This walkthrough will guide you through an exciting escape adventure from the boundaries of your office. Get ready to solve puzzles, unlock doors, and strategize your way out using simple and straightforward techniques. Each level presents unique challenges, coupled with fun and excitement. This guide aims to help you escape these levels by navigating through them step by step.
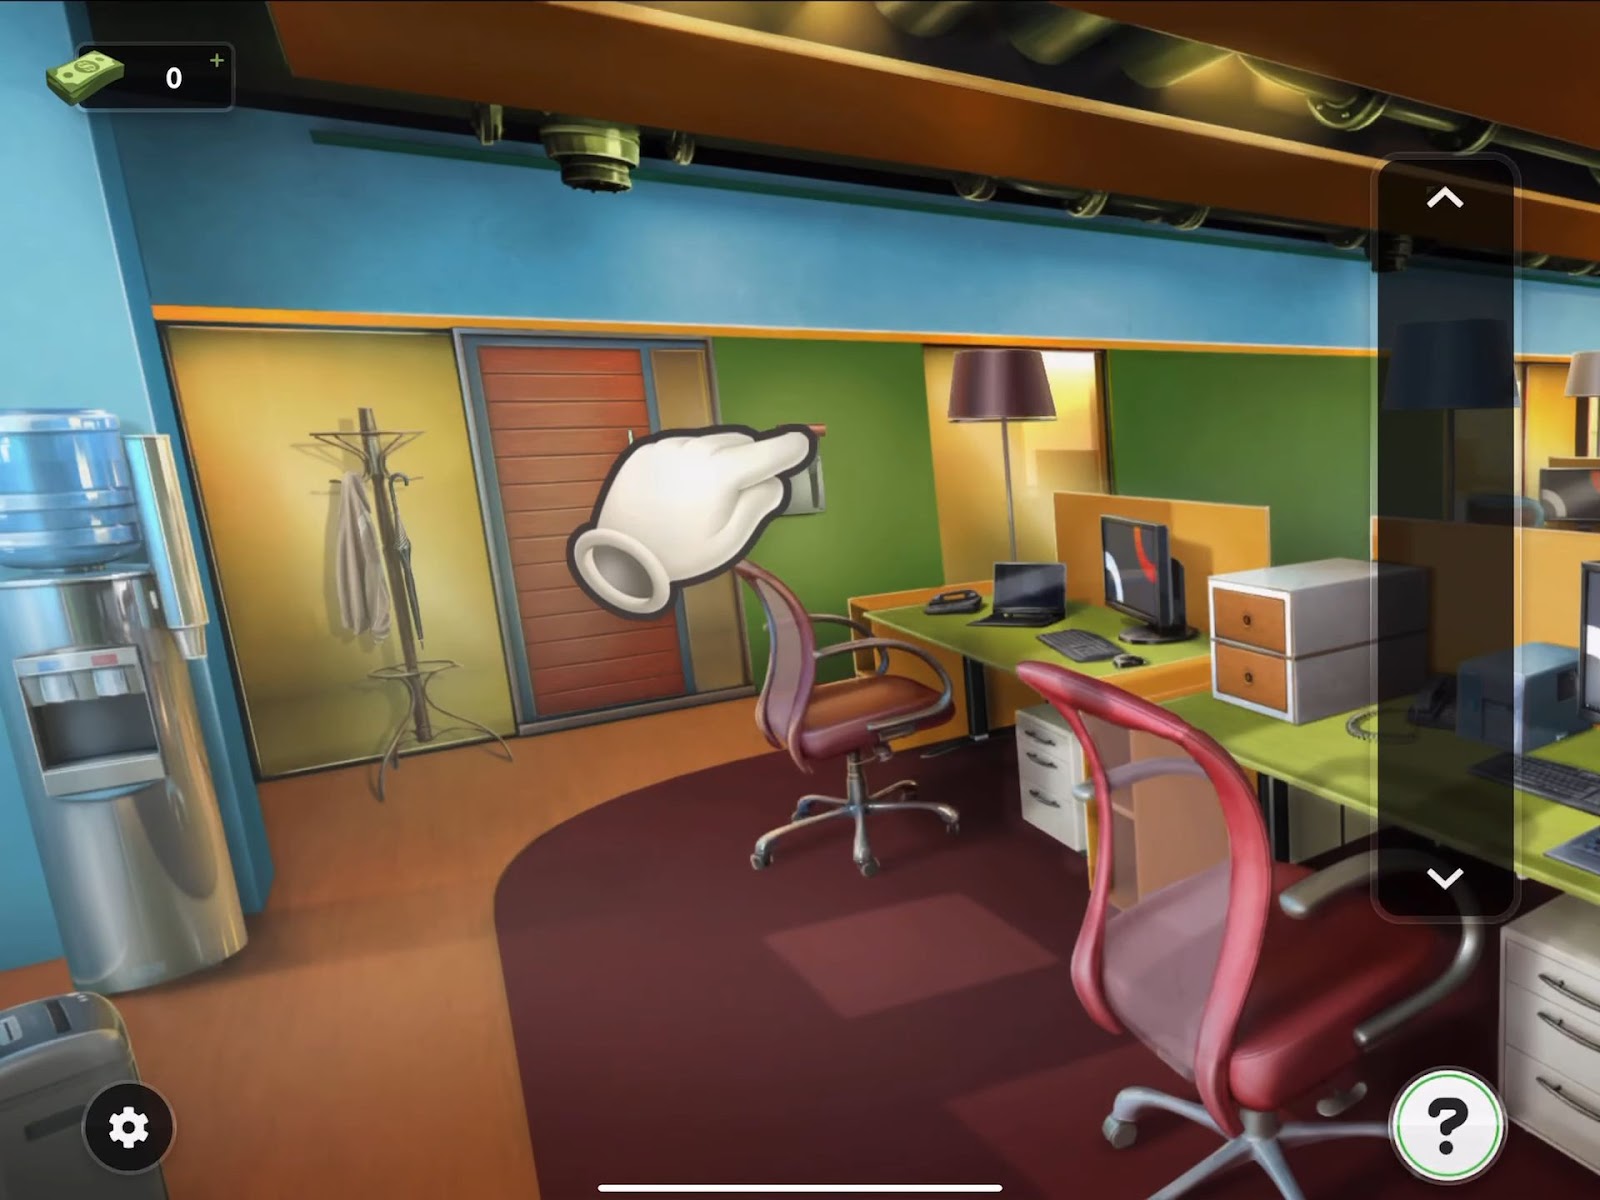
Level 1:
To complete level 1, follow the instructions below:
- Firstly, pull the lever as directed.
- After that, the door will open and you can now exit easily.
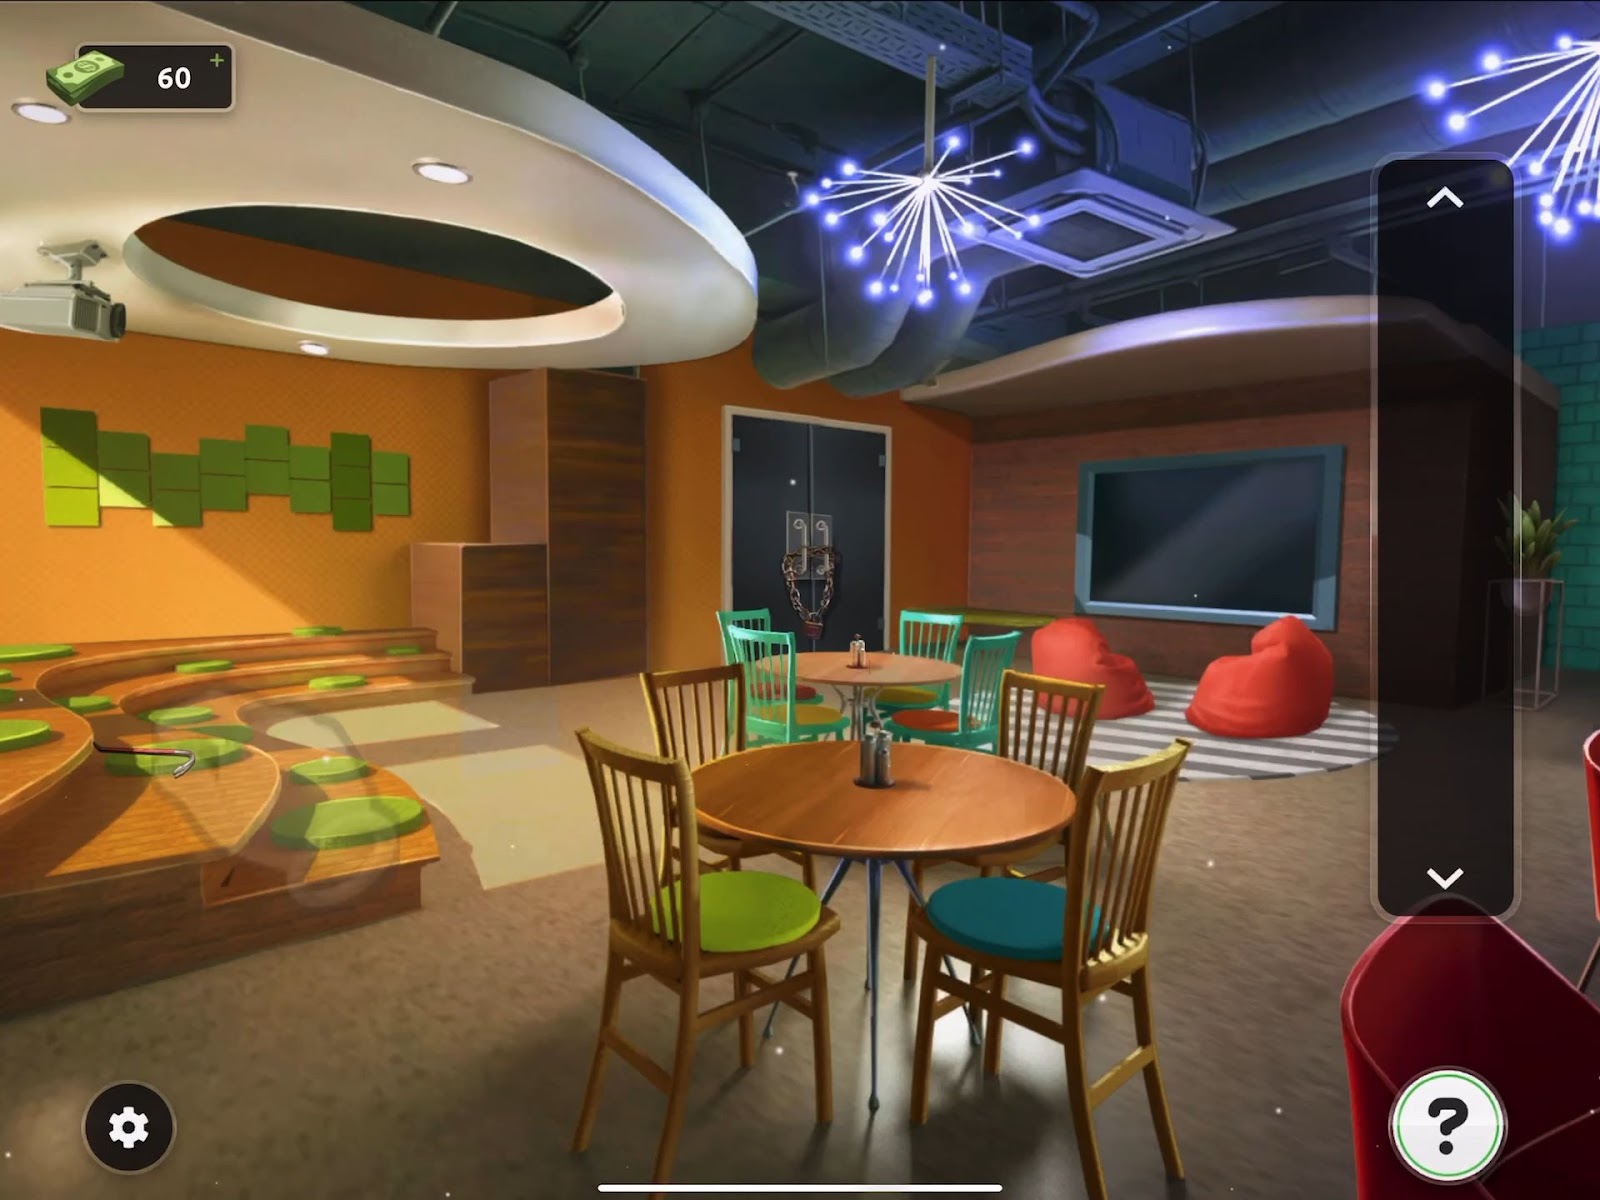
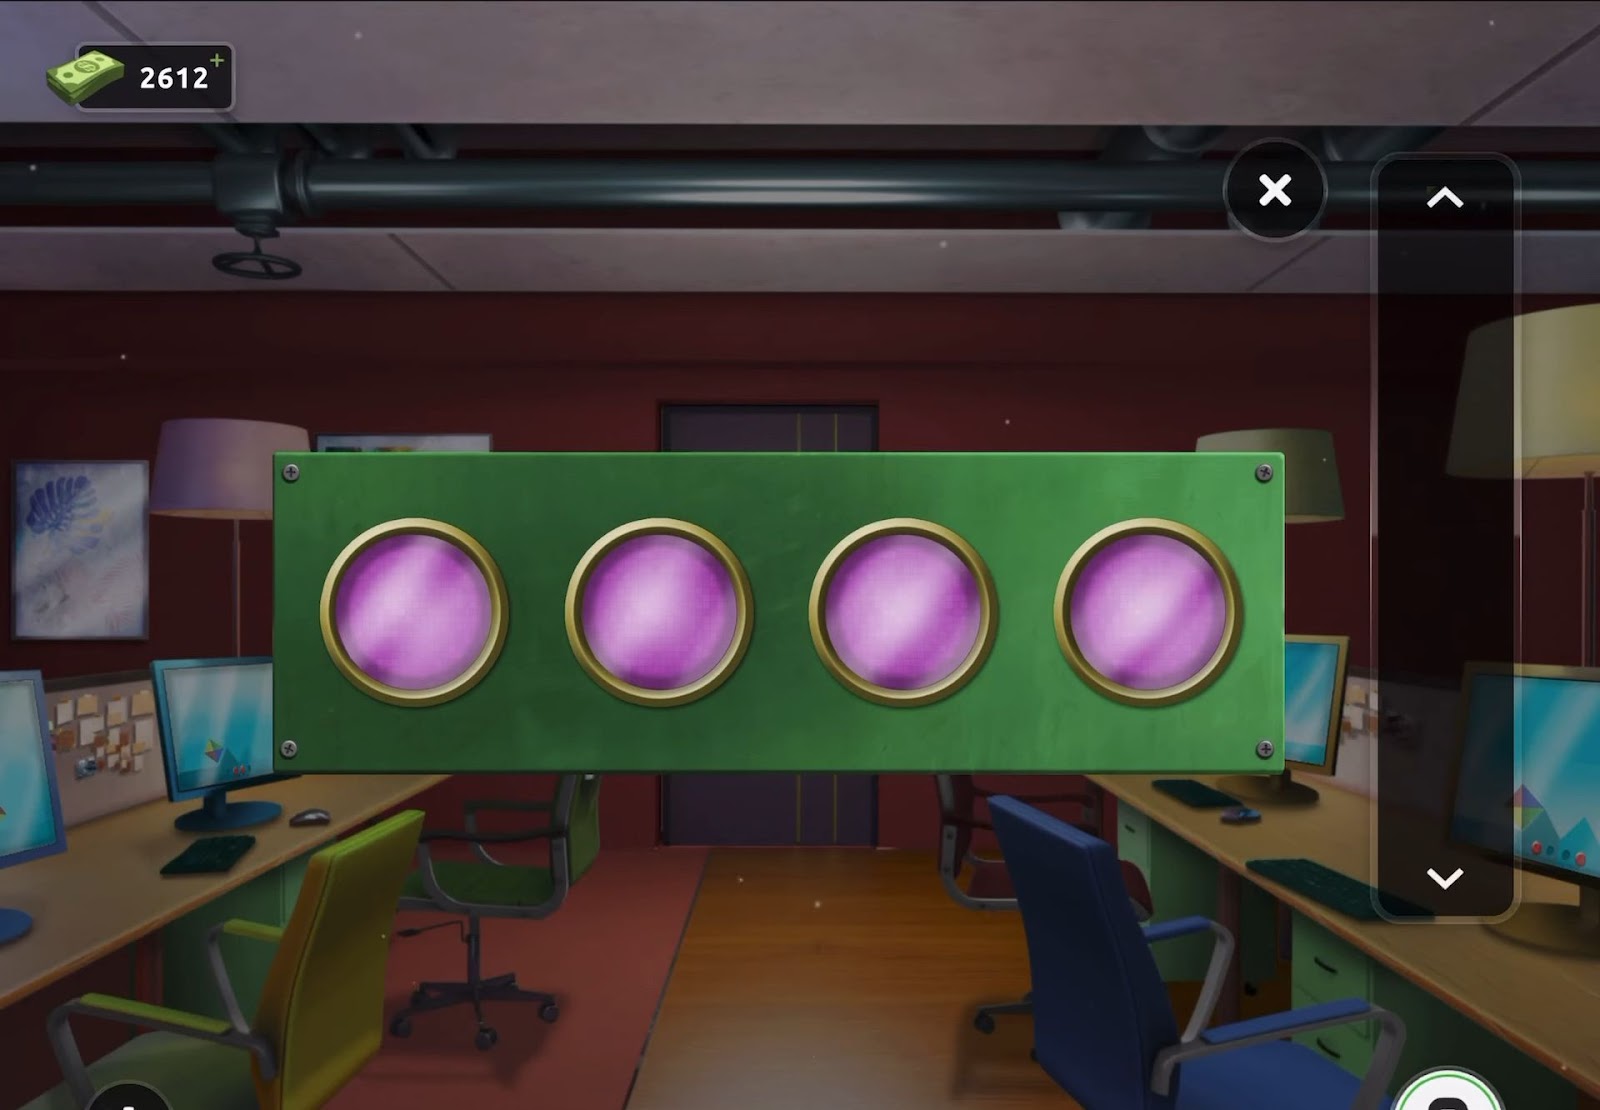
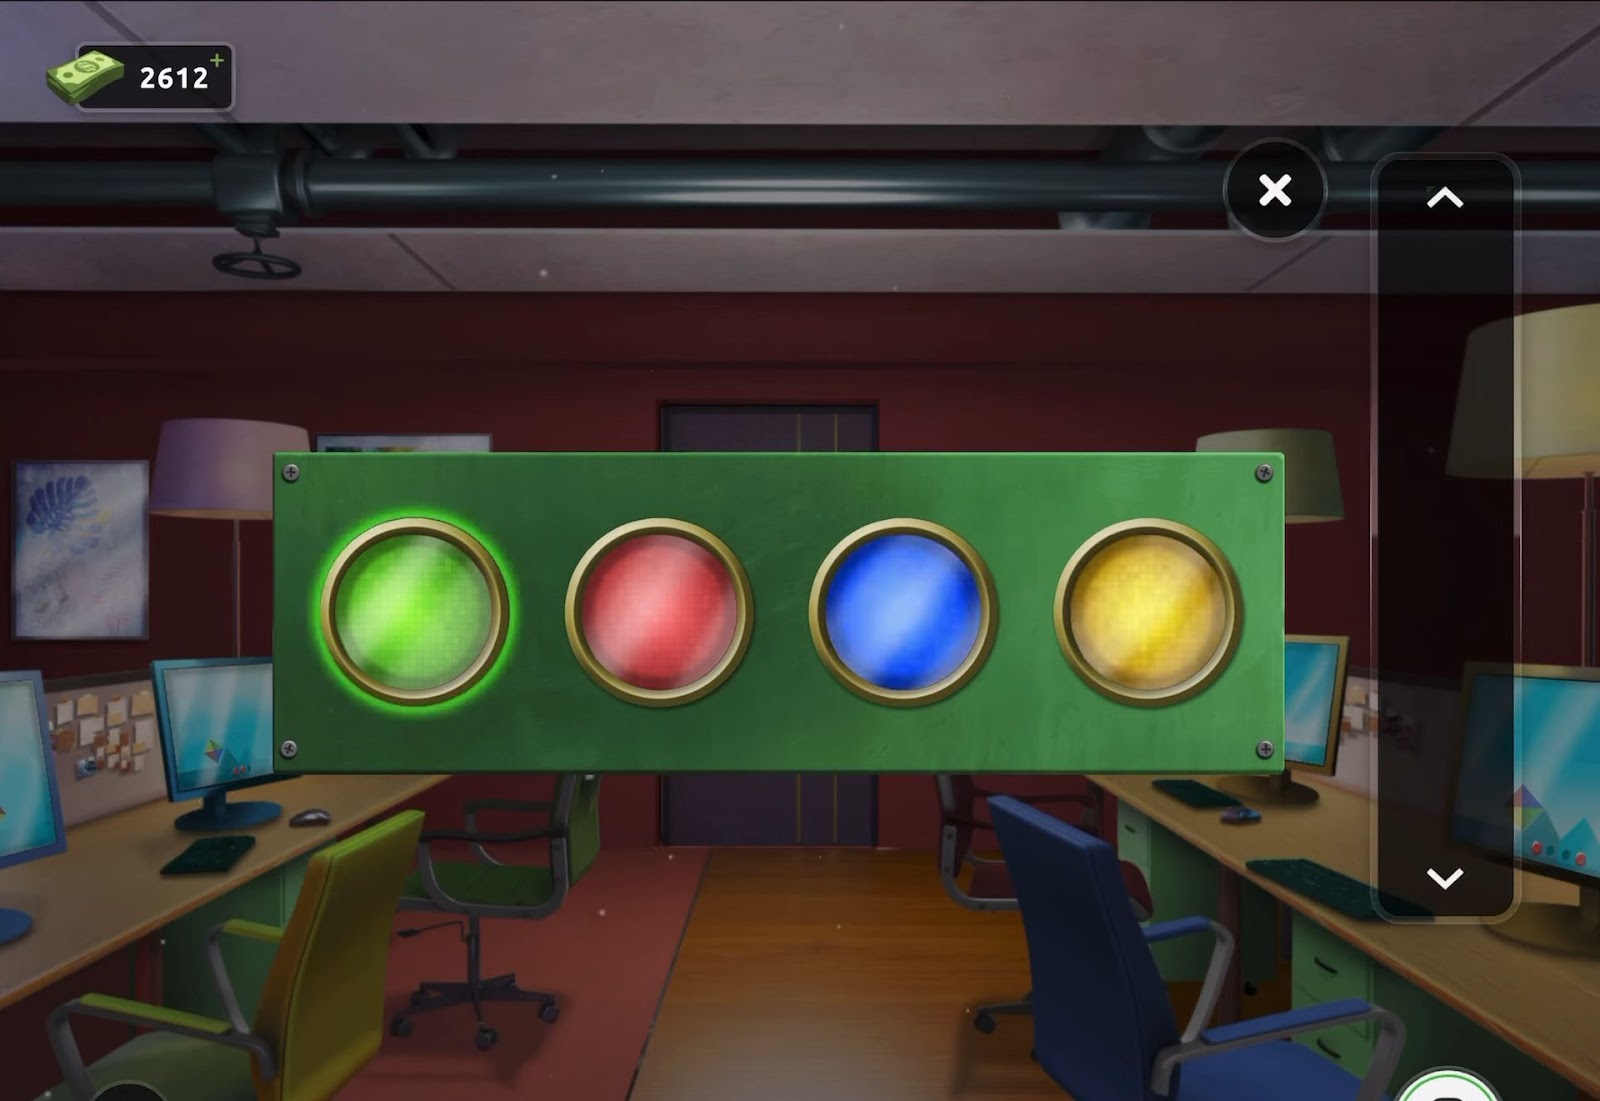
Level 2:
To complete level 2, follow the instructions below:
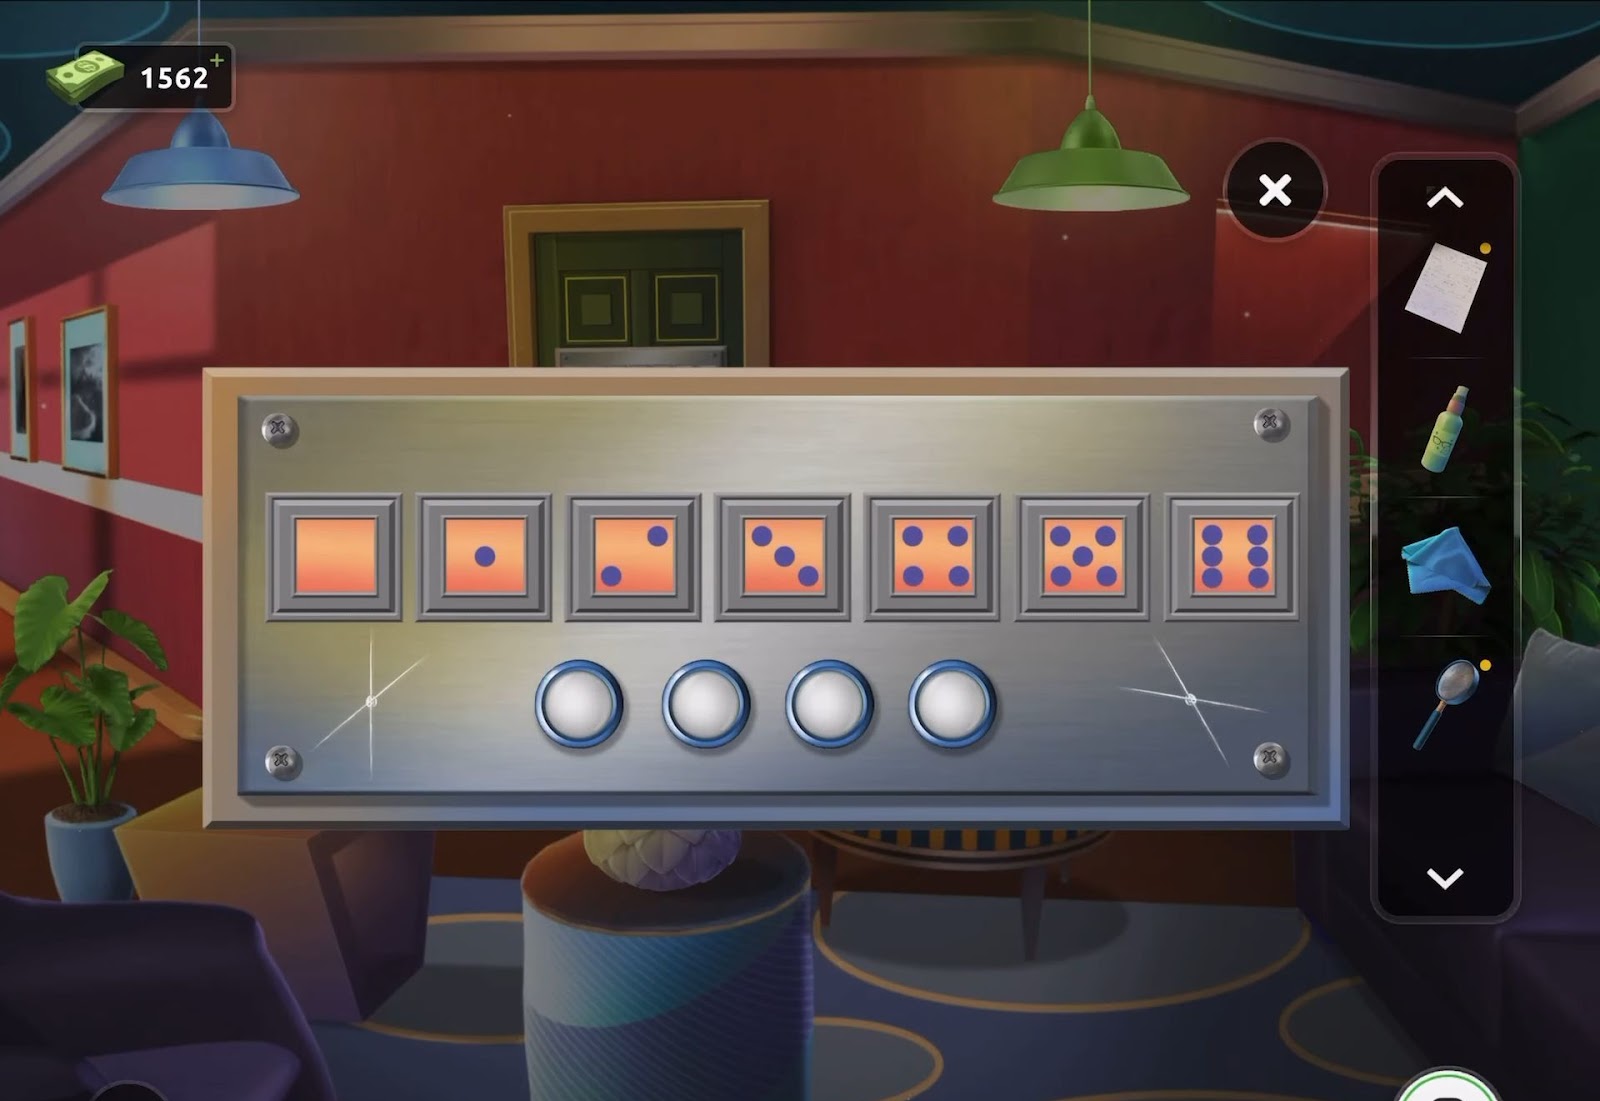
- Firstly, you’ve to observe the items in the center of the room.
- Next, Press the items, this will uncover the door.
- So, the door is now open, you can exit the door and move on to the next level.

Level 3:
To complete level 3, follow the instructions below:
- Start by collecting the crowbar provided on the left side of the room.
- Then you have to use this crowbar to unlock the door.
- After that, you can escape from the room using the opened door.
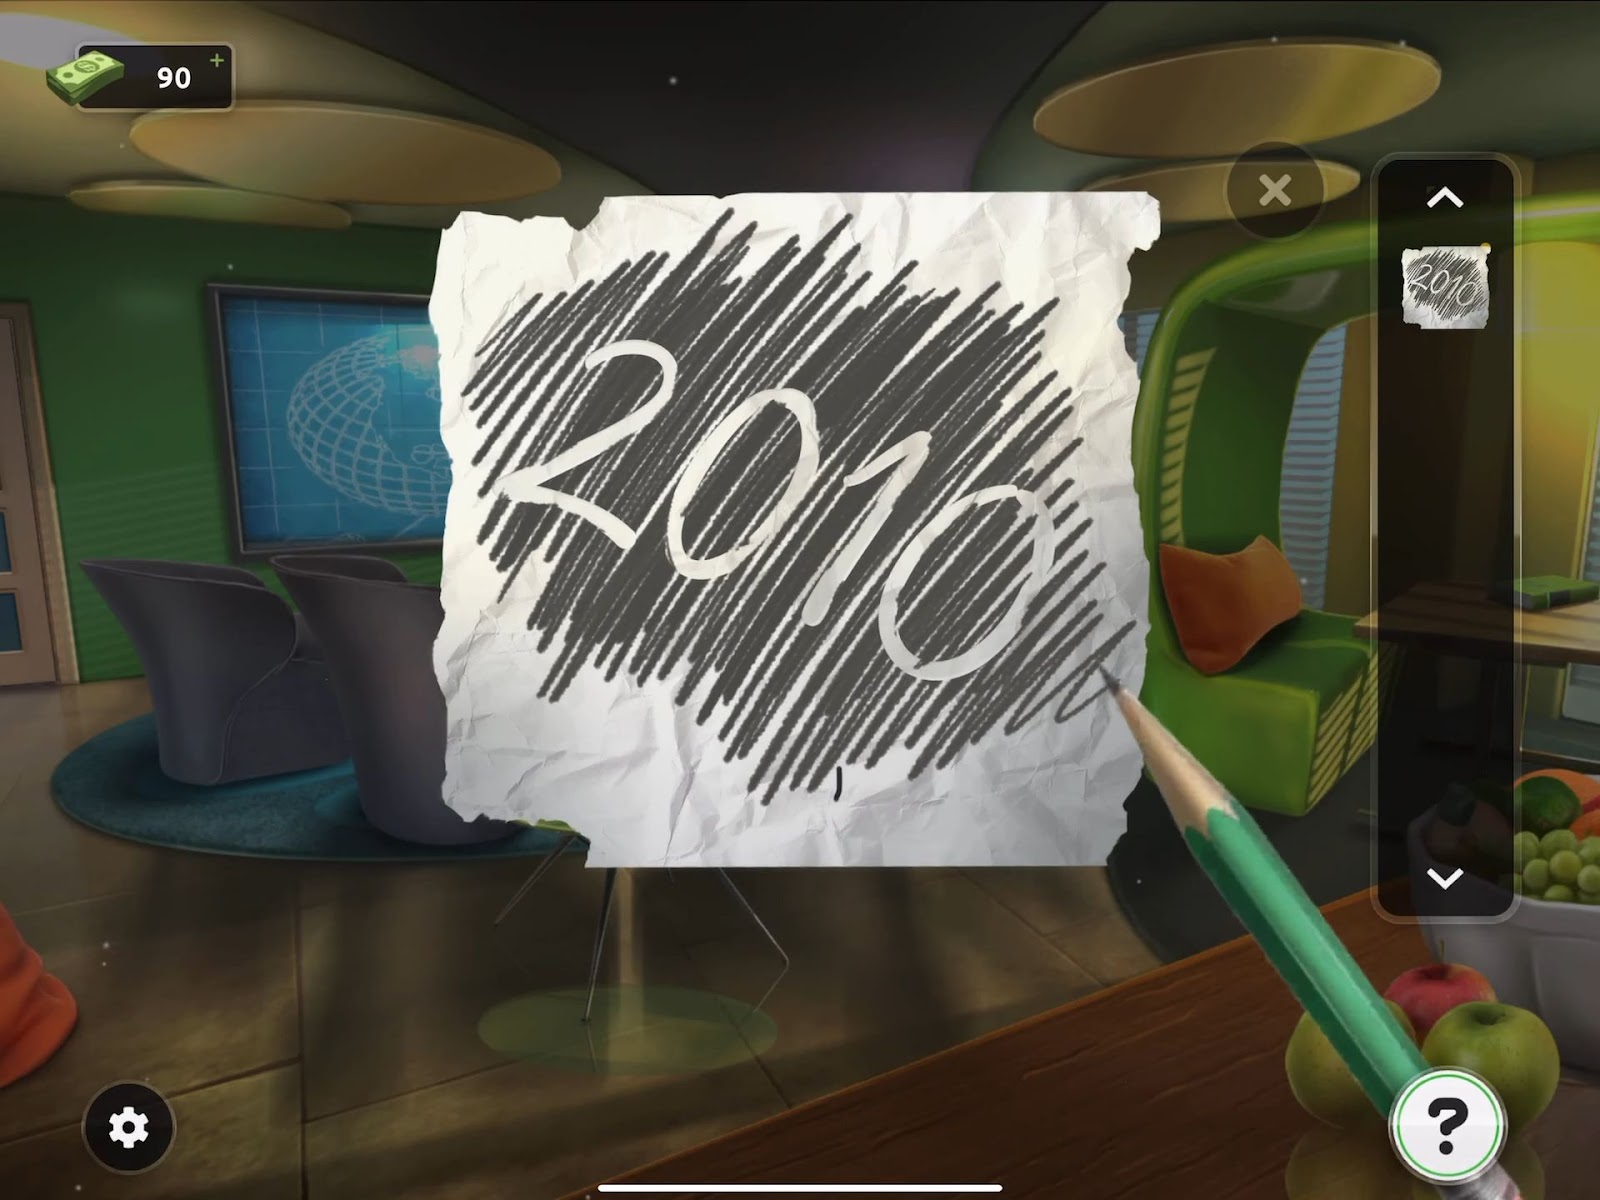
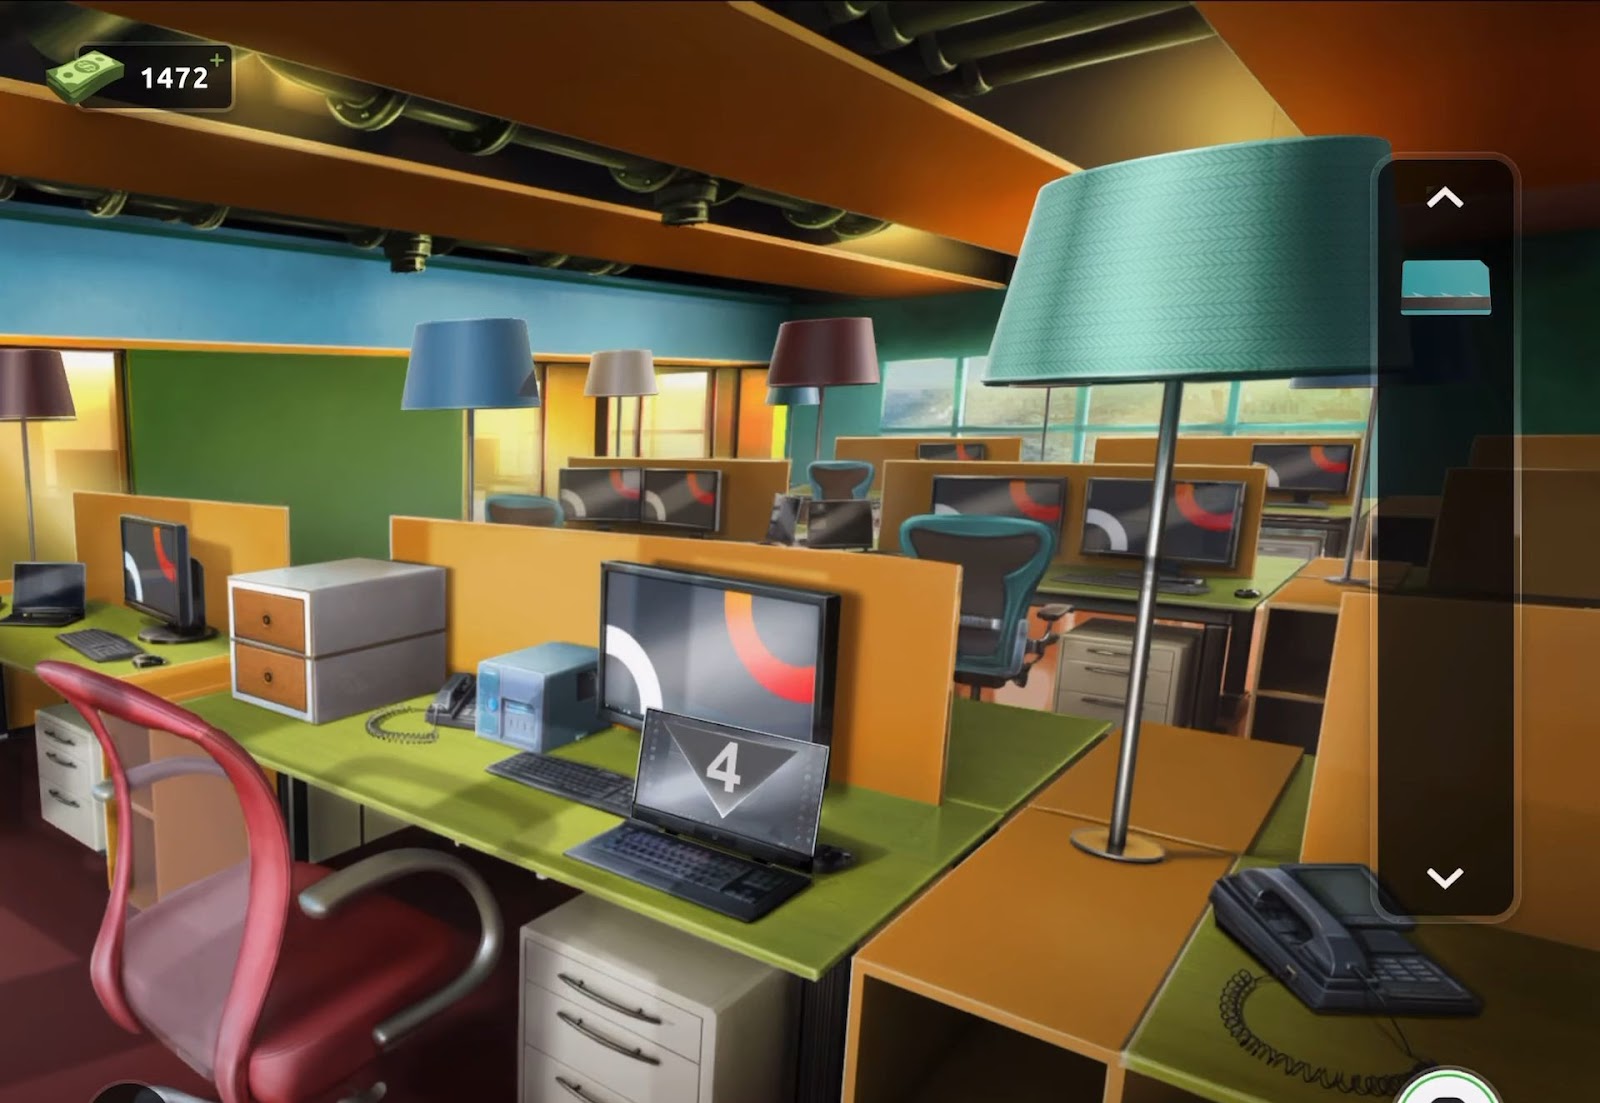
Level 4:
To complete level 4, follow the instructions below:
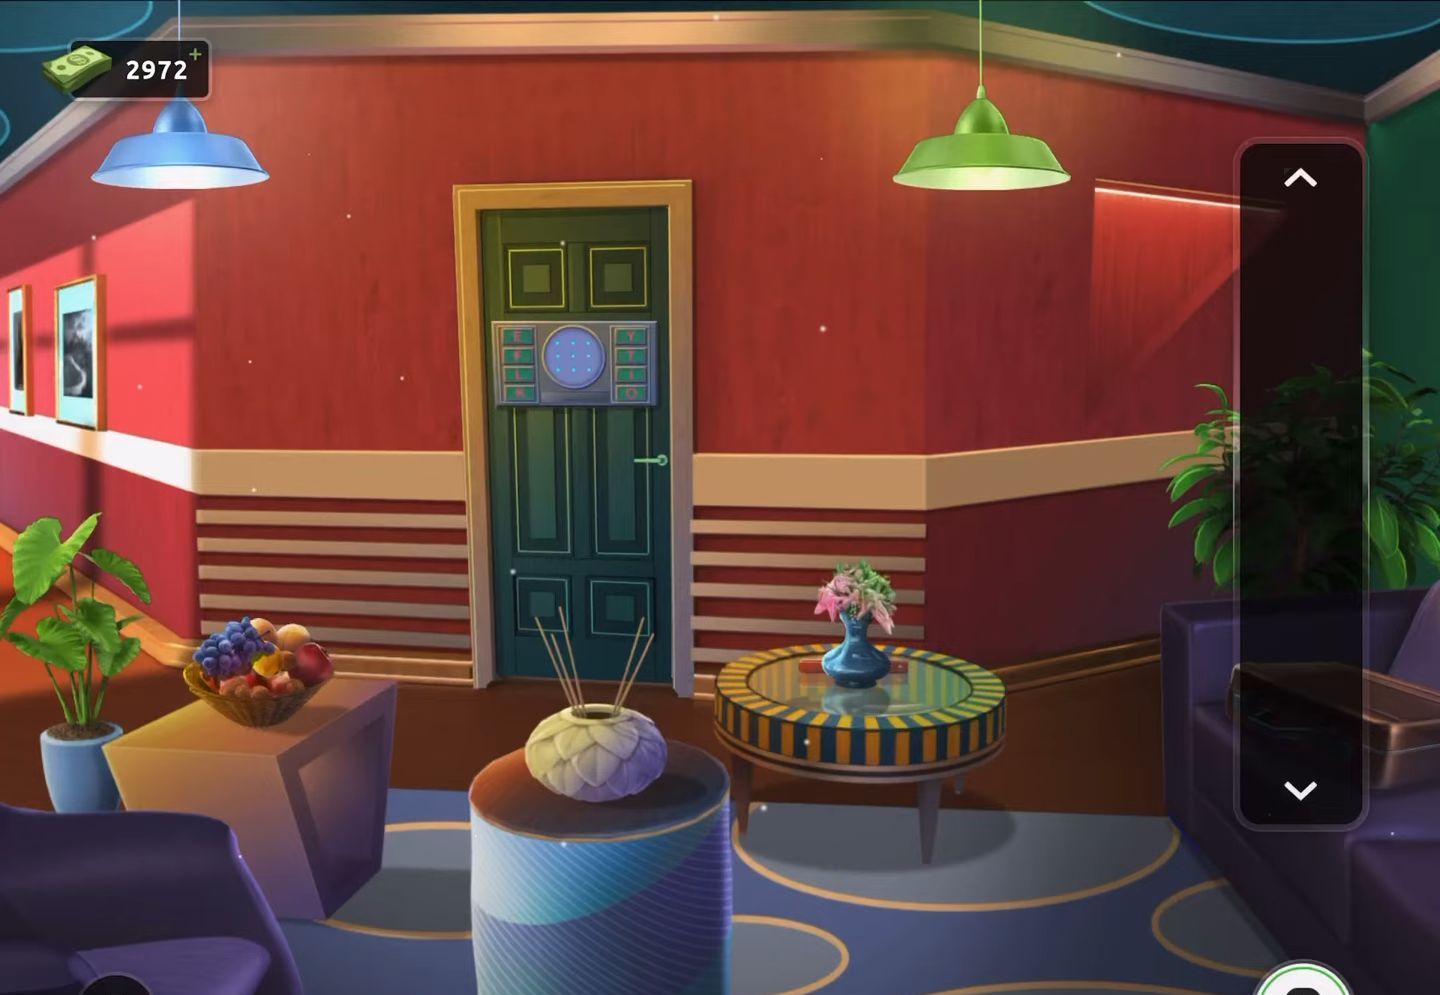
- First, you have to grab a pencil from the large orange bean bag chair placed on the left of the room.
- Now grab the paper ball from the fruit bowl given on the right.
- After that, access the paper stored in your inventory and select it to unfold and flatten it.

- Next, you need to use the pencil on the paper to reveal a clue.
- Then observe a code entry (2010) by looking at the left door.
- You will use this number (2010) obtained from the clue to enter the code for opening the door.
- So, the door is now open, you can exit the door and move on to the next level.
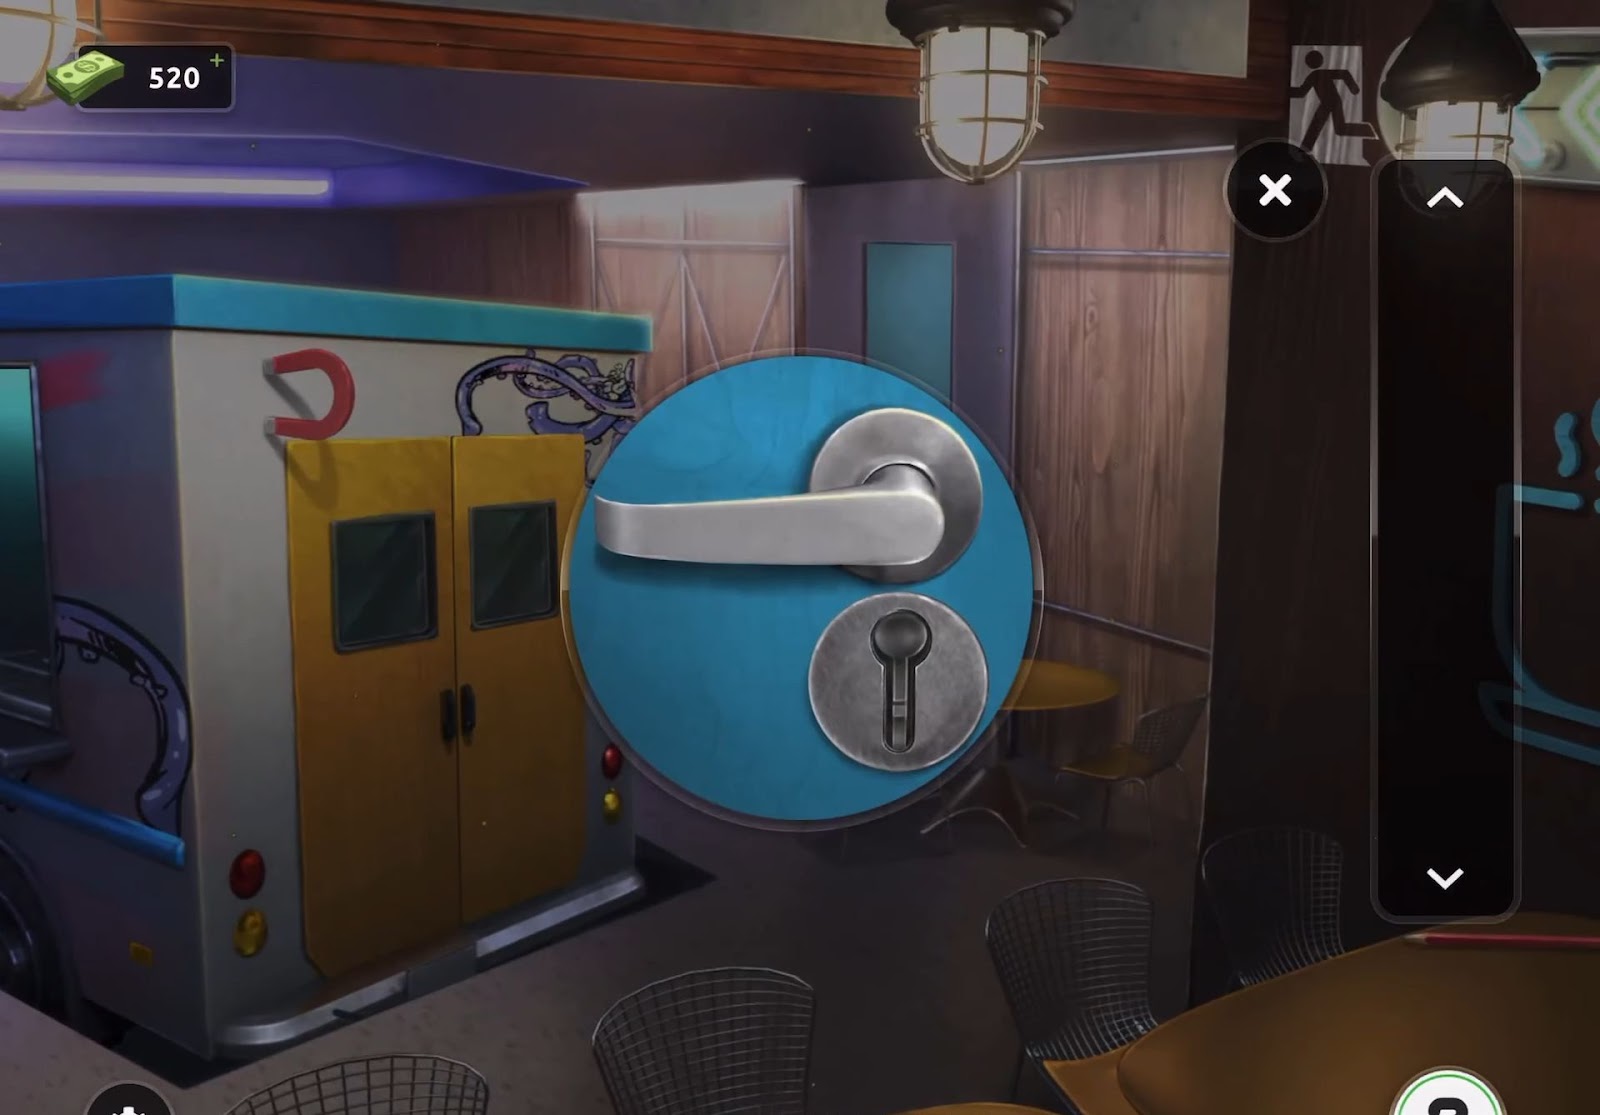
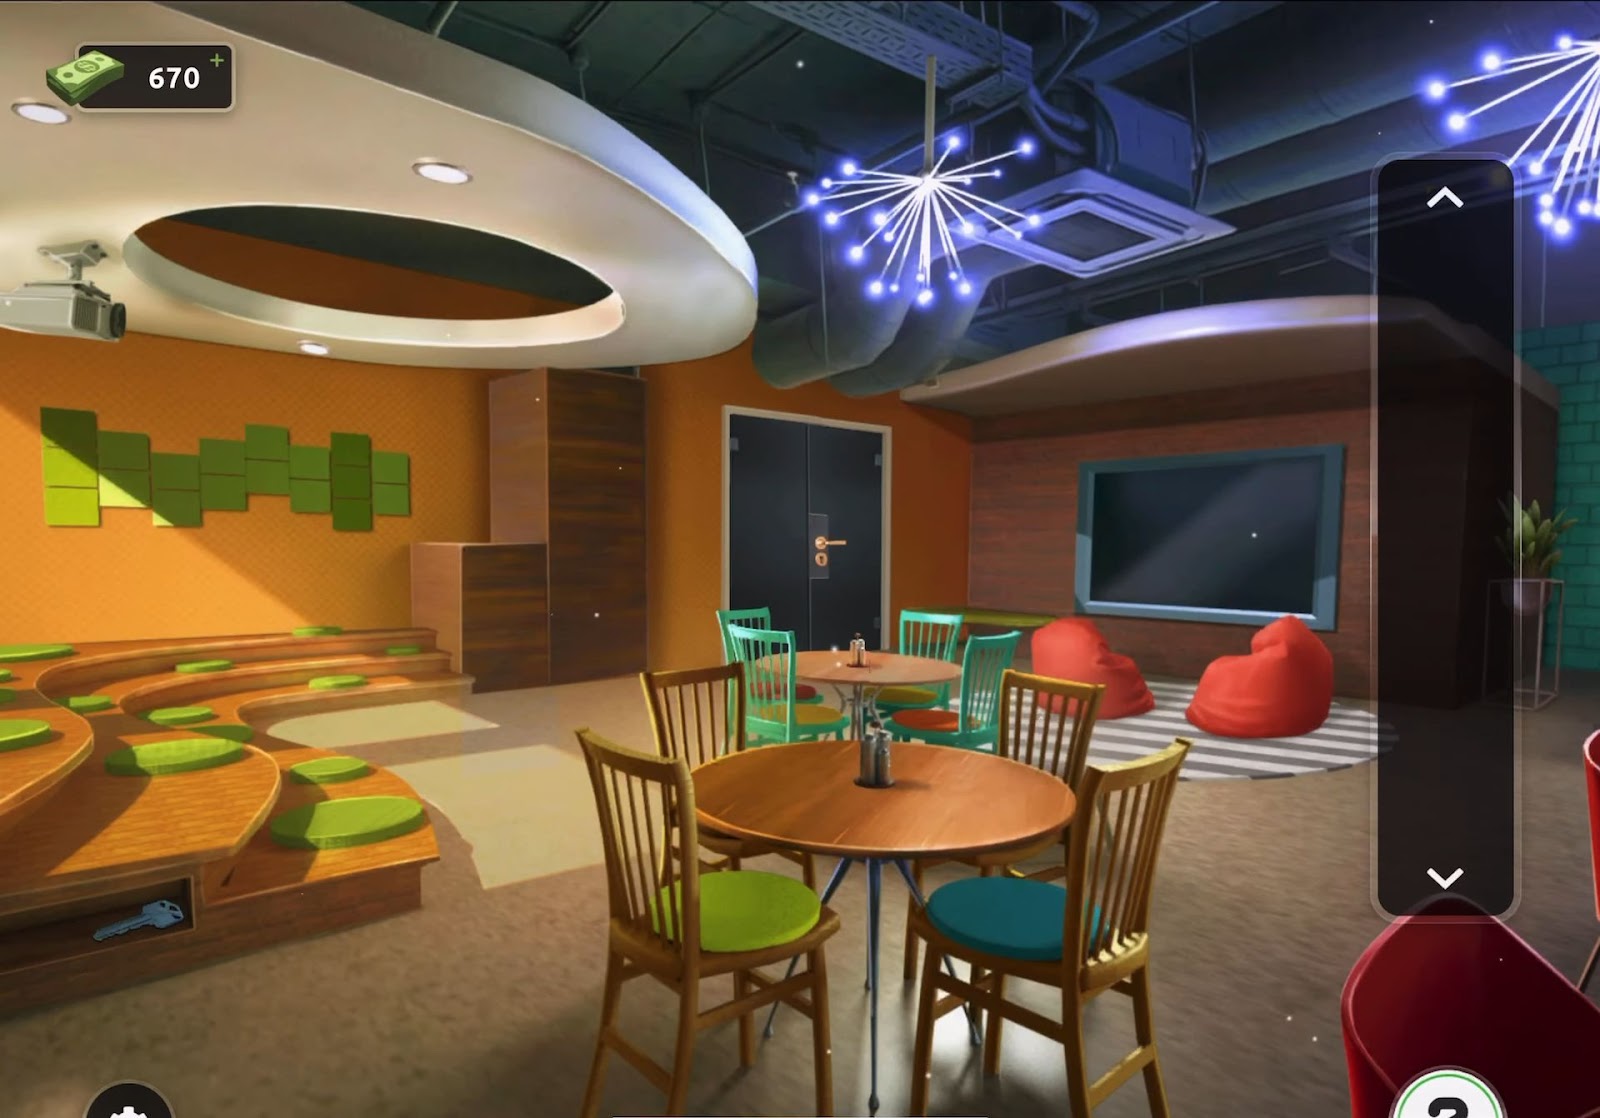
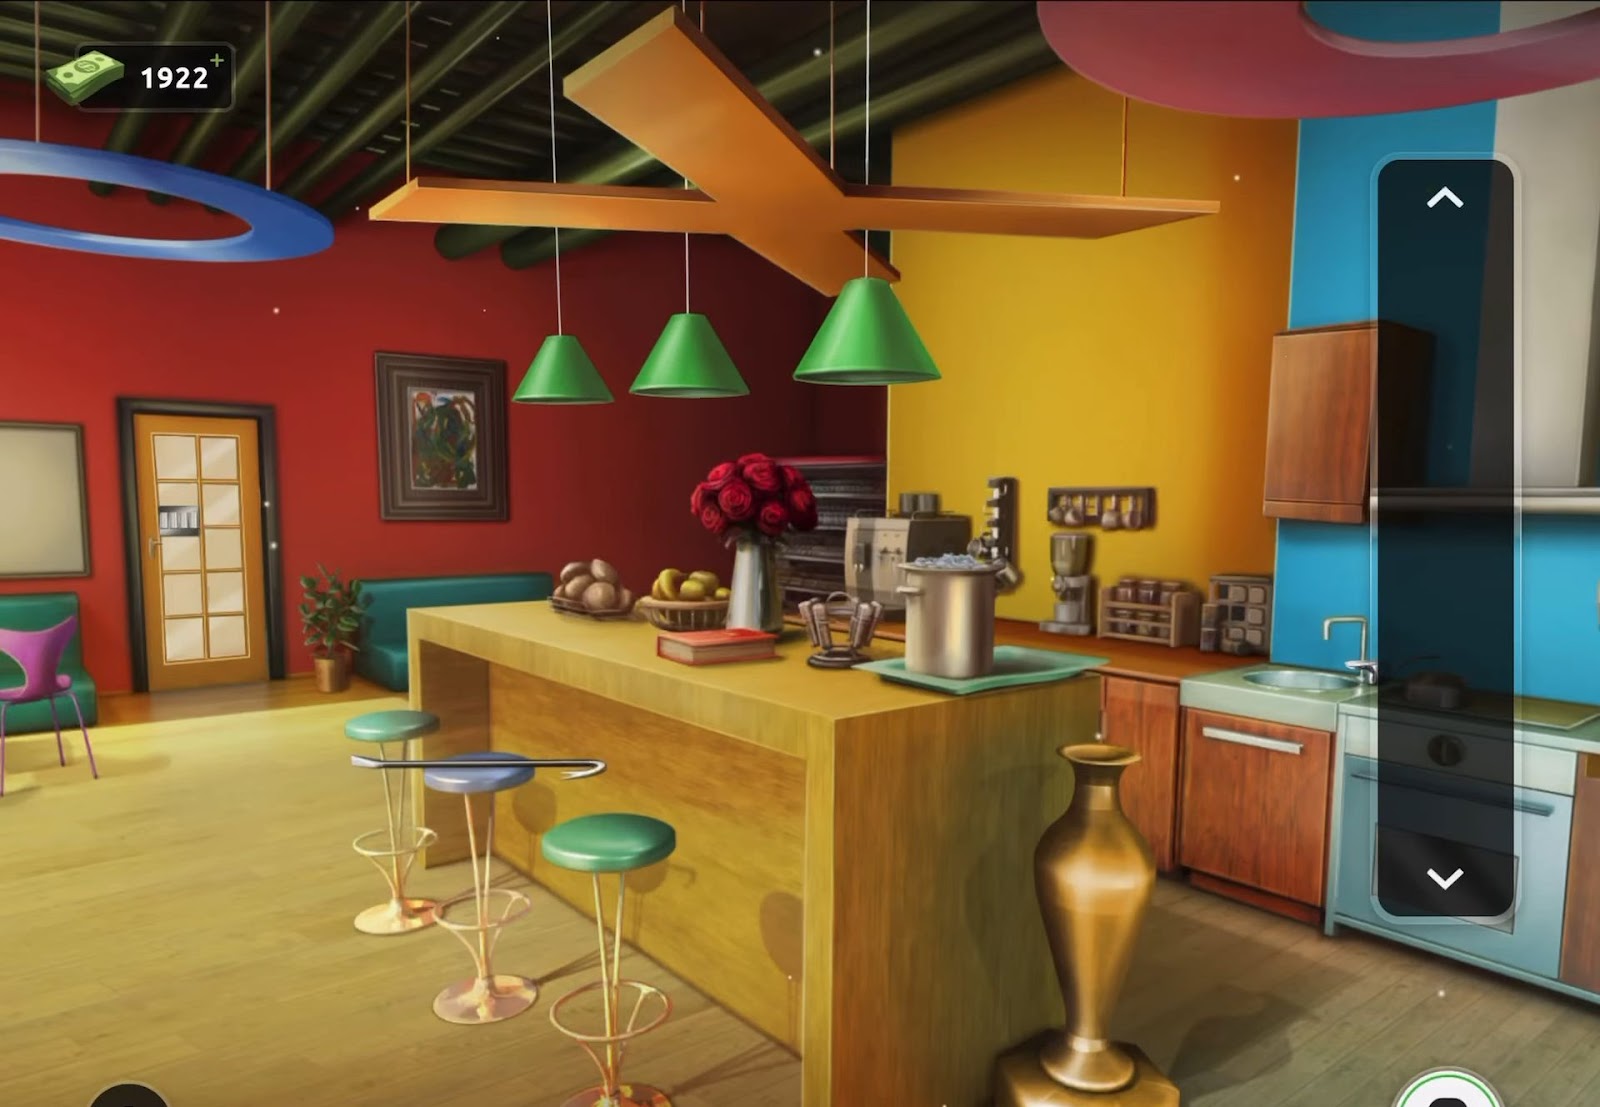
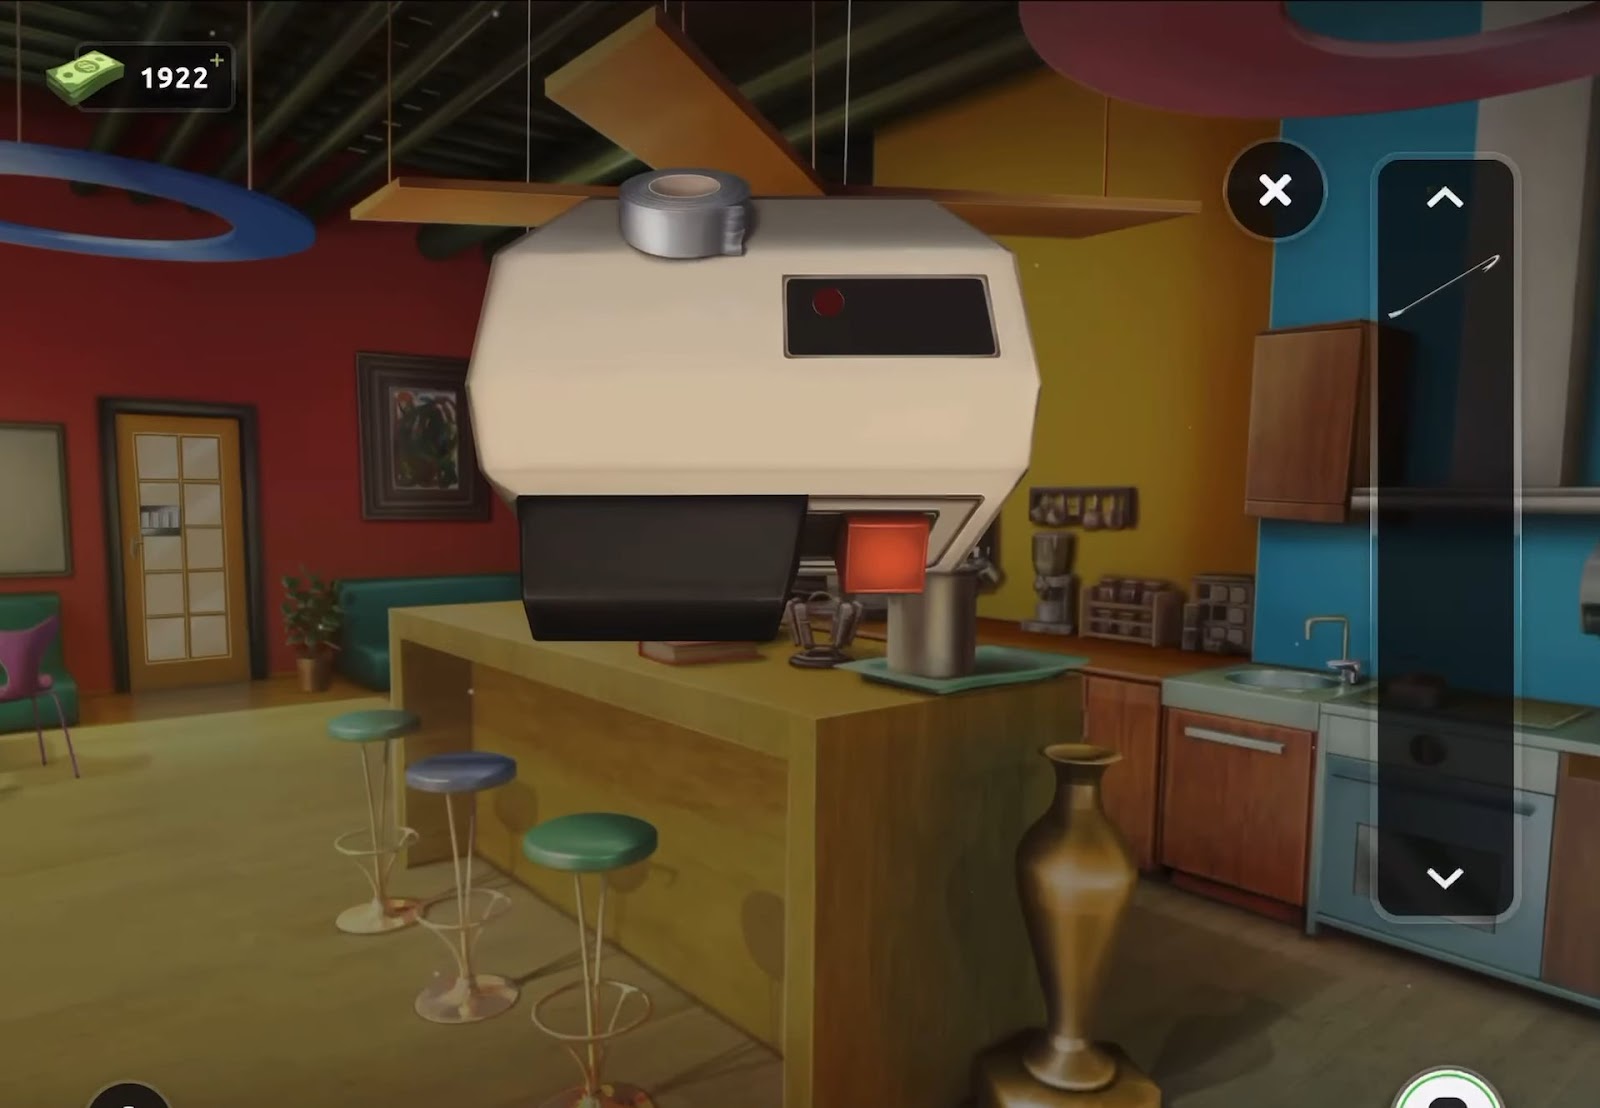
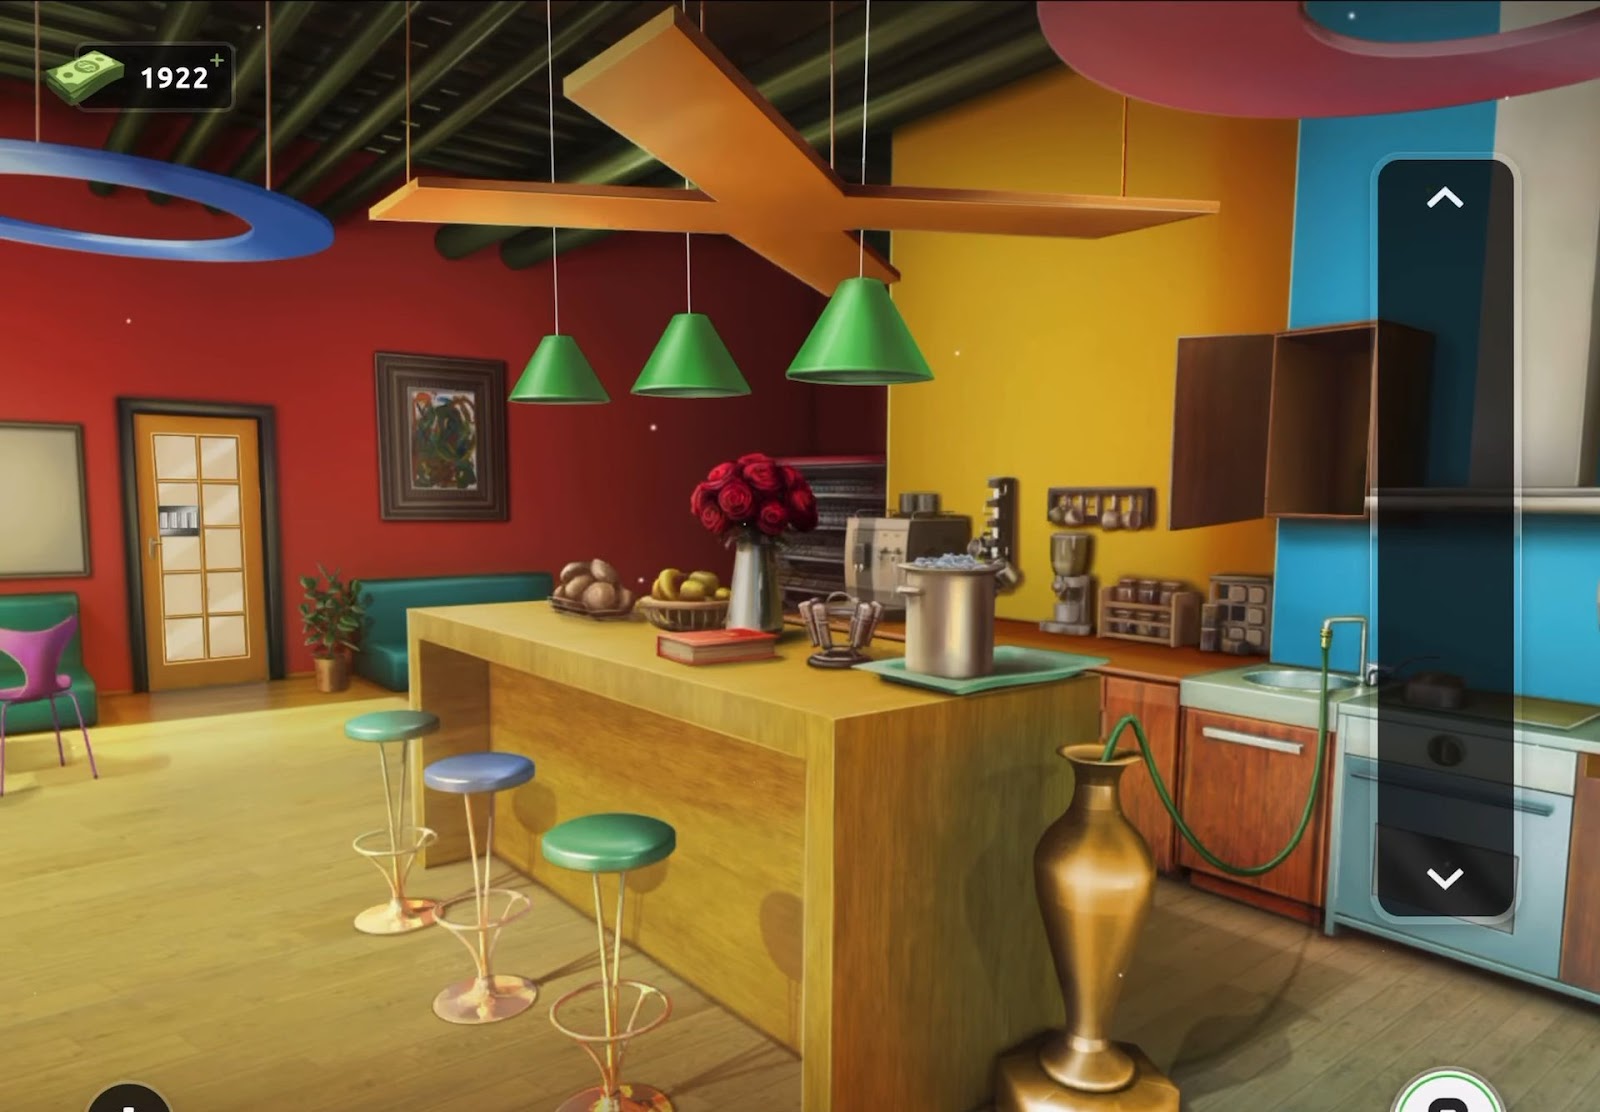
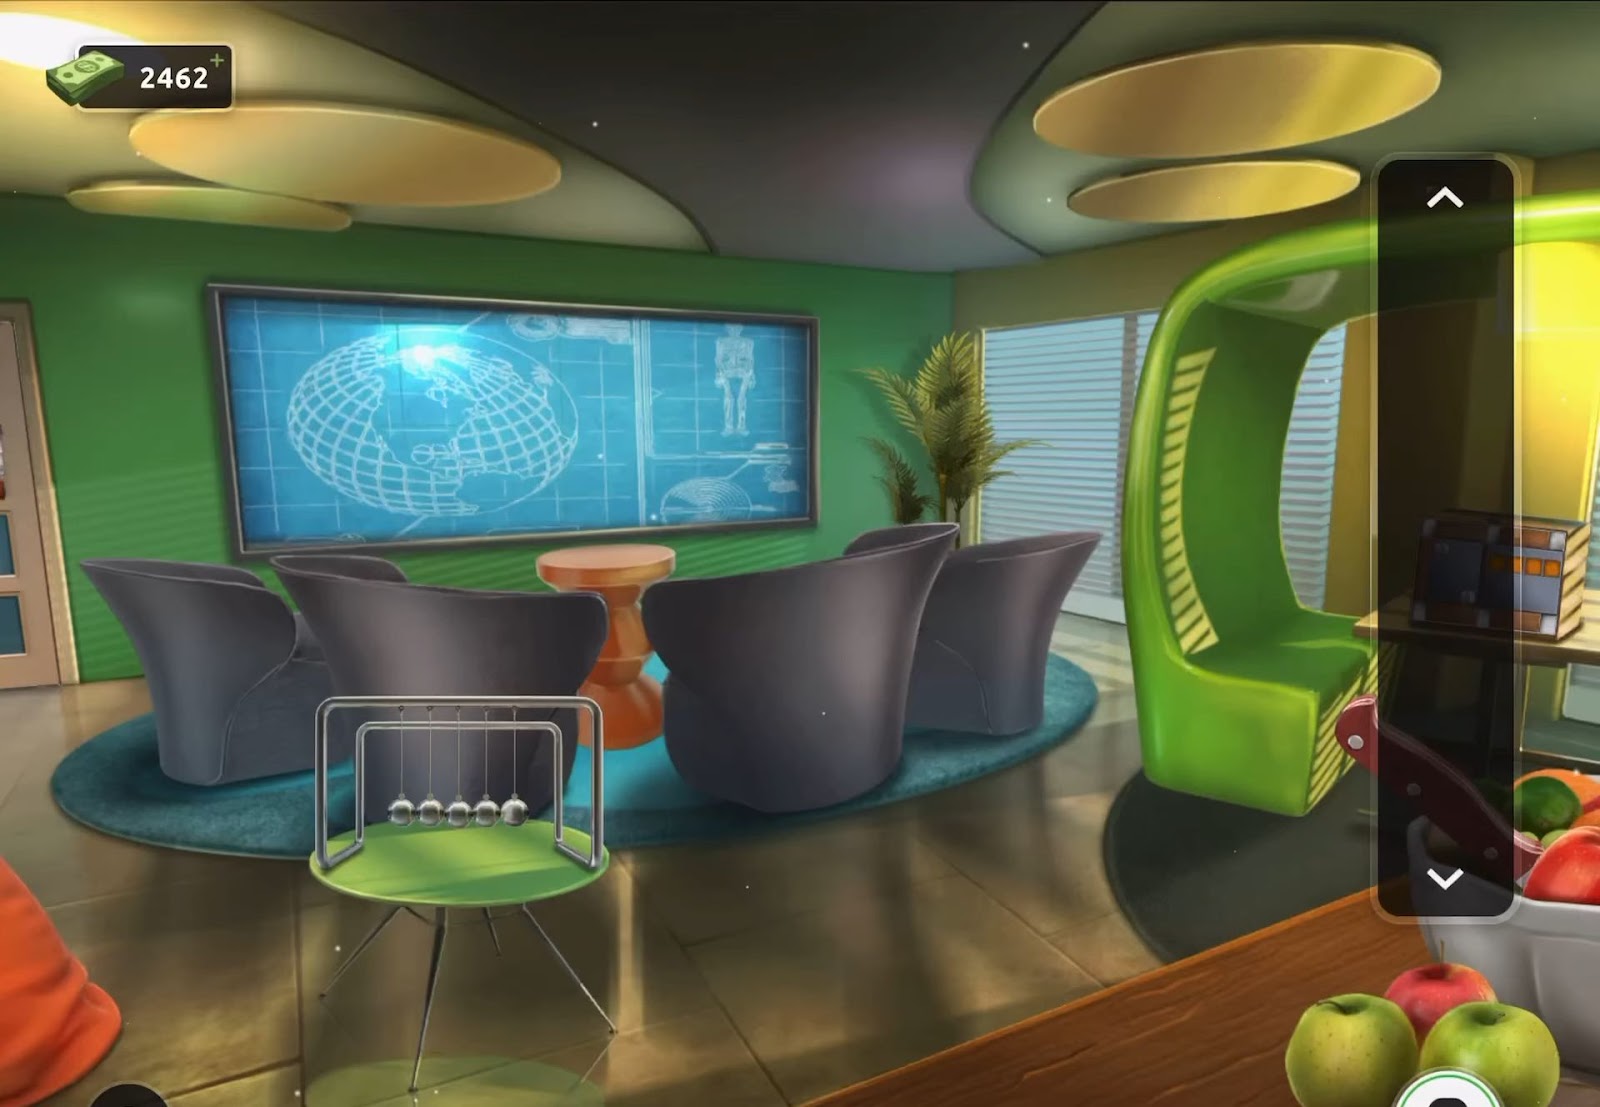
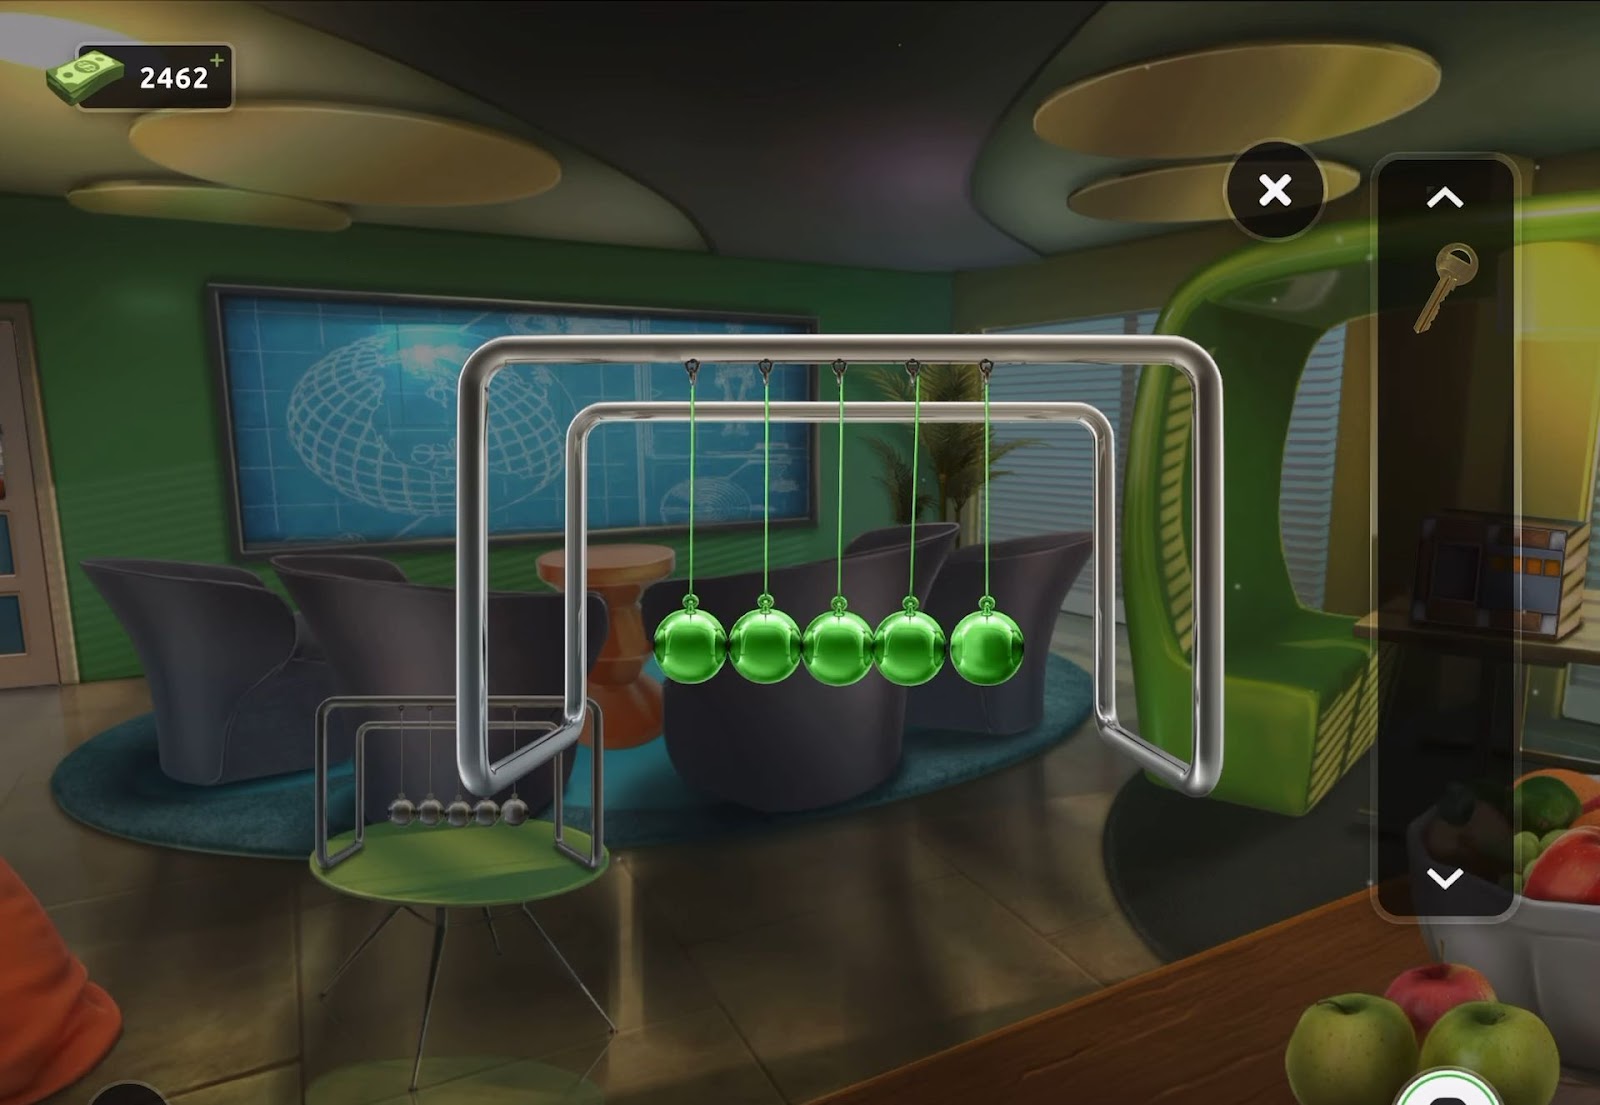
Level 5:
To complete level 5, follow the instructions below:
- Firstly, acquire a magnet situated atop the food truck and gather a pencil located on the table in the lower right section.
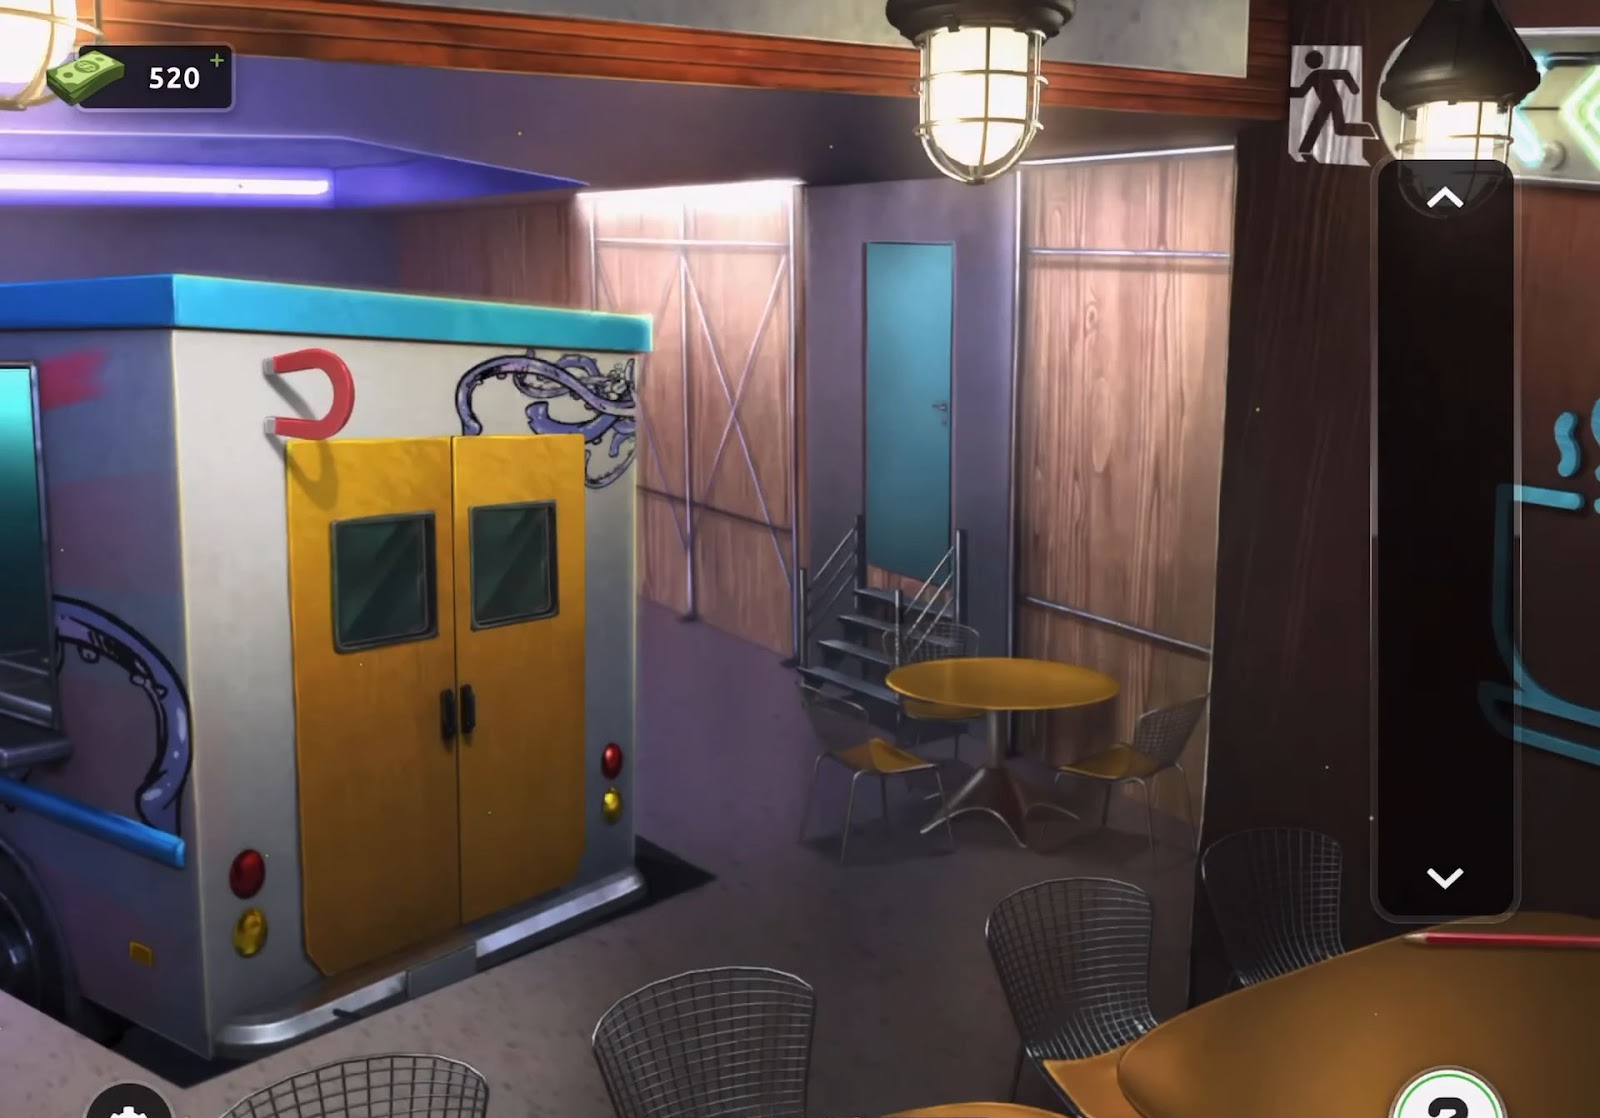
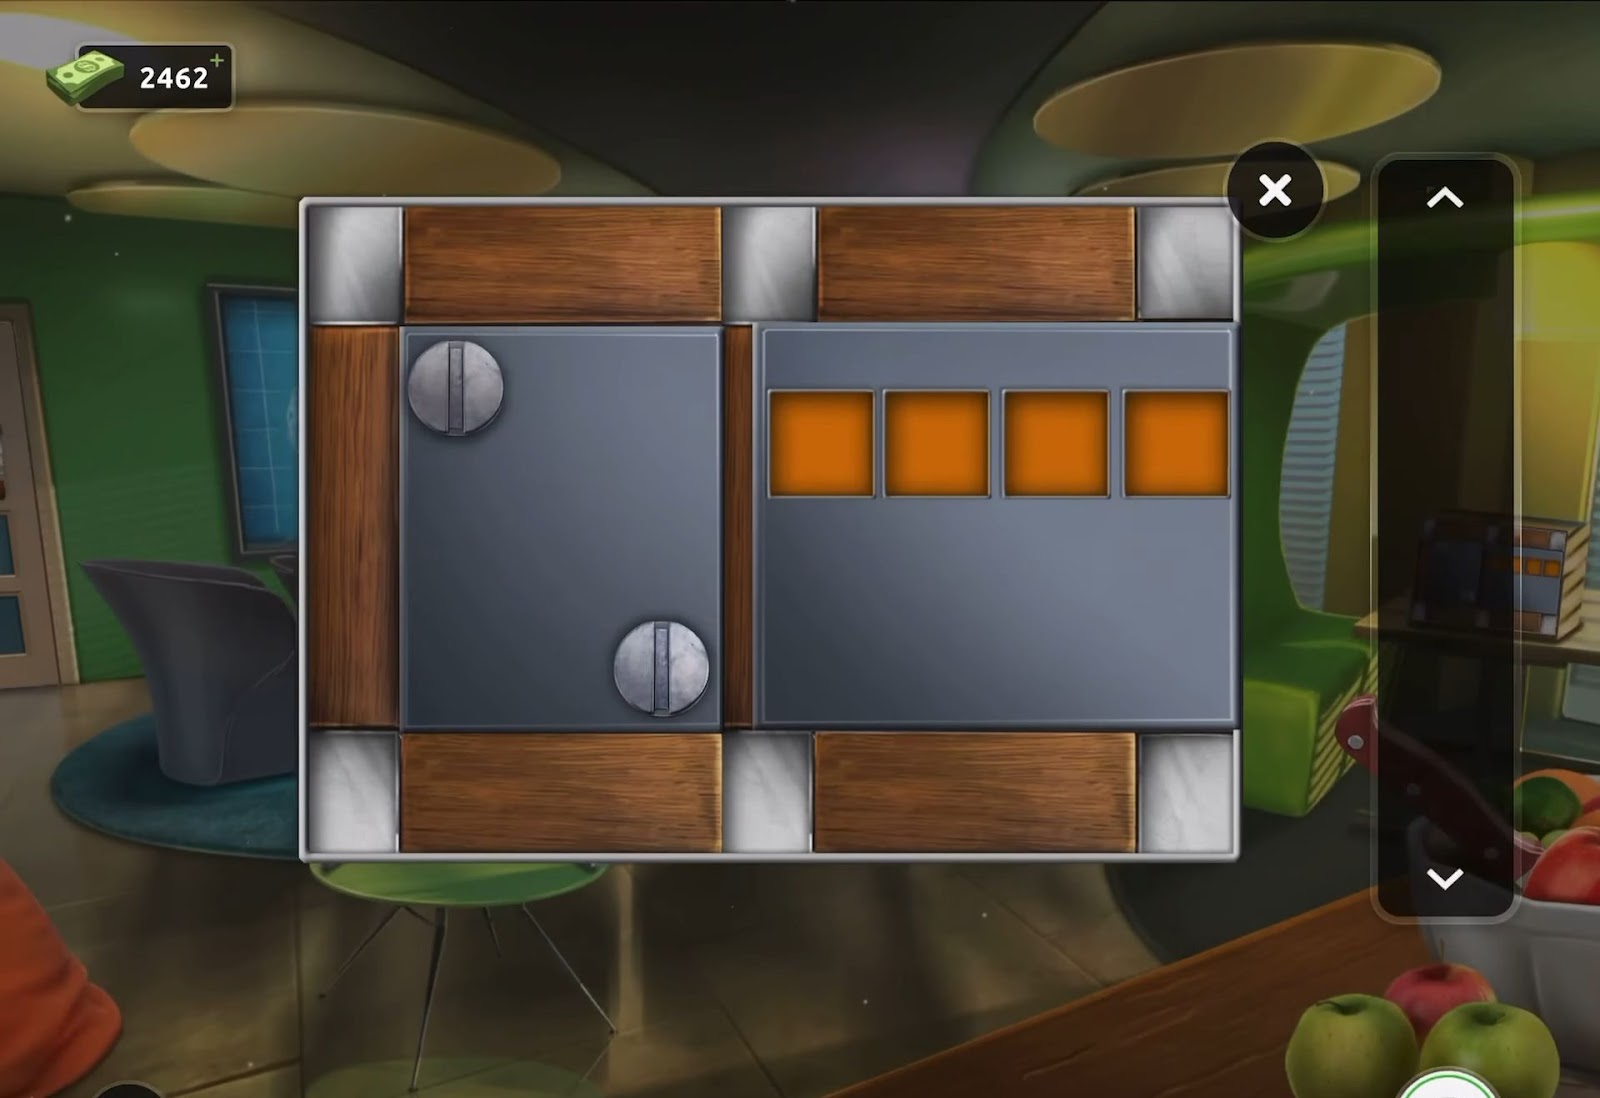
- Next, press on the blue door from the right wall to reveal the lock.
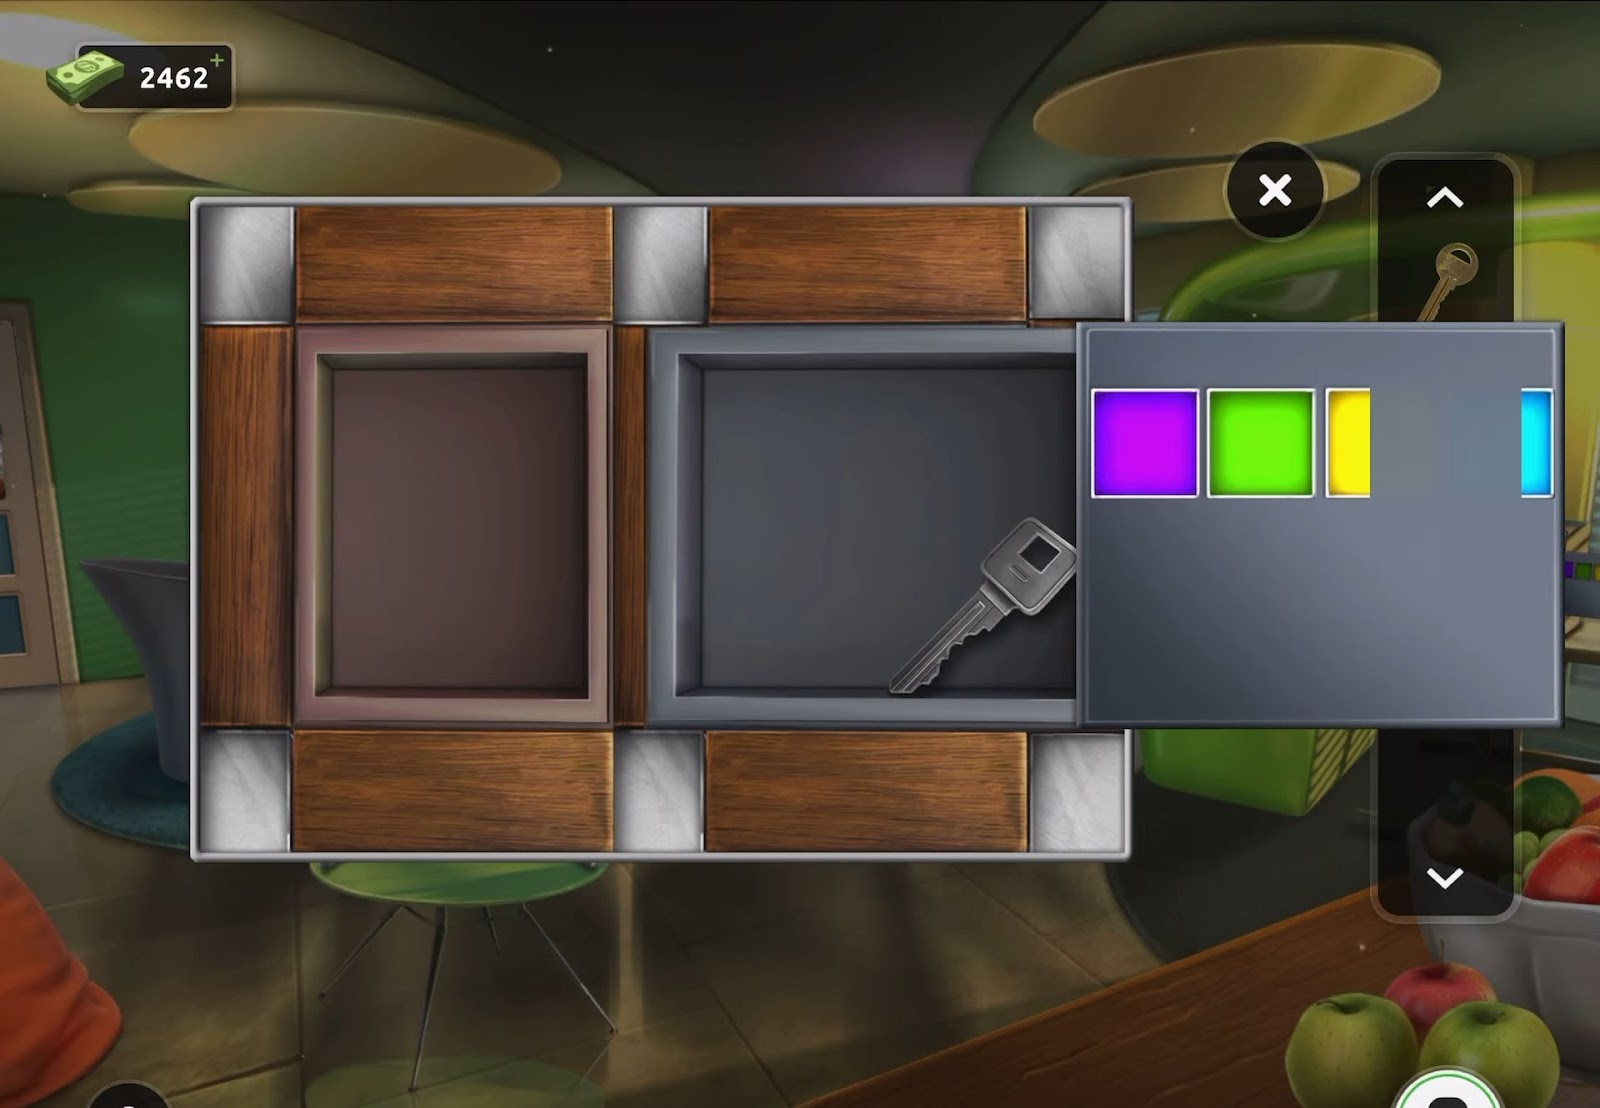
- Now, employ the pencil to manipulate the keyhole, pushing the key from the opposite side to move it.
- Subsequently, locate the key underneath the door once it has been displaced.
- After that, retrieve the key using the magnet and get it.
- So, you will use this key to open the door and exit easily.
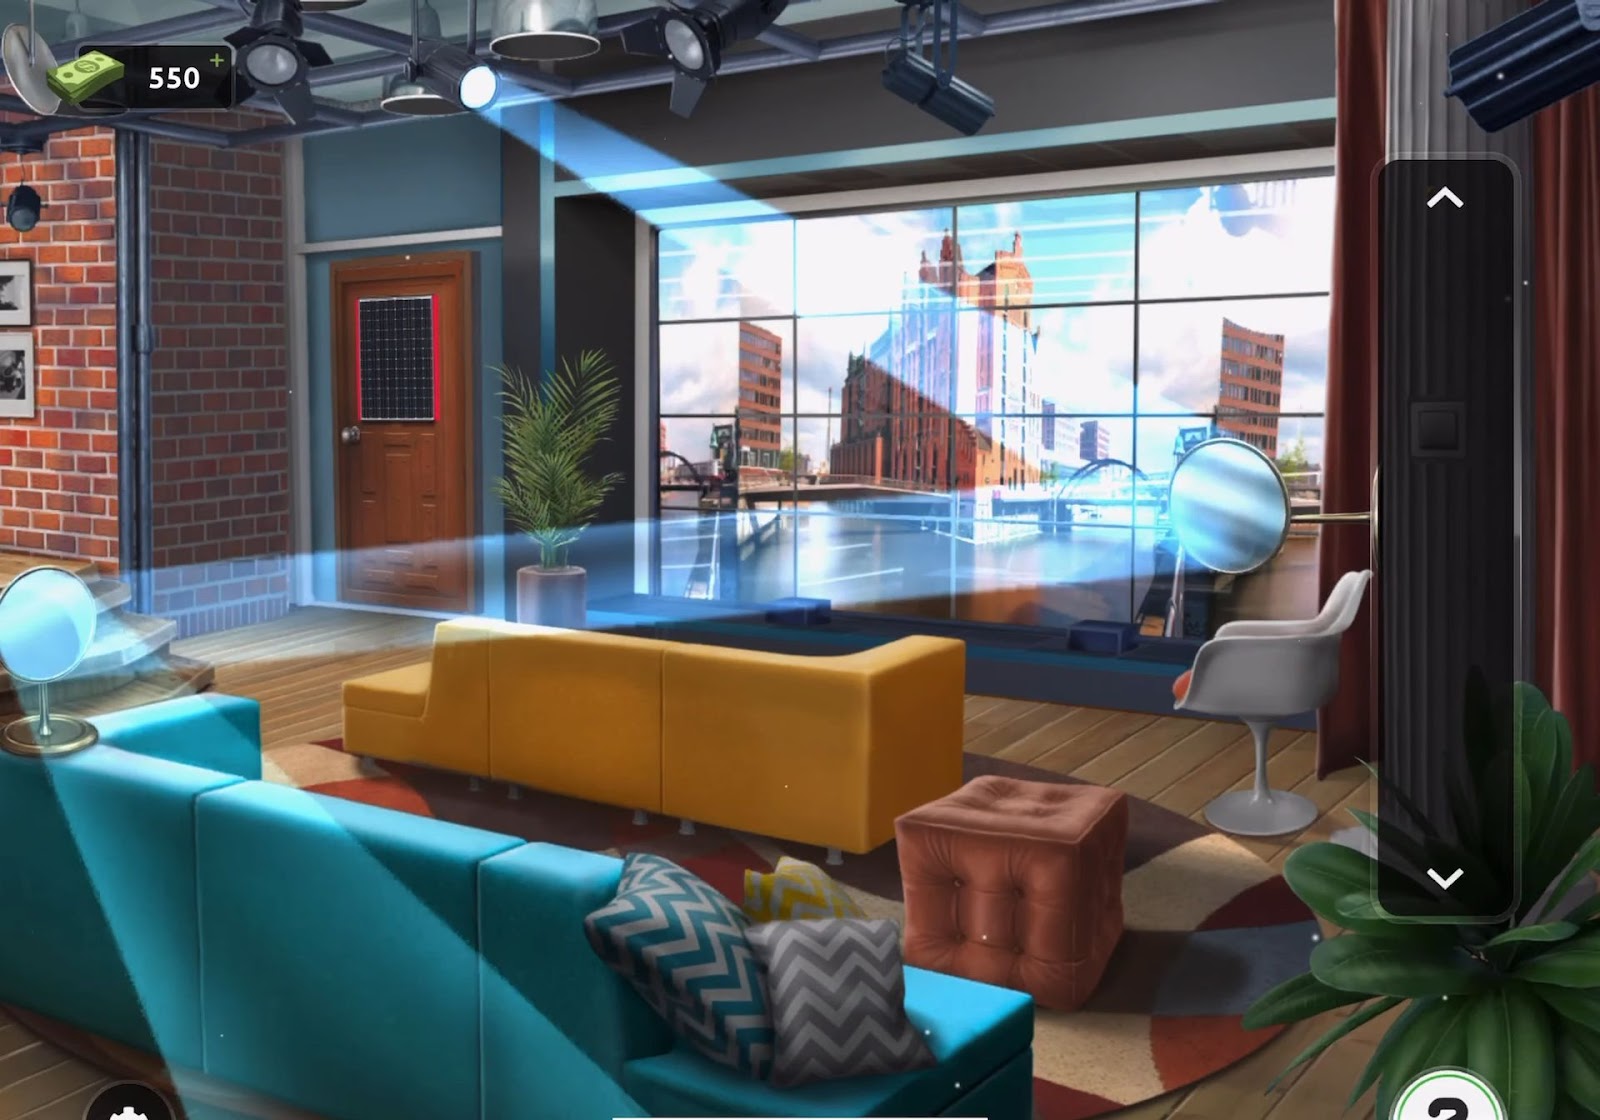
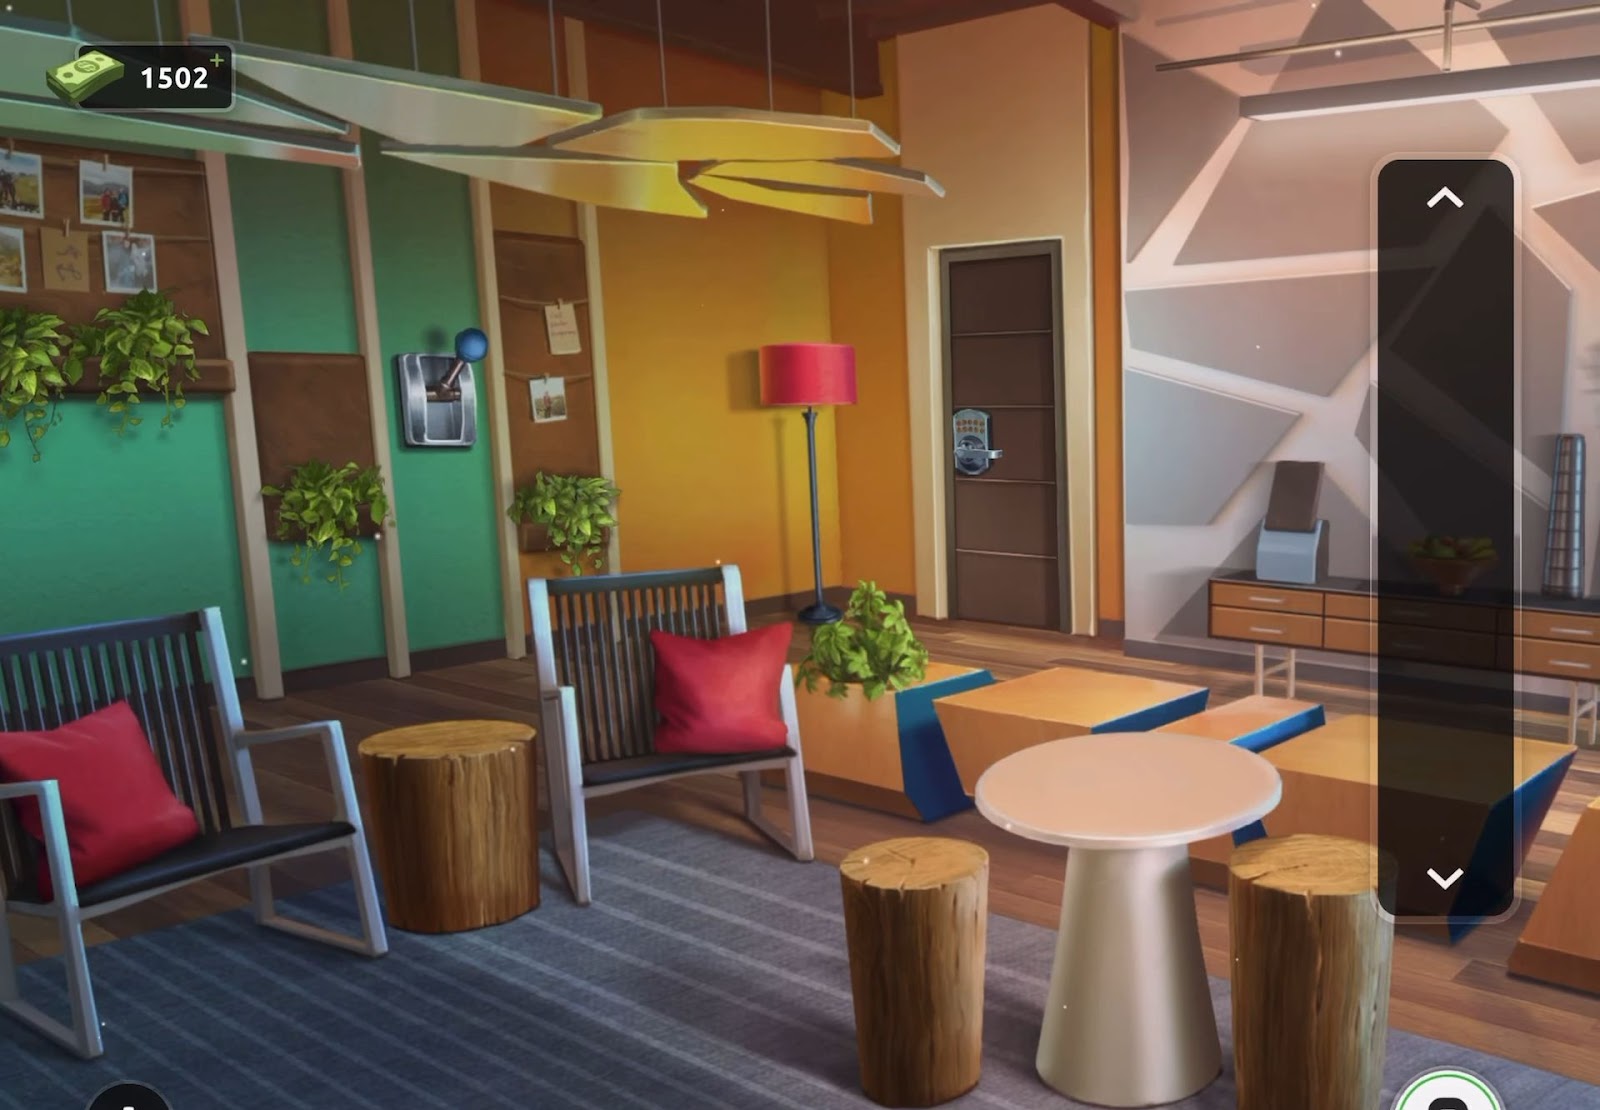
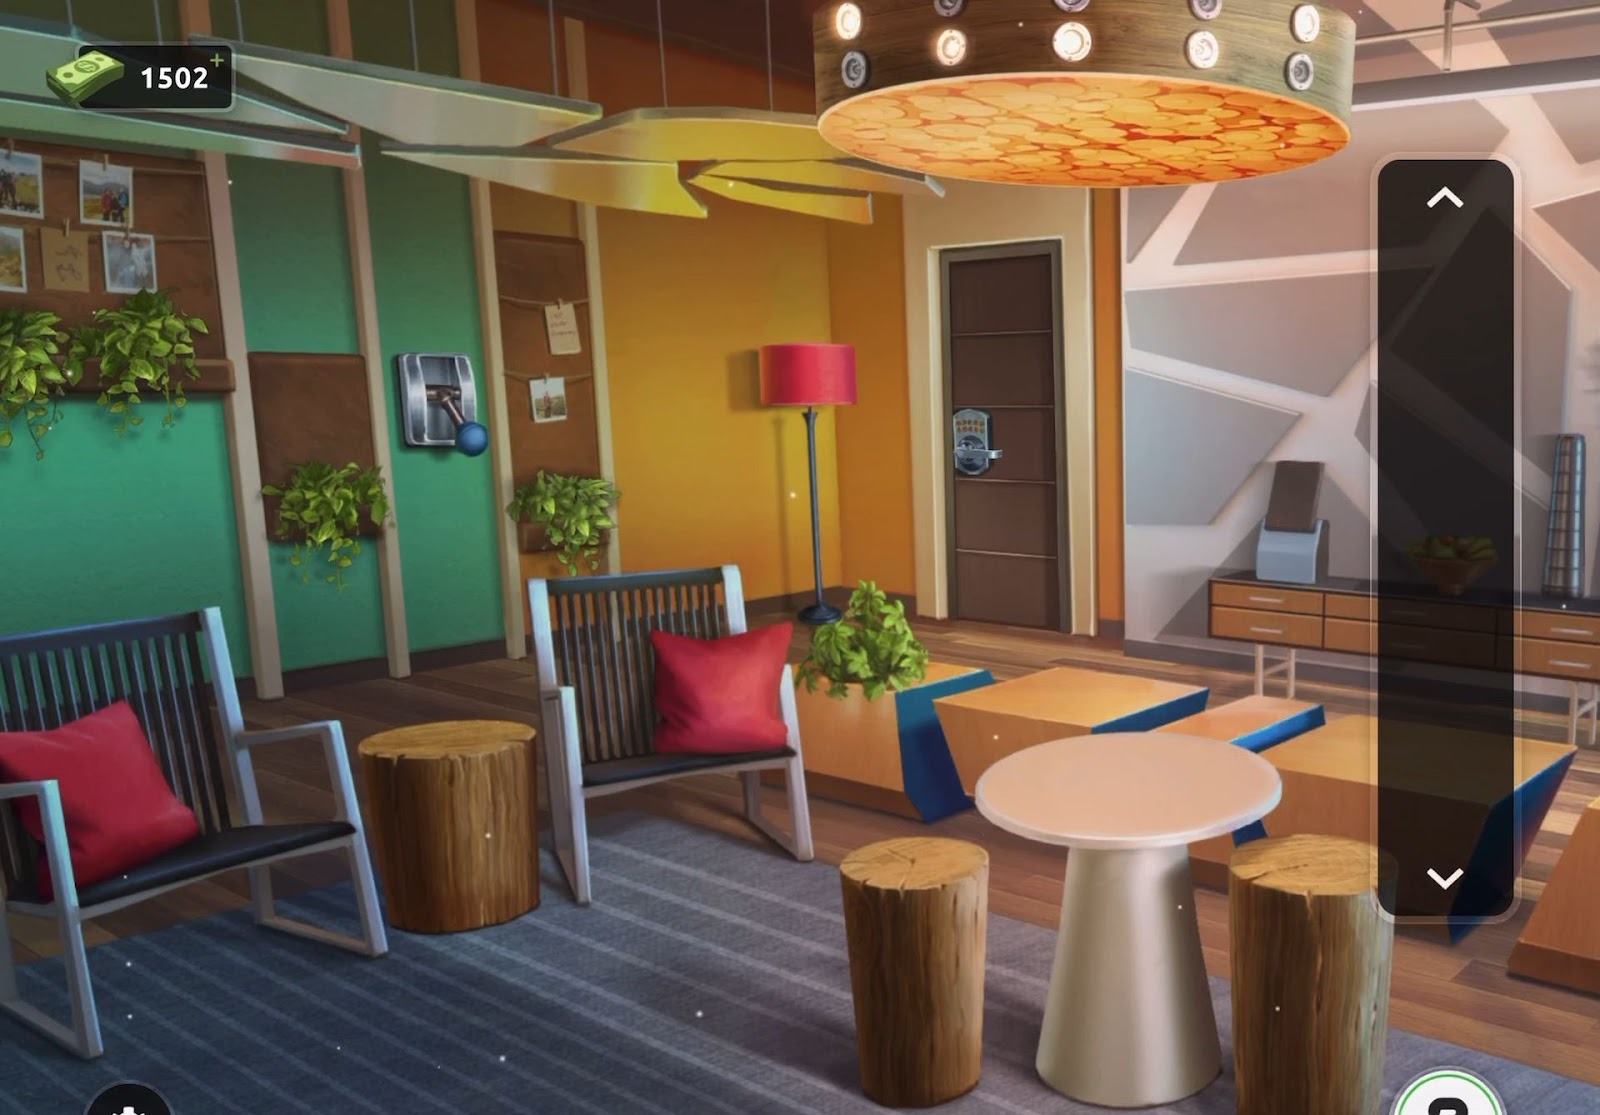
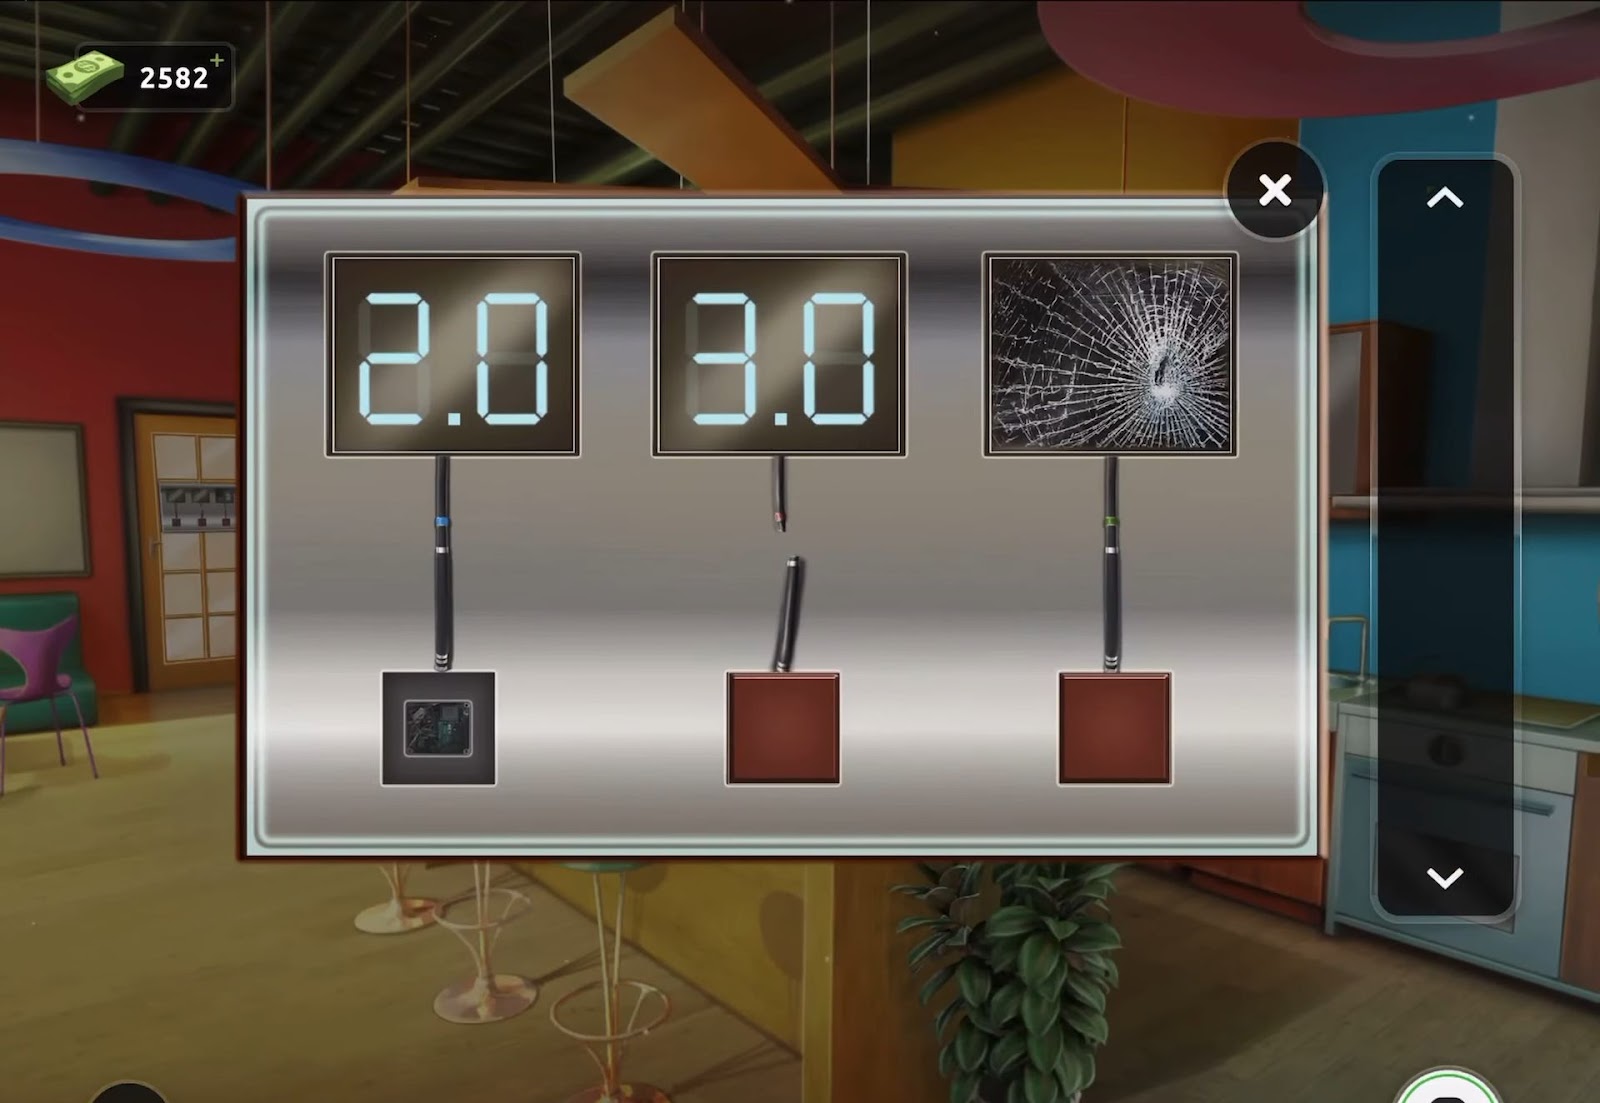
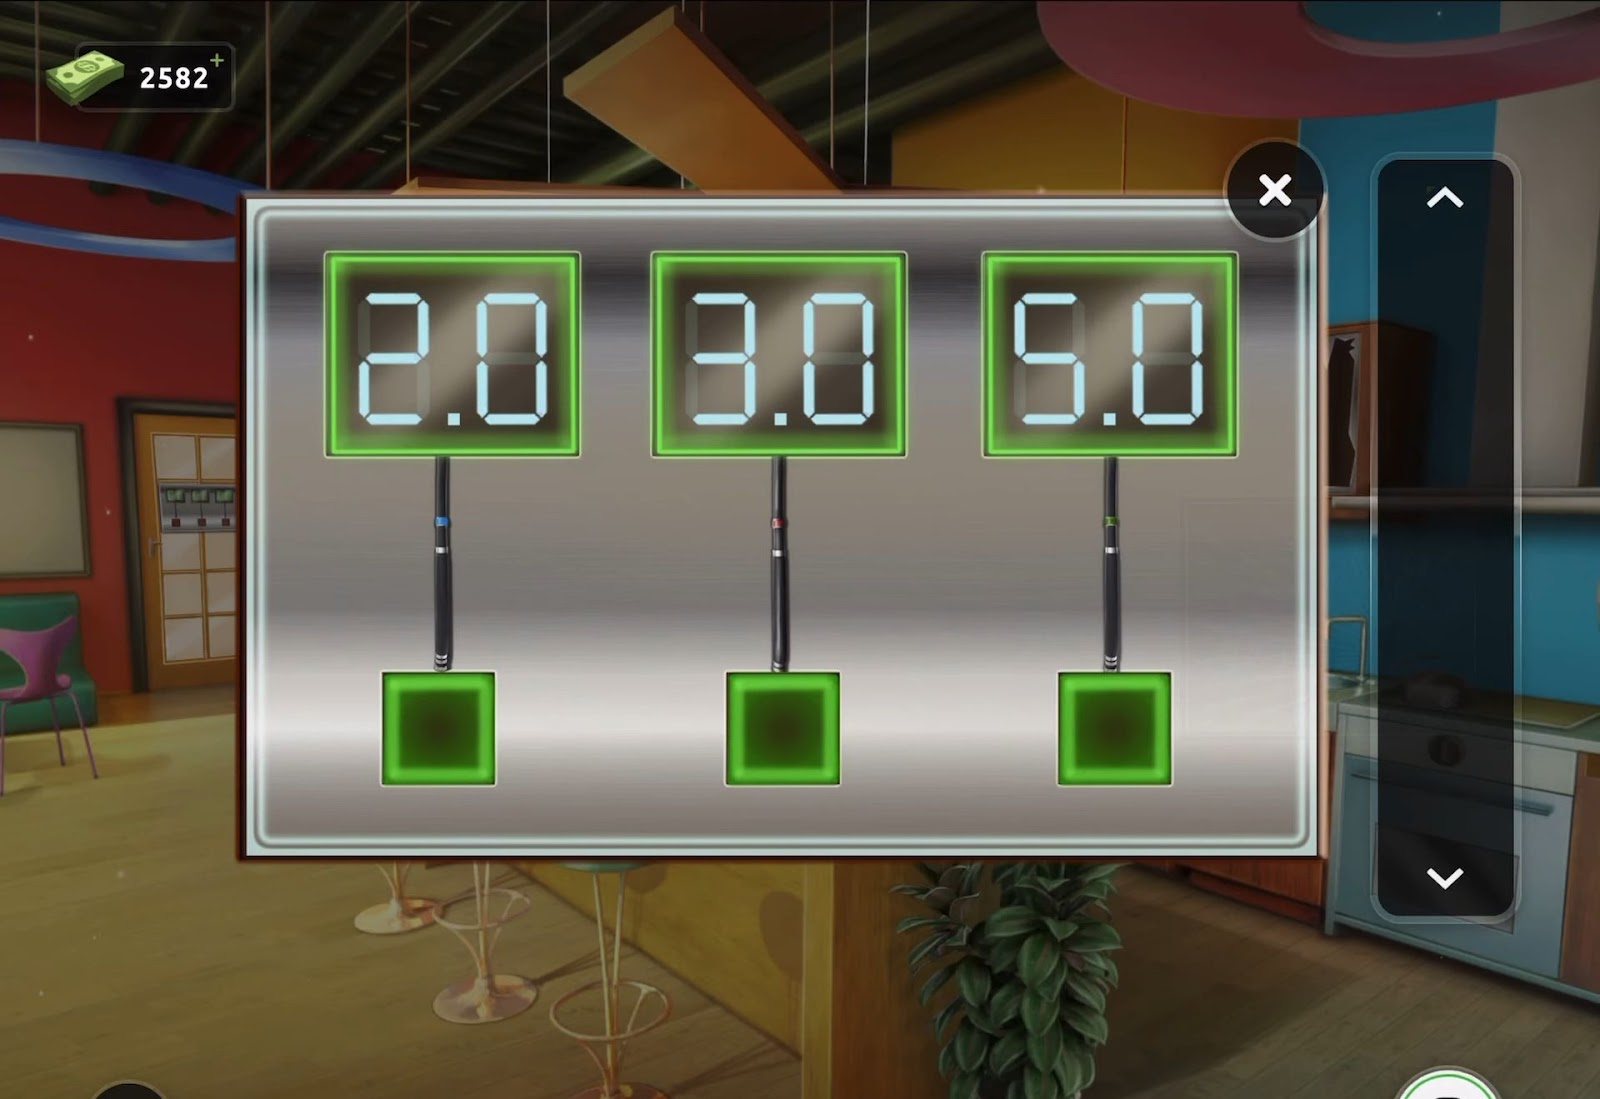
Level 6:
To complete level 6, follow the instructions below:
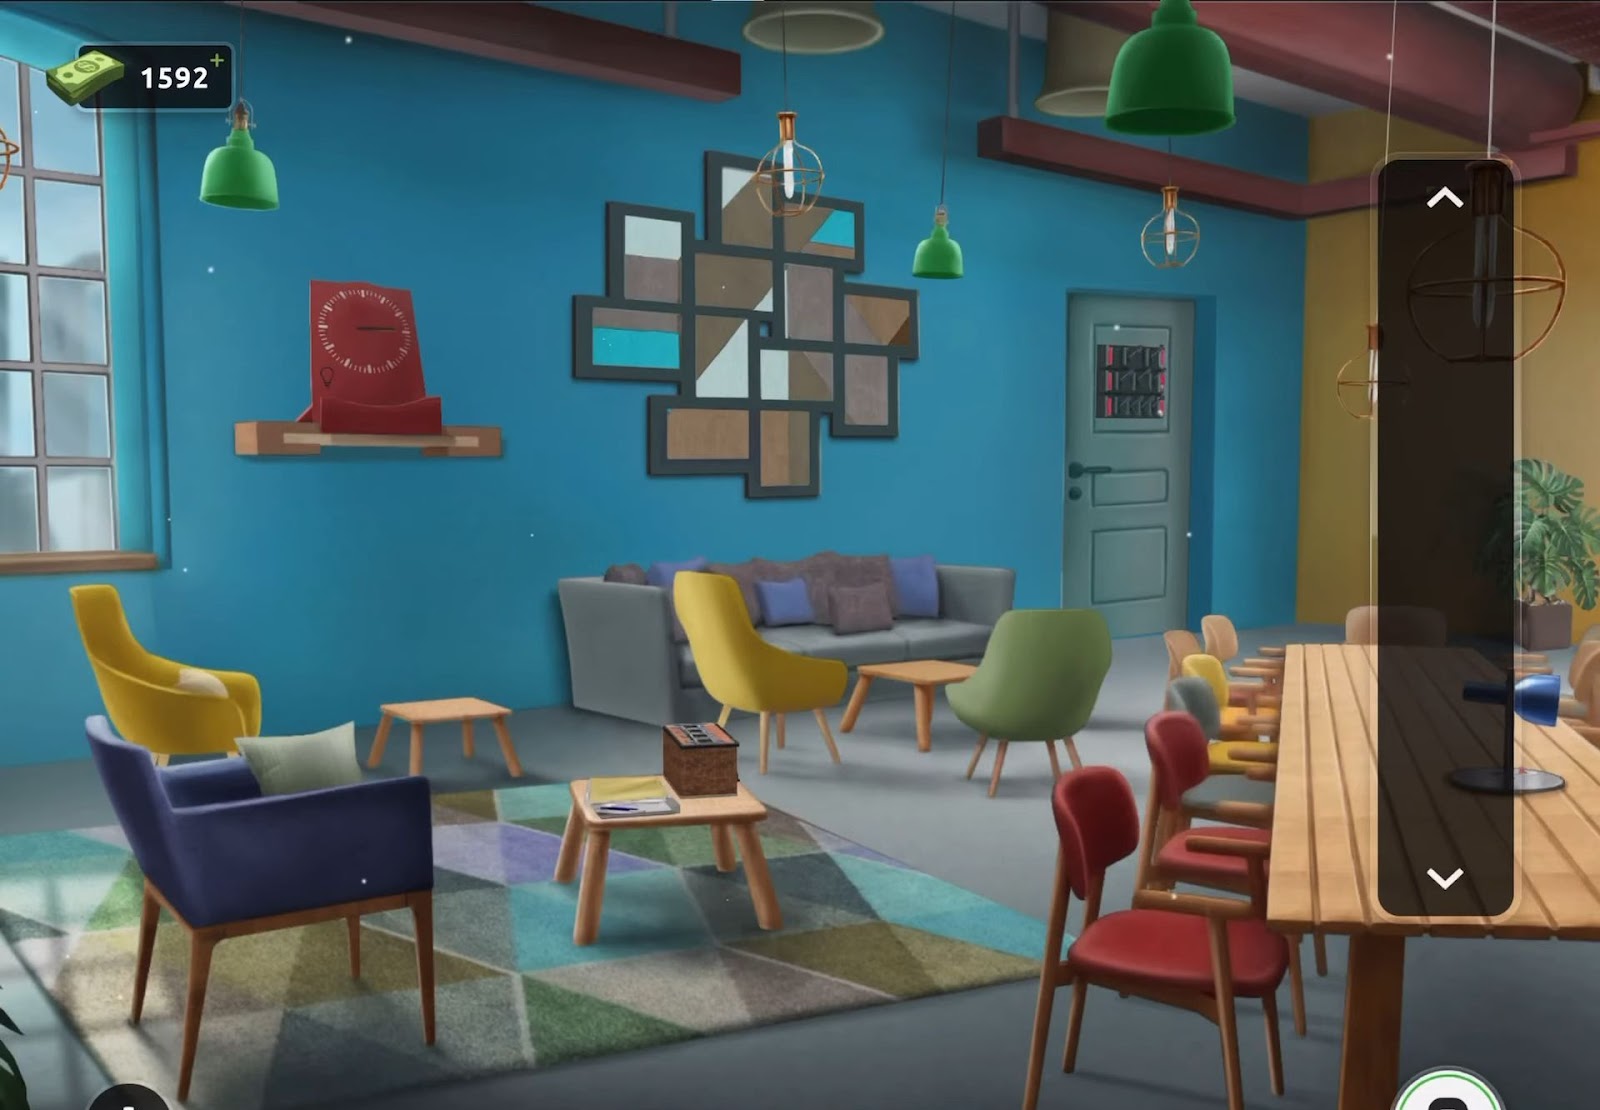
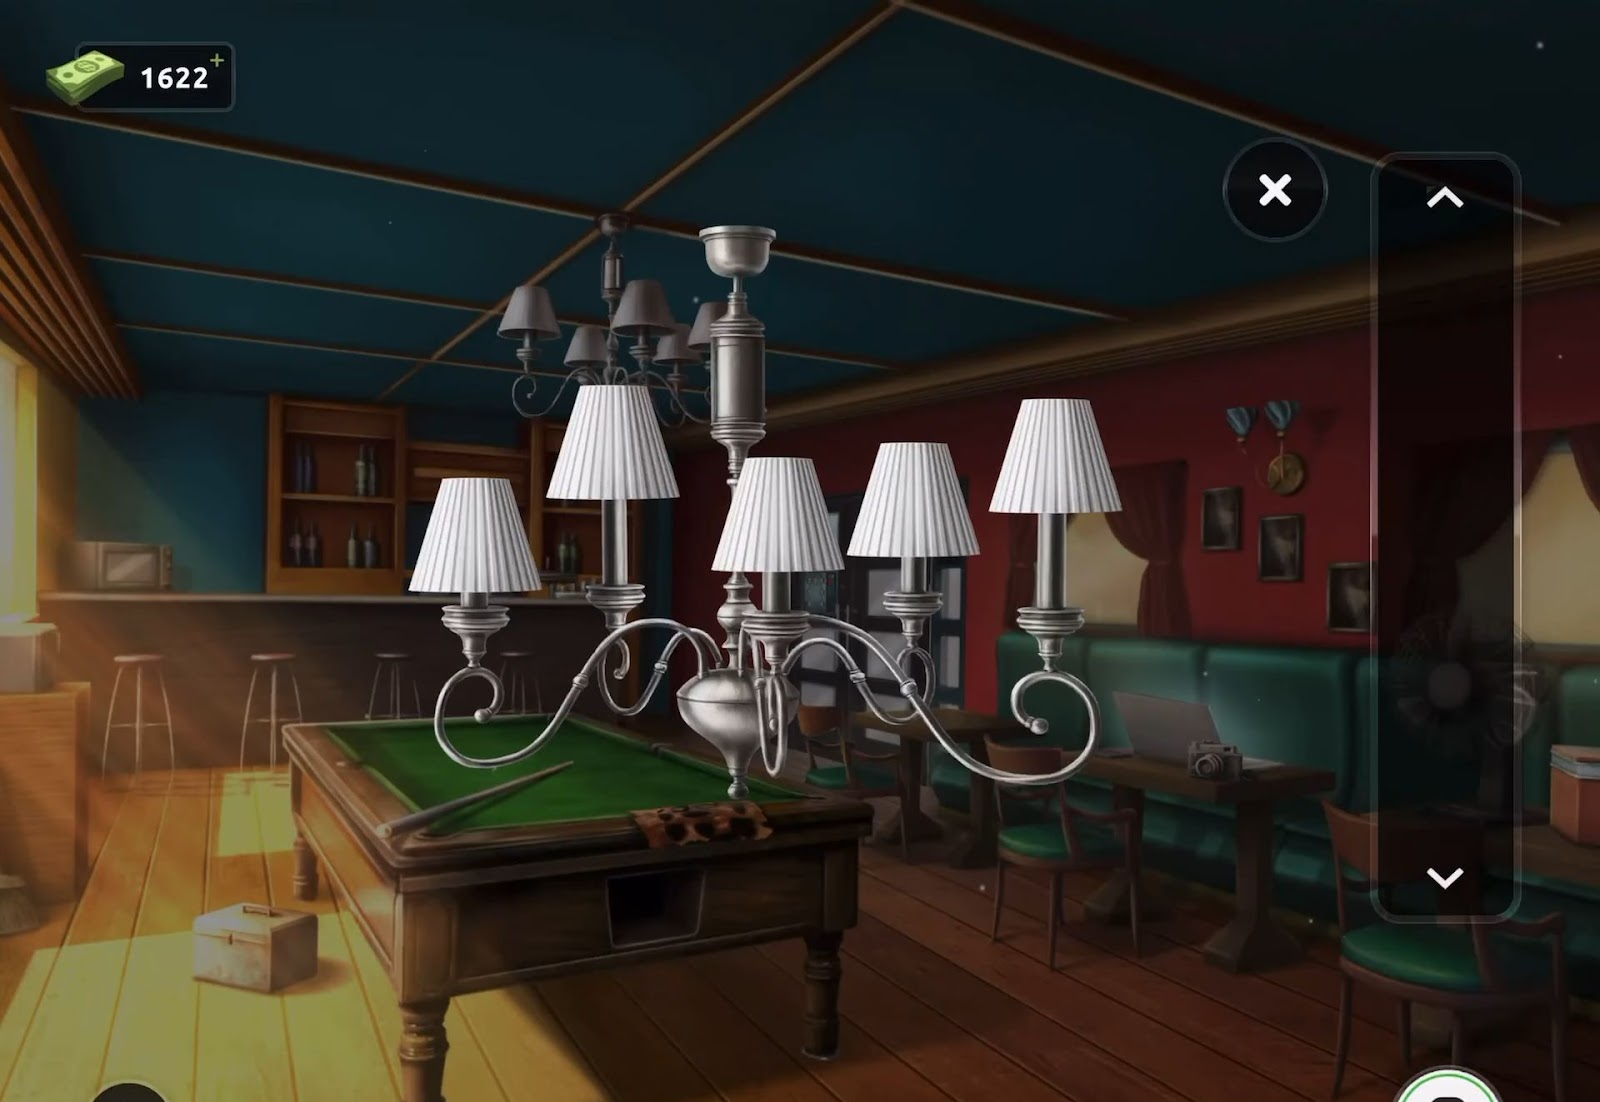
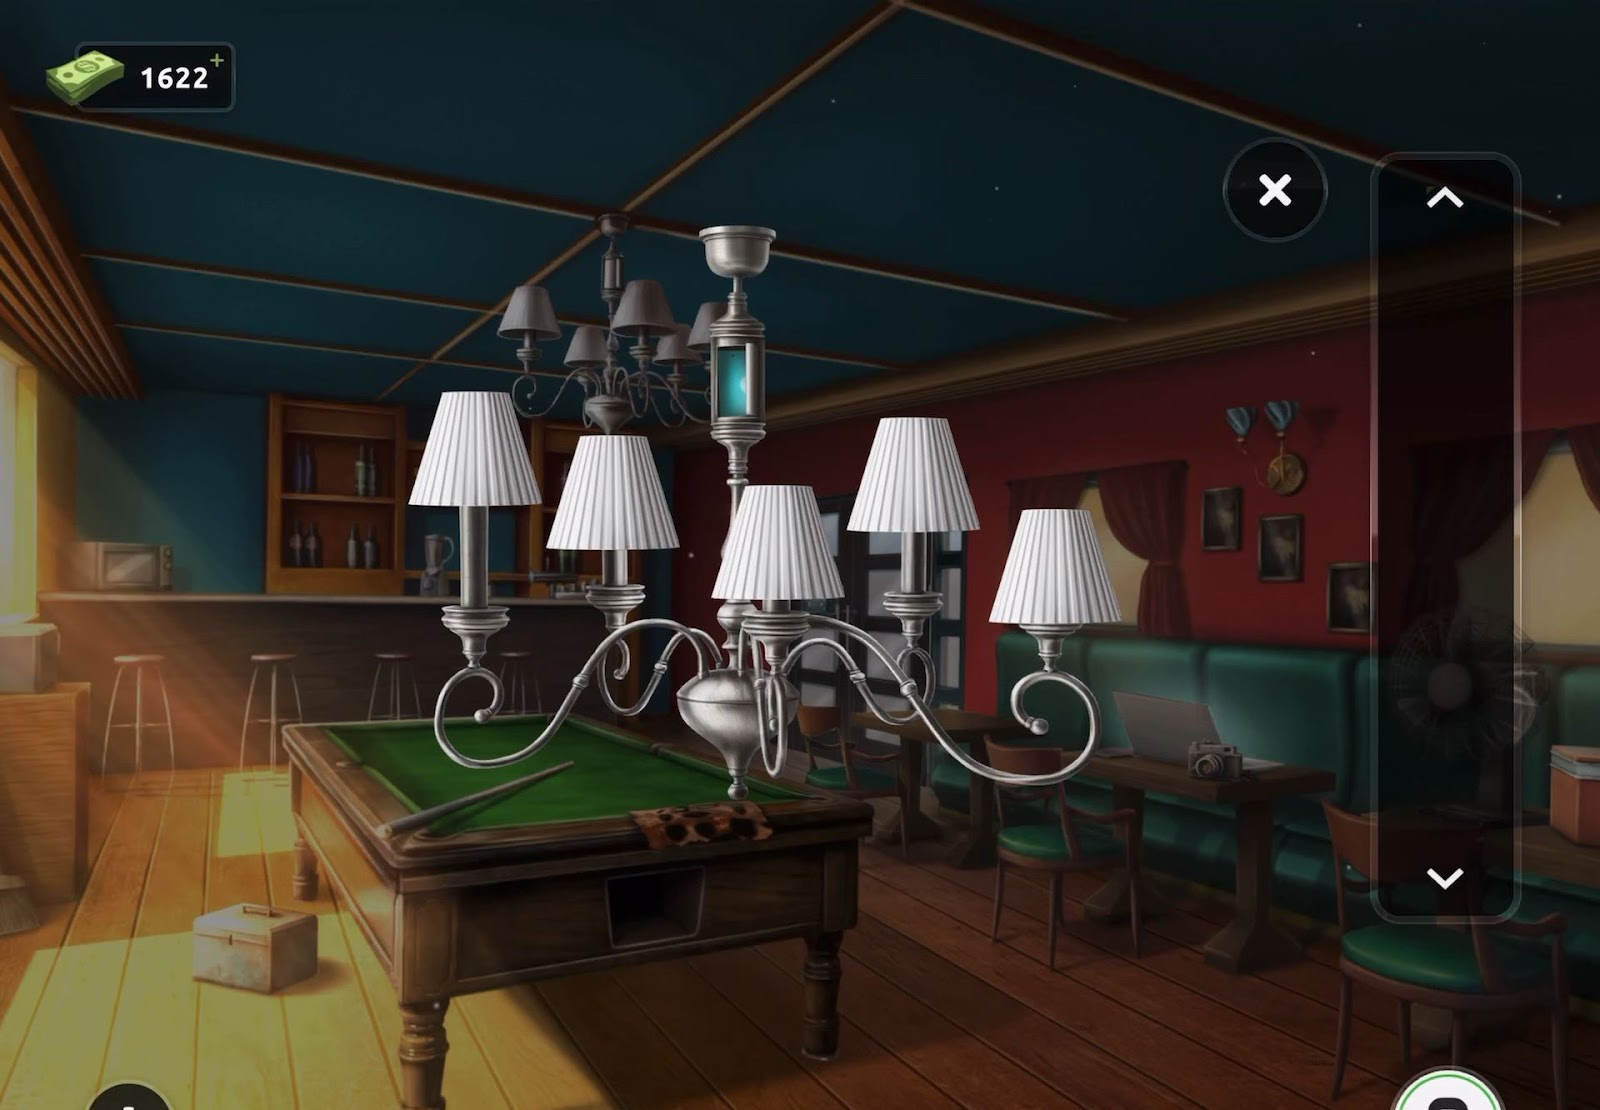
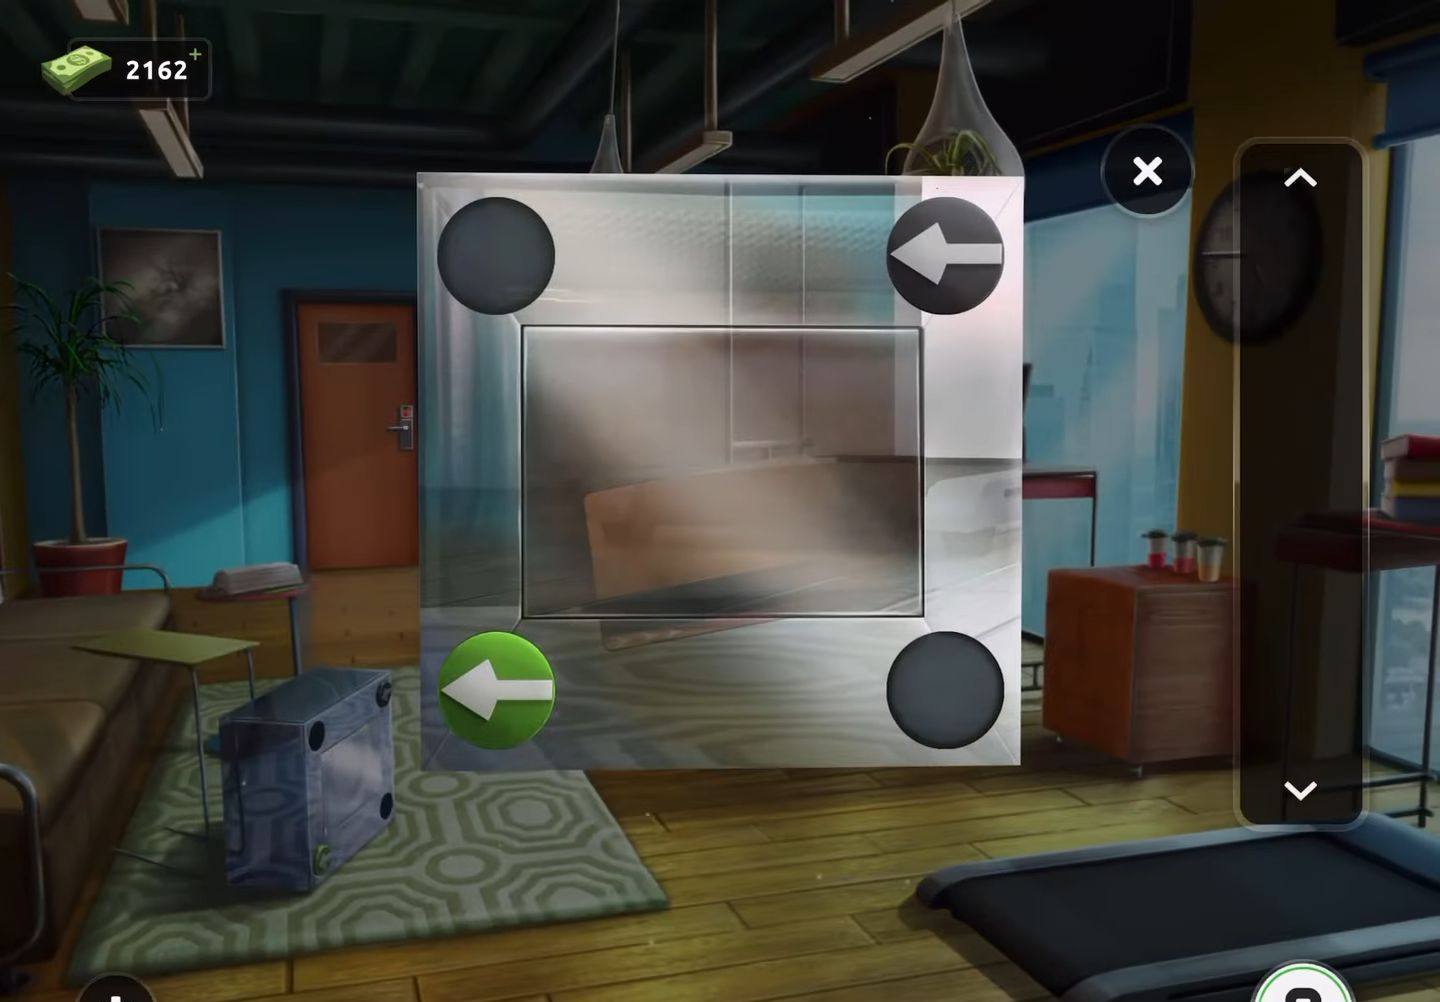
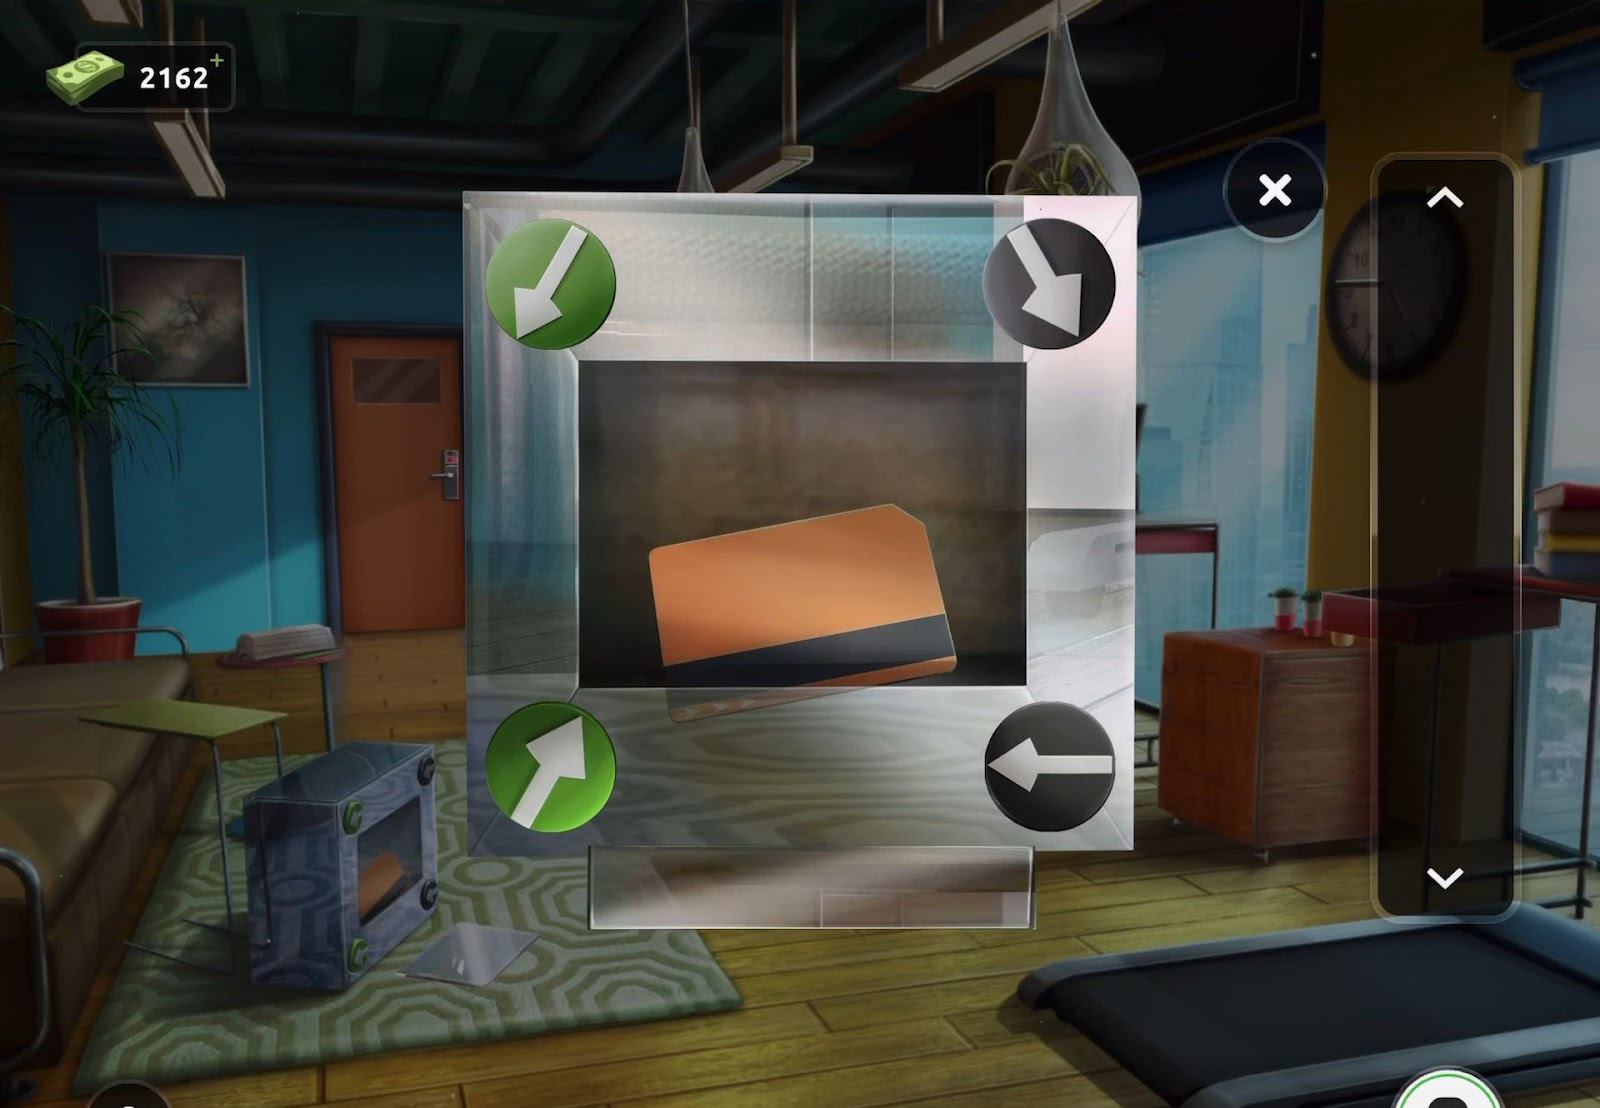
- This level involves a door powered by solar energy. You are required to focus light on this specific door.
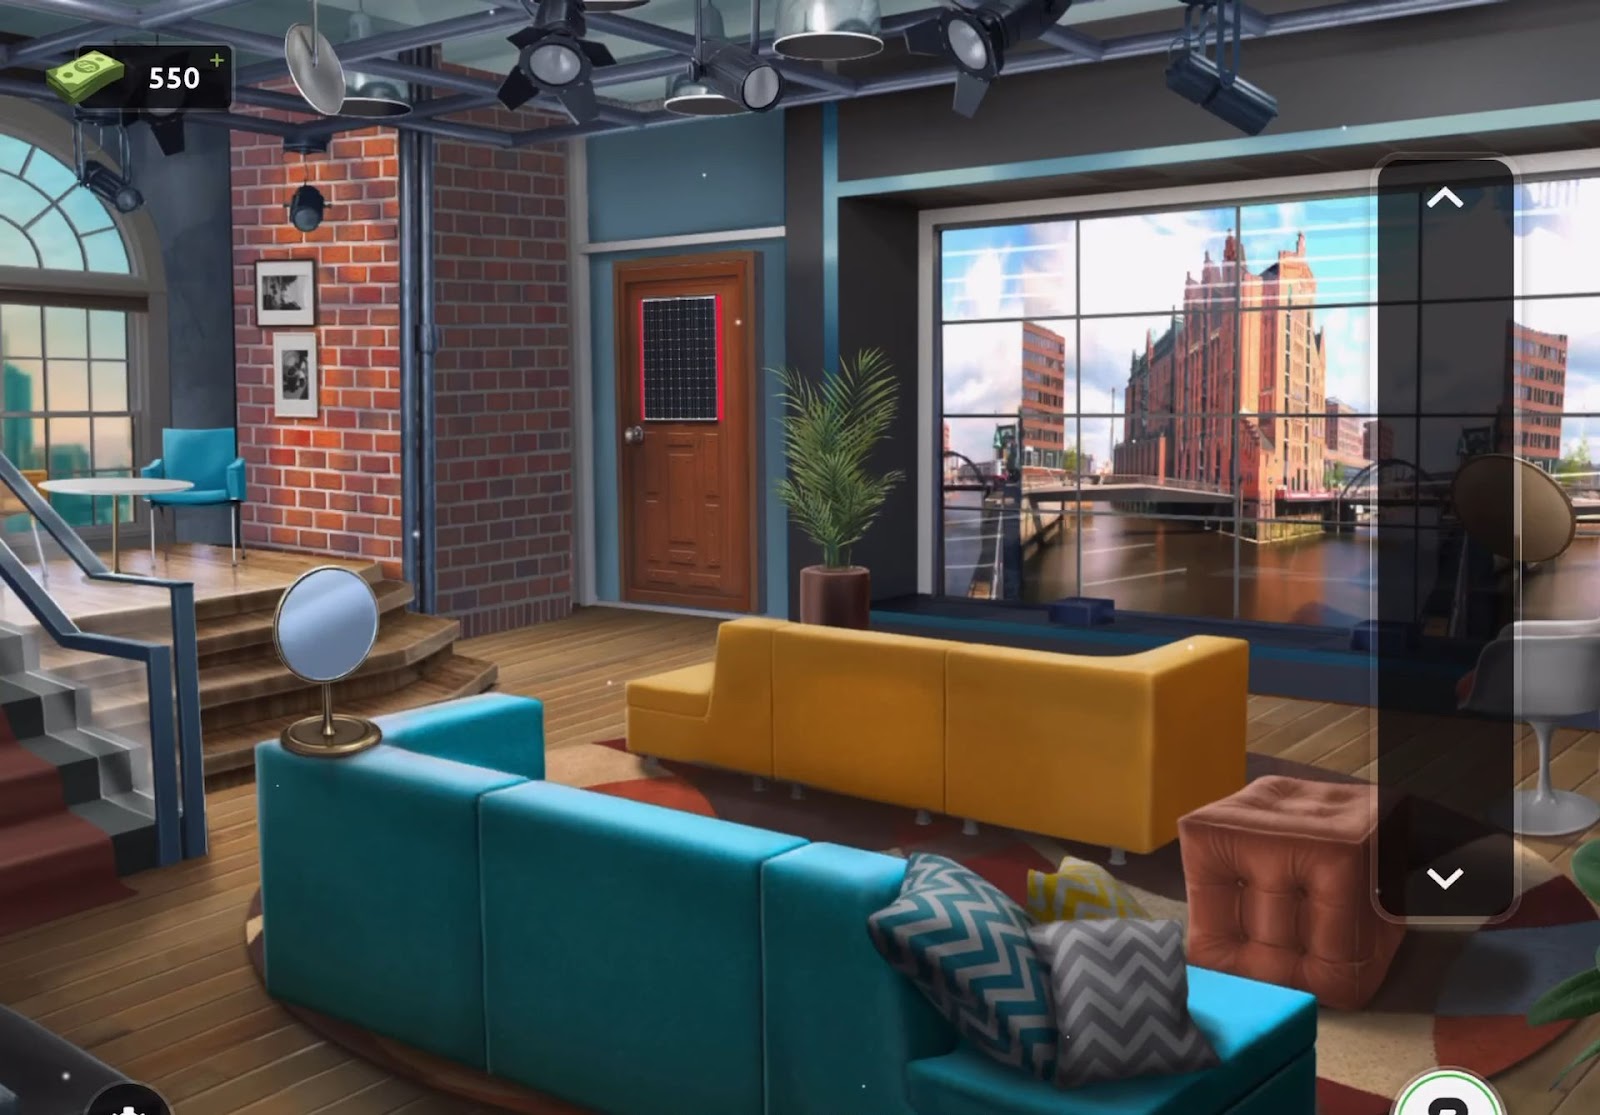
- Begin by finding a white column with a switch on the right side.
- Next, press this switch to turn on a light.
- After that, interact with the mirror illuminated by the light to redirect the light towards another mirror.
- You have to repeat this procedure until the light is directed at the door.
- This will open the door and you can exit through it easily.
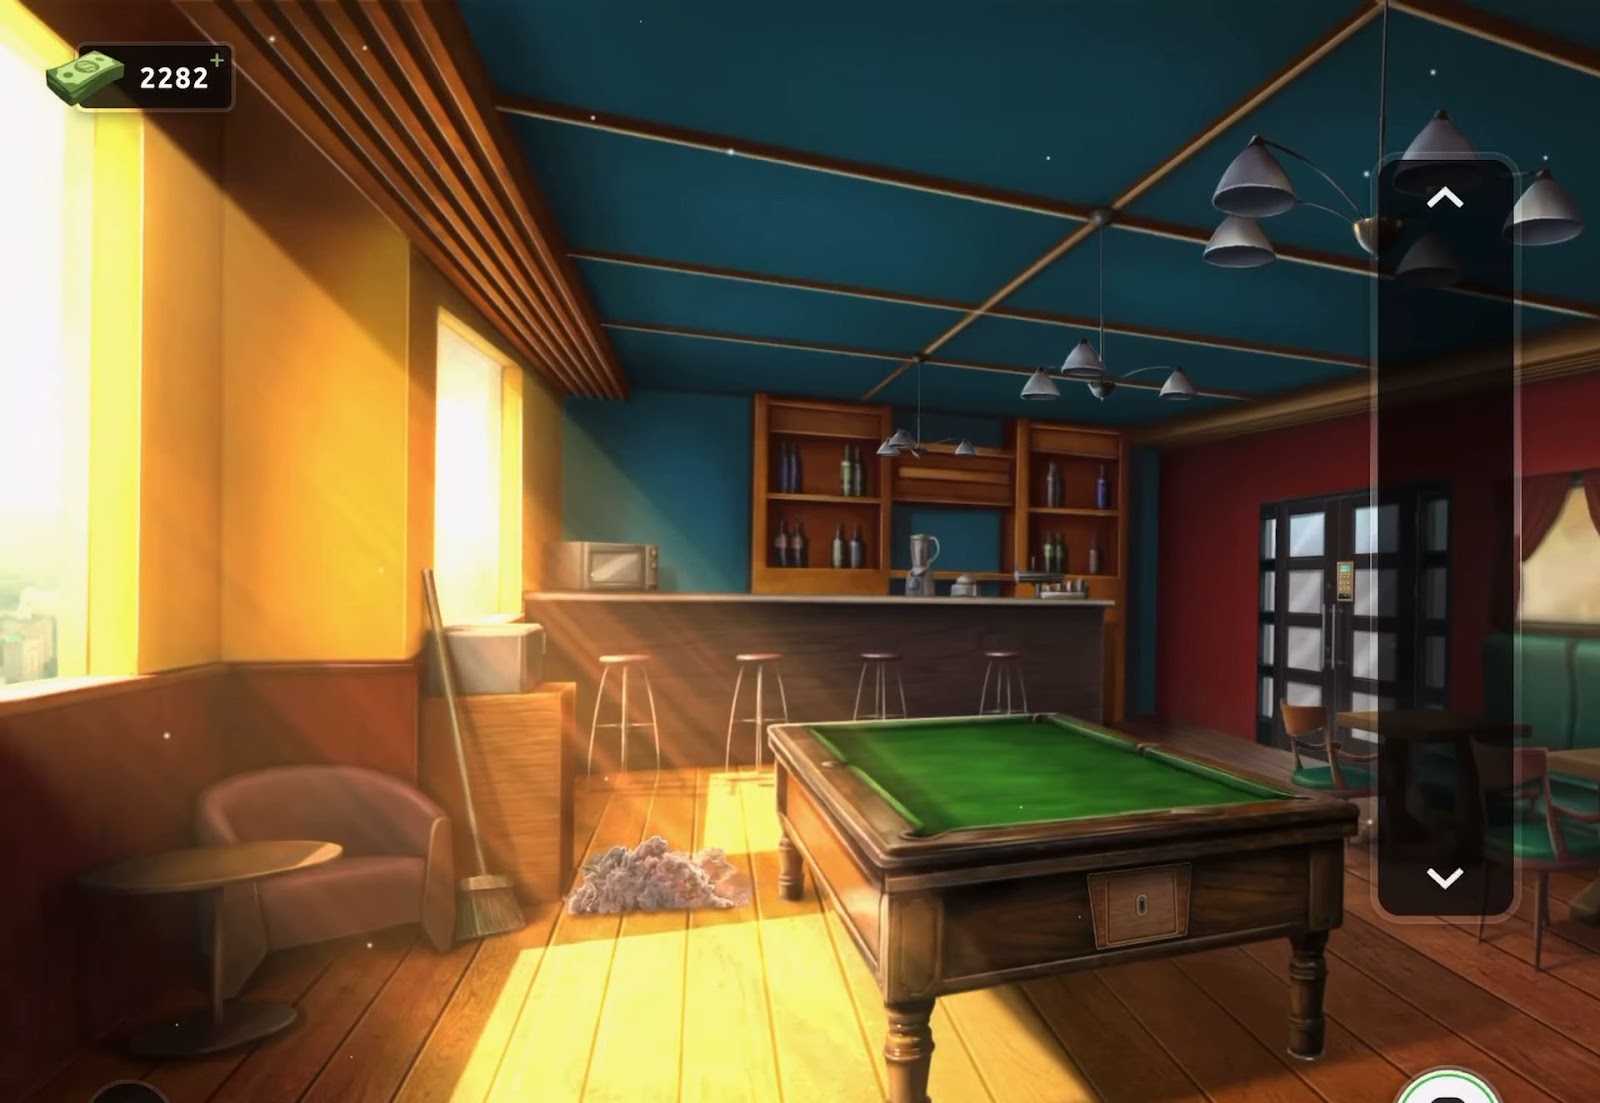
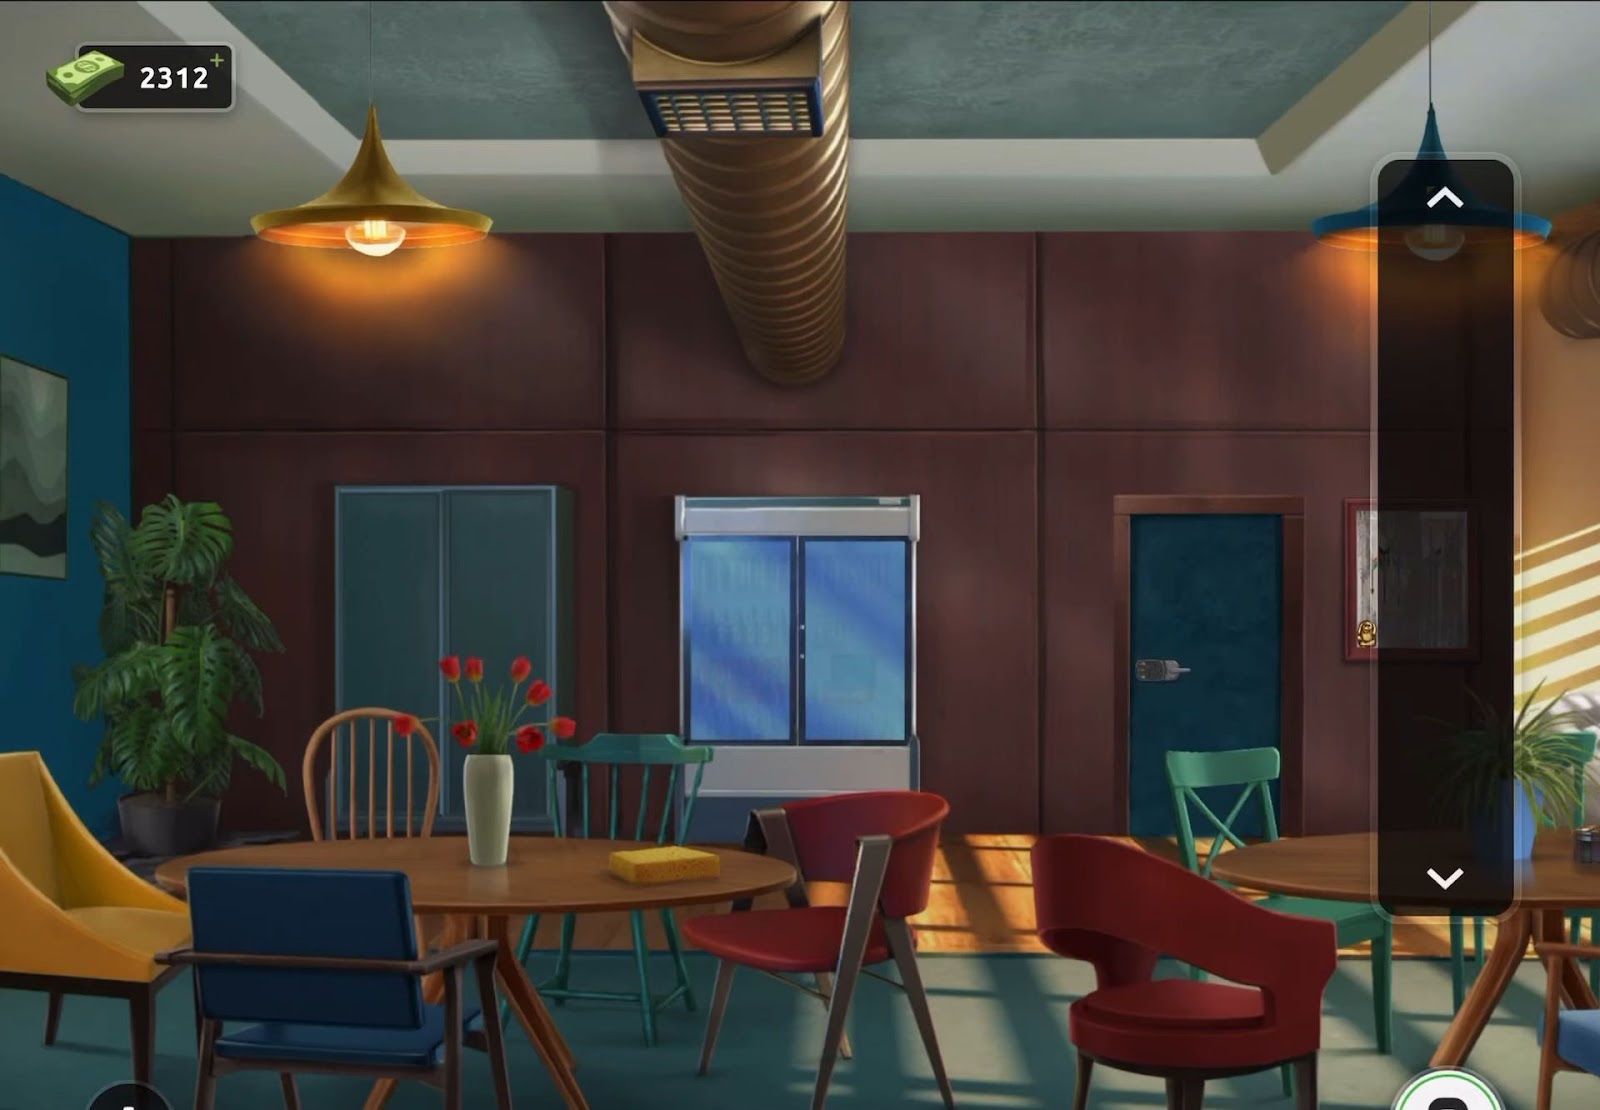
Level 7:
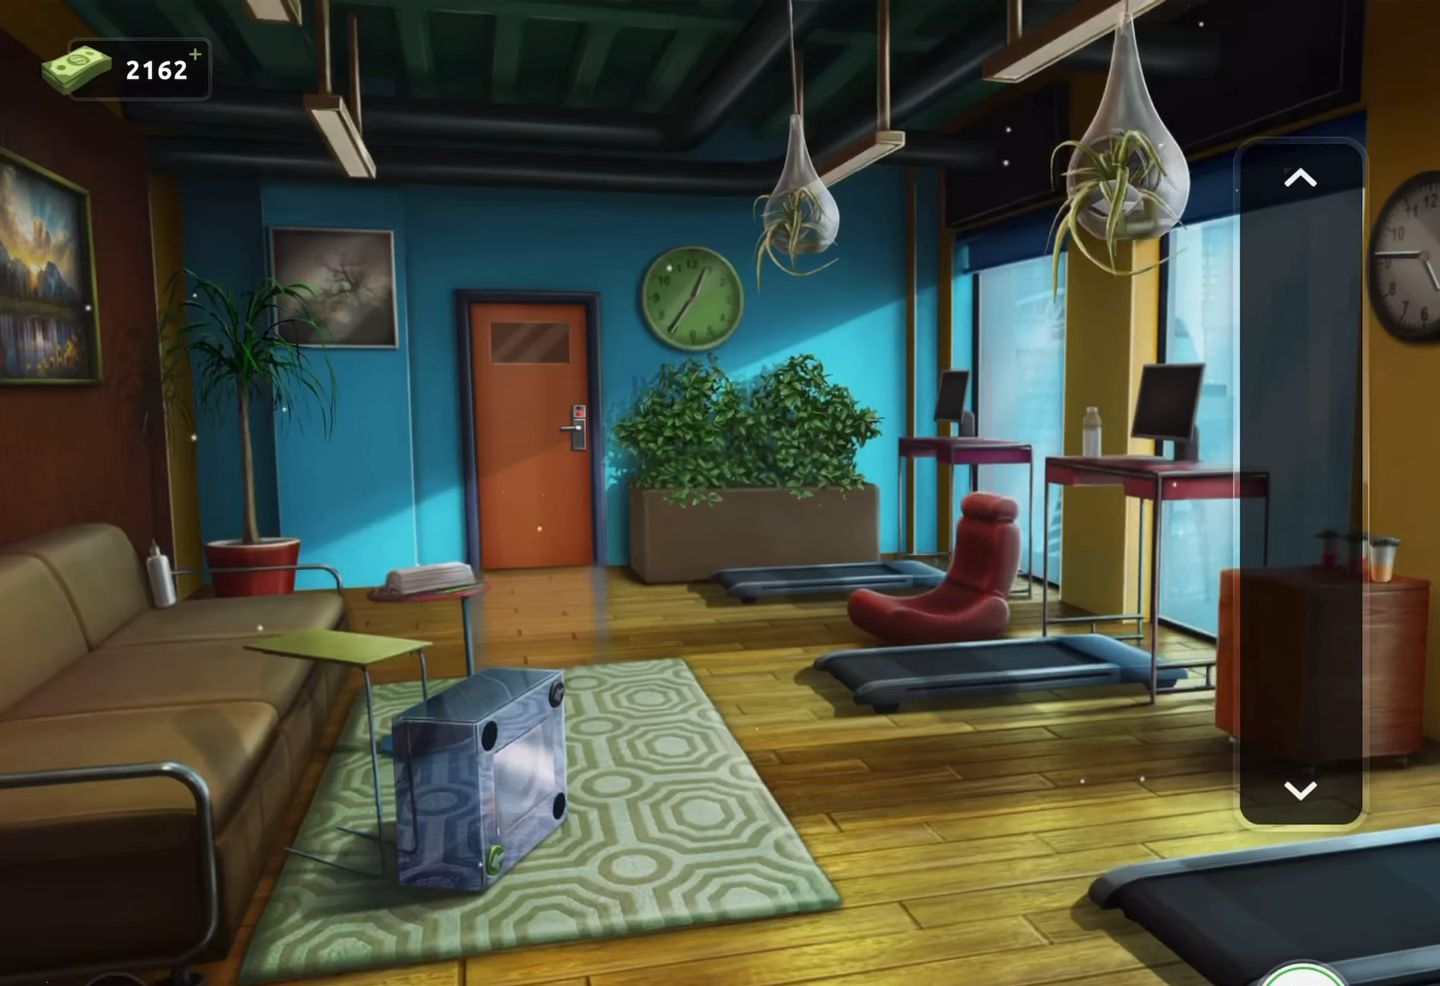
To complete level 7, follow the instructions below:
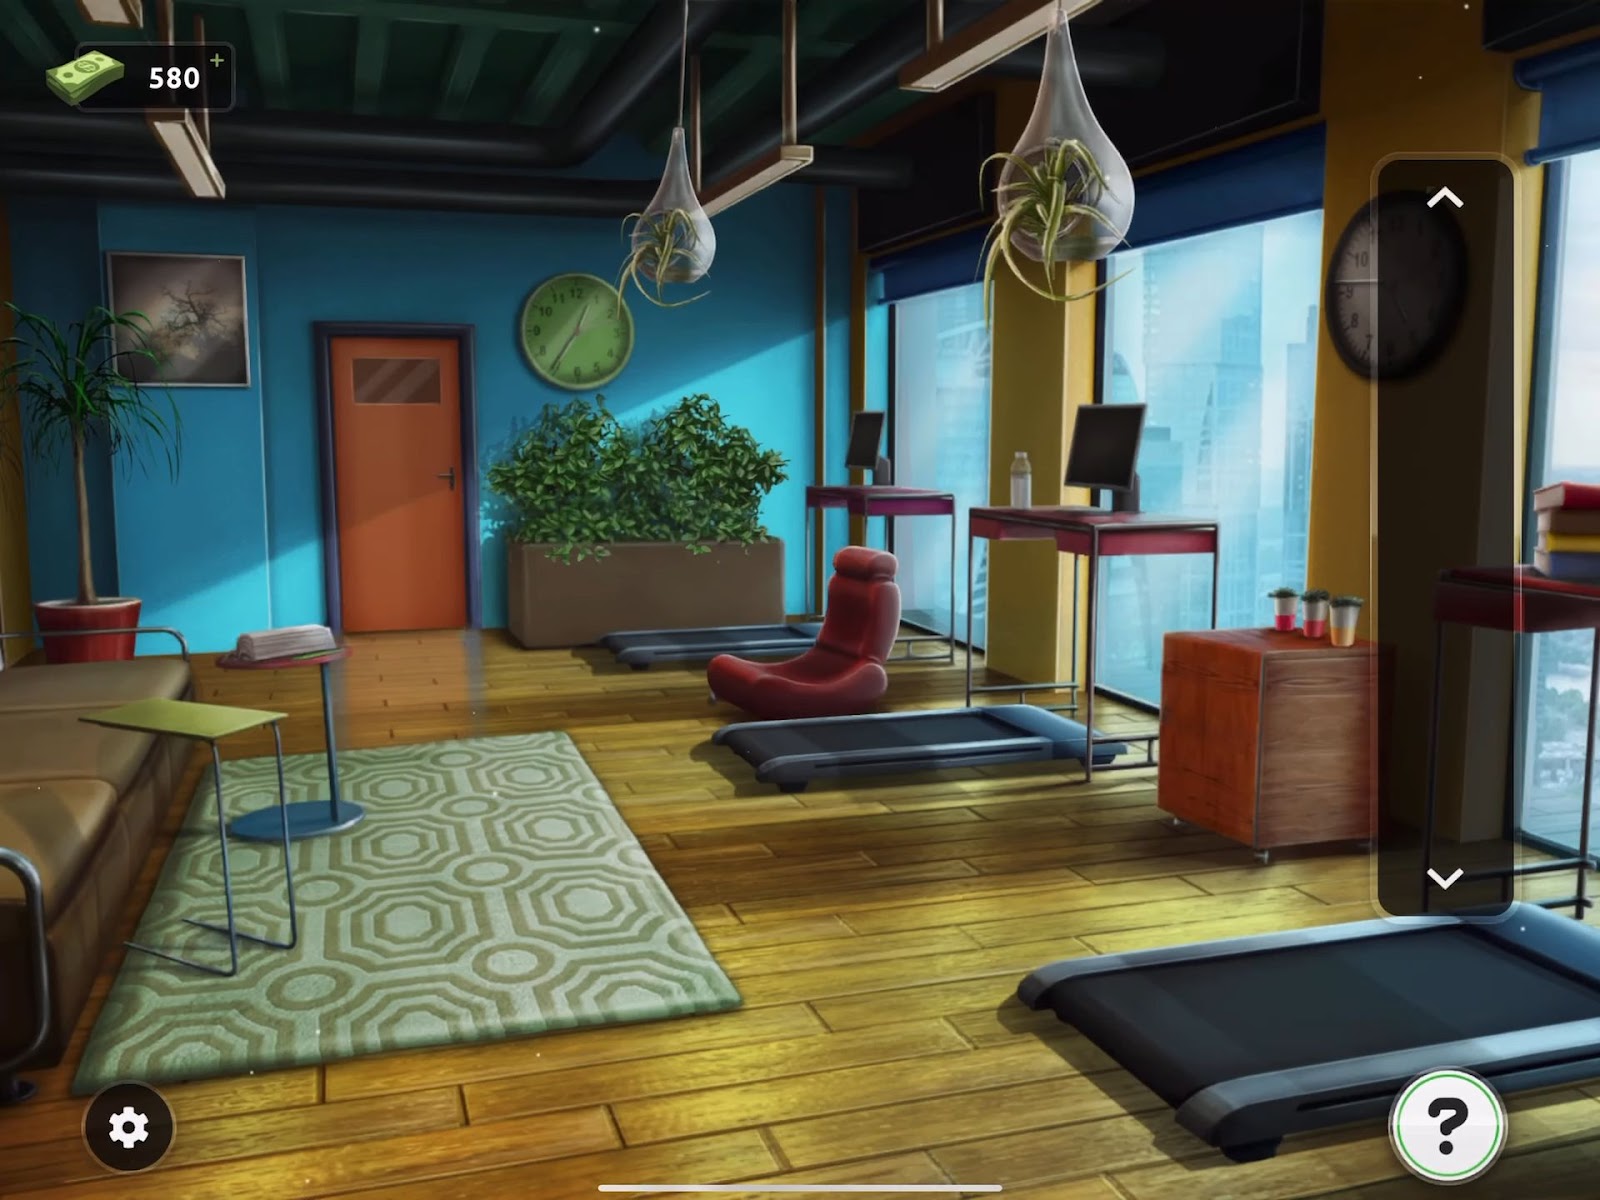
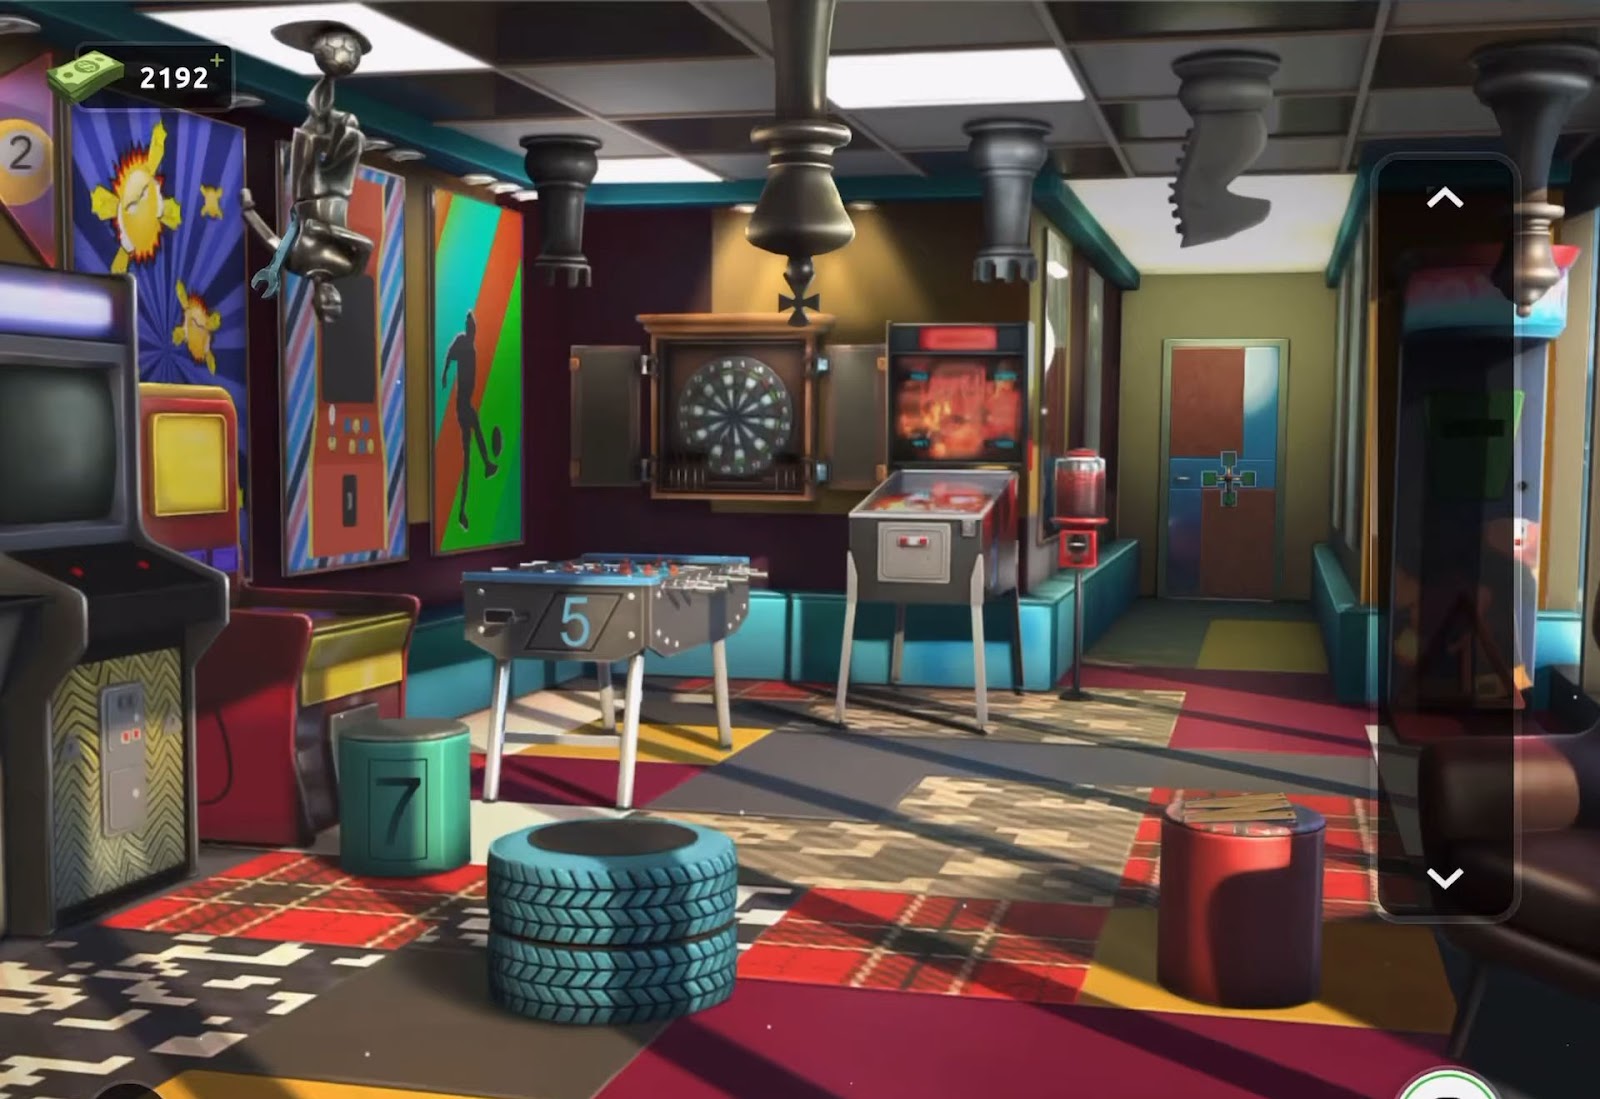
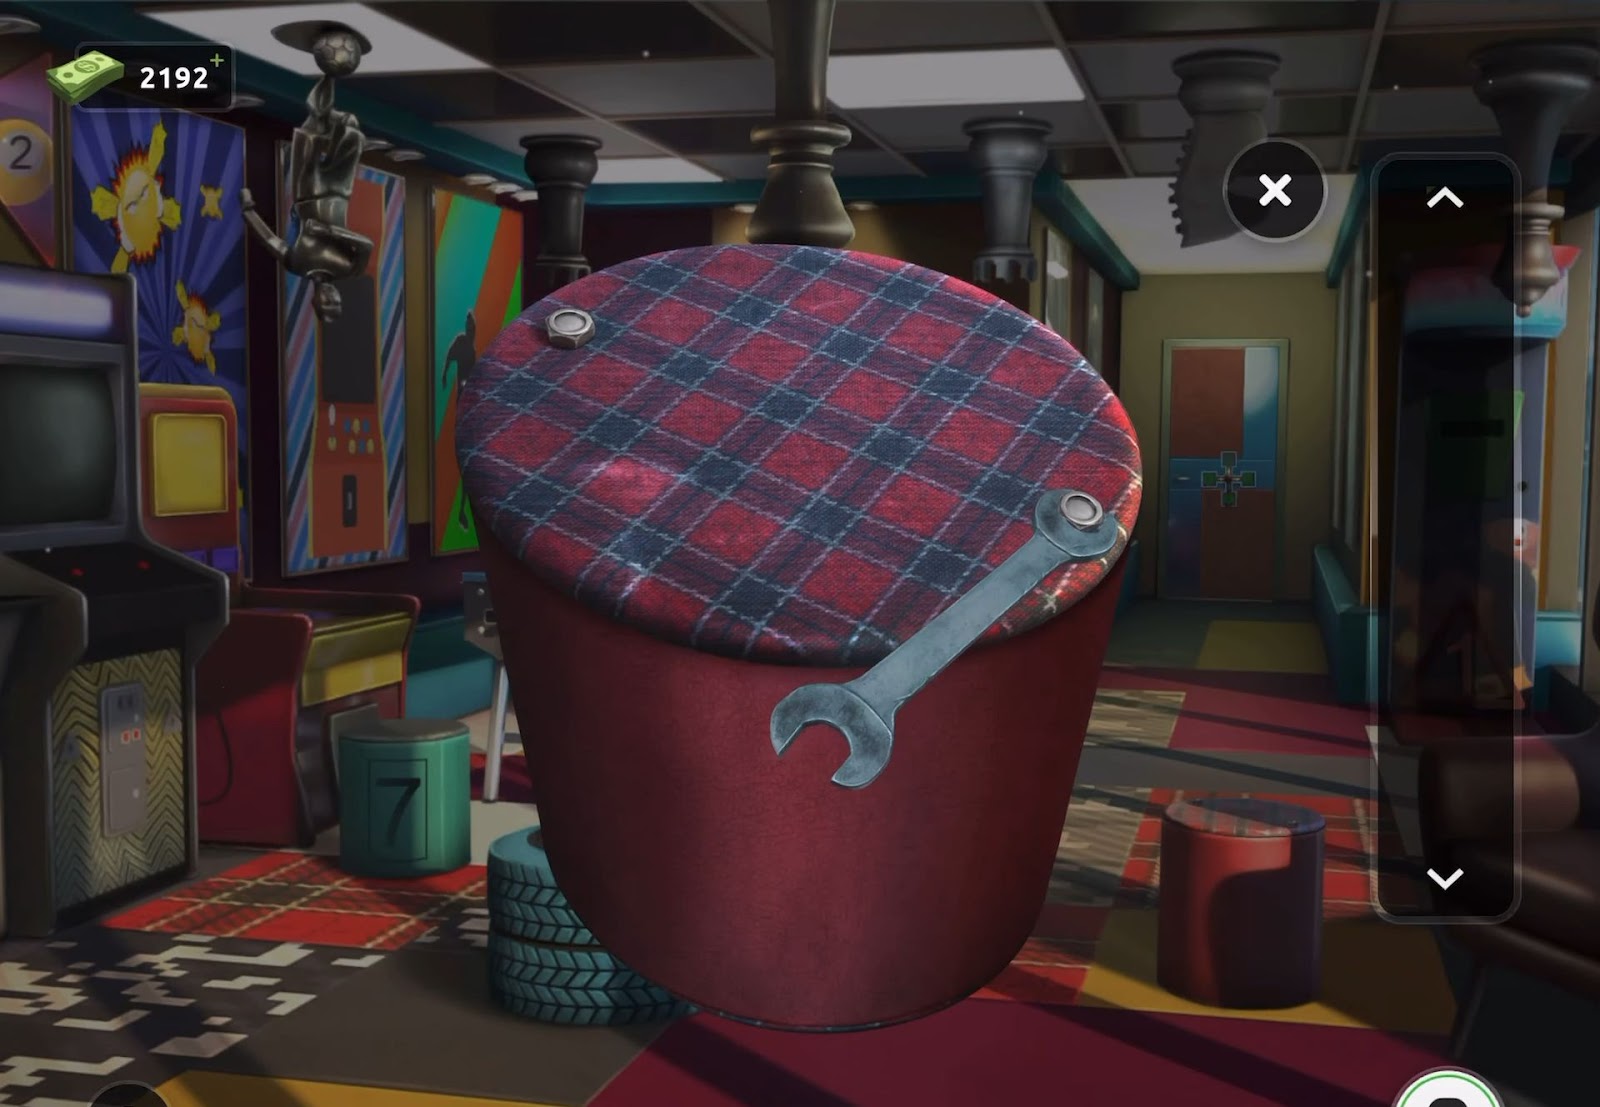
- Firstly, press the low red chair from the right to displace it in an exercise office.
- Next, you need to grab the hammer from the floor.
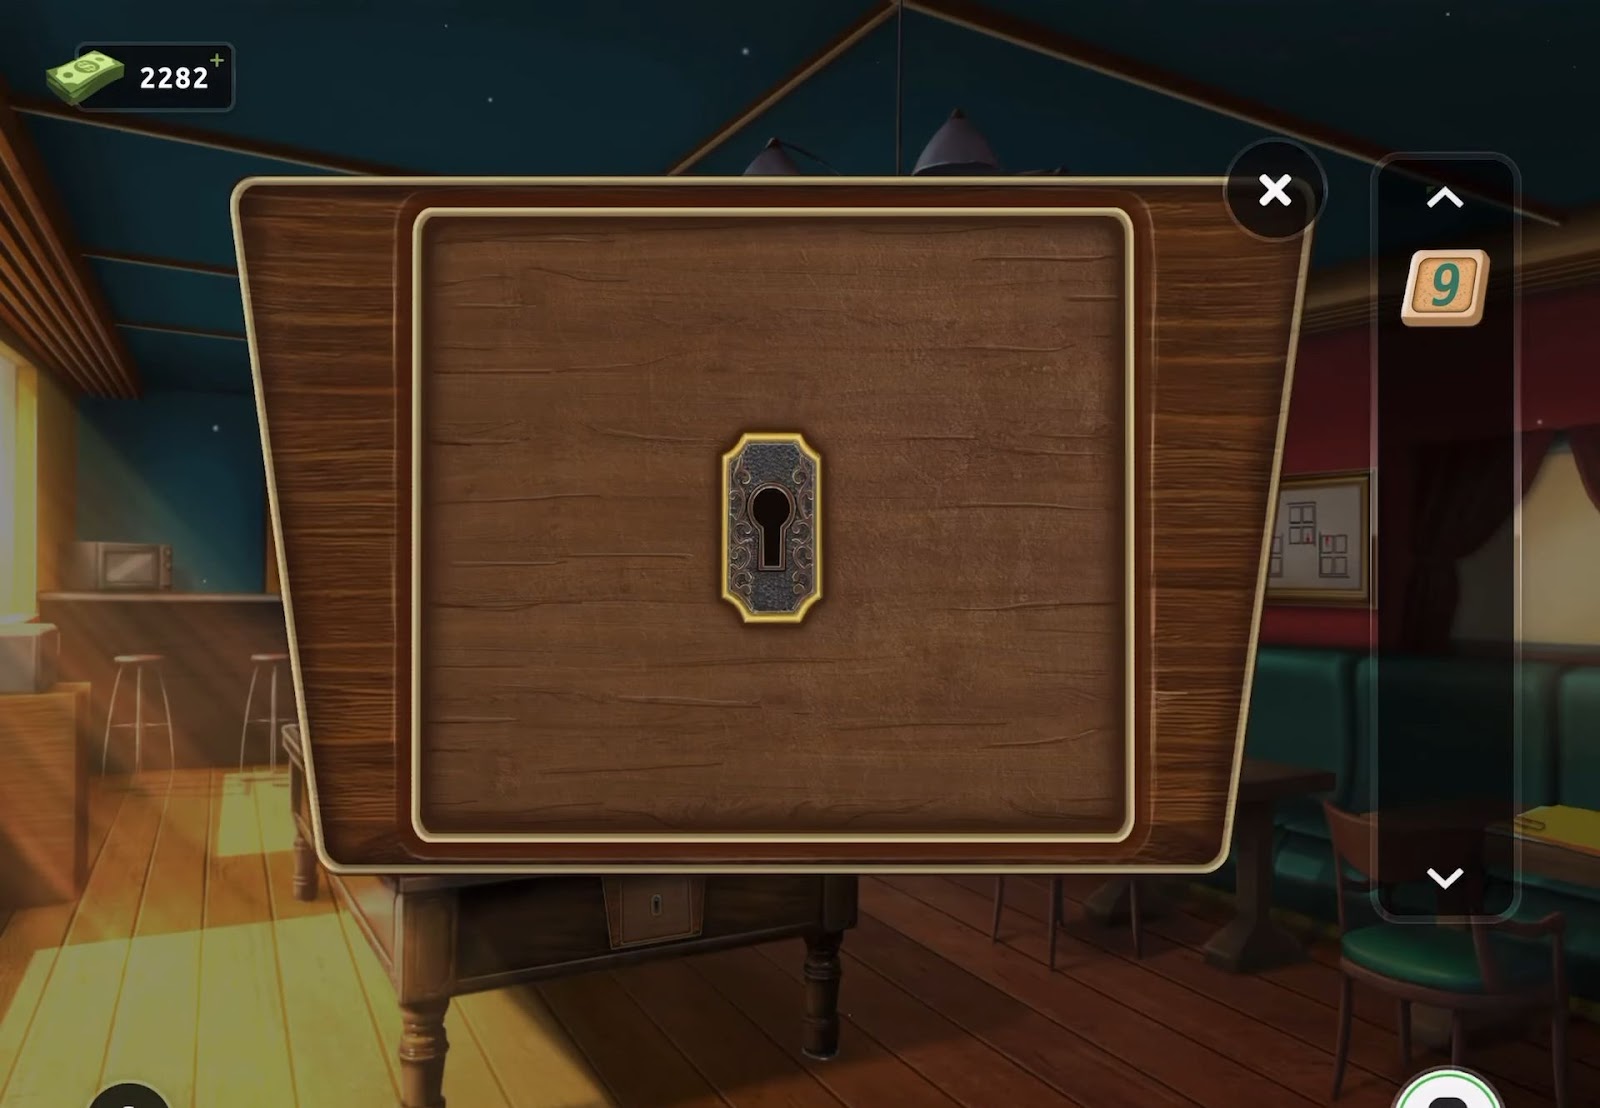
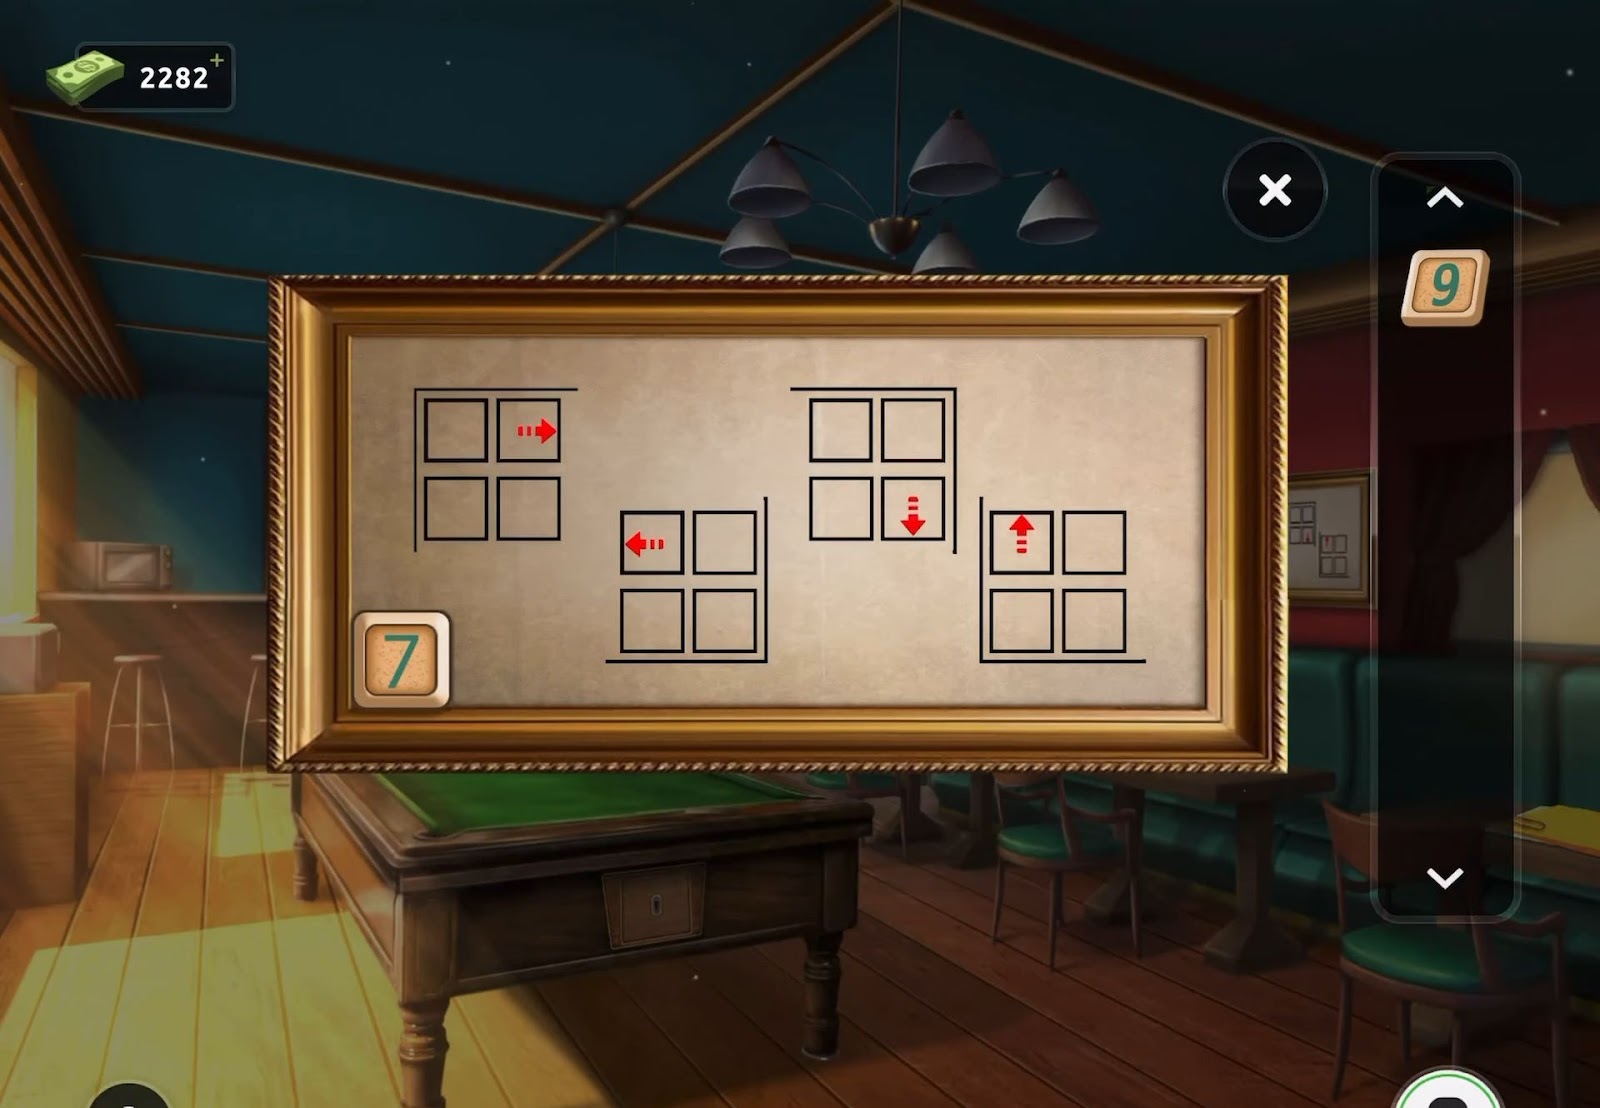
- Then click the square picture on the wall to the left of the door to drop it.
- After that create a hole using the hammer on the wall behind the picture.
- Now grab the key from this hole.
- Finally, use the key to unlock the door and exit through it.
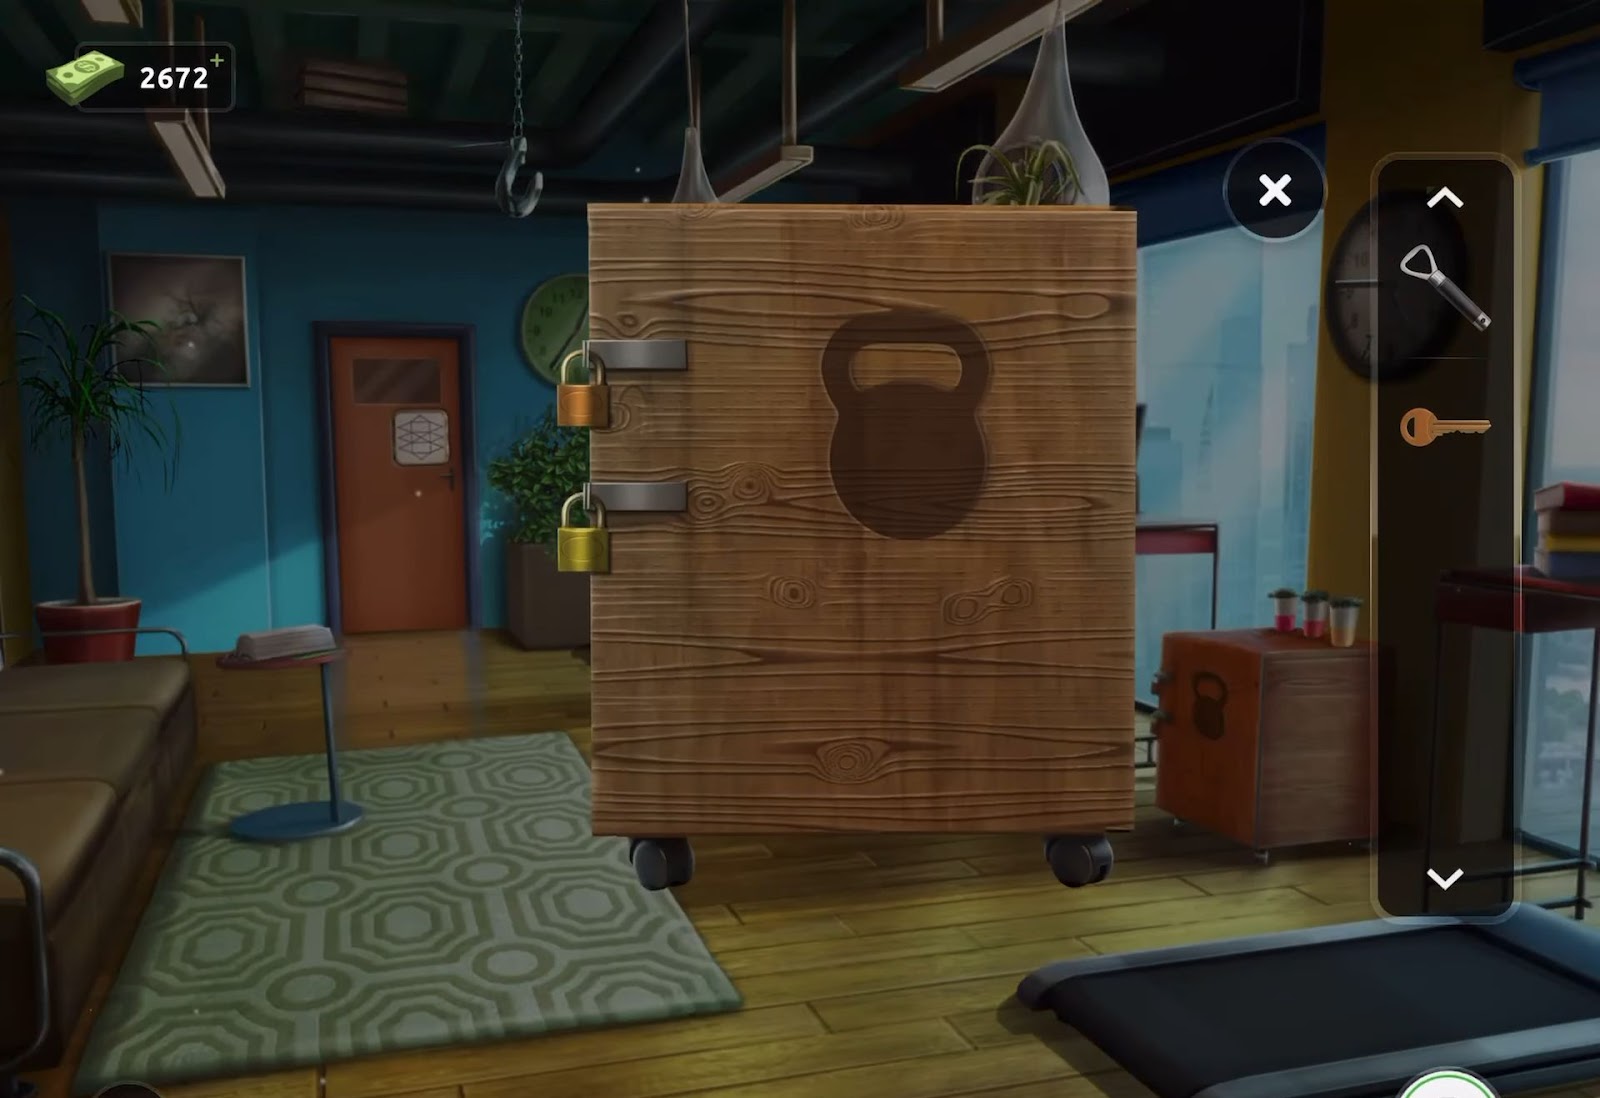
Level 8:
To complete level 8, follow the instructions below:
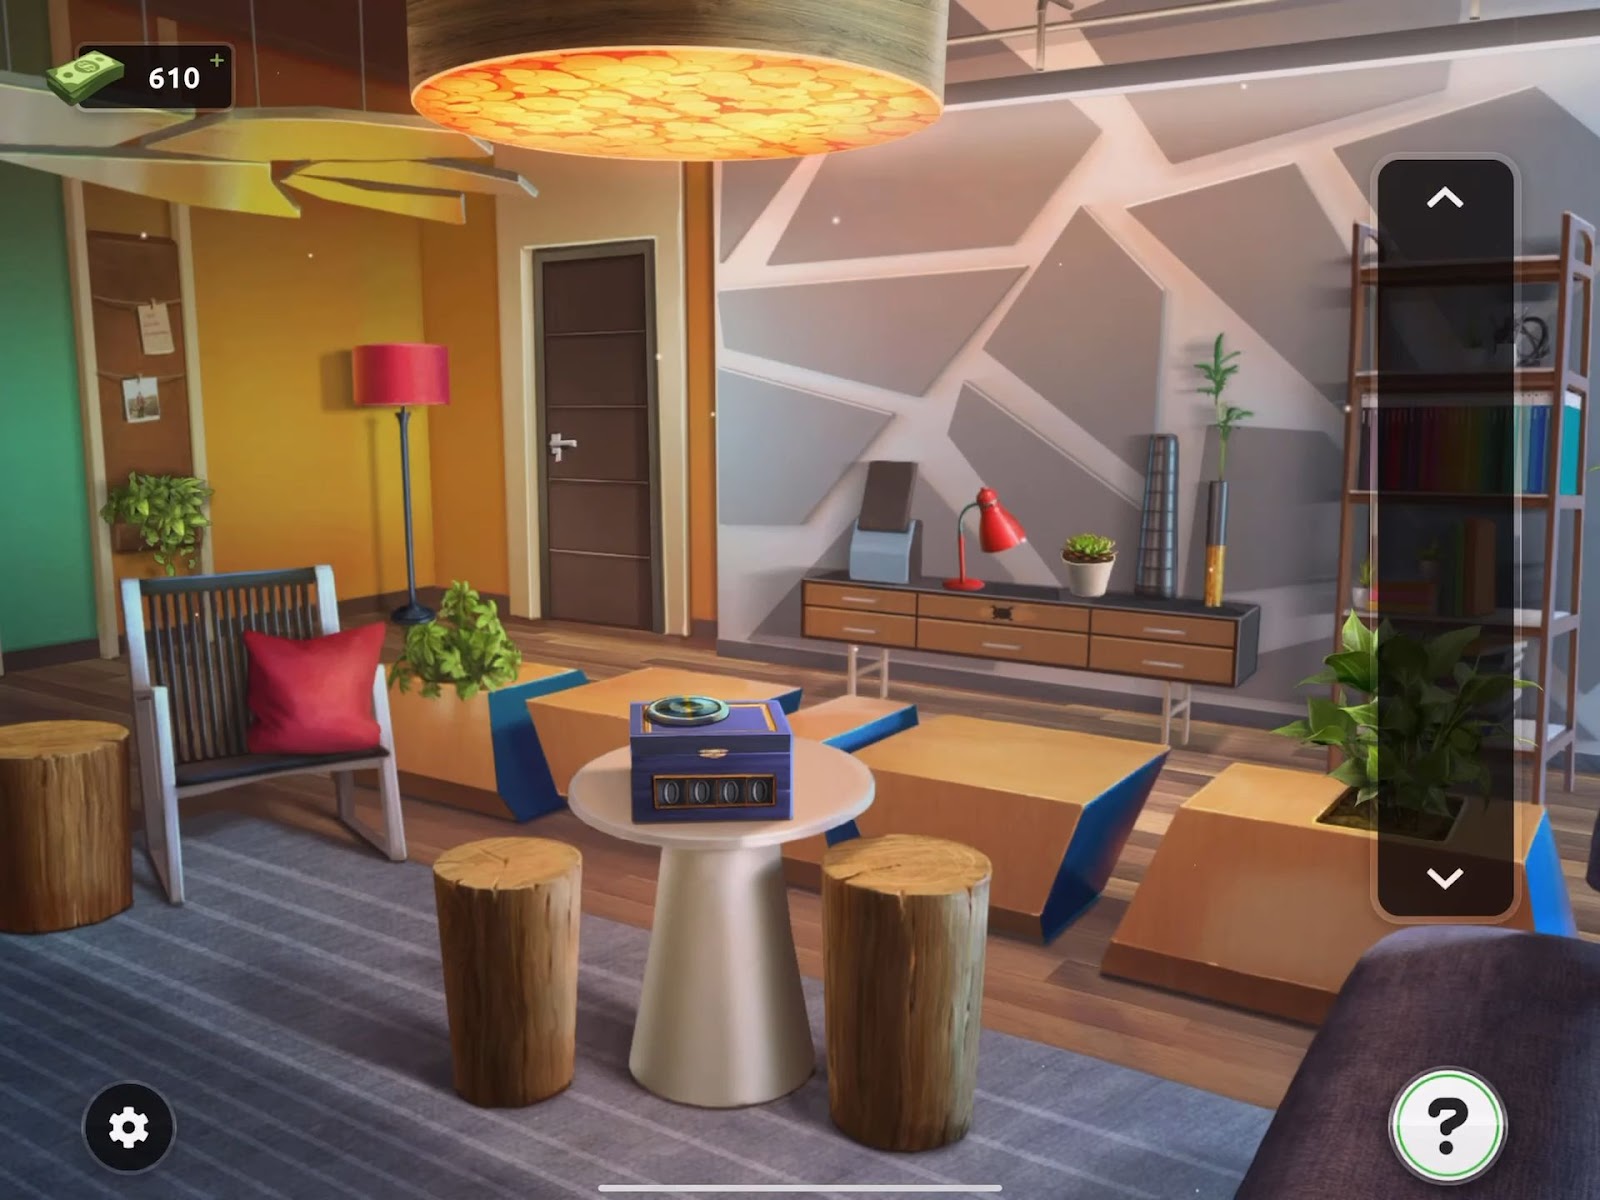
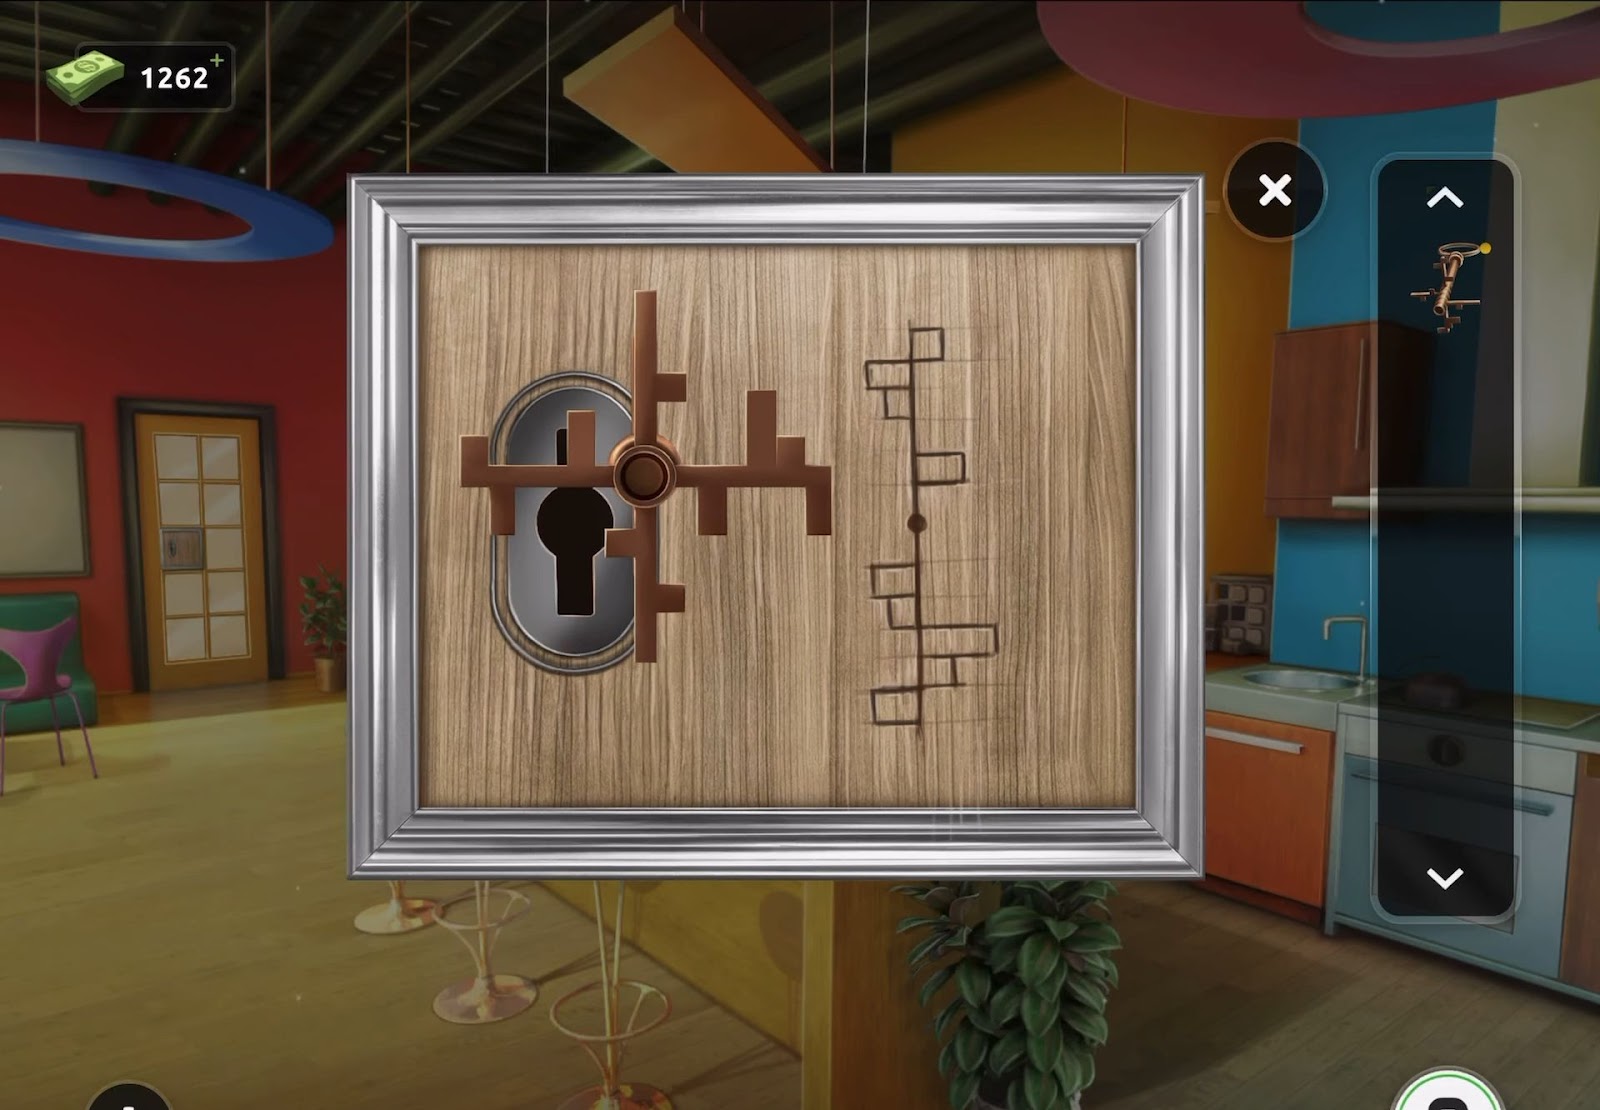
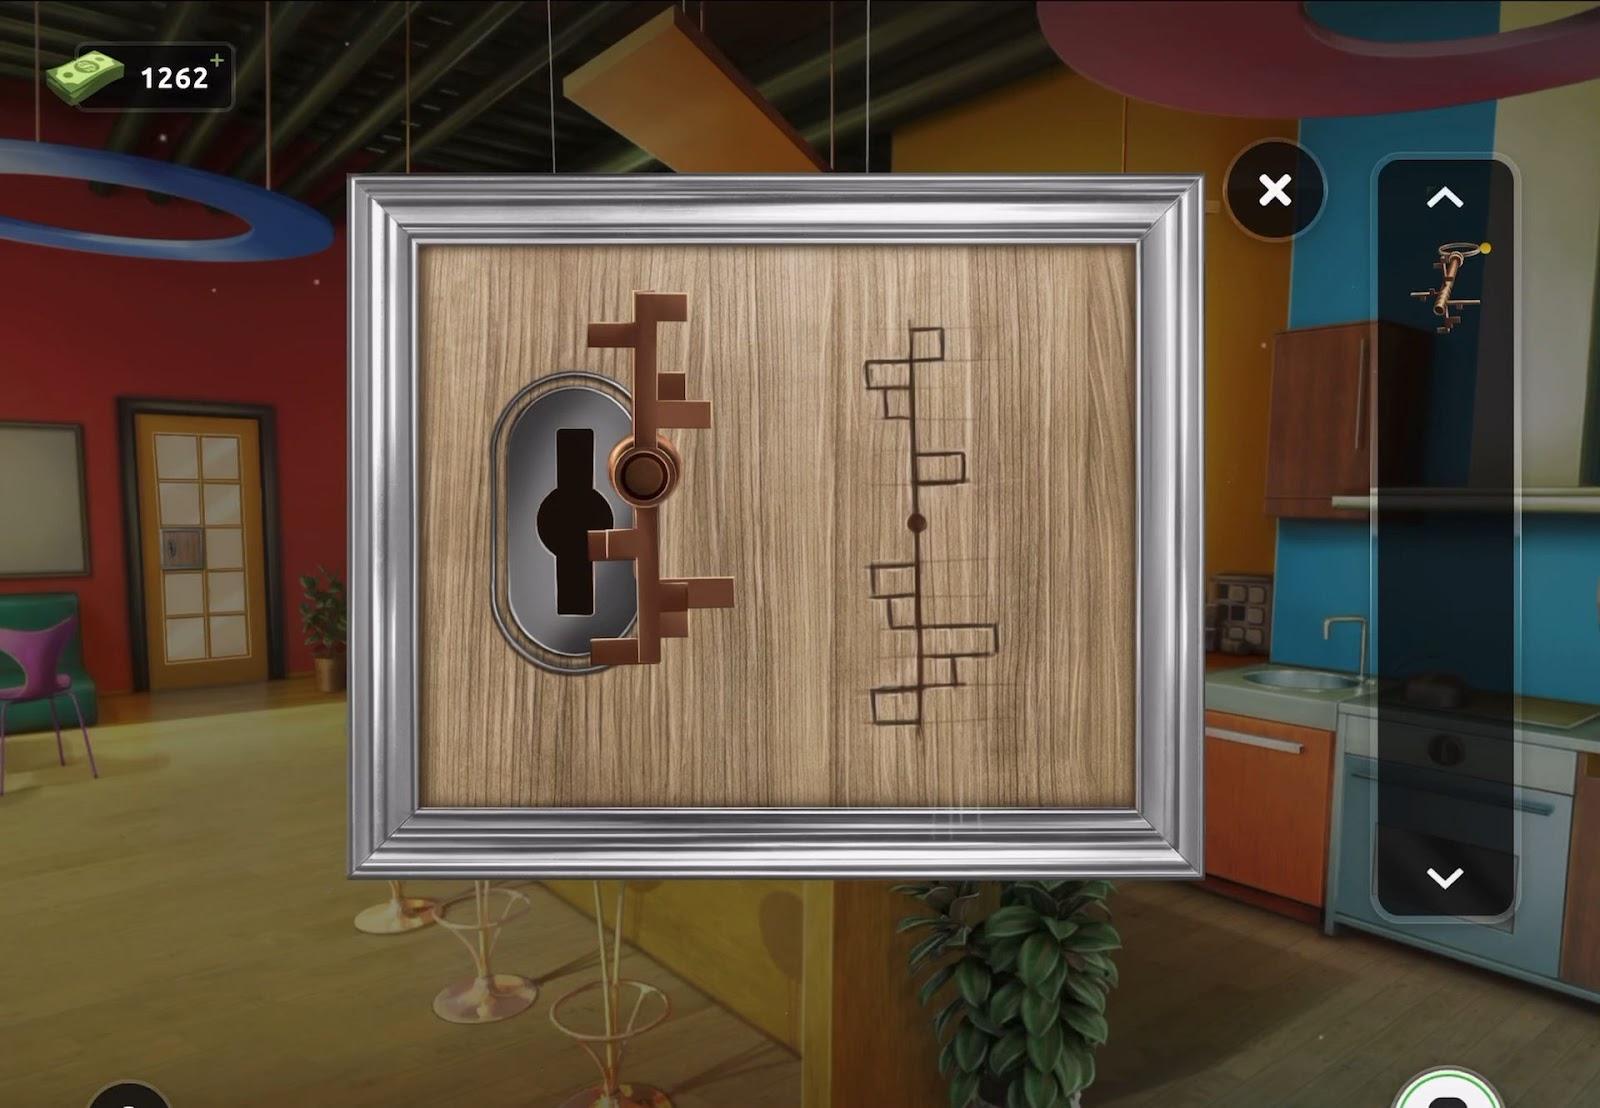
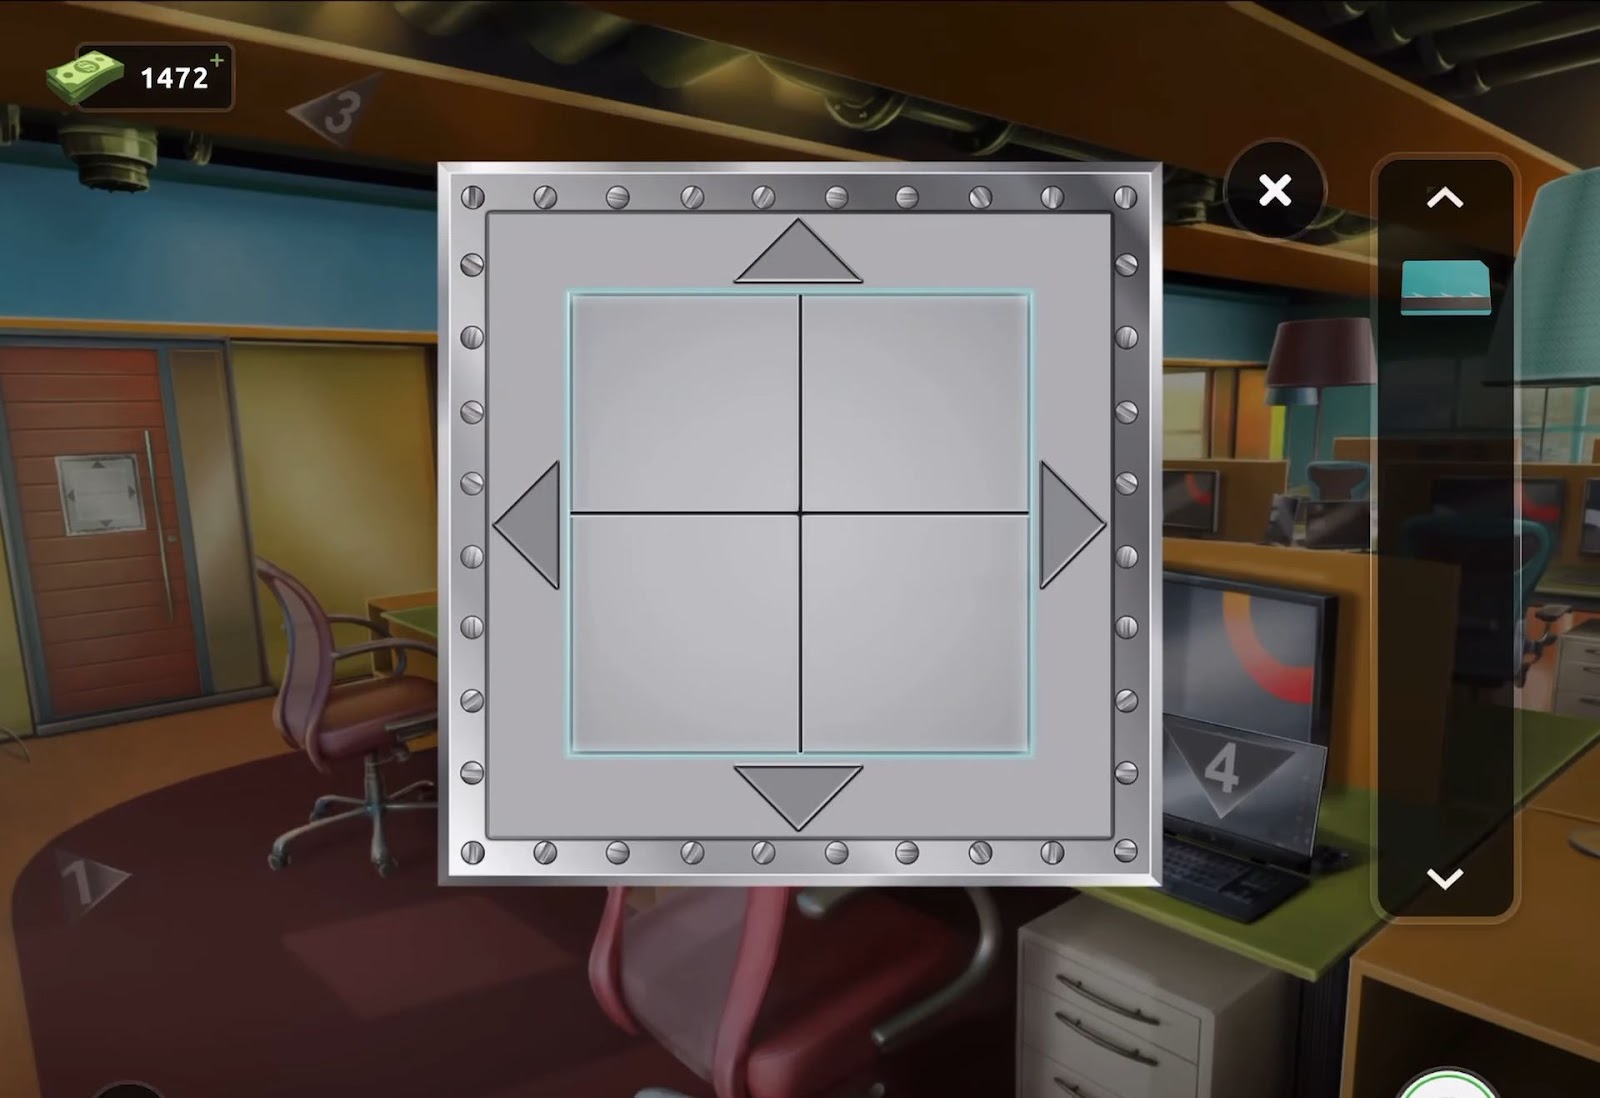
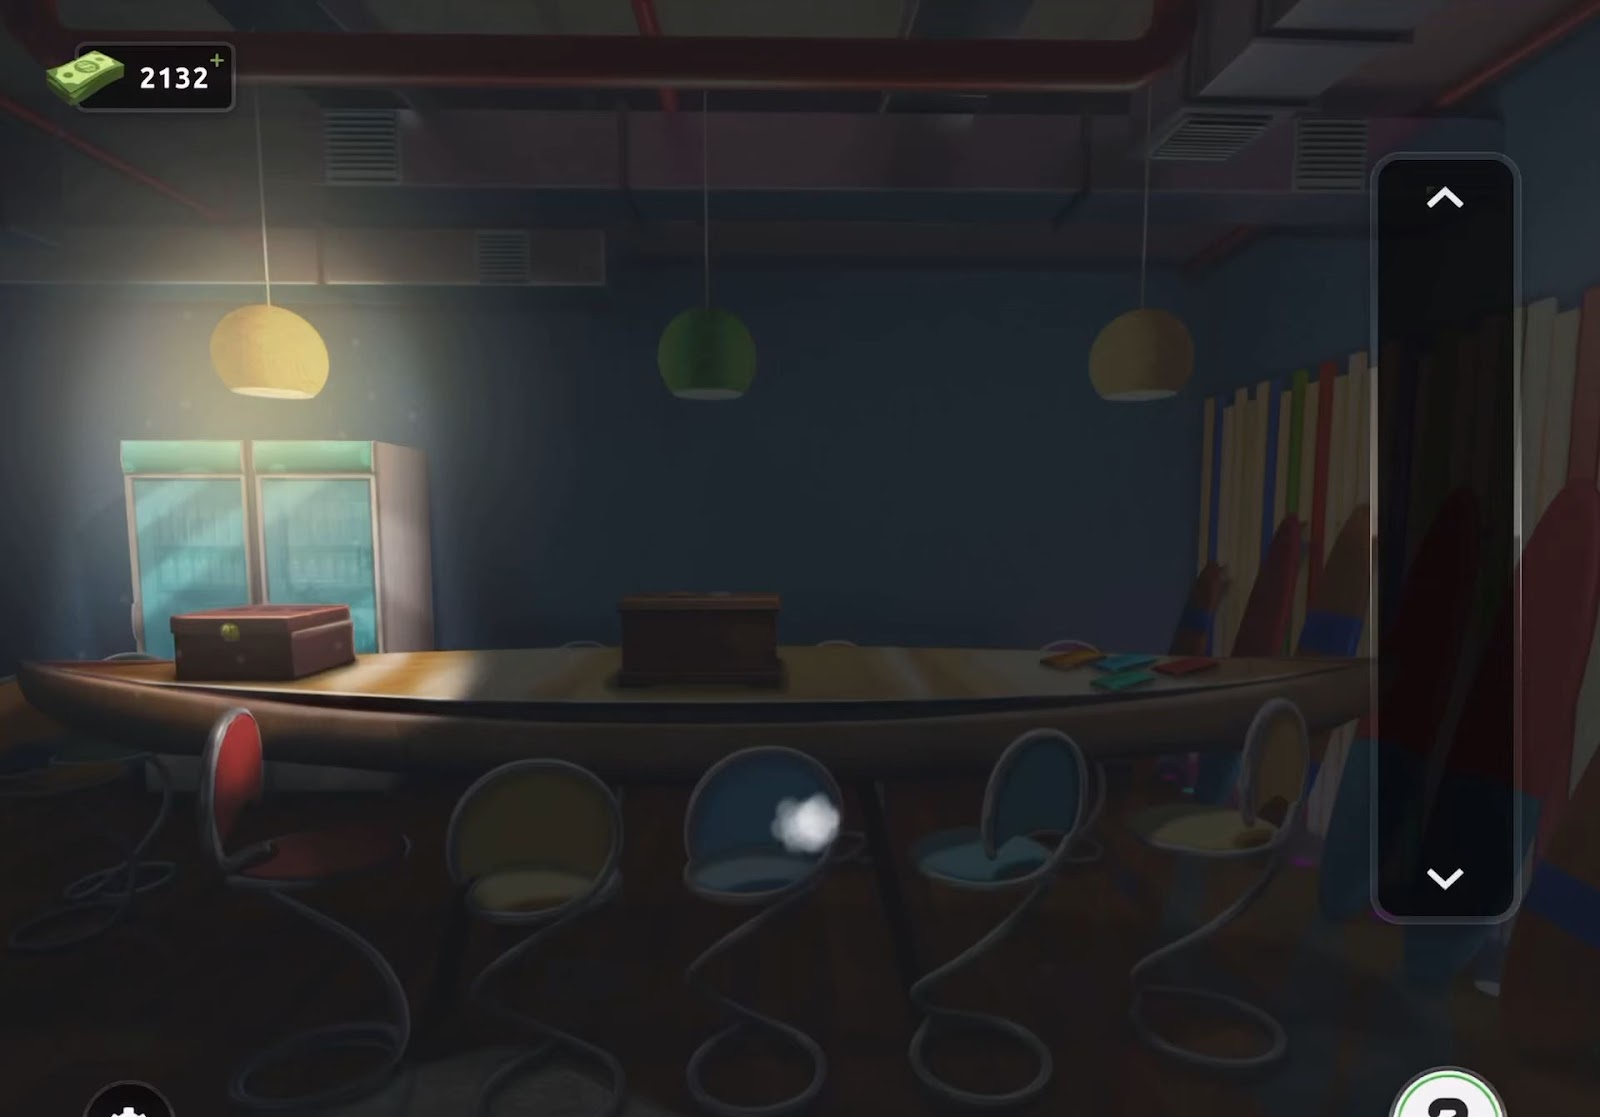
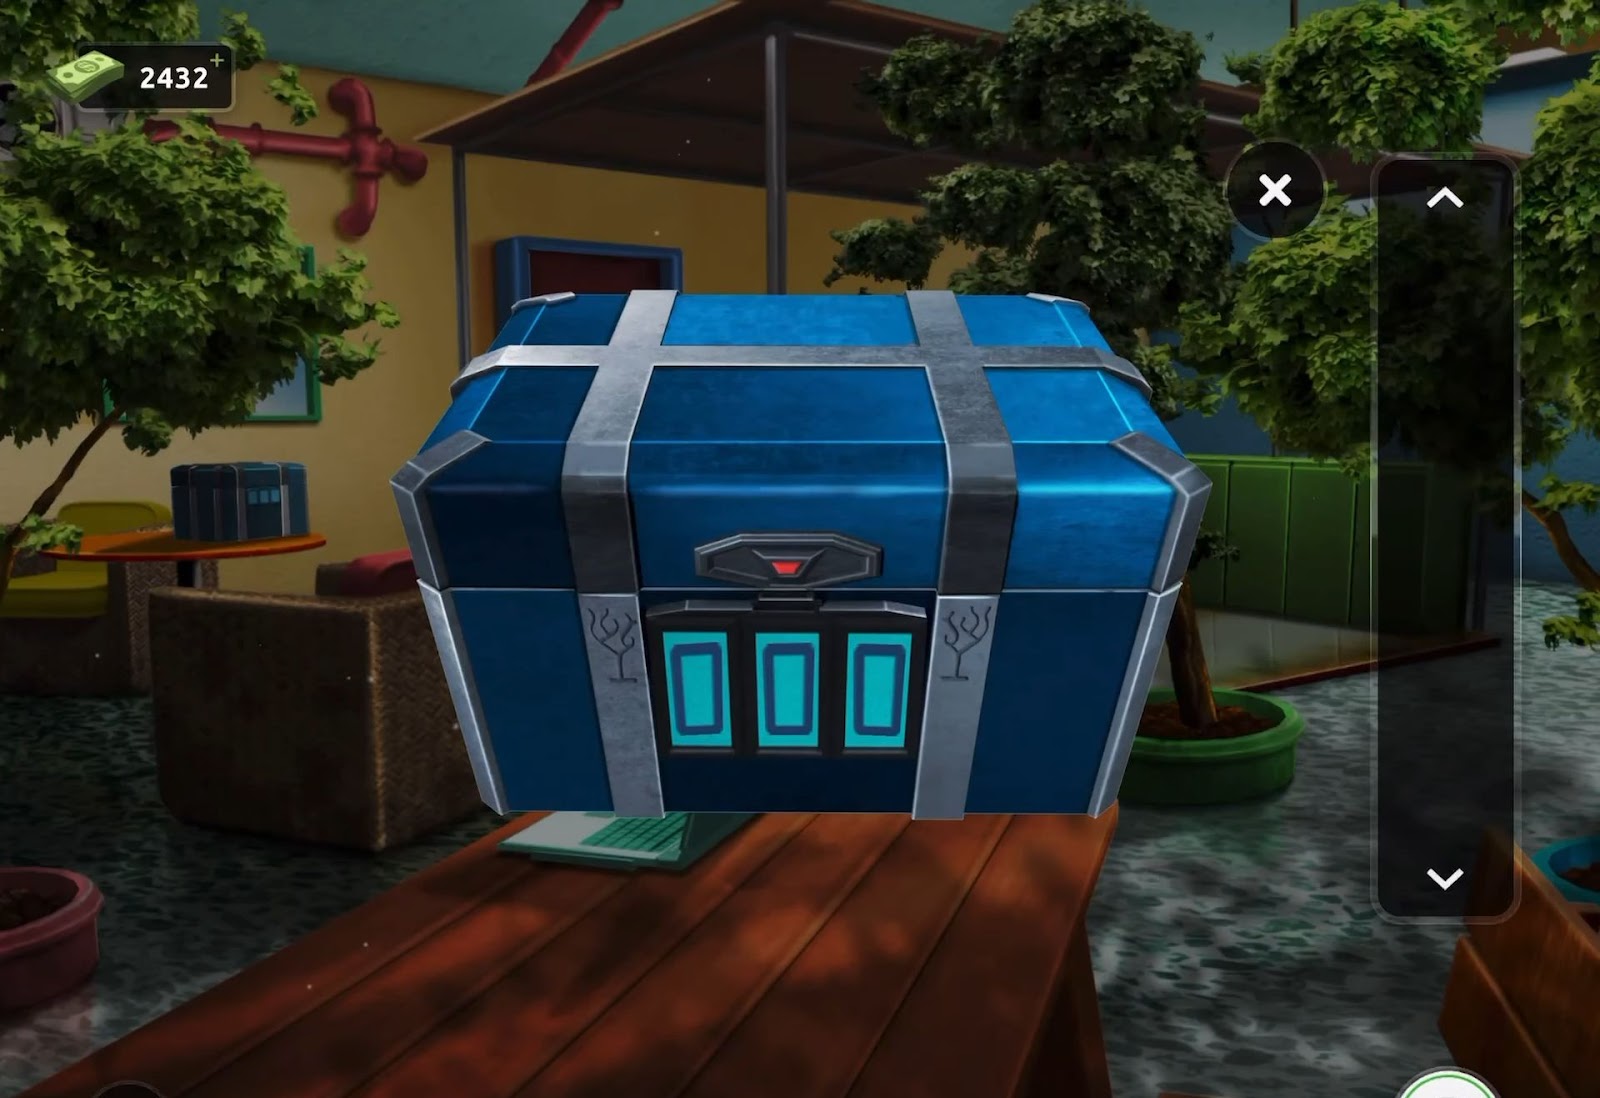
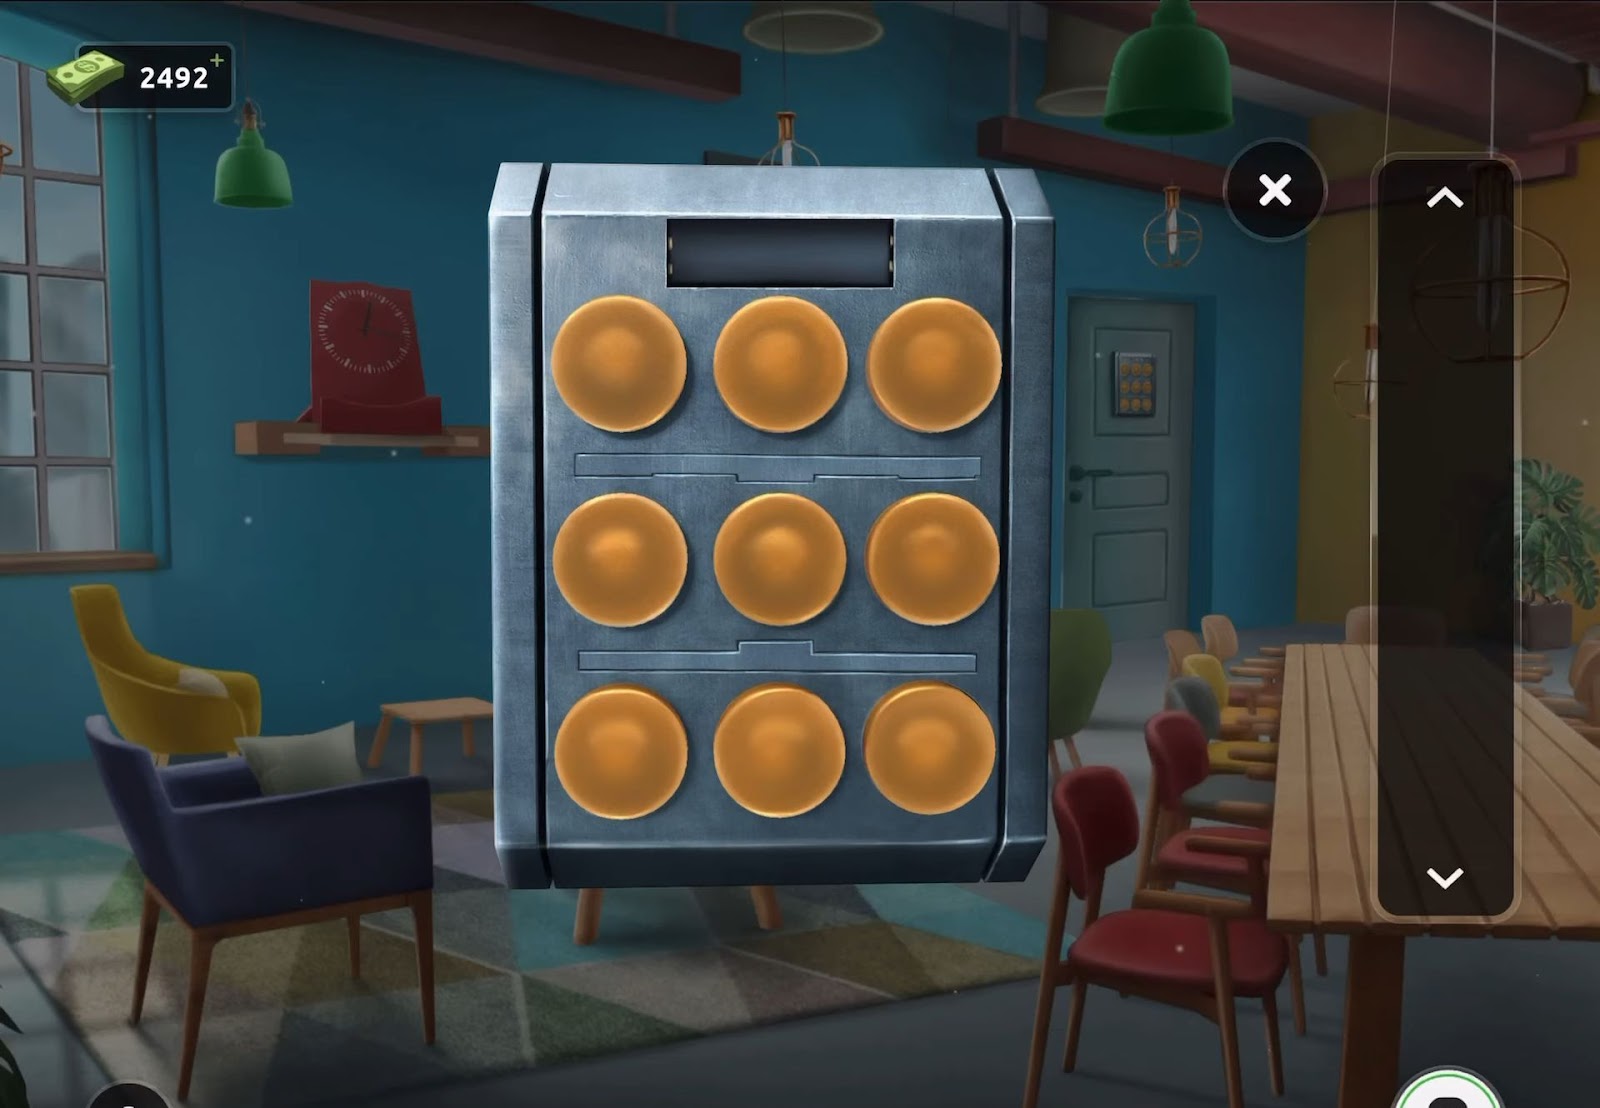
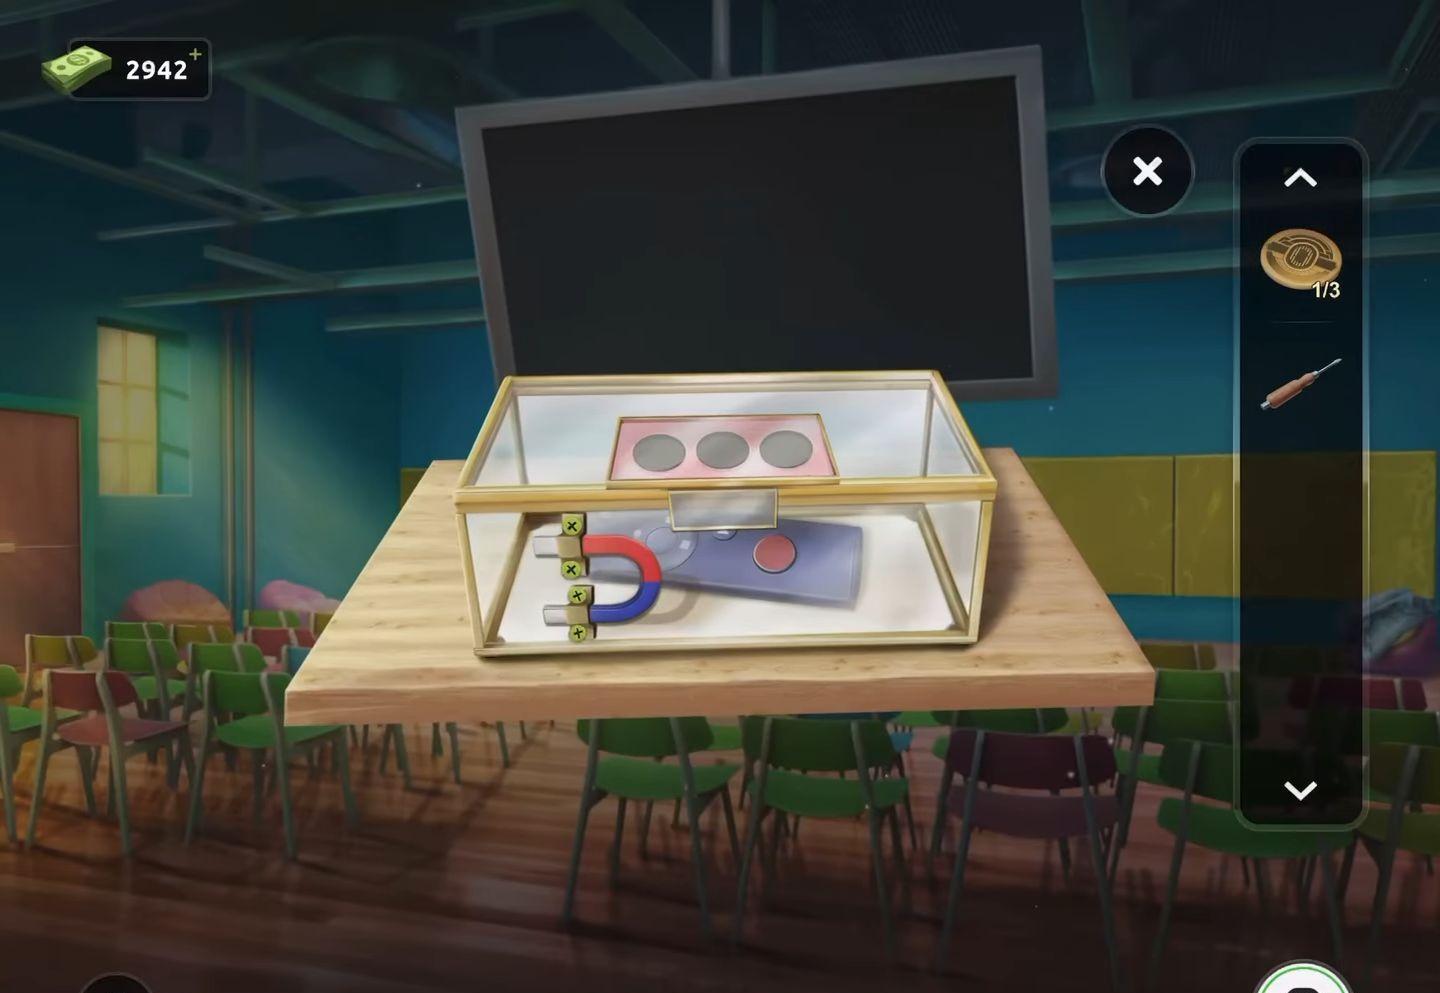
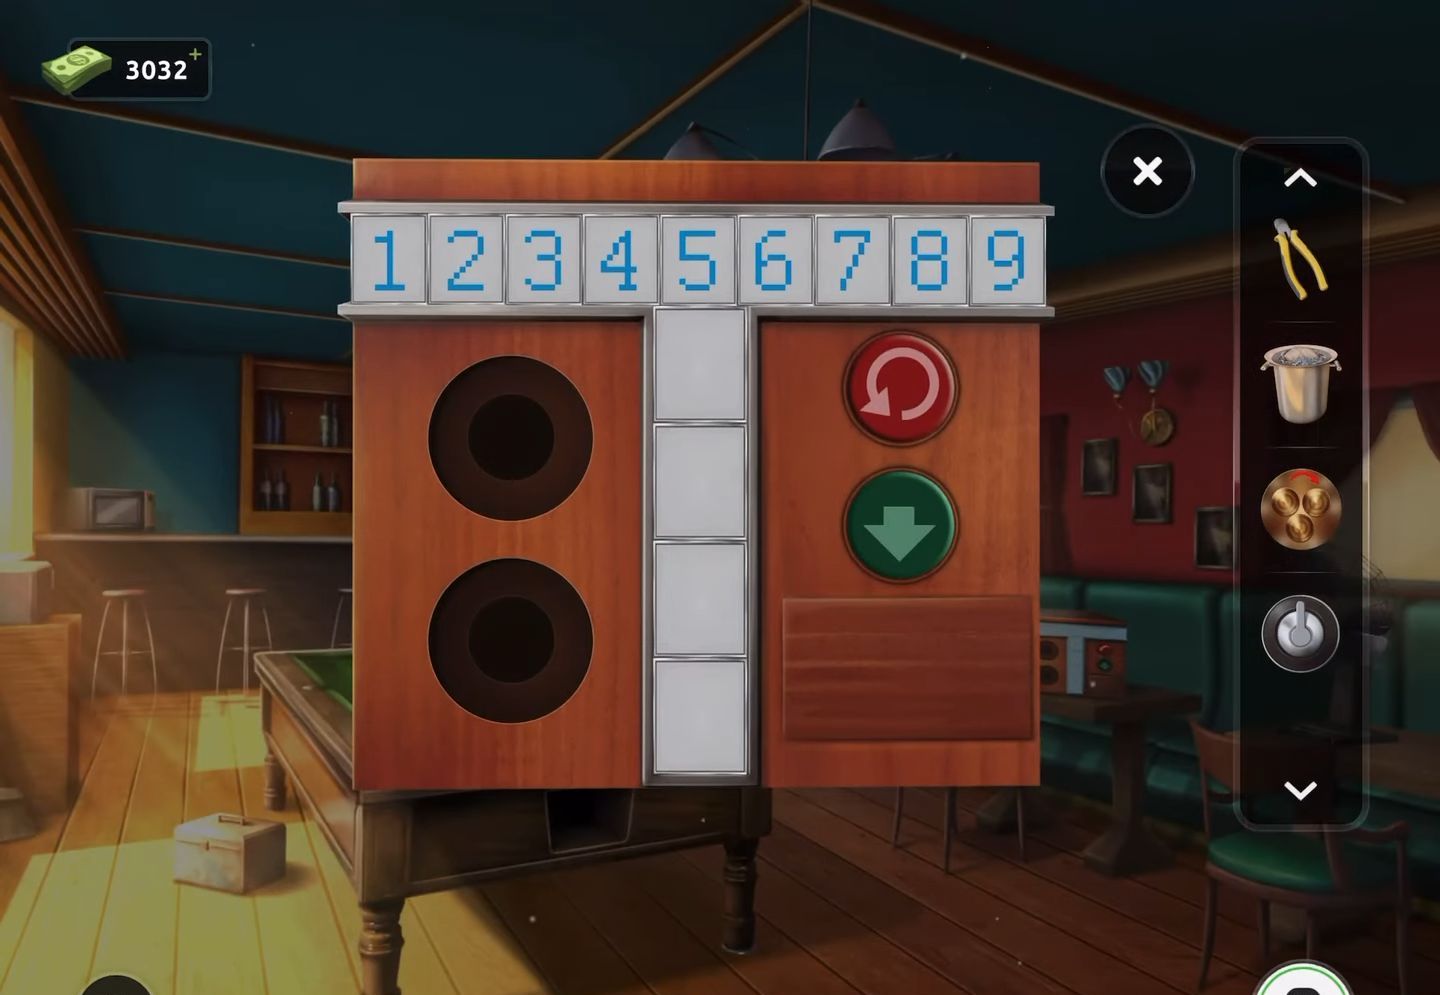
- Start by observing the small box on the round white table placed in the center.
- Next, you need to get the puzzle disk from the top of the box.
- Then observe the puzzle disk from your inventory and slide the center to adjust the lines. This will assist in opening the puzzle disk with four arms sticking out.
- After that, inspect the low drawer unit mounted on the wall and situated to the right of the door.
- You will get a shaped slot at the top center drawer.
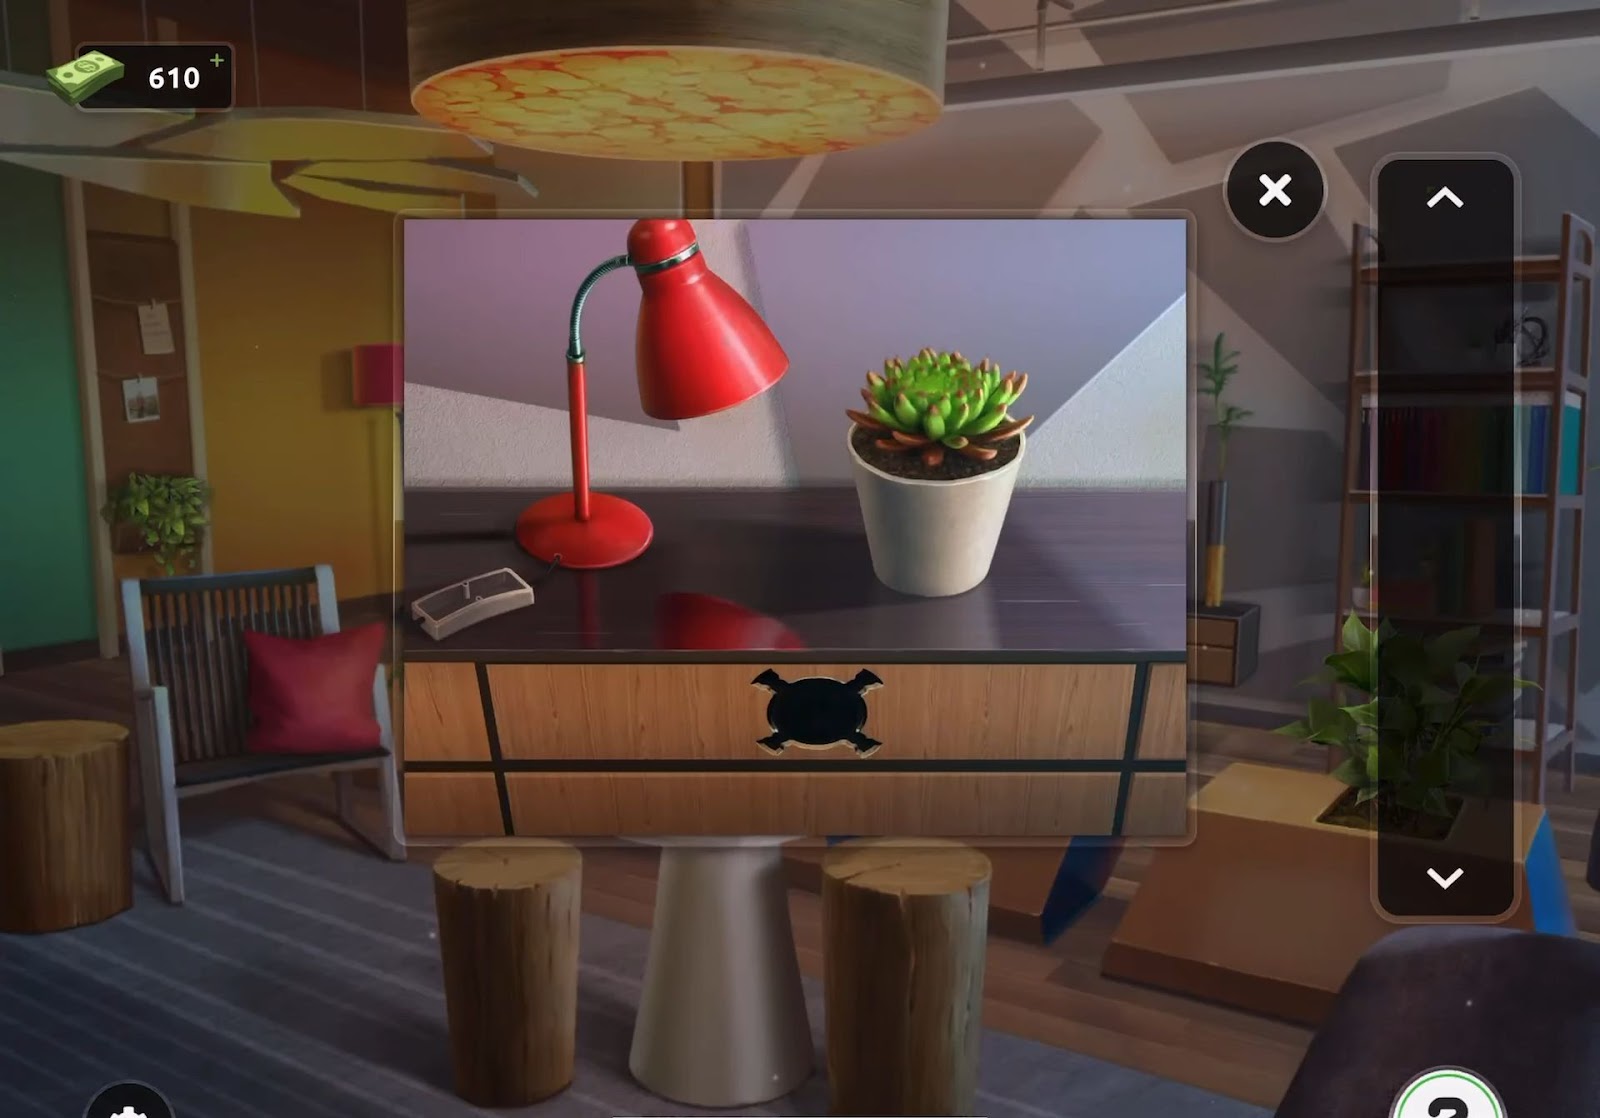
- Now place the disk into the slot to unlock the drawer and retrieve a switch from within.
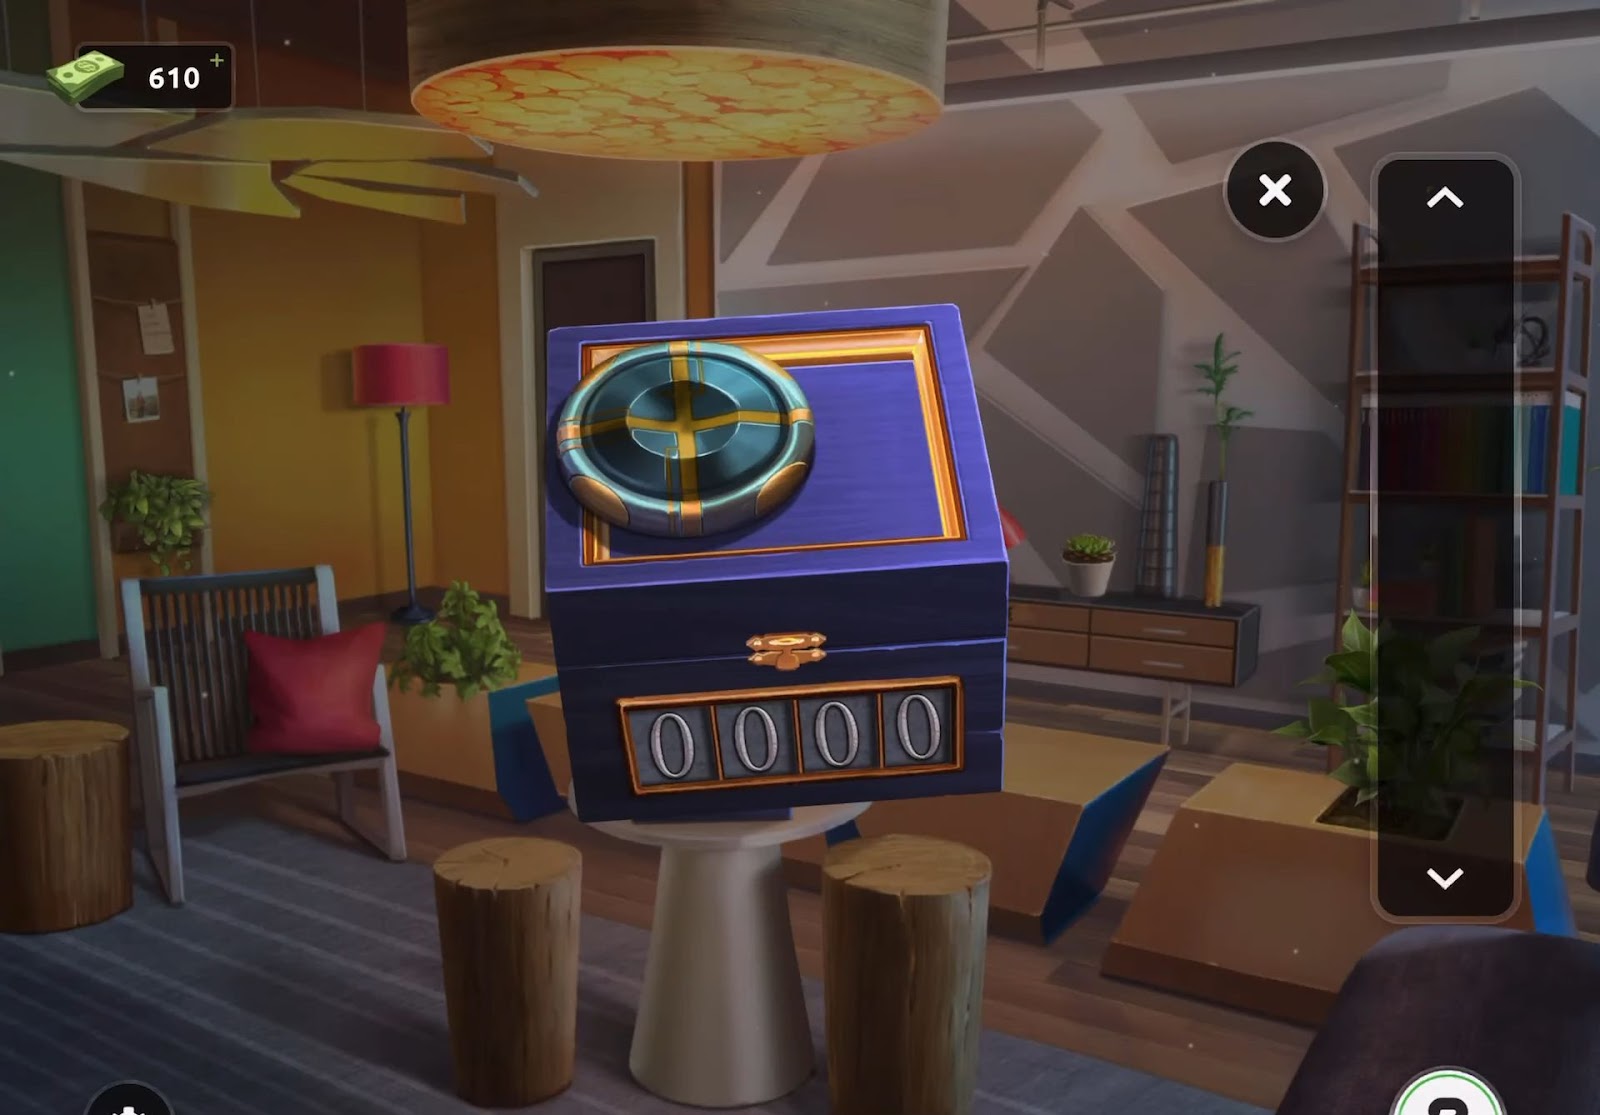
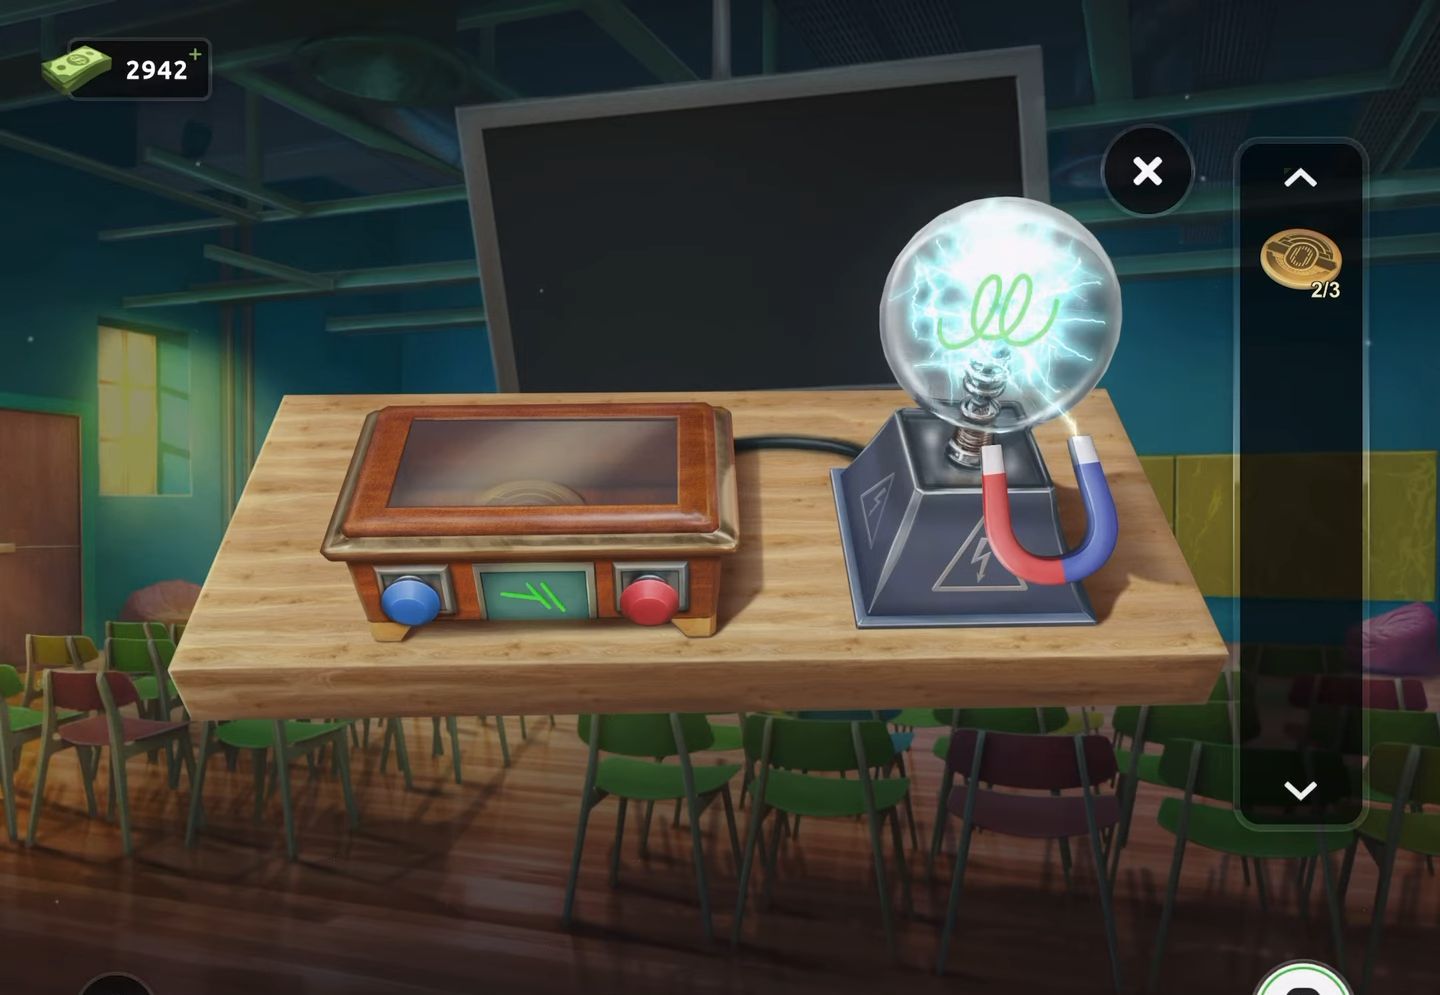
- You have to insert the switch into the box situated adjacent to the lamp on the top of the drawers.
- Then press the switch to turn on the lamp.
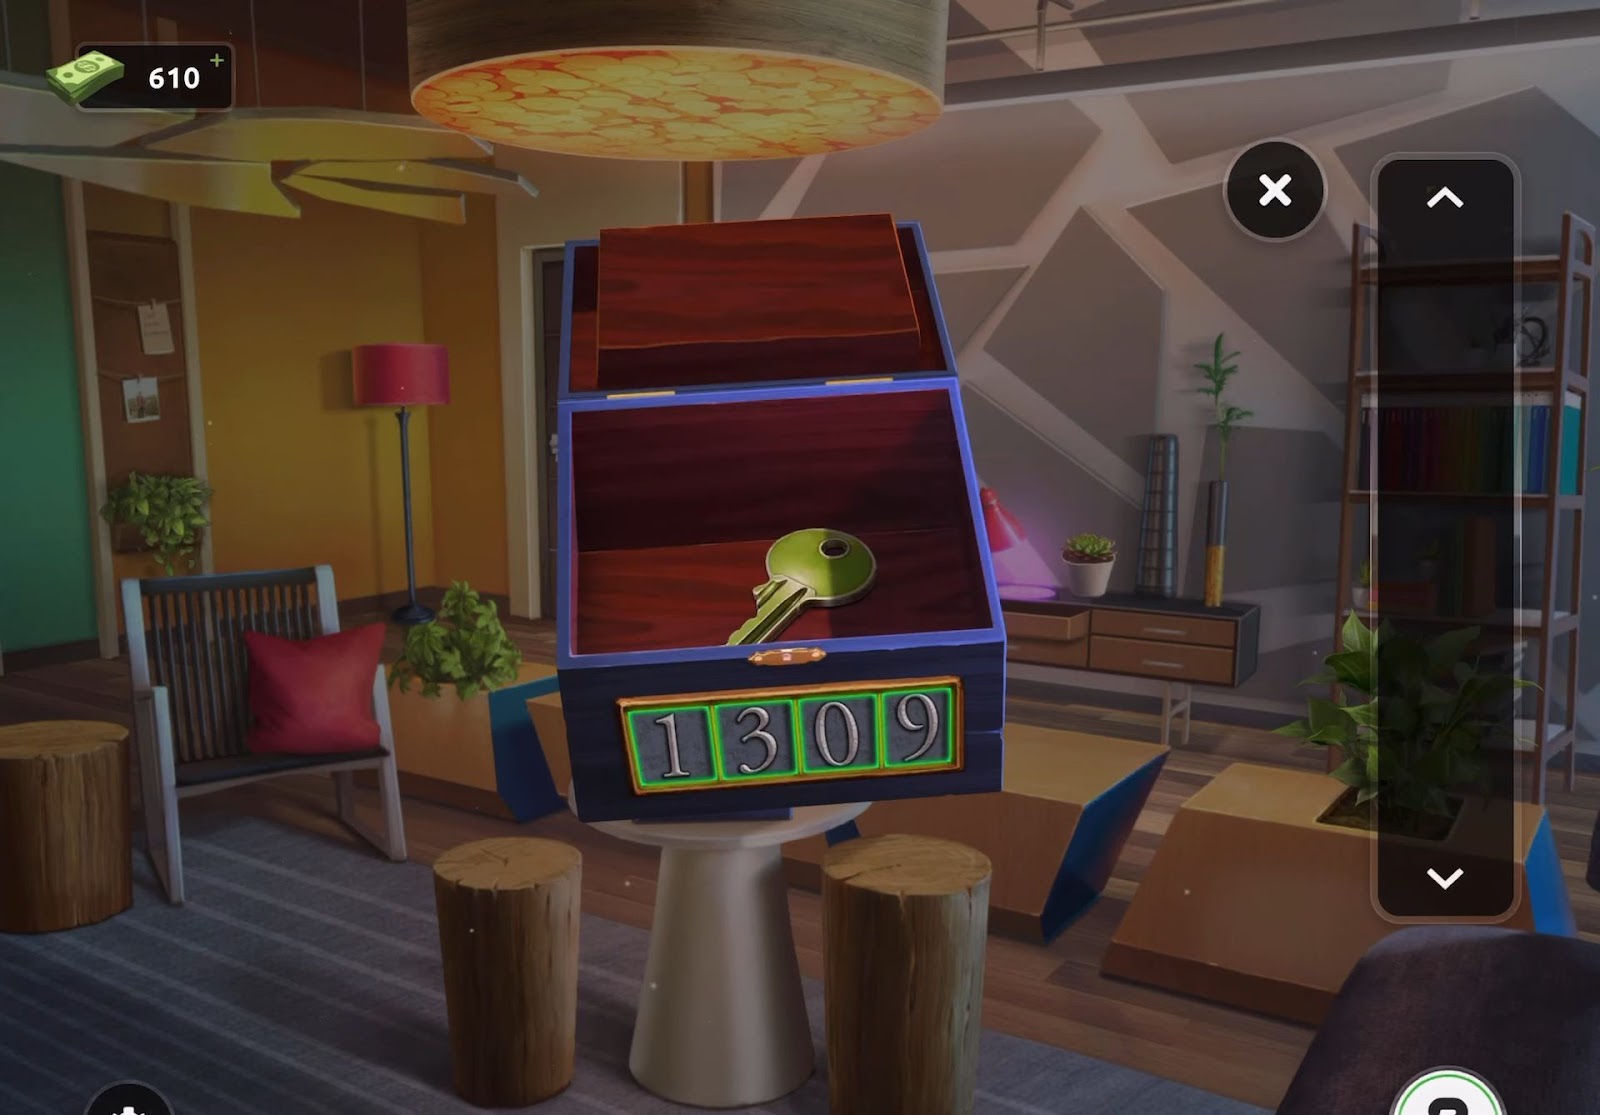
- Next, rearrange the plant pot located on the right to unveil a hidden code (1309).
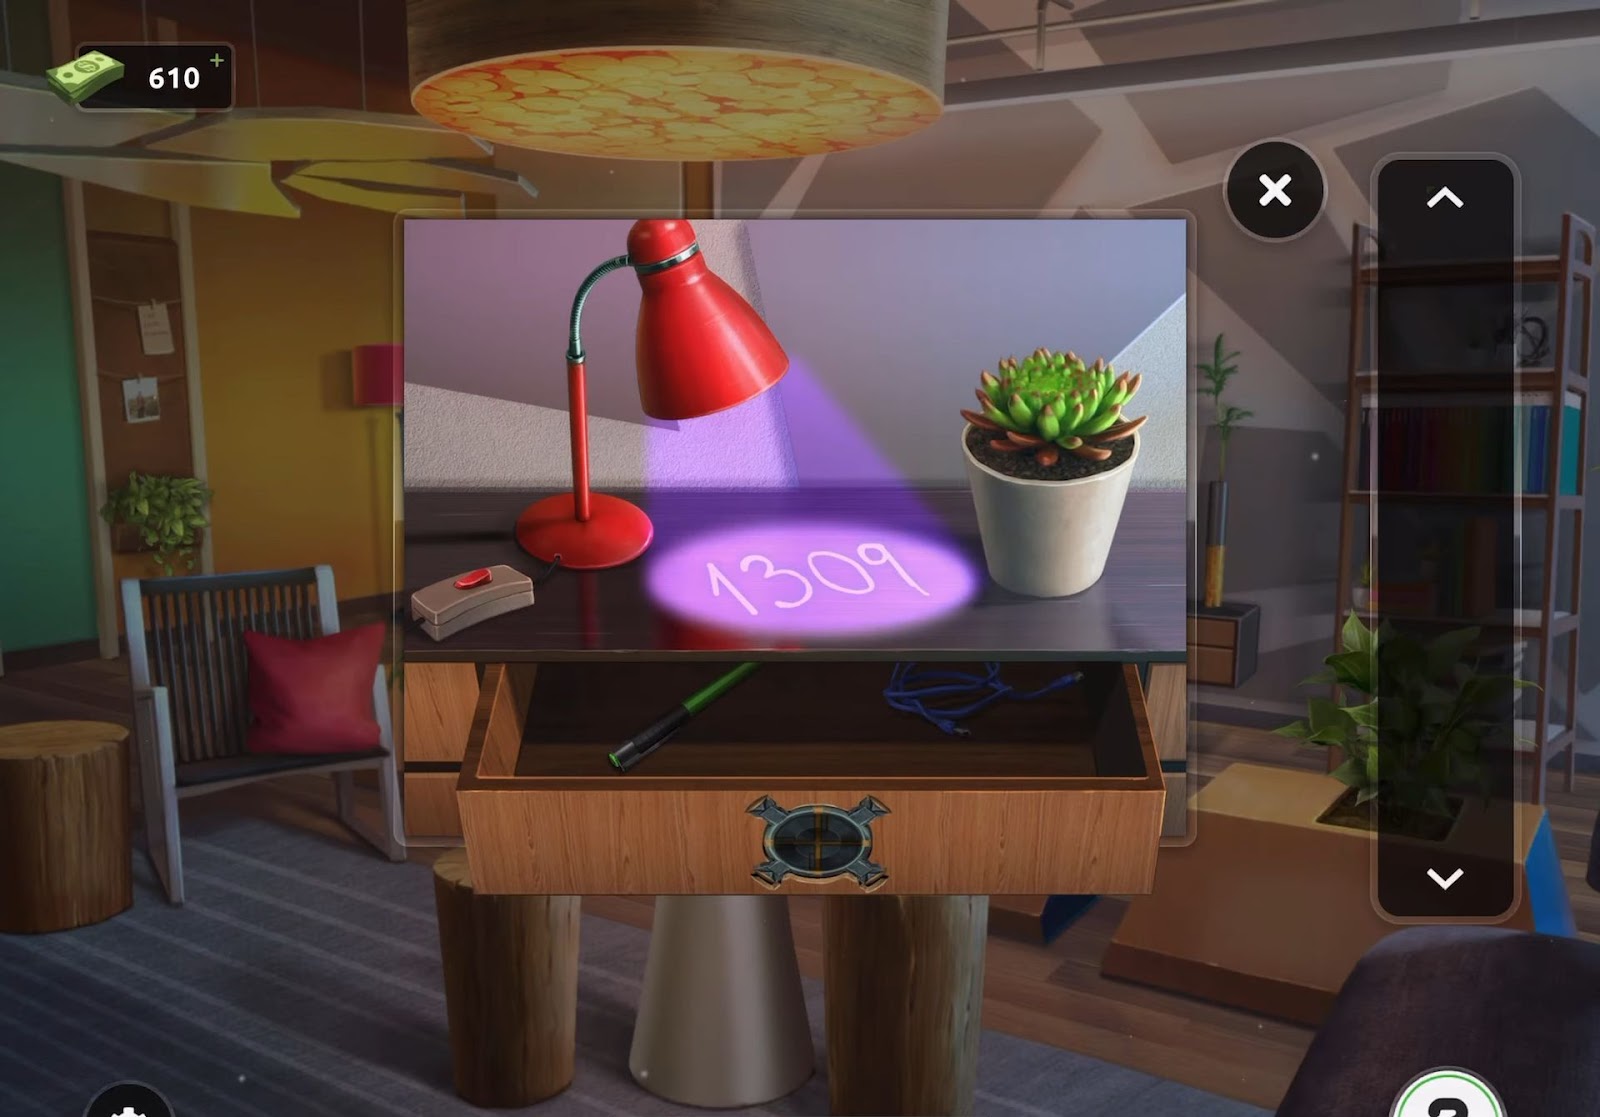
- After that, revisit the blue box positioned on the white table and input the revealed code (1309) to unlock it.
- Now you have to retrieve the key stored inside the opened box.
- Finally, employ the key to unlock the door and make your exit.
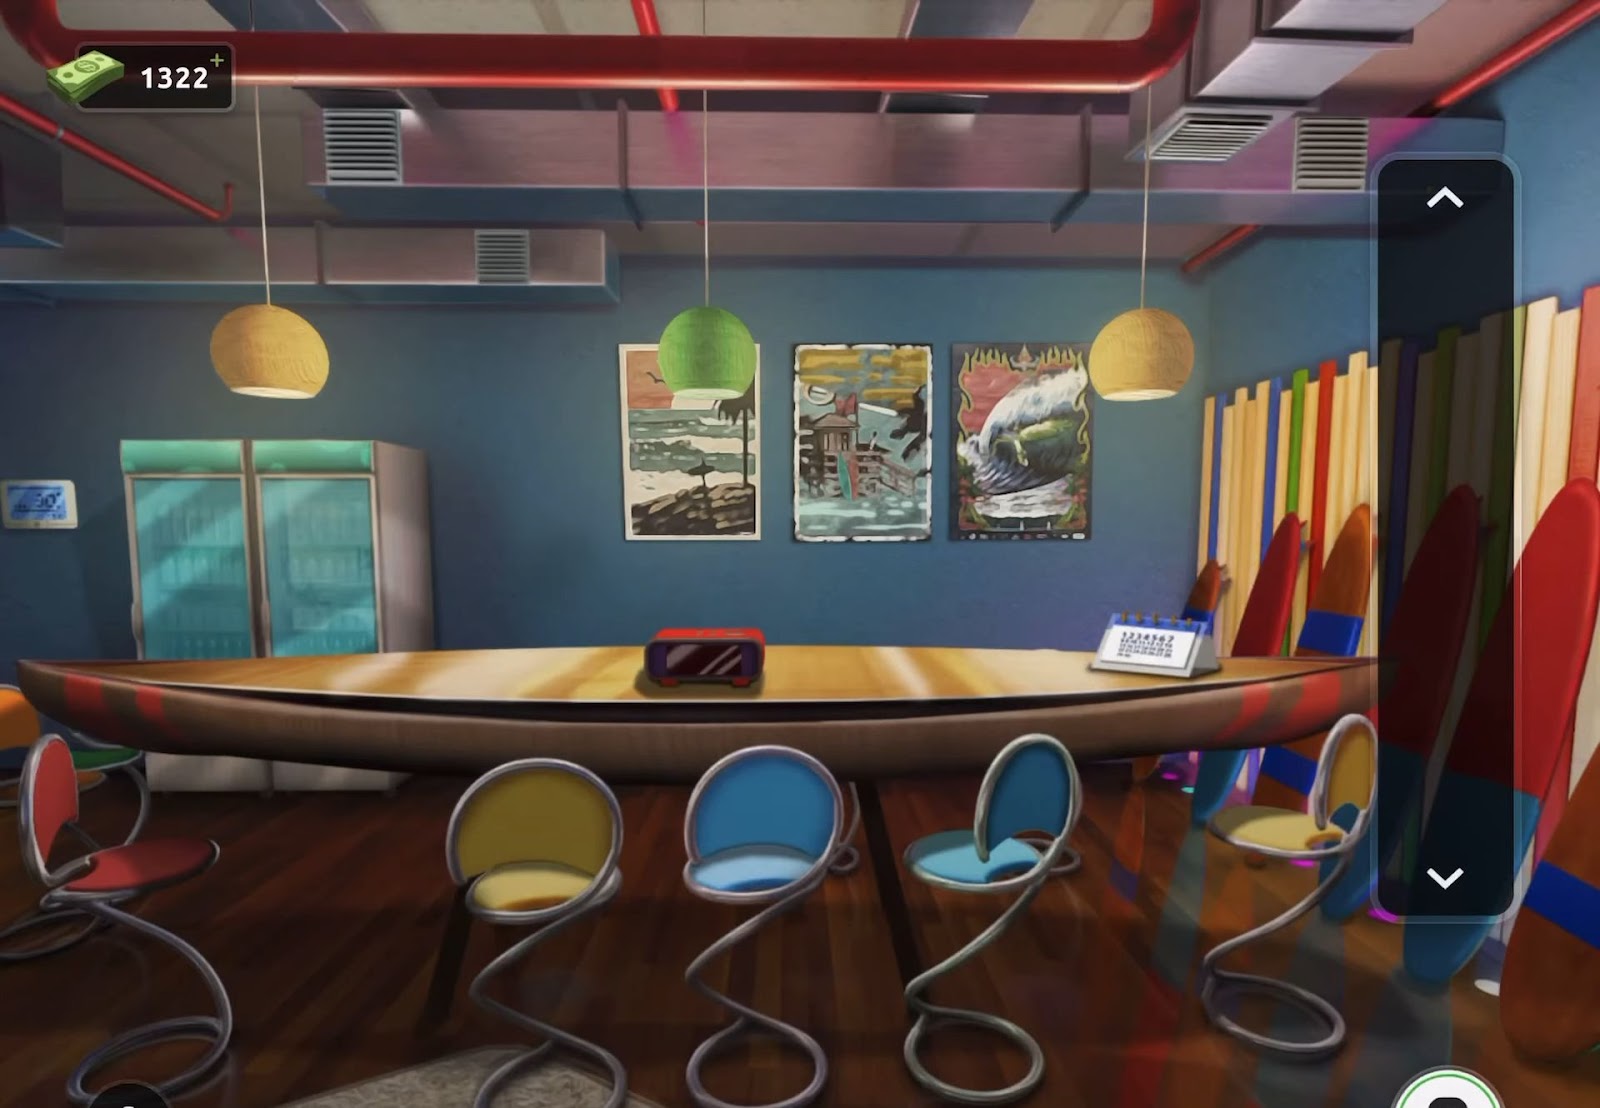
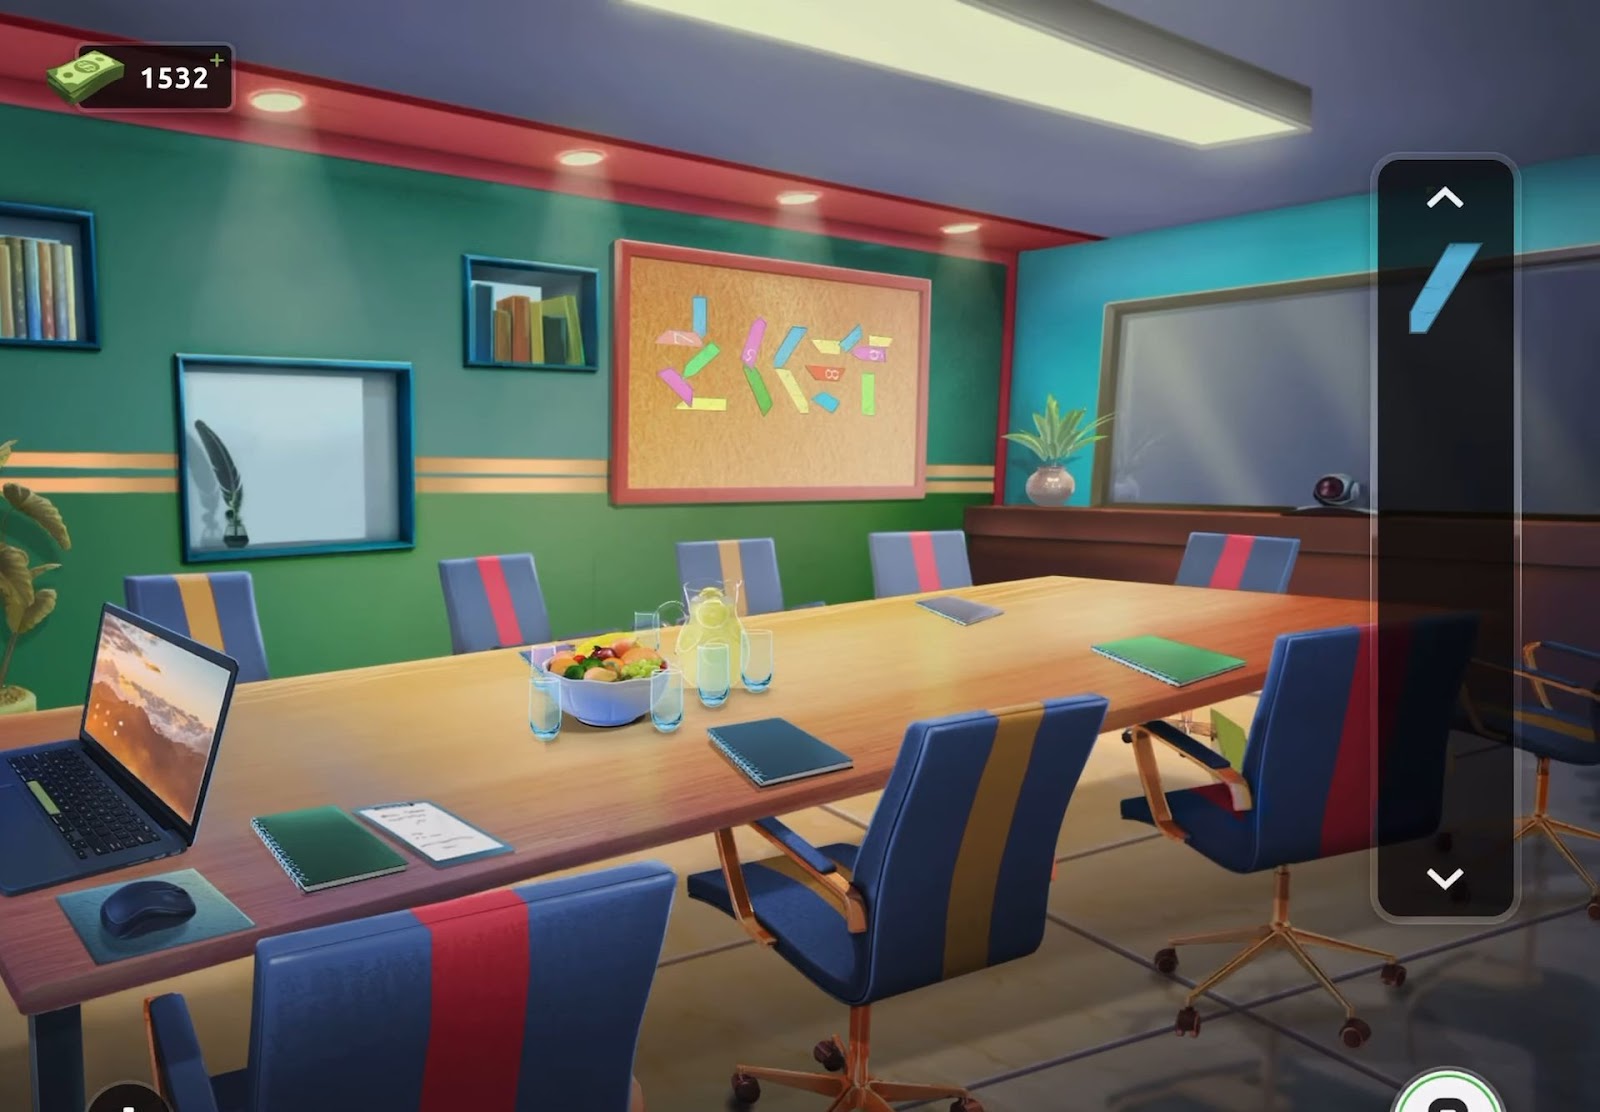
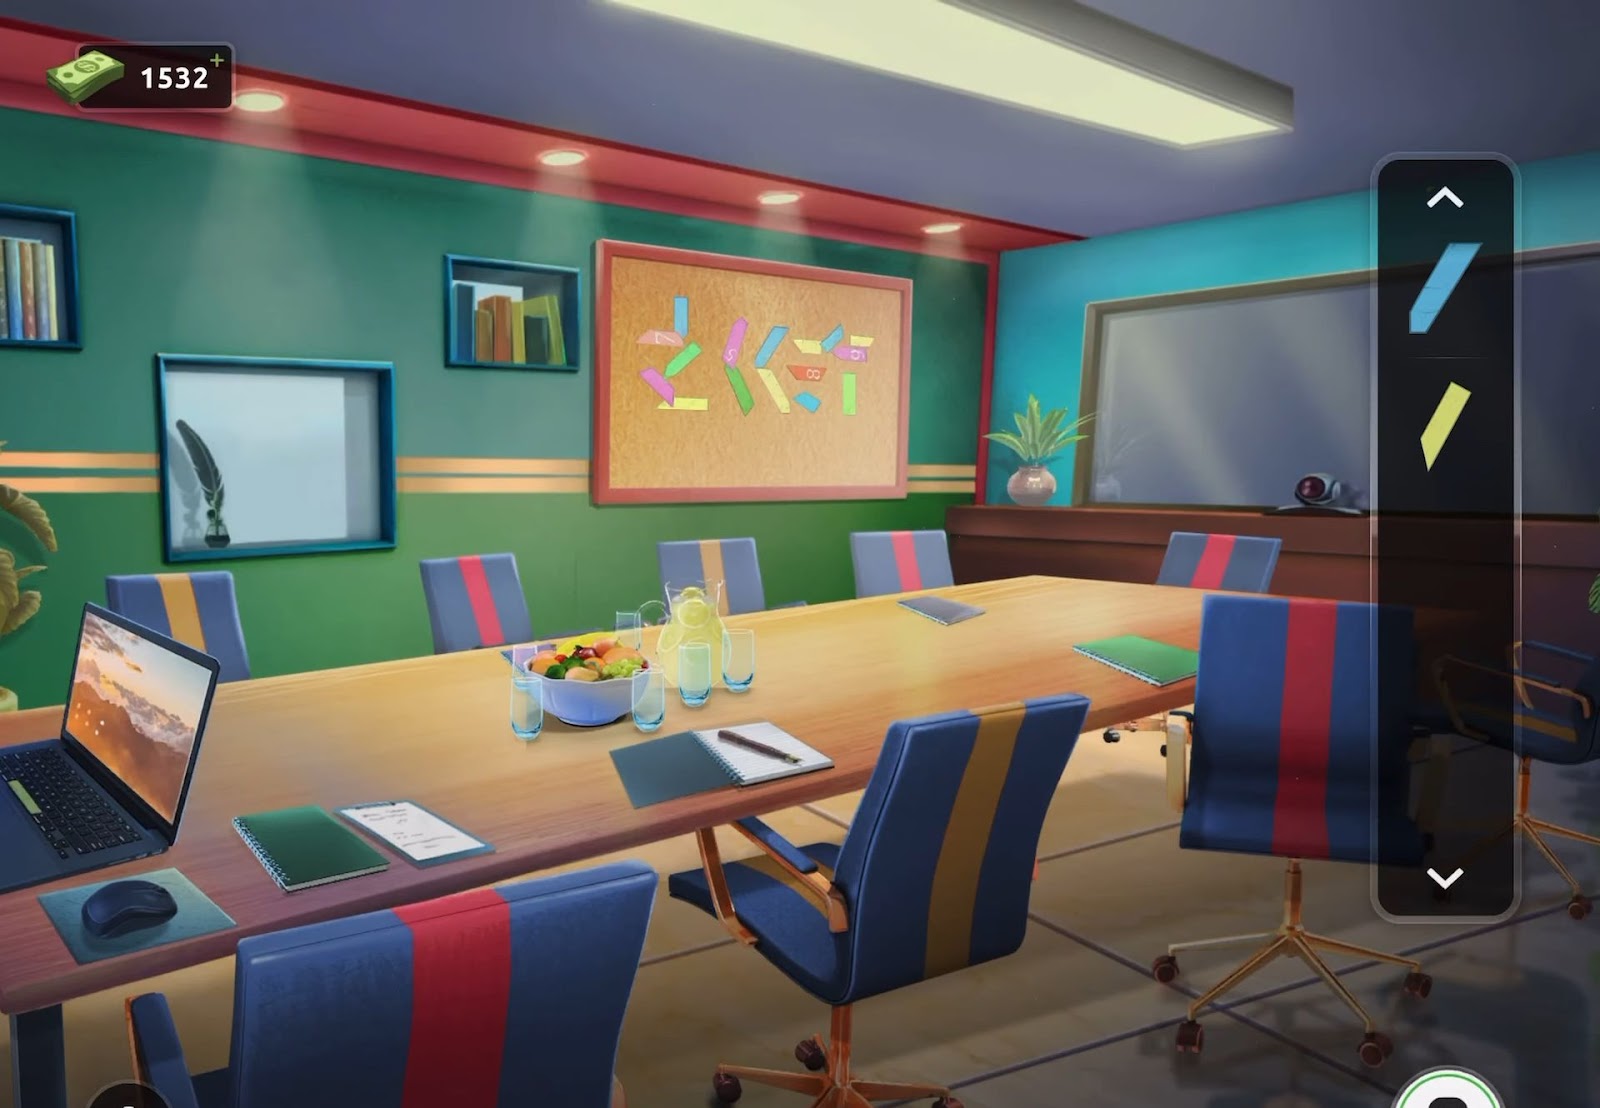
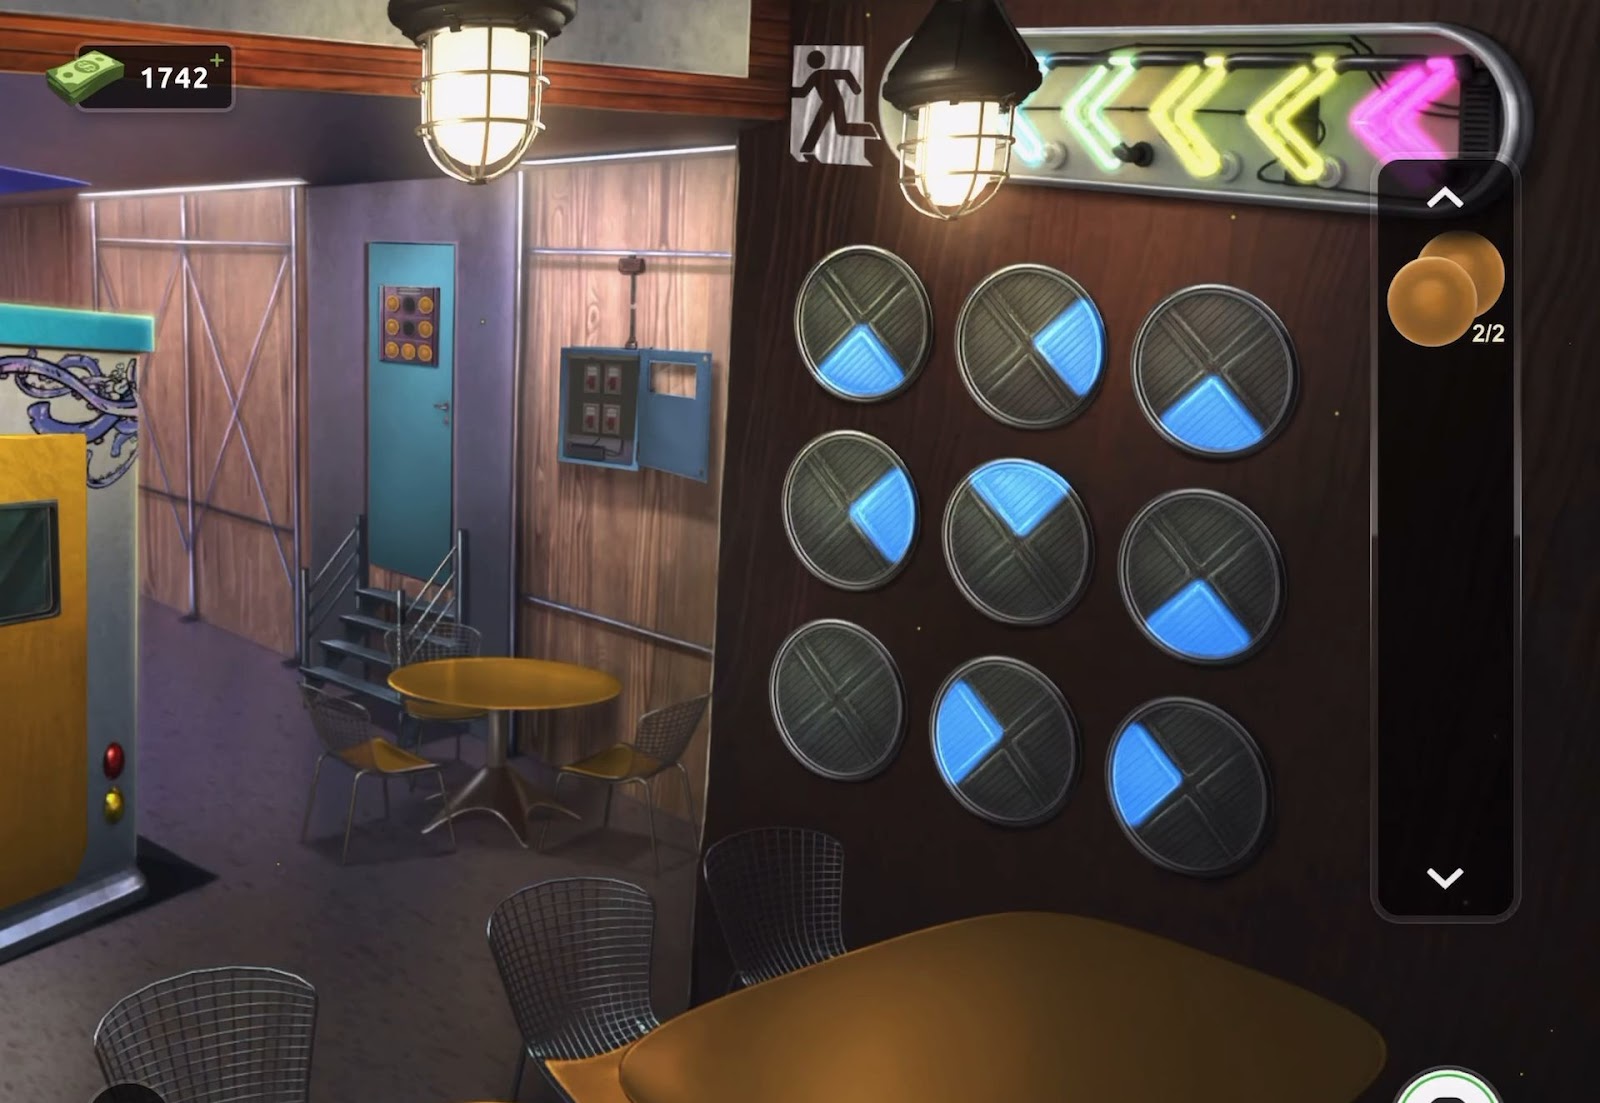
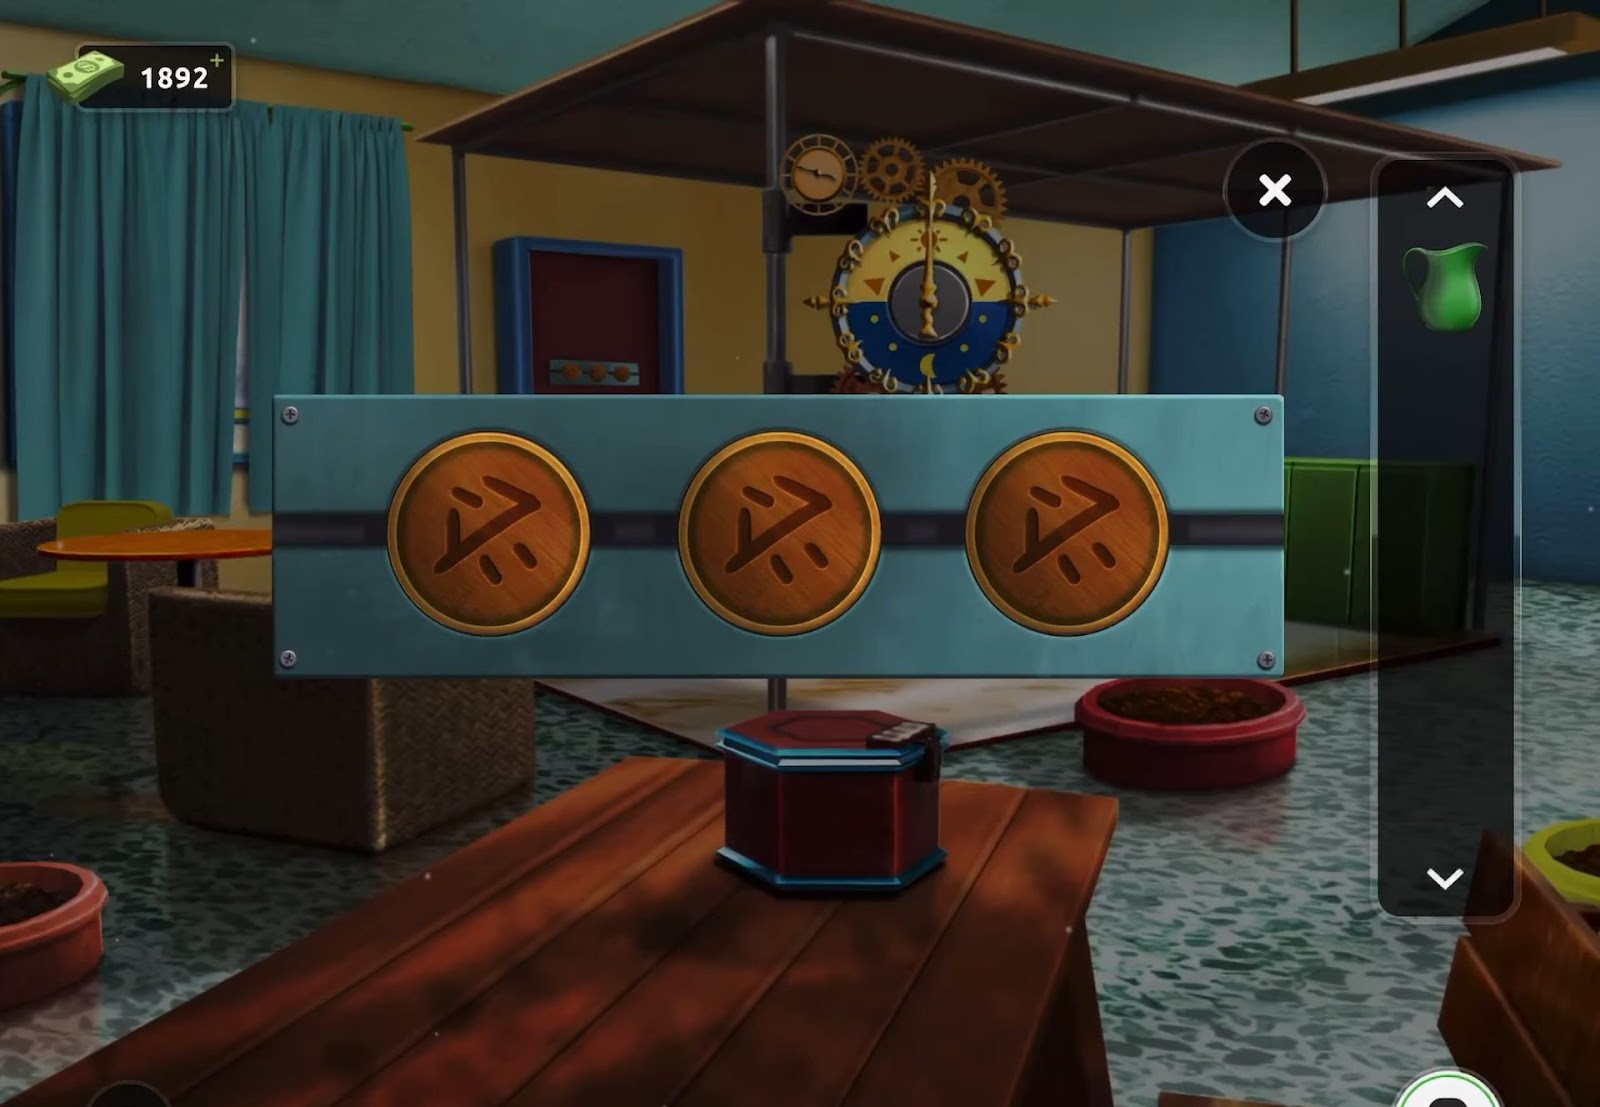
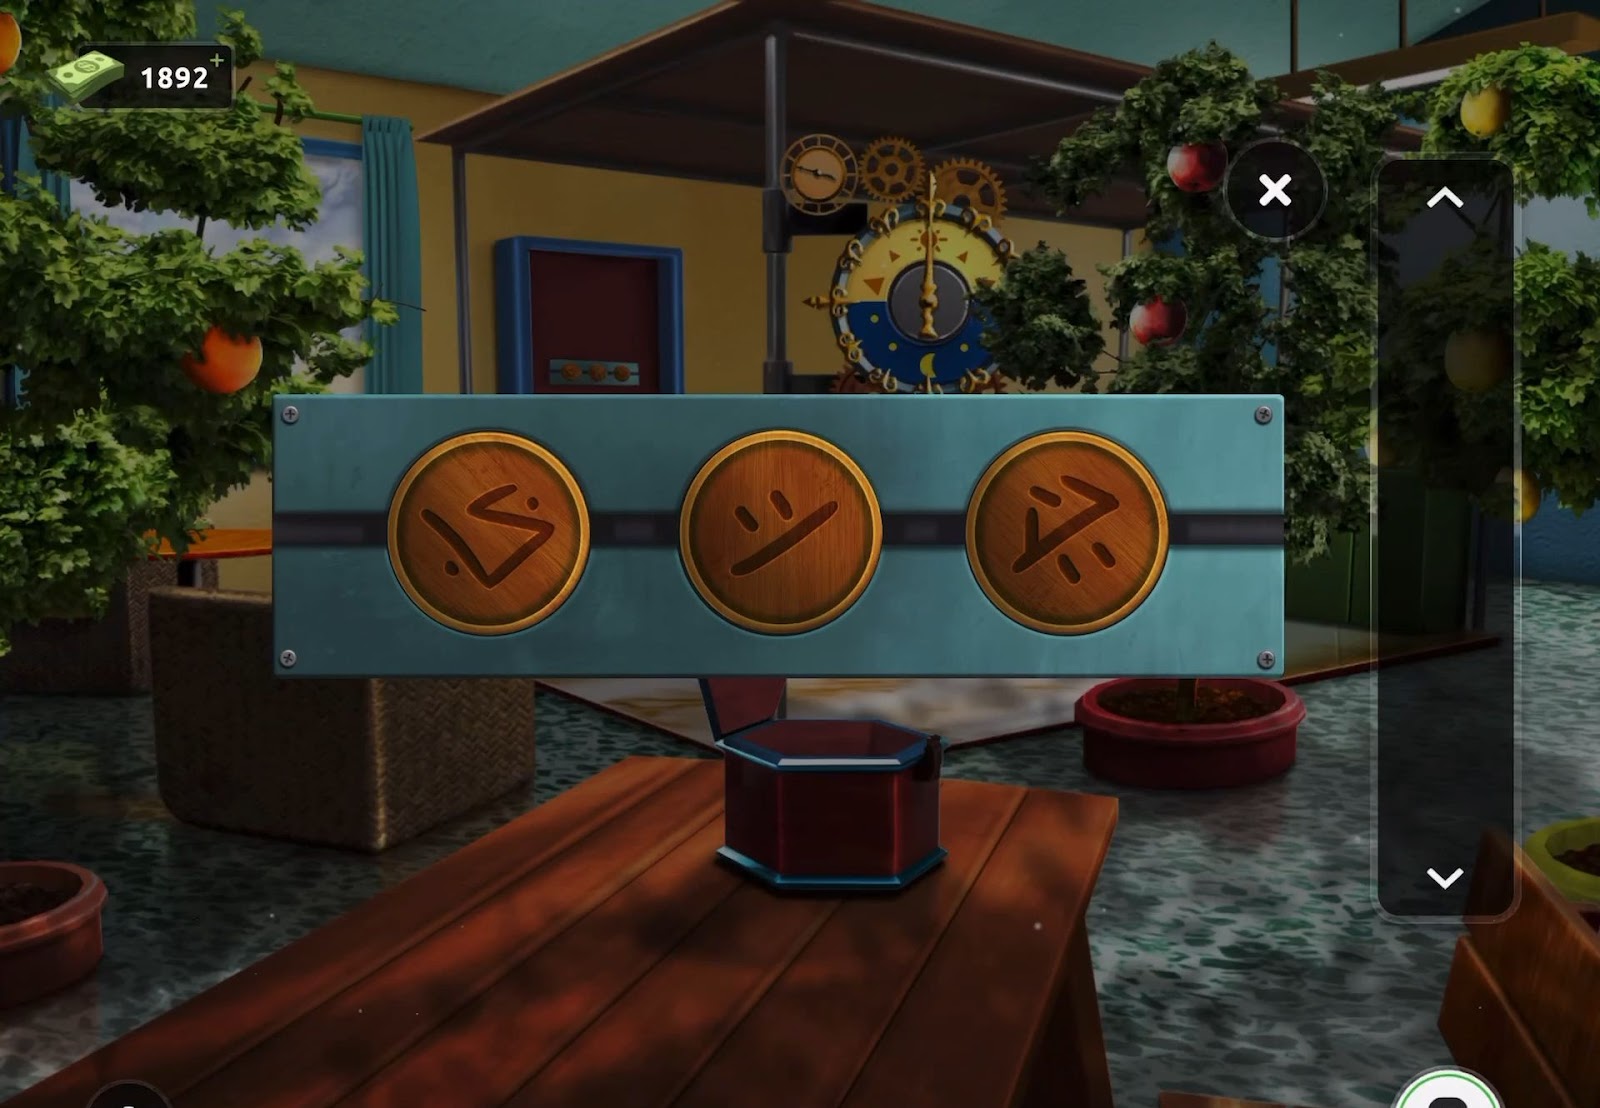
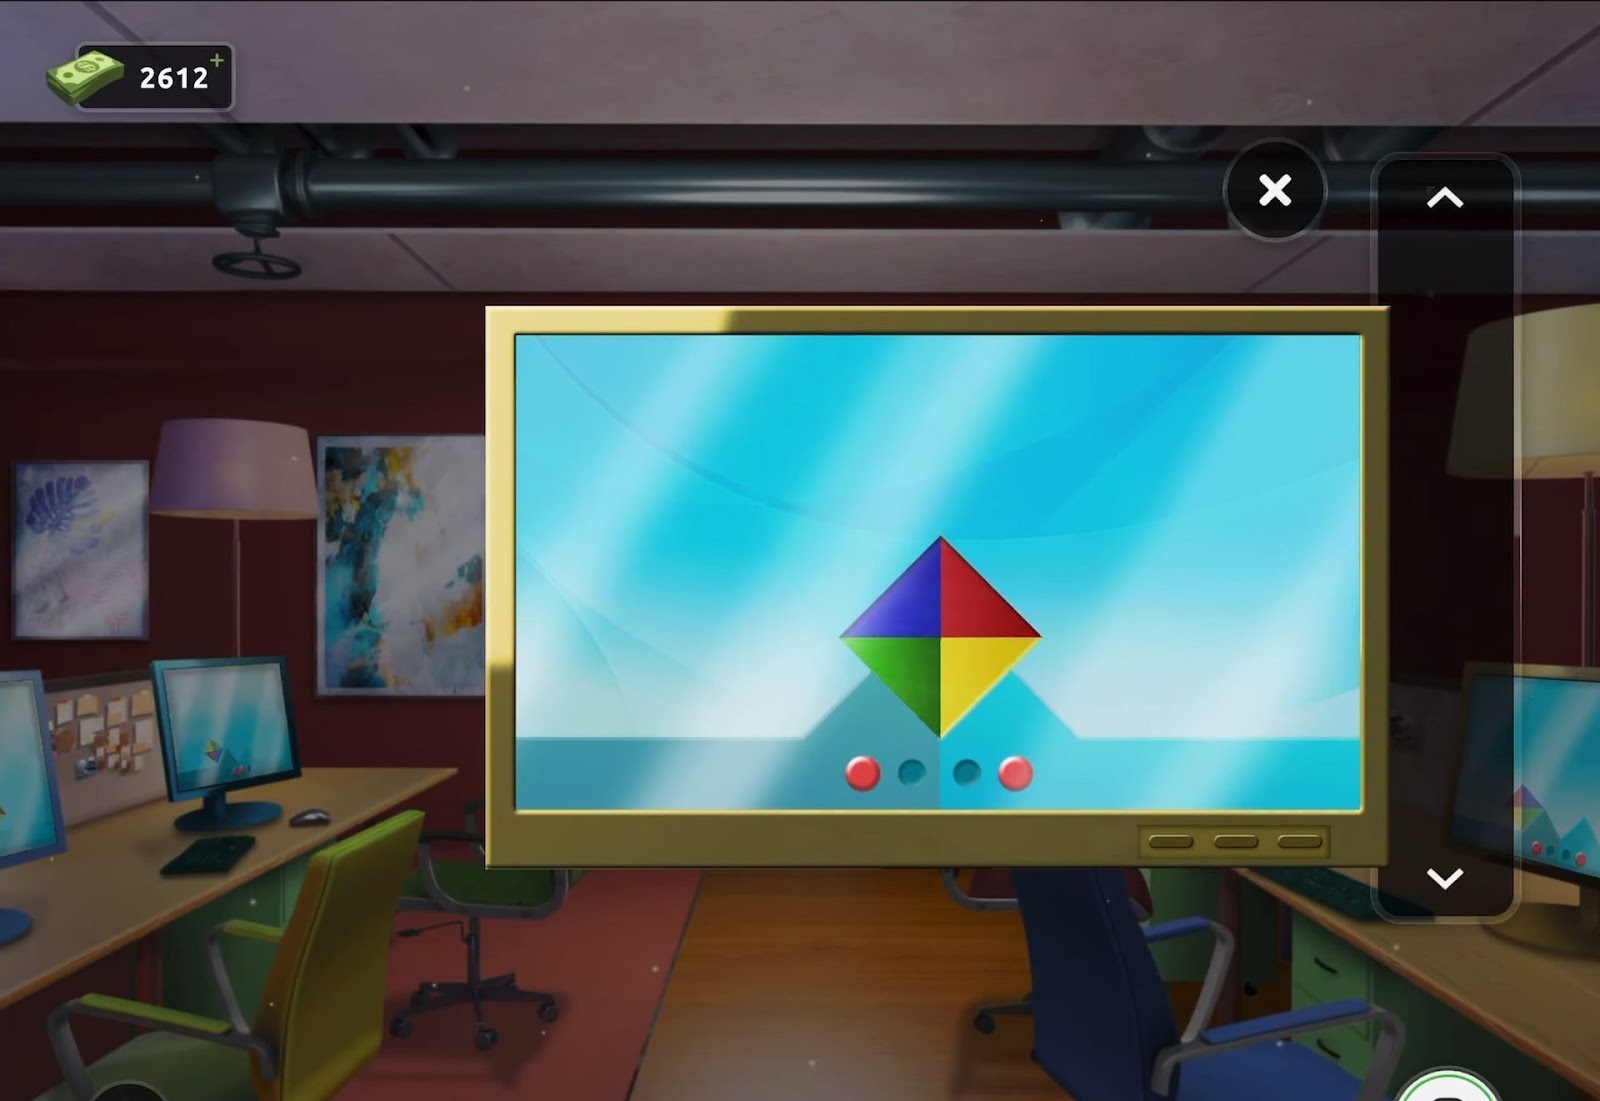
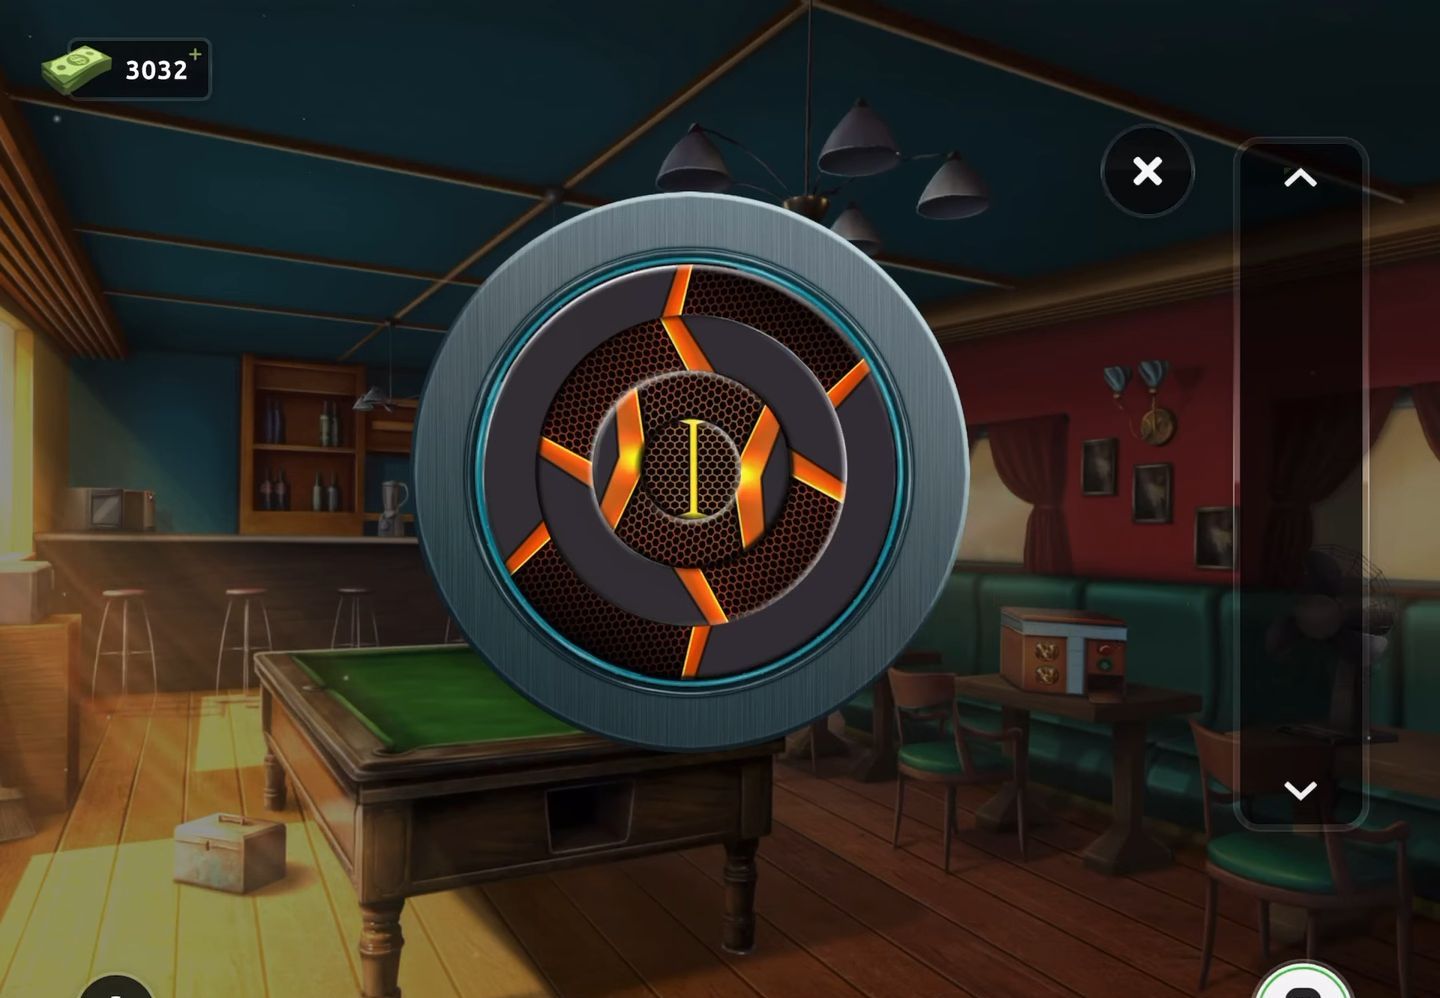
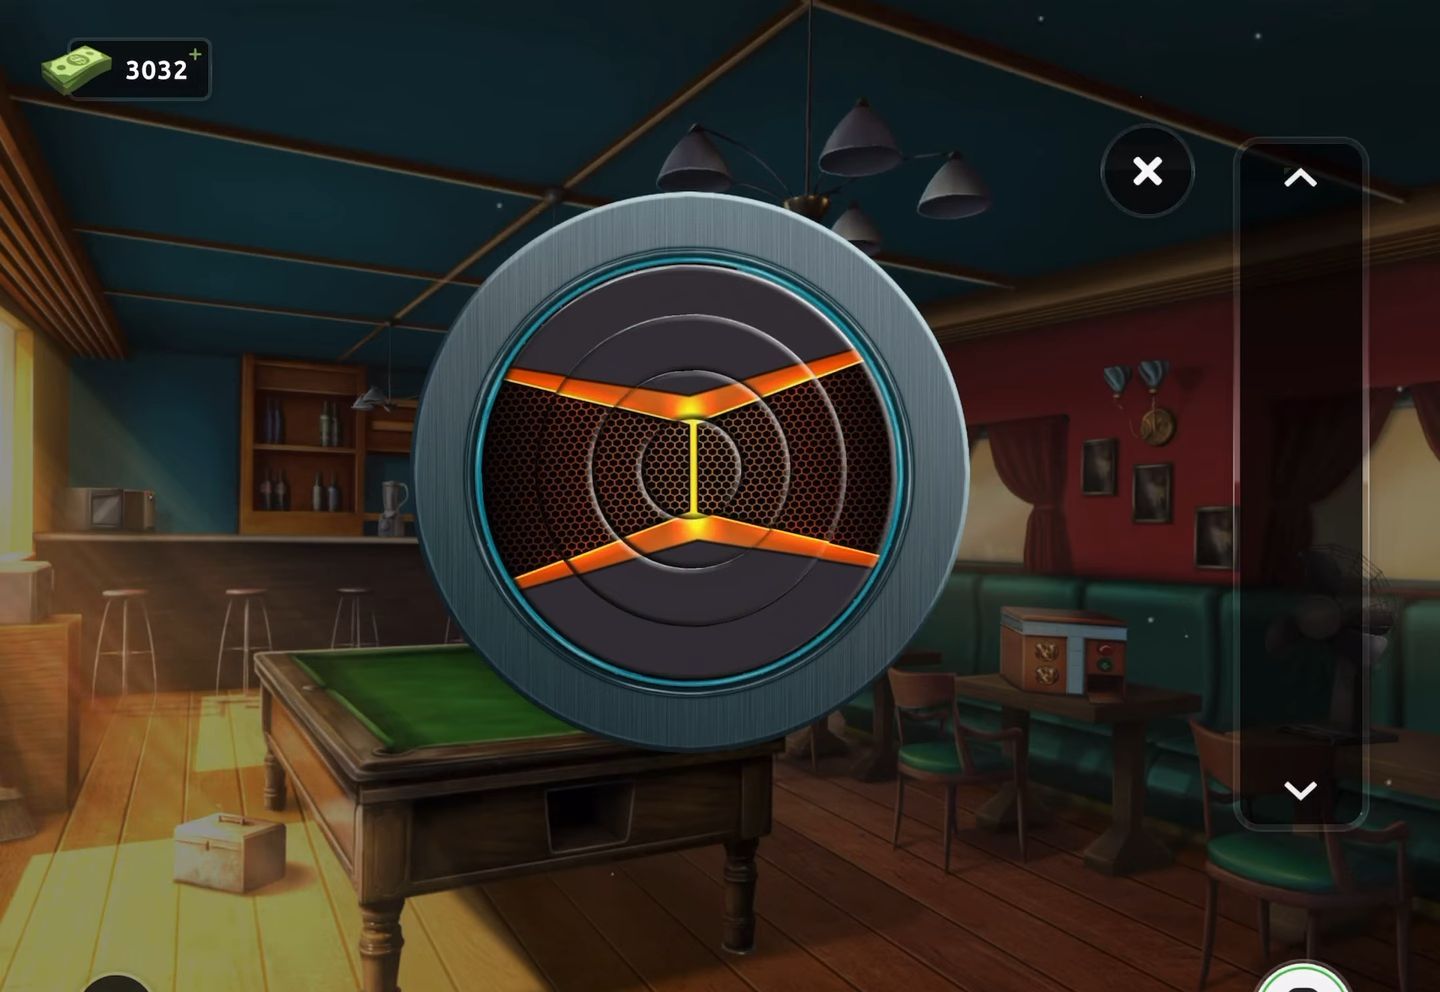
Level 9:
To complete level 9, follow the instructions below:
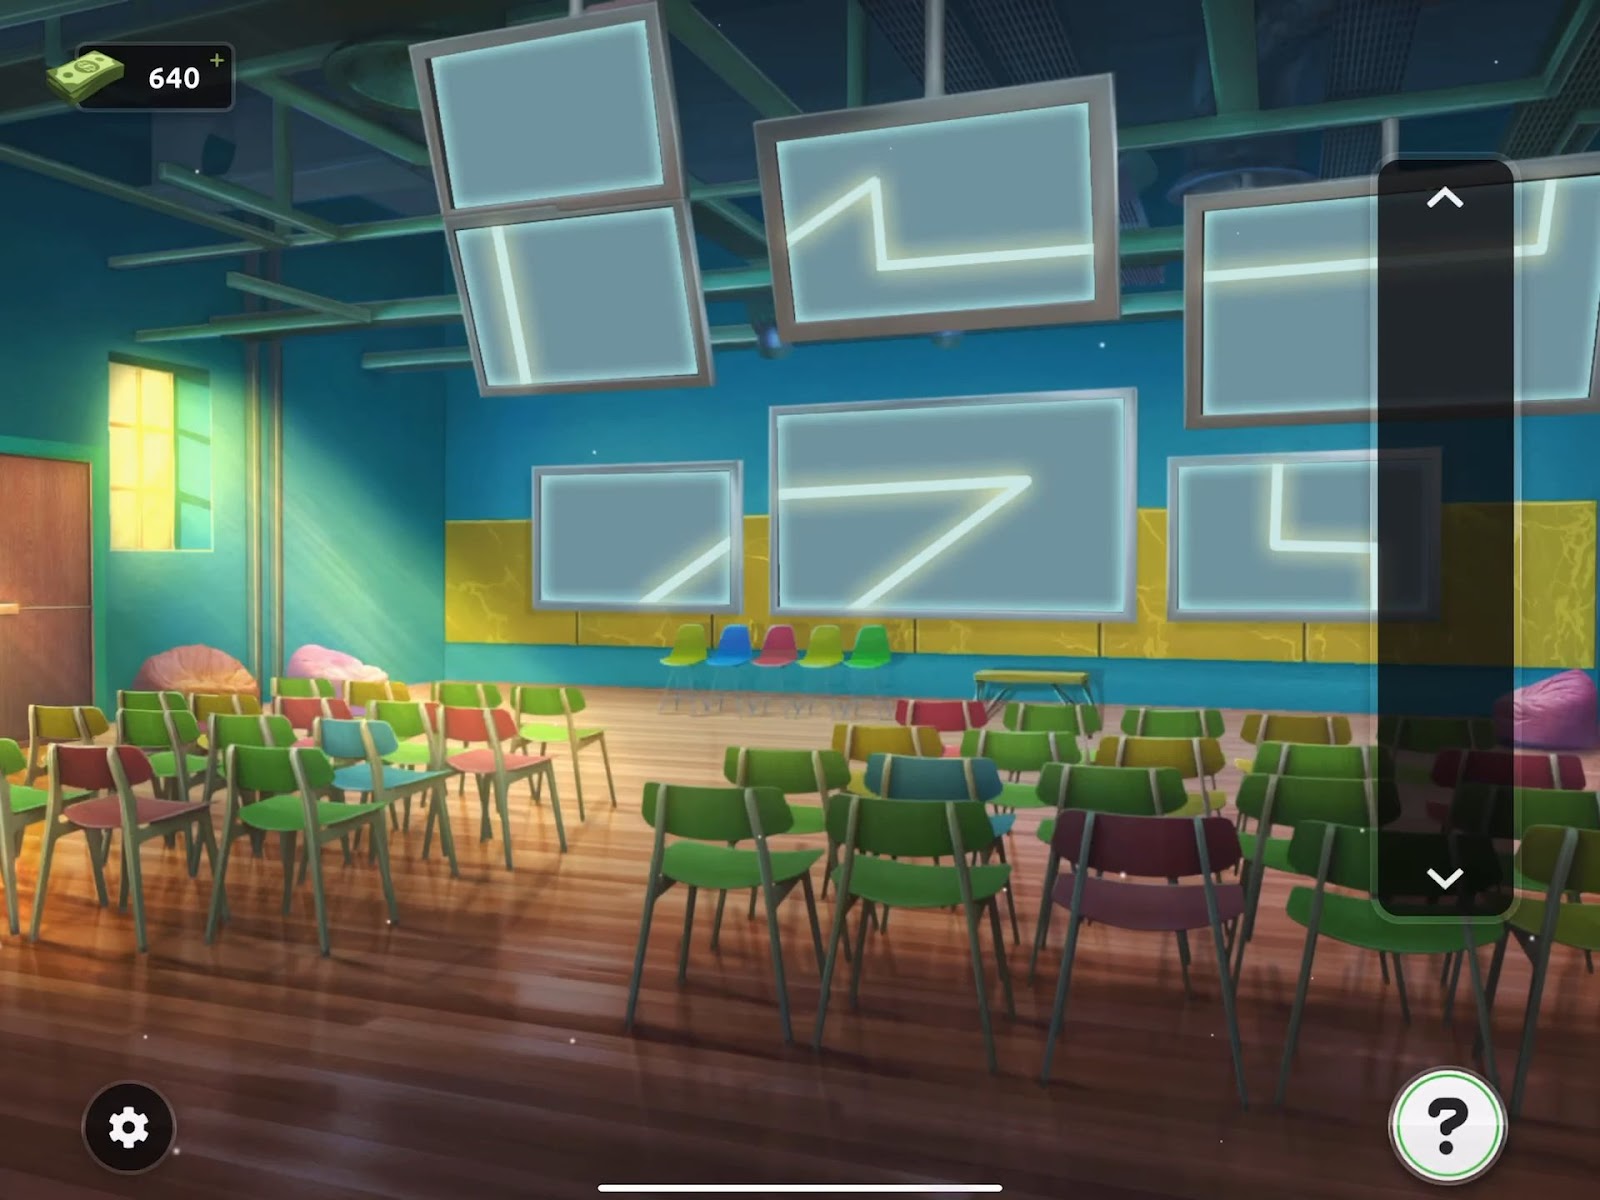
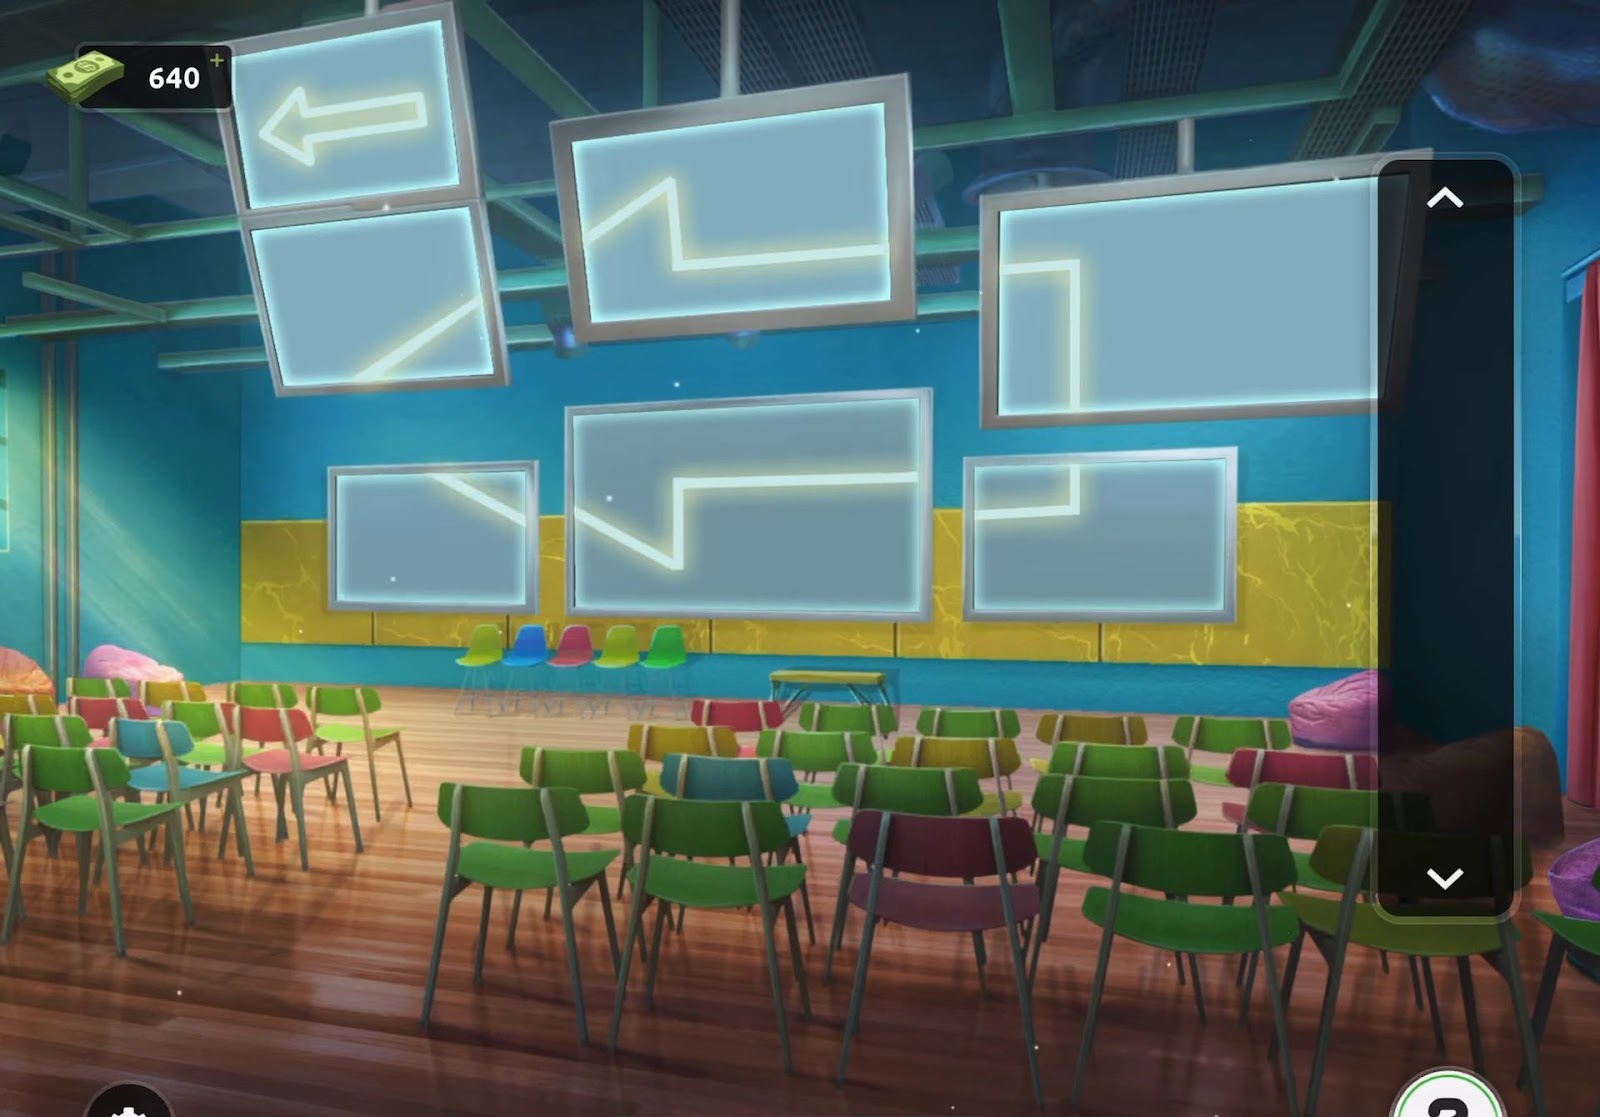
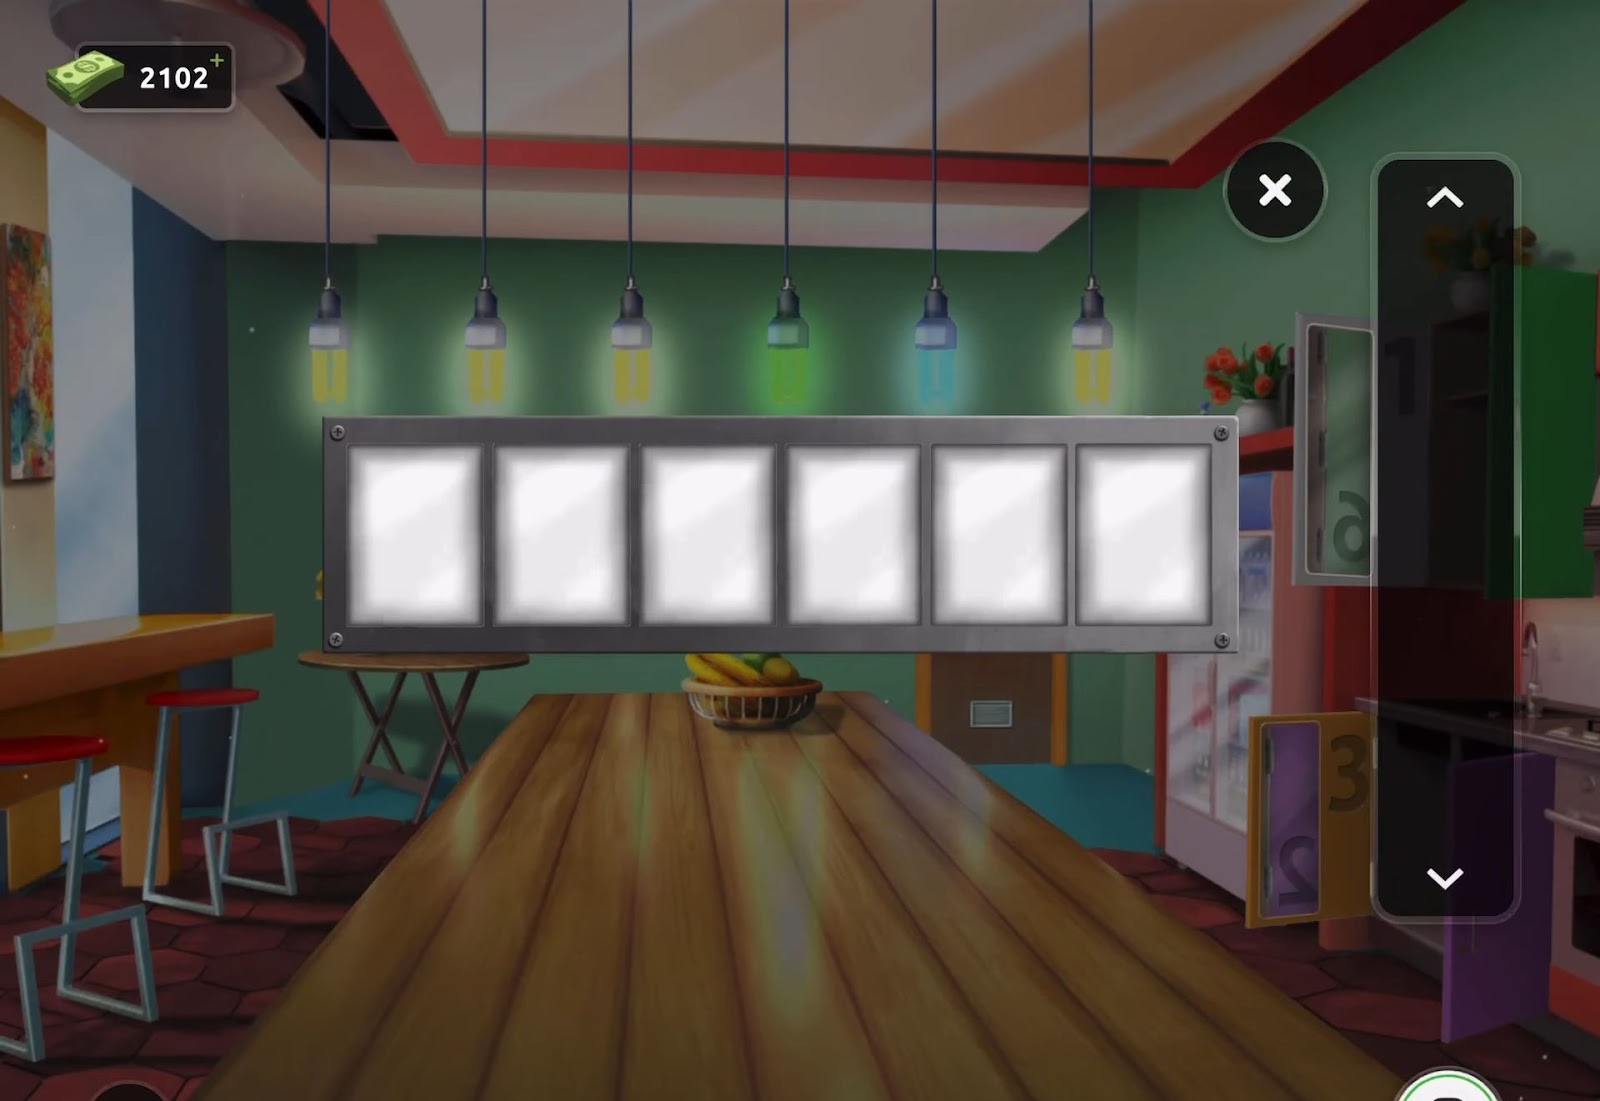
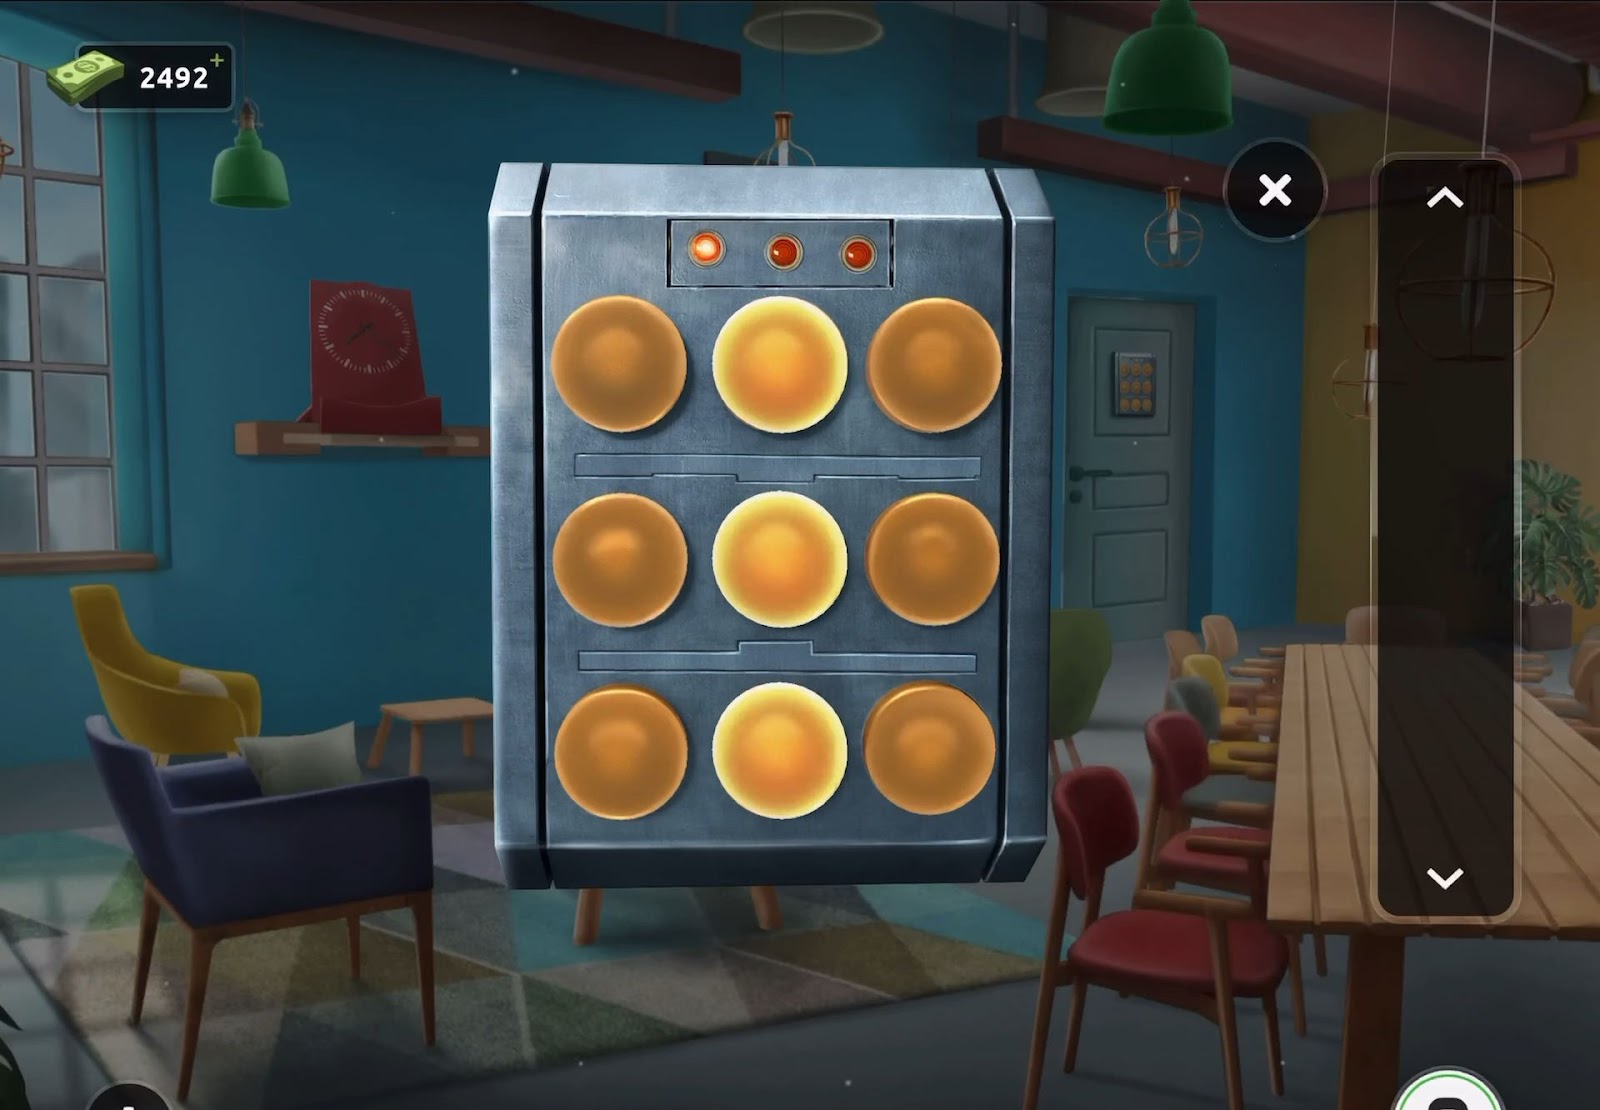
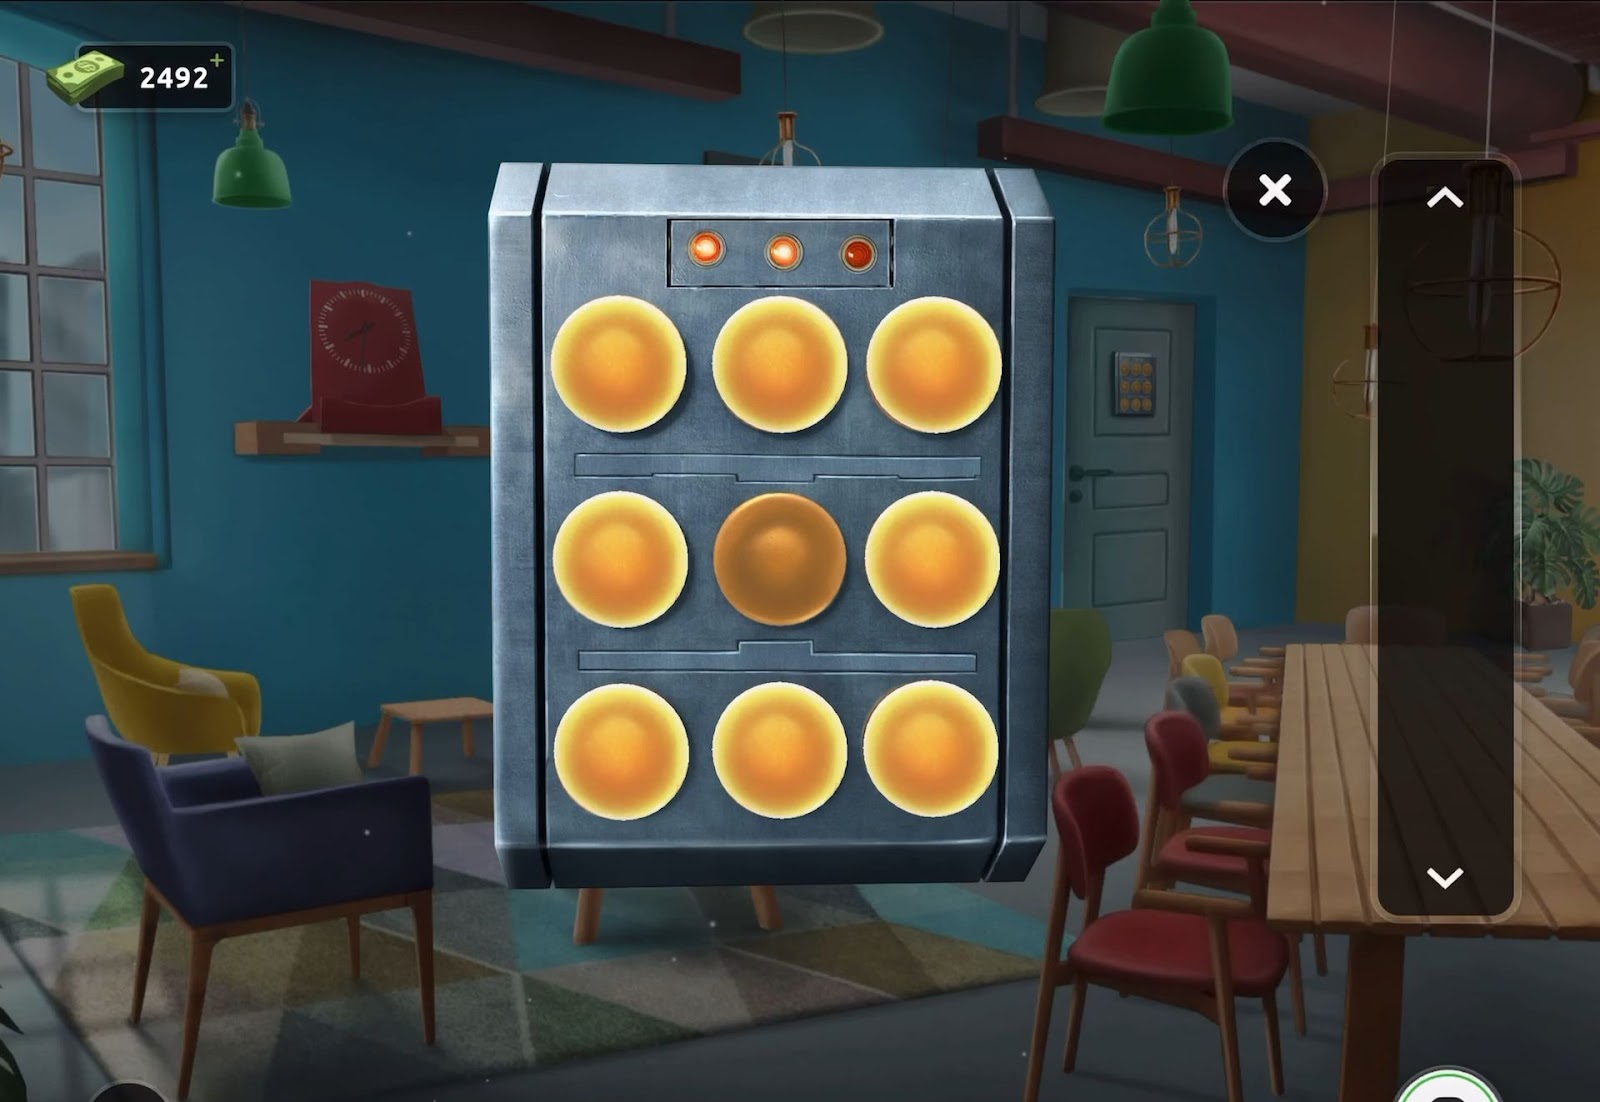
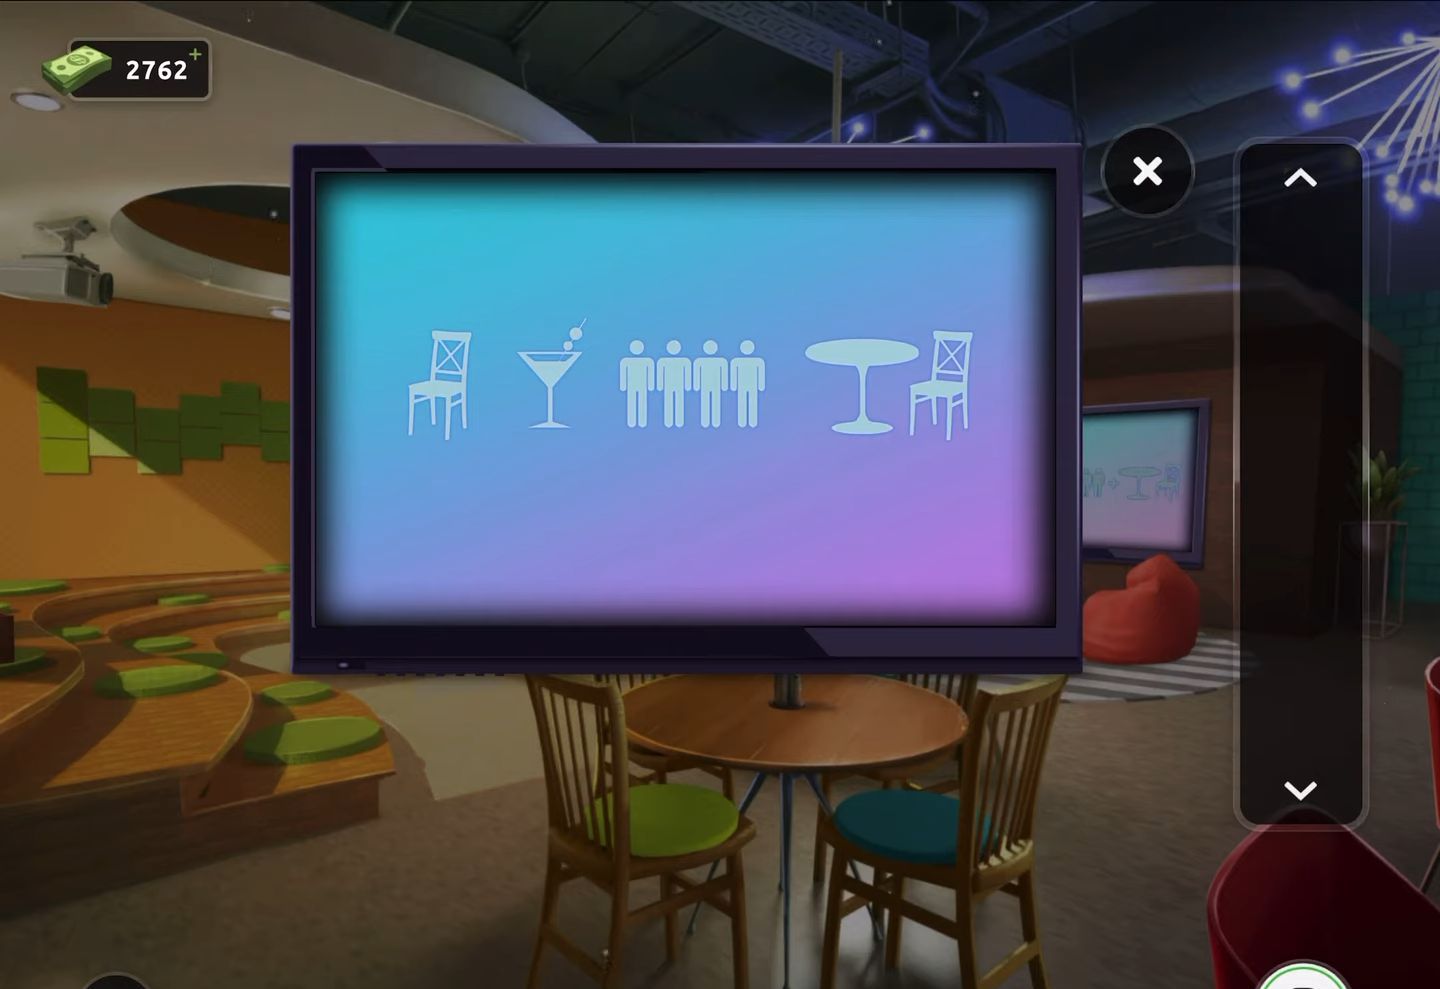
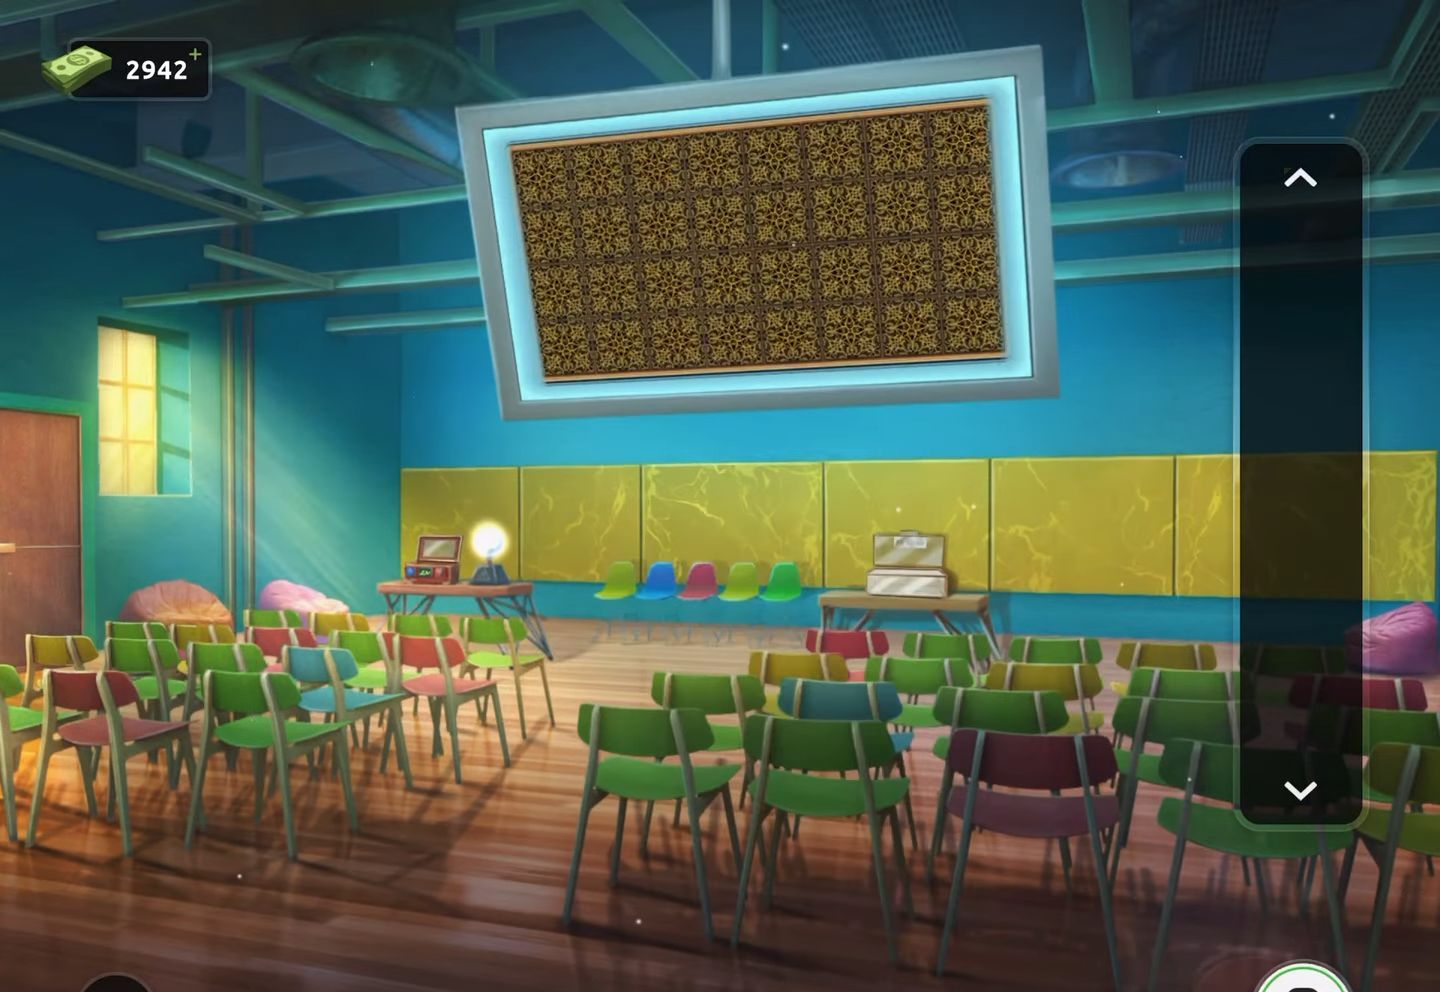
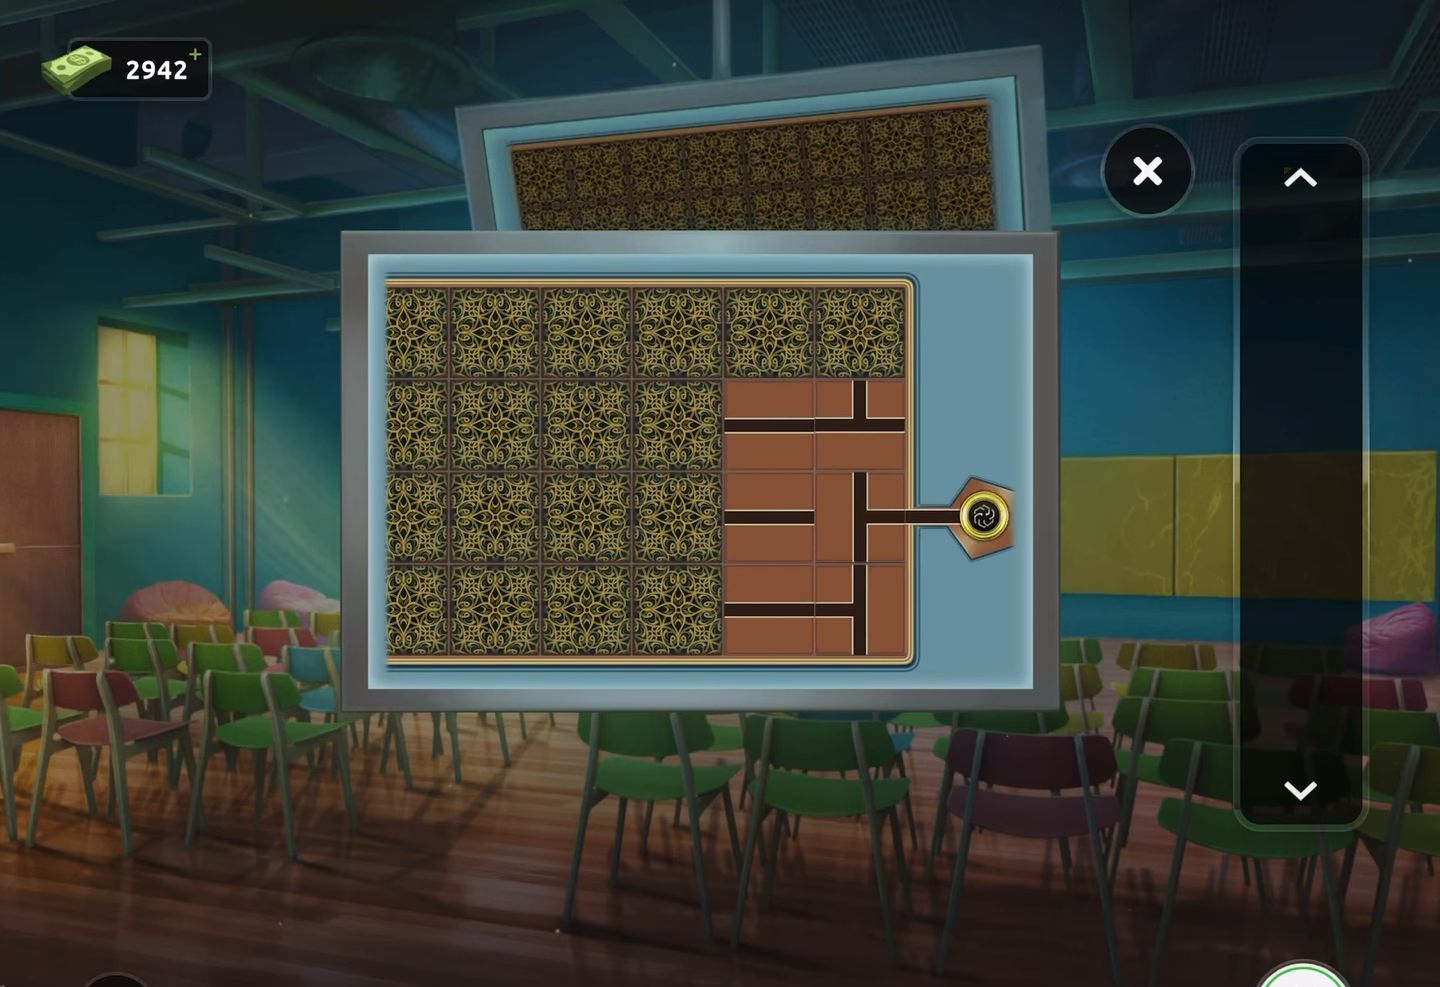
- This level is based on the theme of a conference hall having big display screens.
- Firstly, press the screens to alter the lines displayed on them.
- When all the images are arranged in the shape of an arrow, the door will be opened.
- So you have to exit through this door.
Level 10:
To complete level 10, follow the instructions below:
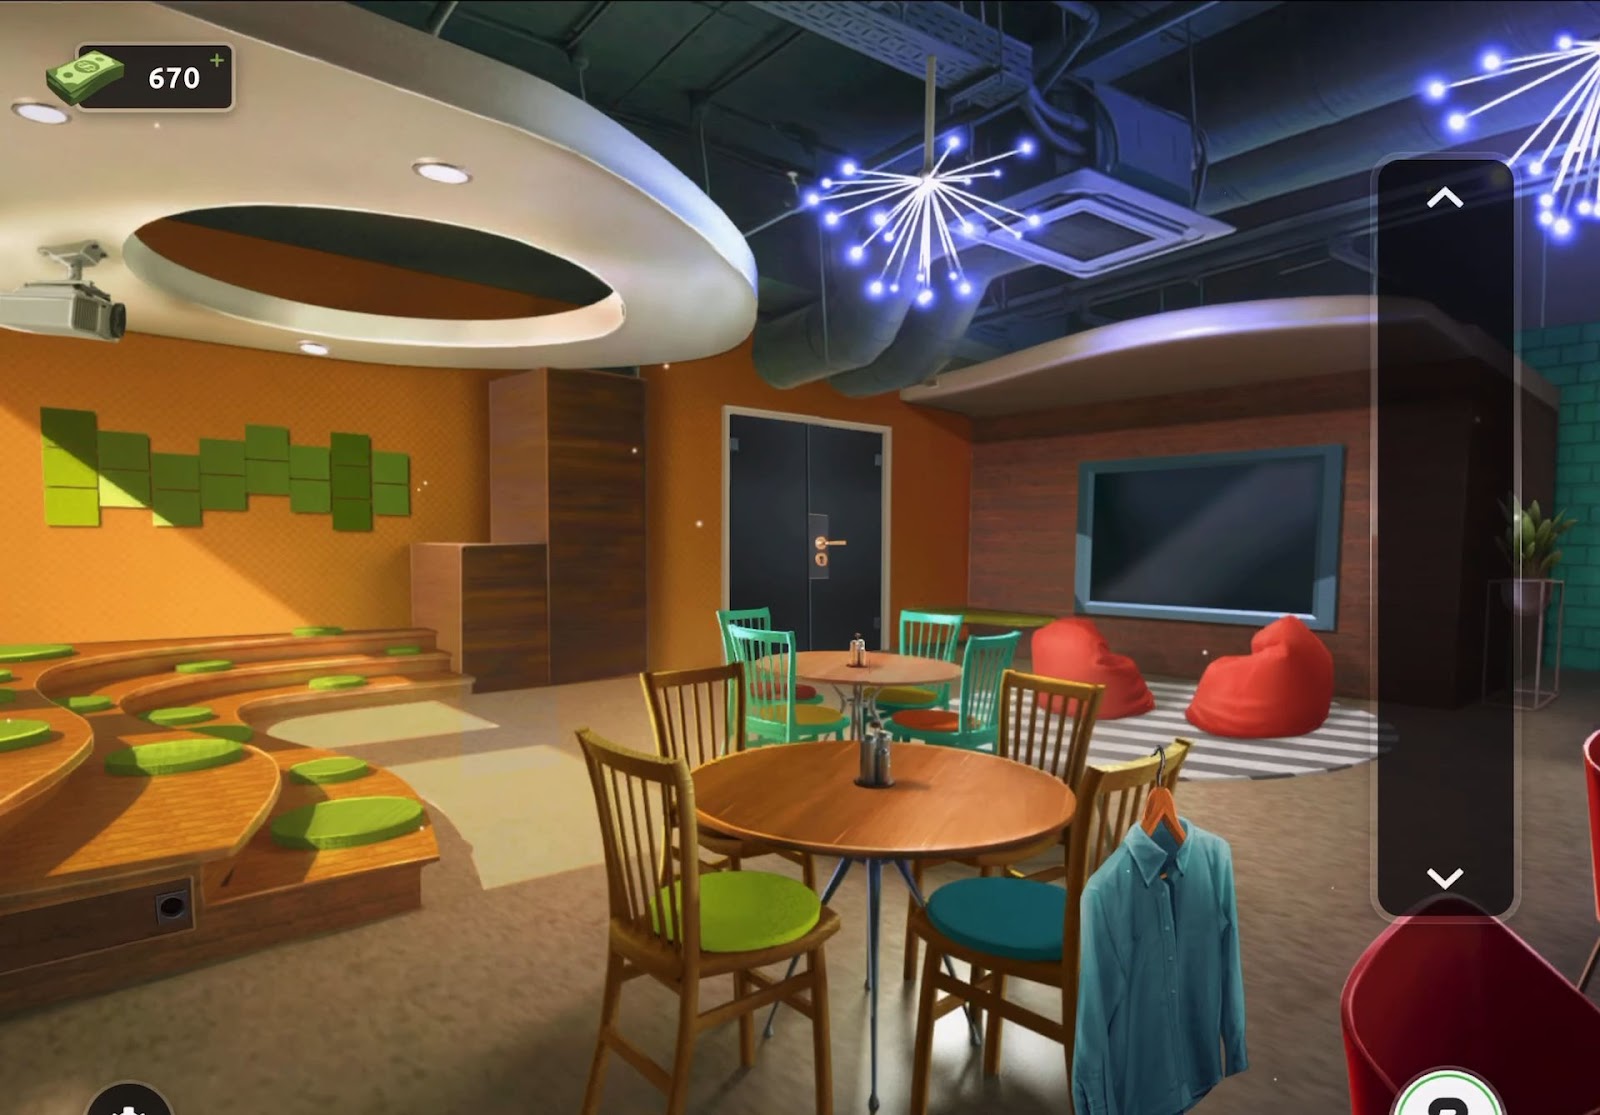
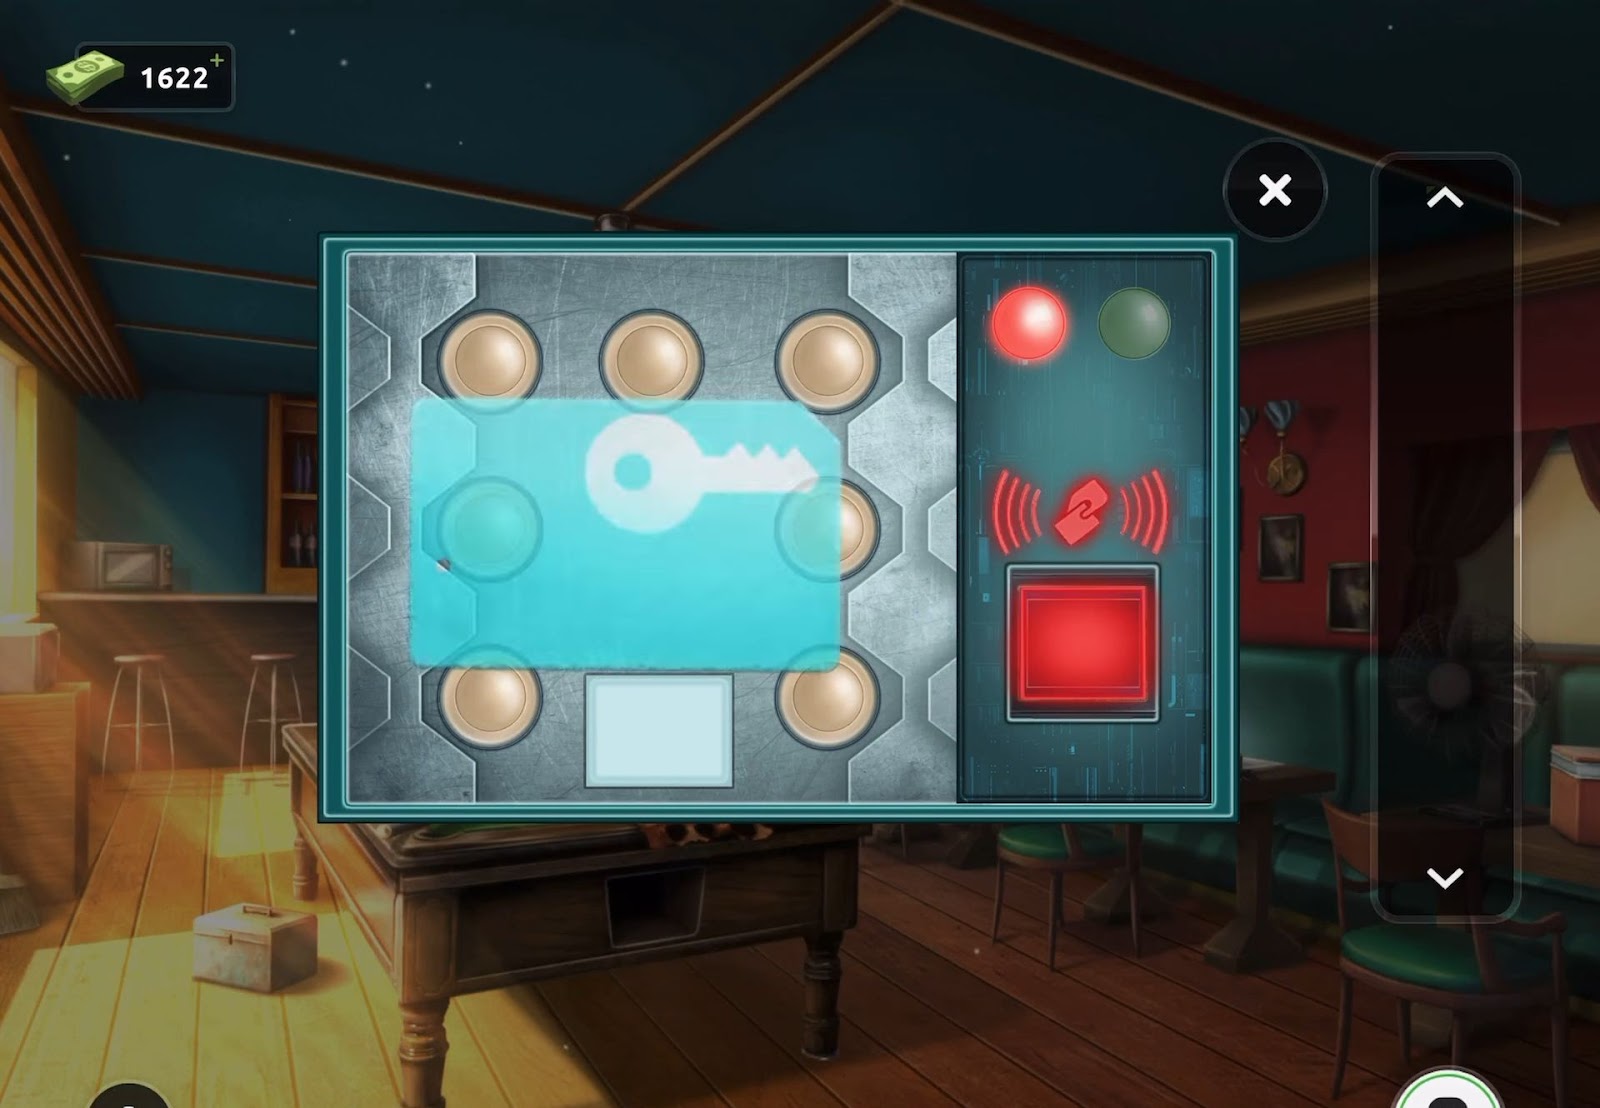
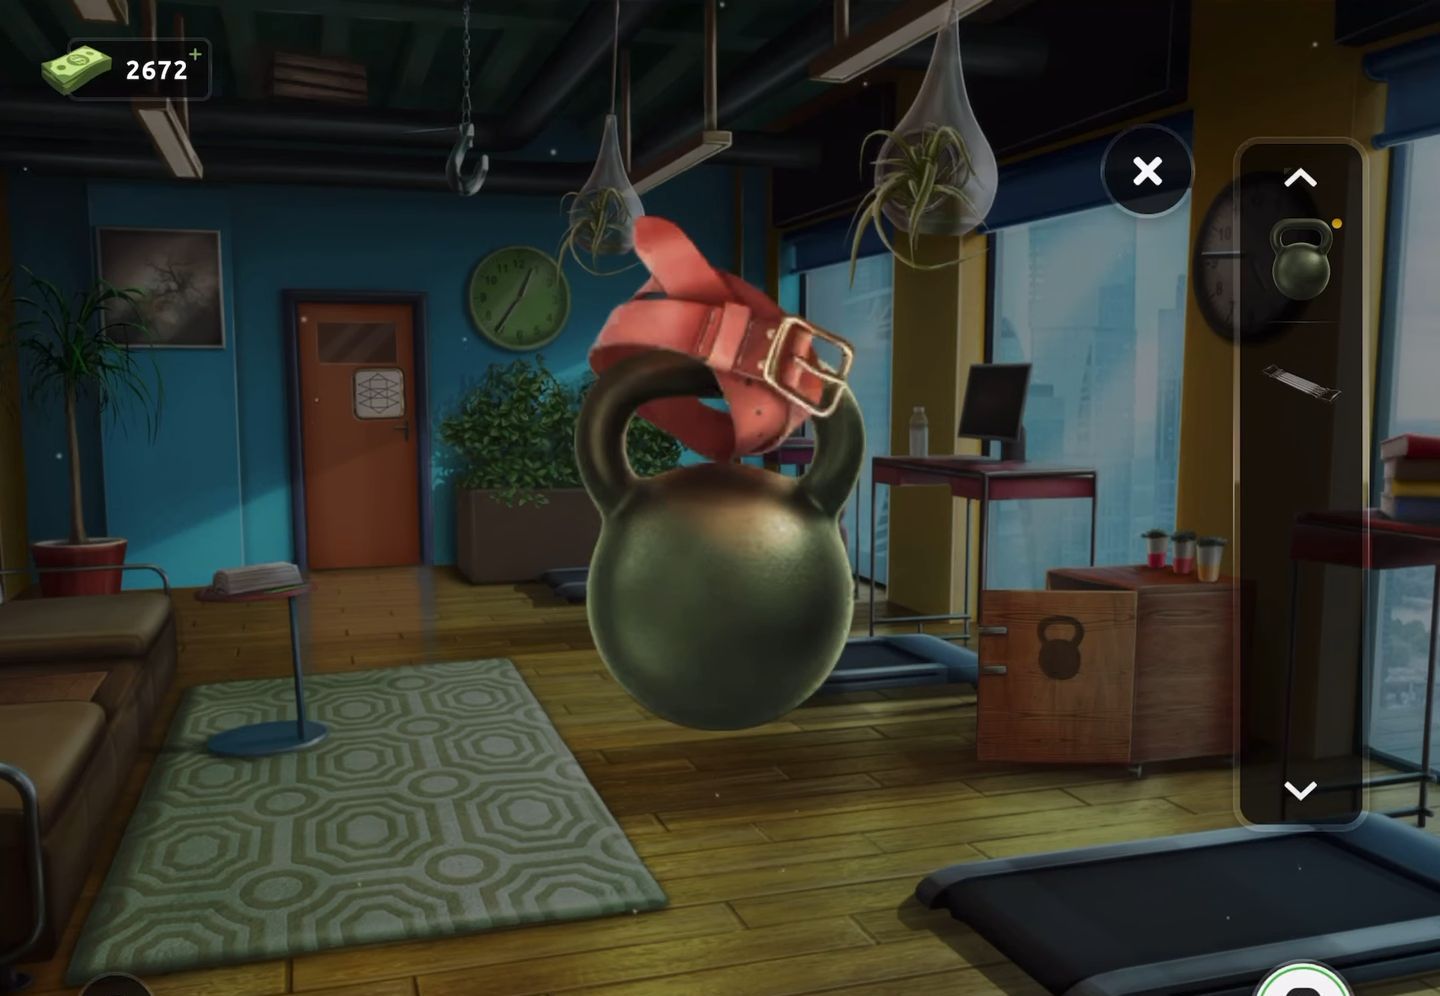
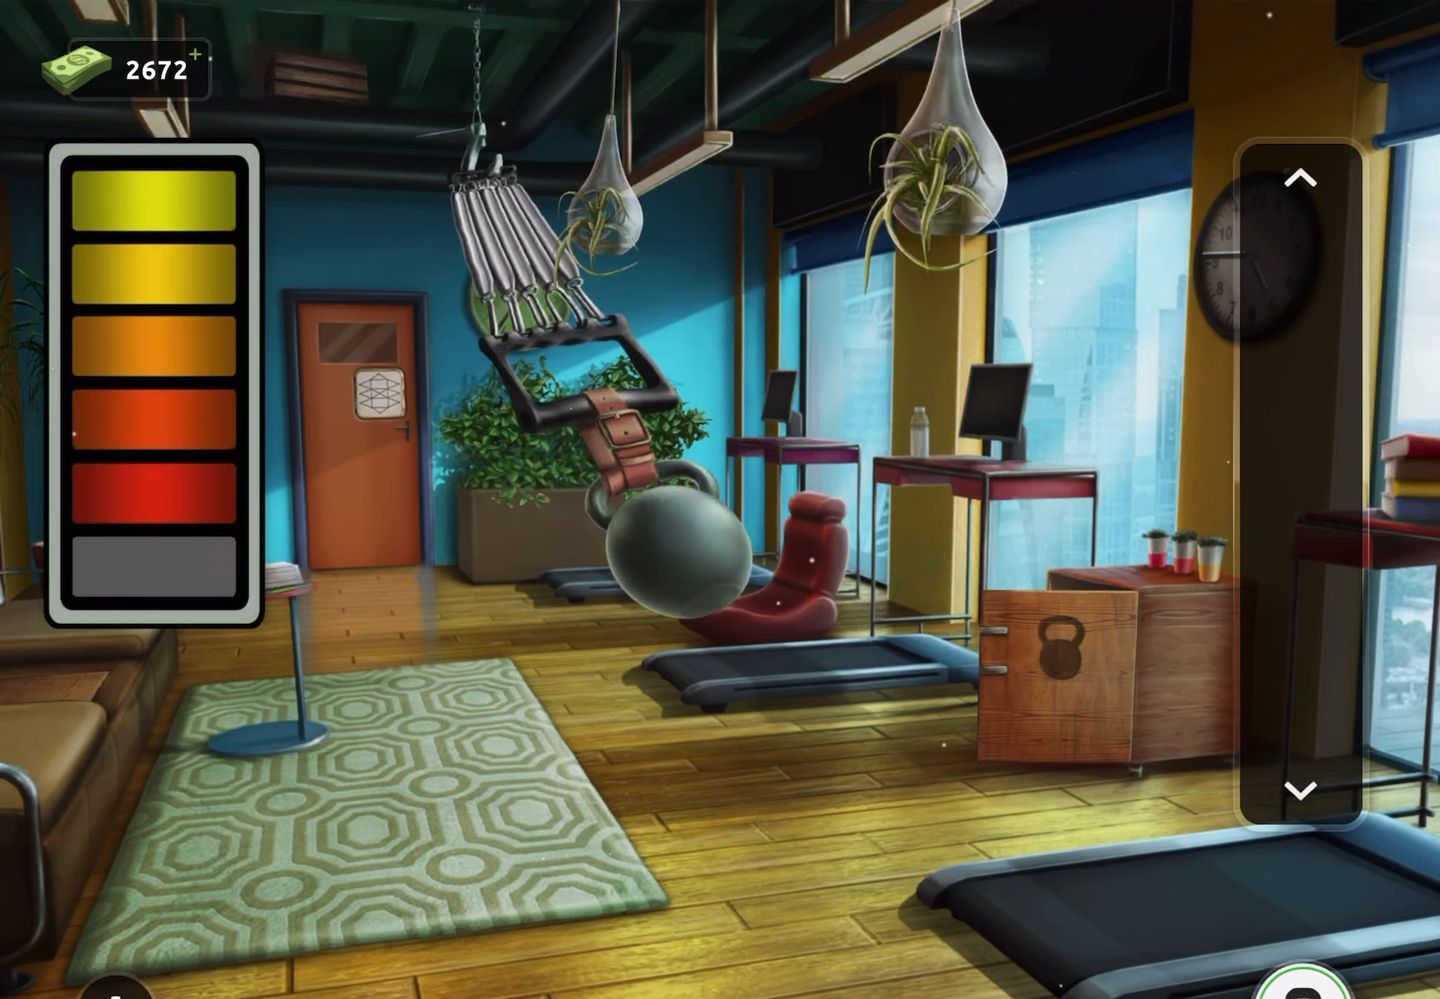
- Firstly, touch the blue shorts located at the backside of the chair positioned on the right to detach it.
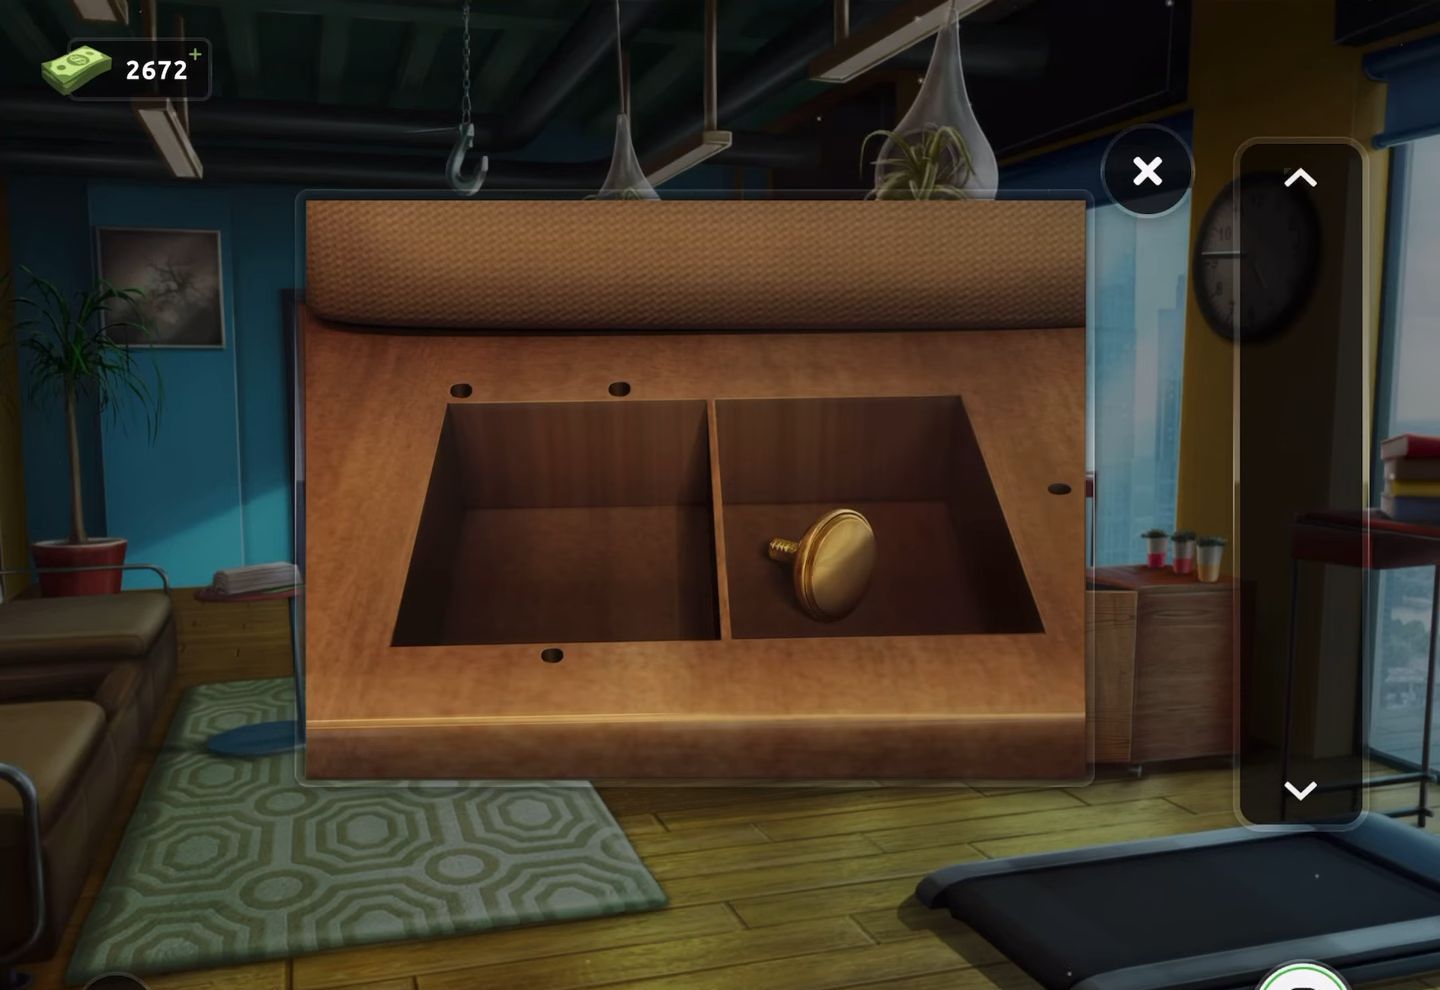
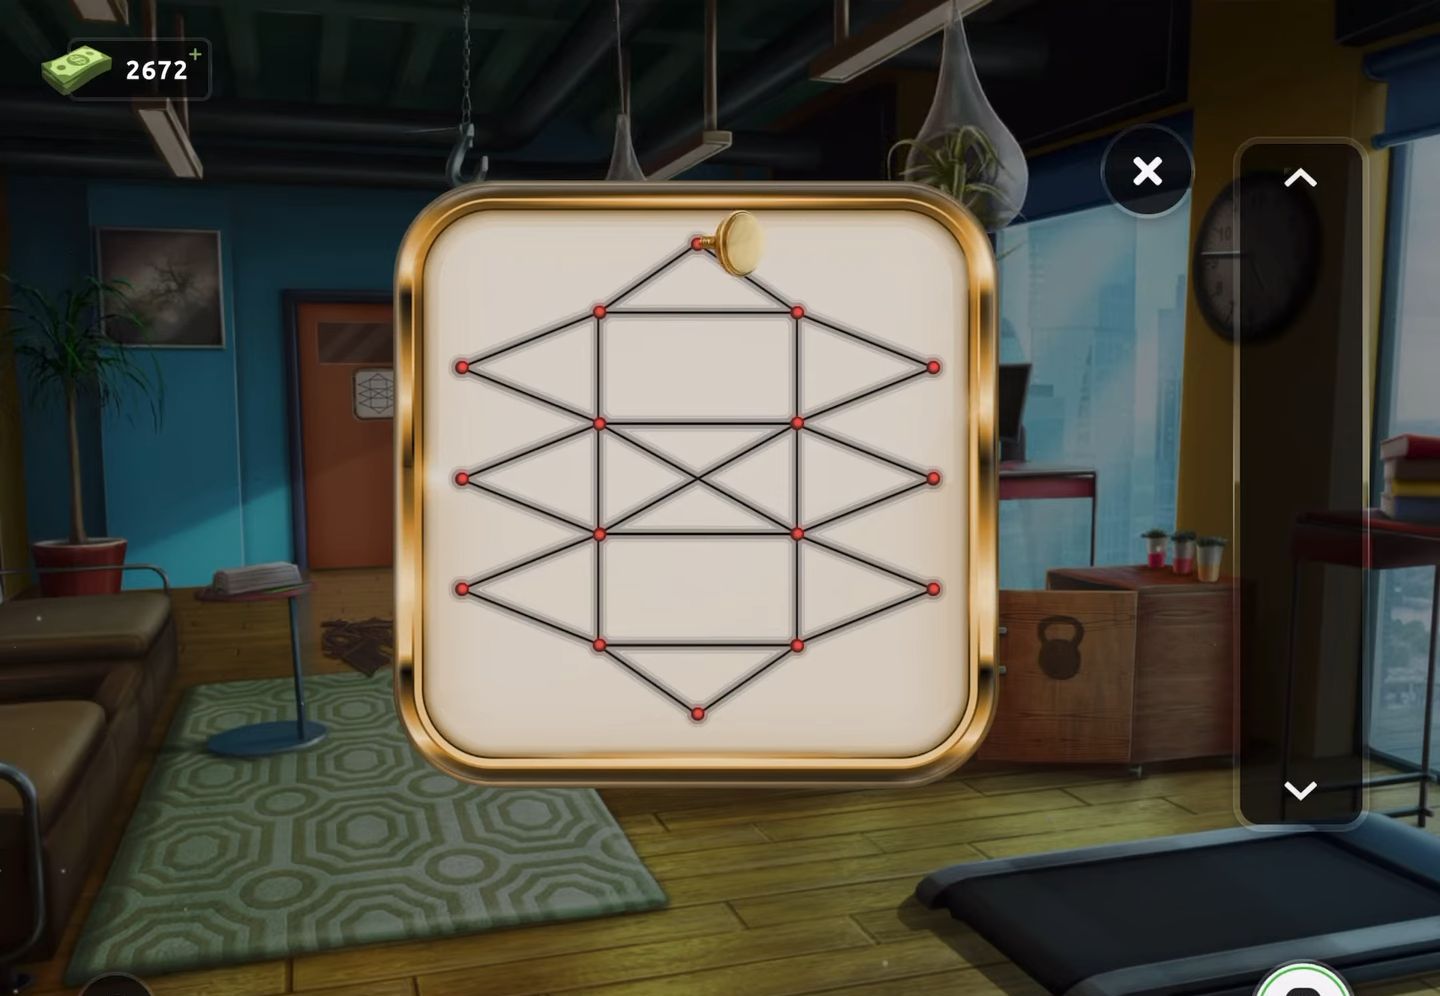
- Next, get the hanger and use it on a panel from the lower left to unlock it. This will assist you to find a key.
- Finally, use the key to unlock the door and exit through it.
Level 11:
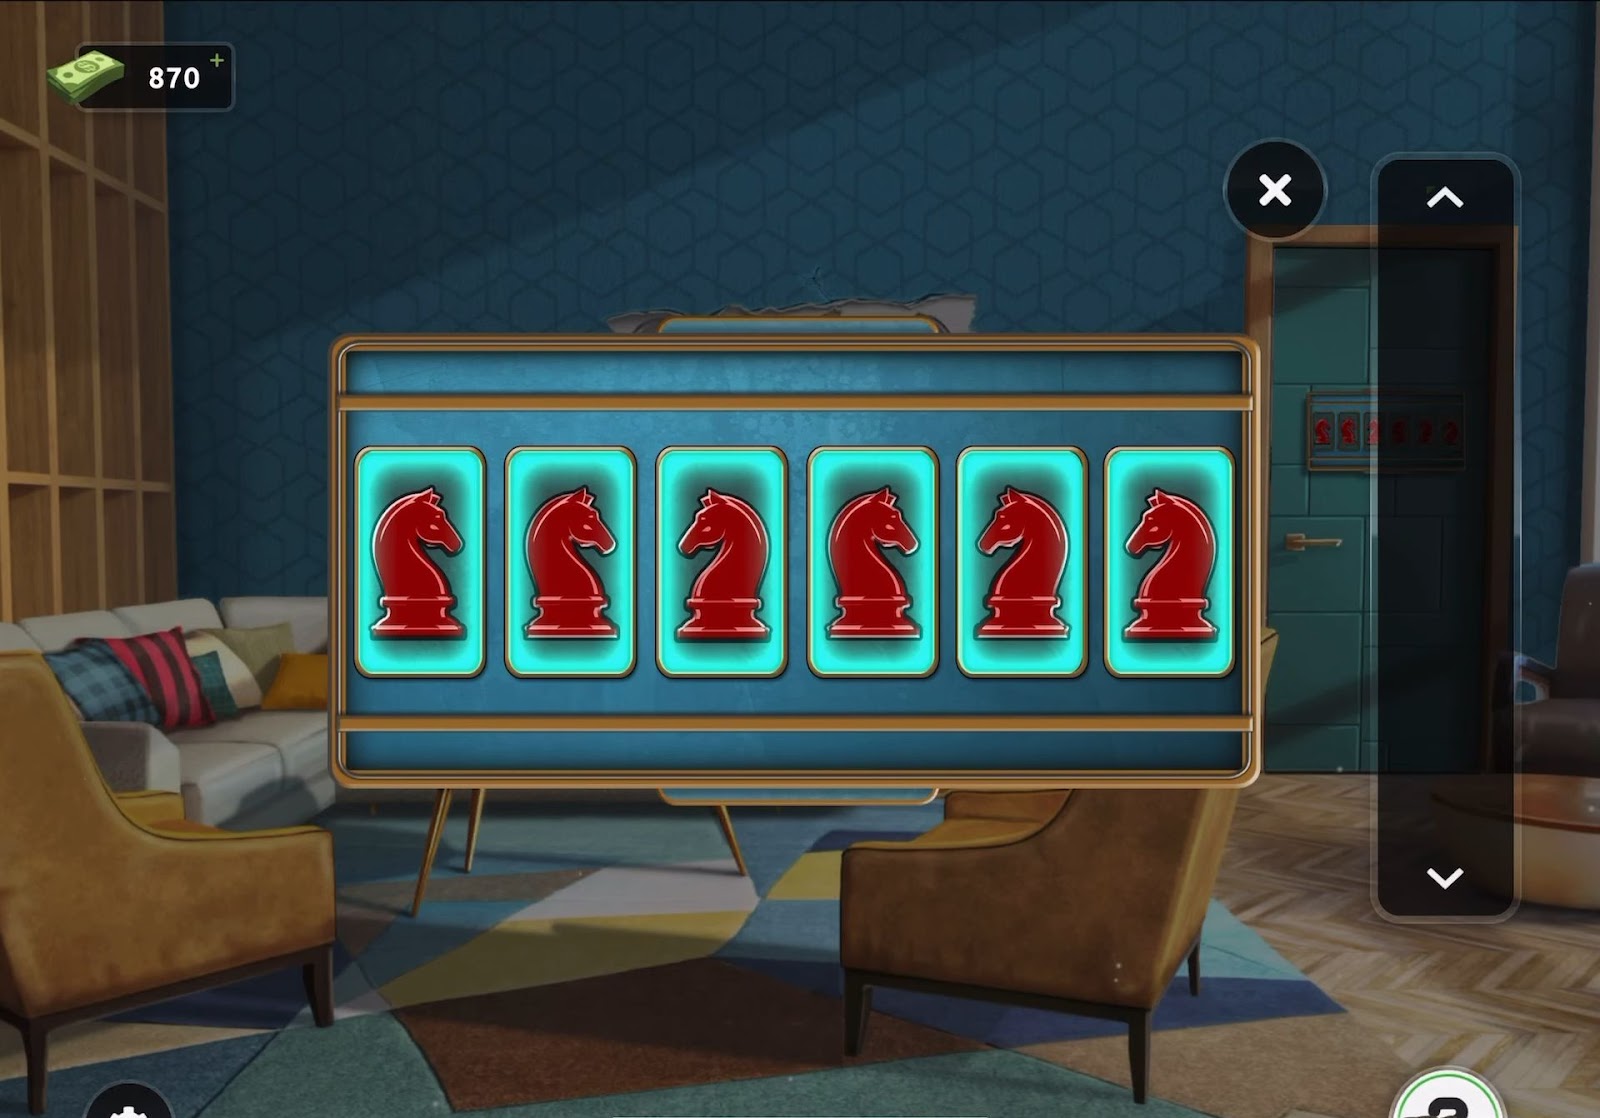
To complete level 11, follow the instructions below:
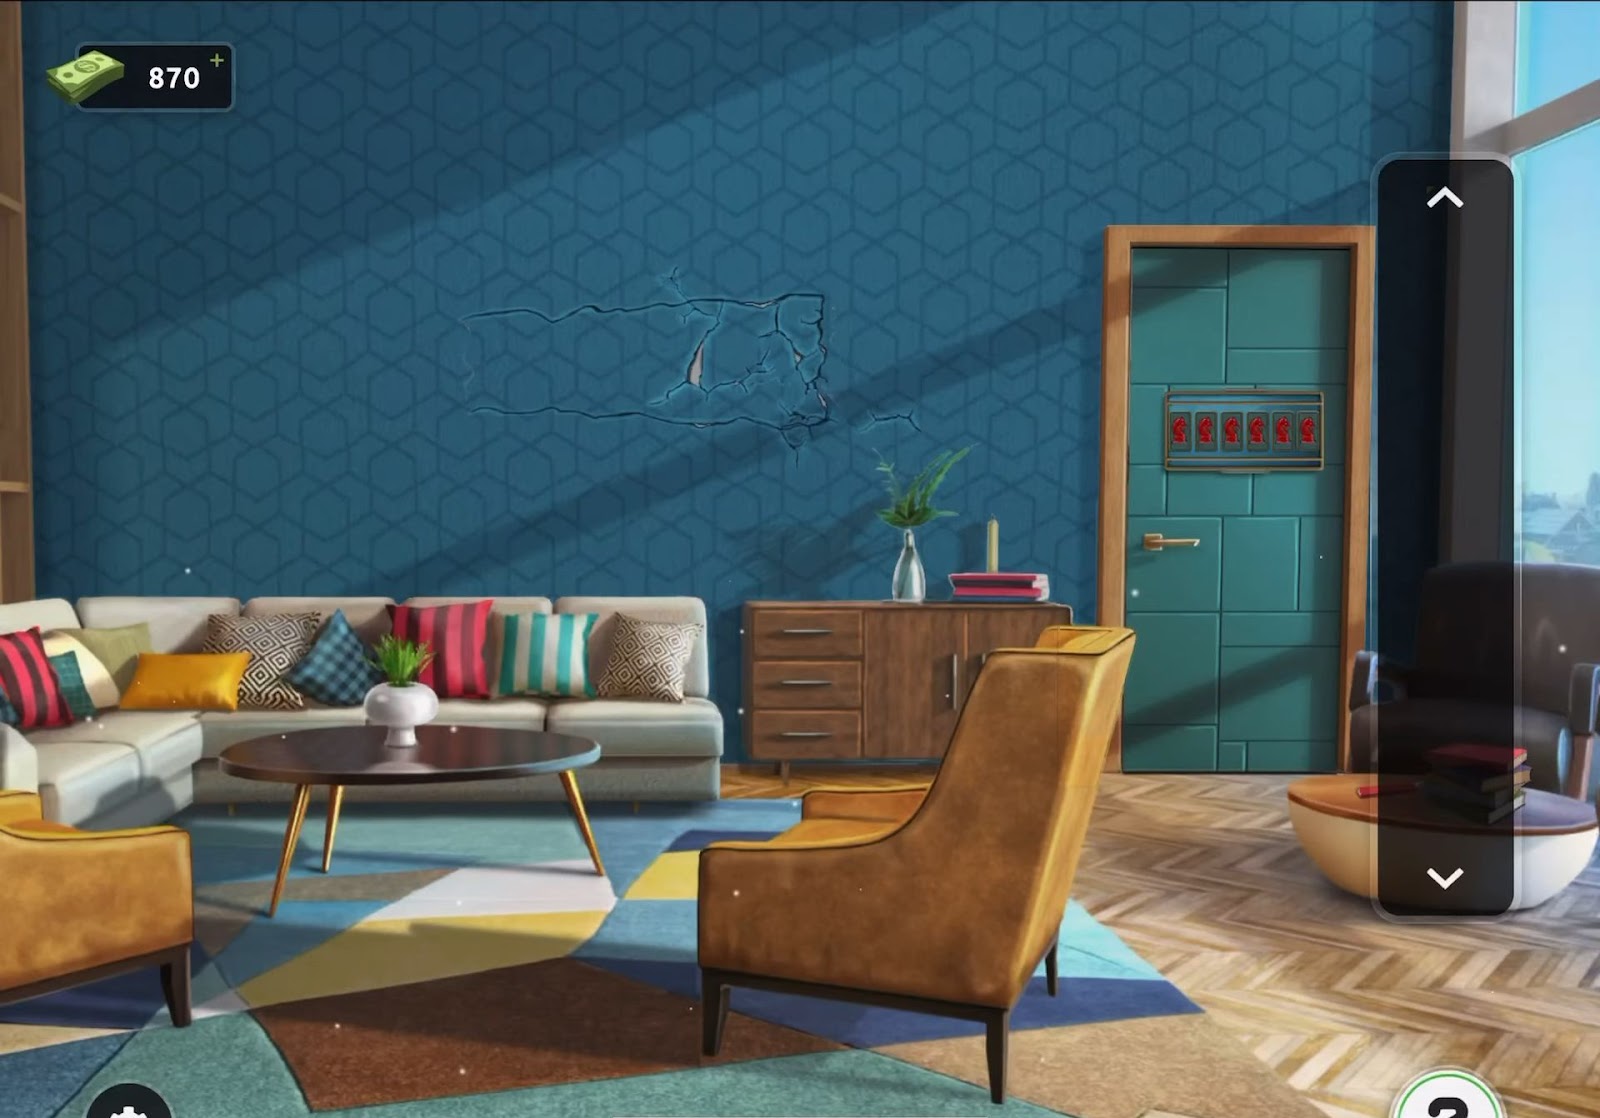
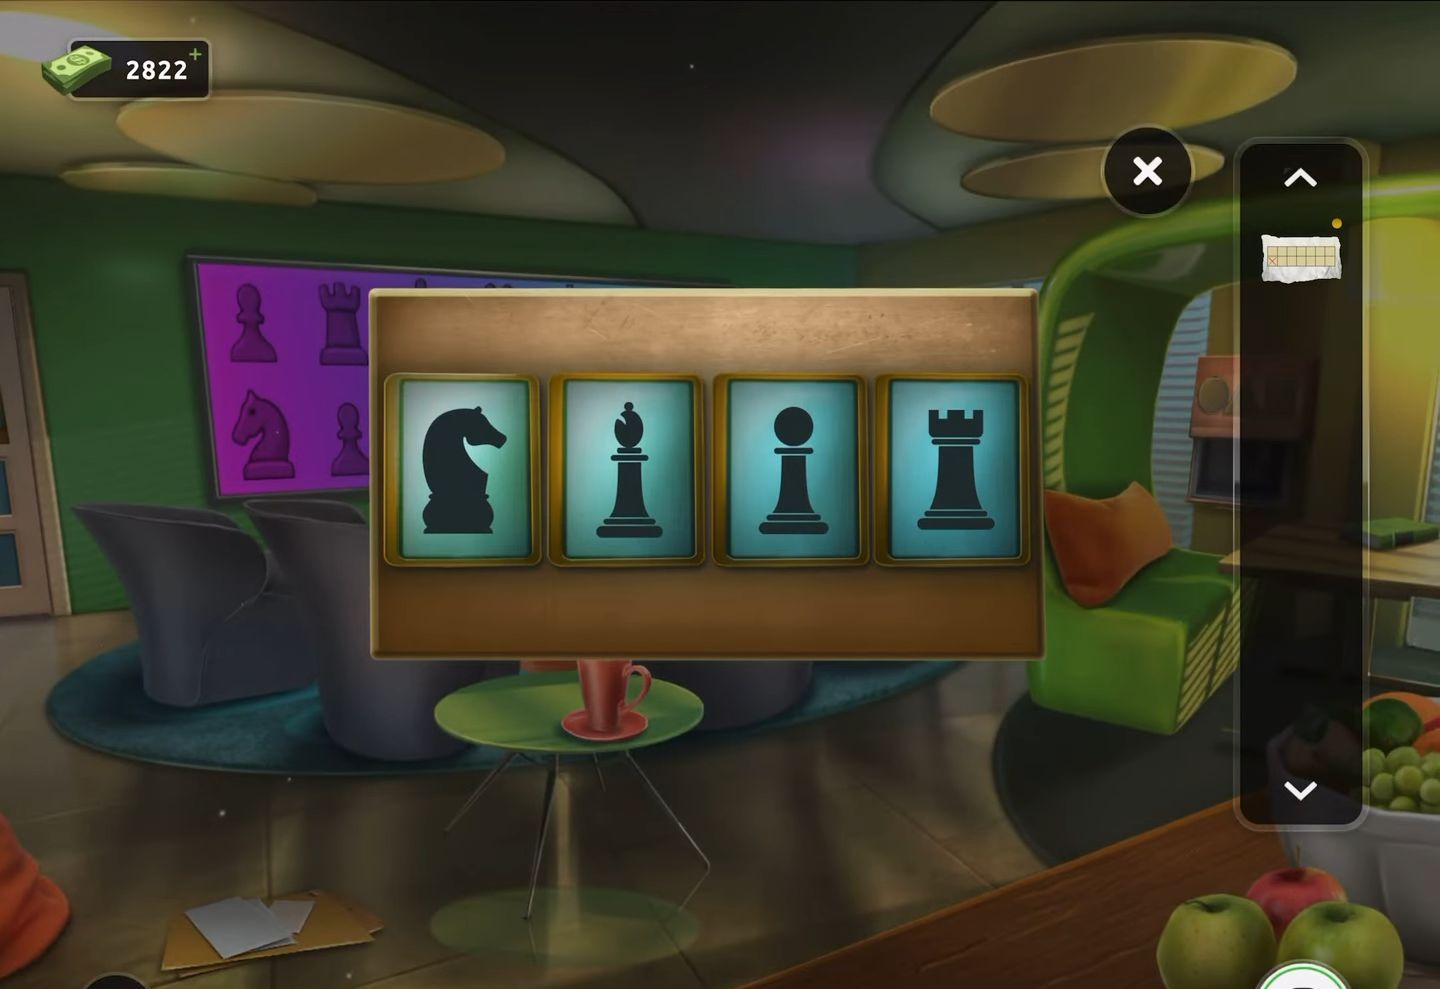
- Start by finding a paint scraper on a small round table by removing the books.
- Now employ this paint scraper on the loose paper on the wall to get a clue.
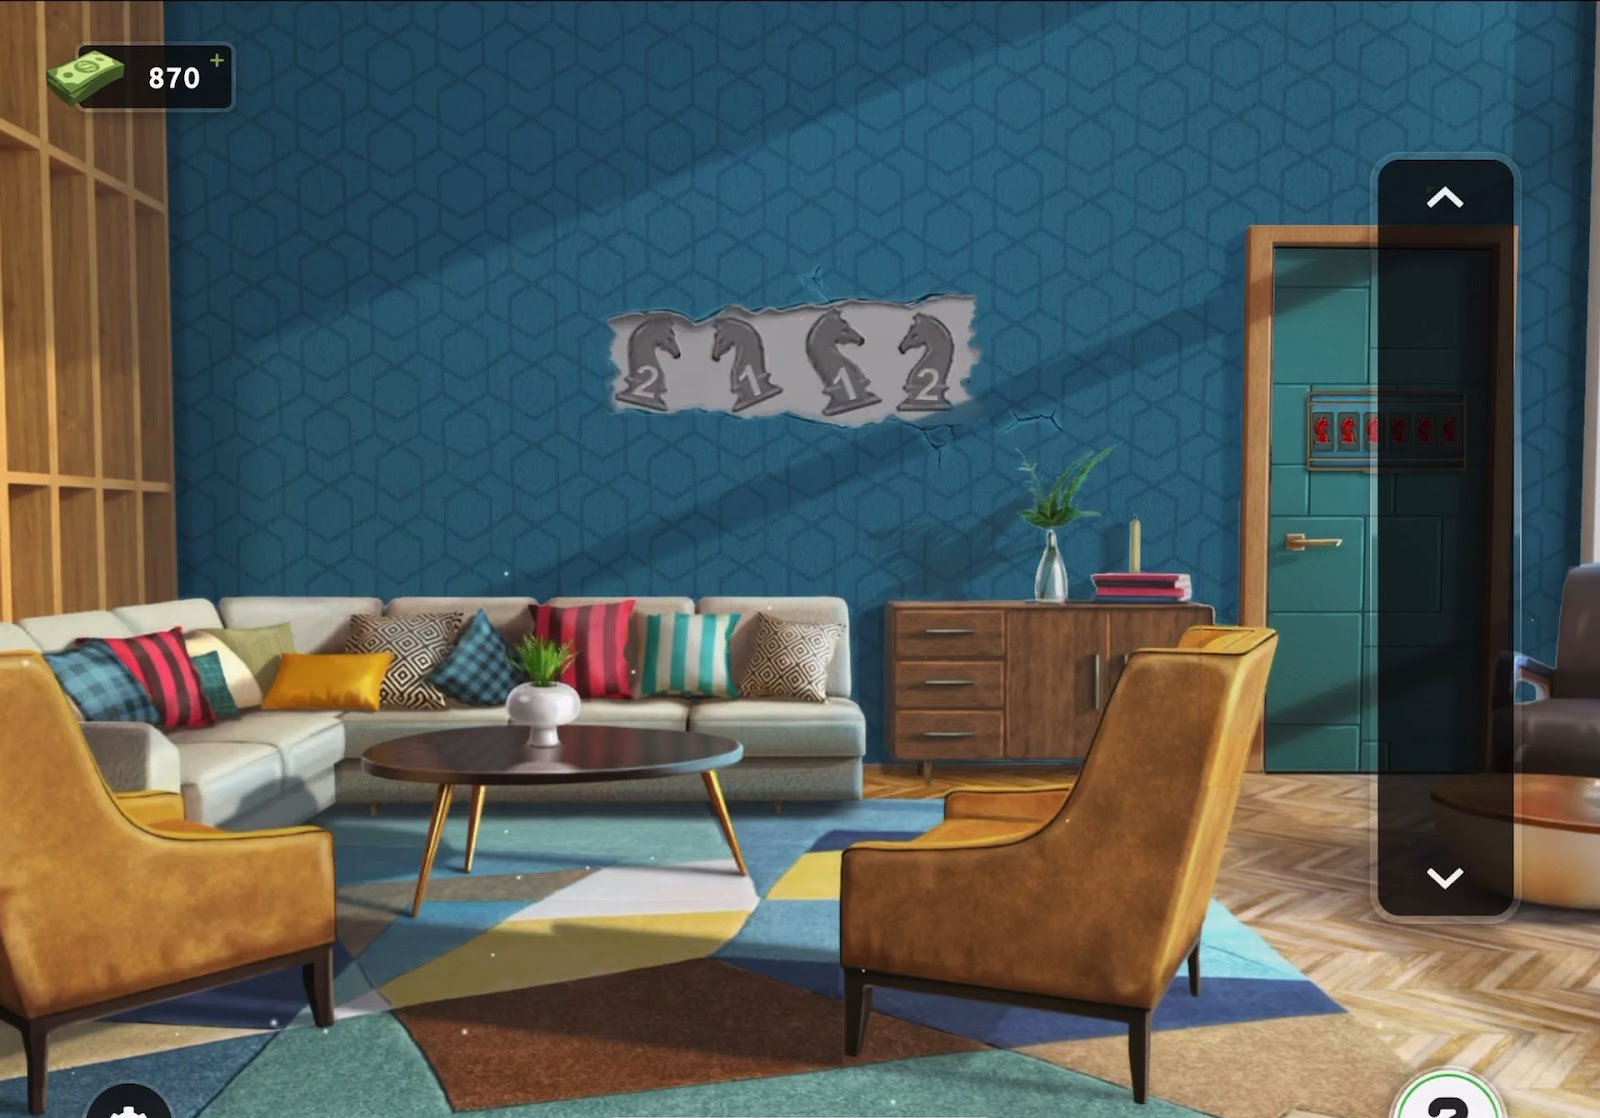
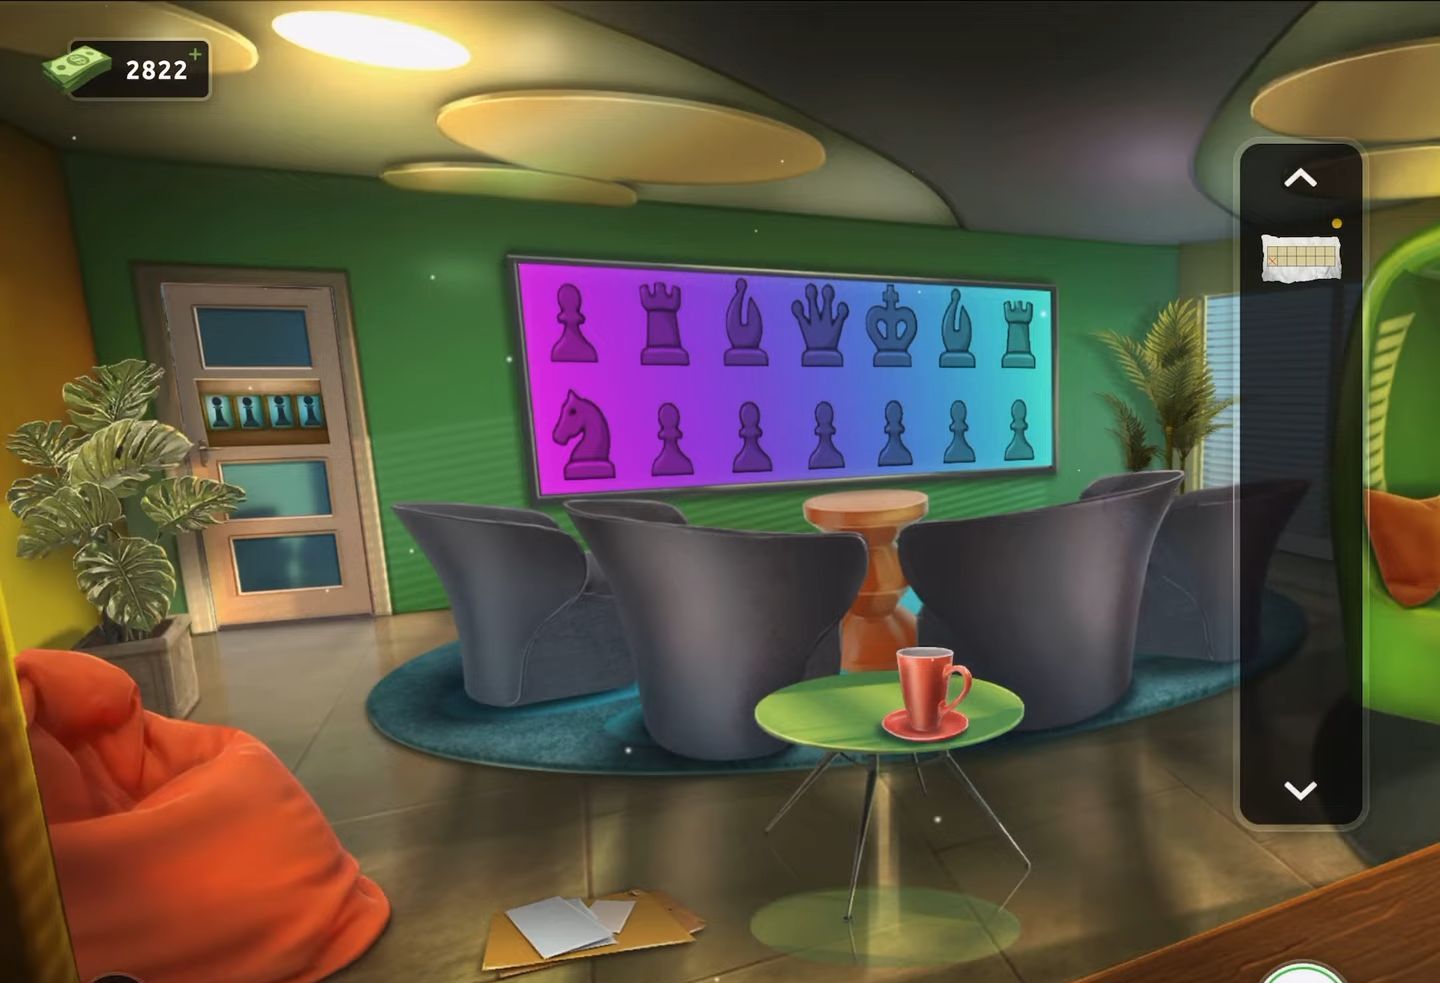
- Next, press the door to view 6 knights’ chess pieces. You have to arrange them as per the clue: such as set 1 and 2 to the right, 3 to the left, 4 to the right, and 5 and 6 to the left.
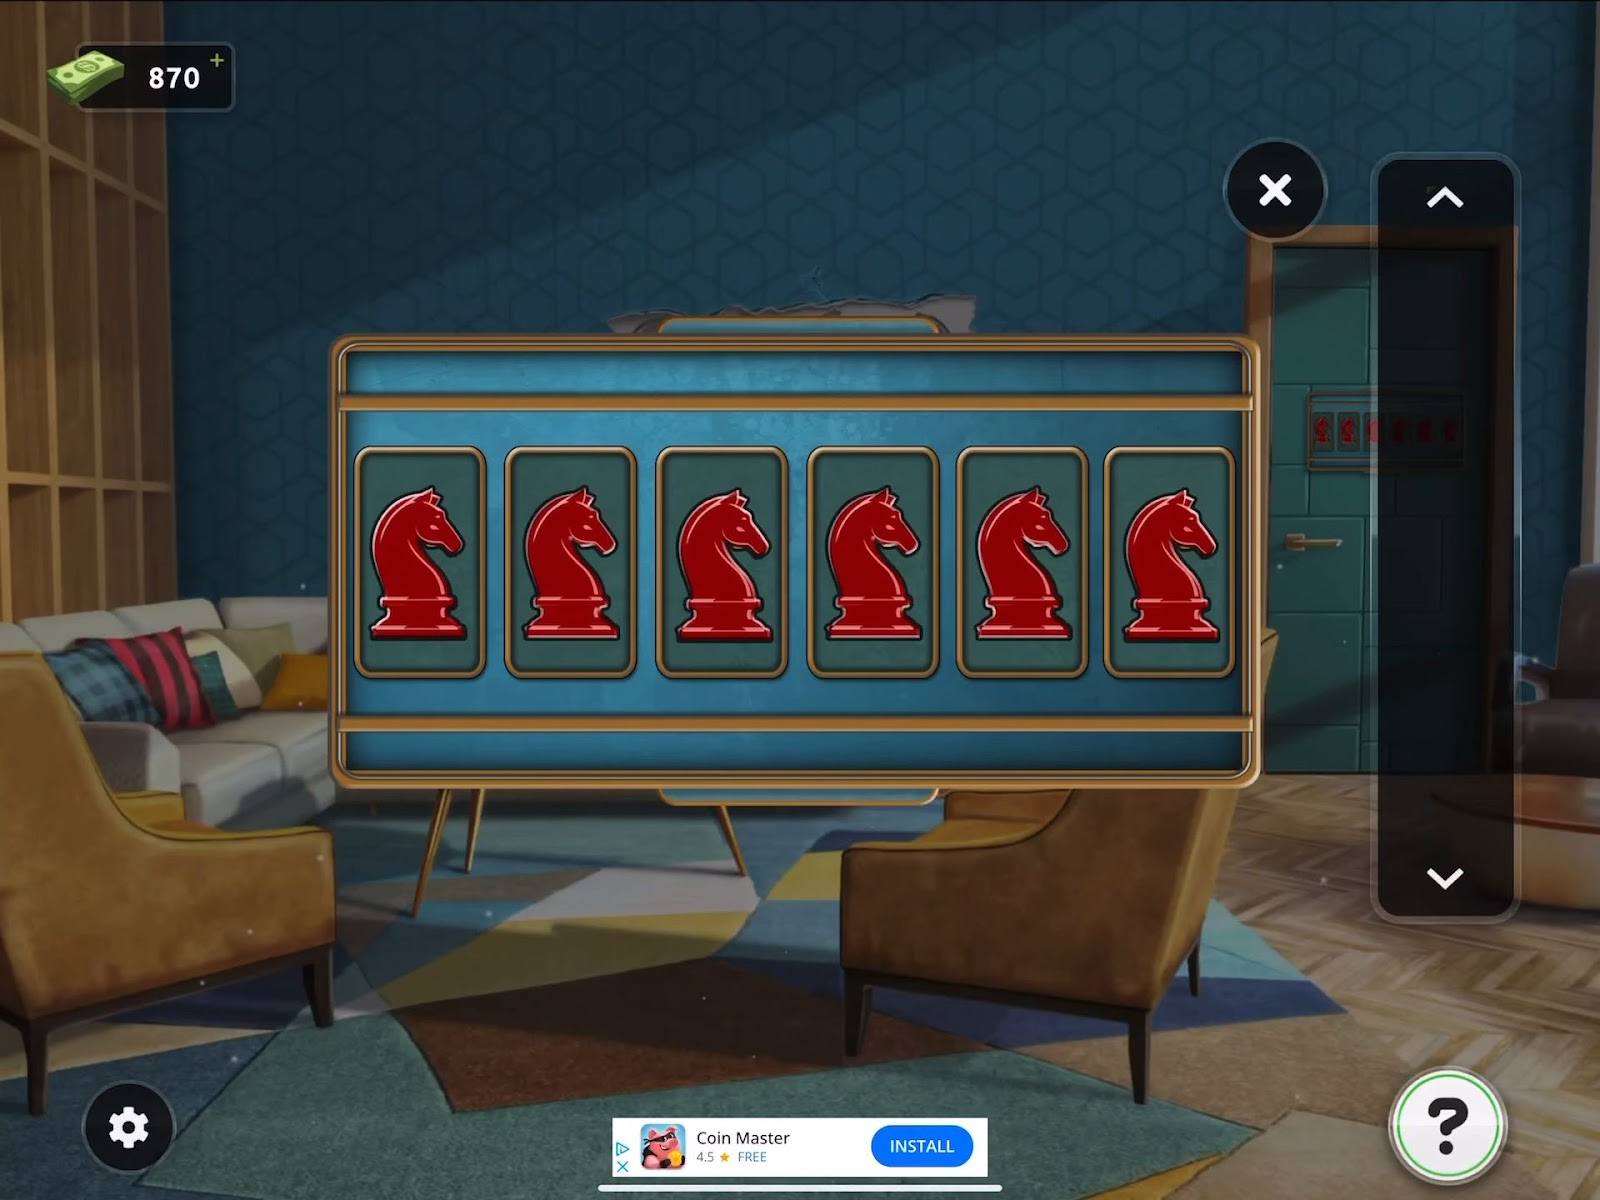
- Once the pieces are adjusted properly, then you can exit the room easily.
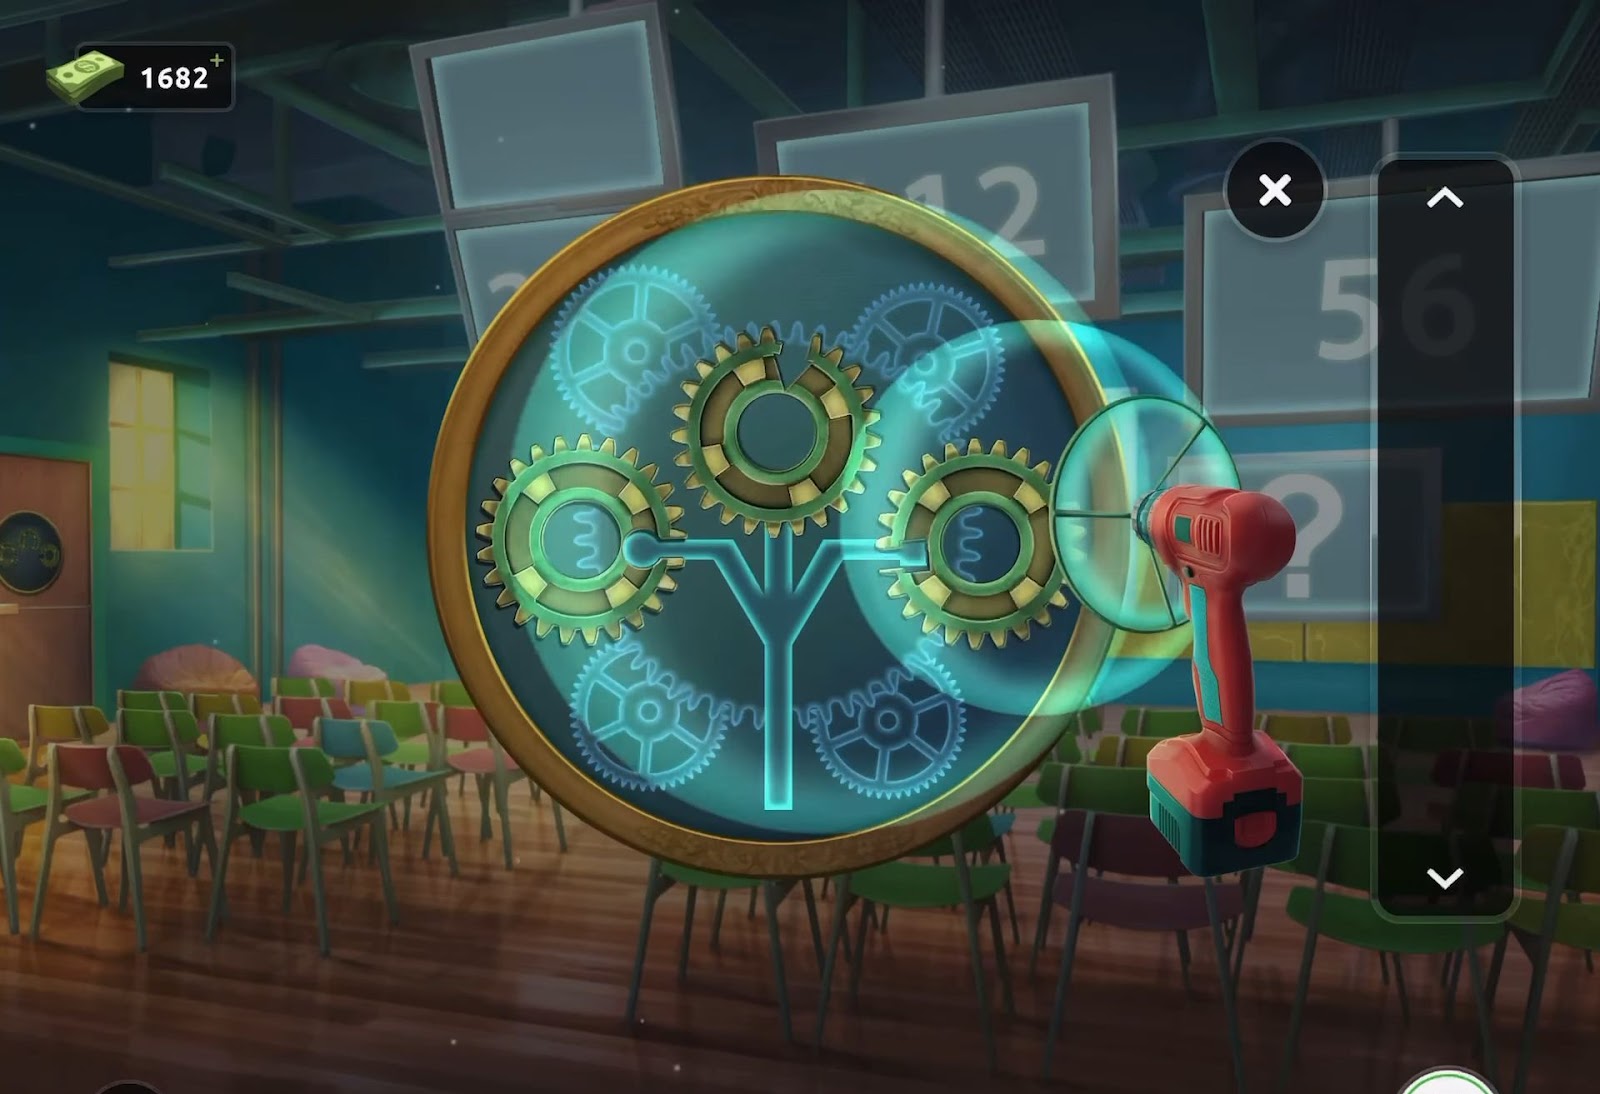
Level 12:
To complete level 12, follow the instructions below:
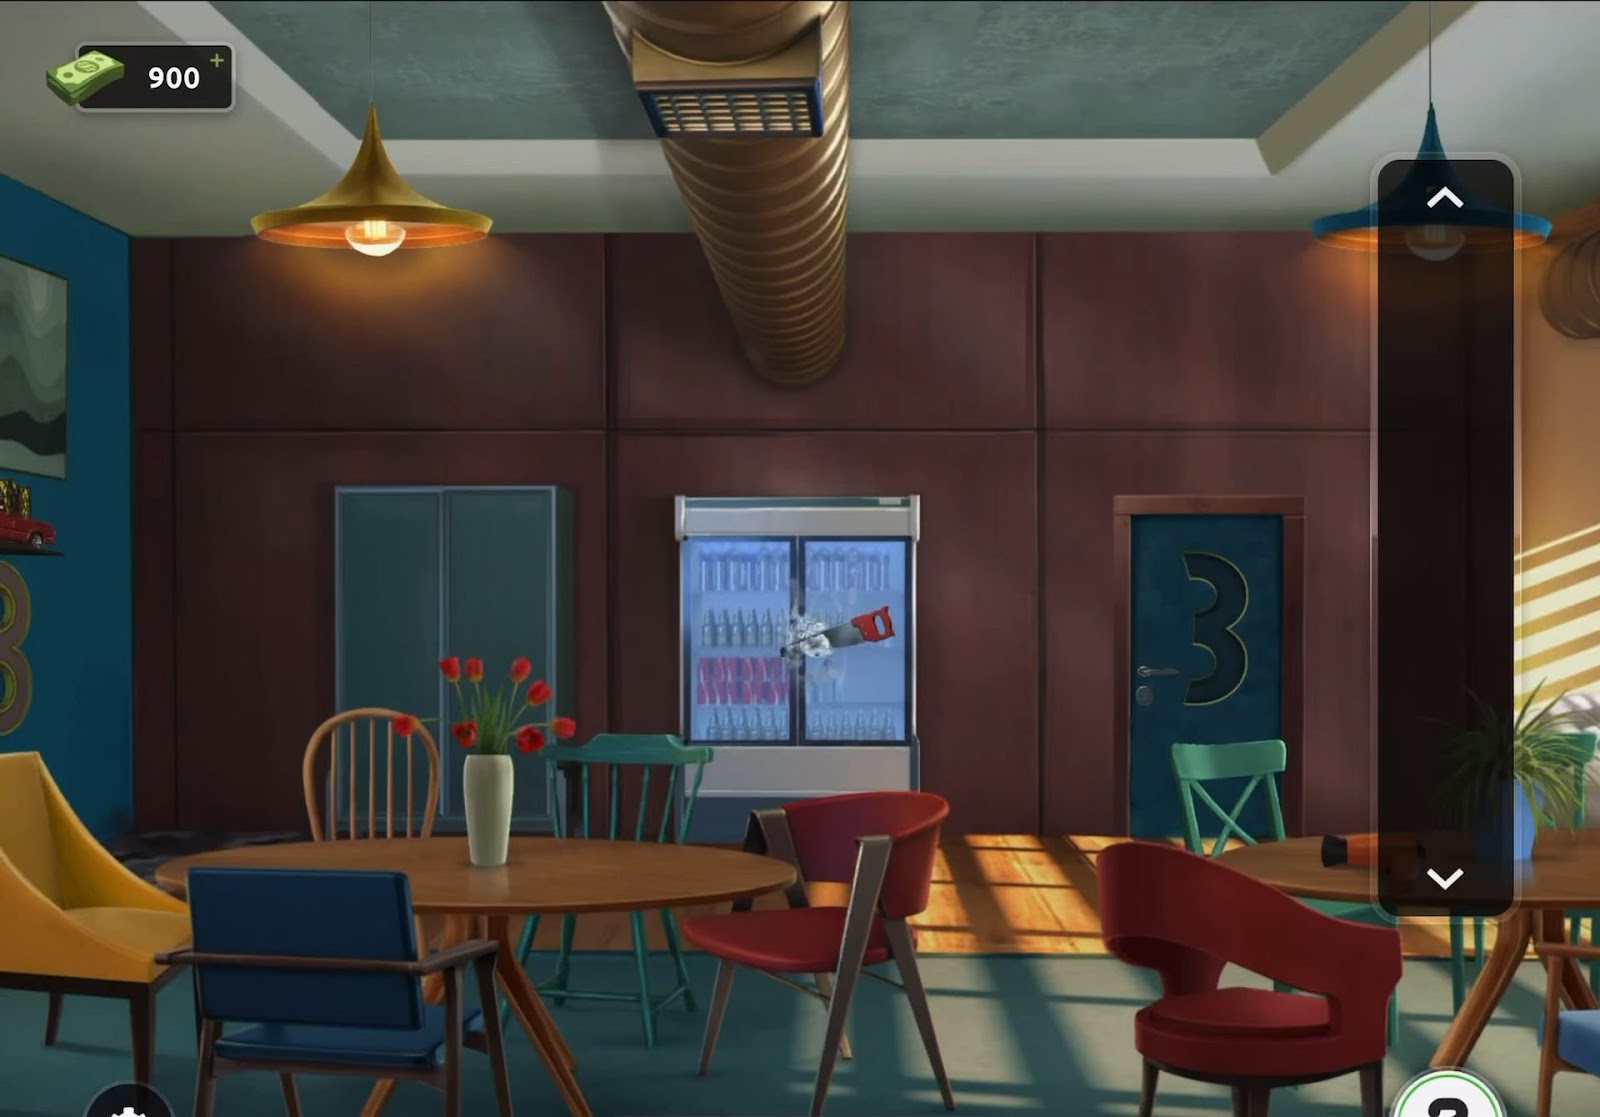
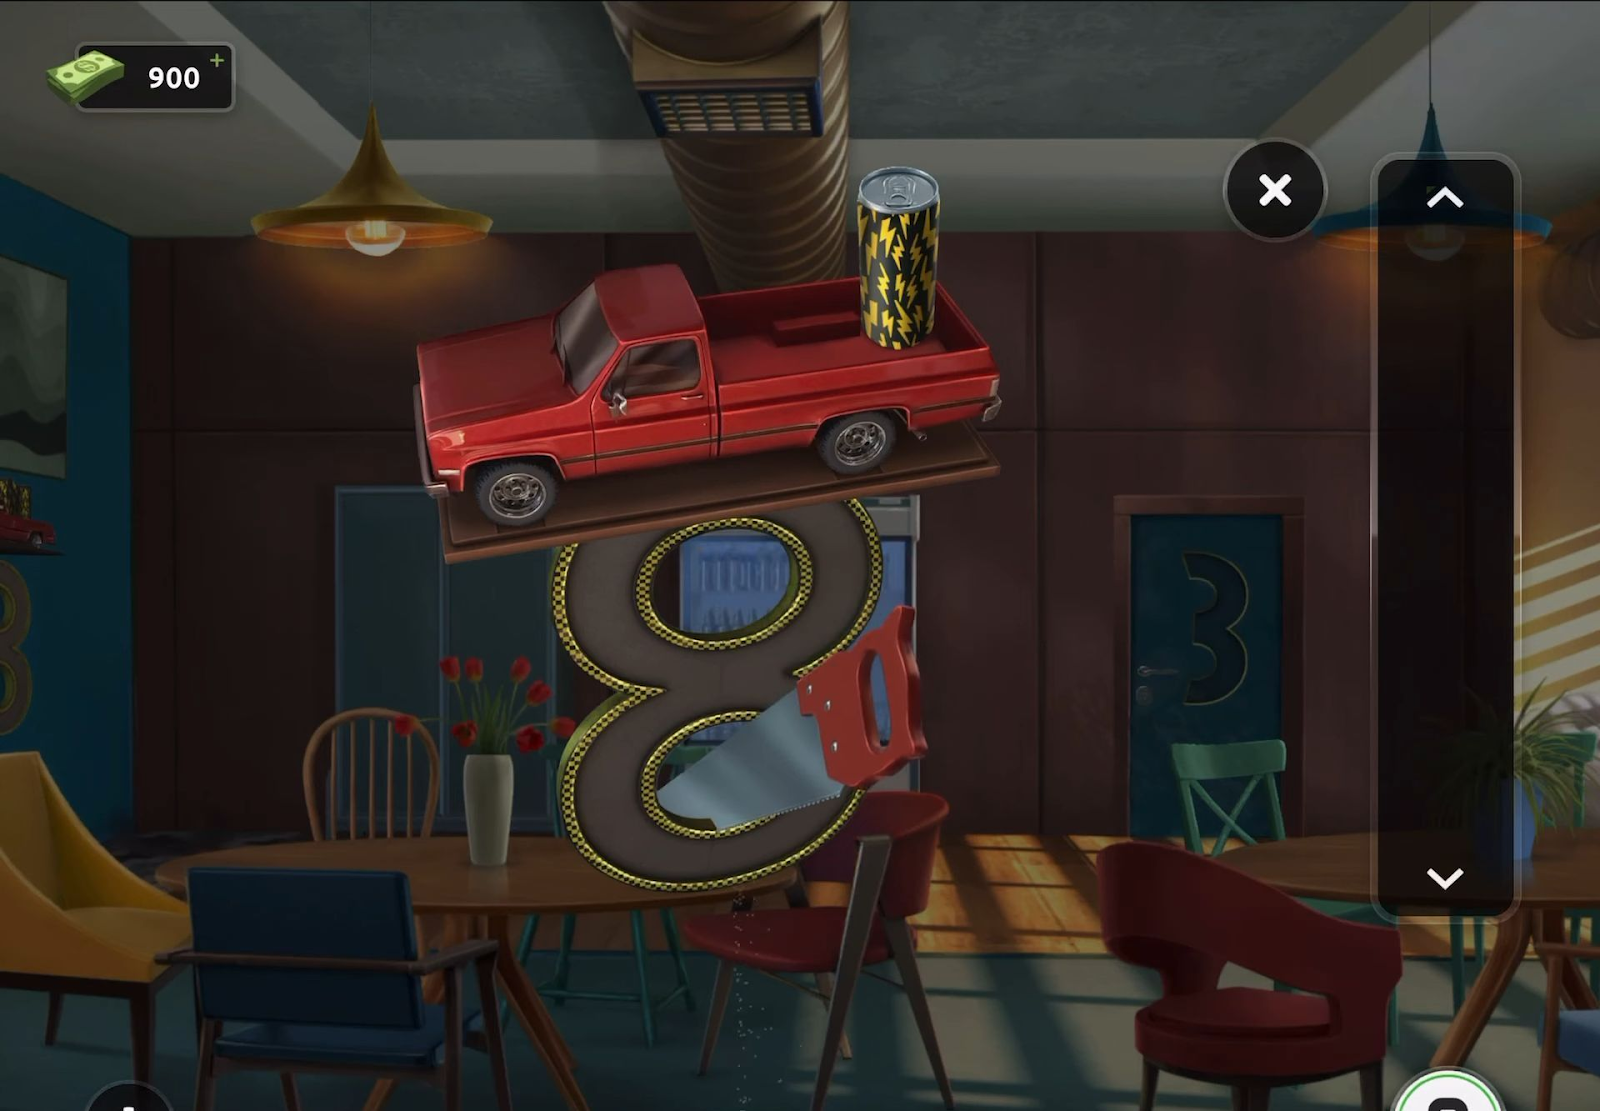
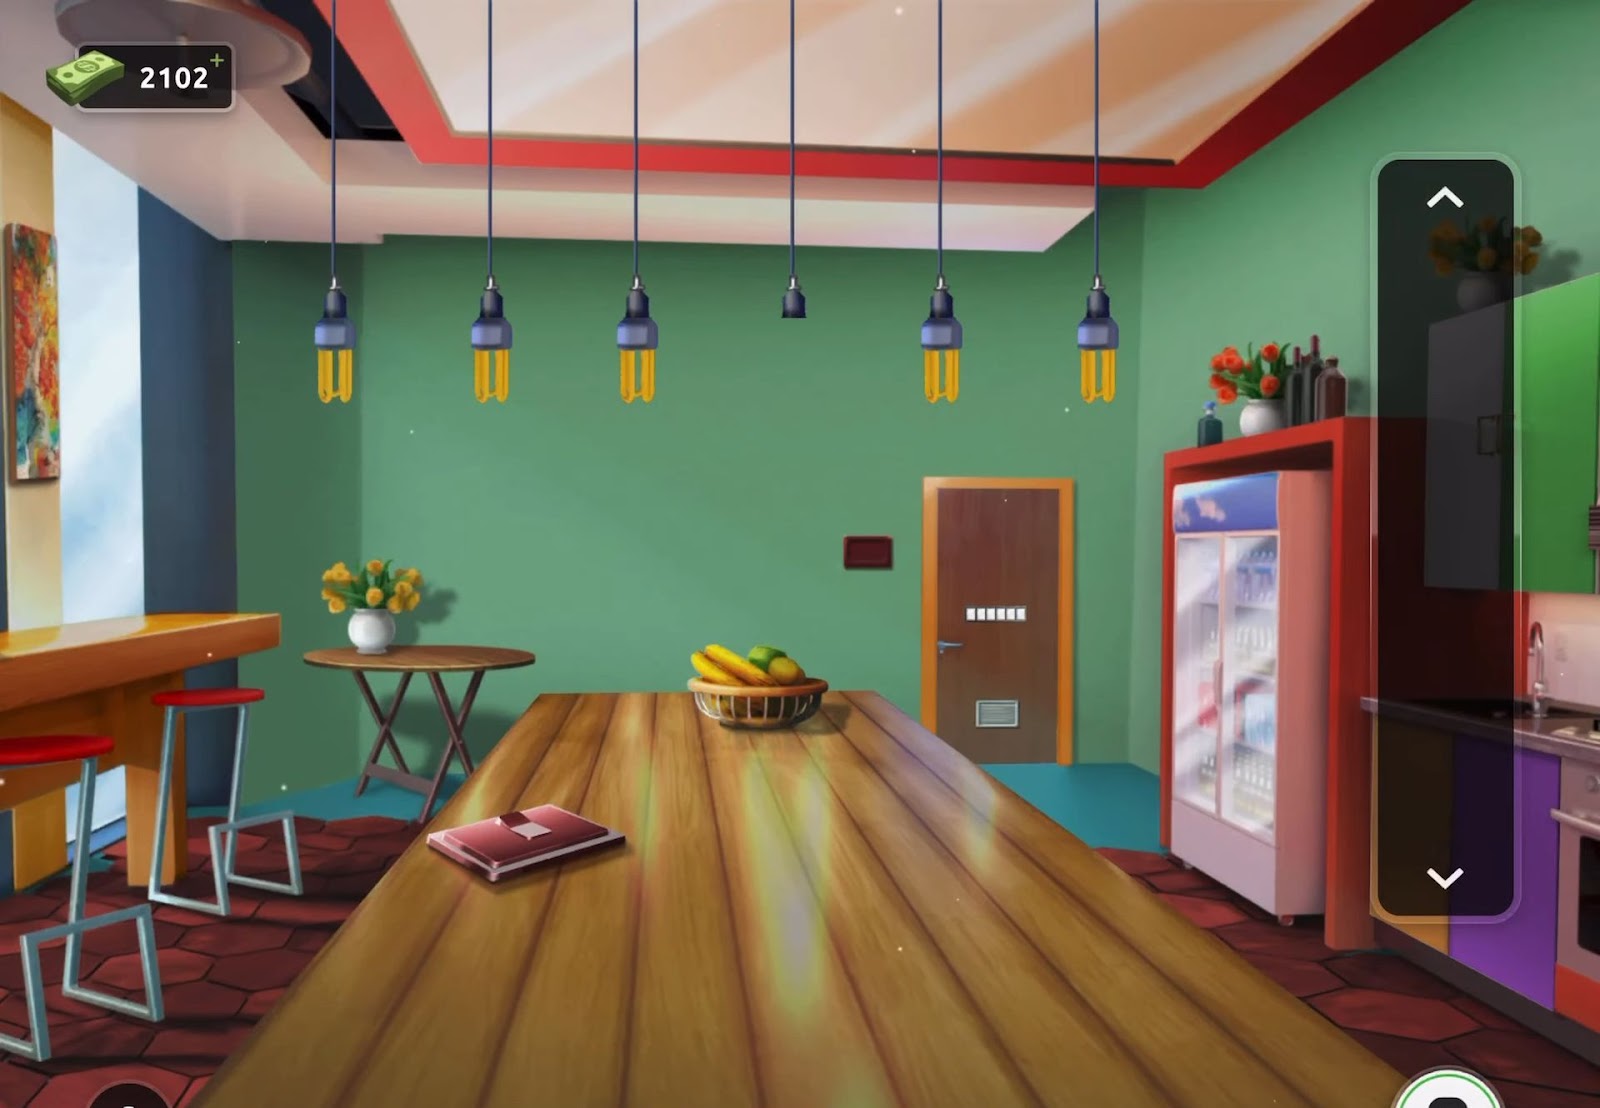
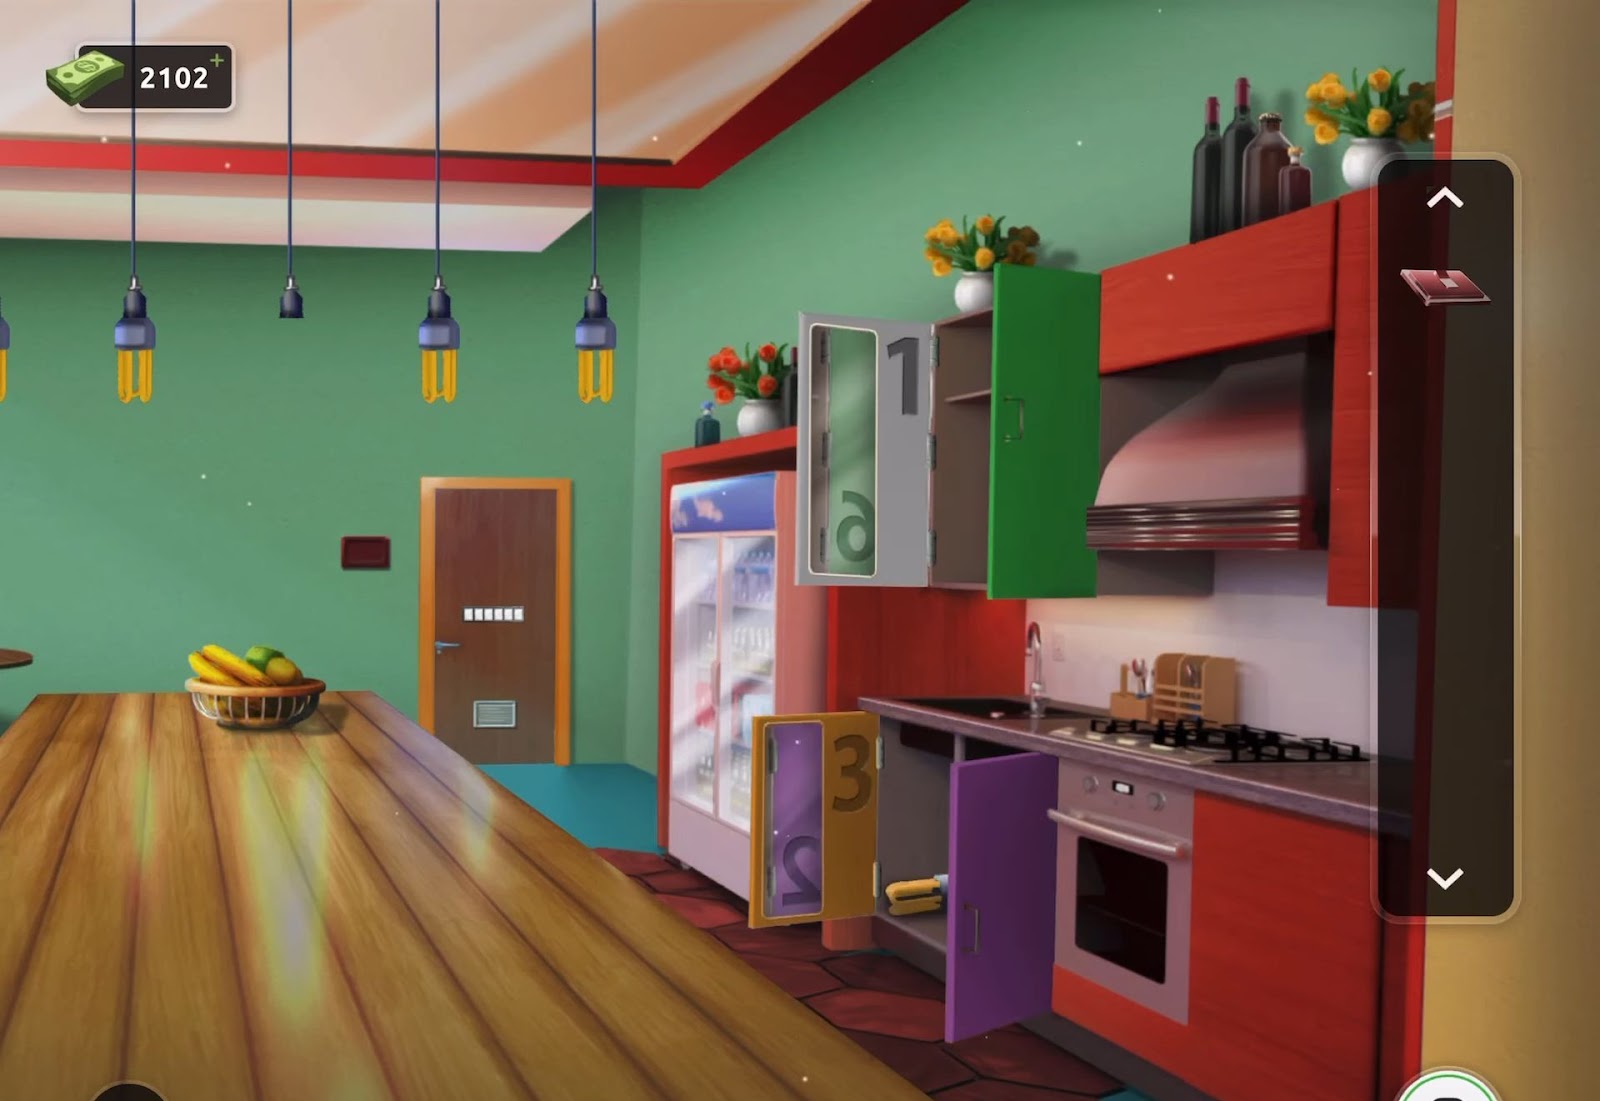
- Firstly, observe the compact shelf placed on the left wall, situated above the number 8.
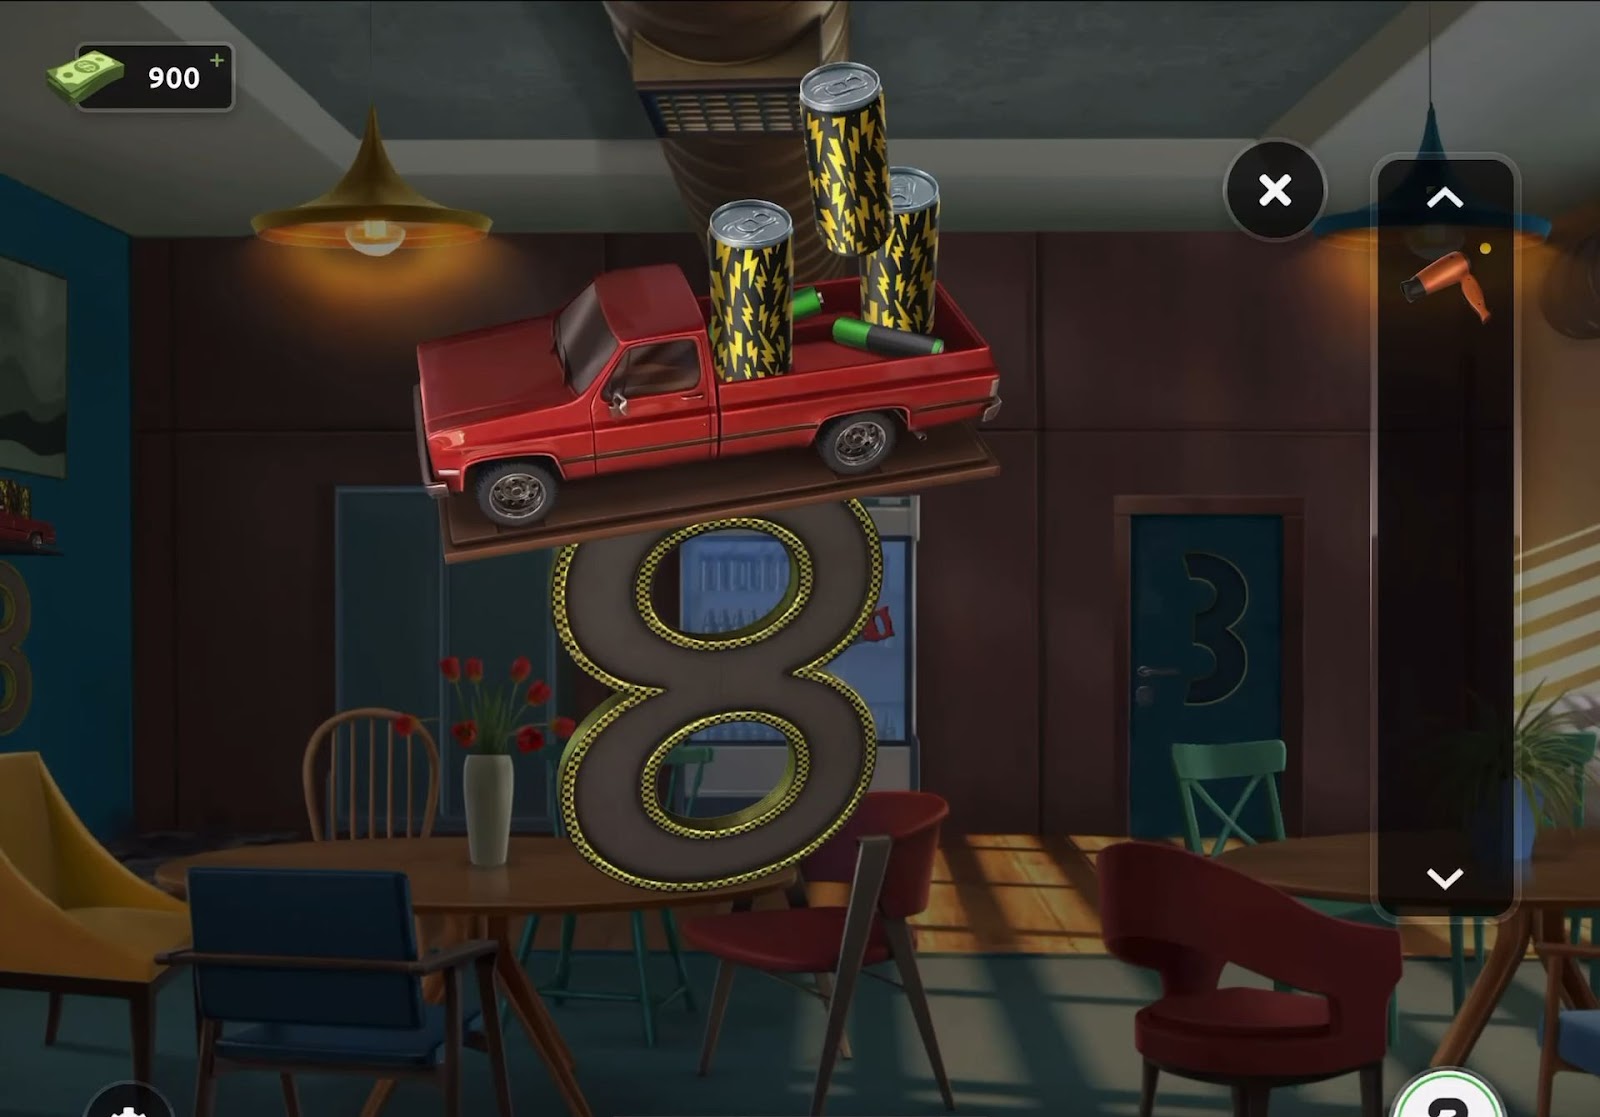
- Next, gather hidden batteries stored within beverage cans and retrieve a hairdryer found on a nearby table.
- Then apply the batteries to power the hairdryer and release a saw that’s stuck to the cooler.
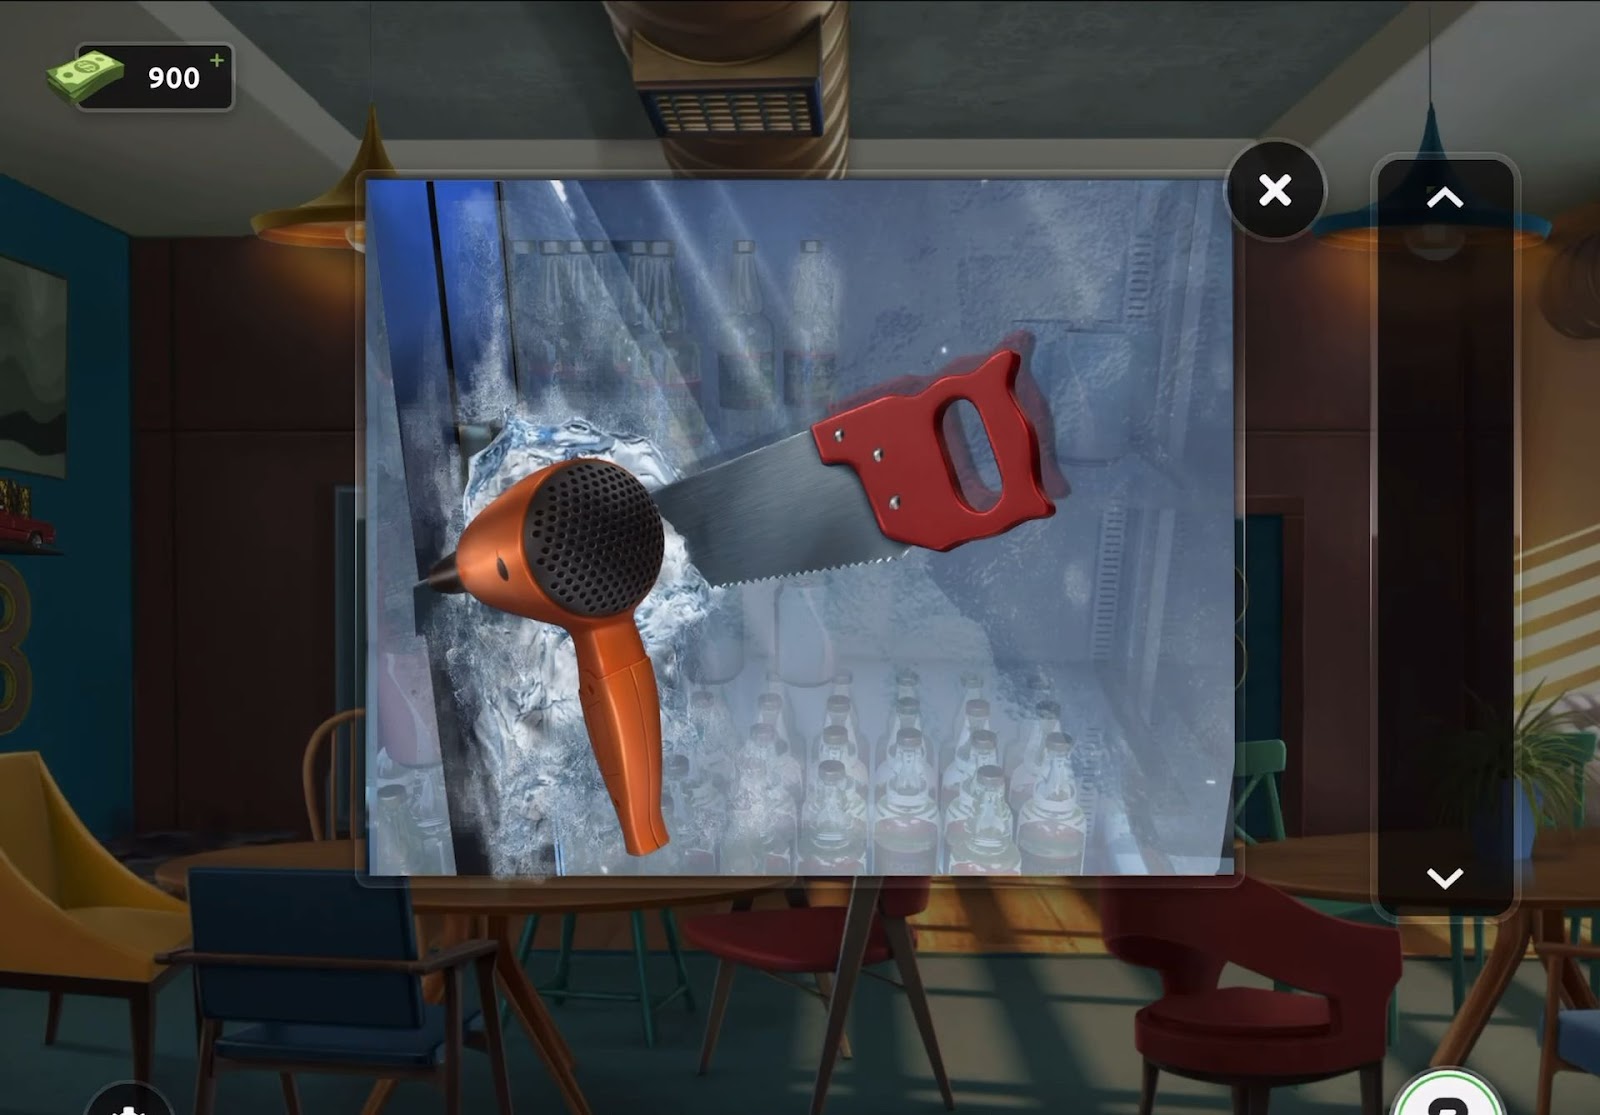
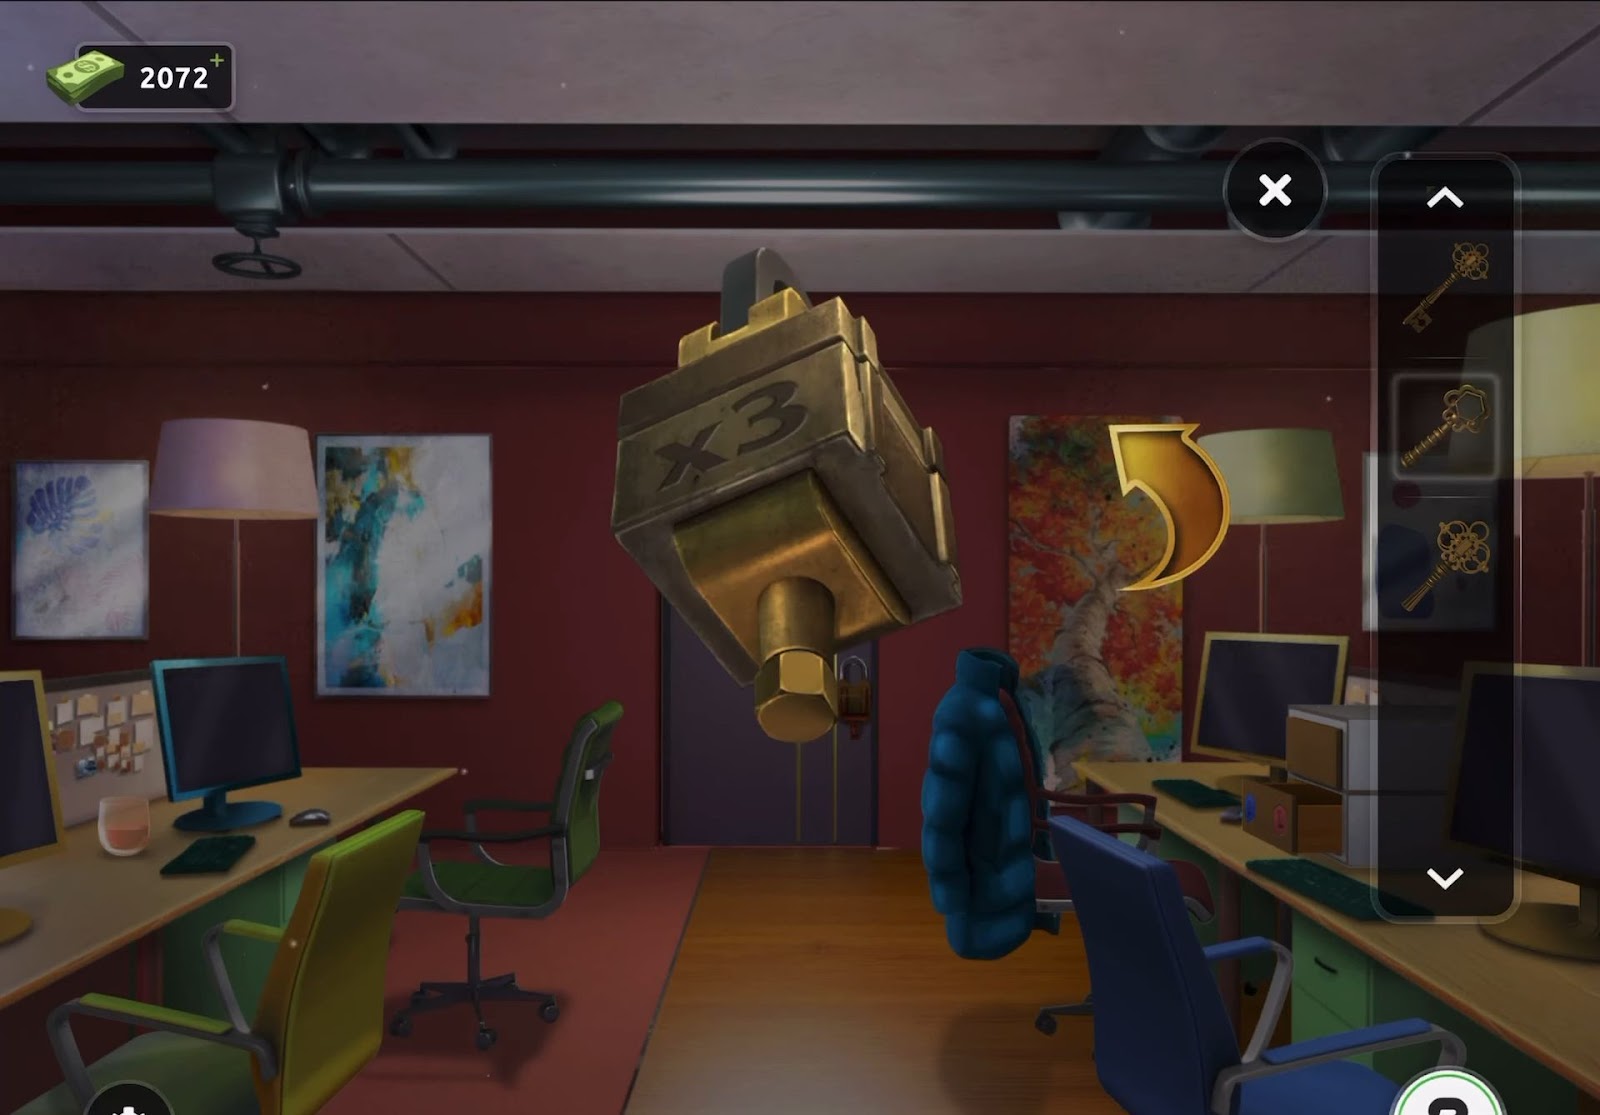
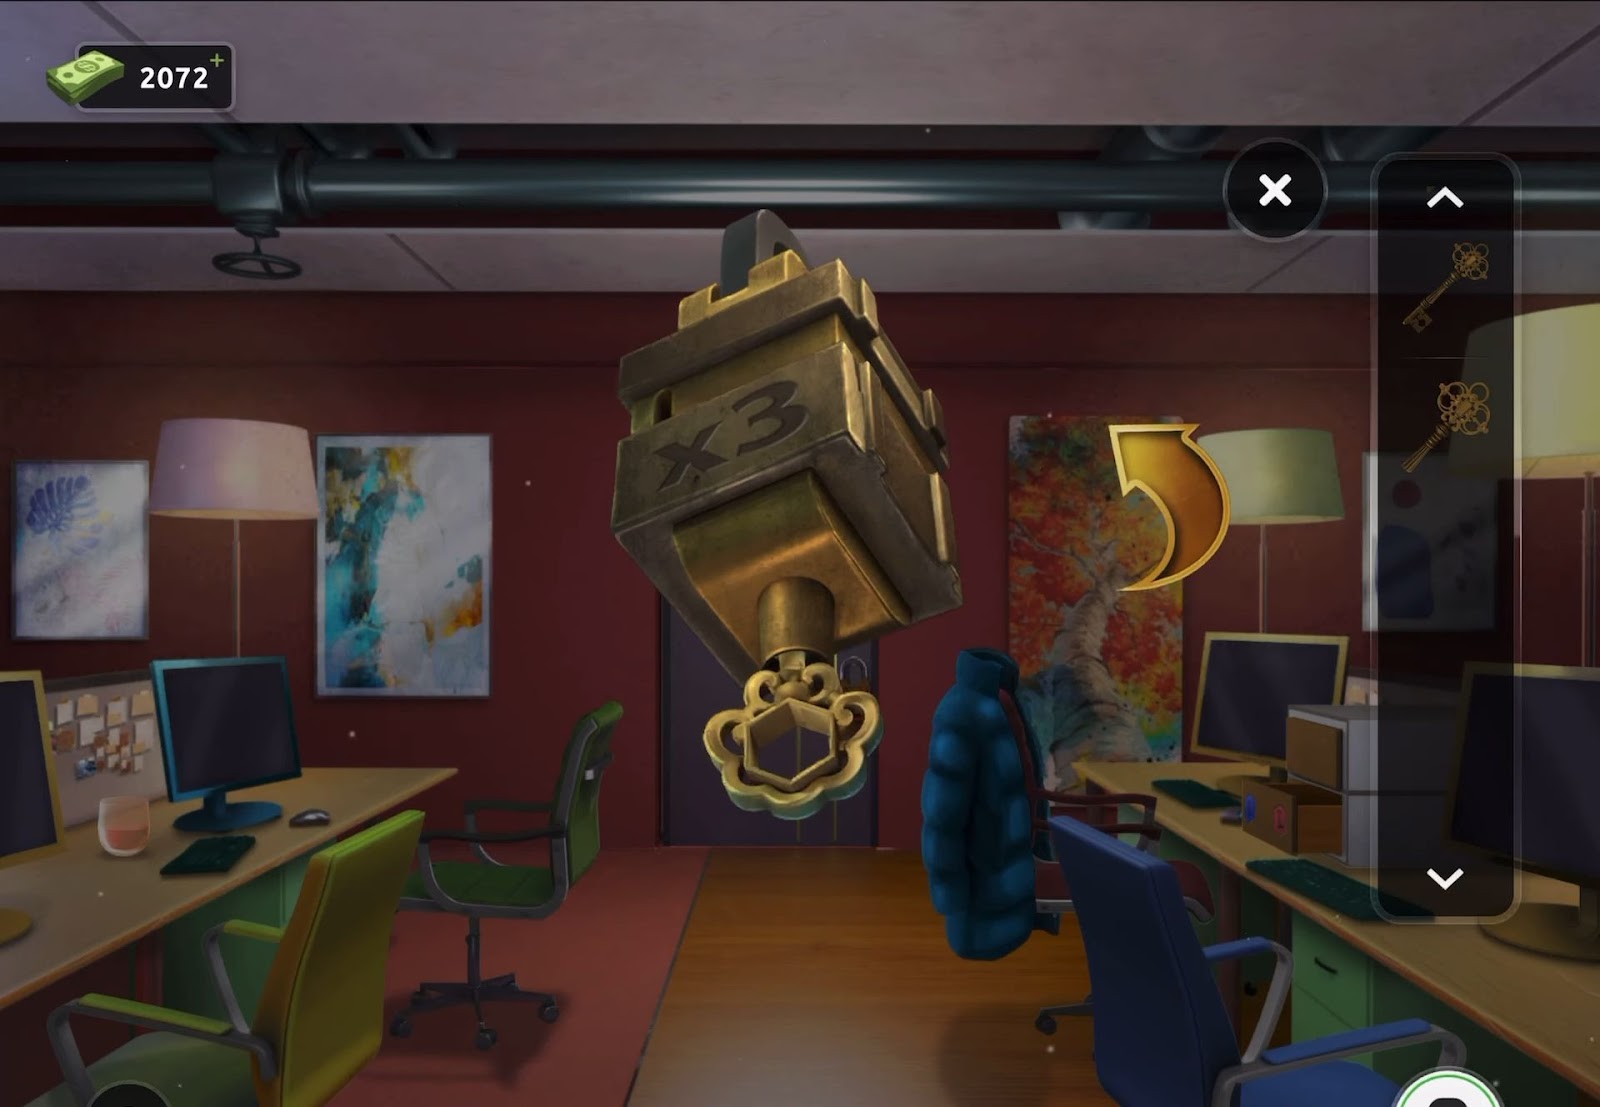
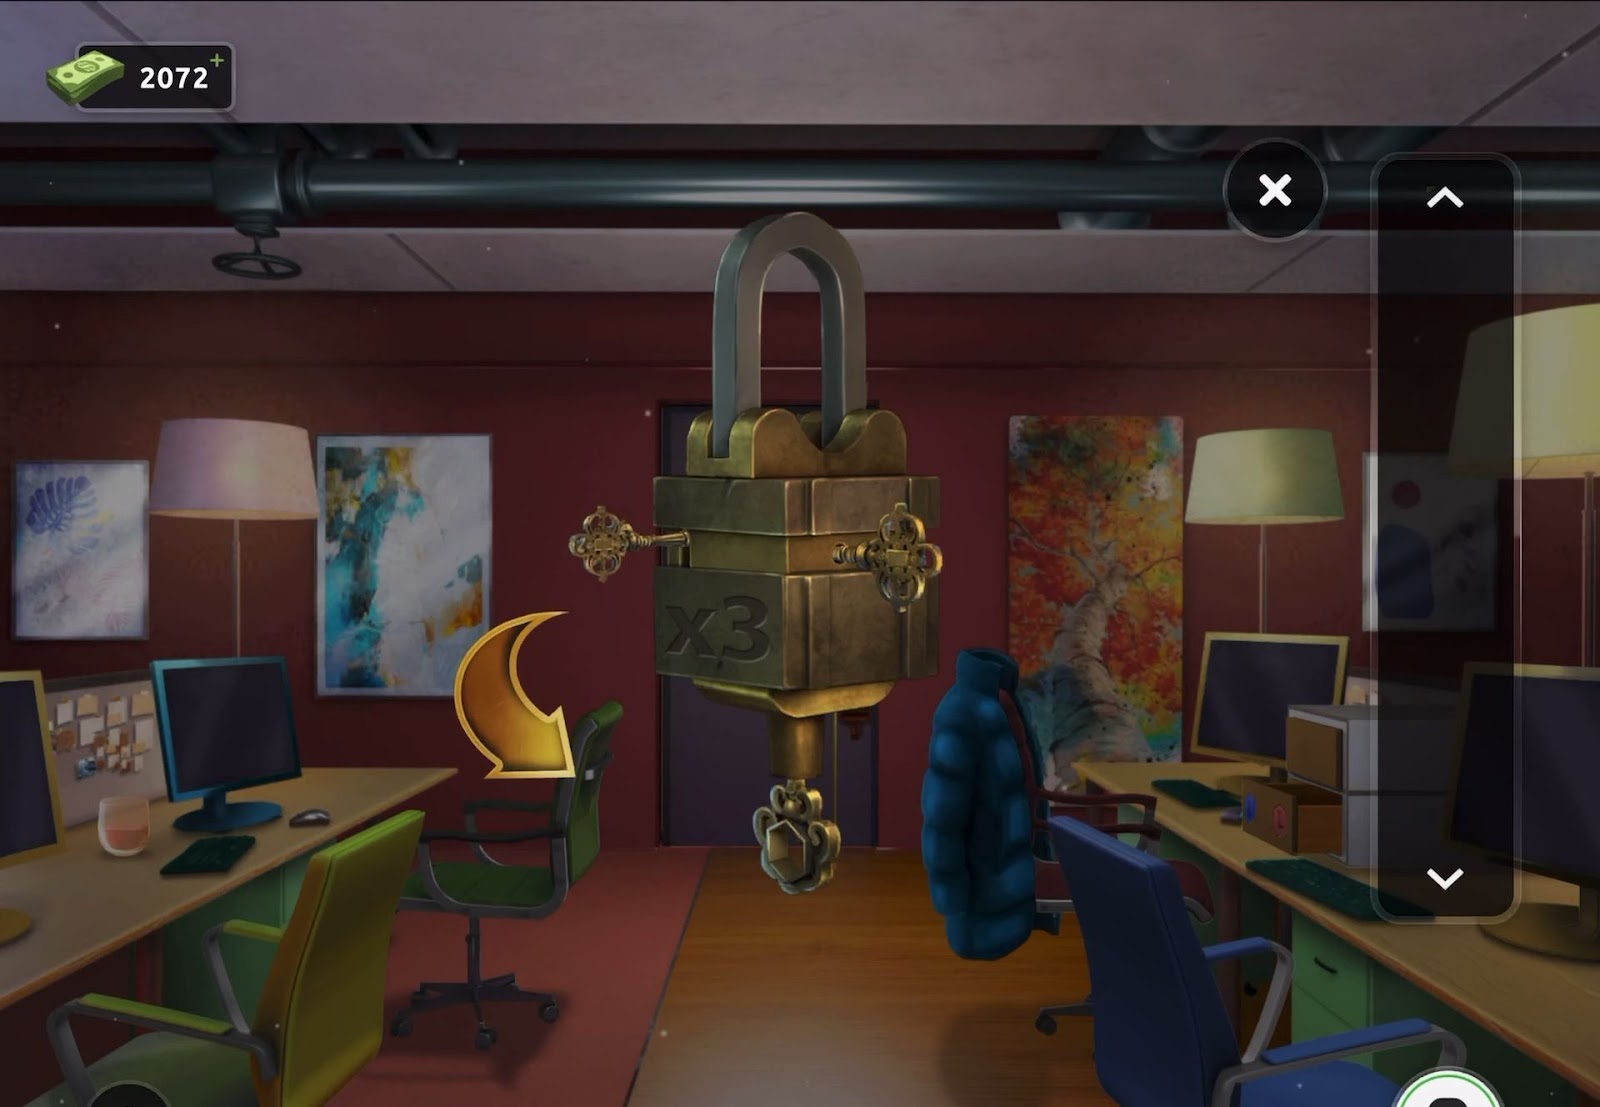
- Subsequently, collect the saw once it’s freed.
- After that utilize the saw to slice through the number 8, resulting in the shape resembling the number 3.
- Finally, place the number 3 shape into the designated slot on the door, allowing you to leave the room.
Level 13:
To complete level 13, follow the instructions below:
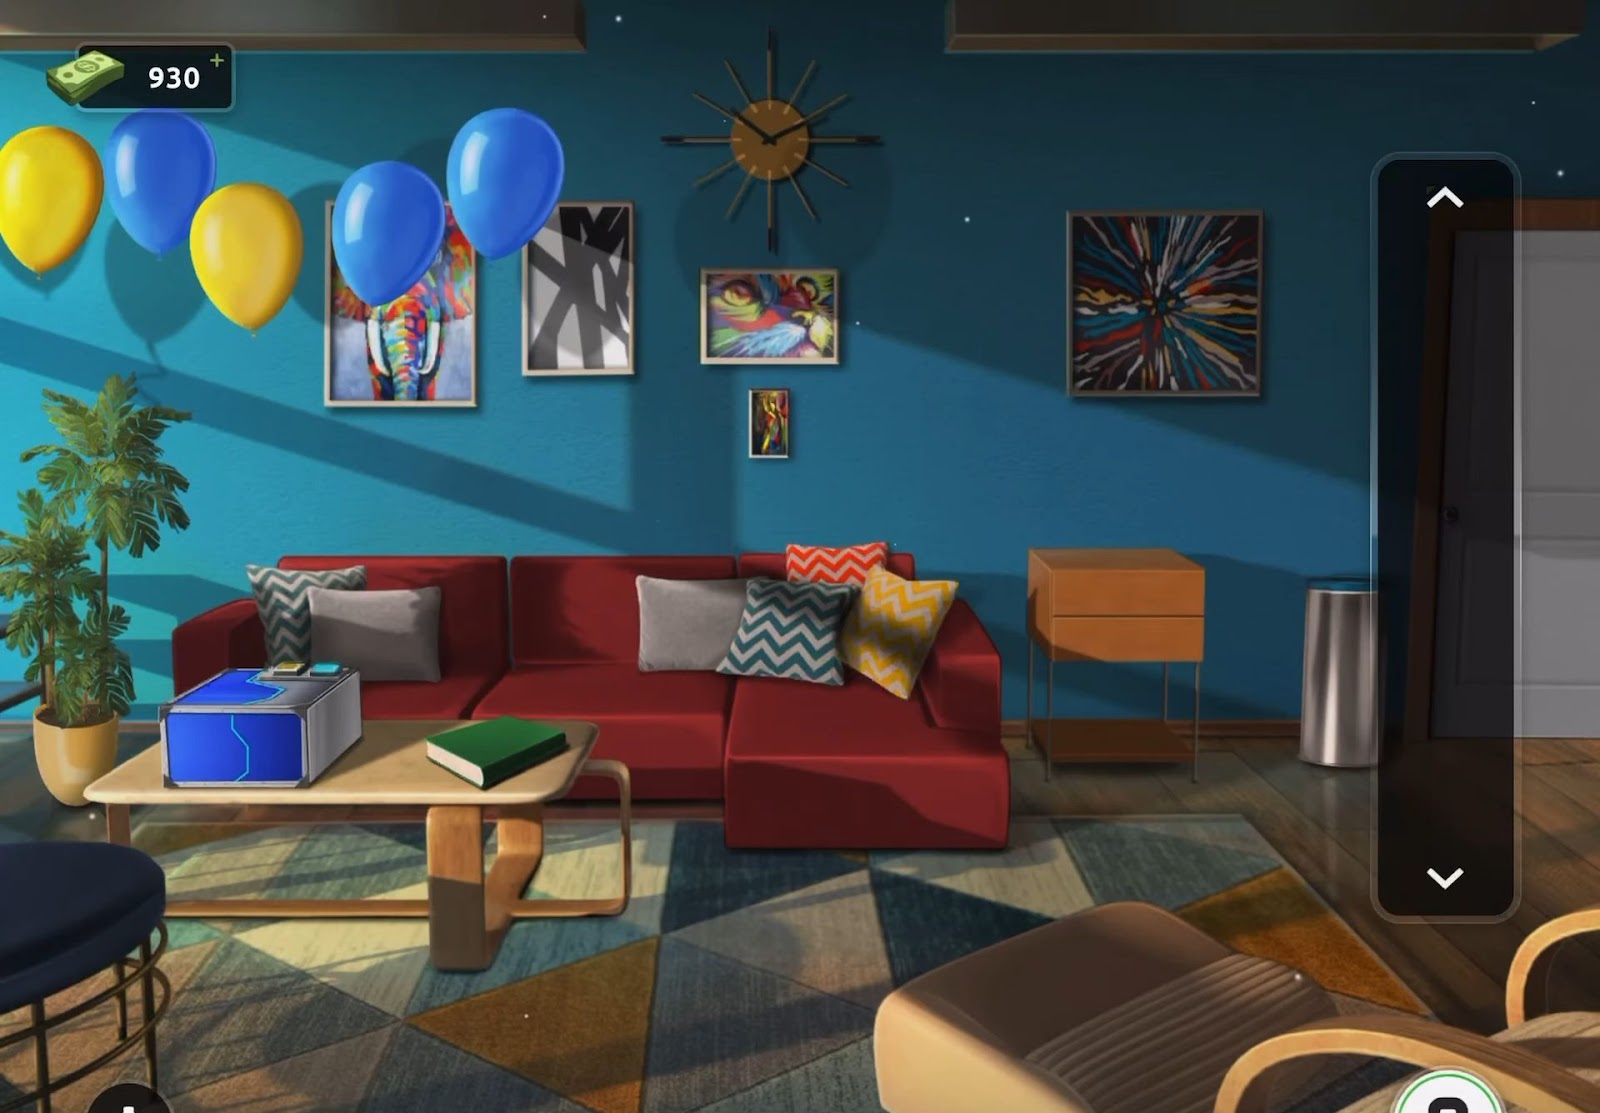
- Firstly, observe the arrangement of balloons positioned in the top left corner.
- Then, interact with the blue box placed on the table to reveal two buttons.
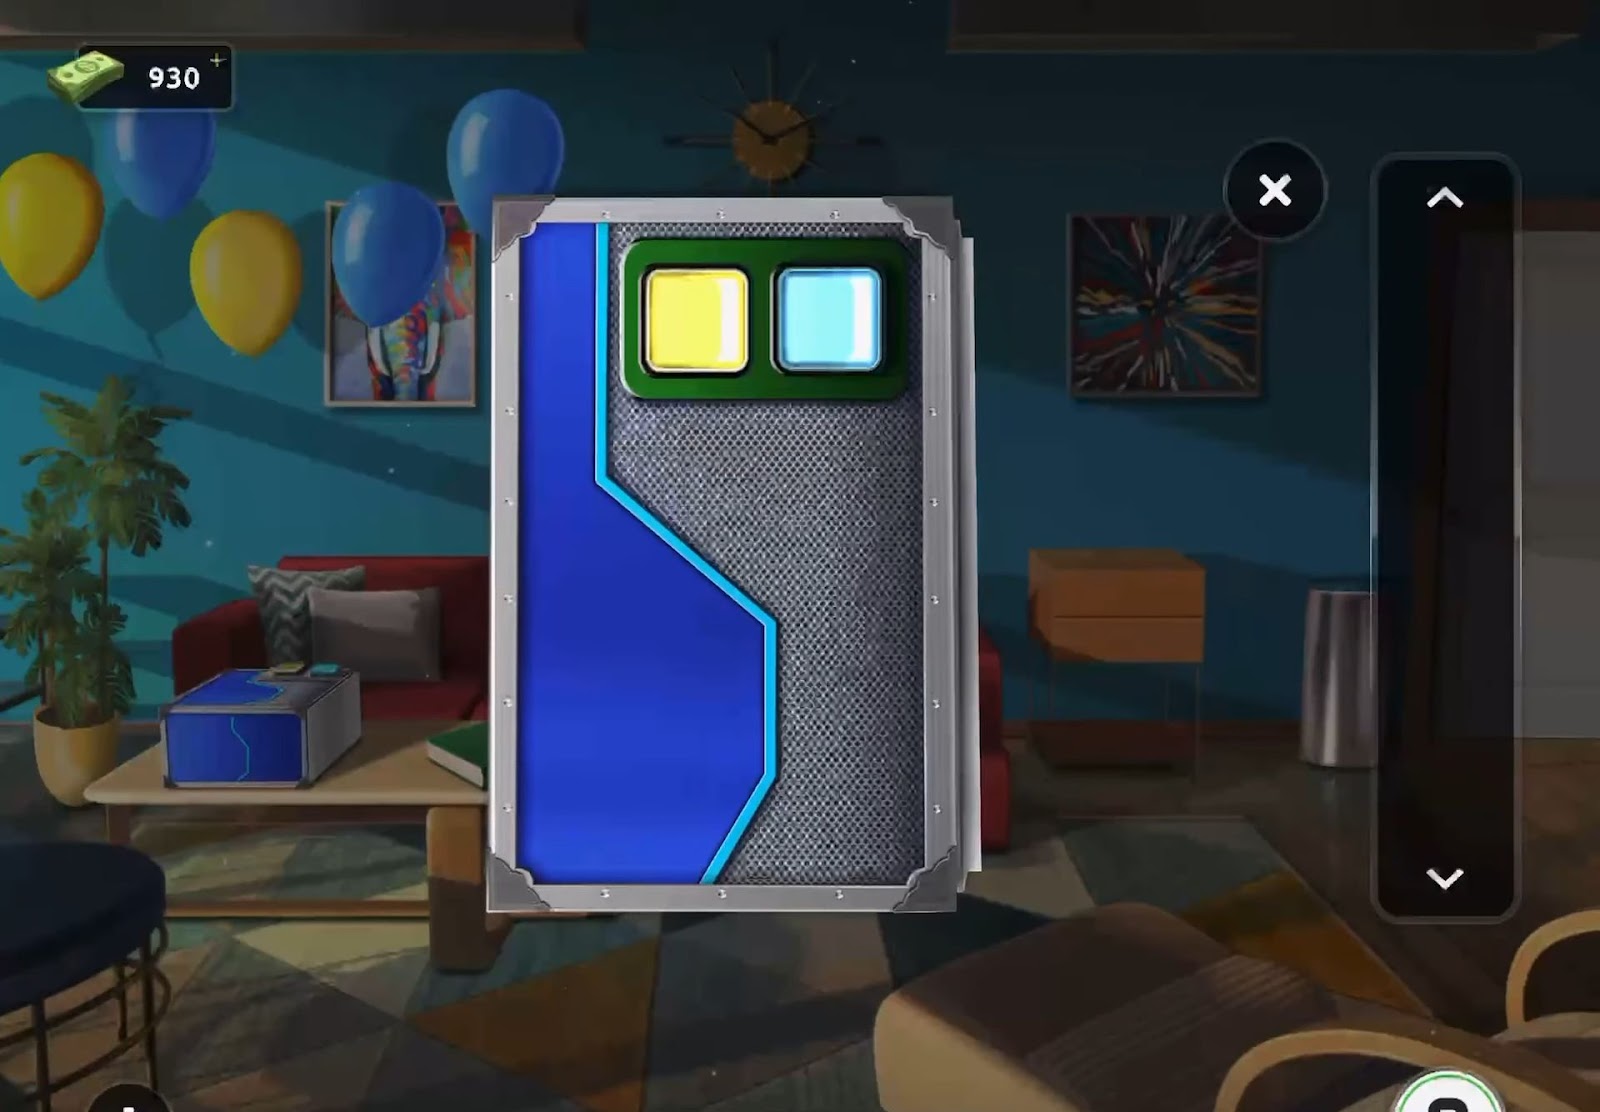
- After that, memorize the order of balloon colors and tap the corresponding colors on buttons such as Yellow, Yellow, Blue, Yellow, Blue, and Blue.
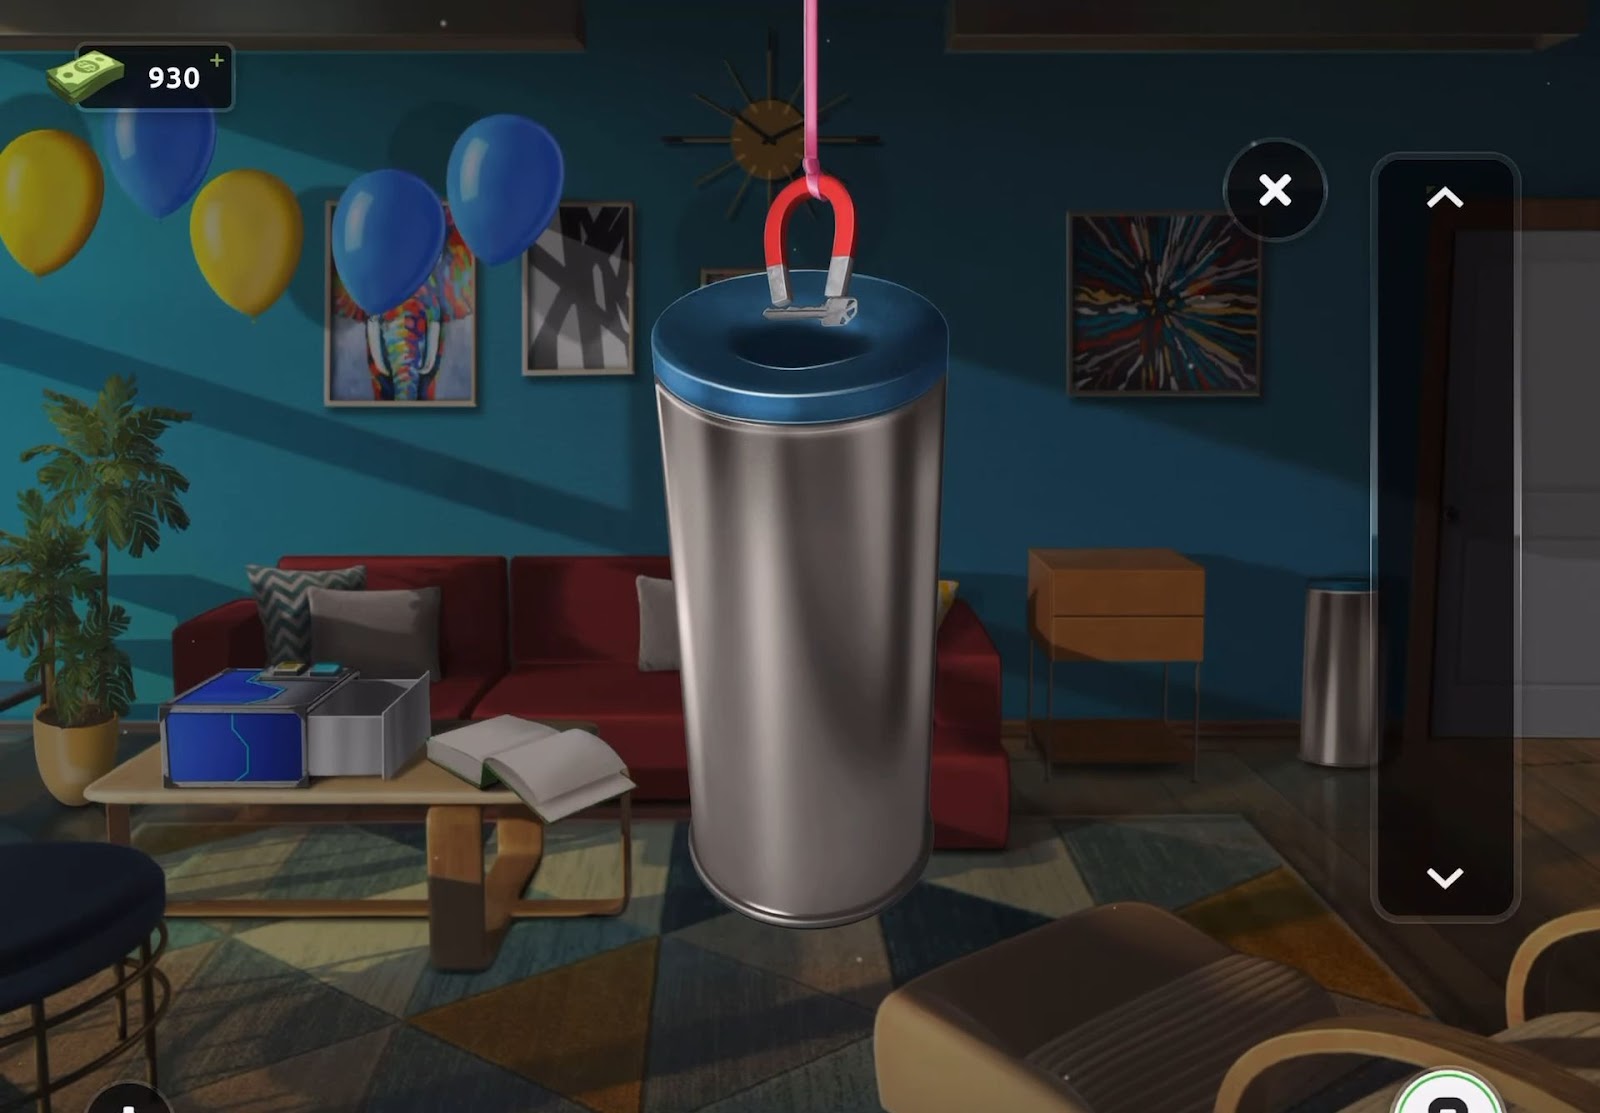
- Acquire a magnet. Then, interact with the green book located on the table to open it, revealing a knife for collection.
- Use the knife to cut the grey balloon and retrieve the fallen ribbon.
- Next, combine the ribbon with the magnet in your inventory and employ this assembled item on the waste bin situated next to the door on the right to obtain a key.
- Finally, use the key to unlock the door and exit through it.
Level 14:
To complete level 14, follow the instructions below:
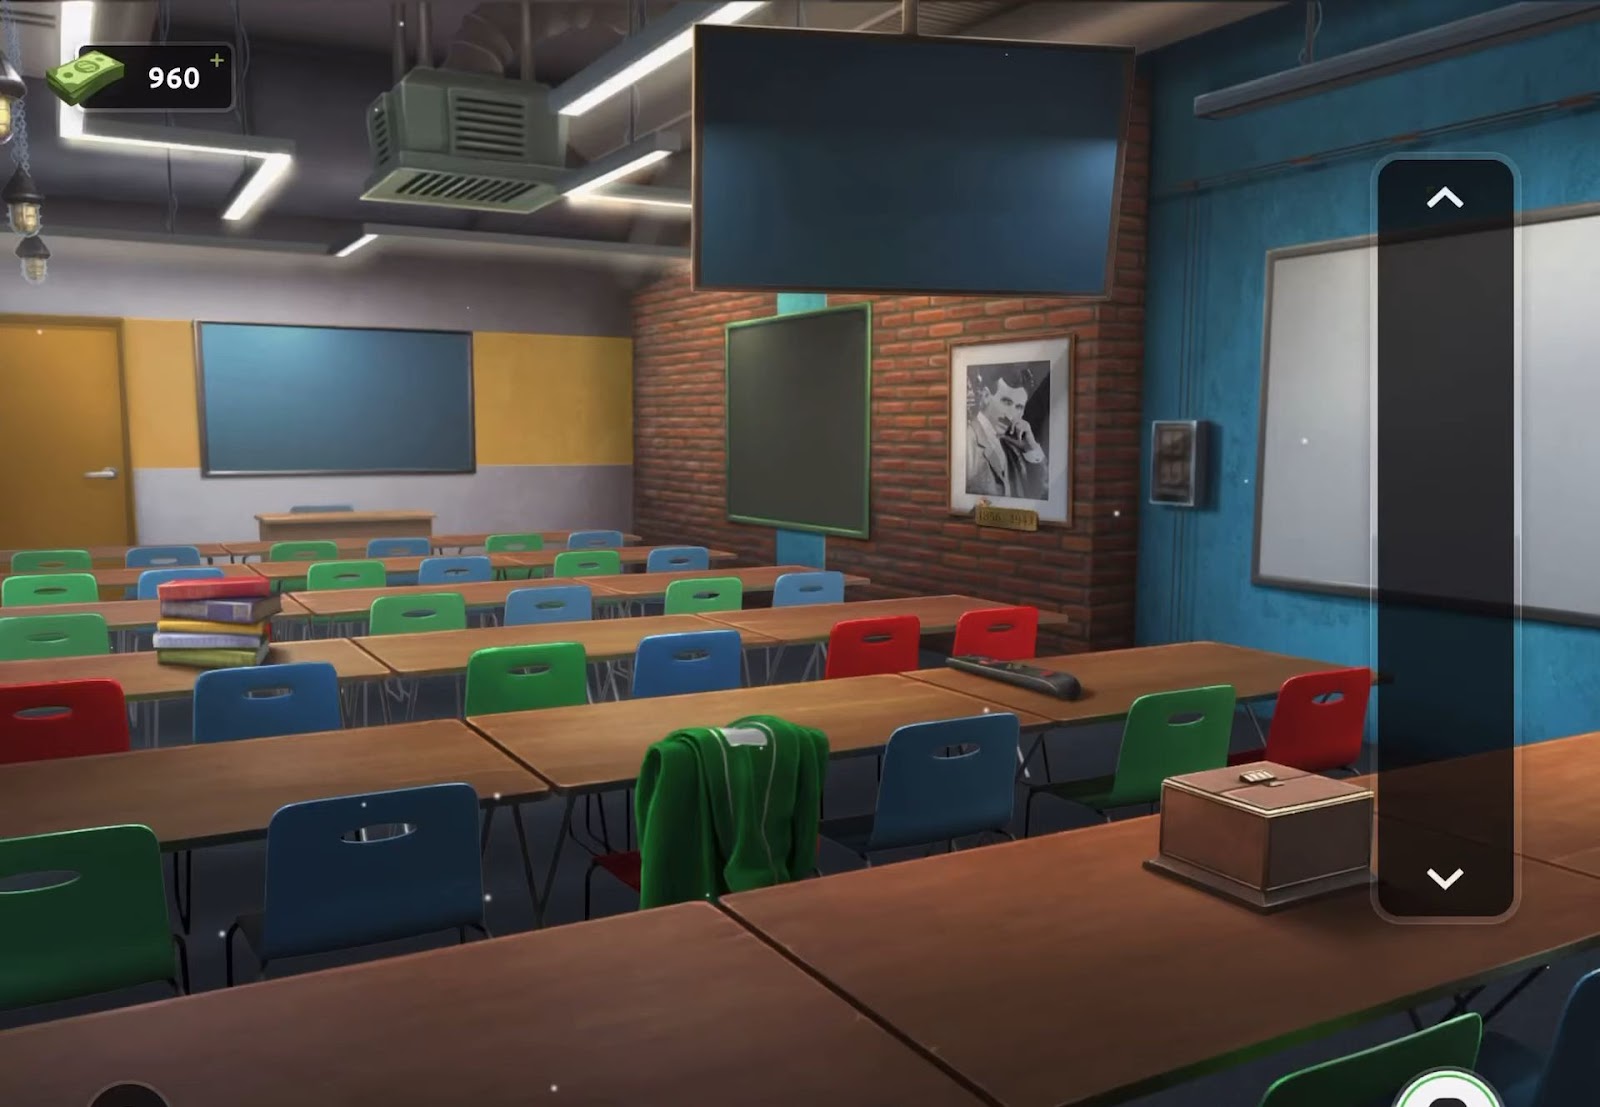
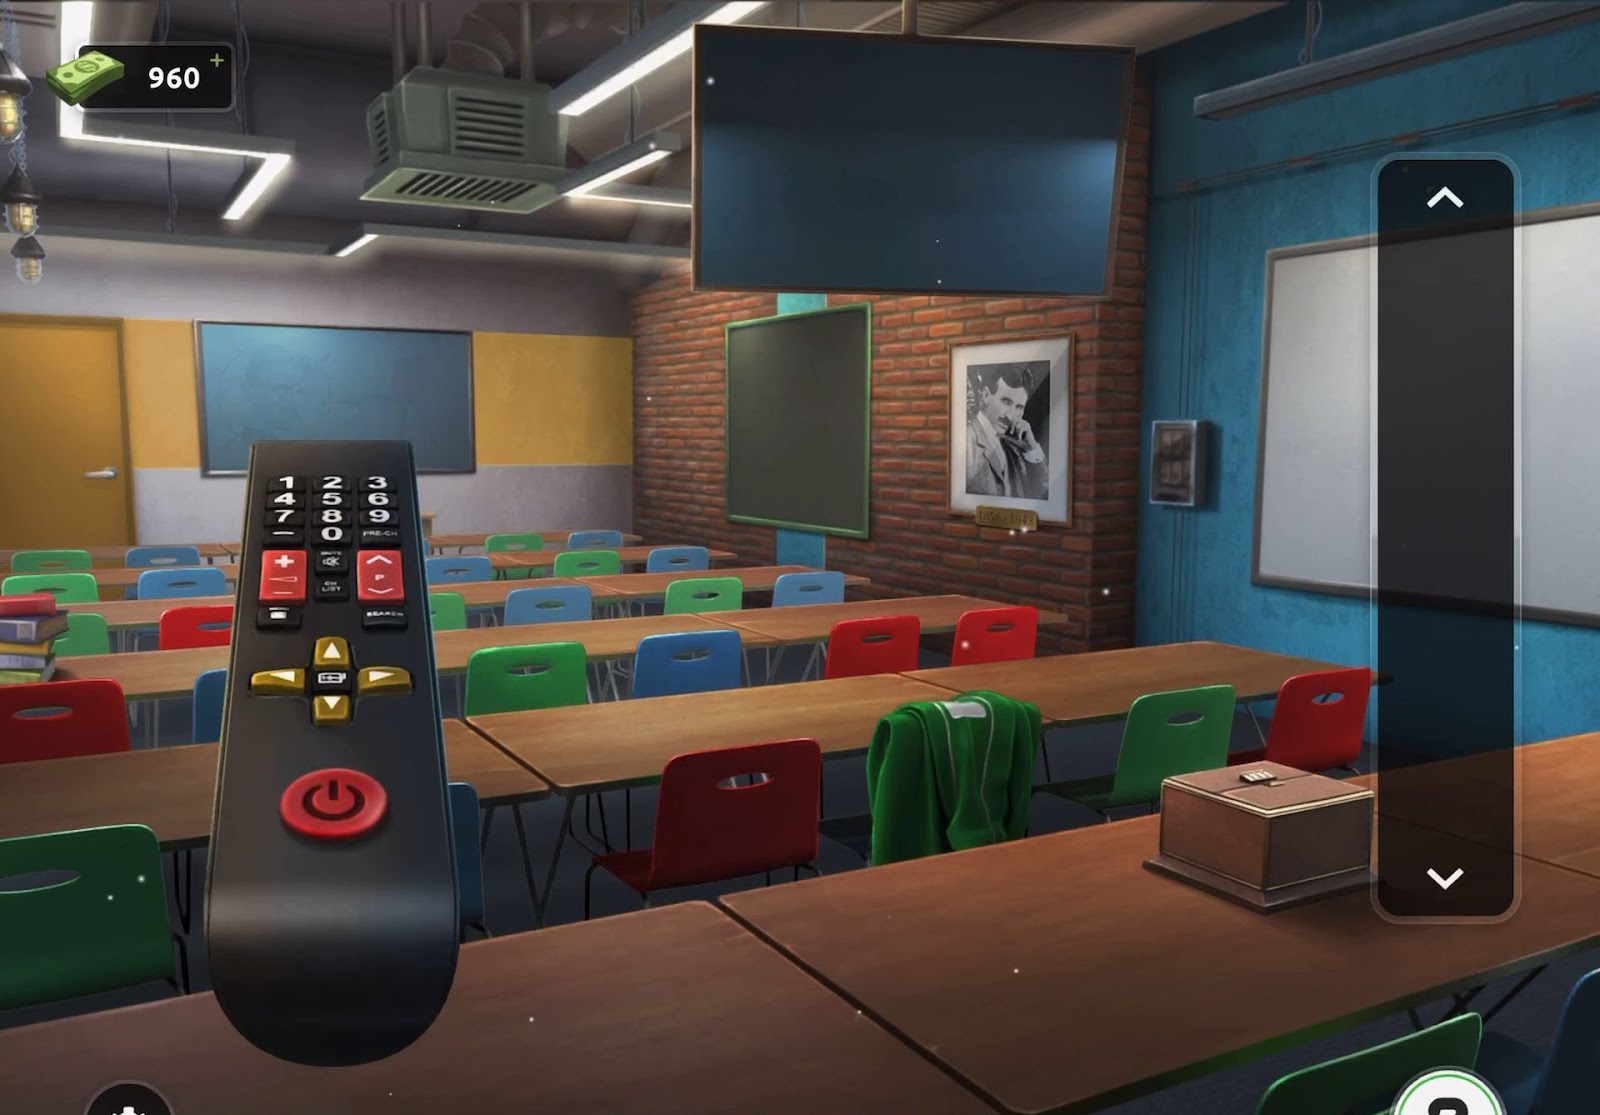
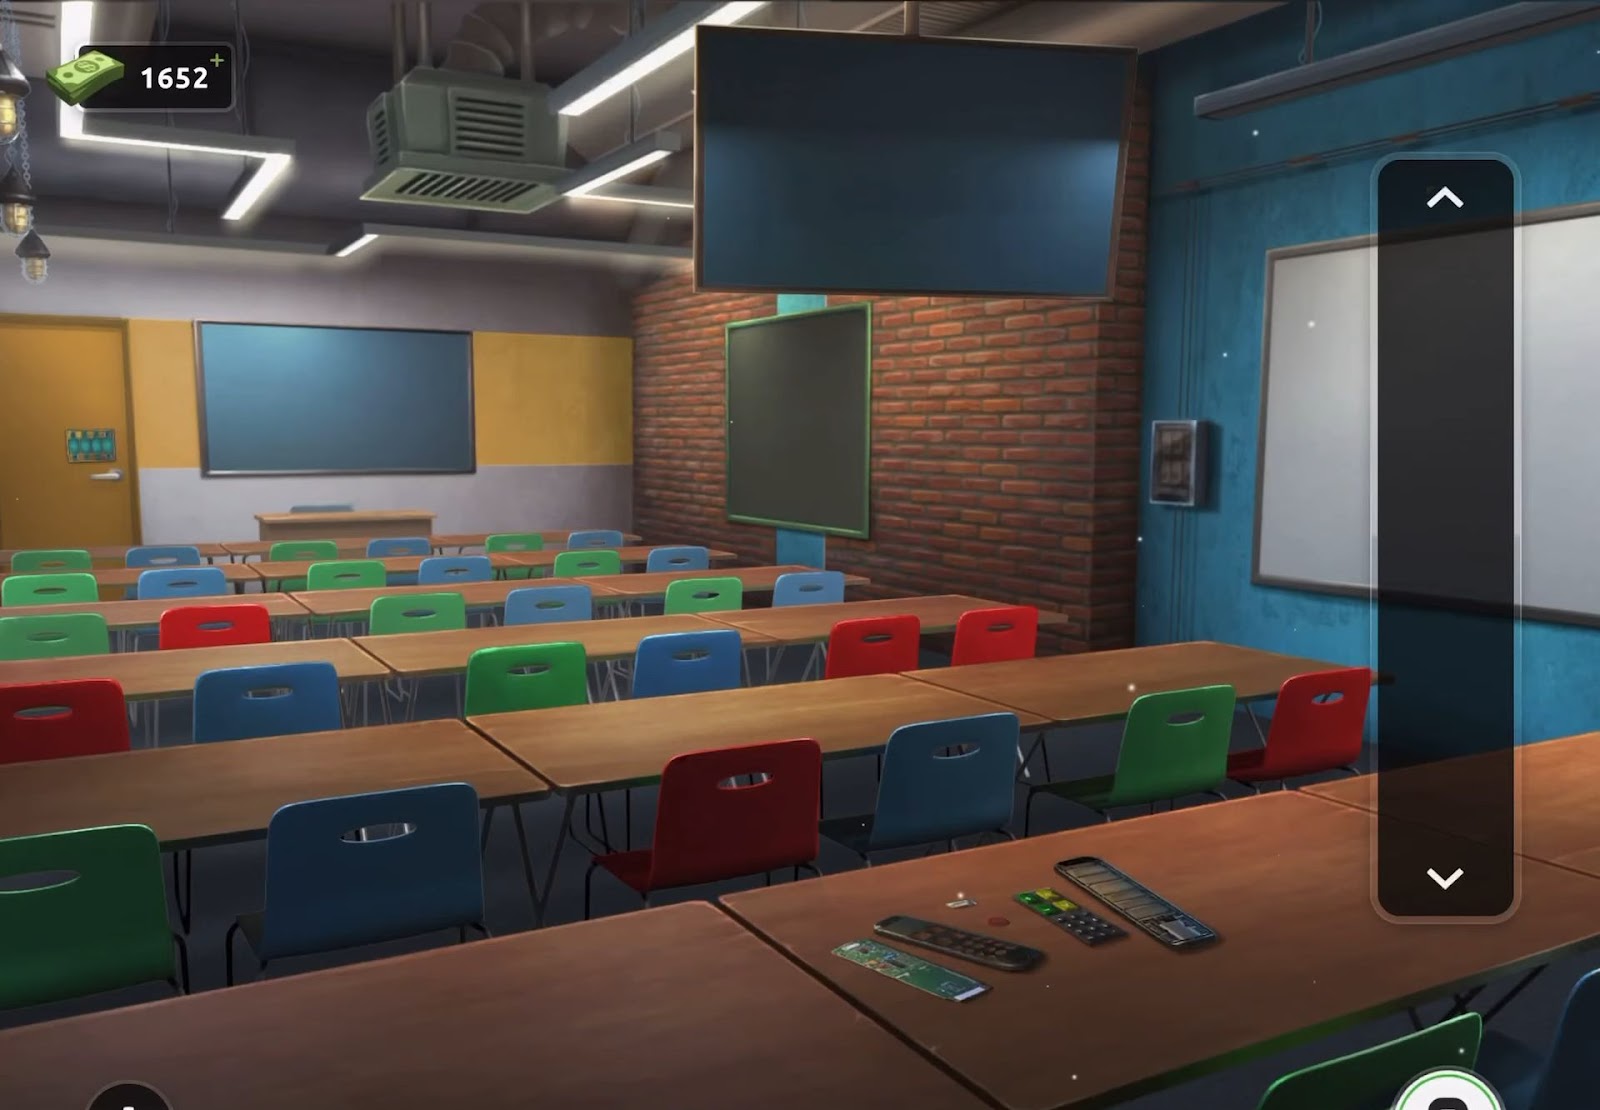
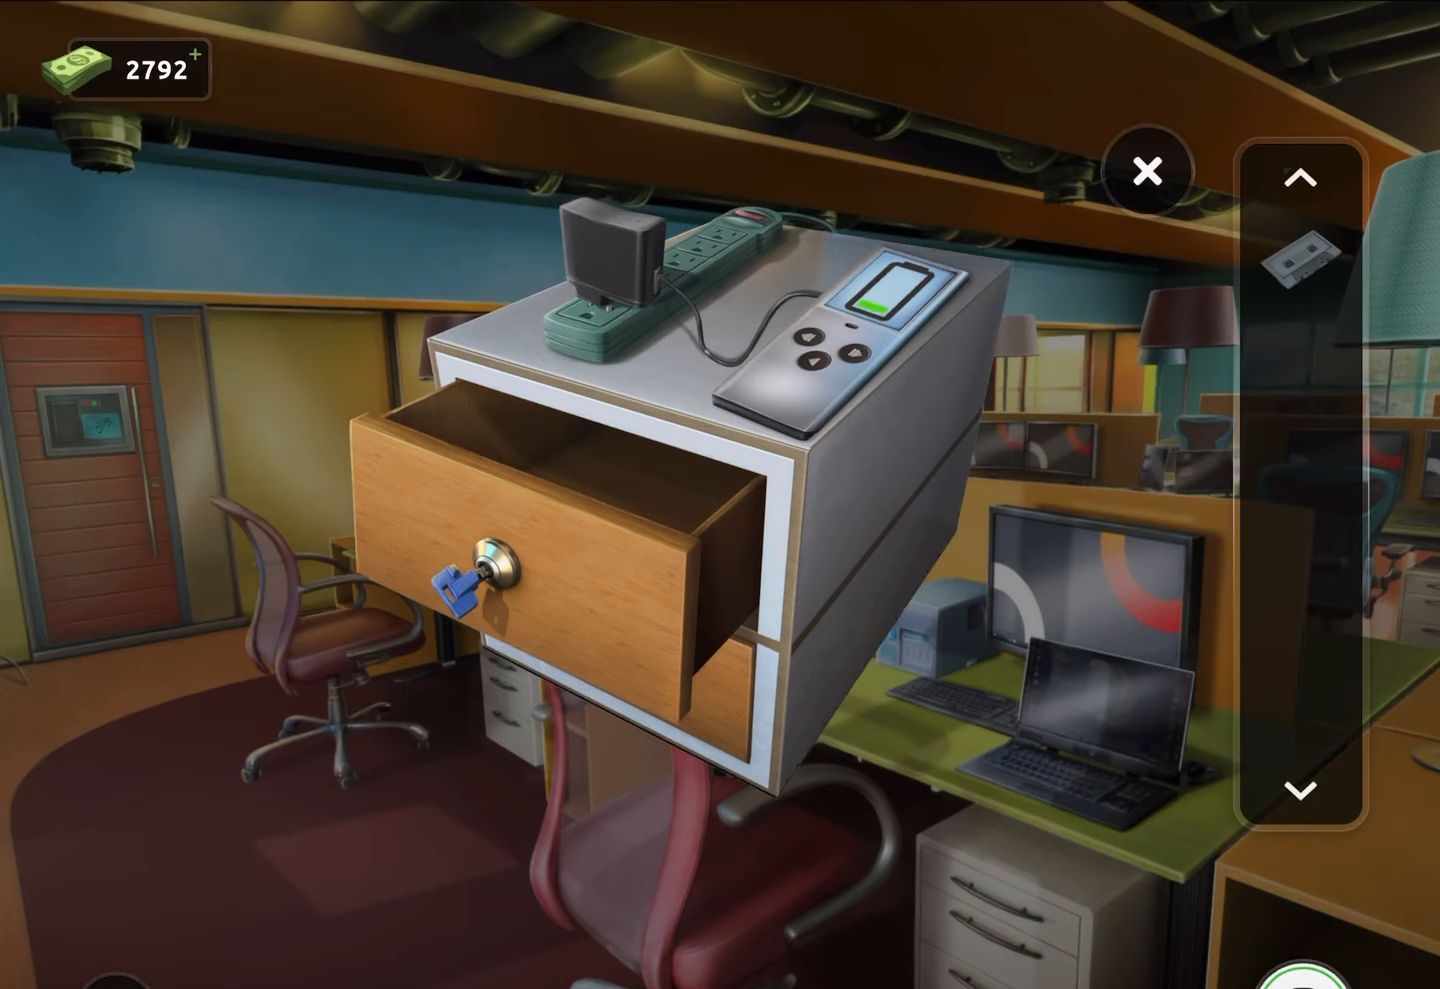
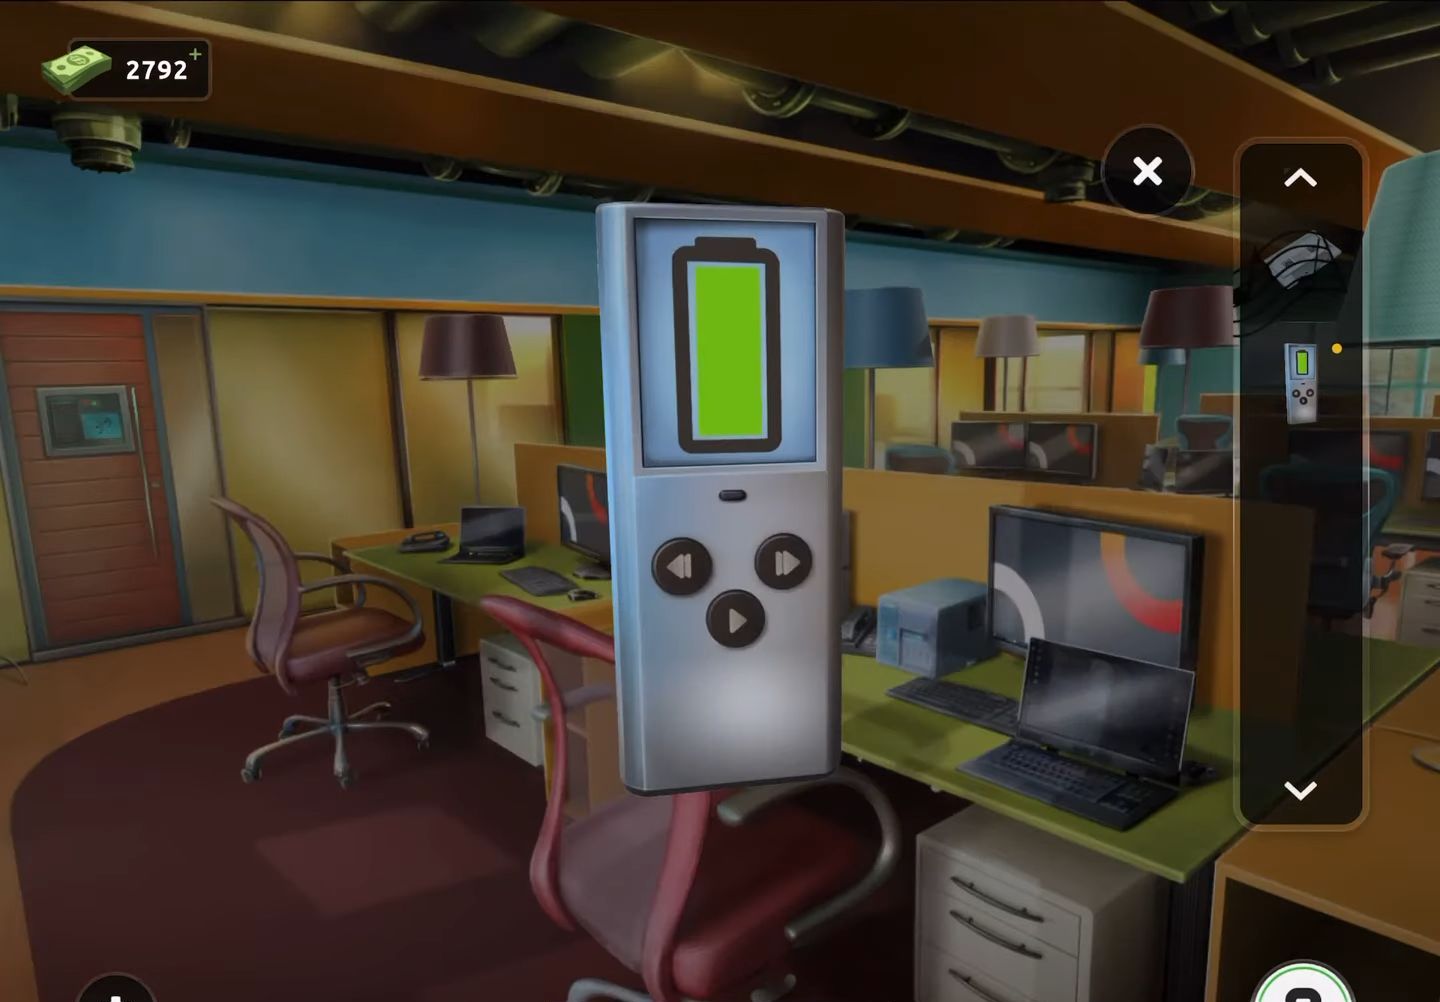
- Firstly, obtain the remote control located on the table near the green jacket.
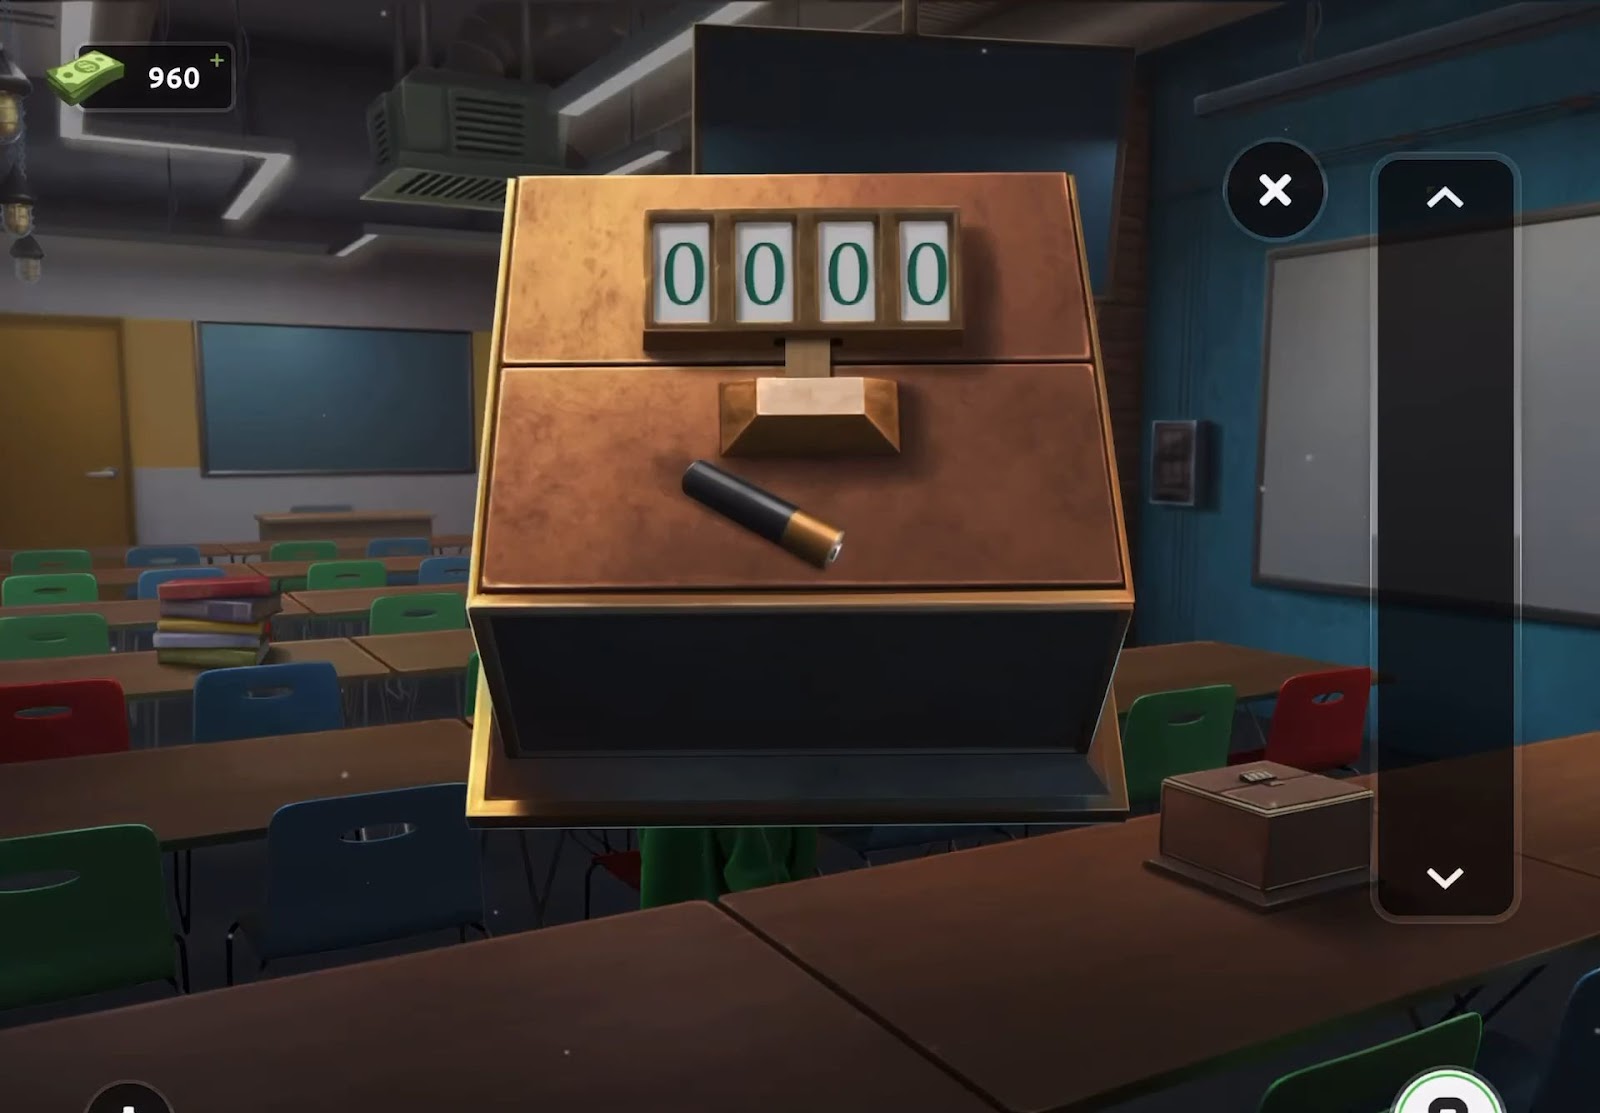
- Next, examine the box situated on the nearest table to discover and collect a battery.
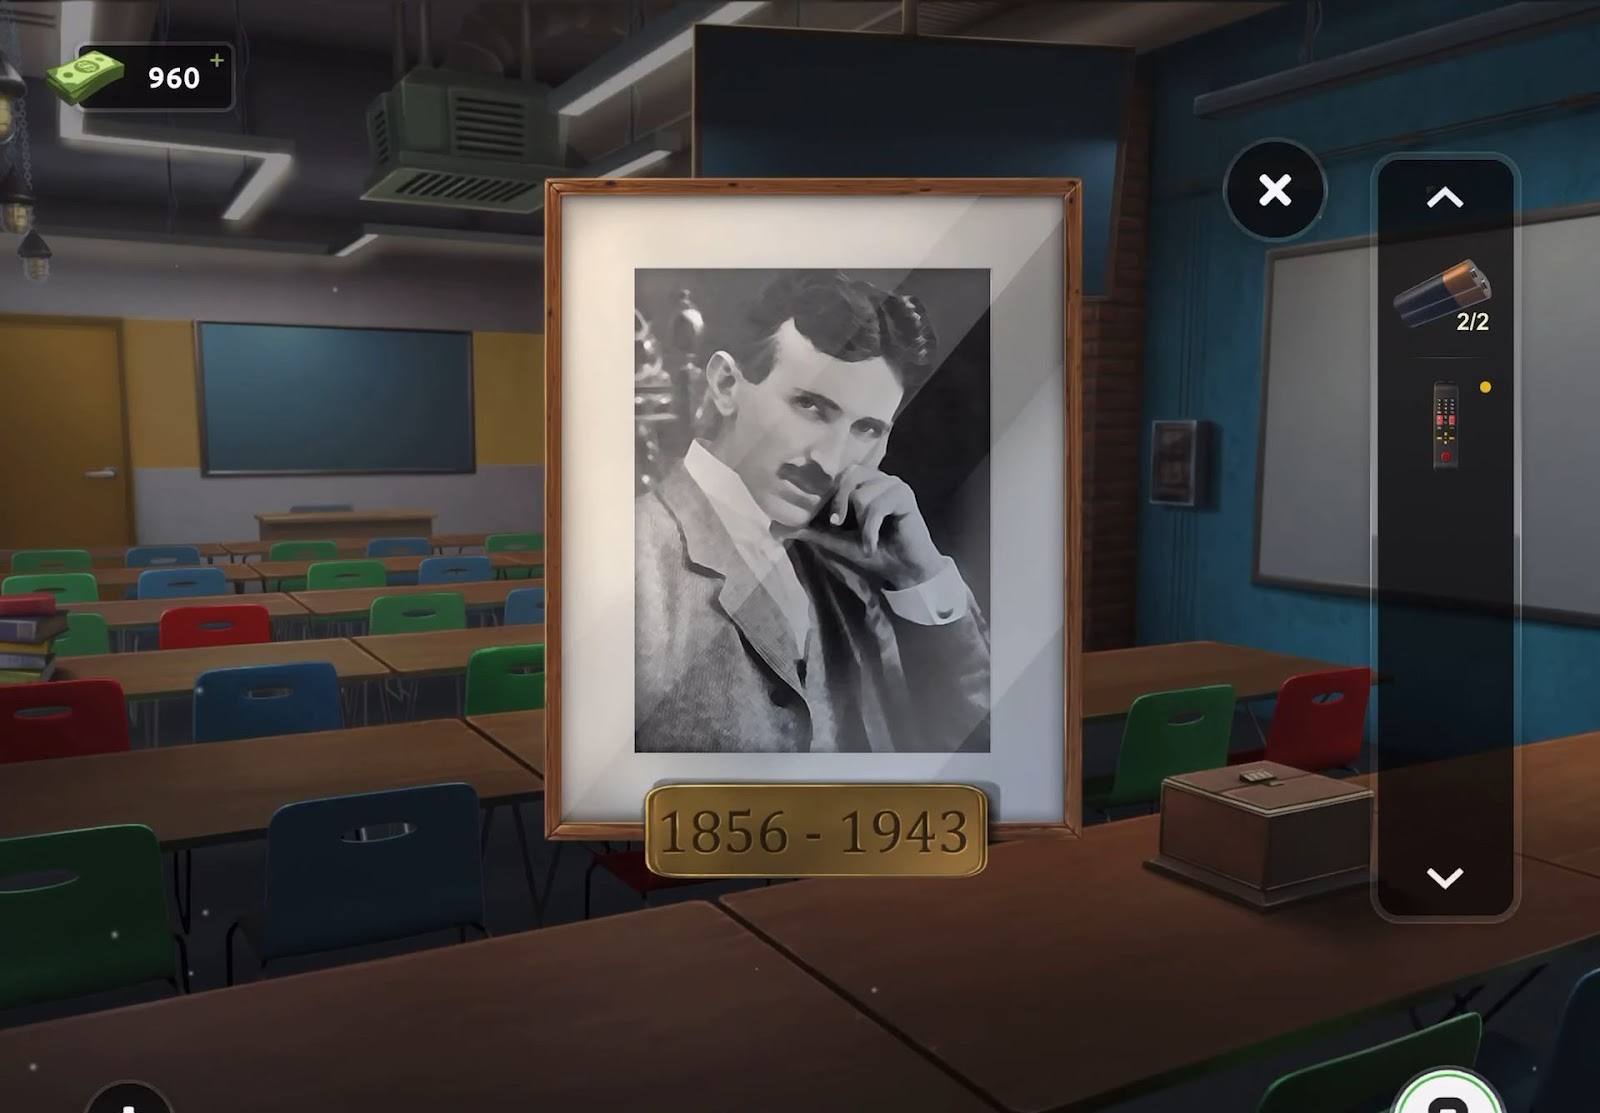
- Afterward, proceed to select the picture of Nikola Tesla on the right wall to view it and retrieve an additional battery.
- Then inspect the remote control and insert the two batteries into it.
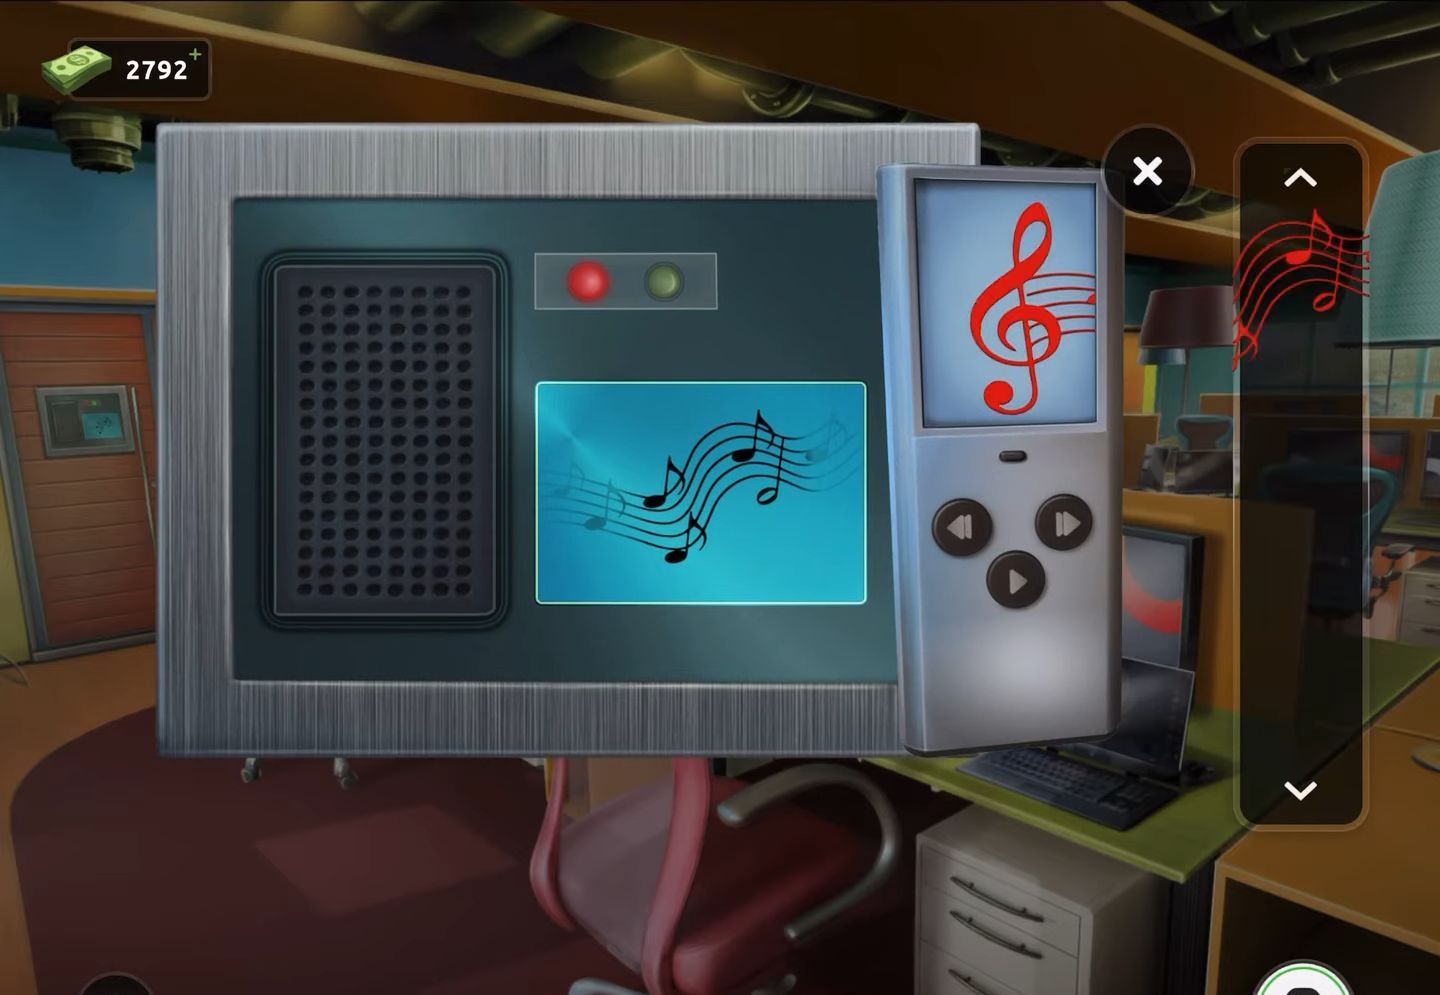
- Subsequently, utilize the powered remote control on the large TV screen positioned at the forefront of the room to activate it.
- Now examine the screen to gather a clue. Next, interact with the books on the central table and shift the green jacket to reveal further information. Then use the clues obtained to derive a four-digit number (1949).
- After that revisit the box on the table and input the derived code (1949) to unlock it.
- Finally, retrieve the key from inside the box and use it to escape.
Level 15:
To complete level 15, follow the instructions below:
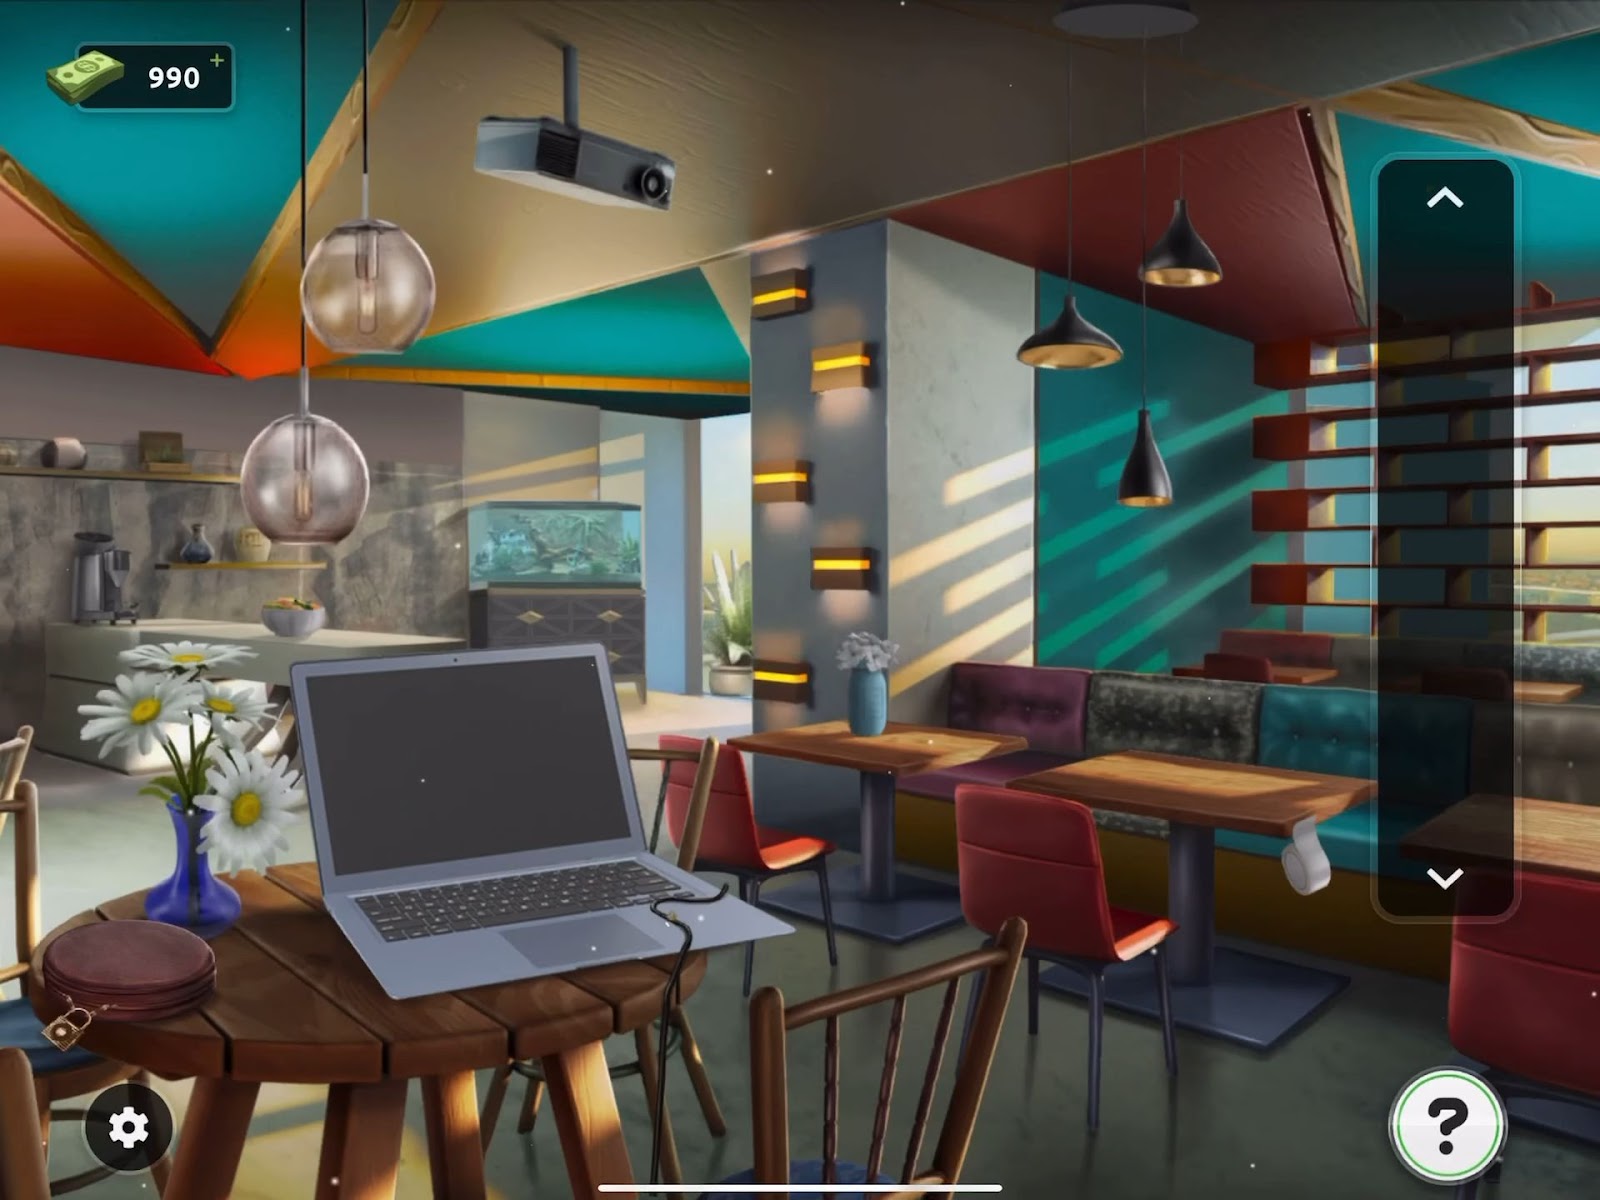
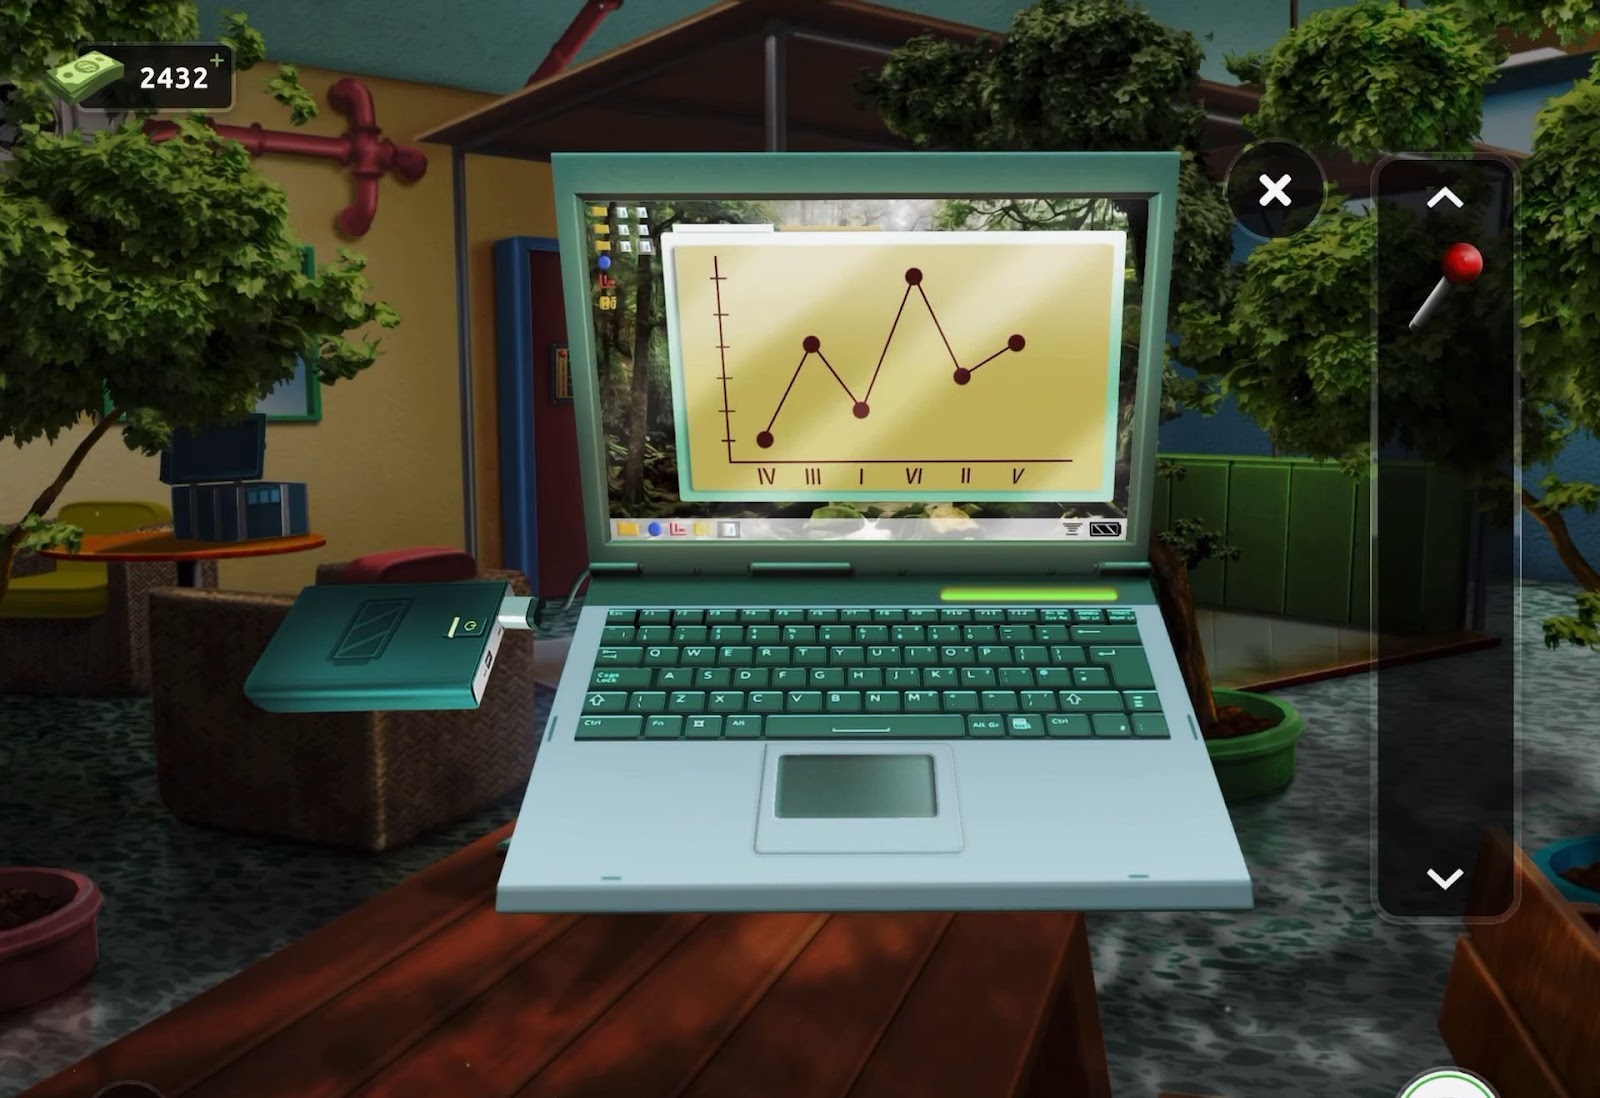
- Begin by gathering a roll of white tape positioned on the right side of the middle table within the room.
- Next, apply the roll of tape to the damaged power cable connected to the laptop to repair it. Once fixed, power on the laptop and tap on it to view its contents.
- Then tap the laptop screen to reveal and access the drive tray, retrieving a small disk from within.
- After that, direct your attention to the circular CD holder table situated to the left of the laptop.
- Next, place the disk onto the padlock, unlocking it and allowing you to retrieve a CD.
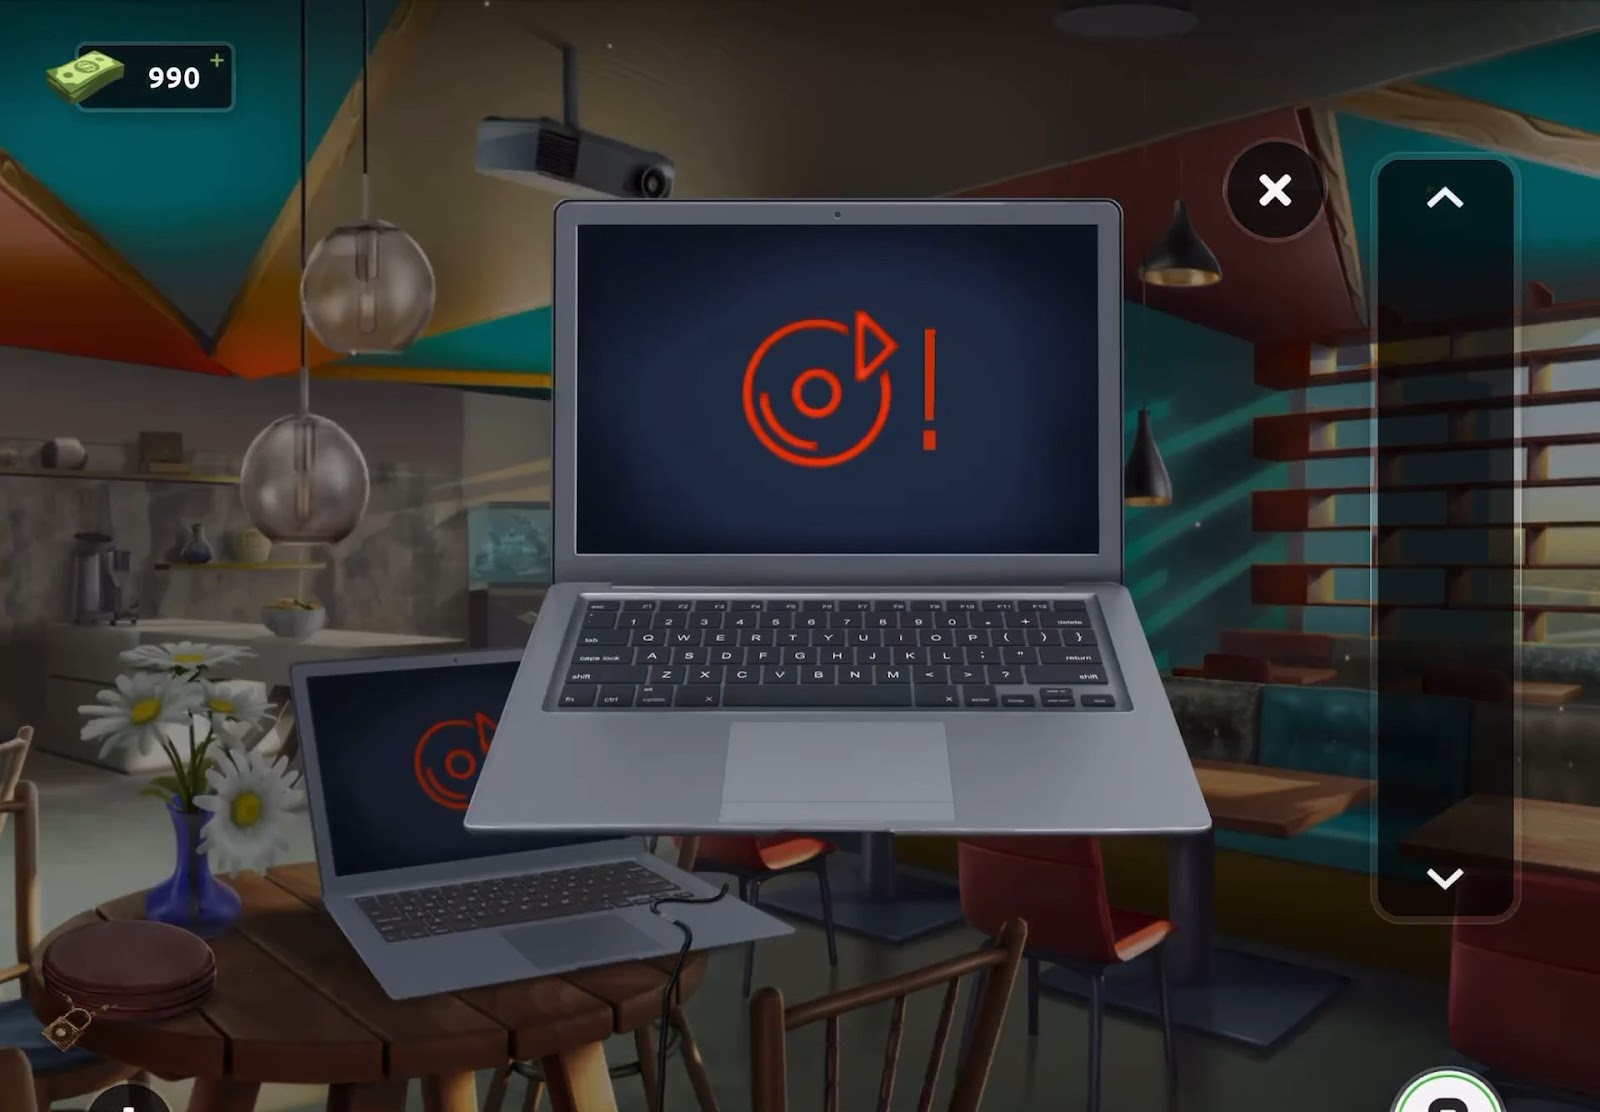
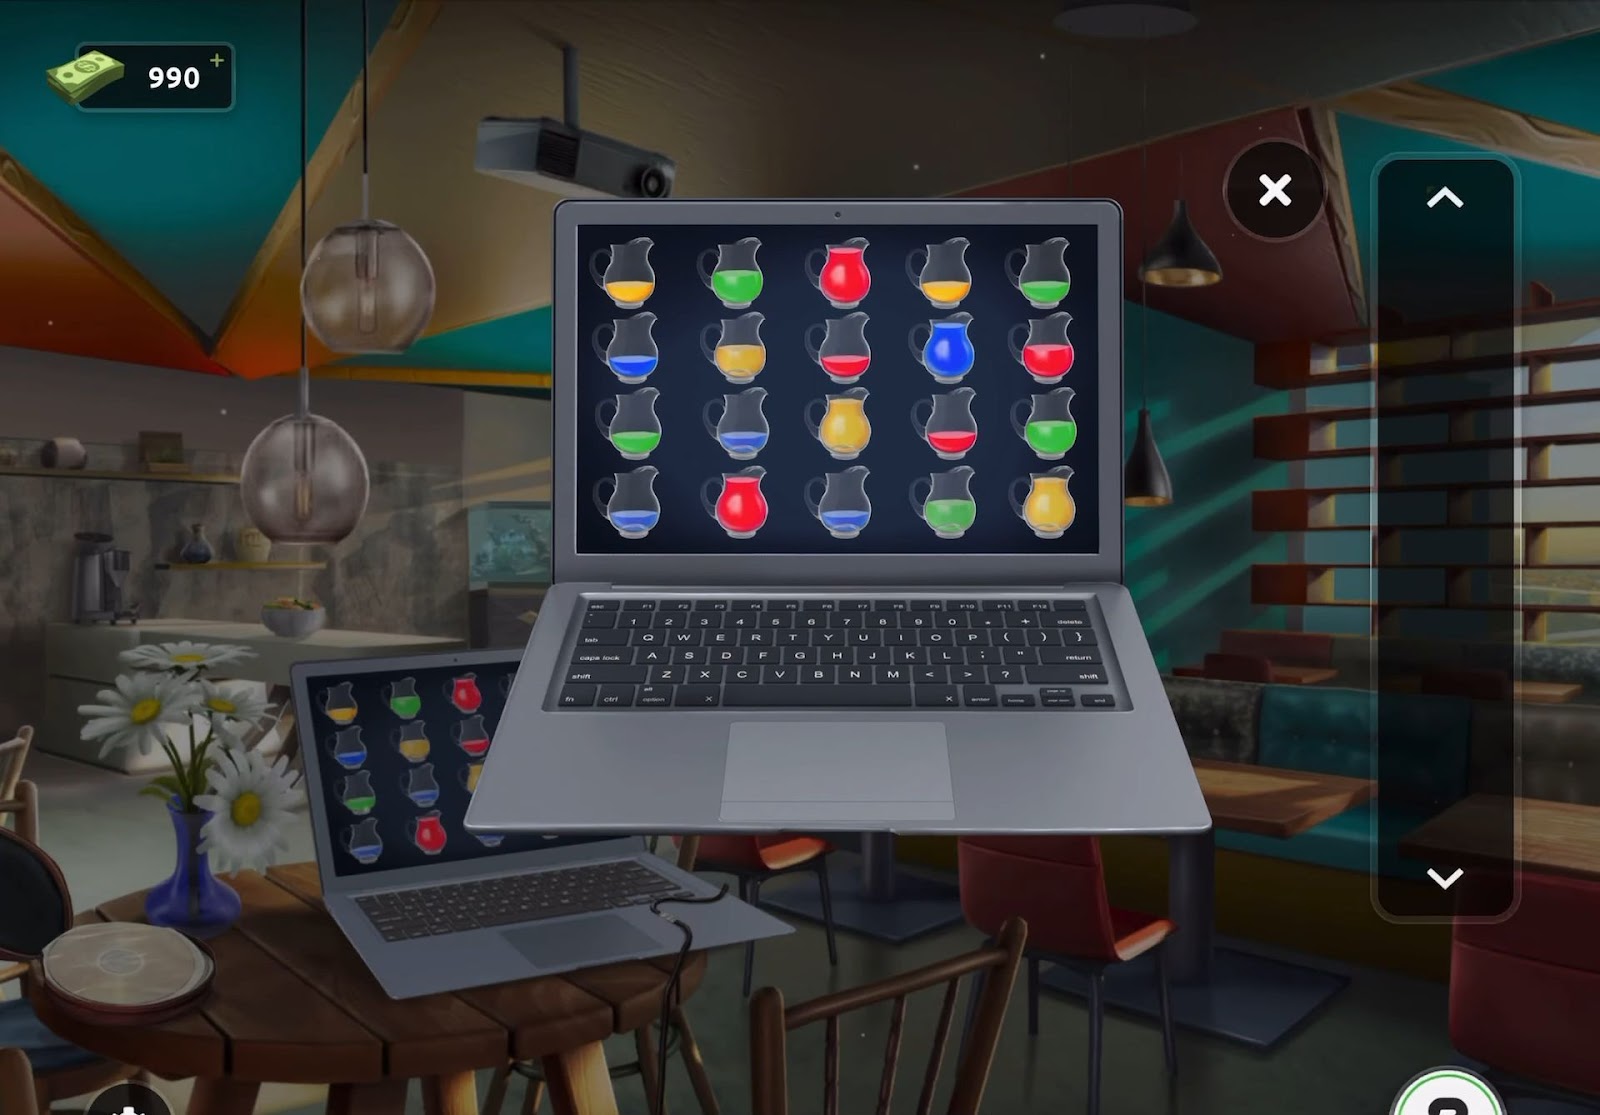
- Then, go back to the laptop and insert the CD into the drive tray. This will display an image on the laptop screen.
- Inspect the door to exit the room, noticing the requirement for a 4-digit code (3223). The hint for this code is based on colors: yellow, blue, green, and red.
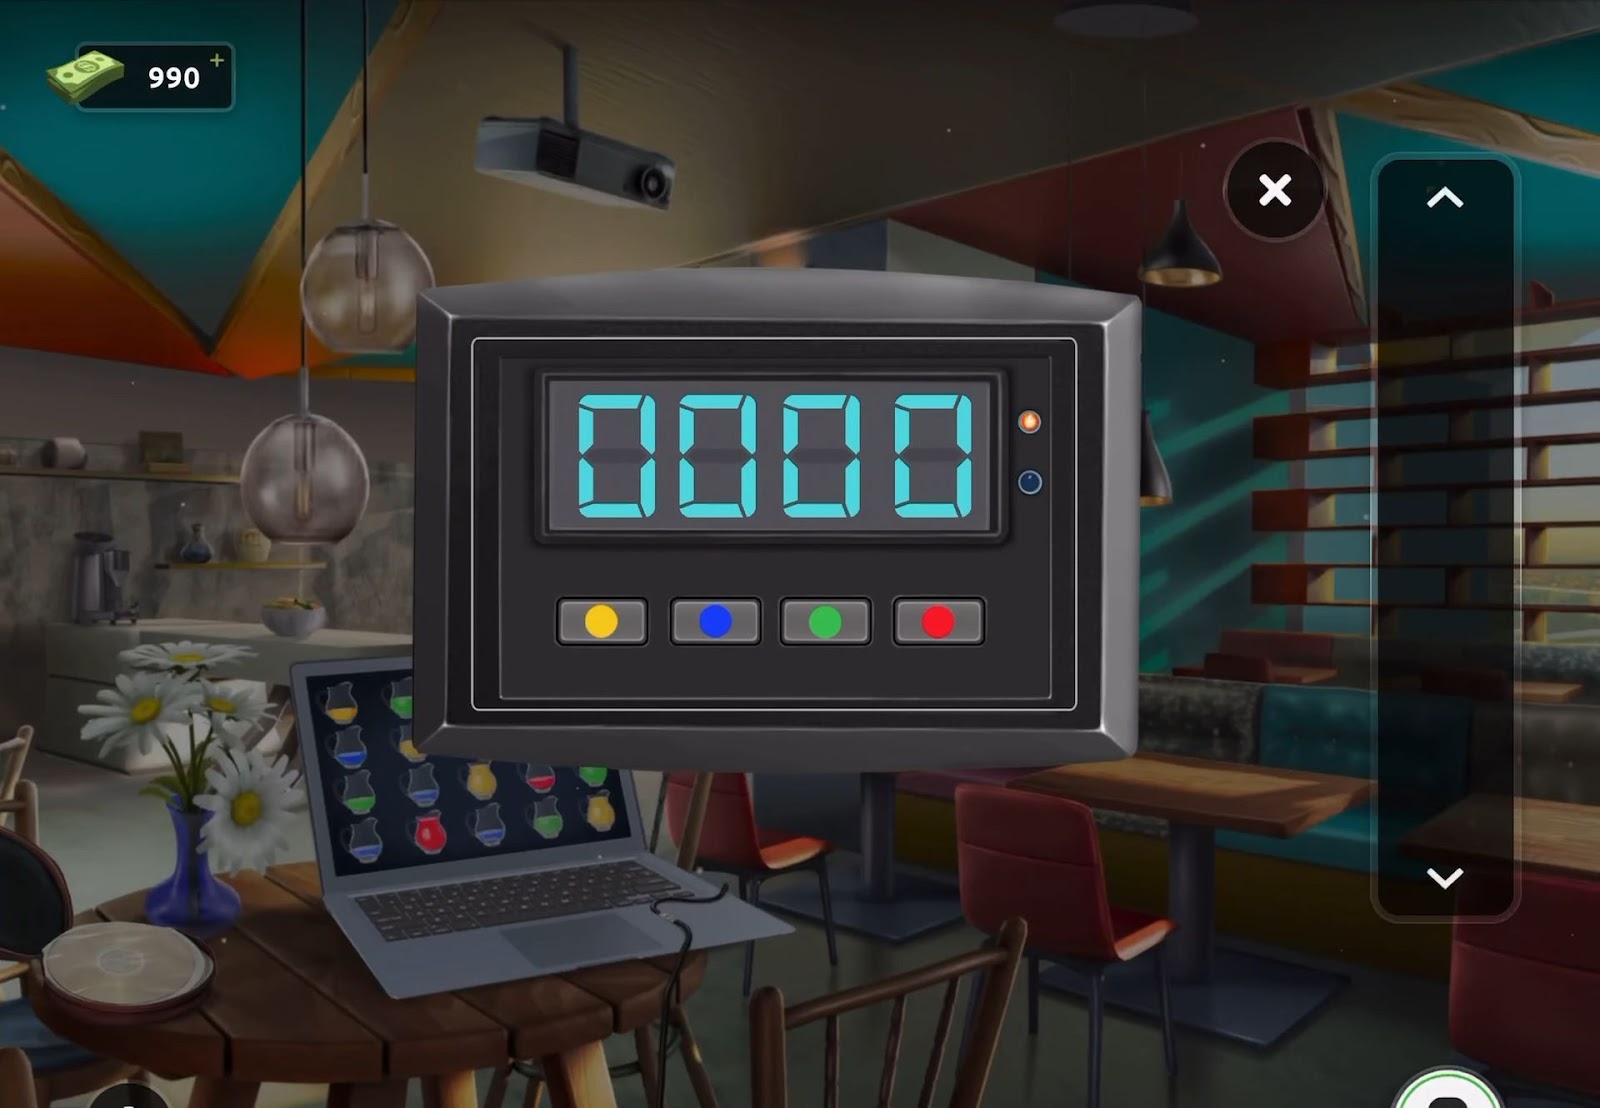
- Ultimately, utilize this code (3223) to unlock the door and make your exit.
Level 16:
To complete level 16, follow the instructions below:
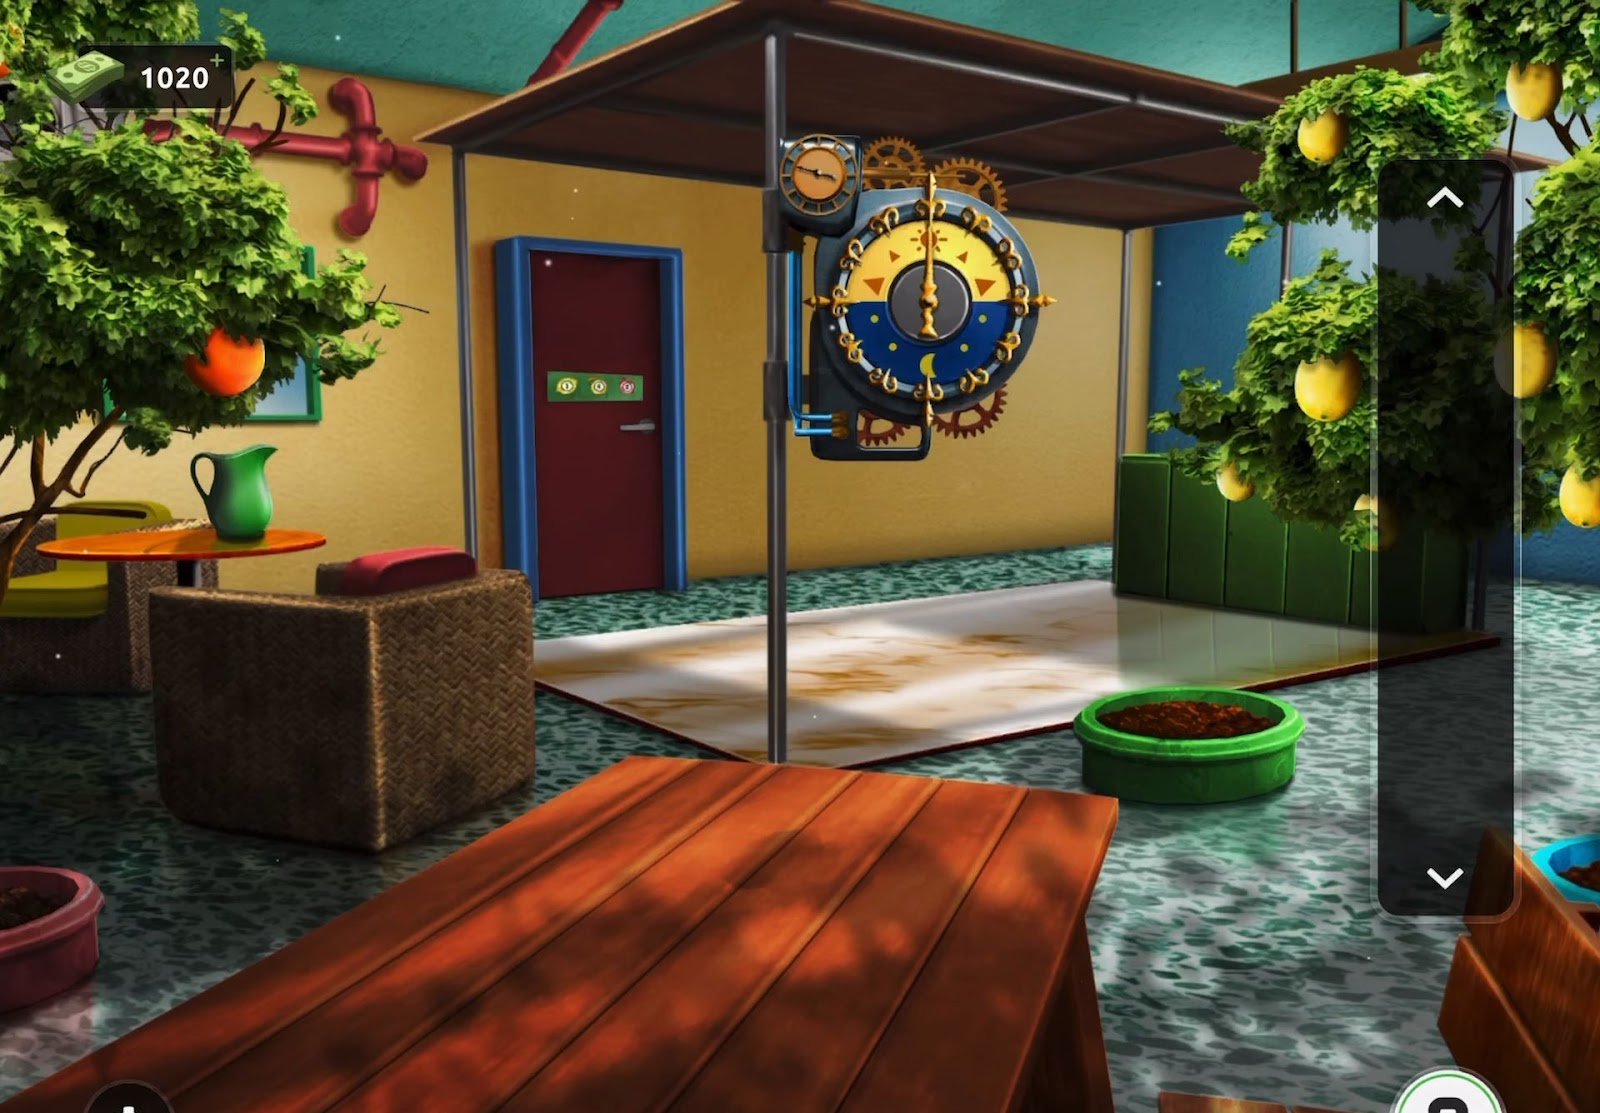
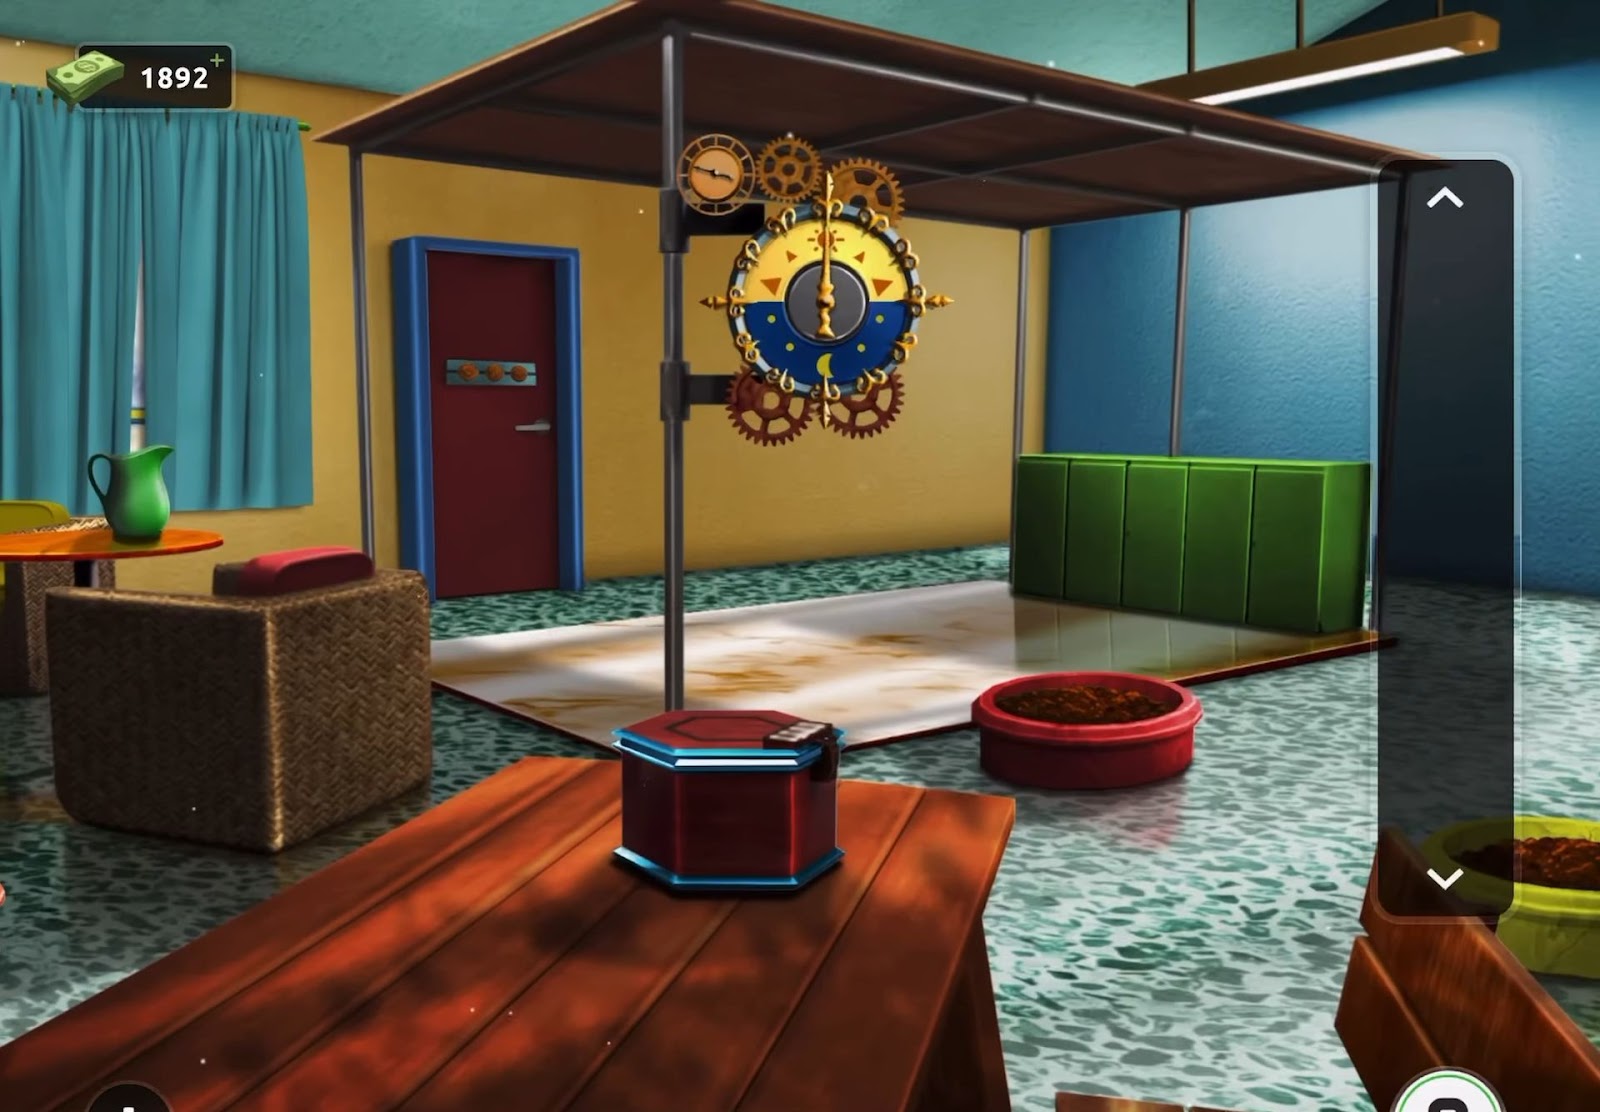
- Firstly, observe the courtyard terrace, taking note of the fruit trees bearing fruit.
- Afterward, gather the bag of seeds from the table.
- Next, place the seeds into the green planter, then retrieve the green jug located under the orange tree on the left side.
- After that apply the jug on the planter to water the seeds, facilitating their growth.
- Then, interact with the time device on the pole at the center of the scene to accelerate the seed’s growth process.
- An apple tree will be produced as a result.
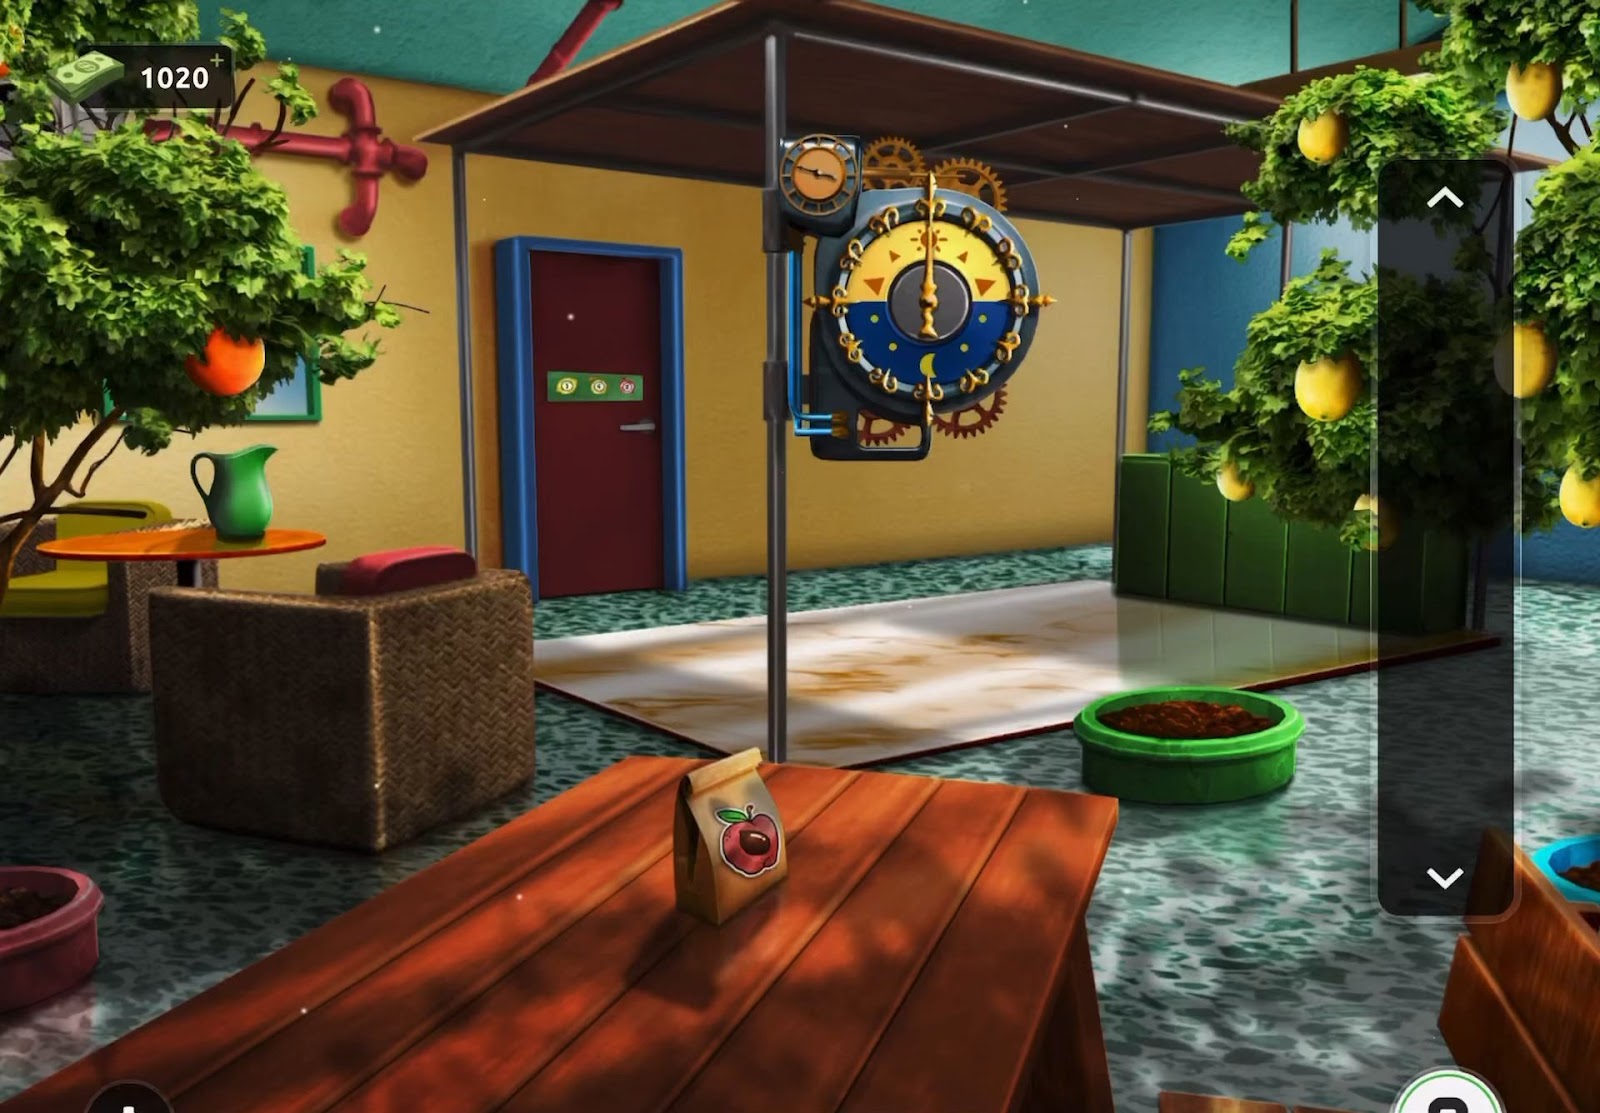
- Next, proceed to count the fruits on the three trees. You will need to tap a high branch on the orange tree to reveal an additional orange fruit.
- The fruit count is 5 for Oranges, 3 for Apples, and 8 for Lemons.
- After gathering this information, view the door to locate the code lock. Input the counted numbers (853) to unlock the door.
- Finally, exit through the door to the next level.
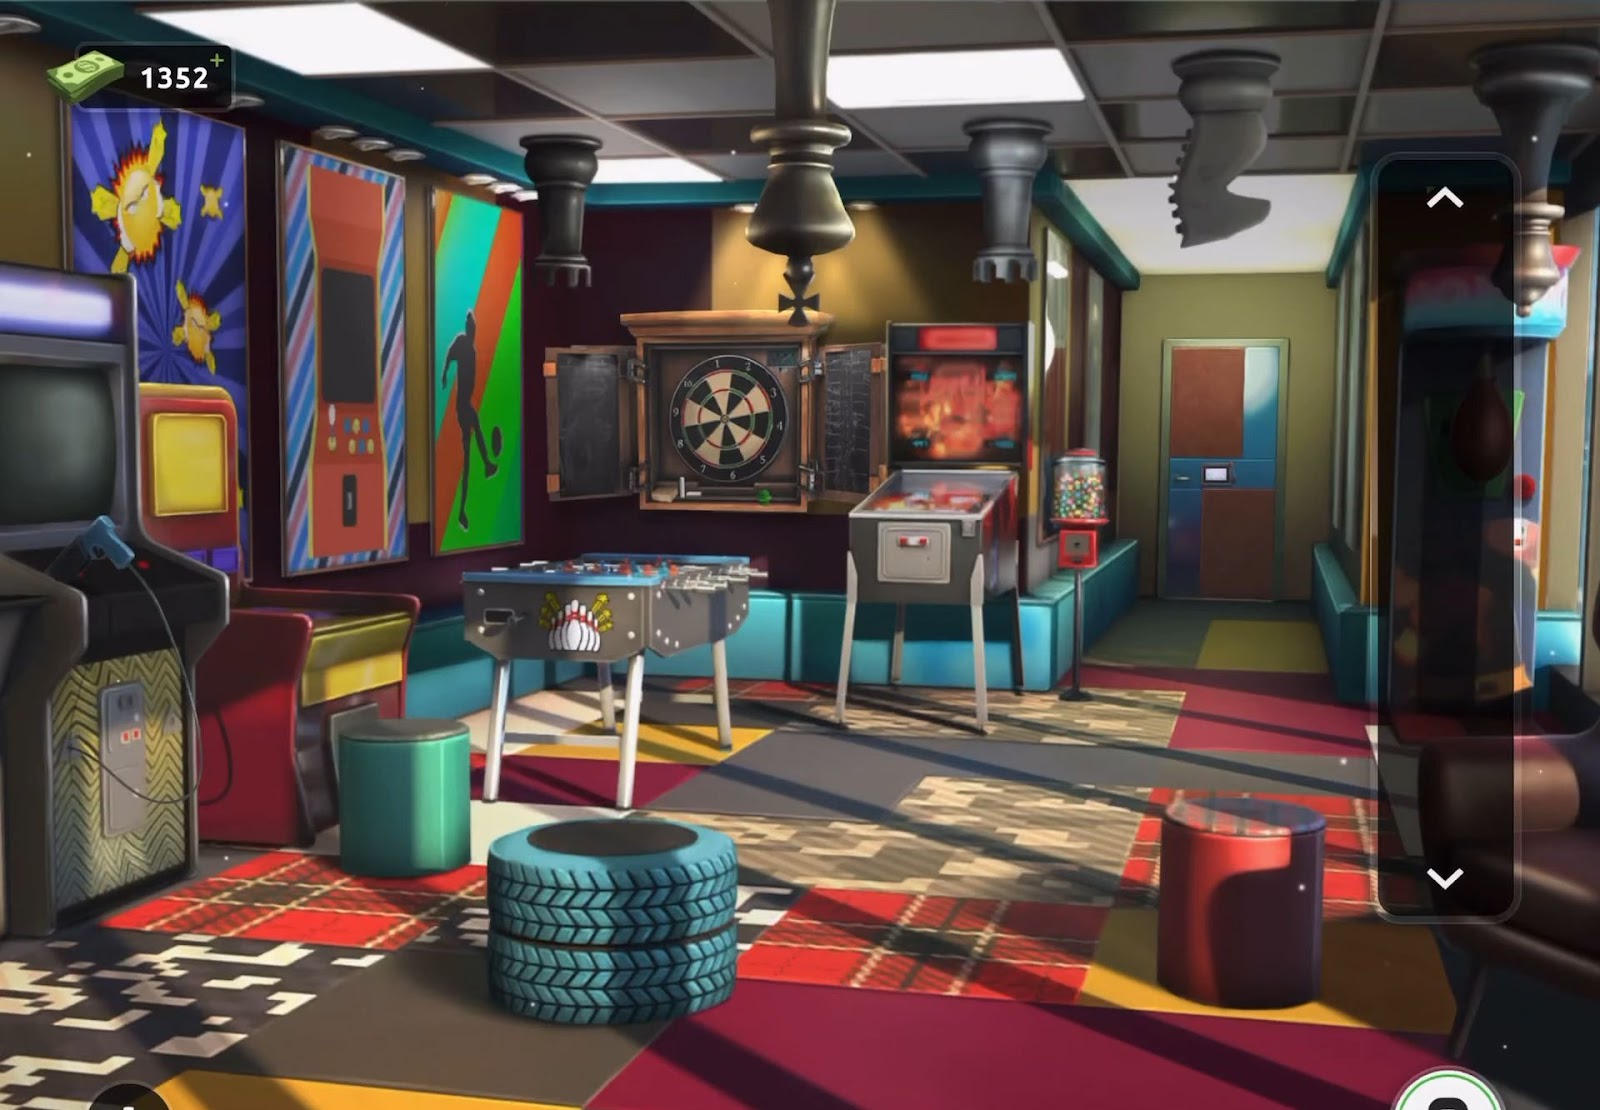
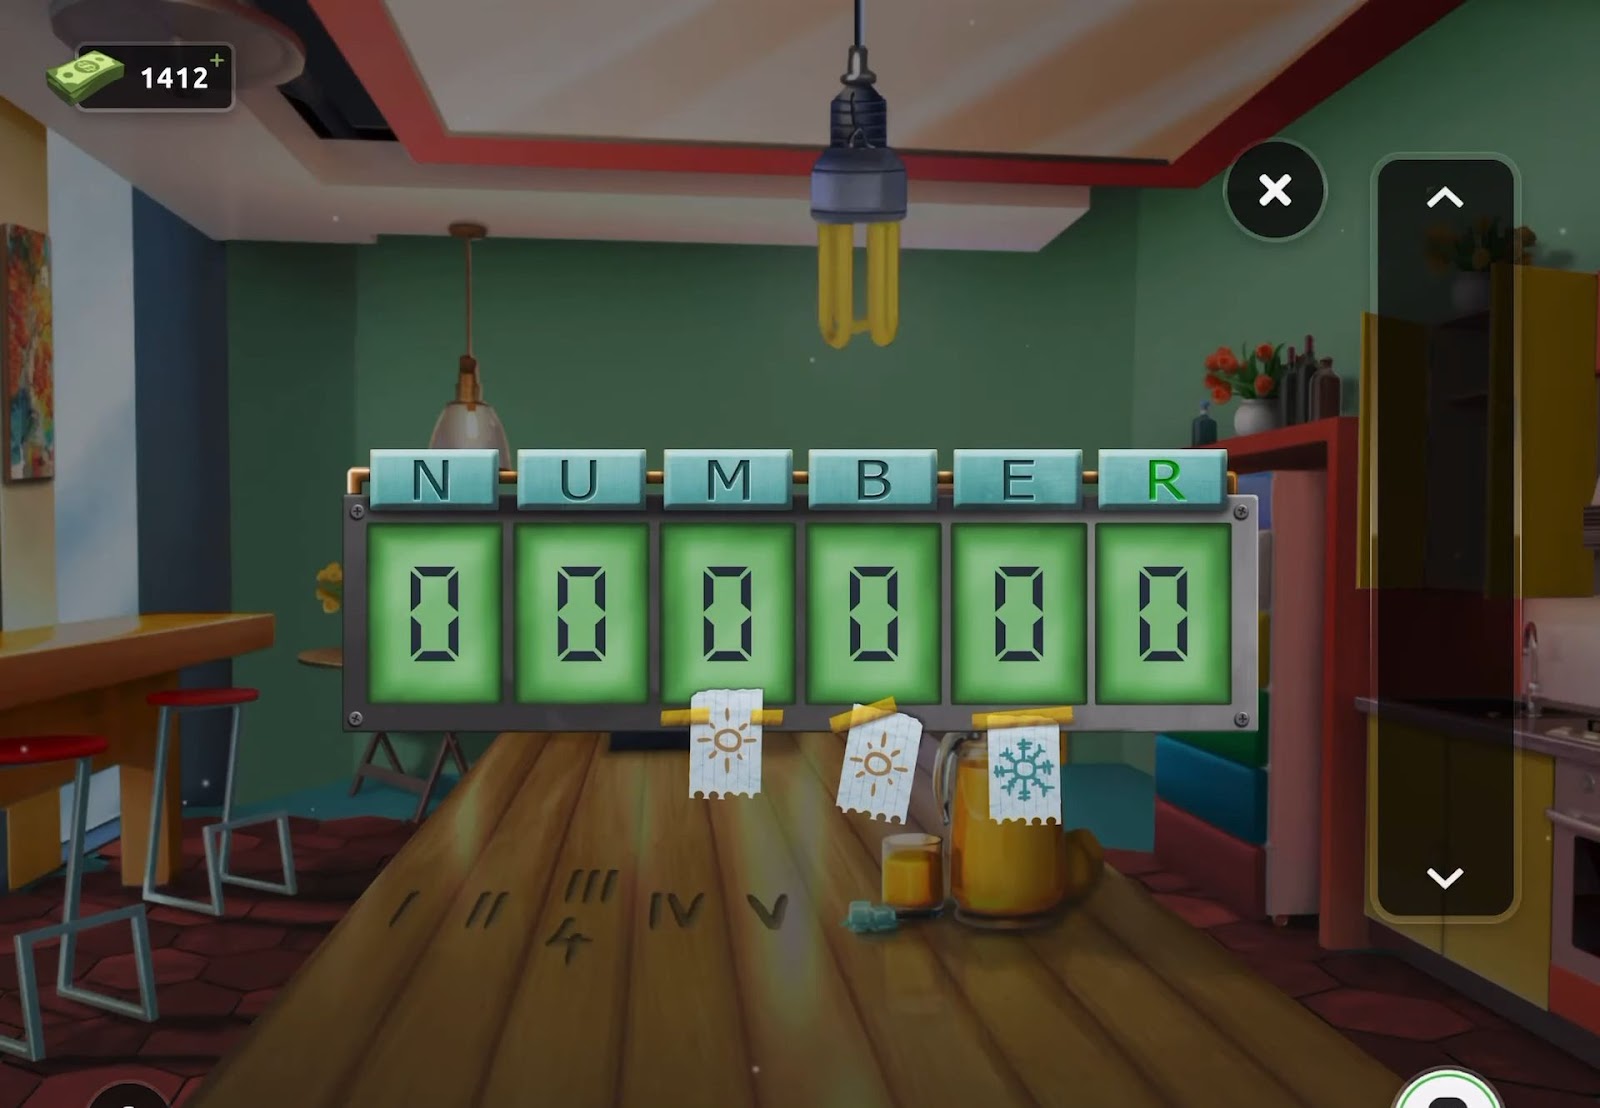
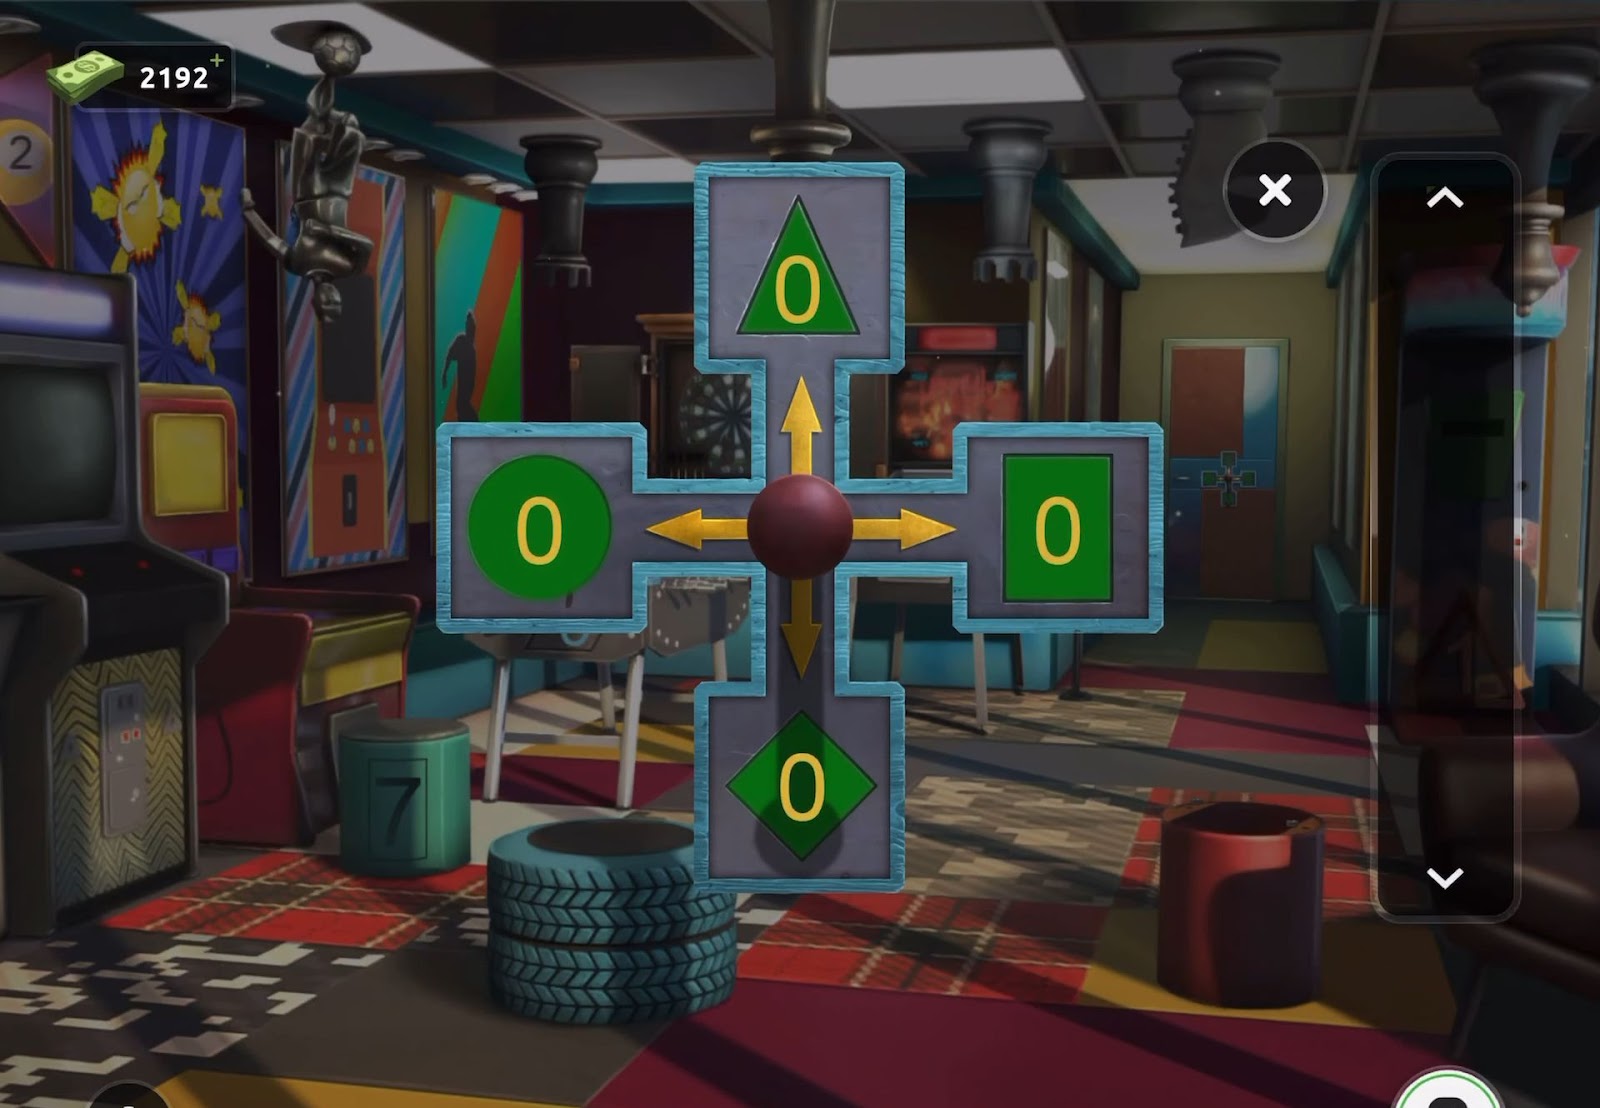
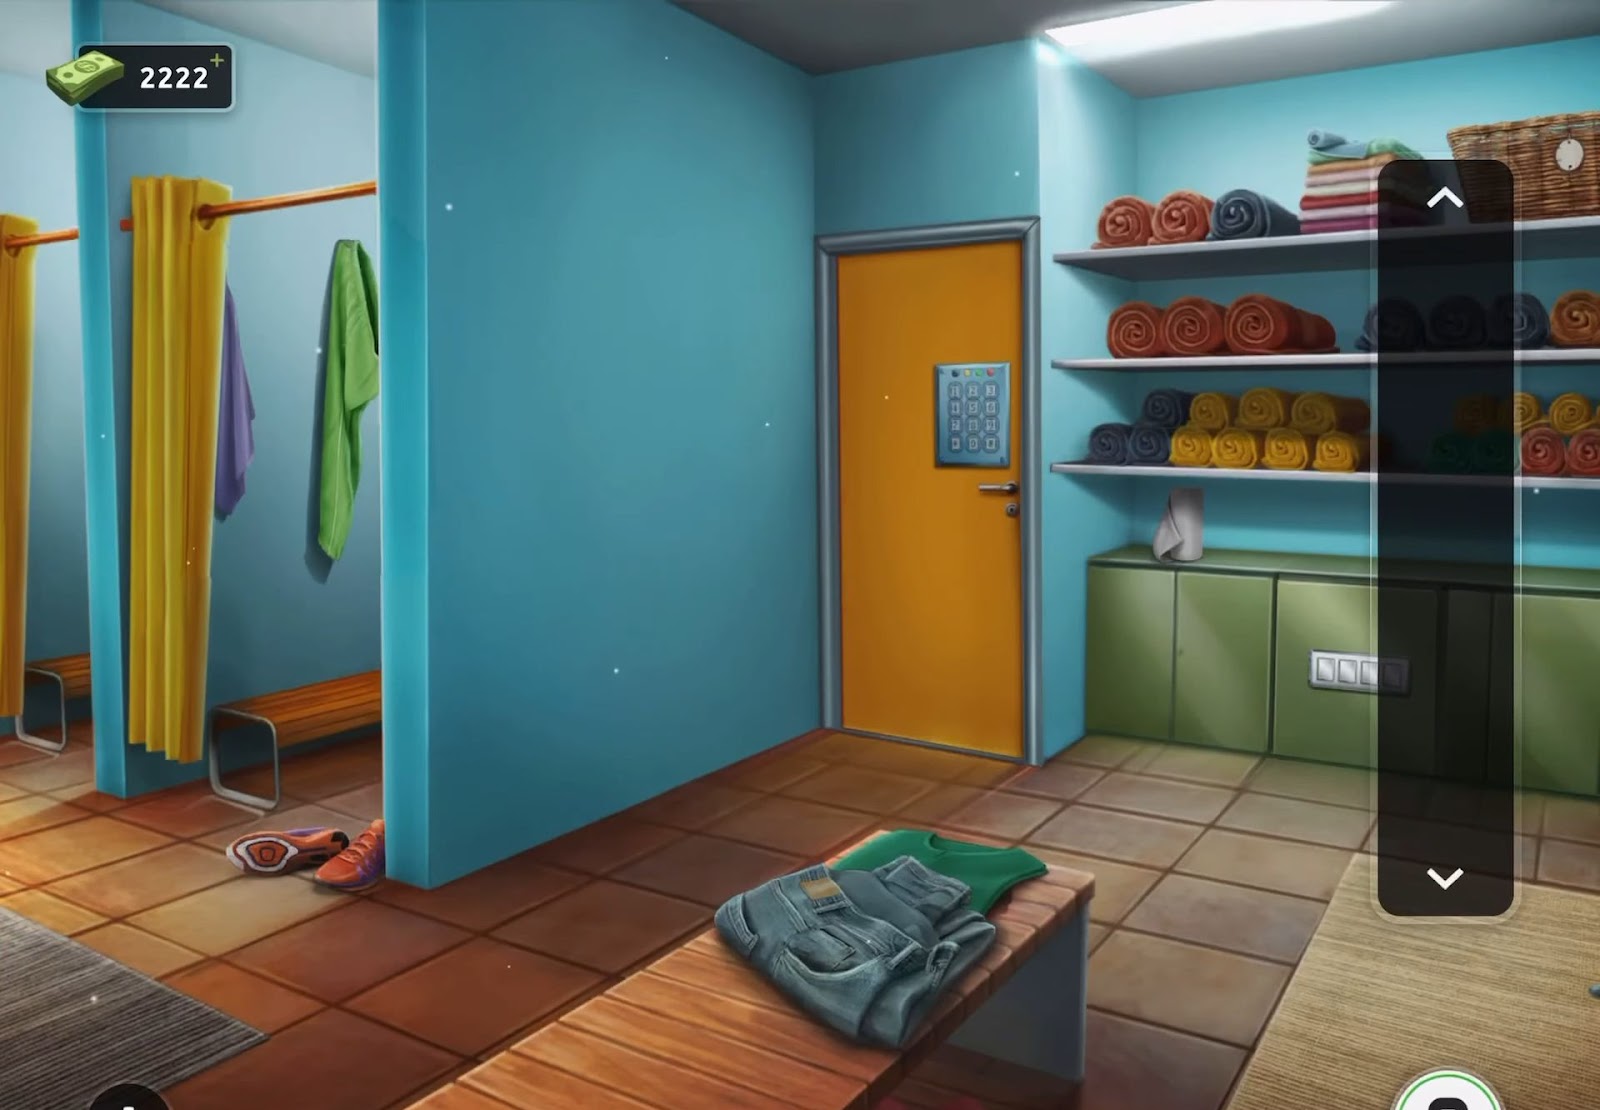
Level 17:
To complete level 17, follow the instructions below:
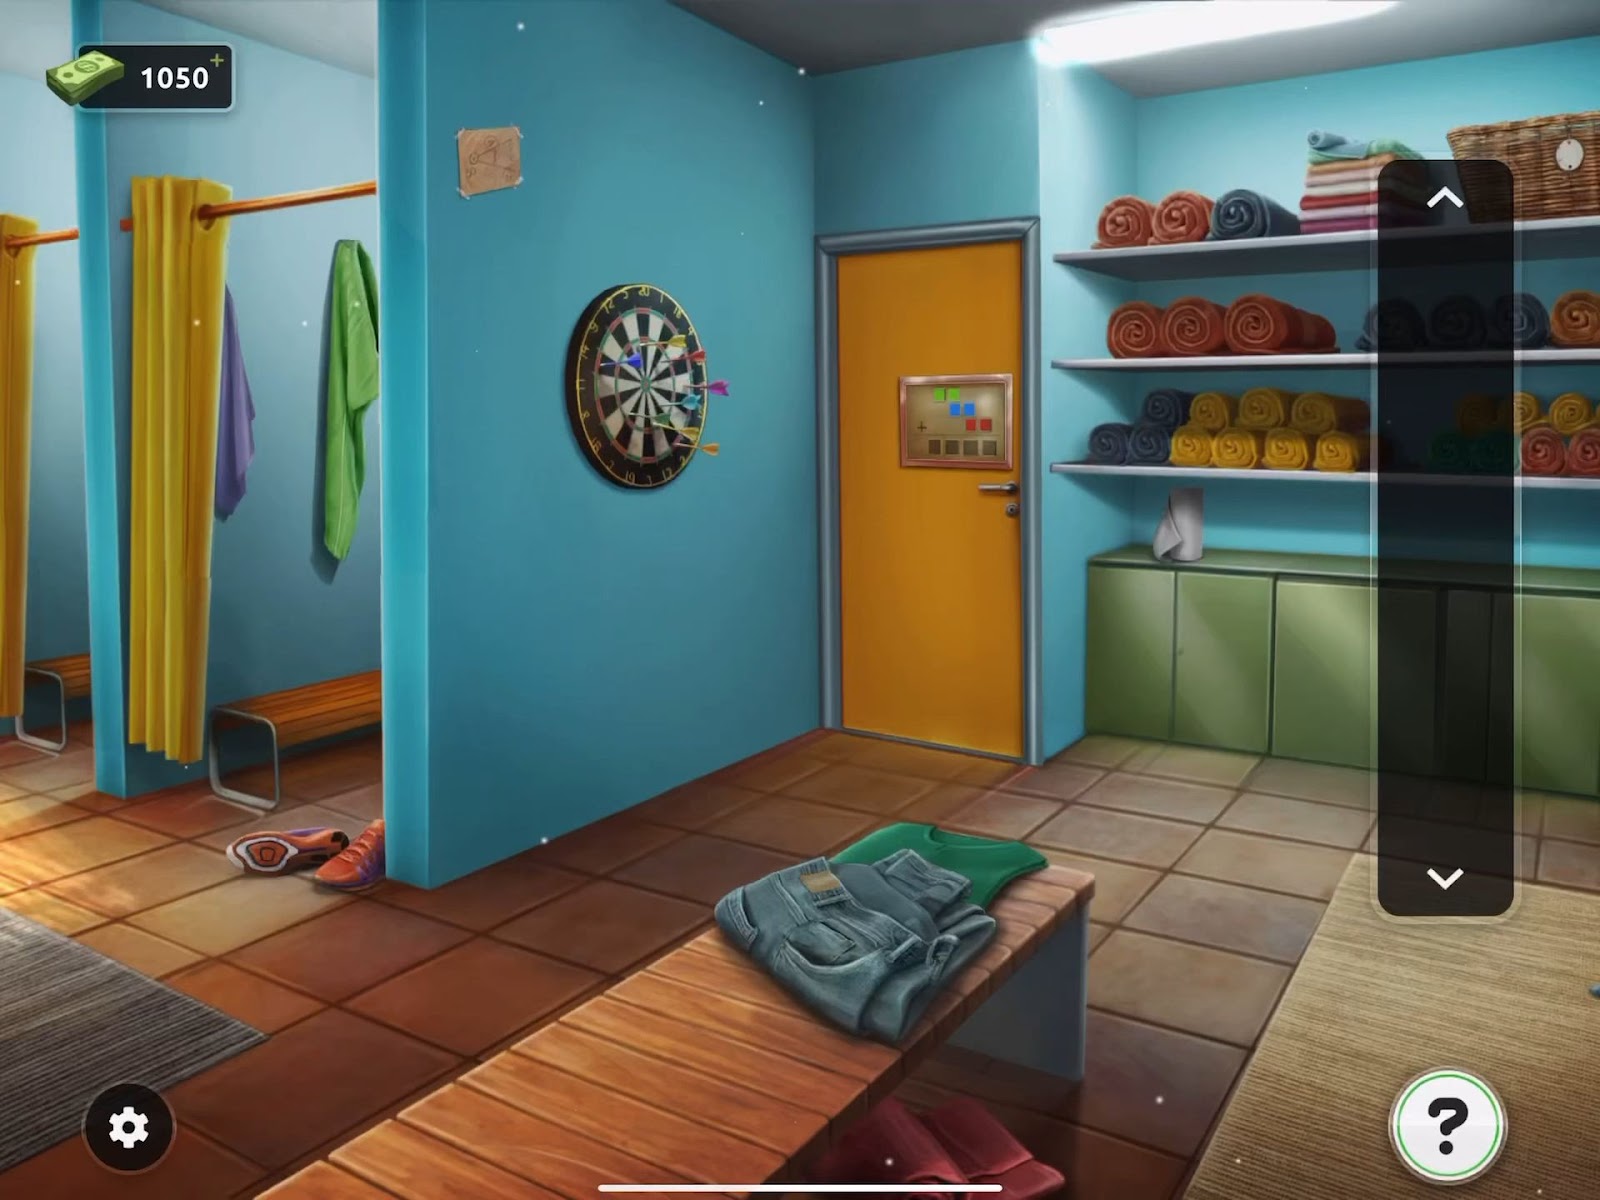
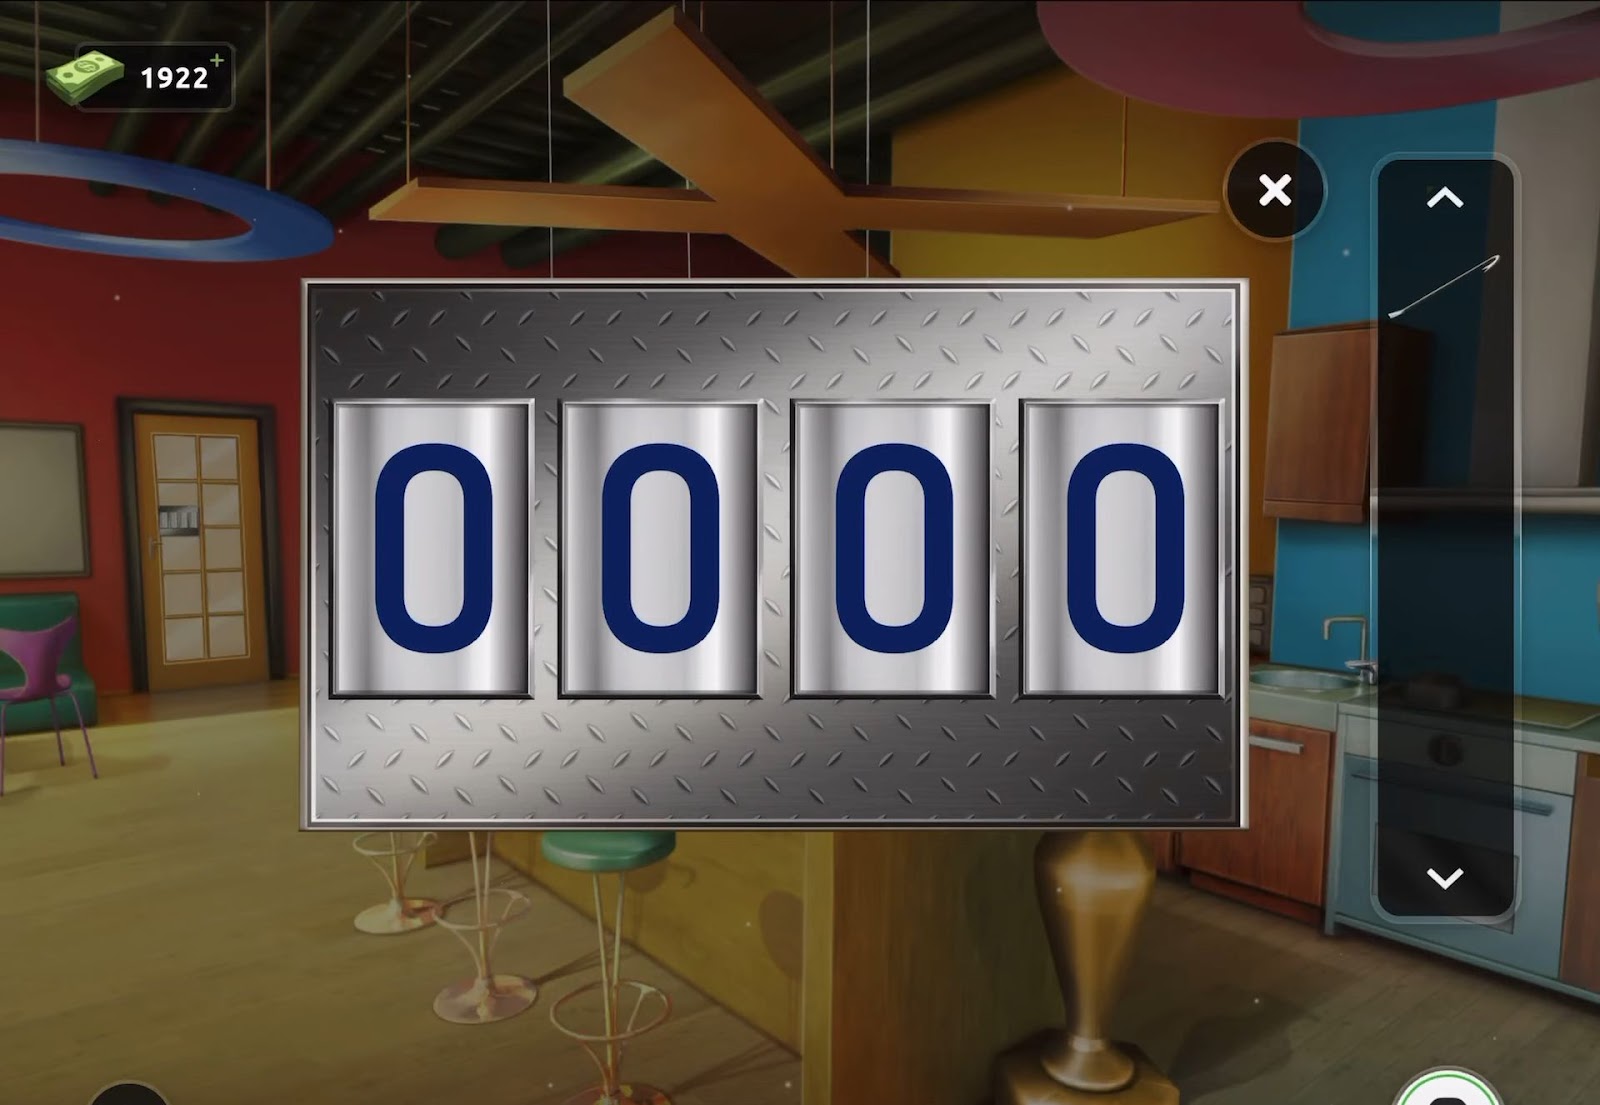
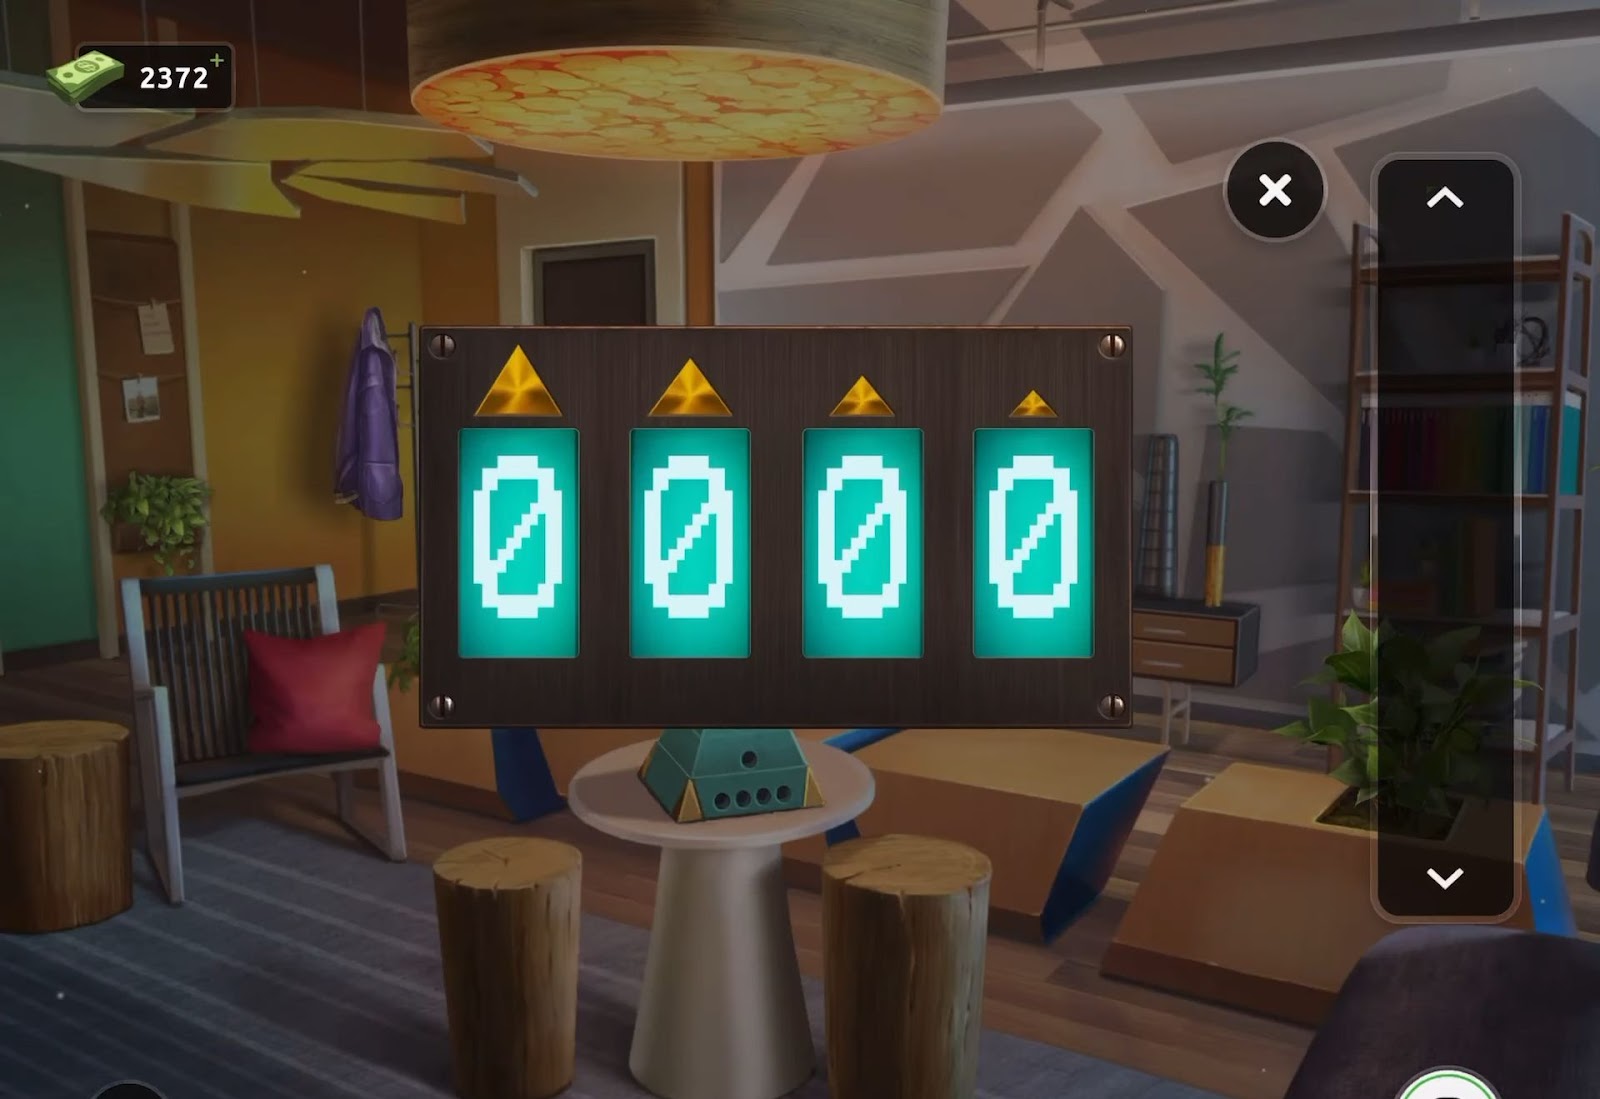
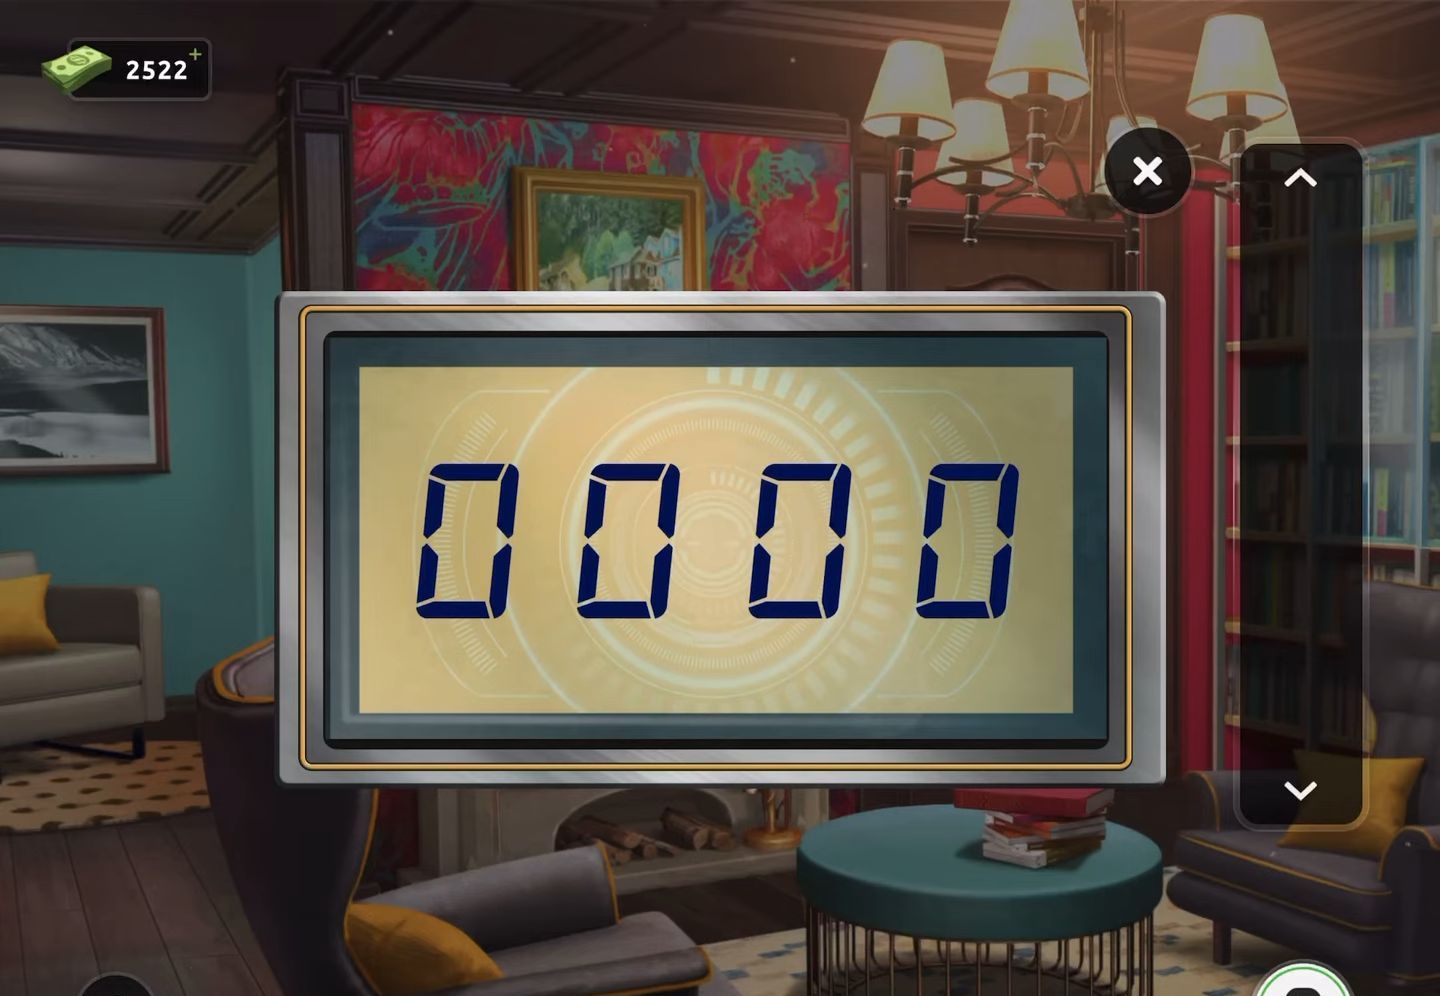
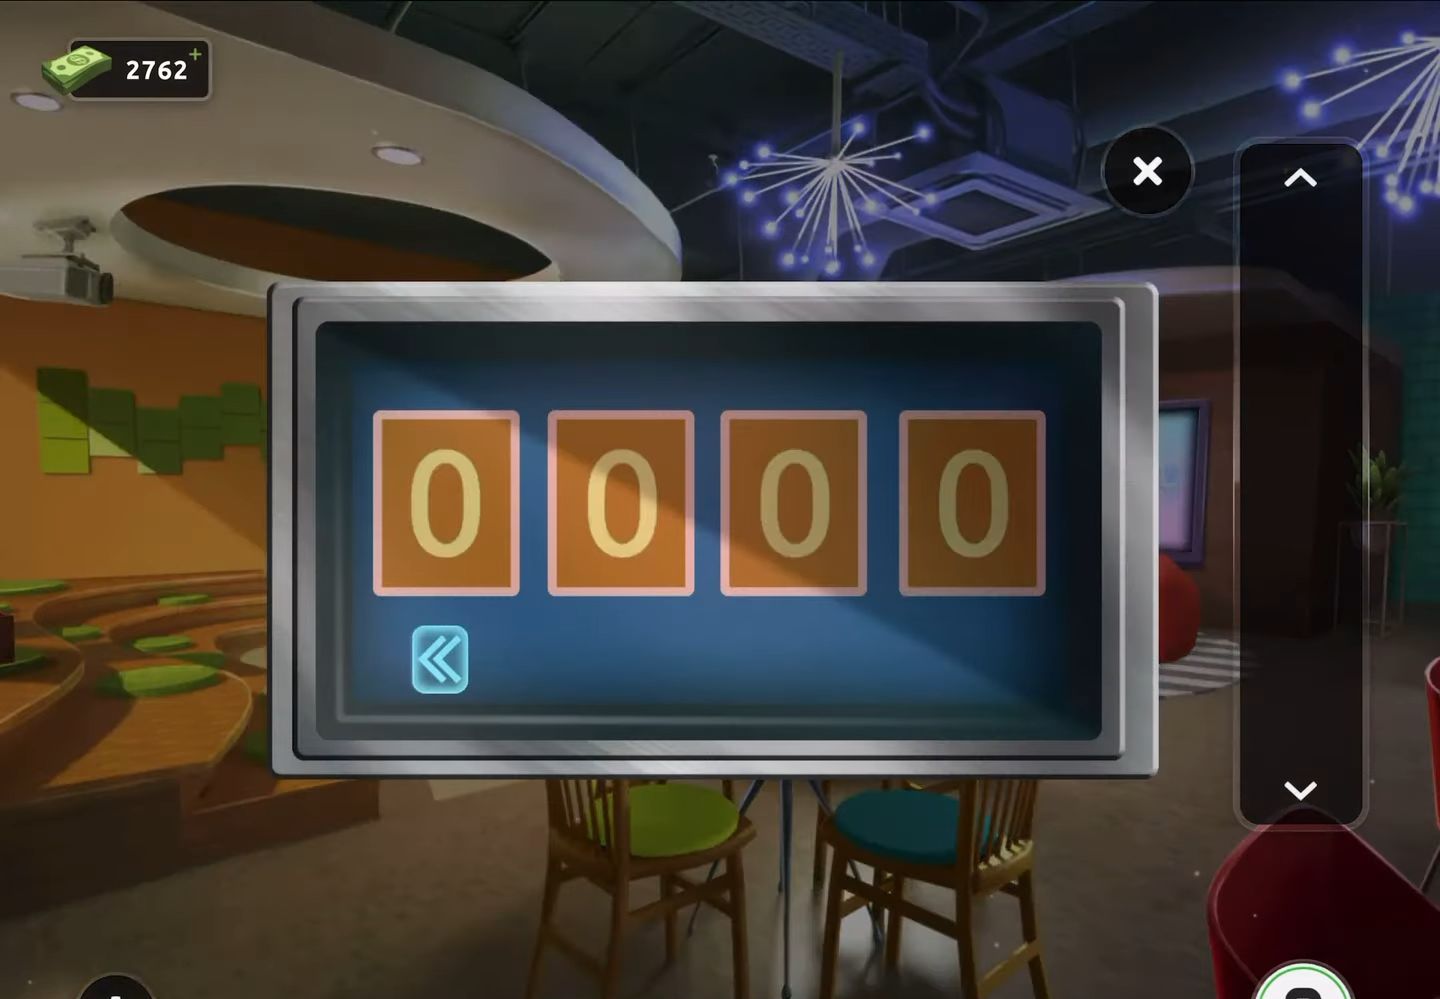
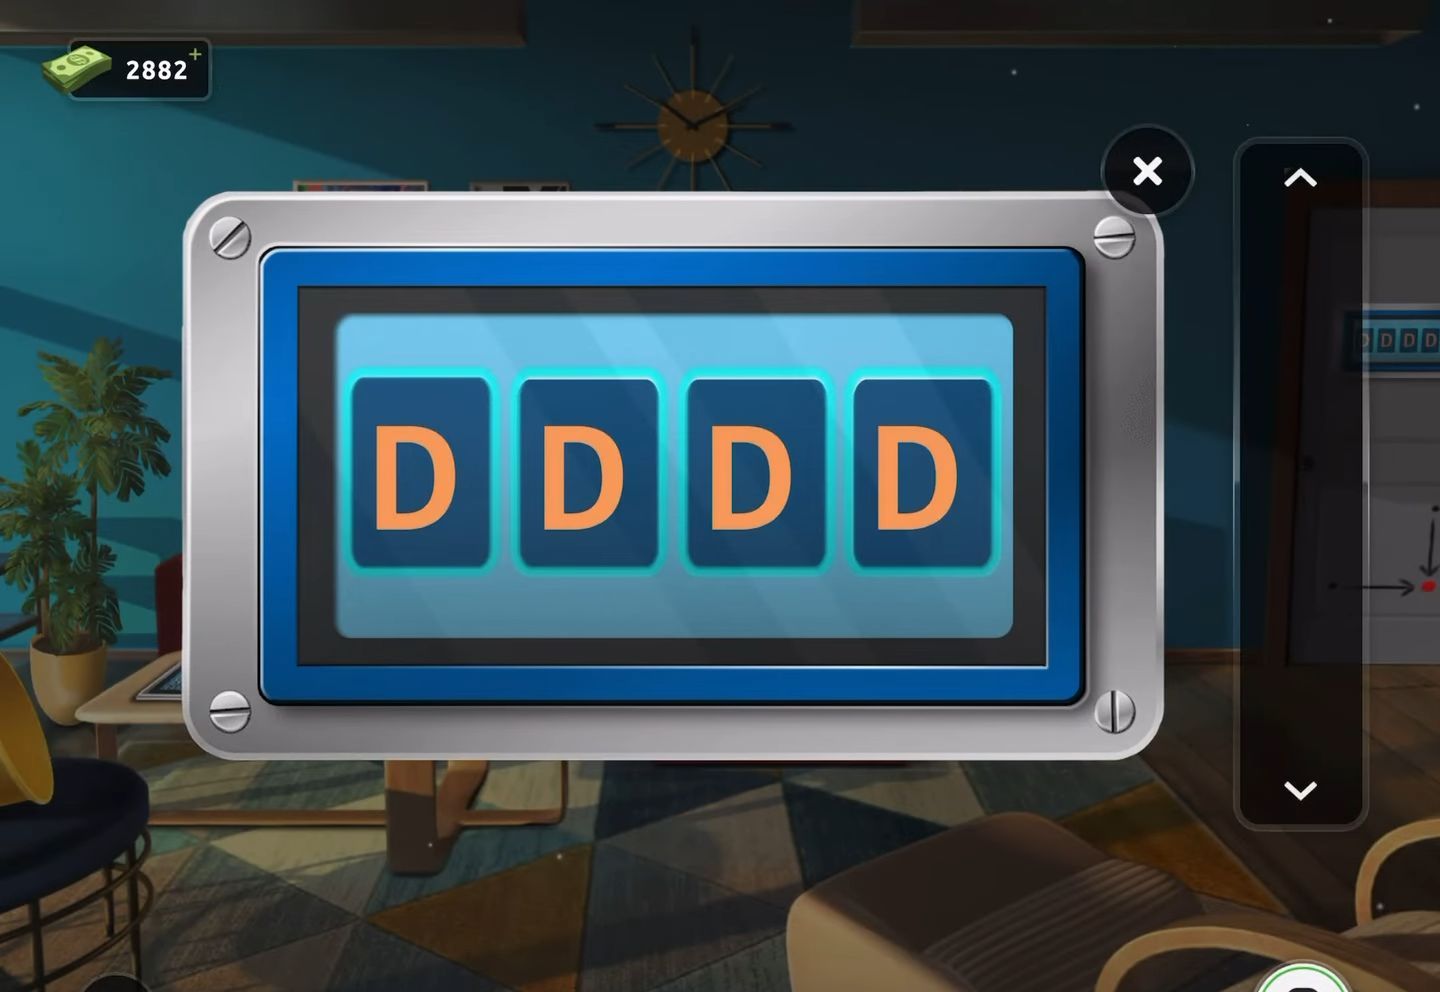
- Overview of the shower room. Firstly, you have the option to tap and view a paper located on the wall above the dartboard, providing assistance in determining the values of different areas on the dartboard if you’re uncertain.
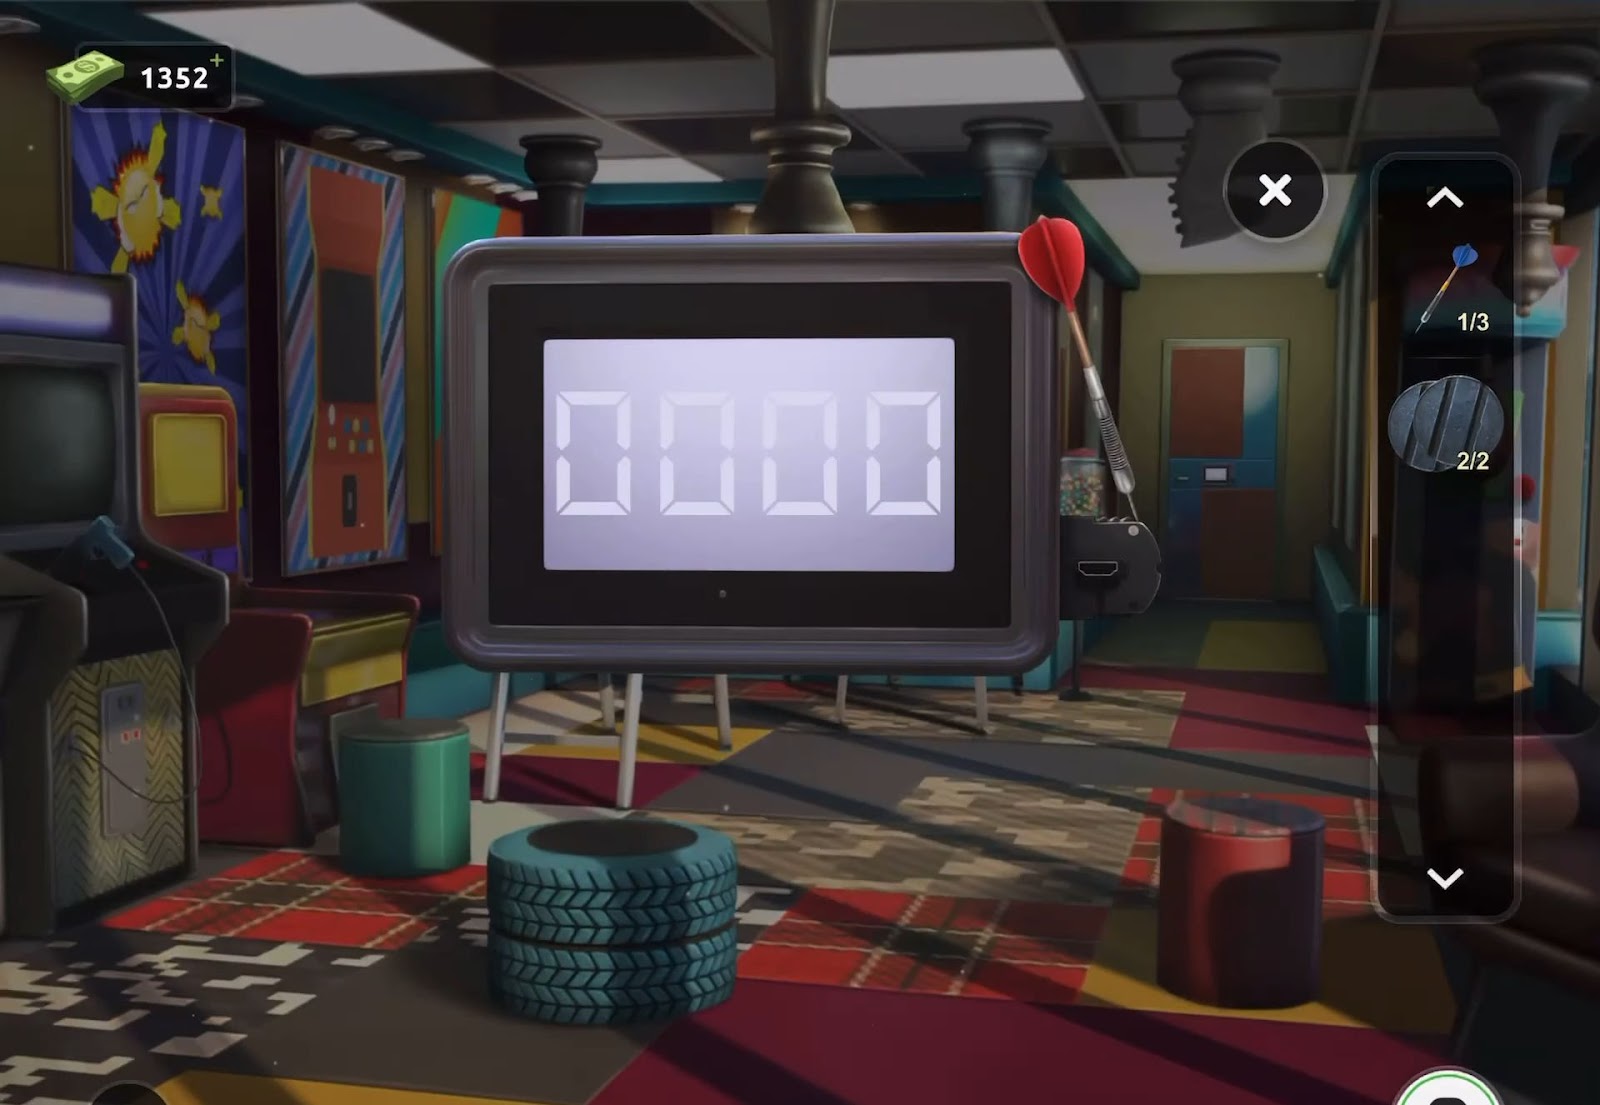
- Next, tap to access and view the dartboard.
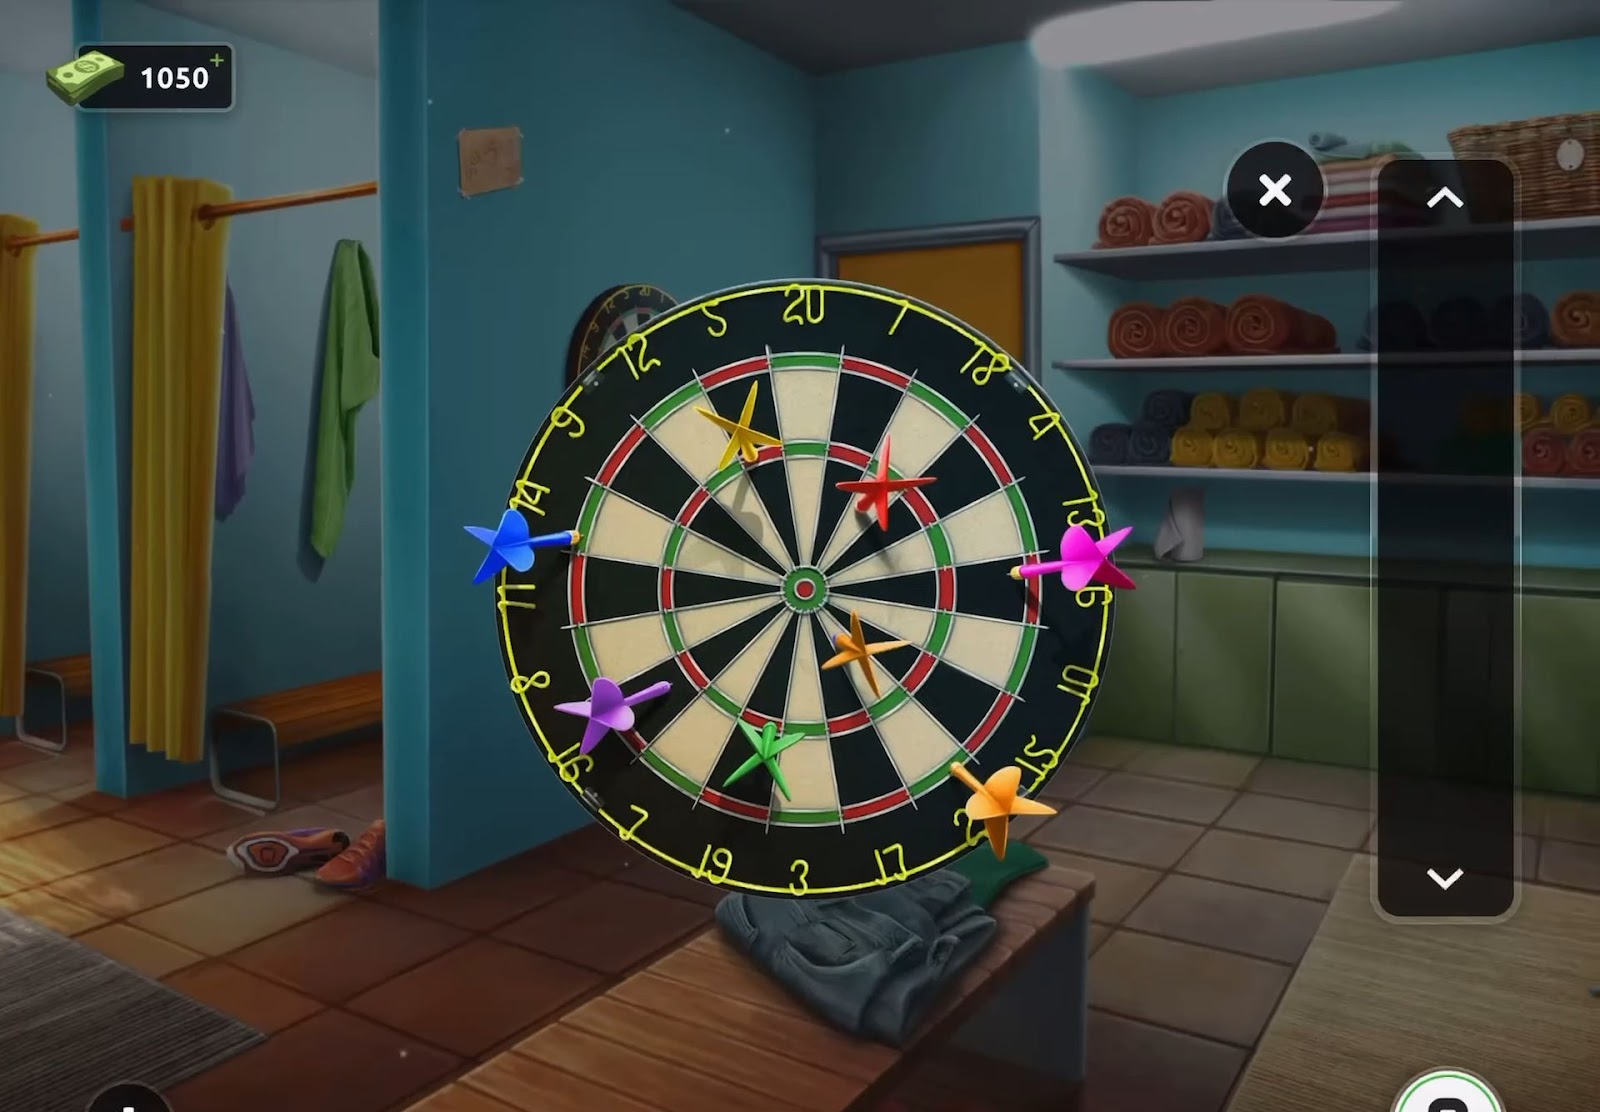
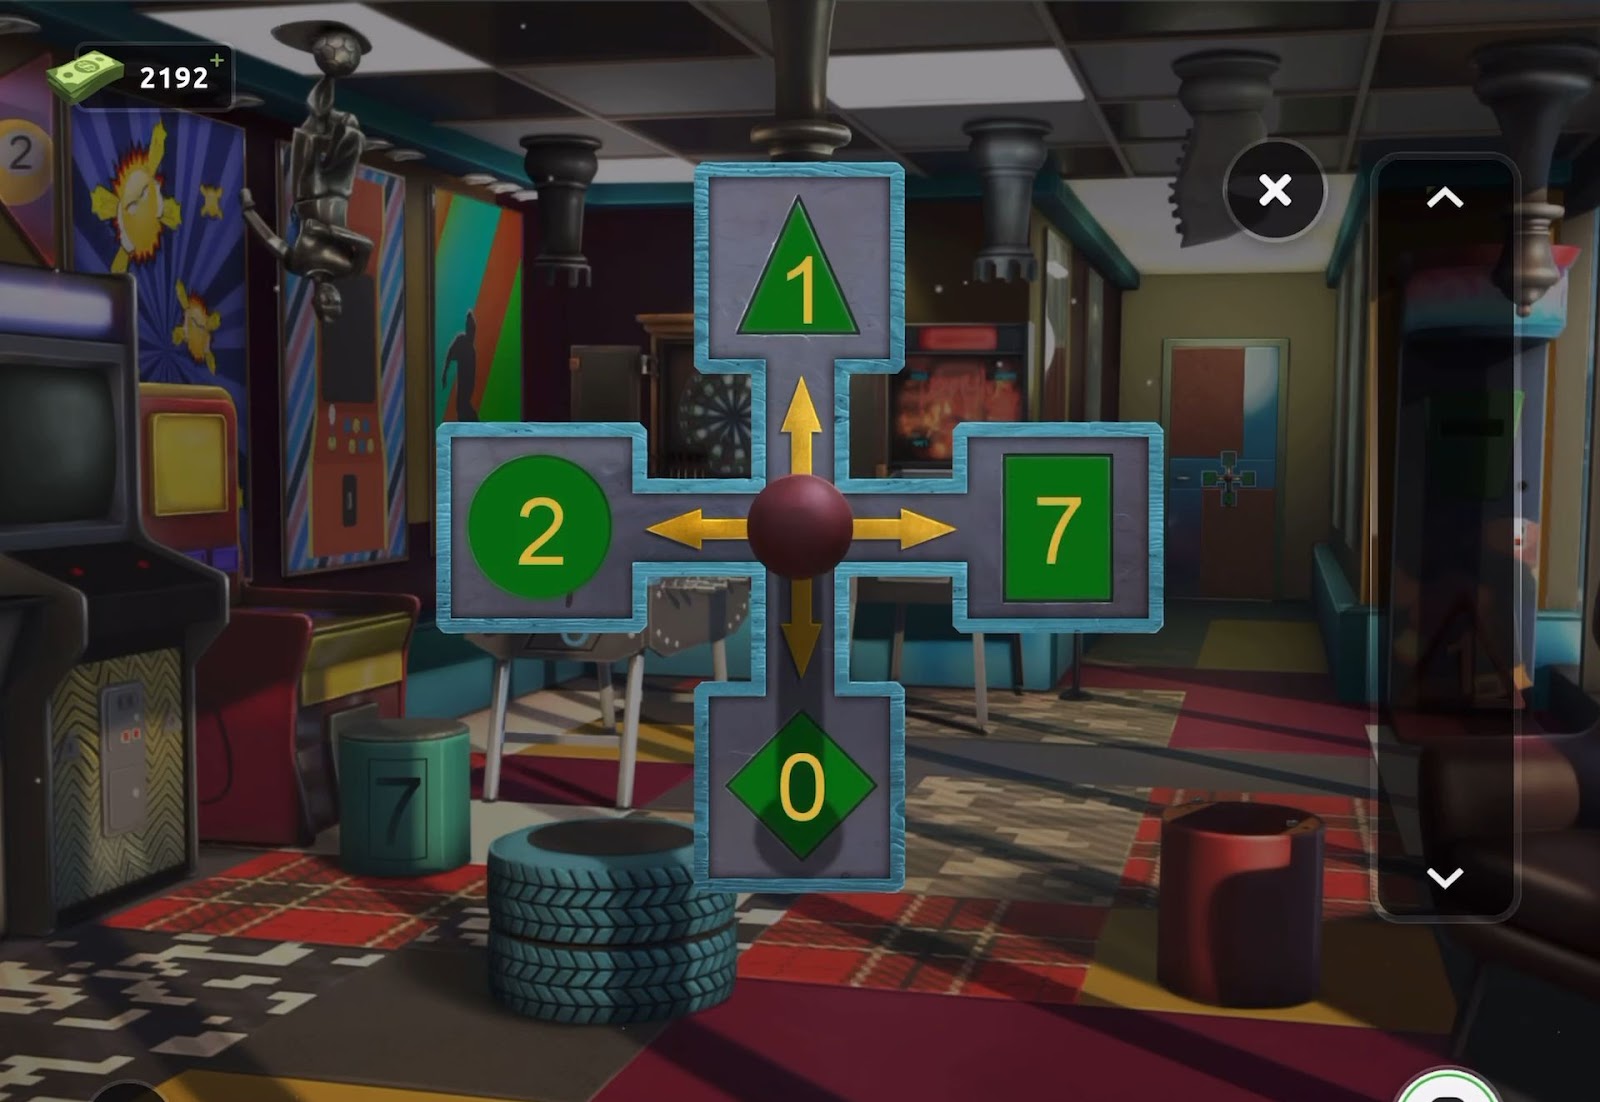
- Make a note of the numbers corresponding to each dart.
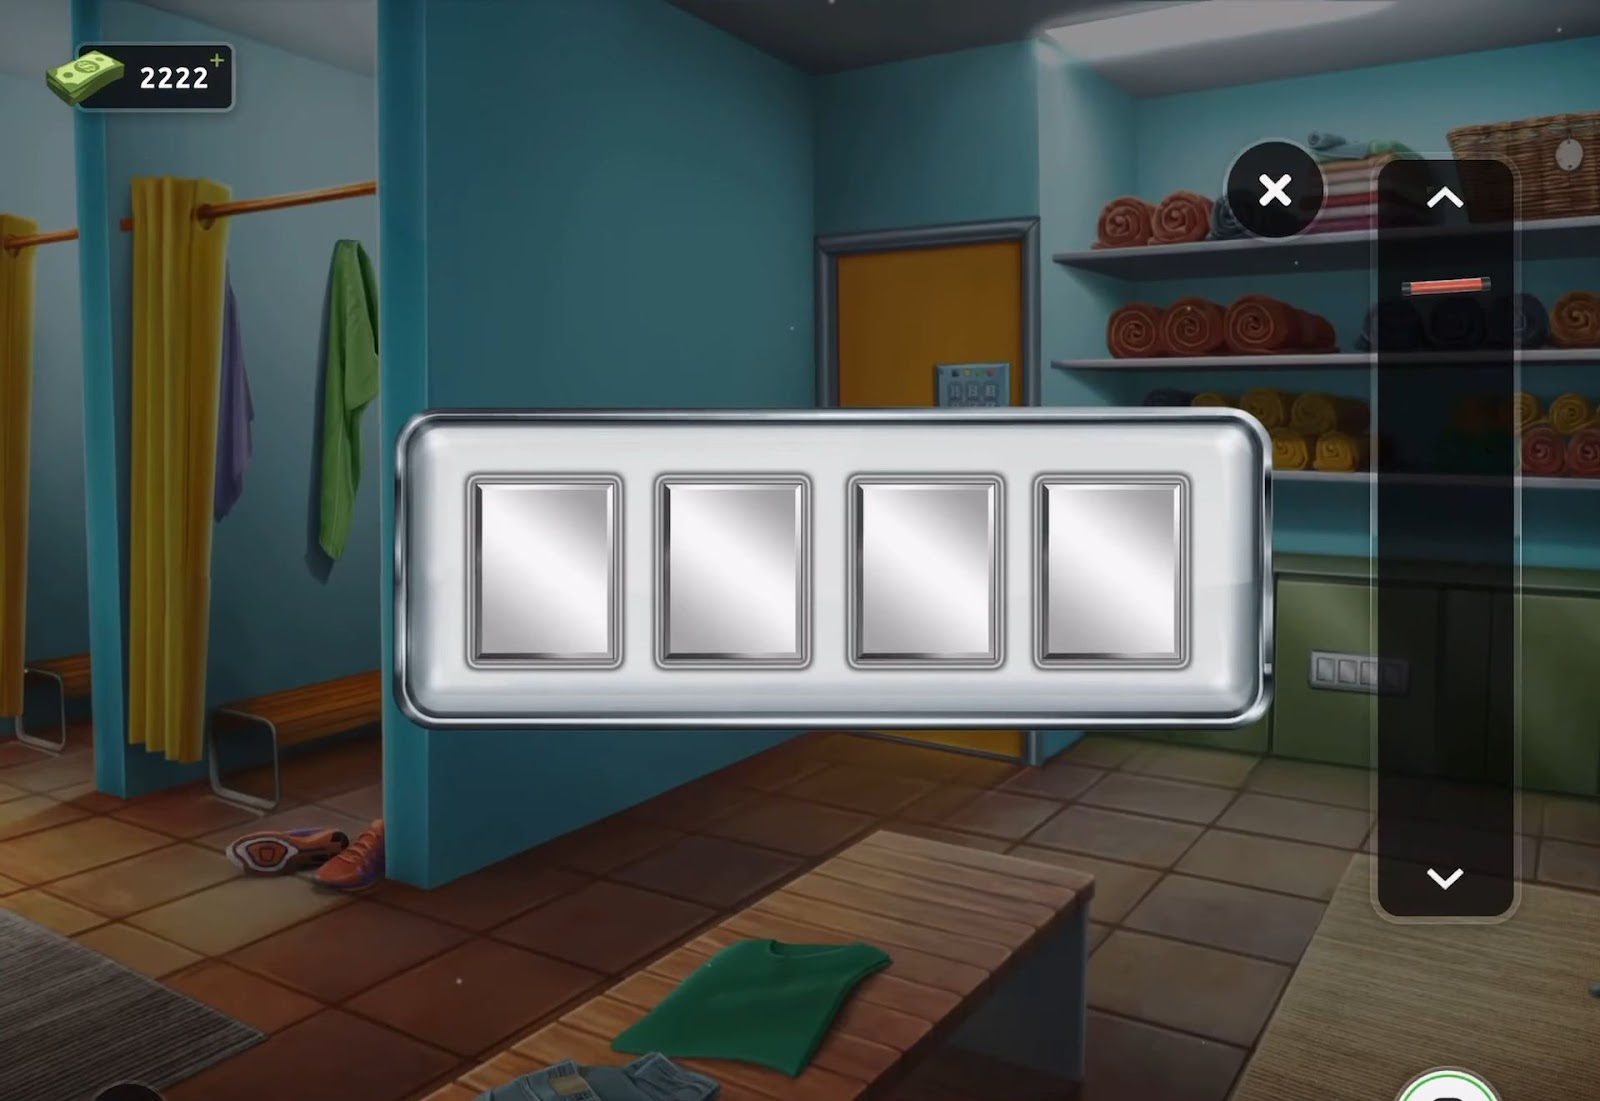
- Then, tap on the door to access and view the code lock.
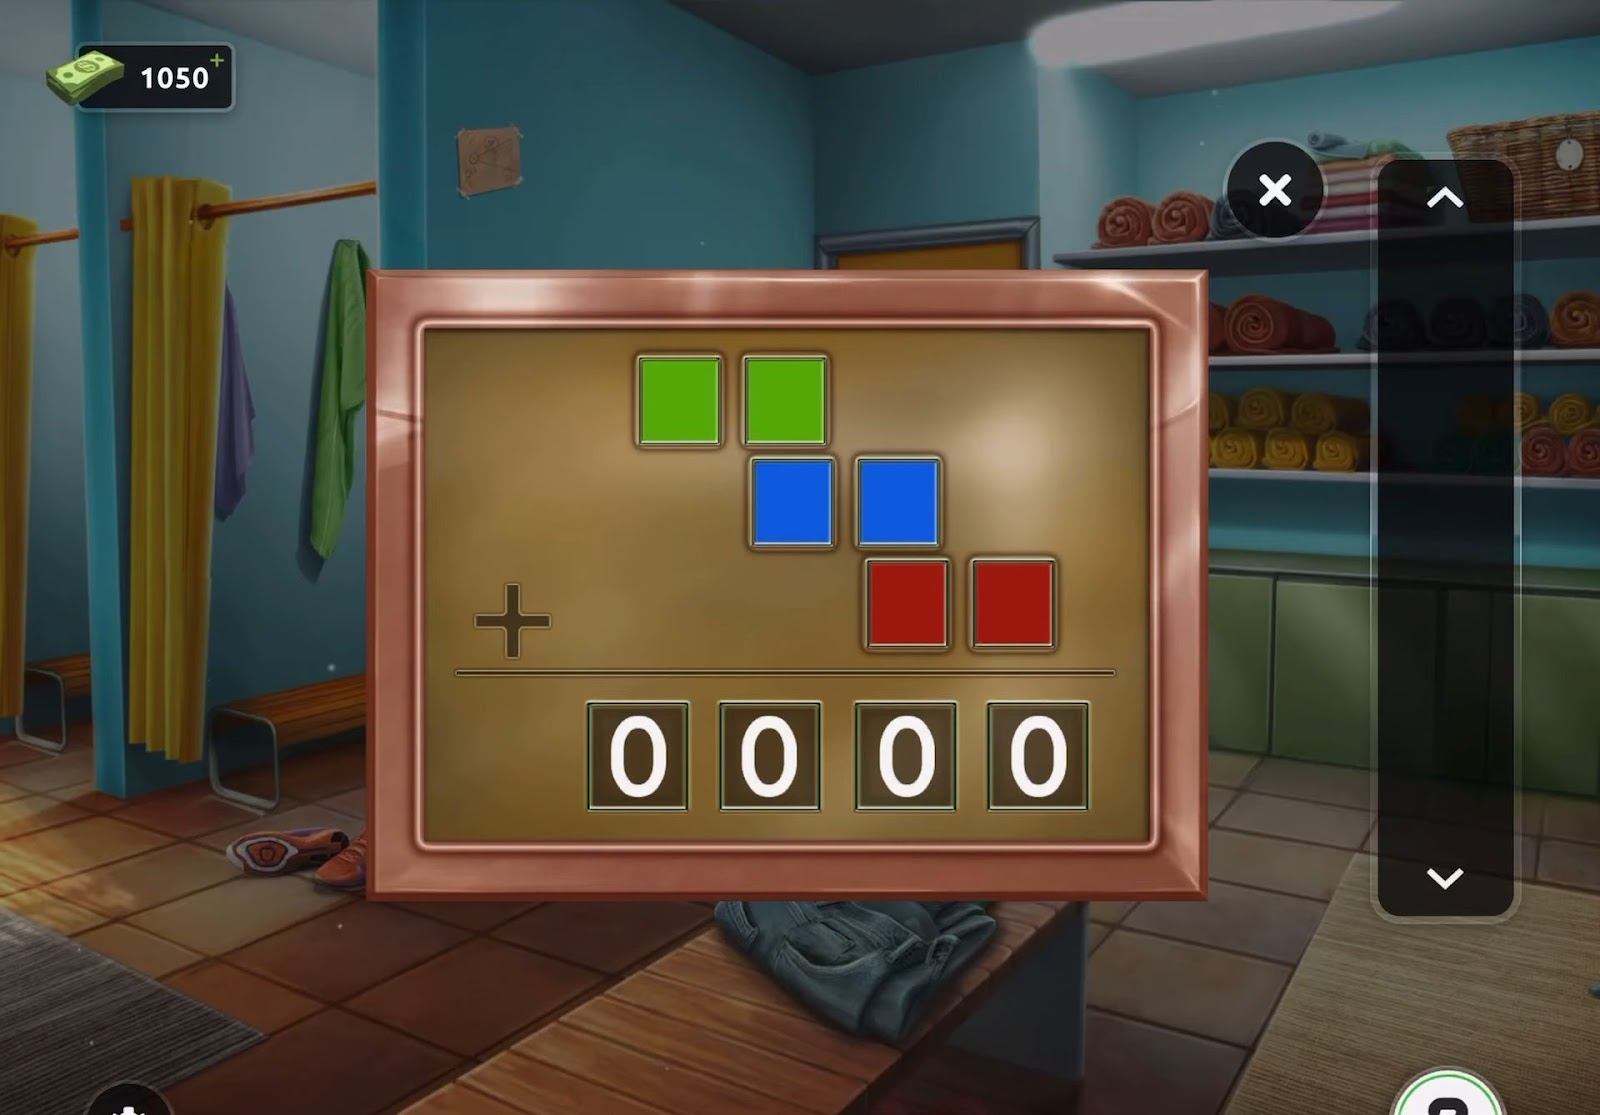
- After that, calculate the code by utilizing the numbers associated with the green, blue, and red darts on the dartboard.
- Then add these numbers together to derive the code (0000).
- Finally, use the code obtained to unlock the door and exit through it.
Level 18:
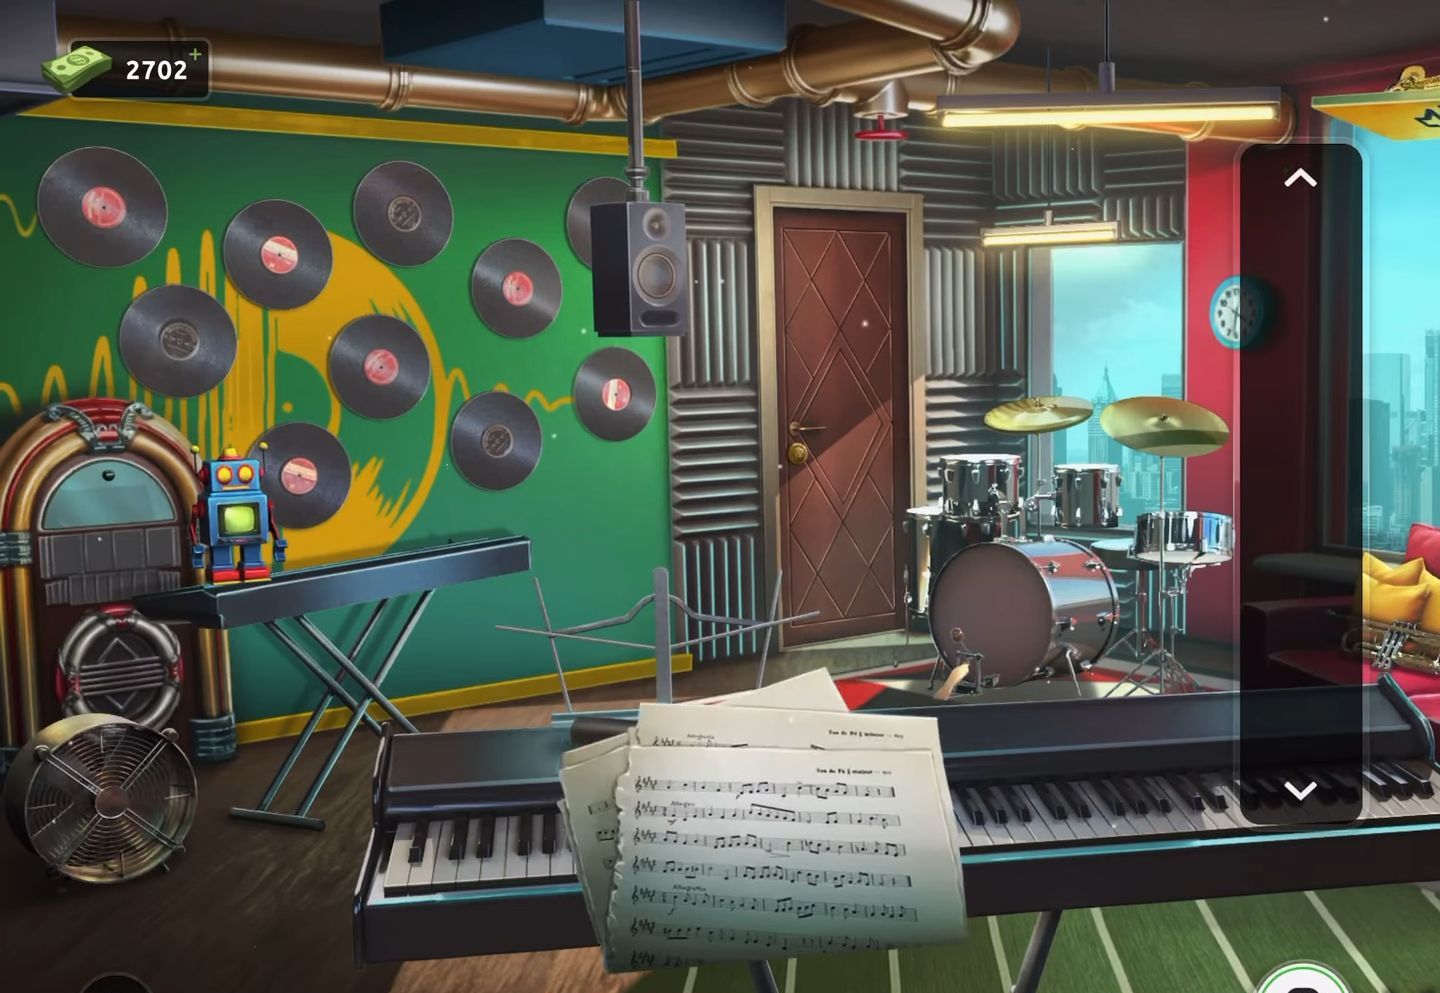
To complete level 18, follow the instructions below:
- Access the Music Studio. Firstly, retrieve the torch from the keyboard.
- Then, apply the torch to the records hanging on the wall.
- Now activate the torch by tapping on it, thereby illuminating letters on each record.
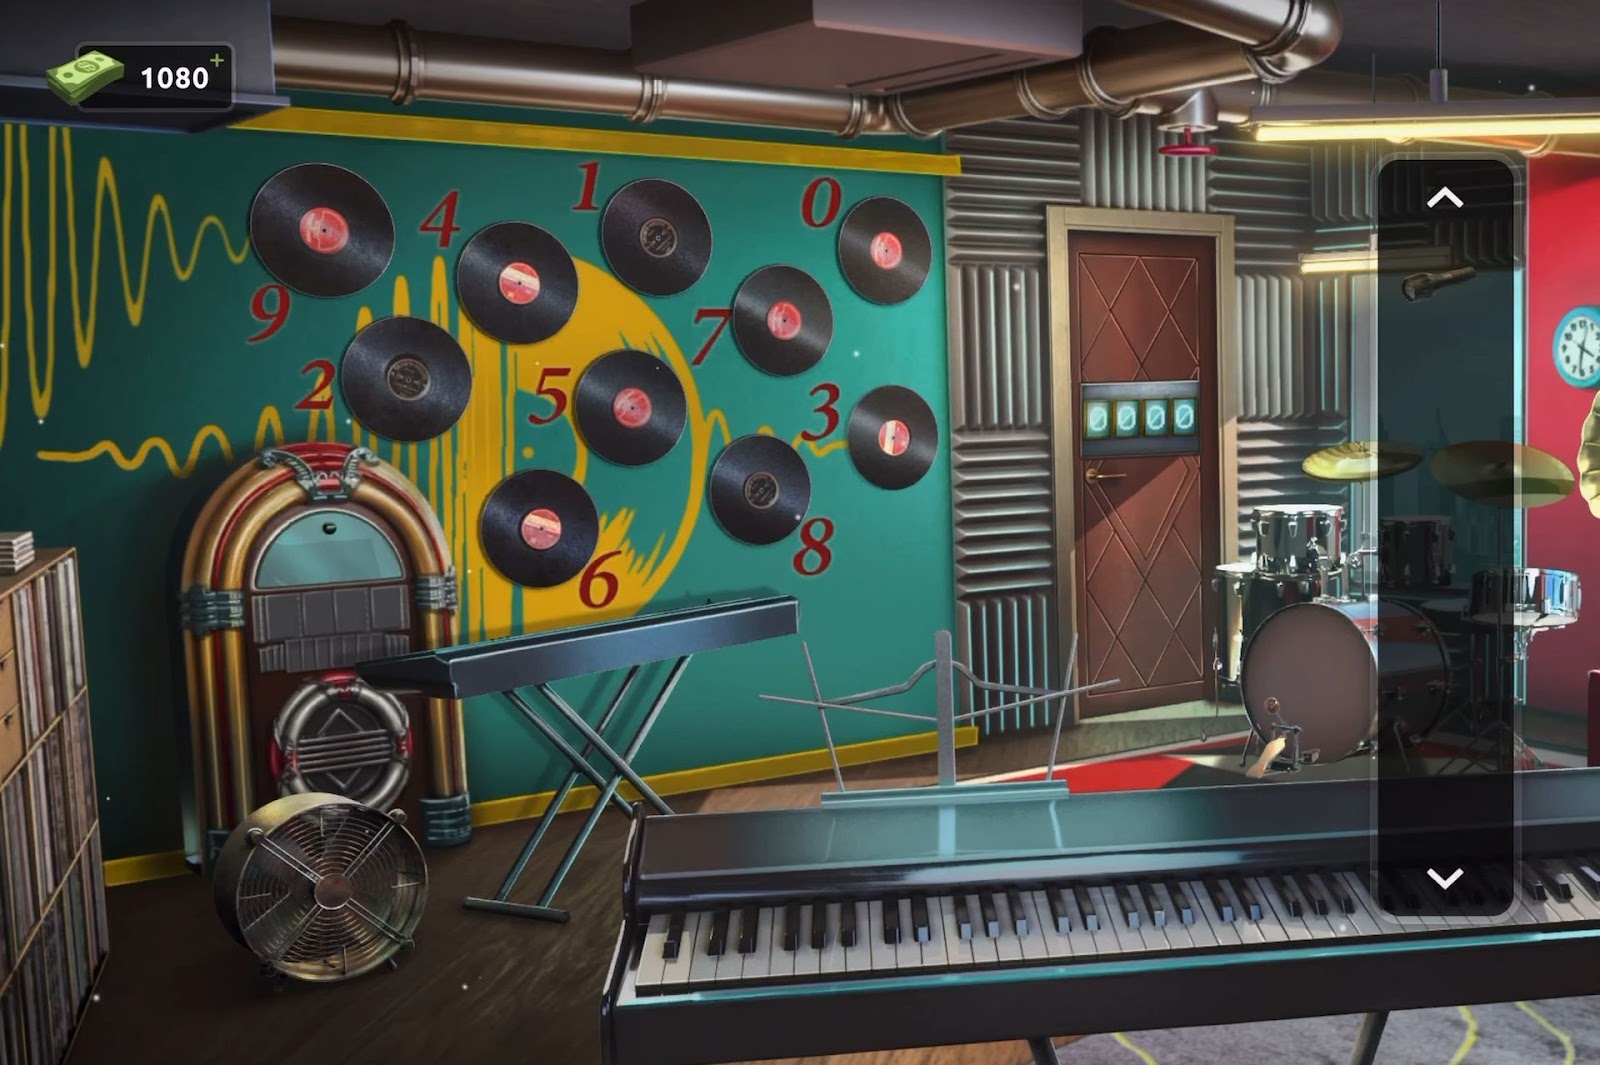
- Next, observe that the record player located on the right displays the letters XY.
- After that, identify the record that bears the XY markings and drag it over to position it on the record player.
- As a result, a sequence of four letters (CDAB) will be revealed.
- Next, utilize the letters to correspond with the records on the wall, deriving a set of five numbers.
- Then, direct your attention to the code lock situated on the door.
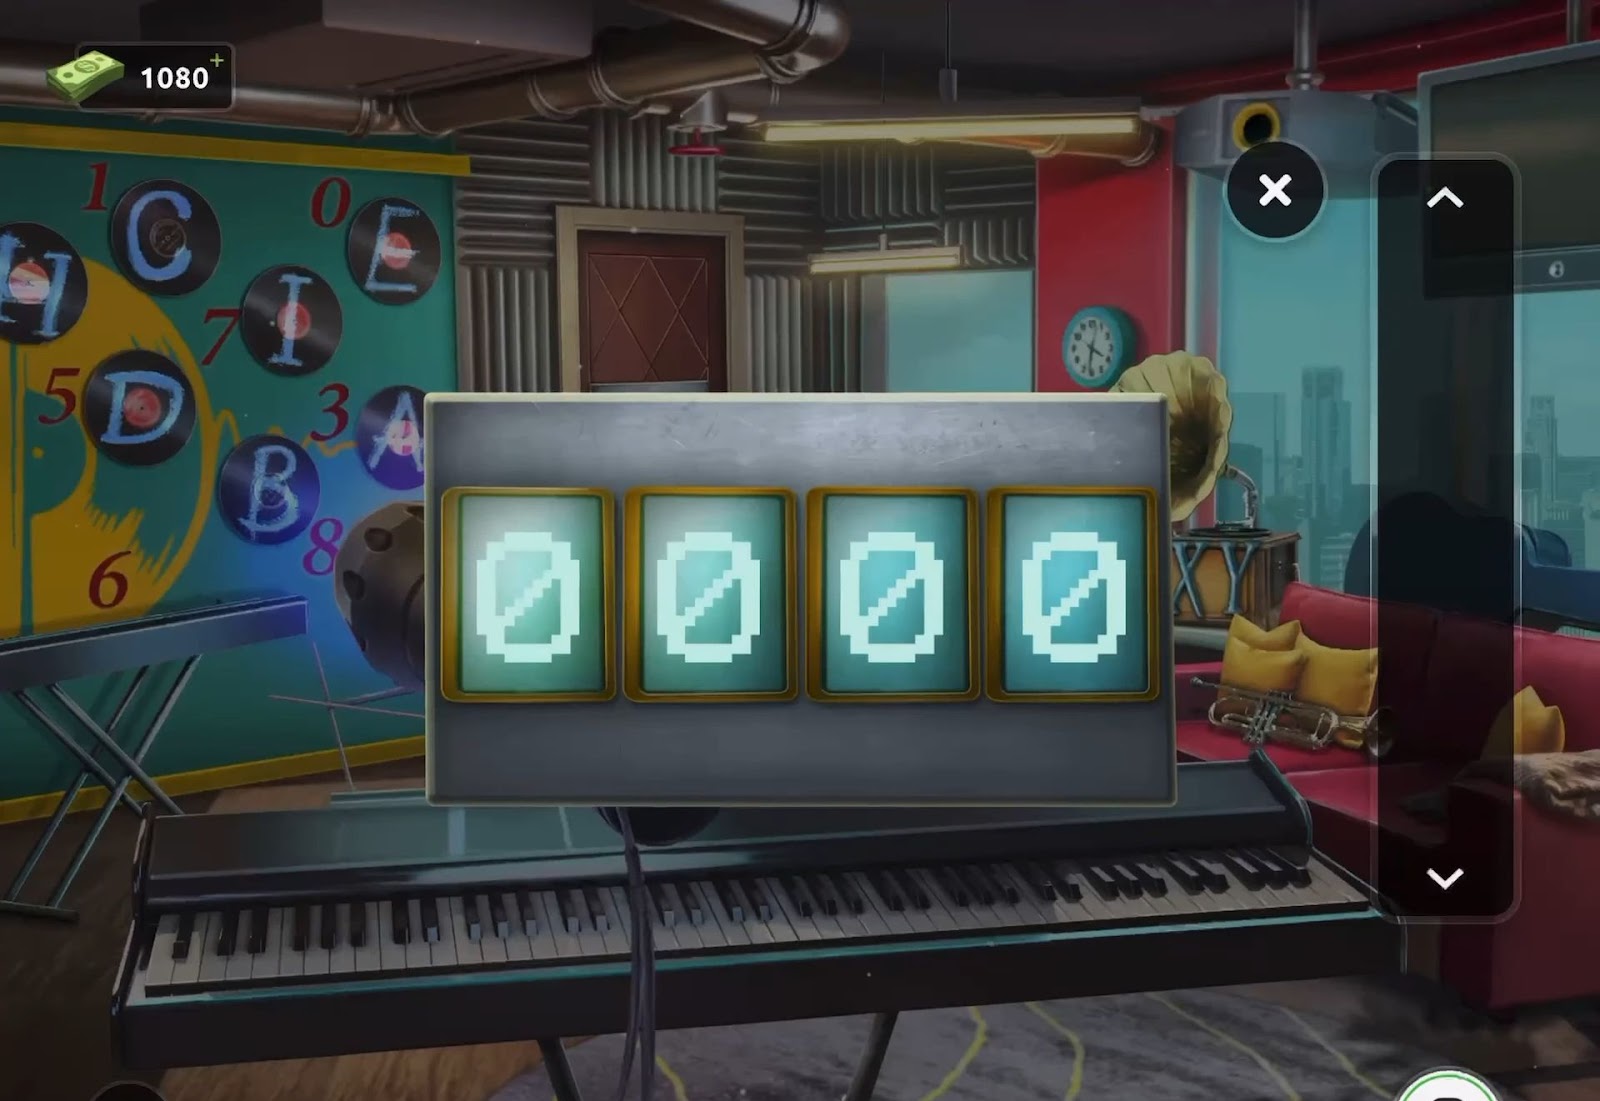
- Finally, input the four-digit code (1538) into the lock to unlock the door.
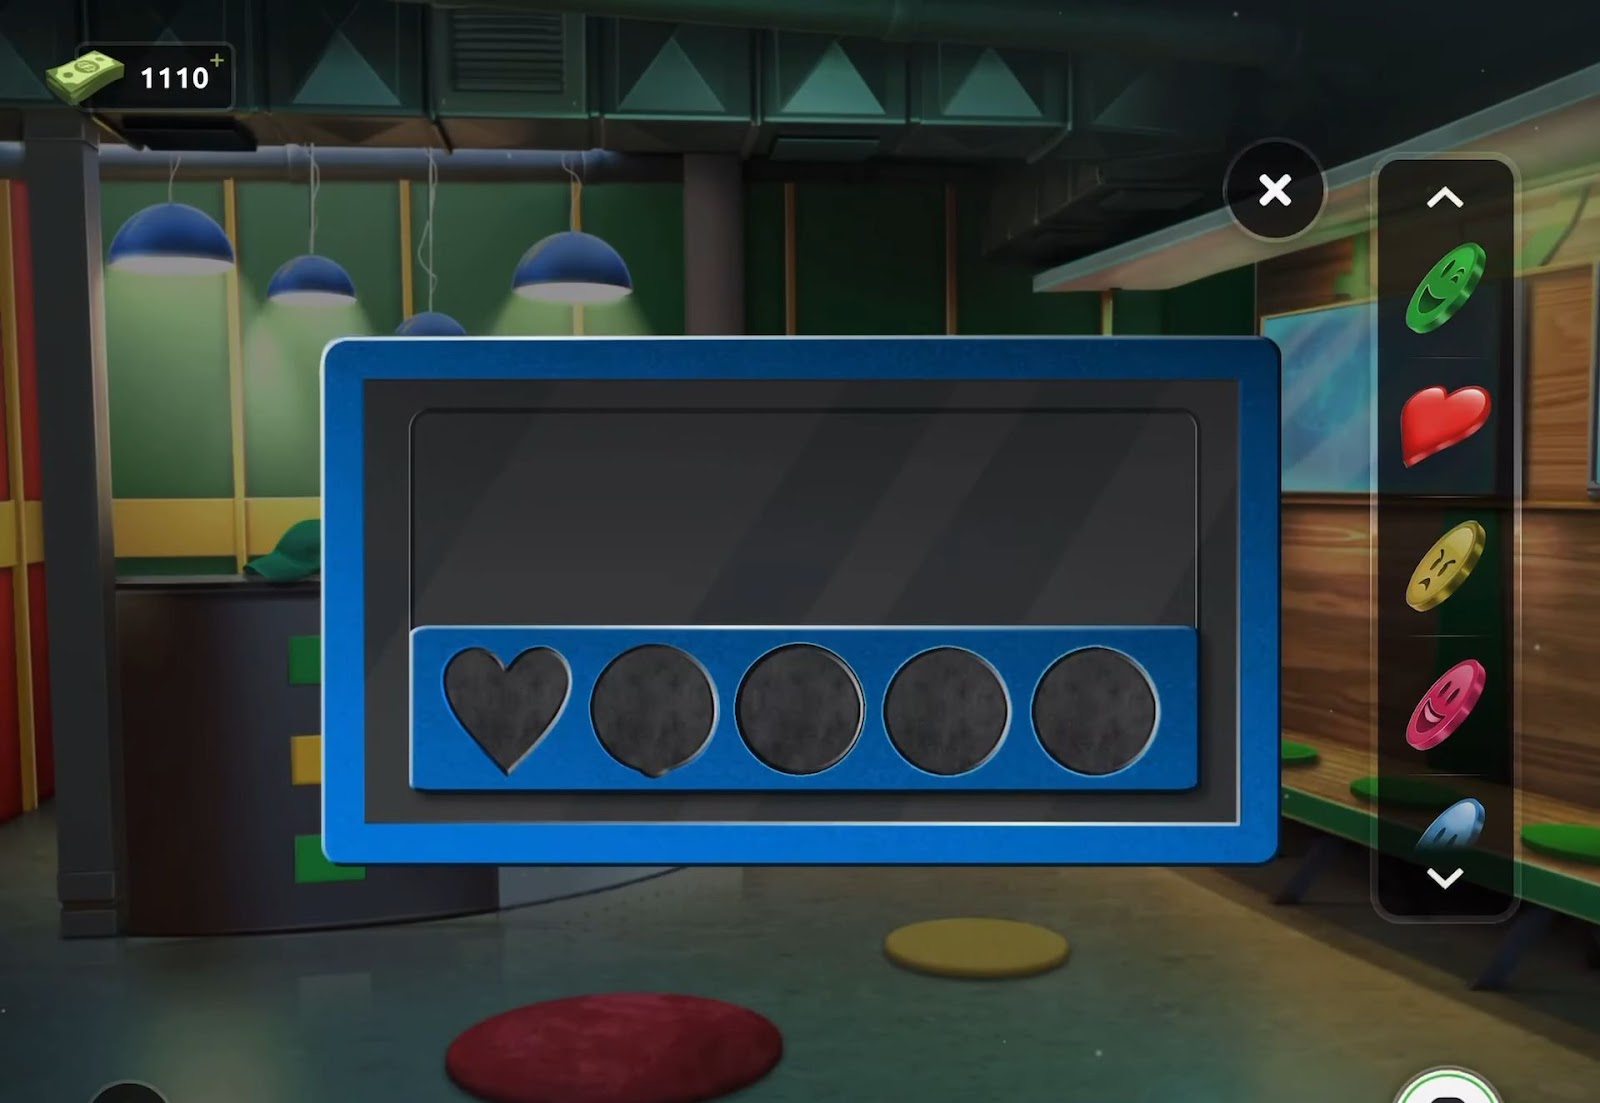
Level 19:
To complete level 19, follow the instructions below:
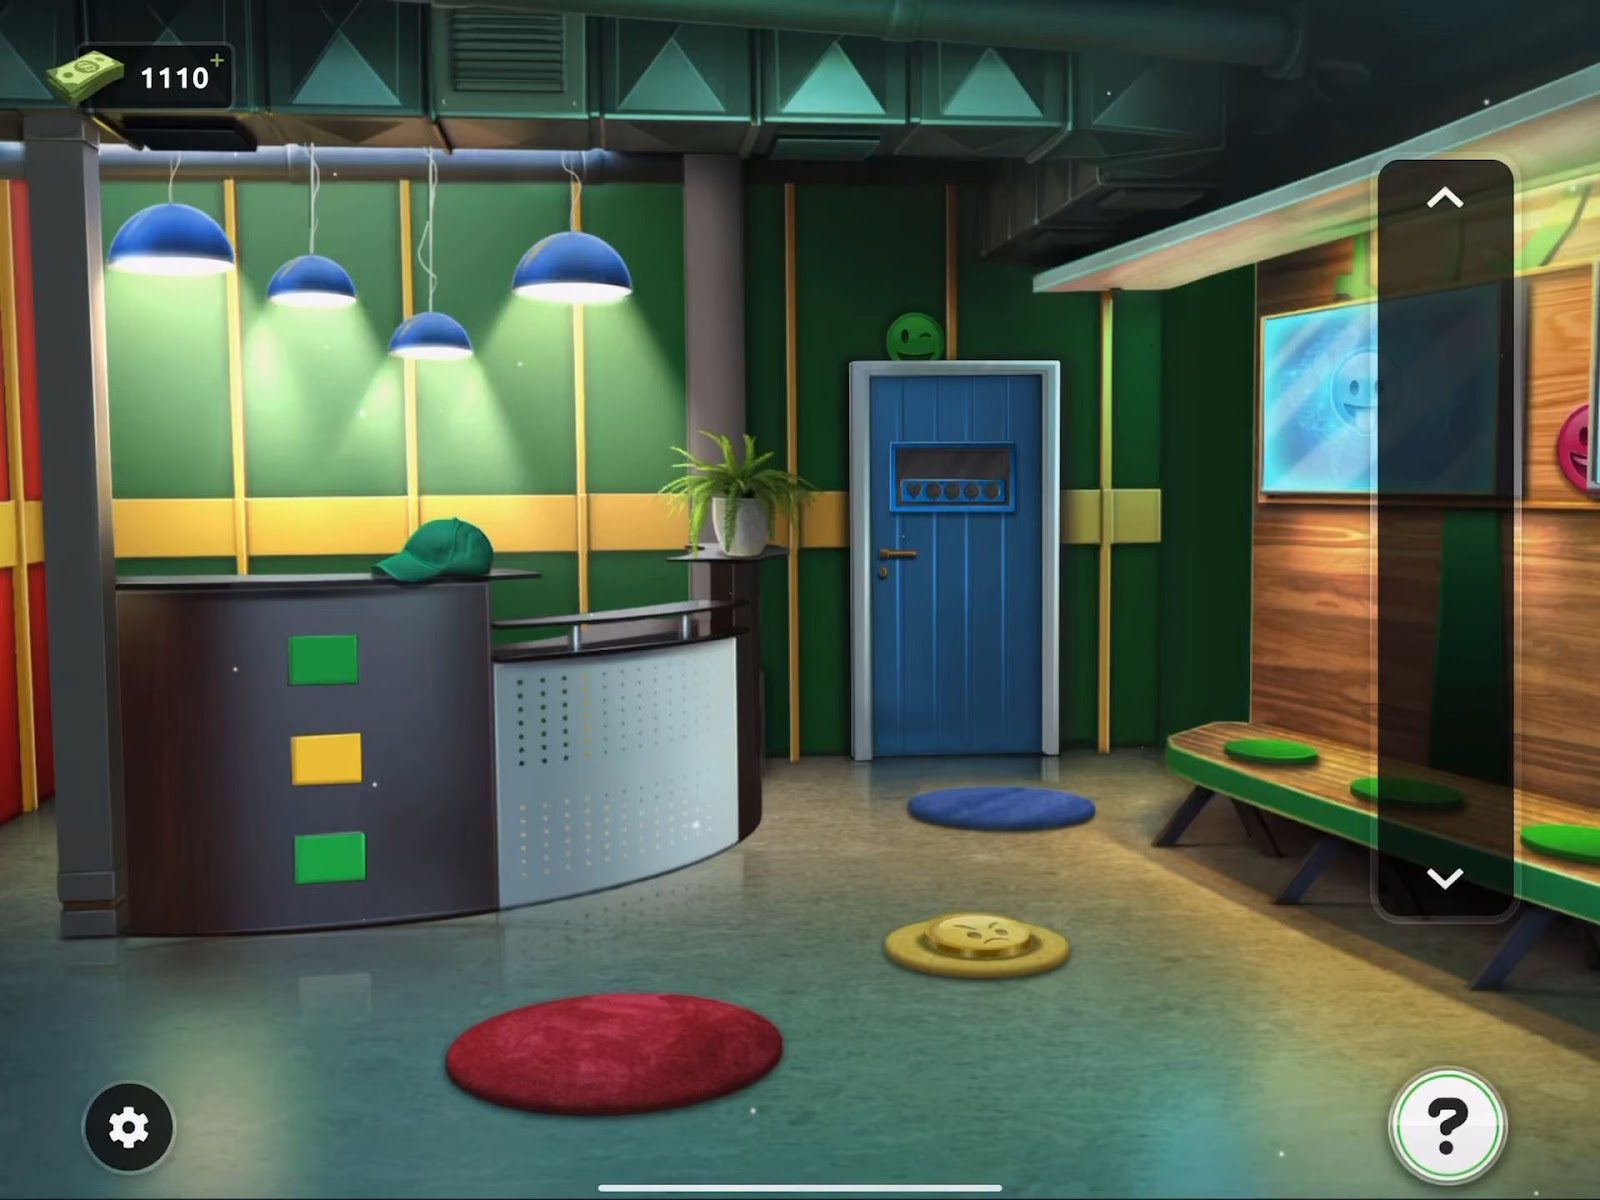
- Start by locating and gathering the five hidden emojis in the room following these cues:
- Green Face – Positioned above the door.
- Yellow Face – Situated on the floor.
- Blue Face – Concealed within the blue screen on the right wall.
- Red Face – Hidden behind the other blue screen on the right.
- Heart – Discover it by moving the green cap located on the desk’s top.
- Next, inspect the lock on the door and add the five emojis to it.
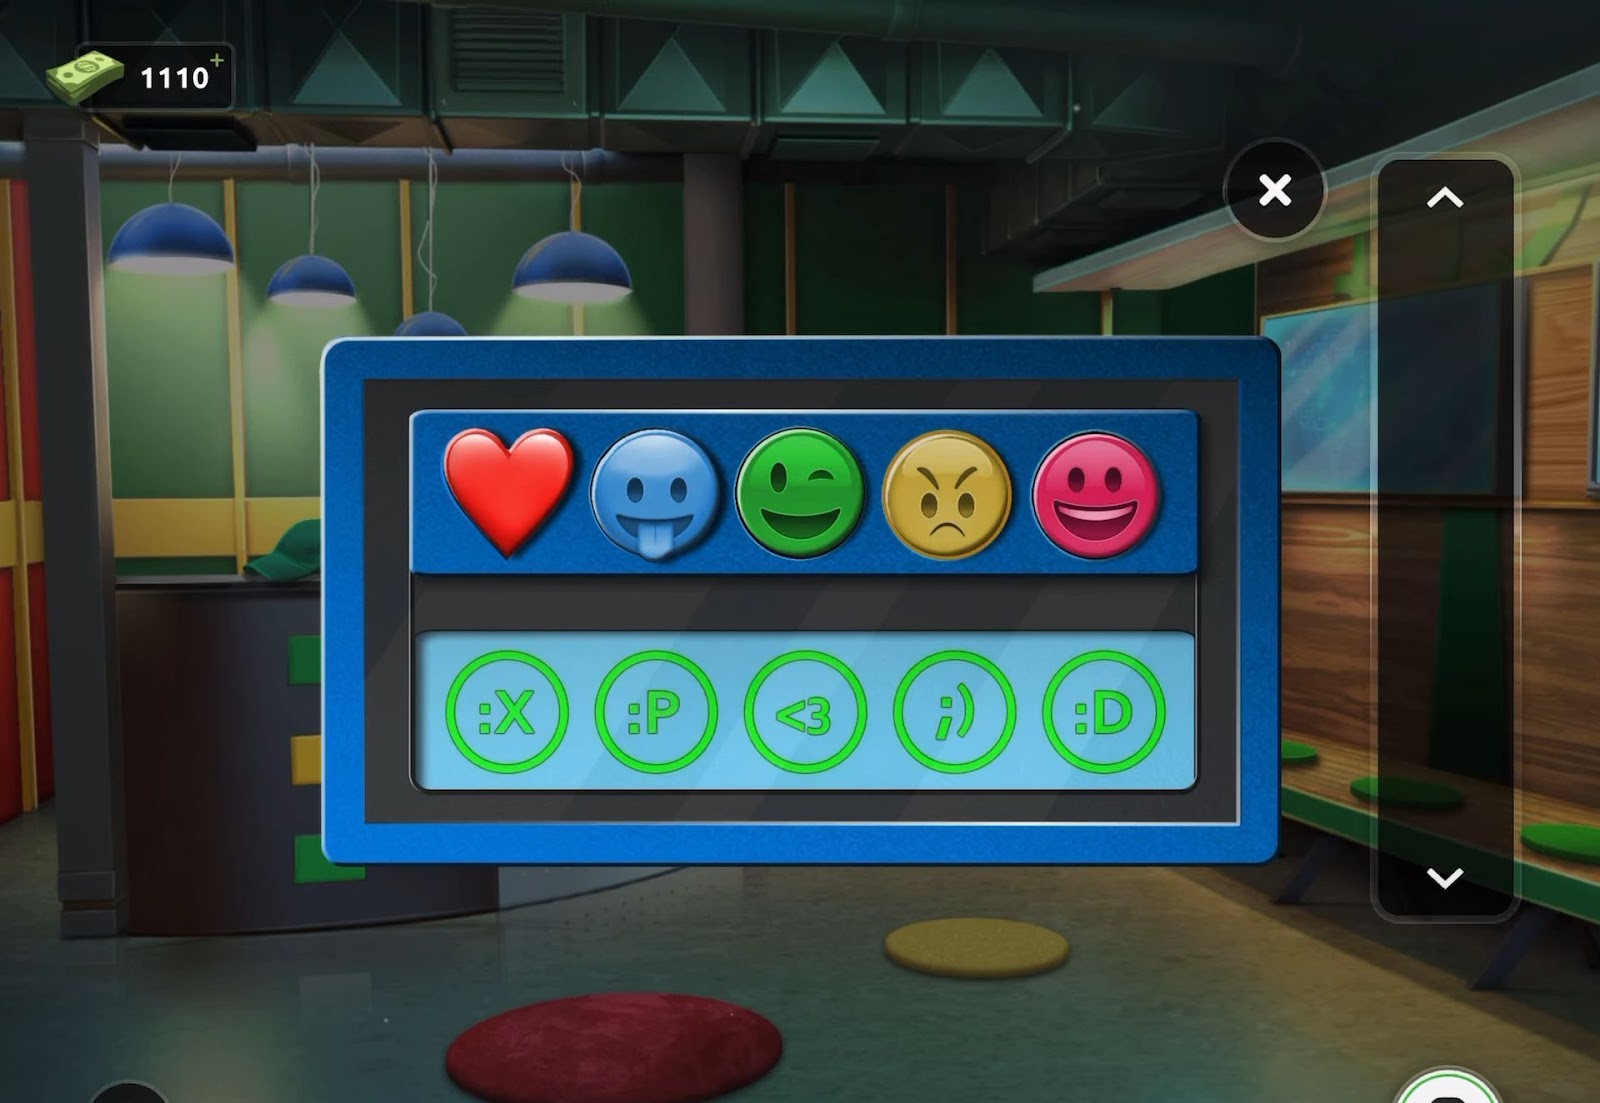
- This initiates a puzzle. Press the textual representations (<3 | 😛 | 😉 | :X | :D) of the five emojis in the accurate sequence.
- This will unlock the door and allow you to escape through it.
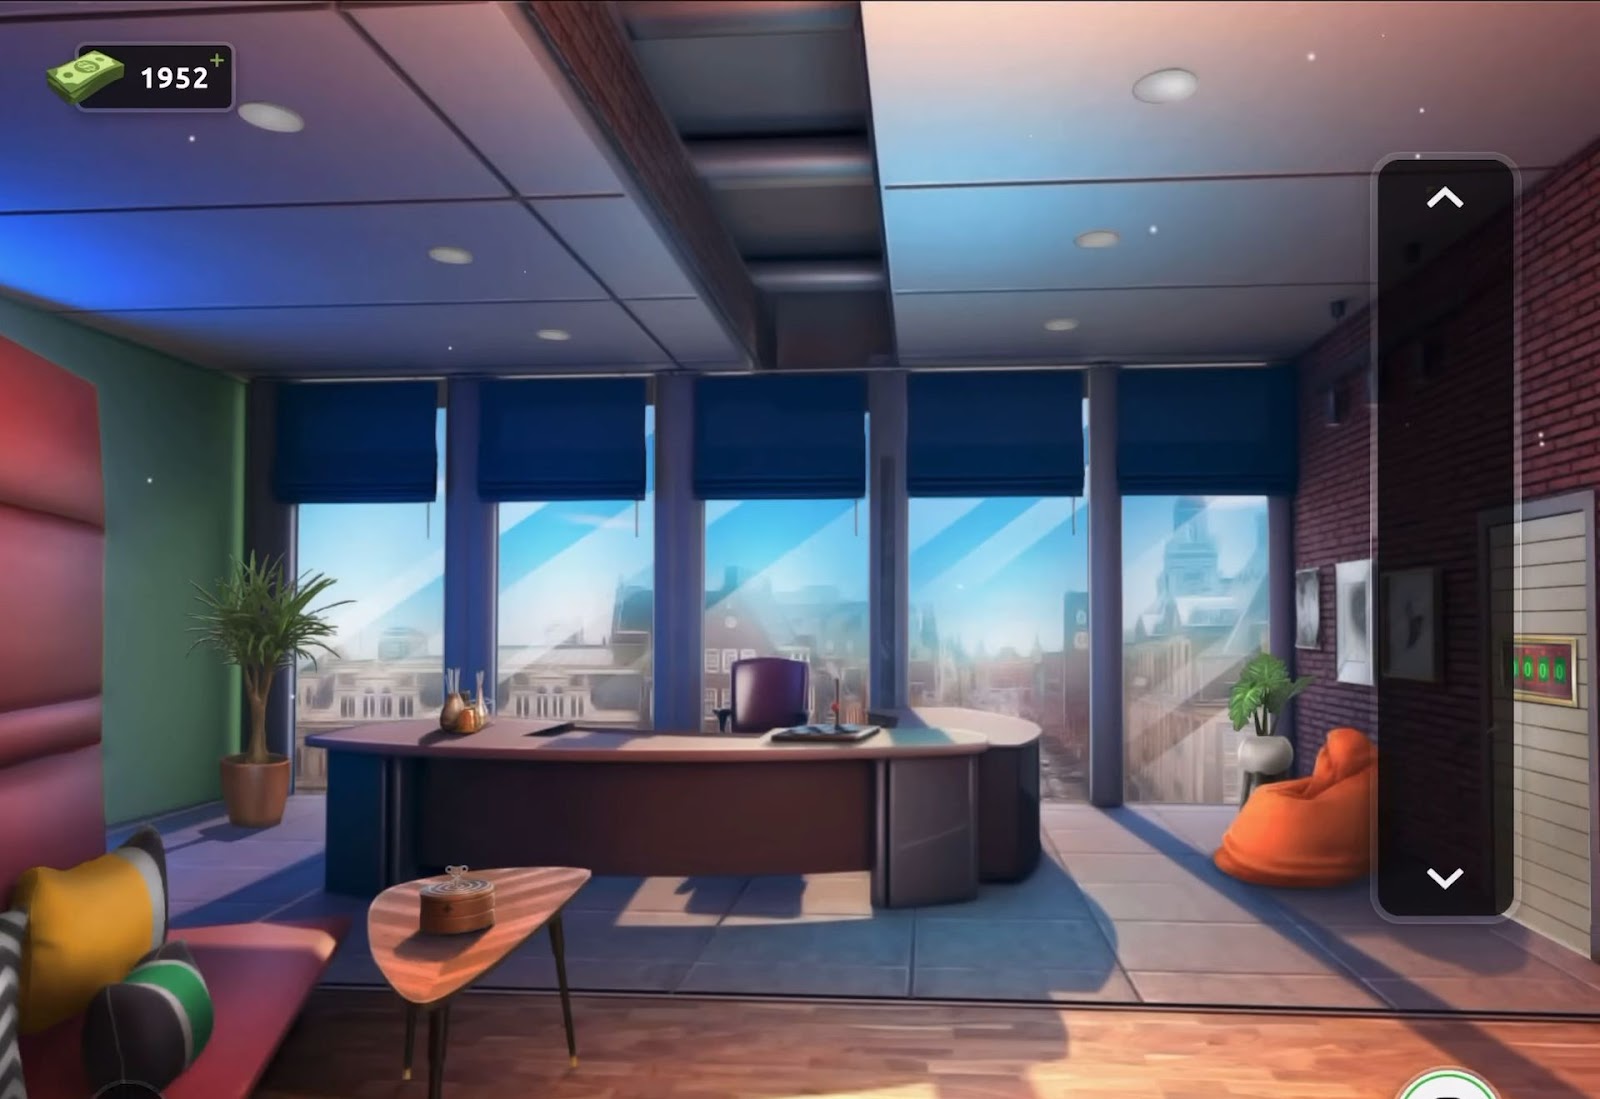
Level 20:
To complete level 20, follow the instructions below:
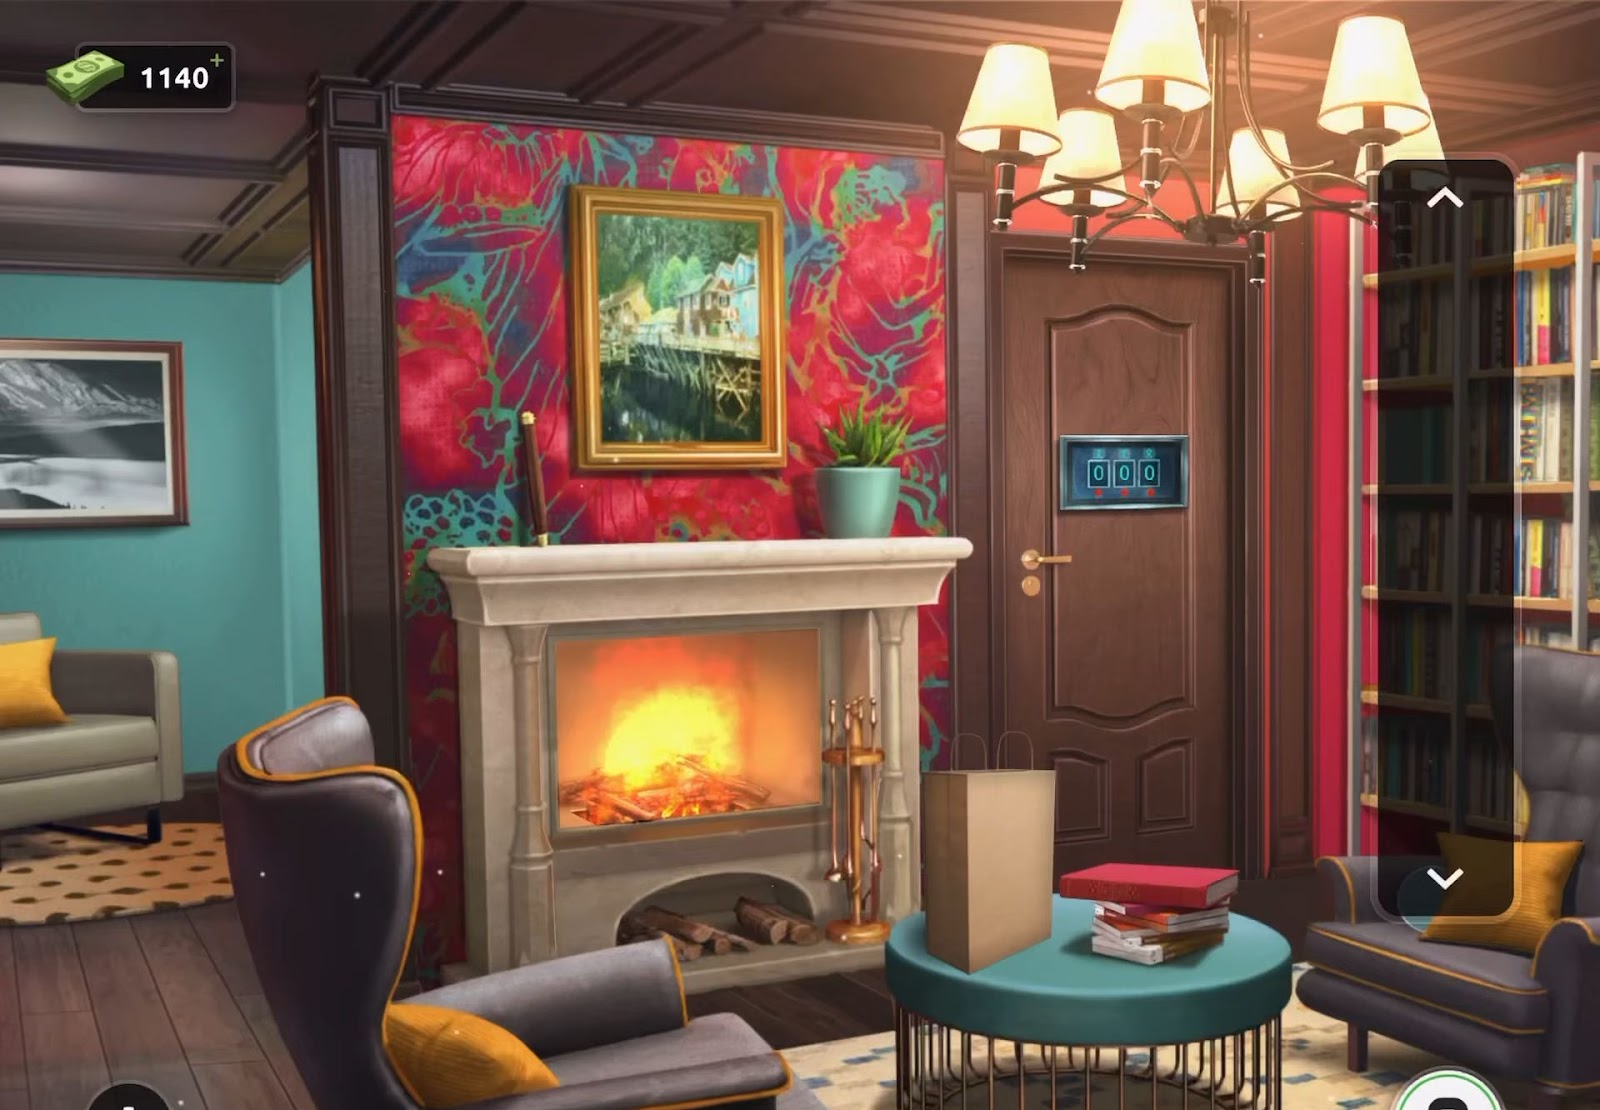
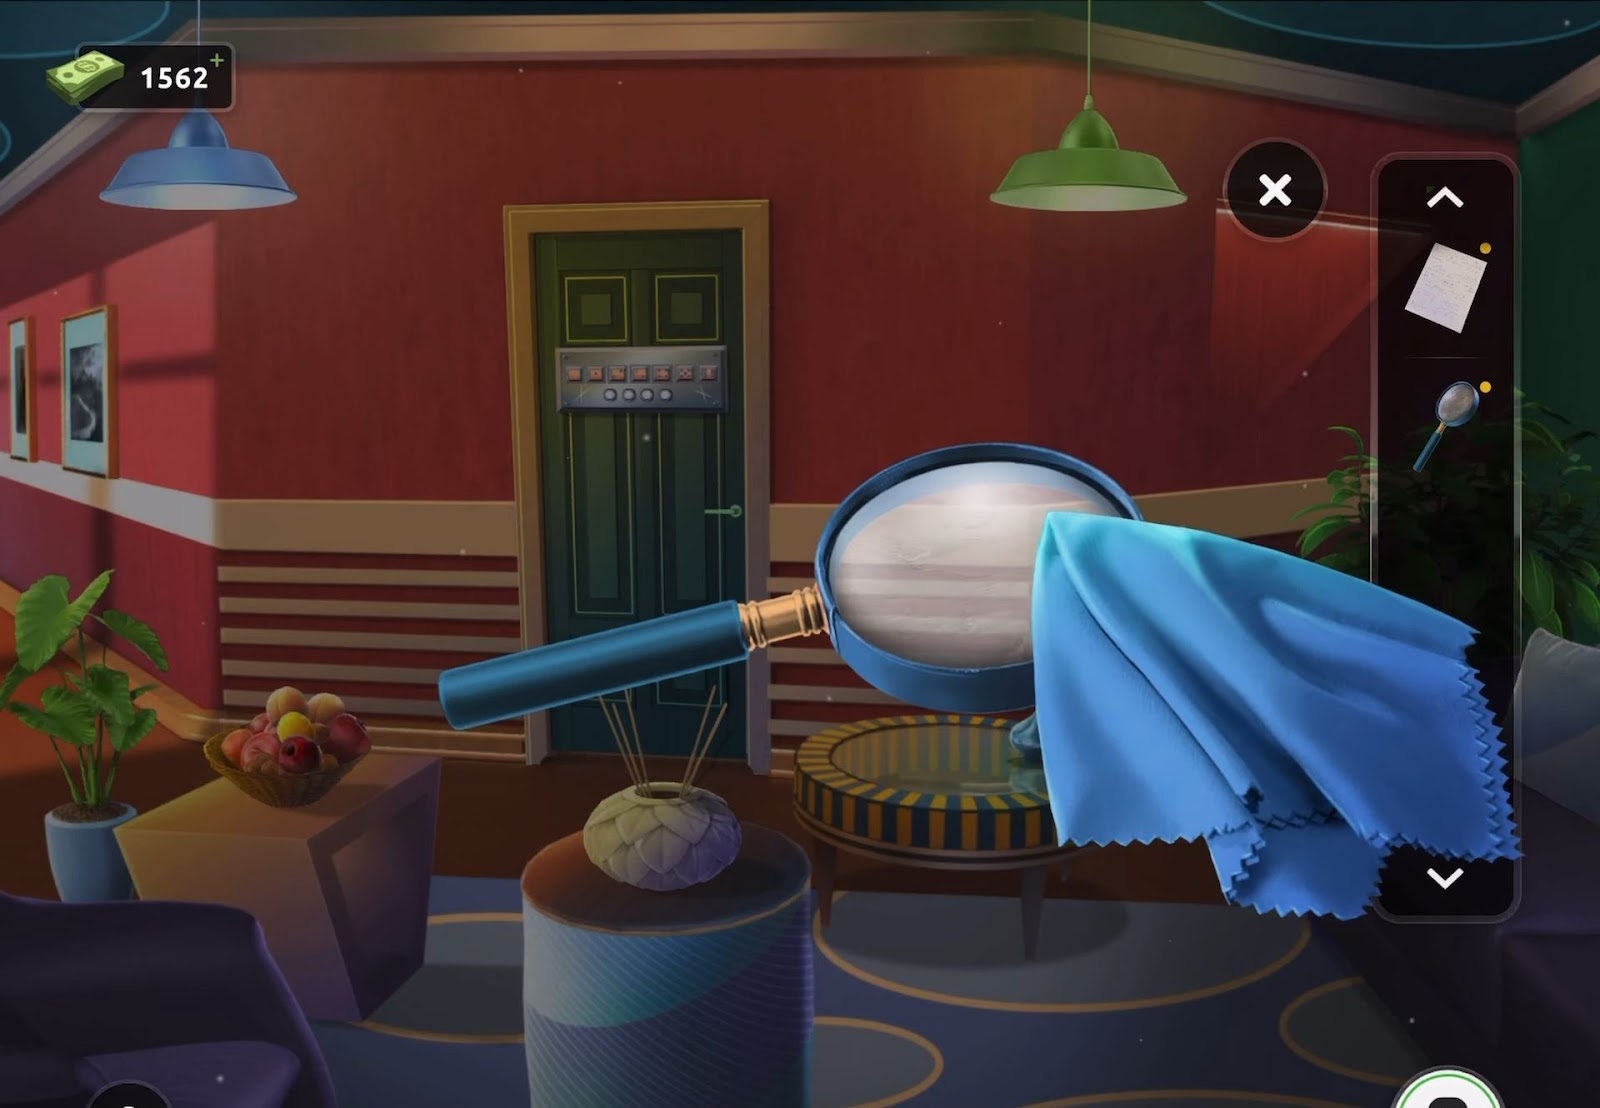
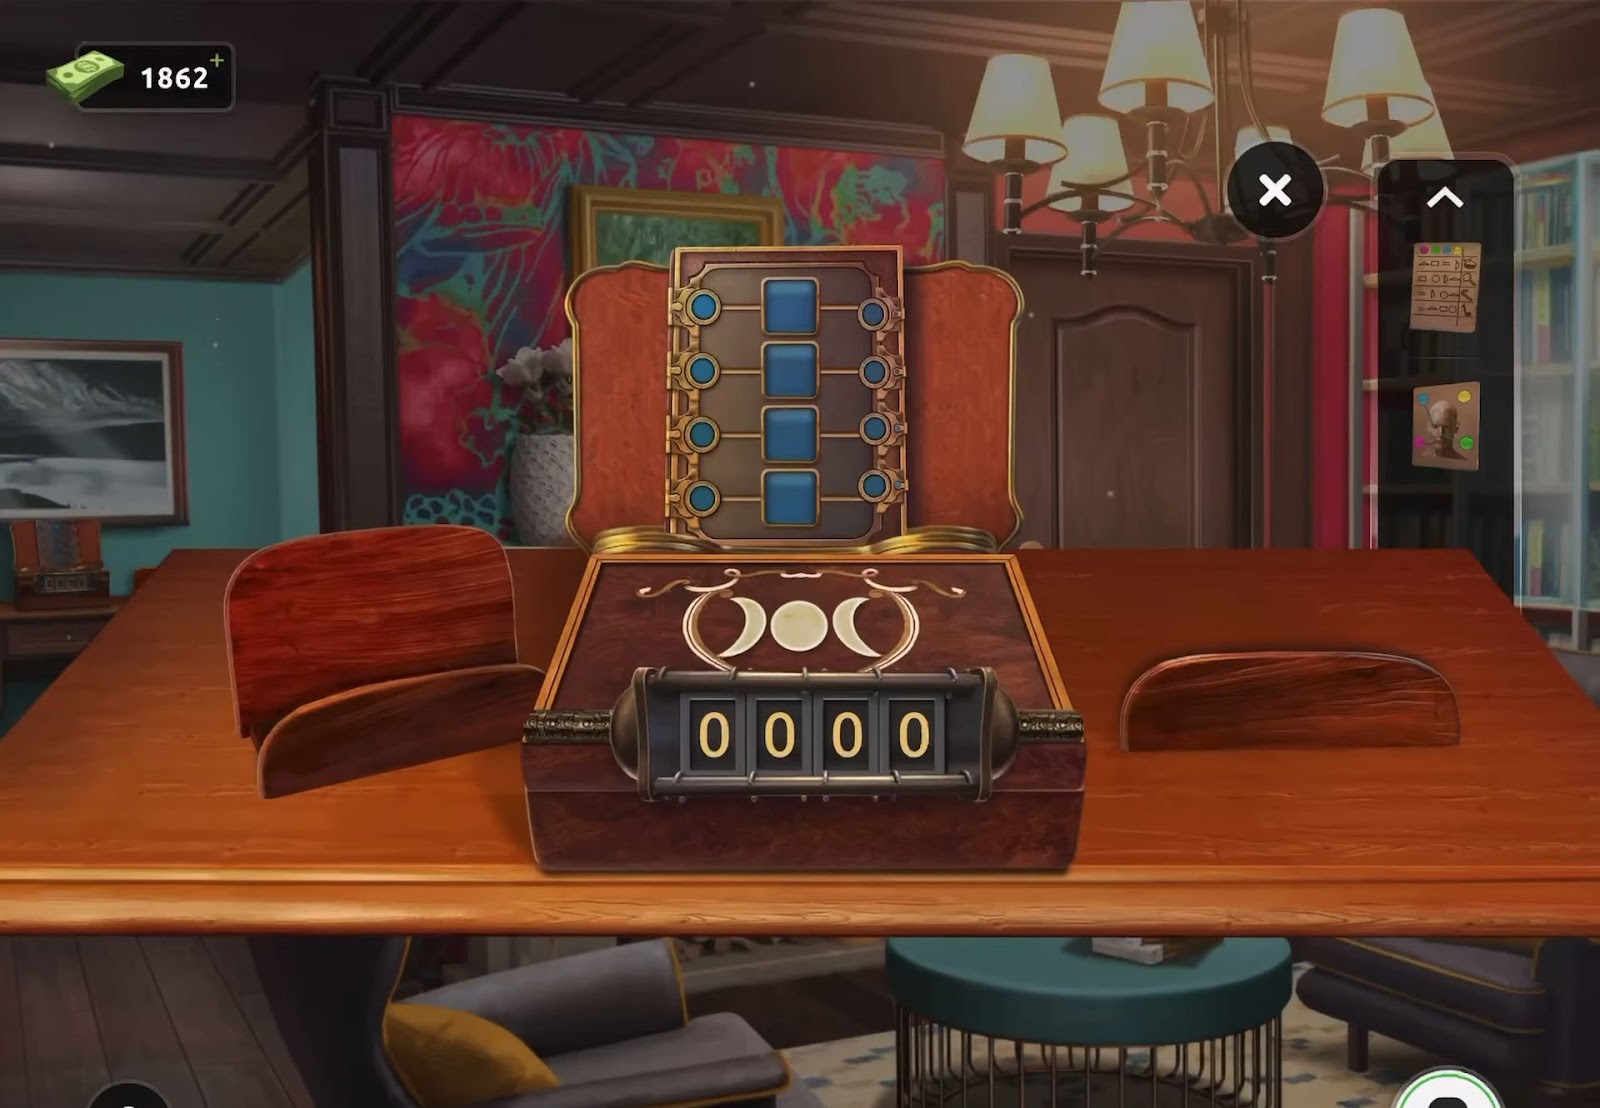
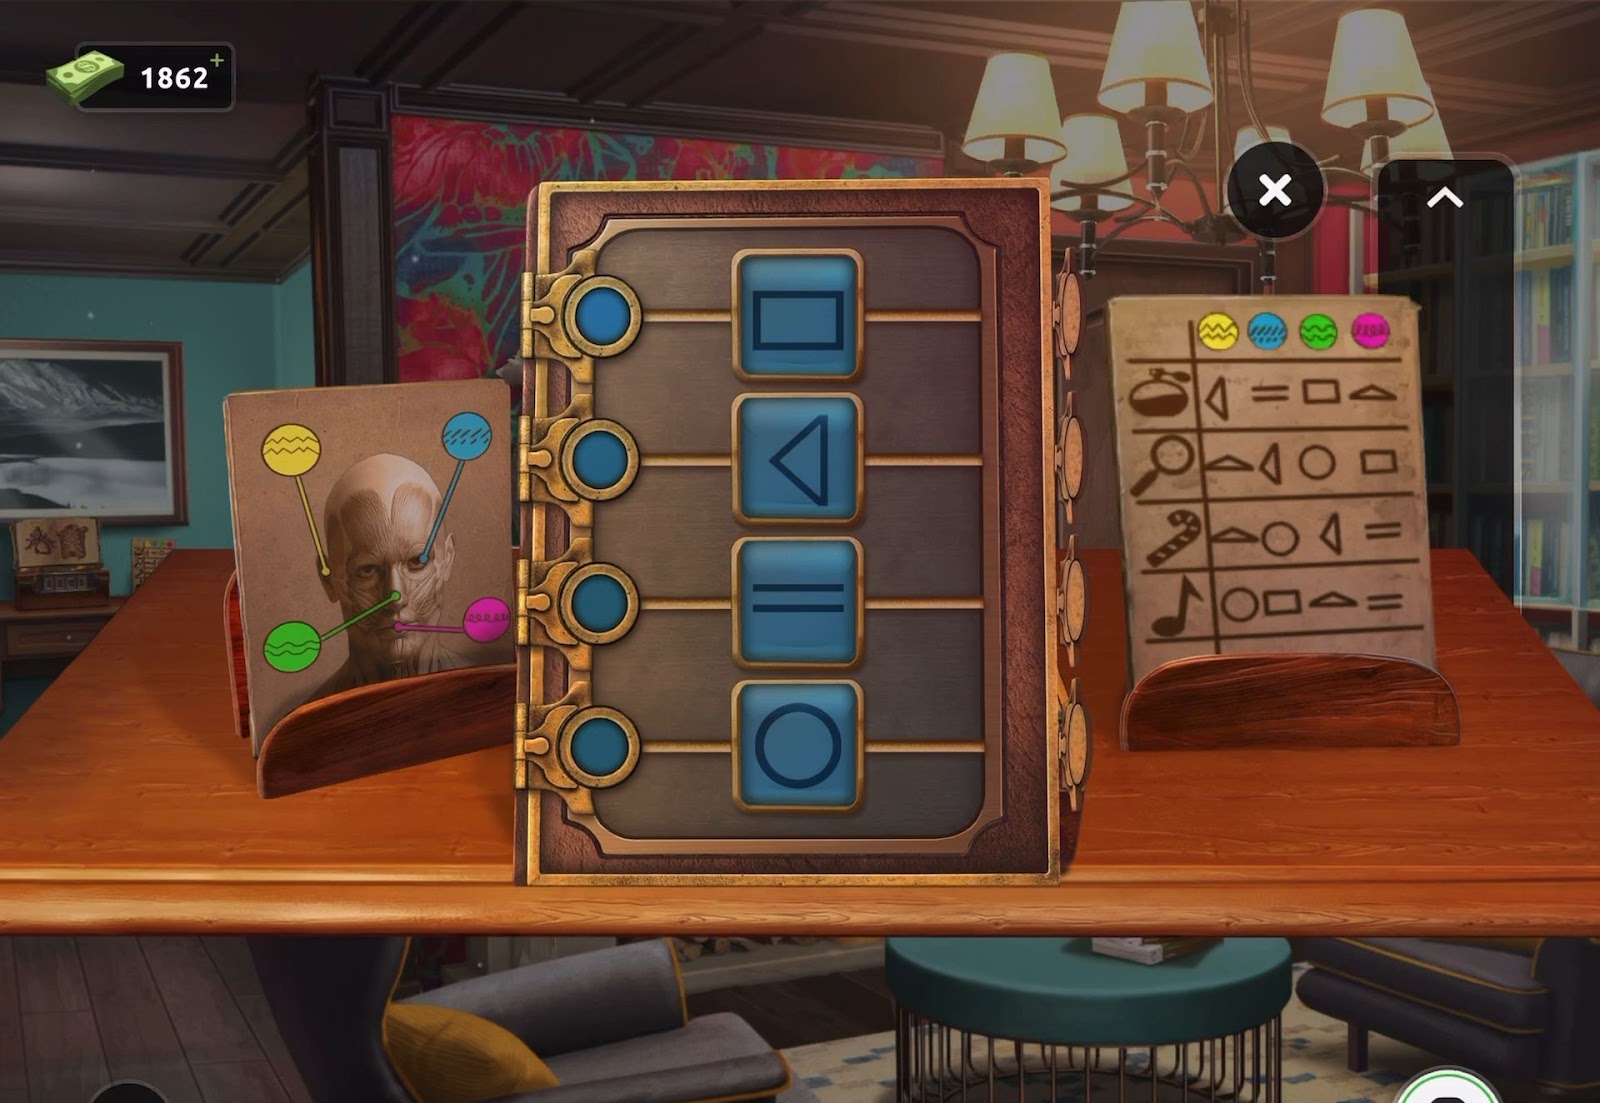
- This level is based on an executive study. Firstly, retrieve a handle from the mantle above the fireplace.
- Subsequently, tap the bag placed on the table to displace it and gather a ring.
- Next, obtain a round glass hidden behind the cushion on the chair located to the right.
- After that, inspect the ring within your inventory. Combine it with the handle and the glass to assemble a magnifying glass.
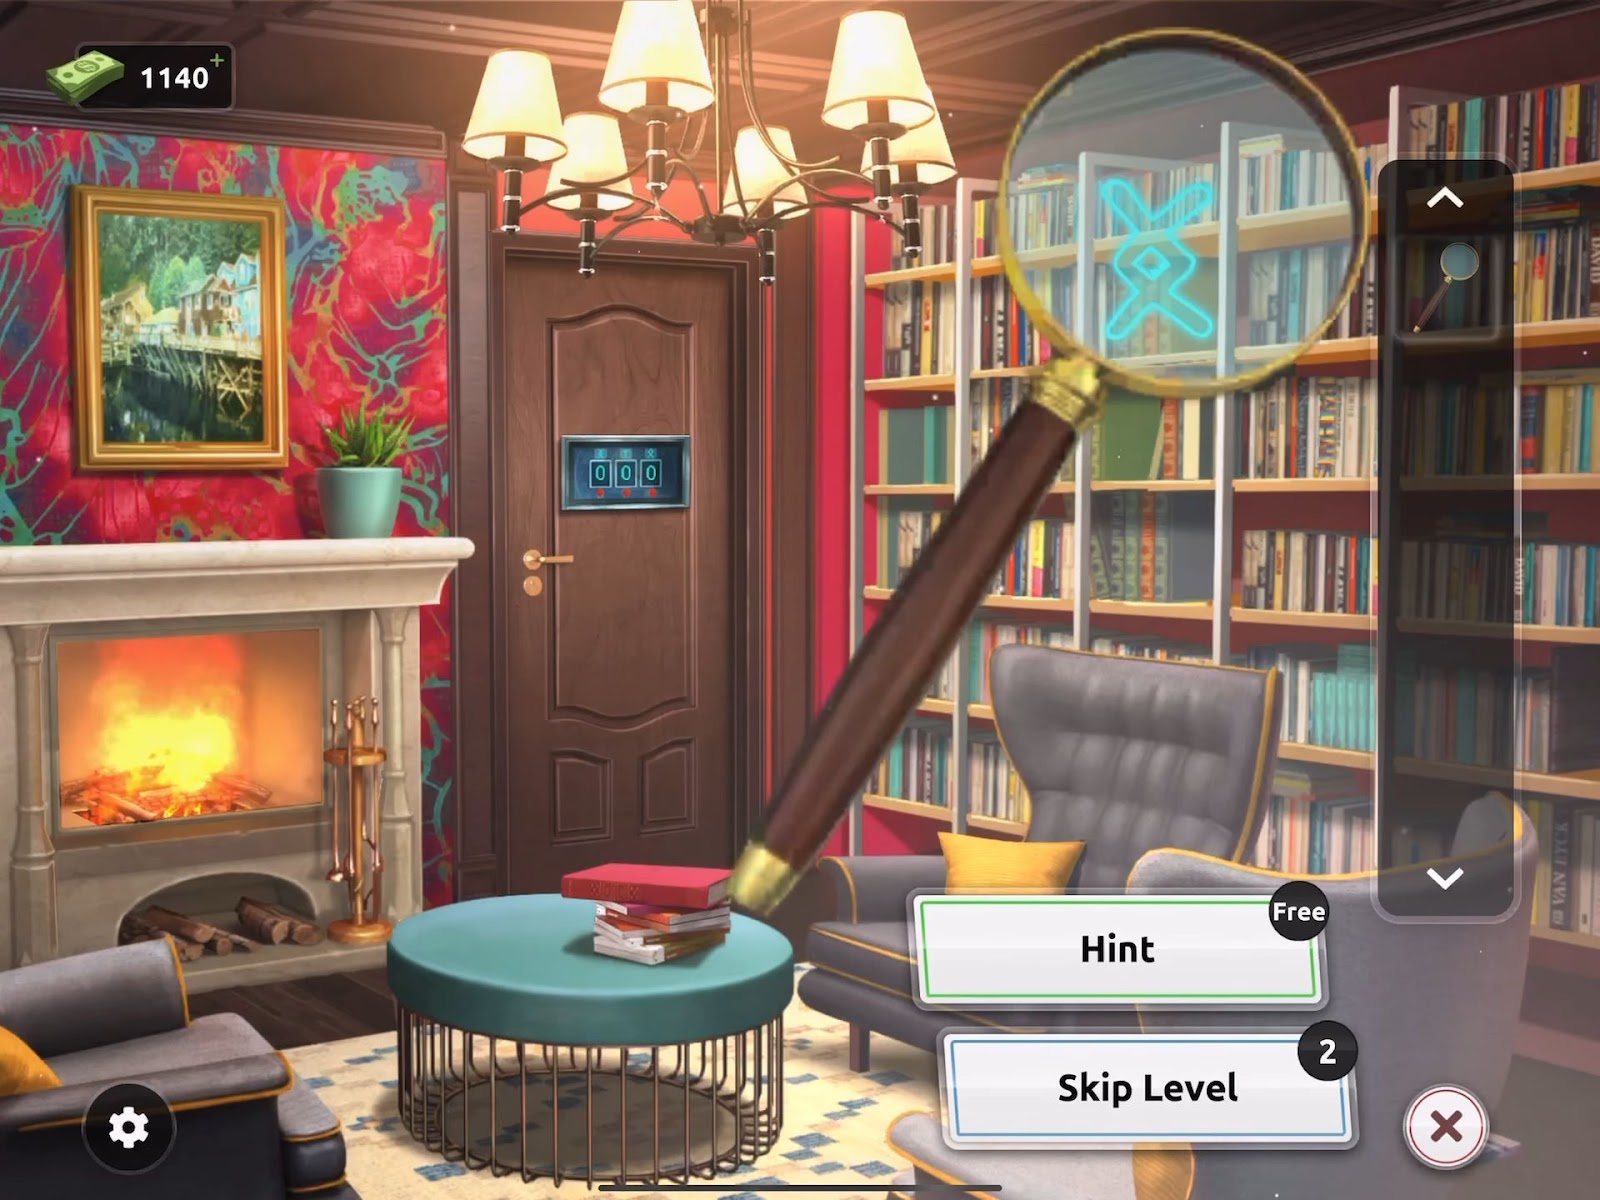
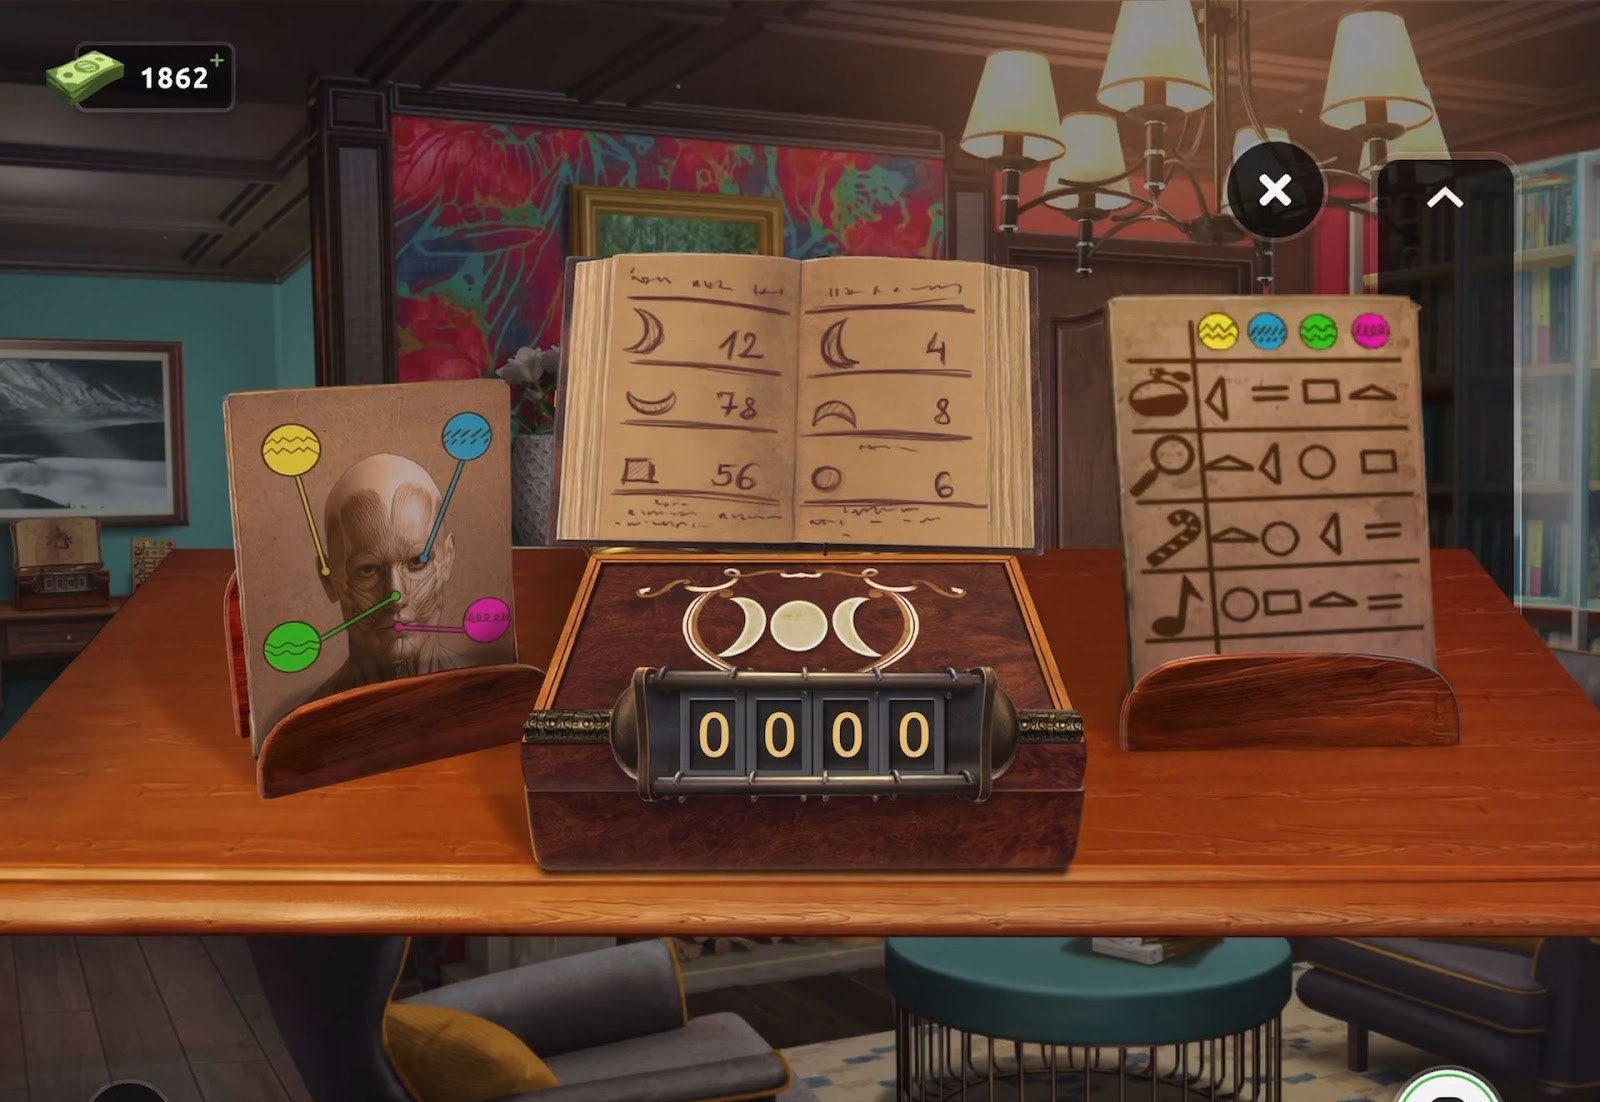
- Now use the magnifying glass across the room to search for and count the concealed symbols.
- Then discover and count the three distinct symbols, noting the quantity of each one.
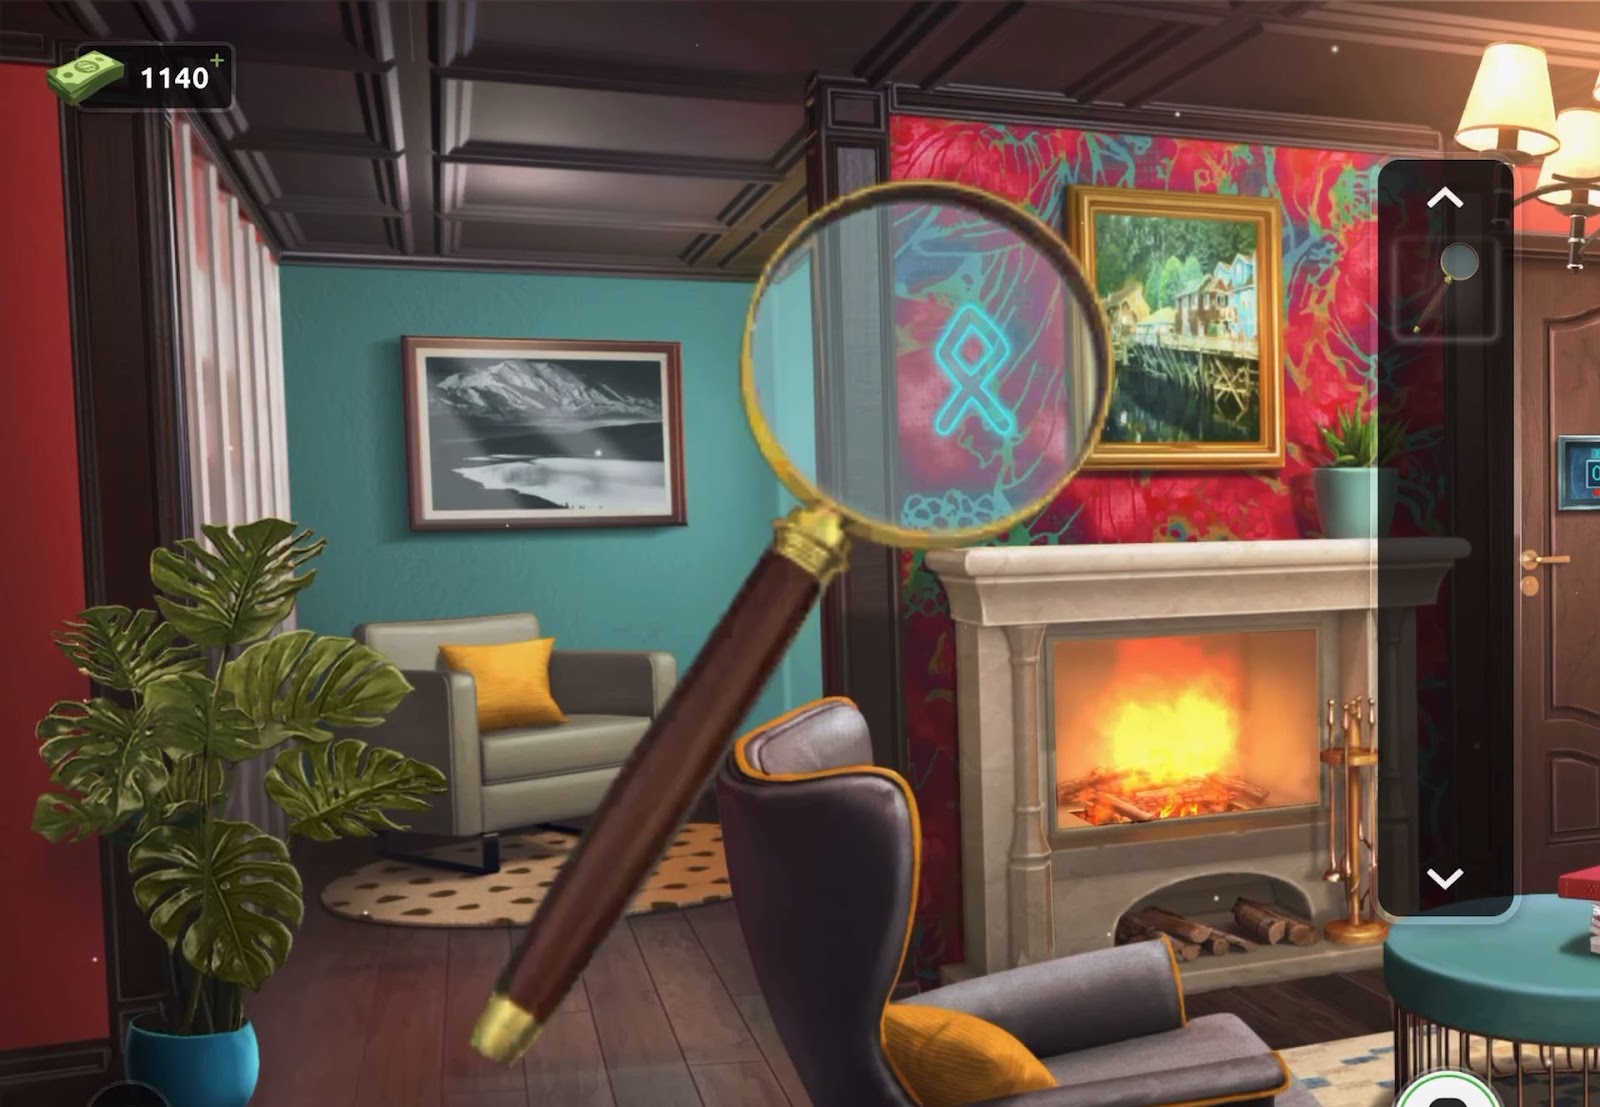
- Next, examine the door and input the respective numbers associated with each symbol to decipher the lock code (635).
- This will unlock the door and you can exit through it easily.
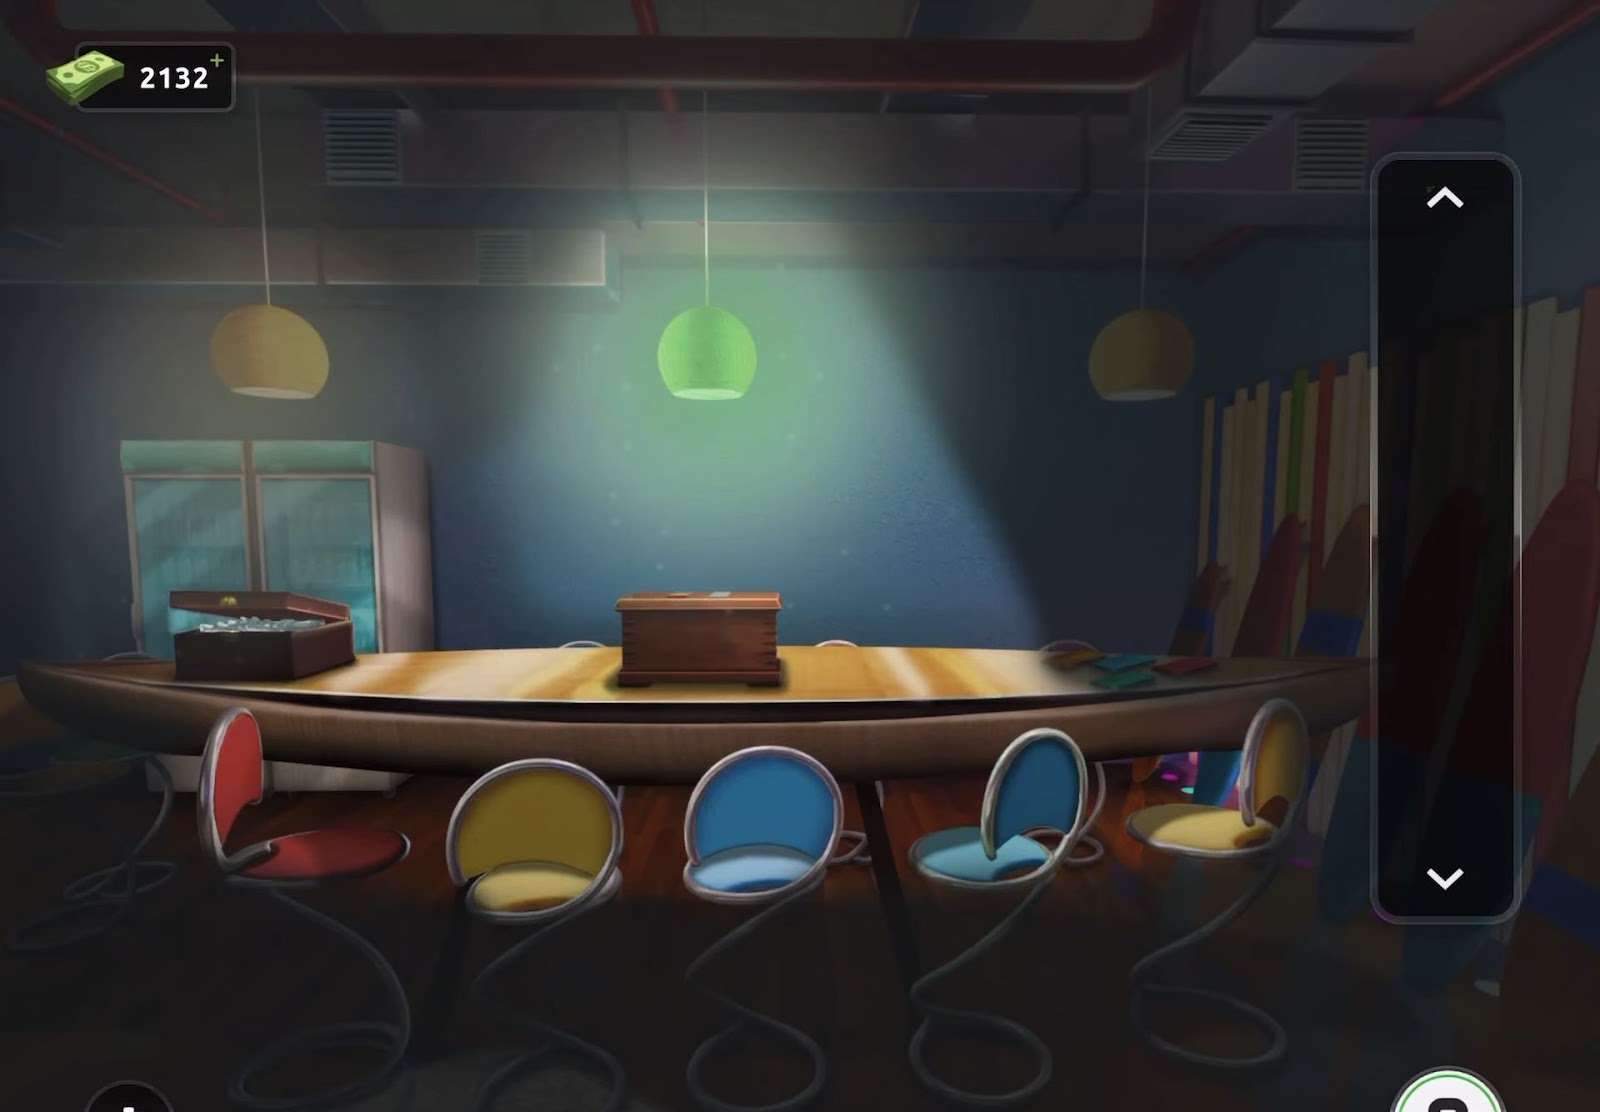
Level 21:
To complete level 21, follow the instructions below:
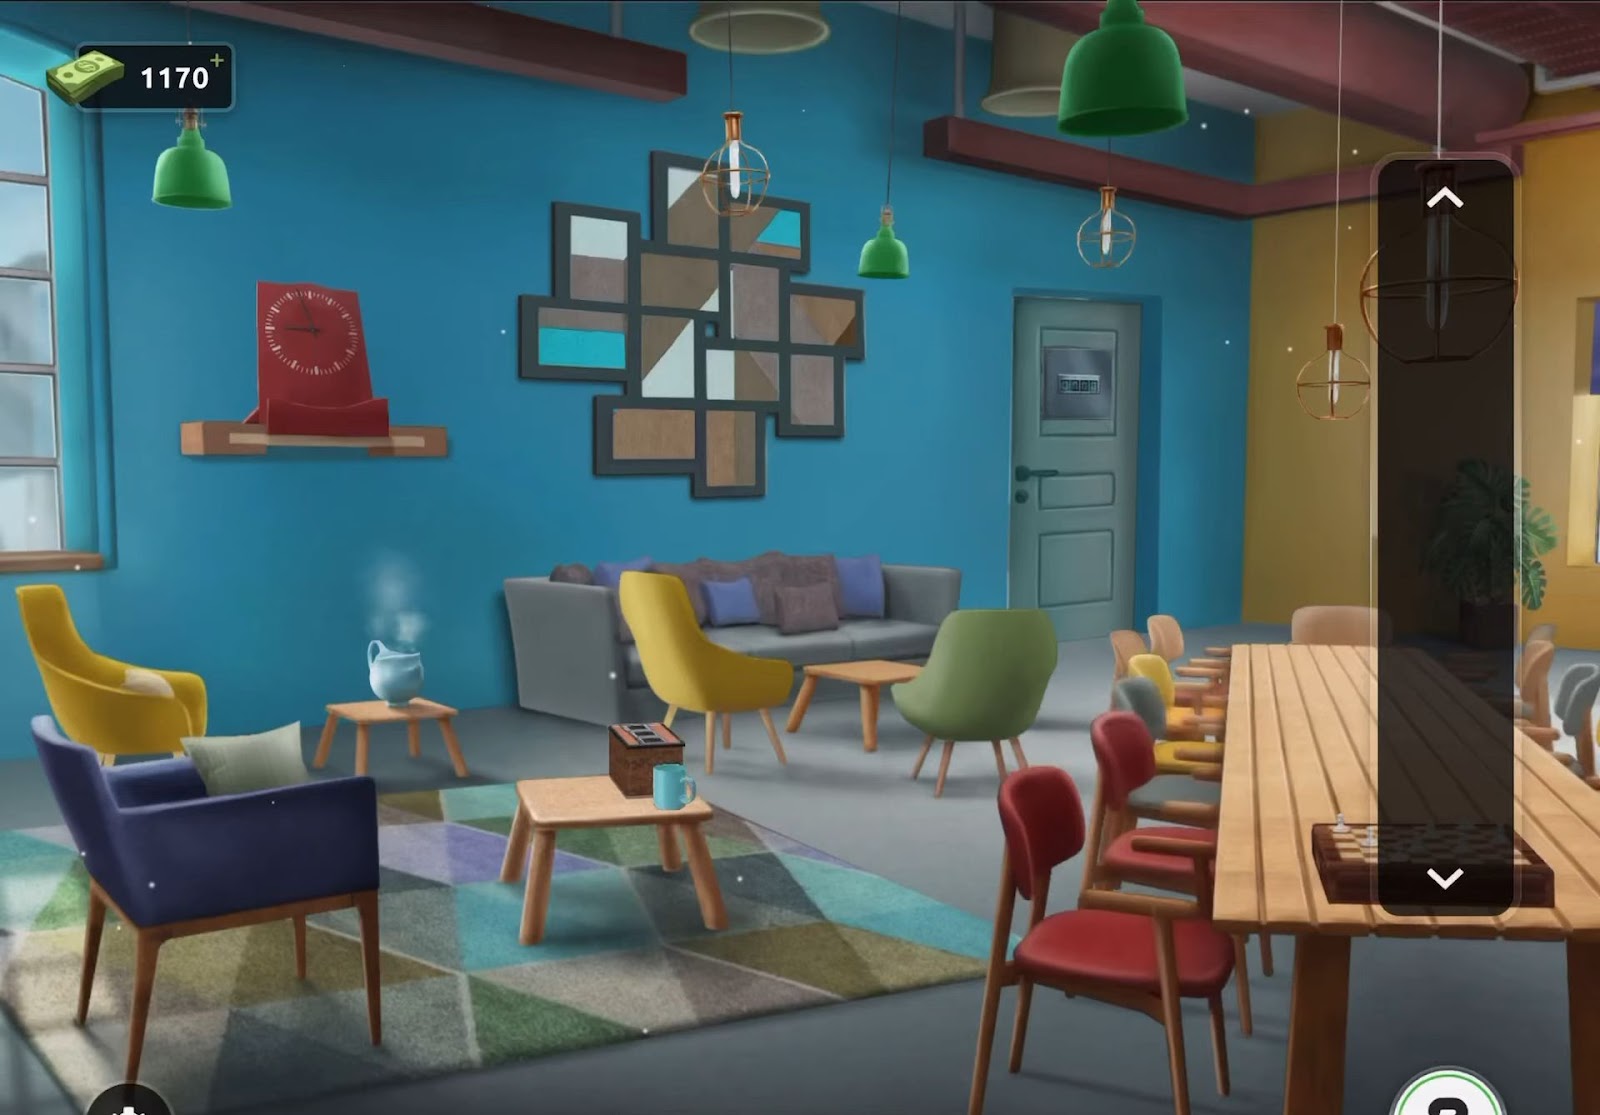
- Firstly, gather the steaming water jug from the small table located under the clock.
- Afterward, inspect the small square table featuring the blue mug.
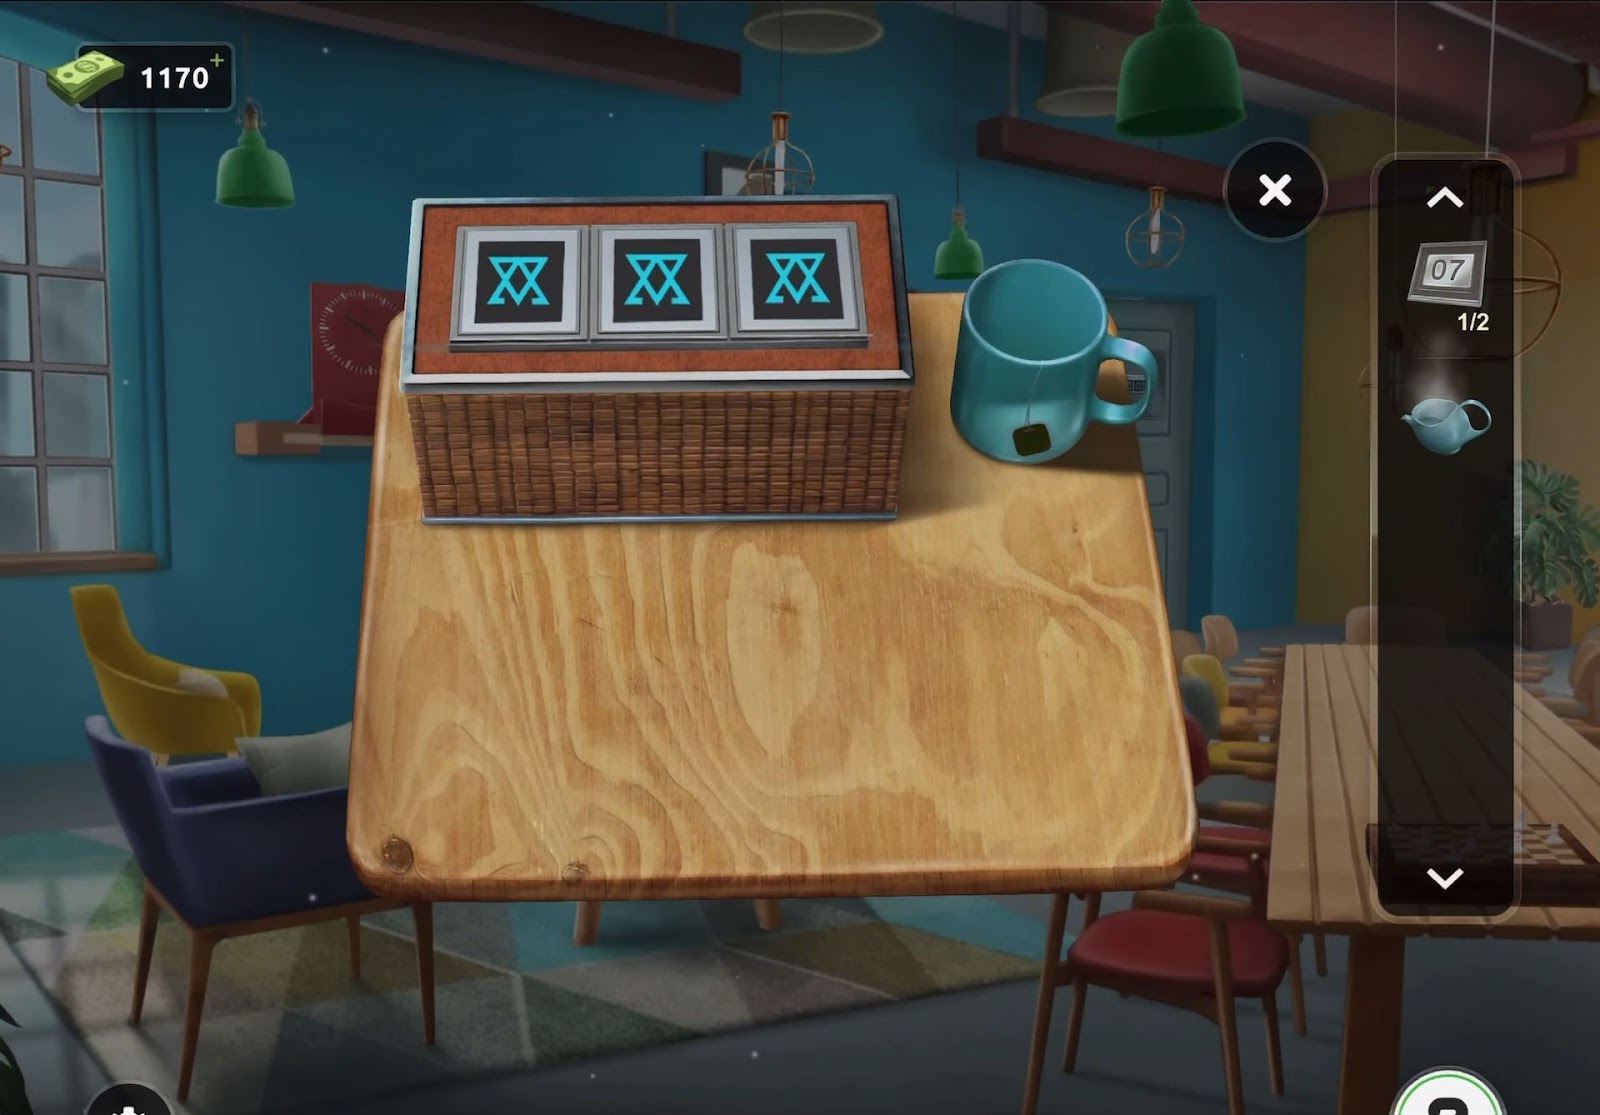
- Then utilize the water jug to pour water into the mug, uncovering several symbols.
- Next, tap the mug to drink the tea and unveil the last symbol.
- After that, interact with the symbols displayed on the box to modify them, aligning them to match the symbols observed on the mug.
- Upon opening the box, gather the numerical tile bearing the number (03).
- Then proceed to examine the chessboard situated on the long table to the right, collecting the second number tile.
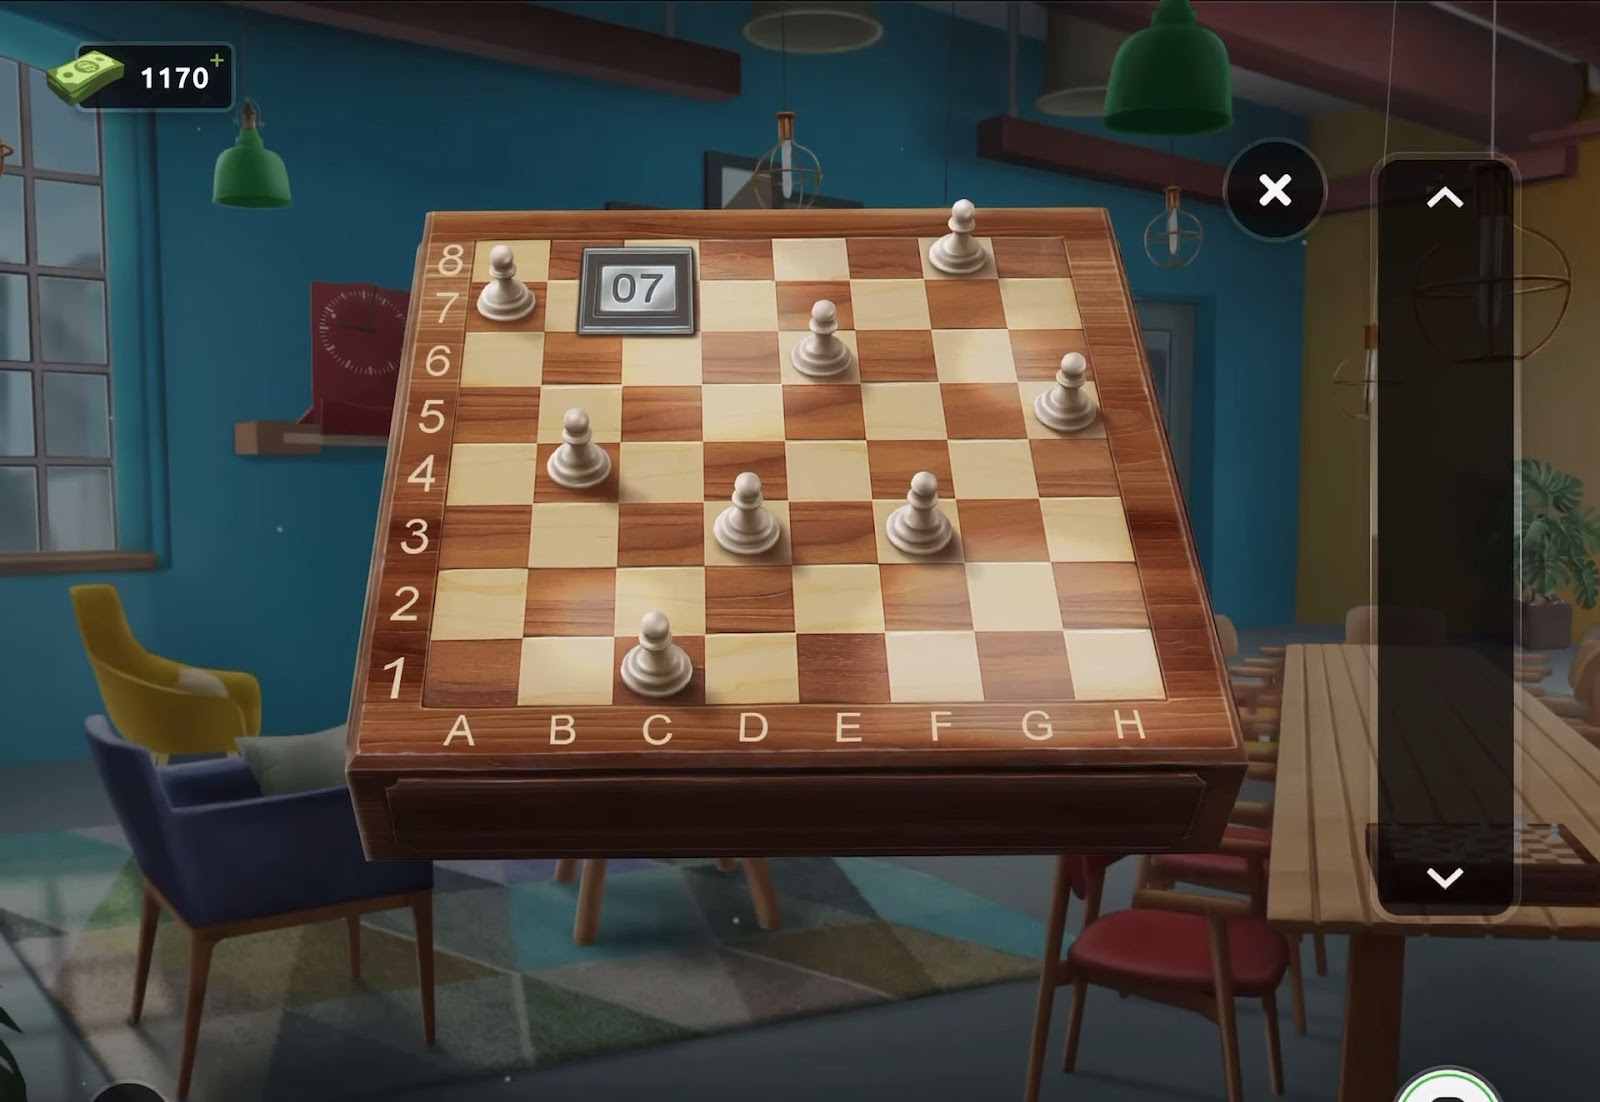
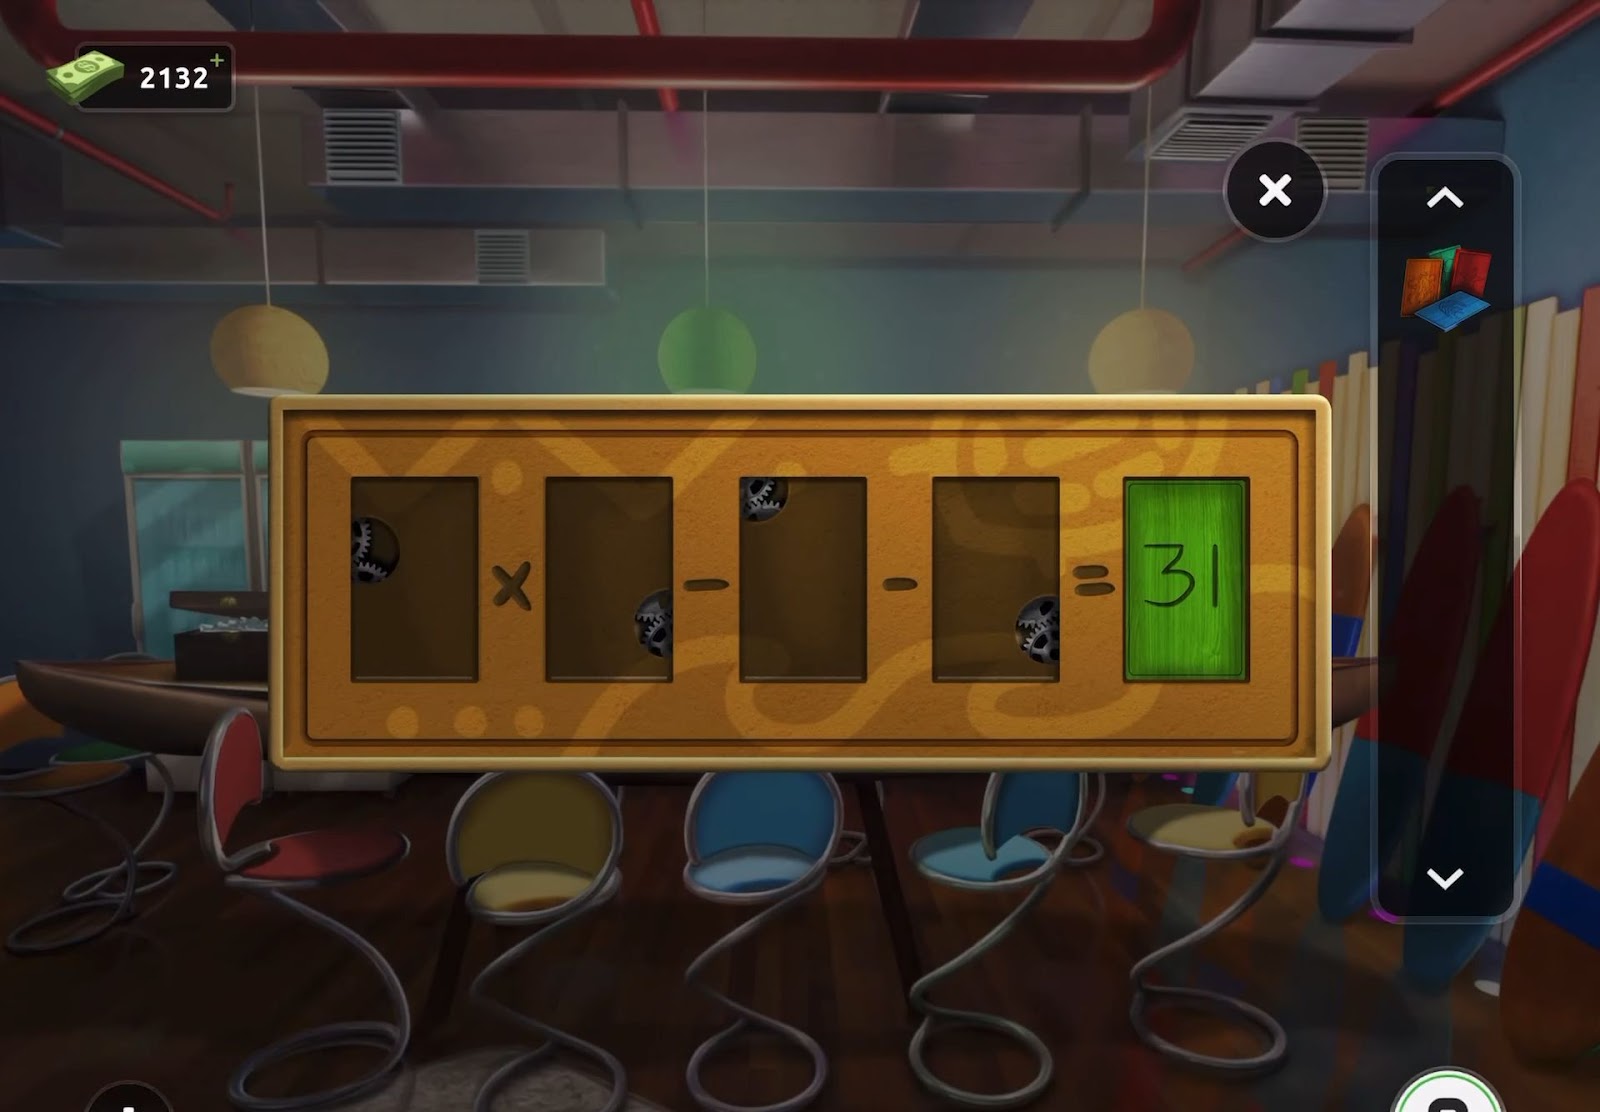
- After that, tap on the door to recognize the requirement for a four-digit code, with the clue consisting of the letters BFAC.
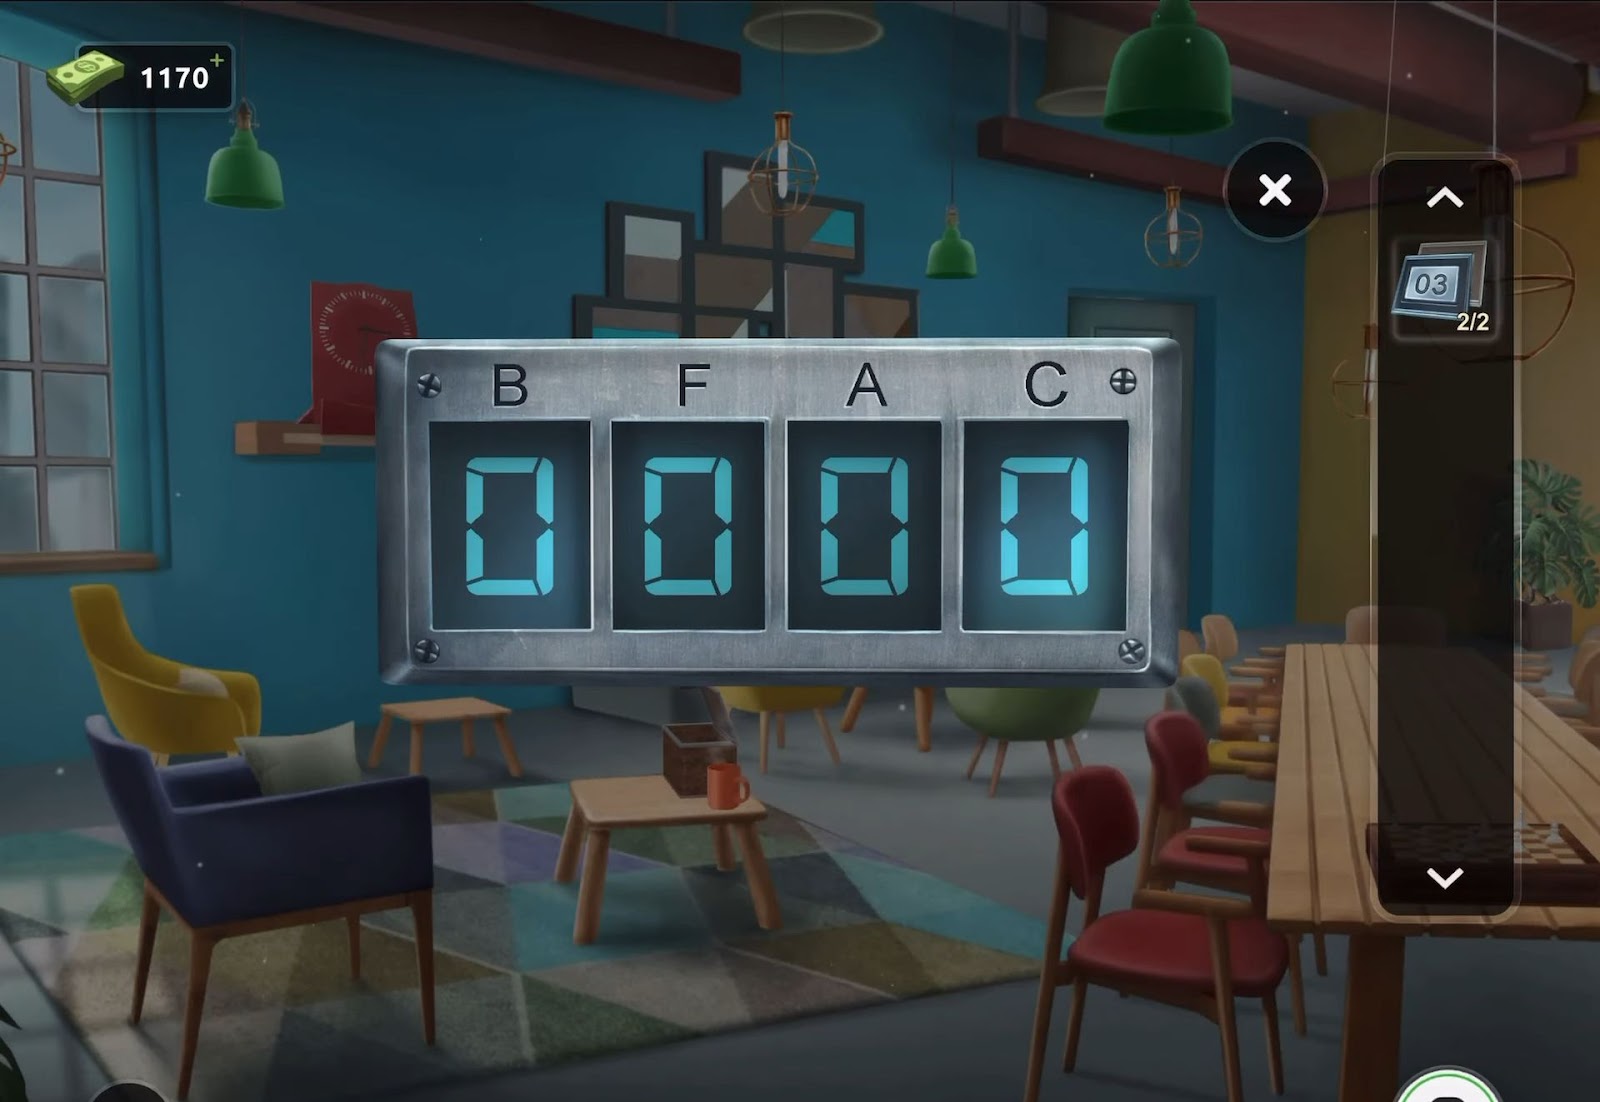
- Next, revisit the chessboard once more and determine the corresponding numbers (4371) for the pieces positioned on the letter columns.
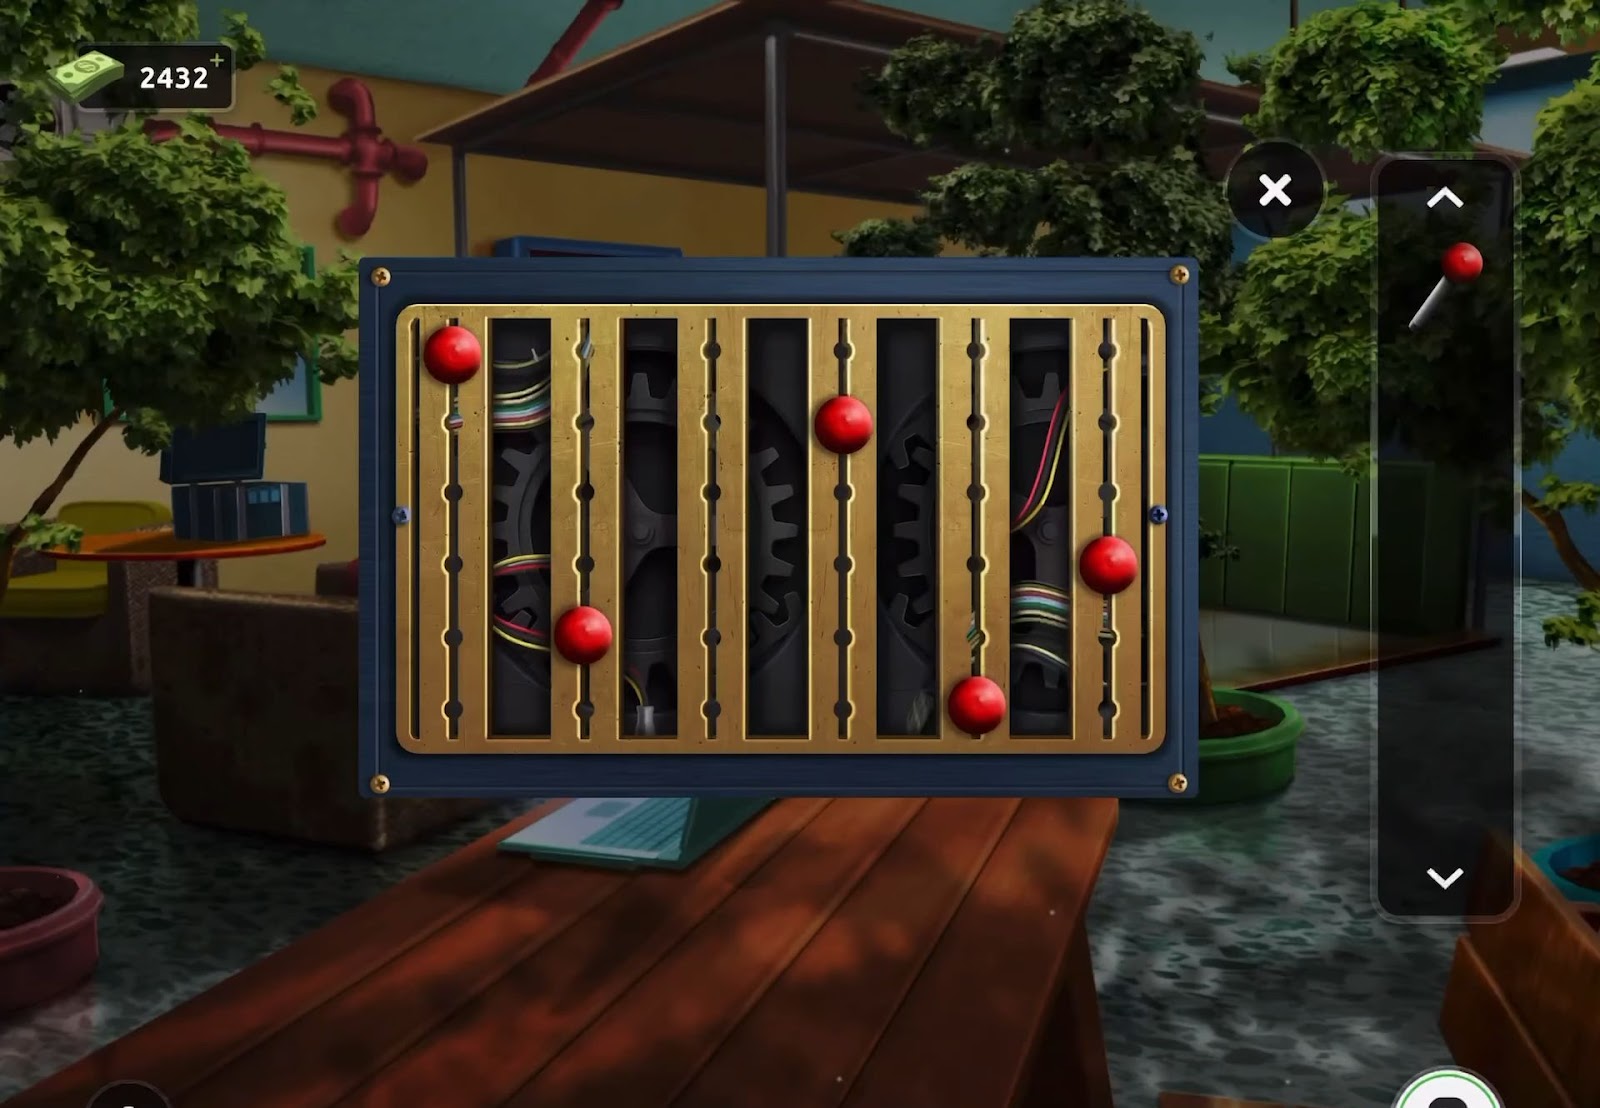
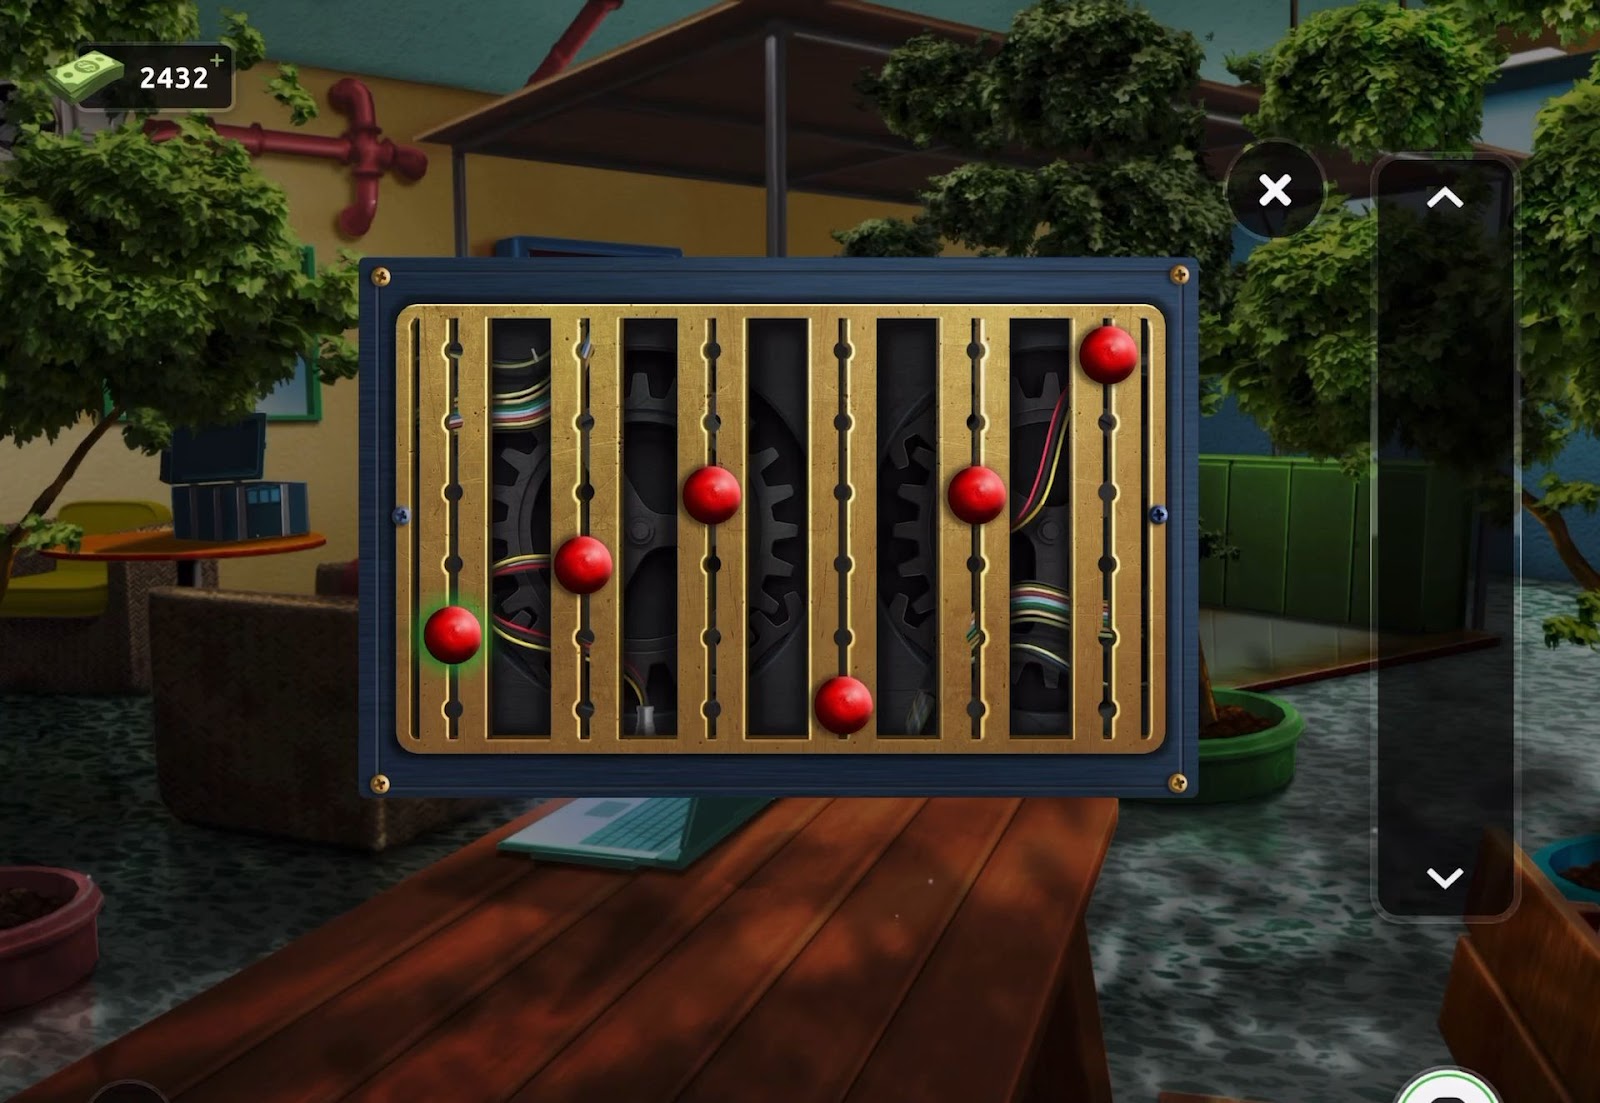
- This action initiates a secondary puzzle. Start by placing the two number tiles into the designated area to commence the challenge.
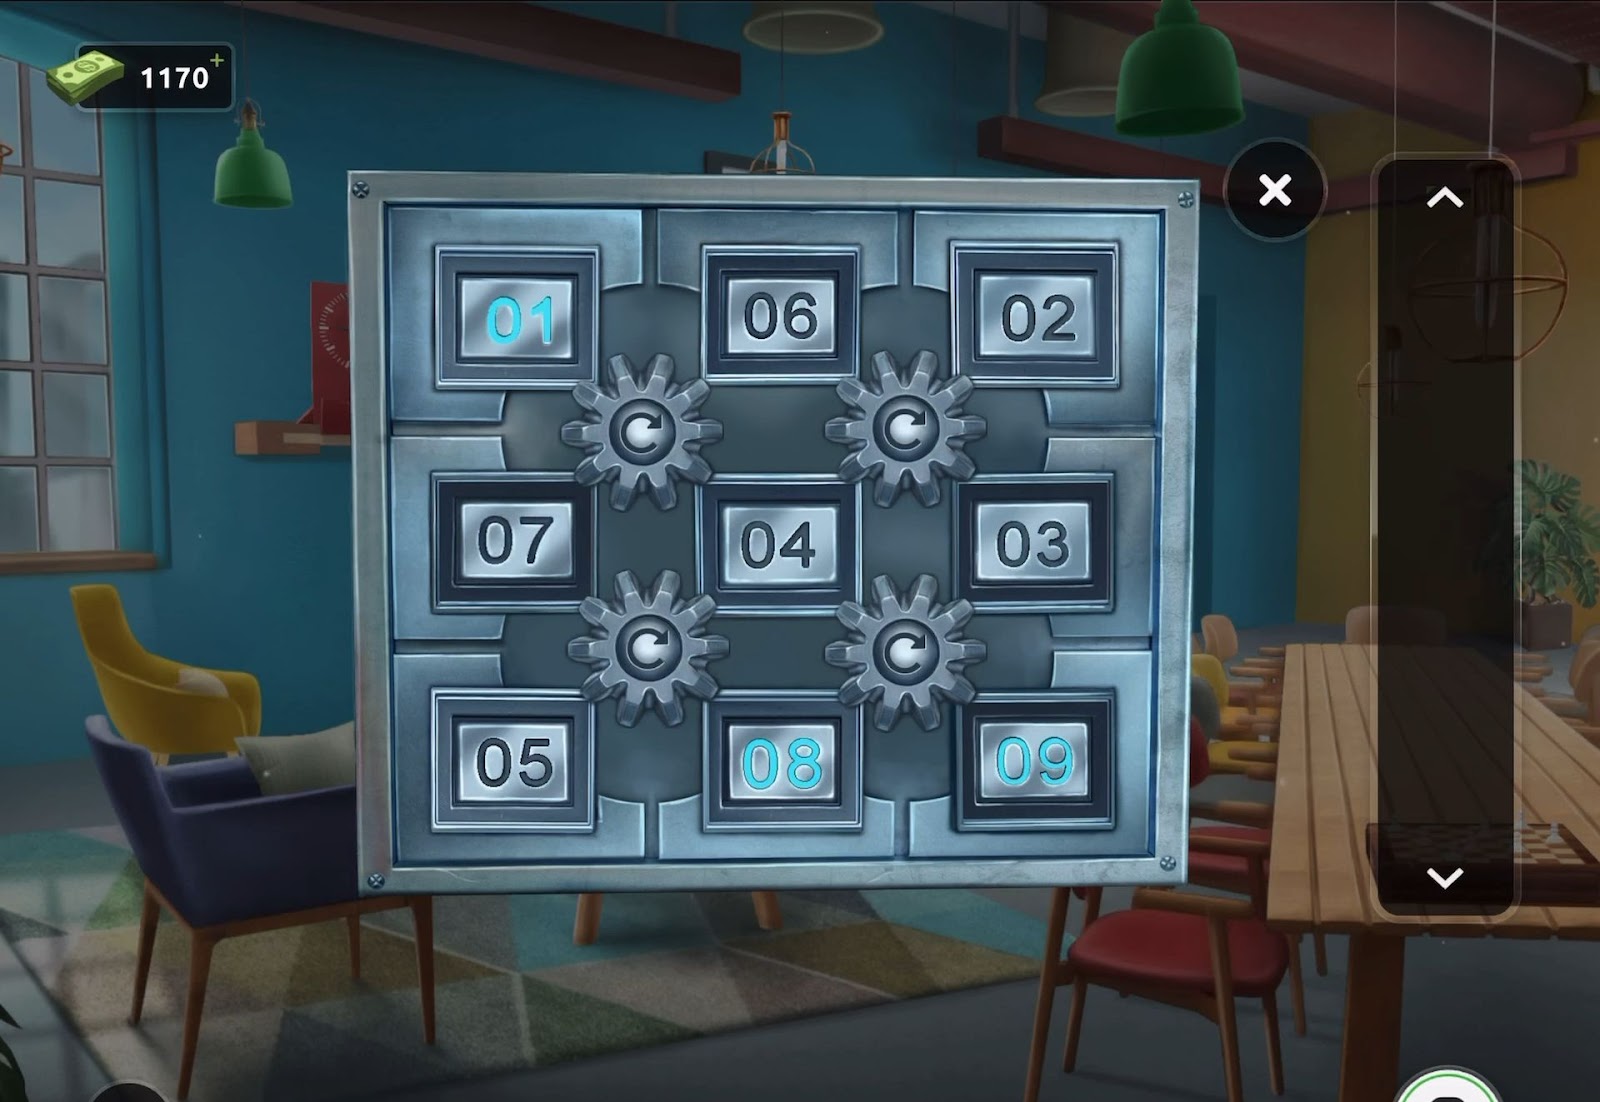
- To resolve this, tap the gear mechanisms to rotate the pieces, aligning them sequentially from 1 to 9, starting from the top left and ending at the bottom right. The pieces will illuminate in blue when positioned correctly.
- The door will then open, allowing you to make your escape.
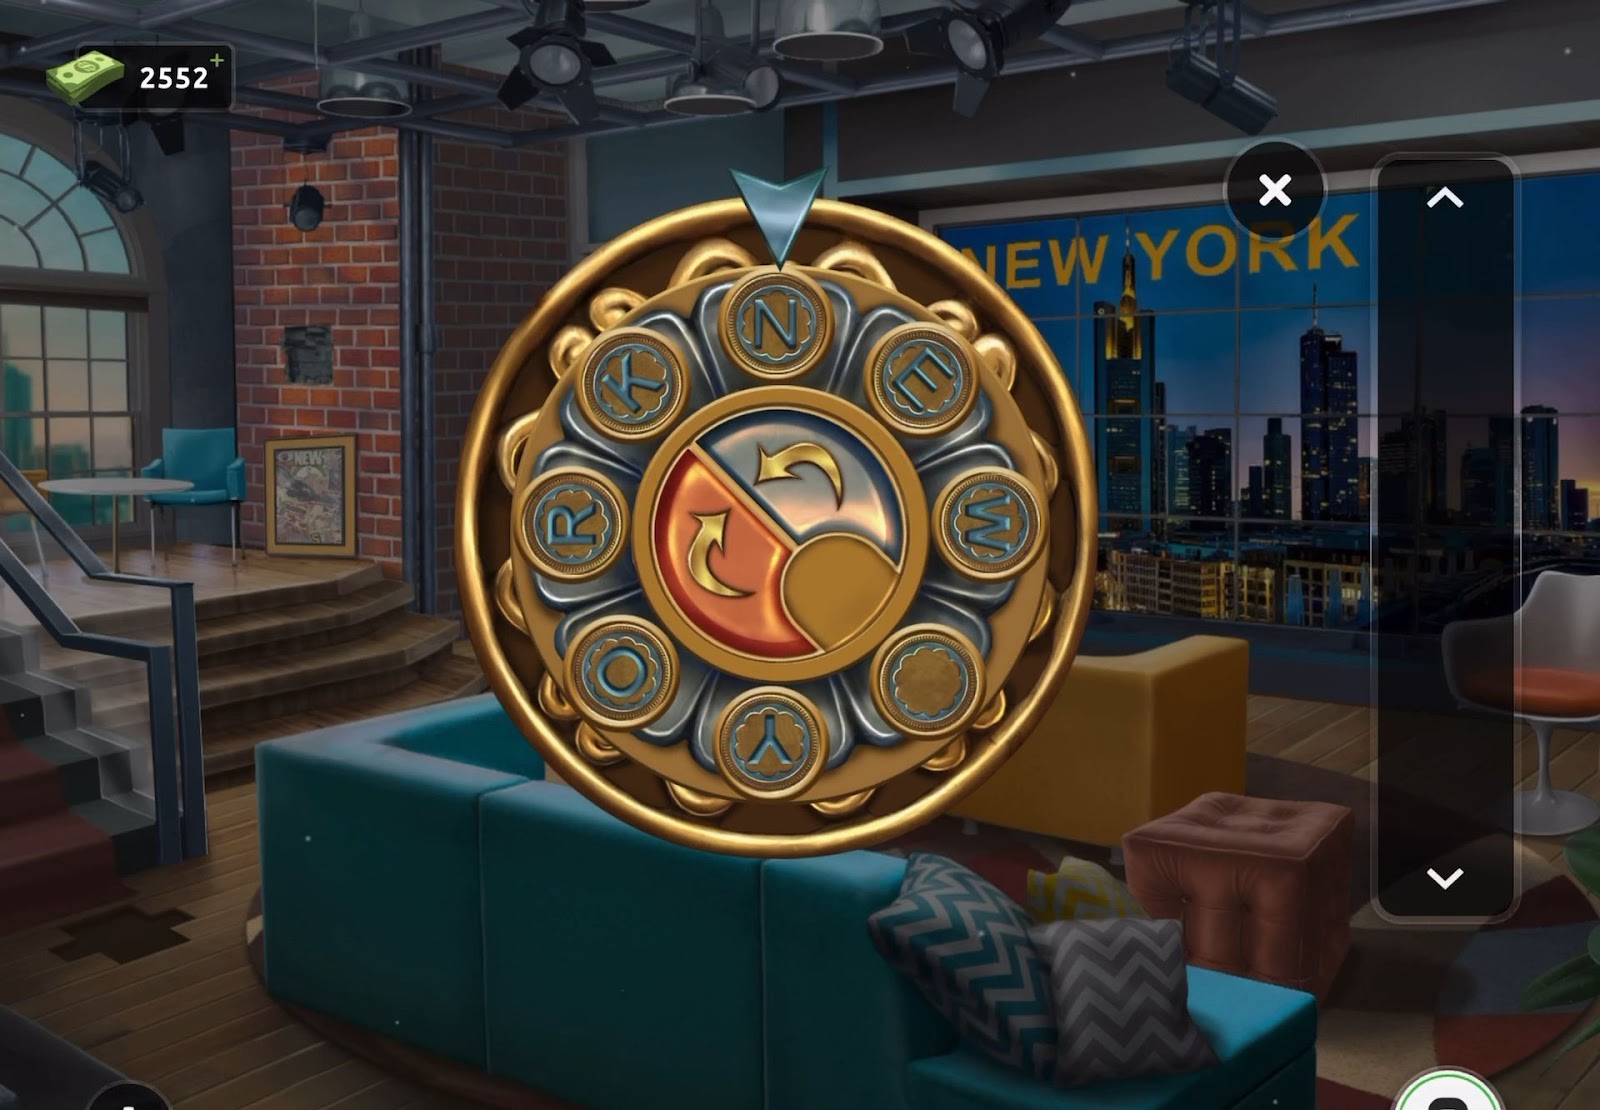
Level 22:
To complete level 22, follow the instructions below:
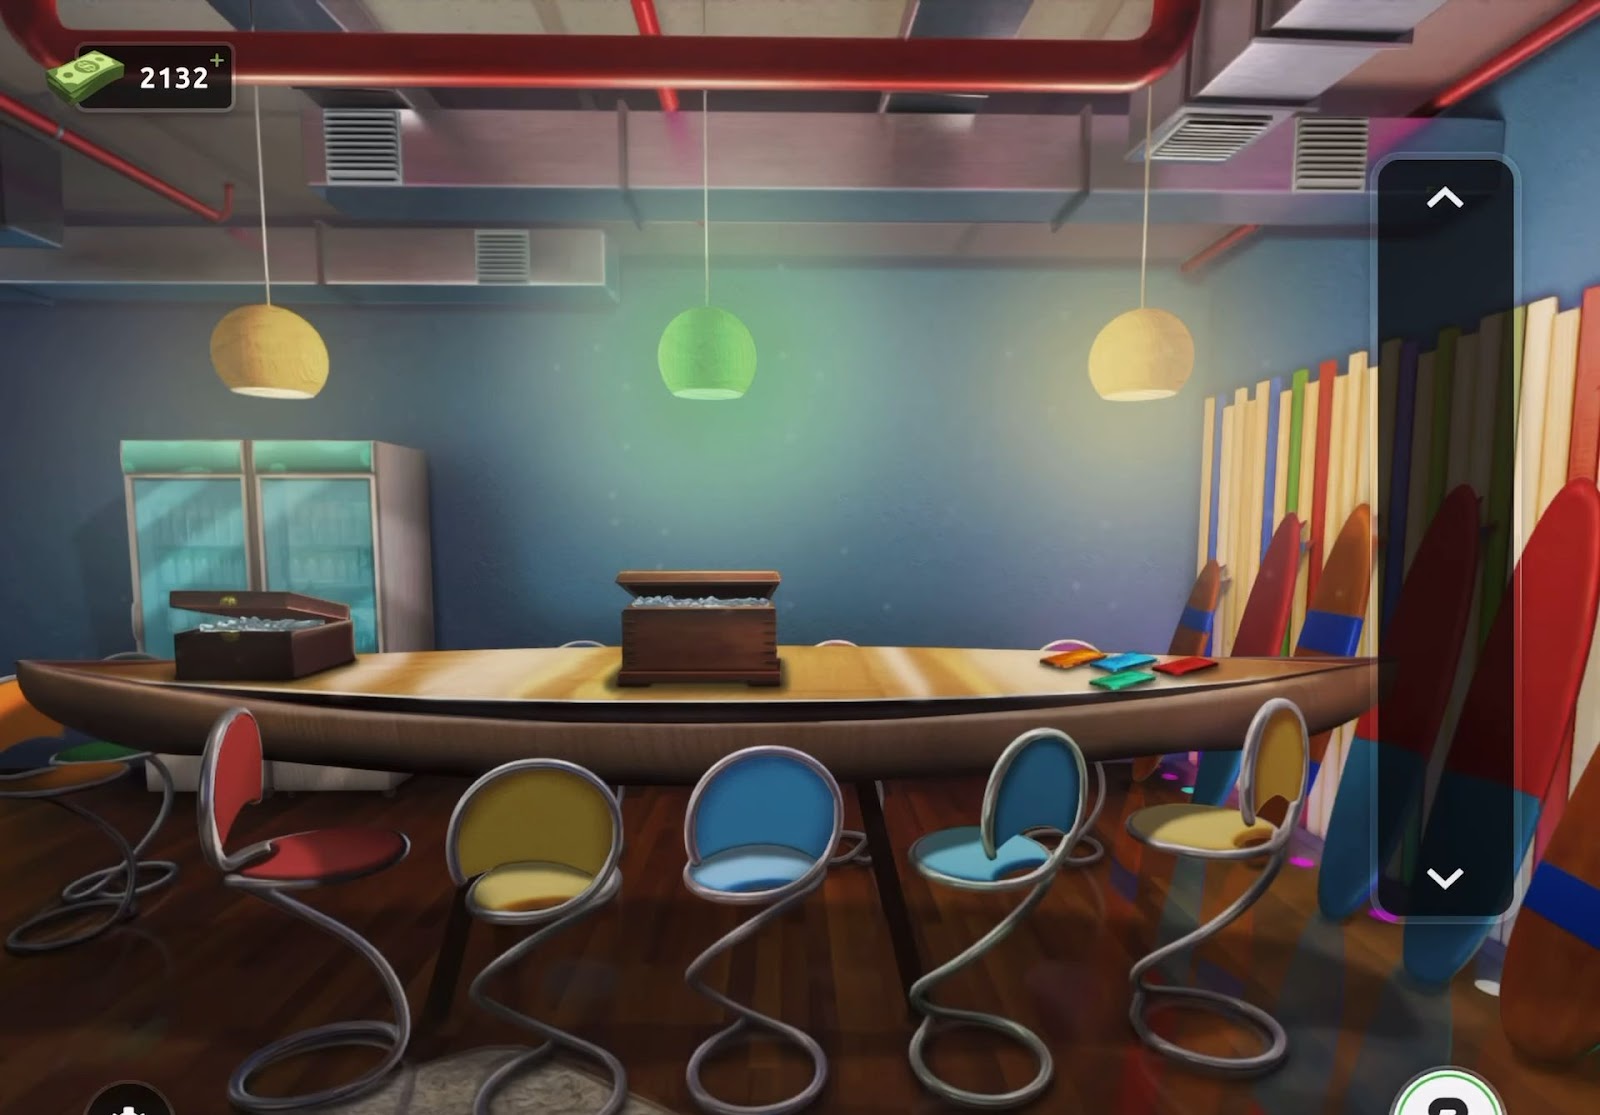
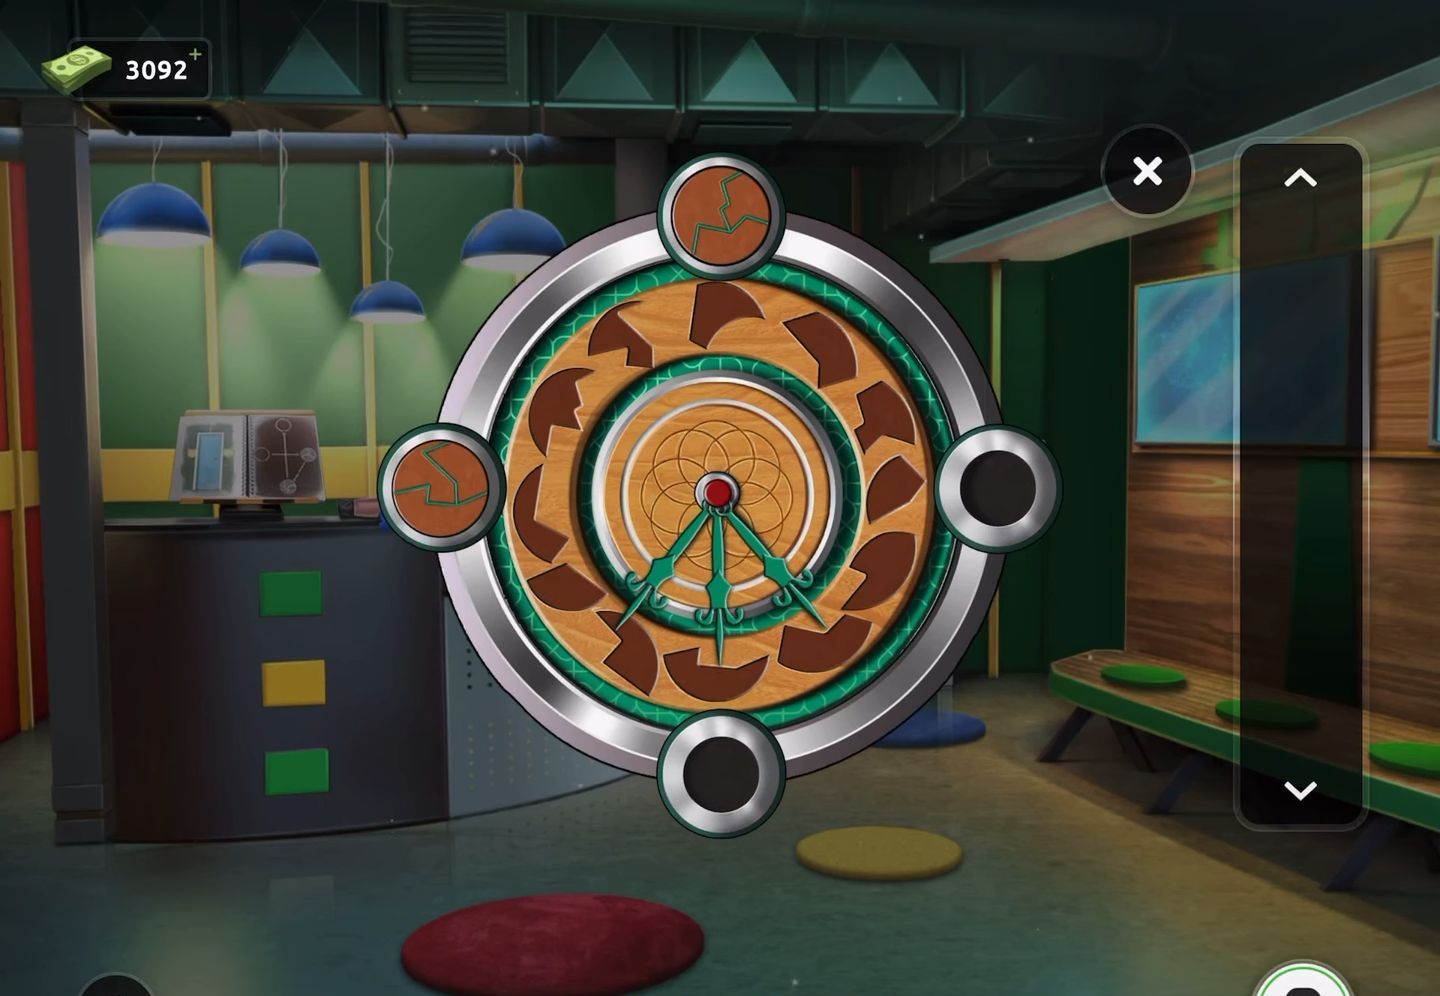
- First, acquire a small metal bar positioned against the bar on the left side of the table.
- Then, locate another metal bar on the shelving situated behind the bar.
- The third metal bar is located as one of the legs supporting the small stand under the potted plant positioned to the right of the room, adjacent to the door.
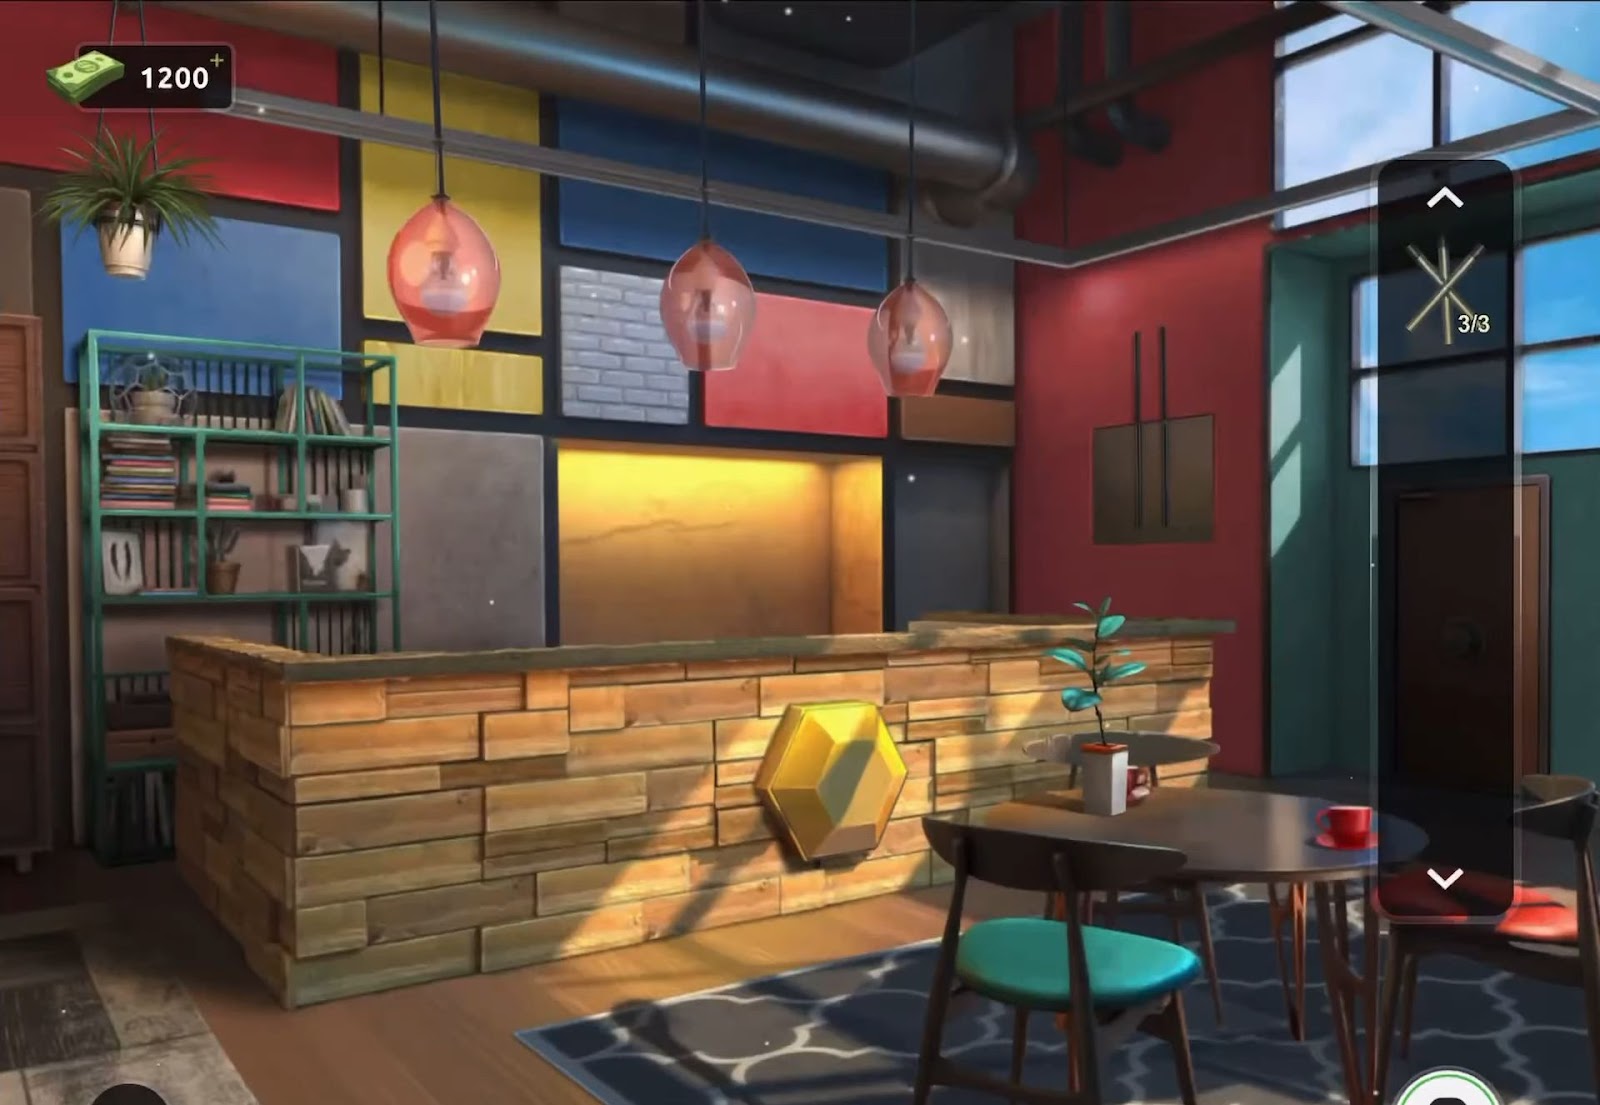
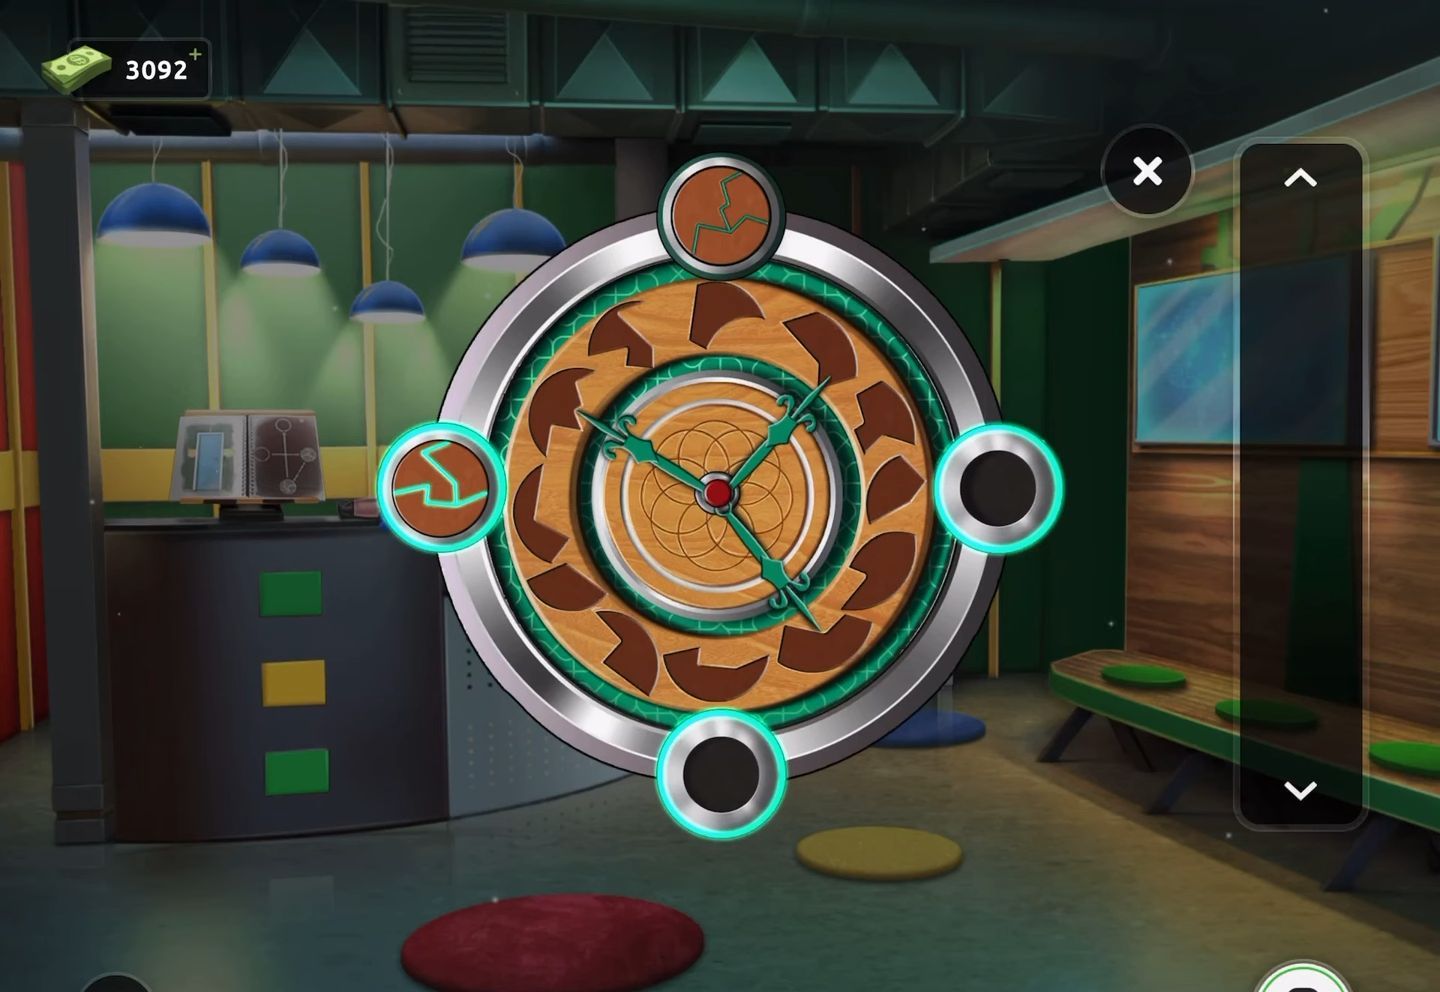
- After obtaining all three metal bars, proceed to tap on the door to view the central wheel.

- Next, insert the three bars into the wheel, causing it to illuminate. Afterward, turn the handle to open the door and proceed.
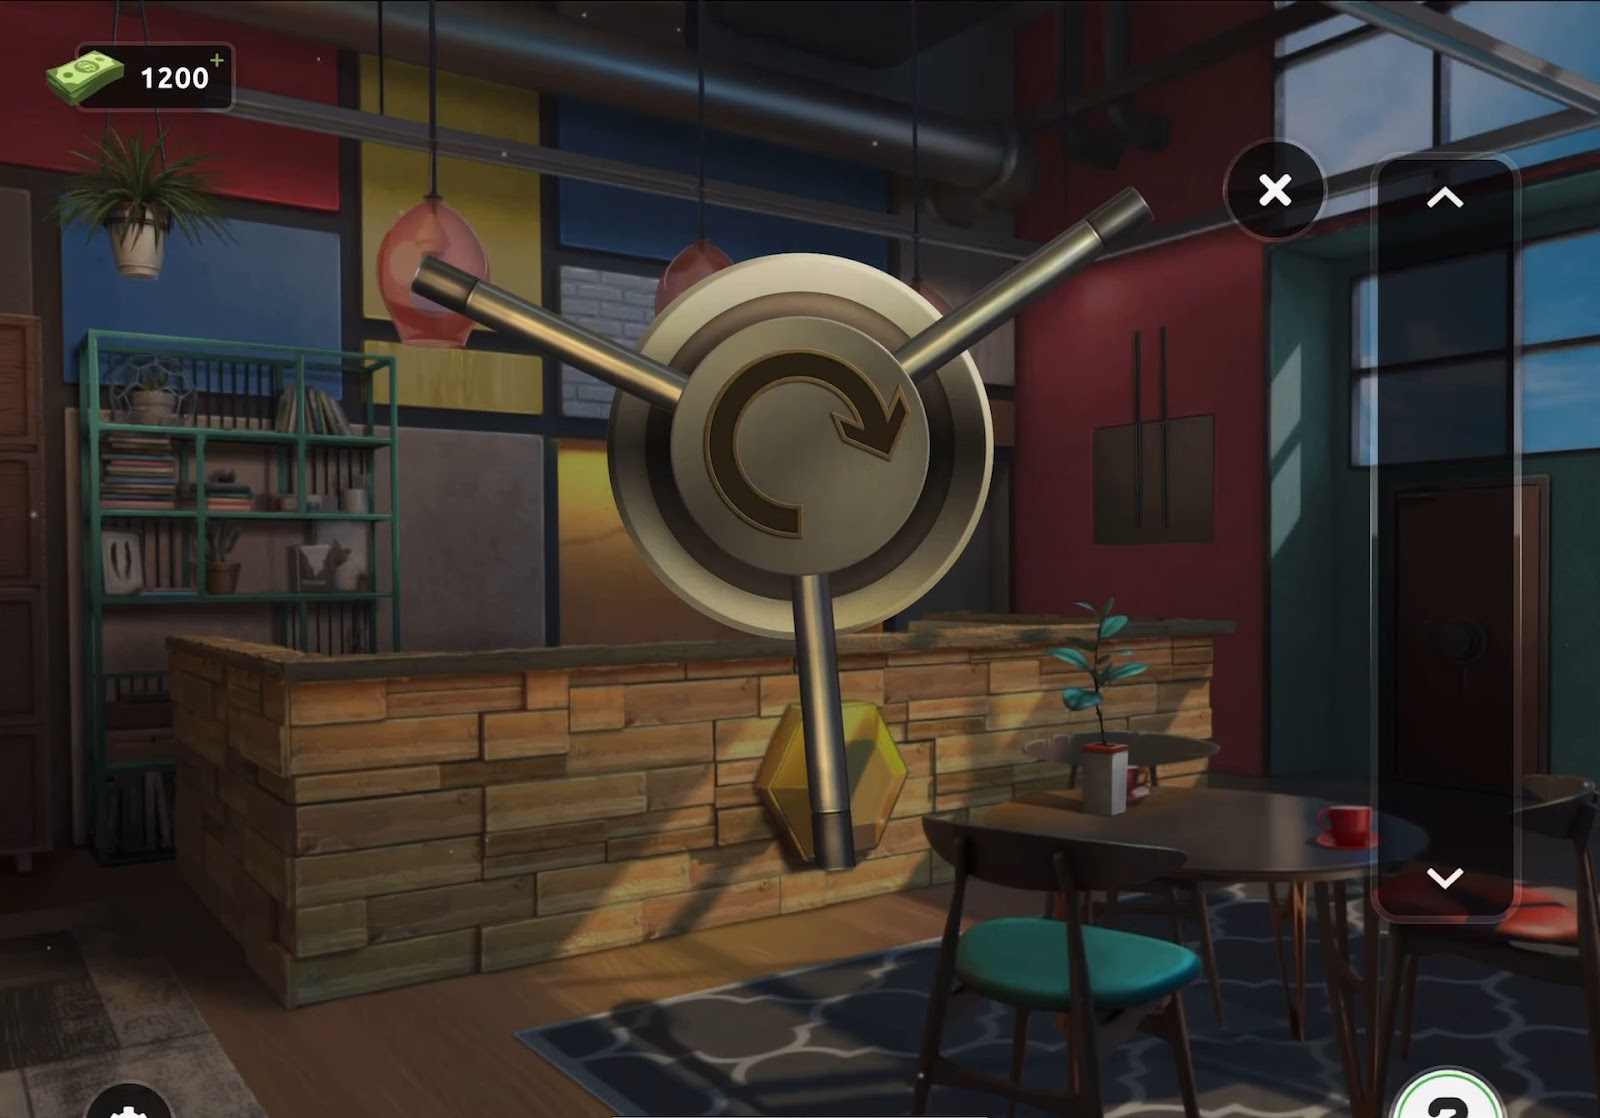
- Finally, exit through the room to progress to the next level.
Level 23:
To complete level 23, follow the instructions below:
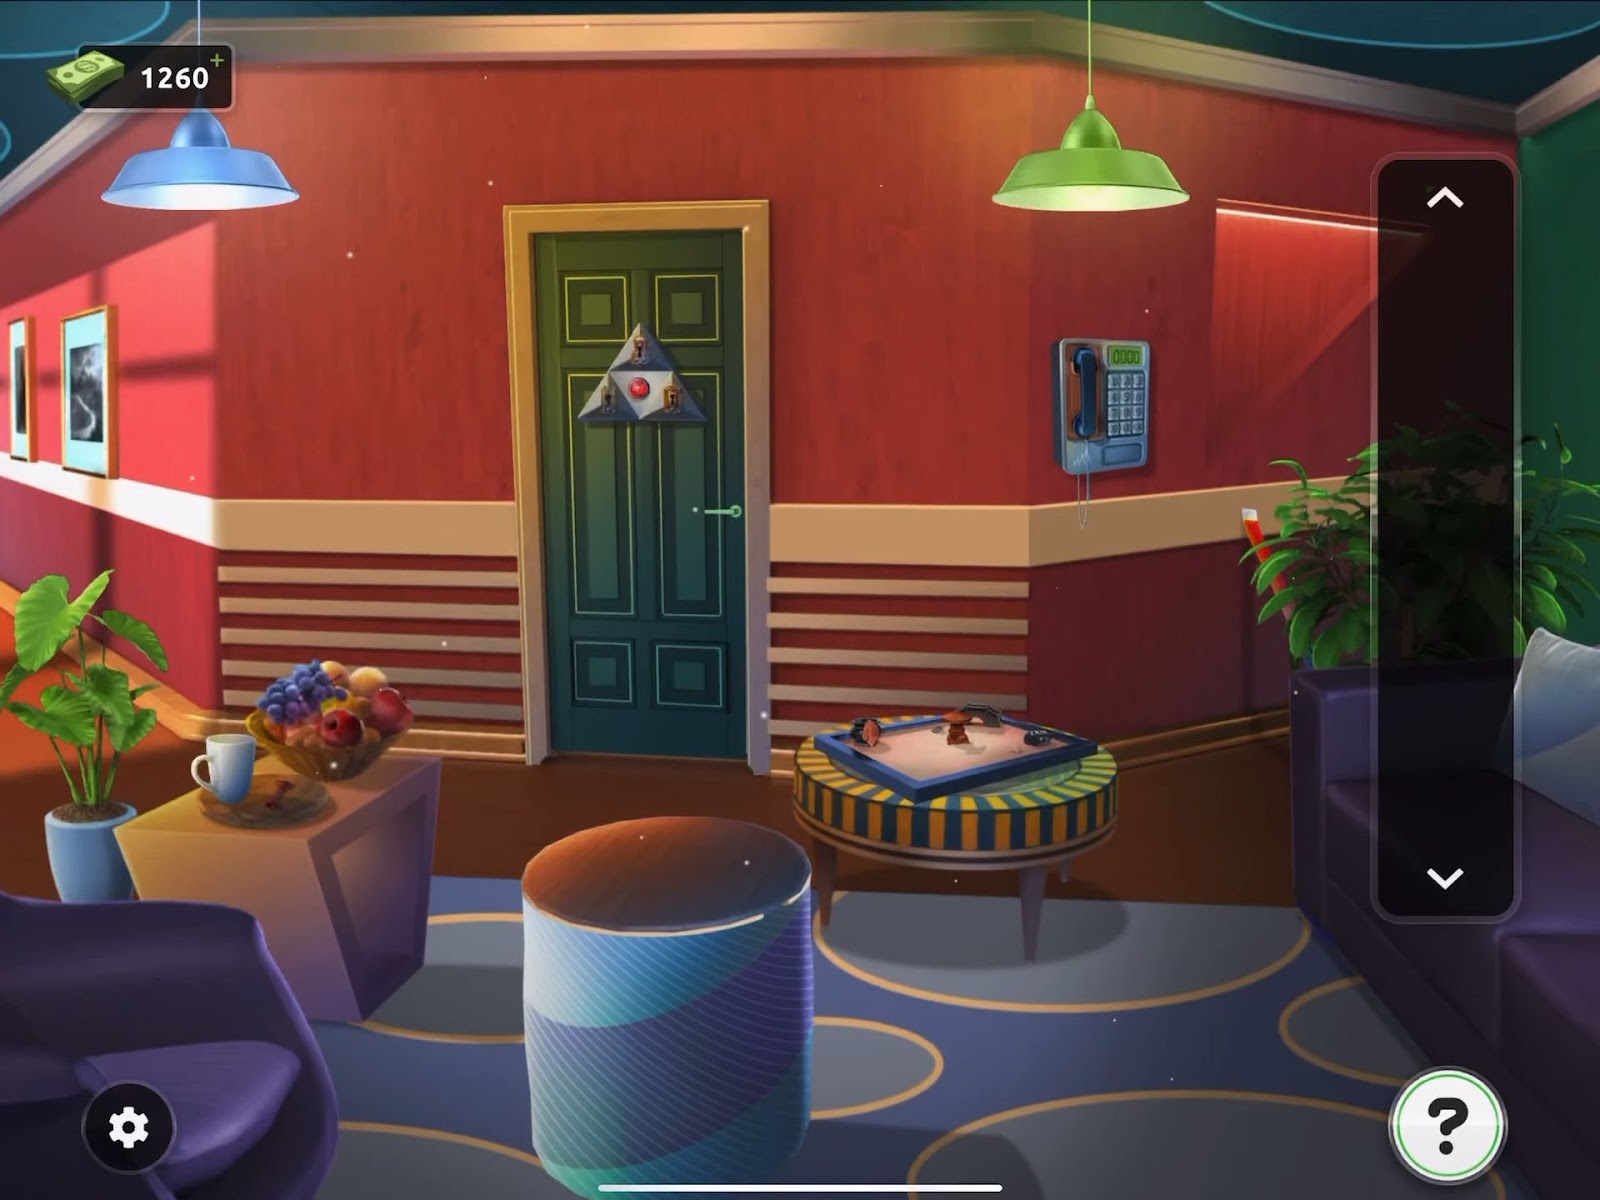
- Firstly, retrieve a crowbar concealed within the potted plant located behind the sofa on the right side.
- Subsequently, use the crowbar on the top section of the round table situated in front of the door, enabling the removal of the top.
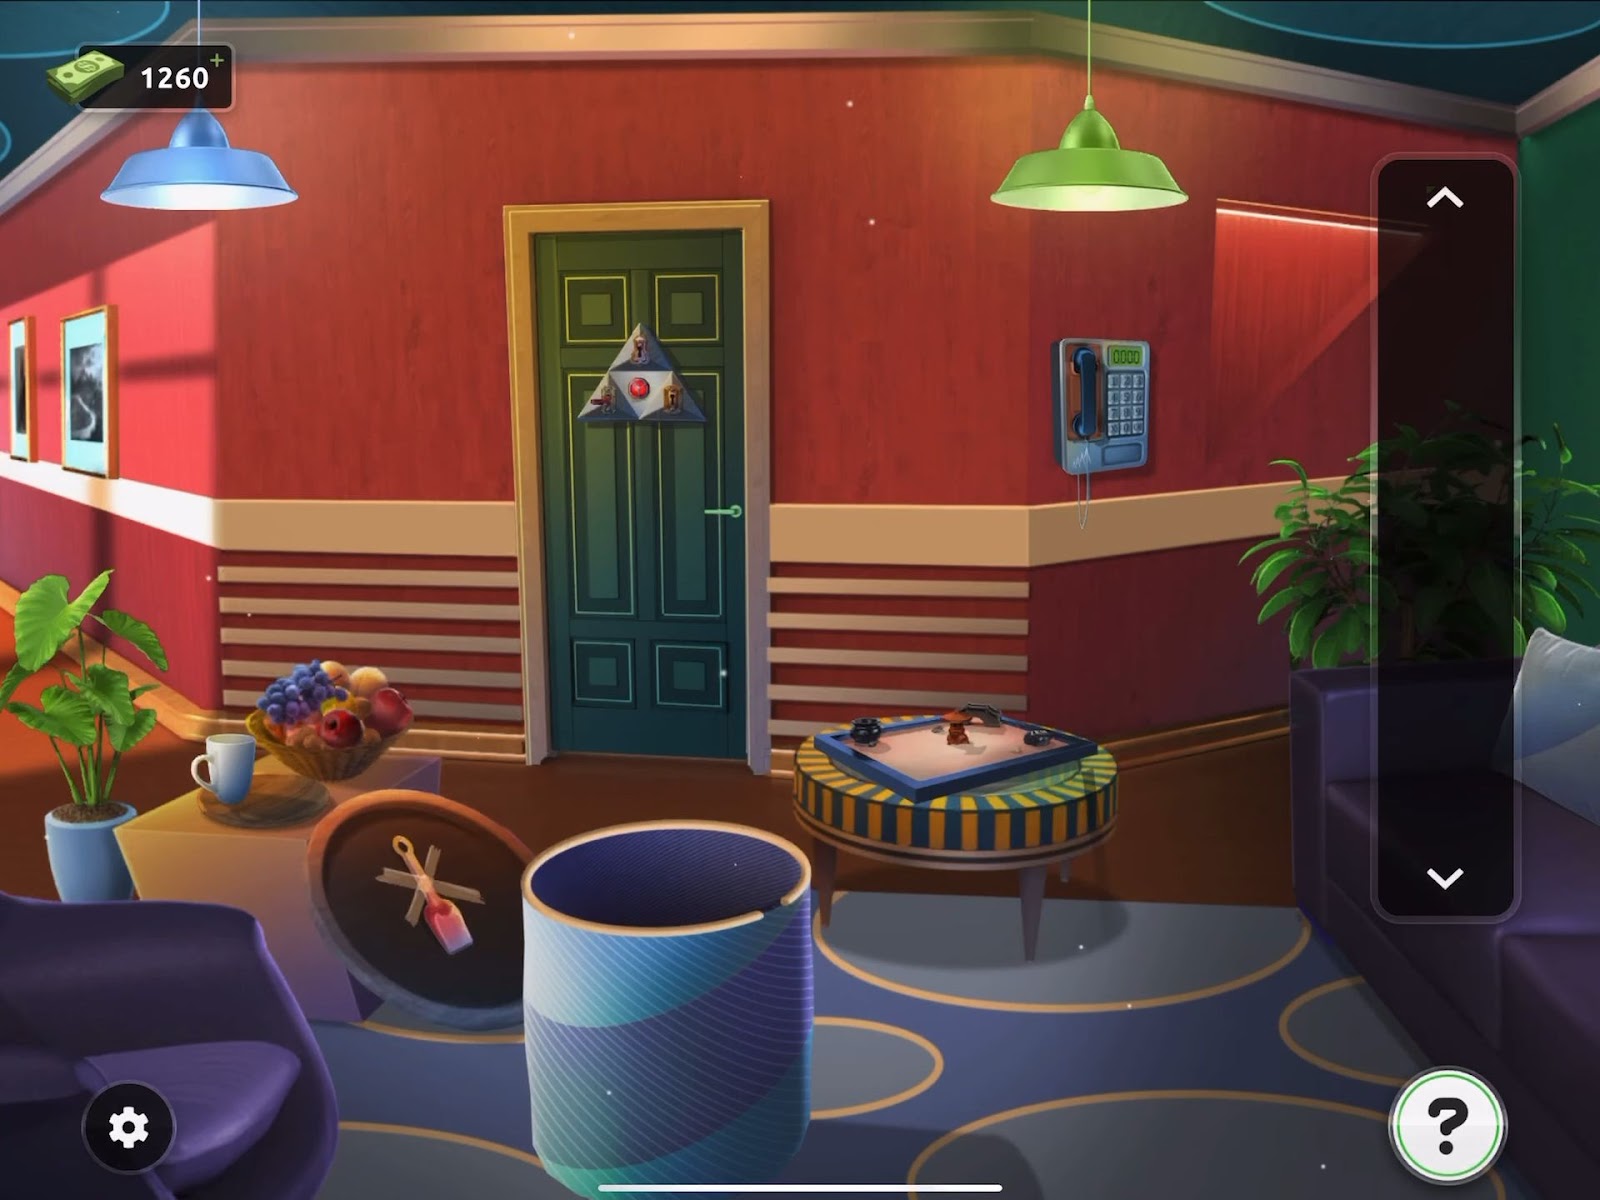
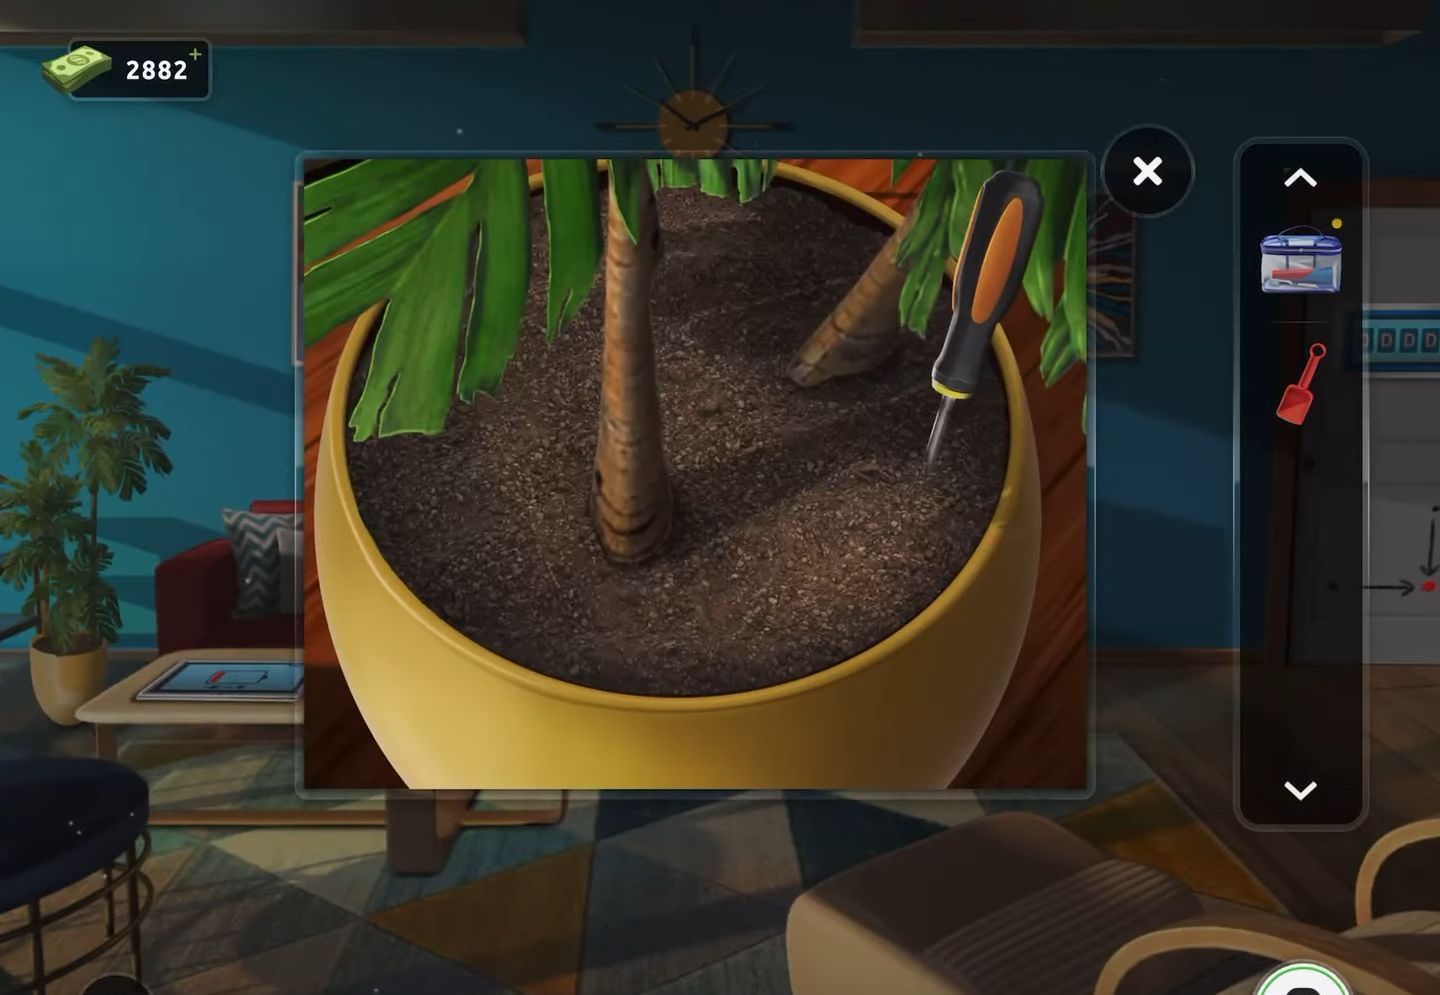
- Next, gather a small shovel, then observe the round table situated to the right with the sand tray placed on top.
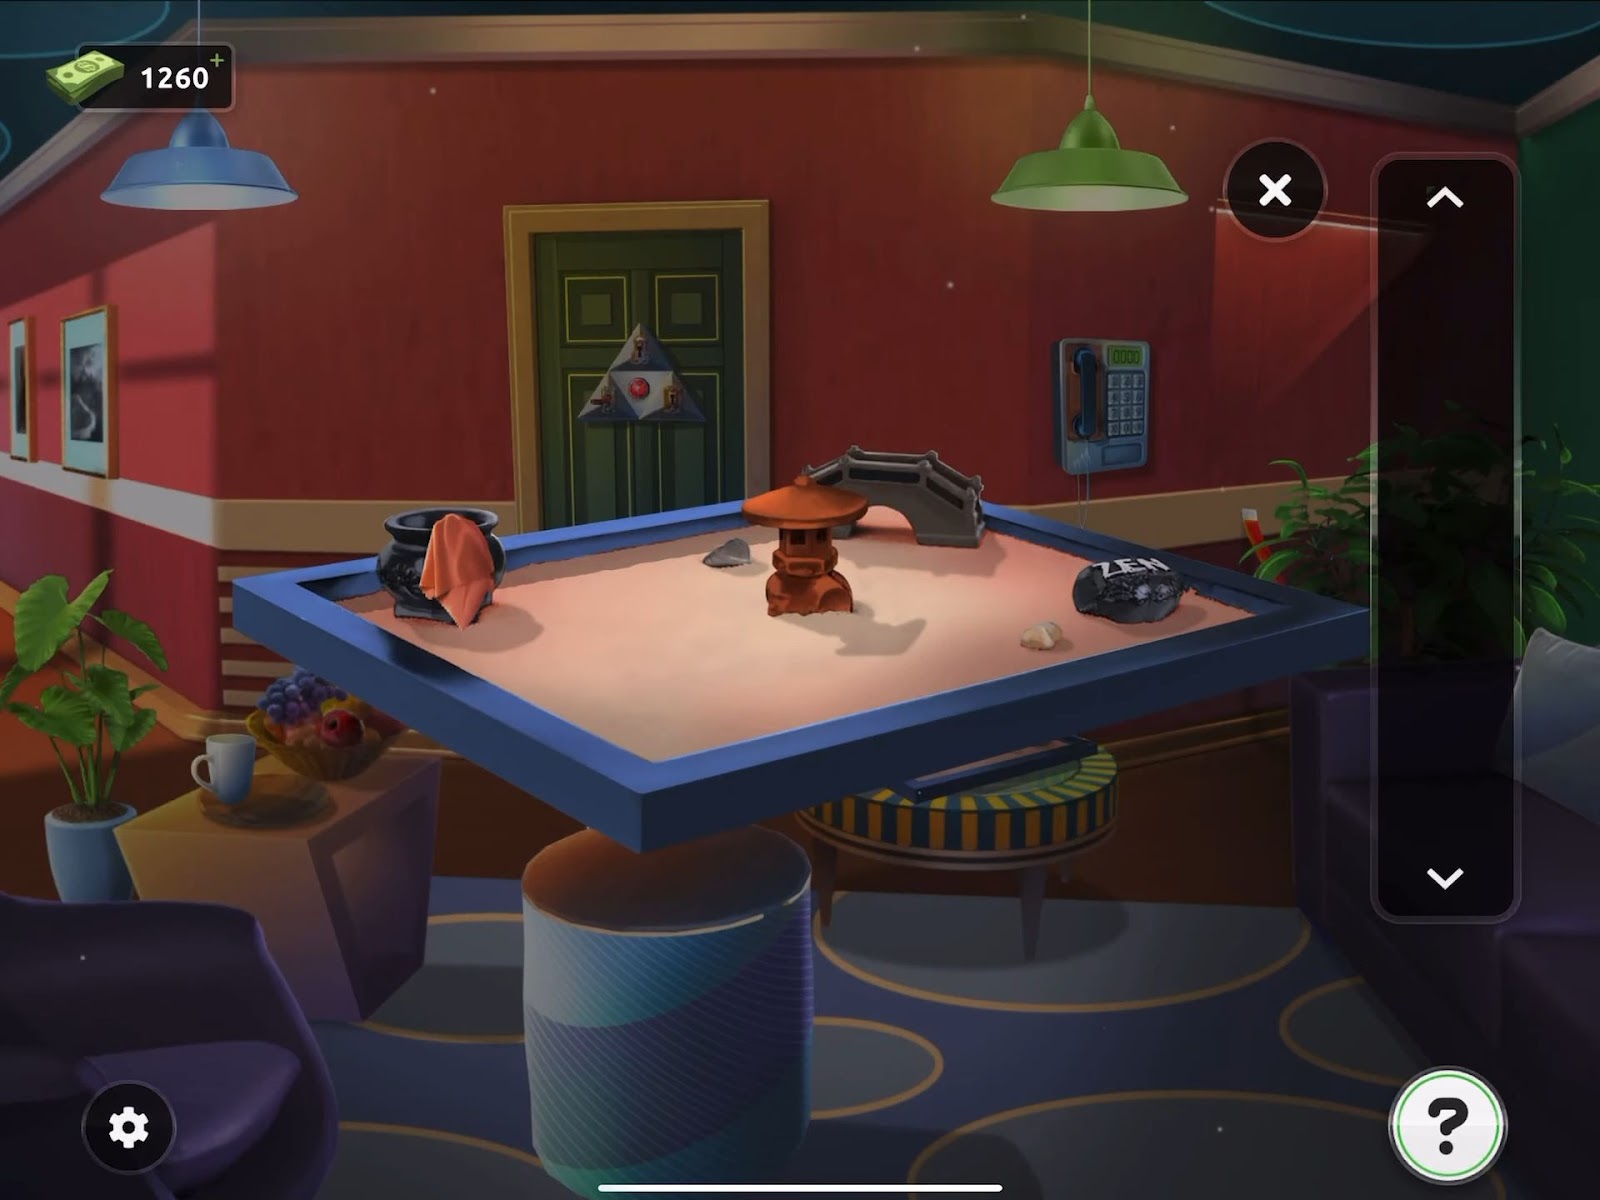
- Then retrieve the small cloth from the pot located on the left.
- Subsequently, use the shovel to dig into the sand within the tray, uncovering and collecting a key.
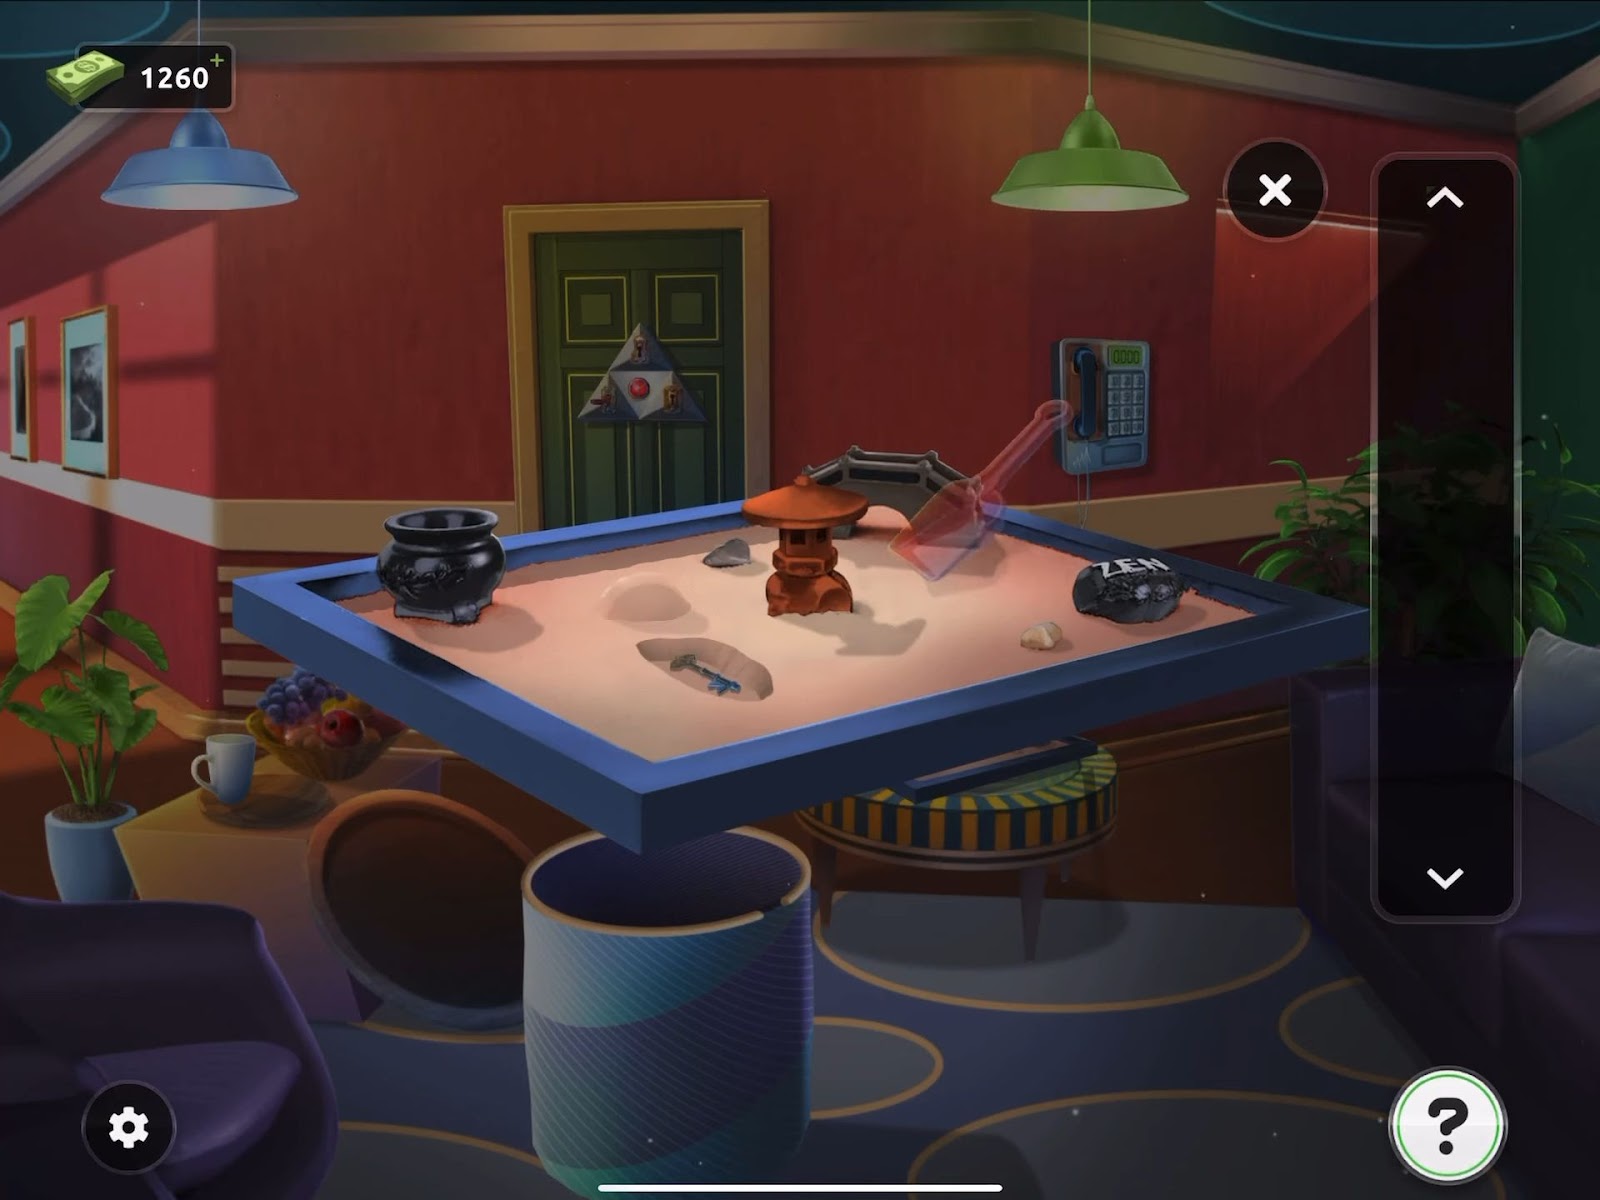
- Next, tap the small square table positioned just to the left, adorned with a bowl of fruit and a cup. You will observe an empty cup upon interaction.
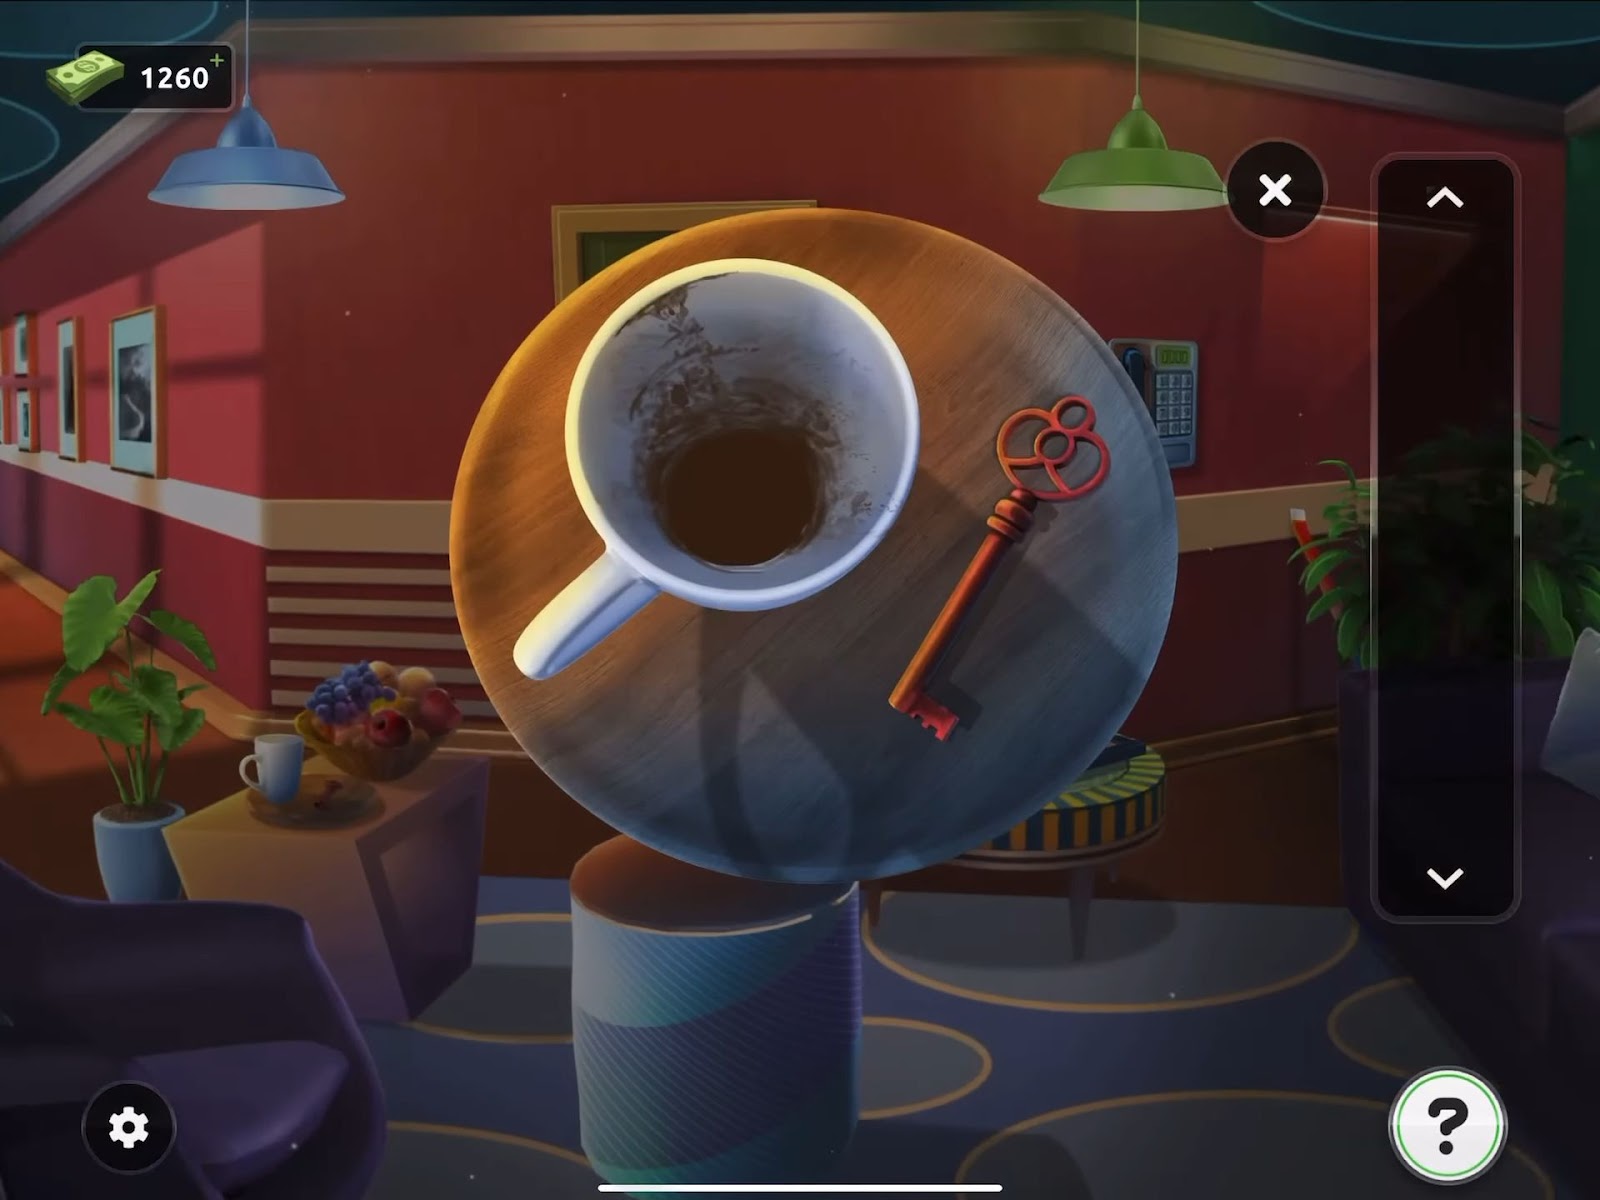
- After that, acquire the key, then employ the cloth to wipe the inside of the cup, revealing a clue.
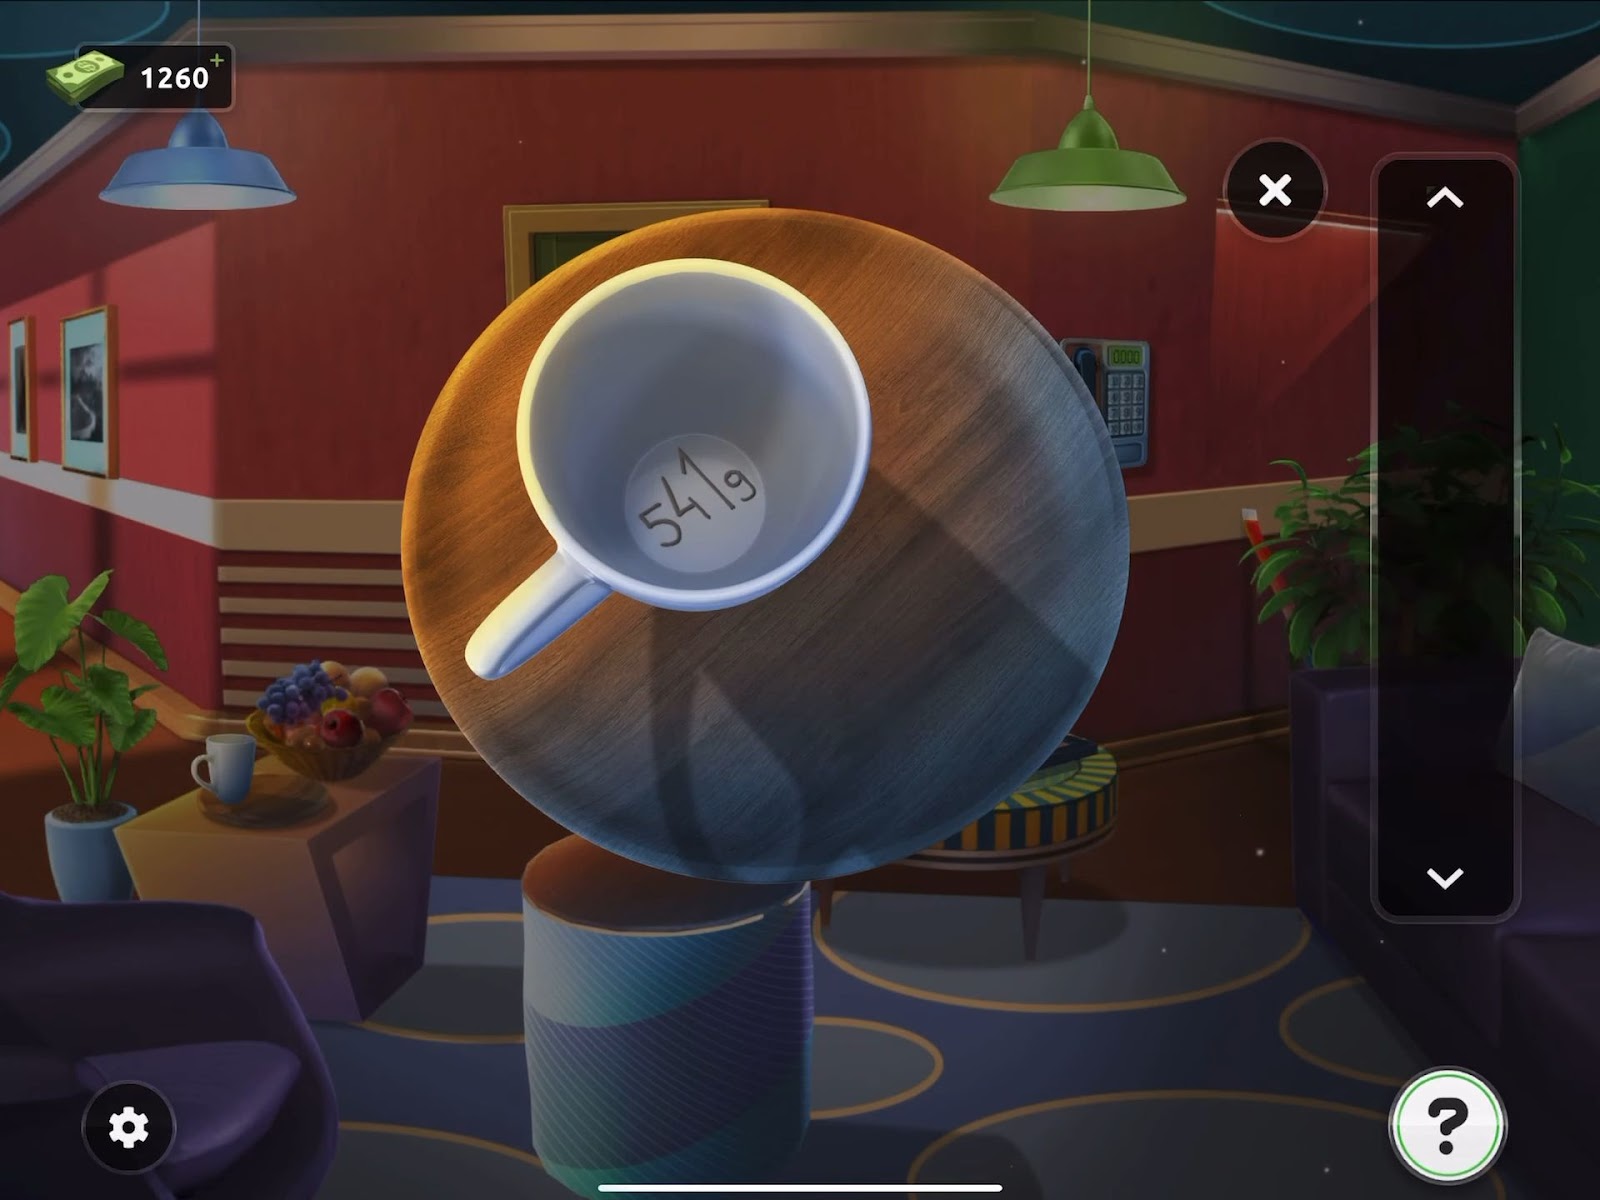
- Then observe that the numbers vary in size. Proceed to view the telephone positioned on the right side of the door.
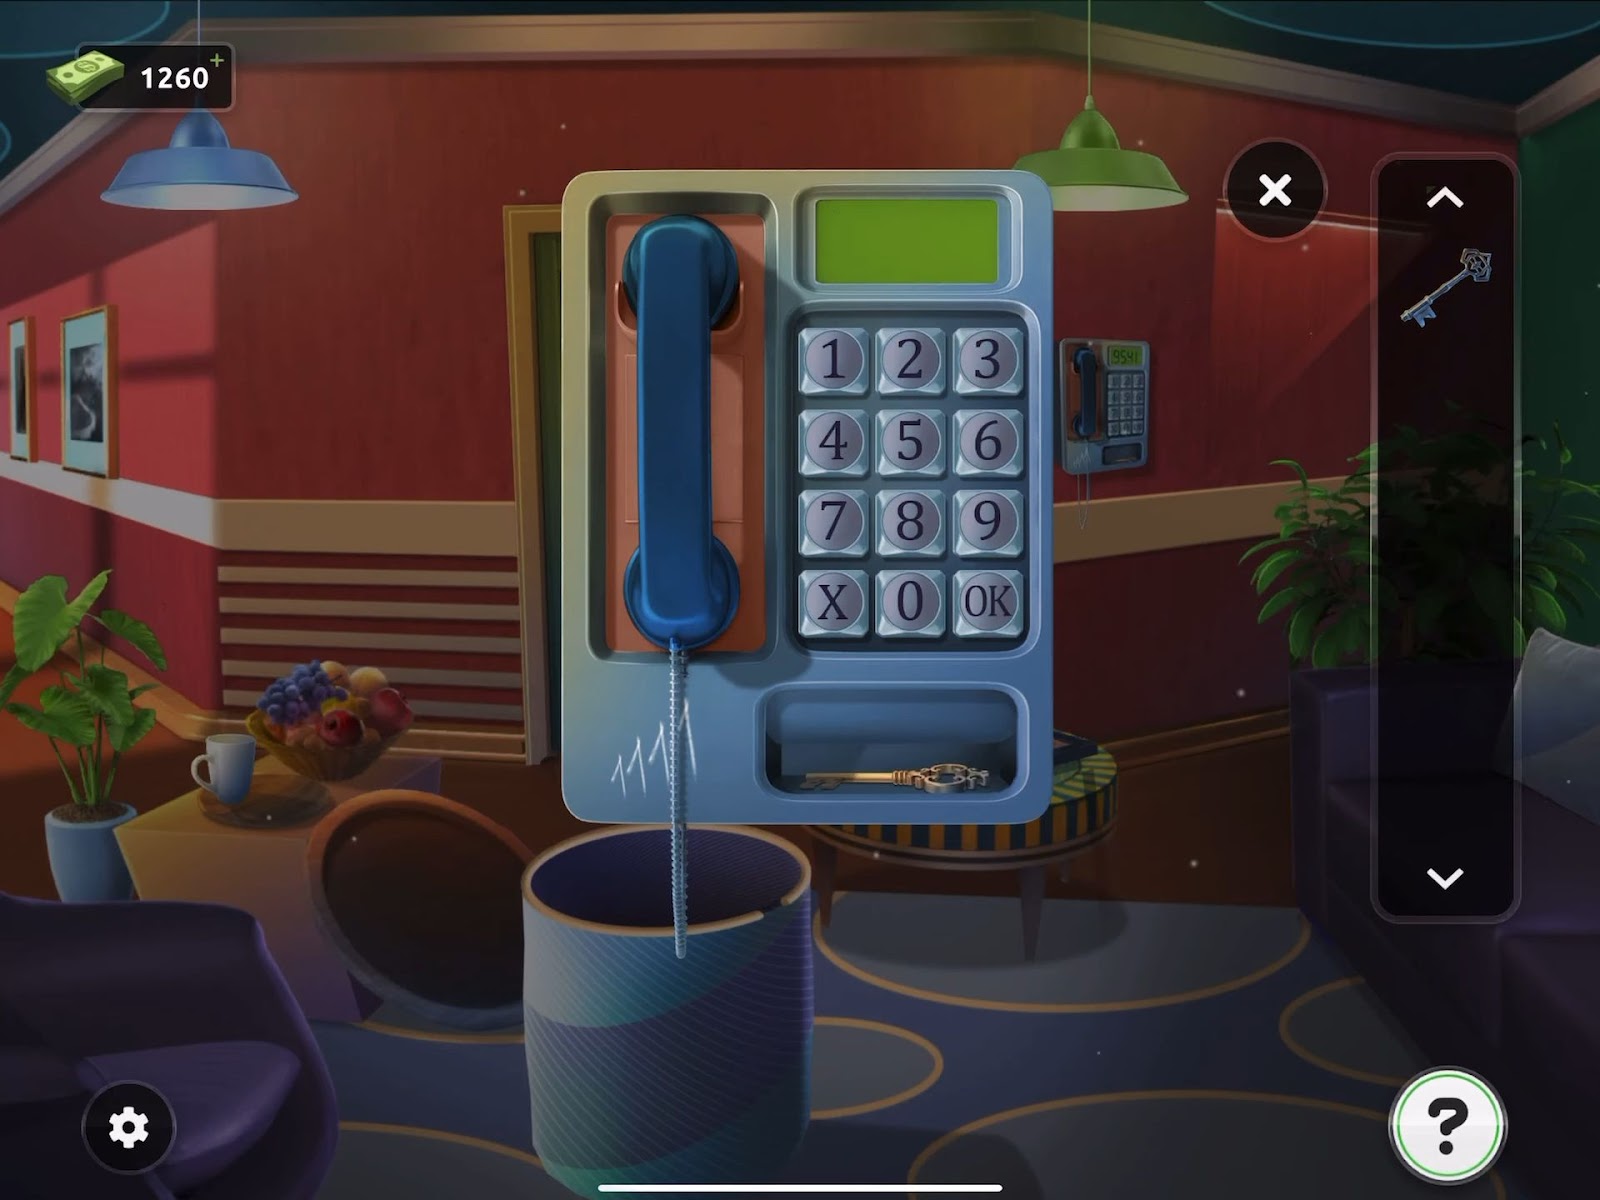
- Now input the accurate four-digit number into the system, and tap the “OK” button.
- Then observe the four number 1s scratched on the phone, arranged in ascending order of size. Utilize the numbers (9541) from the cup, similarly organized in ascending size order.
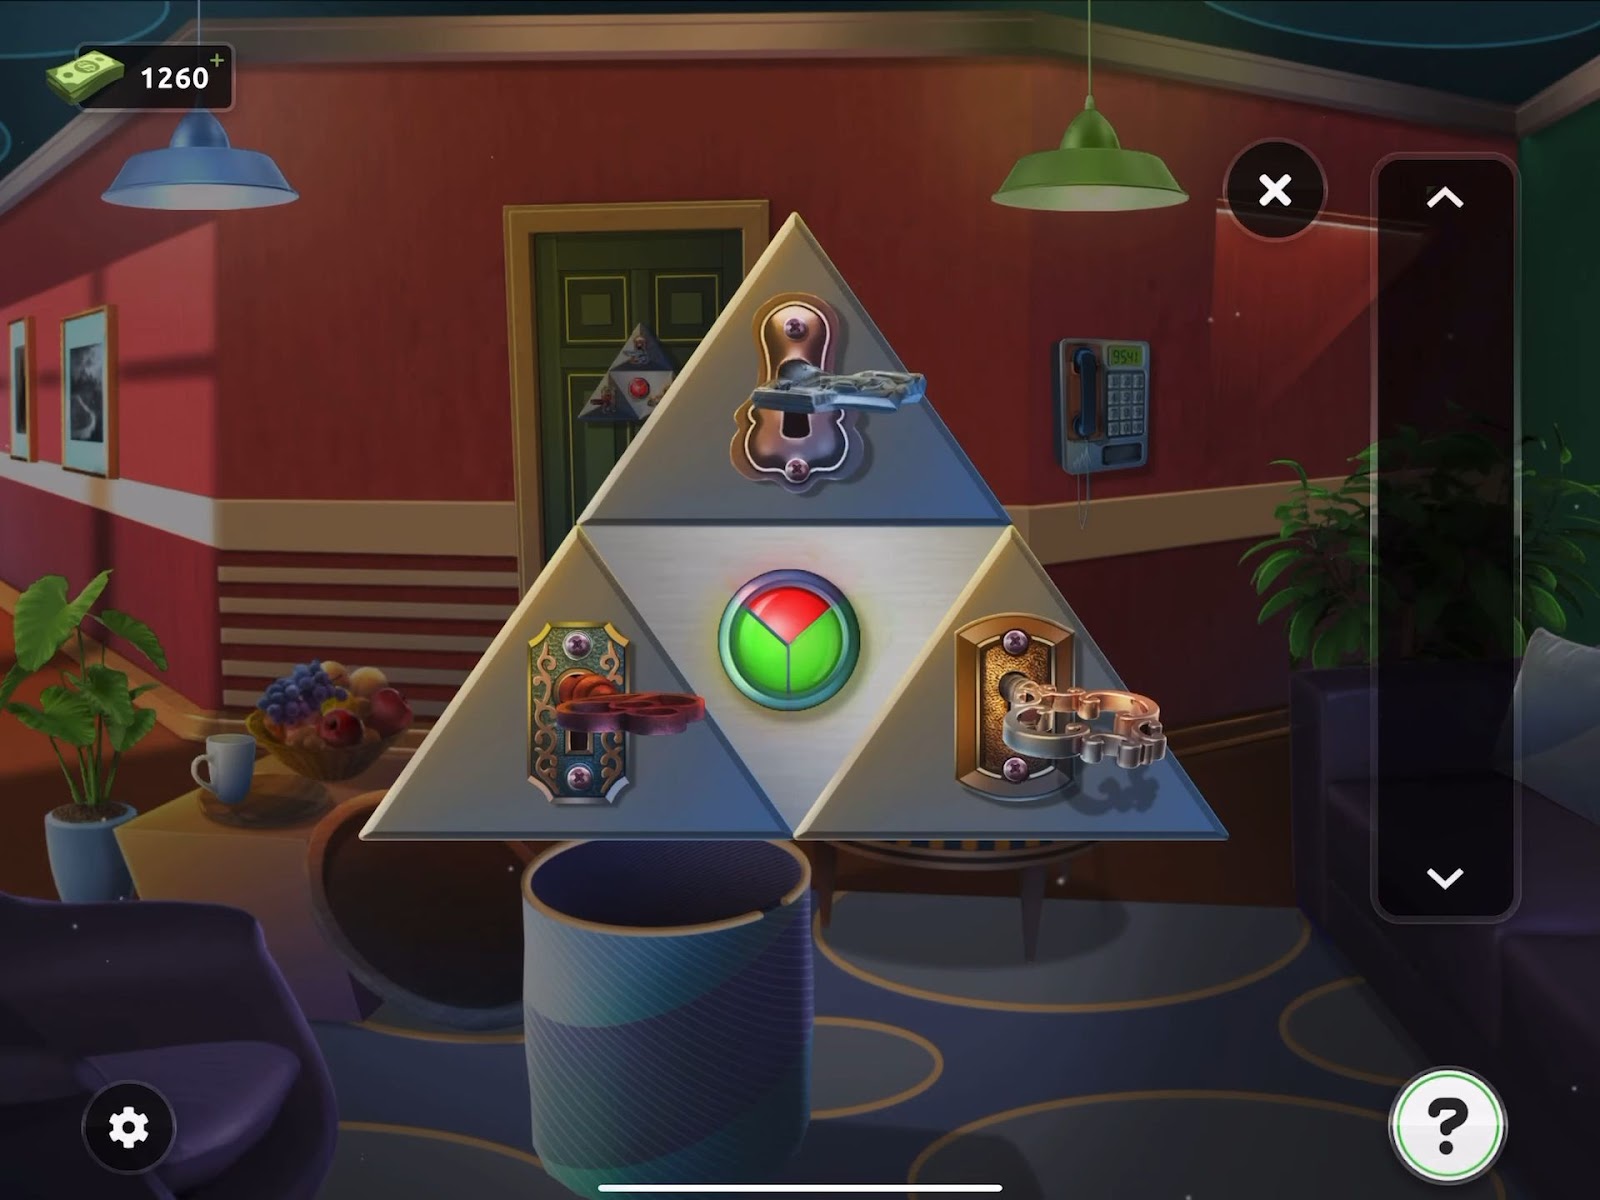
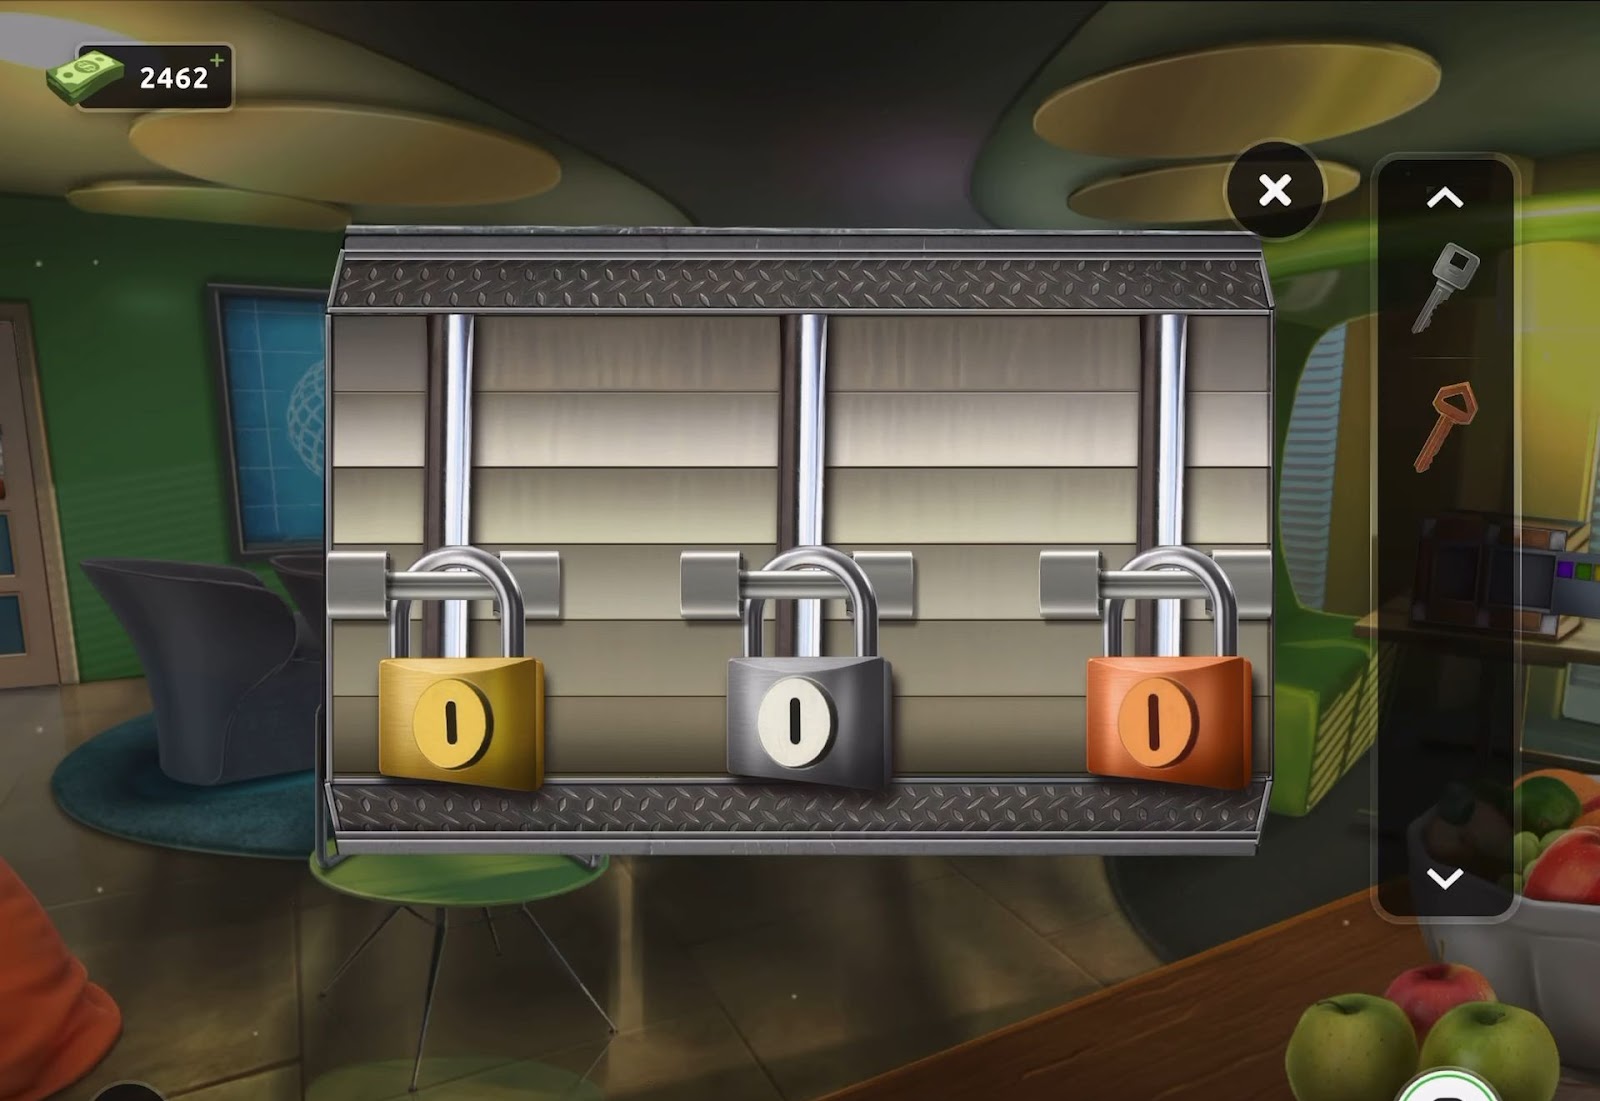
- Next, grab the third key and proceed to the door where a lock that requires three keys is visible.
- Finally, utilize all three keys in the lock, which will allow you to escape once unlocked.
Level 24:
To complete level 24, follow the instructions below:
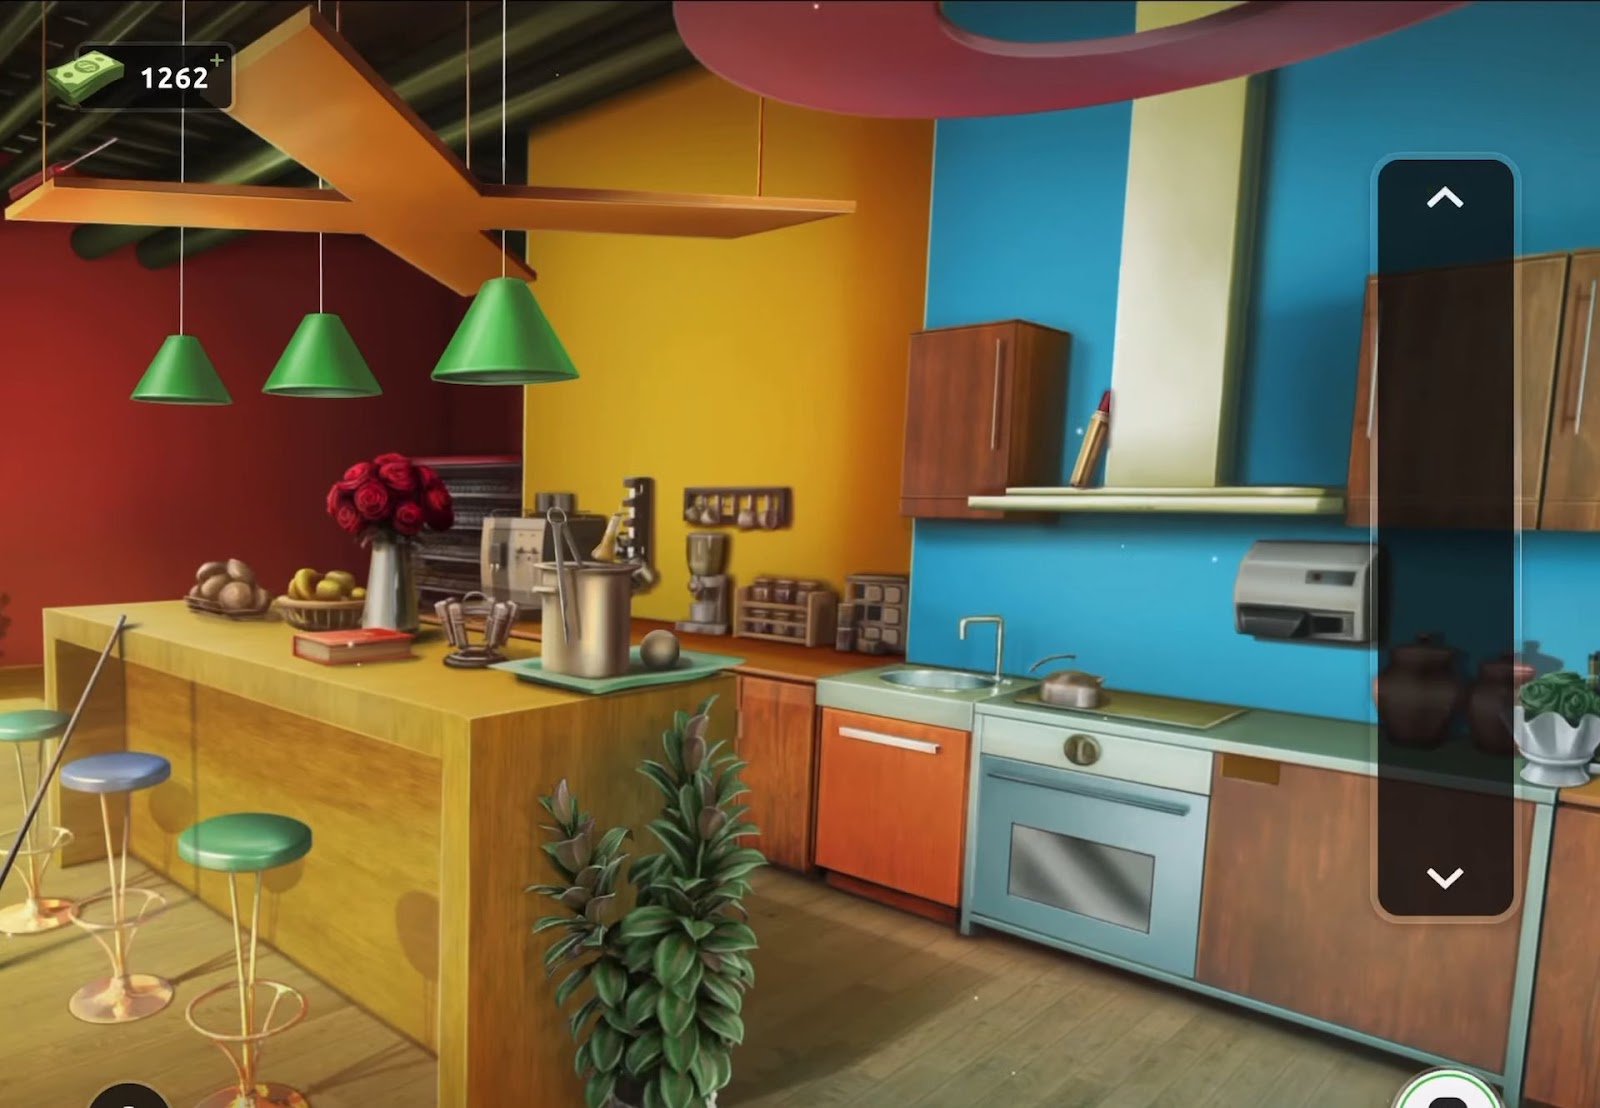
- Firstly, obtain the long stick located next to the bar stools.
- Then, utilize the stick to strike the orange X-shaped object hanging above the bar, causing a lighter to fall.
- Now collect the lighter once it has dropped.
- Next, retrieve a bottle of lighter fluid from the extractor hood positioned above the oven on the right side.
- Examine the lighter and apply the lighter fluid to create a functional, operating lighter.
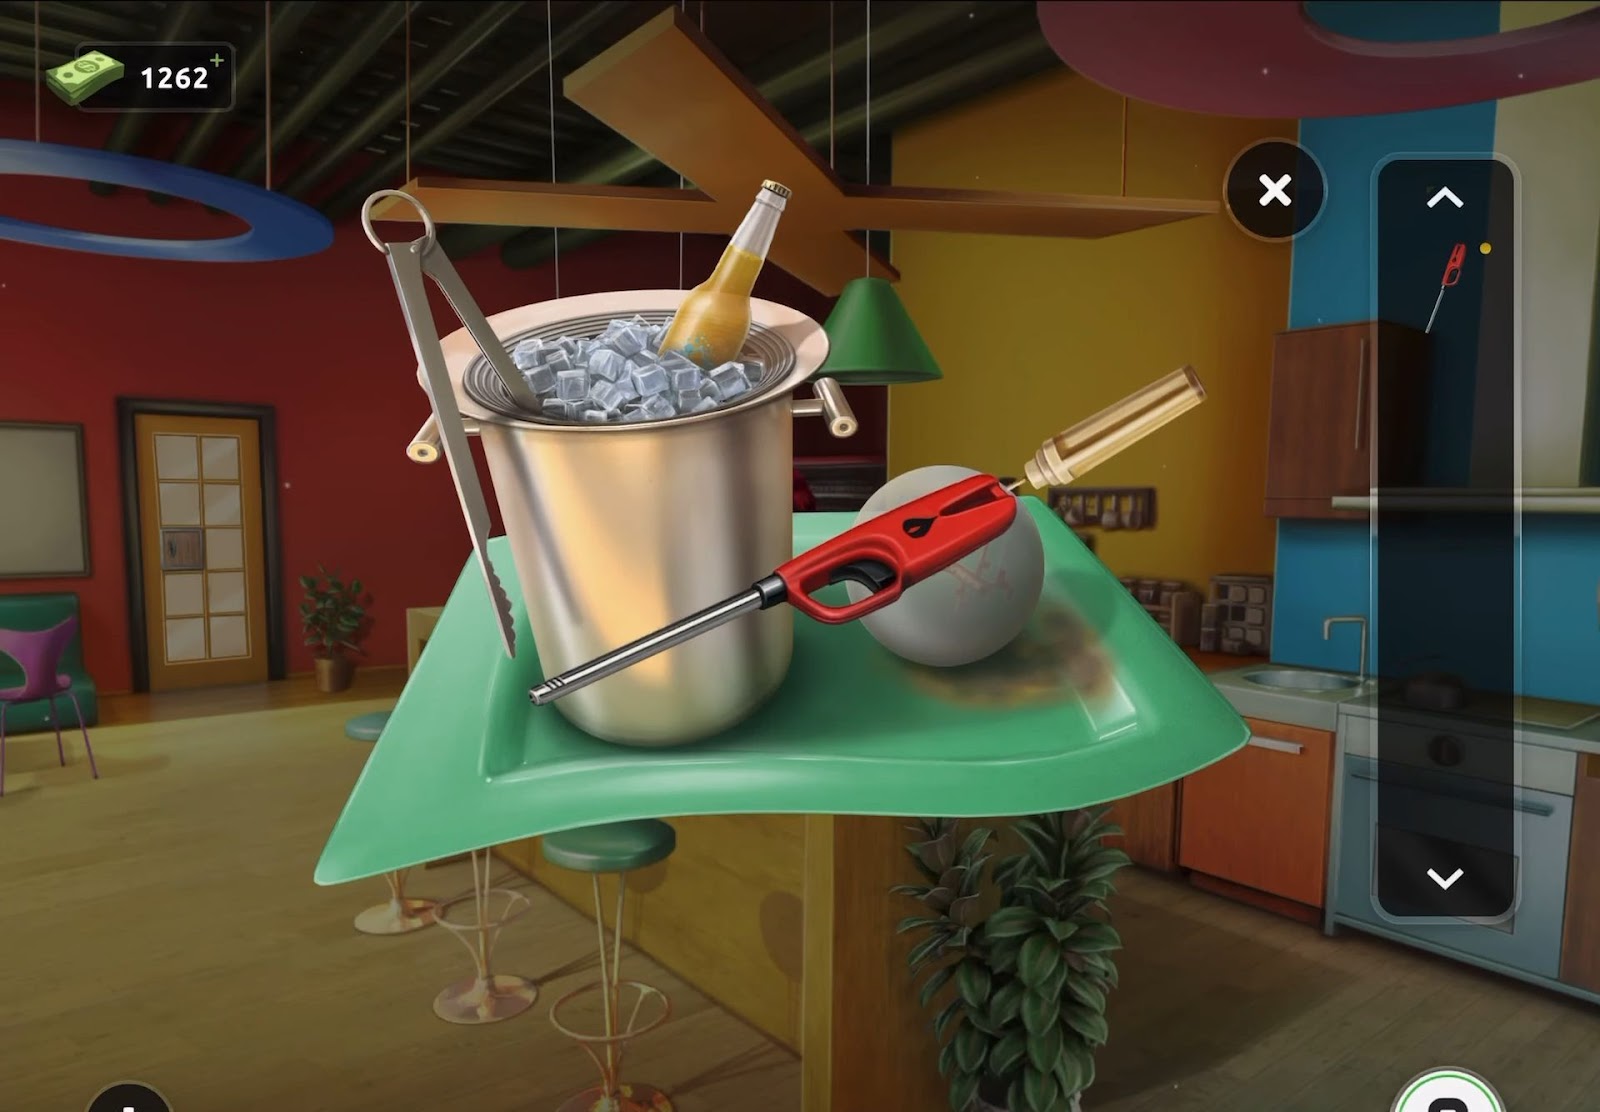
- Next, select the green tray situated at the front end of the bar to reveal the ice bucket placed on it.
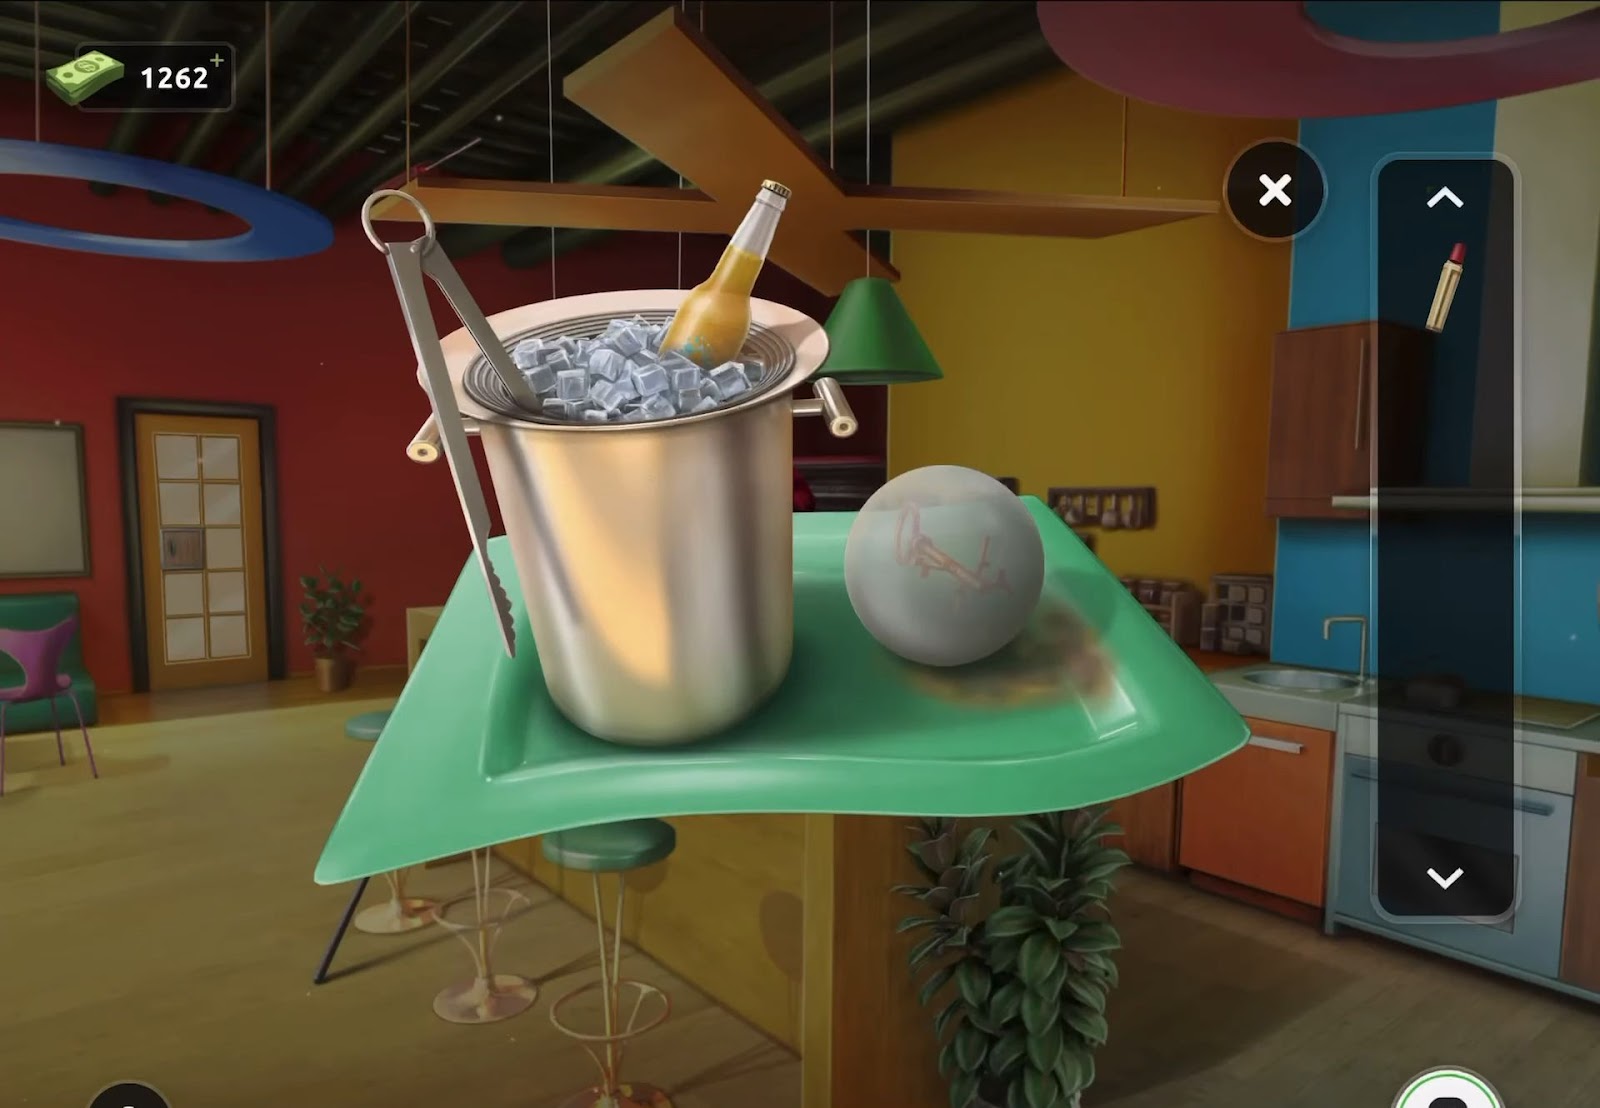
- After that, gather the bottle of drink from the ice bucket, then proceed to use the lighter on the ice ball located on the right side to melt it.
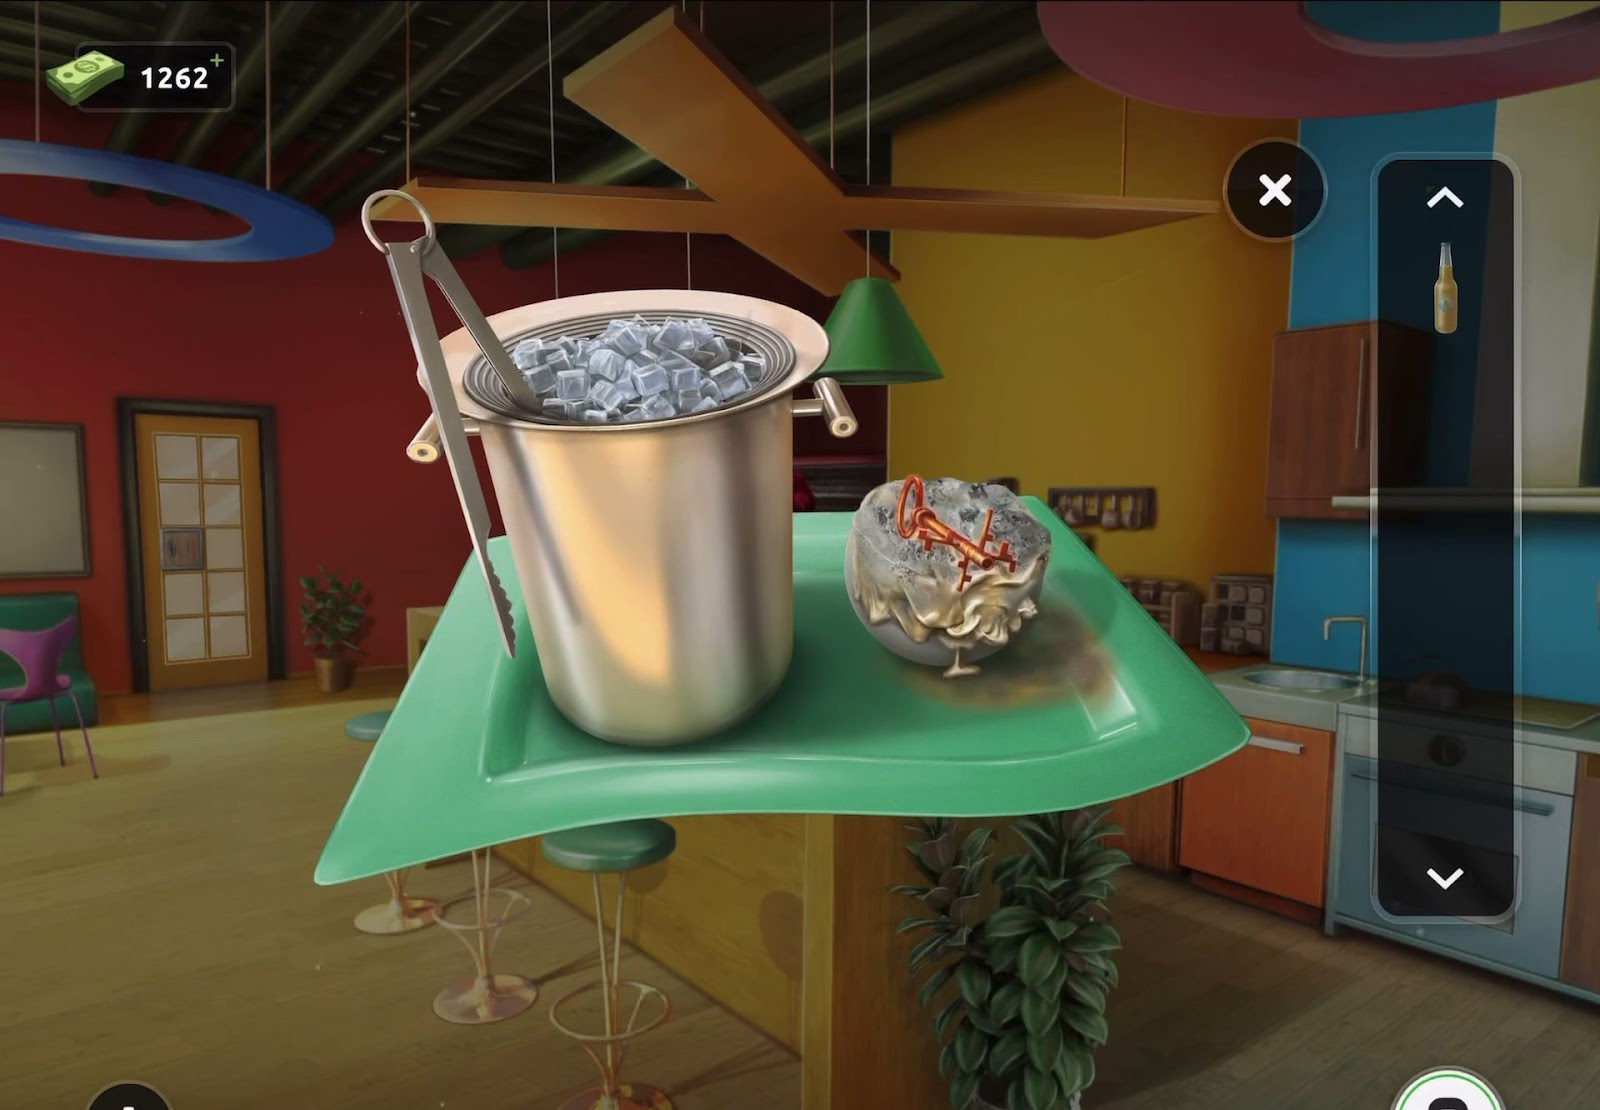
- After melting the ice, use the tongs to lift the hotkey and drop it into the ice bucket. Retrieve the cooled key.
- Next, proceed to inspect the door to observe the keyhole and take note of the line pattern on its right.
- Then, view the key in your inventory and then combine it with the bottle of drink to render the key mobile.
- The key consists of four rotatable sections. Rotate these sections until the pattern of ridges on the top and bottom aligns with the diagram displayed on the right.
- Finally, utilize the configured key to unlock the door, granting your escape.
Level 25:
To complete level 25, follow the instructions below:
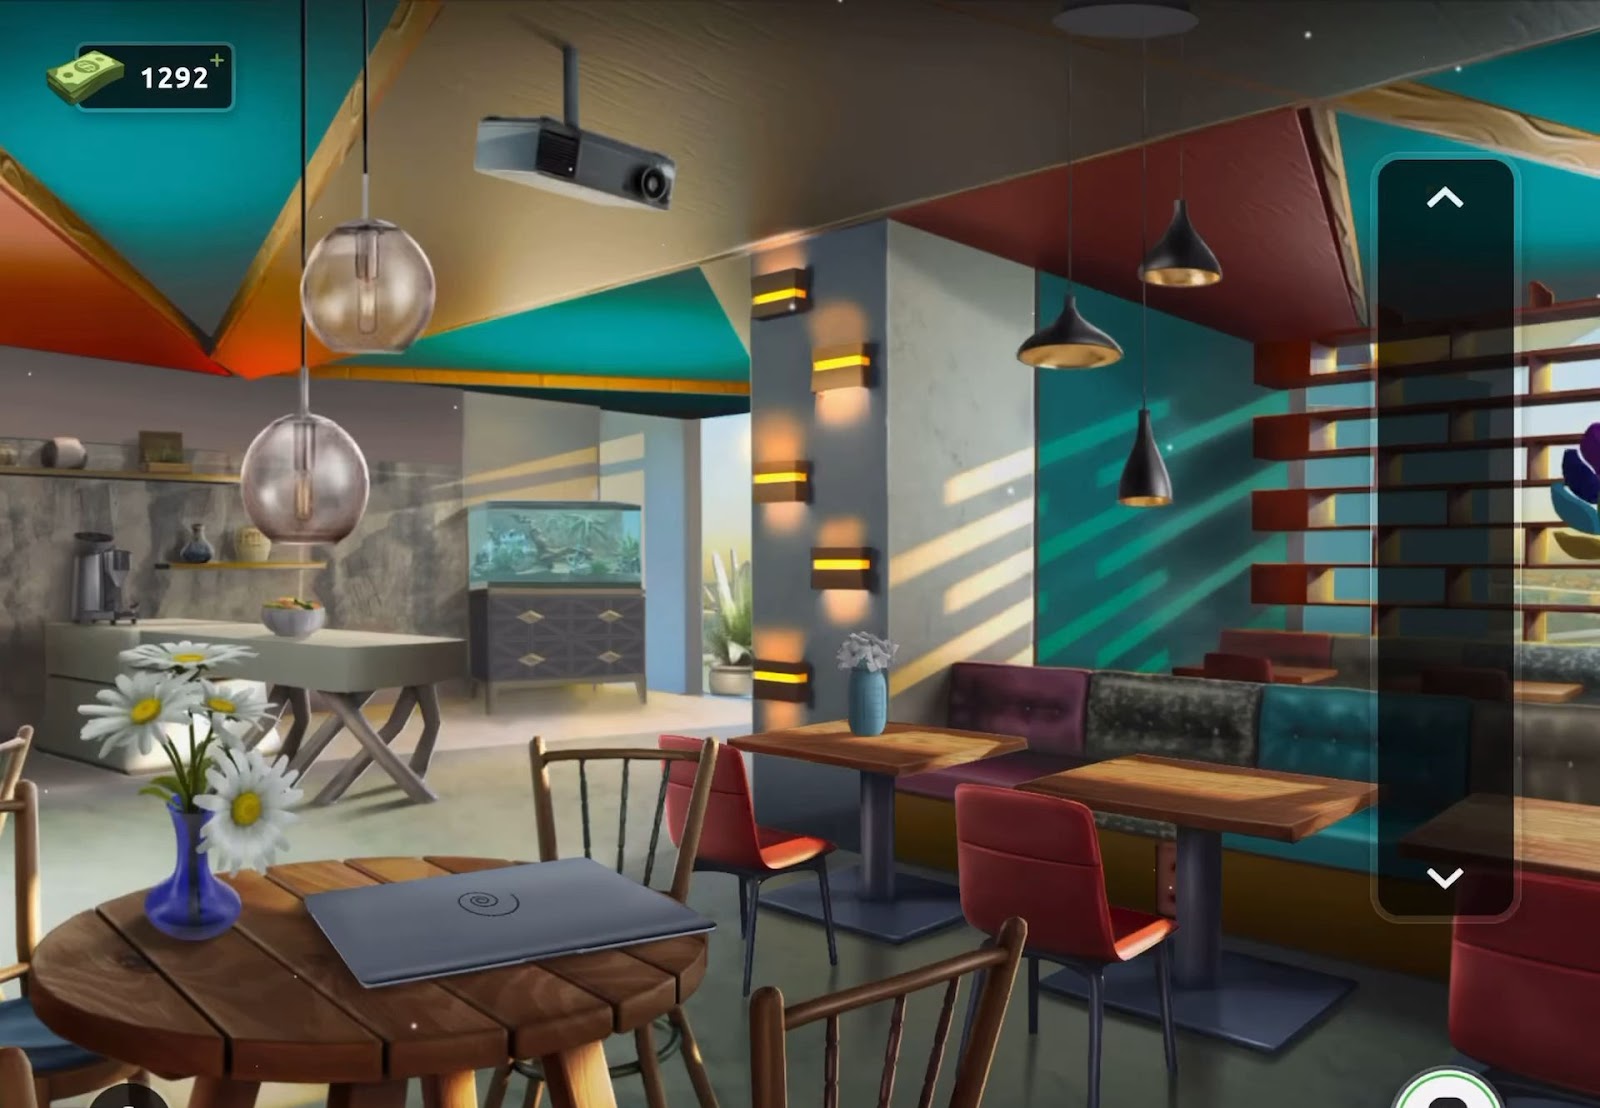
- Start by opening the laptop on the table to obtain a tile marked with the number 4.
- Next, survey the exposed wall above the tables on the right to discover an additional tile labeled with the number 7.
- Afterward, interact with the center table on the right to shift it, revealing another tile imprinted with the number 3.
- Then tap the door to encounter a puzzle lock. Place the three tiles into the lock to commence the puzzle.
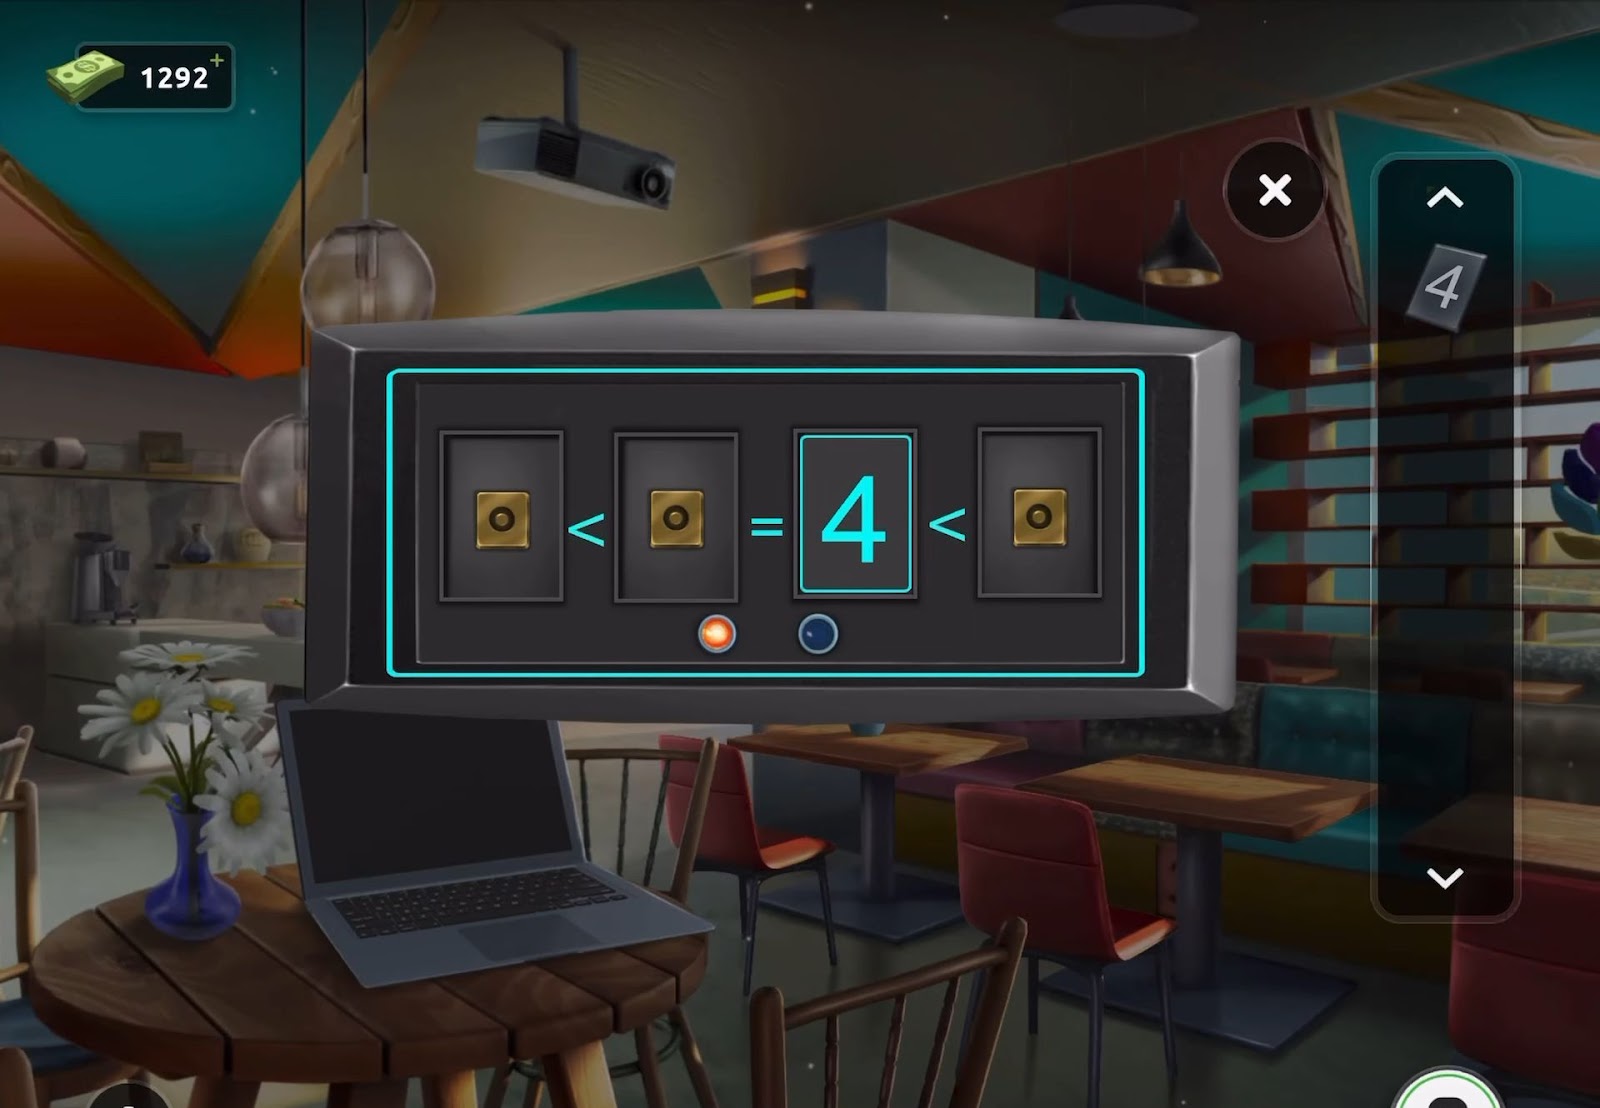
- After that, rearrange the tiles so that the mathematical statements they form become accurate.
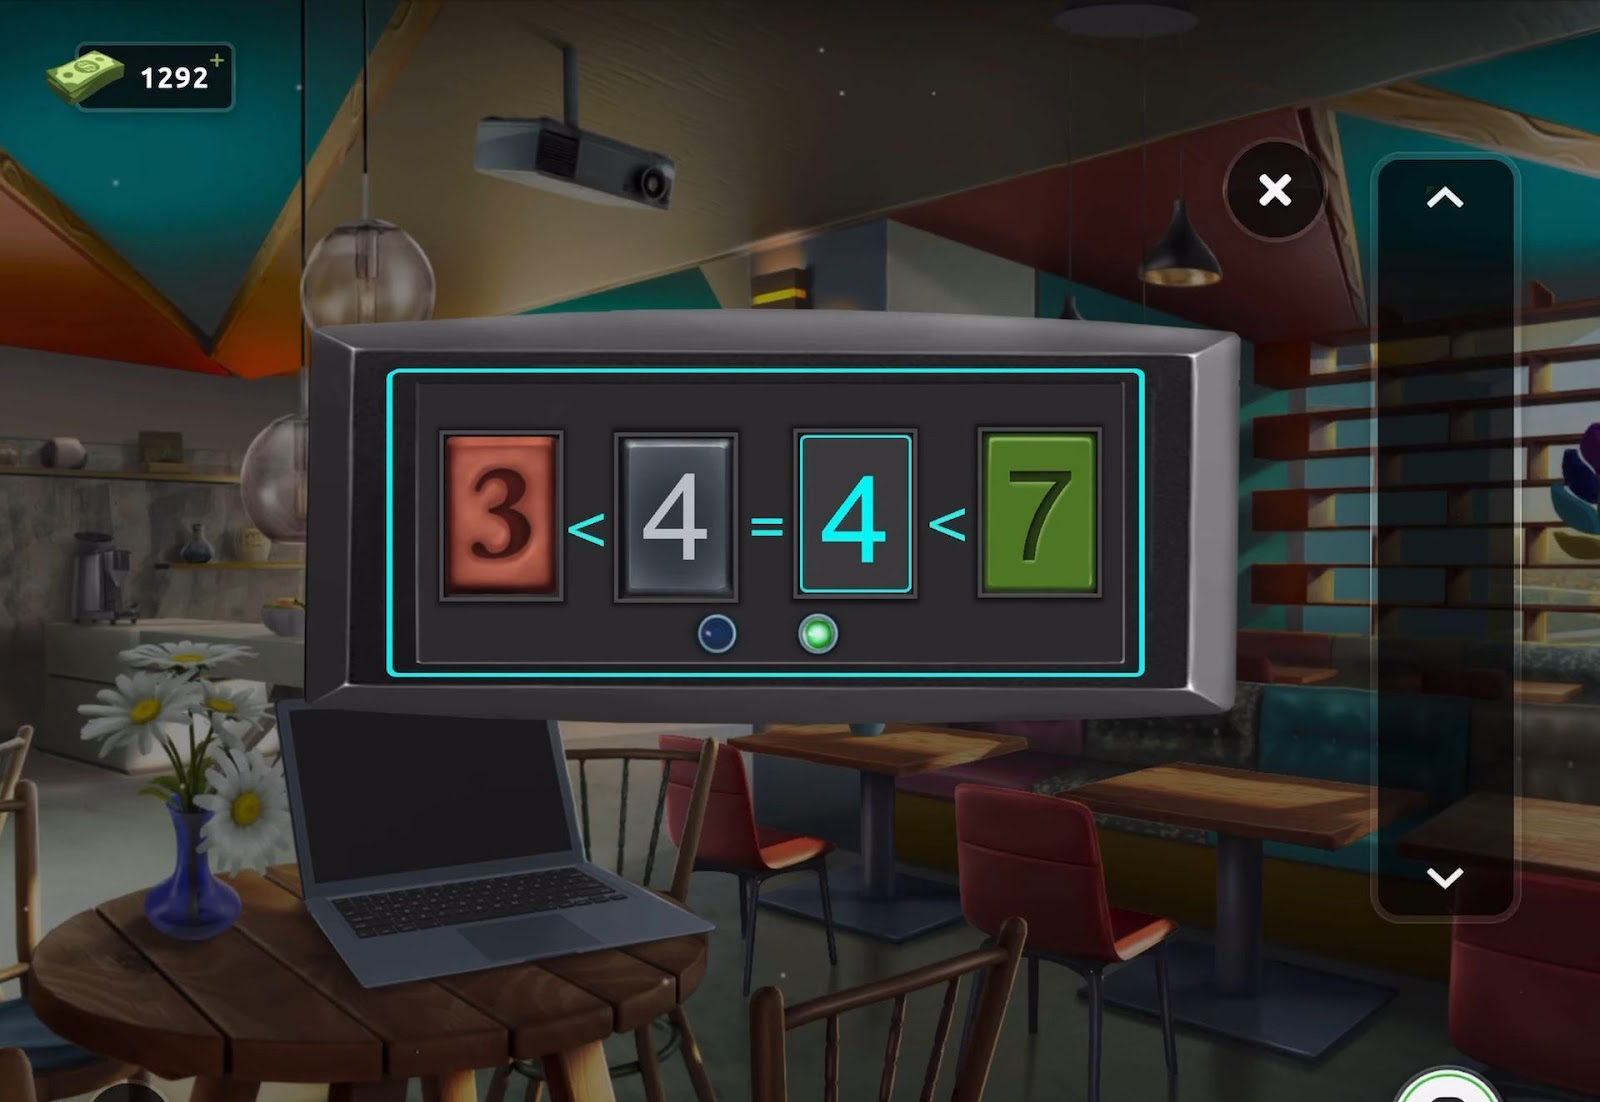
- Once the equations are correctly arranged, the door will open, allowing your escape.
Level 26:
To complete level 26, follow the instructions below:
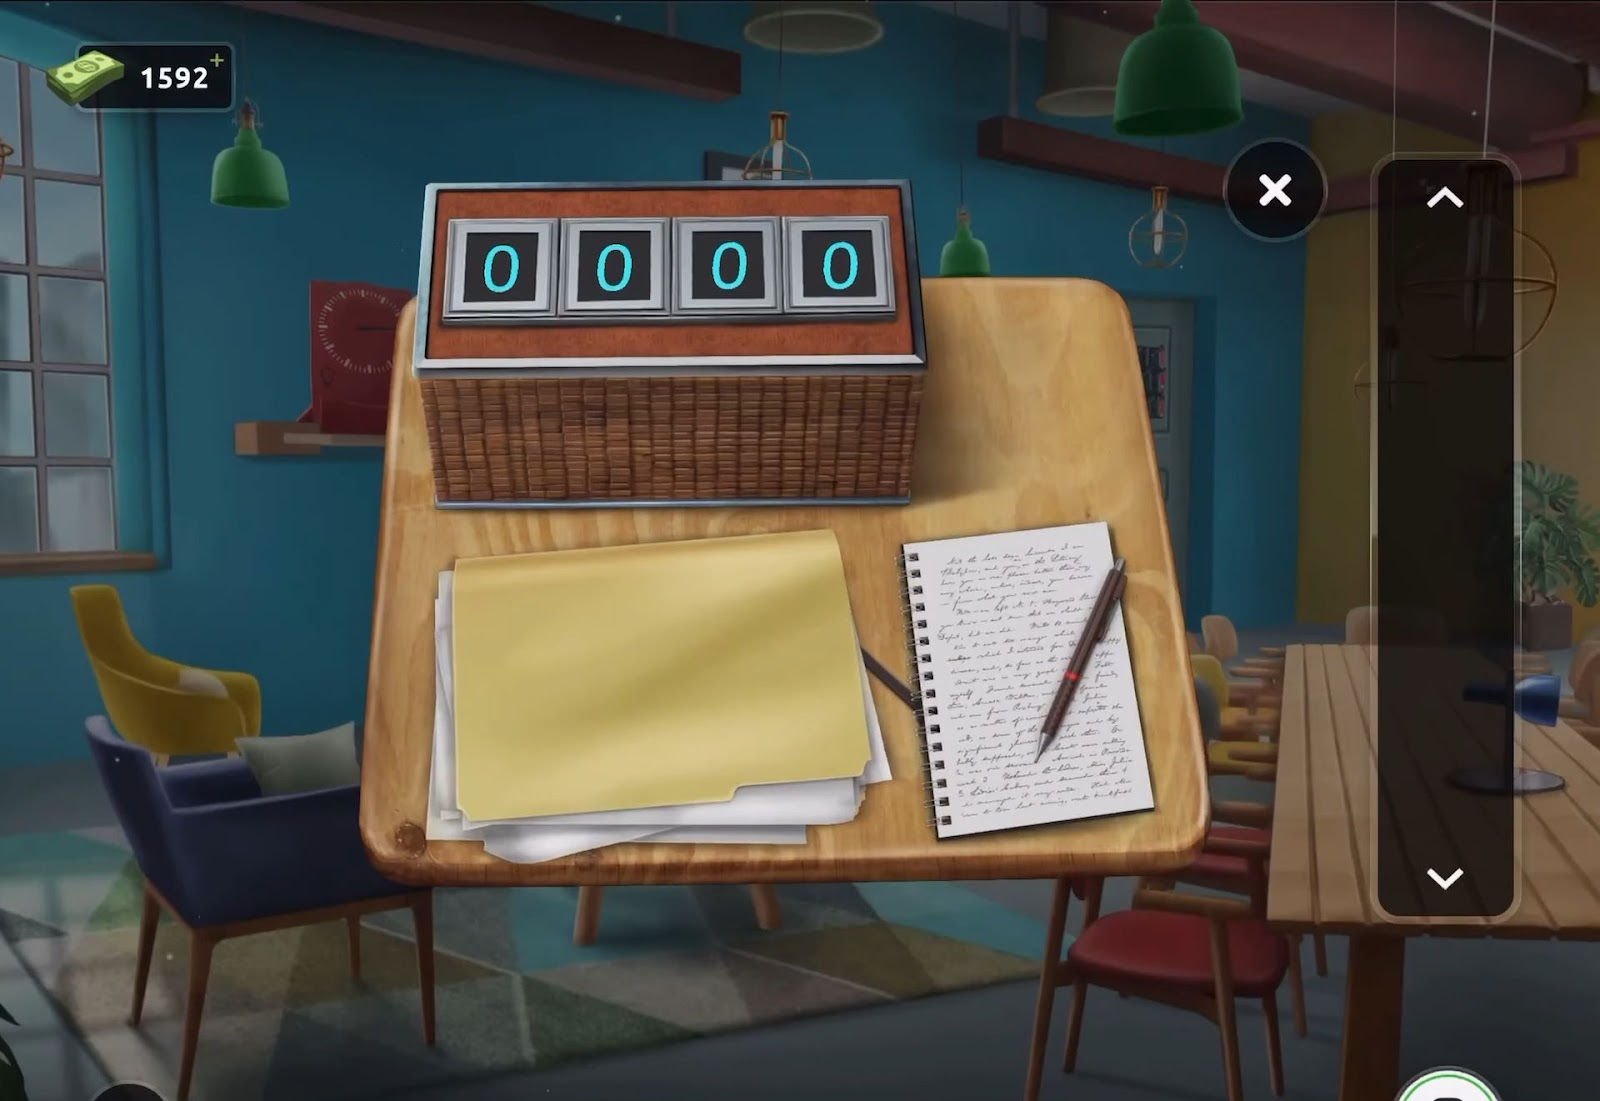
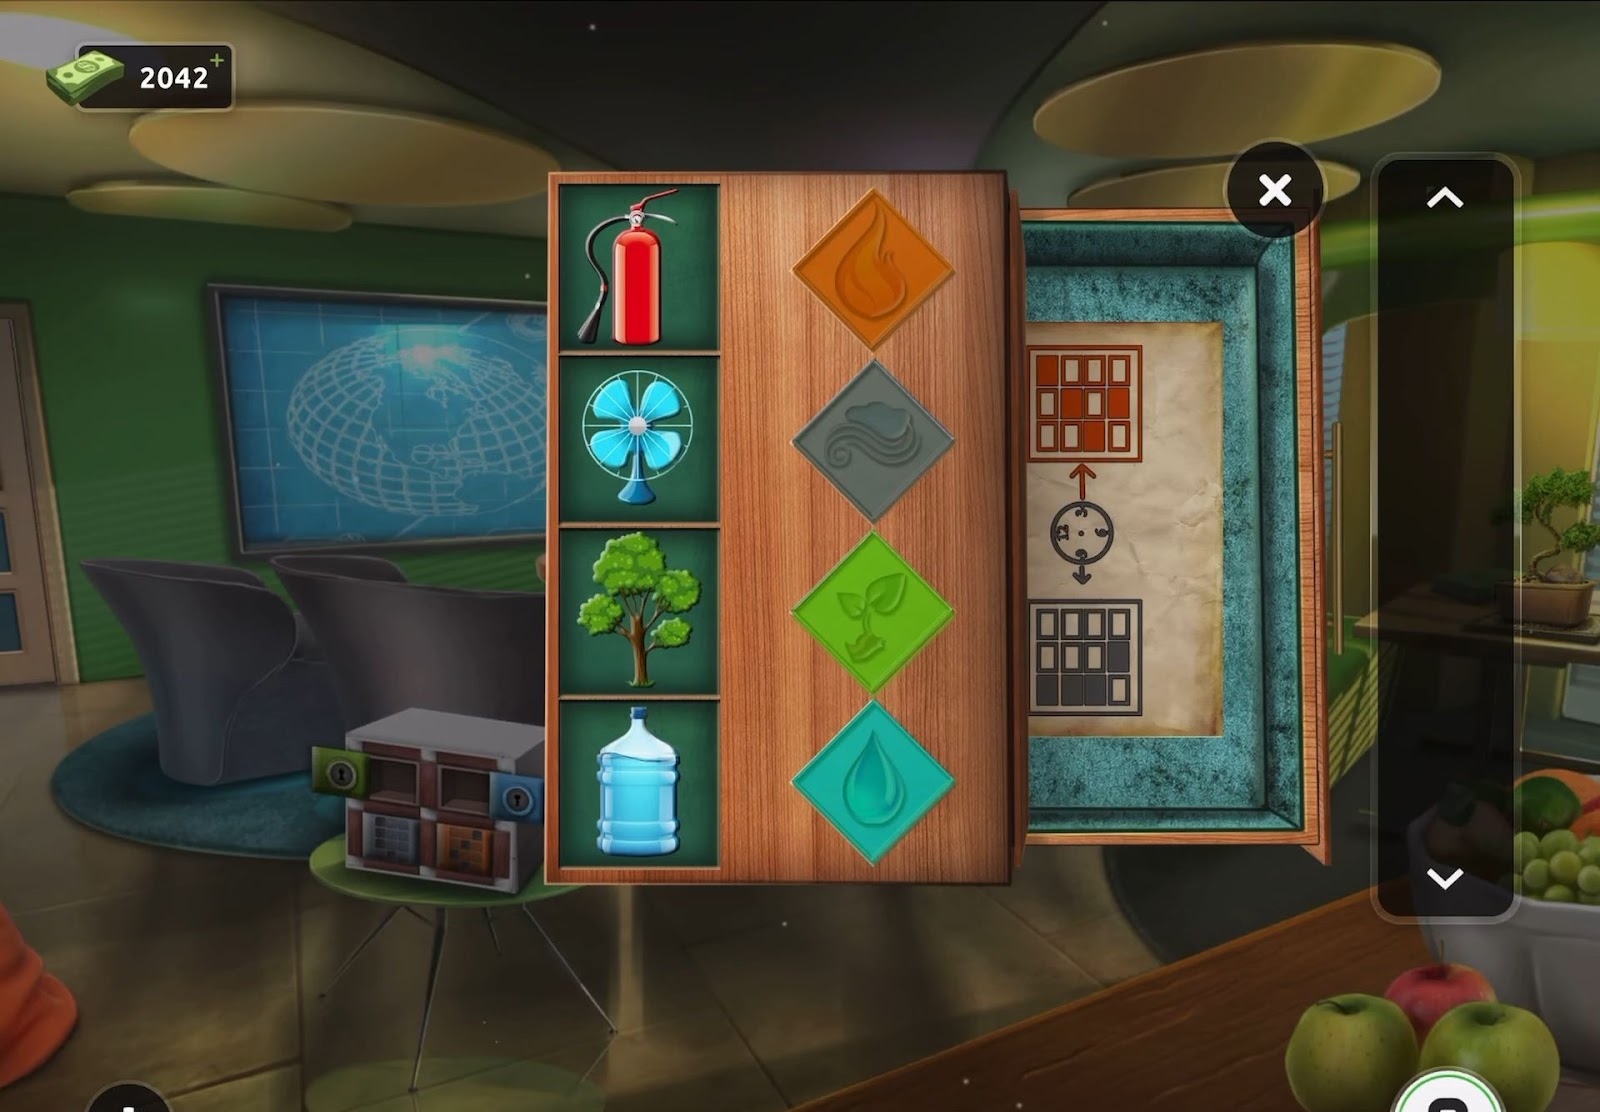
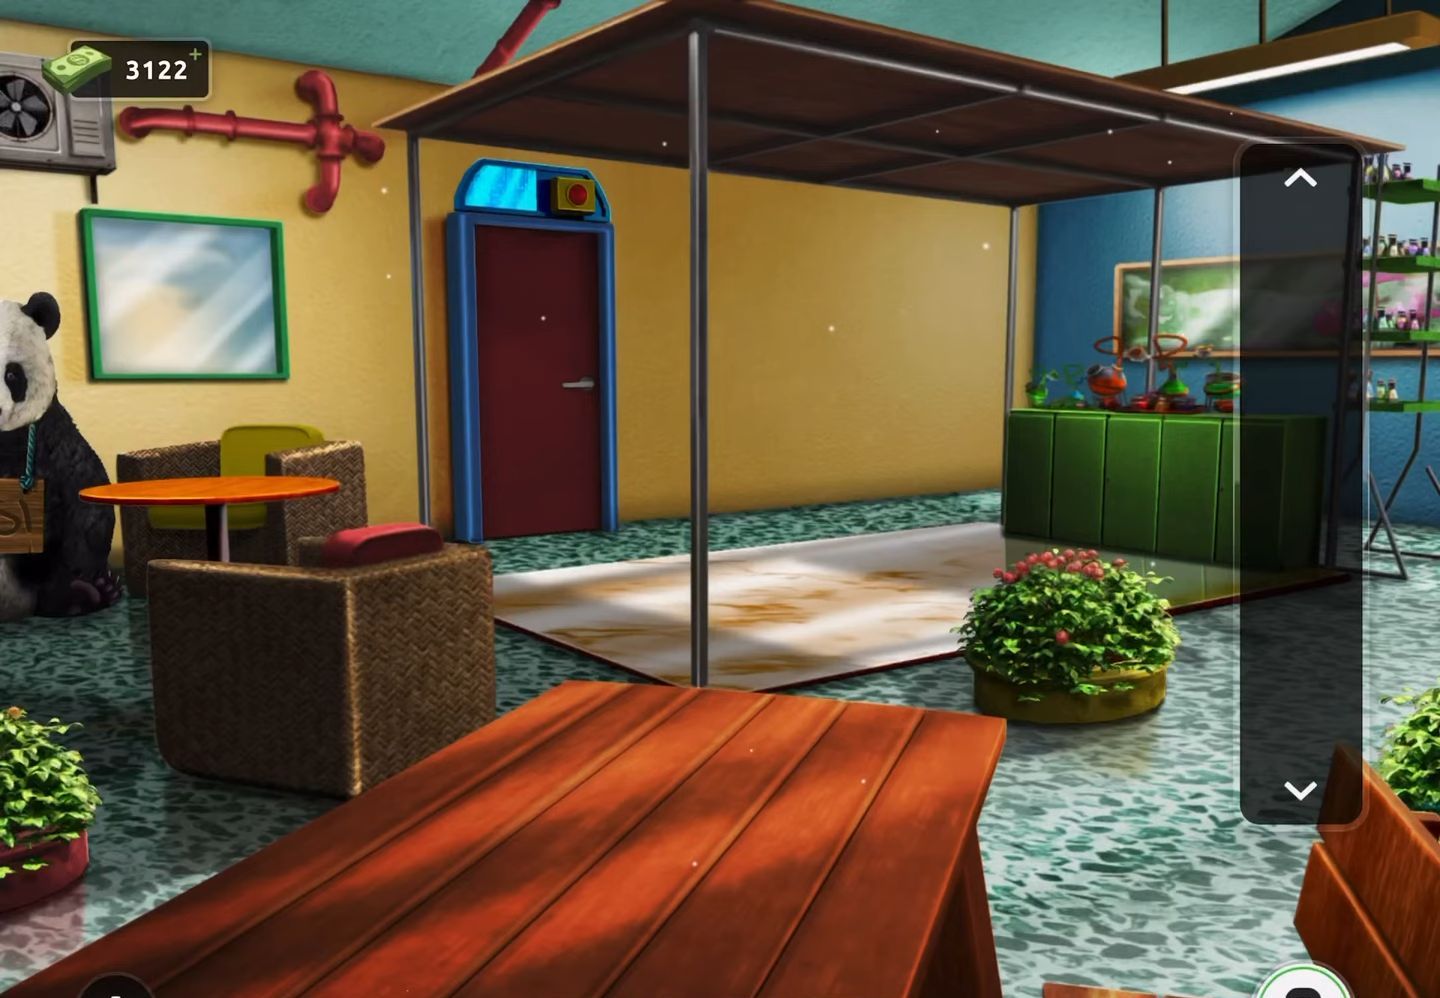
- Begin by observing the thermostat, a small blue panel located near the door on the left side.
- Then record the temperature and collect a battery from the top.
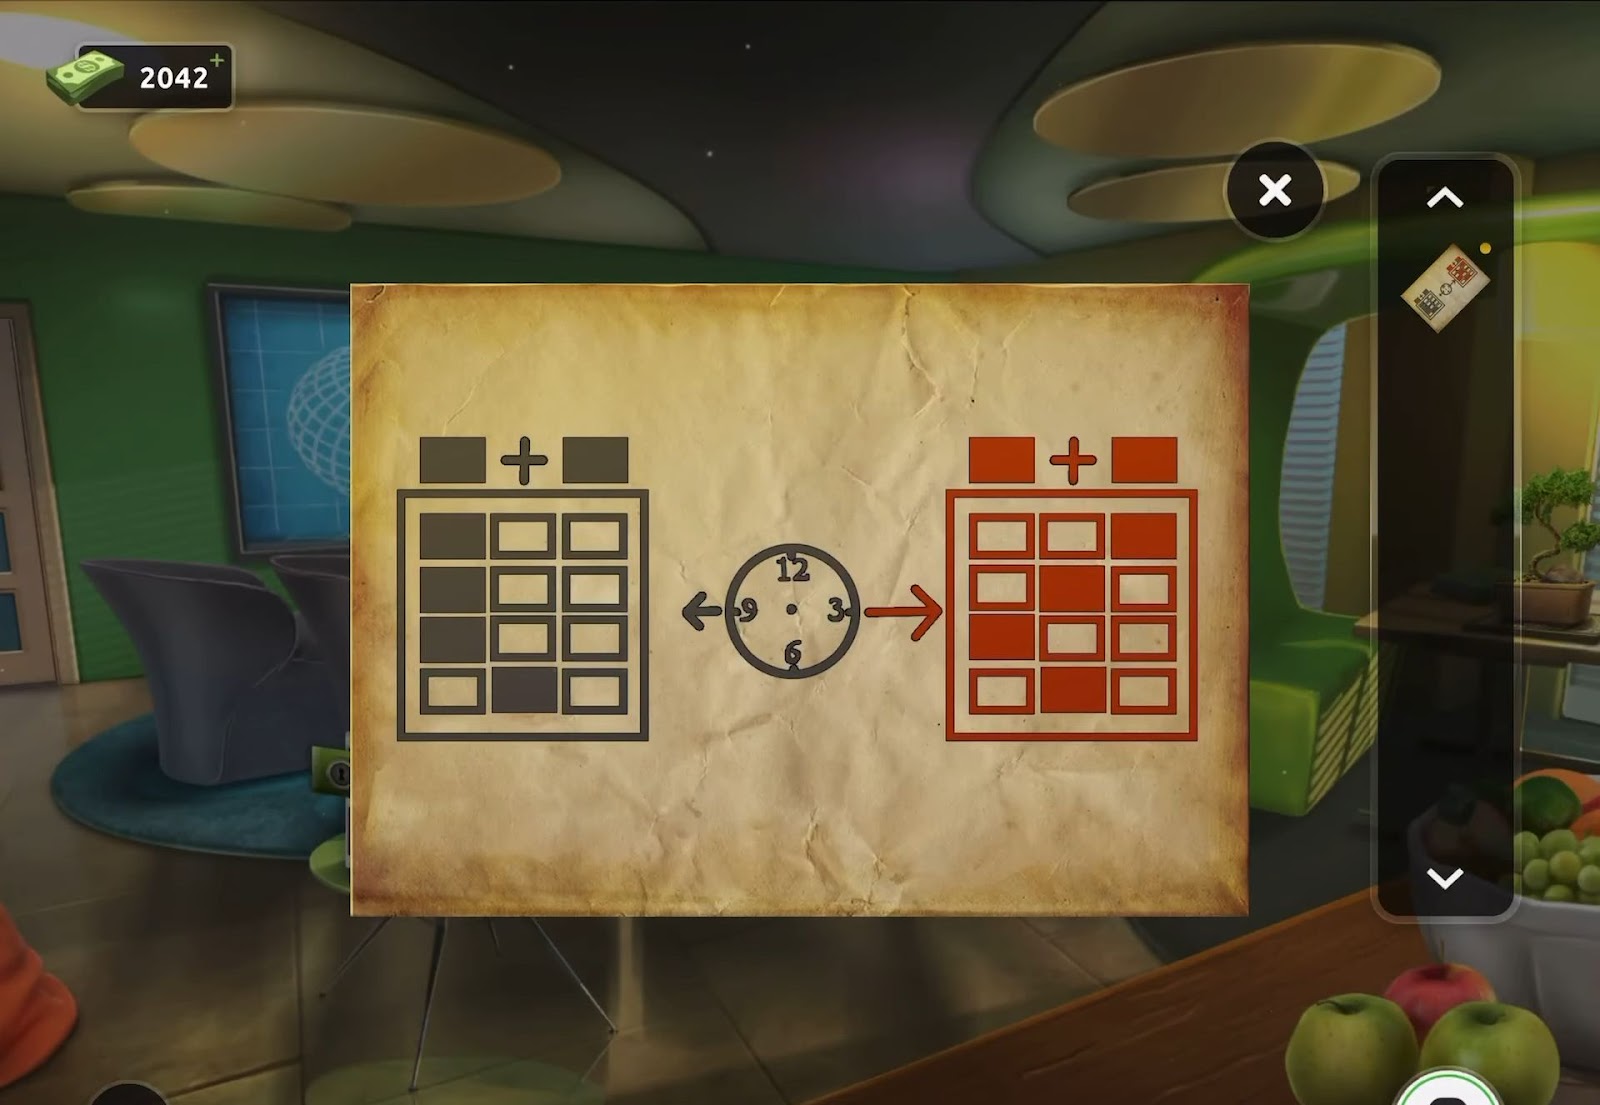
- Next, proceed to examine the calendar positioned on the right side of the table. Collect another battery and take note of the clue provided.
- Start from the number seven, then shift two spaces to the left, followed by one move downward and one move to the left, leading to the number eleven.
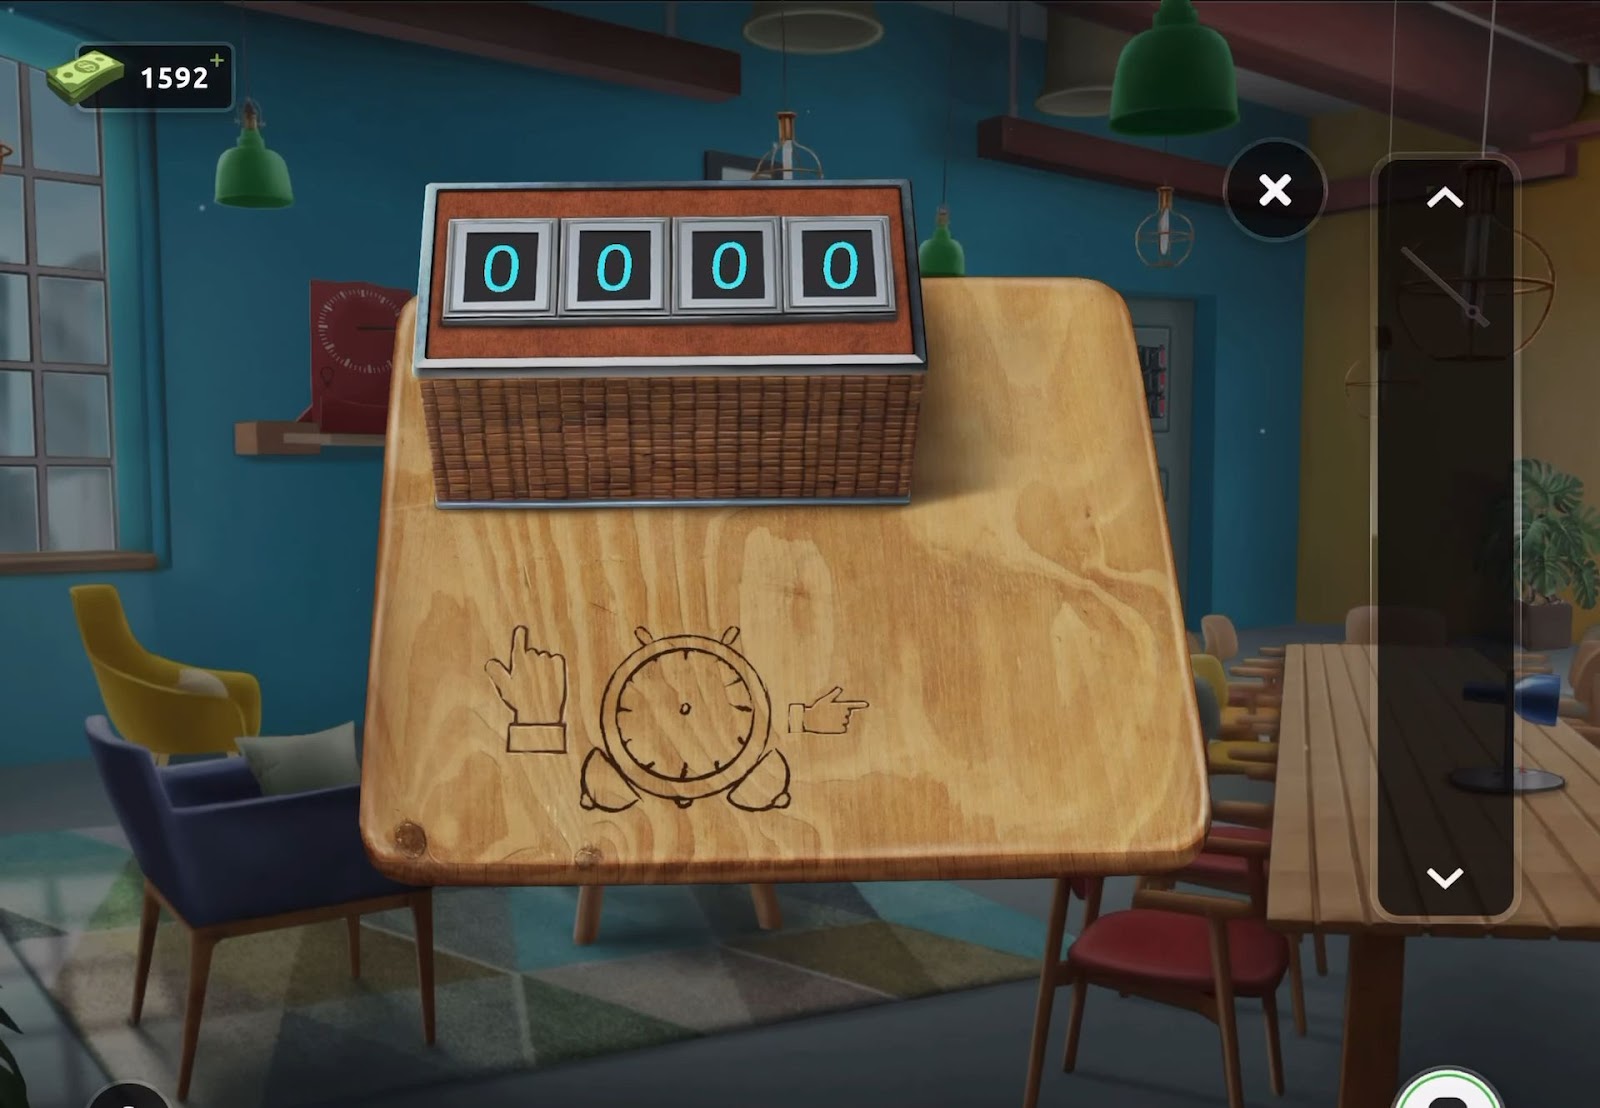
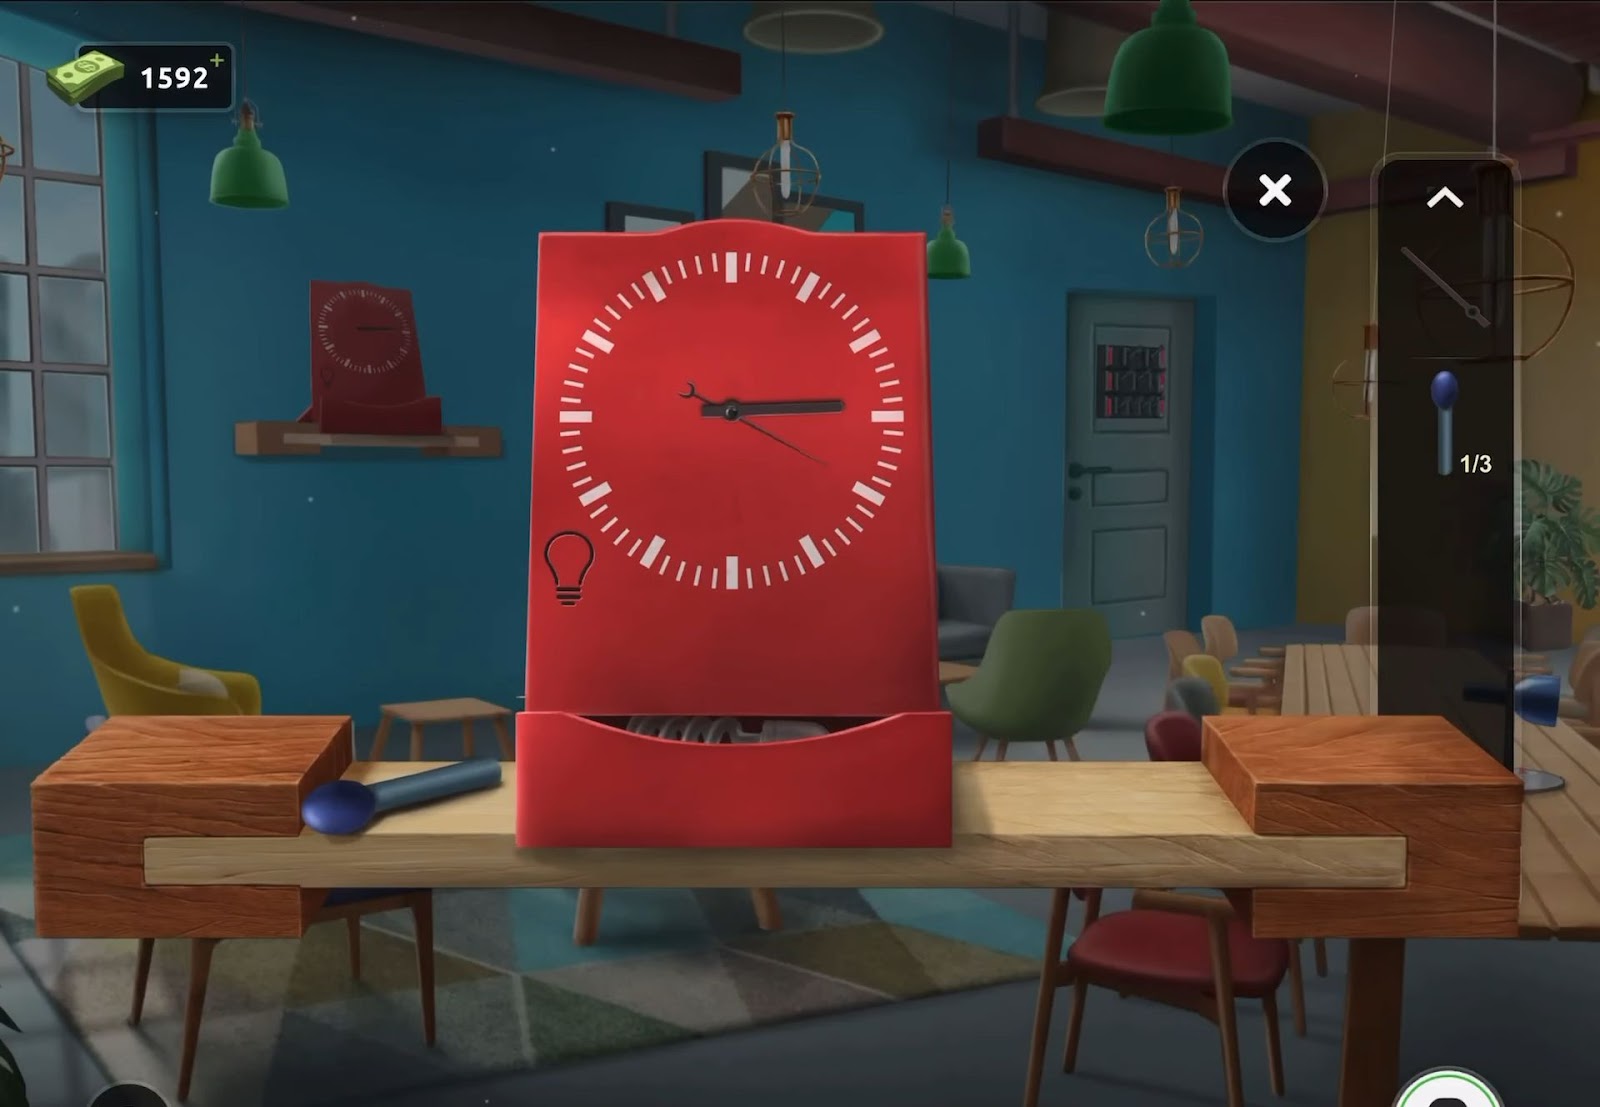
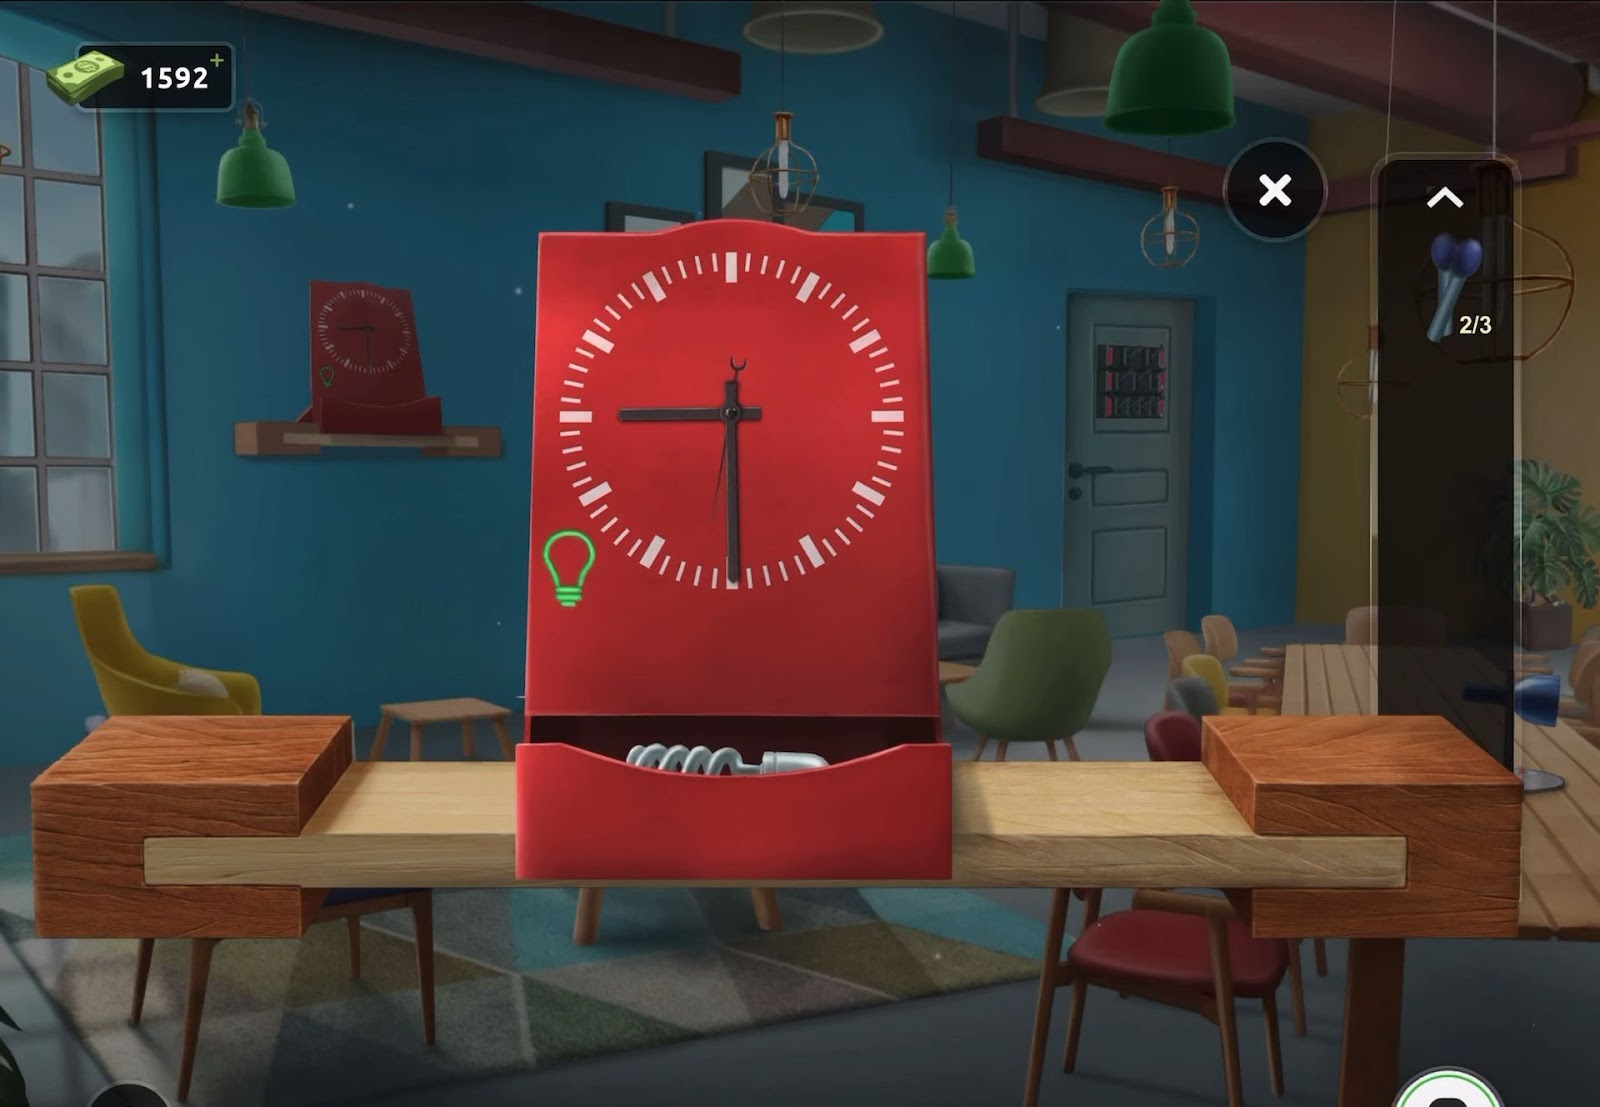
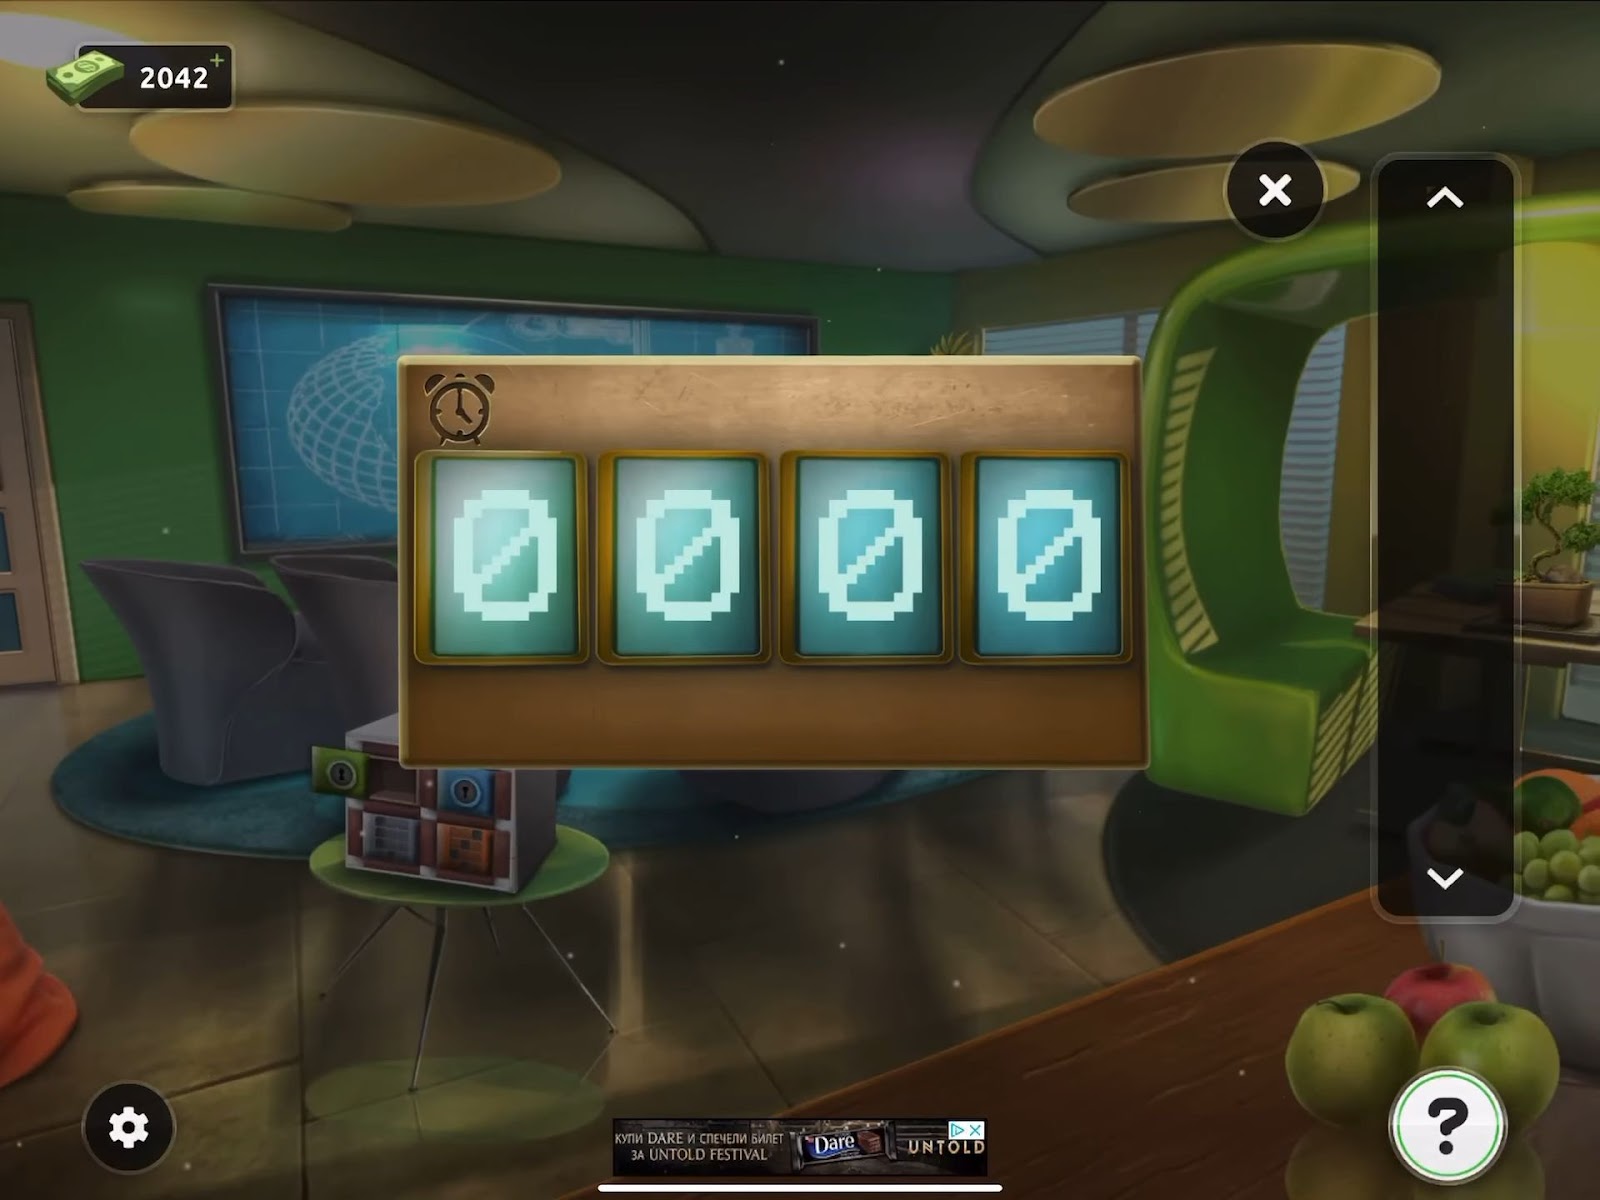
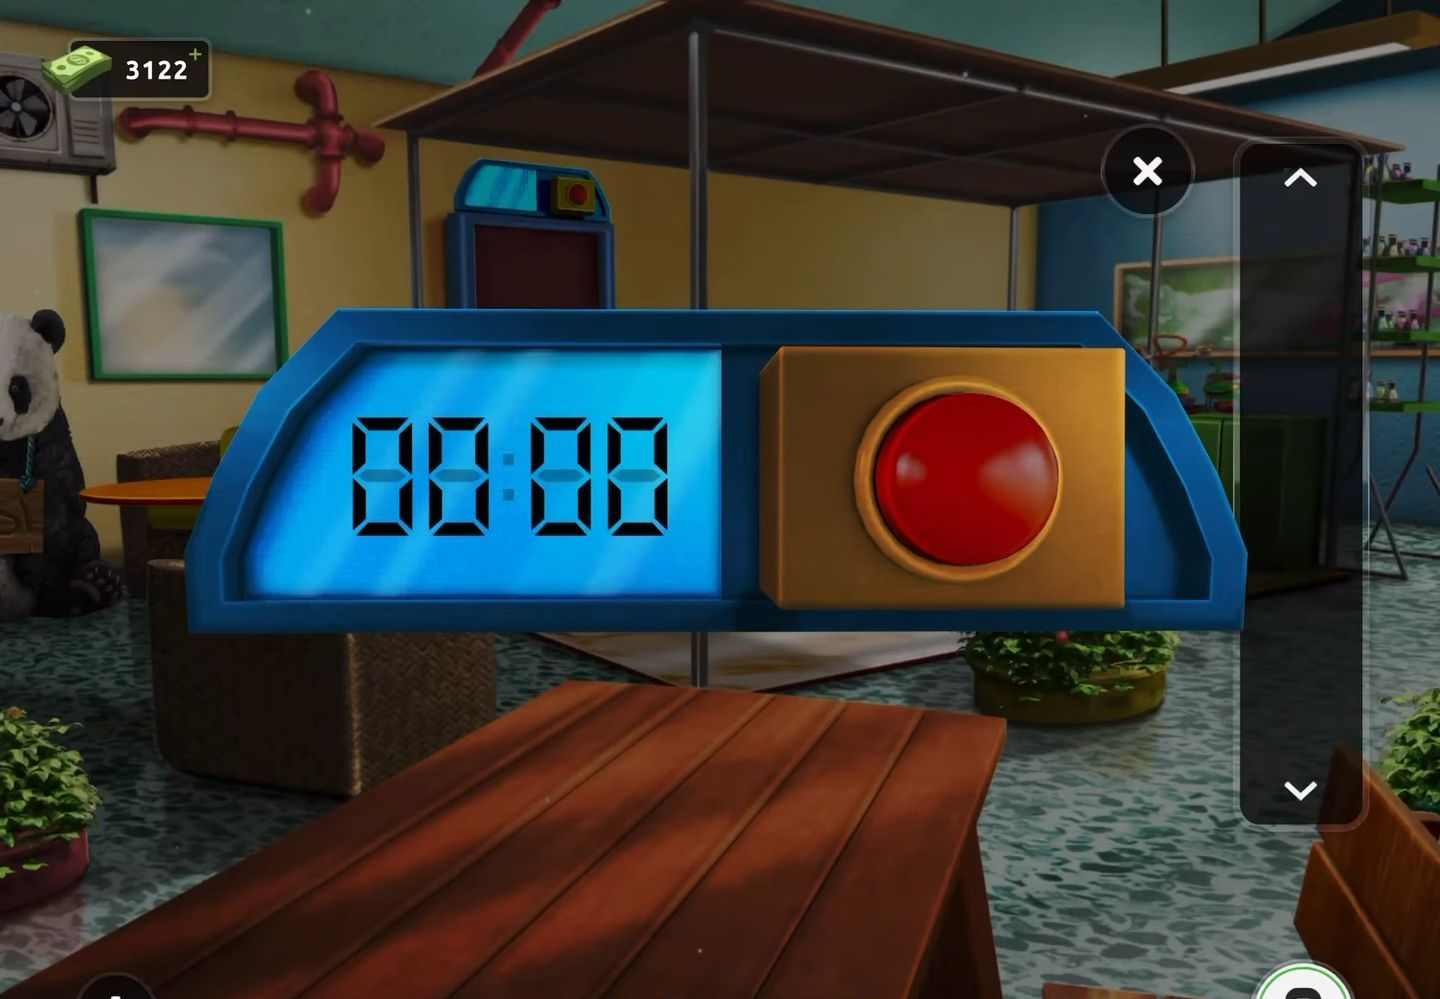
- Now, inspect the red clock situated on the table. Insert the batteries into the clock, allowing you to tap the blue button to display the time.
- After that, tap the button once more to reveal an alarm time (1589).
- Then, tap on the door and open the panel to encounter a puzzle.
- Solve the equation: (Alarm x Time x Temp) – Calendar date = (8 x 10 x 20) – 11.
- Upon solving the equation correctly, the room will be unlocked, allowing you to escape.
Level 27:
To complete level 27, follow the instructions below:
- Firstly, interact with the exit door to view the code lock. Additionally, collect a dart located on the right side.
- Next, tap the pinball machine situated to the right of the dart board. Retrieve a handle located in the lower right section.
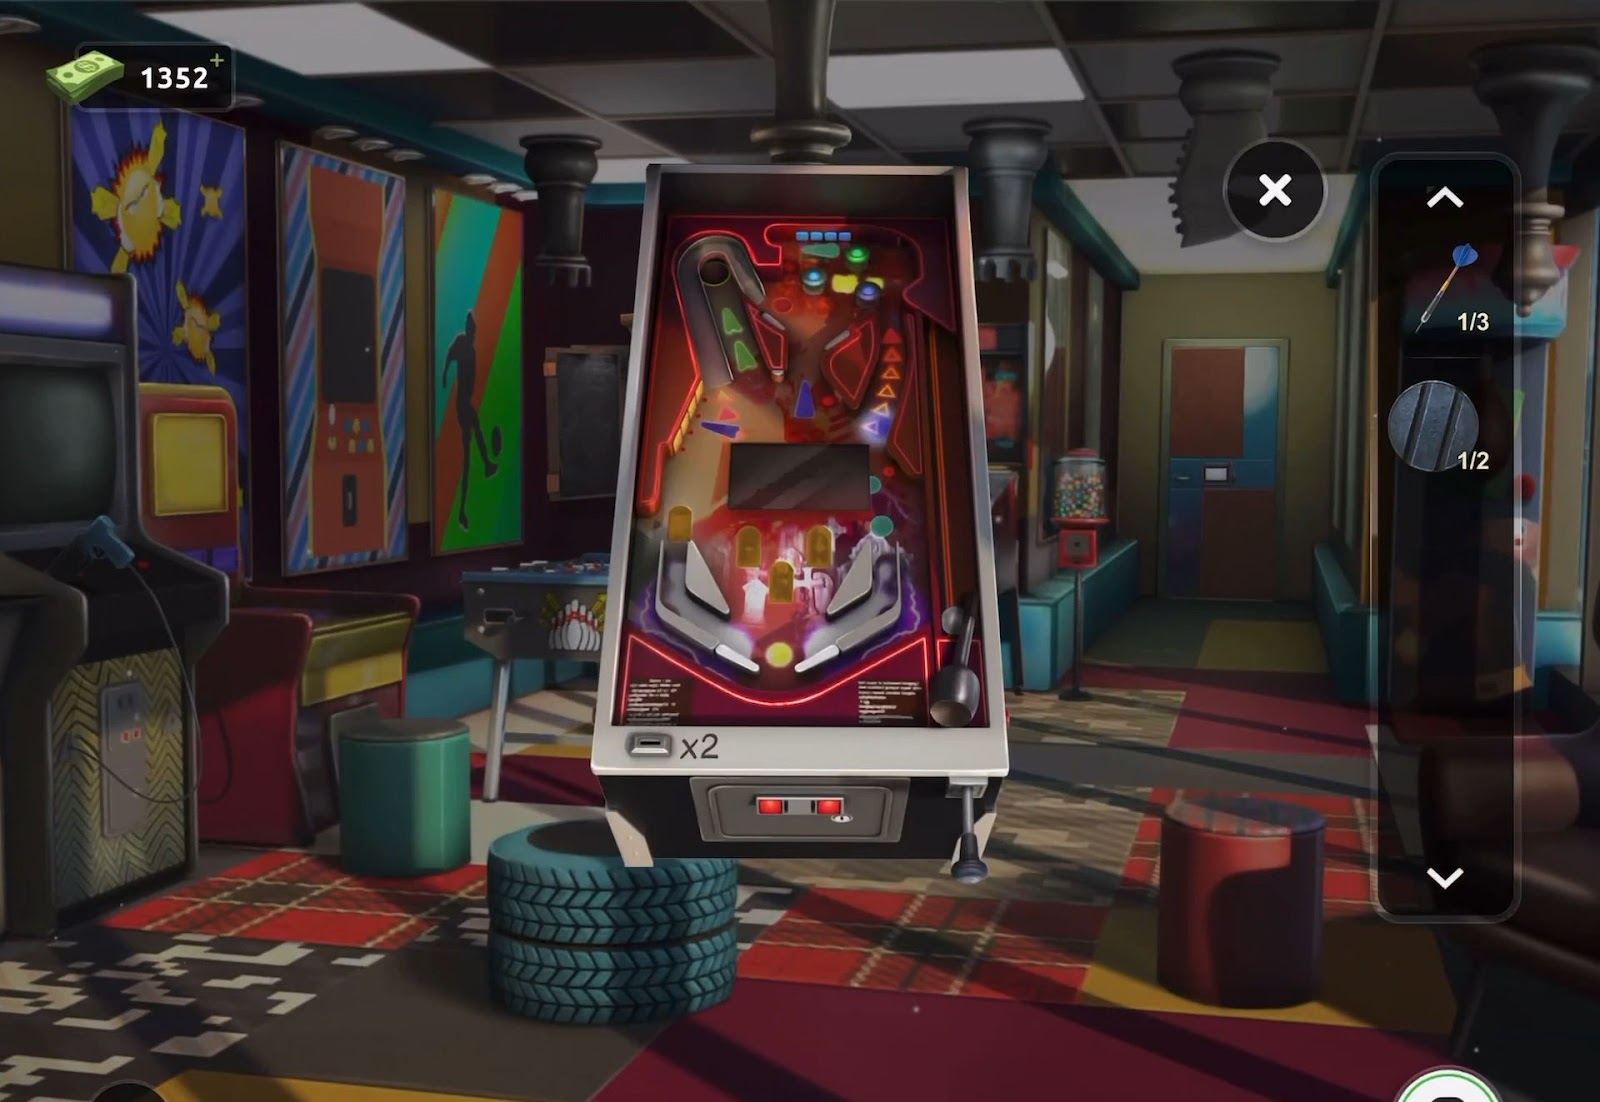
- Then tap on the table football located beneath the dartboard to reveal the ball slot, where another dart is available for collection.
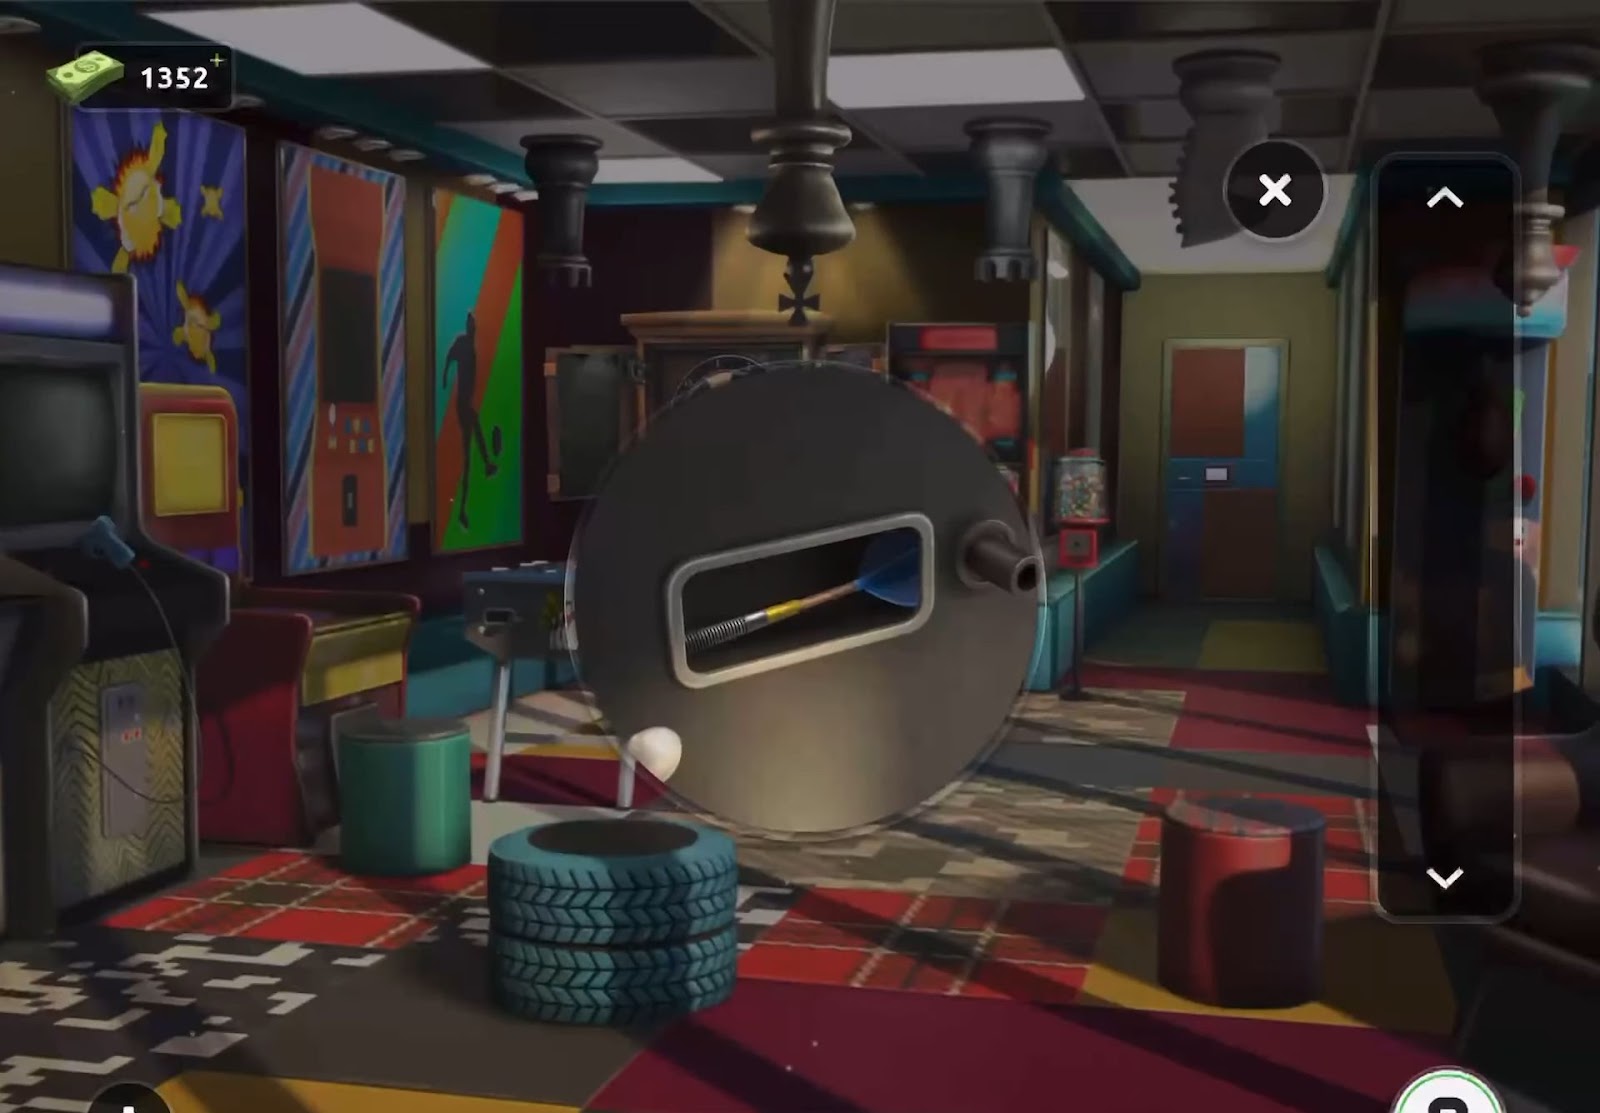
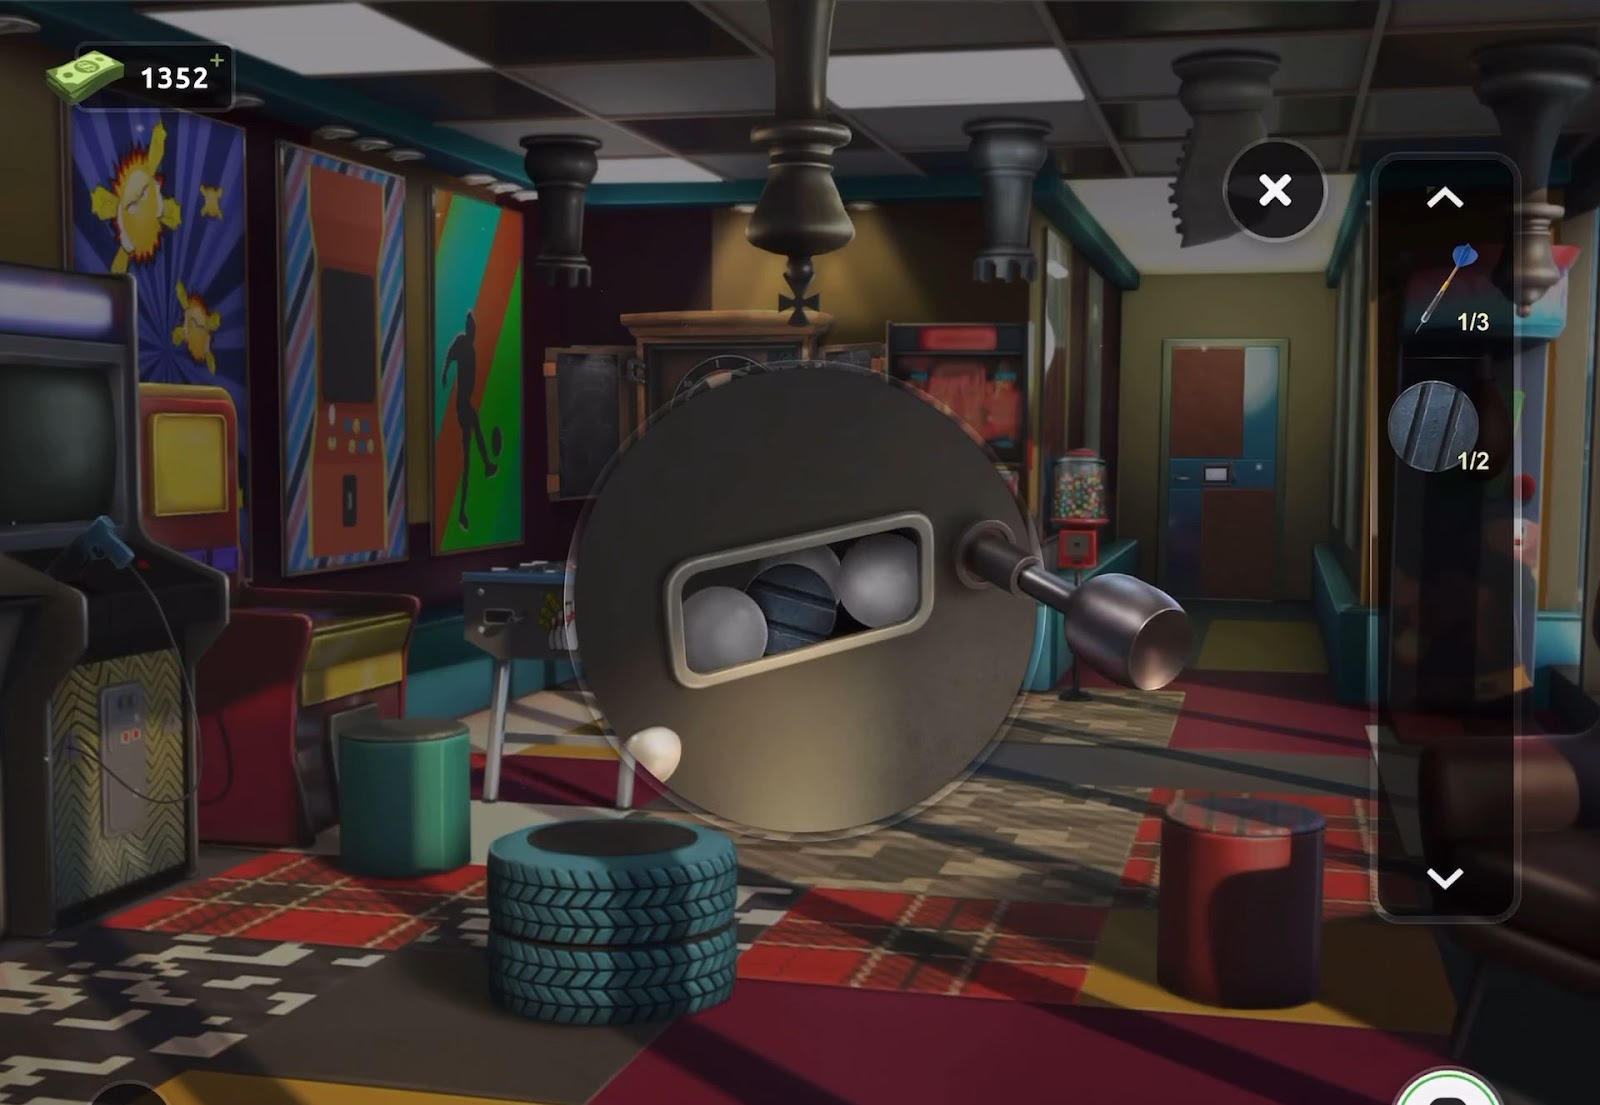
- Next, acquire the dart and proceed to attach the handle to the hole located on the right side. Tap it to release some balls.
- Then, gather the round token that appears as a result.
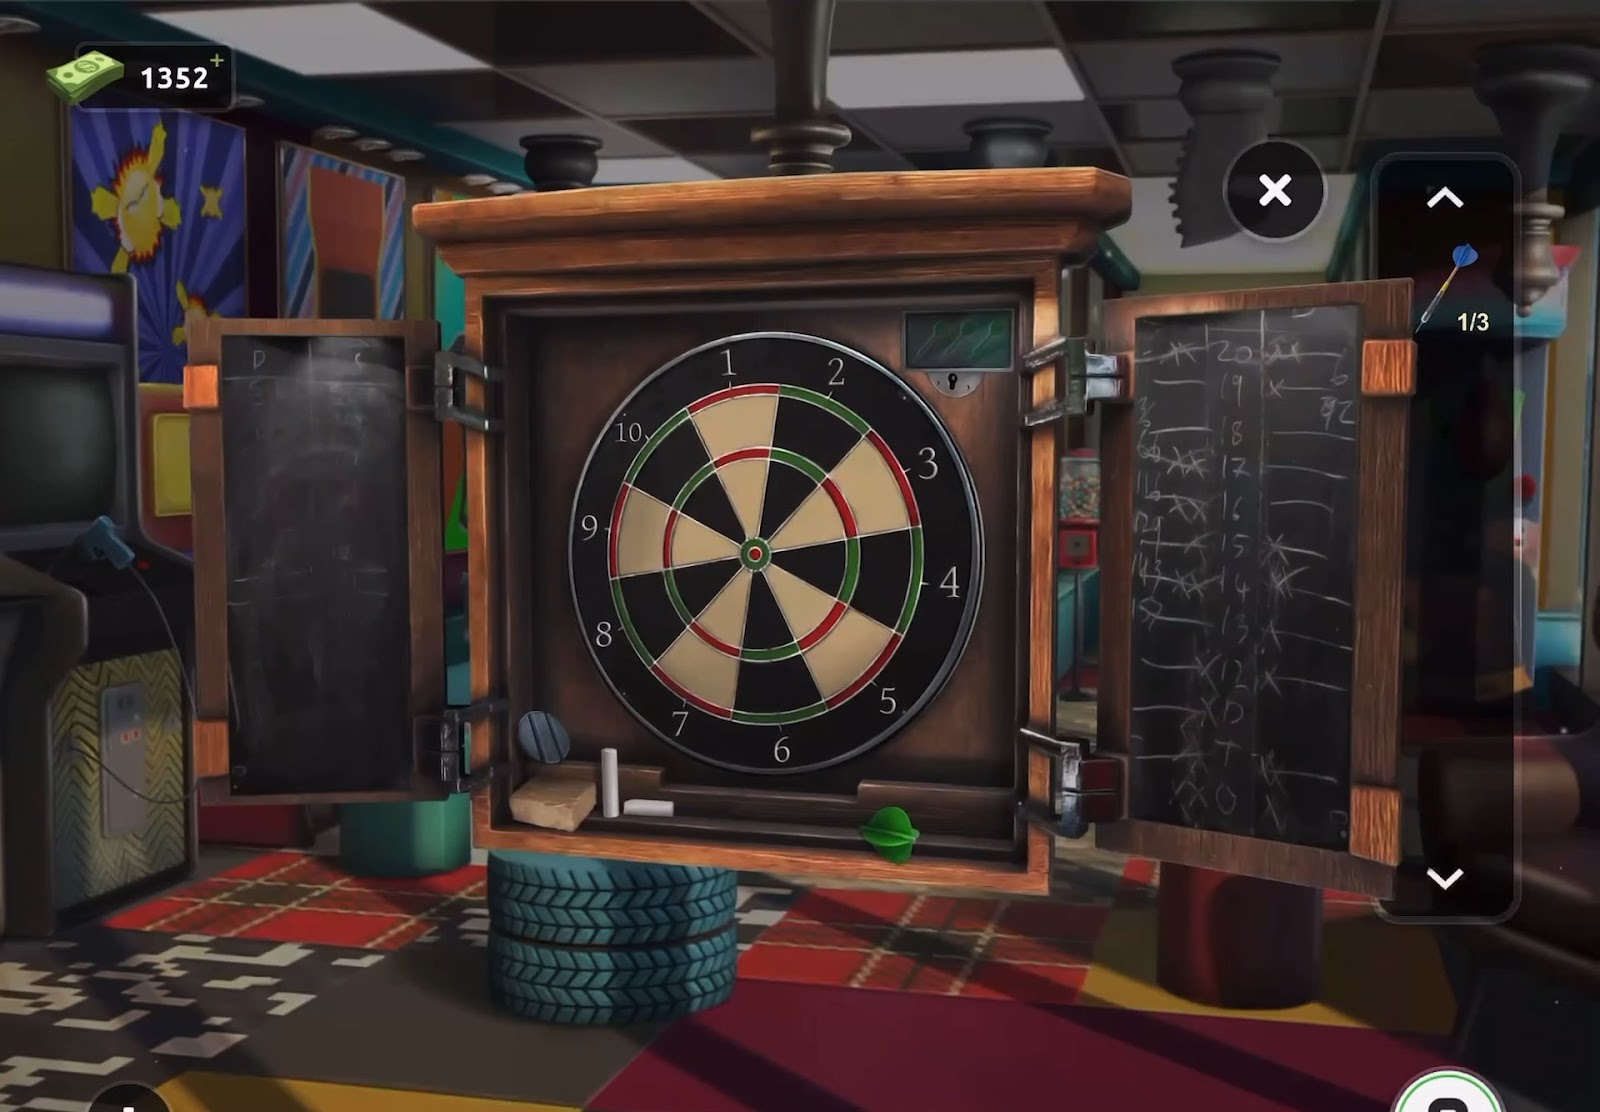
- Next, inspect the dartboard and obtain an additional round token located at the bottom left.
- Now return to the pinball table and initiate the game by using the two tokens.
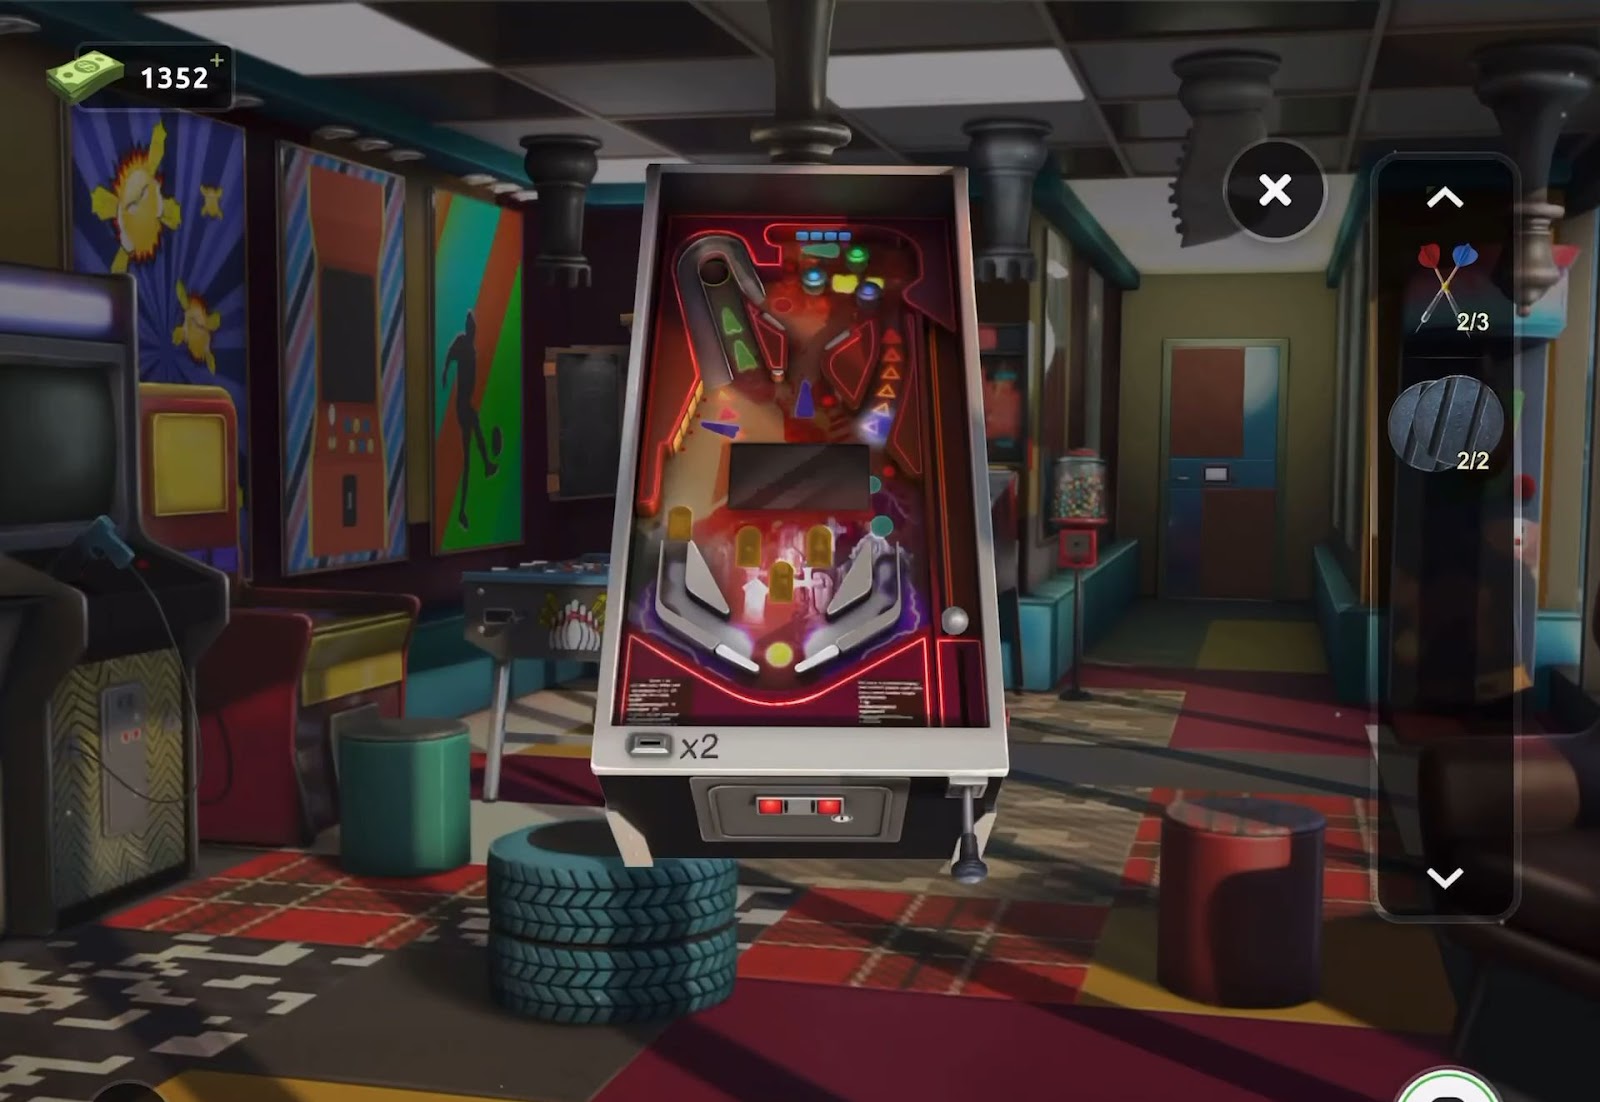
- First, tap and hold the handle, releasing it when the slider aligns at the center. Obtain another dart and a key. Take note of the symbols presented in the center.
- Then return to the dartboard and utilize the key on the top right corner to initiate a game. Proceed by using the darts to begin the game.
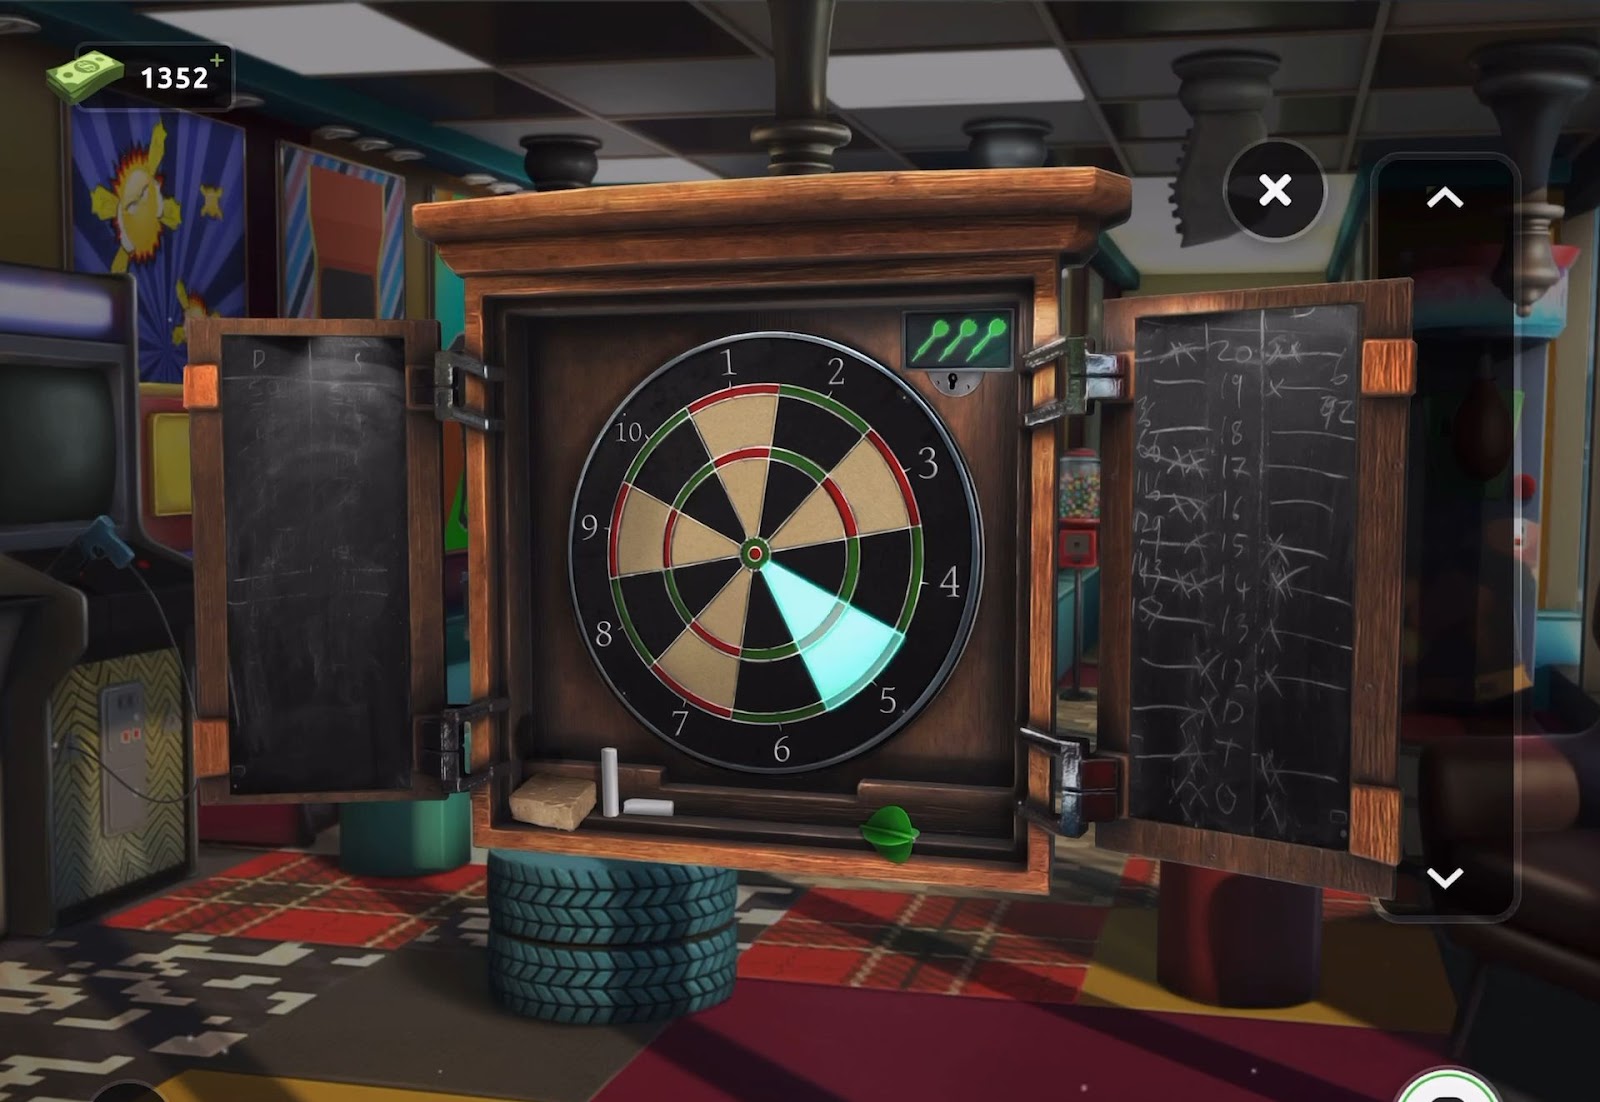
- The dartboard will illuminate specific segments.
- Next, you are required to tap and throw the darts onto the highlighted segments from the beginning, which will be 5, 10, 3, and then 10. As you progress, the difficulty will increase.
- After successfully completing the dart game, grab a joystick.
- Then return to the door lock and insert the joystick, allowing entry to input the code.
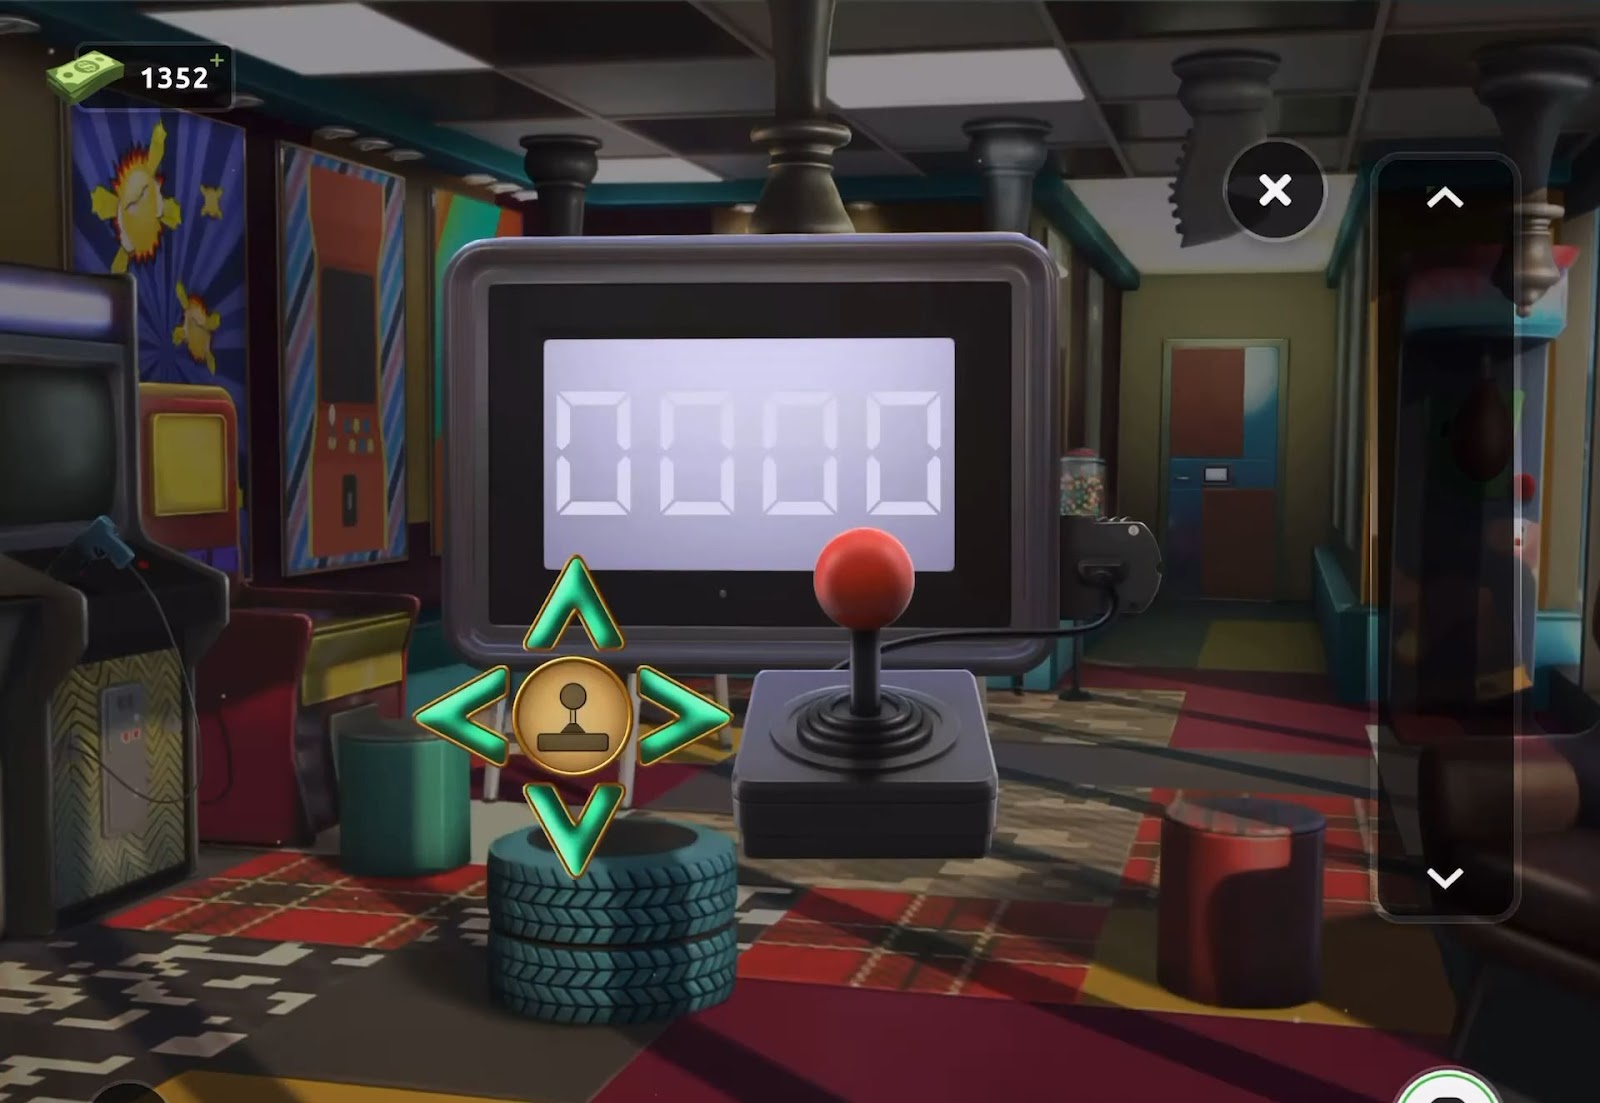
- Then you have to input the identical symbols from the pinball table by tapping the left arrows.
- Now the process will automatically input two lines for each symbol.
- Tap in the sequence: left, down, up, right, left, down, up, right.
- This will enable you to escape the room and let you proceed to the next level.
Level 28:
To complete level 28, follow the instructions below:
- First, acquire a metal bar from beneath the round table, and obtain another one positioned behind the pink cushion on the sofa located to the right of the table.
- Next, access the cupboard situated below the fish tank on the right side of the room to obtain a third bar.
- Then, tap to view the musical wind chime suspended at the top left of the room.
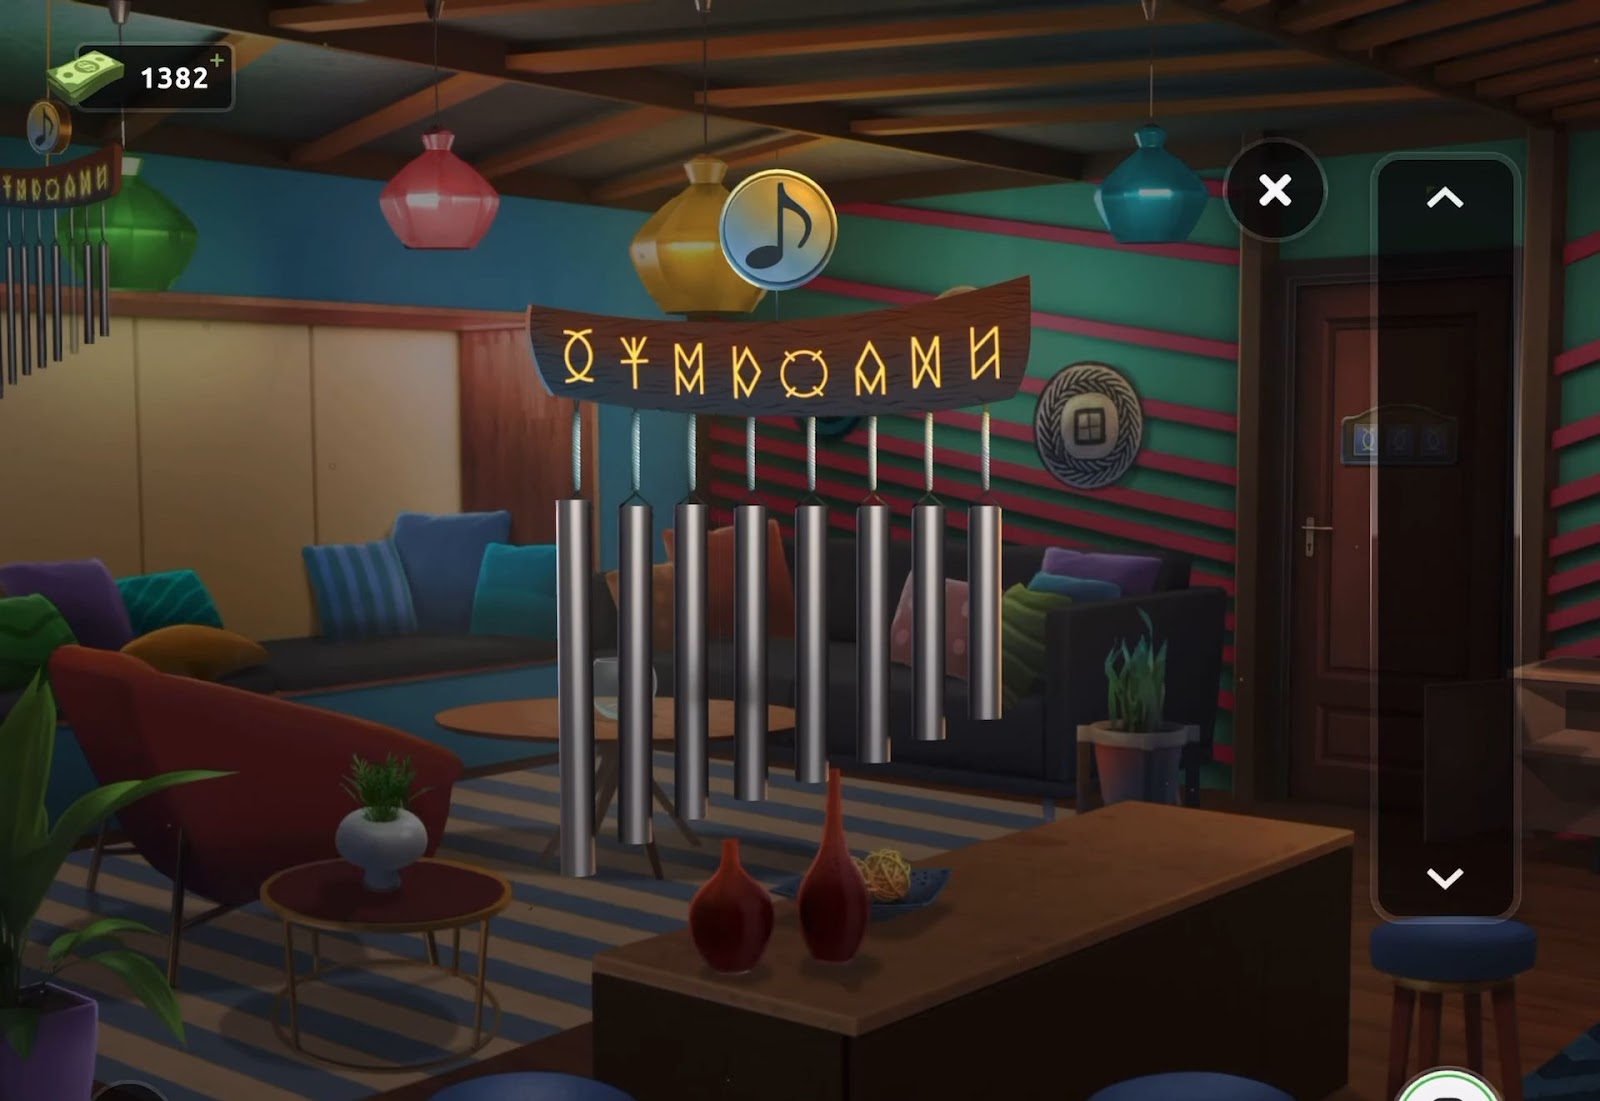
- Now insert the three bars into the wind chime to complete it. Tap the musical note at the top to play a tune, observing that the symbols light up red as they are played.
- Afterward, inspect the door lock, which demands three symbols to proceed.
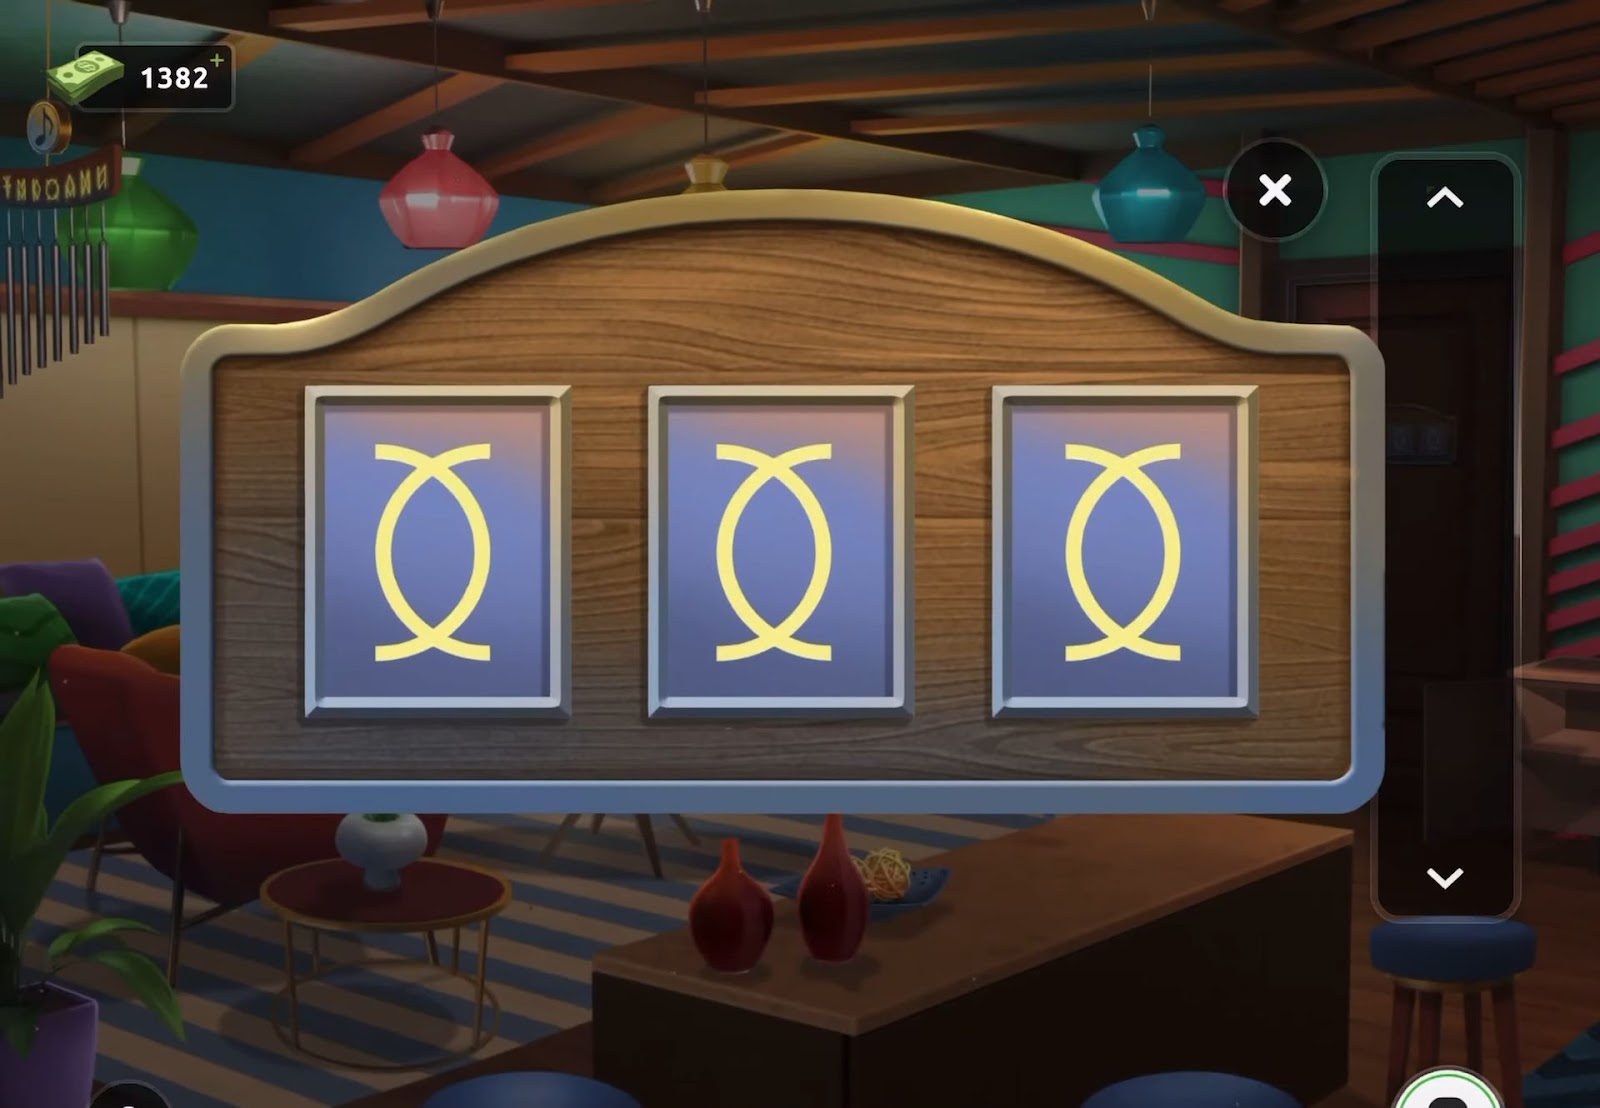
- When the tune is played, all symbols except for three light up, employ the remaining three symbols in the same left-to-right order.
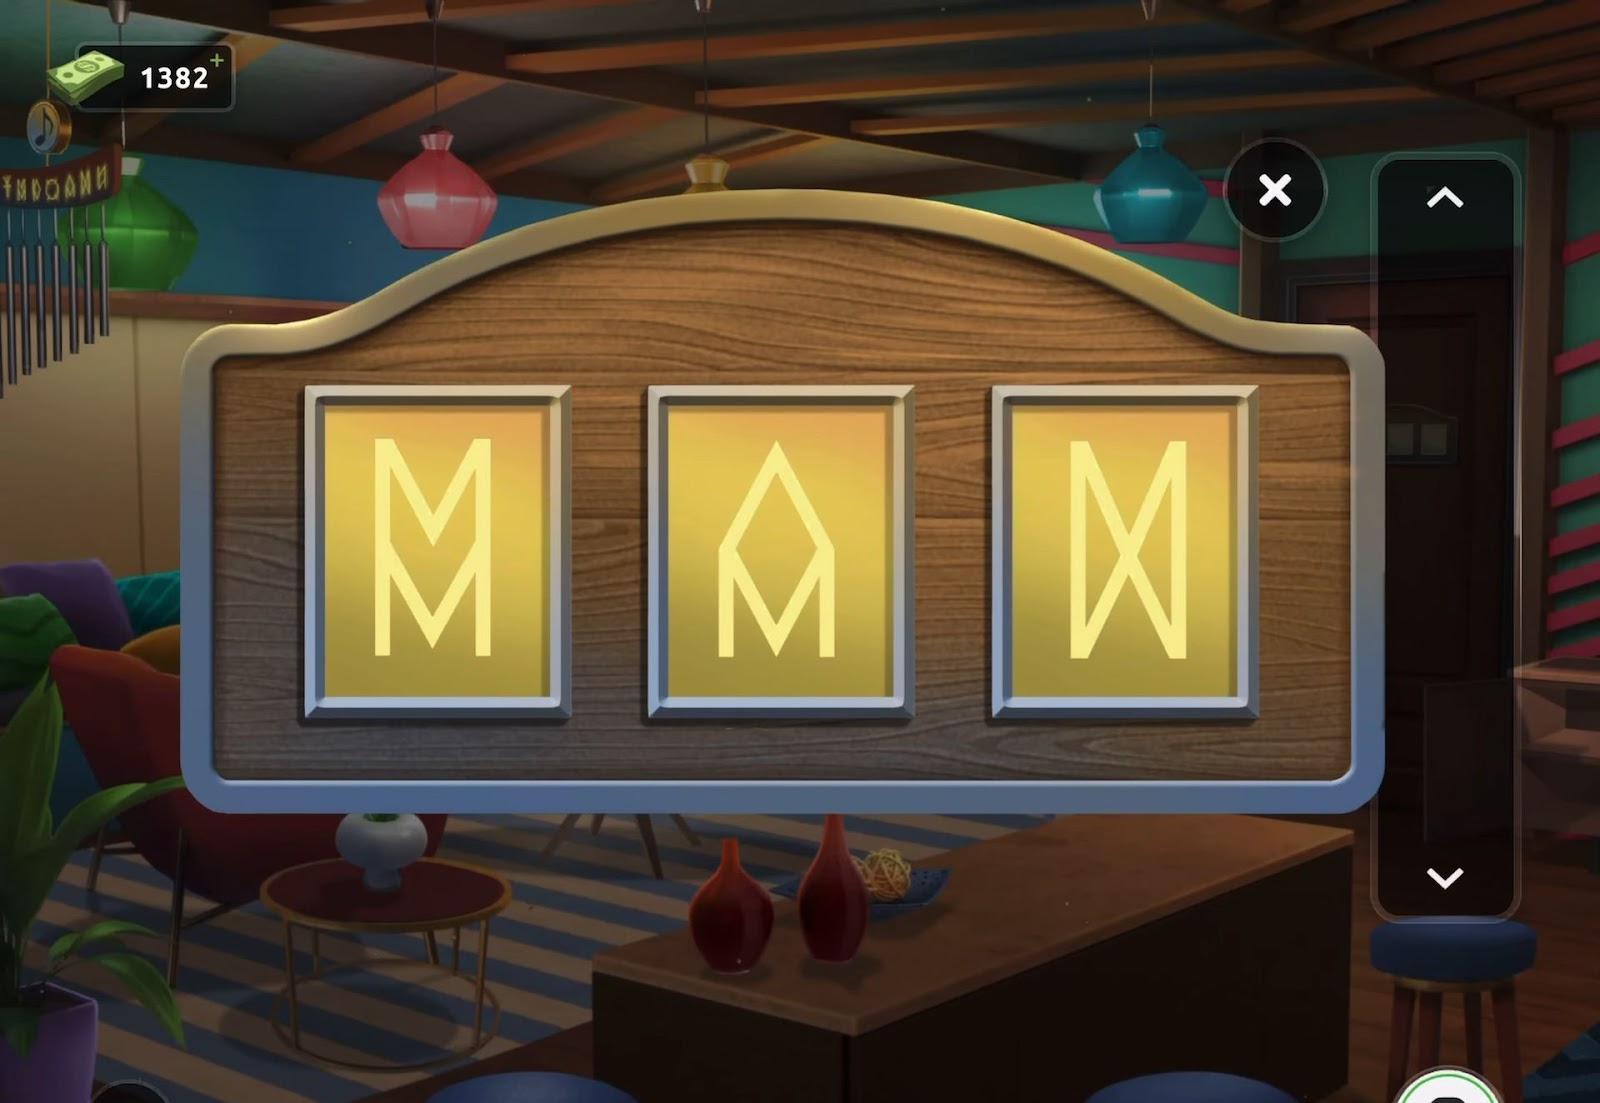
- Finally, unlock the door and escape the room.
Level 29:
To complete level 29, follow the instructions below:
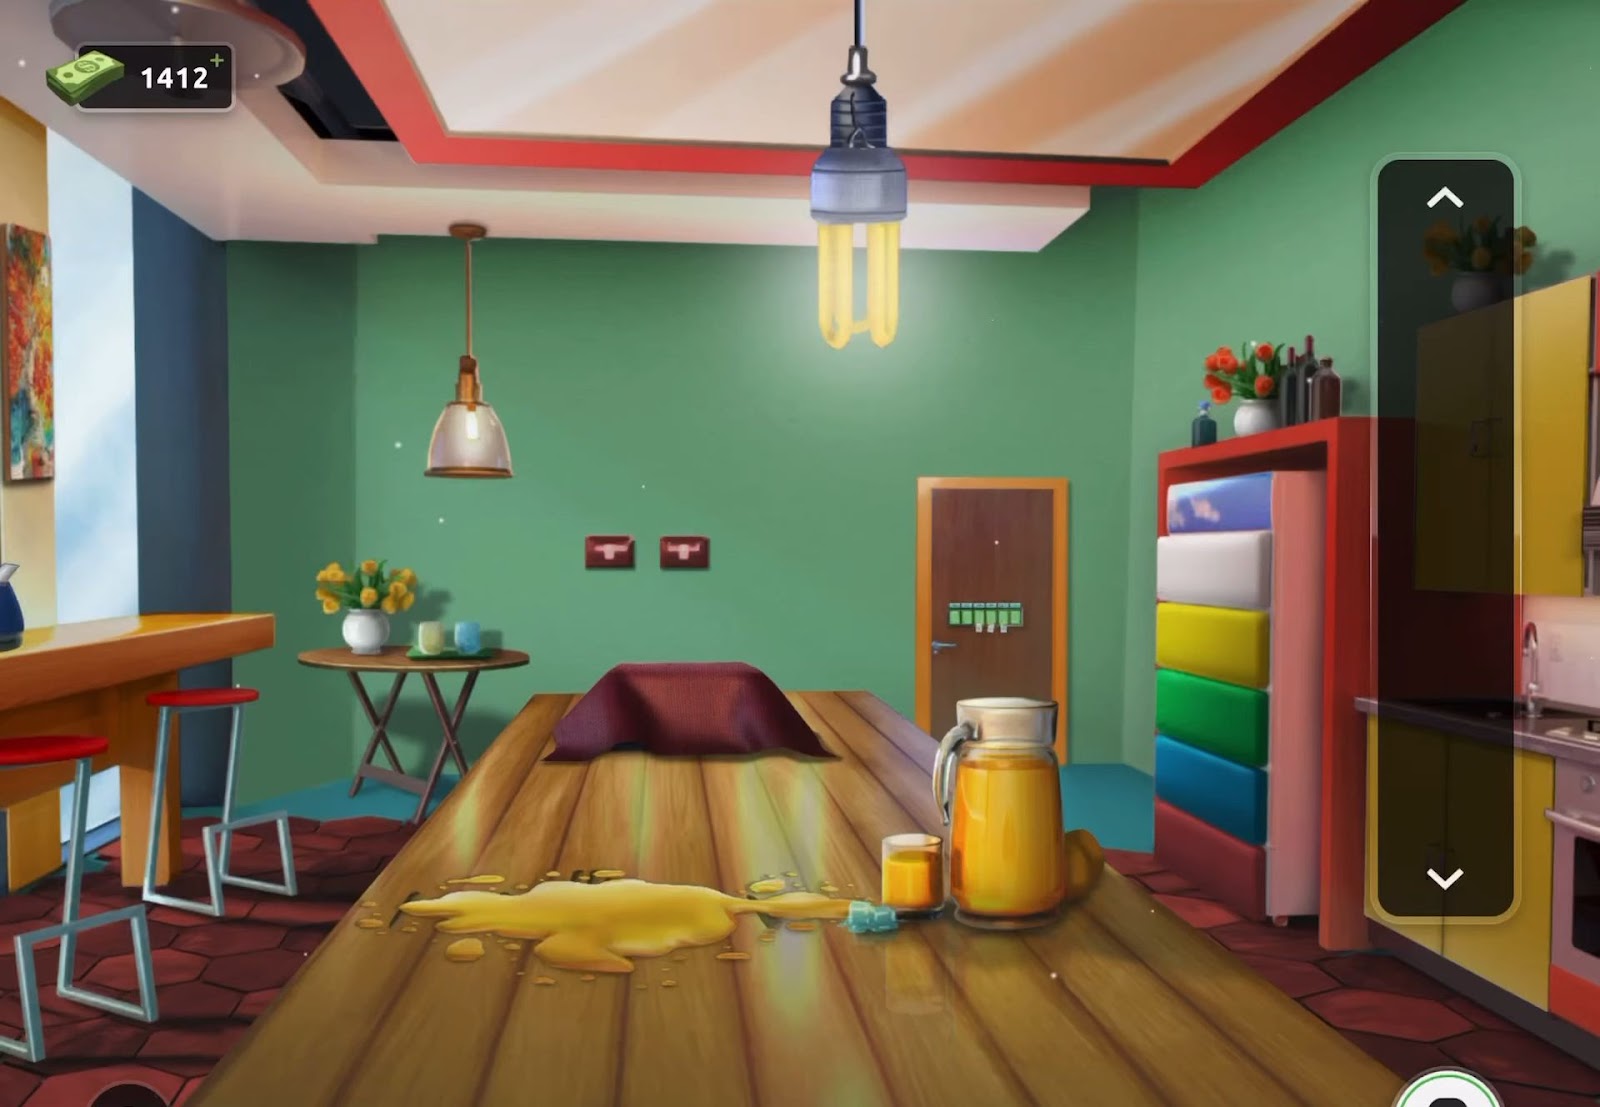
- Start by gathering a cloth from the back section of the table where a locked box is situated underneath.
- Next, use the cloth on the spilled drink residue on the table to uncover a clue.
- Then observe the presence of five boards marked with numbers.
- Additionally, take note of the existence of five colors displayed on the drawers situated on the right.
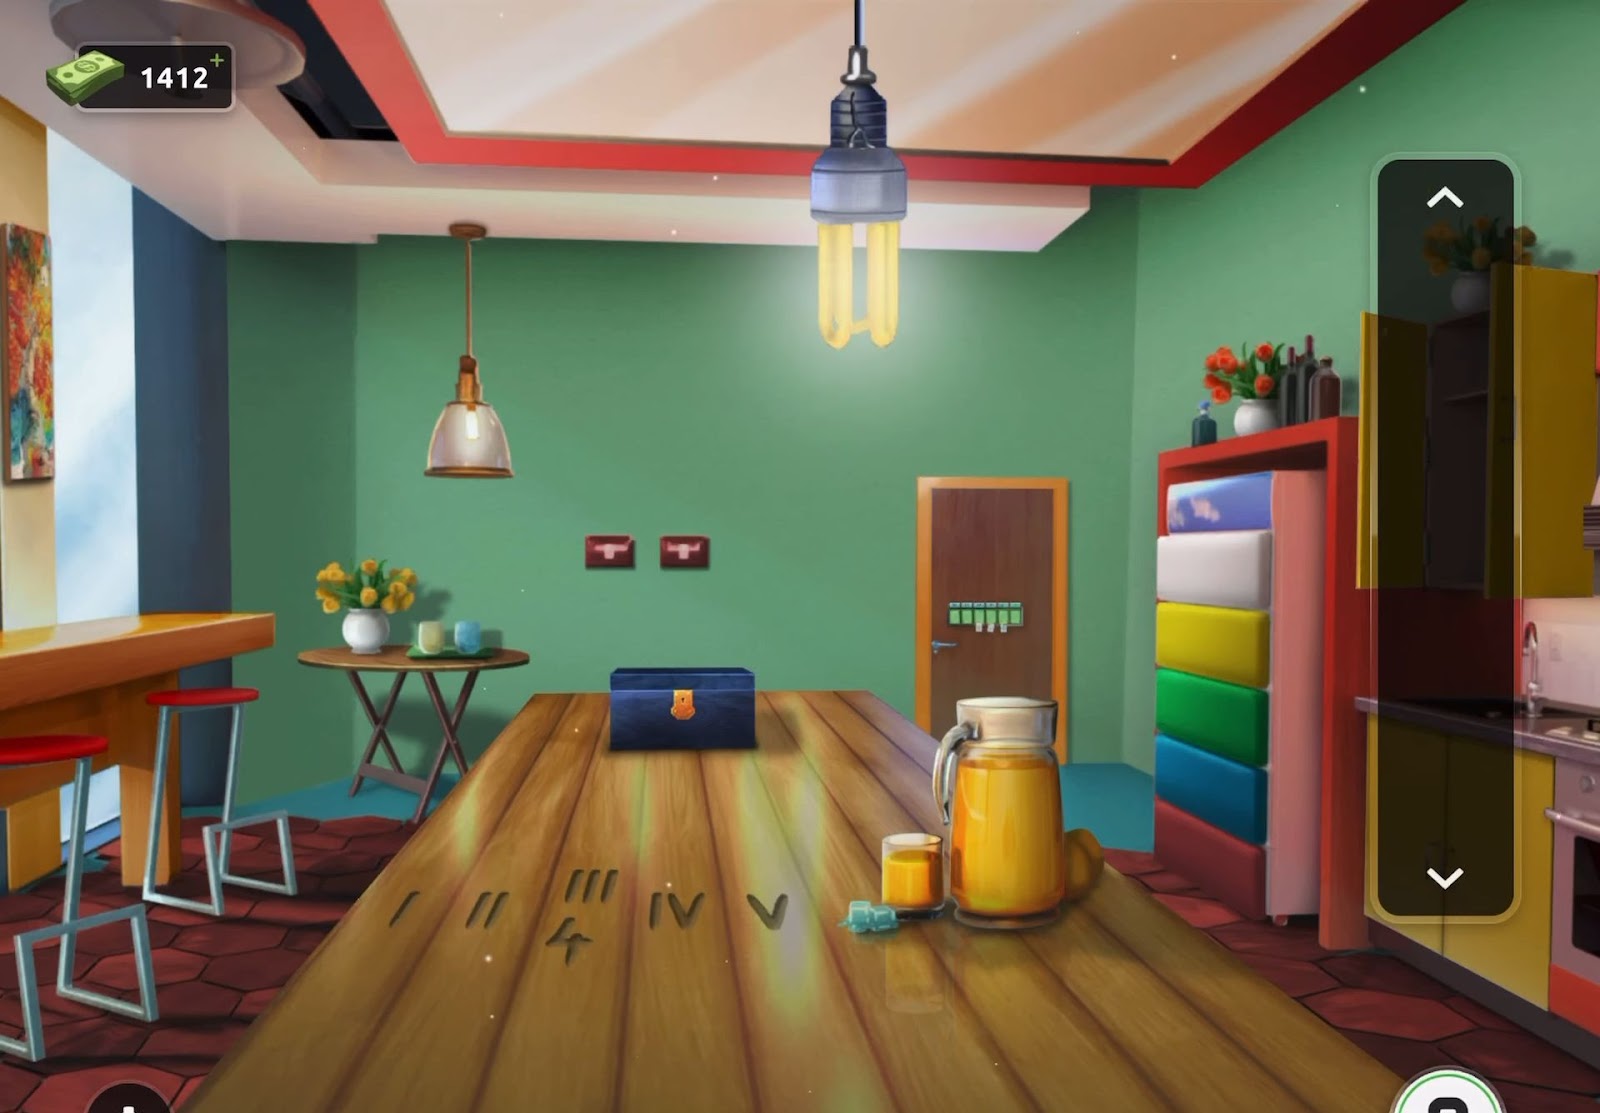
- After that, tap on the flickering light positioned above the table to obtain a key.
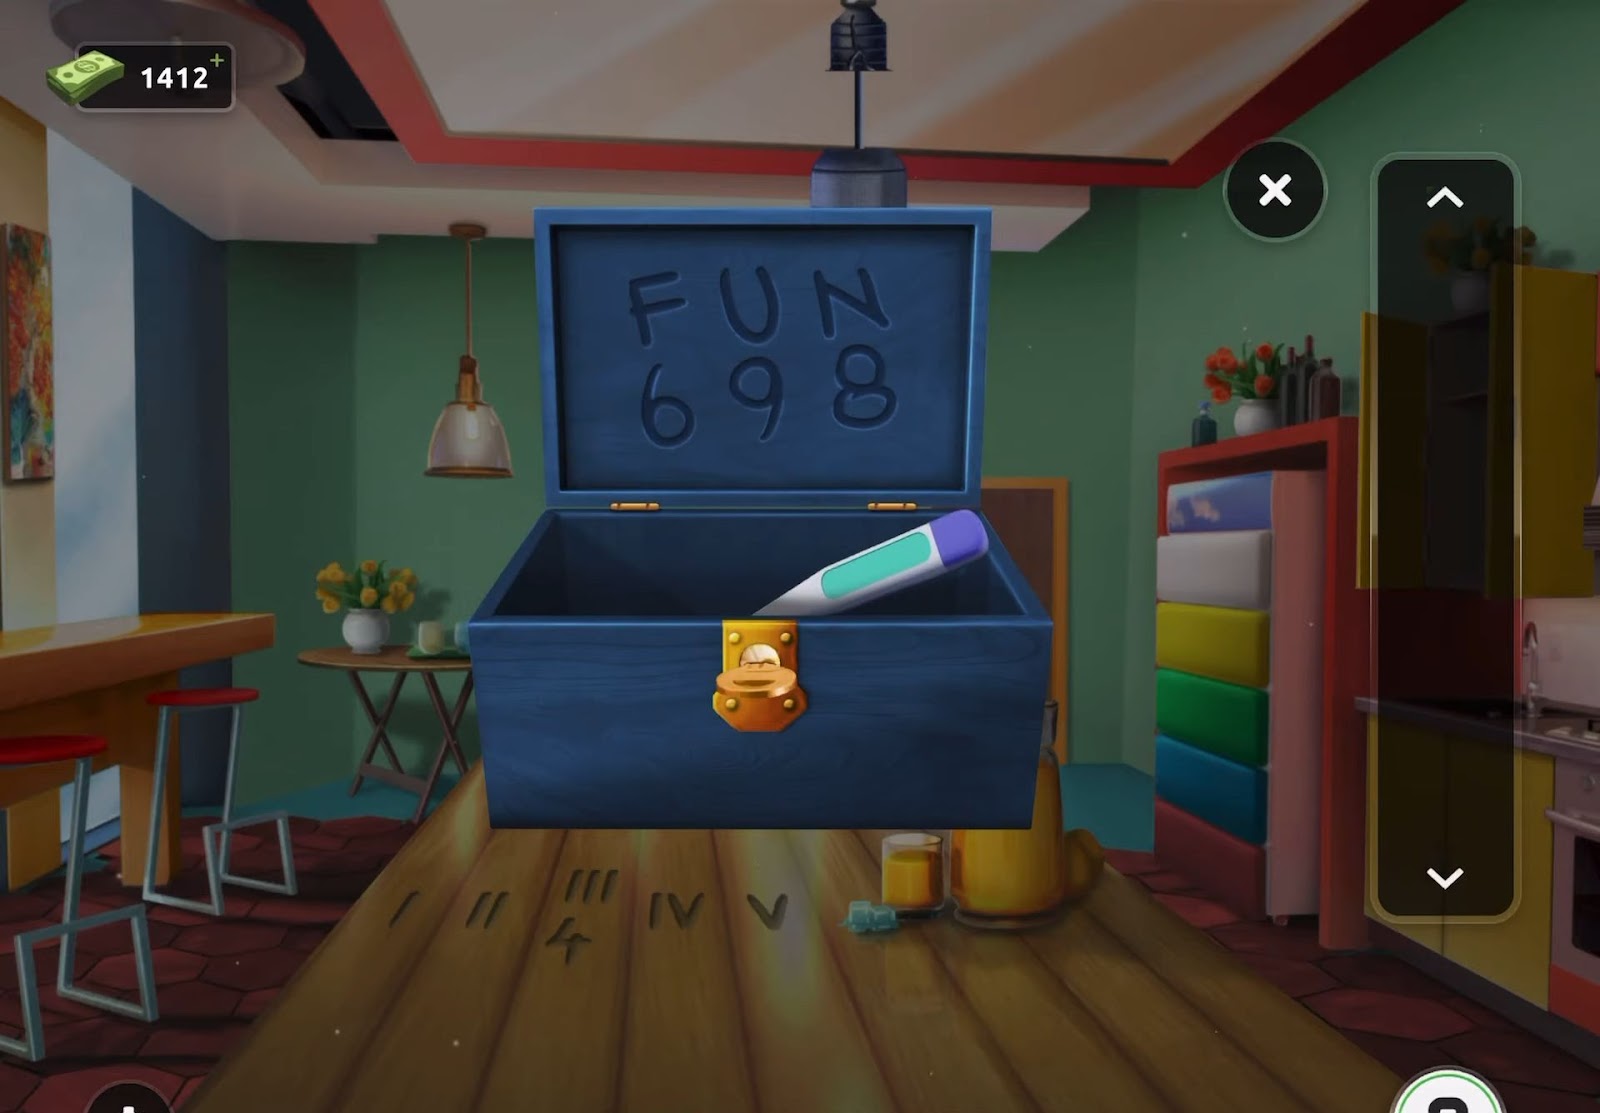
- Now utilize the key to unlock the previously observed locked box.
- Then you have to discover another clue and acquire the thermometer.
- Next, proceed to collect the blue kettle positioned on the bar situated on the left side of the room.
- Now, tap to view the glasses arranged on the round table located at the back.
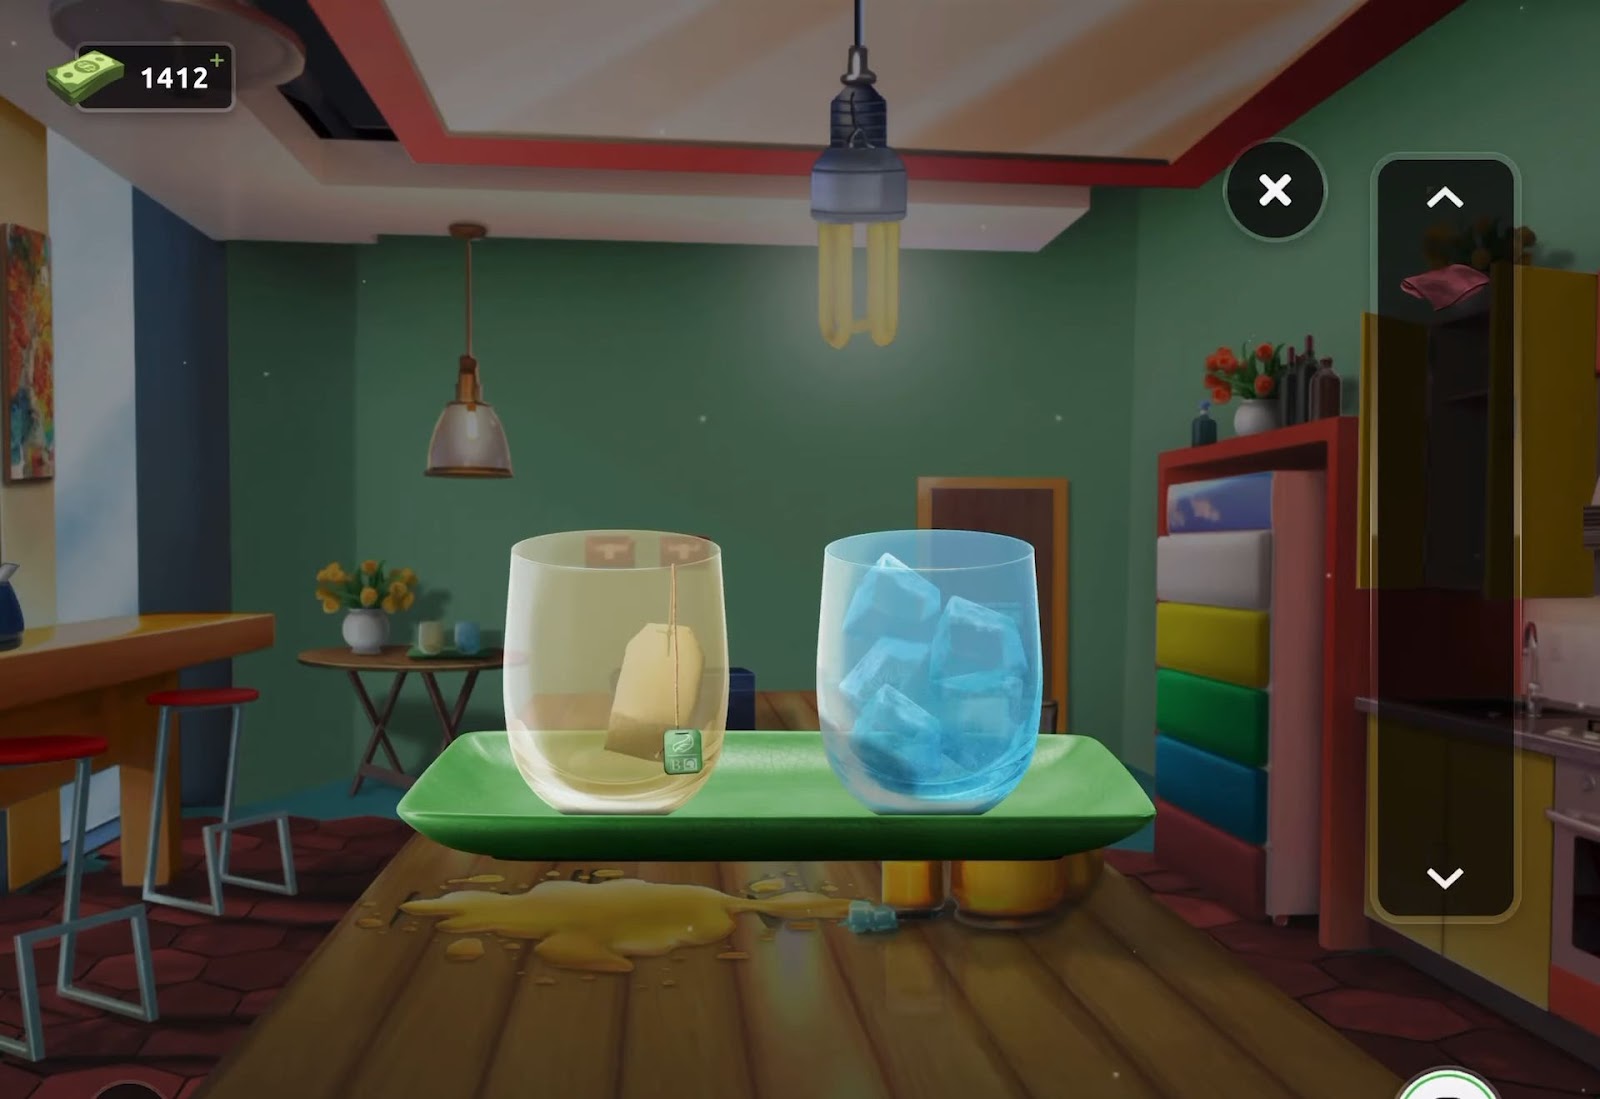
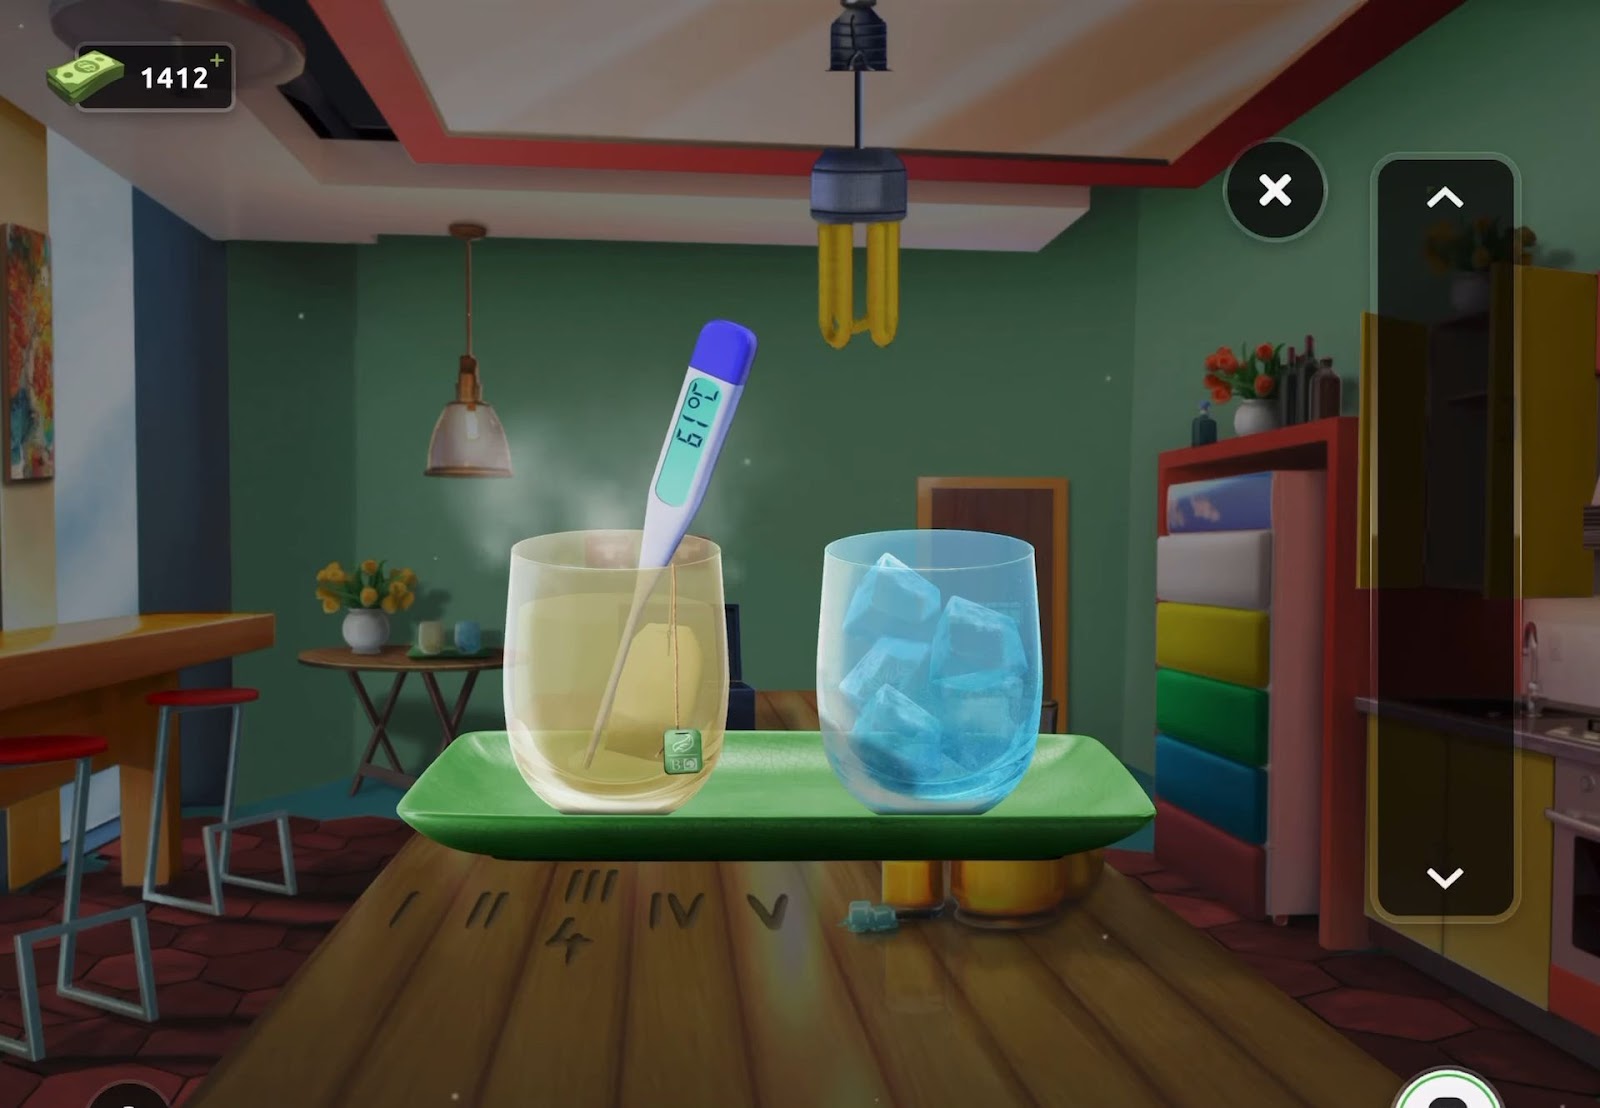
- Employ the kettle to pour hot water into the left glass.
- Then, utilize the thermometer on the glasses to measure their temperatures.
- This action will enable you to measure the temperature of the hot glass first and then the cold glass upon tapping it again.
- Now utilize the code (896124) provided to establish the correct number sequence.
- Finally, use this code to escape the room successfully.
Level 30:
To complete level 30, follow the instructions below:
- Begin by retrieving the step ladder located behind the desk toward the back left of the room.
- Next, shift the plant pot situated to the left of the step ladder to reveal a metal pipe.
- Then position the step ladder at the central area of the room on the X mark, allowing you to collect a second pipe from the ceiling.
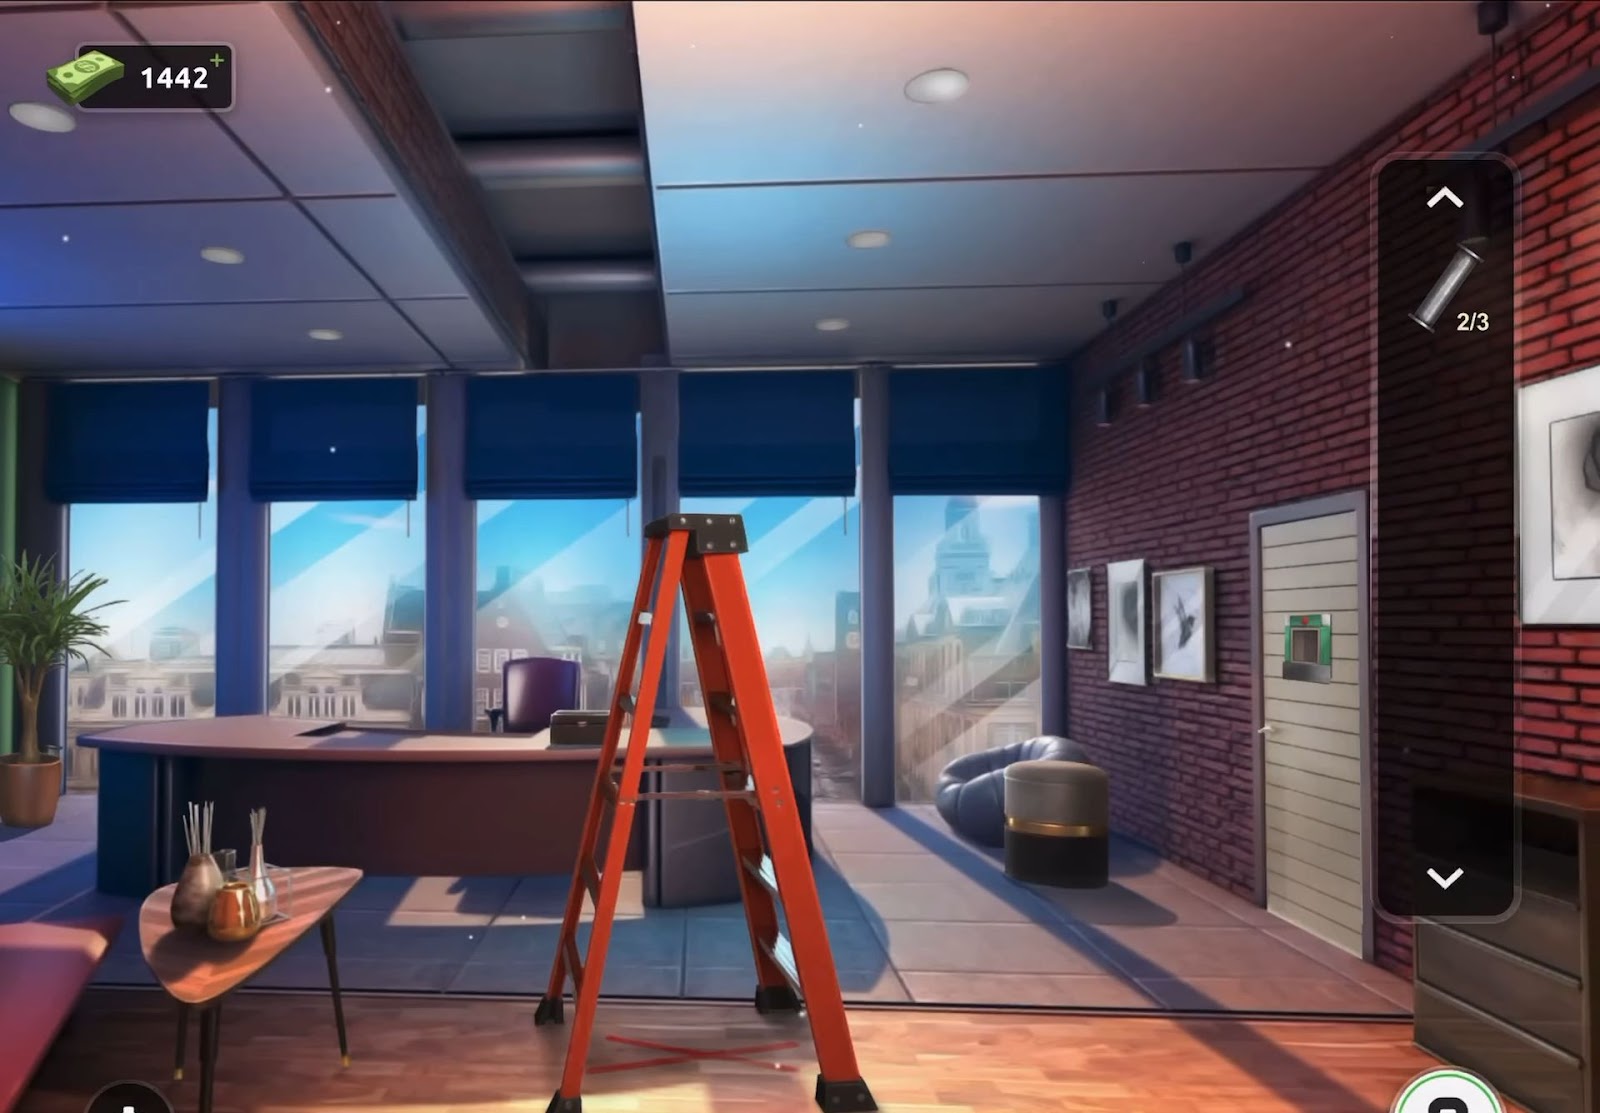
- Now, reposition a round stool situated on the right side of the room adjacent to the door, revealing a third pipe.
- Next, tap on a box placed on the desk just behind the ladder to discover a pipe puzzle.
- After that, integrate the three pipe pieces into the puzzle to commence the task.
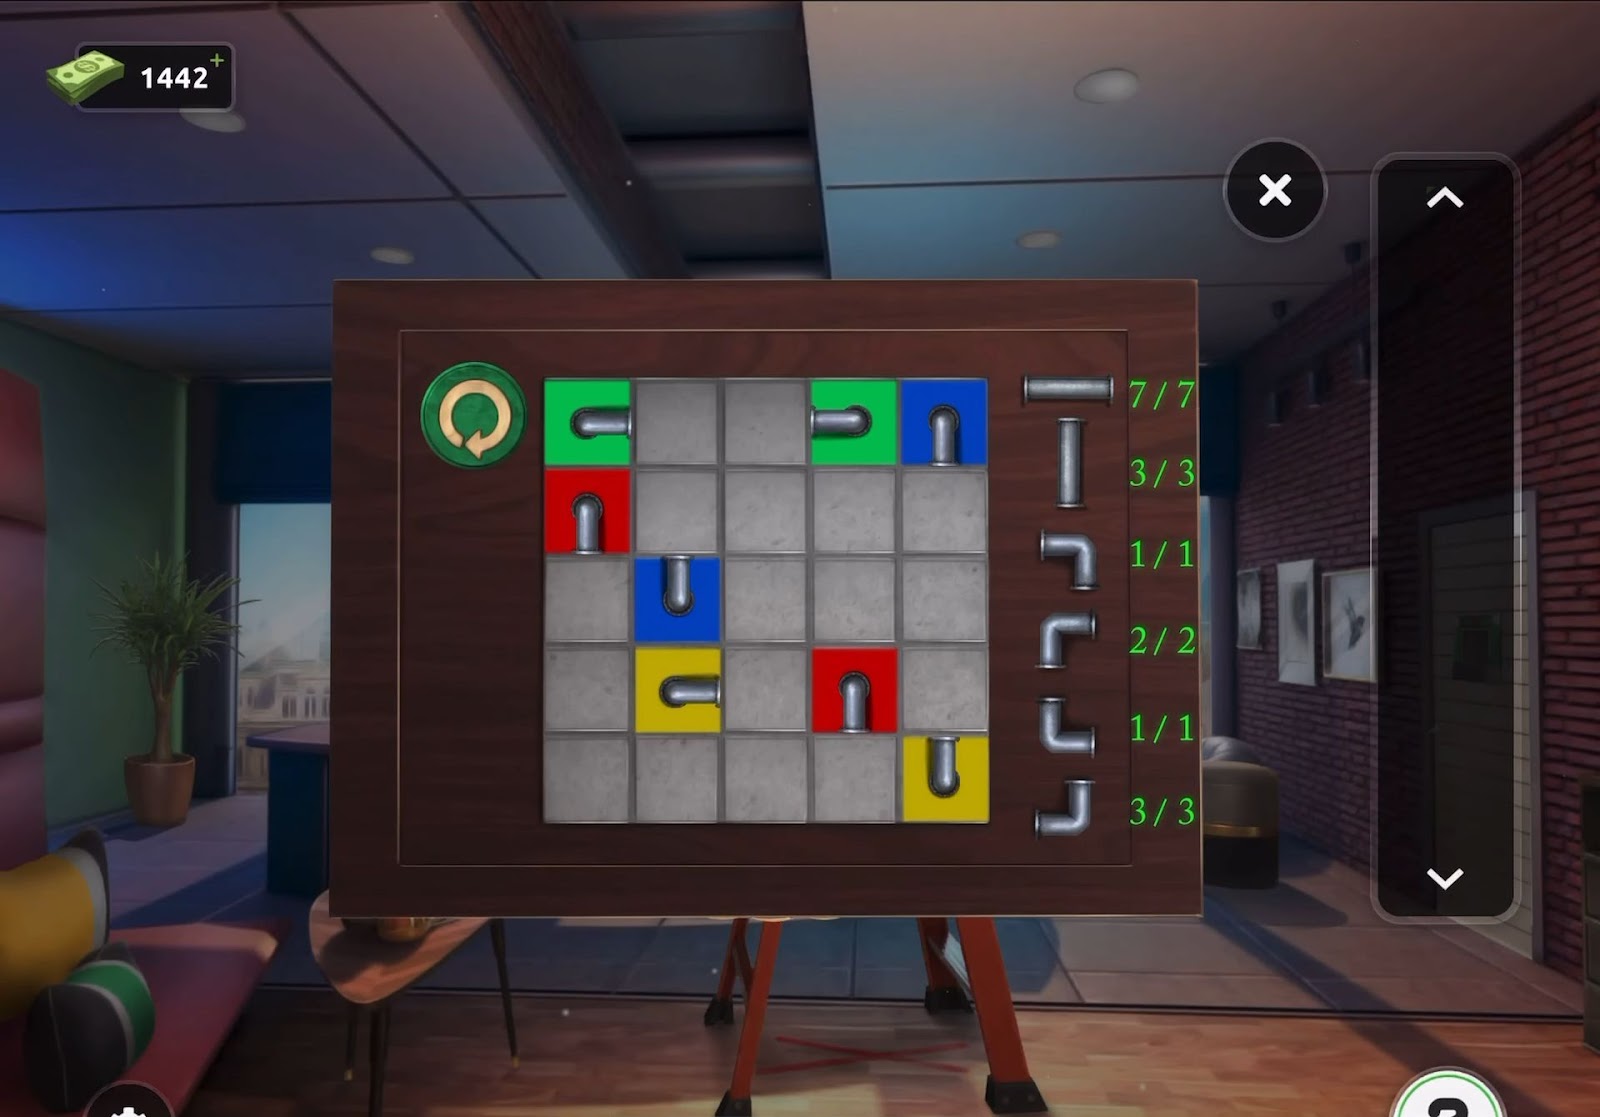
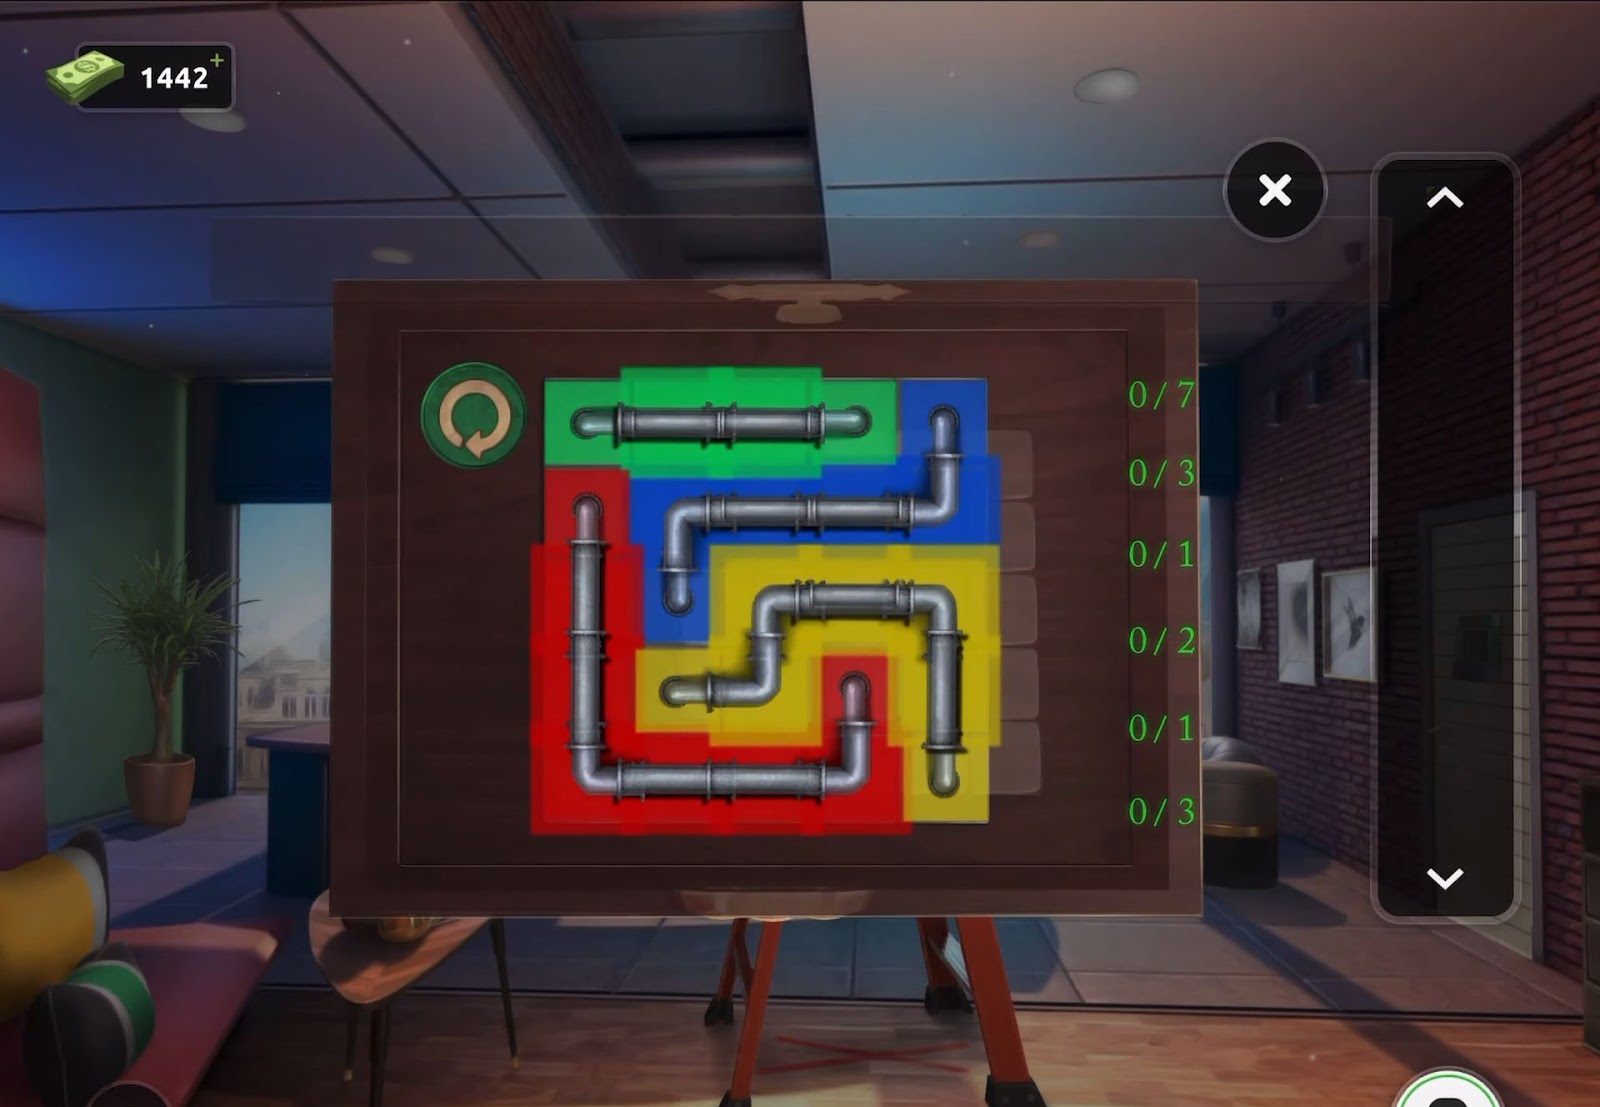
- Then, utilize the pipes to connect the colored pipe ends together and finalize the assembly of the puzzle.
Level 31:
To complete level 31, follow the instructions below:

- Firstly, observe the floor indicating an arrow with the number 1 (Right arrow) and the ceiling displaying the number 3 (Left arrow).
- Near the center of the room, there is a blue lampshade; rotate it by tapping to reveal the number 2 (Up arrow).
- On the desk in the lower right, open the black laptop to view the number 4 (Down arrow).
- After that, tap to shift the red book on the same desk, enabling you to collect a blue key card.
- Next, inspect the lock on the door.
- Then employ the key card on the lock to activate it, then tap the arrows in the correct sequence: Right, Up, Left, Down.
- Finally, the door will open, granting your escape.
Level 32:
To complete level 32, follow the instructions below:
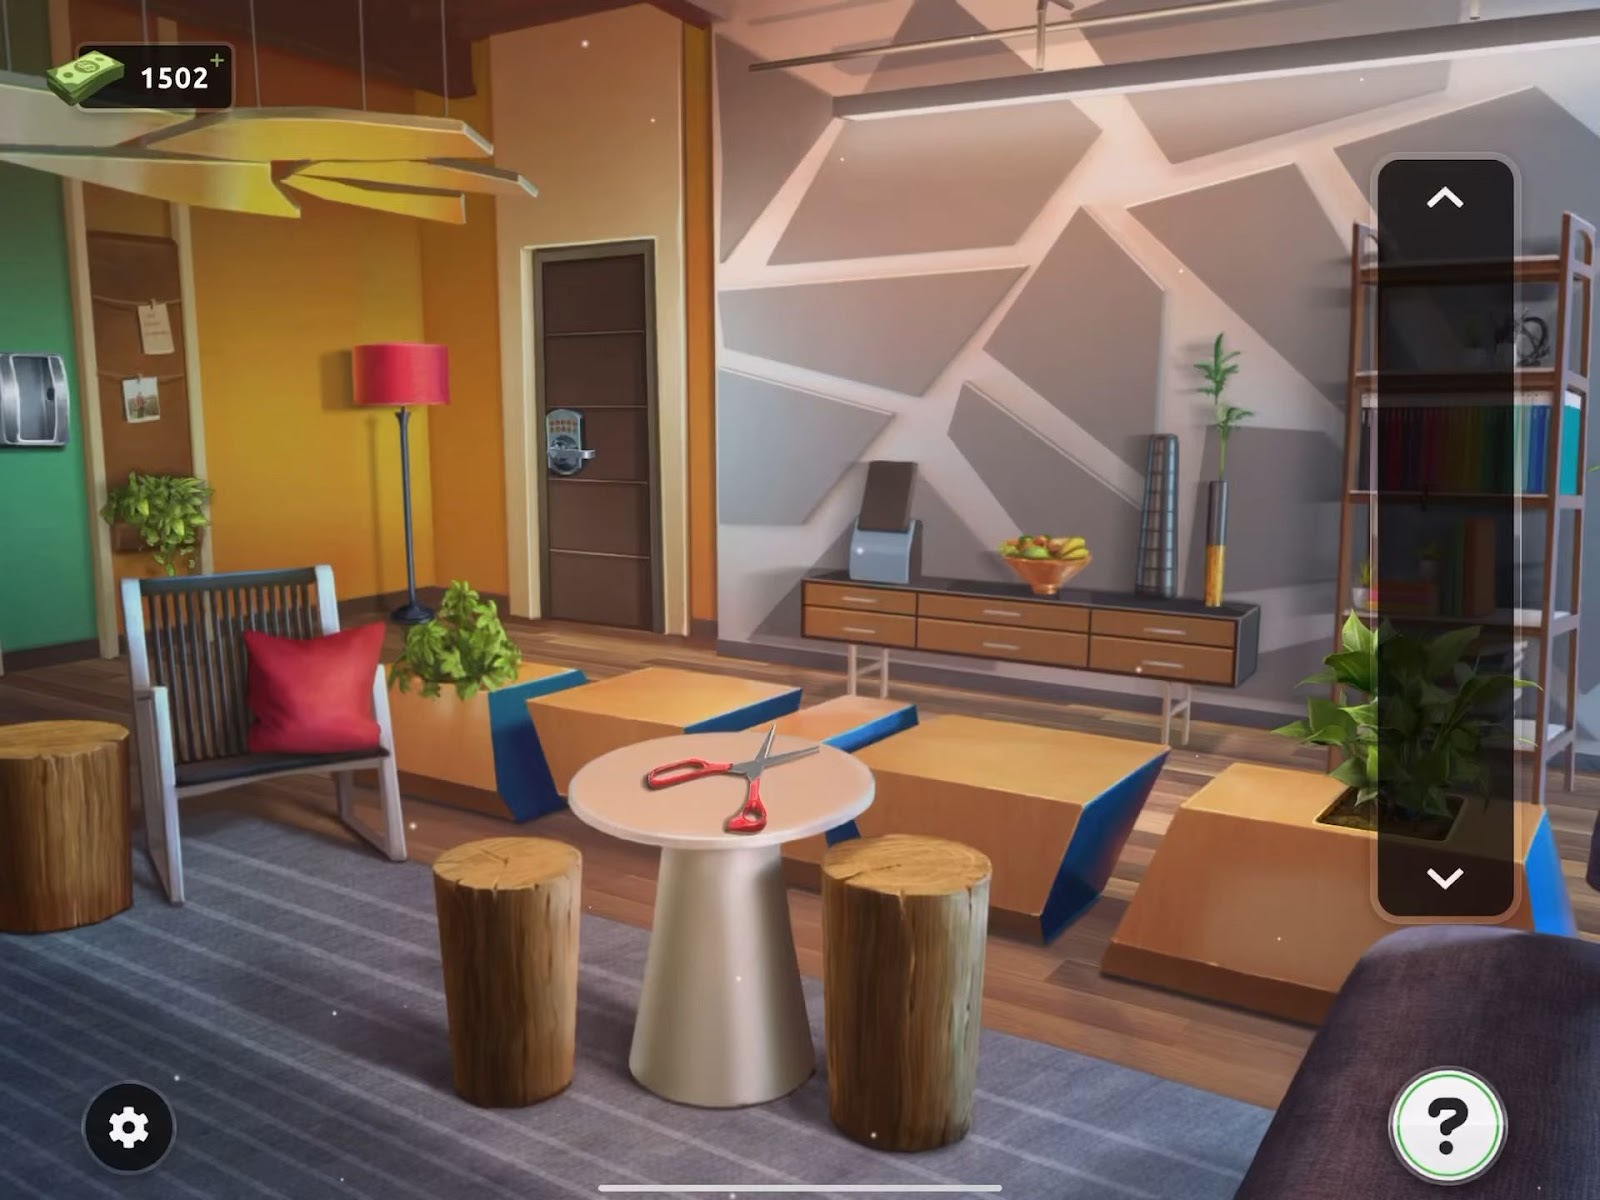
- Firstly, retrieve the scissors placed on the small round table at the center of the room.
- Next, focus on the small bush located to the right of the table.
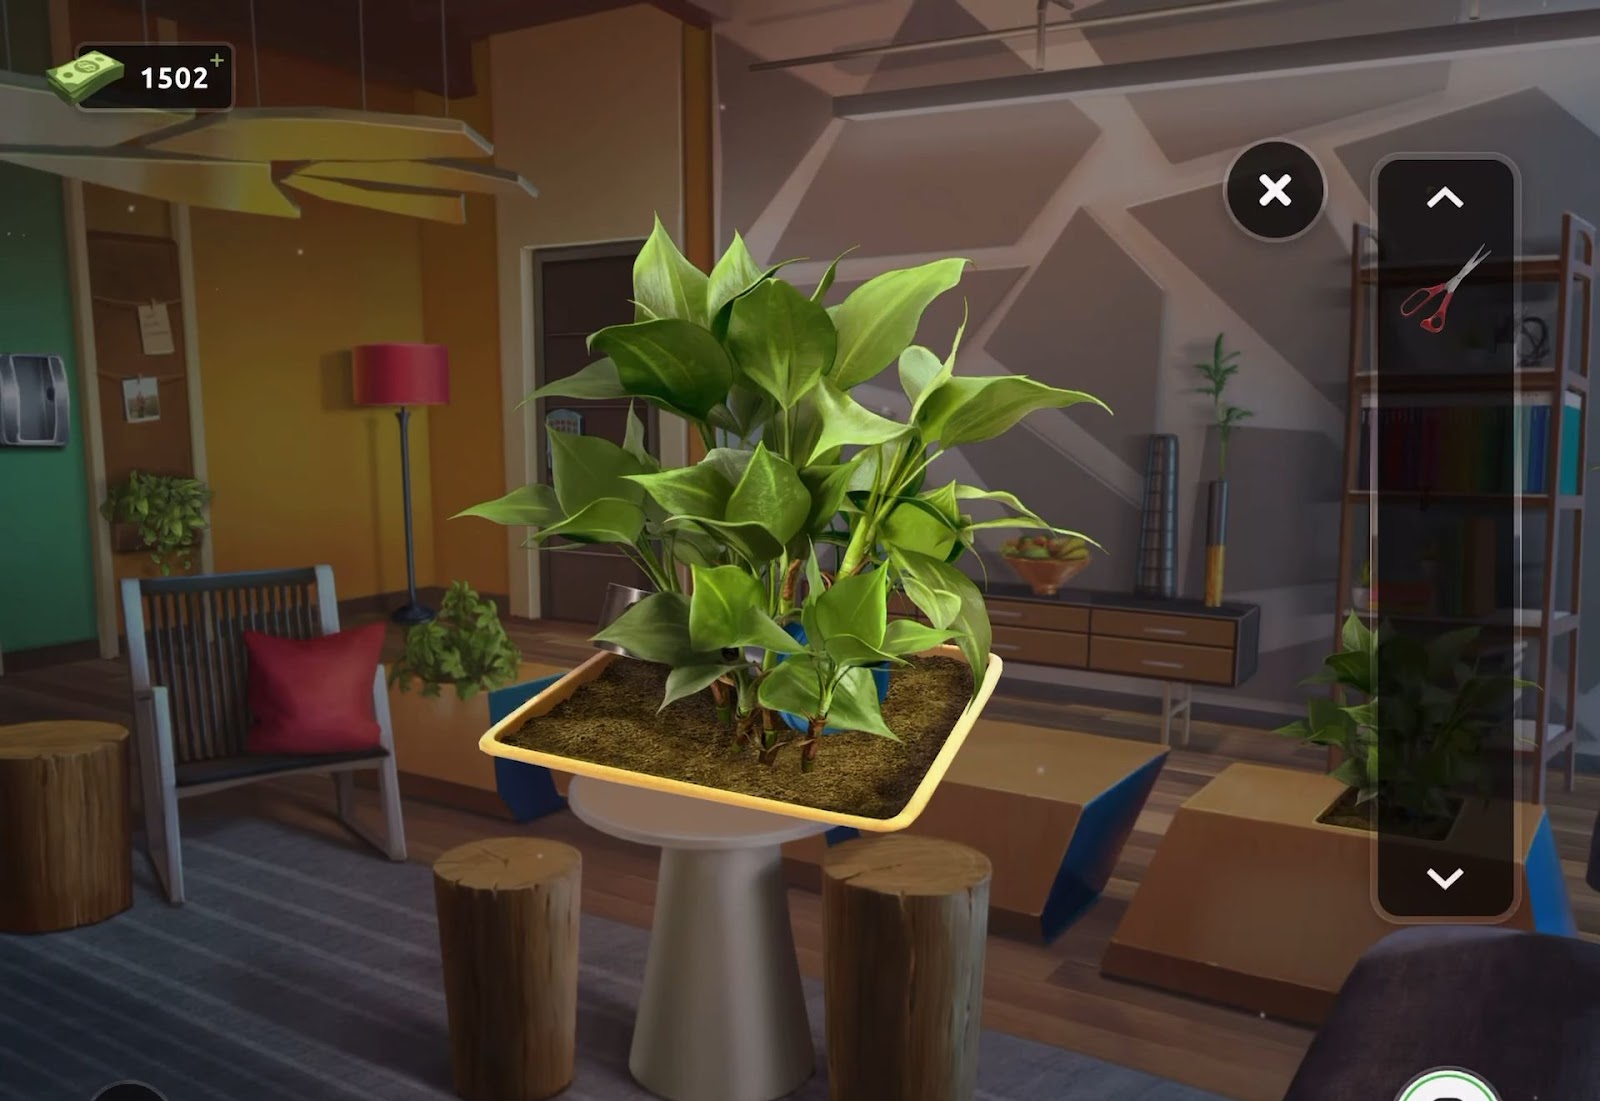
- Next, utilize the scissors to trim the bush, then gather a lever handle.
- Then insert the lever handle into the socket located on the left side of the room.
- Now activate the lever to lower a light and observe a pattern.
- Next, examine the door handle to view the puzzle lock. Configure the lights to match the pattern observed earlier.
- This will enable you to escape the room.
Level 33:
To complete level 33, follow the instructions below:
- Firstly, tap on the upper-left bookshelf to acquire a blue block.
- Then, interact with the red-striped chair situated in the lower right to rotate it and gather a yellow block.
- Afterward, access the blue book on the table located in front of the central yellow-striped chair to open it and retrieve a pen.
- Now examine the laptop on the table, then utilize the pen to retrieve a green block from it.

- Now inspect the pinboard located at the top right corner of the room.
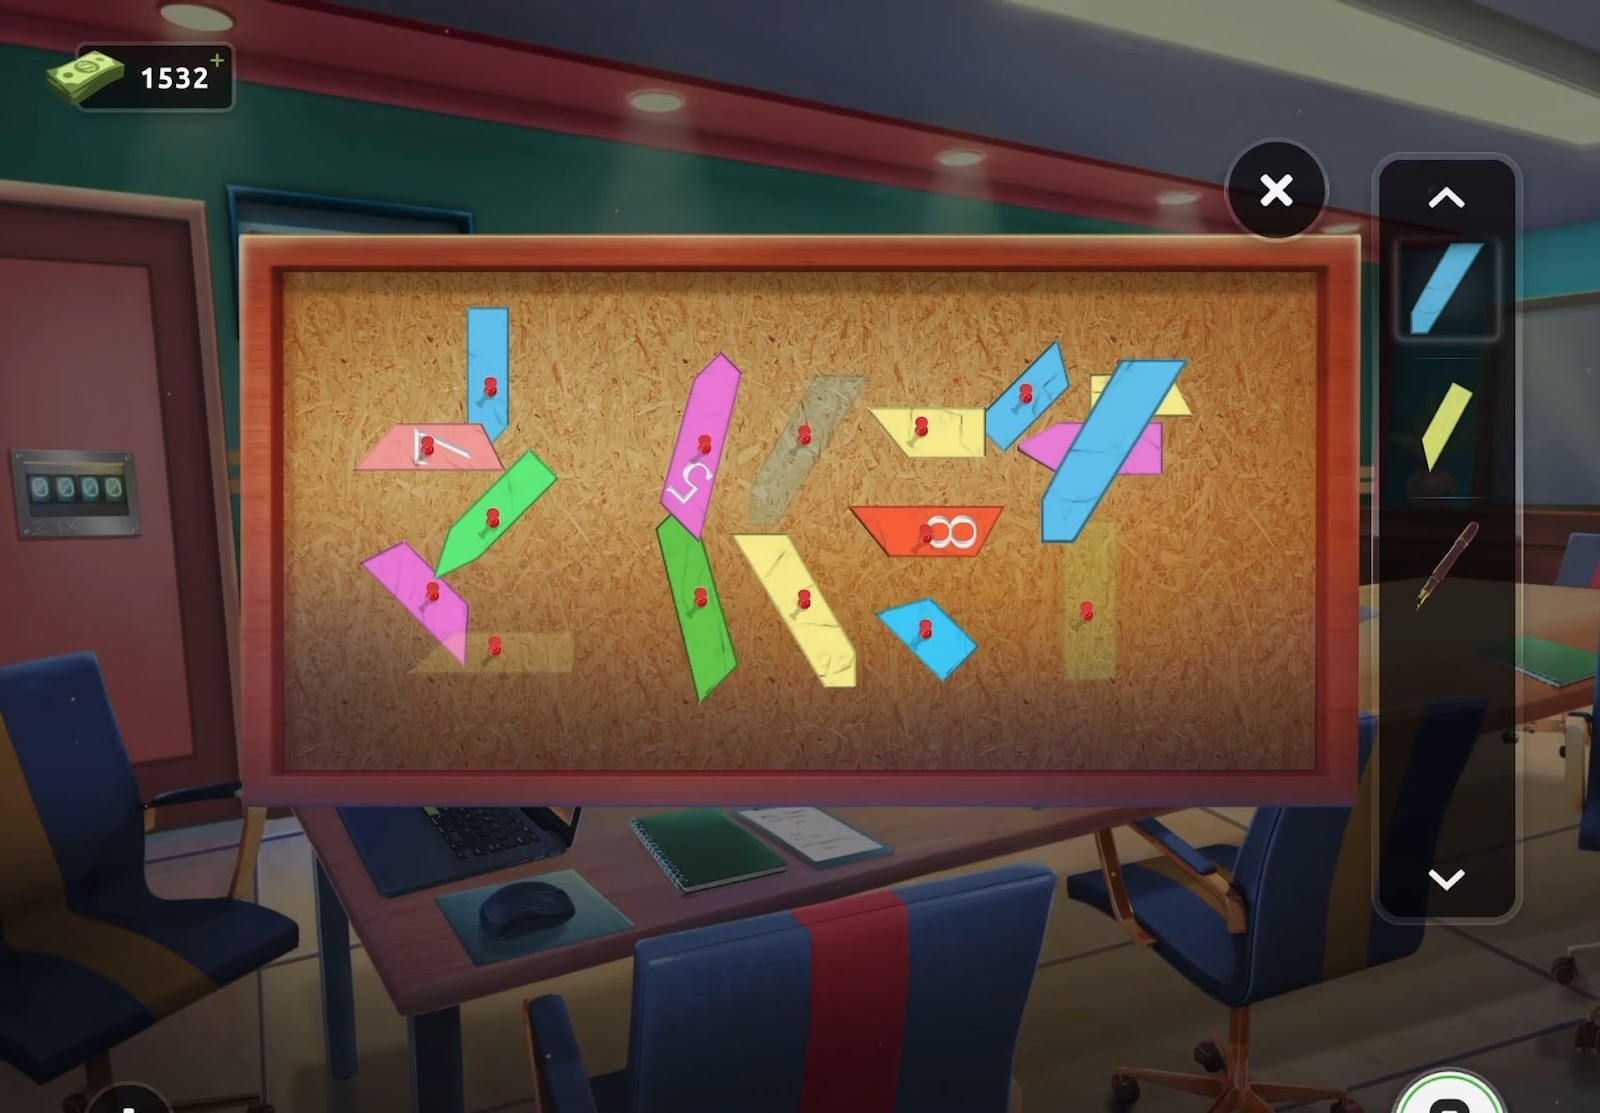
- Next, attach the three blocks to the board. Then, manipulate and arrange the blocks to create a word.
- Upon completion, it will reveal four numbers.
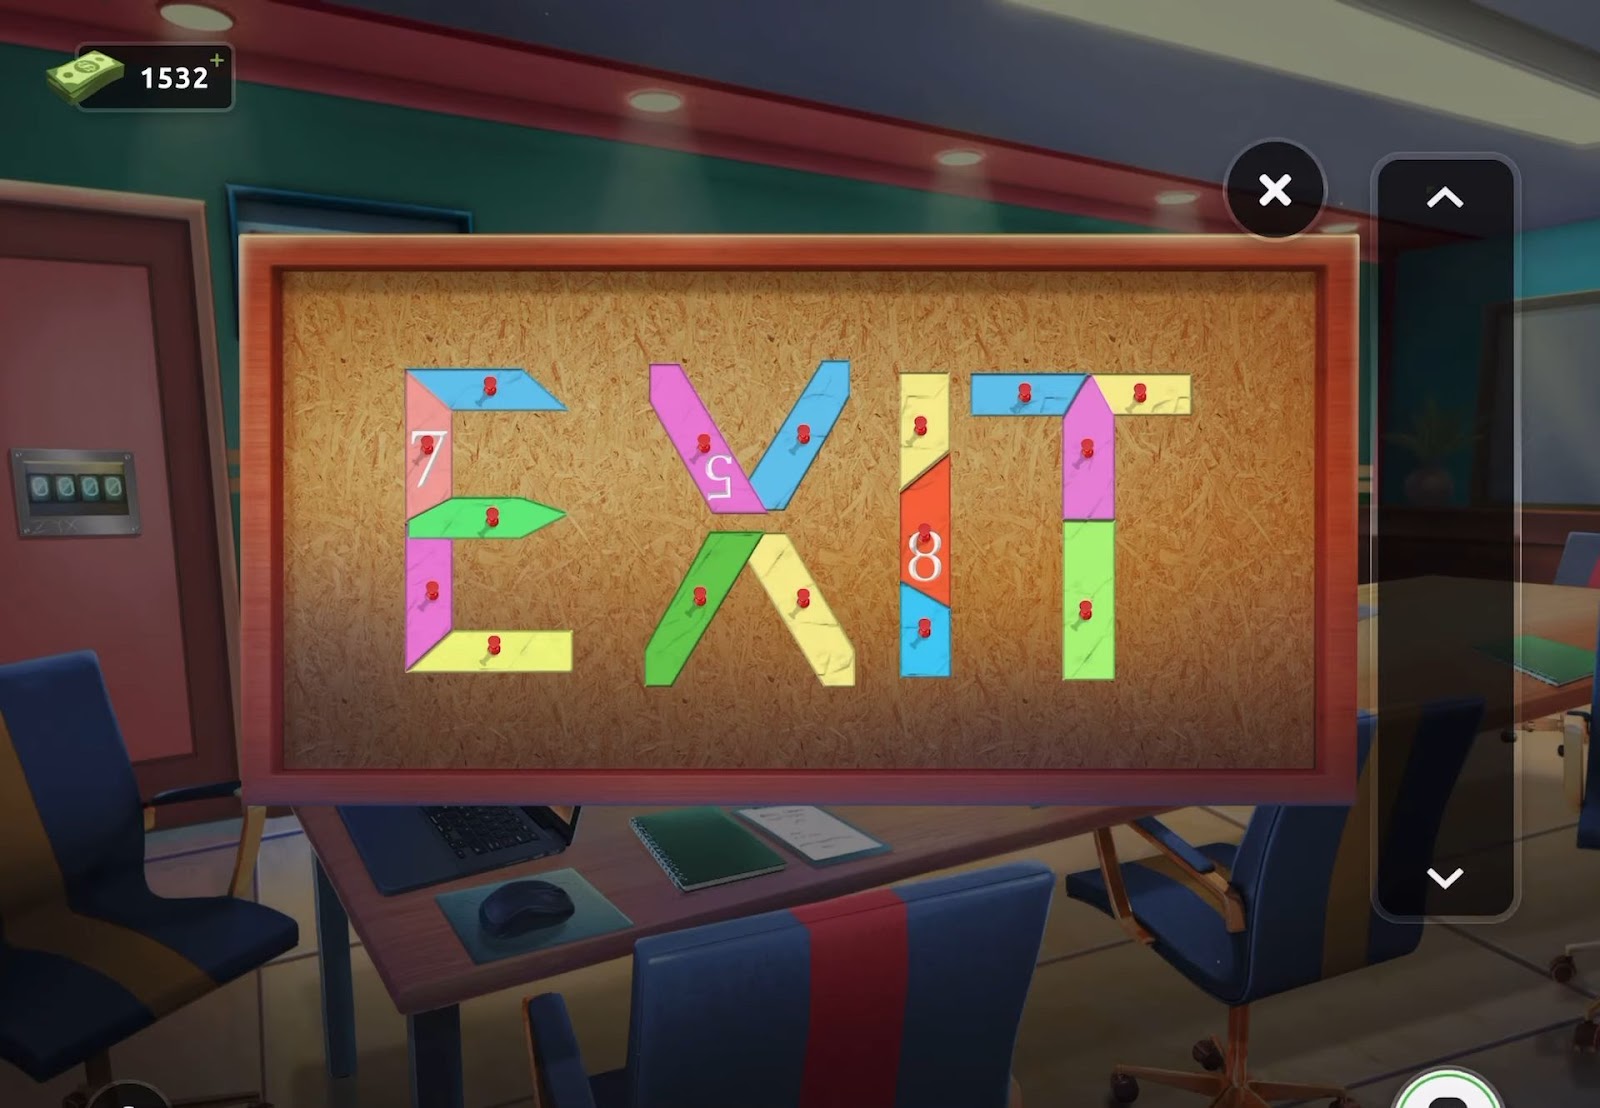
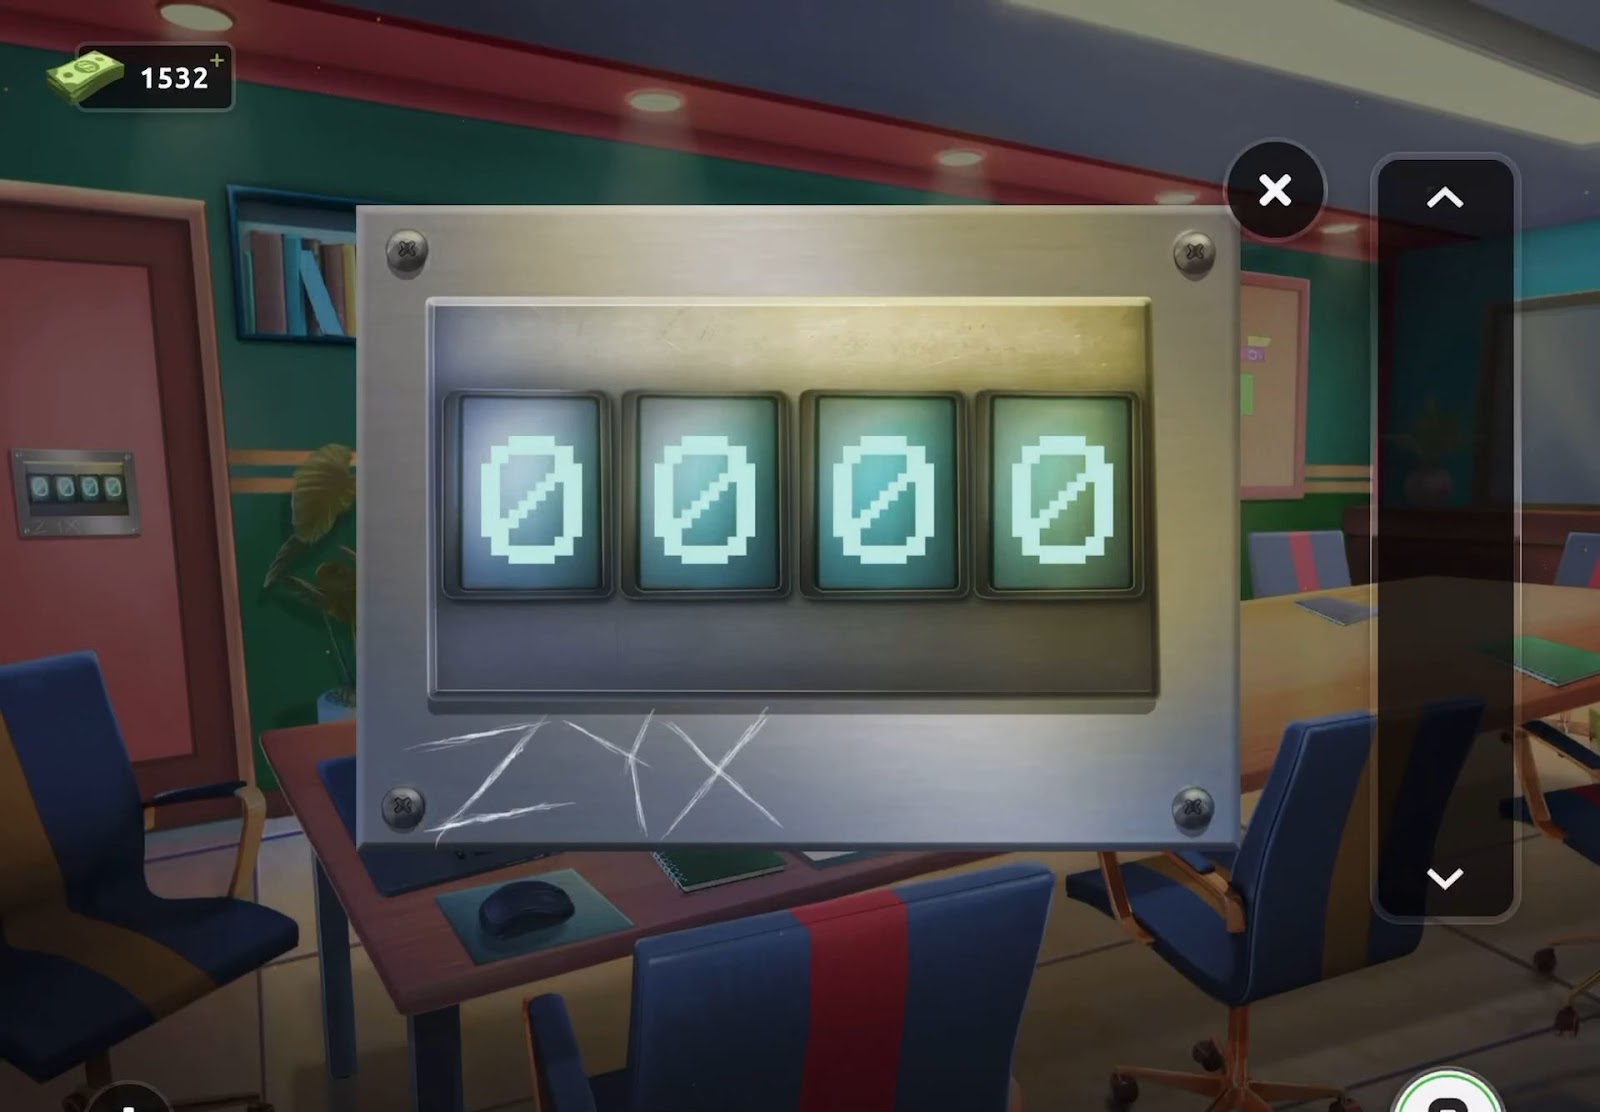
- Now overview the lock mechanism on the exit door.
Level 34:
To complete level 34, follow the instructions below:
- Firstly, tap the fruit bowl located left of the door to obtain a magnifying glass.
- Then proceed to the round vase in front of the door to collect a blue cloth.
- After that, acquire a small bottle of cleaner from the wall on the top right, adjacent to the green light.
- Upon obtaining the magnifying glass, apply the cleaner followed by the cloth to thoroughly clean the magnifying glass.
- Then, tap the blue vase situated on the small table to the right of the door to displace it, allowing you to collect a paper clue.
- Now access your inventory to view the paper, then utilize the magnifying glass on it.
- After that, move the magnifying glass around the paper to unveil the hidden clue.
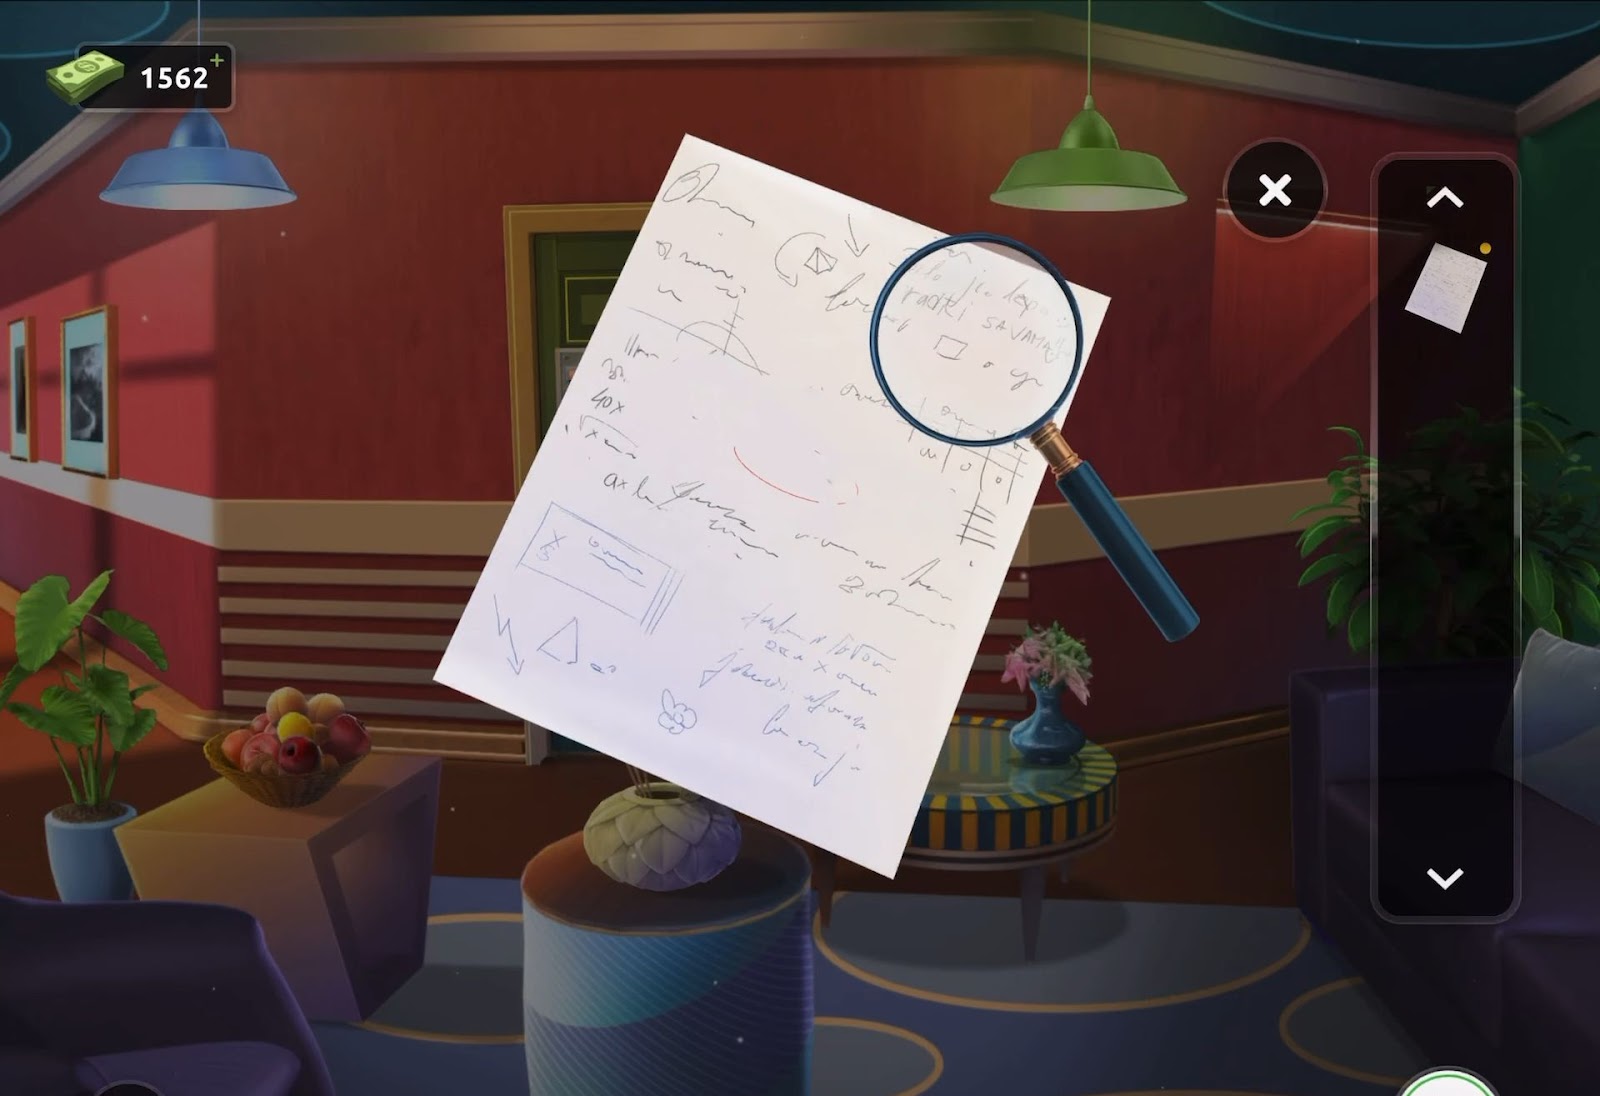
- Now examine the code lock located on the door.
- Next, observe the scratched crossed lines on the lock and refer to the paper clue to count the number of crossed lines in the four symbols.
- Finally, use this code (4206) to unlock the code and escape the room.
Level 35:
To complete level 35, follow the instructions below:
- Firstly, examine the small square table that contains a box.
- Next, clear away the papers on the table to collect a clock hand and reveal a clue.
- Now observe the red clock positioned on the shelf above.
- Next, retrieve a blue switch from the left side of the area.
- Then, add the clock hand to the clock face.
- Now configure the time on the clock by referring to the upside-down clue found on the table.
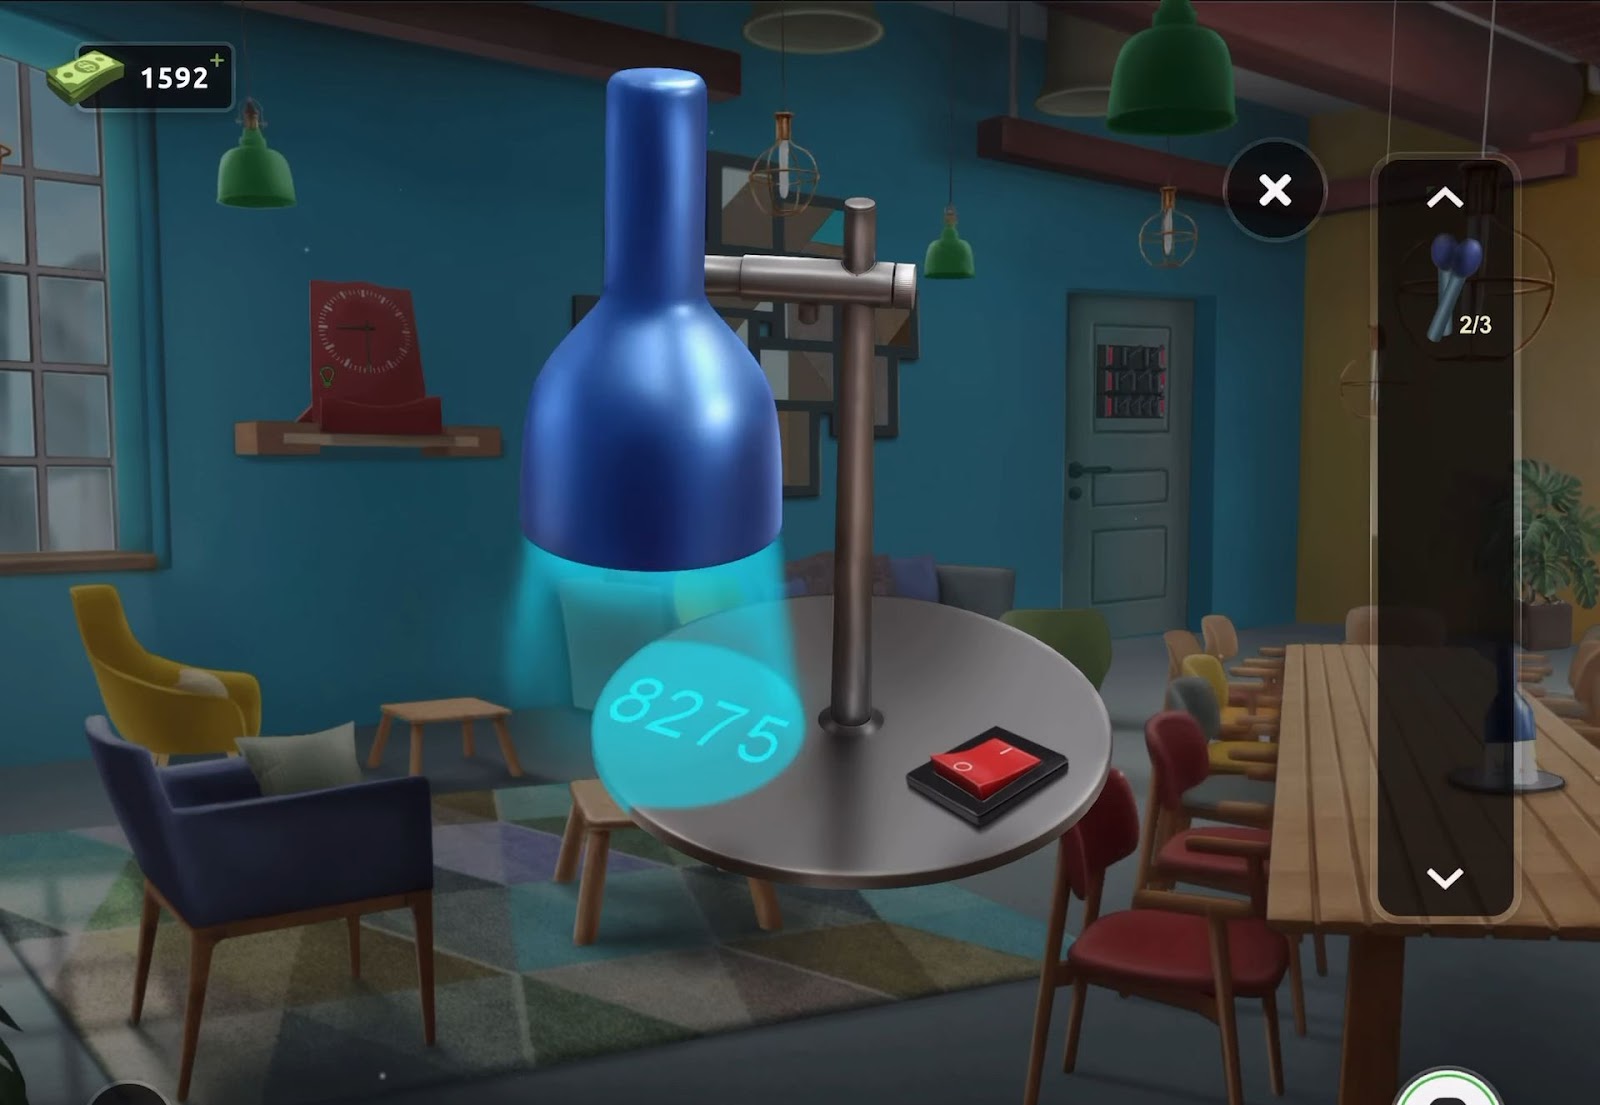
- Then acquire the light bulb from the room and examine the blue lamp situated on the long table.

- After that, obtain another blue switch and attach the light bulb to the lamp.
- Now activate the lamp and adjust its position downwards to reveal a code hint.
- Go back to the box placed on the small table and input the obtained code (8275).
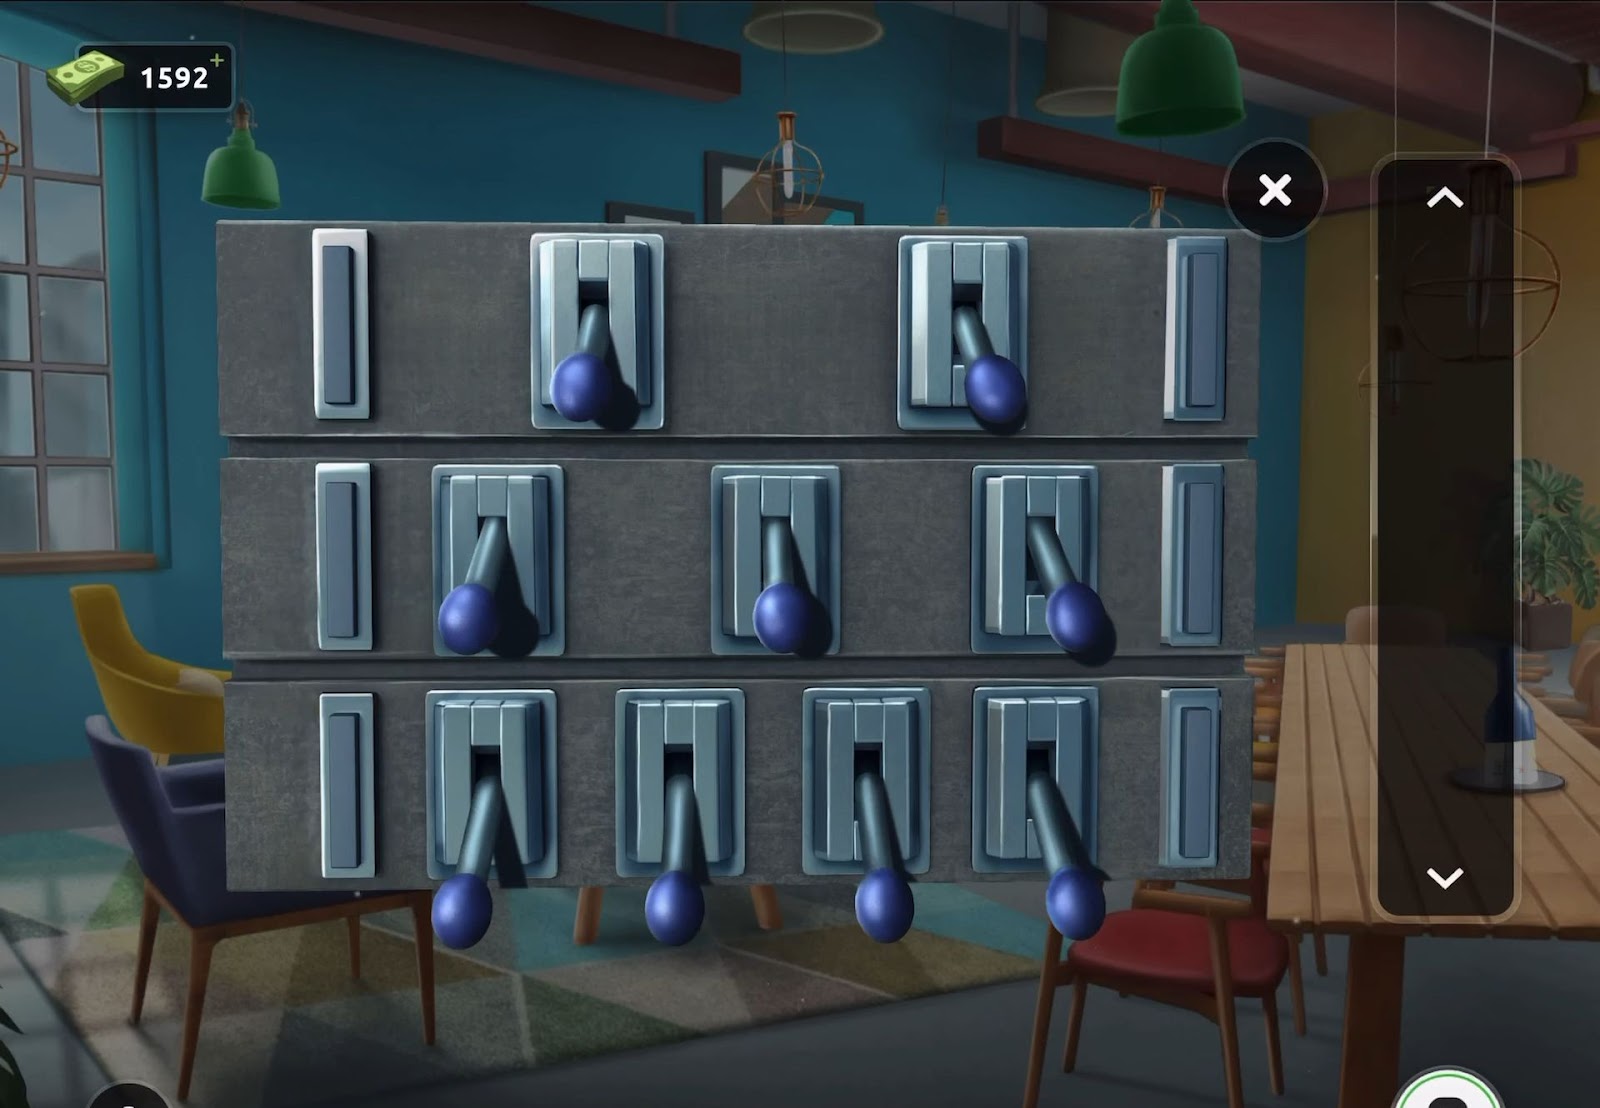
- Then obtain an additional blue switch and observe the exit door to identify the puzzle.
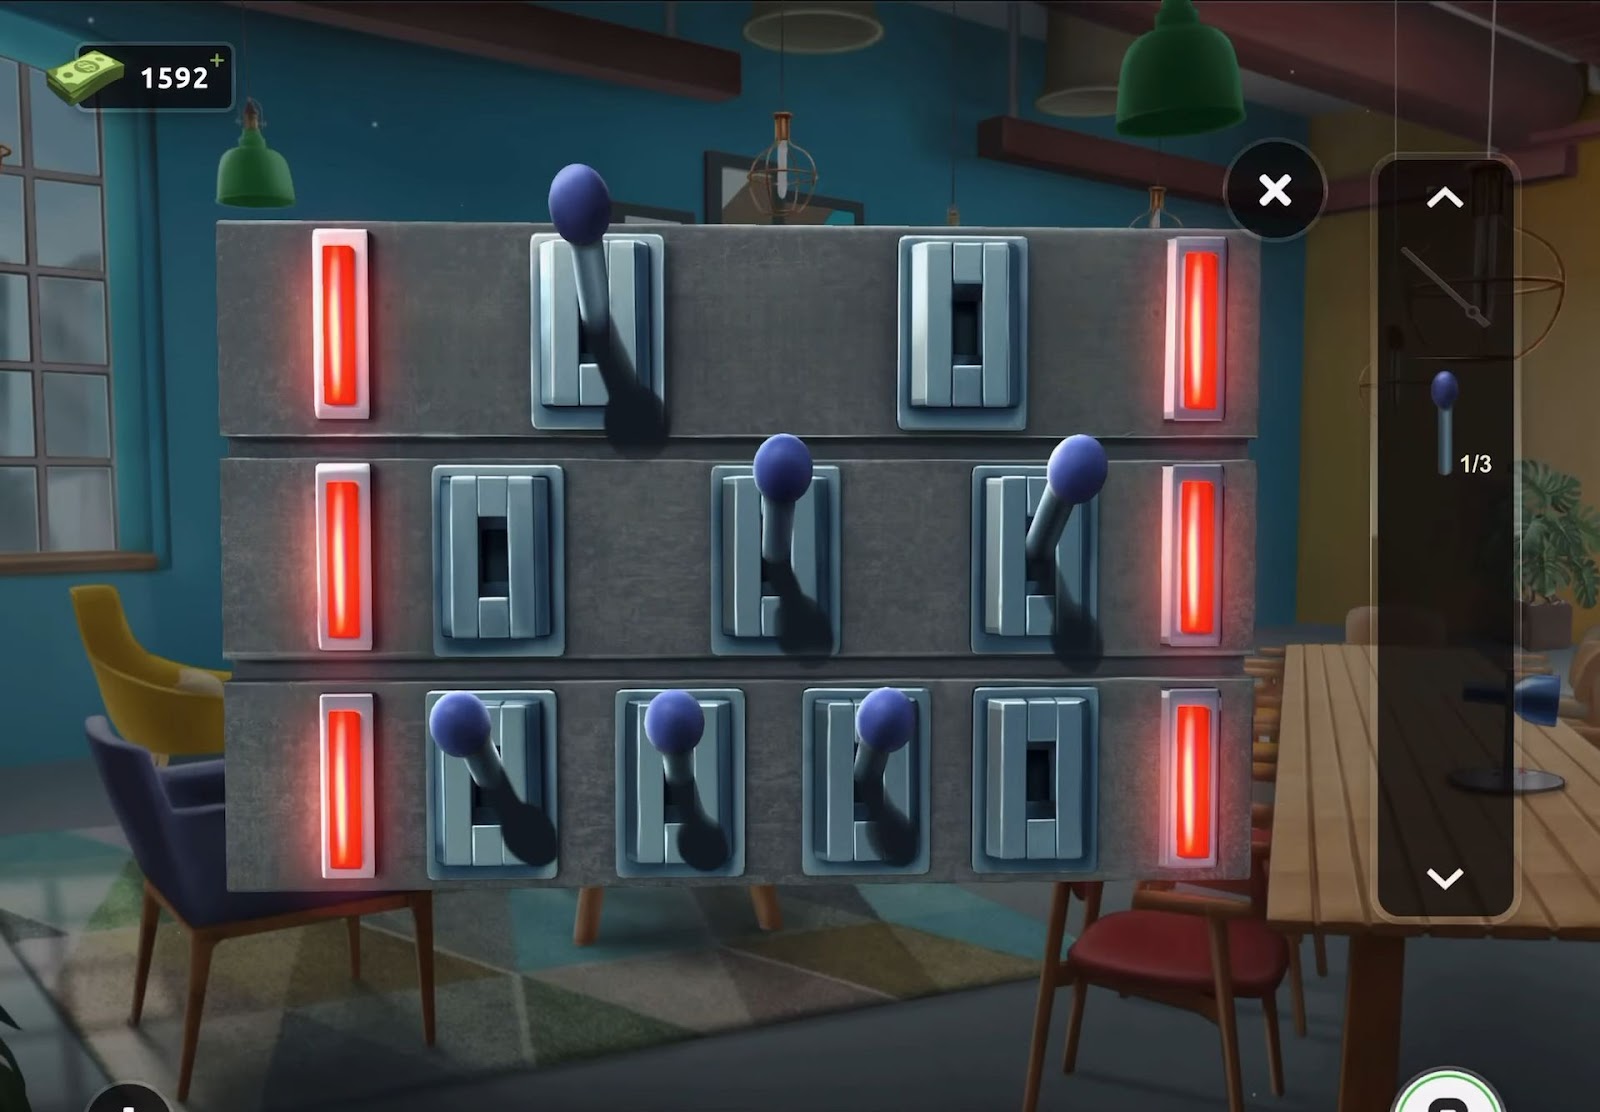
- Now incorporate the three switches into the puzzle to initiate the challenge. To proceed, tap the switches in a specific order to set them all down.
- To solve the puzzle, commence from the top and follow a process of elimination.
- Next, activate switch 2, then switch 1.
- In the second row, activate switches in the following order: 2, 3, 1.
- In the bottom row, activate switches in this order: 3, 1, 4, 2.
- Finally, with the correct sequence, the room will be escaped.
Level 36:
To complete level 36, follow the instructions below:
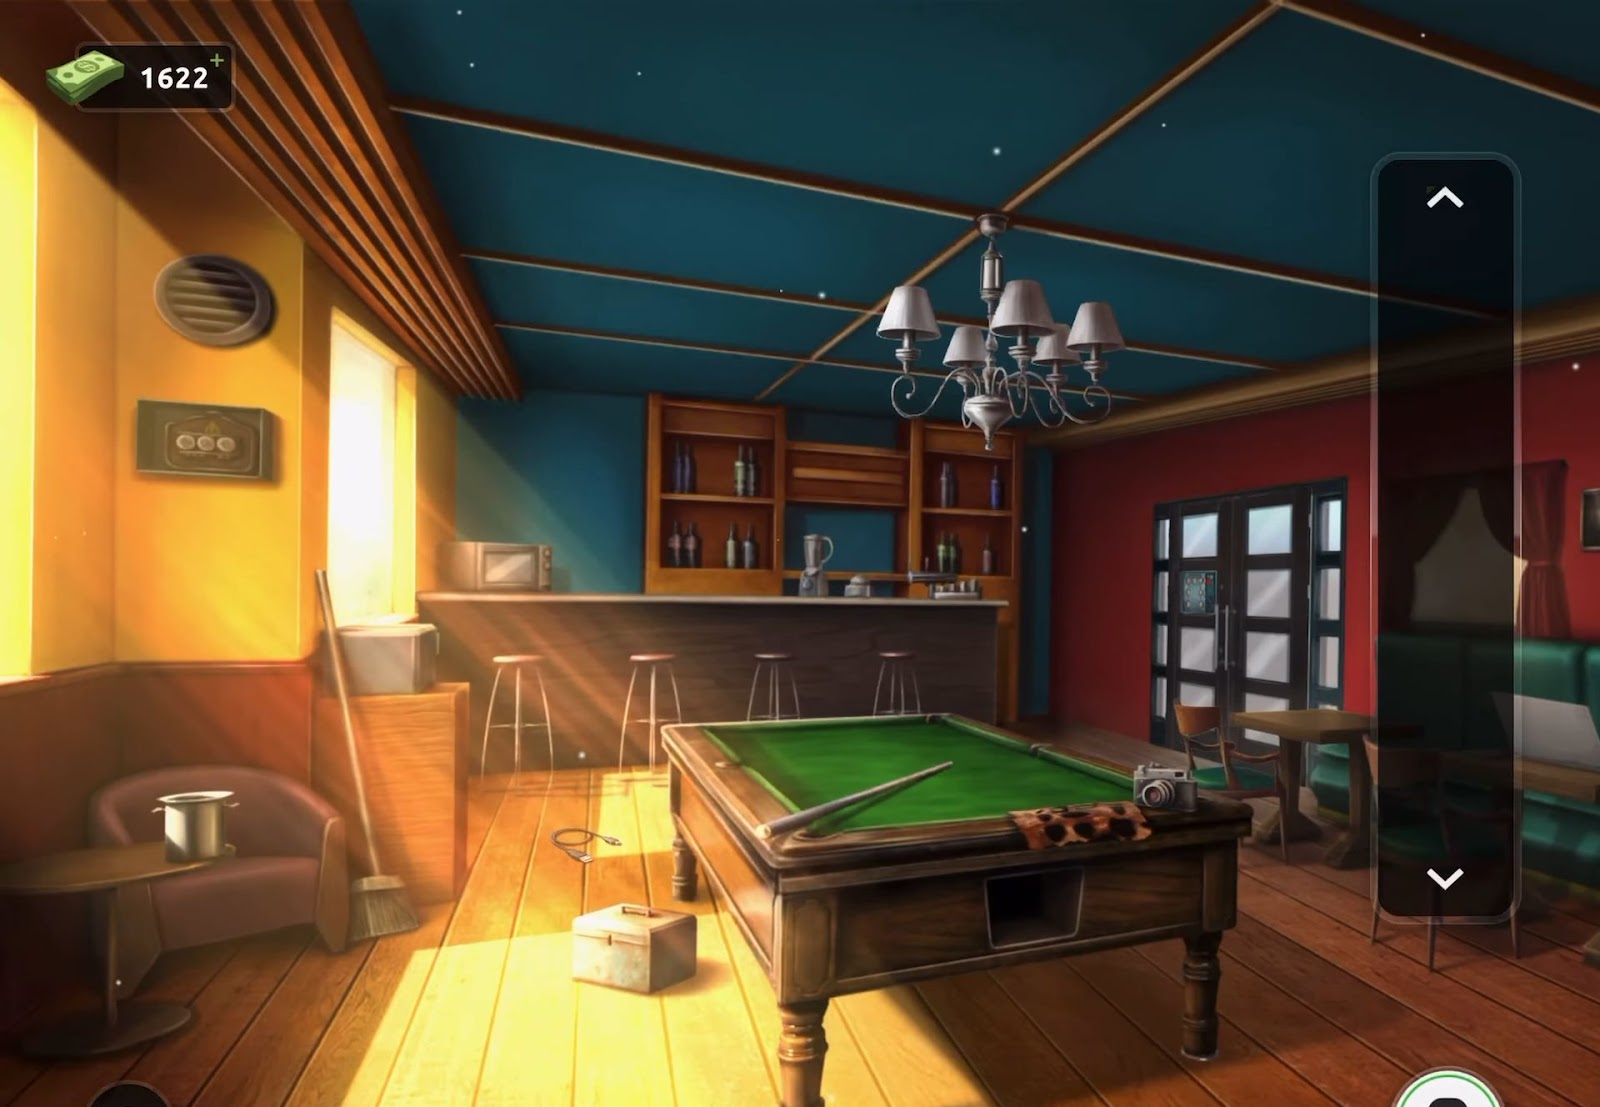
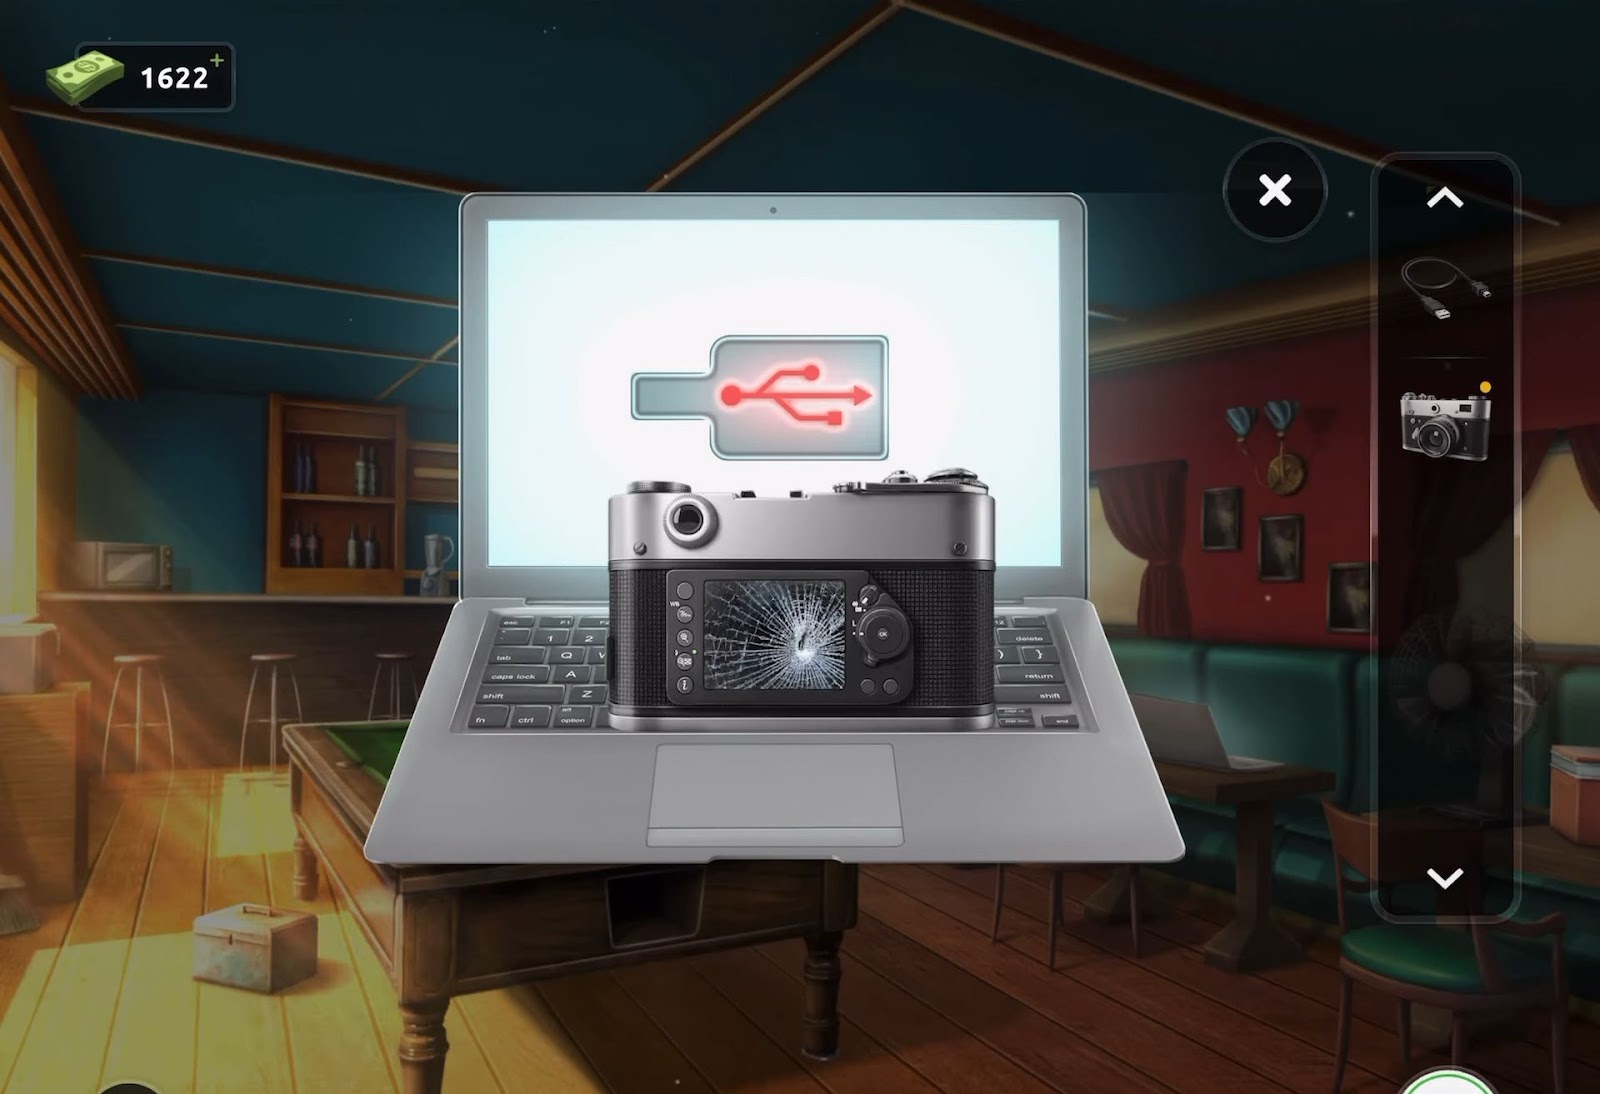
- Start by collecting the camera located on the snooker table. Also, find a USB cable on the floor to the left of the table.
- Then, access your inventory and combine the camera with the USB cable.
- Next, examine the exit door and observe the arrangement of 7 lights on the left side.
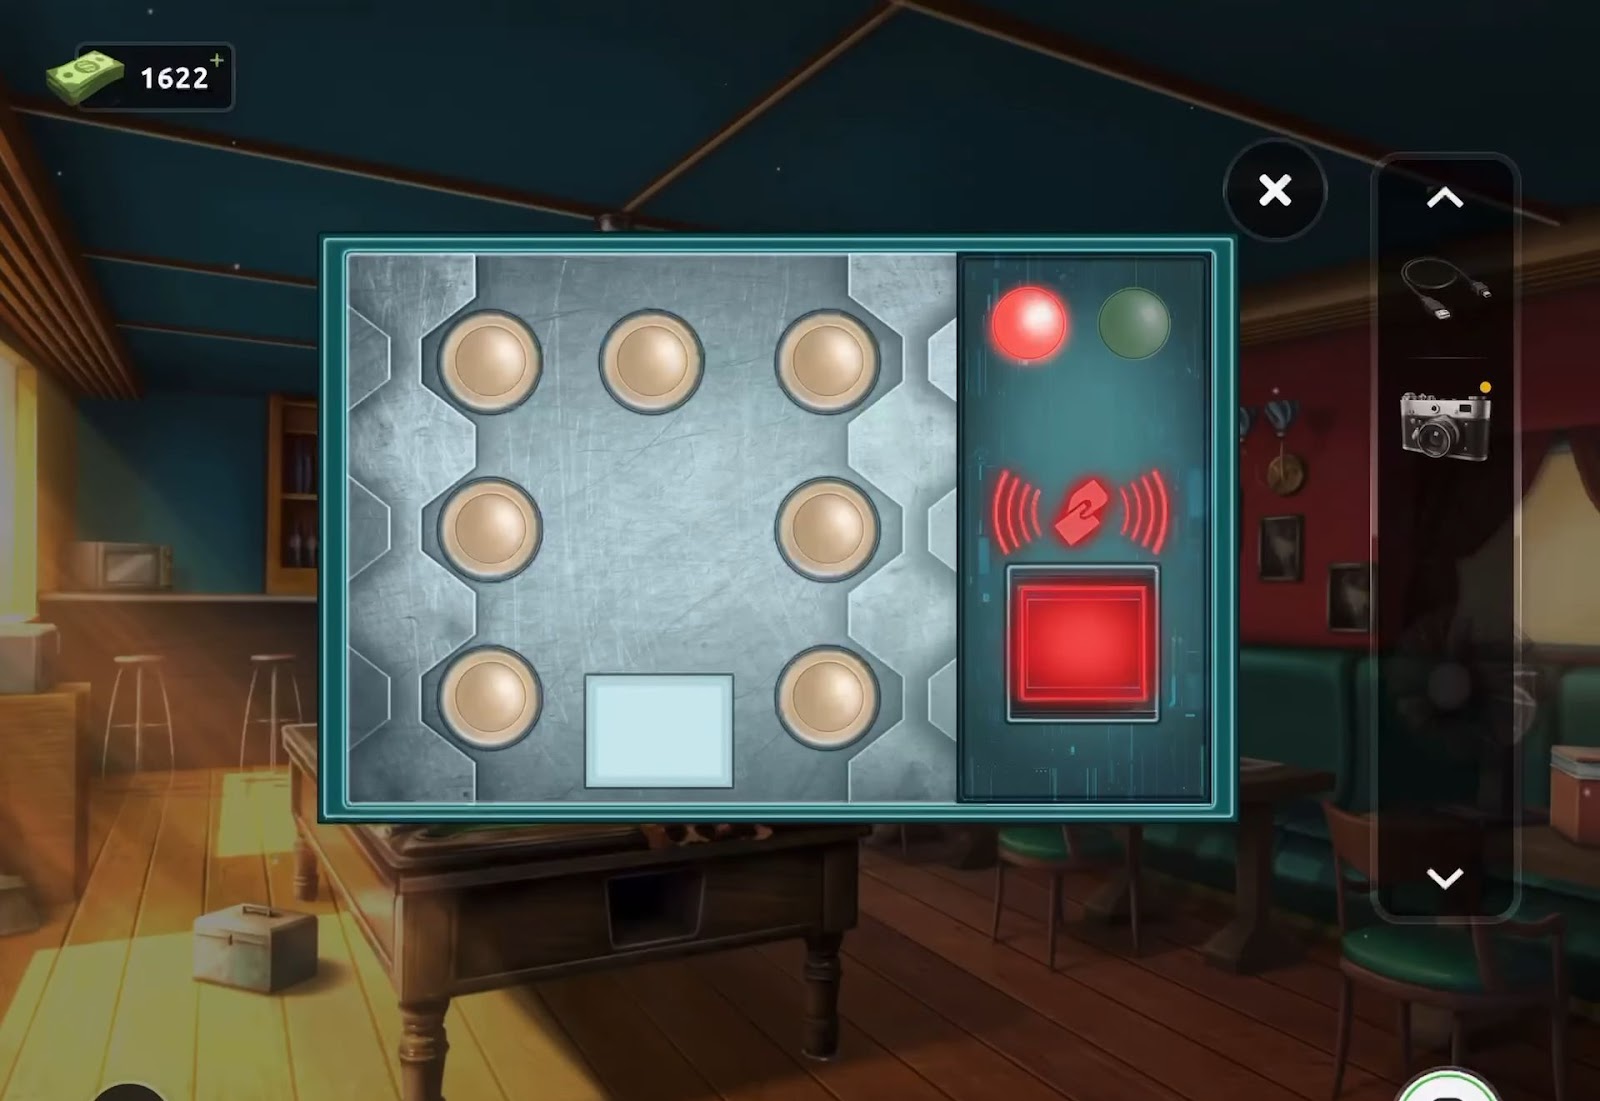
- After that, tap the square button located at the bottom to reveal a flashing light sequence. Memorize this sequence.
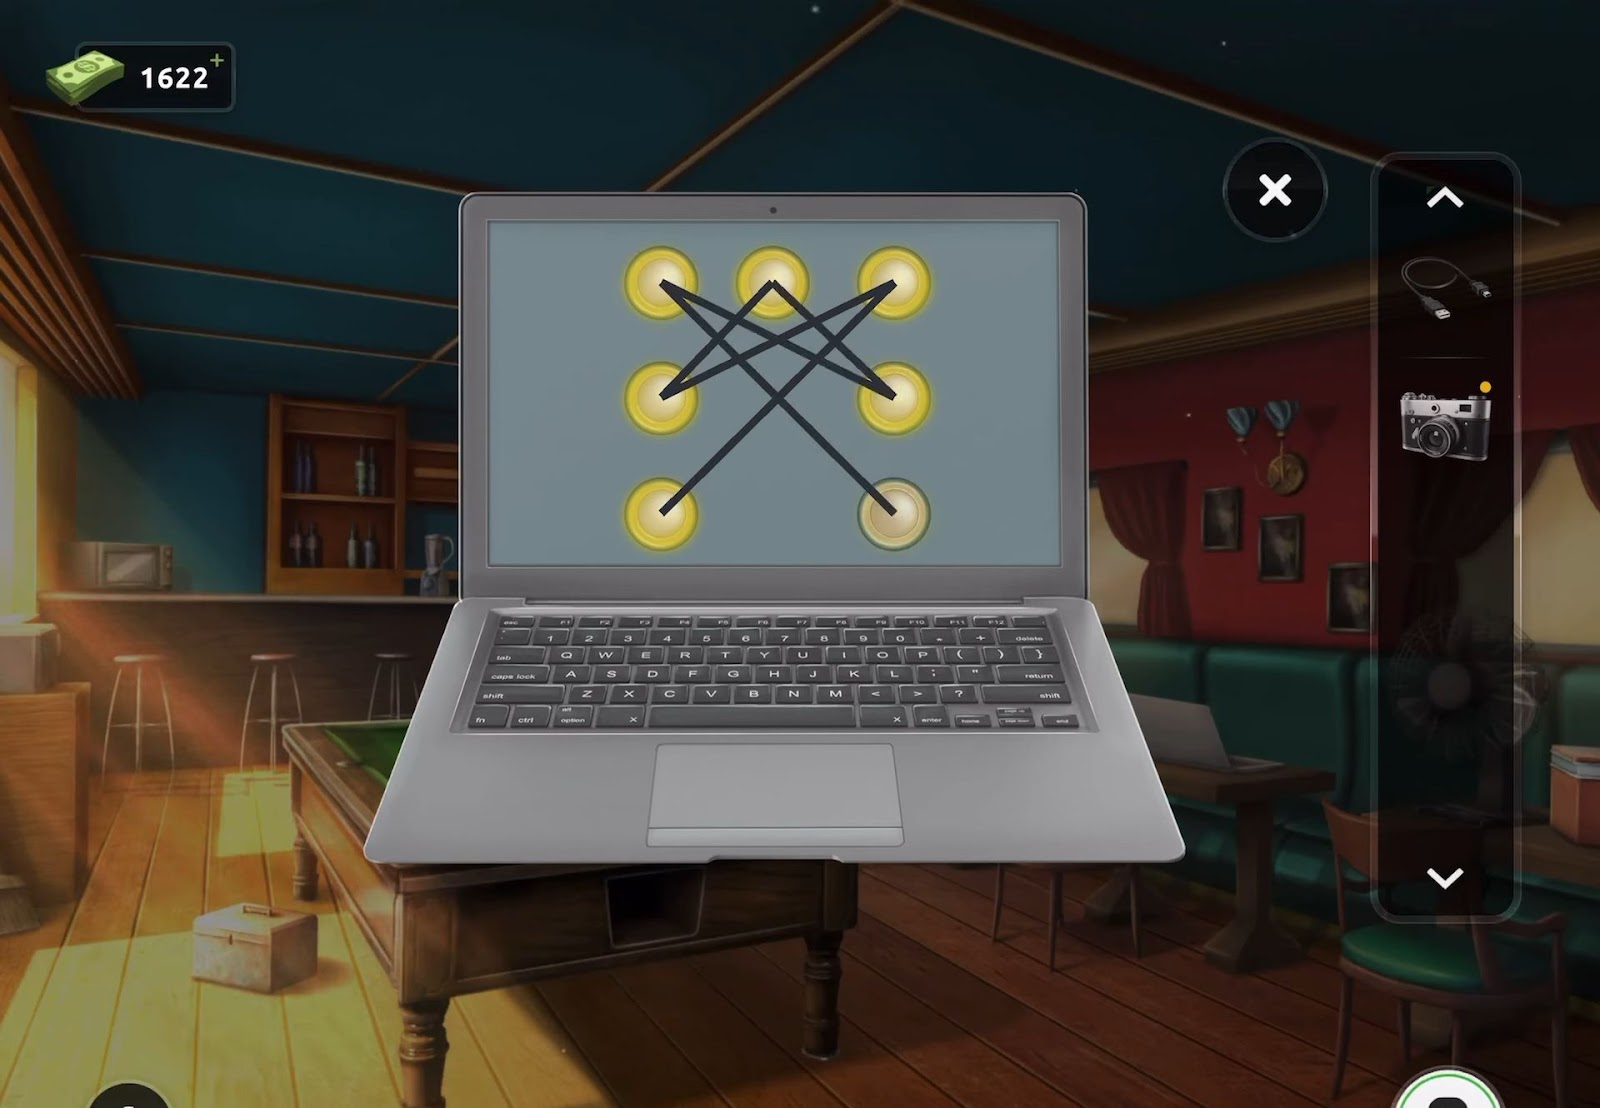
- Then, proceed to inspect the laptop positioned on the right side of the room.
- Now, replicate the light sequence shown on the screen to access the laptop. Begin from the bottom left side.
- Next, insert the camera attached to the cable into the unlocked laptop. An image will be revealed.
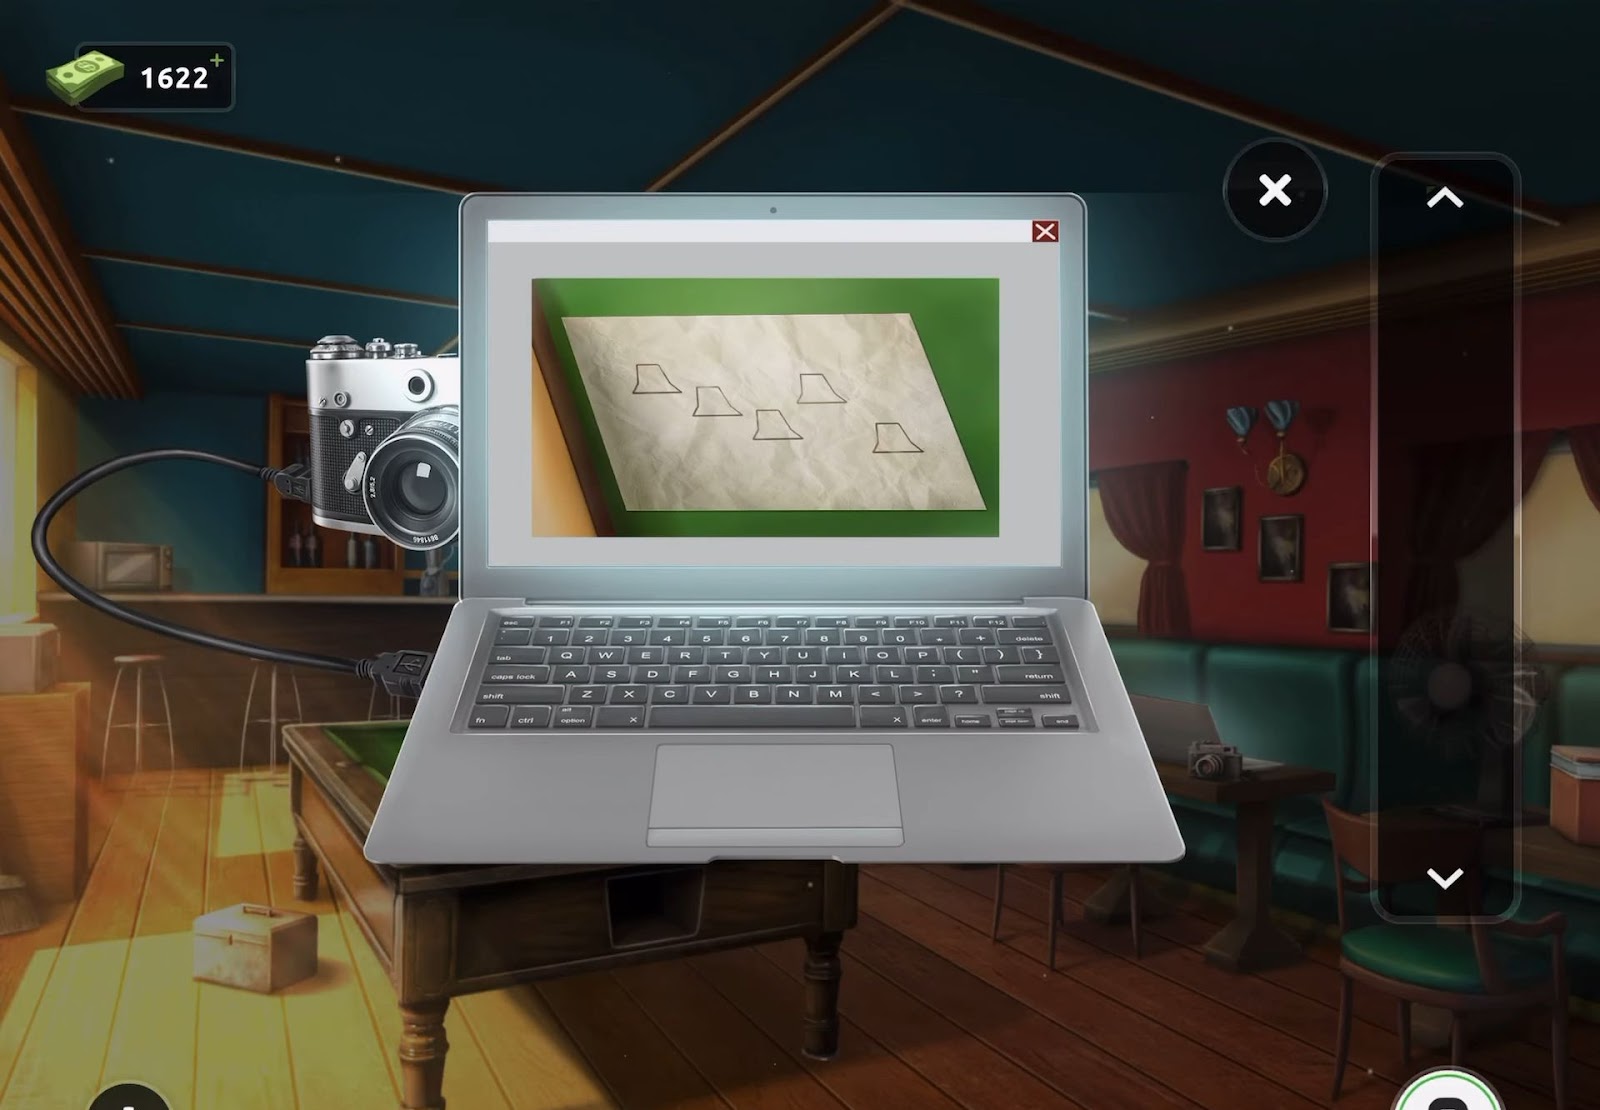
- Then tap to examine the ceiling lights.
- Now adjust the lamp heights to match the pattern depicted in the laptop image.
- After that, obtain the key card from atop the light. Revisit the exit door and utilize the key card on the right to unlock it.
- Finally, the door will be opened, and you can escape through it.
Level 37:
To complete level 37, follow the instructions below:
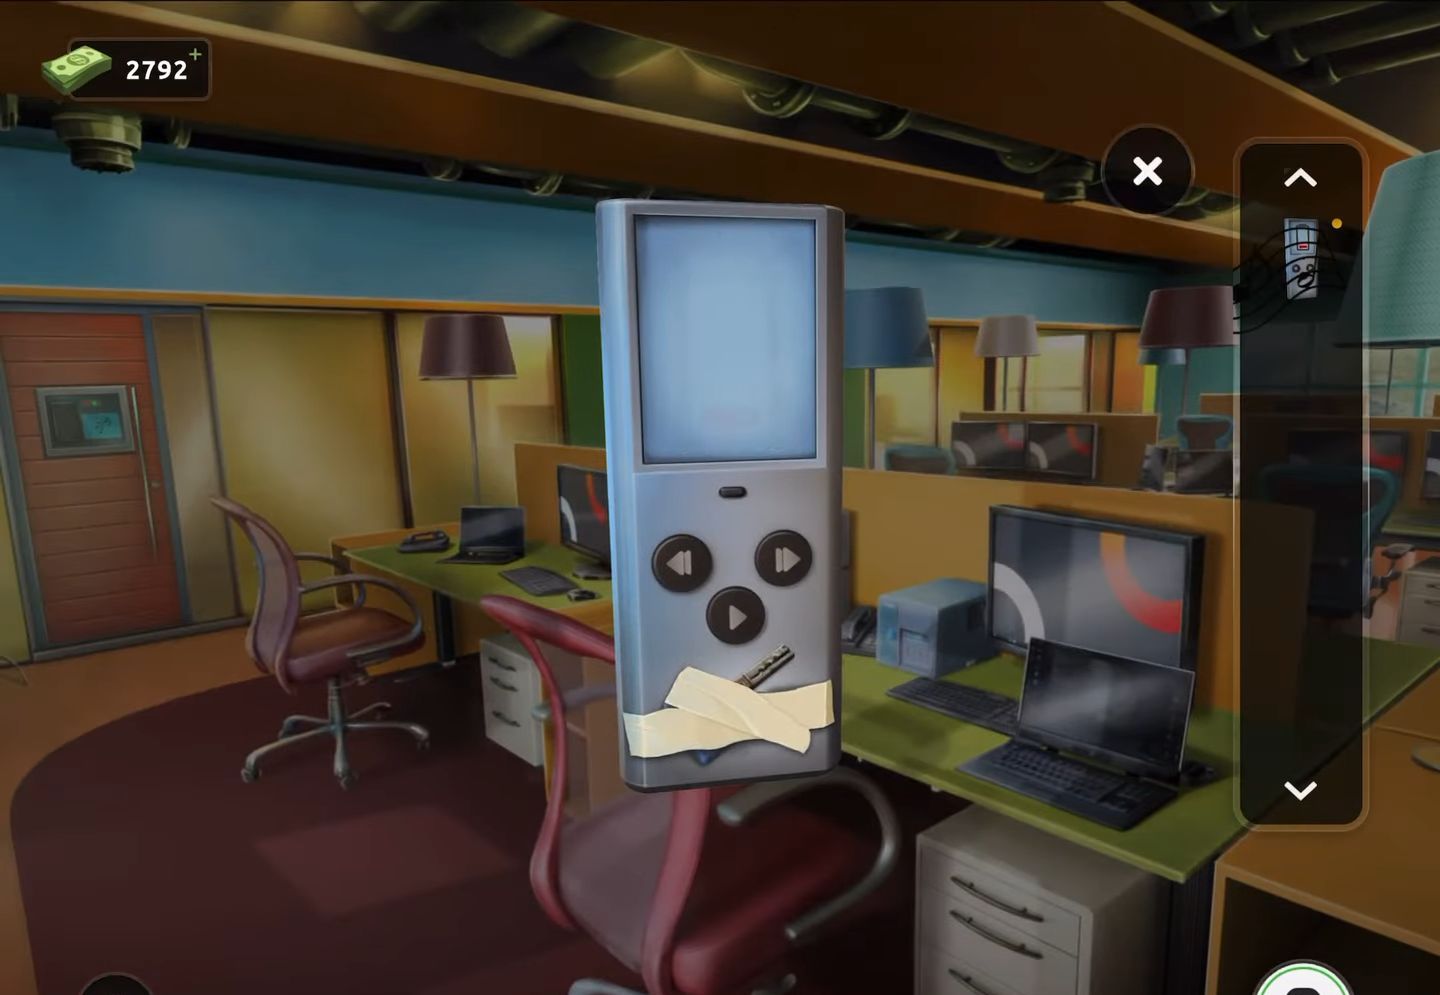
- Begin by inspecting the disassembled remote control parts placed on the desk.
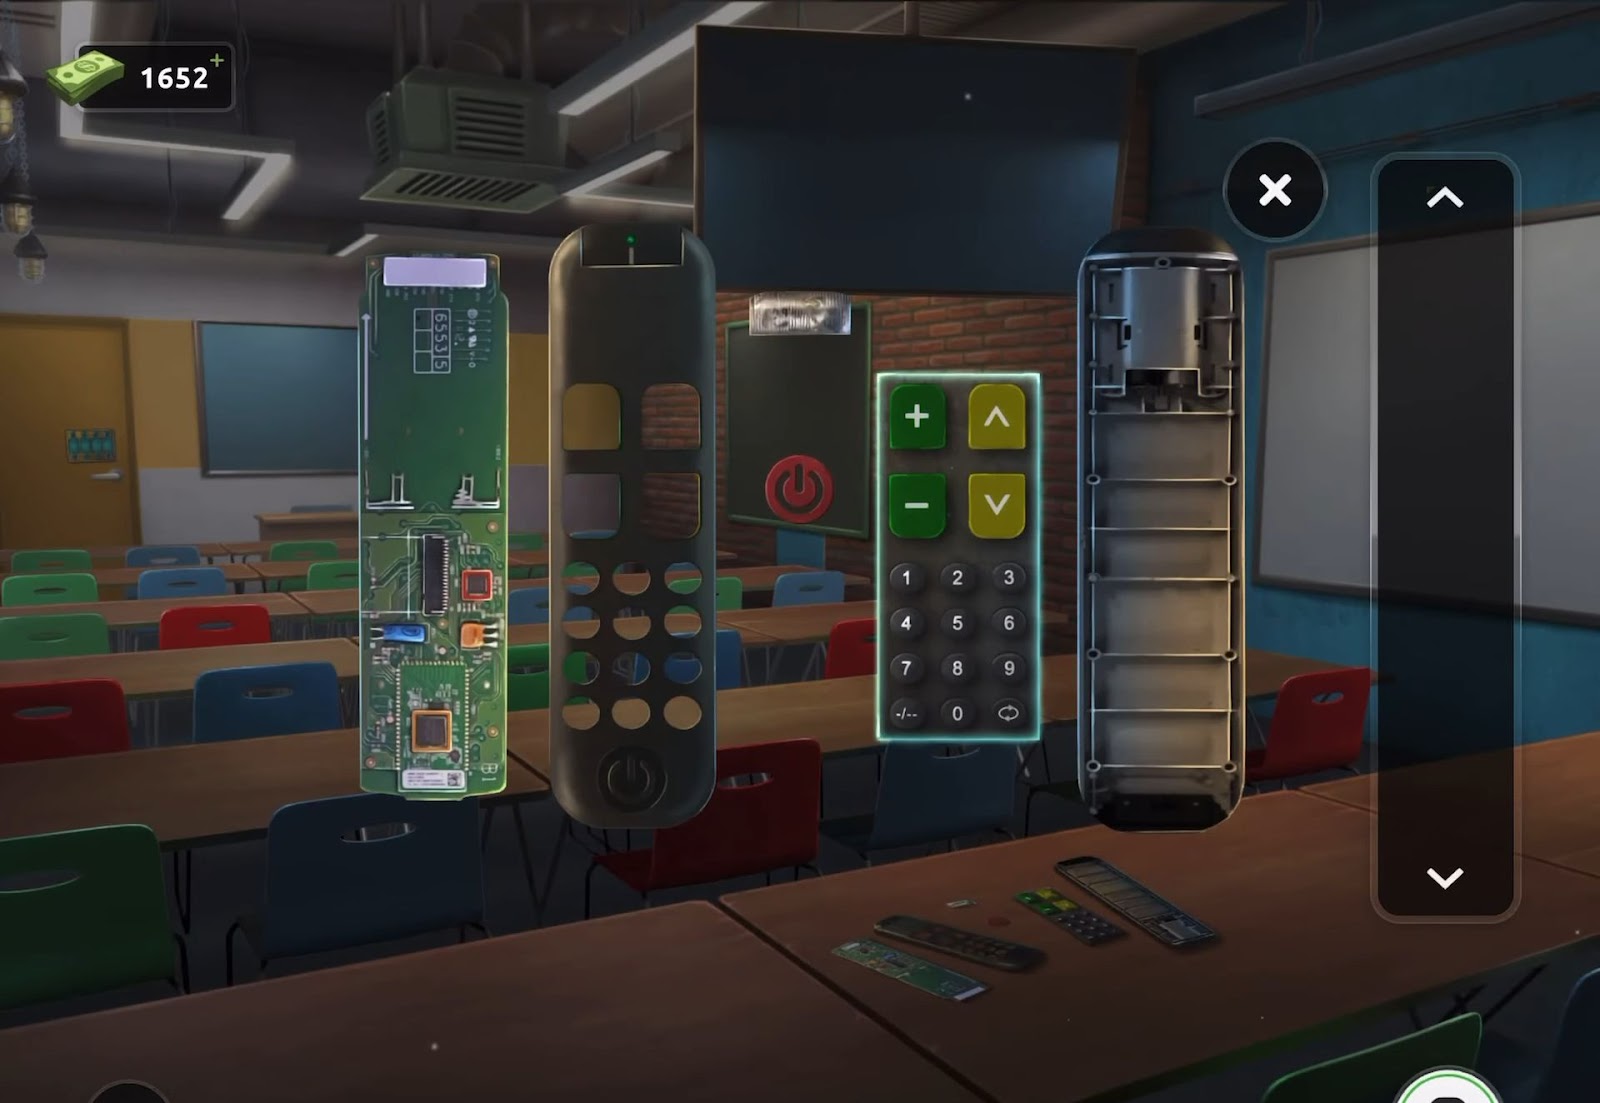
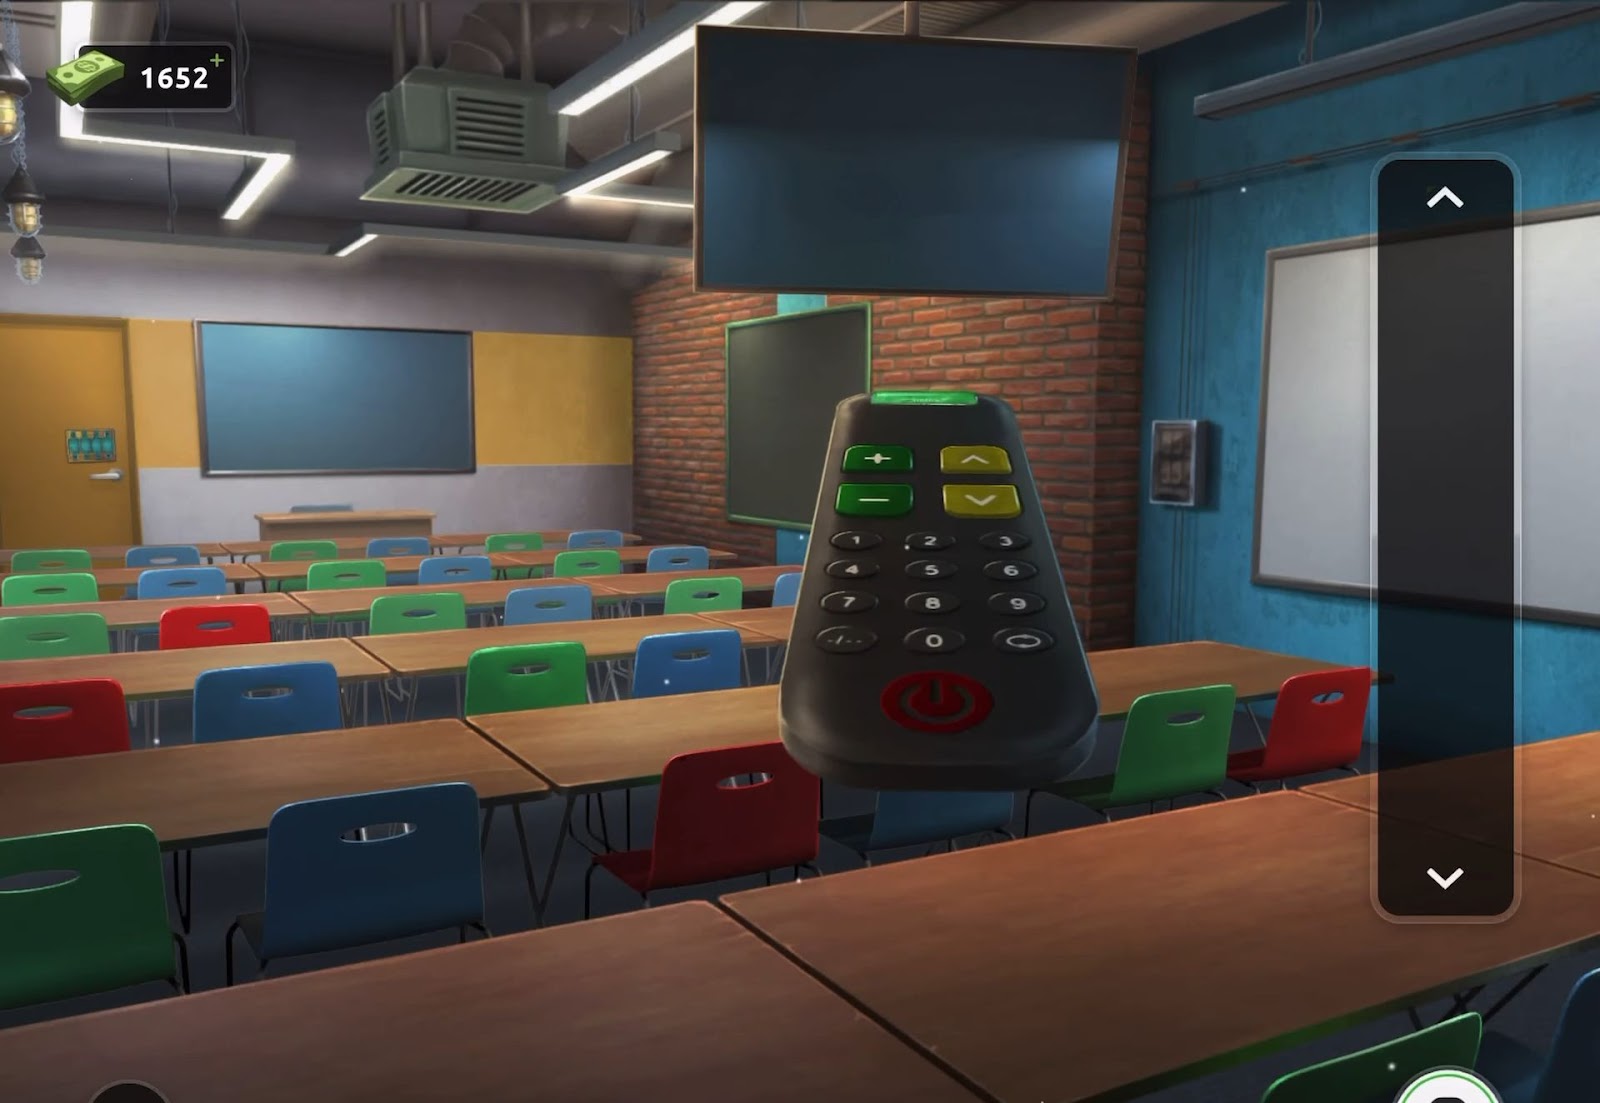
- Next, assemble the remote by tapping on each piece in the correct order.
- Then utilize the reassembled remote on the sizable screen suspended to the right. An image with a hint will be displayed.
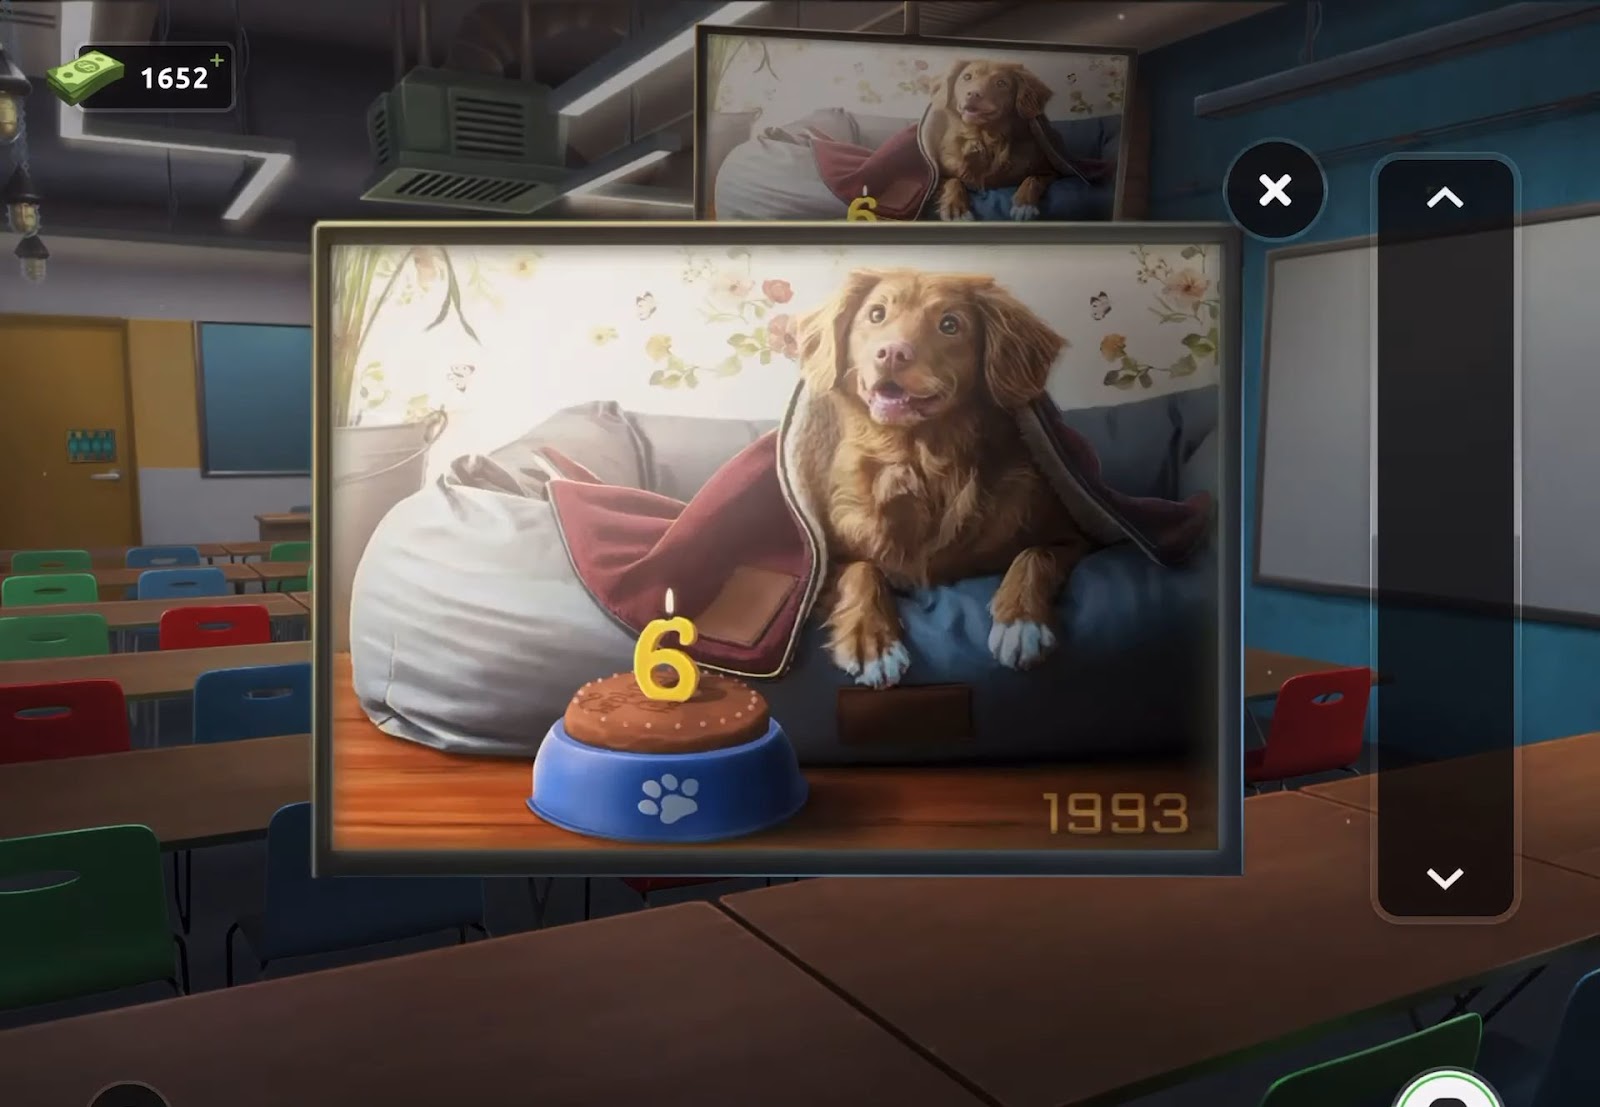
- After that, proceed to the exit door and input the code (1987) derived from the clue.
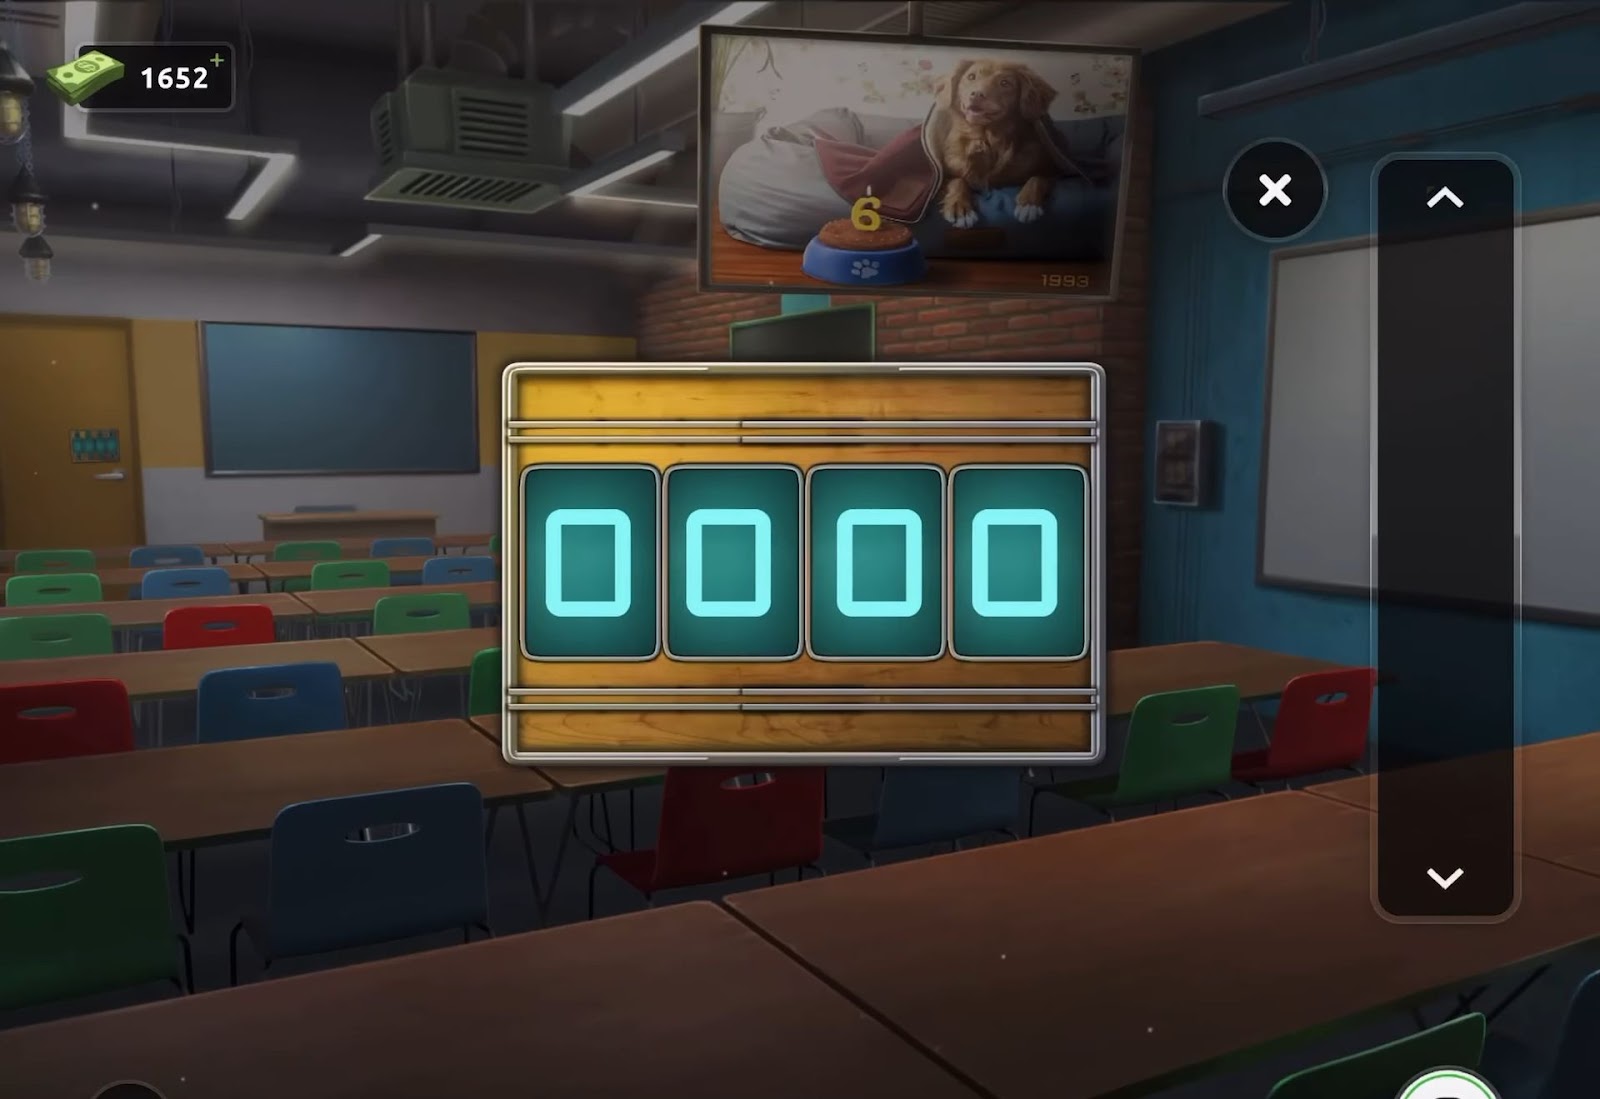
- Finally, exit through the door to proceed to the next level.
Level 38:
To complete level 38, follow the instructions below:
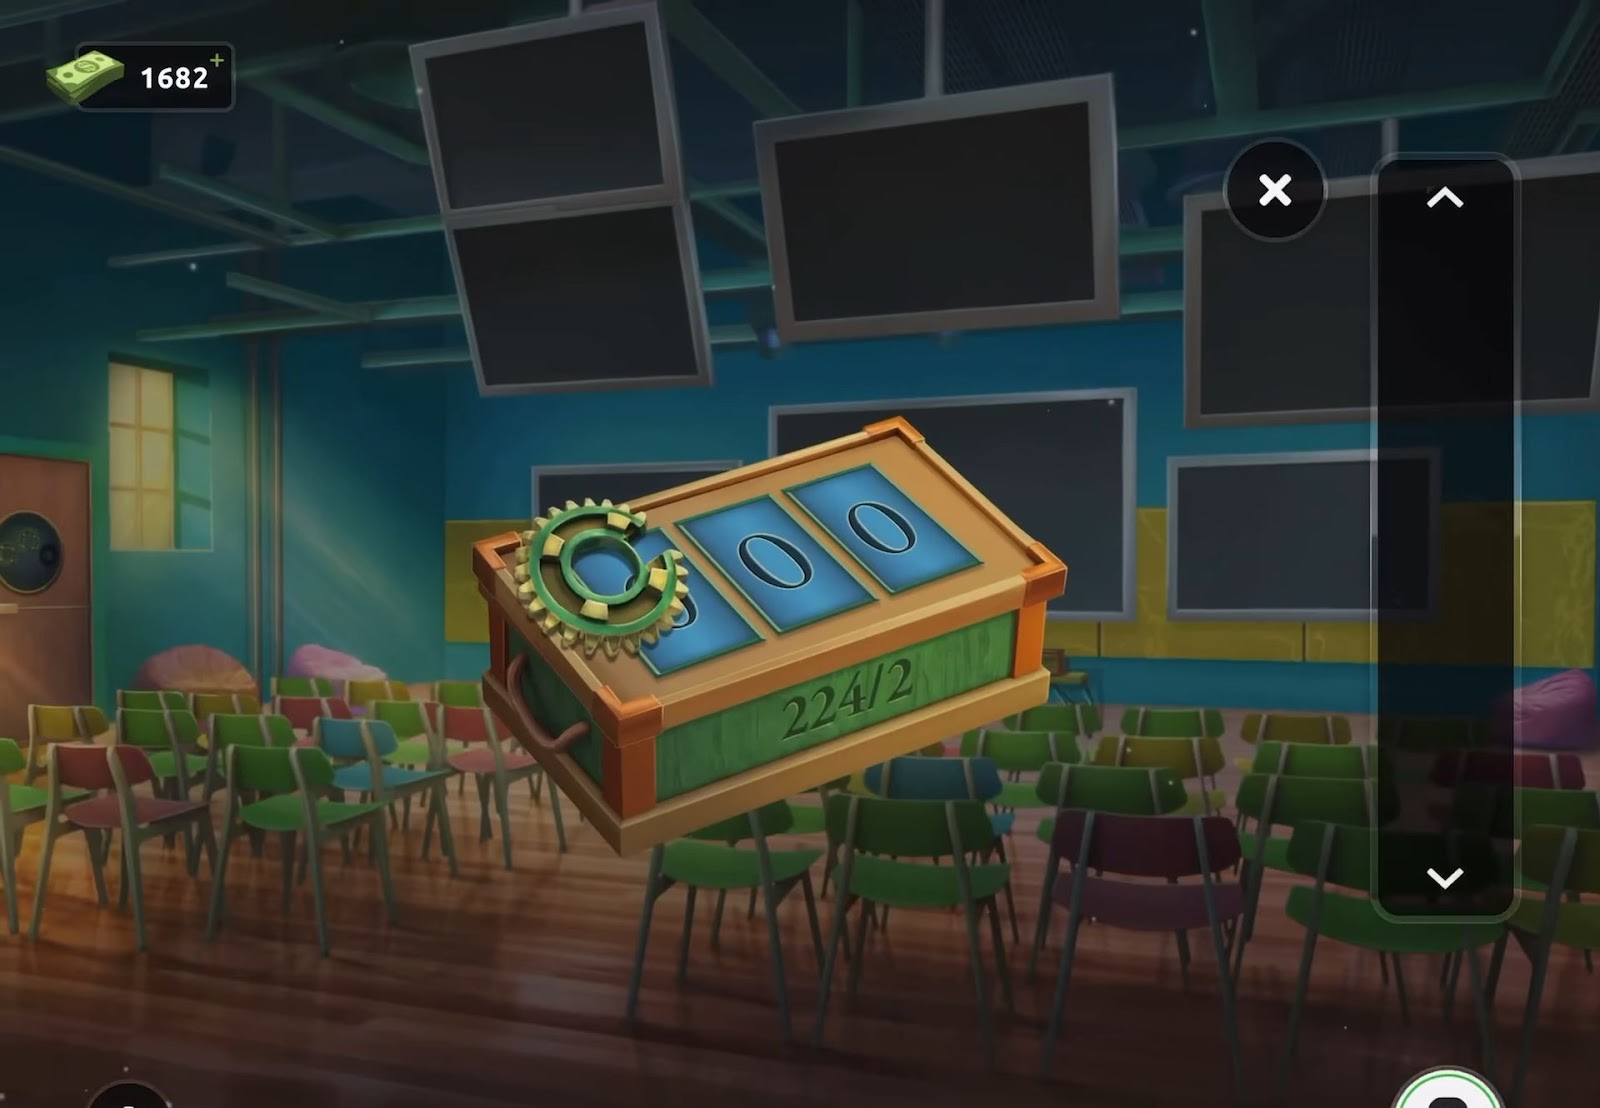
- Start by examining the small box located on the table positioned at the rear of the room beneath the large screens.
- Then retrieve the cogwheel from the box and take note of the clue inscribed on its side.
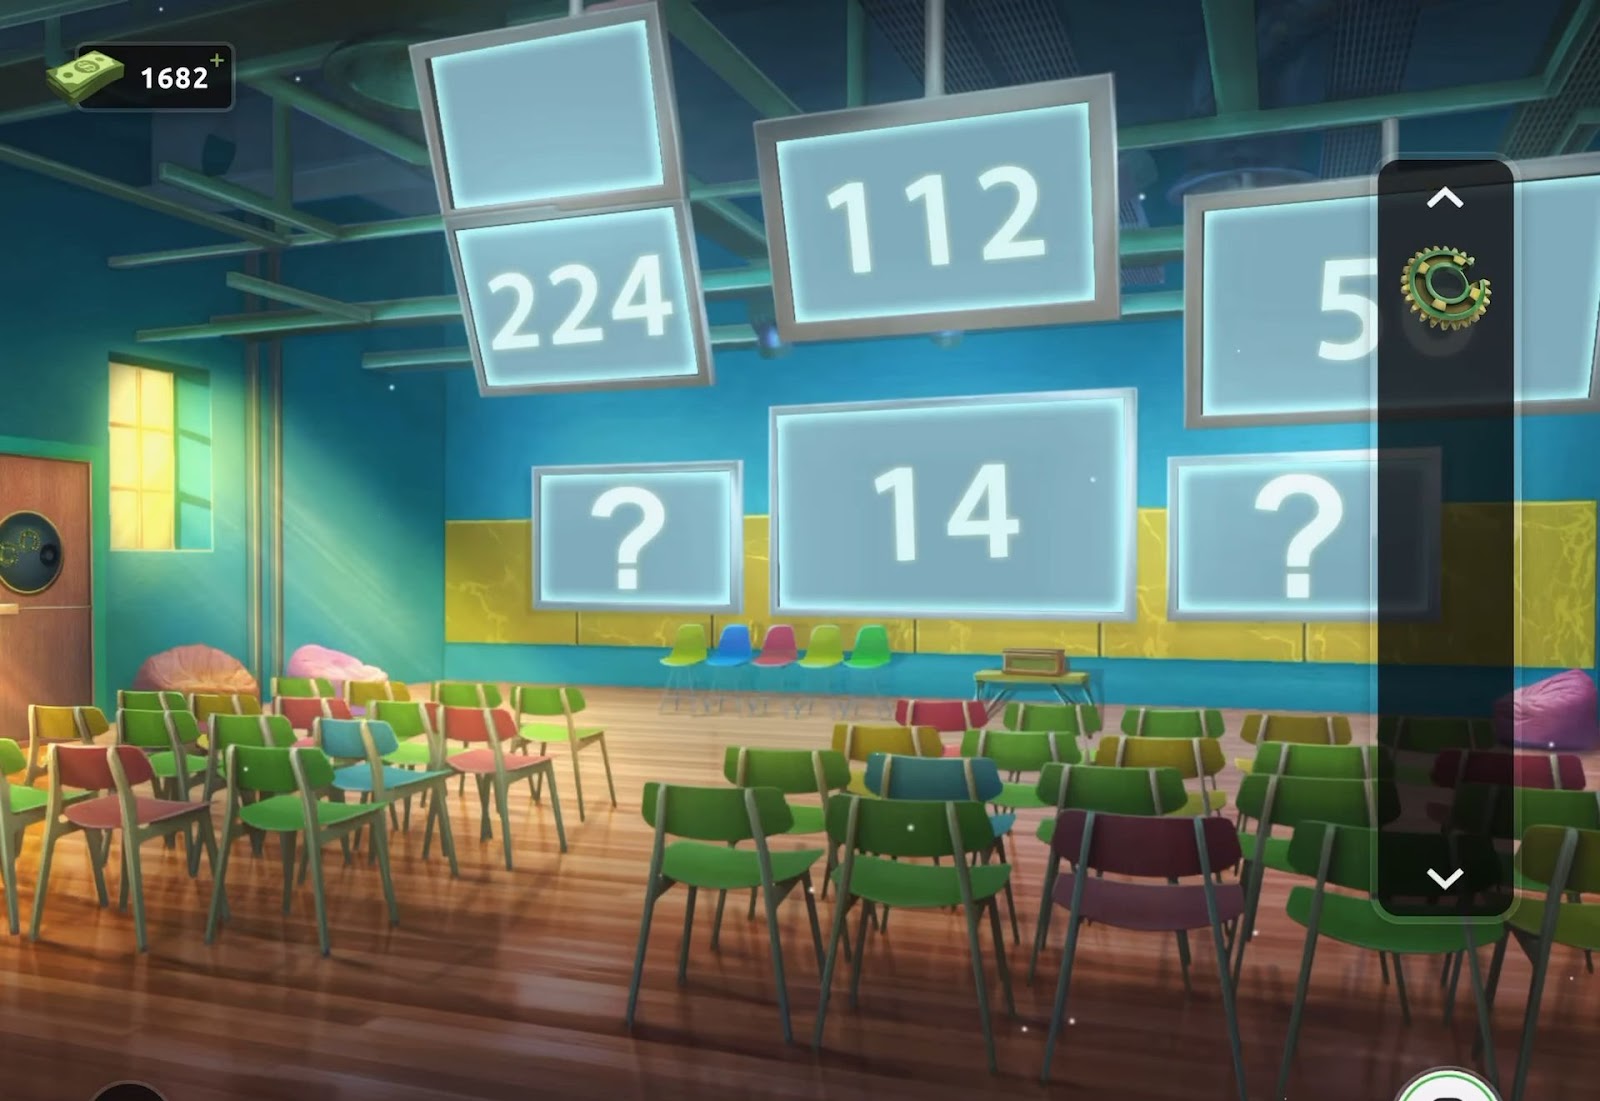
- Next, activate the large screens. They’ll display a sequence of numbers. Utilize the provided clue and the sequence to deduce the missing numbers.
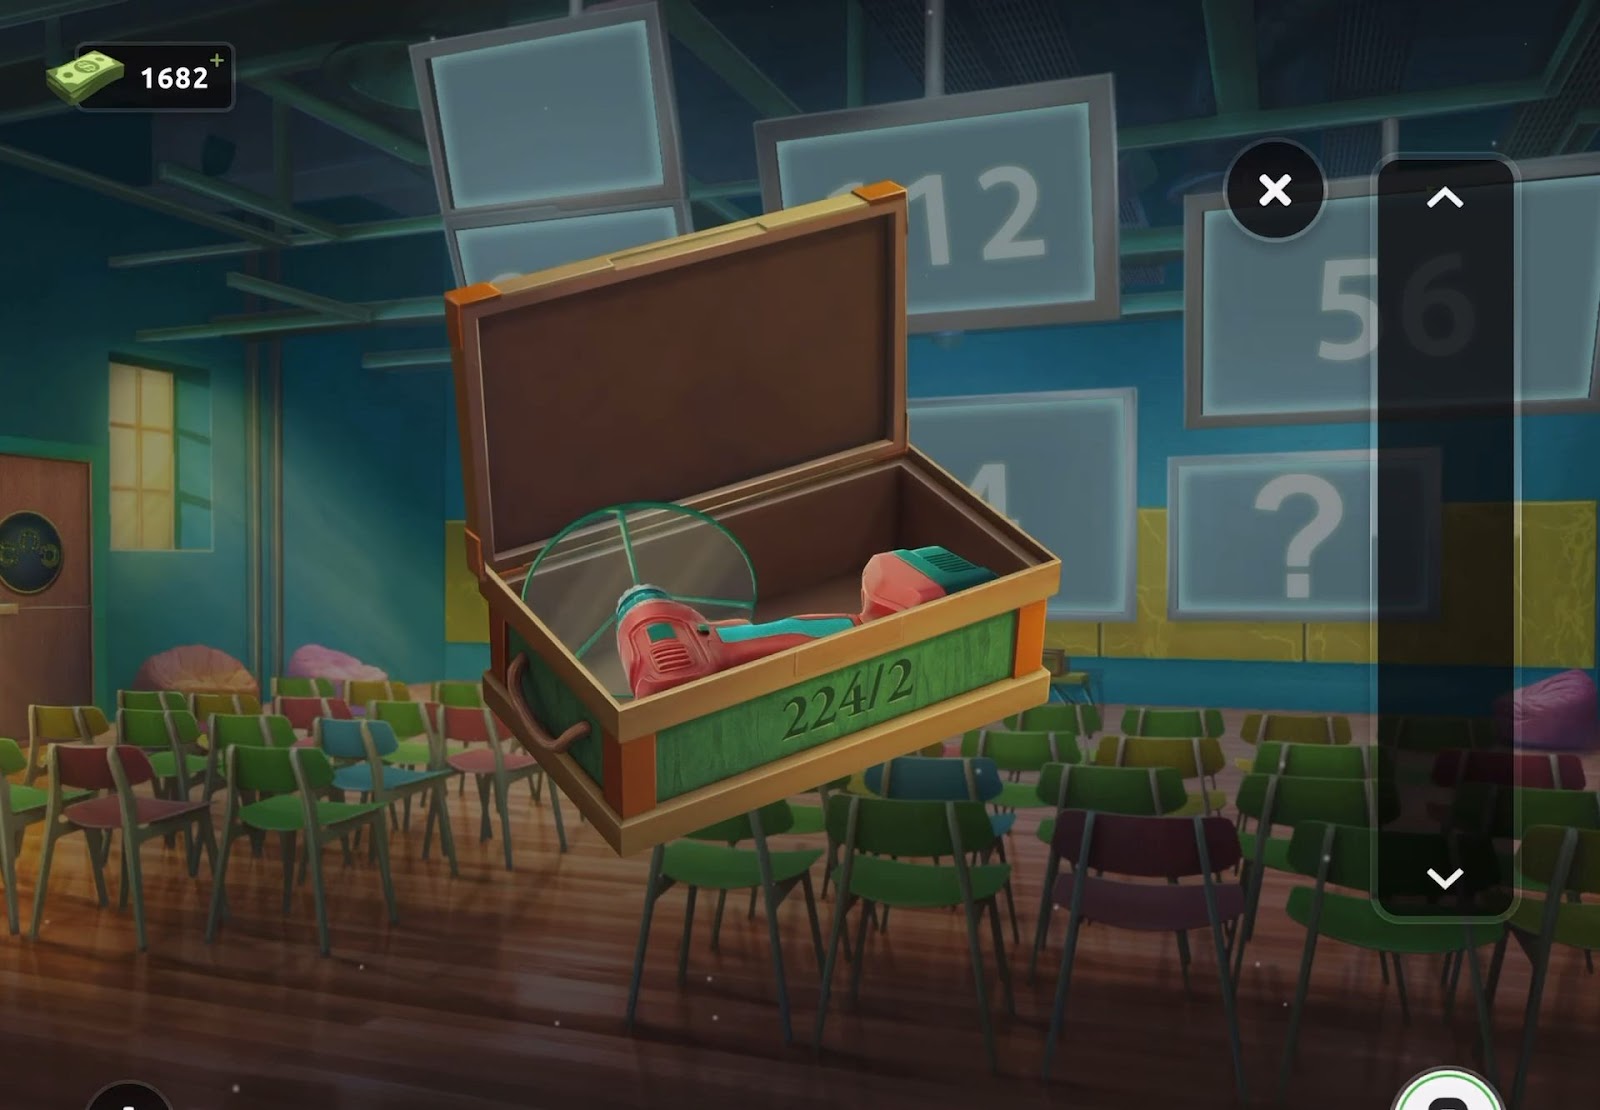
- Now revisit the box and apply the previously deciphered clue to obtain the code (287) required to unlock it.
- After that, grab a device contained inside the opened box.
- Then proceed to the door and integrate the third cog into its mechanism.
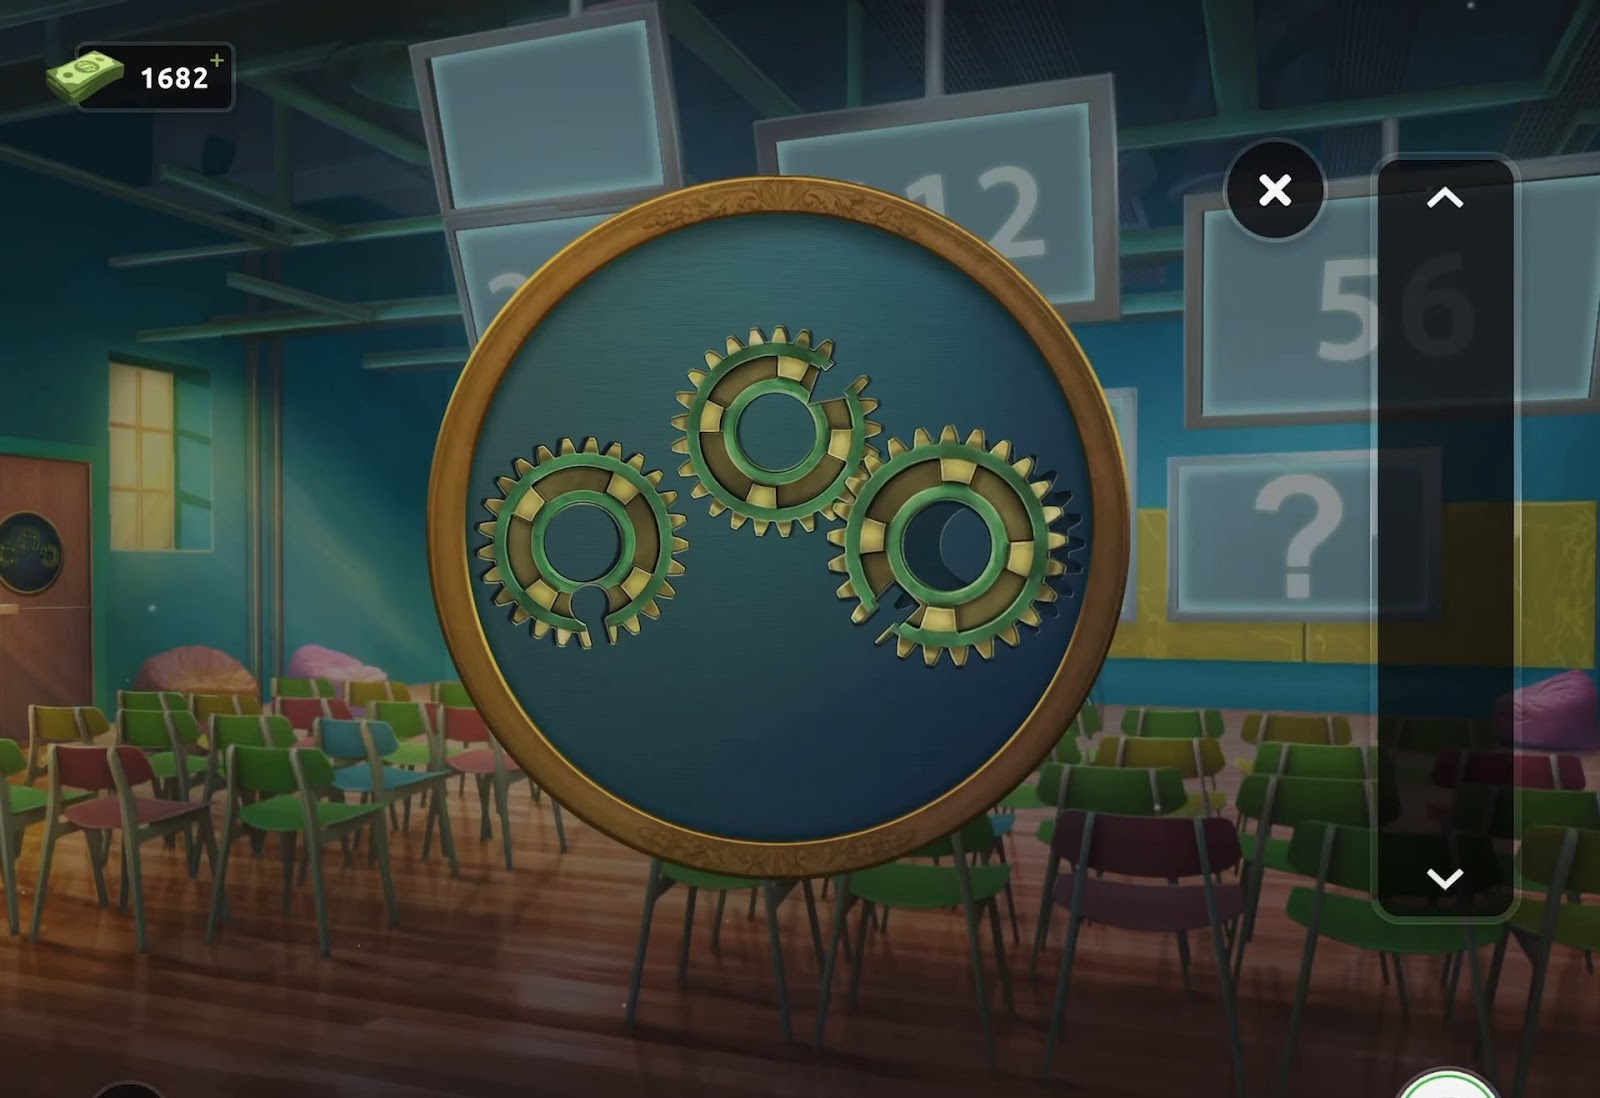
- Next, employ the device on the door’s mechanism, which will reveal a specific pattern.
- Now adjust the cogs to align with the revealed pattern. Rotating one may affect the others.
- Upon successfully aligning the cogs, the door will unlock, allowing you to escape from the room.
Level 39:
To complete level 39, follow the instructions below:
- Firstly, obtain a blue and black switch from the chair situated on the right side of the room.
- Then interact with the light switch by the door to close the blind on the window, resulting in a darkened room.
- Next, proceed to the round table to the left and view the projector. Attach the blue and black switch to the left side of the projector.
- After that, turn on the switch, illuminating an image projected onto the wall.
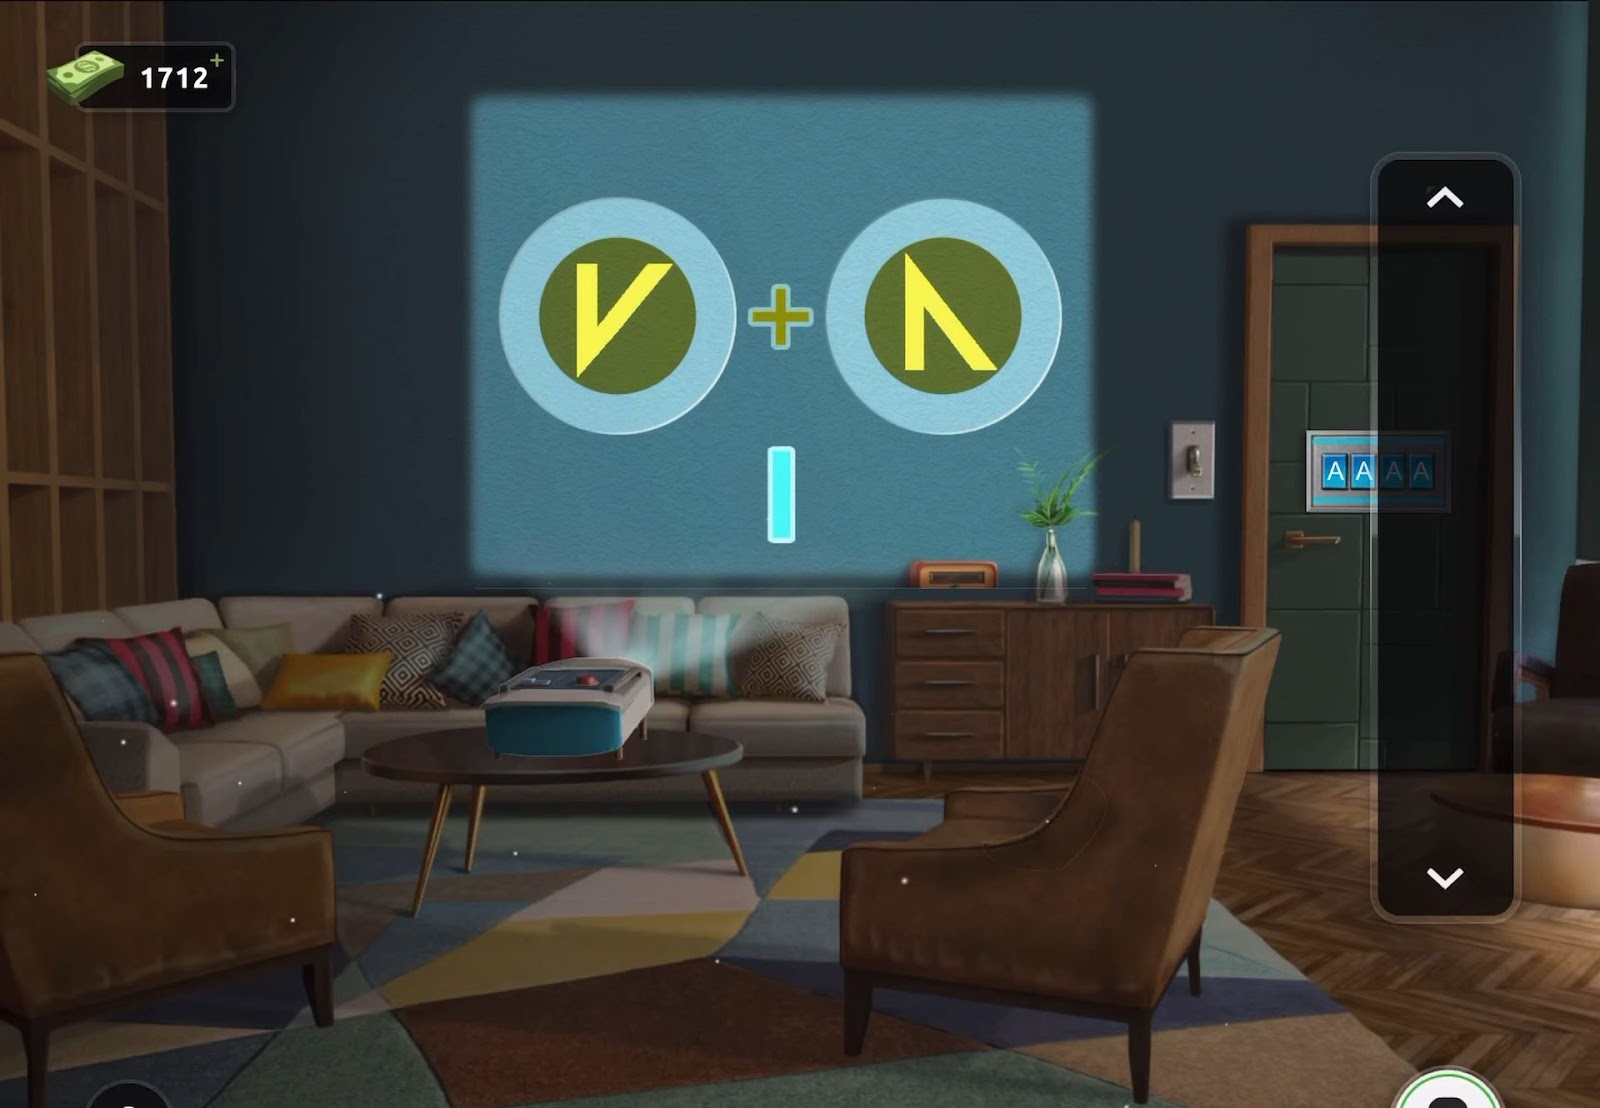
- Now examine the shapes in the first image and deduce the letter that can be formed by combining them.
- Subsequently, revisit the projector and manipulate the control on the right to rotate it.
- Then observe the wall again to reveal a different clue, denoted as image 2, and repeat the process to extract four letters.
- After that approach the exit door and access the code lock.
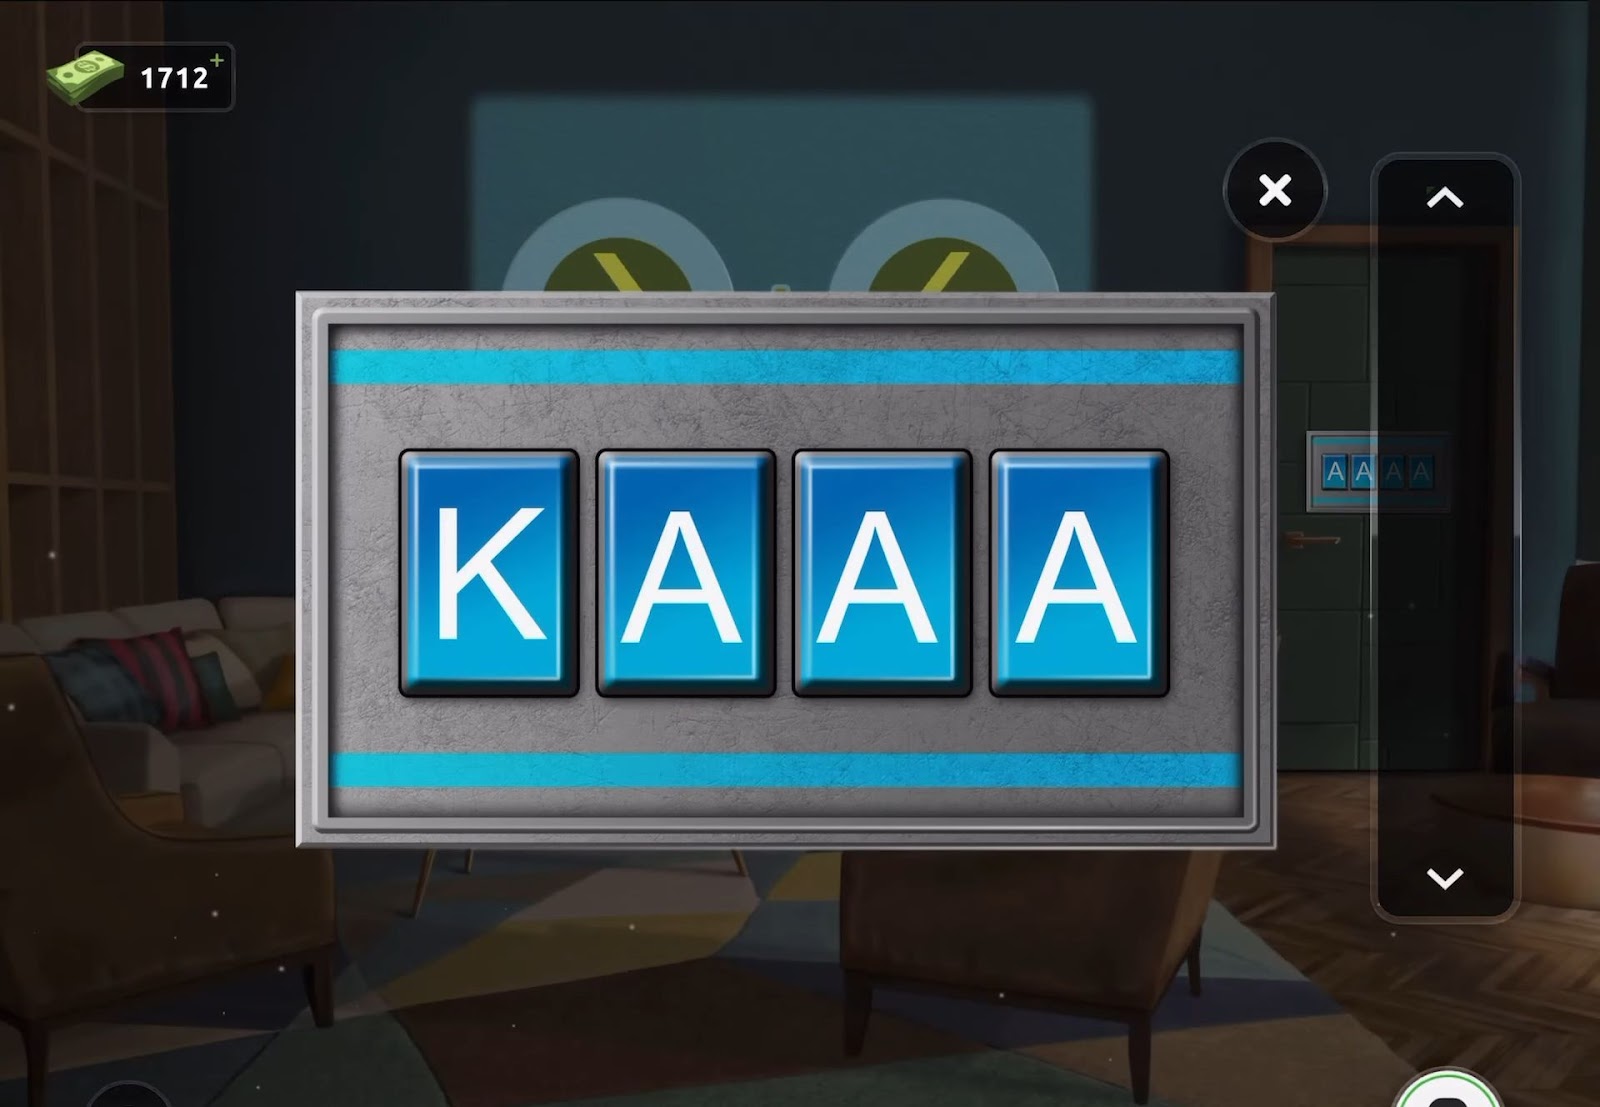
- Next, input the four-letter code (KXPE) to unlock the door.
- Finally, exit through the door to proceed to the next level.
Level 40:
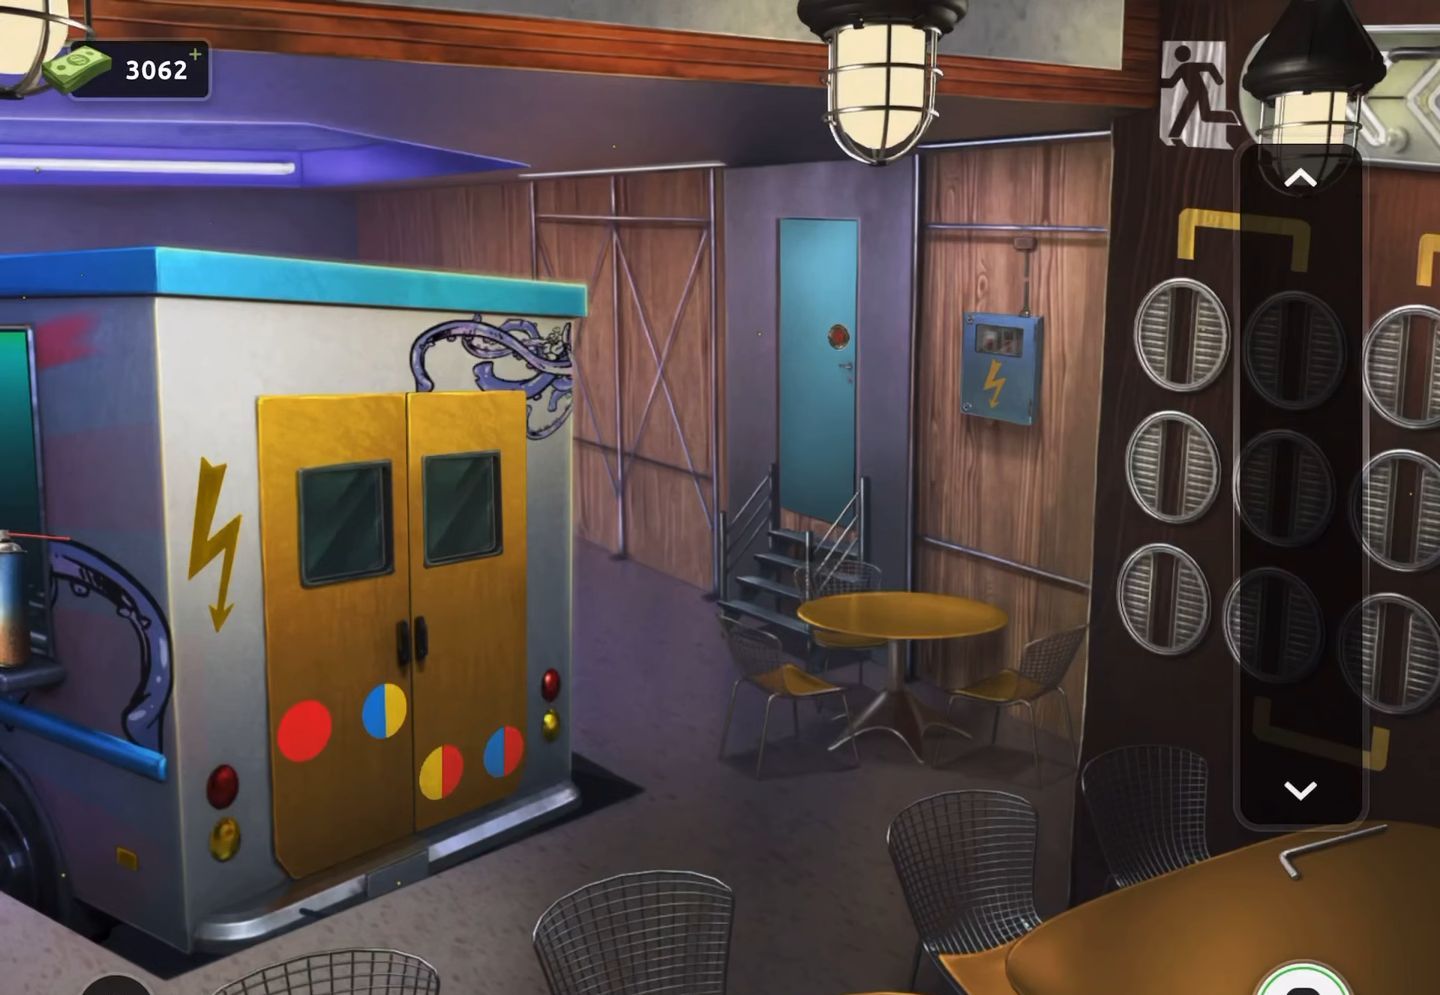
To complete level 40, follow the instructions below:
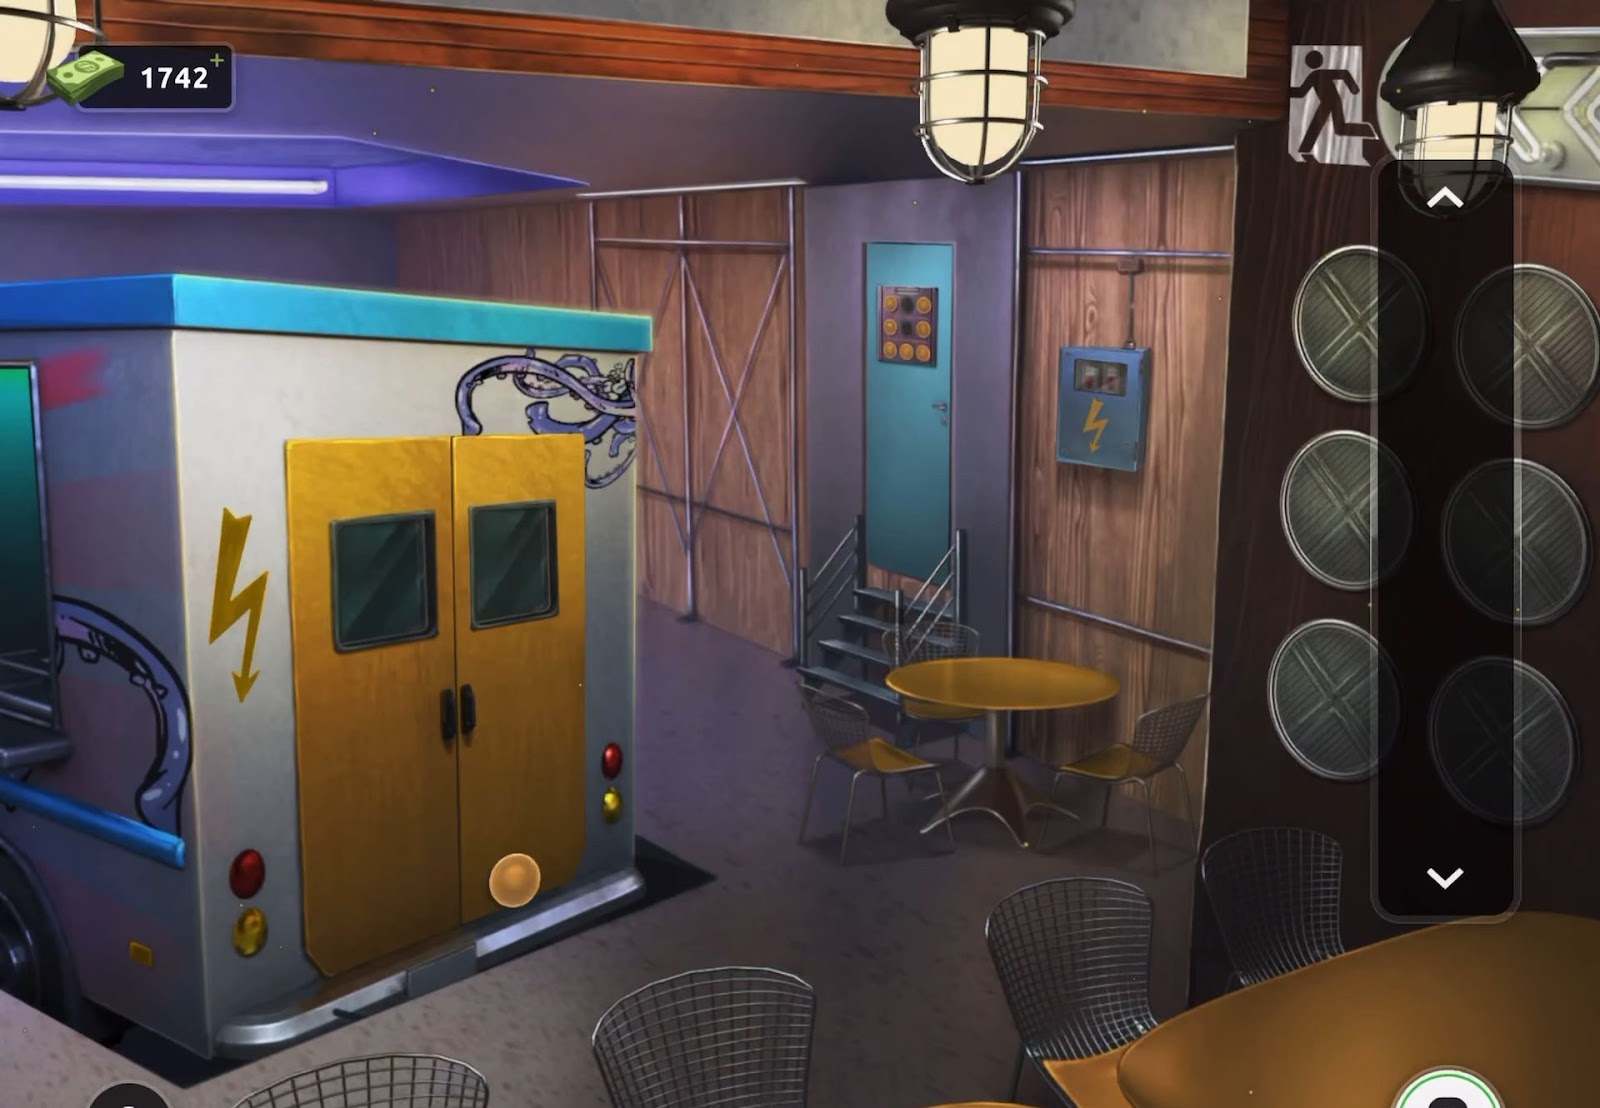
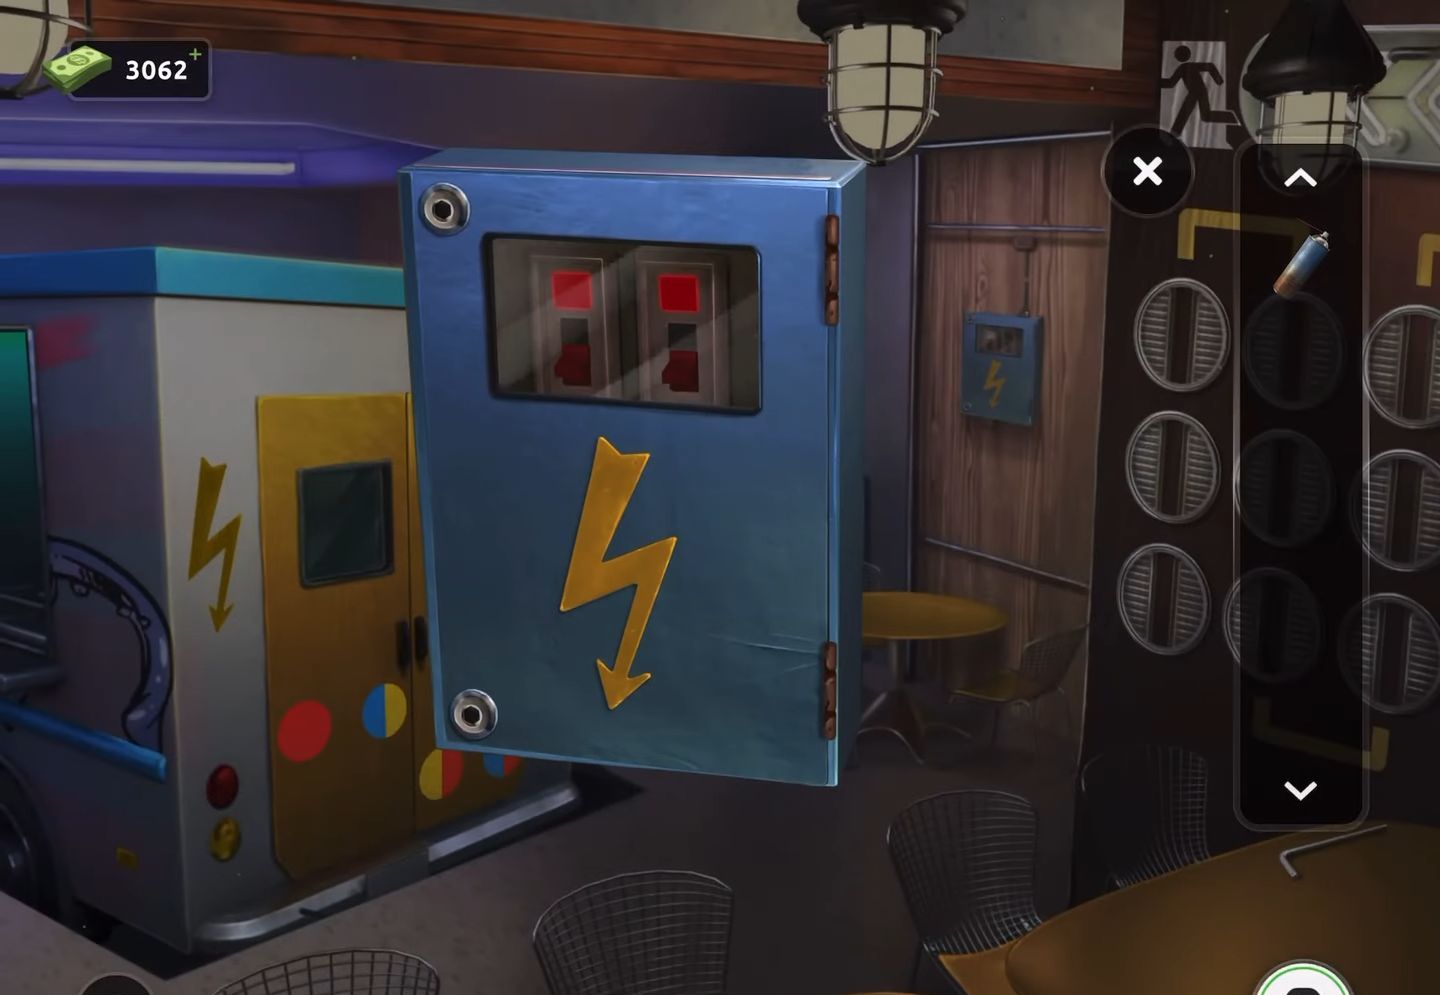
- Firstly, gather a gold button from the rear door of the truck’s bottom section and inspect the electrical box placed on the right side of the door.
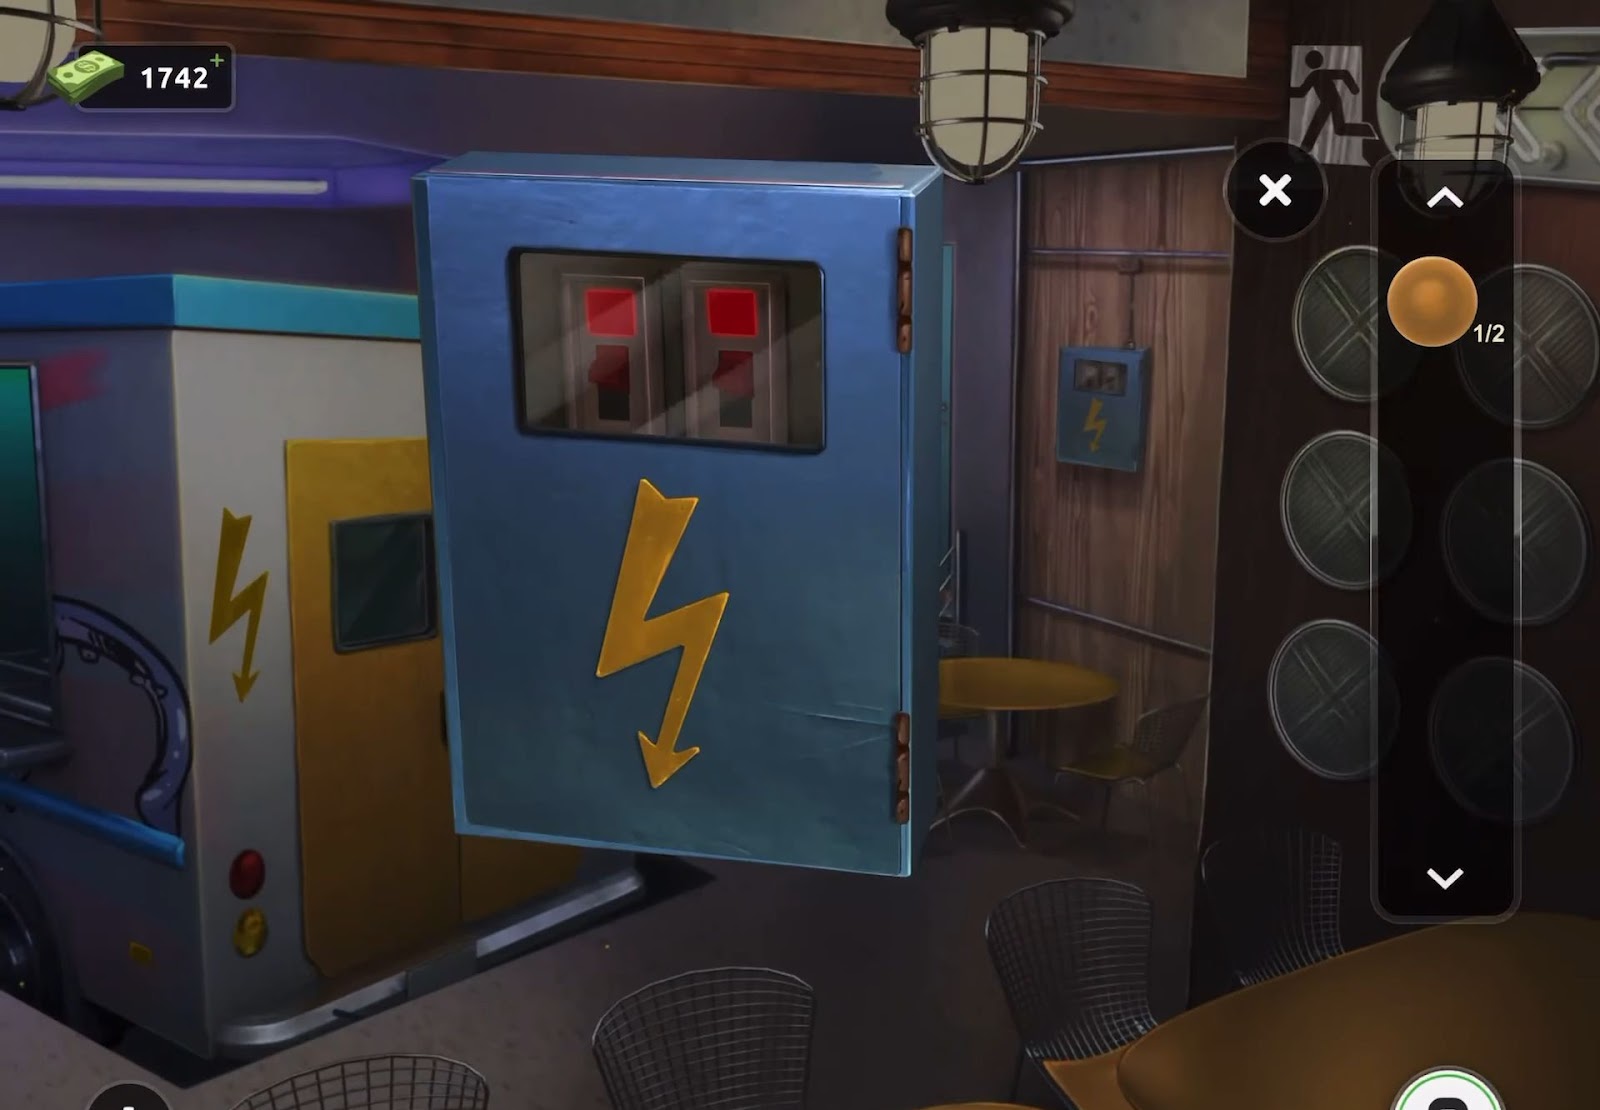
- Next, unlock it to obtain another gold button and activate all the switches to power on the devices.
- As a result, a clue will be illuminated on the right side of the room.
- Then examine the lock on the door and insert the two buttons into the designated slots.
- Now proceed to tap each button in the correct sequence.
- After that, refer to the clue displayed on the wall. The illuminated segments will indicate a specific direction. Initiate by pressing the top-left button, then proceed down, right, up, right, down, down, left, and left in the determined sequence.
- Once successfully executed, the door will open, allowing you to exit the room.
Level 41:
To complete level 41, follow the instructions below:
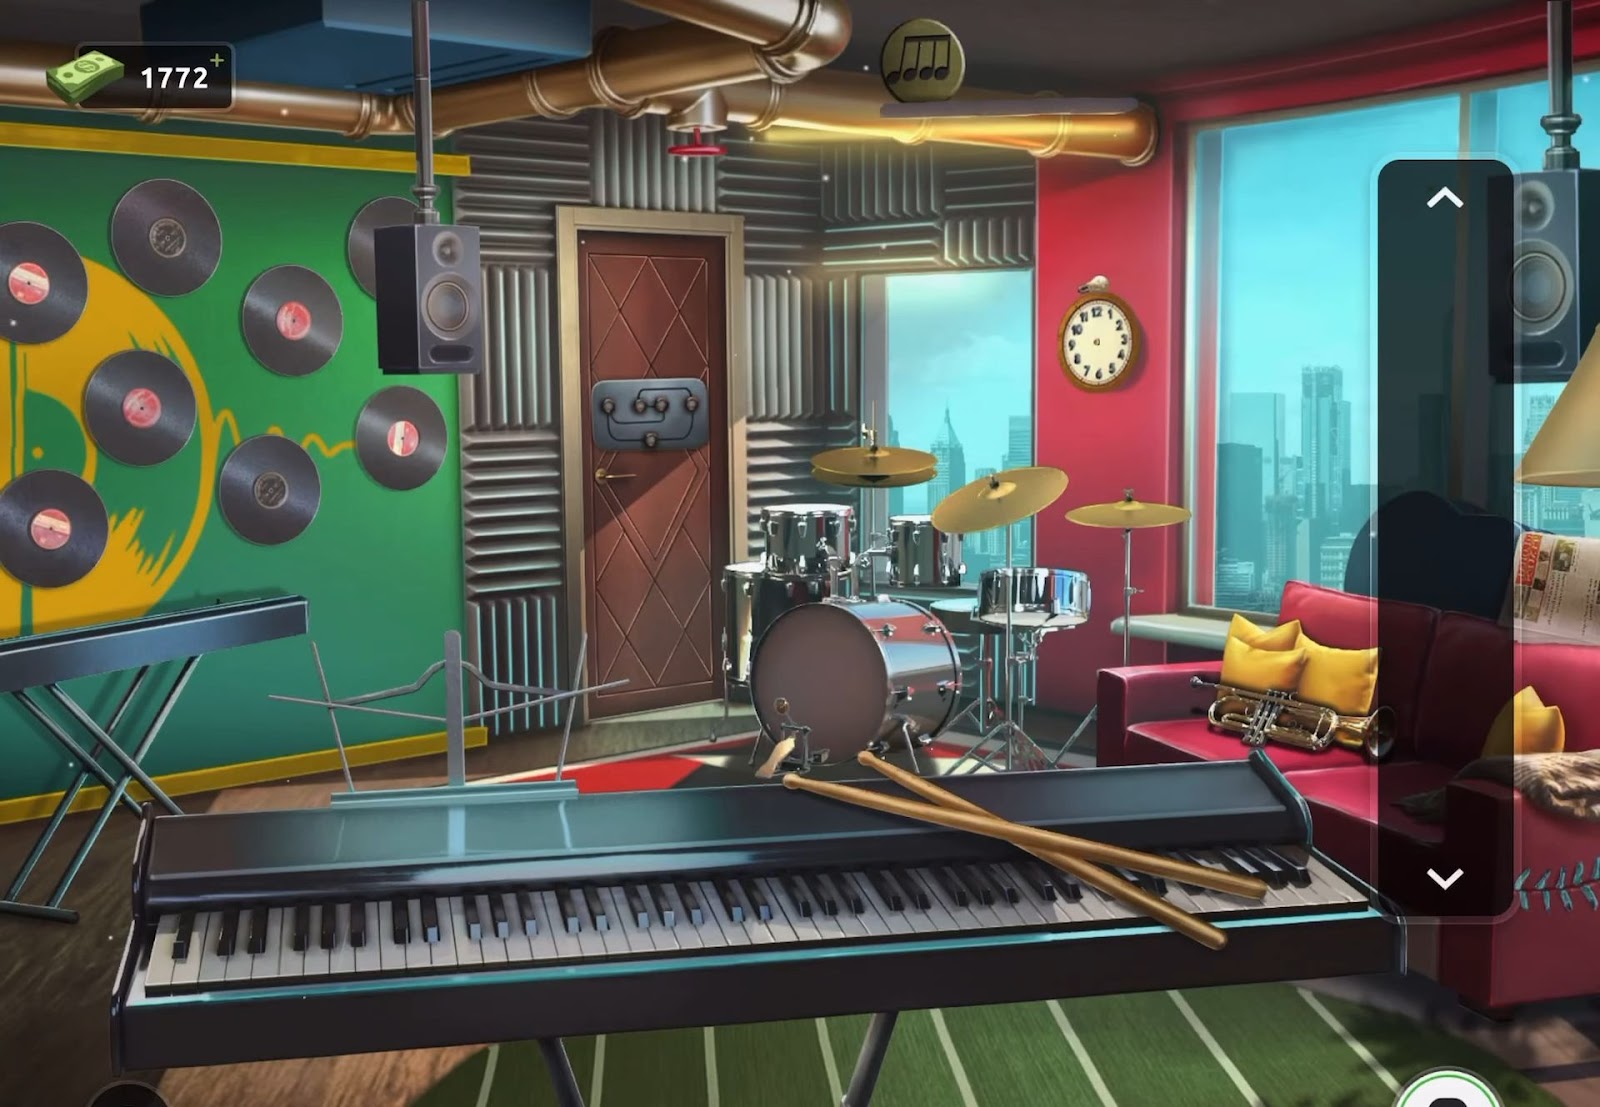
- Begin by obtaining the drumsticks from the keyboard. Use the drumsticks on the drum set located at the rear of the room. This action will cause a circle with a musical note to fall; collect it.
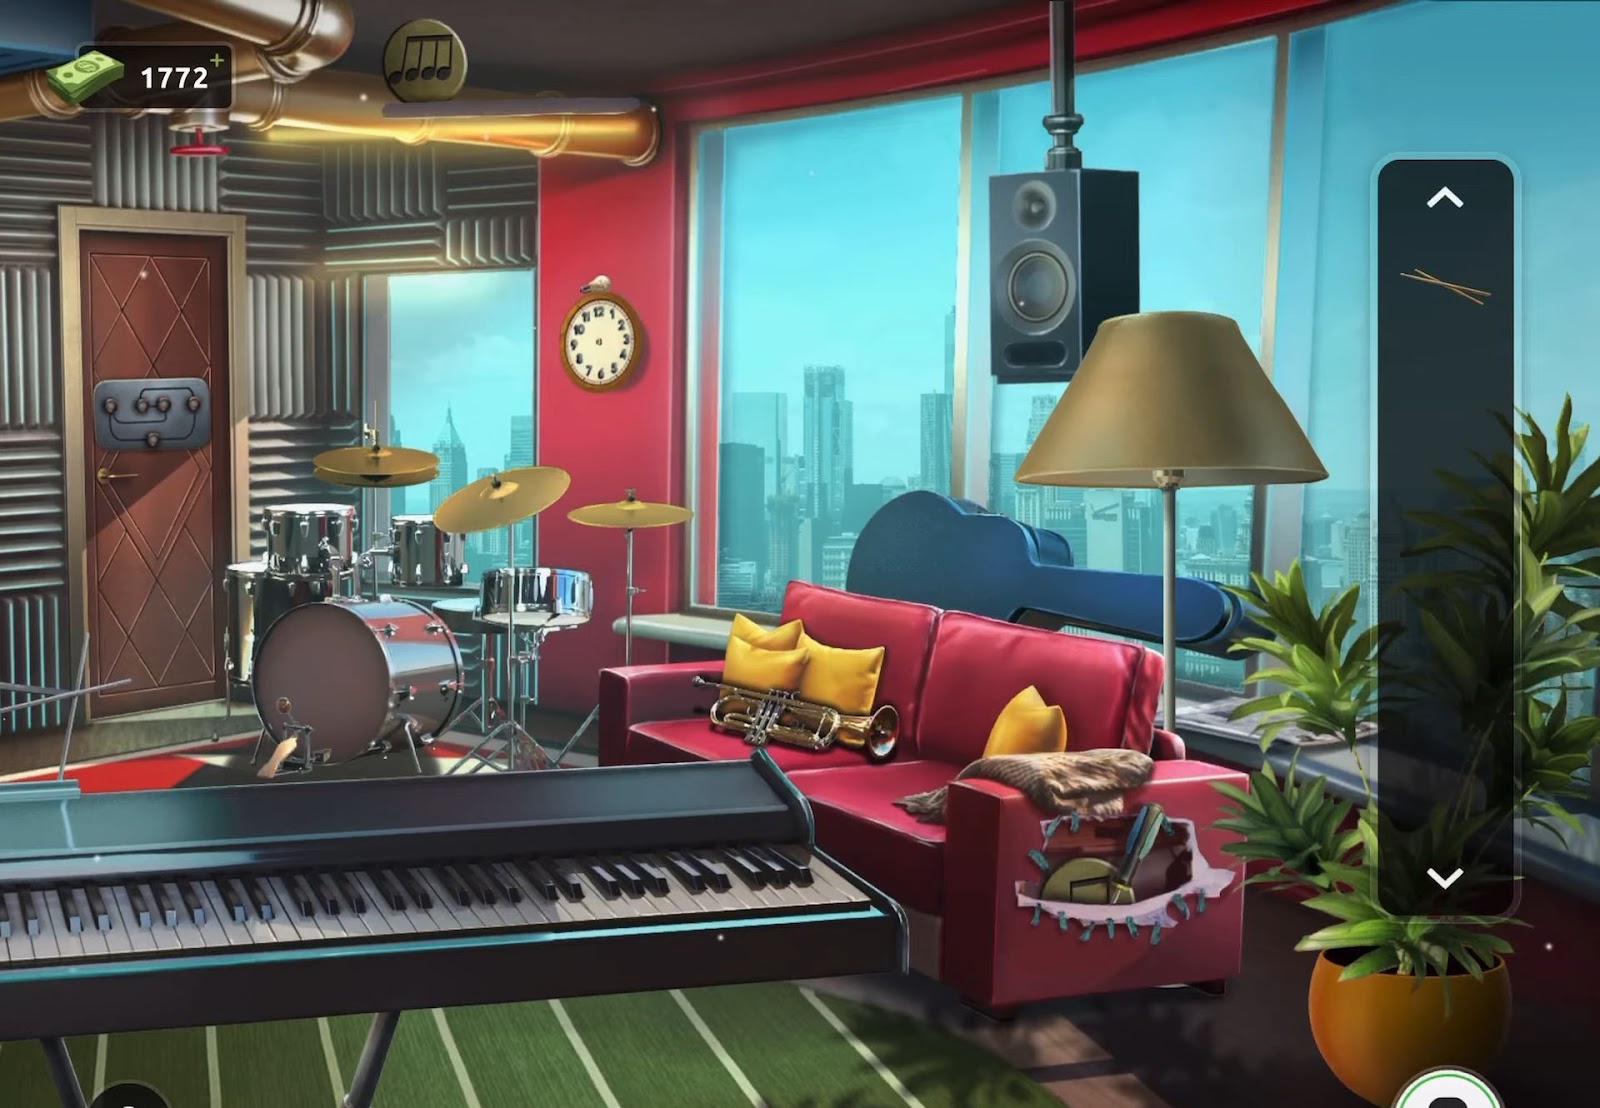
- Next, proceed to tap the newspaper atop the right-sided sofa to reveal a pair of scissors. Use the scissors to cut open the stitched fabric on the side of the sofa.
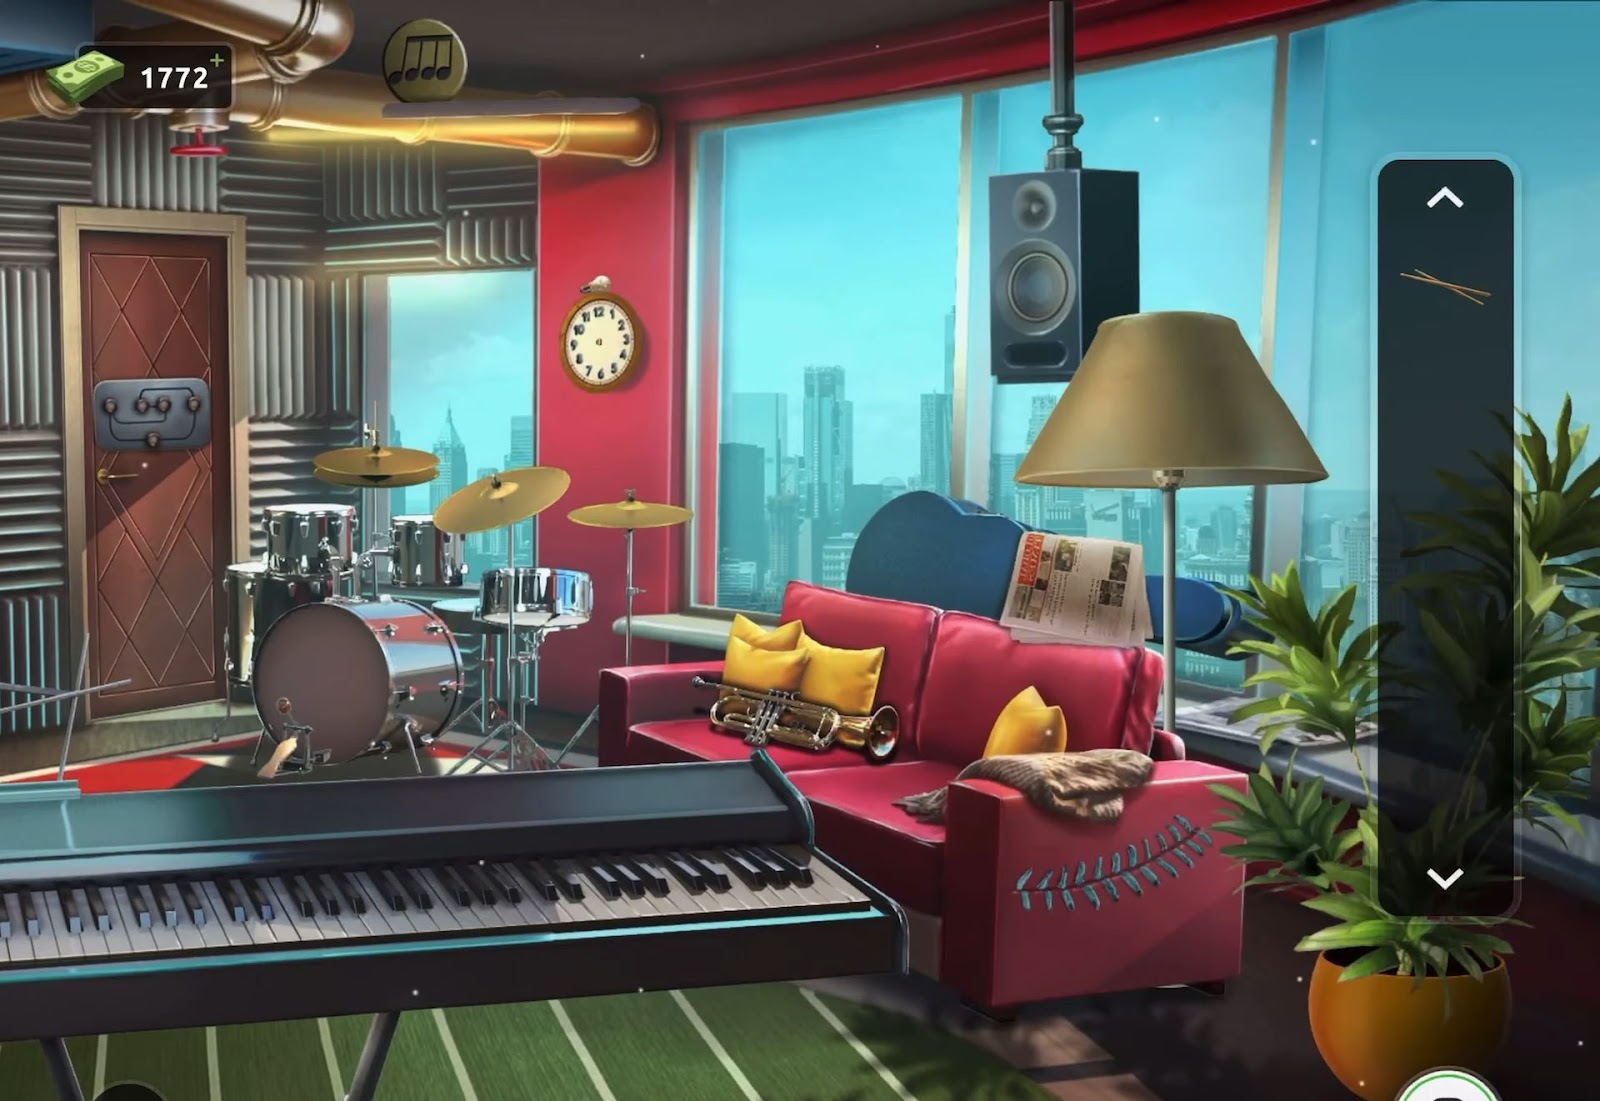
- Then collect a screwdriver and another circular item with a musical note symbol.
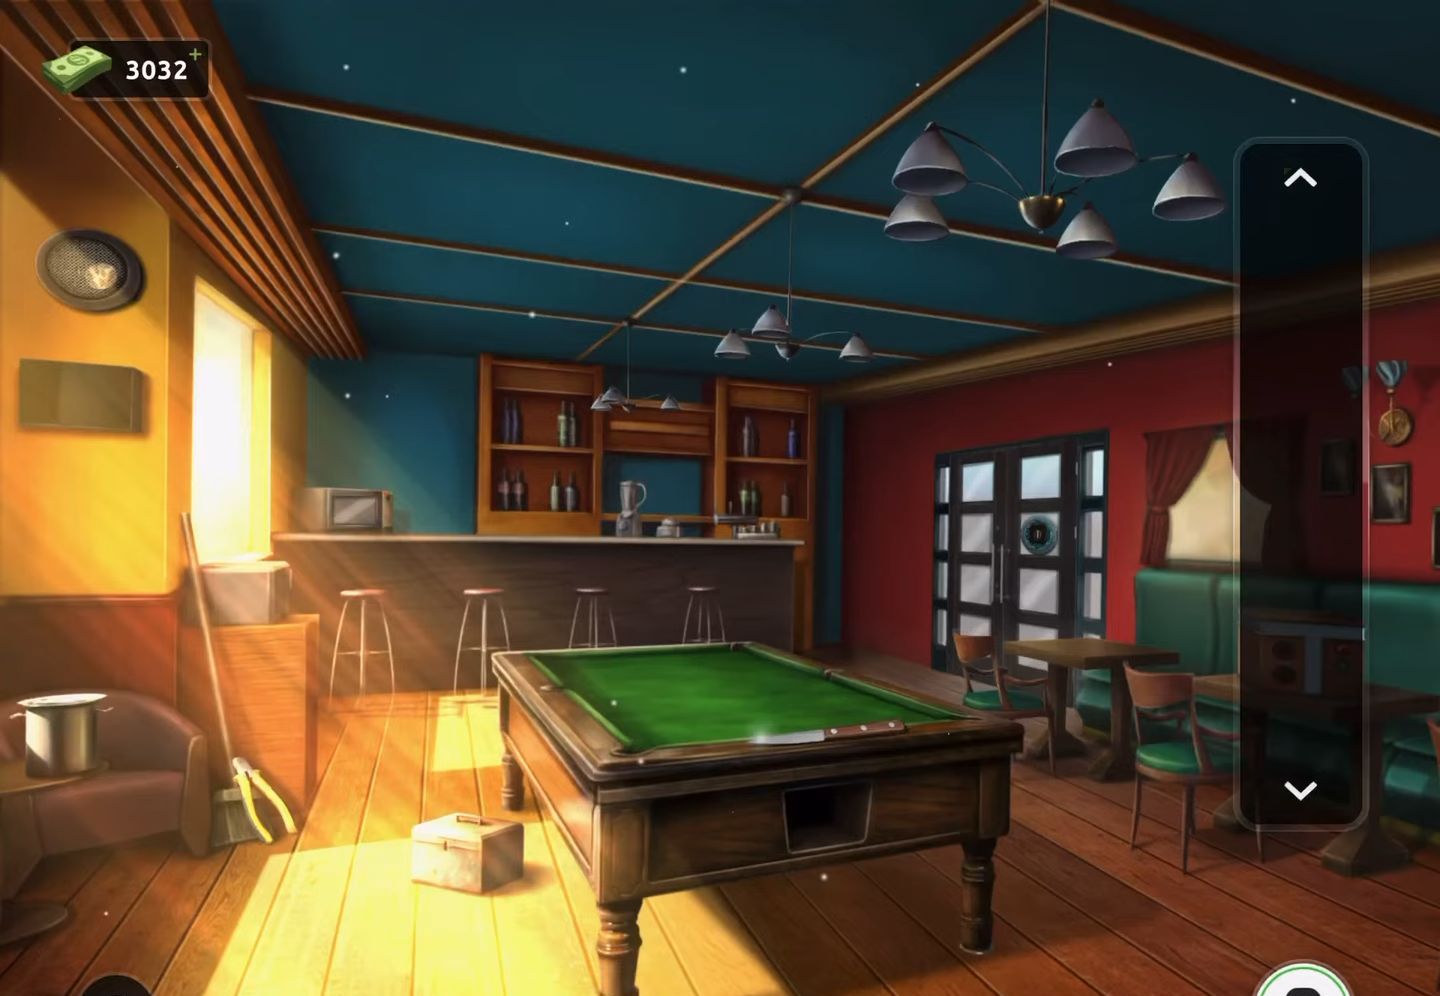
- Next, move on to the fan located on the left by the jukebox.

- After that, use the screwdriver to open the cover of the fan, revealing a pair of clock hands. Then, view the clock on the wall to the right hand.
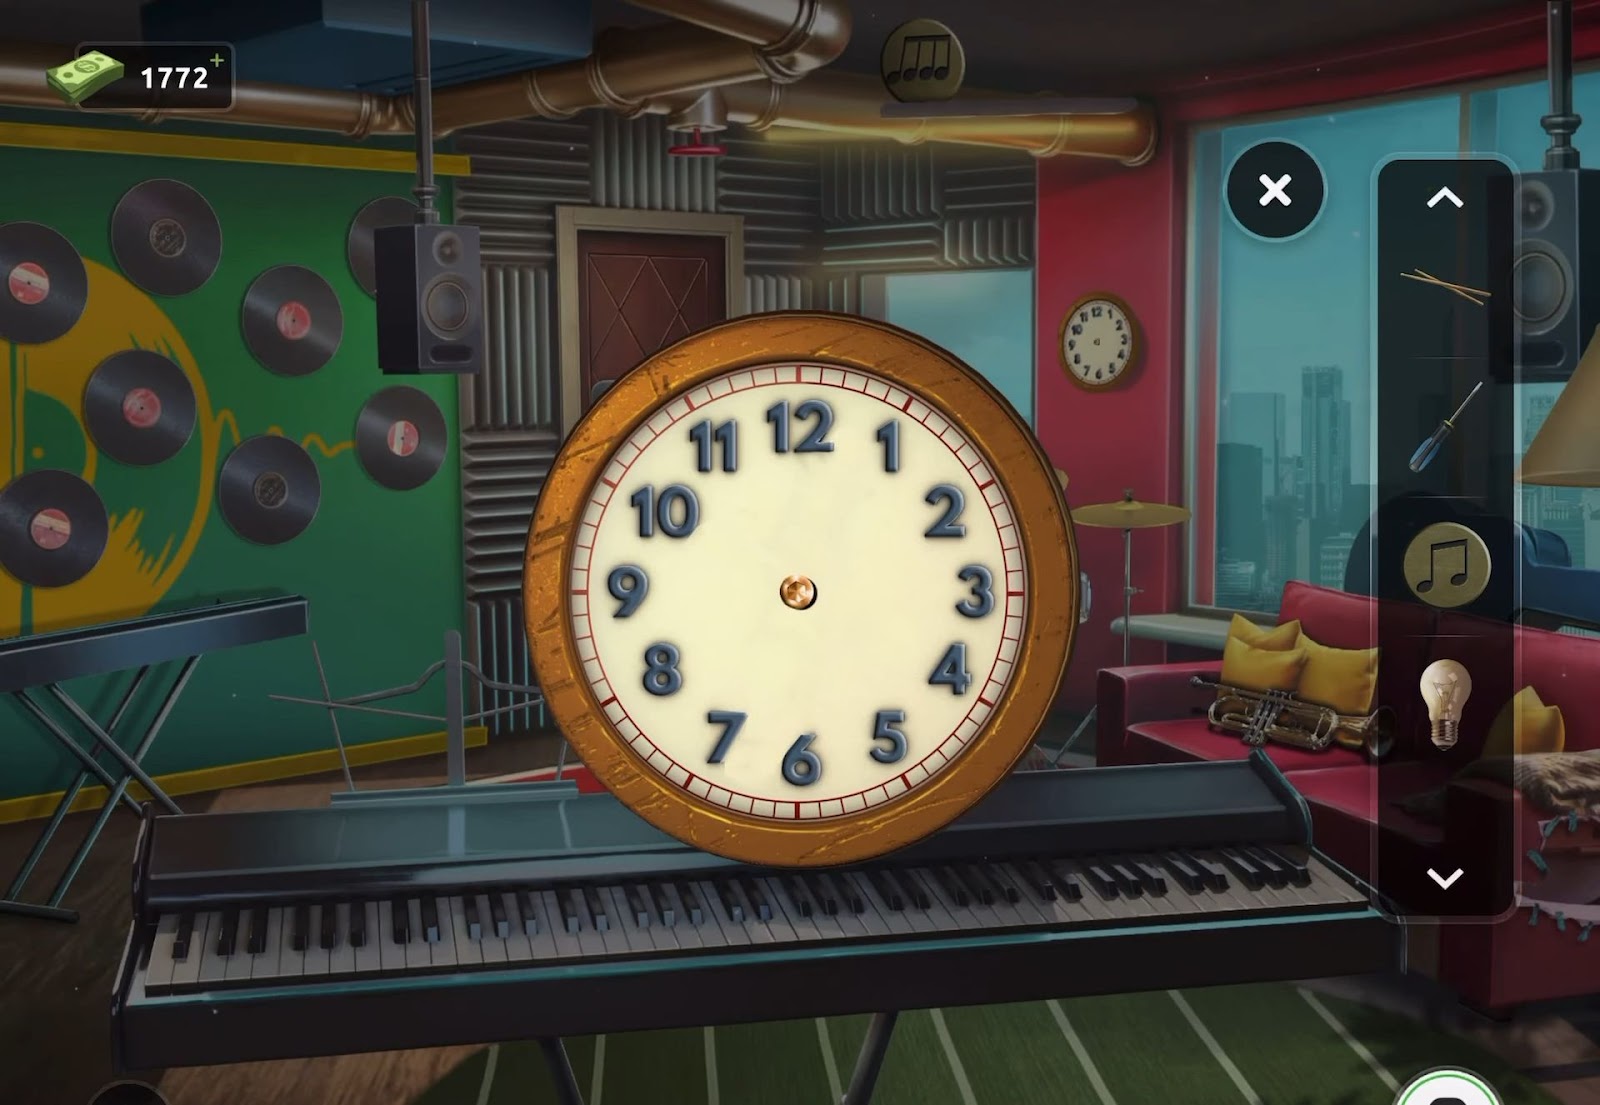
- Now collect the light bulb and insert it into the lamp situated near the sofa on the right side. This action will unveil a clue.
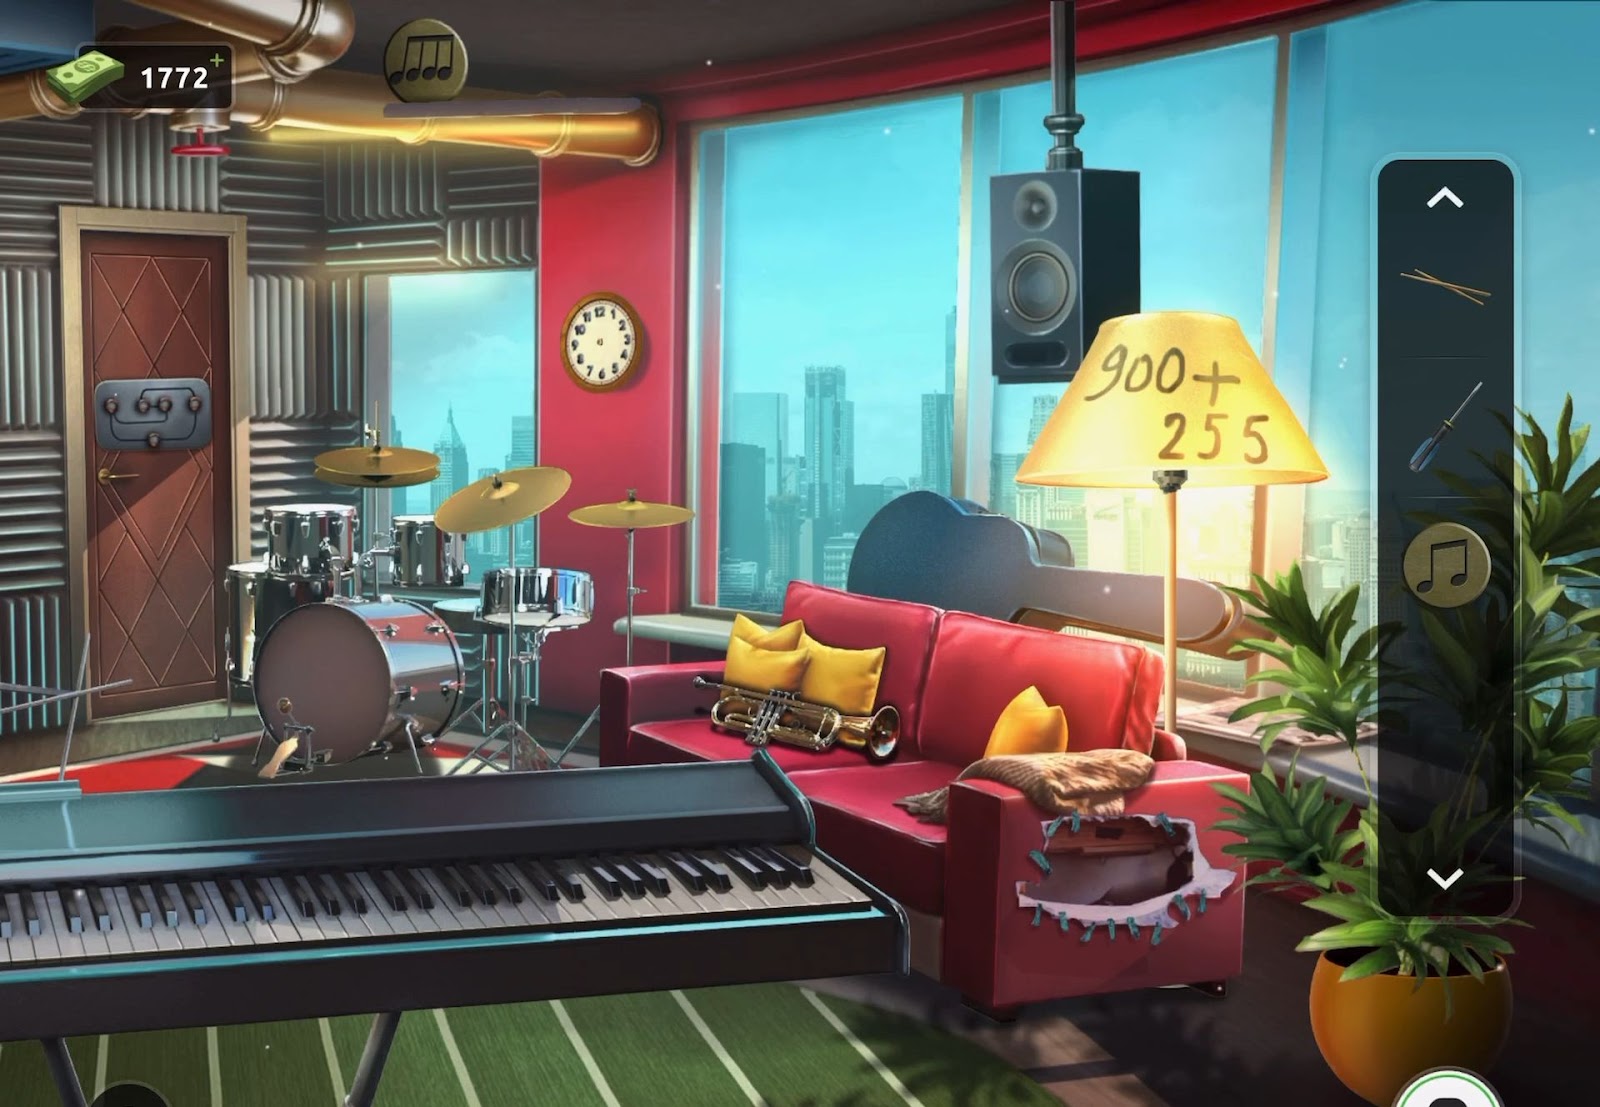
- Then apply the clue to set the clock to the specified time. Using the calculation 900 + 255, the time translates to 11:55. This action will reveal another musical note.
- Next, proceed to view the lock puzzle on the exit door. Attach the three circular items to start solving the puzzle.
- After that, rearrange the counters within the puzzle to align them in numerical order from 1 to 4.
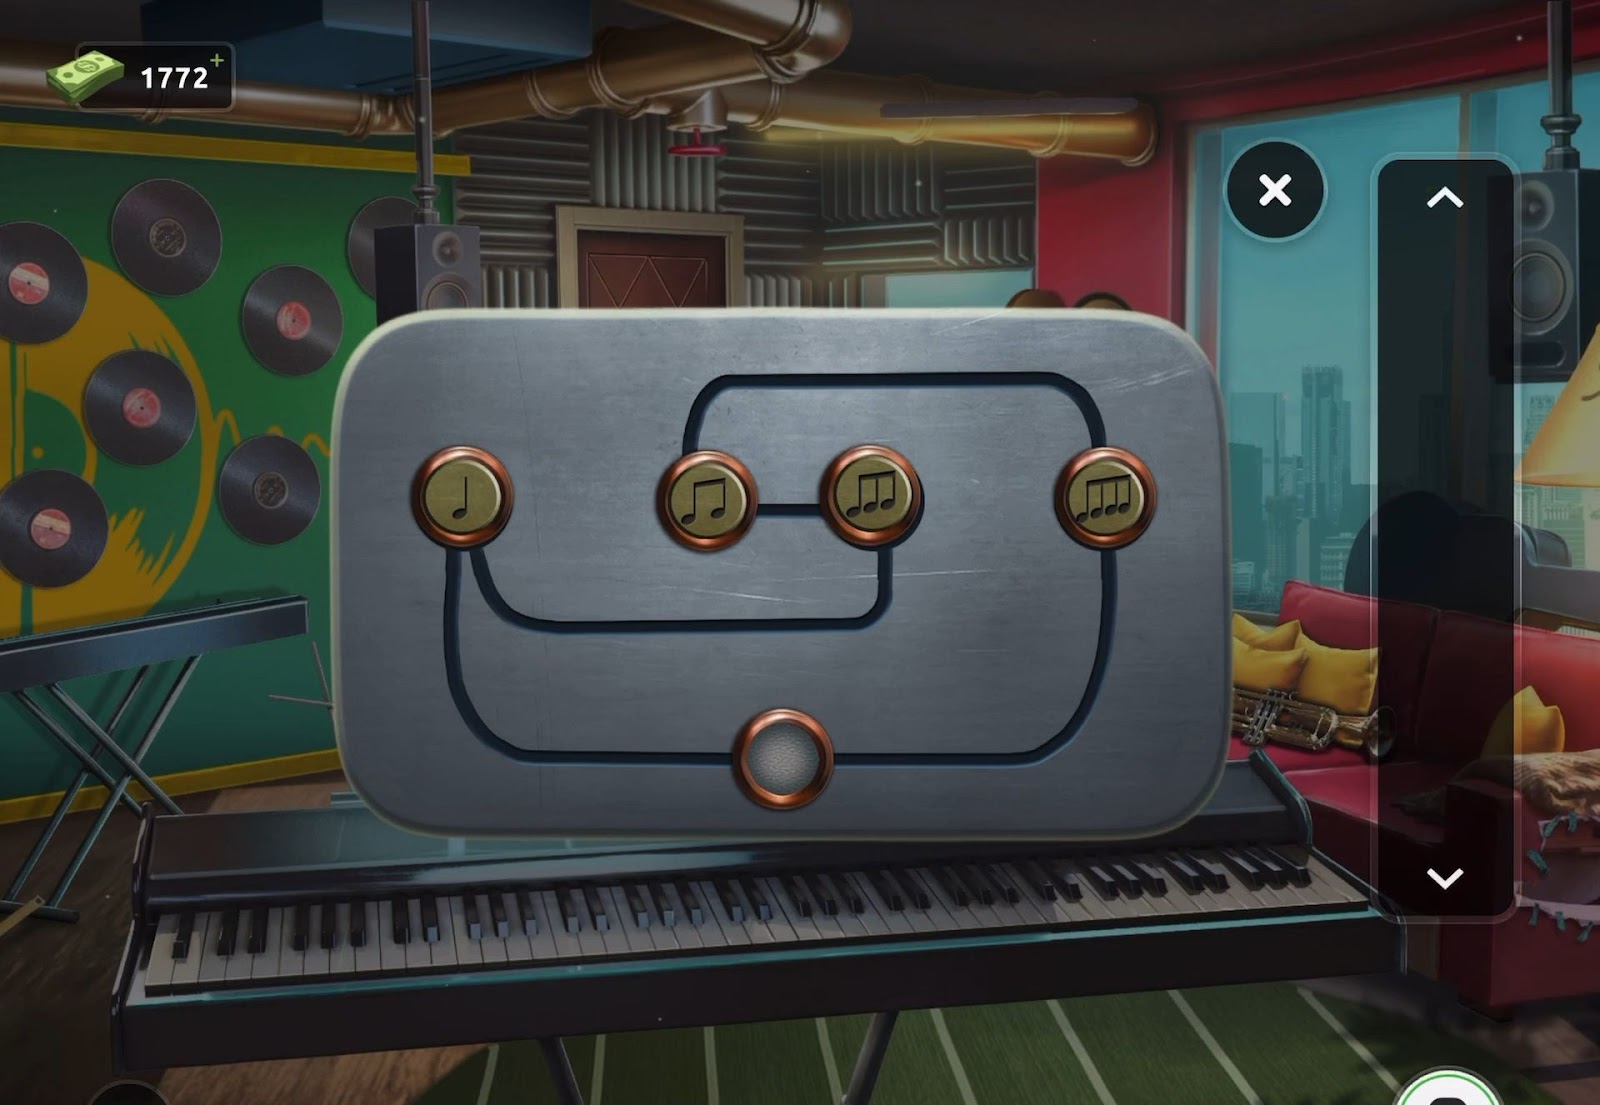
- Finally, the door will open, allowing you to escape the room.
Level 42:
To complete level 42, follow the instructions below:
- Start by rearranging the white vase on the small table and the hat on the sofa to reveal and collect two knobs.
- Now collect a piece of white paper found on the larger table.
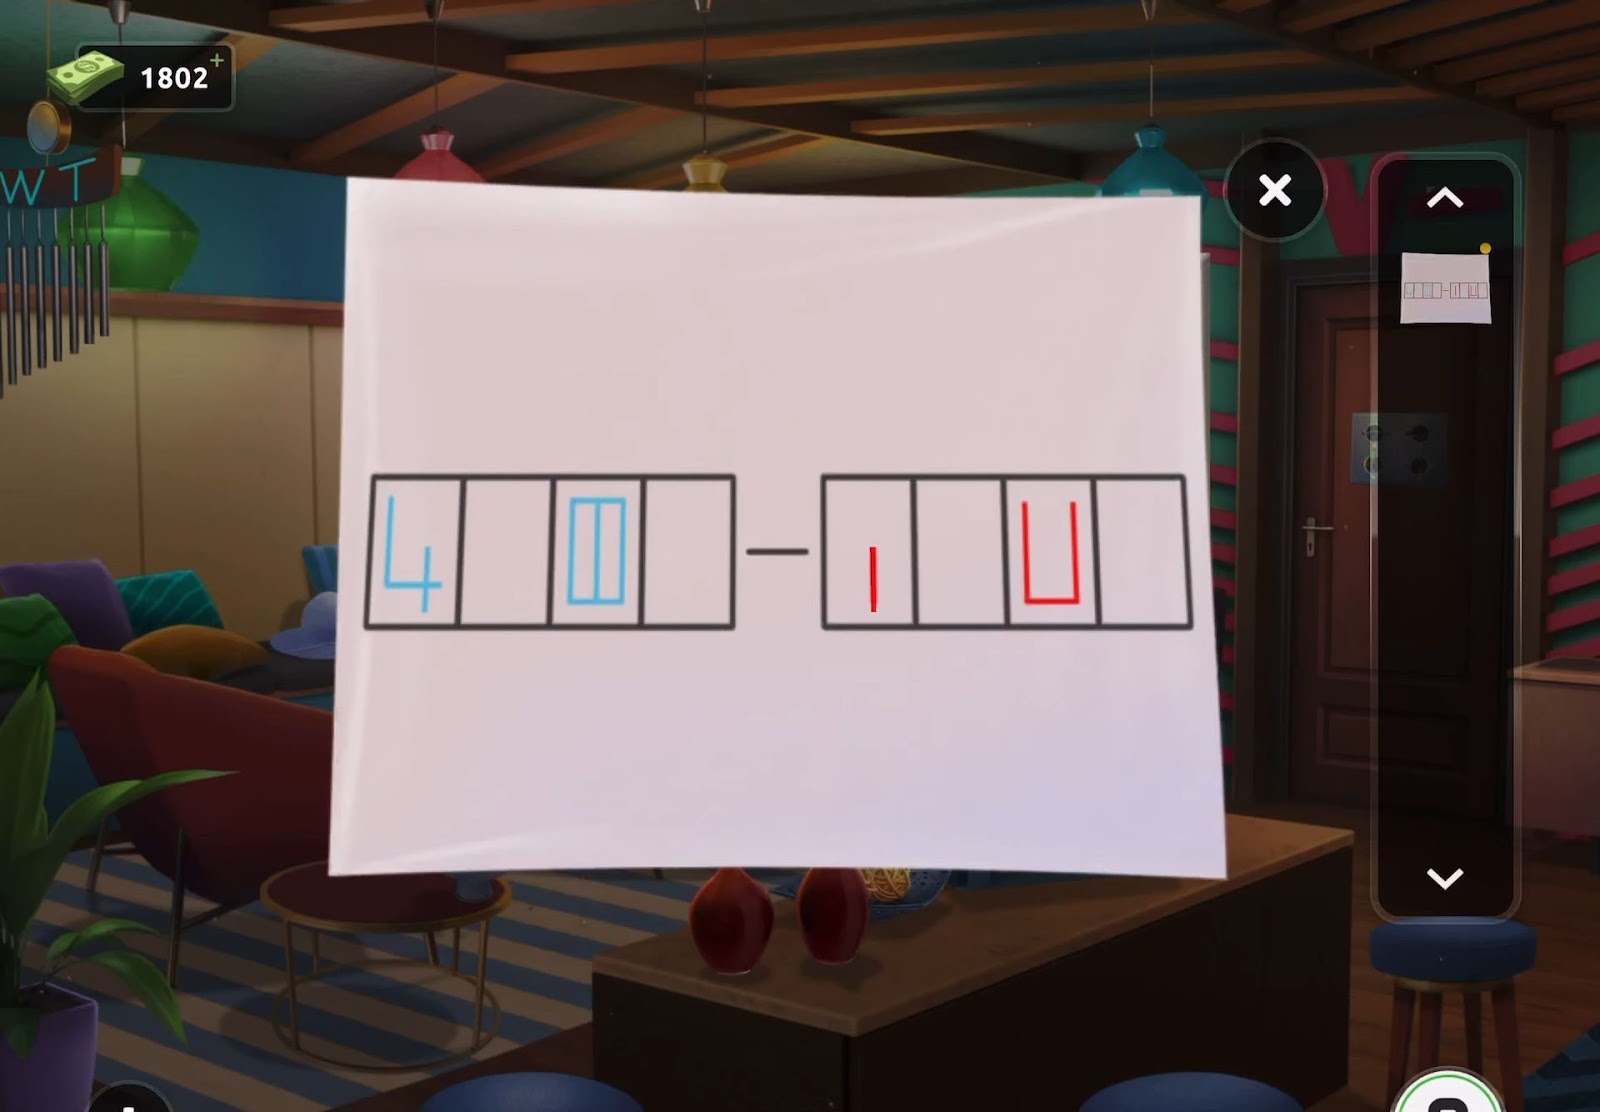
- Then move to the desk and interact with the printer. Add the white paper to the printer and press the red button to obtain a printout revealing a clue.
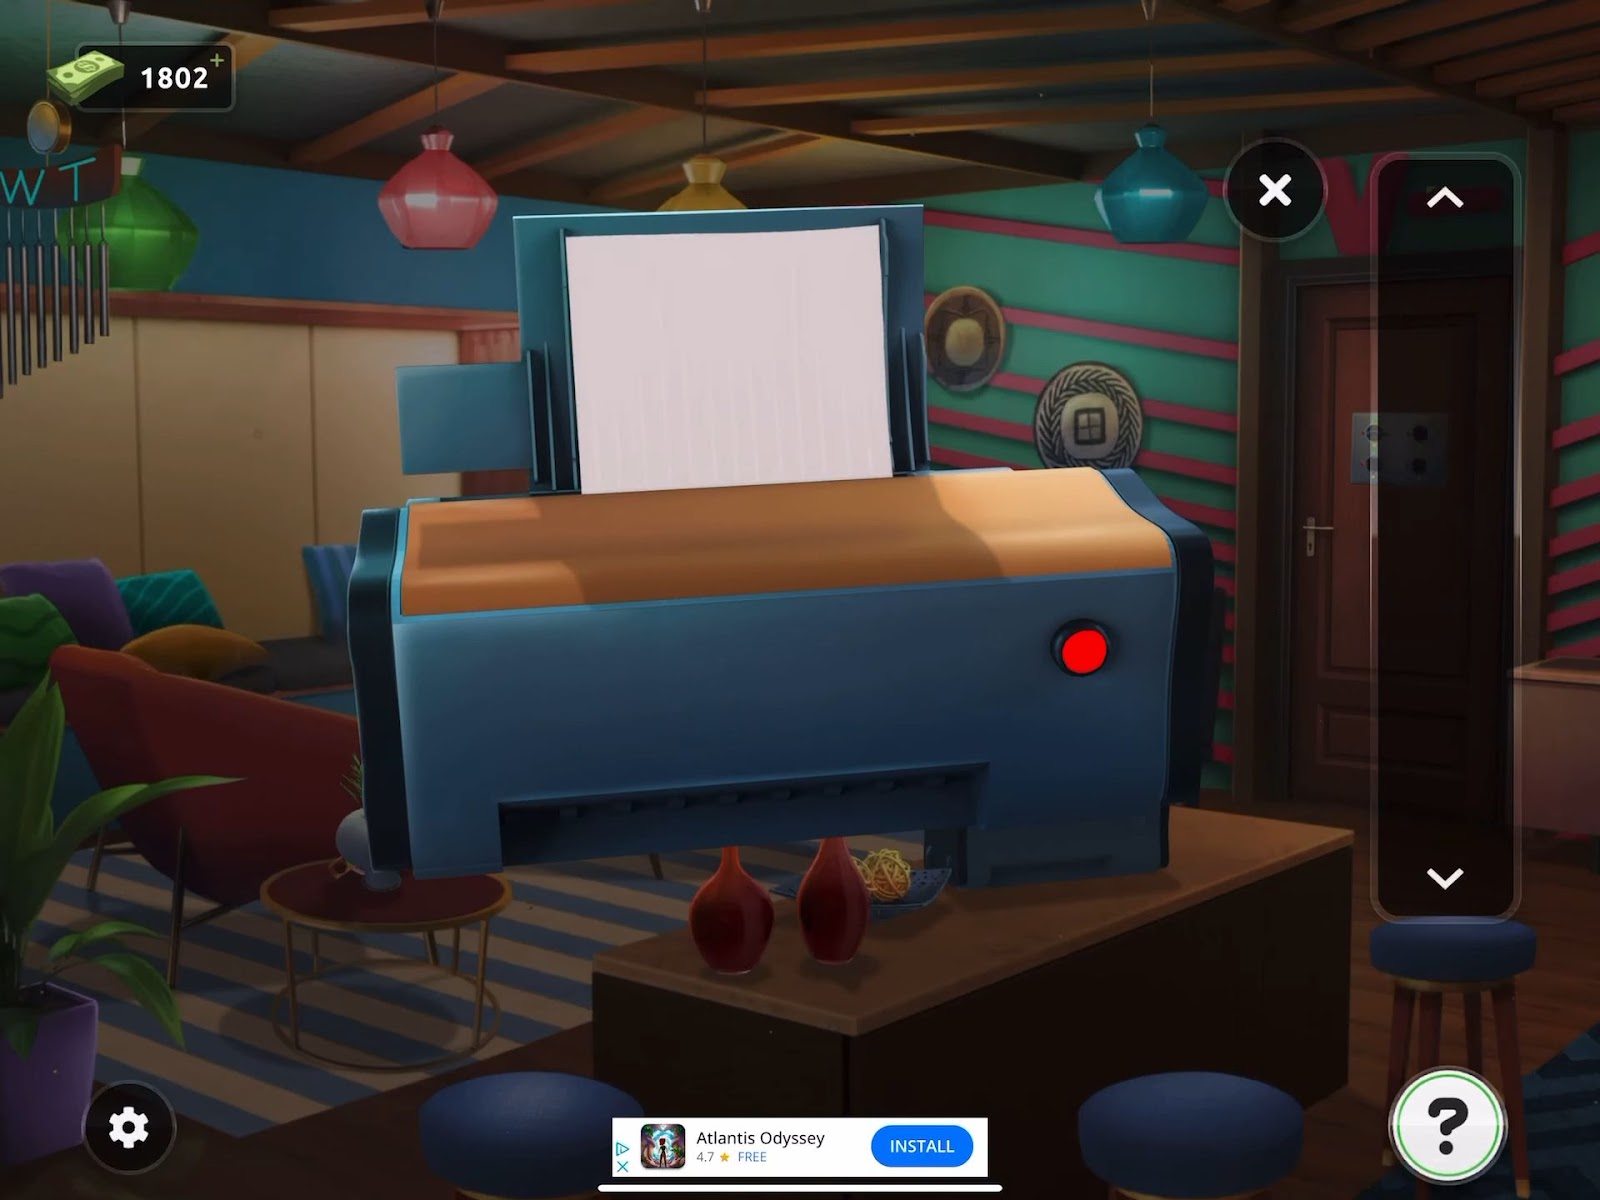
- Start by collecting the paper and opening the printer top to reveal another knob.
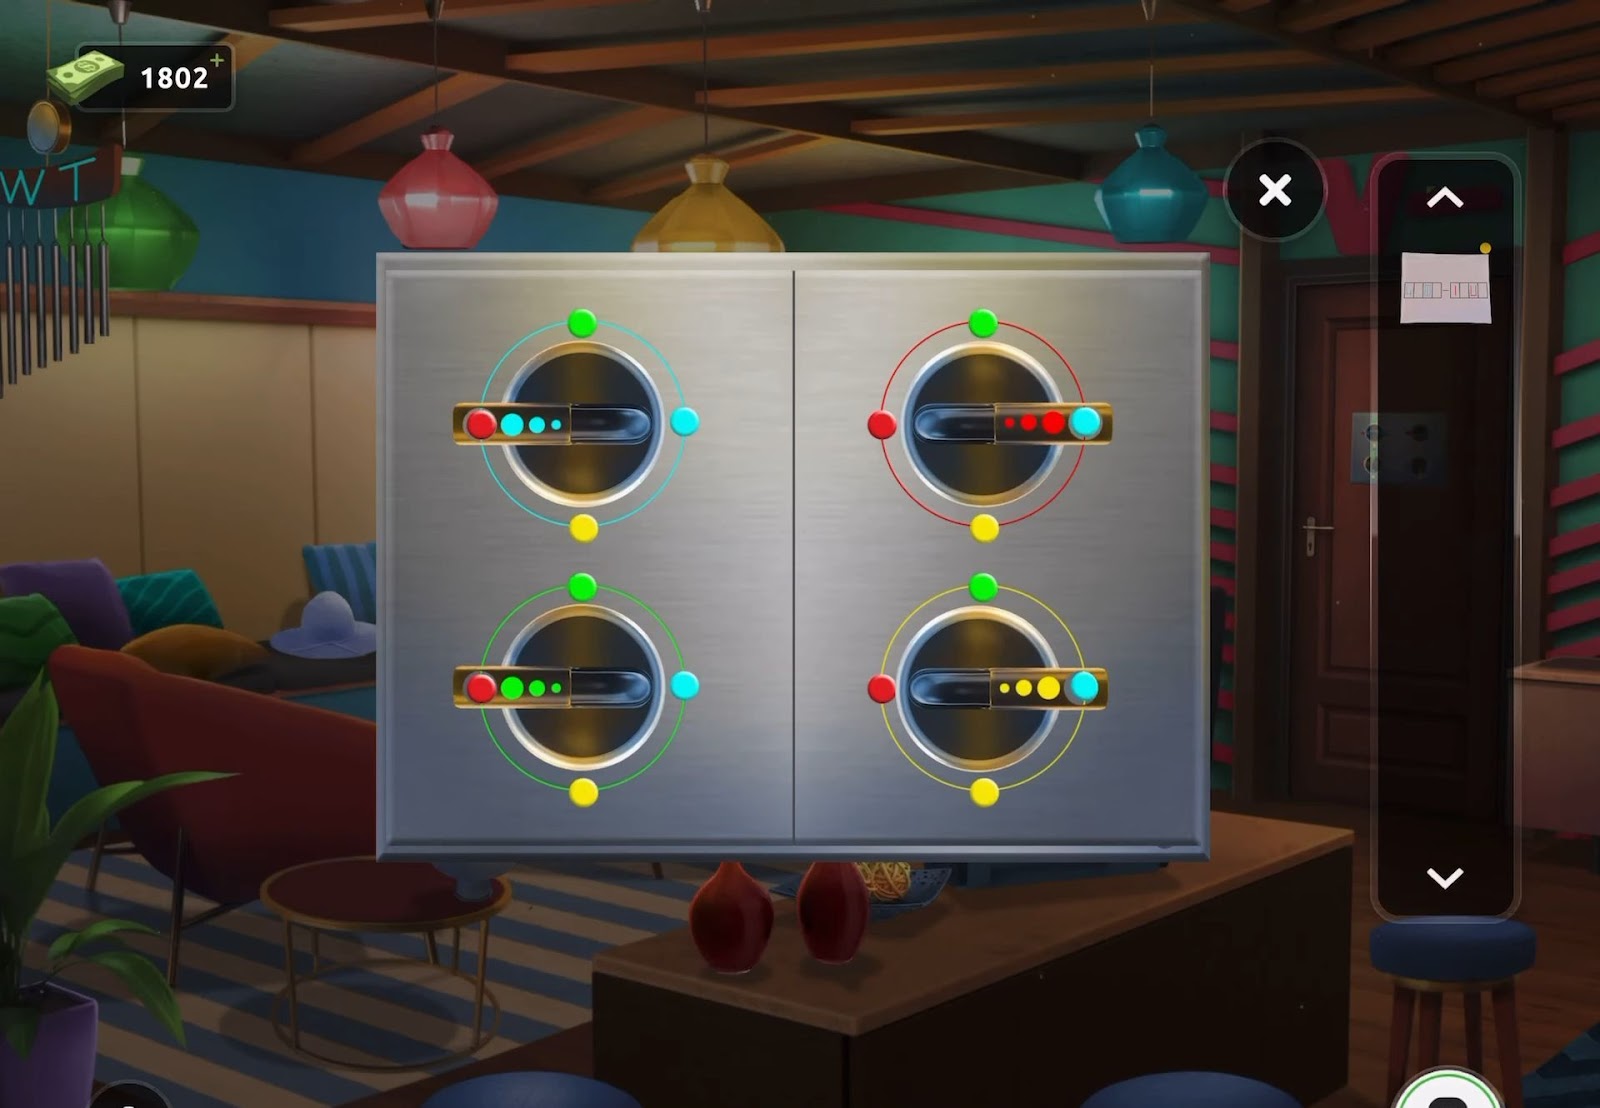
- Now move to the exit door to examine the initial puzzle.
- Next, add the three knobs and adjust them so that the colors on the knobs match the outer ring.
- After that, for the 4-letter code, reference the clues found on the paper, the wind chime hanging on the top left, and another clue (L V T I) positioned above the door.
- Once successfully executed, the door will open, allowing you to exit the room.
Level 43:
To complete level 43, follow the instructions below:

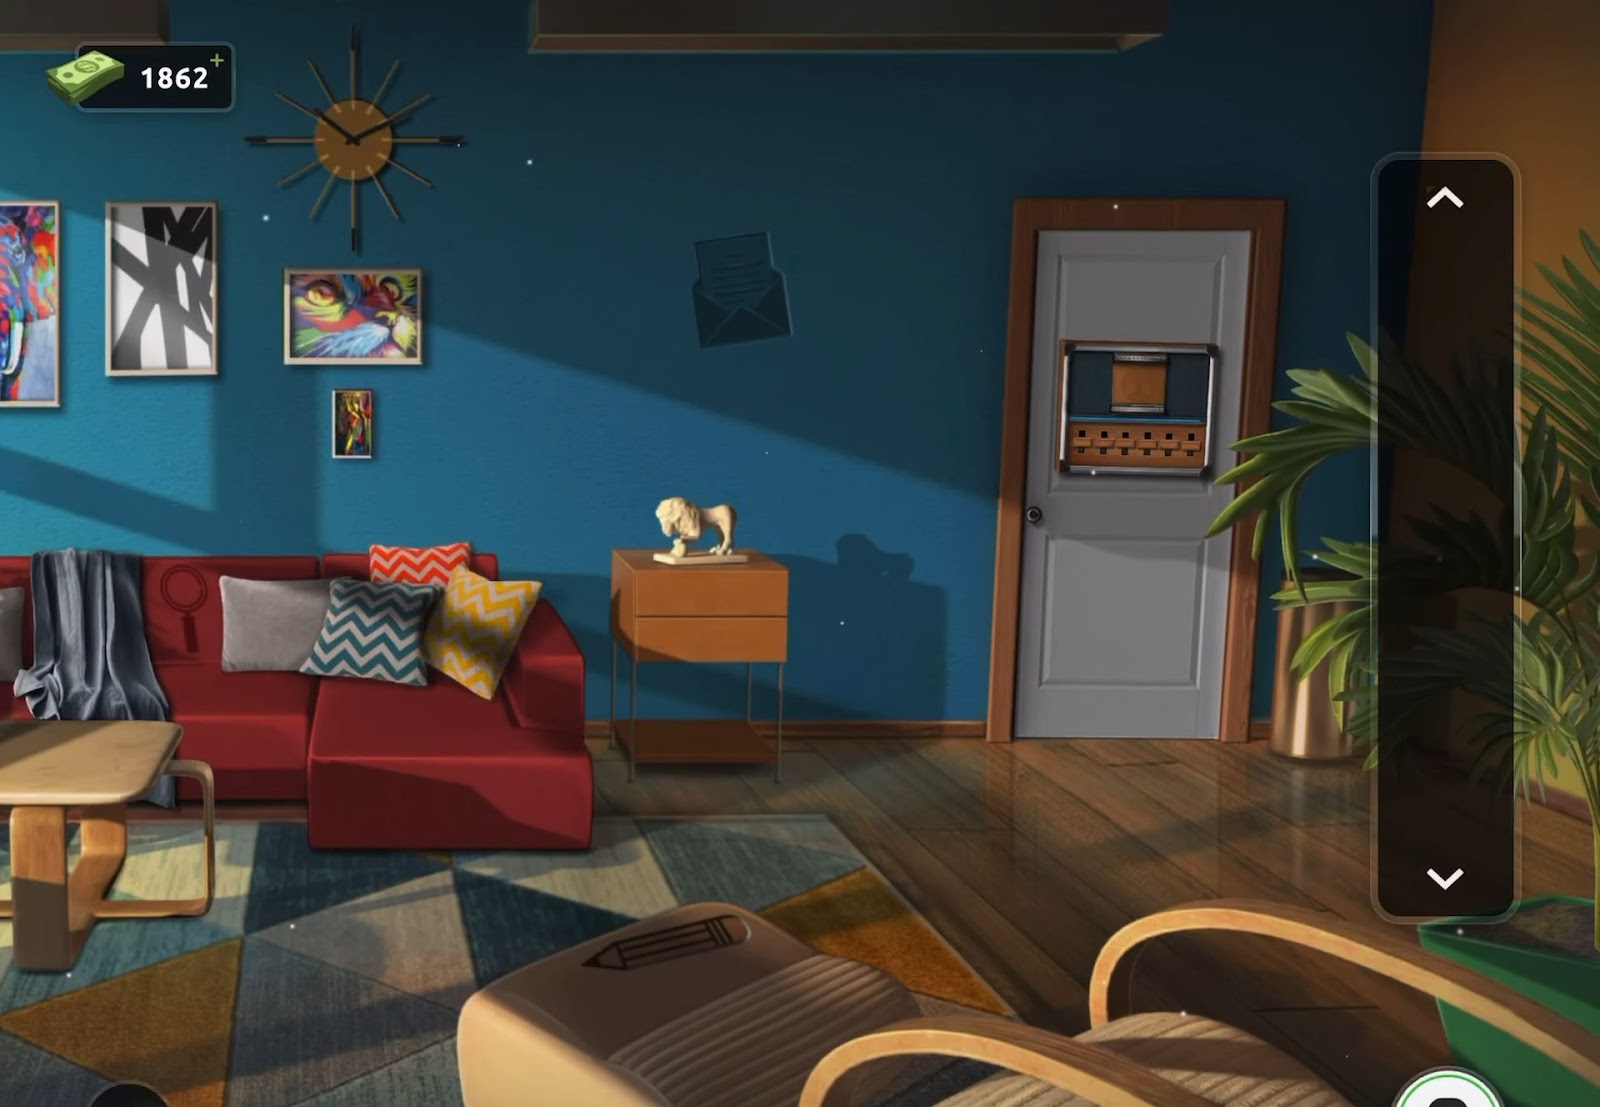
- Firstly, move the painting on the wall to reveal the envelope symbol.
- Now adjust the blanket on the center sofa to find the magnifying glass symbol.
- Then lift the cushion on the footstool to discover the pencil symbol.
- Next, view the box on the coffee table and adjust the symbols according to the line clues to unlock it.
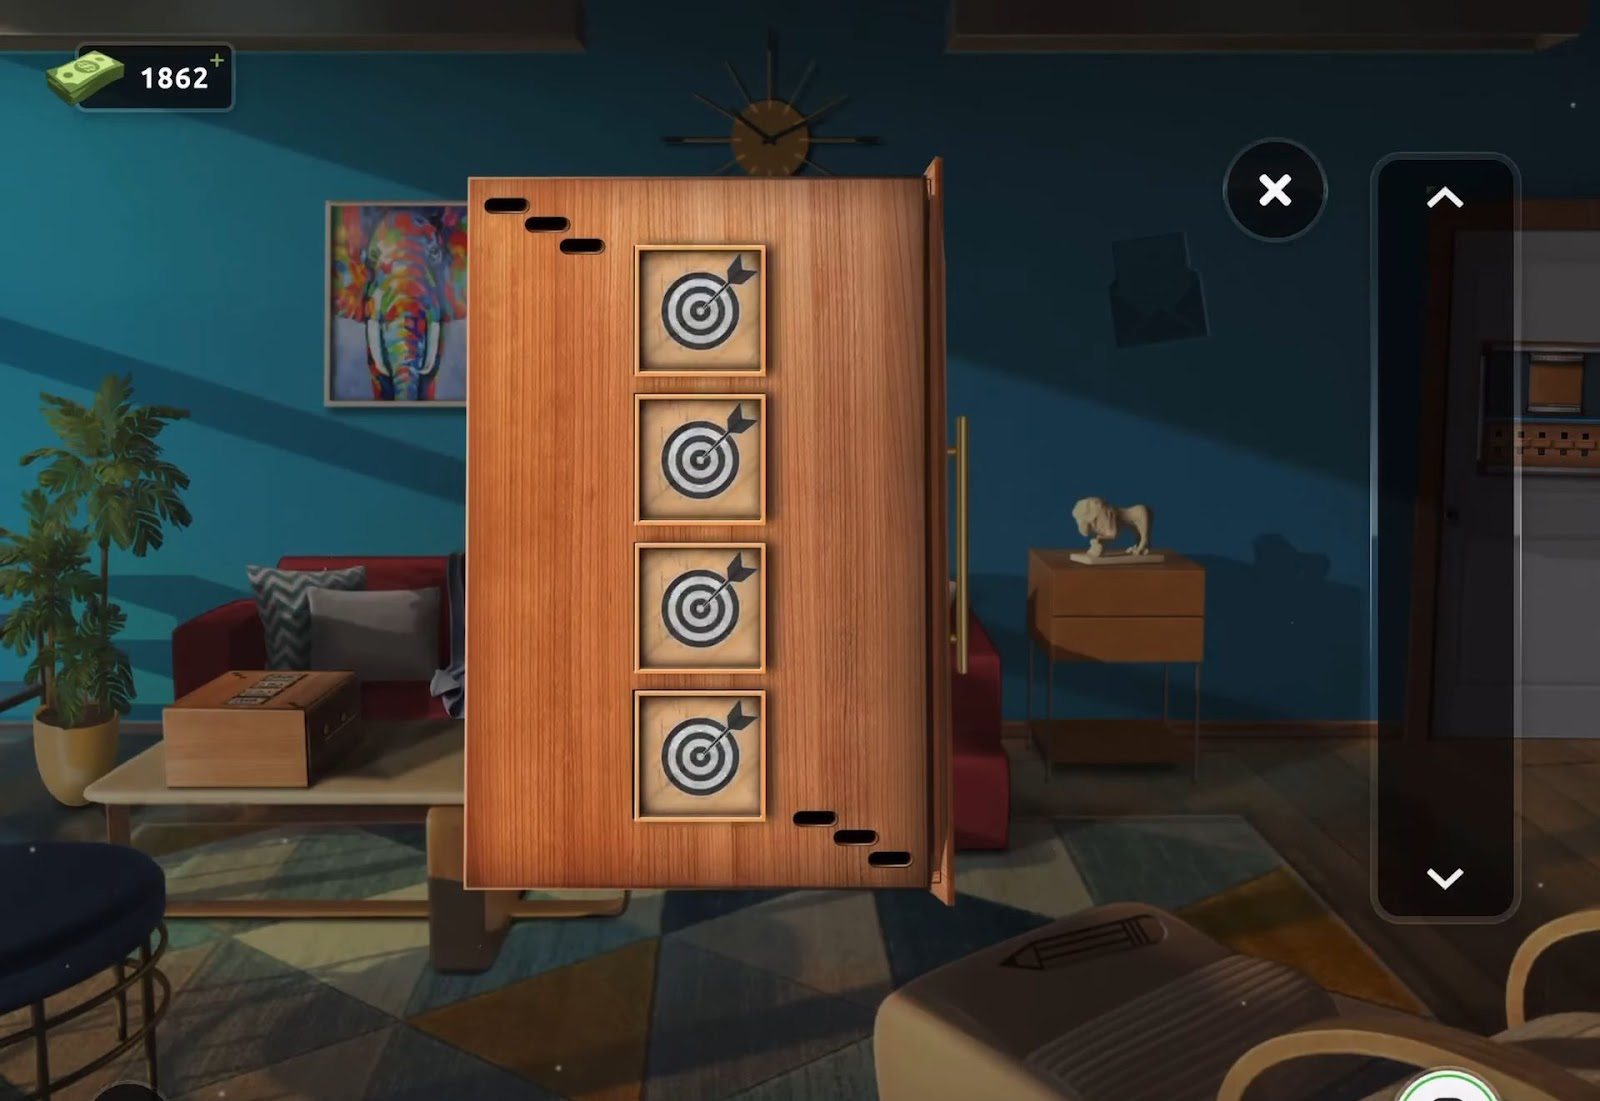
- After that, arrange the symbols from top to bottom: clock, envelope, magnifying glass, pencil.
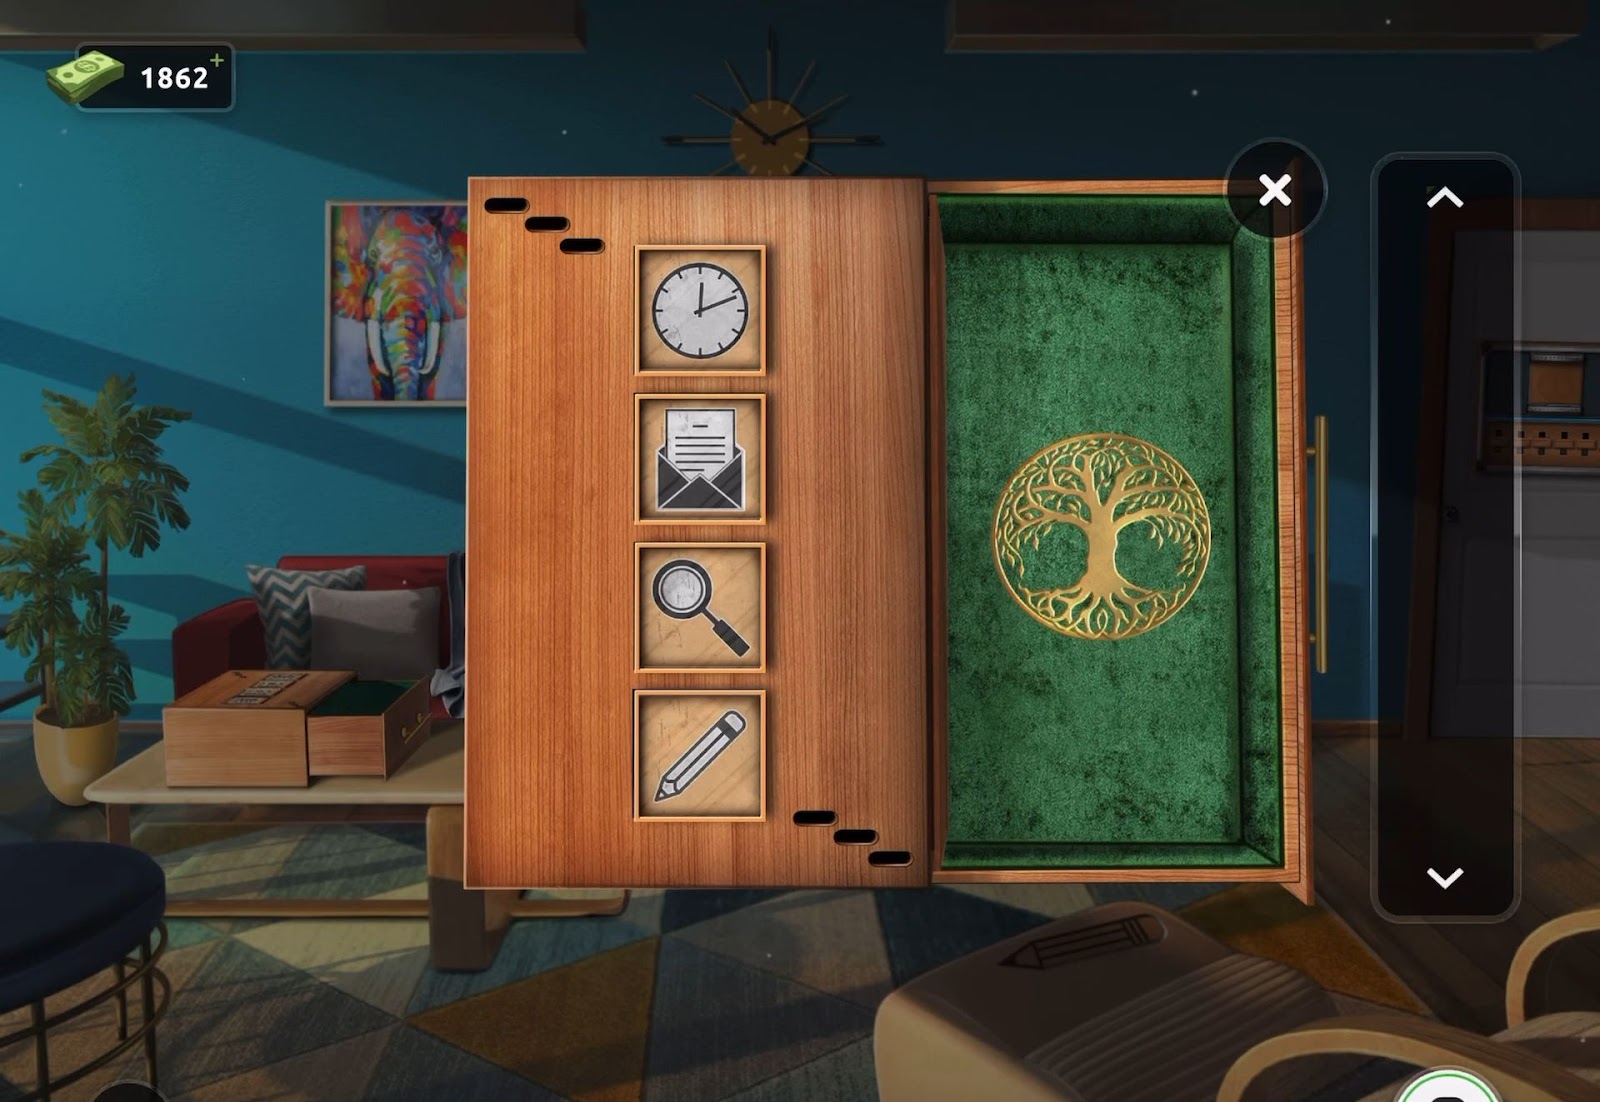
- Now obtain the tree emblem from the unlocked box.
- Then, proceed to the door to access the puzzle lock.
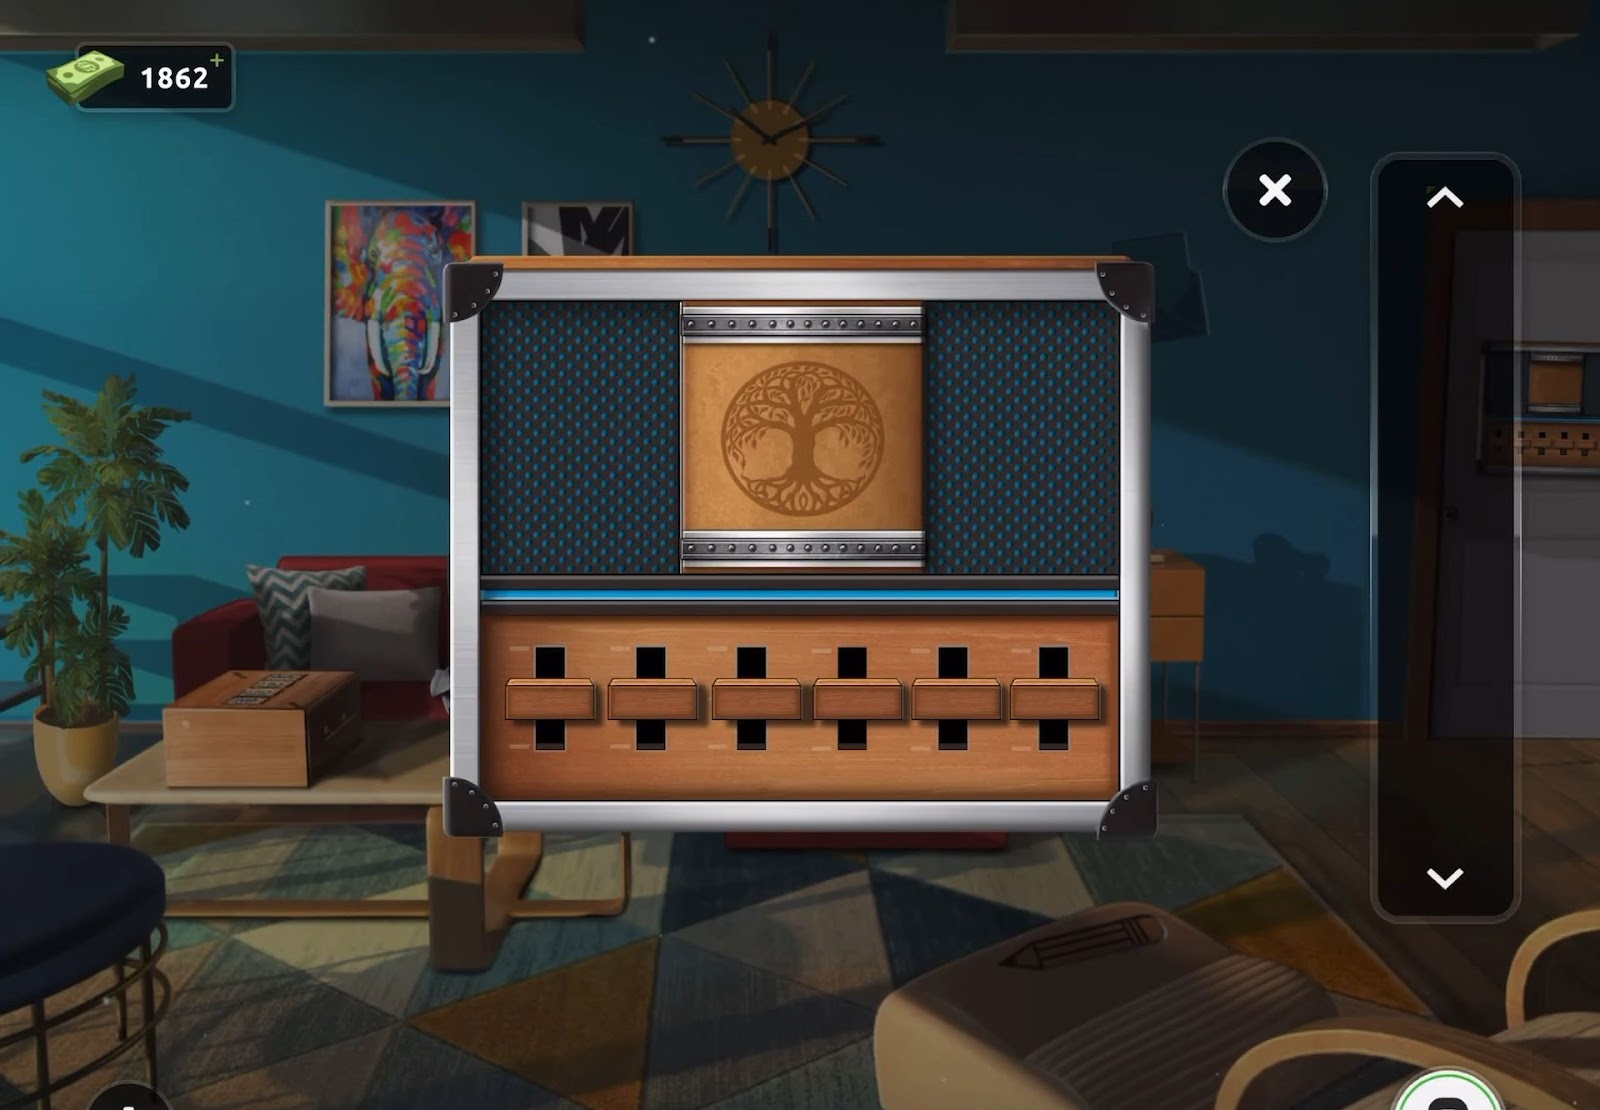
- Next, adjust the sliders at the bottom using the box clue.
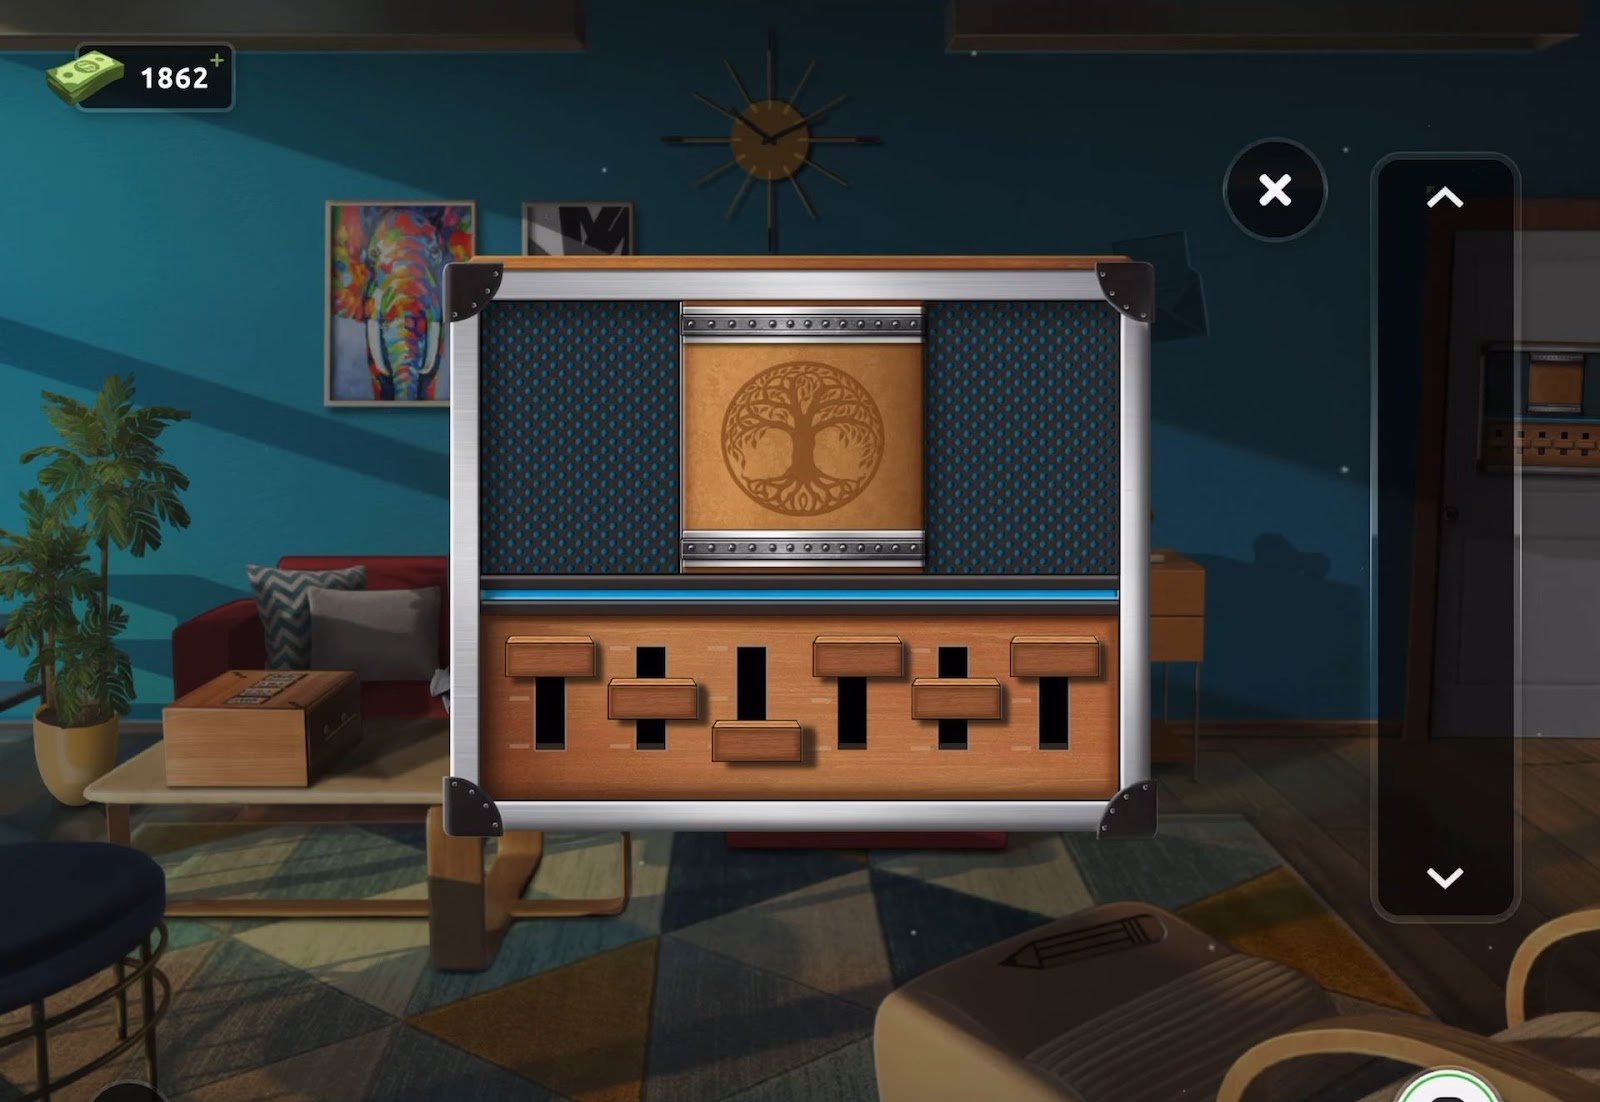
- Finally, add the tree emblem to the top and the door will open, allowing you to exit the room.
Level 44:
To complete level 44, follow the instructions below:
- Firstly, move the white vase on the mantle to uncover a paper clue and collect it.
- Also, find another clue on the bookshelf to the right.
- Then view the puzzle on the desk located on the left side of the room.
- Now add the two clues to the puzzle and tap the locked book in the center to initiate the task.
- After that, decode the clues to acquire the correct set of four symbols needed to open the book.
- Then open the book and search through the pages to locate an additional clue.
- Next, utilize the clue and the symbols present on the box beneath the book to get a code (1264) to unlock the box.
- Finally, collect a key from the opened box and use it to unlock the door and exit the room.
Level 45:
To complete level 45, follow the instructions below:
- Firstly, obtain the green water jug from the left table and proceed to open the window curtains by tapping on them.
- Then observe the view outside, noting the number of clouds.
- Next, speed up time by interacting with the time device on the central pole. Count the clouds again after the change in increments.
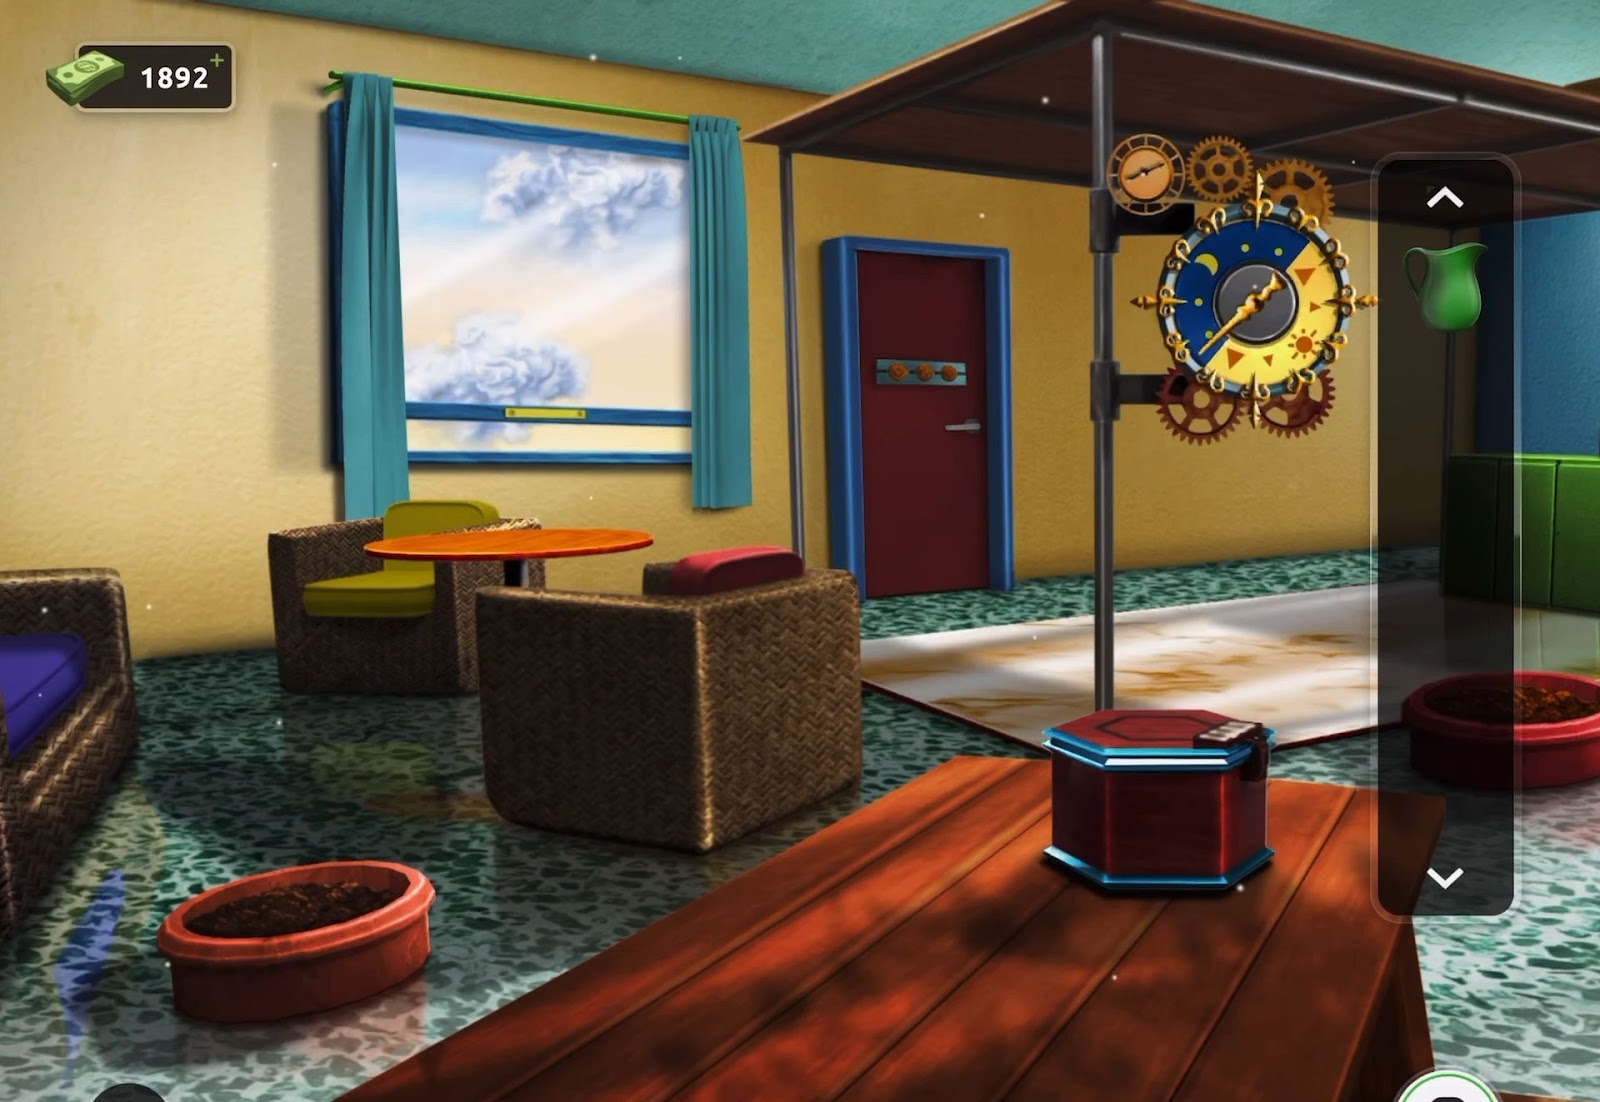
- Then repeat this process twice more to collect a total of four numbers based on the number of clouds seen.
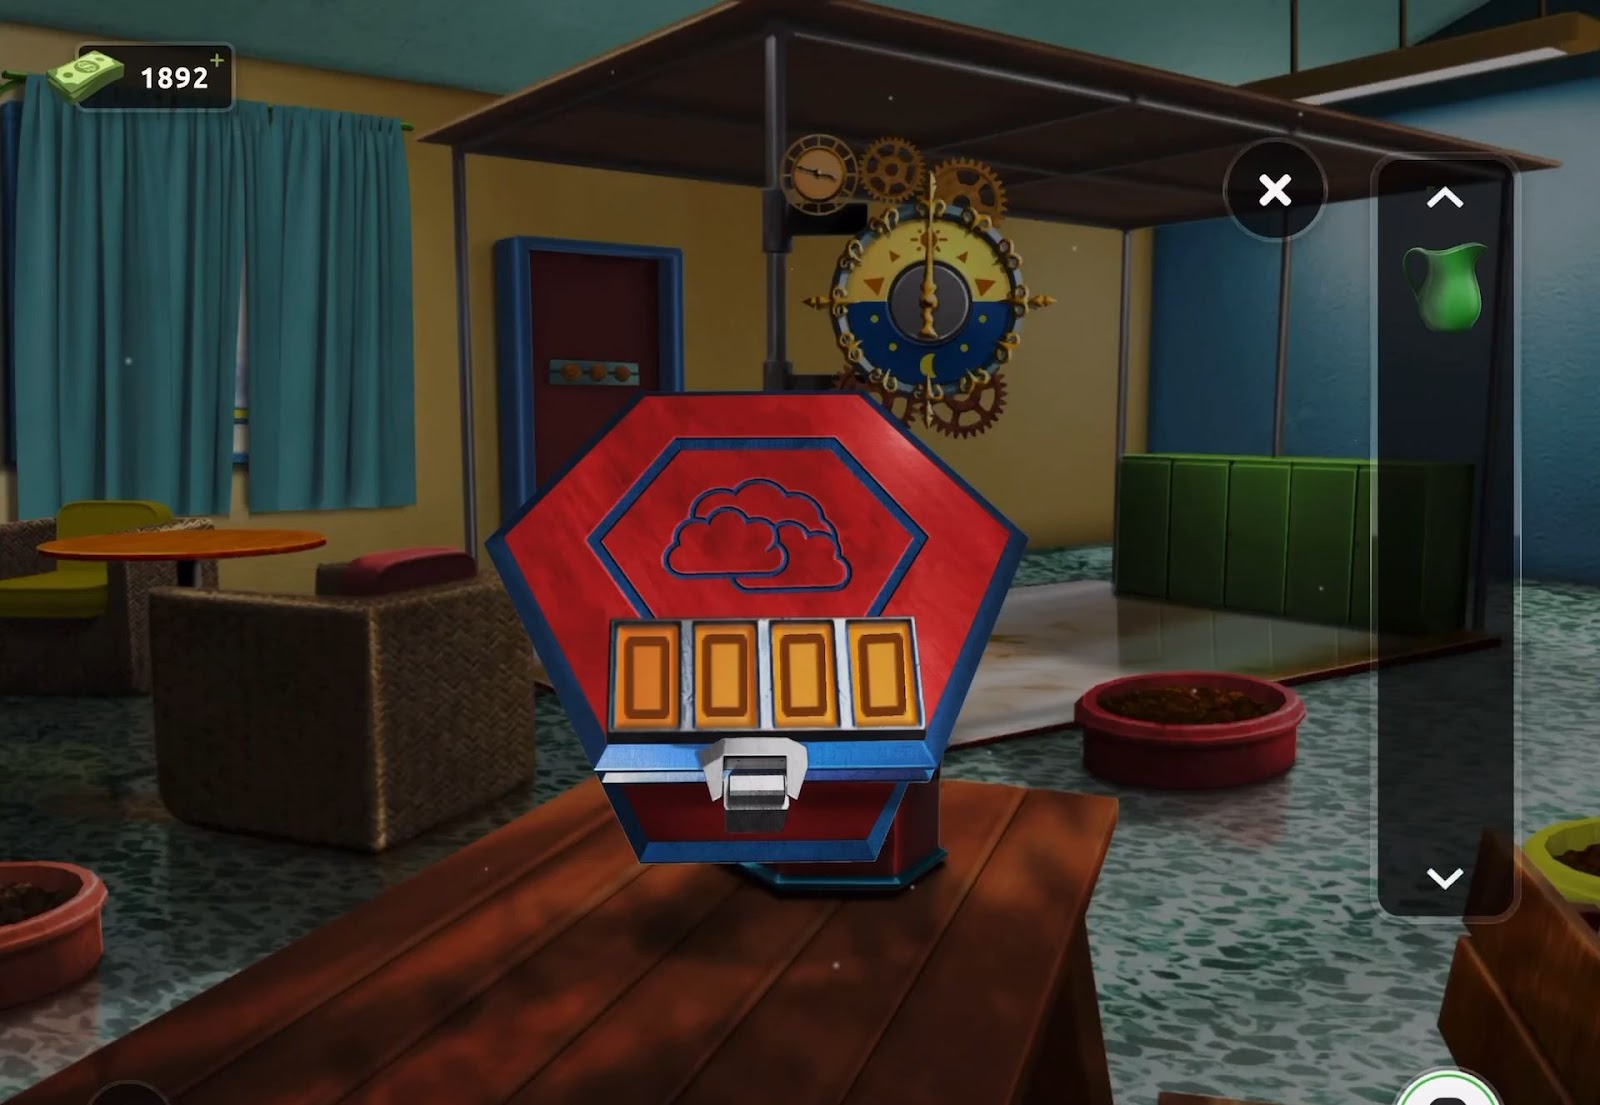
- After that, open the box on the table, which is marked with a cloud, and enter the obtained code (4312).
- Now gather three seed bags from the room. Match each seed bag with its corresponding colored planter: Orange to the left, red in the middle, and yellow to the right.
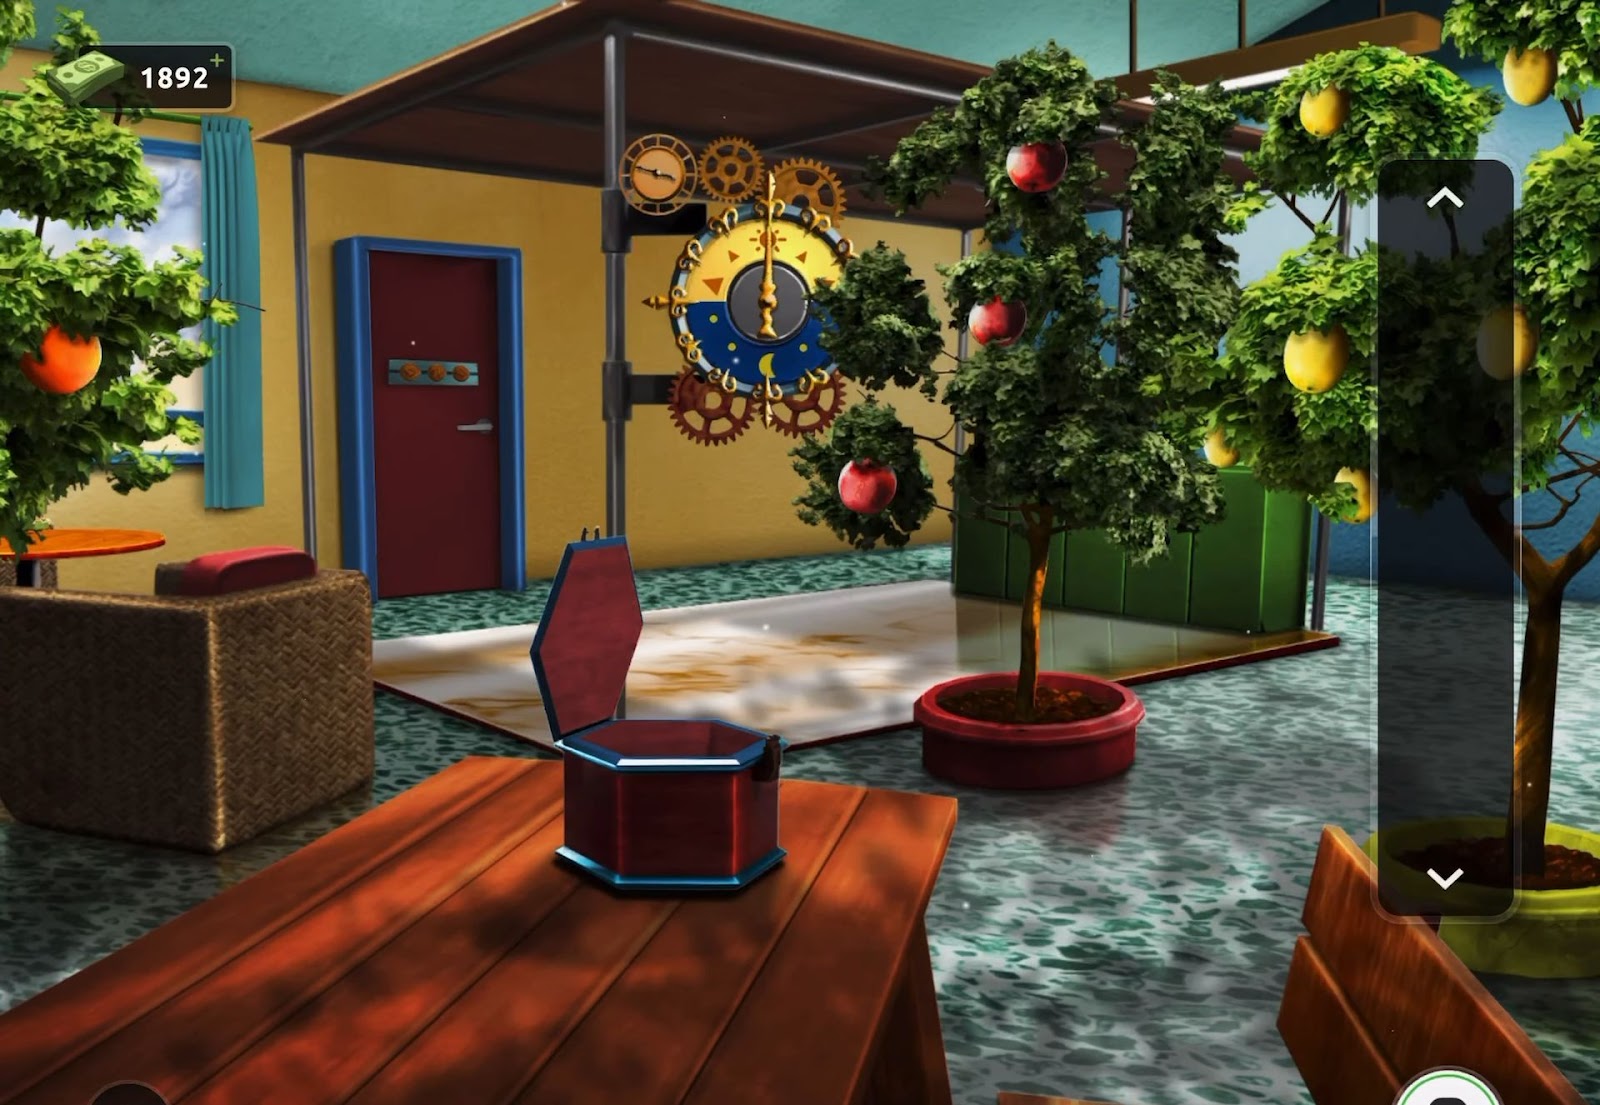
- Then review the door’s puzzle lock, which consists of three shapes.
- Next, select three shapes that closely resemble the trees without considering the fruit.
- Finally, escape the room using the identified shapes on the puzzle lock.
Level 46:
To complete level 46, follow the instructions below:
- Firstly, retrieve a crowbar from the stool in the central area.
- Use the crowbar on the lone wall cabinet above the right-side sink and gather a hose.

- Next, view the wall-mounted hairdryer located to the right of the oven and collect a roll of tape from the top.
- Then inspect the hose to identify a hole, then mend it with the tape. Attach the hose to the right-side sink to fill the tall urn with water.
- Now retrieve a soaked paper from the water. Revisit the hand dryer on the wall and activate it by pressing the button.
- Then insert the wet paper into the dryer to dry it completely.
- Next, examine the dried paper in your inventory and open it by tapping. Review the clue on the paper.

- After that proceed to the exit door lock and utilize the information from the paper to obtain the correct code (1743).
- Finally, the door will be unlocked and you can escape through it.
Level 47:
To complete level 47, follow the instructions below:
- Firstly, obtain a red ring from the drawer unit situated on the far right side of the room.
- Now examine the round wall hook plate located on the right wall.
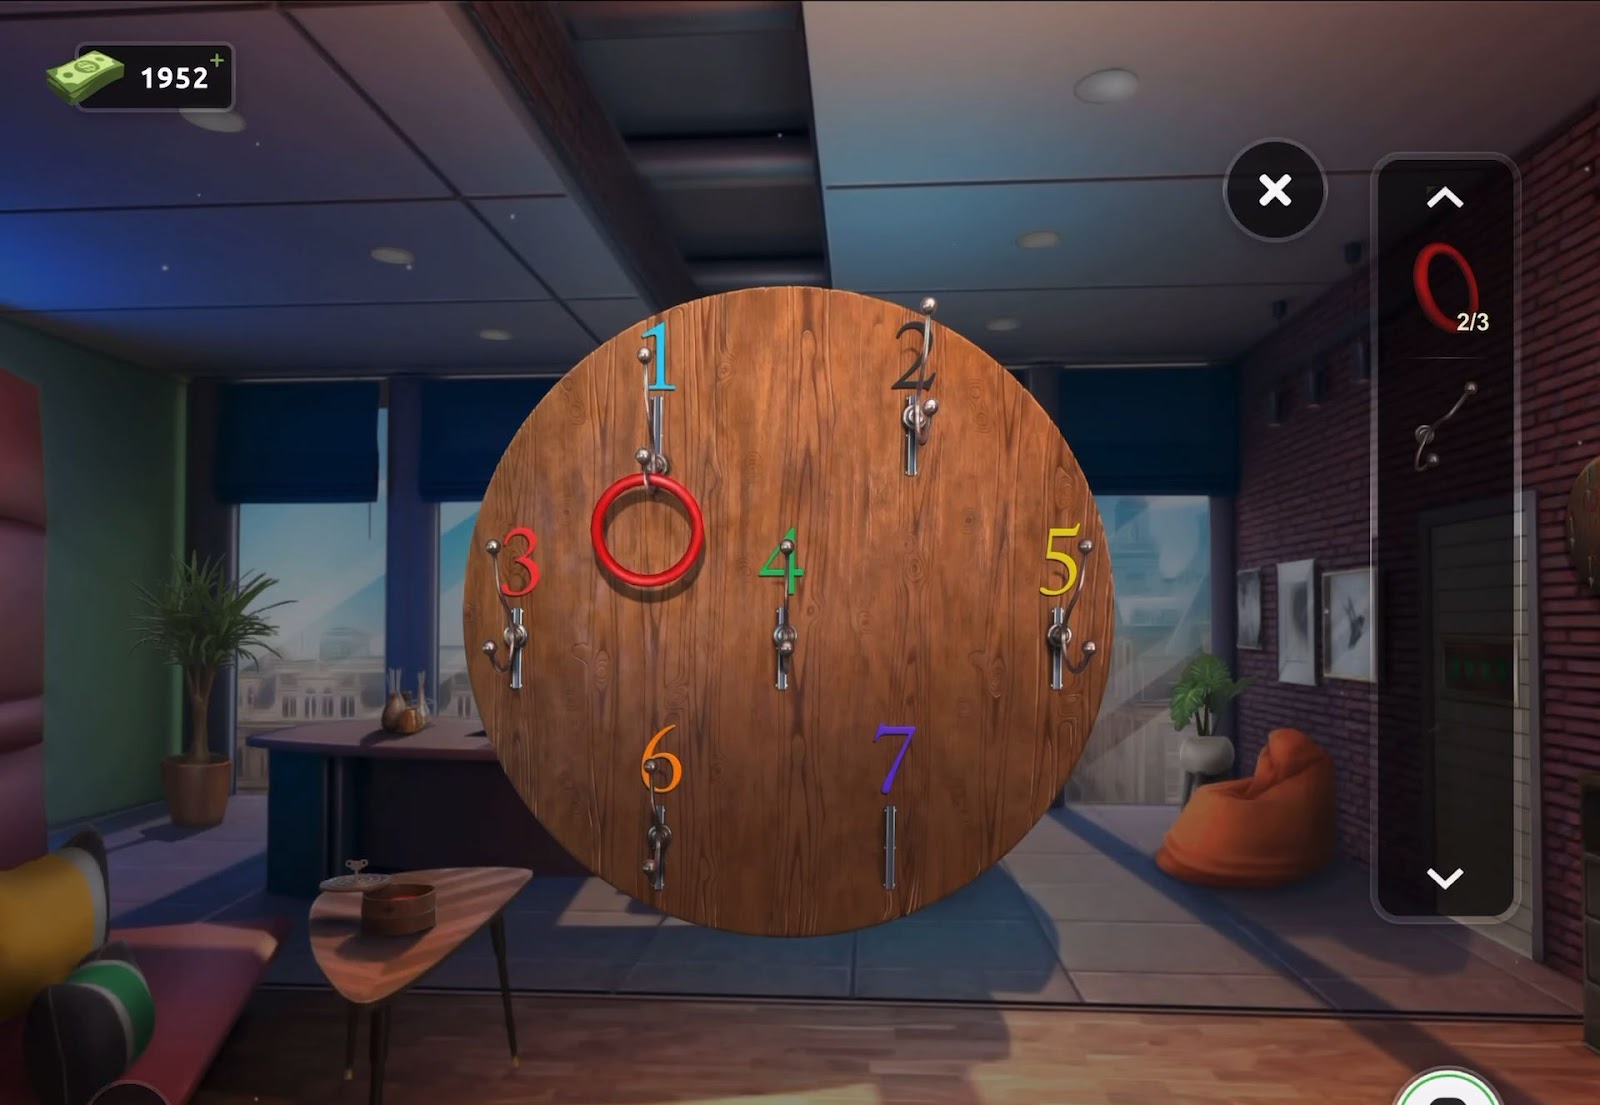
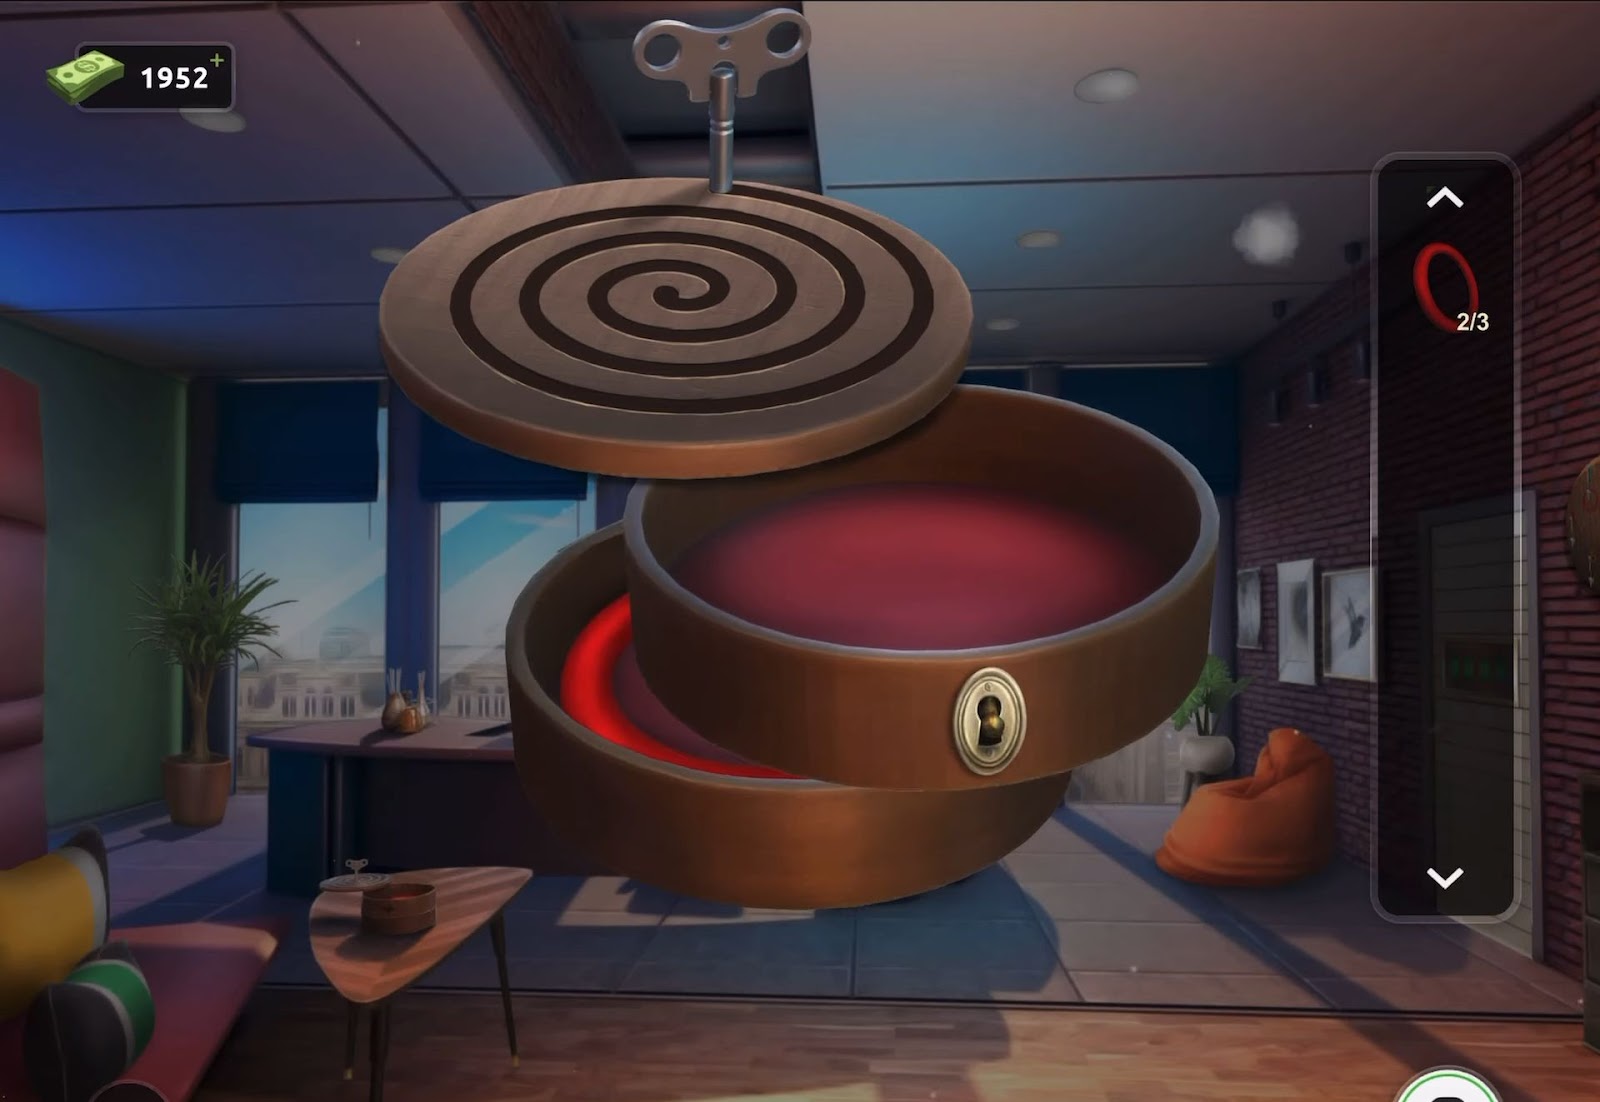
- Next, collect the broken hook placed near the number 7. Explore the small round box positioned on the table next to the left sofa.
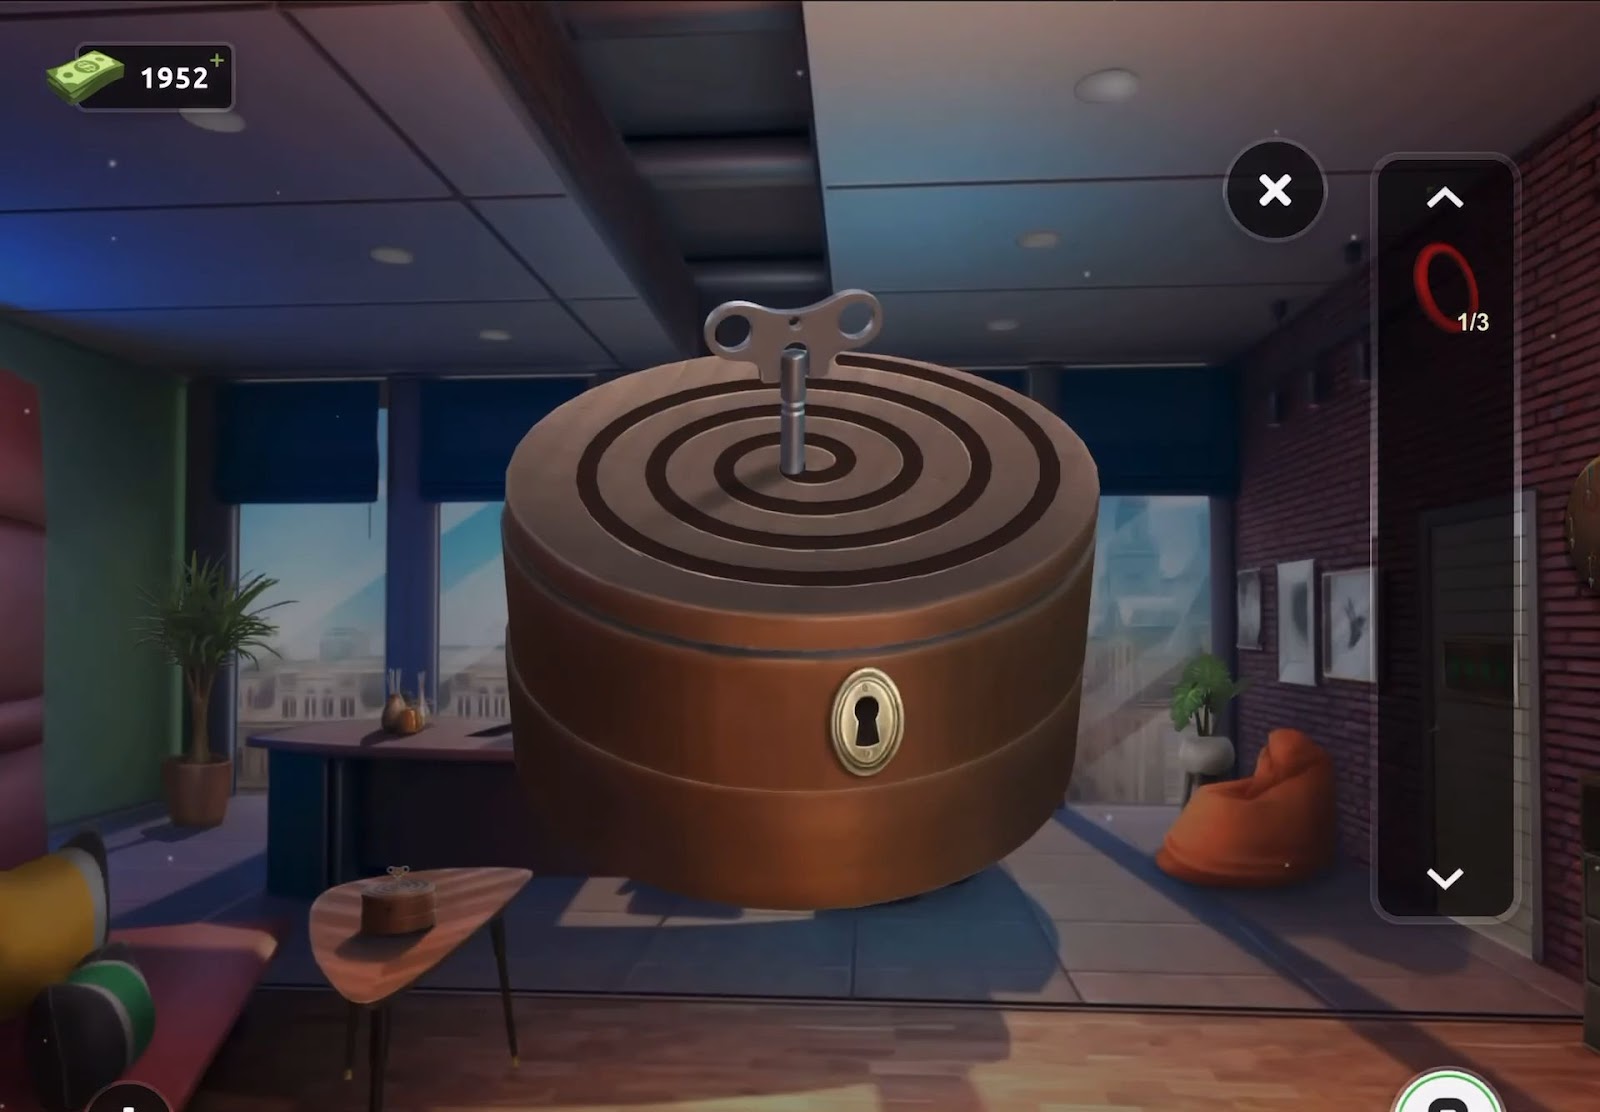
- Then open the top section of the box using the key and retrieve a second red ring and an additional key.
- After that, utilize the key in the lock to open the lower section of the box. Employ the hook to acquire the third red ring from the bottom.
- Now tap on the desk to examine the executive toy.
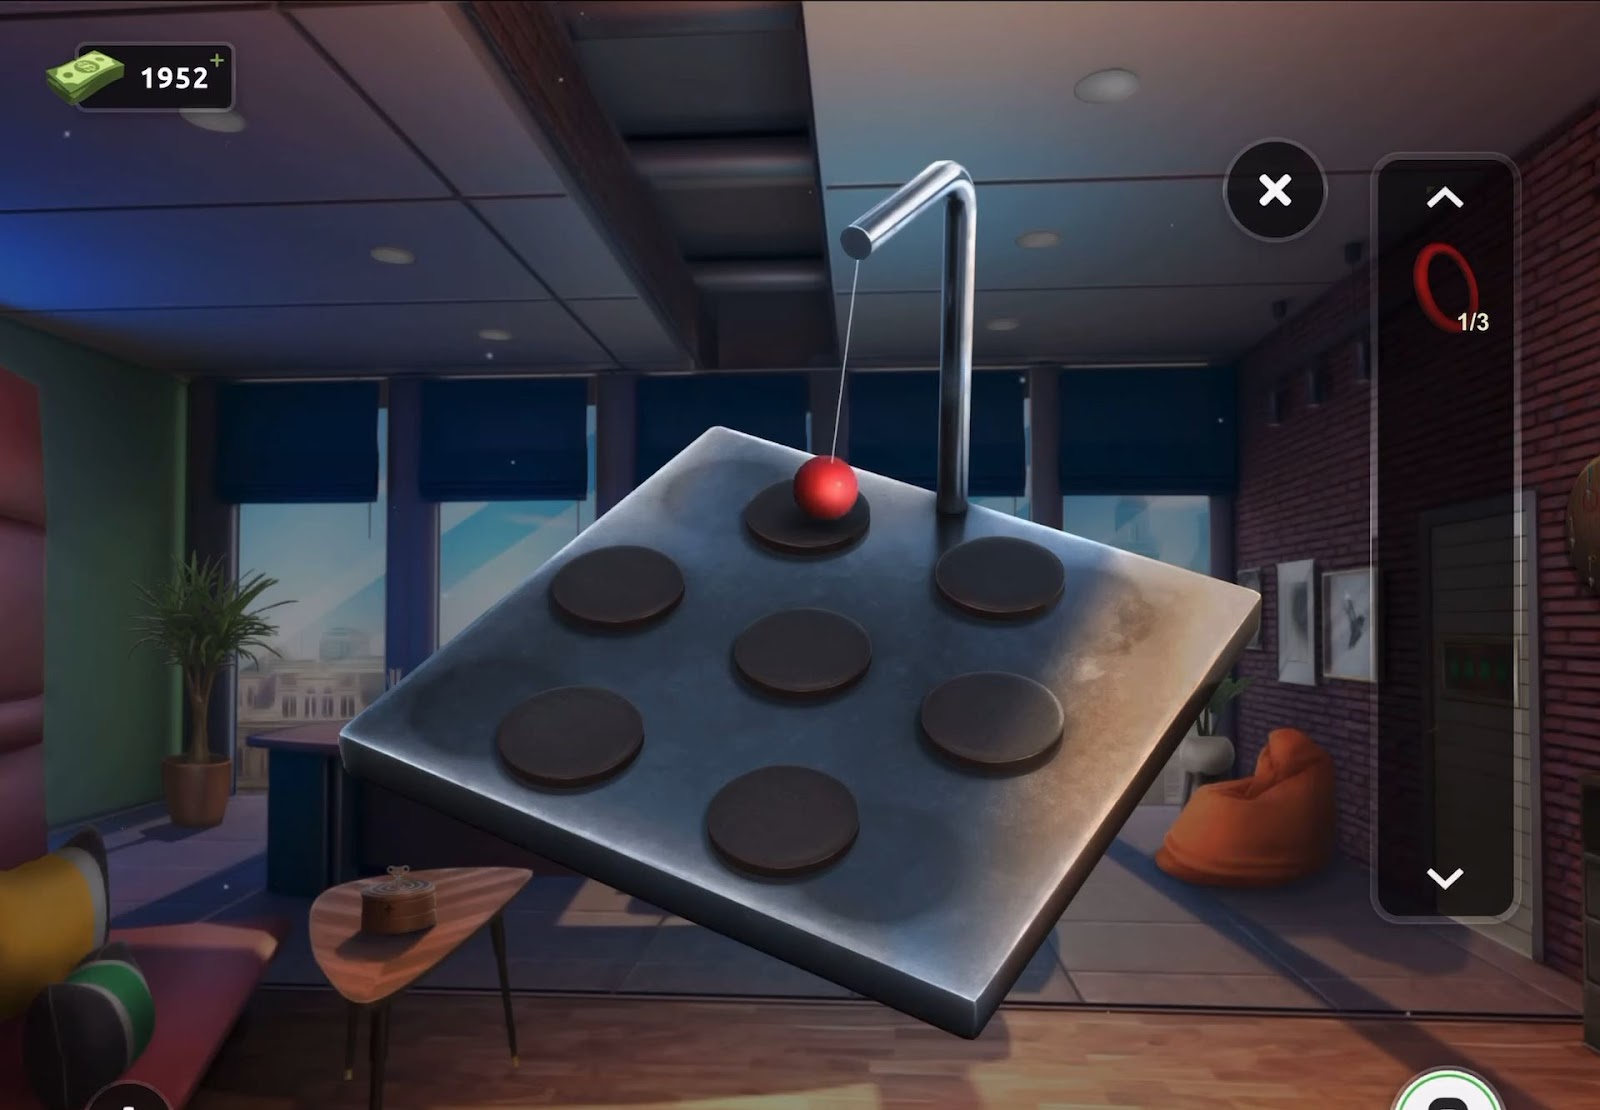
- Then loosen the ball by tapping it, causing it to swing to one of the circles. Repeat this action to make it swing to a new position.
- Continue until you’ve found four different locations.
- After that, revisit the round wall hook plate. Place the three rings onto three additional hooks as per the observed locations.
- Now examine the round wall hook plate once more and place the three rings on three additional hooks.
- Next, upon completion, a color clue will be displayed. Use this clue to get the code (2154) for the exit door.
- Finally, escape the room using the obtained code (2154).
Level 48:
To complete level 48, follow the instructions below:
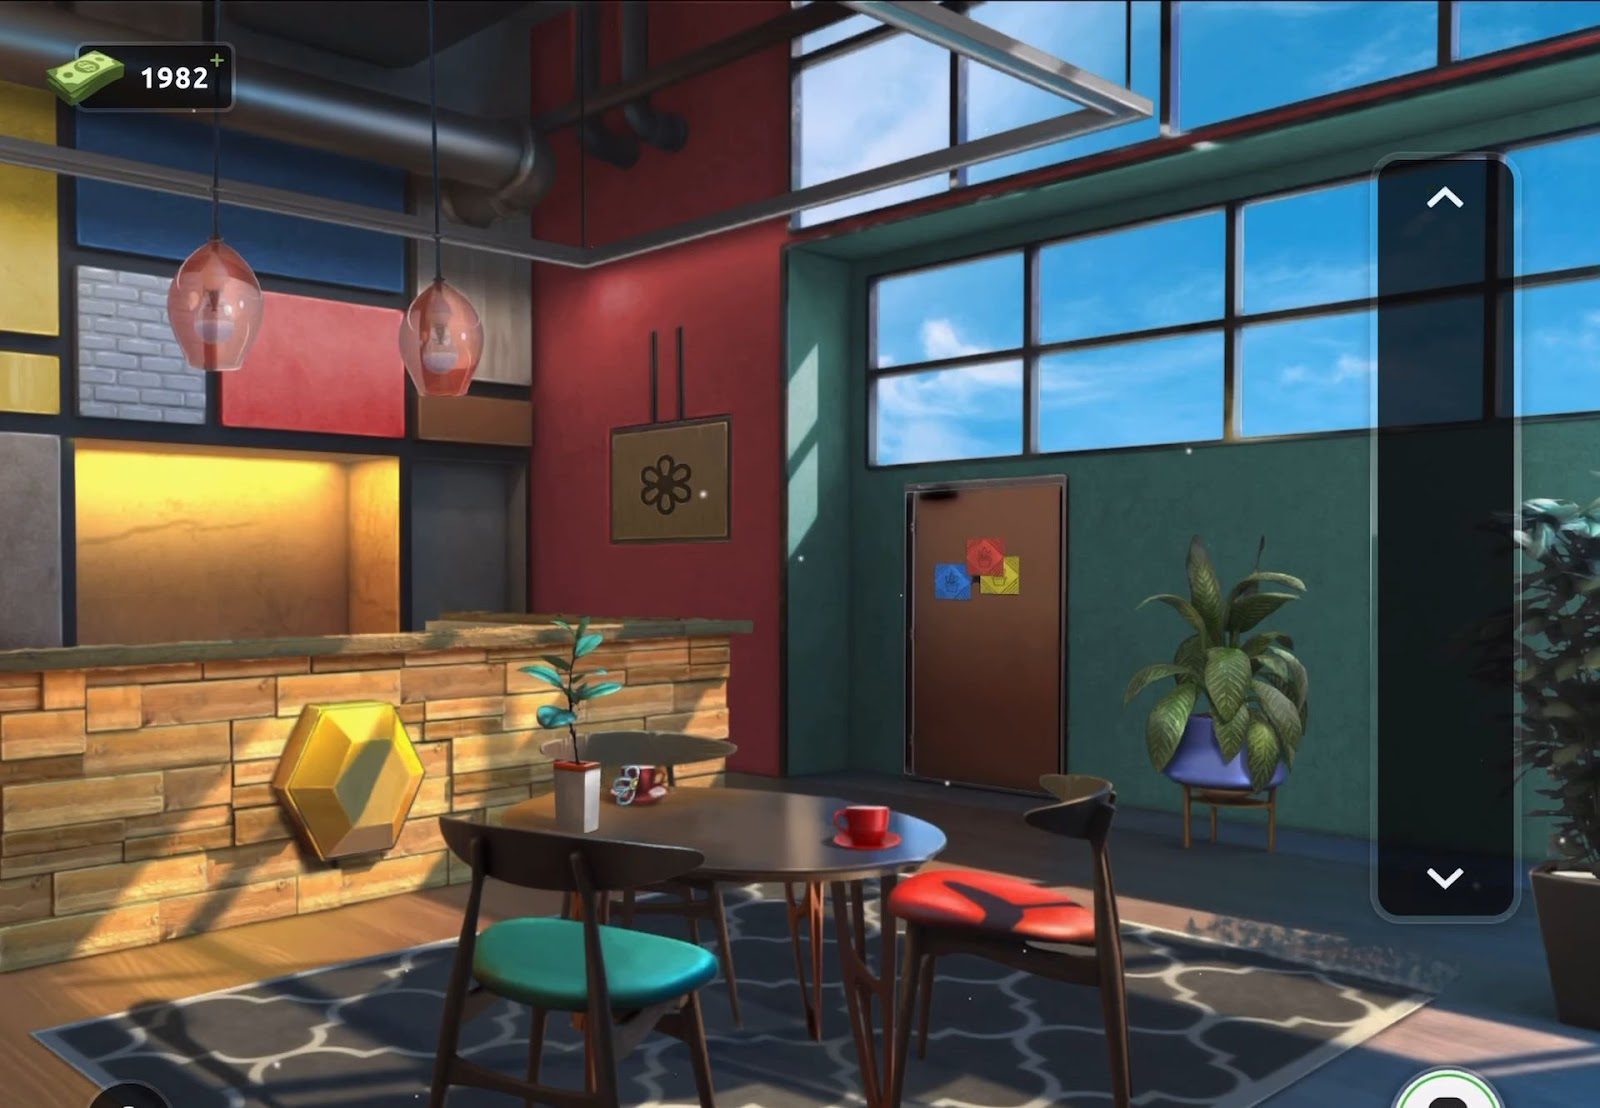
- First, interact with the small plant on the table to reveal half of a flower emblem.
- Next, manipulate the hanging plant in the top-left corner of the room to discover the other half.
- Now, examine the flower emblem on the wall to the left of the door and attach the two pieces to open the frame.
- Then inside the opened frame, interact with the pot plant that emerges, causing it to elevate.
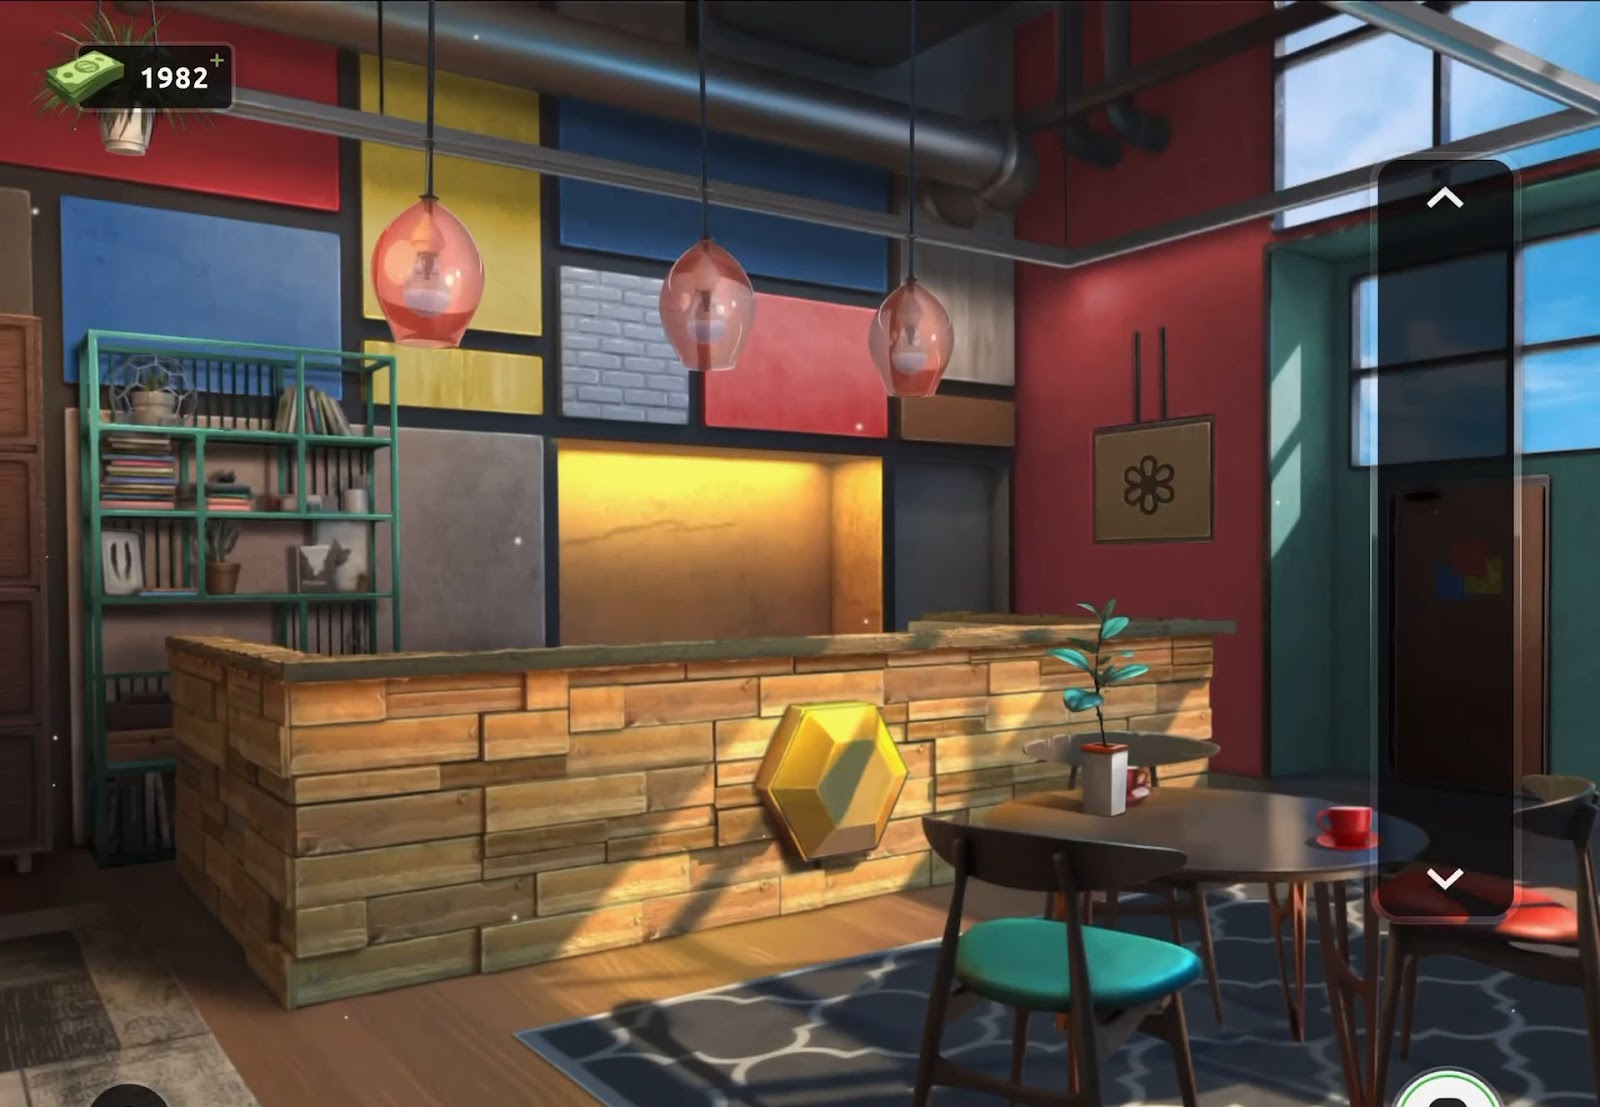
- Next, tap the sizable potted plant on the right to displace leaves and discover a leaf emblem.
- Now proceed to the exit door to identify the leaf emblem slot.
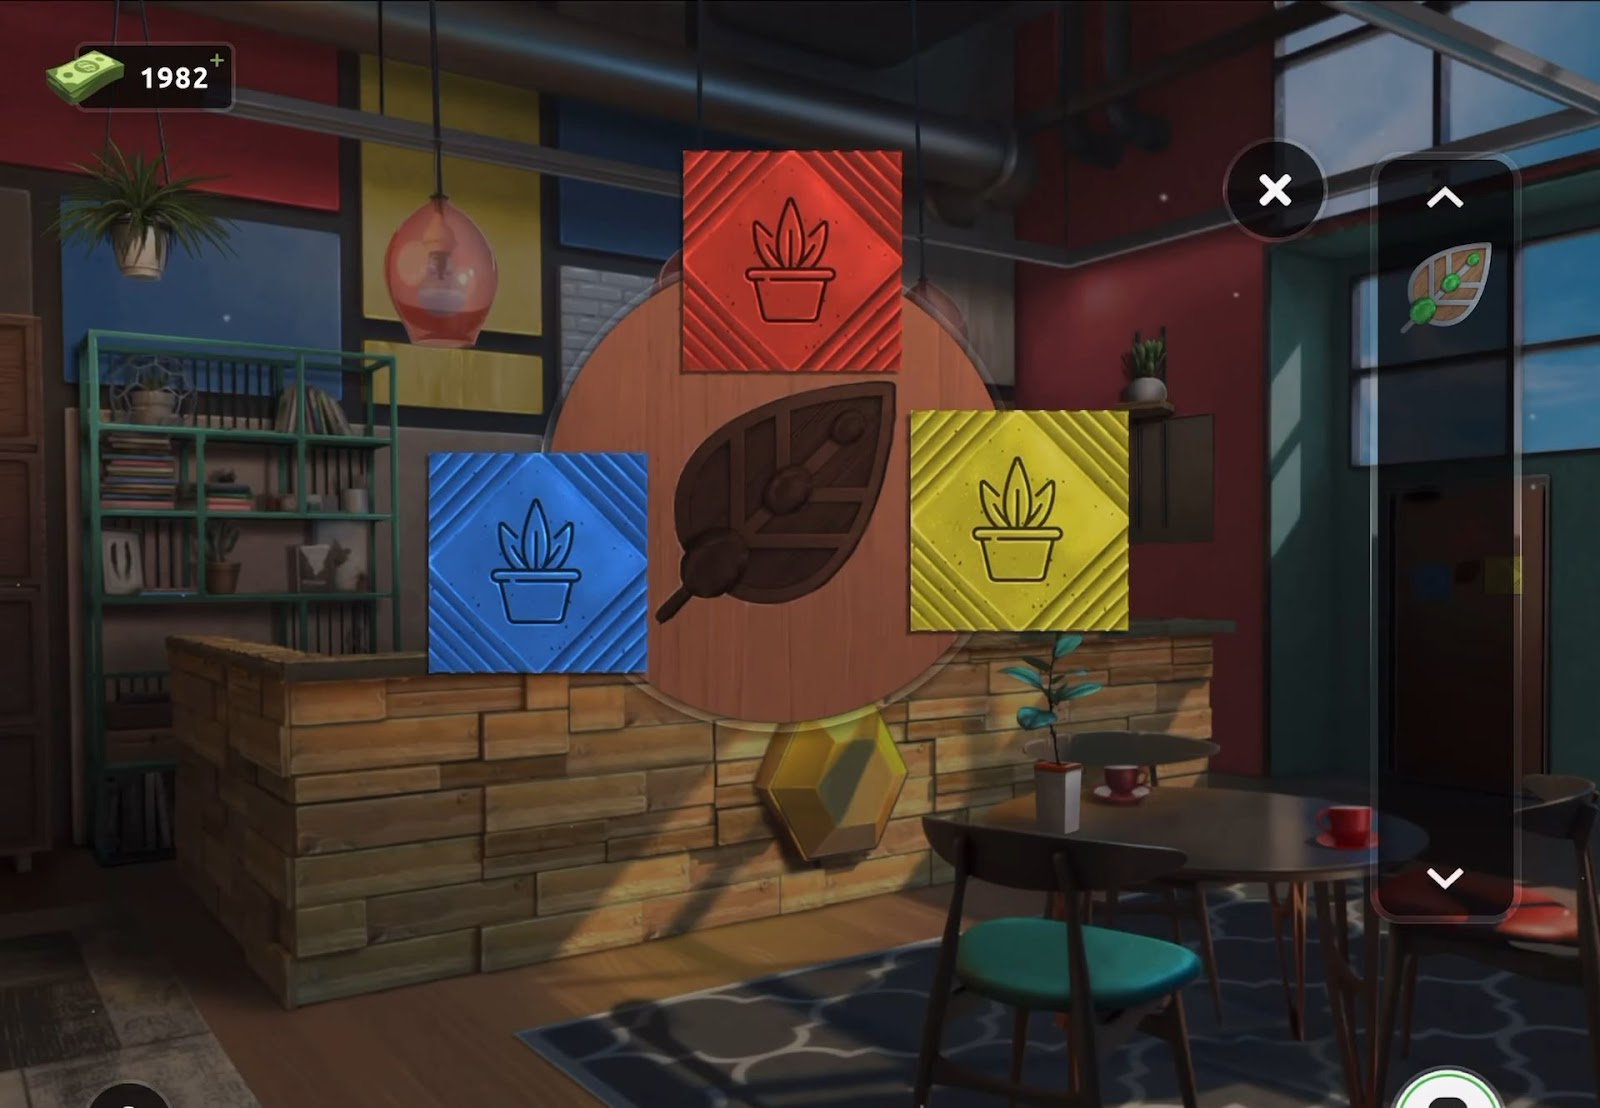
- Finally, insert the emblem into the slot, prompting the door to open, enabling you to escape the room.
Level 49:
To complete level 49, follow the instructions below:
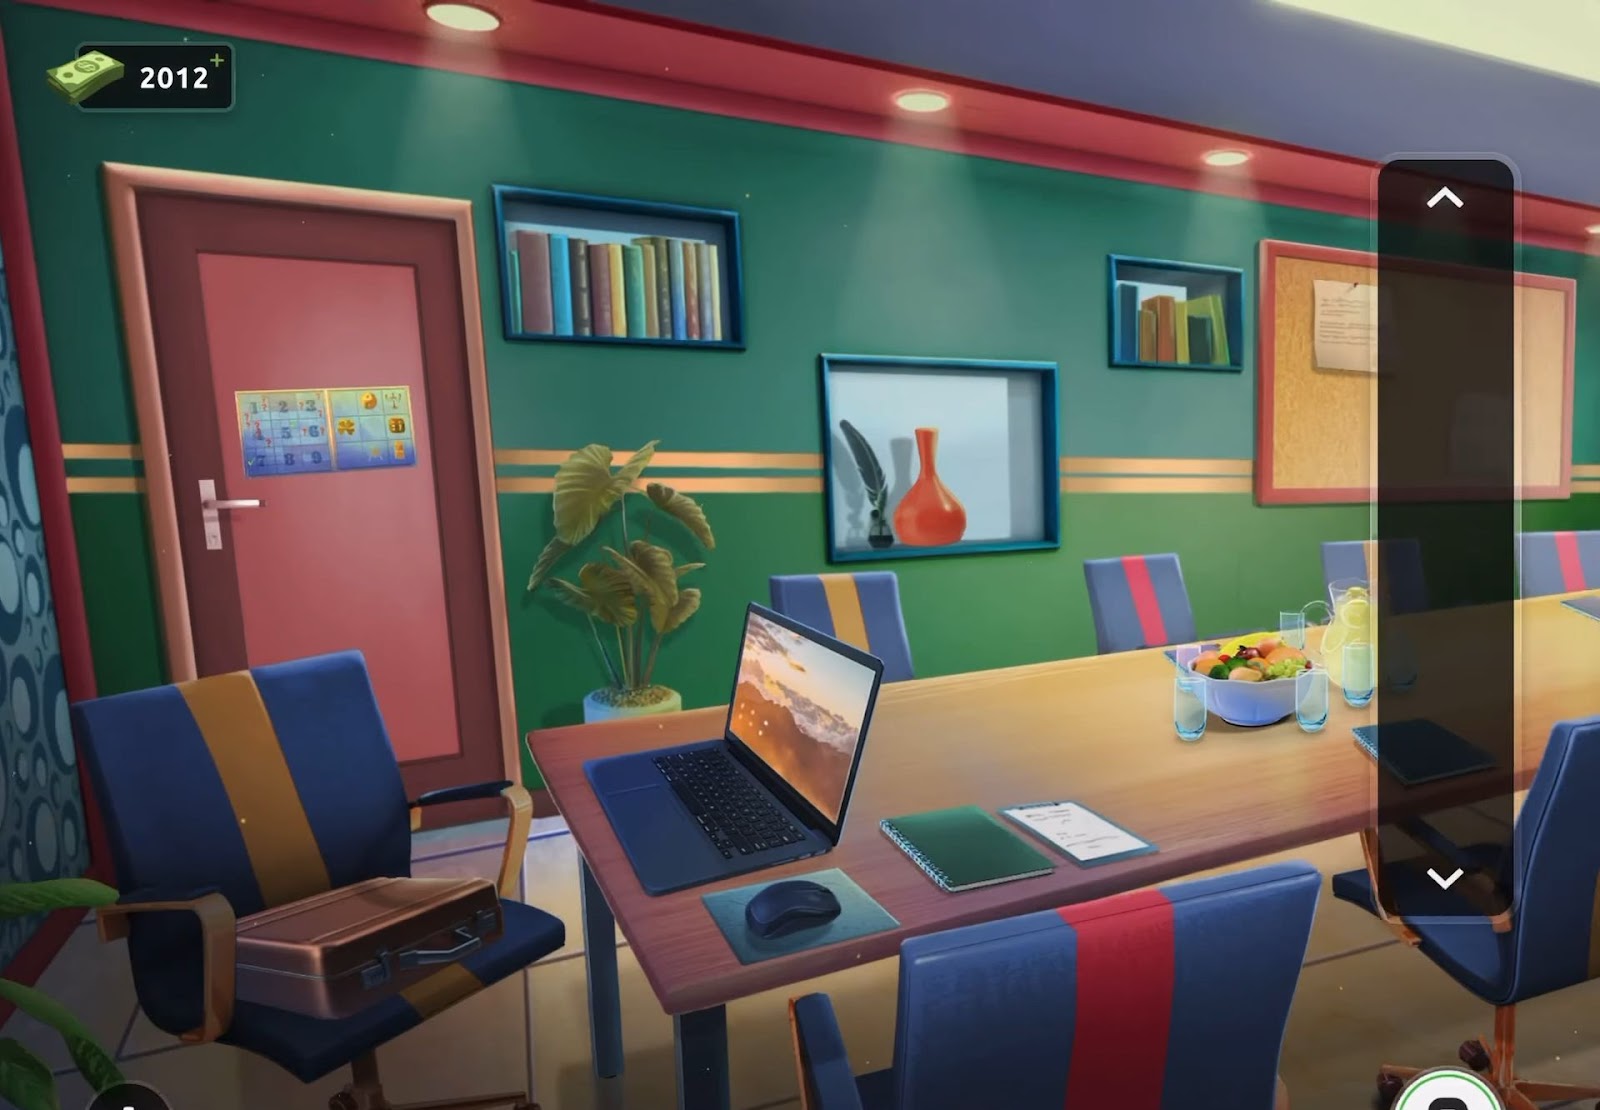
- Firstly, open the briefcase placed on the left chair to acquire a gold star.
- Then shift the green book on the table to reveal a gold playing card.
- Subsequently, uncover a gold thumb hidden beneath a note on the pinboard in the upper right corner. Collect all three gold items.
- Next, proceed to view the poster on the exit door.
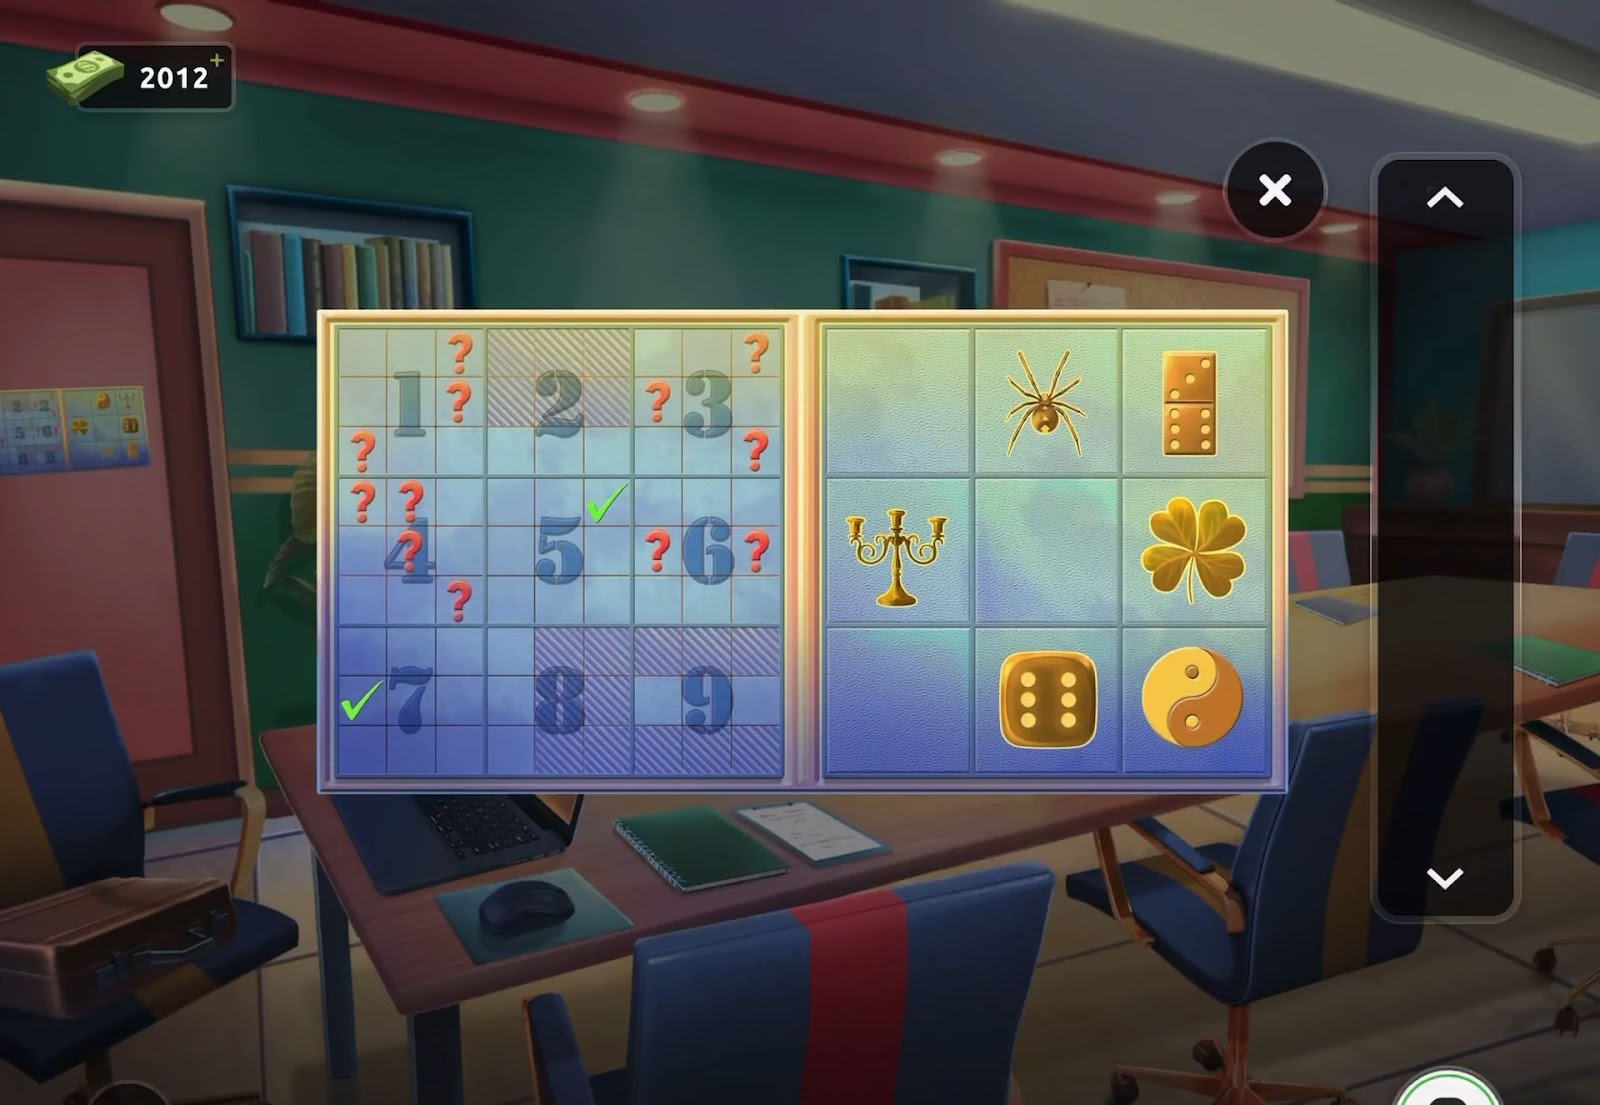
- After that, integrate the three gold symbols to activate the puzzle.
- Now arrange the symbols in their respective positions, each symbol corresponding to a number from 1 to 9.
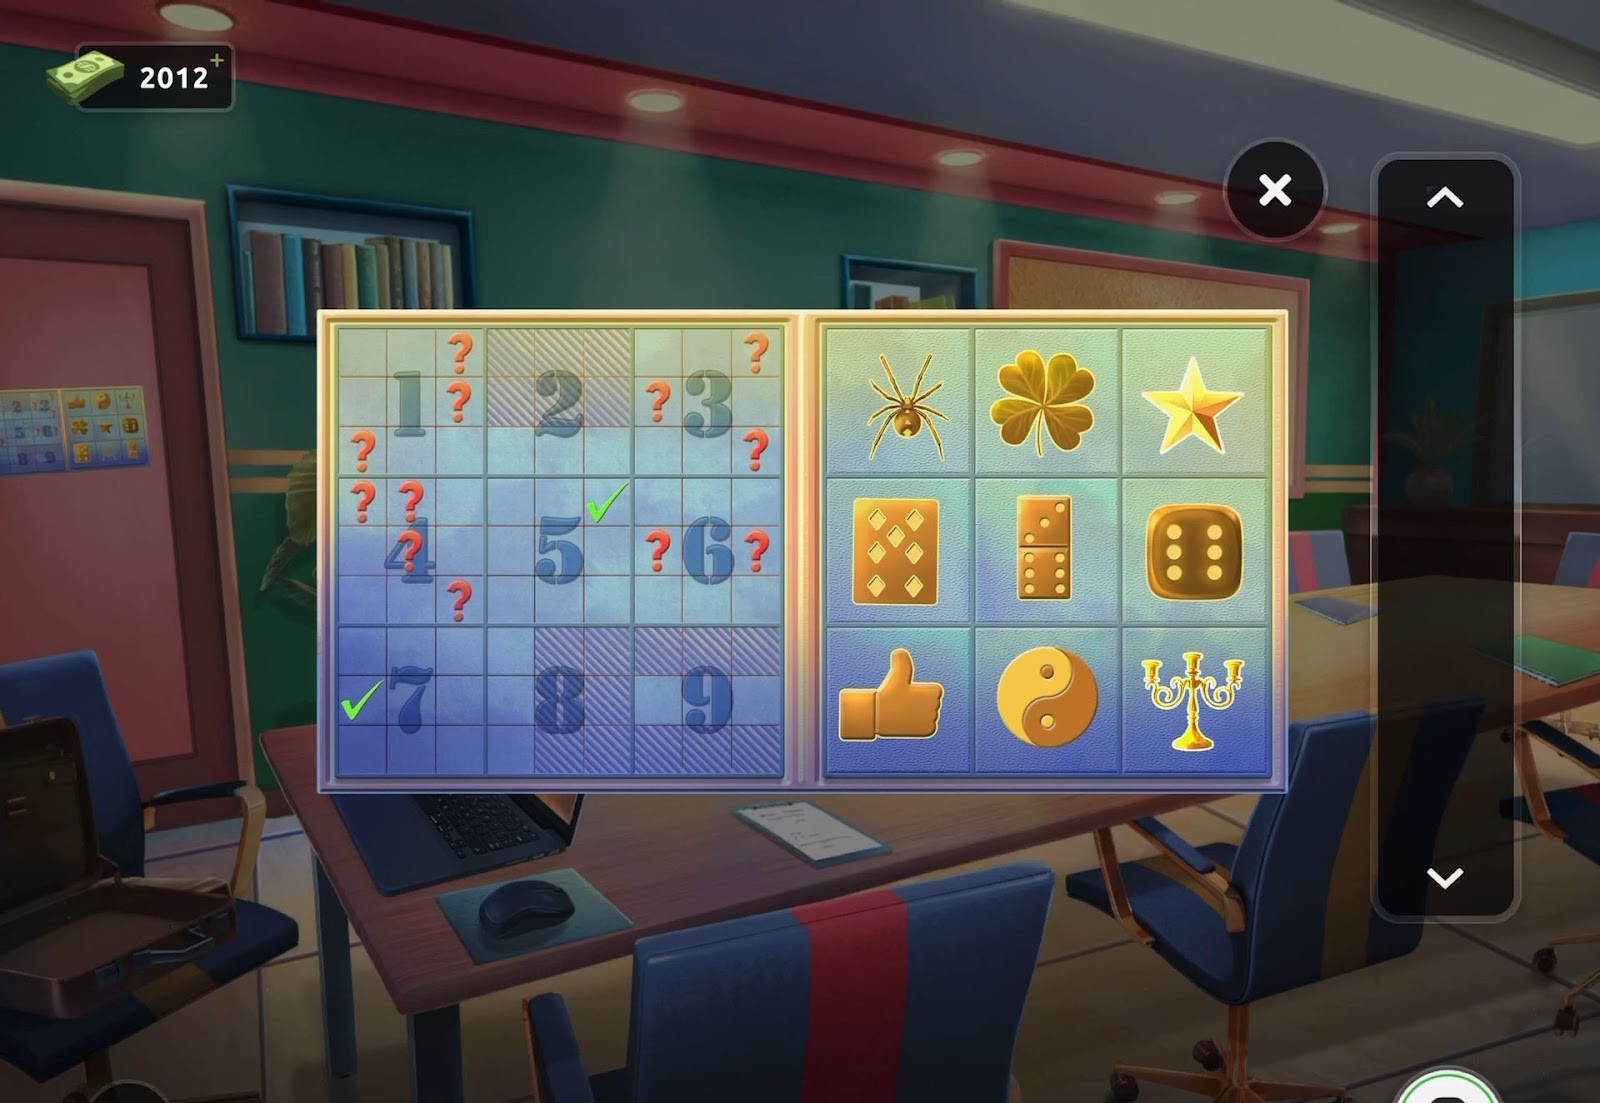
- Once the symbols are placed correctly, the room will be accessible for you to escape.
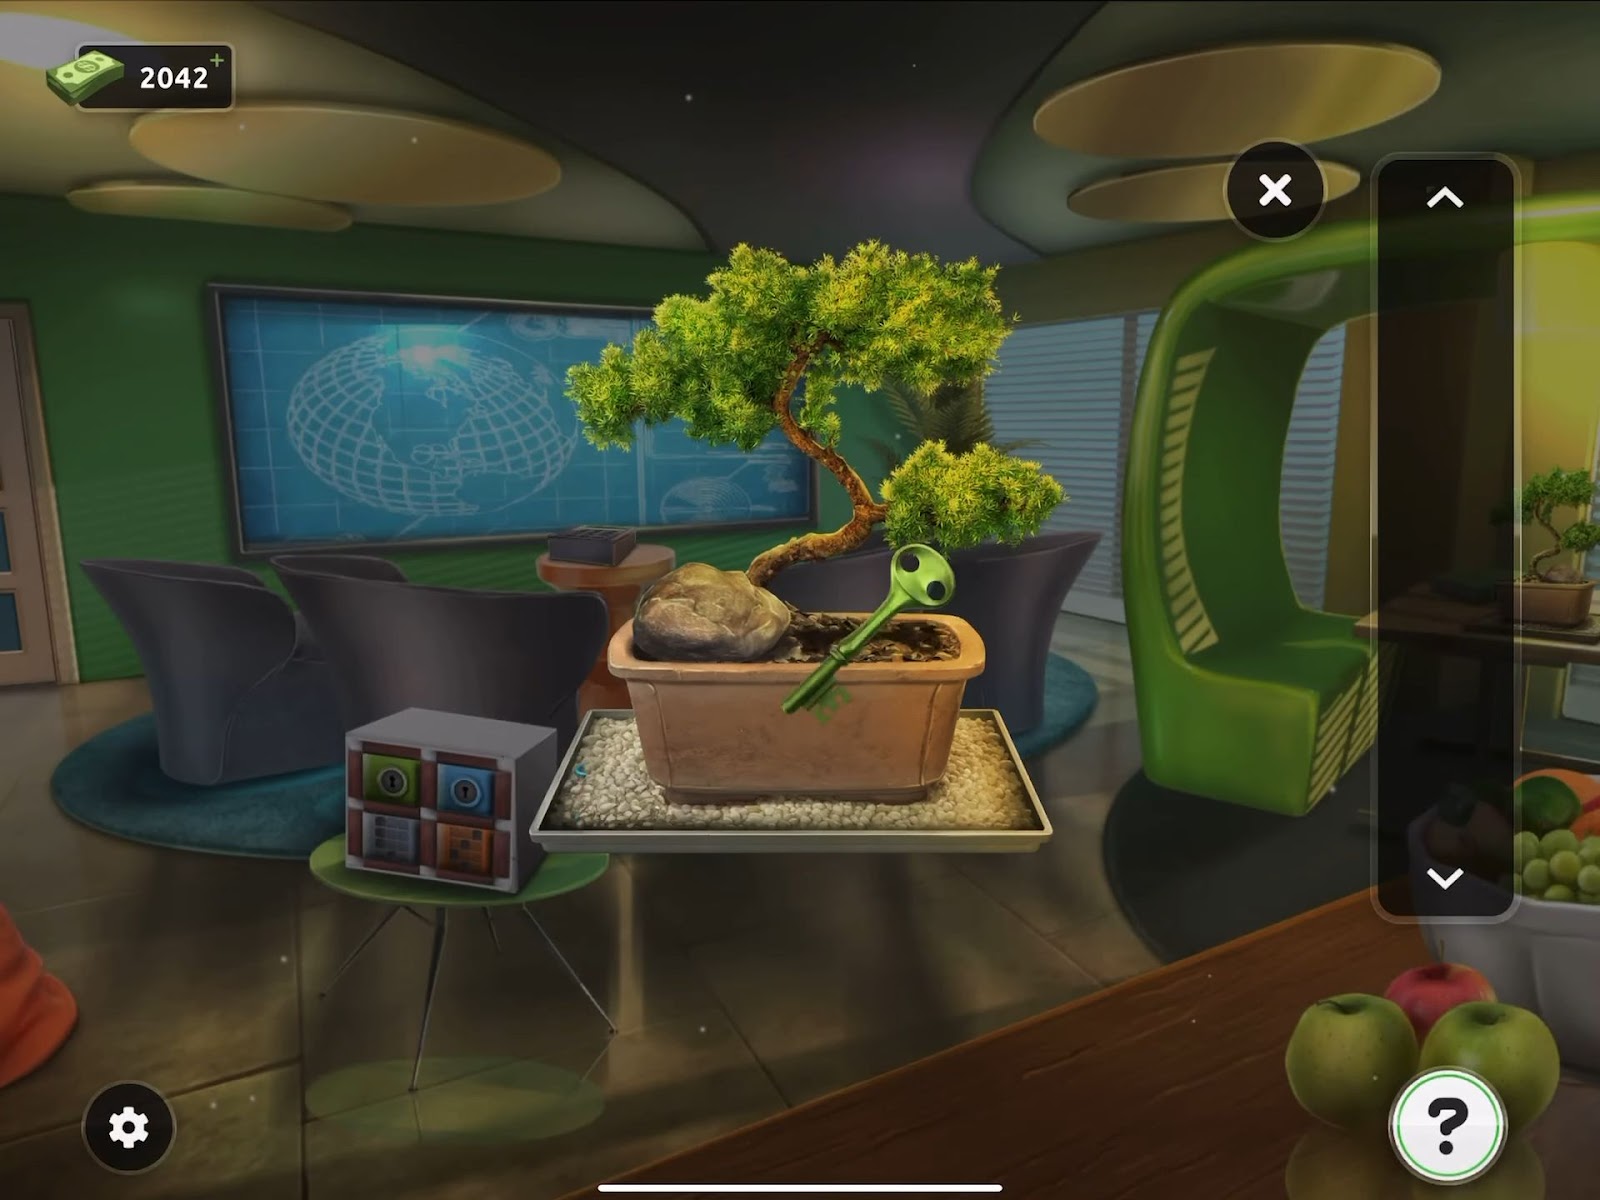
Level 50:
To complete level 50, follow the instructions below:
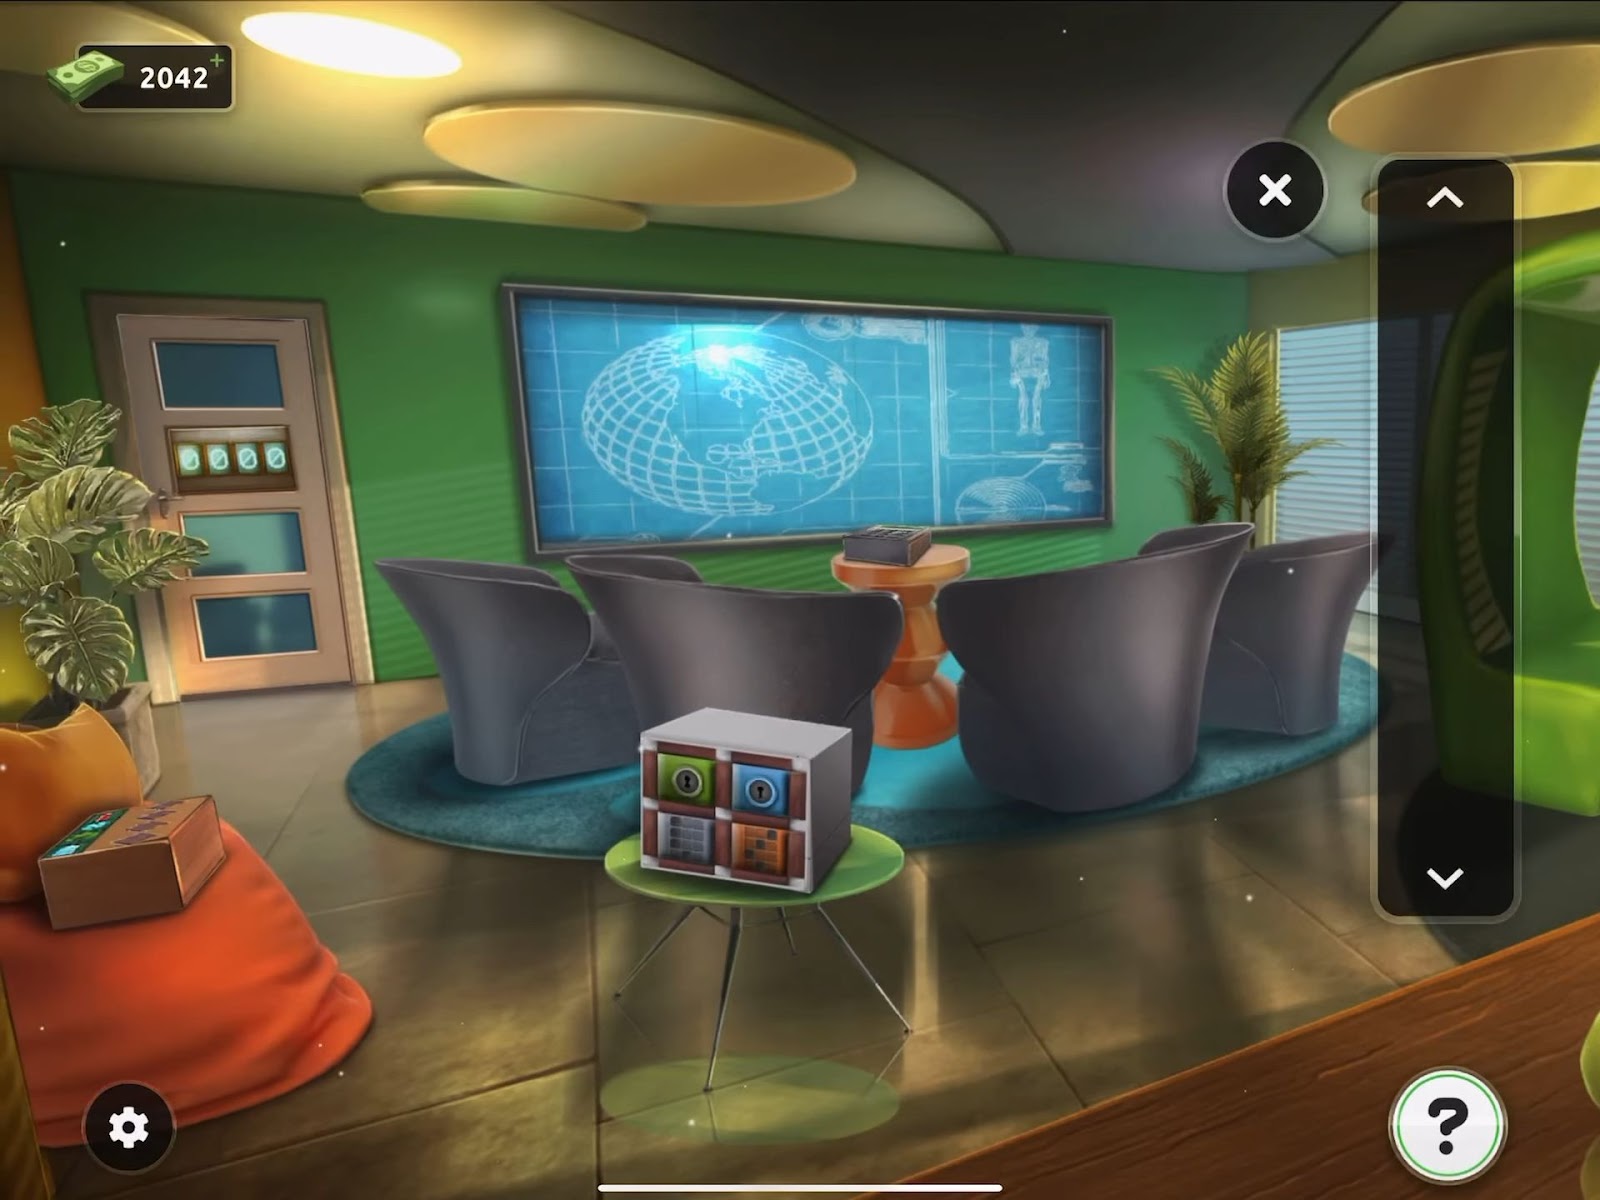
- First, examine the bonsai tree situated on the right-hand side table.
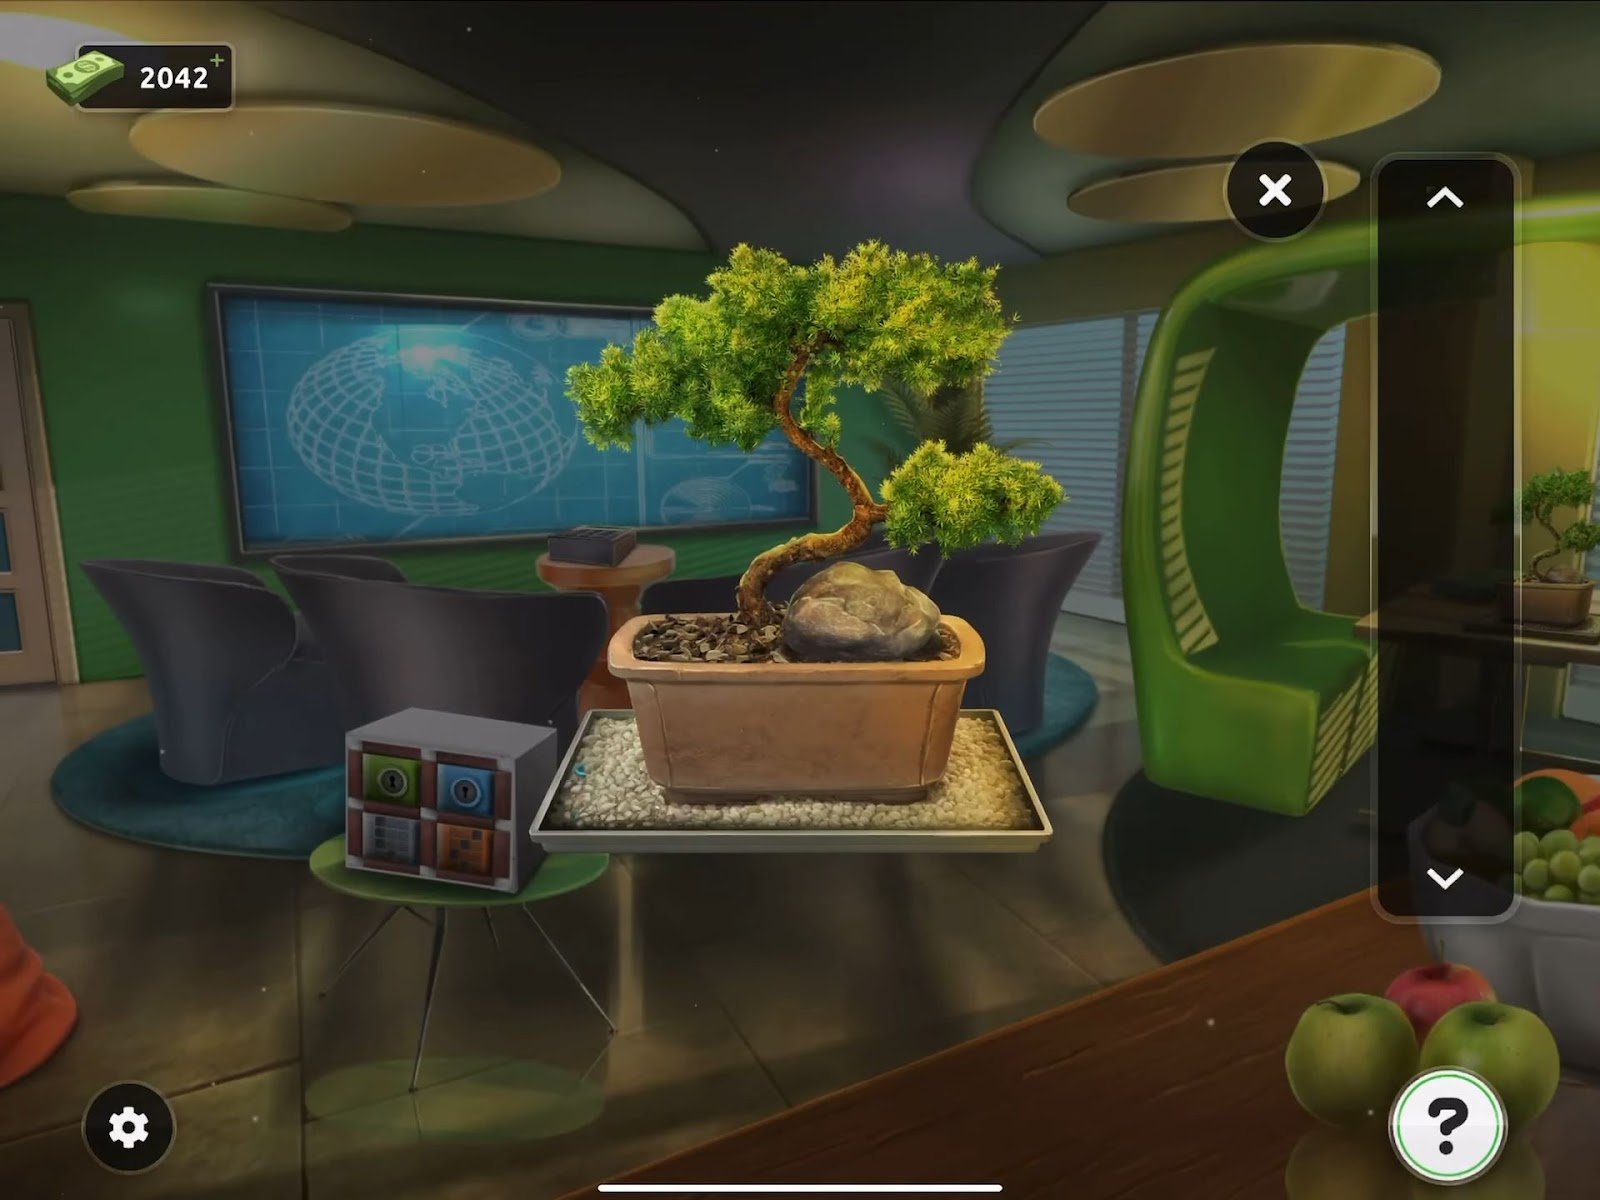
- Then shift the rock embedded in the soil to discover and collect a green key.
- Additionally, dig in the stone positioned on the left to uncover a blue key.
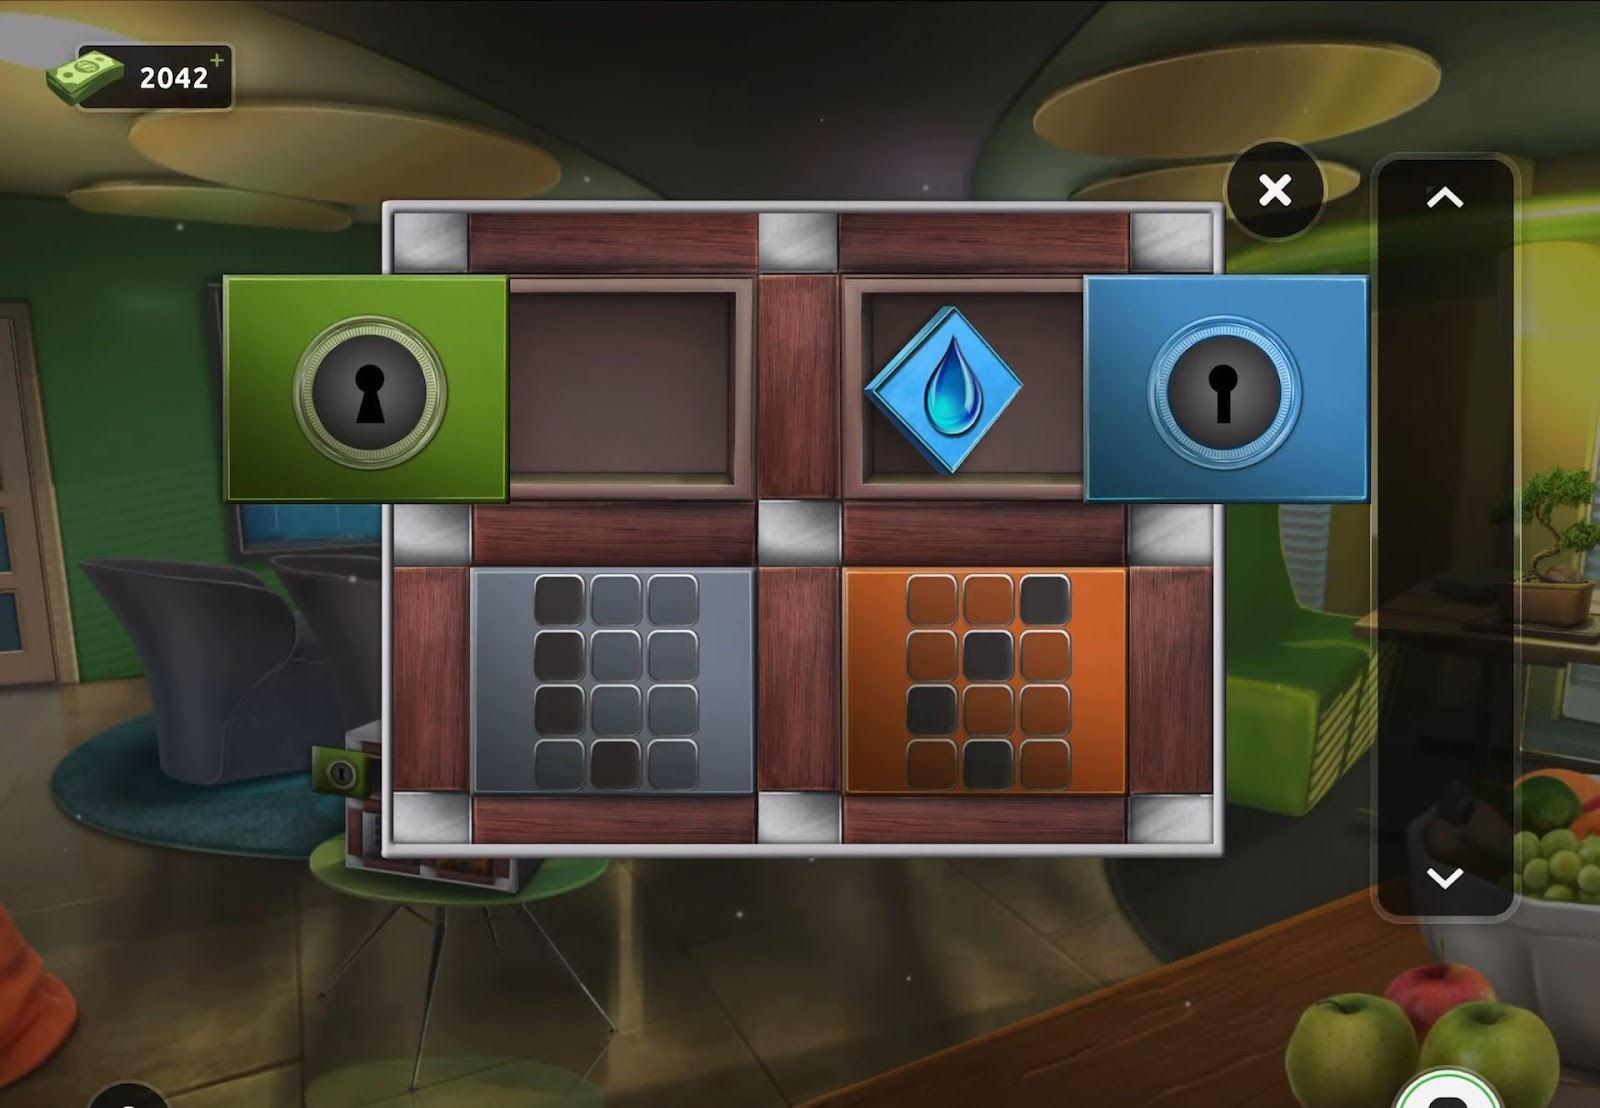
- Then view the box positioned on the small green table.
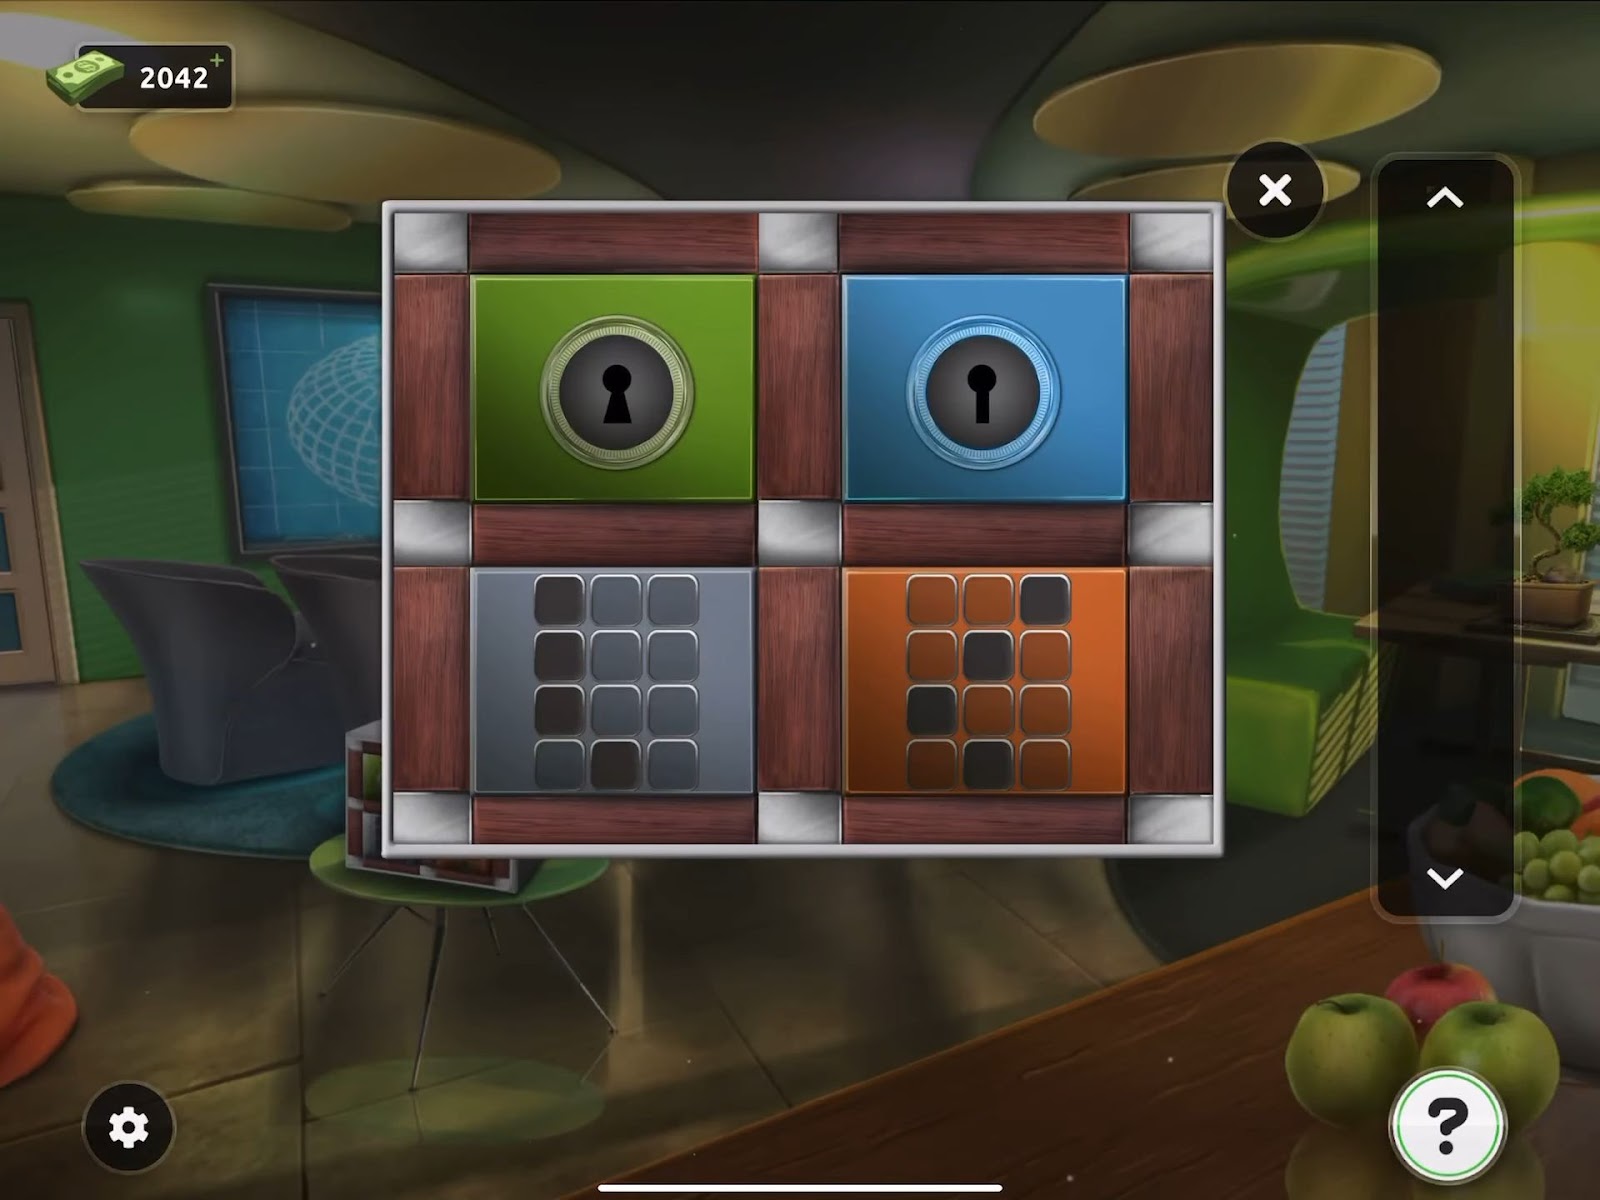
- Next, utilize the two keys to unlock the top compartments, acquiring two colored tiles. Take careful note of the hints presented in the grids of squares below, as they serve as a clue for a puzzle.
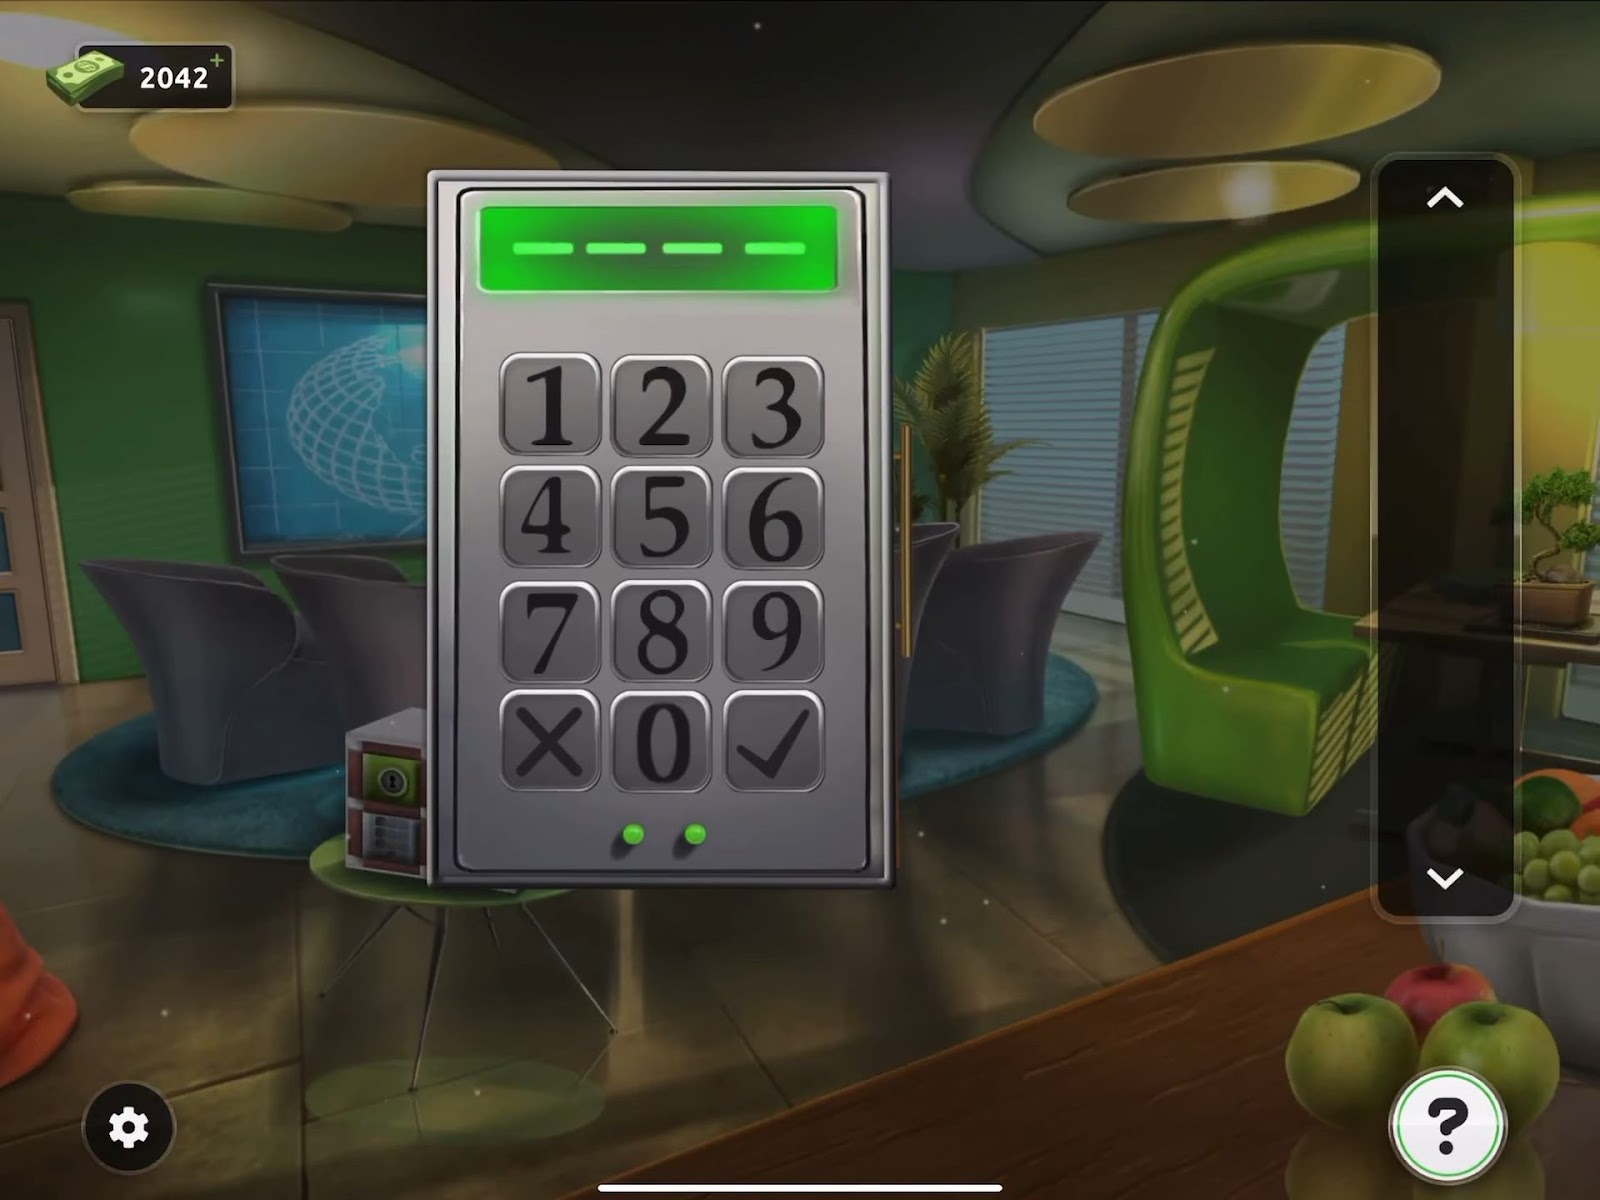
- After that, proceed to the locked box placed on the pedestal situated in front of the prominent blue screen.
- To access this box, input two codes (1470) to open it.
- Upon unlocking, retrieve two additional colored tiles. Direct attention to another box located on the orange chair towards the left-hand side of the room.
- Then insert the four tiles into the slots on the right side of the box to correspond with the symbols on the left.
- Now gather a paper clue from within the box and inspect its contents.
- Then examine the clue, which indicates a time to be deduced from the keypad grids.
- After that, the clock delineates the hour from the left grid and the minutes from the right grid (12:45).
- Now observe the exit door’s puzzle, where a specific time is required. Input the time acquired from the previous step into the code (3570).
- Finally, use this code (3570) to open the exit door and leave the room.
Level 51:
To complete level 51, follow the instructions below:
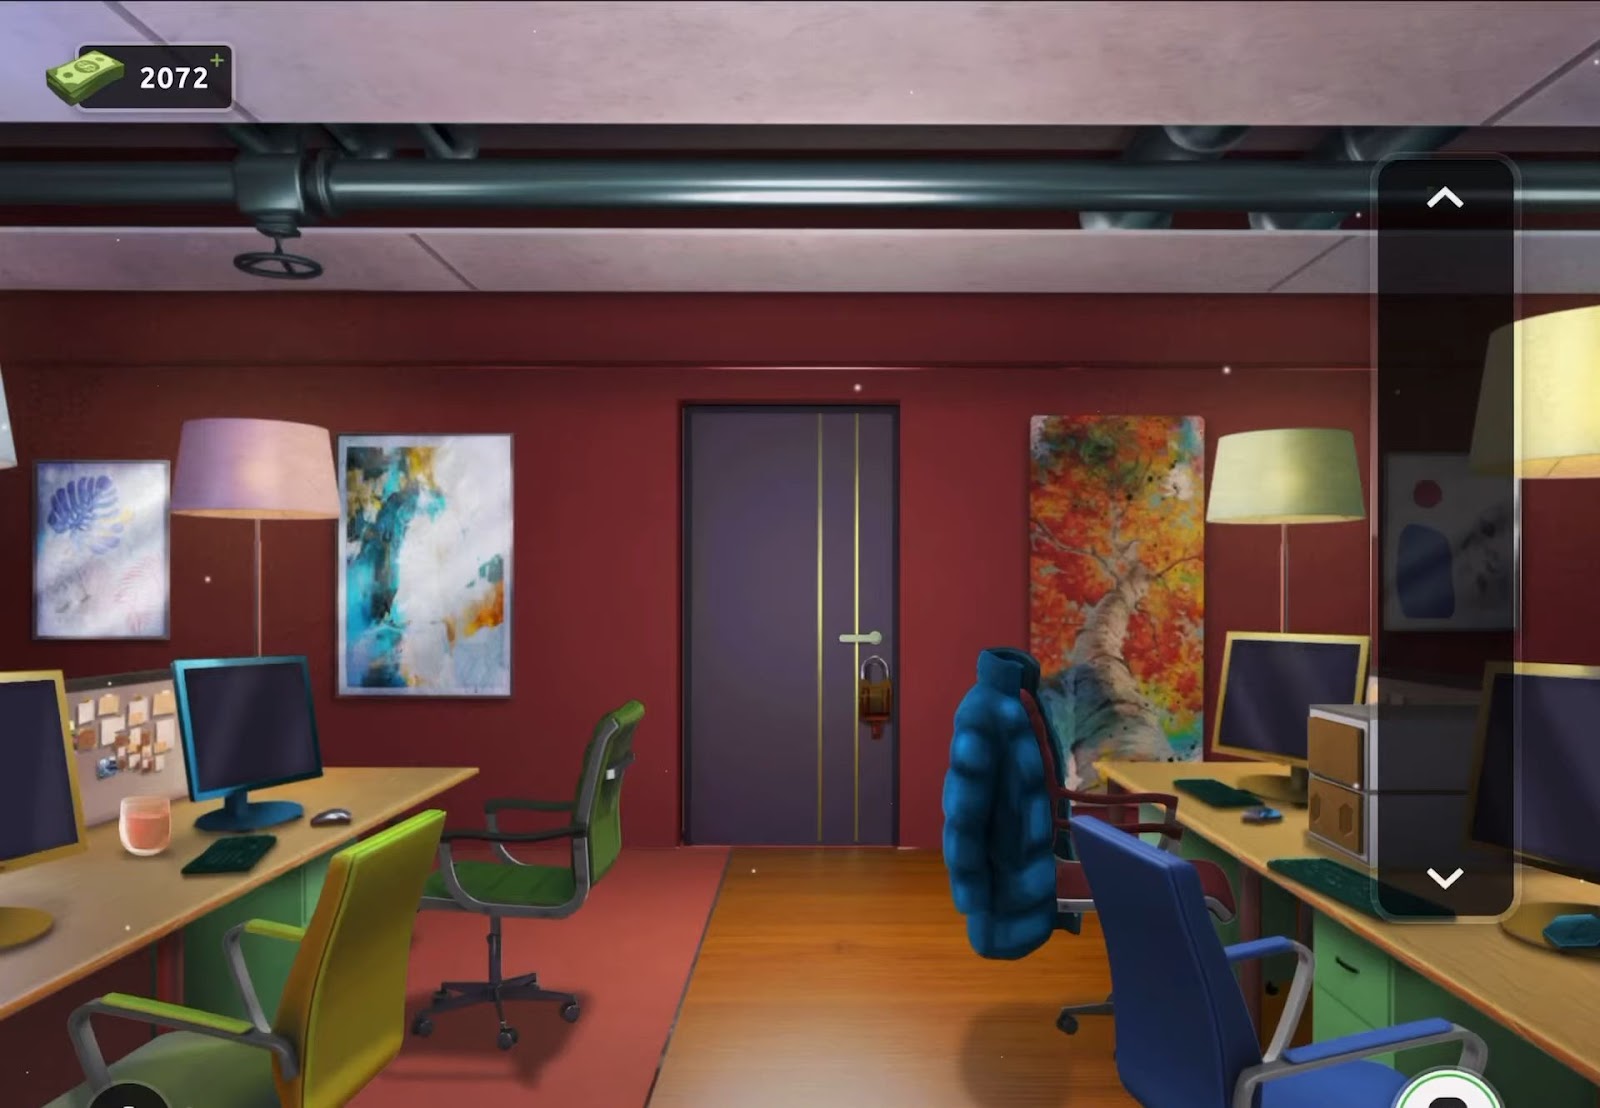
- Firstly, acquire the green lighter located behind the monitor on the left side of the room.
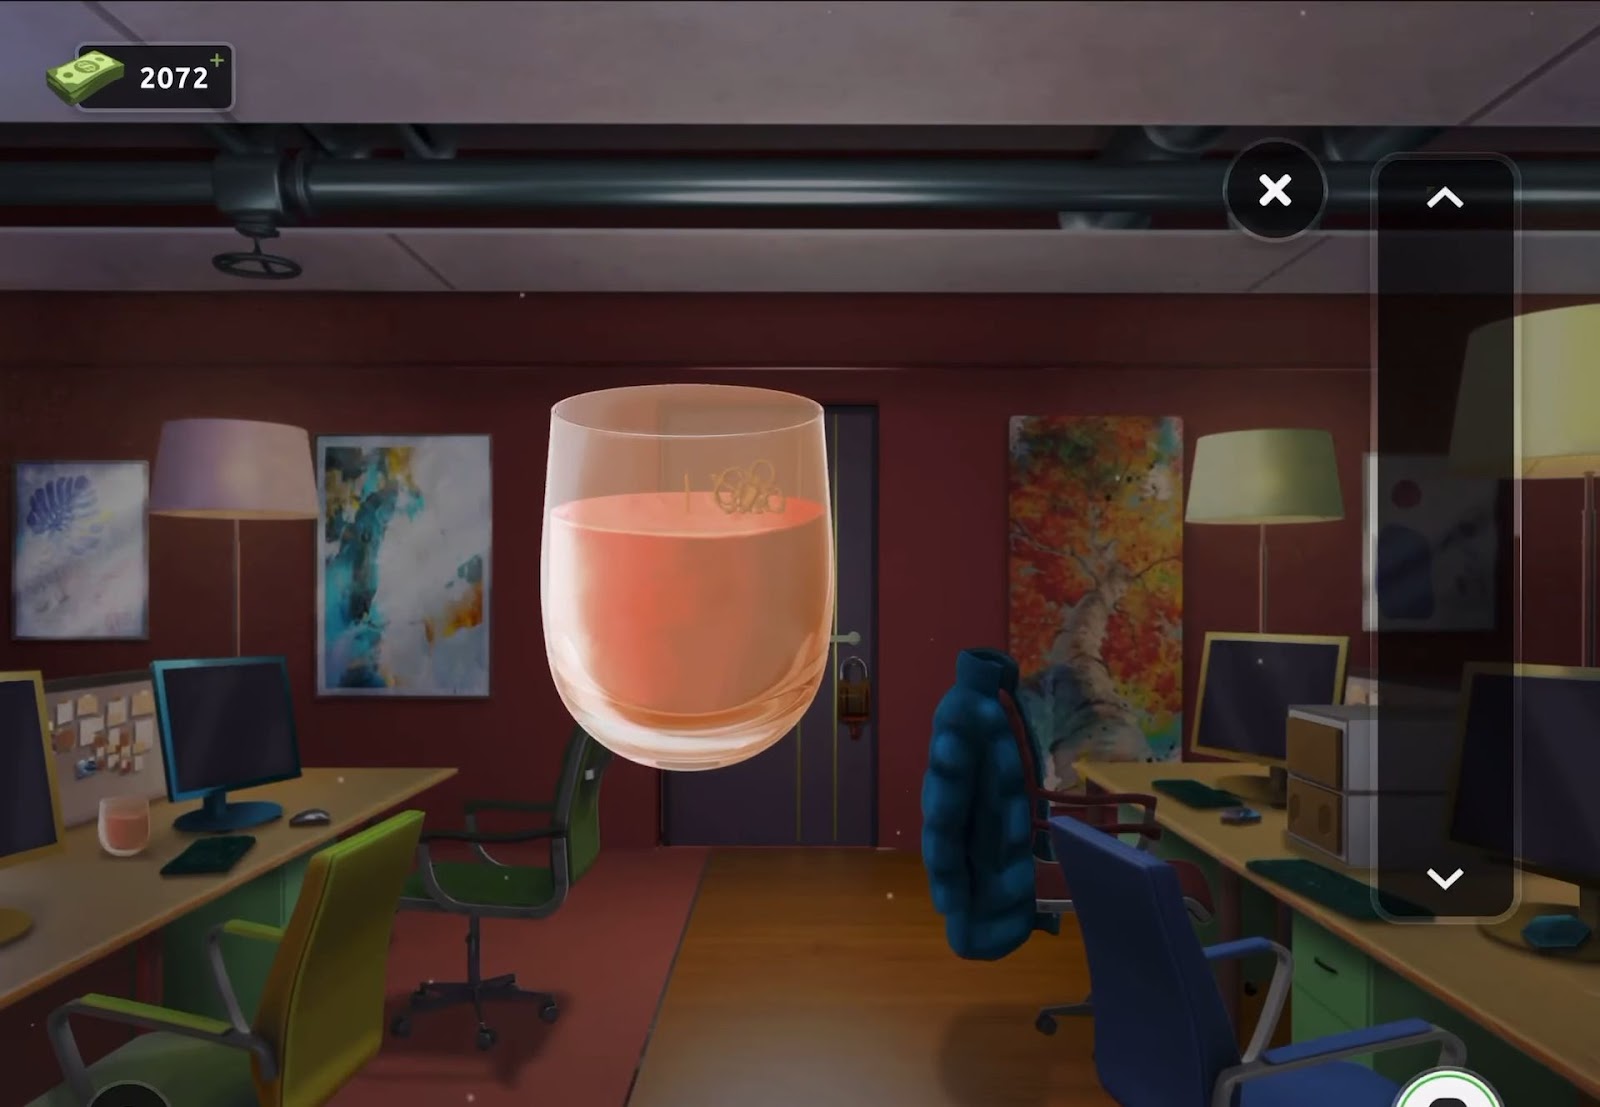
- Then use the green lighter on the pink candle atop the desk to melt it and retrieve a key.
- Next, obtain a handle from inside the blue coat on the right and extract a hexagonal tile from the right pocket.

- After that, find another hexagonal tile located at the base of the monitor on the far right side and view the large box on the right side desk.
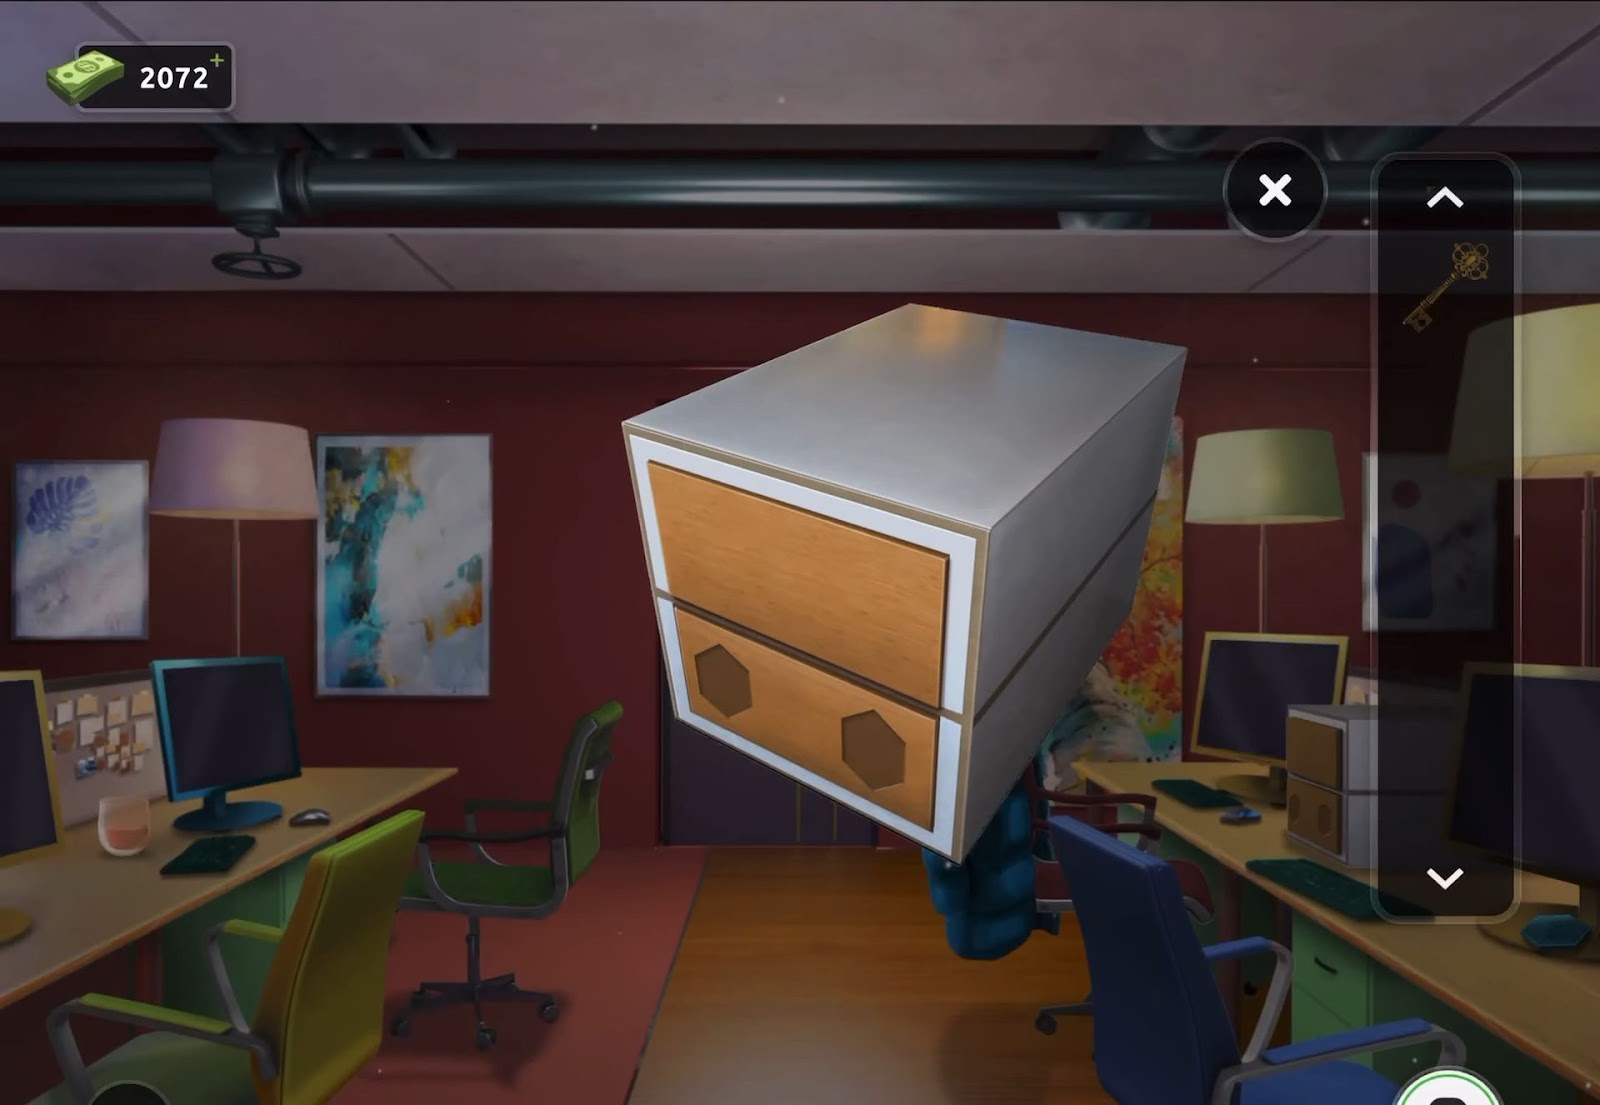
- Now place the two hexagonal tiles at the bottom to unlock a drawer containing an additional key.
- Then, examine the bottom of the green chair positioned near the door.
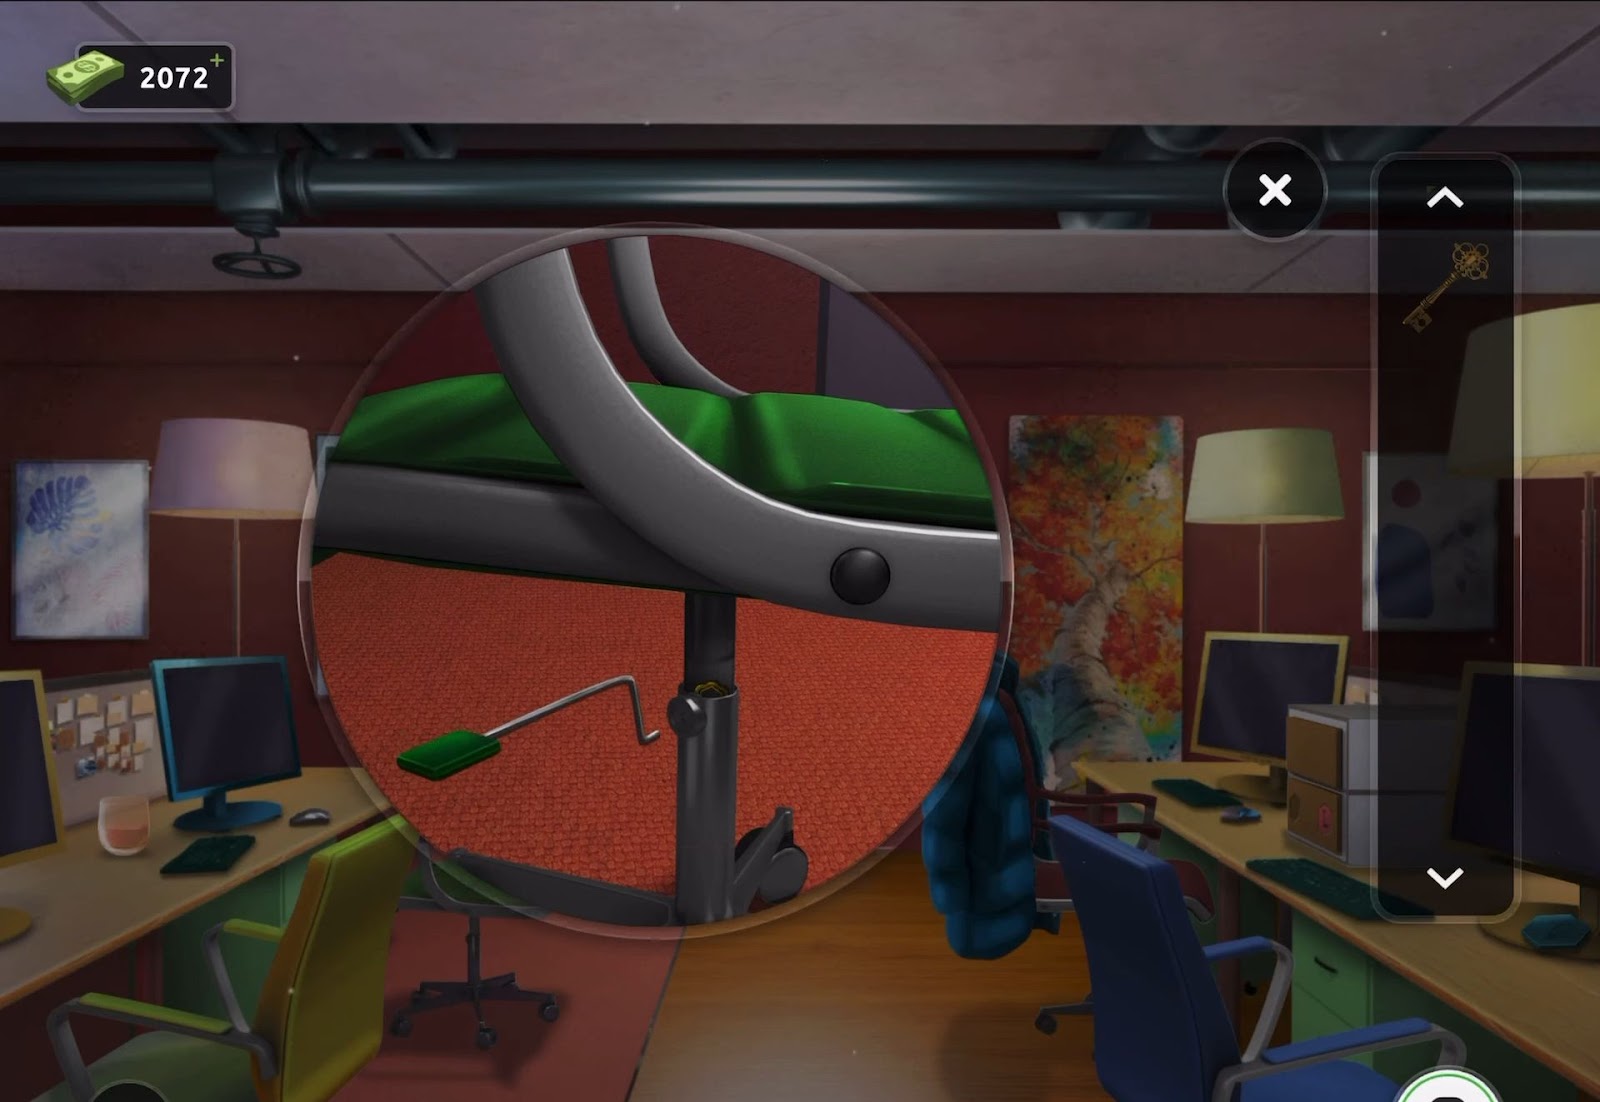
- Next, utilize the handle on the chair’s underside, then tap it to raise the chair, revealing a third key. Proceed to inspect the door lock.

- Then employ all three keys to unlock the door. Initiate by tapping the arrow to reveal the lower part of the lock.
- Next, employ the key with a hole in its head to disengage the bottom bolt.
- Subsequently, use the same key to place it inside the bottom section and release the top part.
- Now return to the top view by tapping the arrow.
- After that, insert the other two keys into the small holes on the left and right sides.
- Finally, open the lock and grant your escape from the room
Level 52:
To complete level 52, follow the instructions below:
- Begin by retrieving the light switch plate from the table.
- Now open the colored cabinet doors located on the right side to observe the clues provided.
- Then extract the light bulb from the lower cabinet and install it into the unoccupied light holder situated above the table.
- Next place the light switch onto the panel near the door and tap it to illuminate the room, paying attention to the colors displayed by two of the lights.
- After that, examine the puzzle lock situated on the exit door, using the color hints acquired to resolve the puzzle.
- Then observe the open cabinet doors to note the colors provided for positions 1, 2, 3, and 6. Recognize the colors exhibited by the light bulbs in positions 4 and 5.
- The sequence of colors discovered is: White, Purple, Orange/Yellow, Green, Blue, and Green.
- Once the door is opened, you can exit through it easily.
Level 53:
To complete level 53, follow the instructions below:
- Firstly, examine the box located beneath the single light fixture to find a 3-digit code (321).

- Then collect a light bulb and insert it into the middle lamp.
- Next, proceed to inspect the central box for another code (221).
- After that gather an additional light bulb and place it into the third lamp.
- Now collect the colored tiles situated on the table and view the exit door puzzle.
- Next, place the 4 tiles into the designated spaces. Rearrange the tiles to correctly complete the arithmetic sum.
- Finally, exit the room once the puzzle is solved.
Level 54:
To complete level 54, follow the instructions below:
- Firstly, collect a white arrow by interacting with the hanging plant closest to you.
- Then open the small drawer located on the desk to your right to obtain a green arrow.
- Next, take note of the green and white clocks on the wall, showing different times.
- Now view the metal case on the left floor and add the two arrows to the case.
- After that, rotate the arrows by tapping them to align them correctly and unlock the case.
- Then collect the key card from inside the case. Use the key card to unlock the exit door.
- Finally, you can escape through the door to reach the next level.
Level 55:
To complete level 55, follow the instructions below:

- Firstly, search the room to locate four numbers contained within different shapes.
- Next, find the folder stick inside the small round footstool on the right side of the room.
- Then use the folder stick to dislodge a hanging statue upside down on the left side and retrieve a wrench.
- Now return to the footstool and use the wrench to remove two bolts and open the top.
- Then retrieve a handle from within the opened top section. View the exit door puzzle.
- Next, incorporate the handle into the center slot. Use the handle to adjust the values for the four shapes surrounding it.
- So, the door is now open, you can exit the door and move on to the next level.
Level 56:
To complete level 56, follow the instructions below:
- Firstly, interact with the clothes on the bench below the door to reveal a glow stick light.
- Then press the green cupboards beneath the towel shelves to access the puzzle lock.
- Next, find the correct sequence (3142) by using a process of elimination to tap the buttons in the puzzle.
- Now examine the contents inside the cupboard, using the glow stick to illuminate and reveal a hidden clue.

- After that, proceed to the exit door keypad, taking note of the sequence (8963) of the four colors depicted above it.

- Finally, utilize the collected clues (8963) to input the correct code into the keypad and escape the room.
Level 57:
To complete level 57, follow the instructions below:
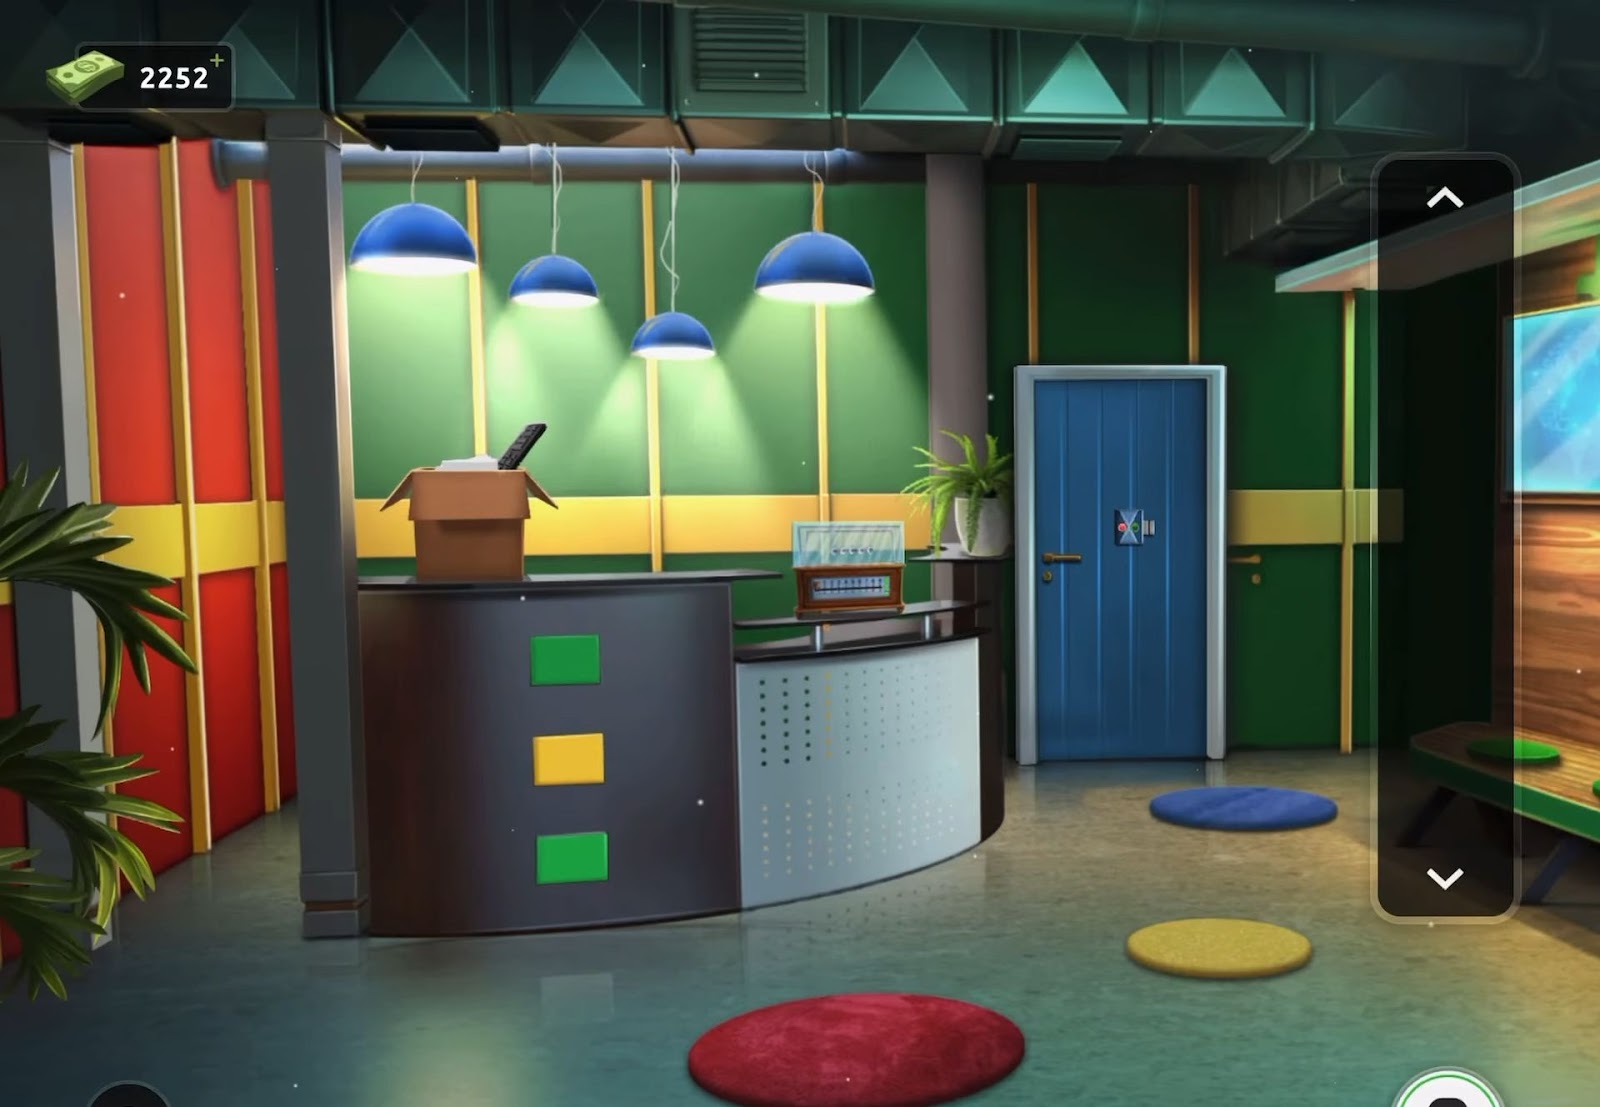
- Firstly, interact with the box on the counter to drop it to the floor and inspect its contents.
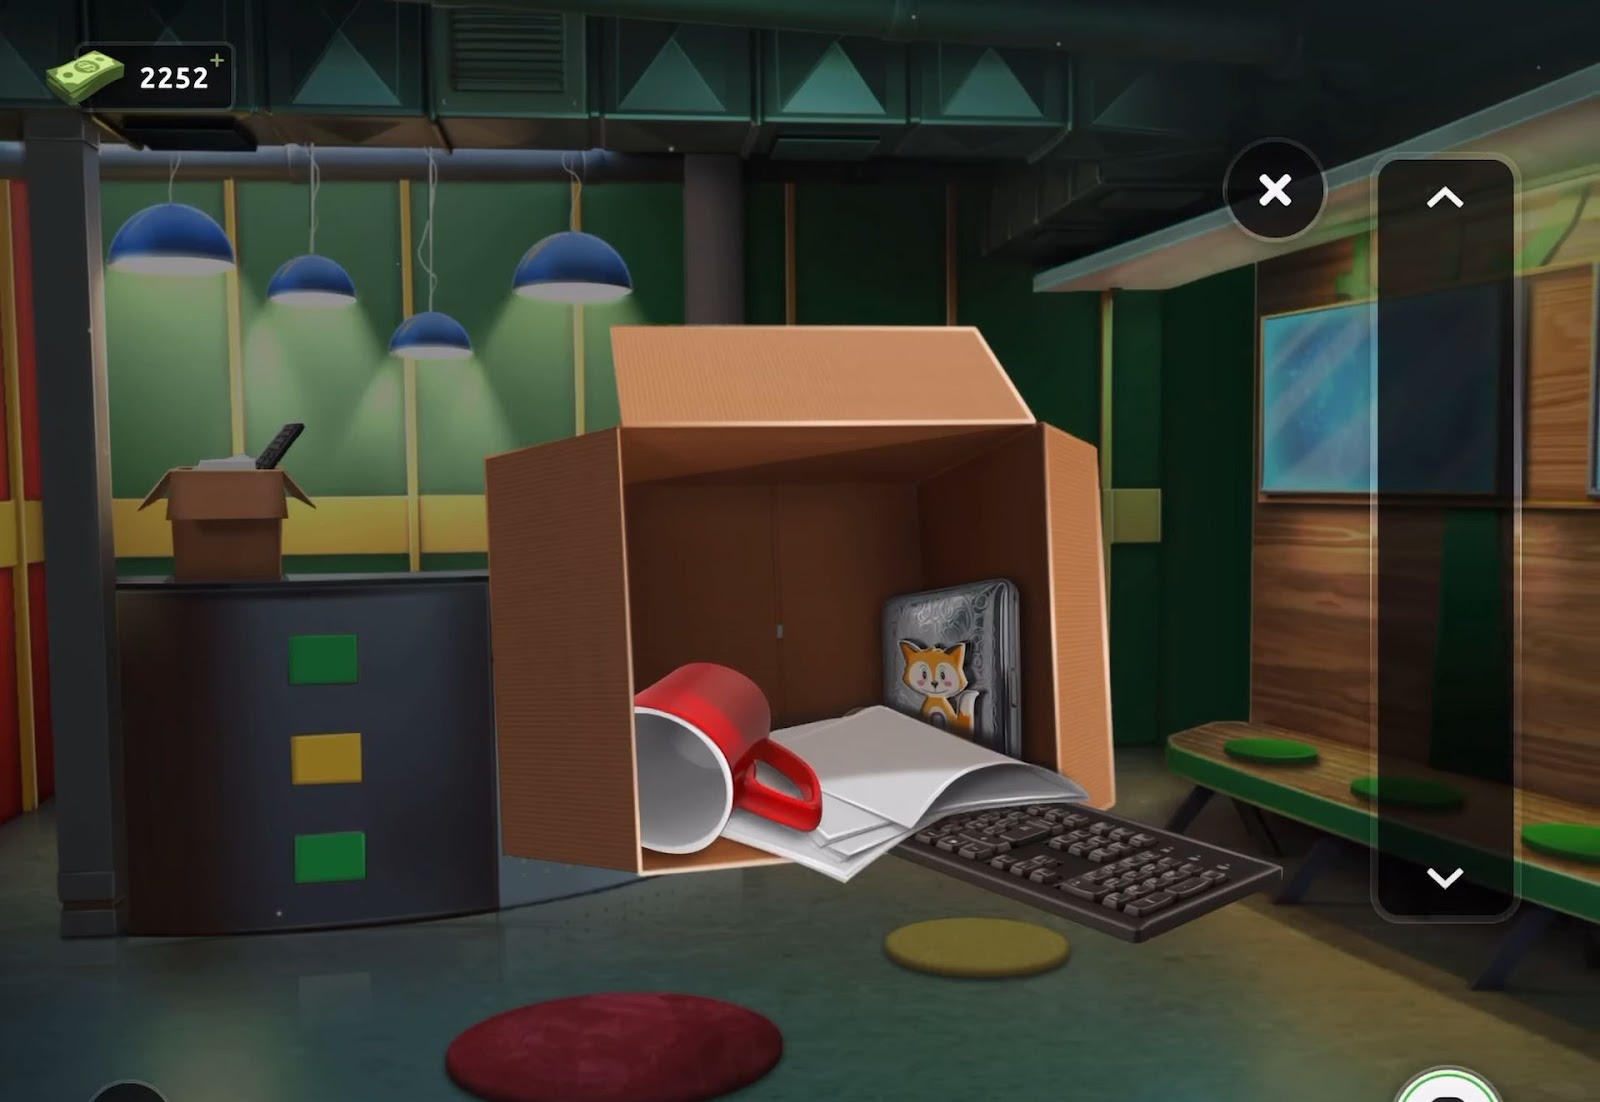
- Then examine the papers inside the box and collect a small handle and a fox magnet.
- Next, use the fox magnet on the toy located on the right side of the counter to initiate the movement of the balls. Note the number of swings and repeat this action three times.
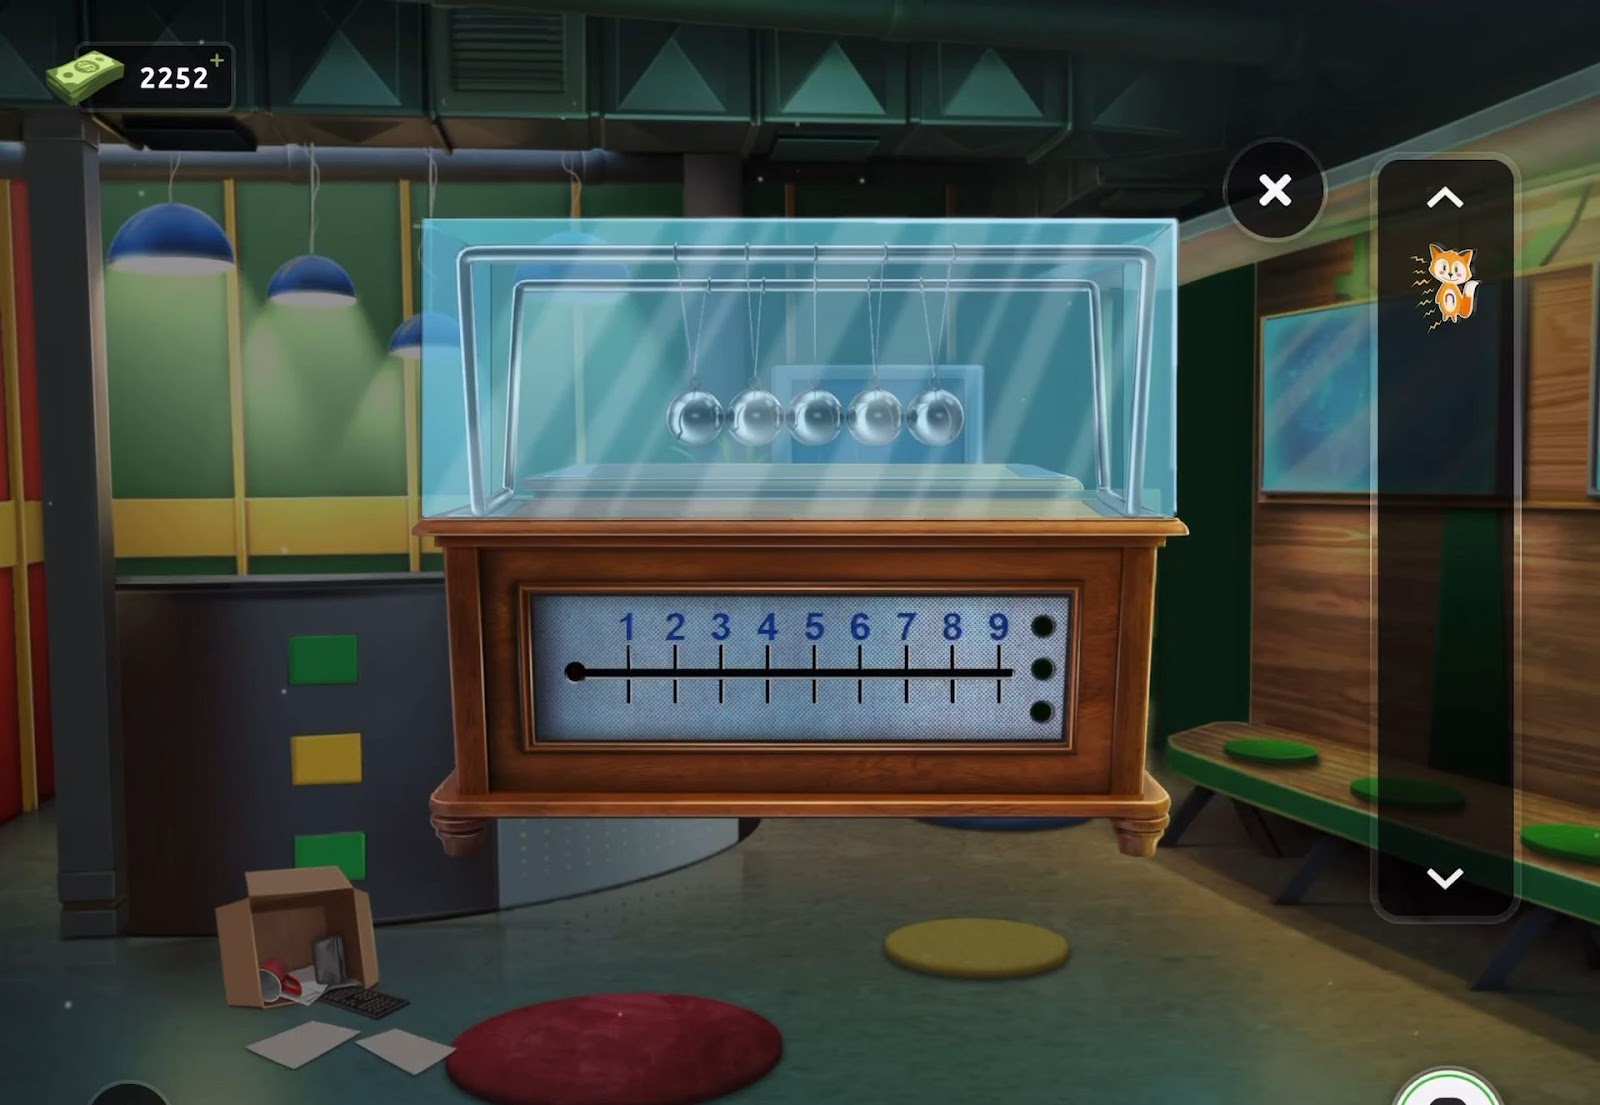
- Now attach the handle to the gauge at the bottom of the mechanism and select three numbers (682) based on the sequence displayed.
- After that, obtain a key card from this action and proceed to view the exit door lock.
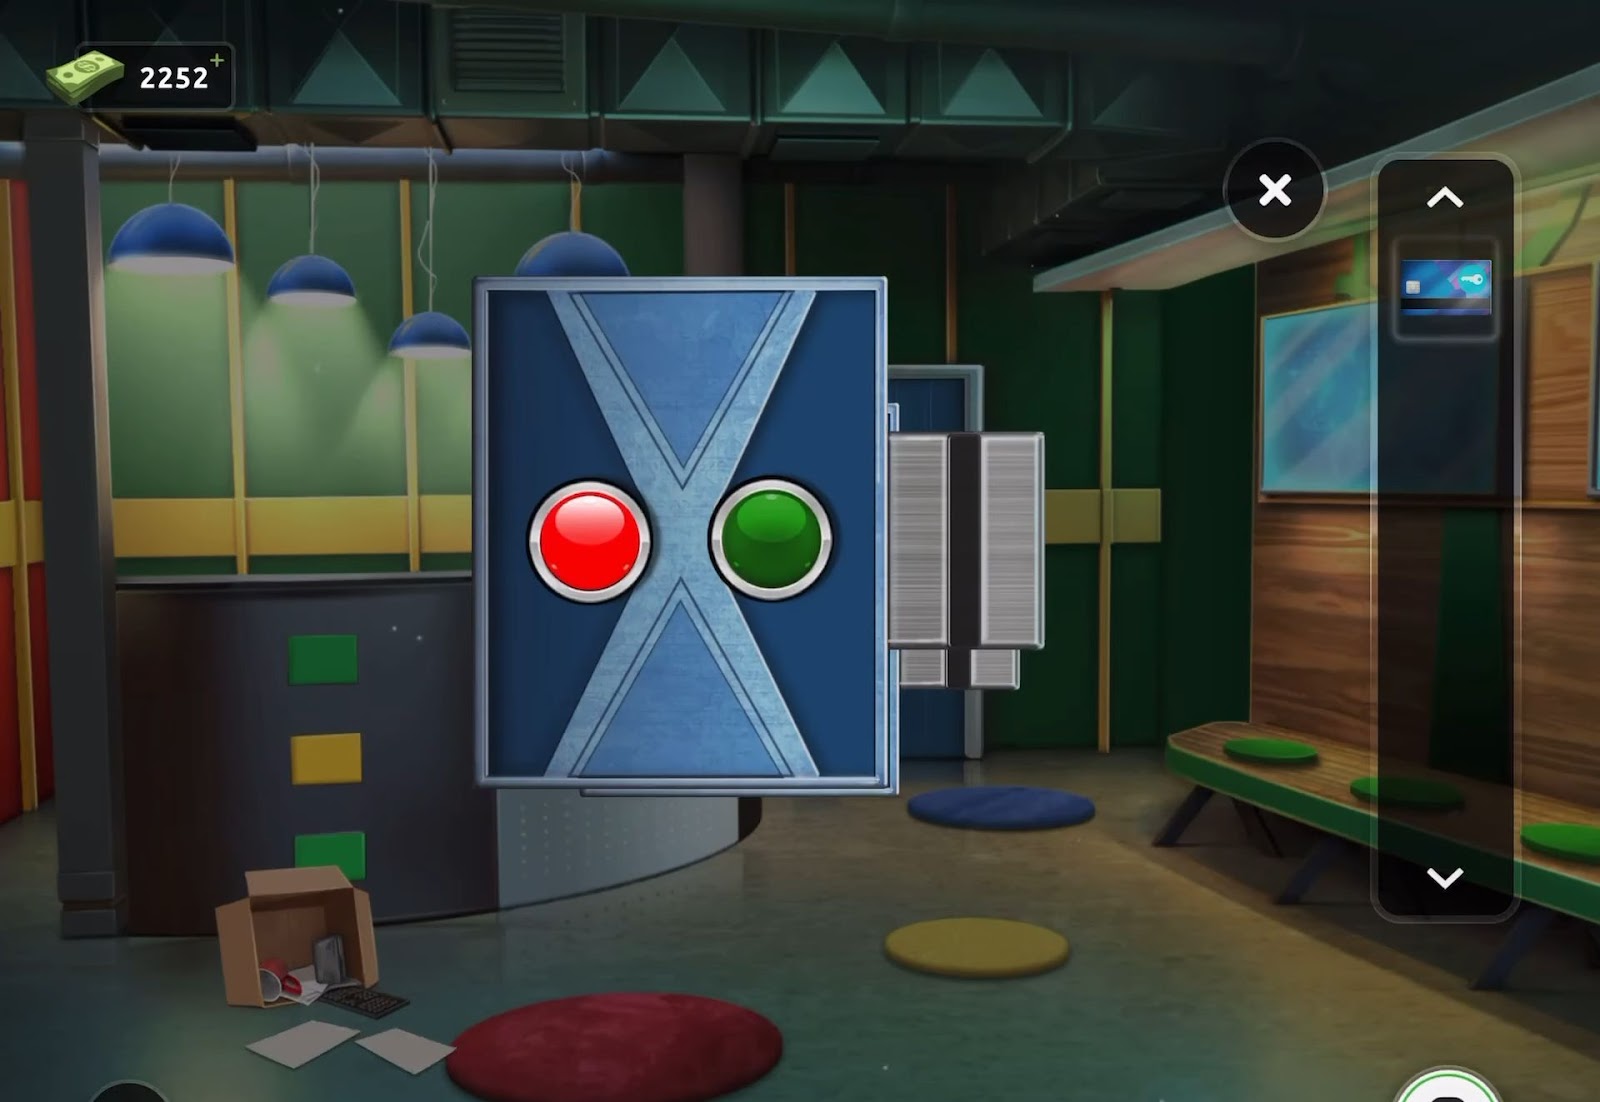
- Finally, use the key card on the lock, allowing you to escape from the room.
Level 58:
To complete level 58, follow the instructions below:
- Firstly, obtain a broom from the left side of the room and utilize it to clear the rubbish present on the floor. Retrieve a number button from the cleaned area.
- Then on the right side, examine the yellow folder on the table and collect a paper clip.

- Next, proceed to inspect the locked panel located at the end of the snooker table.
- After that, employ the paper clip to unlock the panel. Rearrange the balls within to discover a second number button.

- Now observe the diagram within the frame on the right wall and obtain the third number button. Take note of the clues.
- Then proceed to view the keypad on the exit door.
- Next, combine the three number buttons with the keypad, then input the code (9437) obtained from the clue.
- So, the door is now open, you can exit the door and move on to the next level.
Level 59:
To complete level 59, follow the instructions below:
- Firstly, retrieve a Yellow Sponge from the left table, and then inspect the picture frame on the right side of the door.
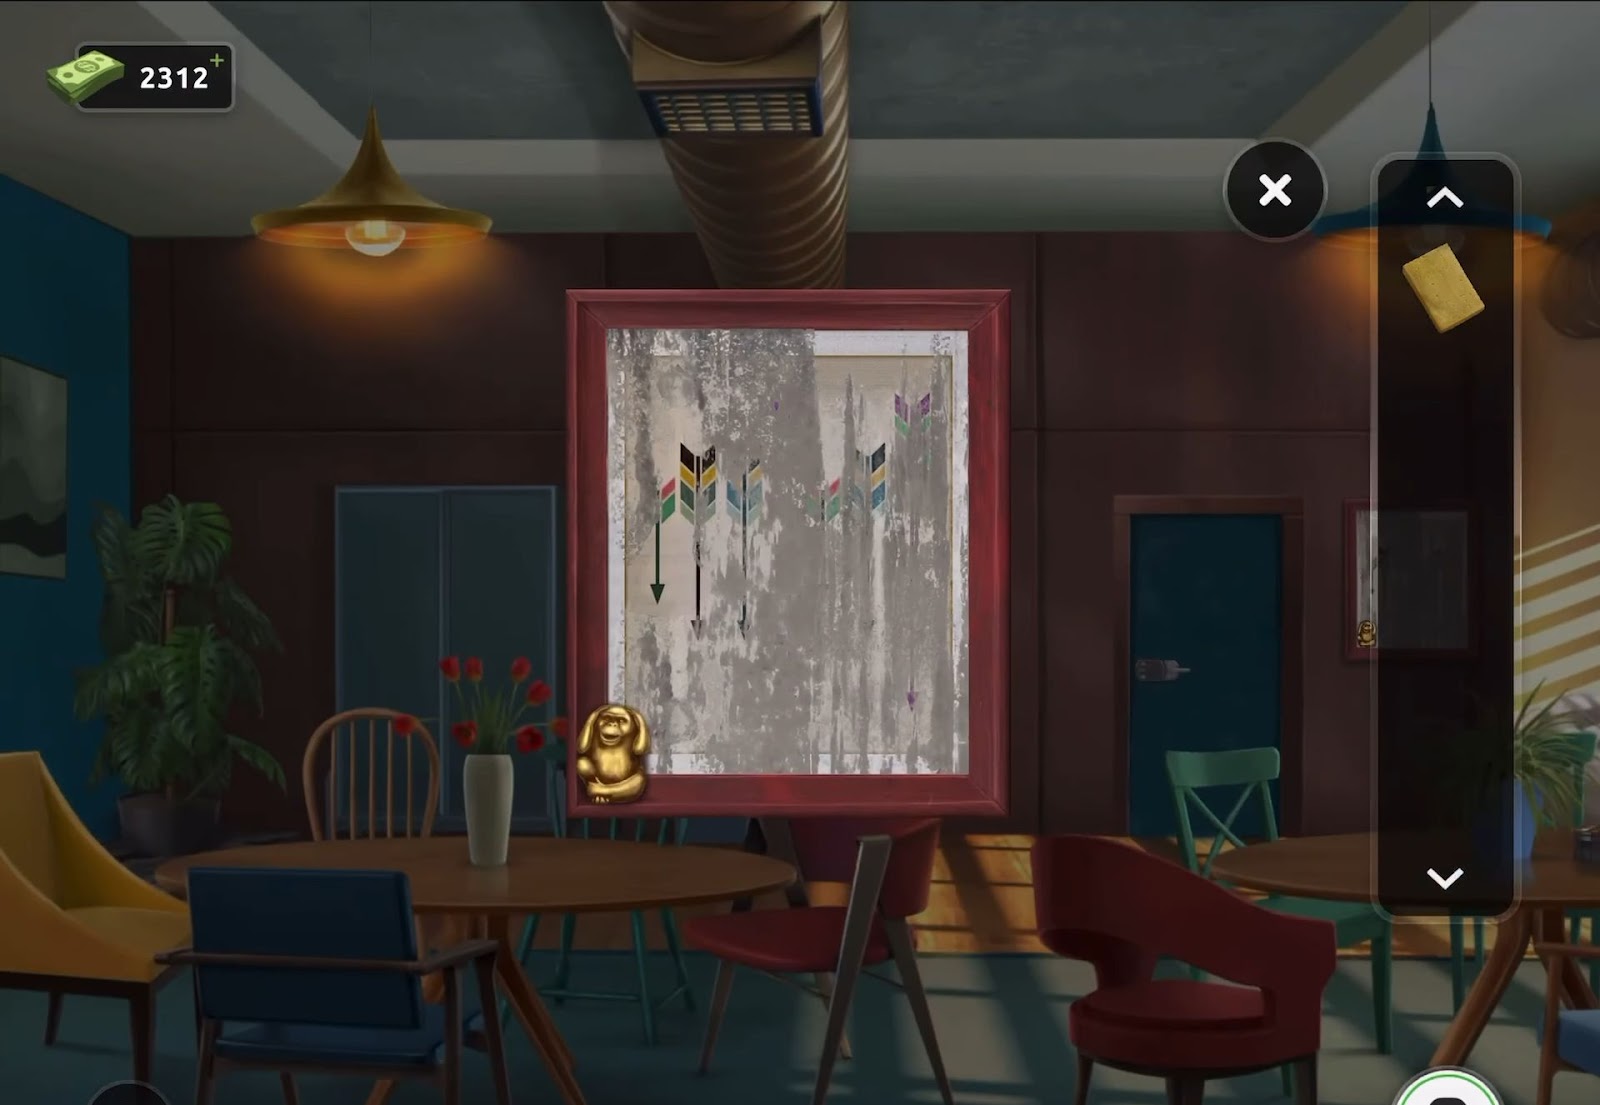
- Next, grab the brass monkey and employ the sponge to clean the picture, revealing a hidden clue.
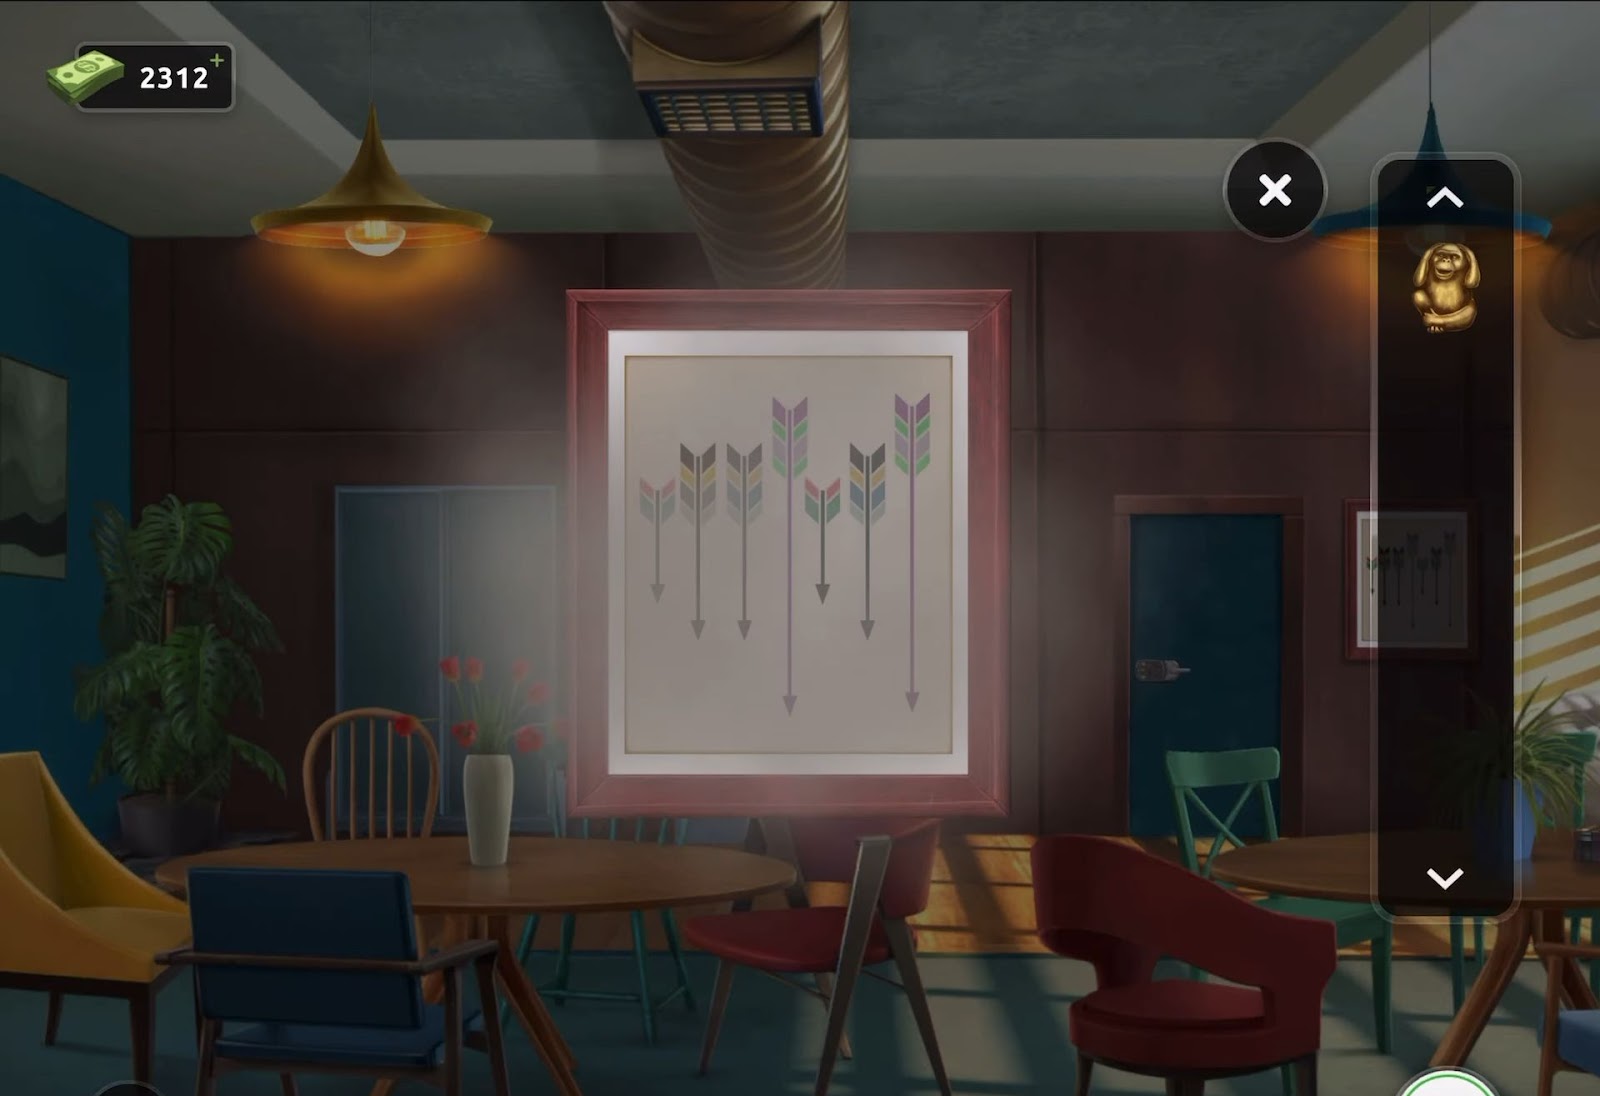
- Afterward, examine the box placed on the right table.
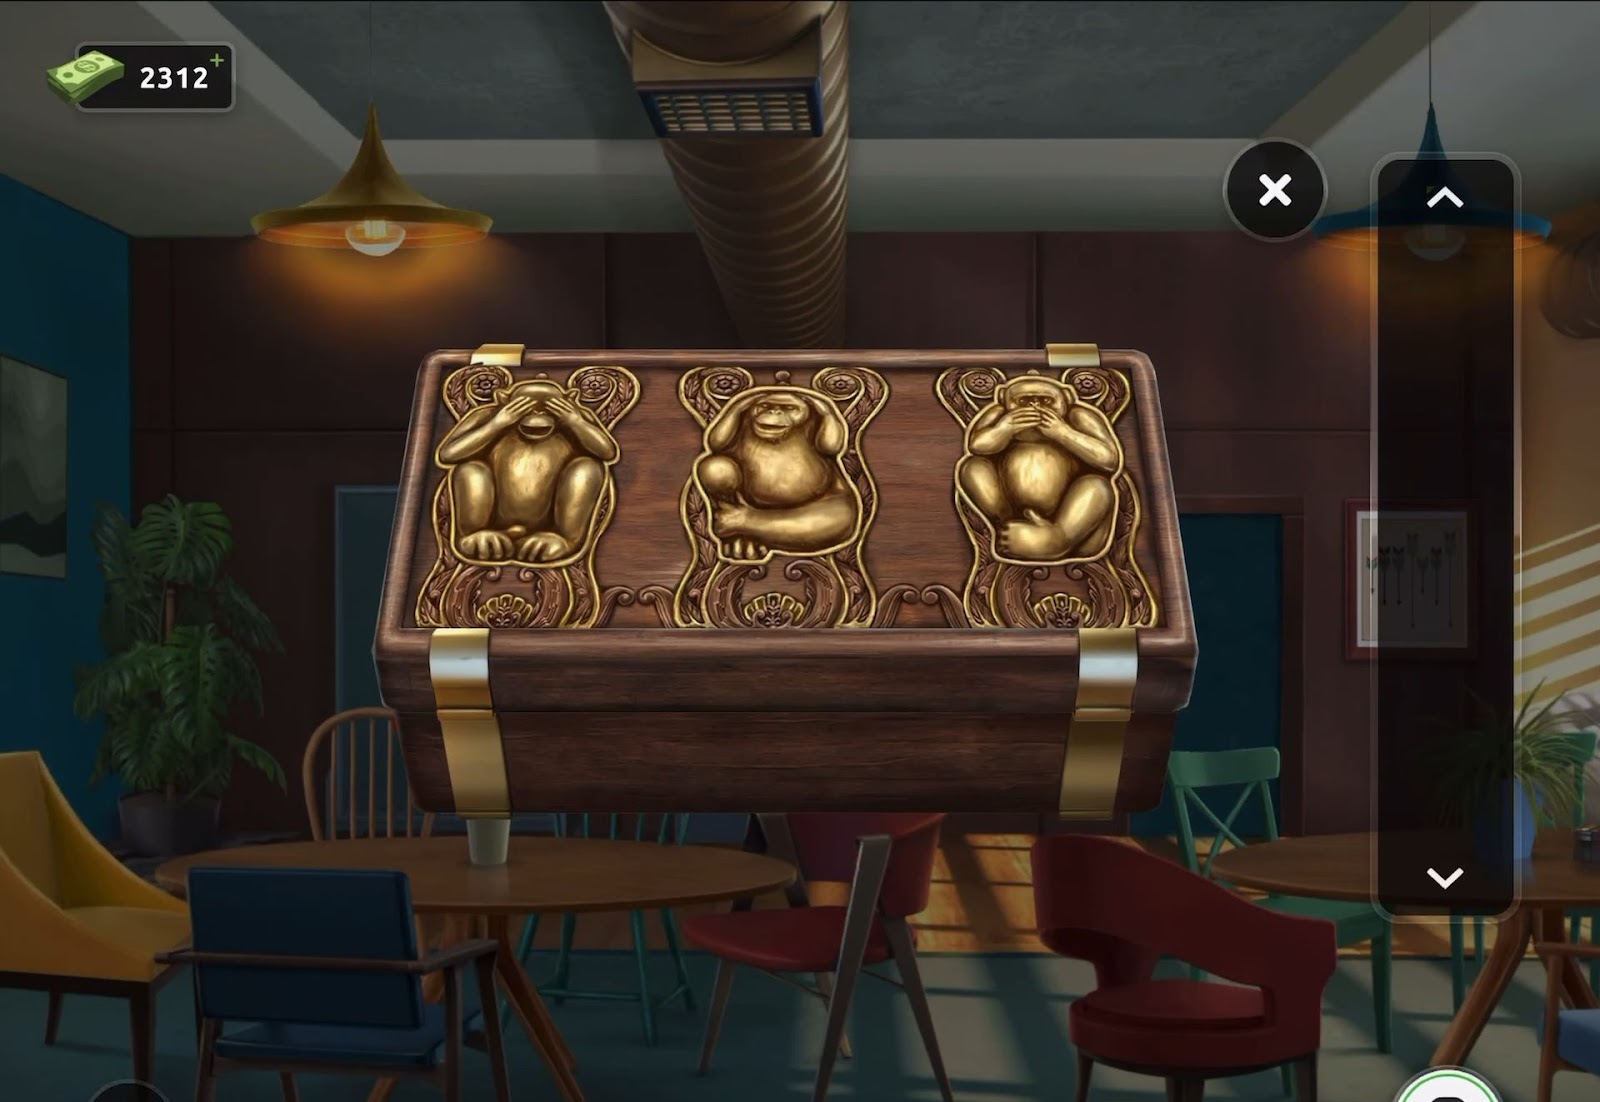
- Then attach the monkey to the box and proceed to tap the monkeys in the correct sequence (1 2 2 3 1 2 3) to unlock the box. Inside, collect a handle and a yellow token.
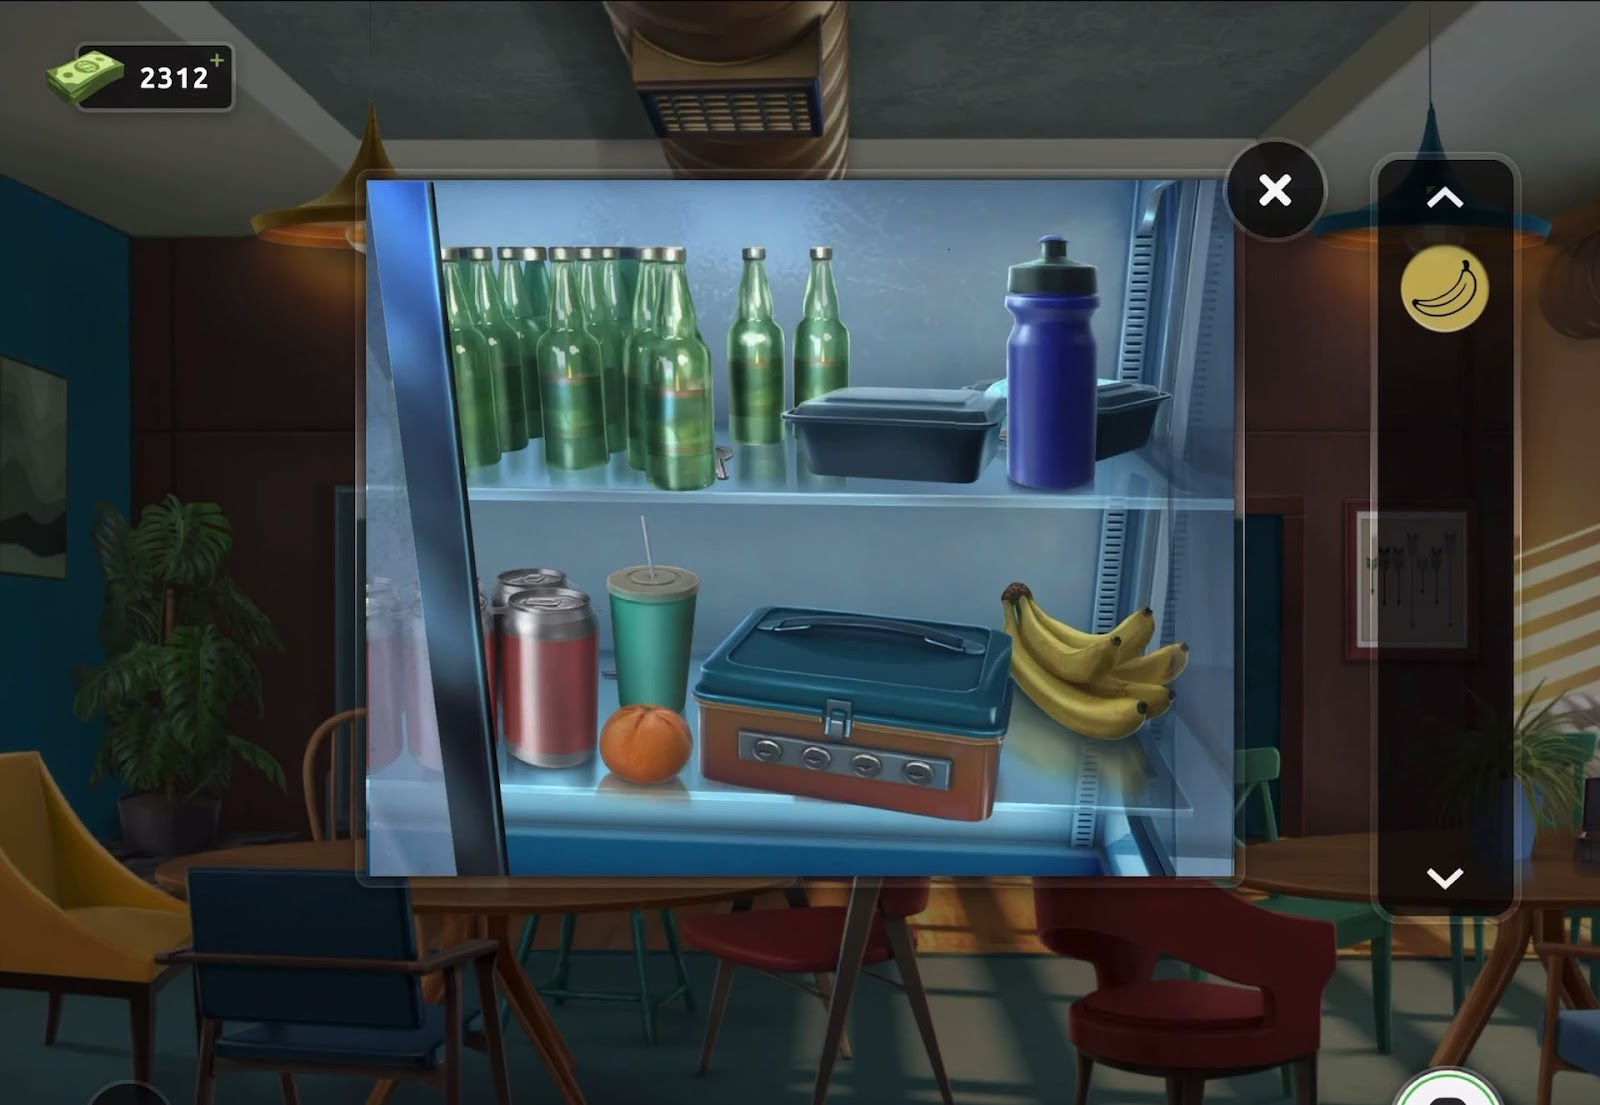
- Next, turn your attention to the fridge located in the center of the back wall.
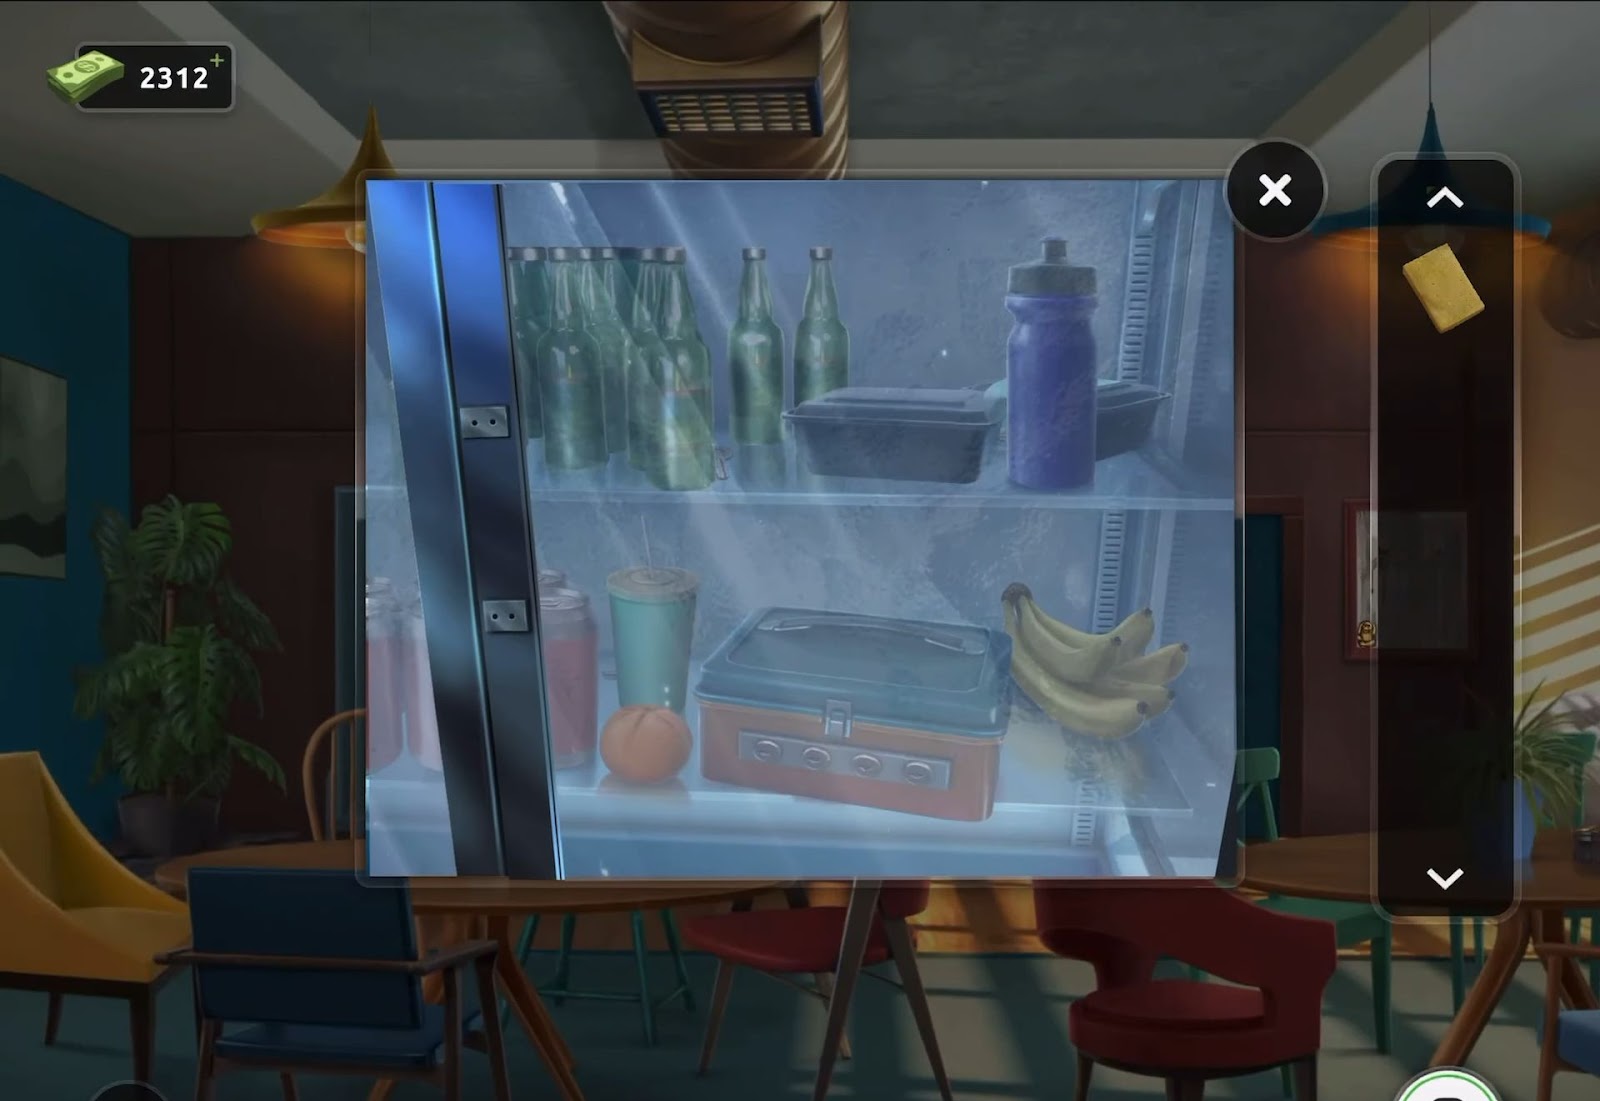
- Now use the handle to open the fridge door. Shift the orange on the lower shelf to discover a green token.
- While inspecting the fridge, search for and collect 4 keys hidden behind various items.
- After that, utilize the keys to unlock the box on the lower shelf, obtaining a red token. Access the exit door lock puzzle.
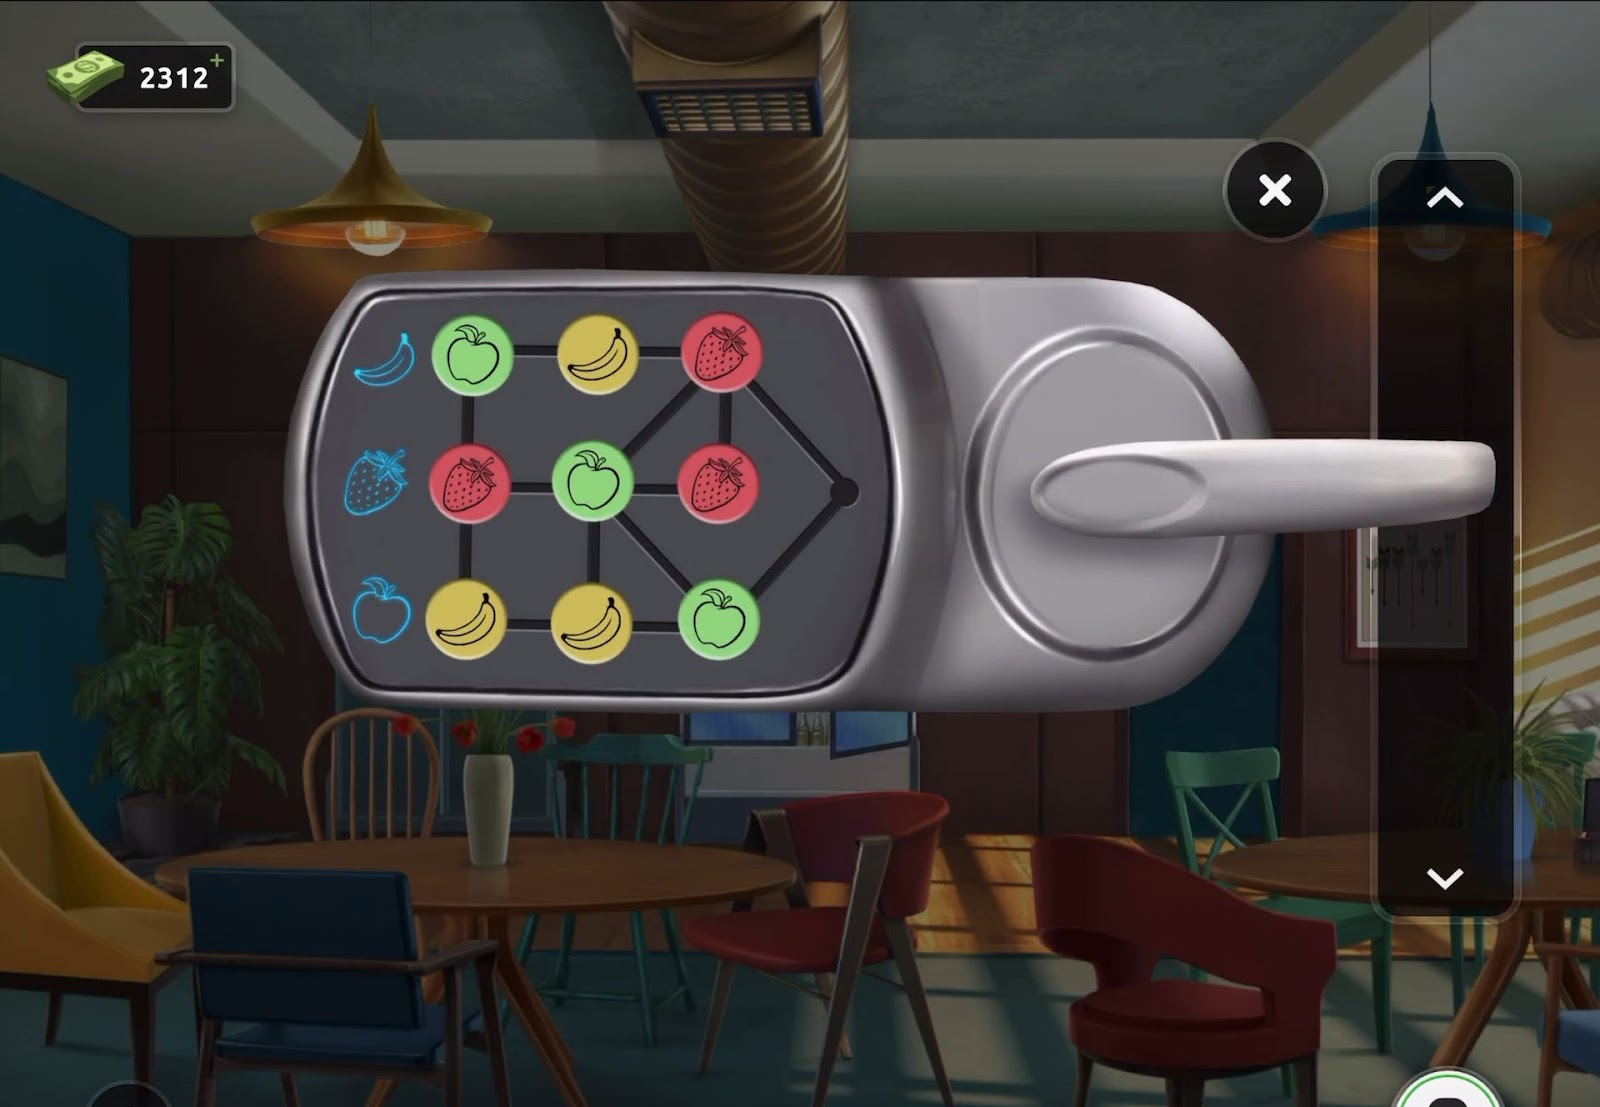
- Then position the yellow tokens representing bananas on the top row, red tokens depicting strawberries in the middle row, and green tokens representing apples on the bottom row.
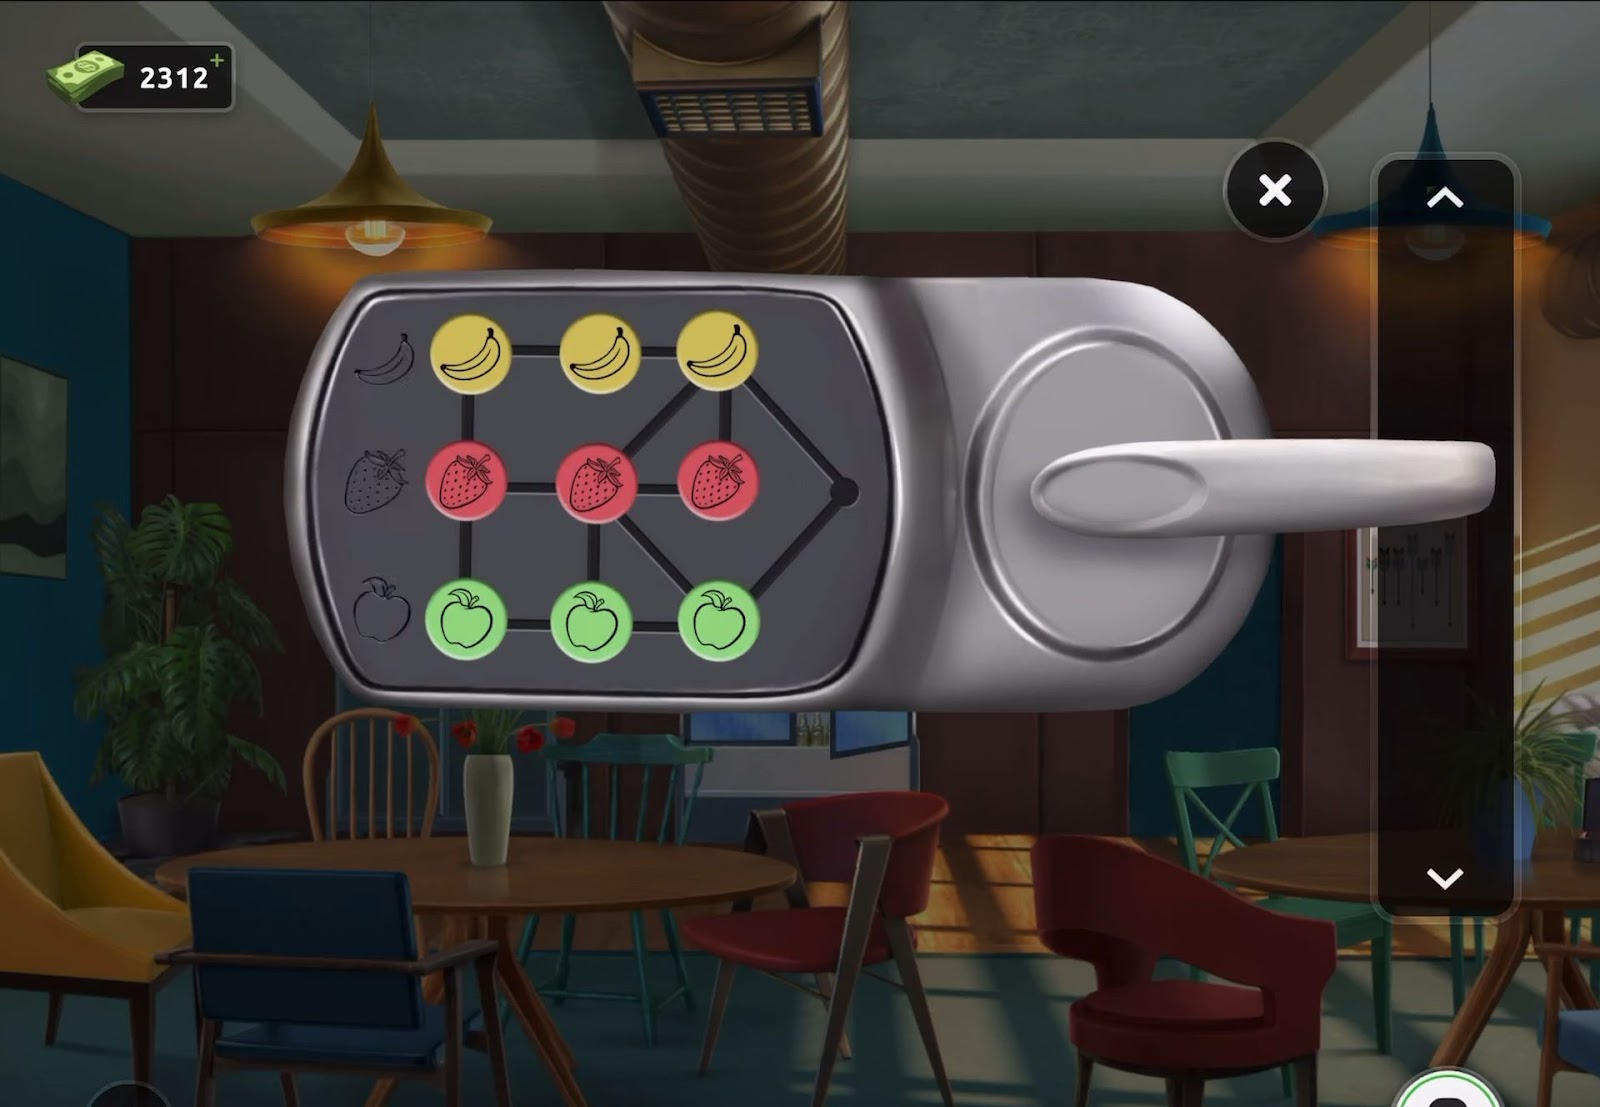
- Finally, the door will be opened, and you can escape through it.
Level 60:
To complete level 60, follow the instructions below:

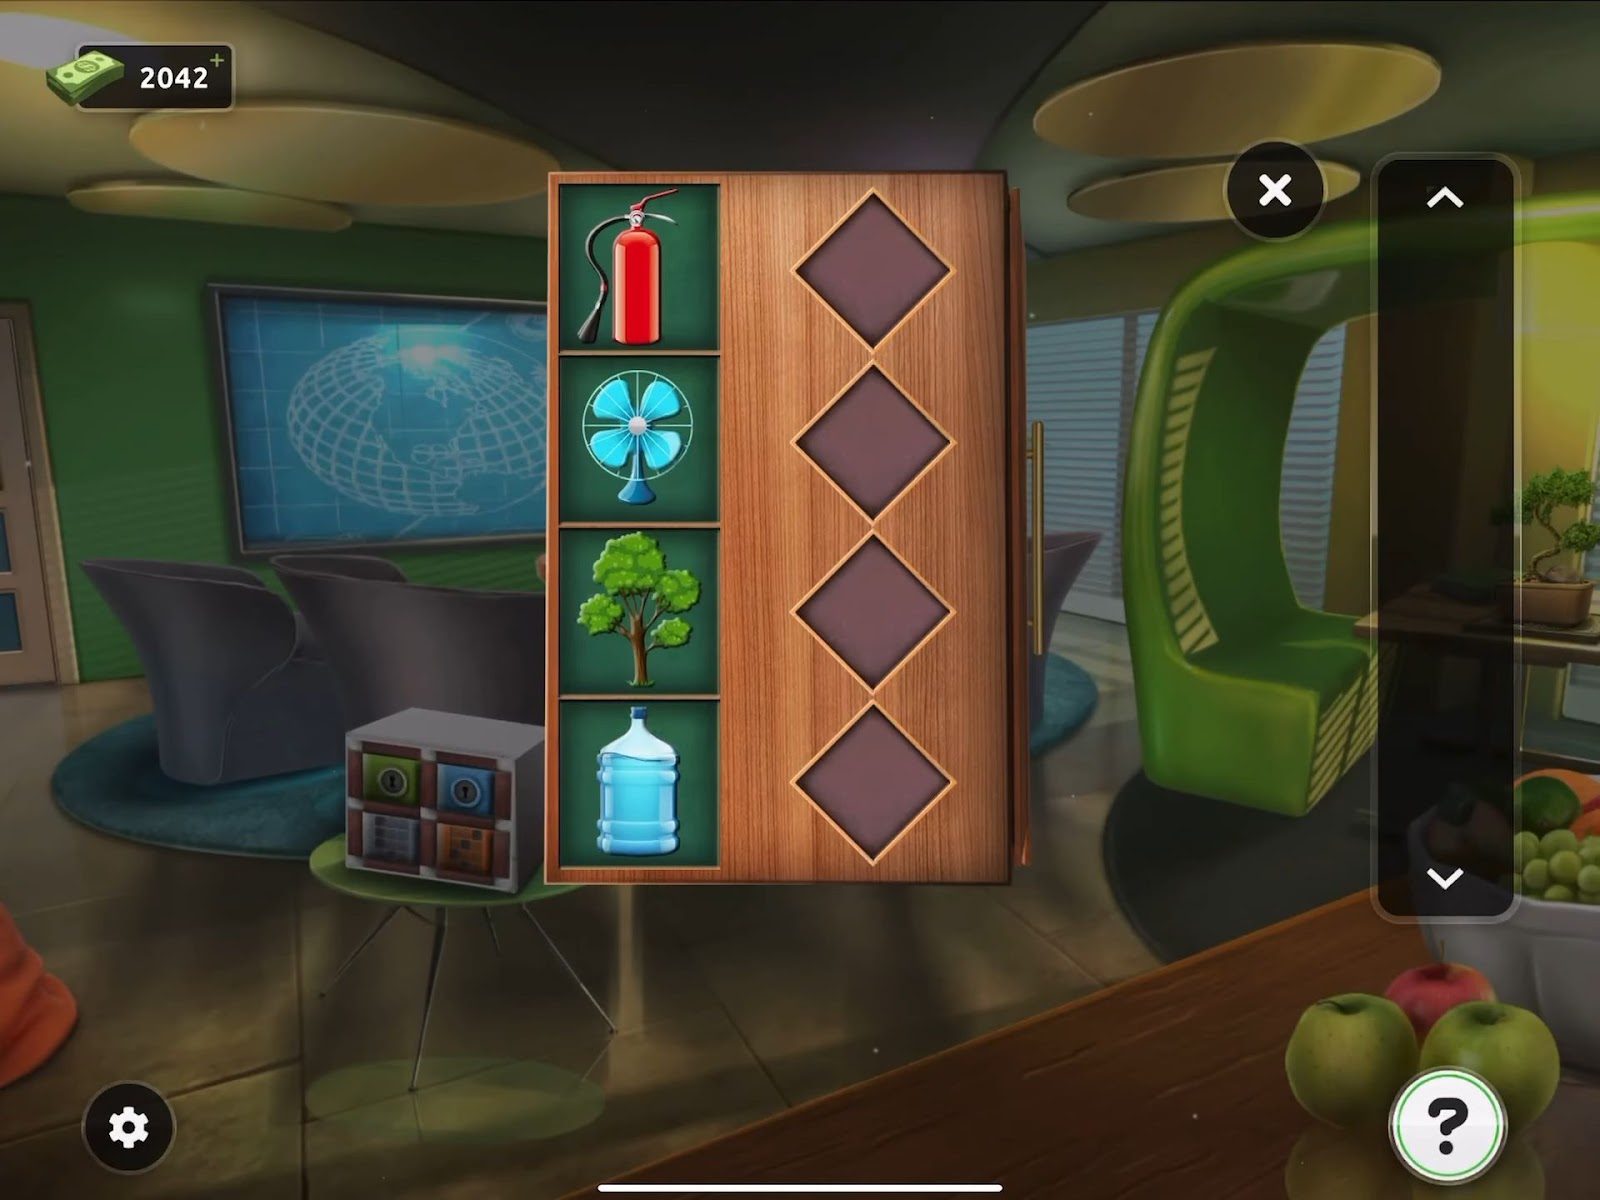
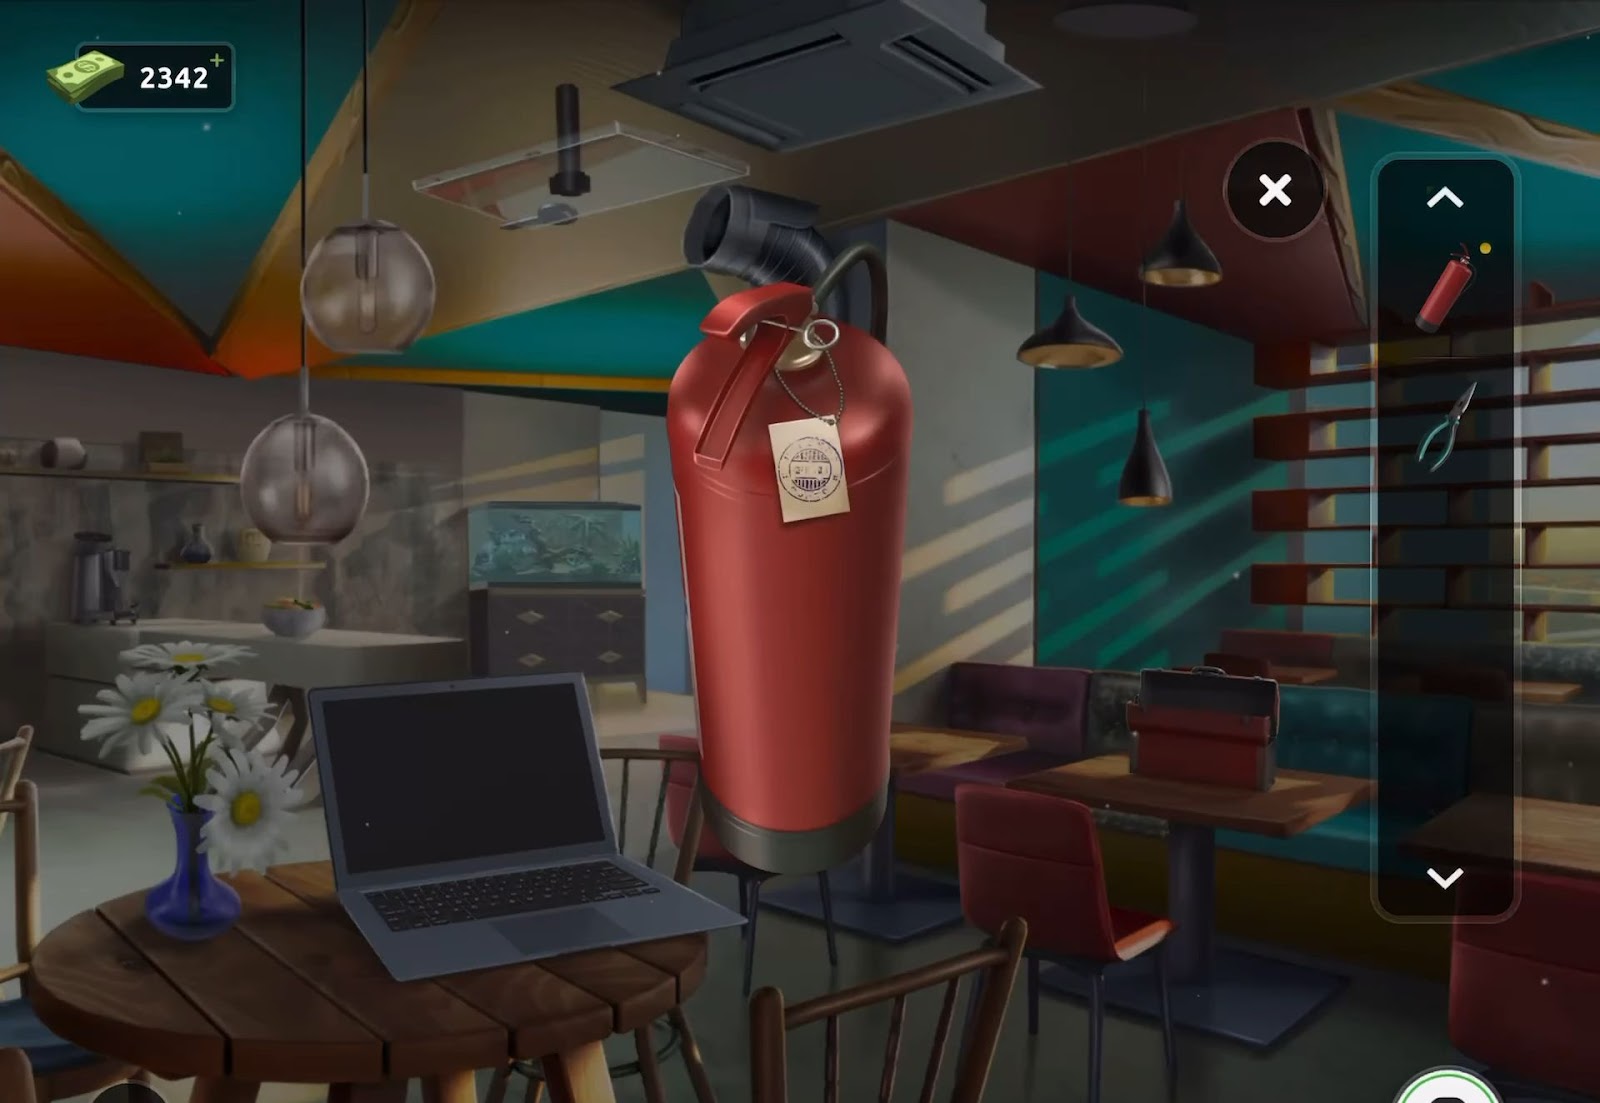
- Begin by obtaining a fire extinguisher located next to the exit door. Check your inventory for details.

- Then collect a small hammer key chain situated on the neck of the extinguisher.
- Next, examine the red toolbox positioned on the right table.
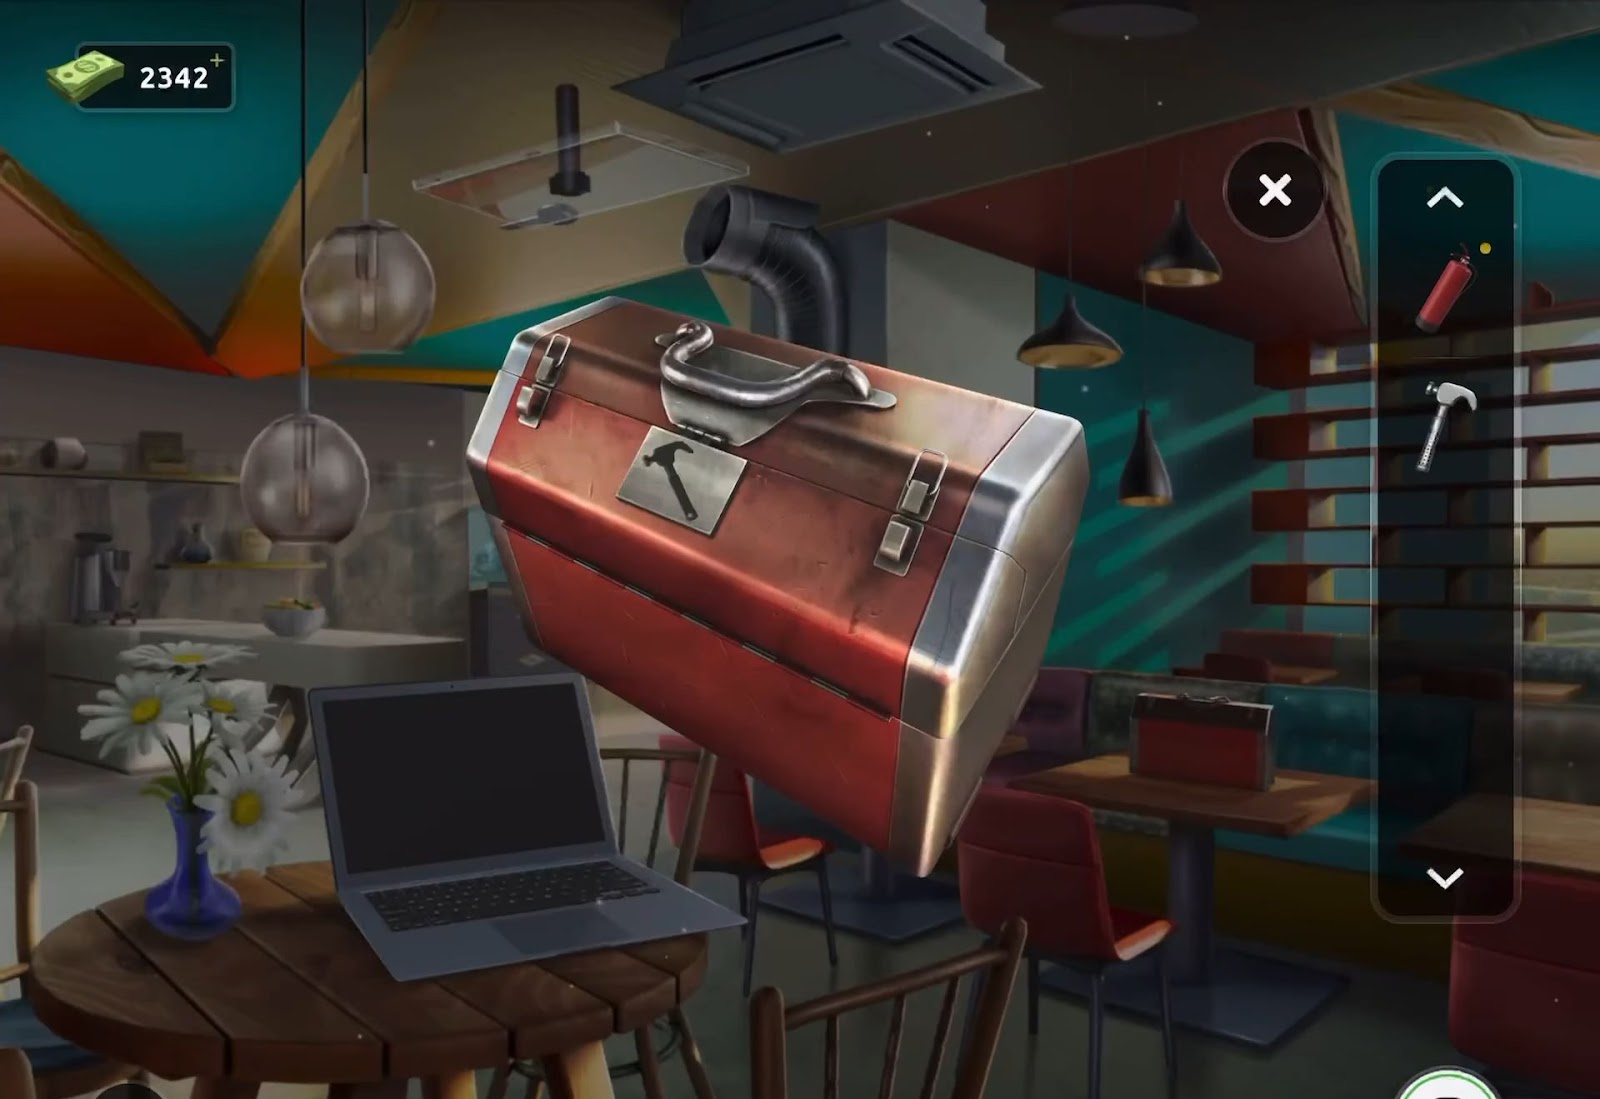
- After that, add the hammer key chain to the lock, which will open and grant access to a pair of pliers.
- Now revisit the fire extinguisher and use the pliers to extract the pin from the handle.
- Now position the fire extinguisher near the silver metal ducting at the room’s center.
- Subsequently, locate a hole close to the bottom and tap it to place the extinguisher.
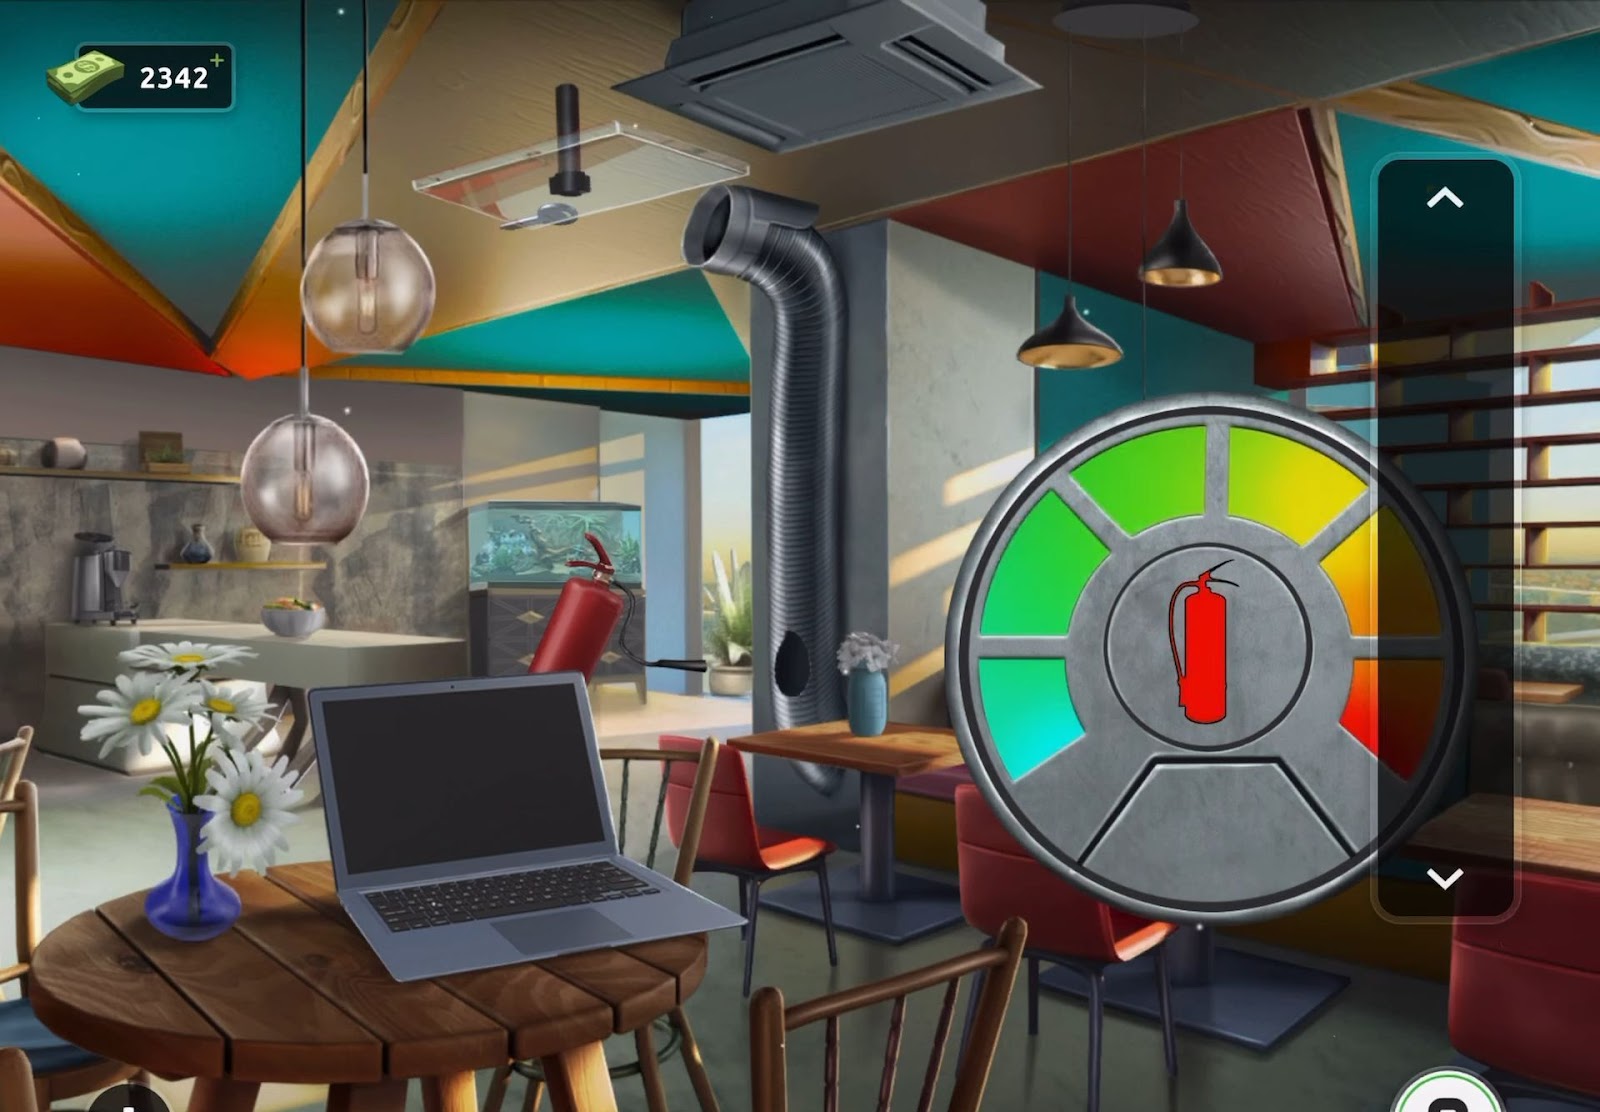
- Next, press and hold the control that appears on the right to accumulate pressure.
- Then release it when the pressure is at maximum. This action will dislodge a key from above.
- Finally, utilize the key to unlock the door and make your escape.
Level 61:
To complete level 61, follow the instructions below:
- Firstly, examine the small plant positioned on the right side to discover a pyramid piece.
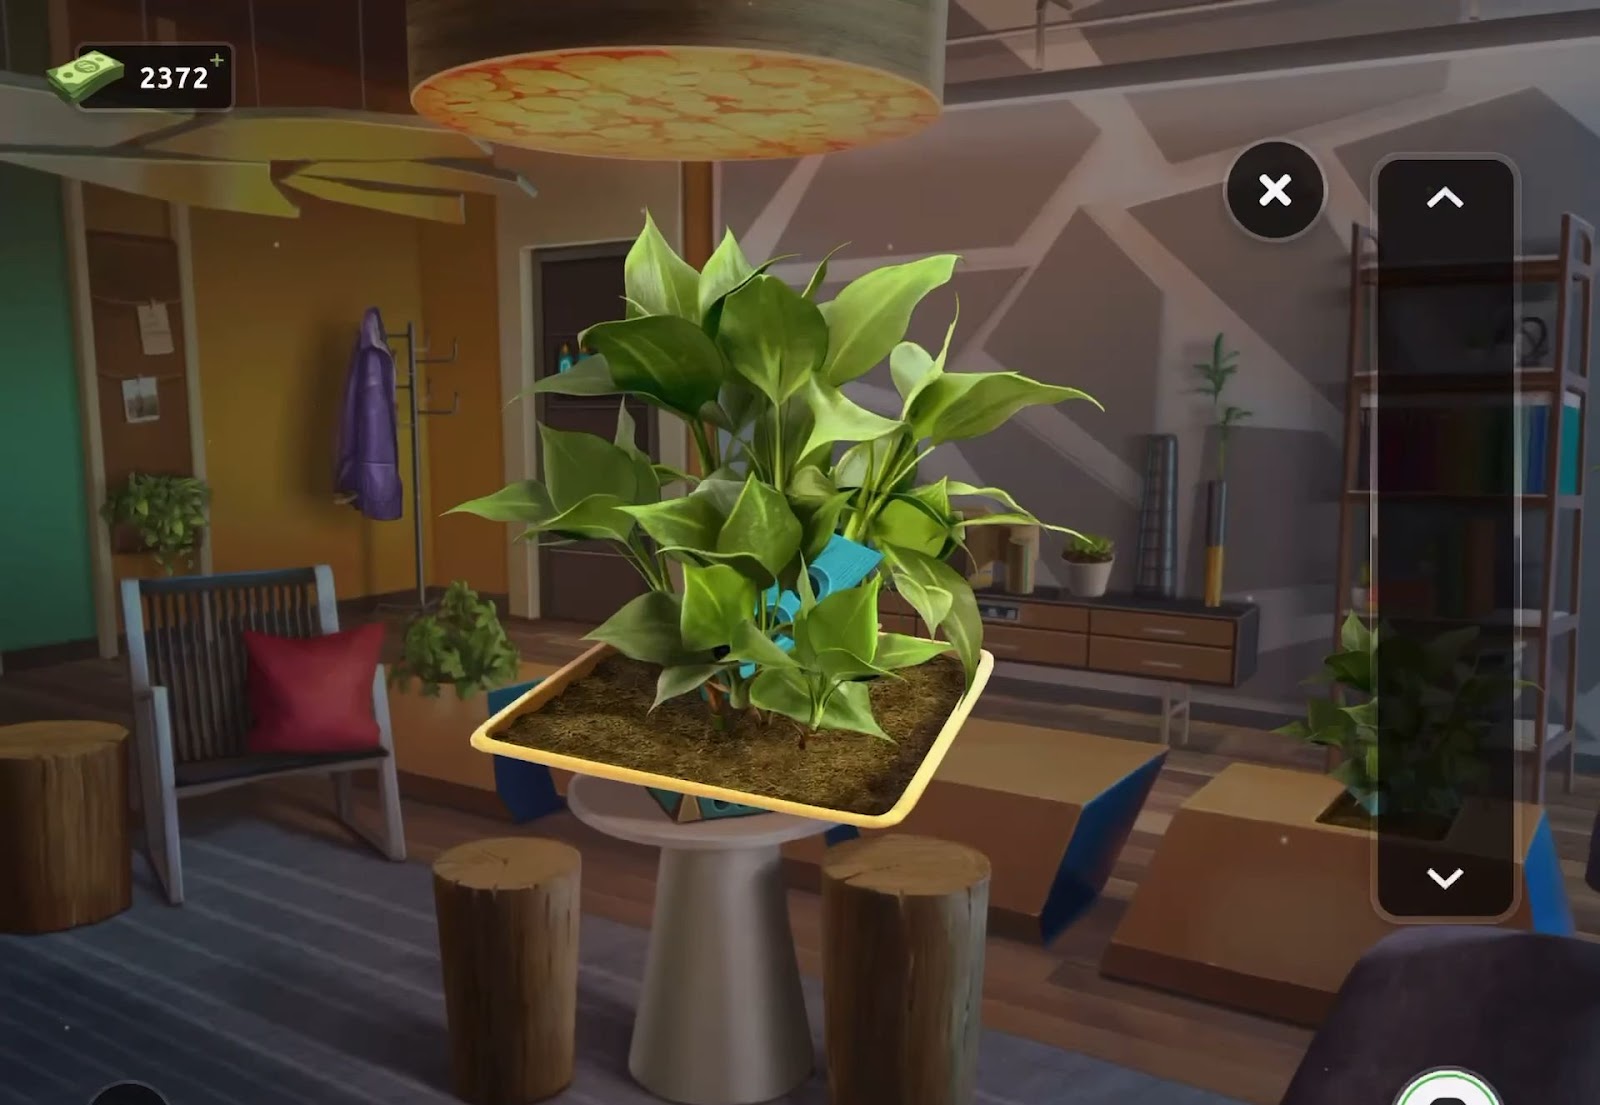
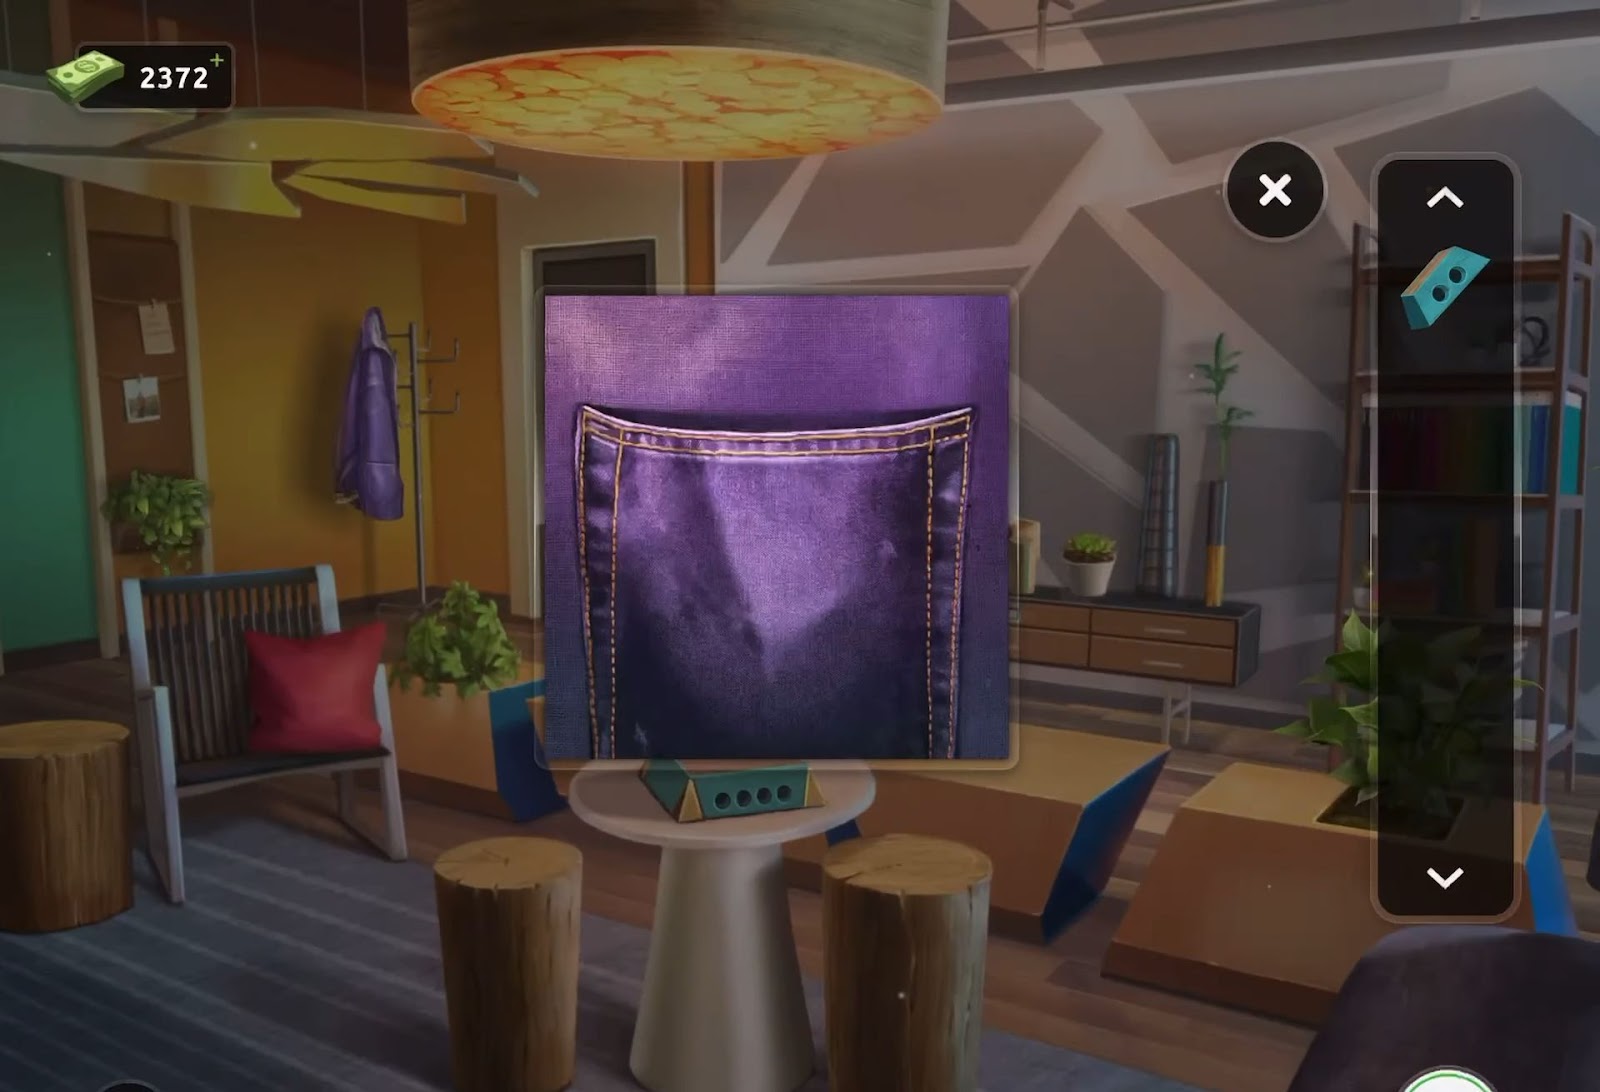
- Next, touch the purple coat near the door to open and locate another pyramid piece in the pocket.
- Then view the low drawer unit mounted on the wall. Solve the puzzle by adjusting the lights to match the correct configuration (054) to unlock the drawer.
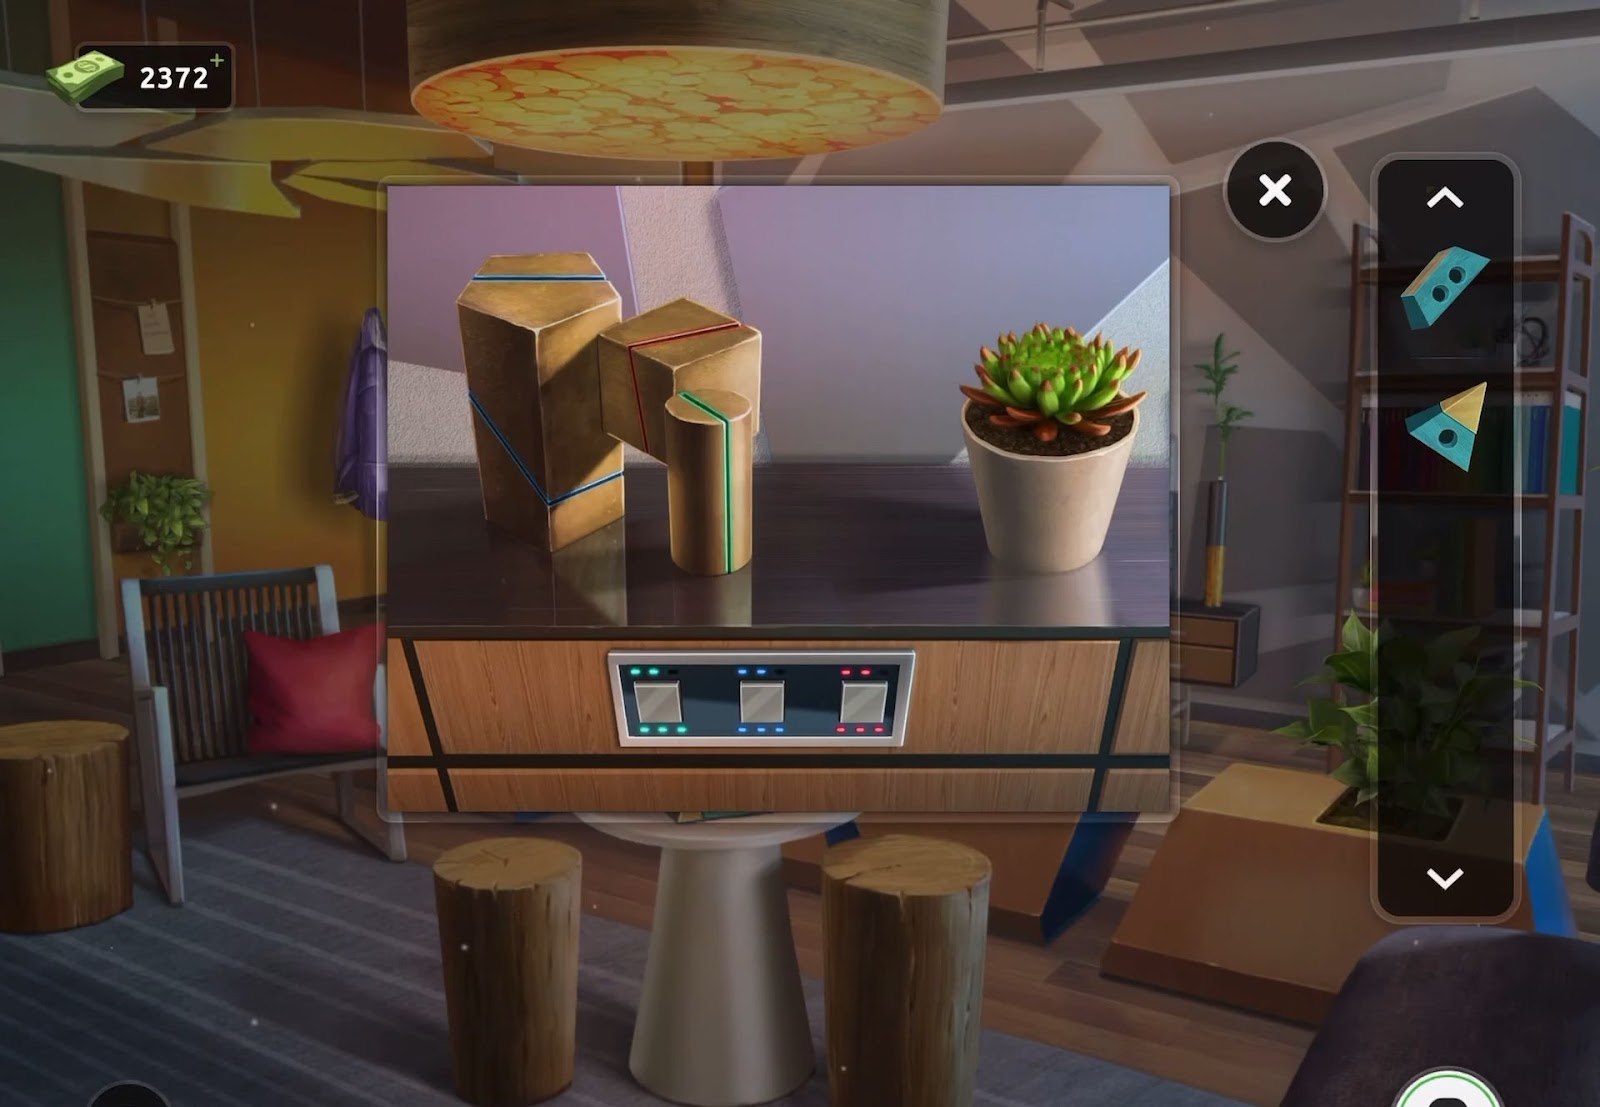
- After that, collect the third pyramid piece. Place all three pieces onto the pyramid base situated on the round table.
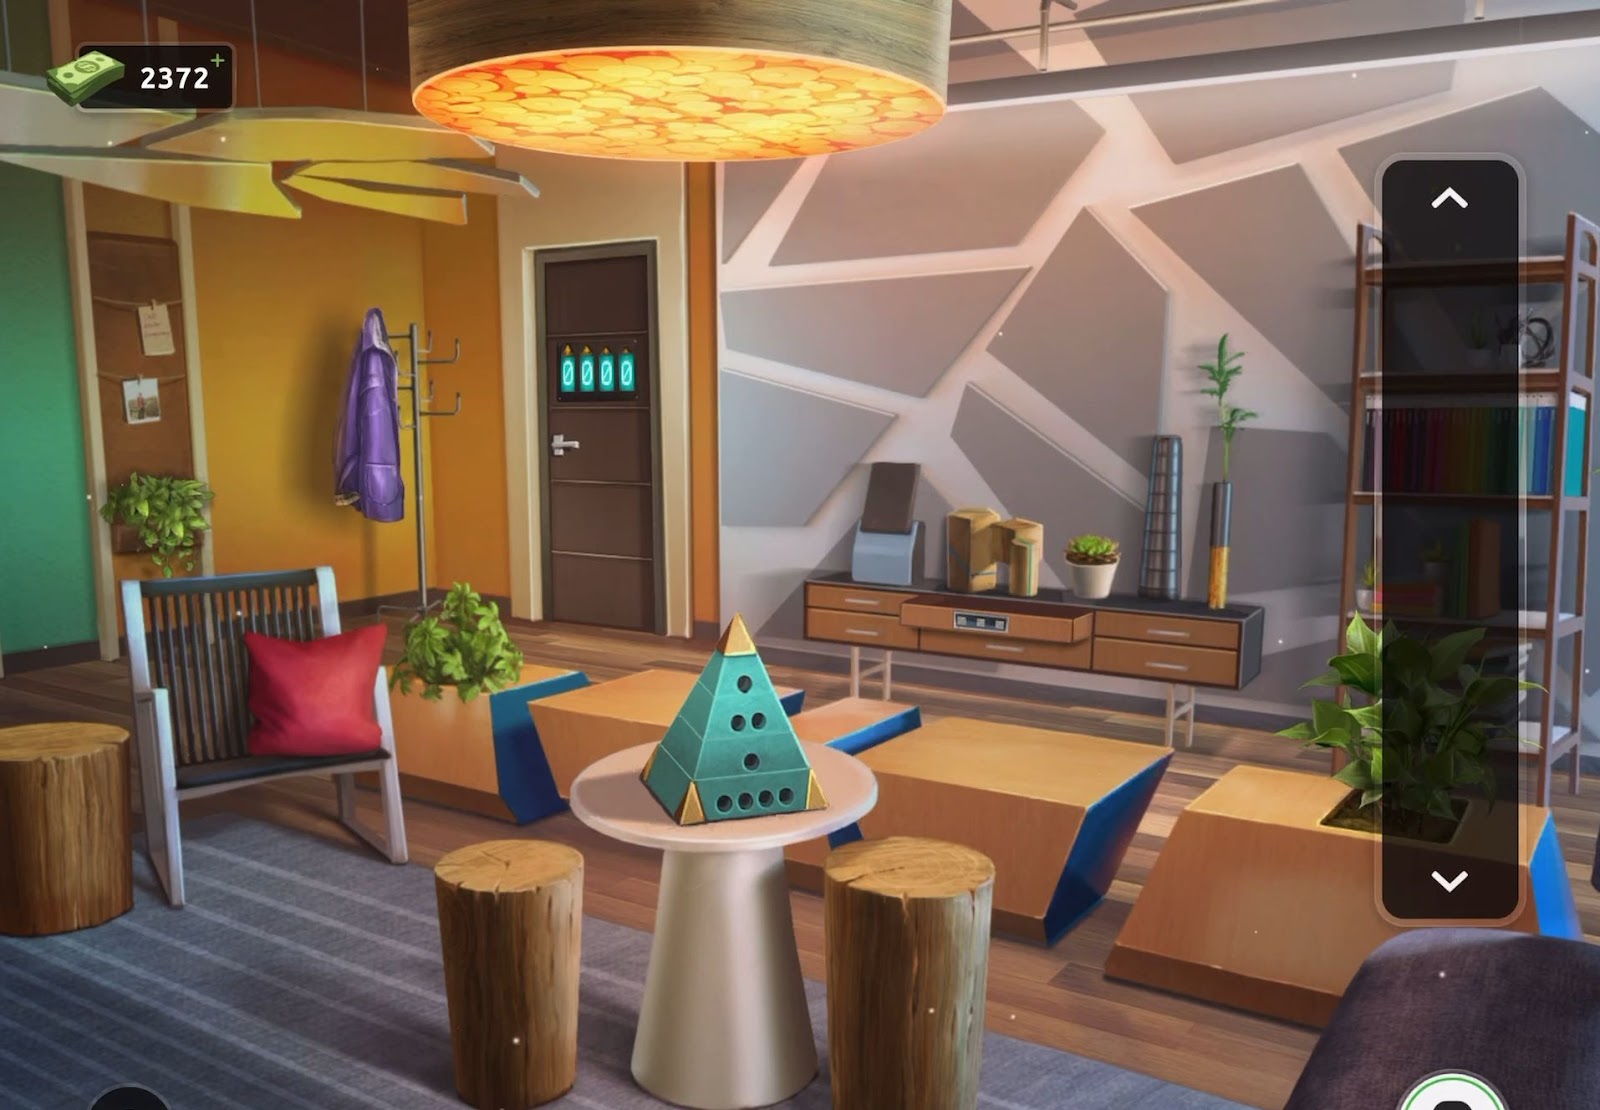
- Now view the exit door code (8431) lock.
- Finally, input the code to open the door and exit the room.
Level 62:
To complete level 62, follow the instructions below:
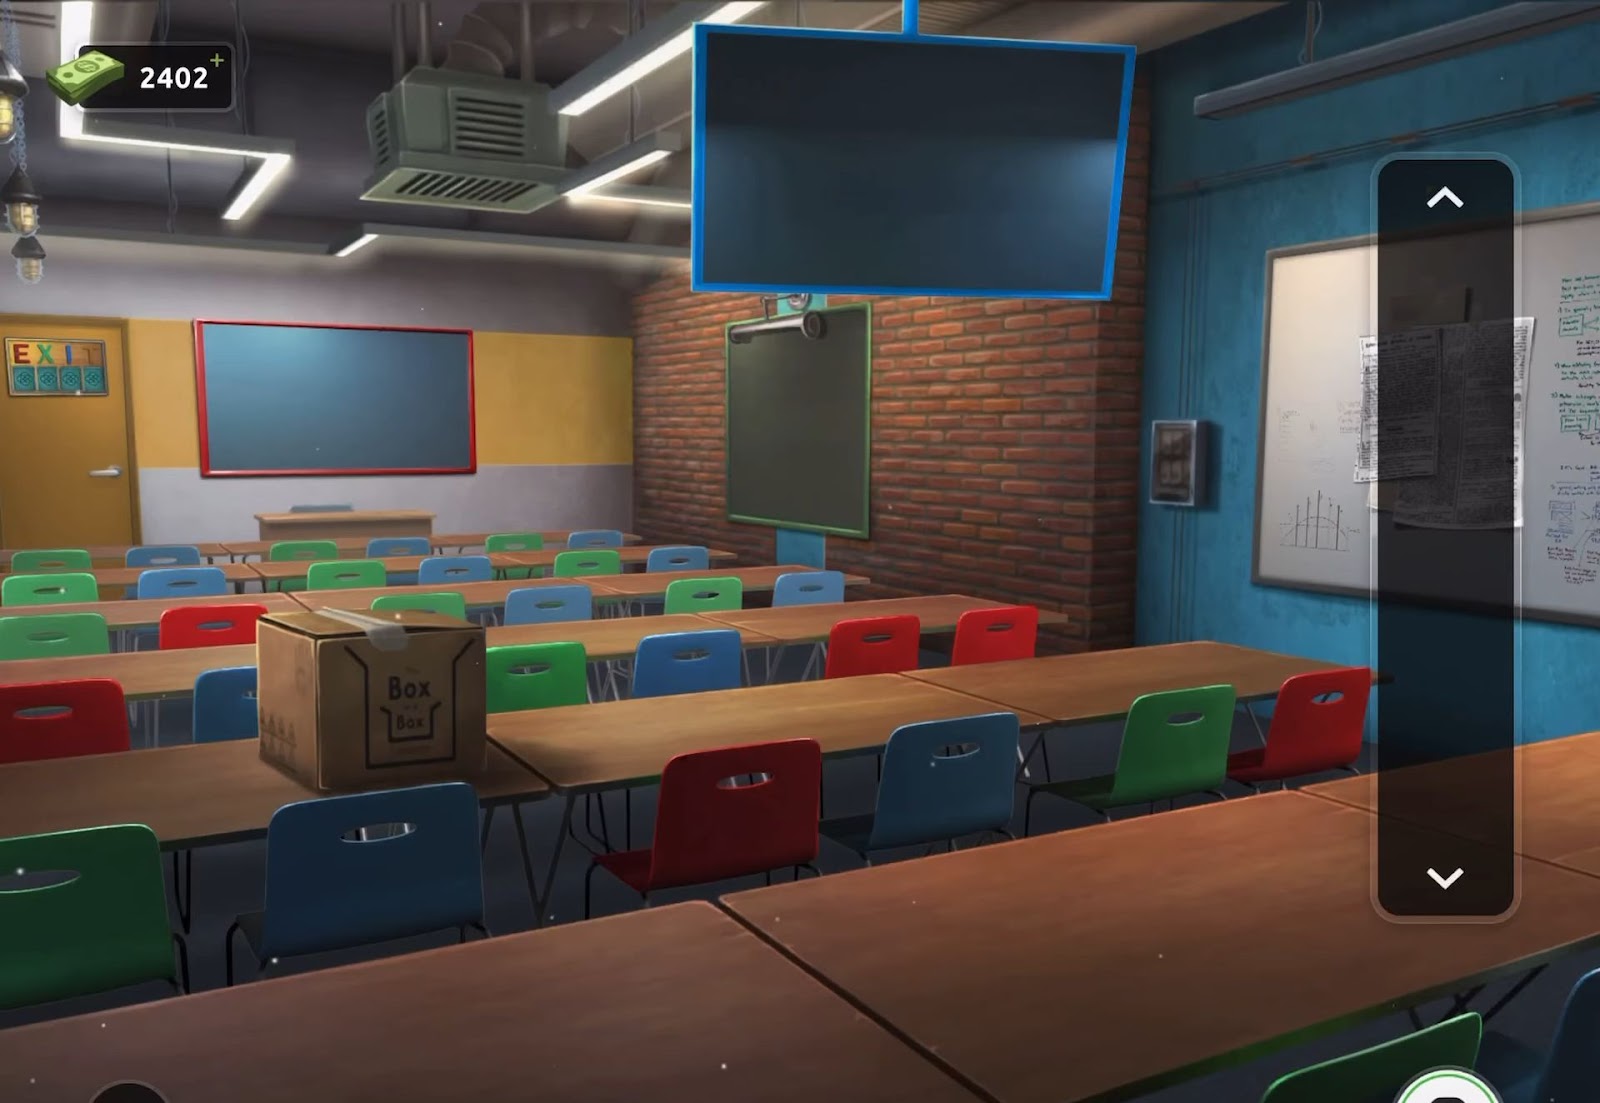
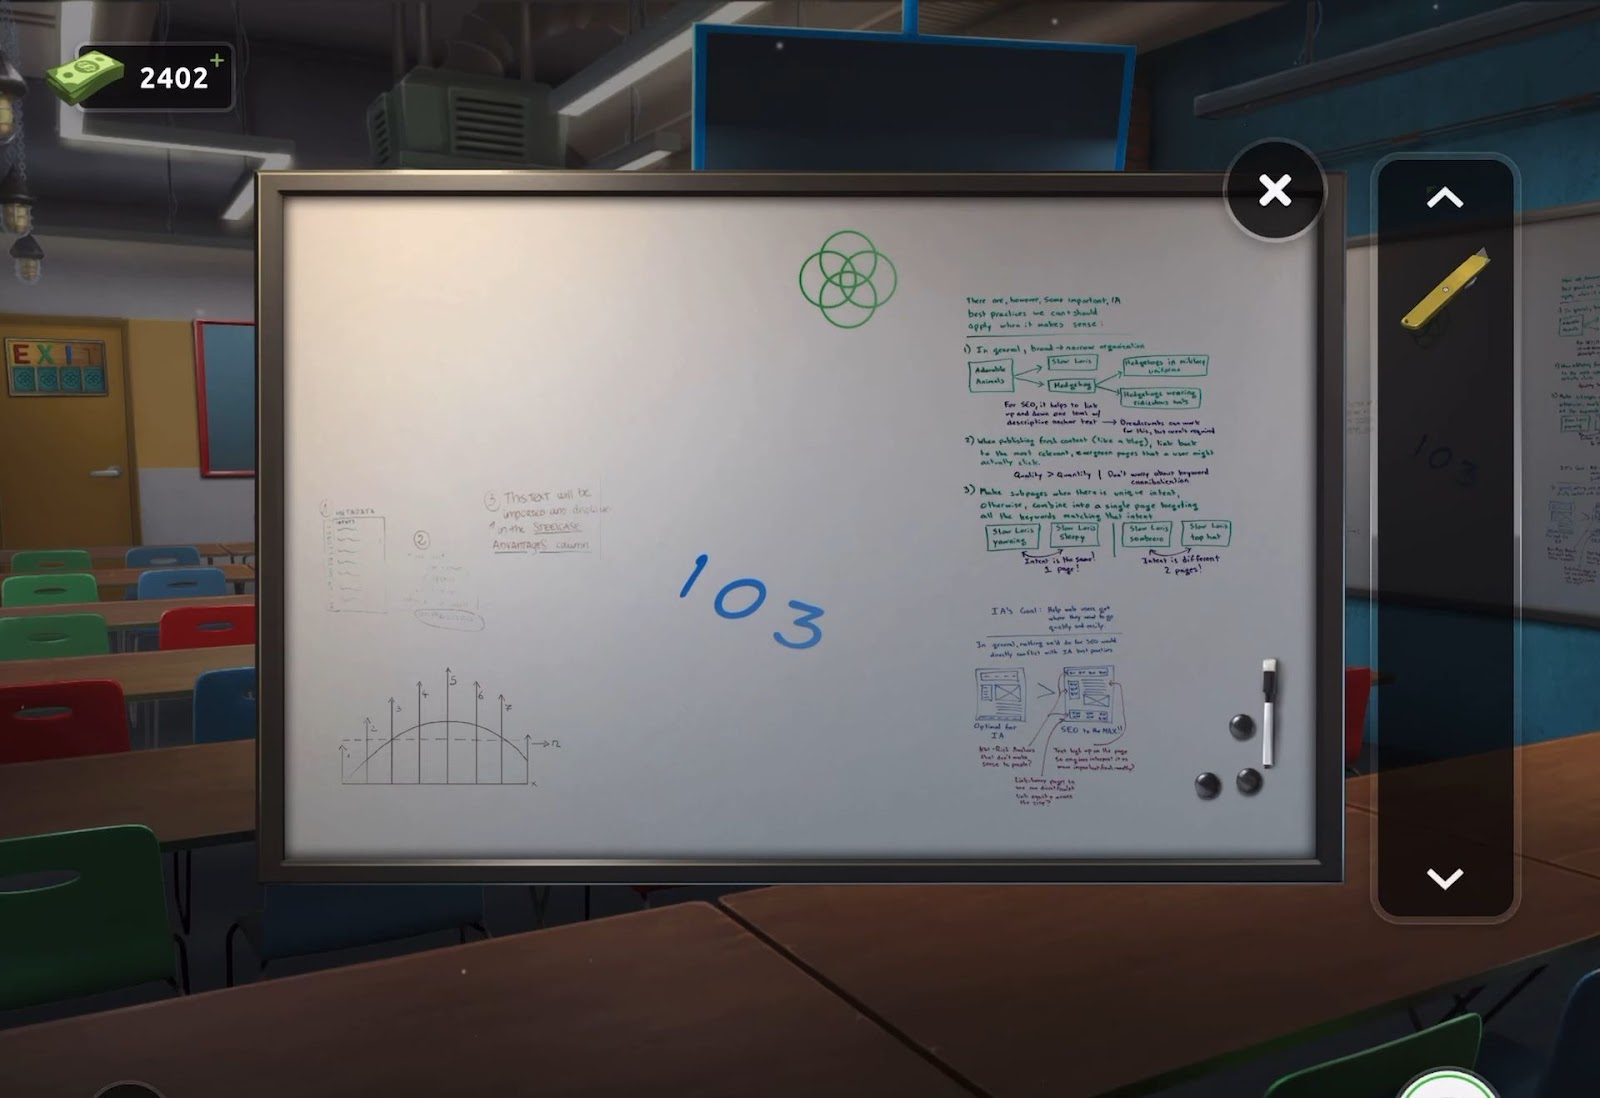
- Firstly, examine the whiteboard on the right, removing the papers stuck to it to reveal clues. Collect the box cutter from there.
- Next, utilize the box cutter to open the cardboard box located on the table.
- Then retrieve the remote control and the tube light from the opened box.
- Now access the remote control and input the number found on the board (103).
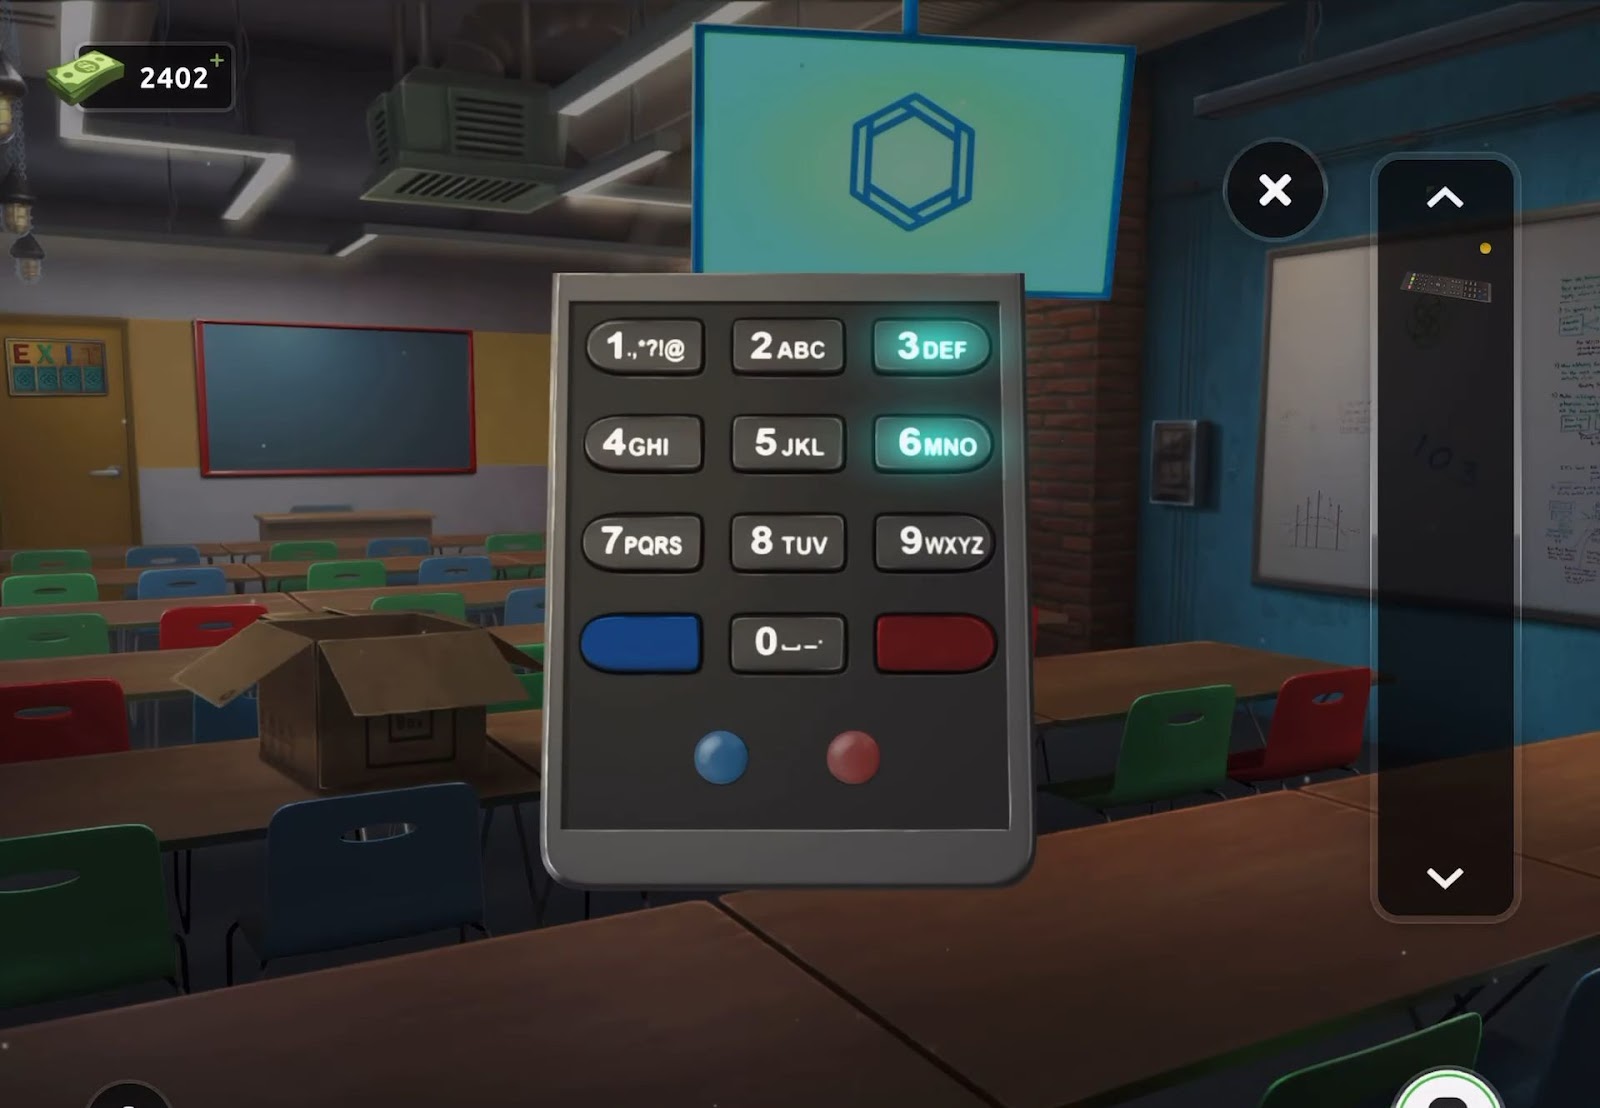
- Now once the screen with a clue is revealed, activating a screen displaying a shape.
- Then fix the tube light on the blackboard to reveal an additional clue, showcasing another shape and a number.
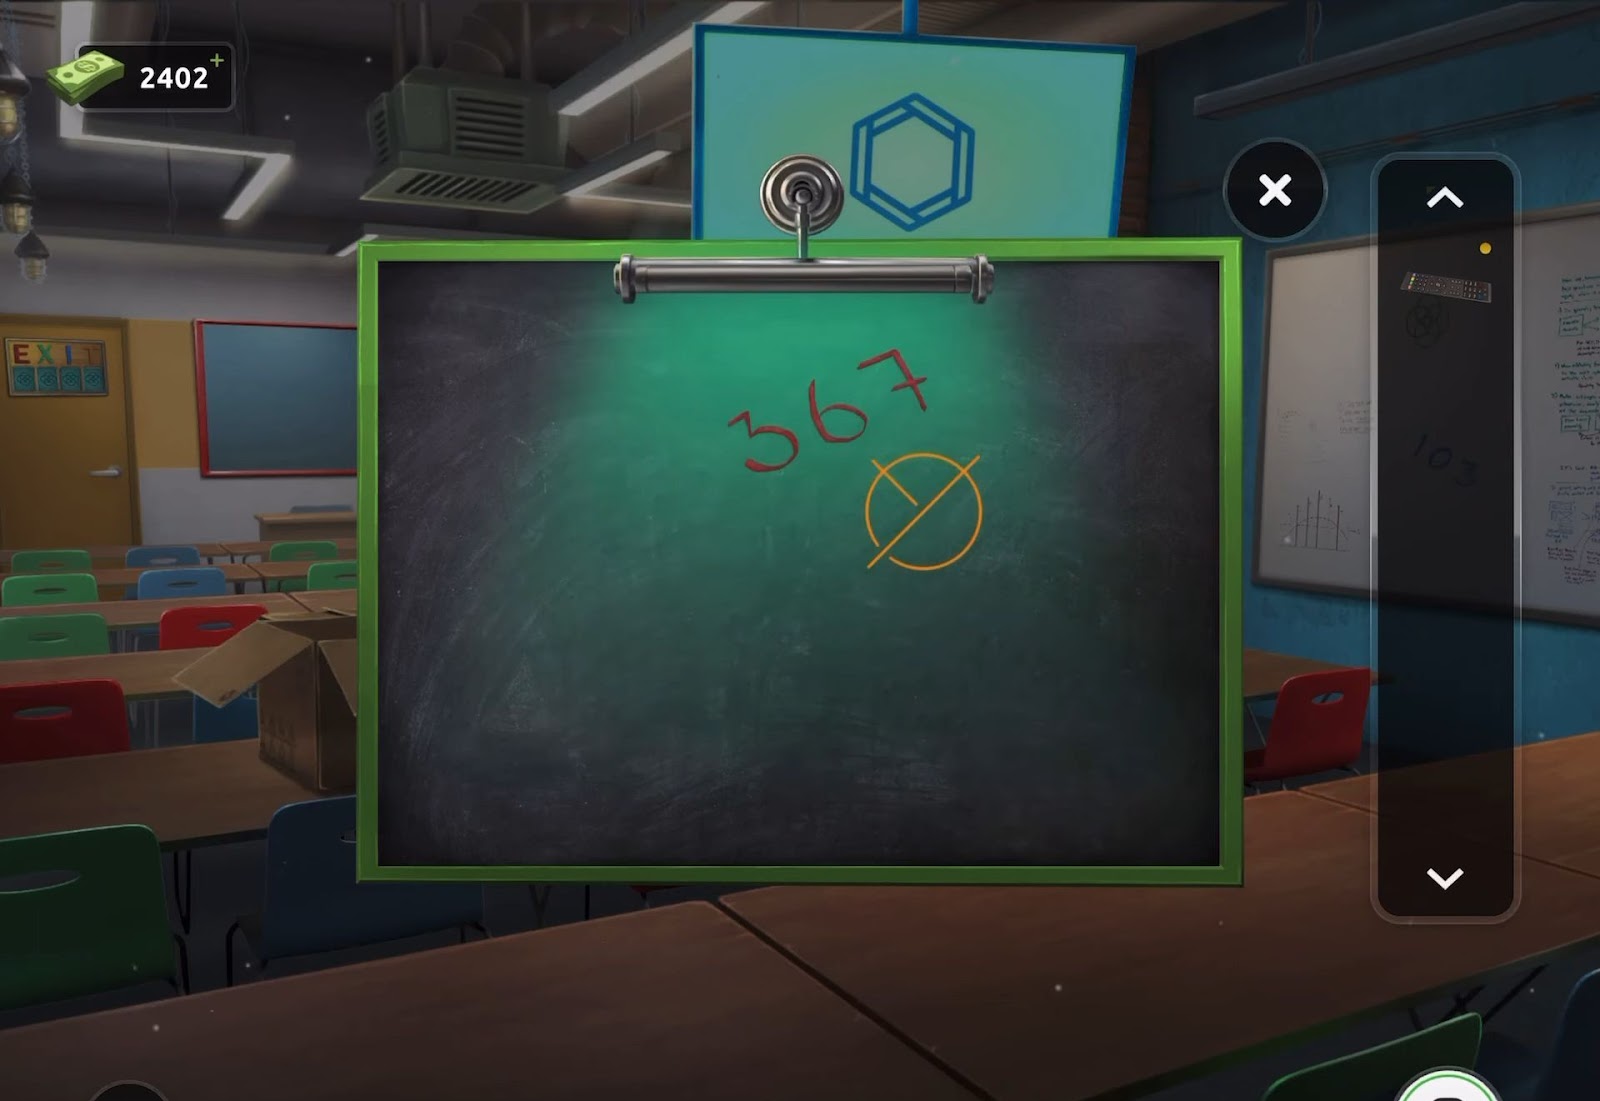
- After that, use the remote control again and enter the new number, (367), displaying another colored symbol on the main screen.
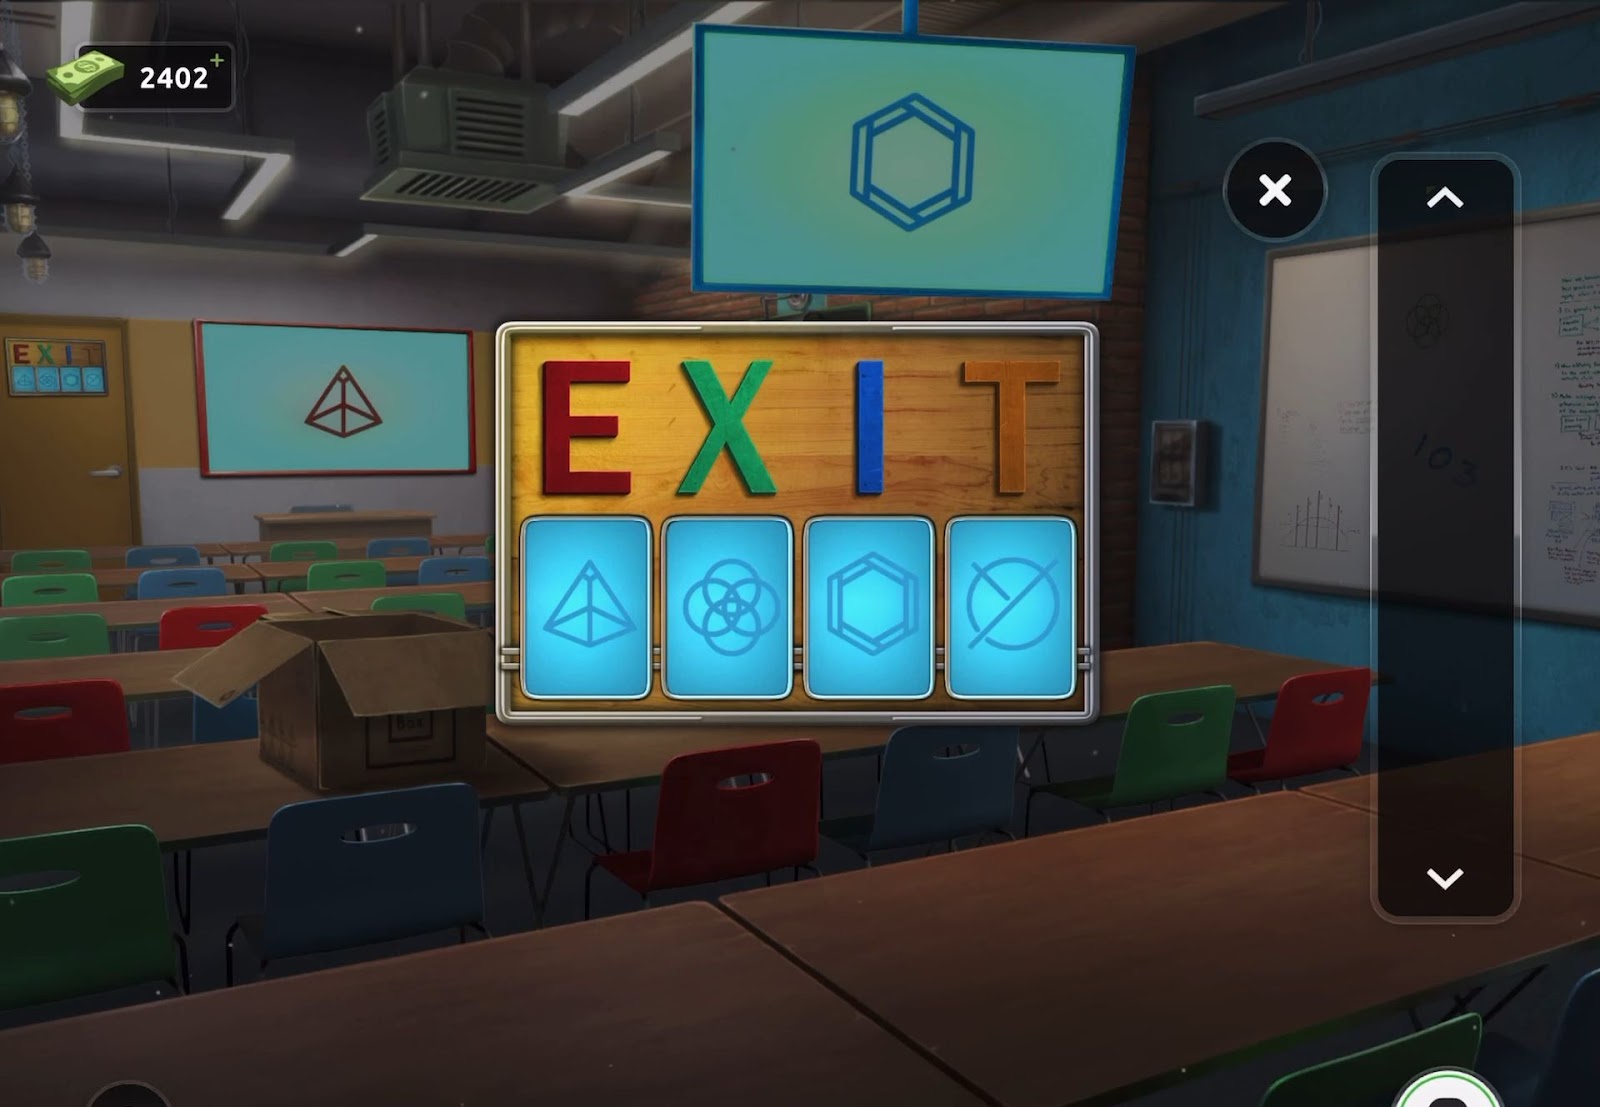
- Finally, proceed to examine the exit door puzzle.
Level 63:
To complete level 63, follow the instructions below:
- Begin by examining the blue box located on the left table, aiming to unlock it with a 3-digit code (413), depicted by tree images.
- Next, acquire a red lever and a battery pack from the box.
- Then add the battery pack to the laptop on the table to charge it and turn it on, revealing a clue.
- Now proceed to view the exit door puzzle.
- After that, inject the red lever in the puzzle mechanism and apply the laptop clue to solve it.
- Then after solving the puzzle, escape from the room.
Level 64:
To complete level 64, follow the instructions below:
- Firstly, locate a key hidden beneath the orange chair pillow and a knife in the fruit bowl on the right.
- Next, observe the desk toy and identify the color sequence formed by the moving balls.
- Then observe a color sequence consisting of 4 colors and proceed to view the box situated on the square table on the room’s right side.
- Now utilize the knife to uncover the panel on the left, revealing a second key.
- After that, apply the color sequence derived from the clue to set the correct order on the four lights situated on the right panel.
- Next, acquire the third key obtained from setting the colors.
- Now proceed to the exit door and utilize the three keys to unlock it.
- Then encounter a new puzzle with three dials on the left side and a corresponding clue displayed on the right.

- Now adjust each of the three dials according to the provided clue.
- After correctly setting these dials, interact with the panel to reveal additional dials on the left. Adjust these to match the clue.
- Finally, upon correctly configuring all the dials, the door will unlock, allowing an exit from the room.
Level 65:
To complete level 65, follow the instructions below:
- Firstly, collect a yellow button from the right side’s long table.
- Next, examine the laptop on the small table and open it to obtain a panel featuring three red lights.
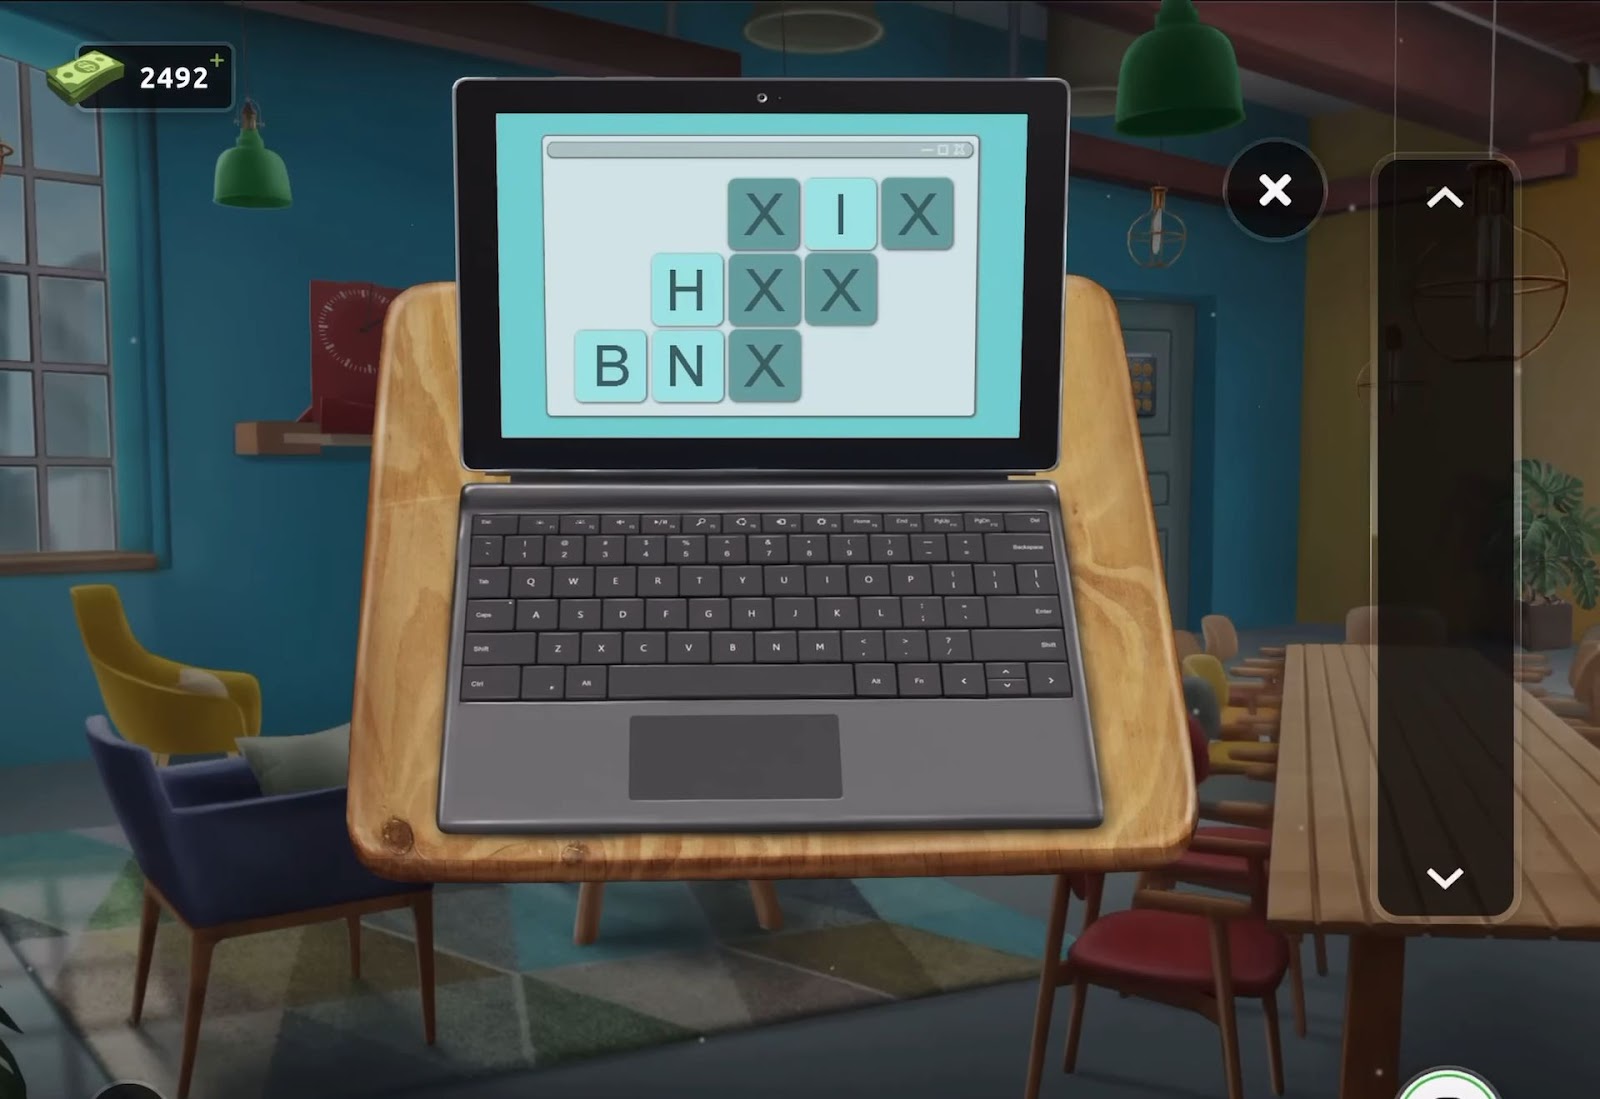
- Then solve the puzzle on the laptop screen by highlighting the letters on the keyboard, which serves as a clue.
- The letters from the keyboard clue are organized as follows: Top row: U I O Middle row: H J K Bottom row: B N M.
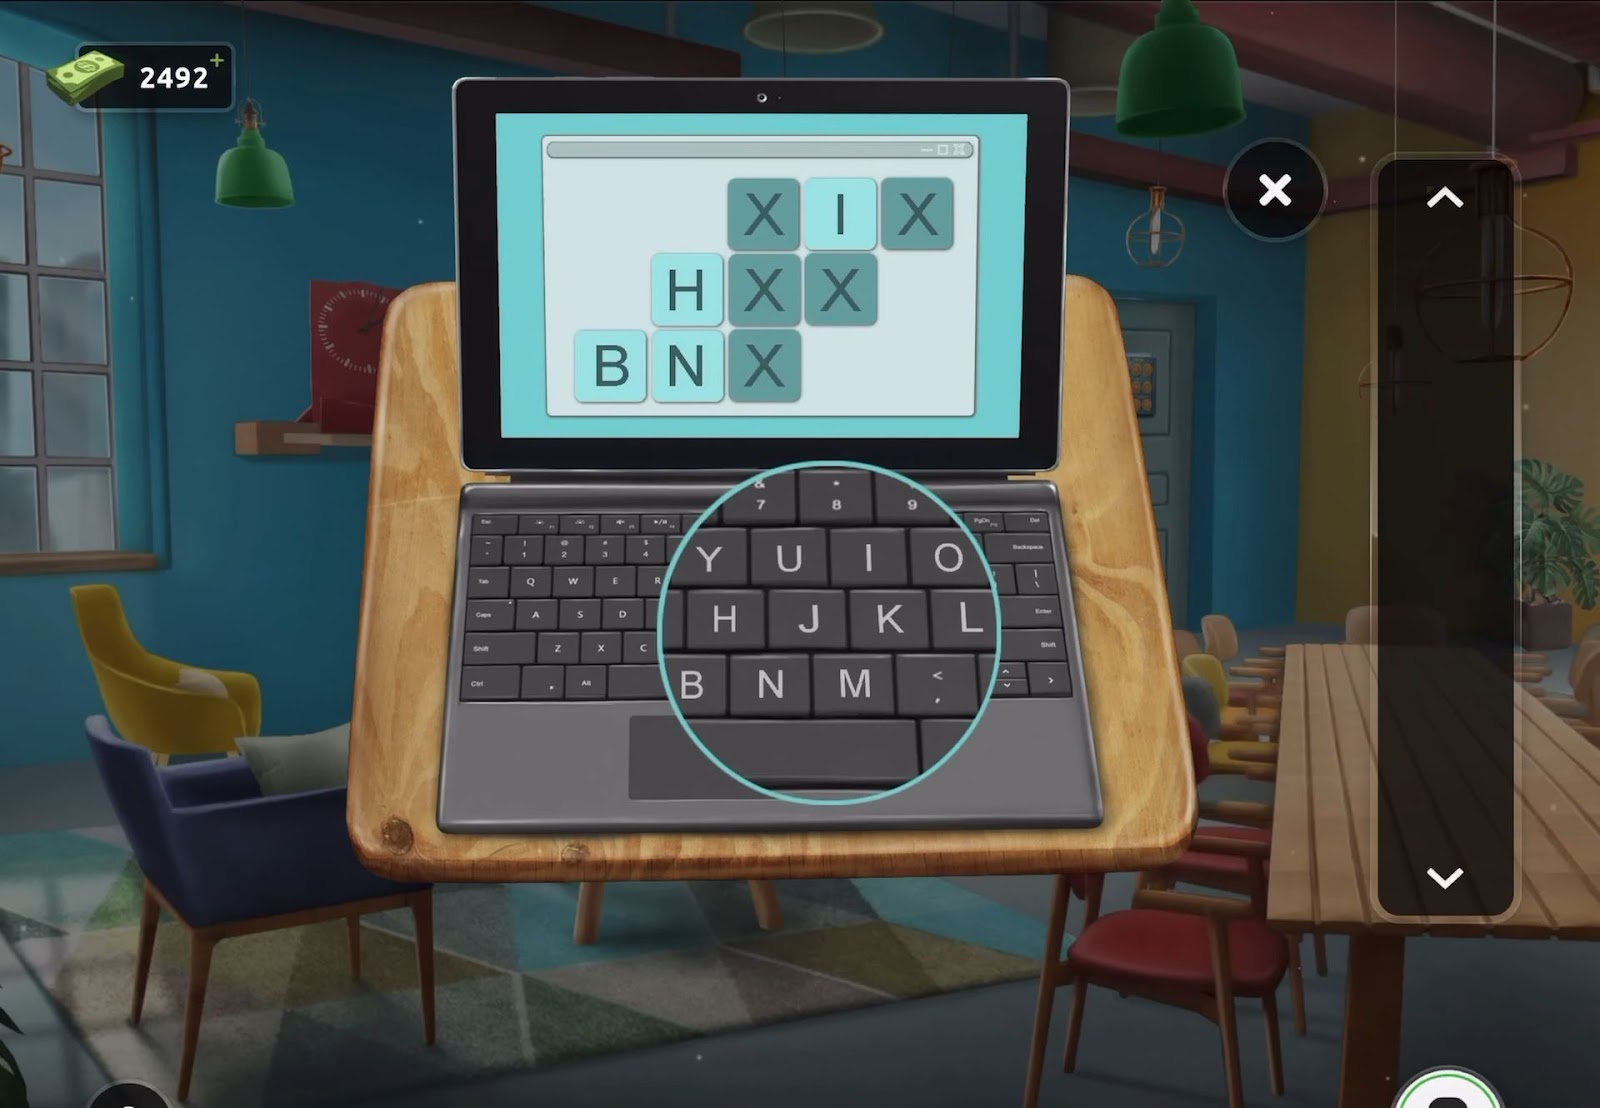
- After that, view the exit door and add the yellow button and lights to activate it.
- Now utilize the laptop clue to tap the correct patterns of buttons on the exit door puzzle.
- Finally, escape the room to proceed to the next level.
Level 66:
To complete level 66, follow the instructions below:

- Firstly, open the glass shelves of the bookcase to reveal a collection of books.
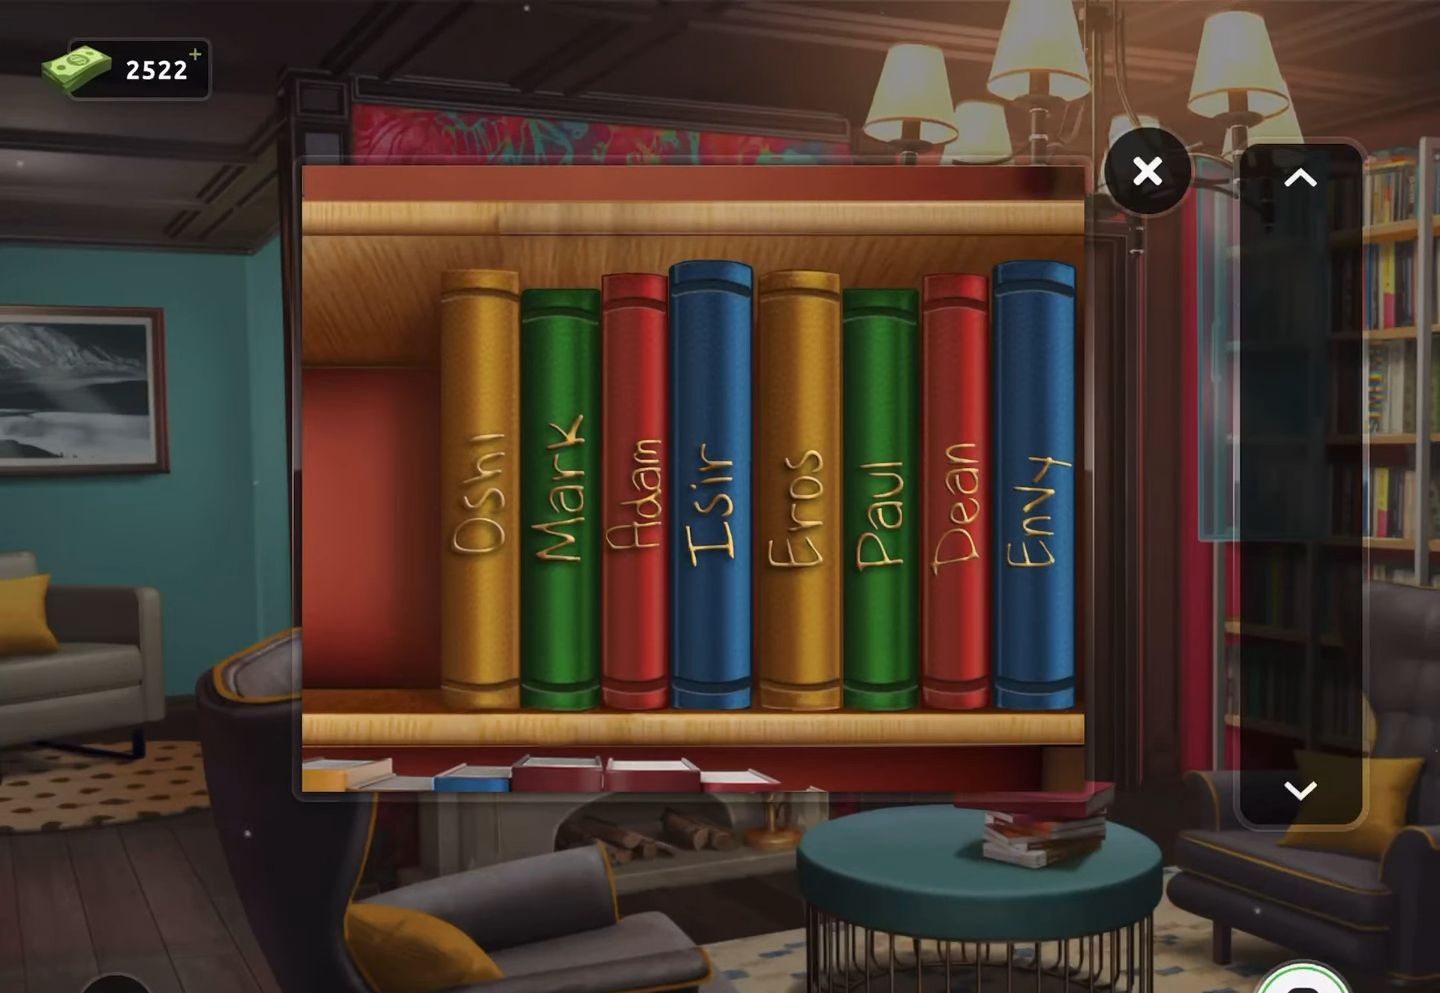
- Next, obtain the clue for the exit door from these books.
- Then use the obtained clue to input the code (1450 upside down of OShI) and unlock the exit door.
- Finally, the door will be unlocked and you can exit through it.
Level 67:
To complete level 67, follow the instructions below:
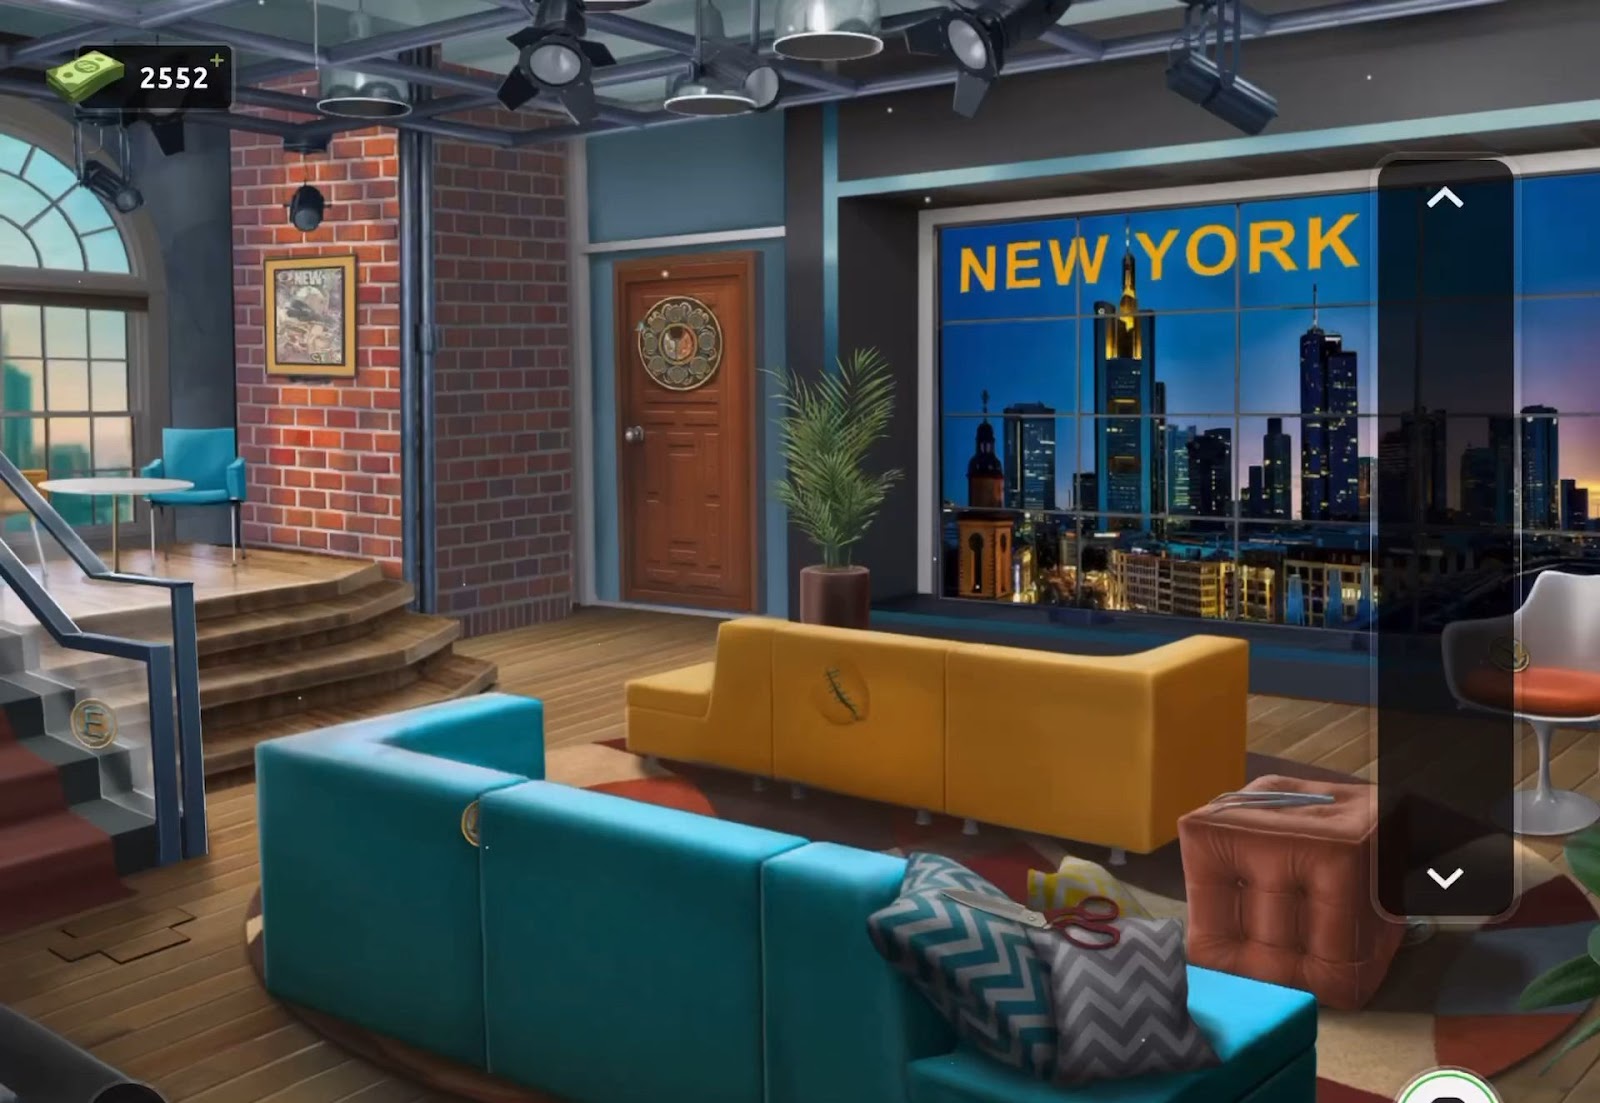
- Firstly, collect a magnet from the left stairs.
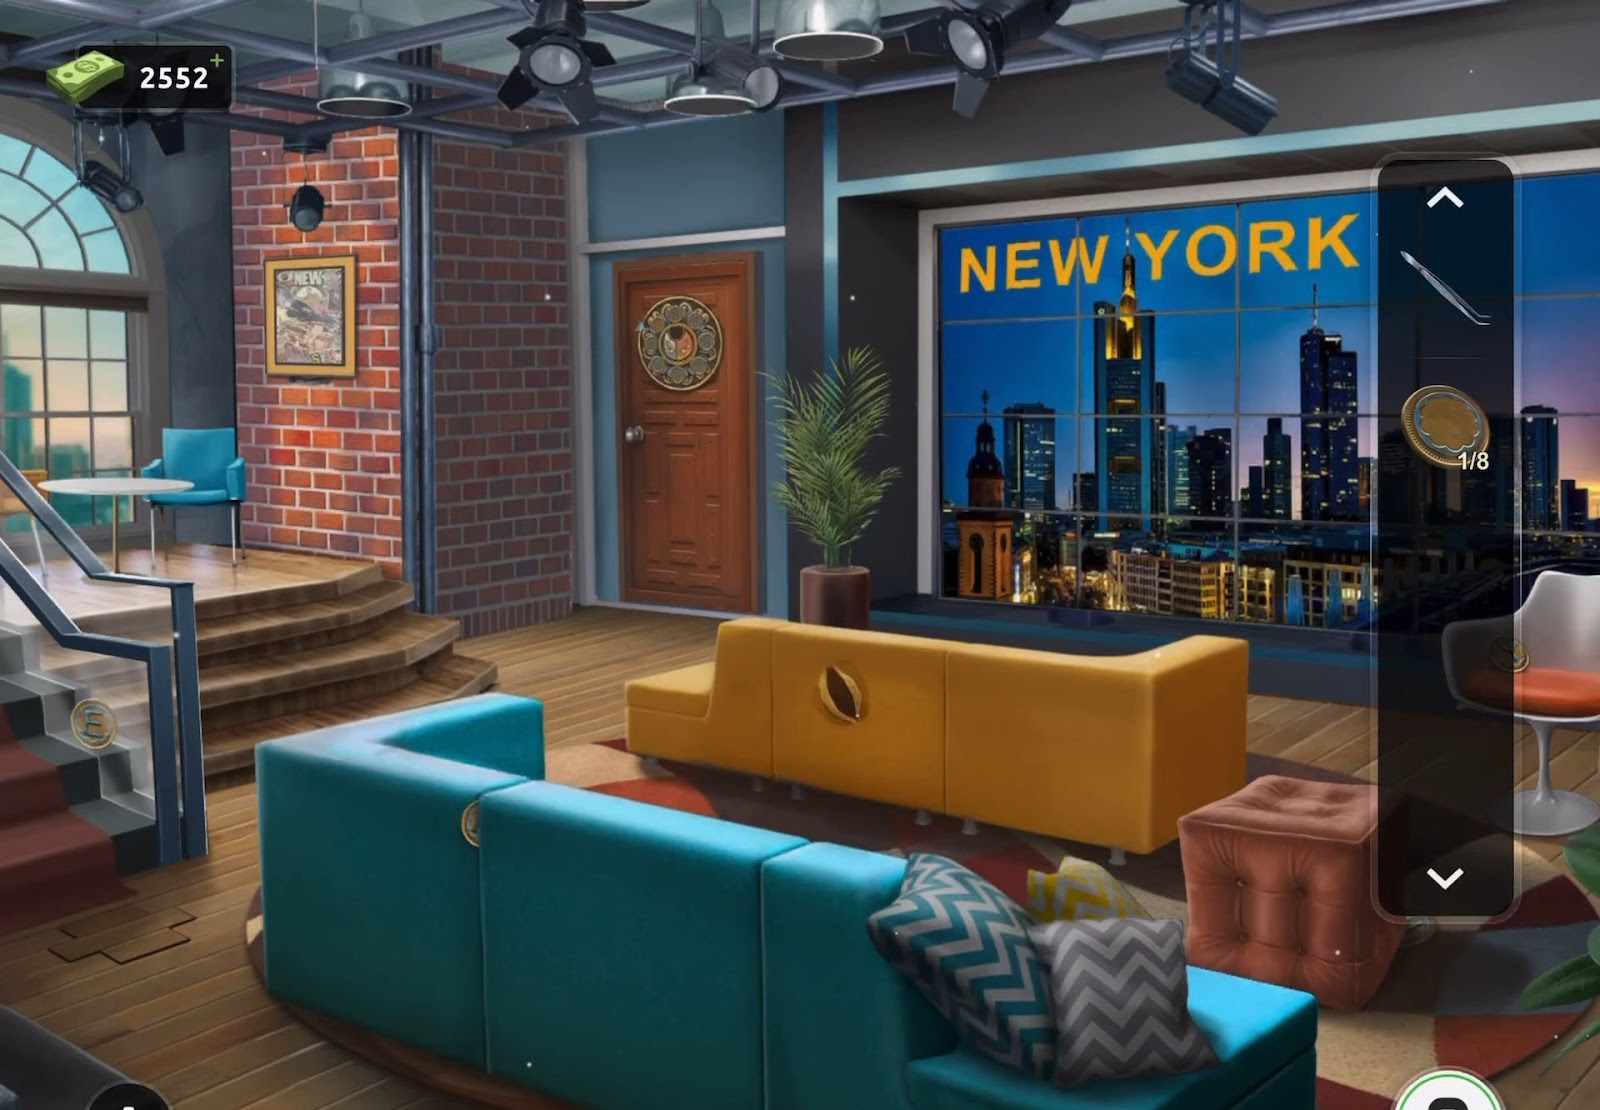
- Then use the magnet to retrieve the first coin lodged between the glass (Coin 1 of 8).
- Next, tap the loose panel on the floor near the stairs to reveal and collect another coin (Coin 2 of 8).
- After that, tap the wall picture near the window to reveal and collect the third coin (Coin 3 of 8).
- Now collect a pair of scissors from the right side of the blue sofa and use them to cut the stitched fabric on the yellow sofa to retrieve a coin (4 of 8).
- Subsequently, use the tweezers from the square footstool to extract another coin lodged behind the blue sofa (5 of 8).
- Now retrieve another coin from under the footstool (6 of 8), followed by one from the white chair (7 of 8), and the final coin from the pot plant on the right (8 of 8).
- Then inspect the puzzle located on the exit door and place all eight collected coins onto it.
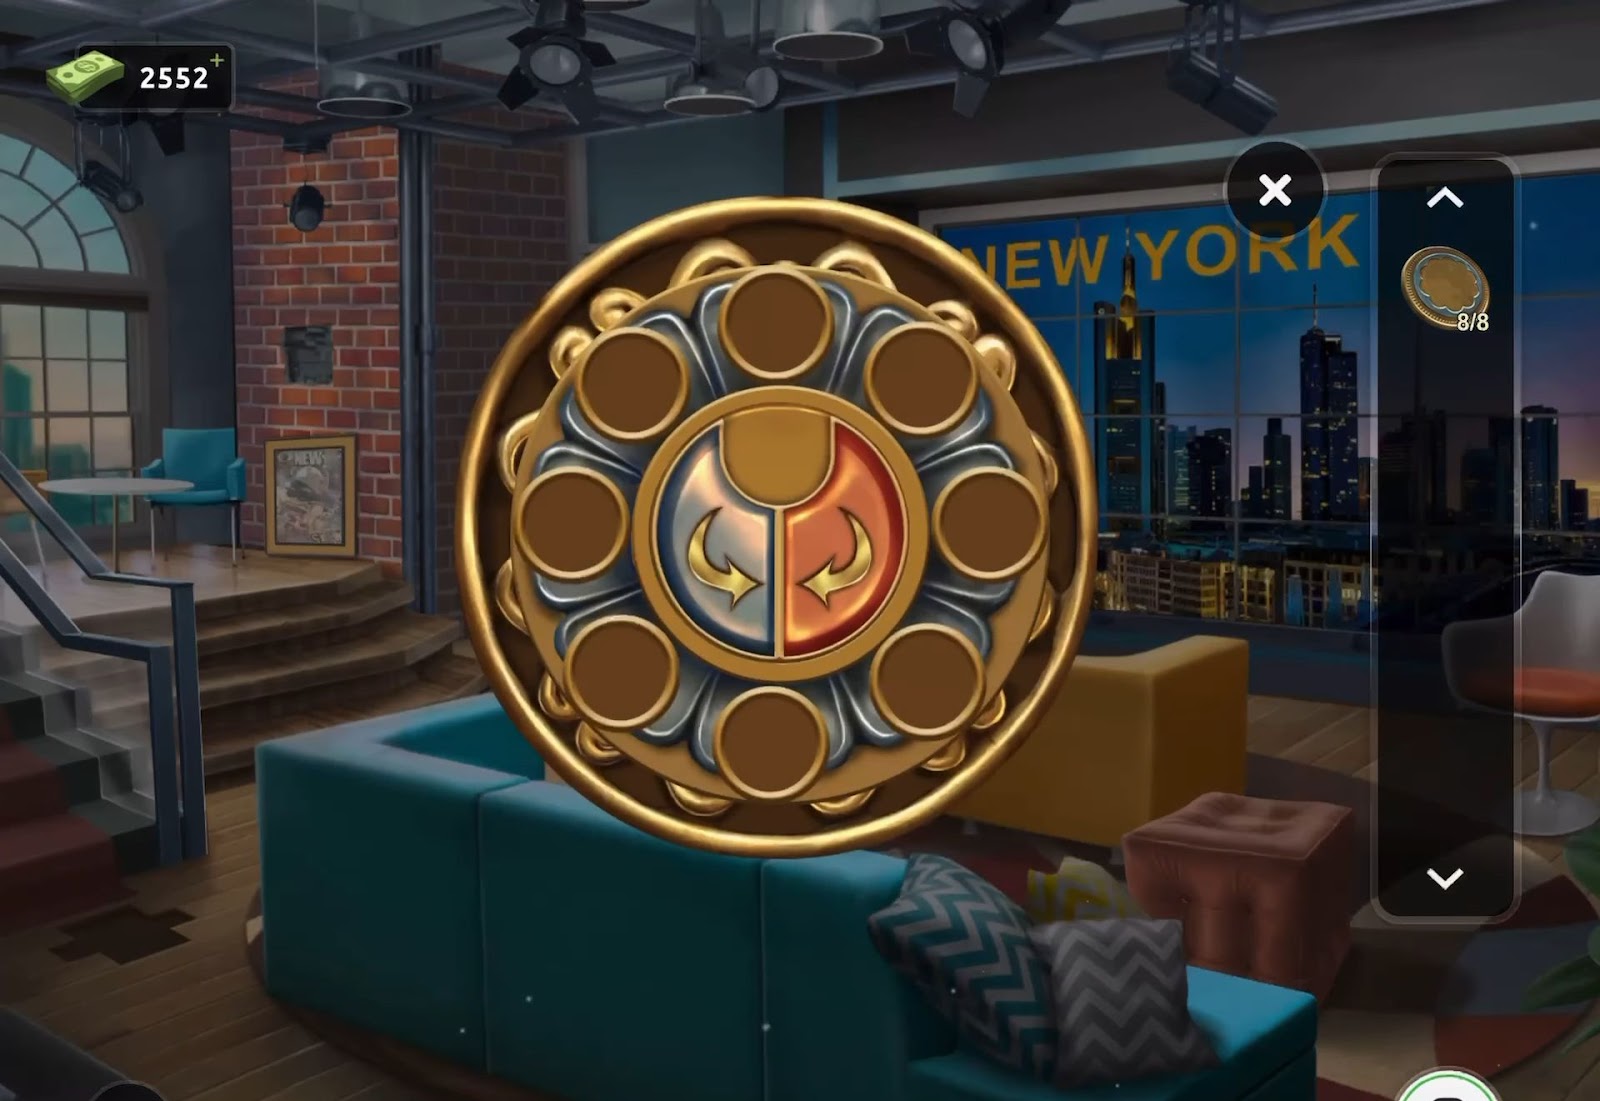
- After that, utilize the central controls to rearrange and position the coins correctly within the puzzle.
- Finally, arrange the coins and proceed to exit the room.
Level 68:
To complete level 68, follow the instructions below:
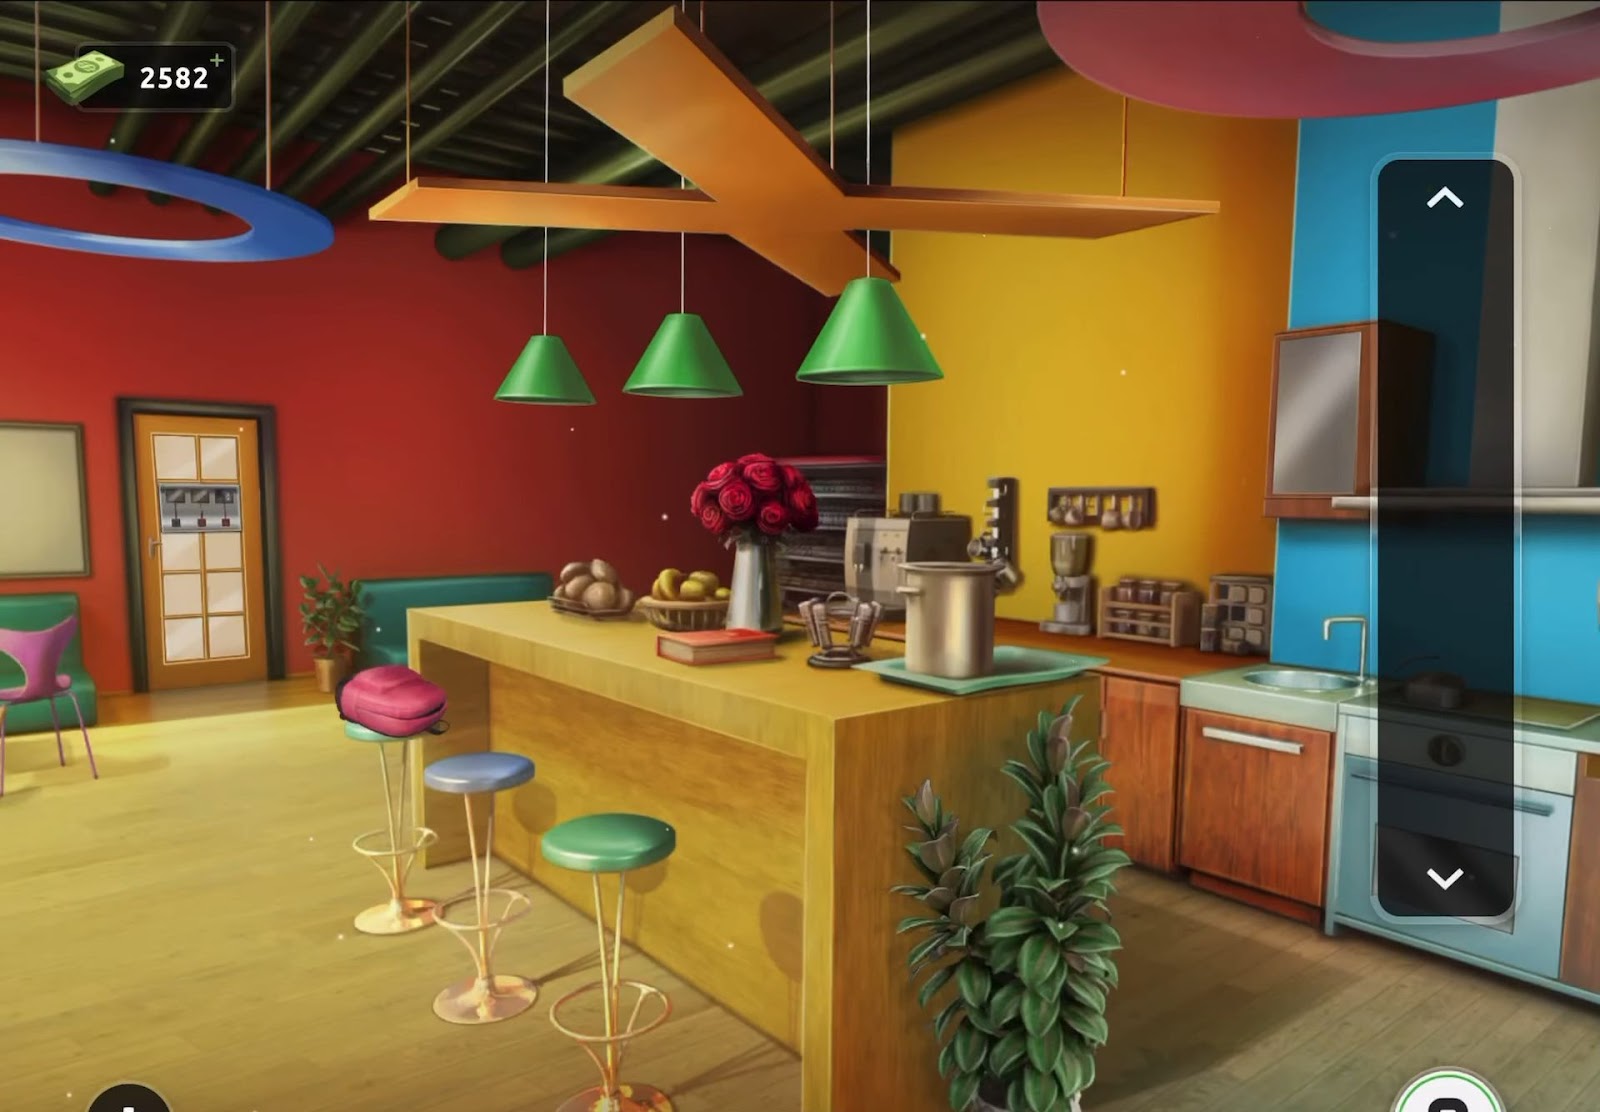
- Firstly, gather a hammer from underneath the table located at the rear left side of the room.
- Next, proceed to view the wall cabinet situated on the right side above the sink, featuring a glass front.
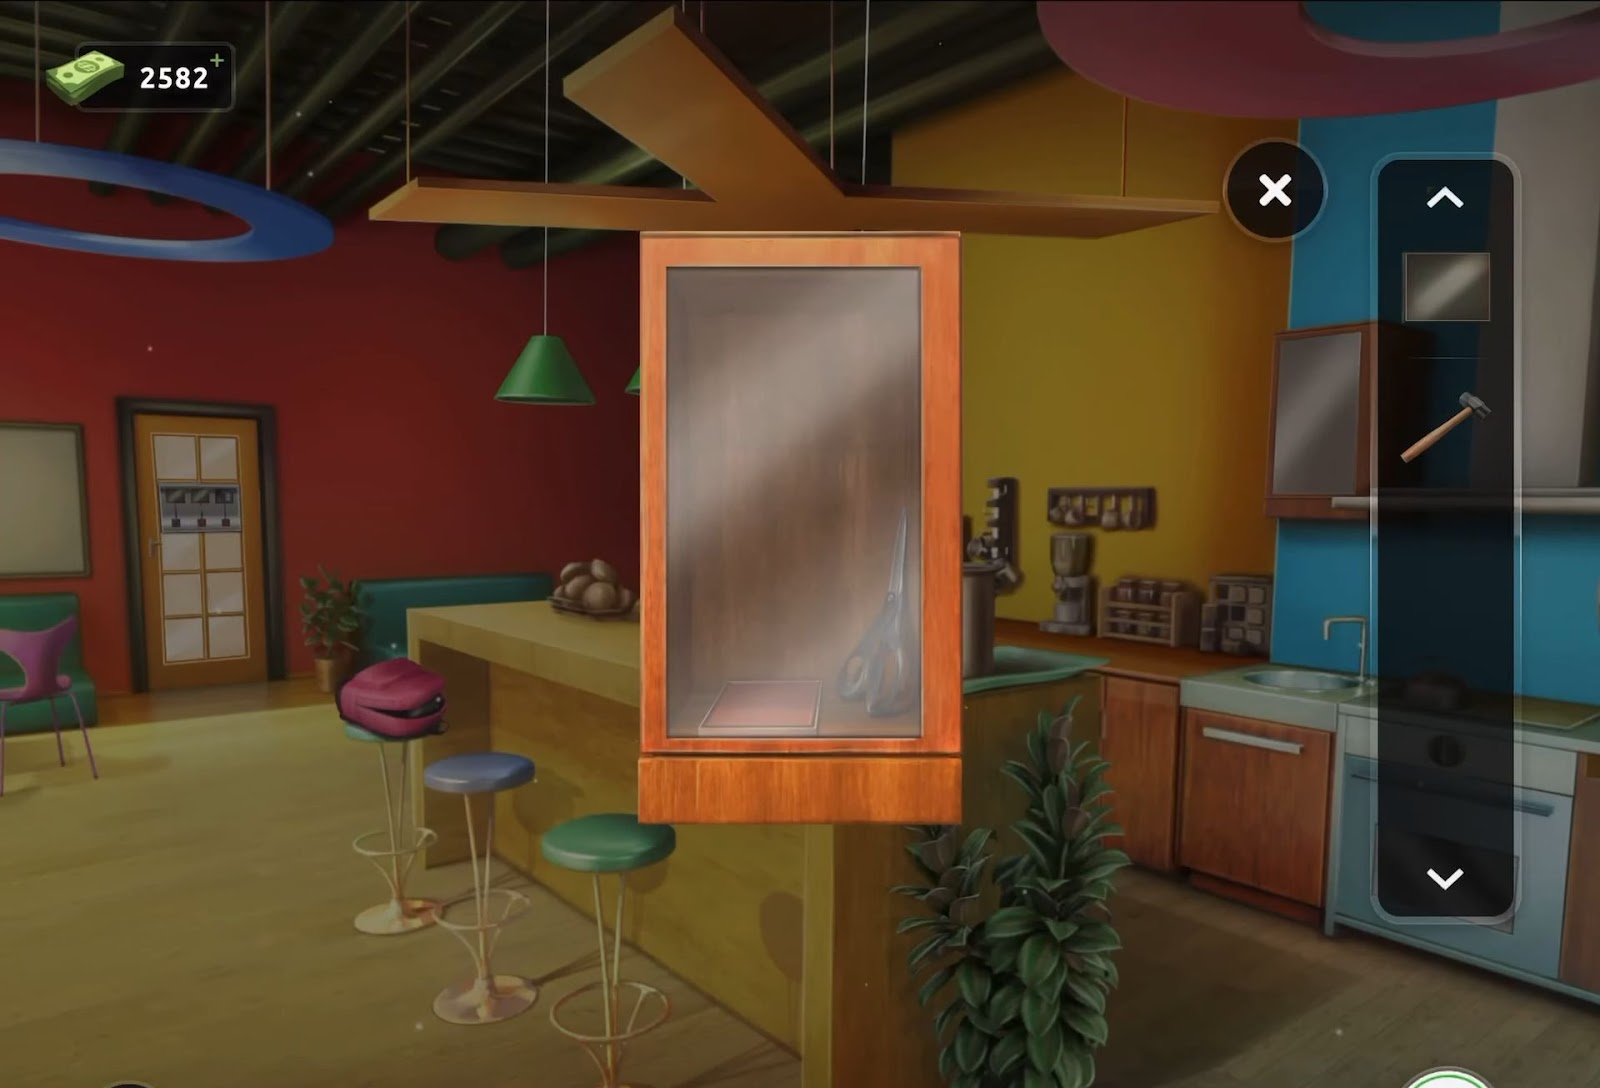
- Then employ the hammer to shatter the glass, retrieving a pair of scissors and a brown square button.
- Move on to inspect the pot of roses situated in the bar area.
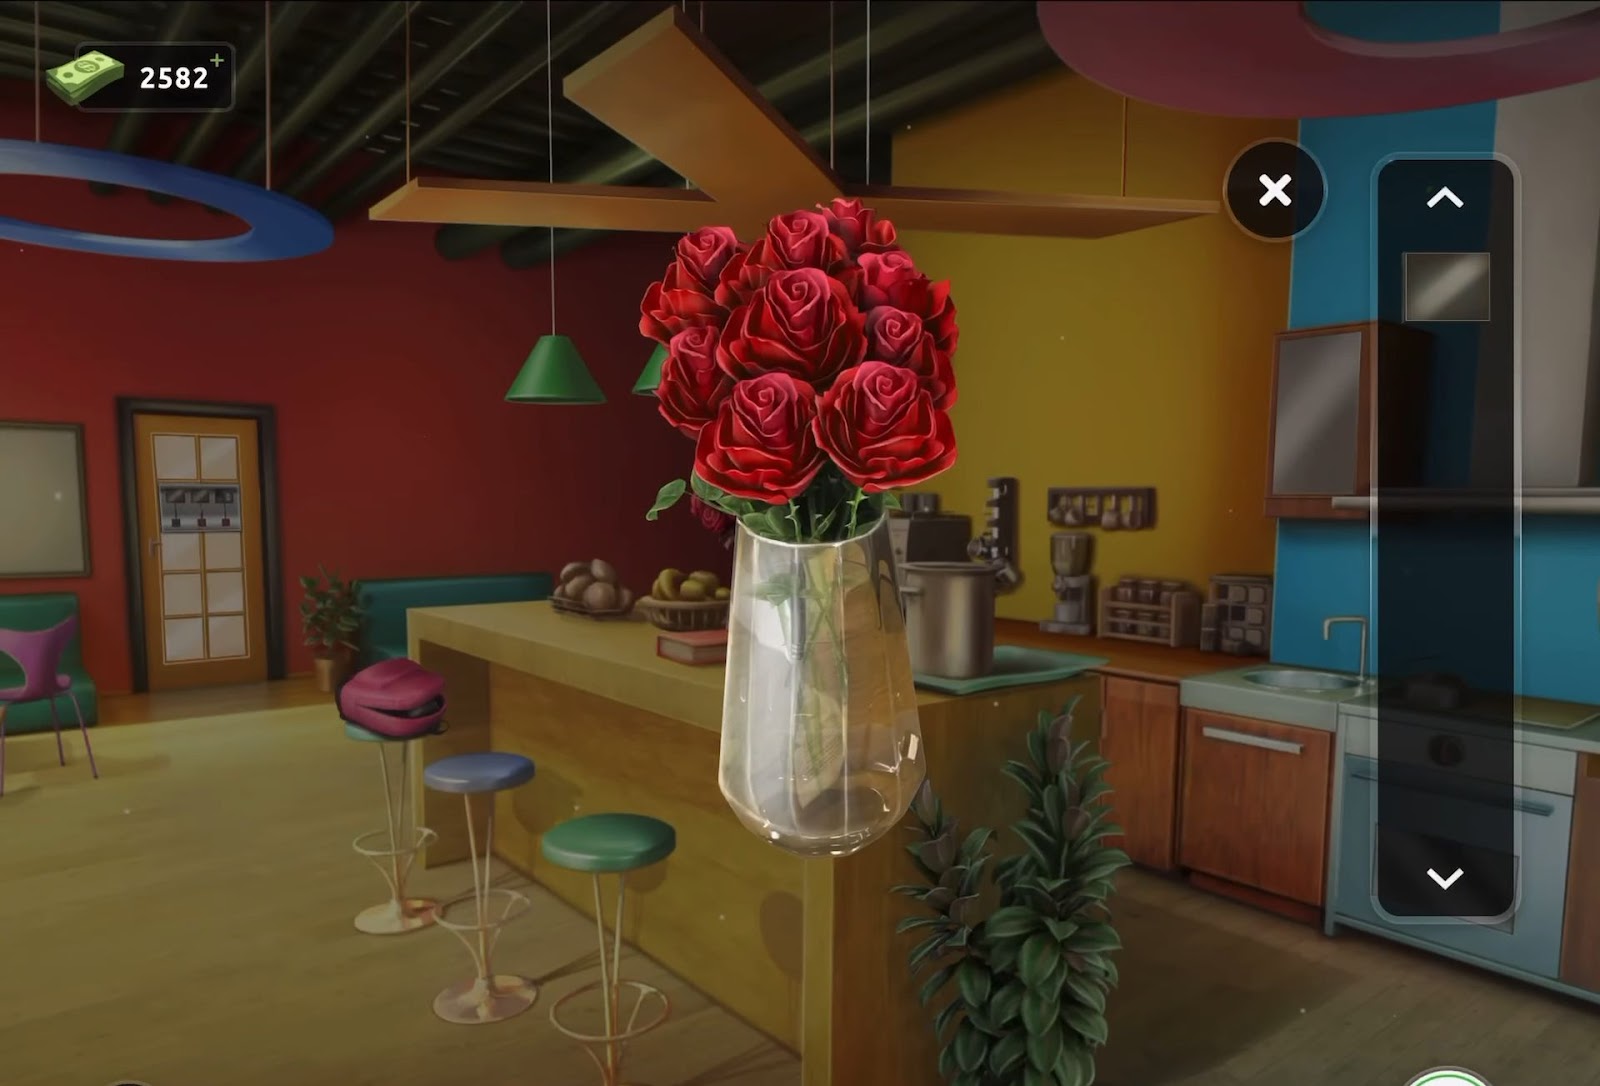
- After that, utilize the scissors to trim the roses and acquire a short black connector.
- Now inspect the pink bag situated on the stool and retrieve a screen from it.
- Then proceed to examine the exit door.
- Next, attach the brown button to the bottom right of the door panel.
- Now remove the broken connector and the damaged screen, then add the new components you have collected.
- After that, engage in a timing-based puzzle to proceed.
- After accurately configuring the three numbers, the door will unlock, enabling your escape.
Level 69:
To complete level 69, follow the instructions below:
- Firstly, observe the animation on the left desk’s monitor to track the square’s movement and notice the position of two red dots among four.
- Then repeat this step with the other monitor on the left to cross-check the observations.
- Next, examine the right desk’s monitor to see a similar animation, but with different colors and positions for the red dots.
- Now proceed to view the exit door puzzle.
- Then arrange the four colored circles according to the patterns observed from the animations.
- Upon completing the puzzle correctly, the room will unlock, allowing you to escape.
Level 70:
To complete level 70, follow the instructions below:
- Begin by collecting a screwdriver from the left table.
- Then approach the exit door and inspect the panel.
- Next, utilize the screwdriver to take off the panel, revealing a hidden puzzle.
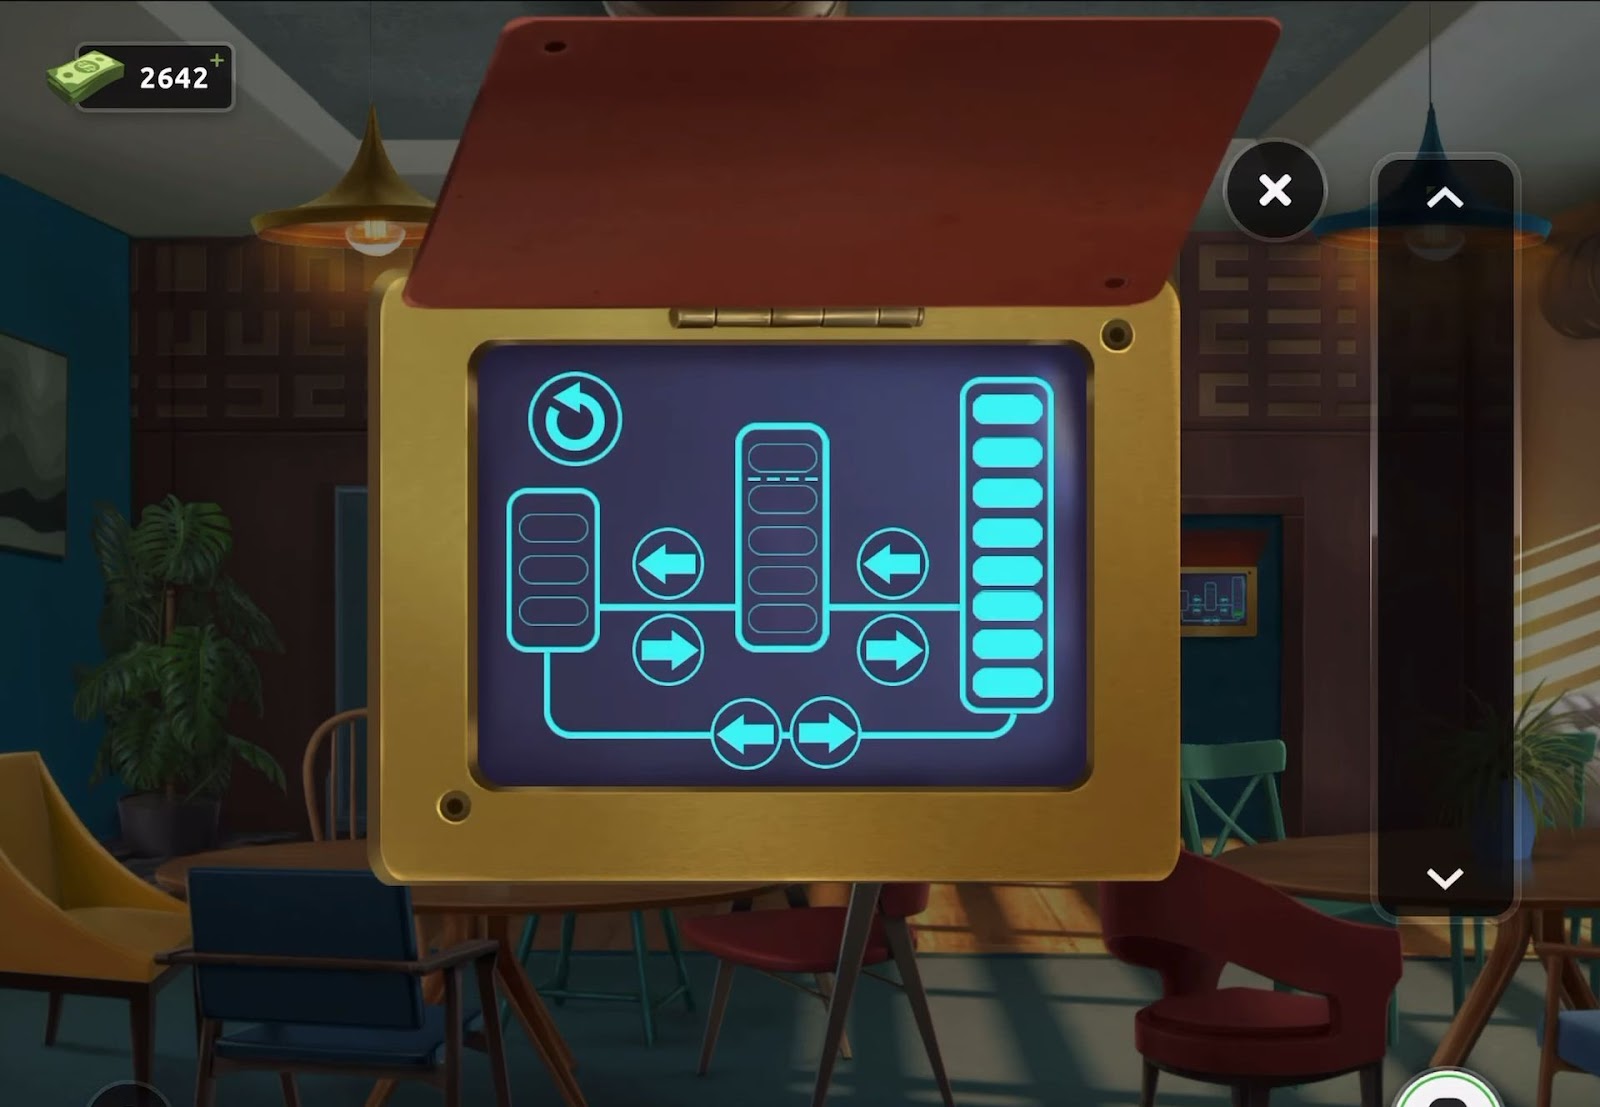
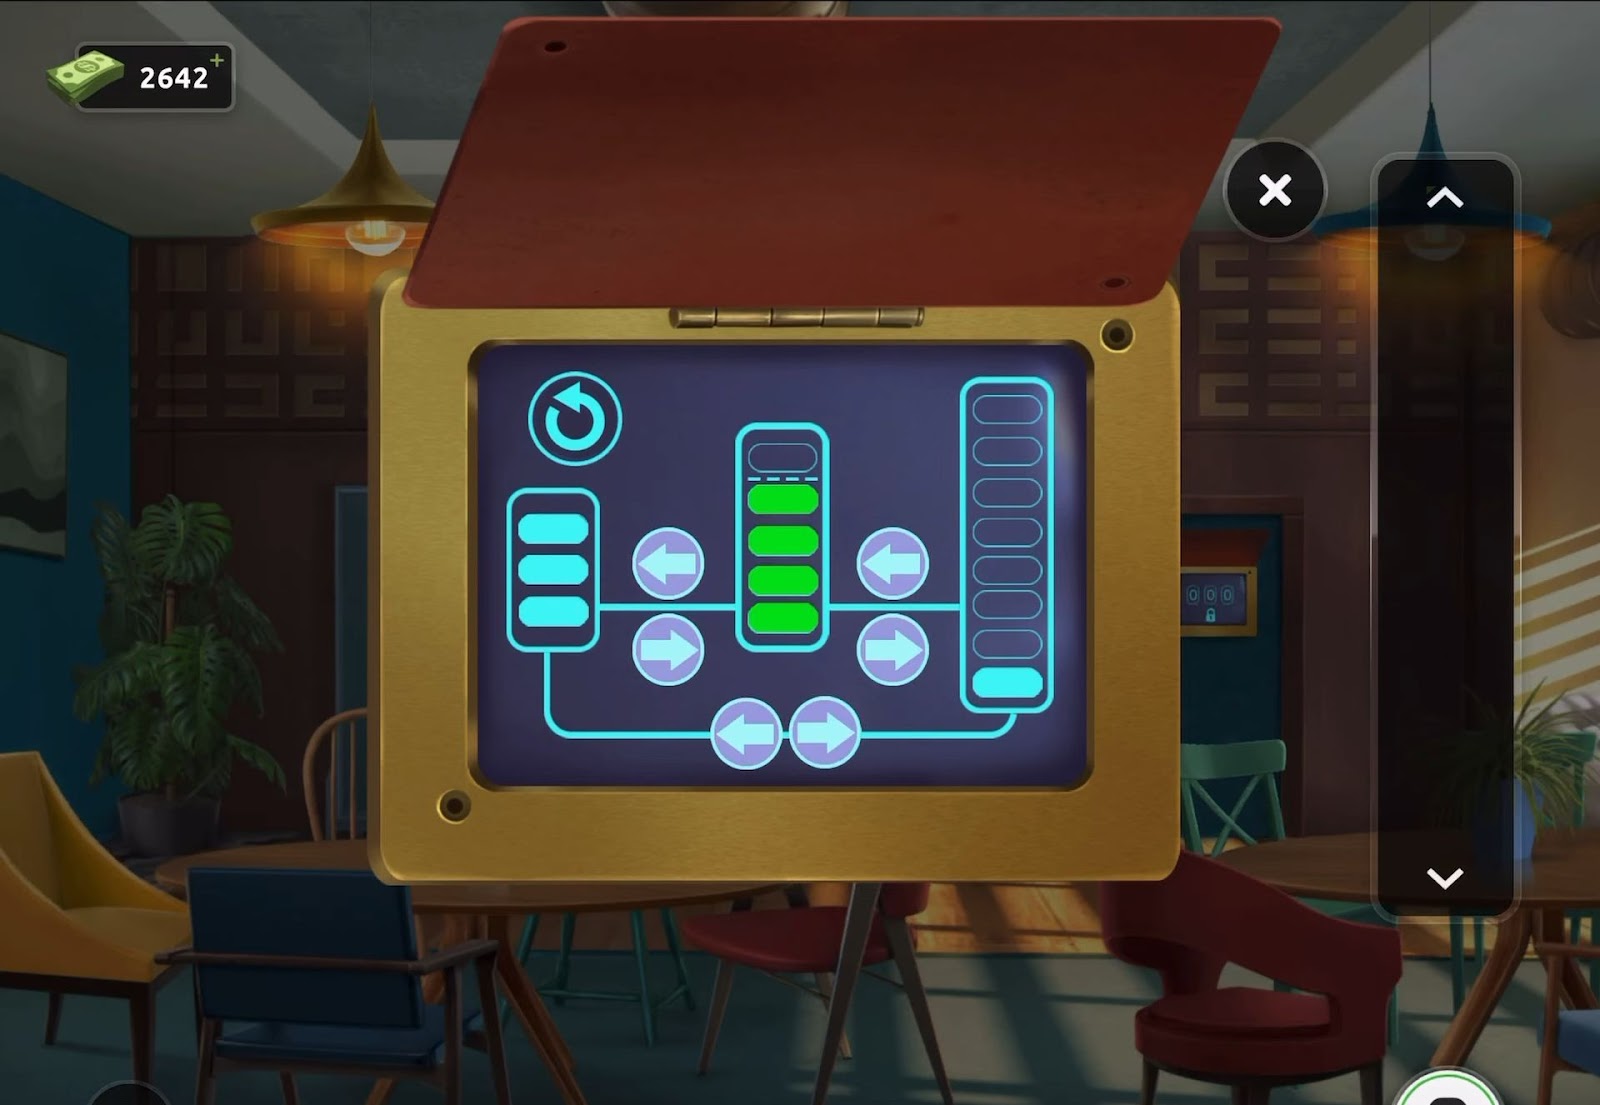
- Then solve the puzzle by using the arrow to shift the lights between the three columns, ensuring that precisely 4 lights remain in the central column.
- After completing the task successfully, the door will unlock, allowing you to exit the room.
Level 71:
To complete level 71, follow the instructions below:
- Start by examining the small cupboard situated to the right, just below the clock, to acquire the bottle opener.
- Then proceed to the left side and inspect the sofa. Tap on the seat to reveal two concealed panels beneath the cushion.
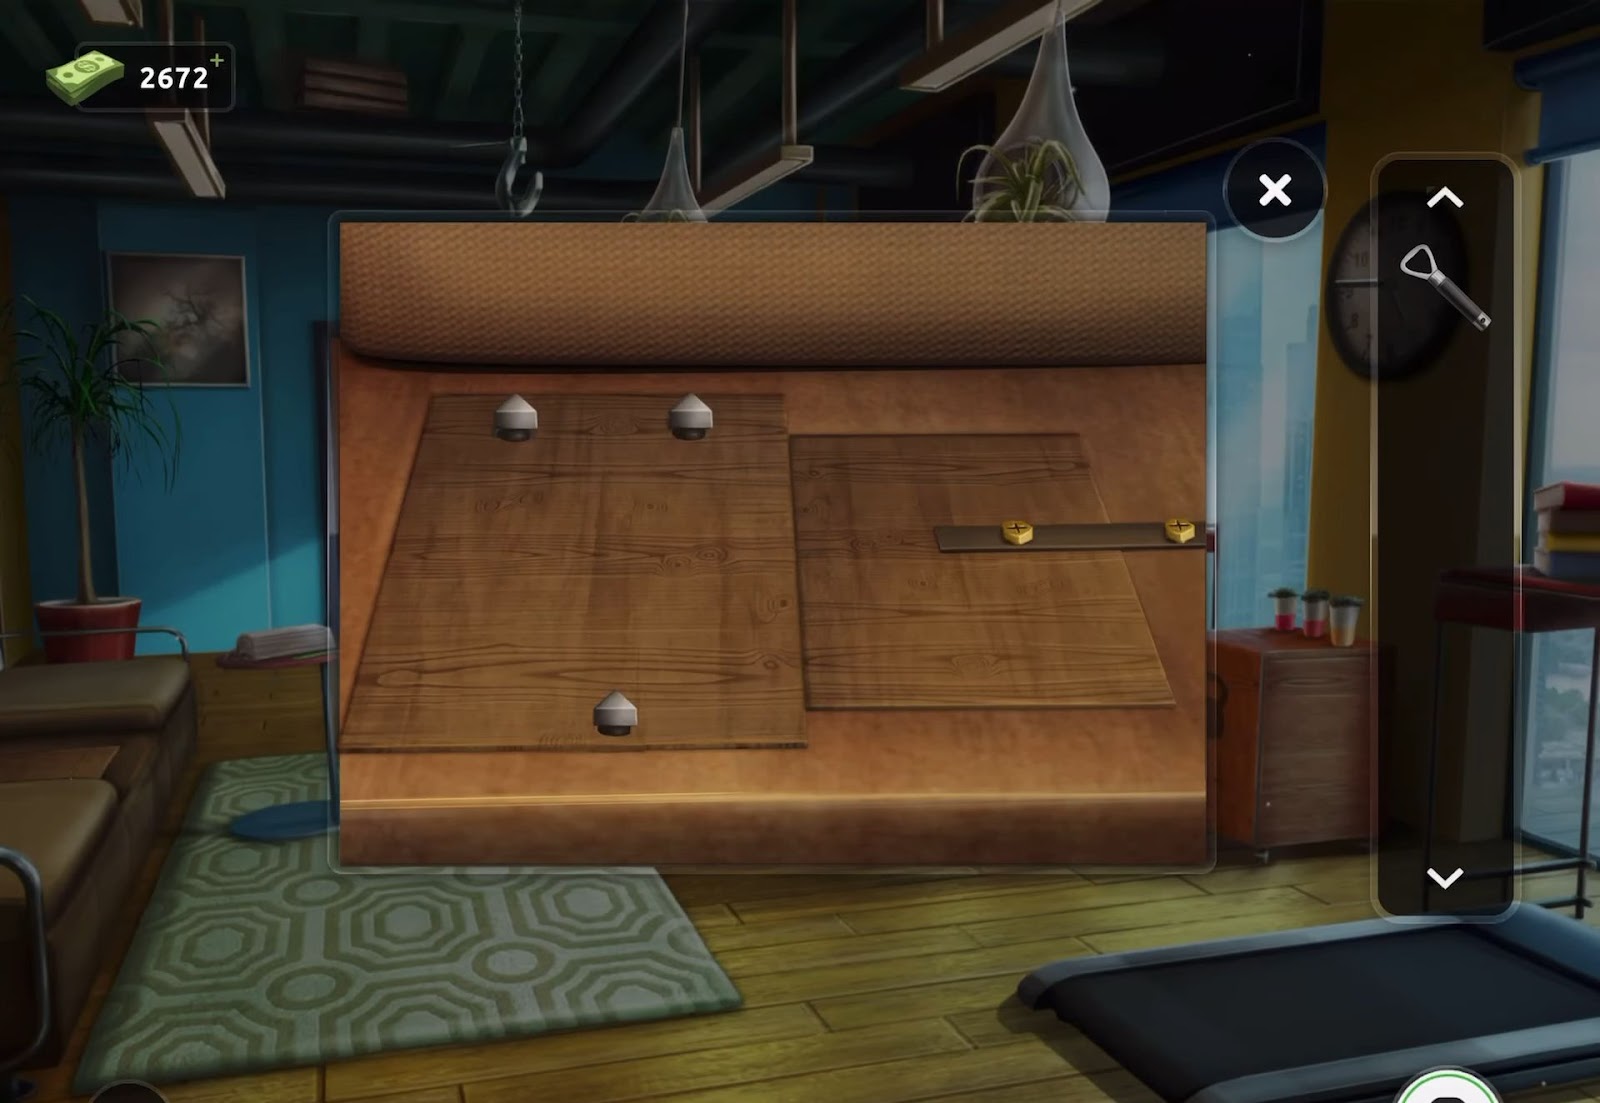
- Next, employ the bottle opener to unlock the left panel. Inside, gather a belt and a key.
- Subsequently, check the exit door for a puzzle and spot a key. Retrieve the key.
- Now return to the small cupboard on the right side and utilize the two keys to unlock it.
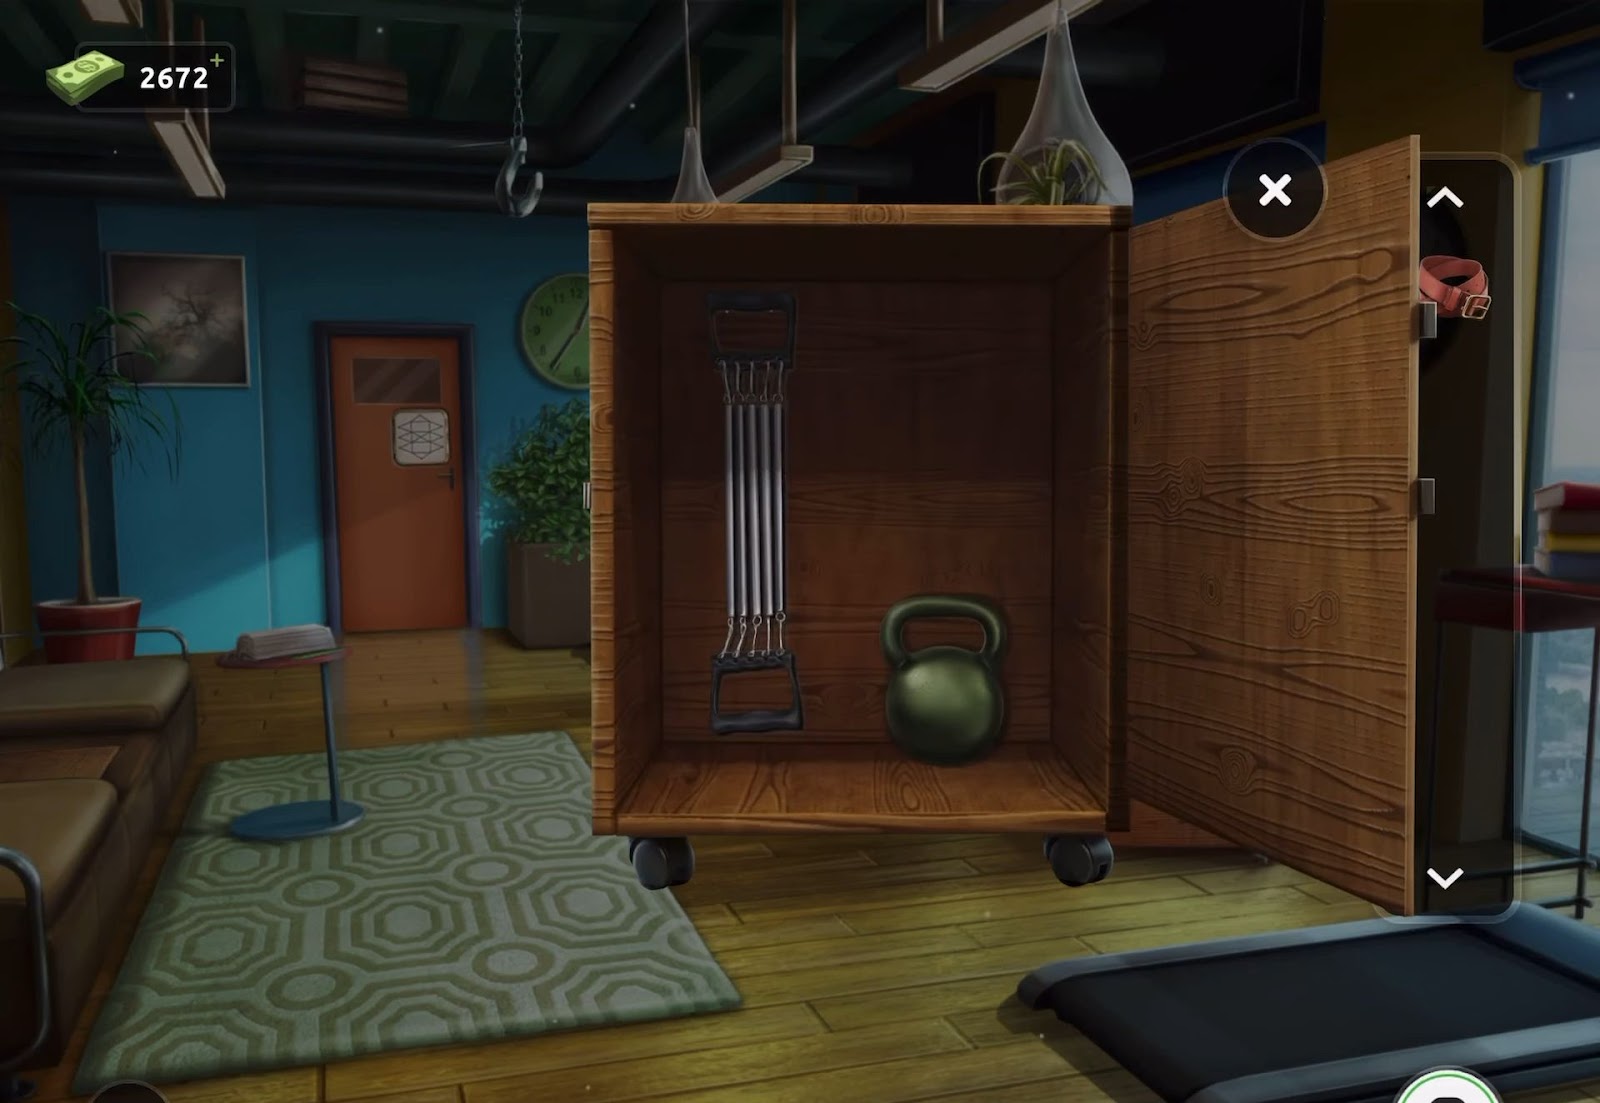
- Next, retrieve the large weight and the chest expander from inside the opened cupboard.
- Now, inspect the weight in your inventory and attach the belt to it.
- Then proceed to use the chest expander on the hook suspended from the ceiling near the door.
- Next, add the weight attached with the belt to the chest expander. This action initiates a mini-game to swing the weight, allowing you to knock down a box from the ceiling.
- Now, interact with the weight when the moving bars are at their fullest to accomplish this task.
- After that, collect the pair of scissors that fall out of the box, then revisit the sofa. Apply the scissors to open the right panel and gather a knob.
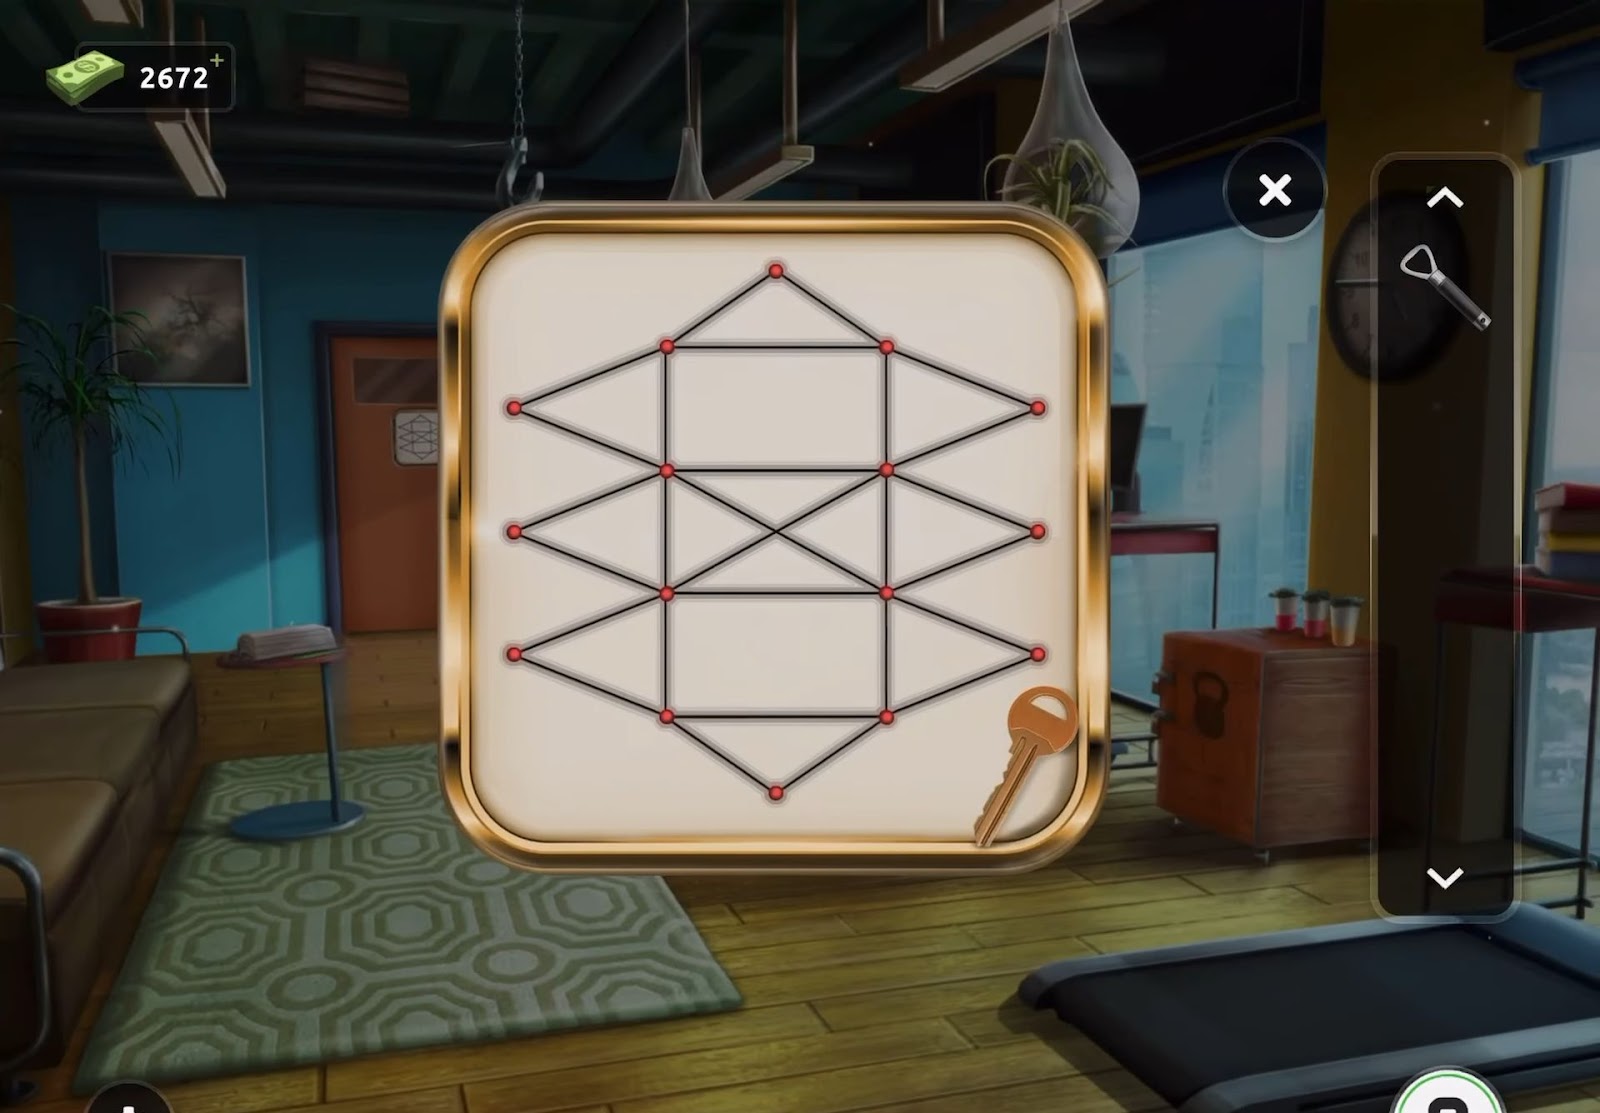
- Afterward, return to the exit door puzzle and attach the knob to begin.
- To resolve this, move the knob throughout the puzzle, ensuring each line is completed without retracing any line more than once.
- Upon completion, the door will open, allowing you to escape the room.
Level 72:
To complete level 72, follow the instructions below:
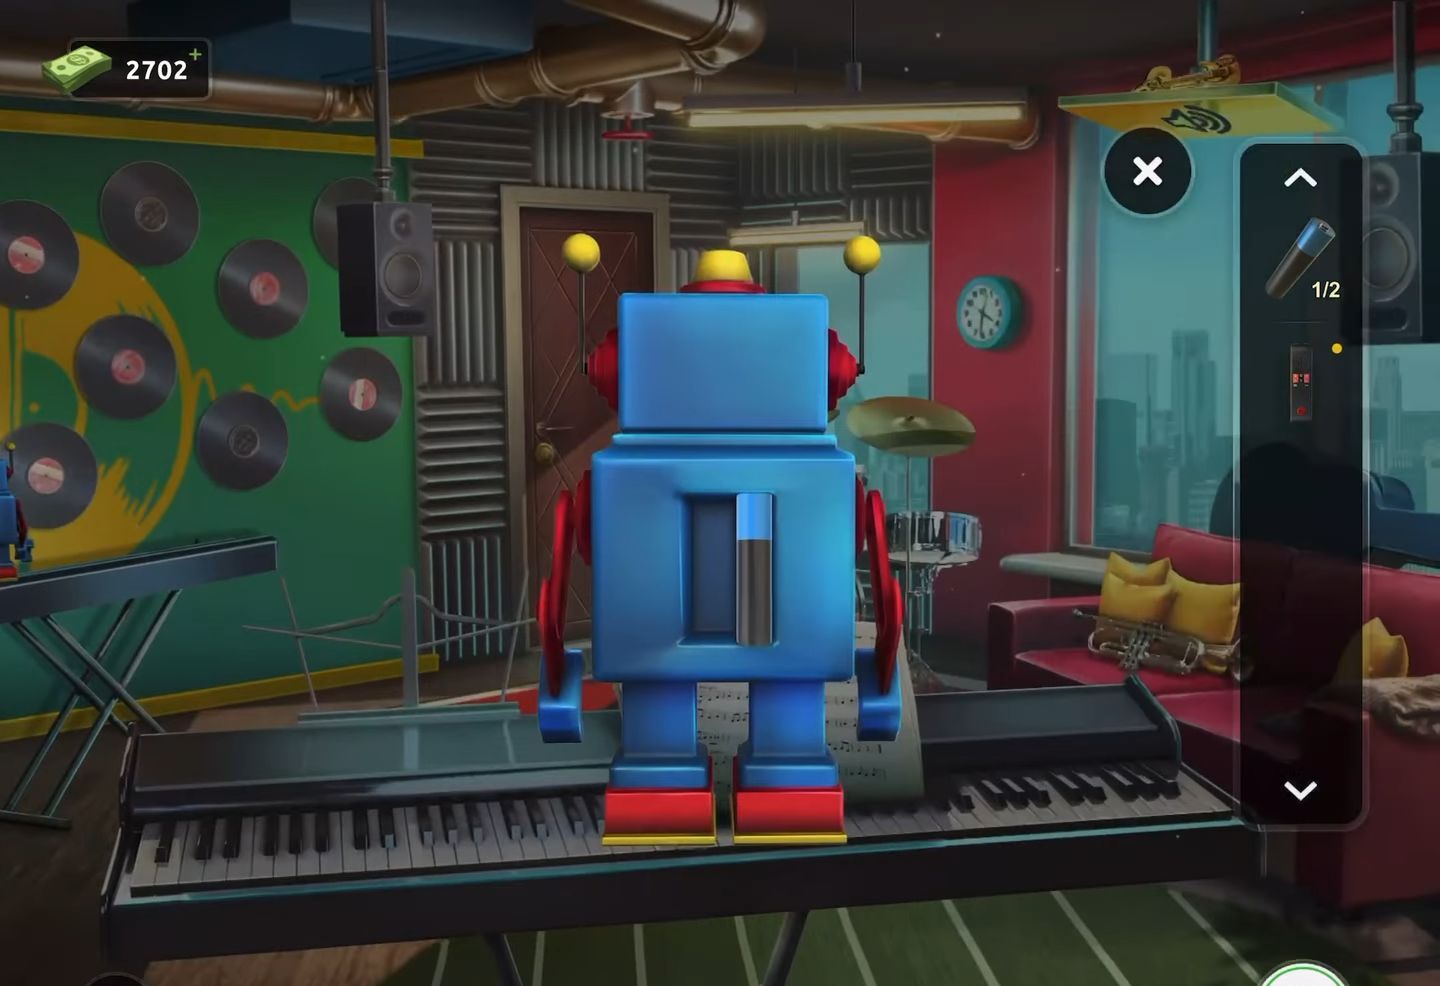
- Start by tapping the robot toy located to the left of the jukebox.
- As it turns around, tap it once more to view its backside, where you can collect a battery.
- Then proceed by tapping and shifting the music sheets atop the keyboard, uncovering another battery hidden underneath.
- Next, tap the blue cushion on the right-side sofa to reveal and grab a remote control.
- After that access your inventory and open the back of the remote control to insert the two batteries.
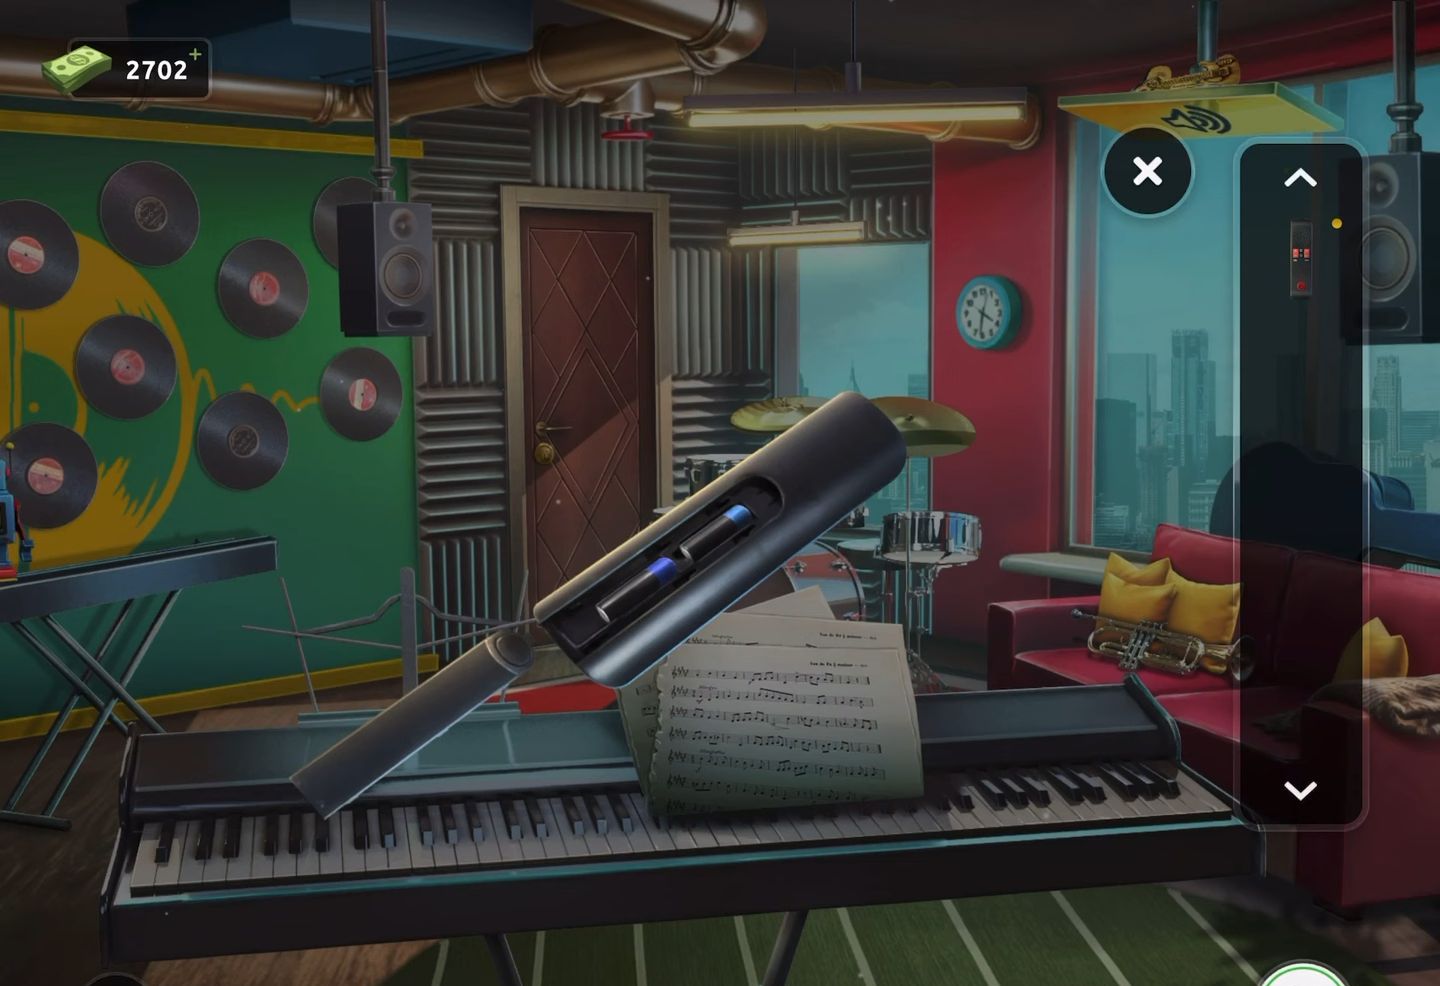
- Next, use the activated remote control on the speaker situated in front of the window on the right side. The music will start playing, prompting a key to fall from the ceiling.
- Finally, retrieve the key and employ it to unlock the door, allowing you to exit.
Level 73:
To complete level 73, follow the instructions below:
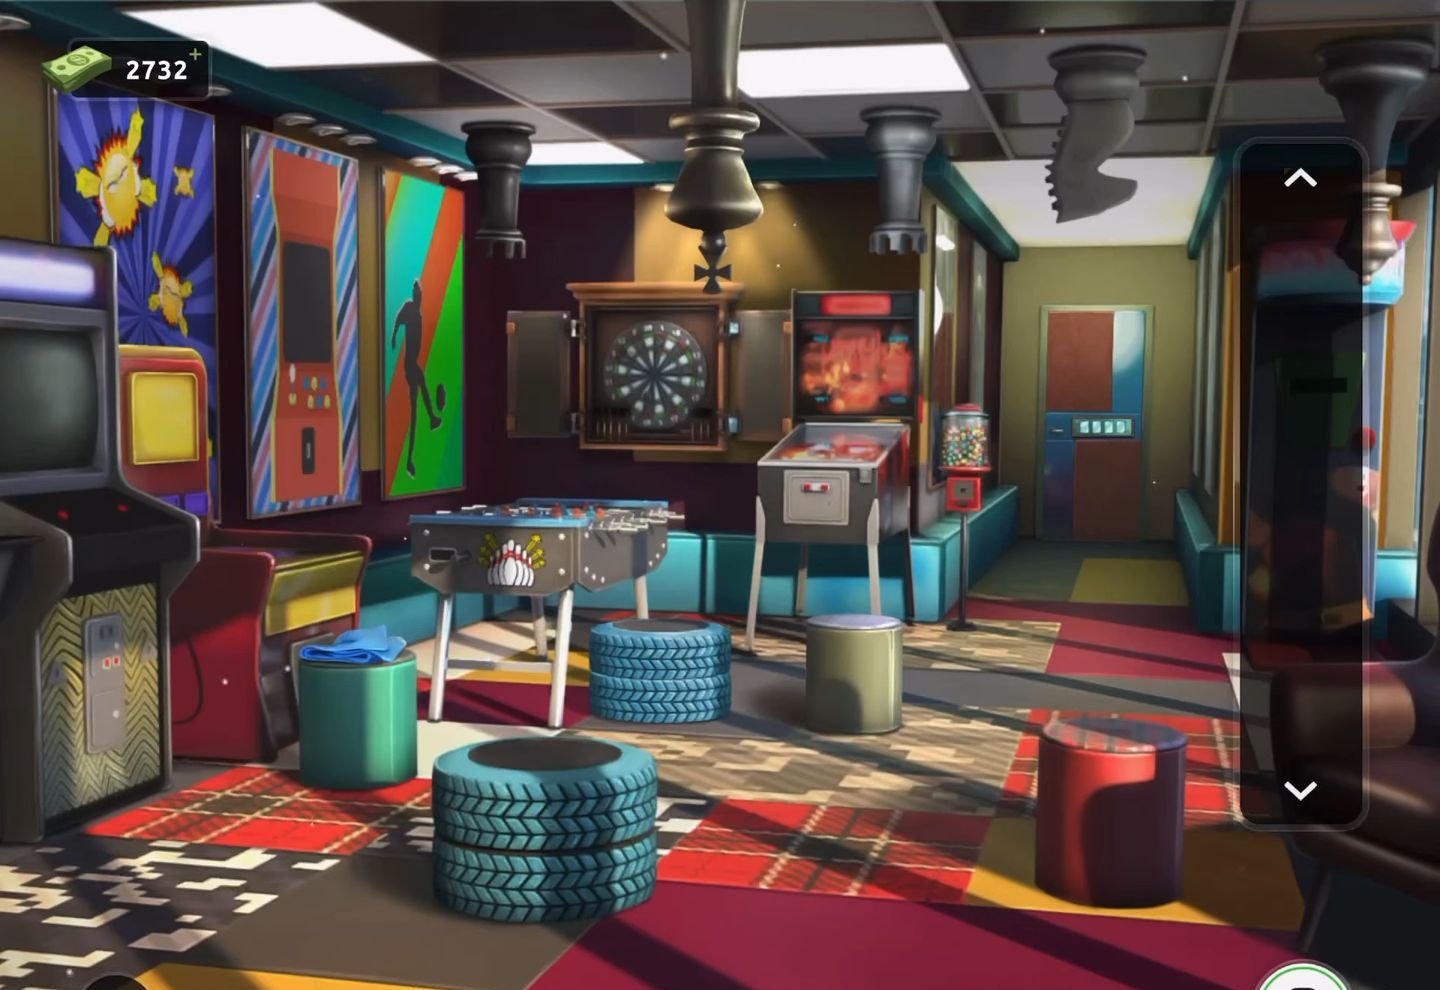
- First, relocate the two tires positioned adjacent to the table football game to reveal a spray bottle of cleaner hidden behind them.
- Also, obtain the blue cloth found on the left-side stool.
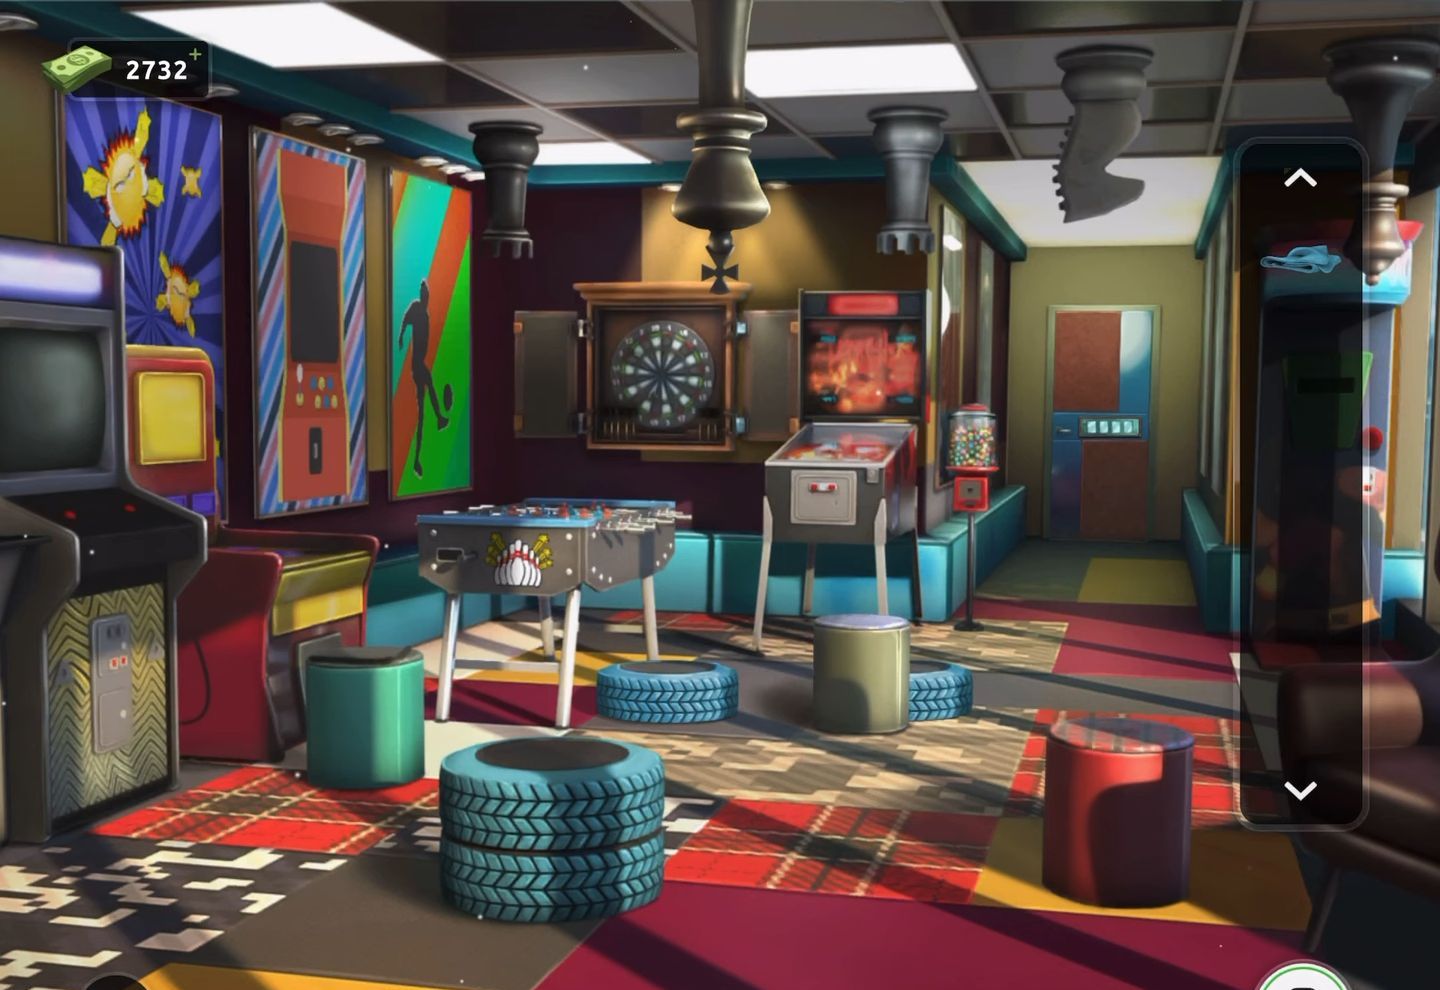
- Next, focus on the arcade machine situated to the left featuring a purple screen.
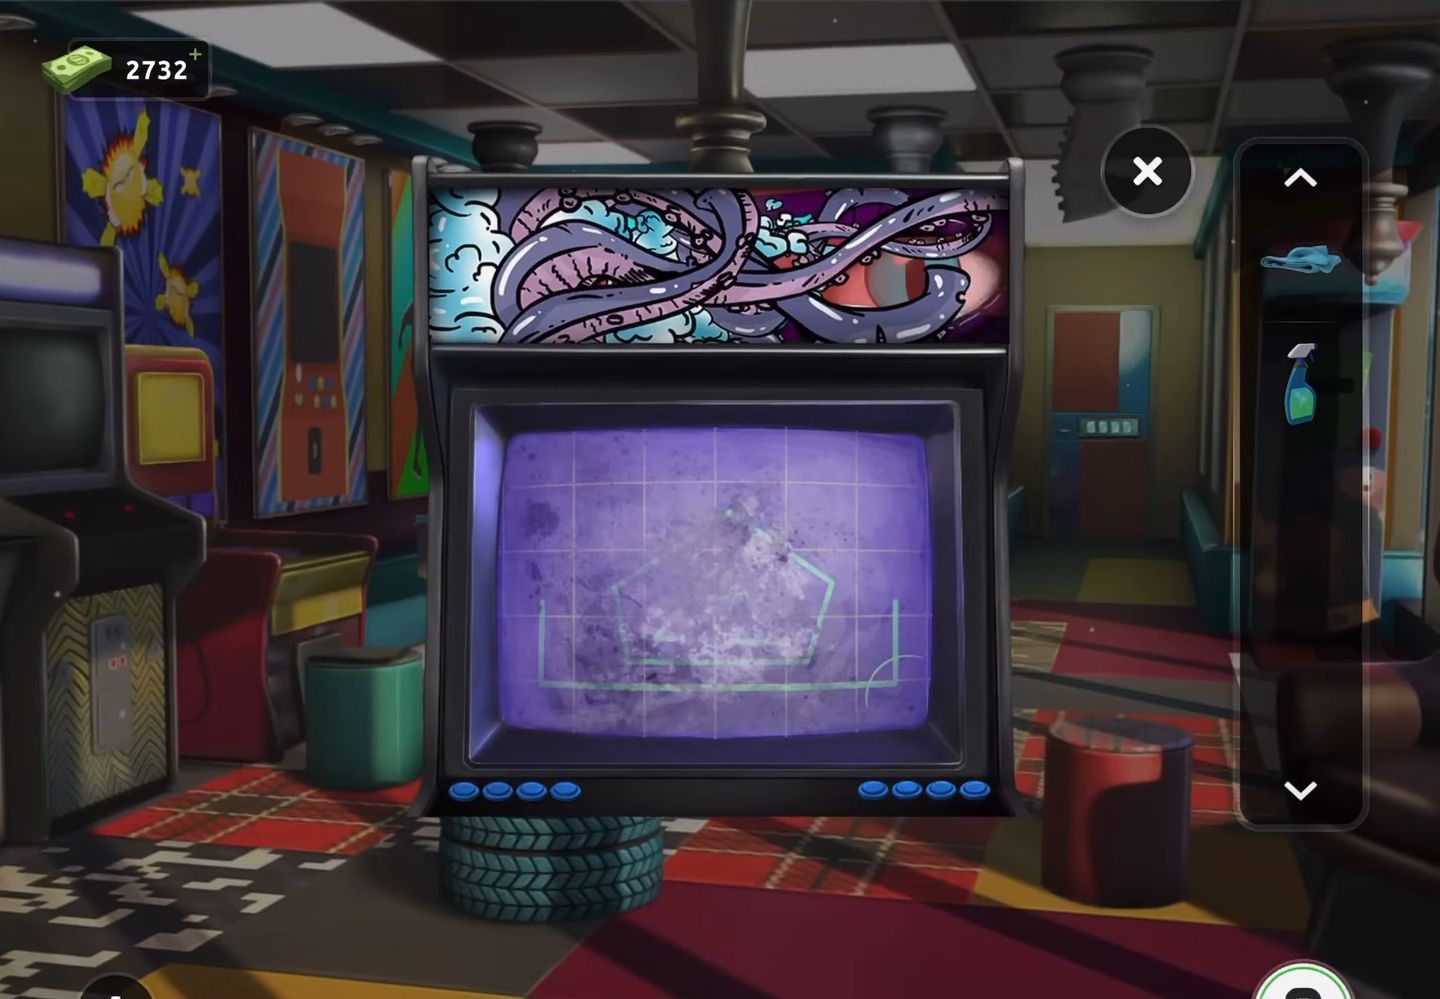
- Then employ the spray bottle on the screen and then use the cloth to clean it, unveiling a hidden clue.
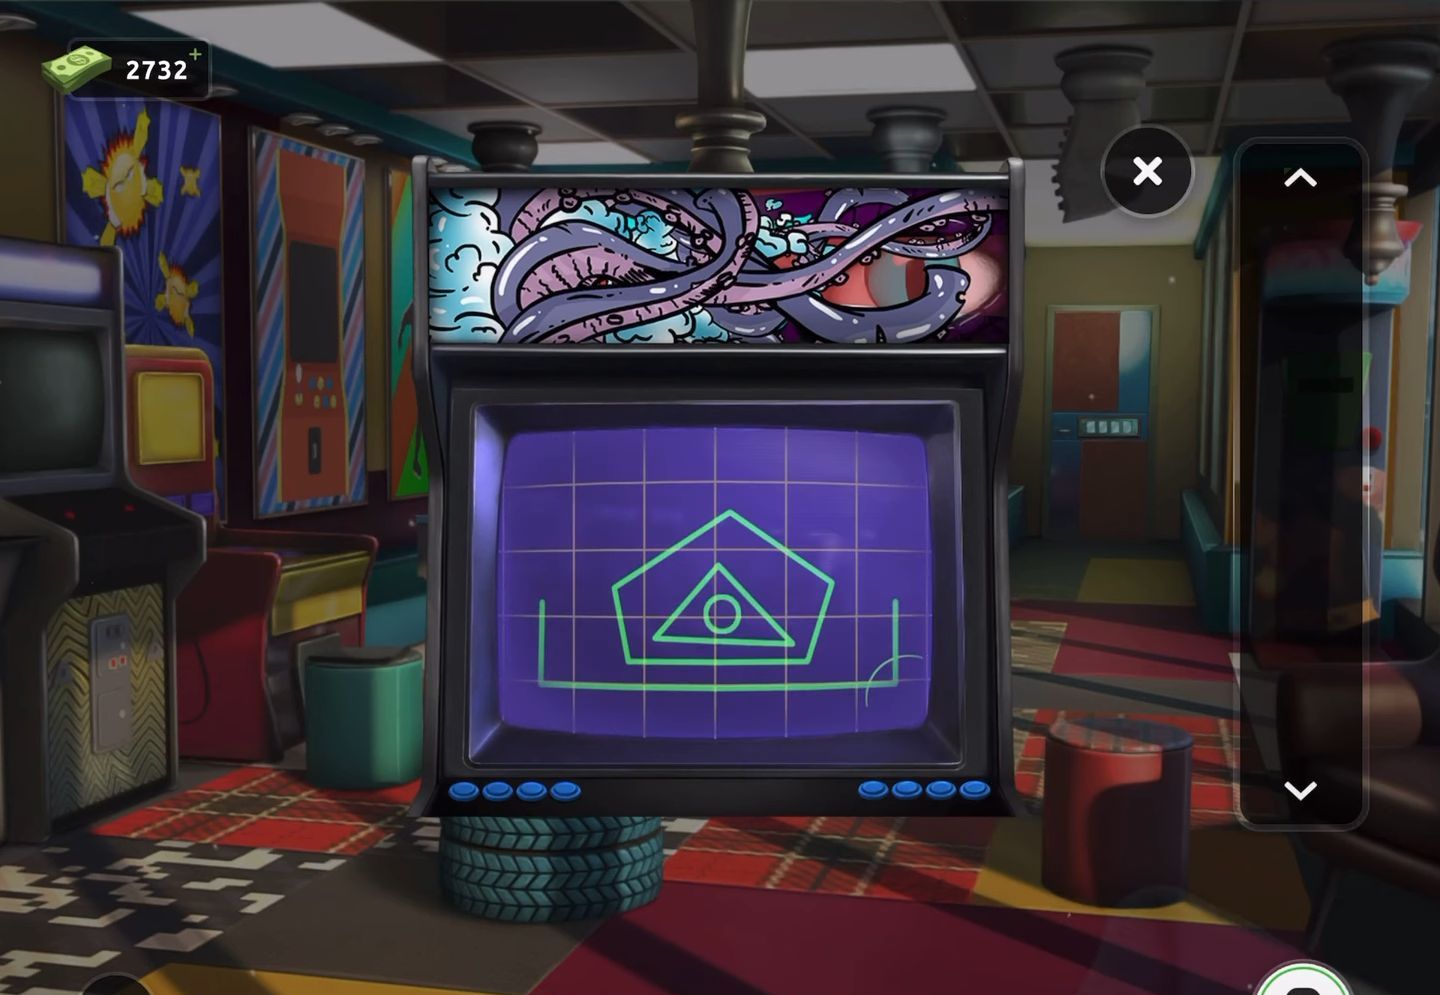
- Now proceed to interact with the exit door and apply the clue to get the code (0352) needed for unlocking it.
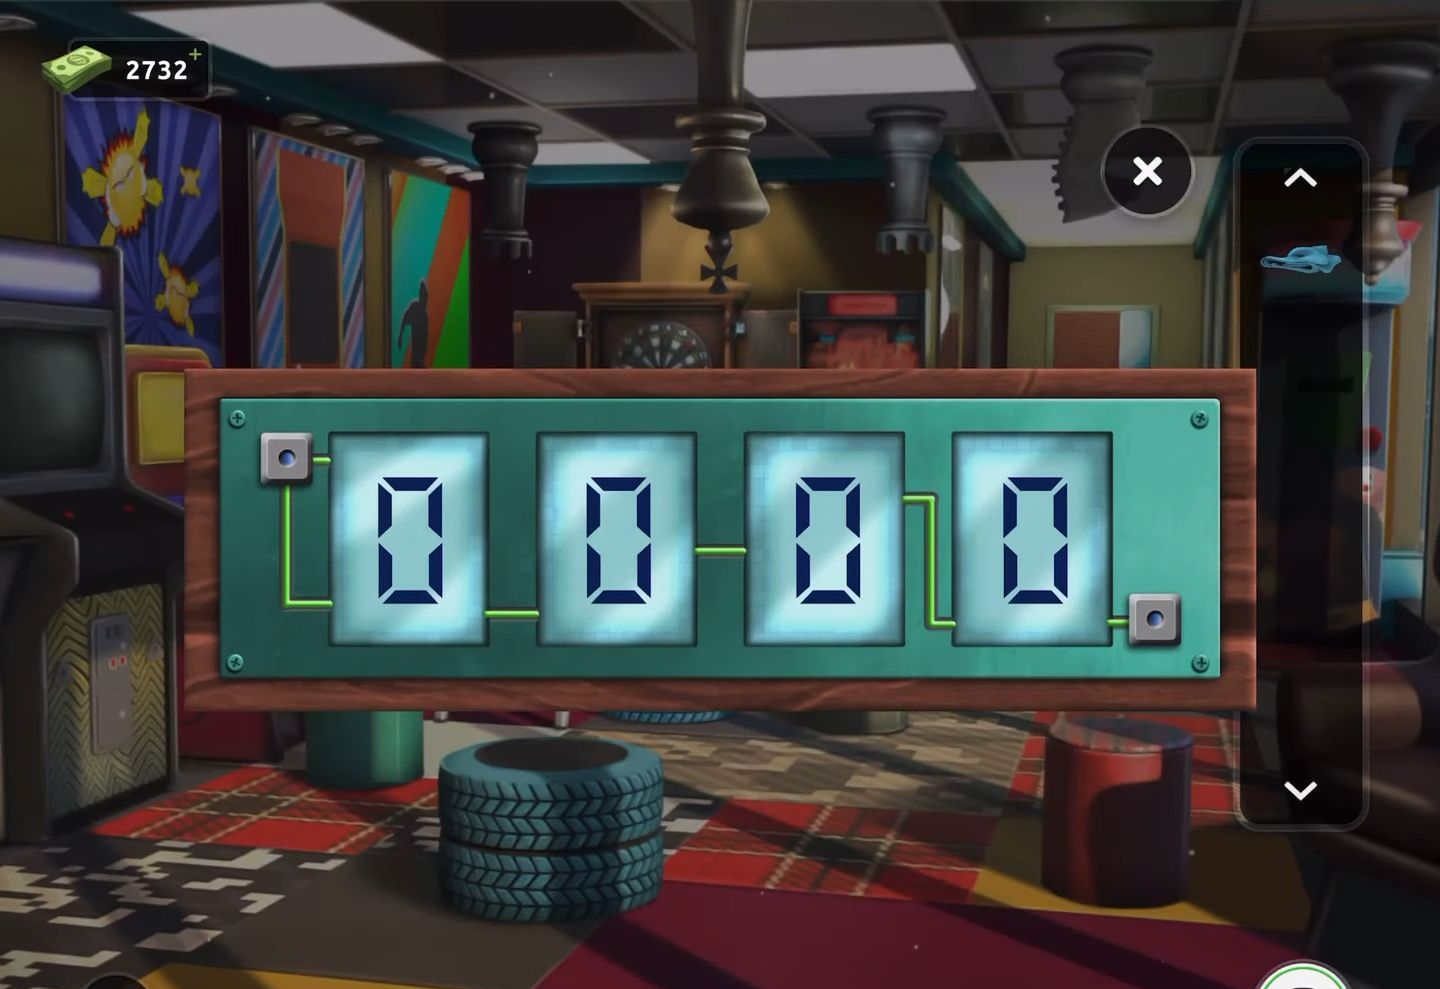
- Finally, the door will be opened and escape through it to the next level.
Level 74:
To complete level 74, follow the instructions below:
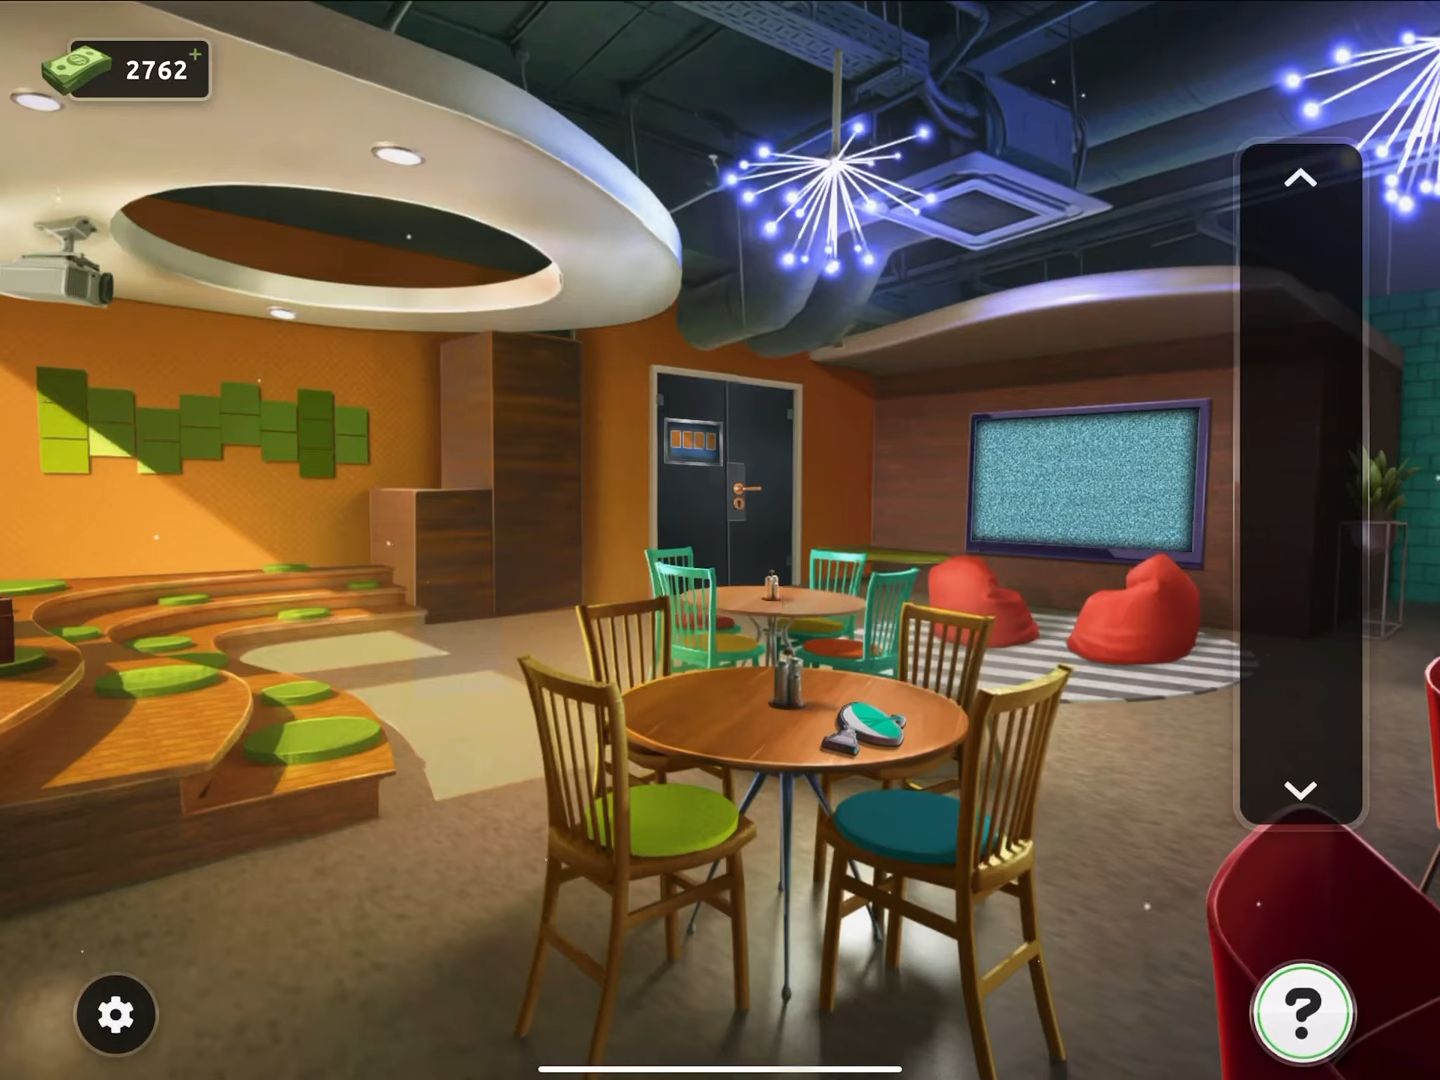
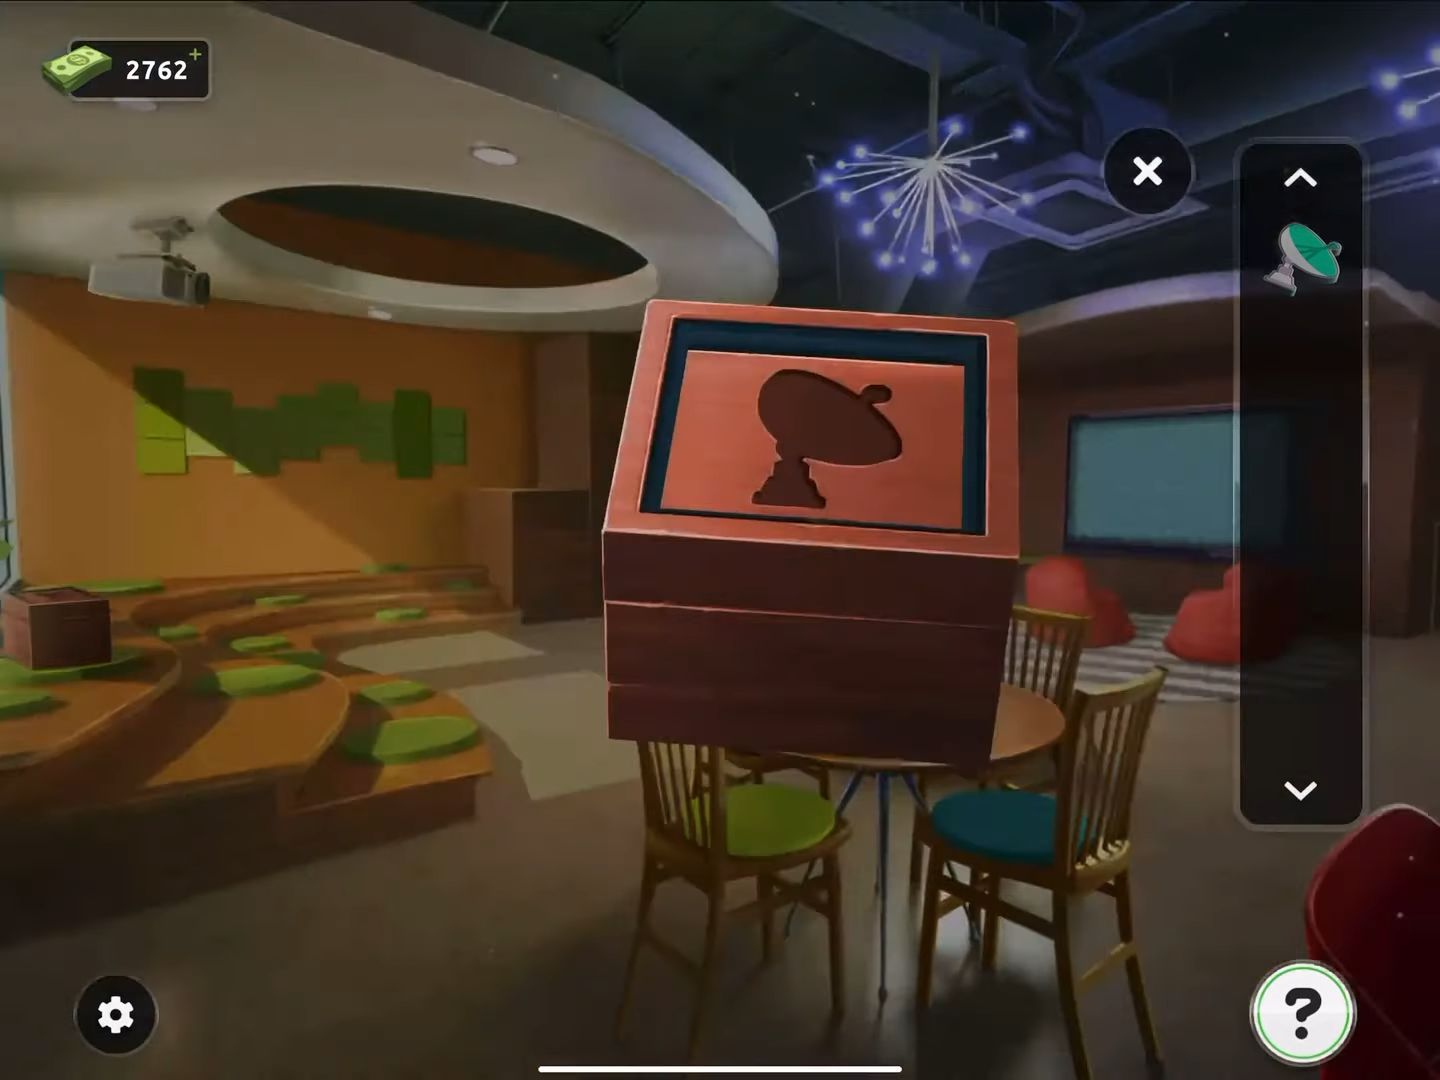
- Firstly, collect the satellite dish emblem from the table nearby.
- Then move to the box situated on the far left and insert the emblem to unlock it, obtaining a remote control.
- Next, tap the exit door to access the code entry lock. First, press the Left arrows beneath the code to reveal a clue.
- After that, observe and remember the colors of the dishes depicted in the clue.
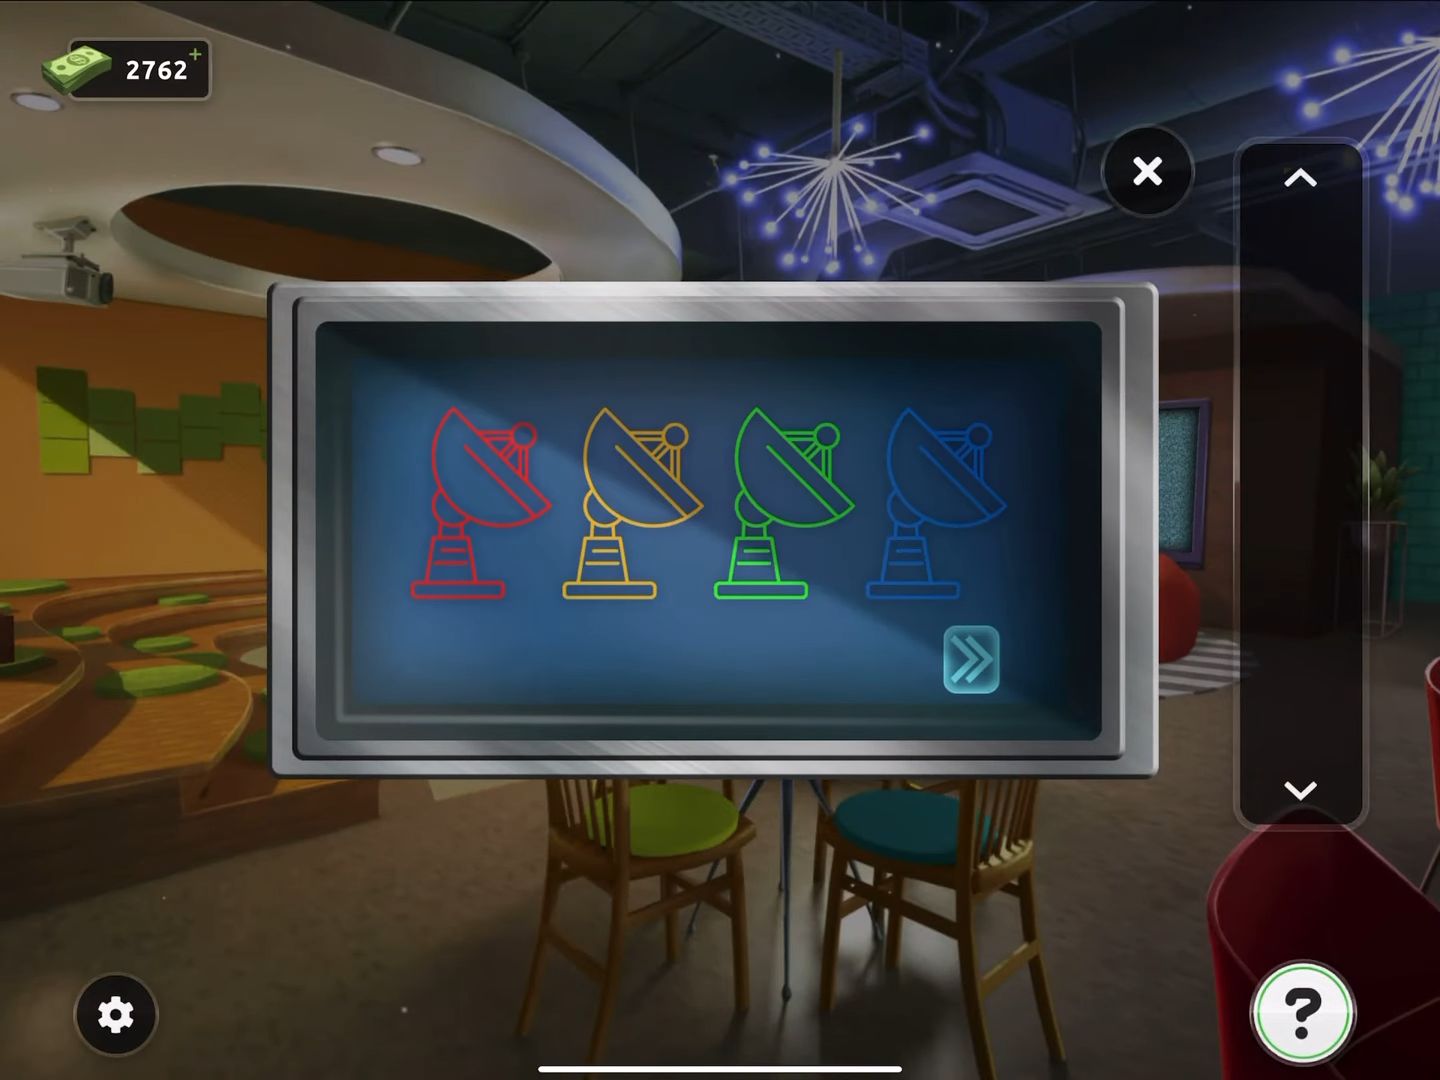
- Now approach the large TV screen beside the door and use the remote control.
- Then tap the color buttons in the correct order according to the clue shown.
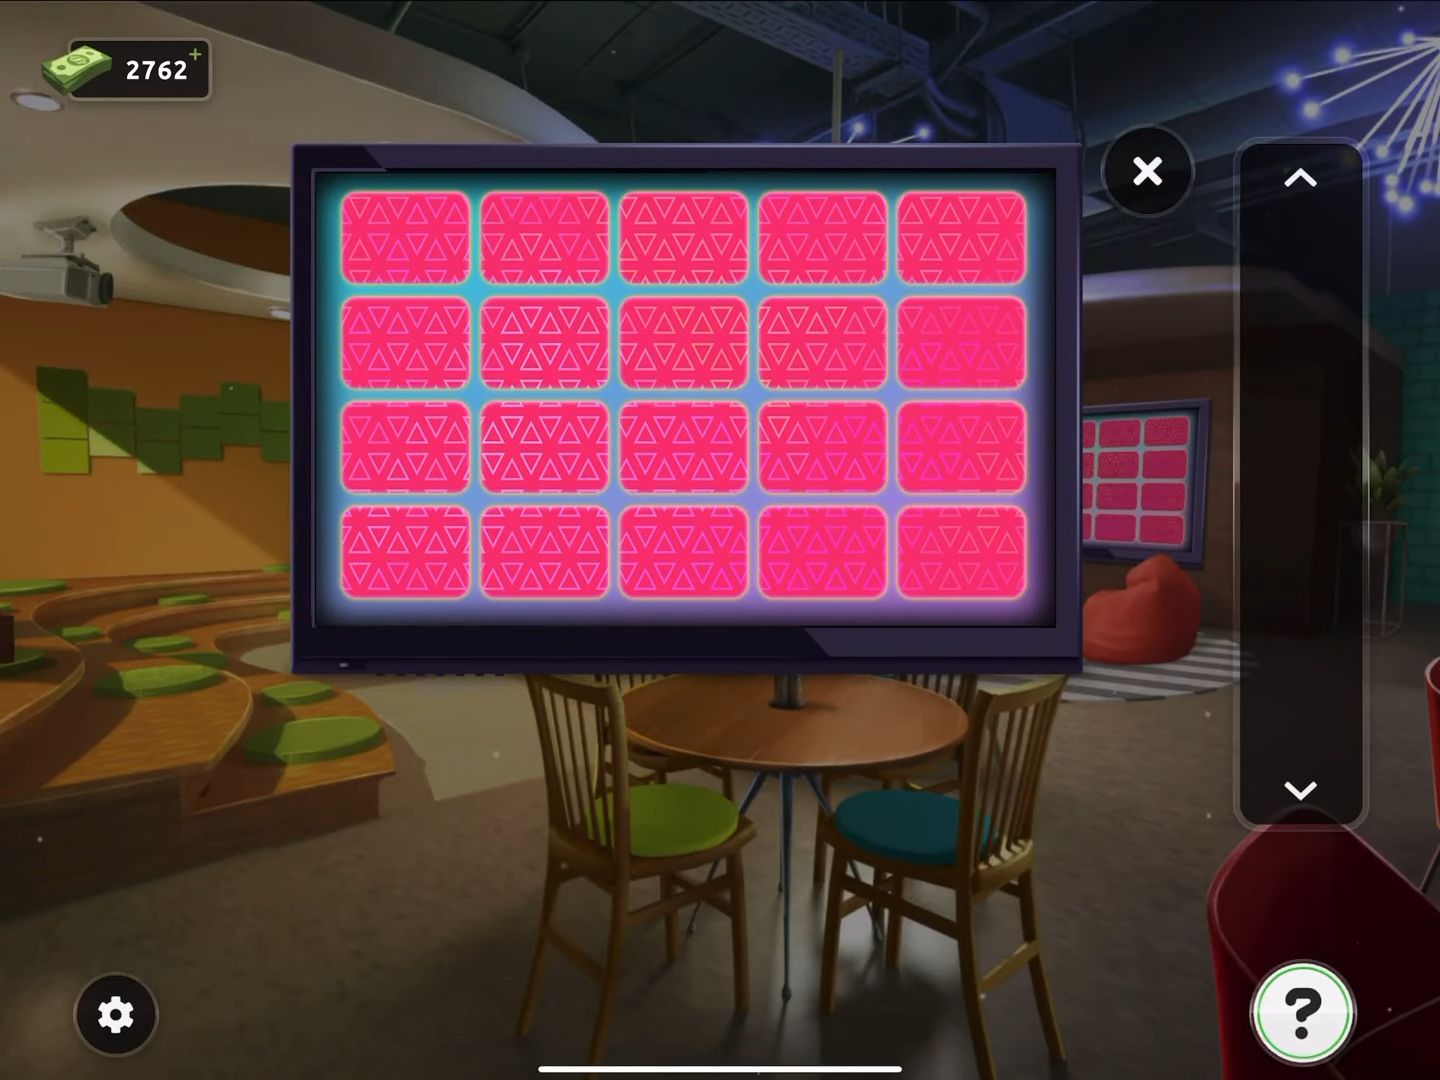
- Next, engage in the matching puzzle game. Search for pairs of images that are related but not identical, such as coffee cups and coffee beans, cocktails and umbrellas, and so on.
- Then match the related pairs throughout the game to progress and complete the puzzle.
- After successfully matching all the pairs, a new clue will be revealed.
- Now return to the exit door with the code entry and use the information obtained from the clue to input the code (4185).
- Finally, the door will open, allowing you to escape the room.
Level 75:
To complete level 75, follow the instructions below:

- Firstly, examine the chair near the door, uncover the jacket and hat, and retrieve a music player such as a tape player.
- Then check the inventory and detach the tape at the bottom, acquiring a key.
- Next, focus on the box with drawers situated on the desk near the same chair.
- Now utilize the key to unlock the drawer, where you will discover a cassette tape and a charging cable.
- Then attach the cable to the power supply atop the box and connect it to the music player for charging.
- Upon fully charged, retrieve it and revisit it in your inventory.
- After that, open the side of the music player and insert the cassette into it.
- Next, tap the exit door to reveal a music-activated lock and insert the tape player into the screen to commence the puzzle.
- Finally, solve the puzzle to unlock the door and exit the room.
Level 76:
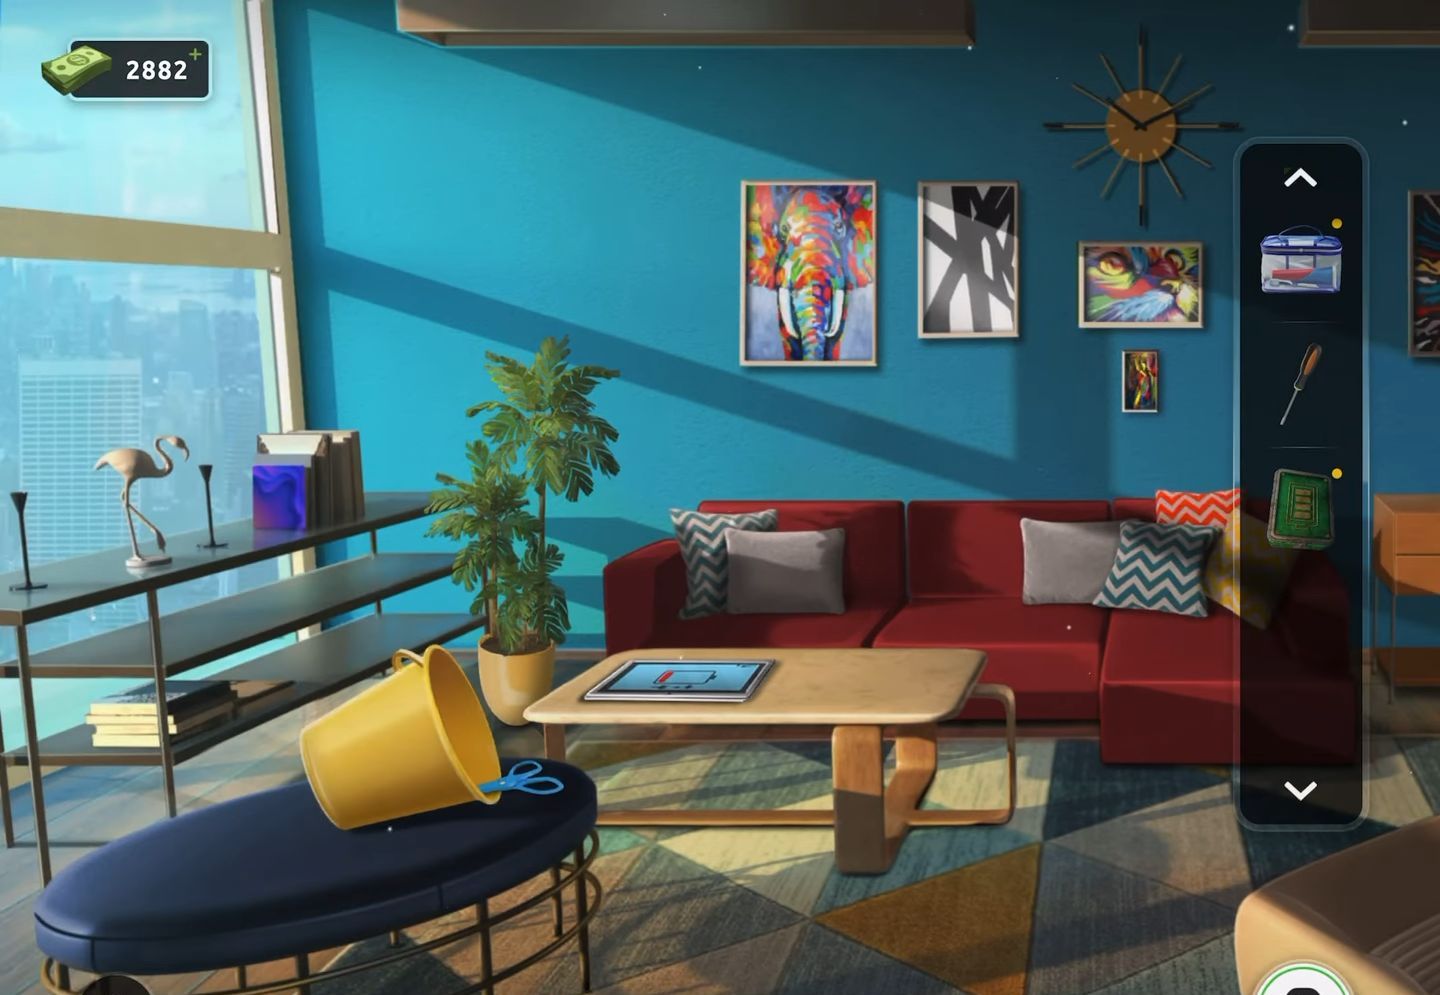
To complete level 76, follow the instructions below:
- Firstly, collect the purple cloth from the orange chair on the left side.
- Then, move the papers on the floor near the green table and collect a square tile.
- Additionally, obtain a triangle tile from the fruit bowl on the right.
- Next, interact with the red cup on the green table to tip it over and collect a crumpled ball of paper. In your inventory, open the crumpled paper ball by tapping on it.
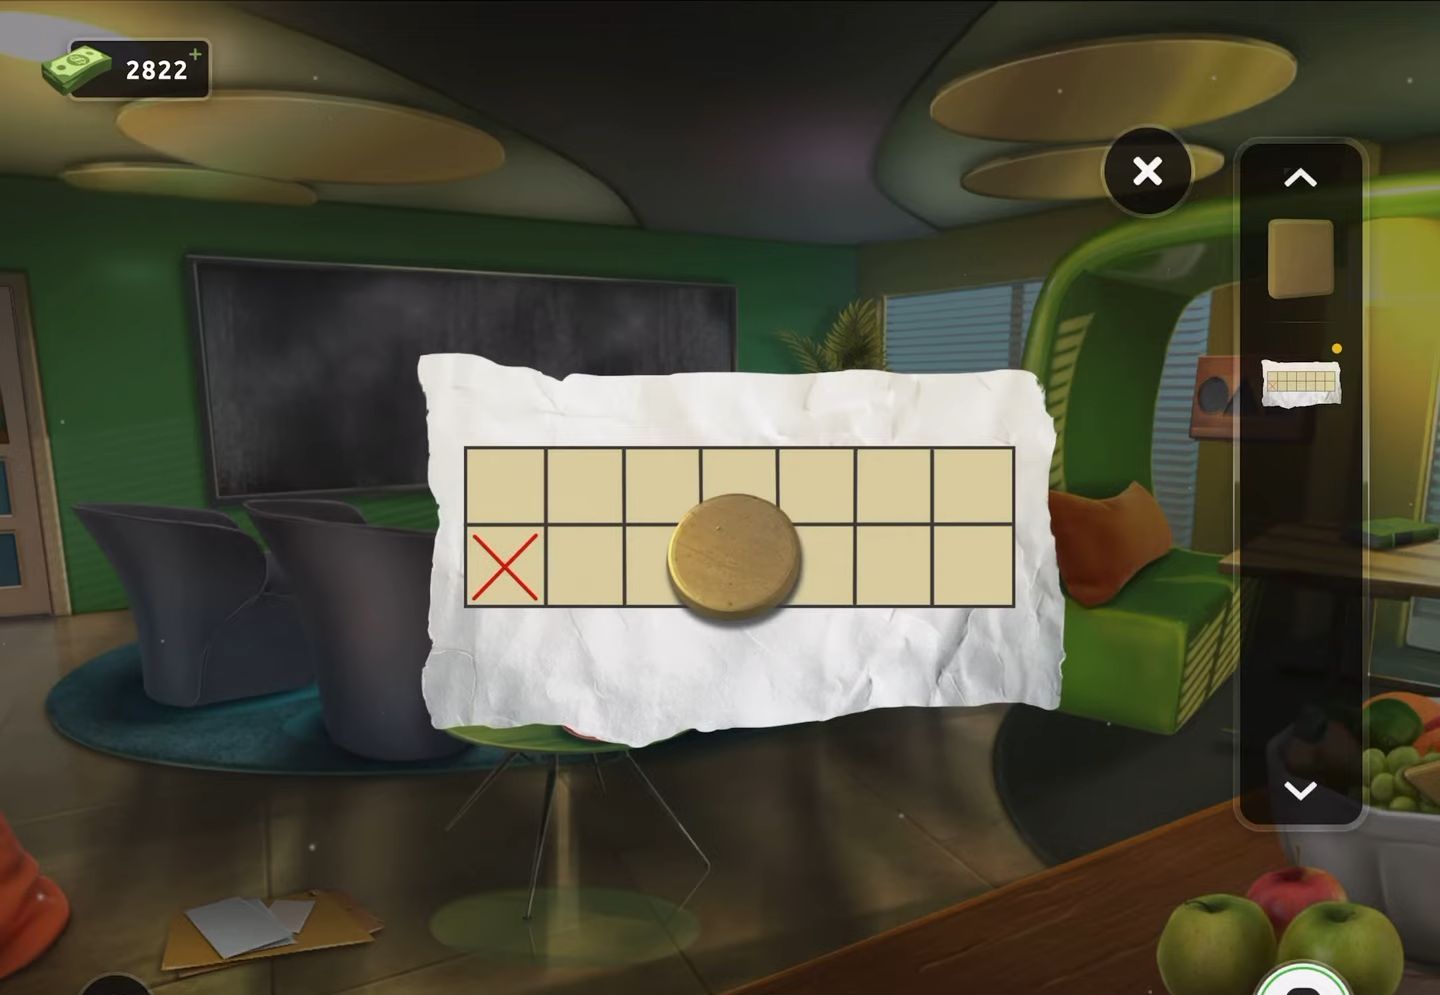
- After that, collect the circle tile and pay attention to the clue presented on the paper.
- Additionally, take note of the details on the reverse side of the paper by tapping it to view the hidden information.
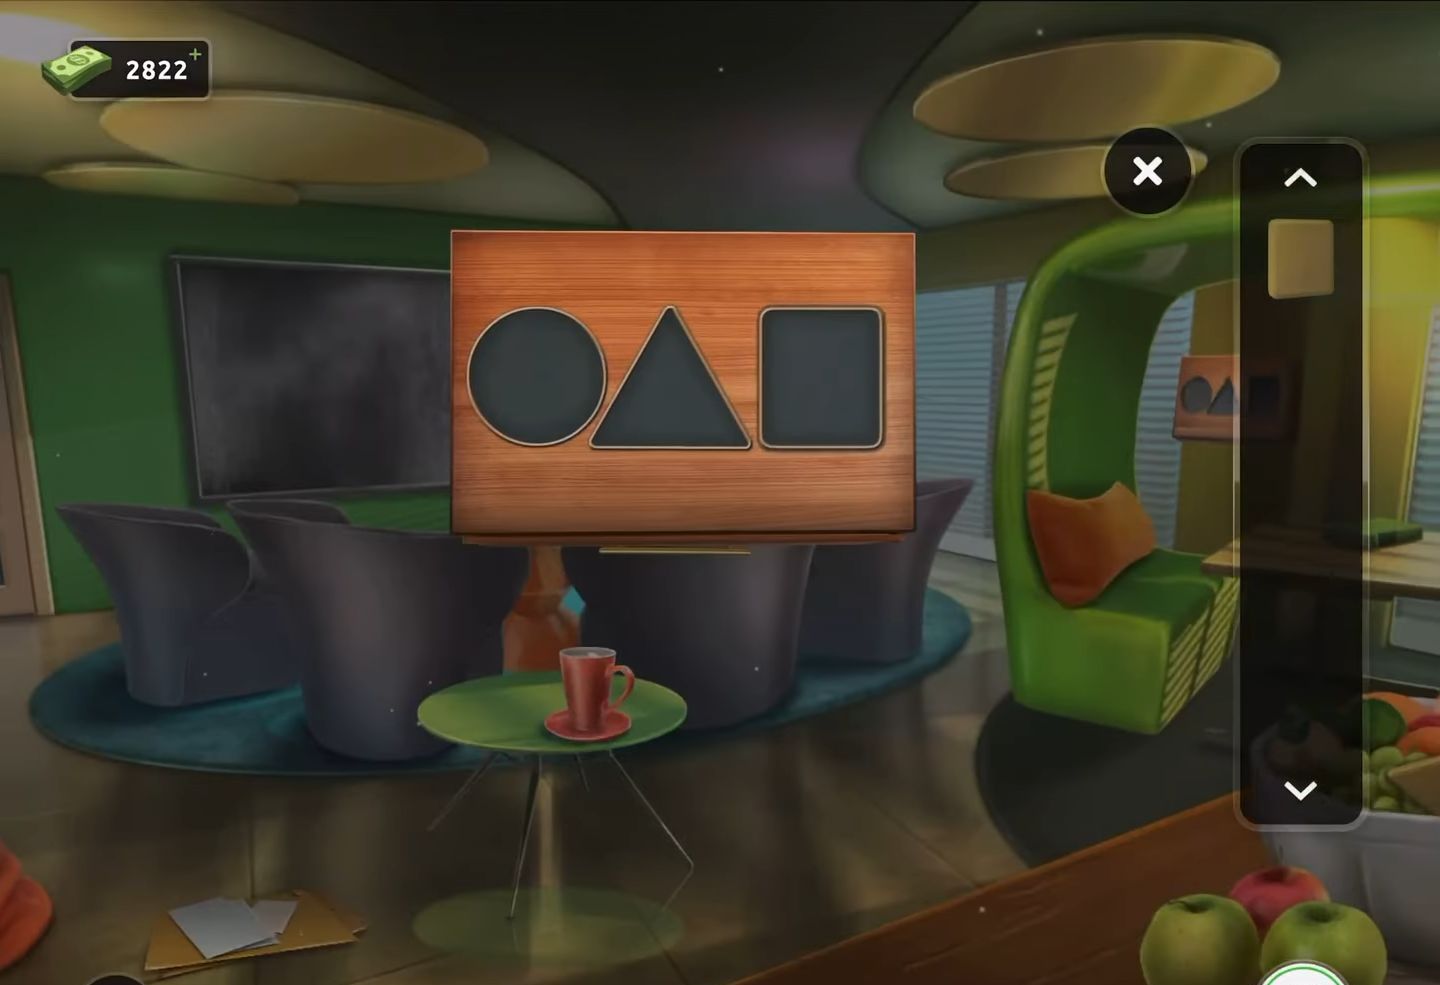
- Now, inspect a box on the right-side wall featuring three shape slots.
- Then insert the three tiles into the slots to unlock it, revealing a spray bottle and a remote control.
- Subsequently, use the spray bottle on the large TV screen on the back wall and clean it with a cloth.
- After that, use the remote control to power it on.
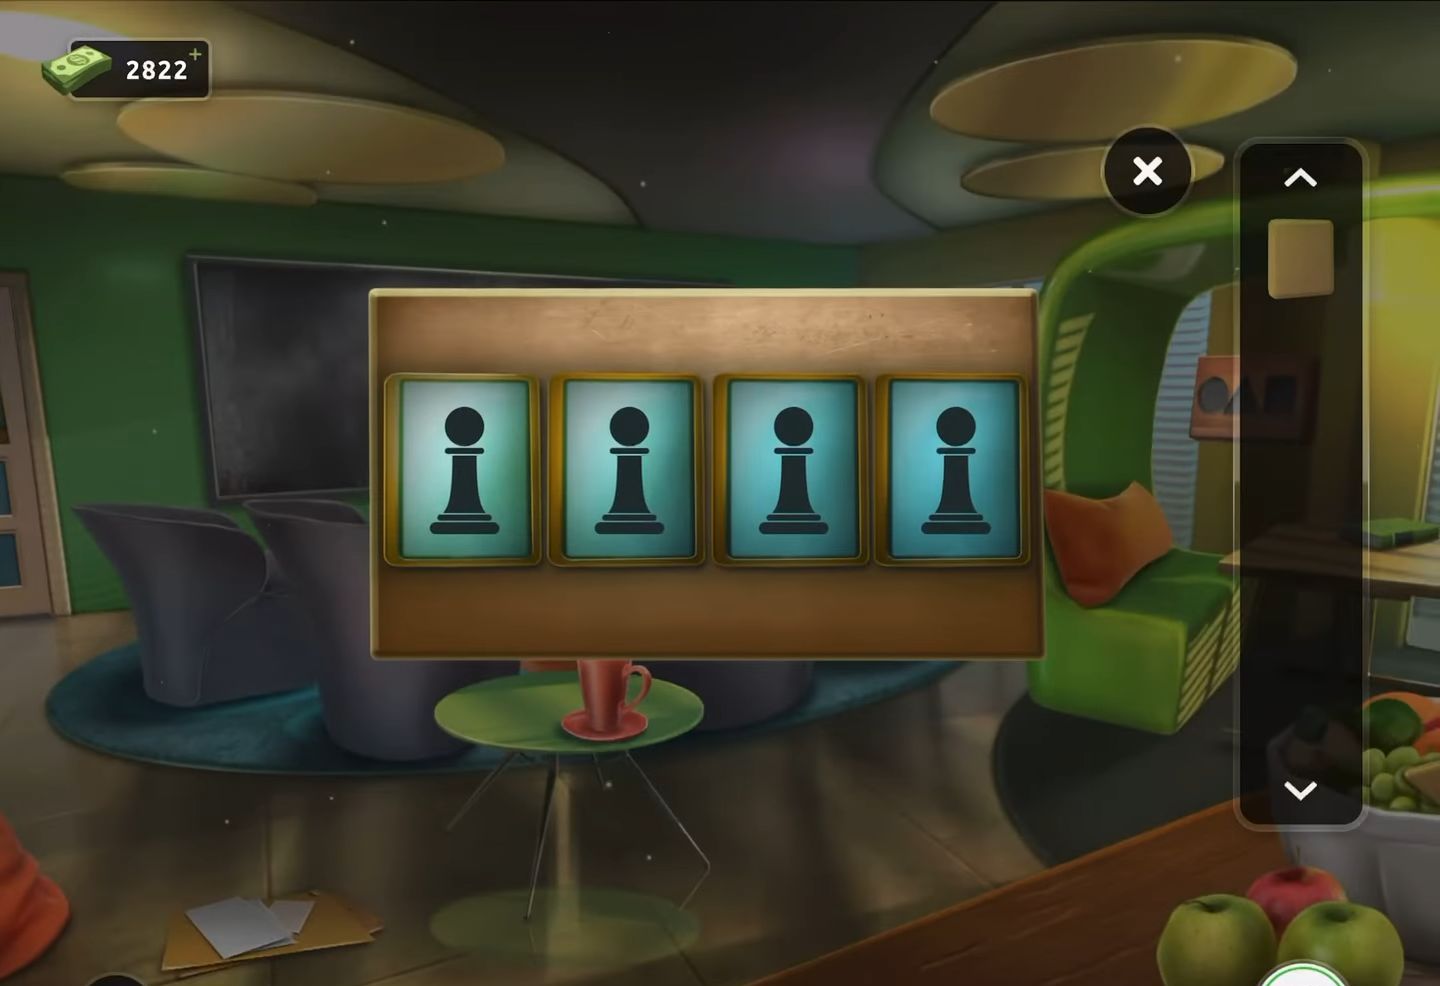
- Once the screen is turned on, access the puzzle lock on the exit door, where you’ll need to input a sequence of four chess piece symbols to proceed.
- Finally, exit the room and proceed to the next level.
Level 77:
To complete level 77, follow the instructions below:
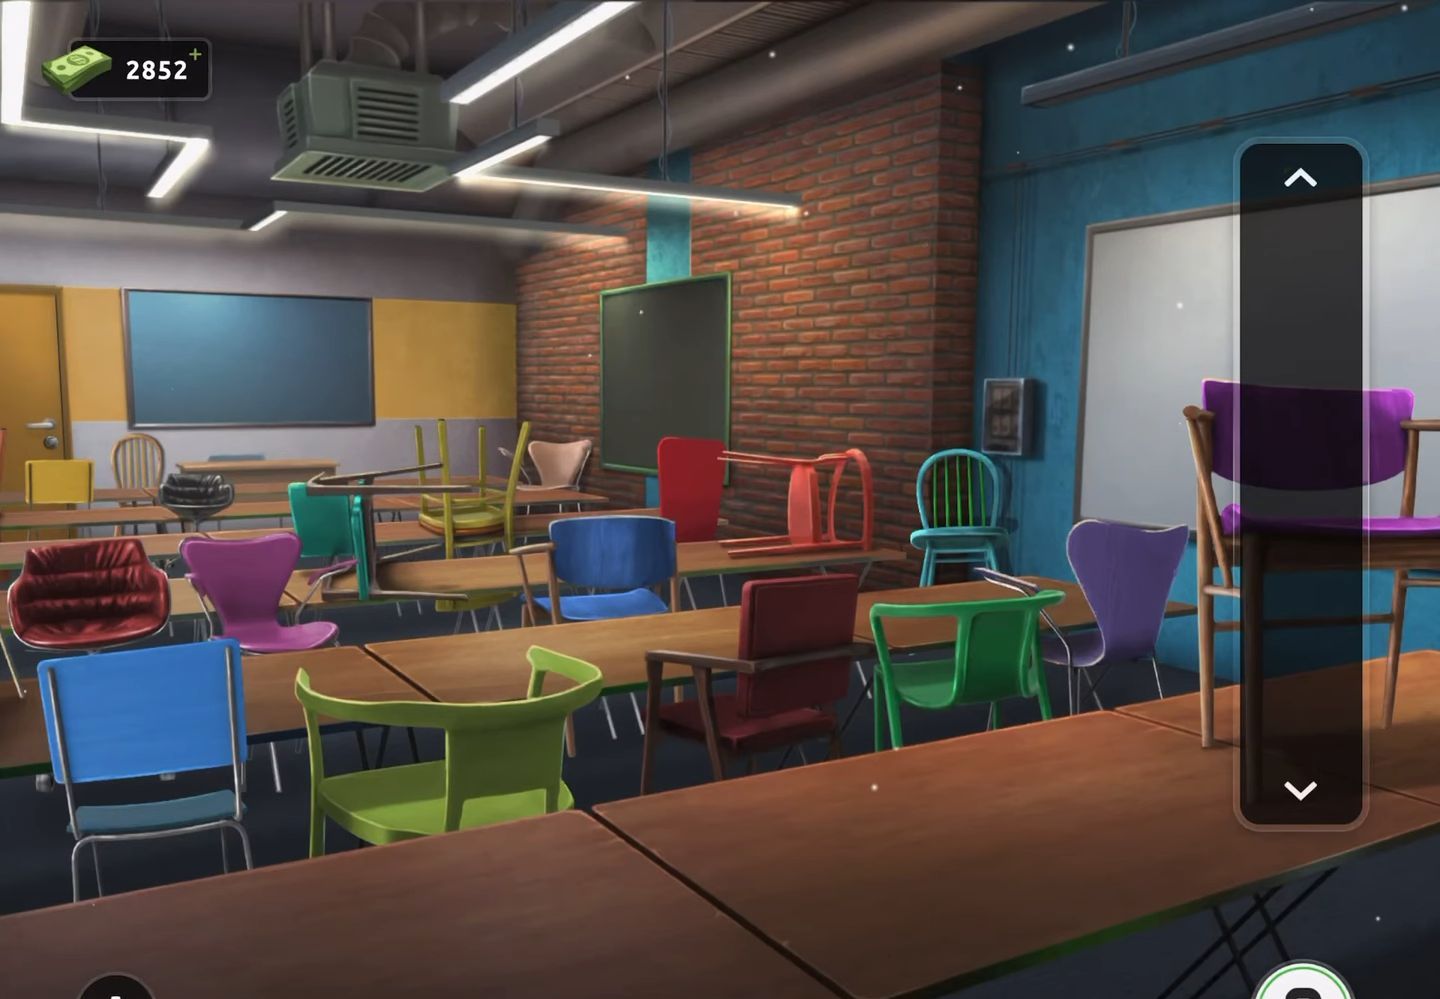
- The room is filled with numerous chairs, each exhibiting various styles and colors.
- The puzzle within this room entails identifying matching pairs of chairs with similar designs.
- Although the colors may differ, the key is to pair chairs with the same shape.
- Some chair pairs might seem similar but won’t match.
- However, there’s always another option to pair them with, ensuring a successful match.
- Ultimately, you’ll be left with one remaining chair. Rotate it and obtain a key.
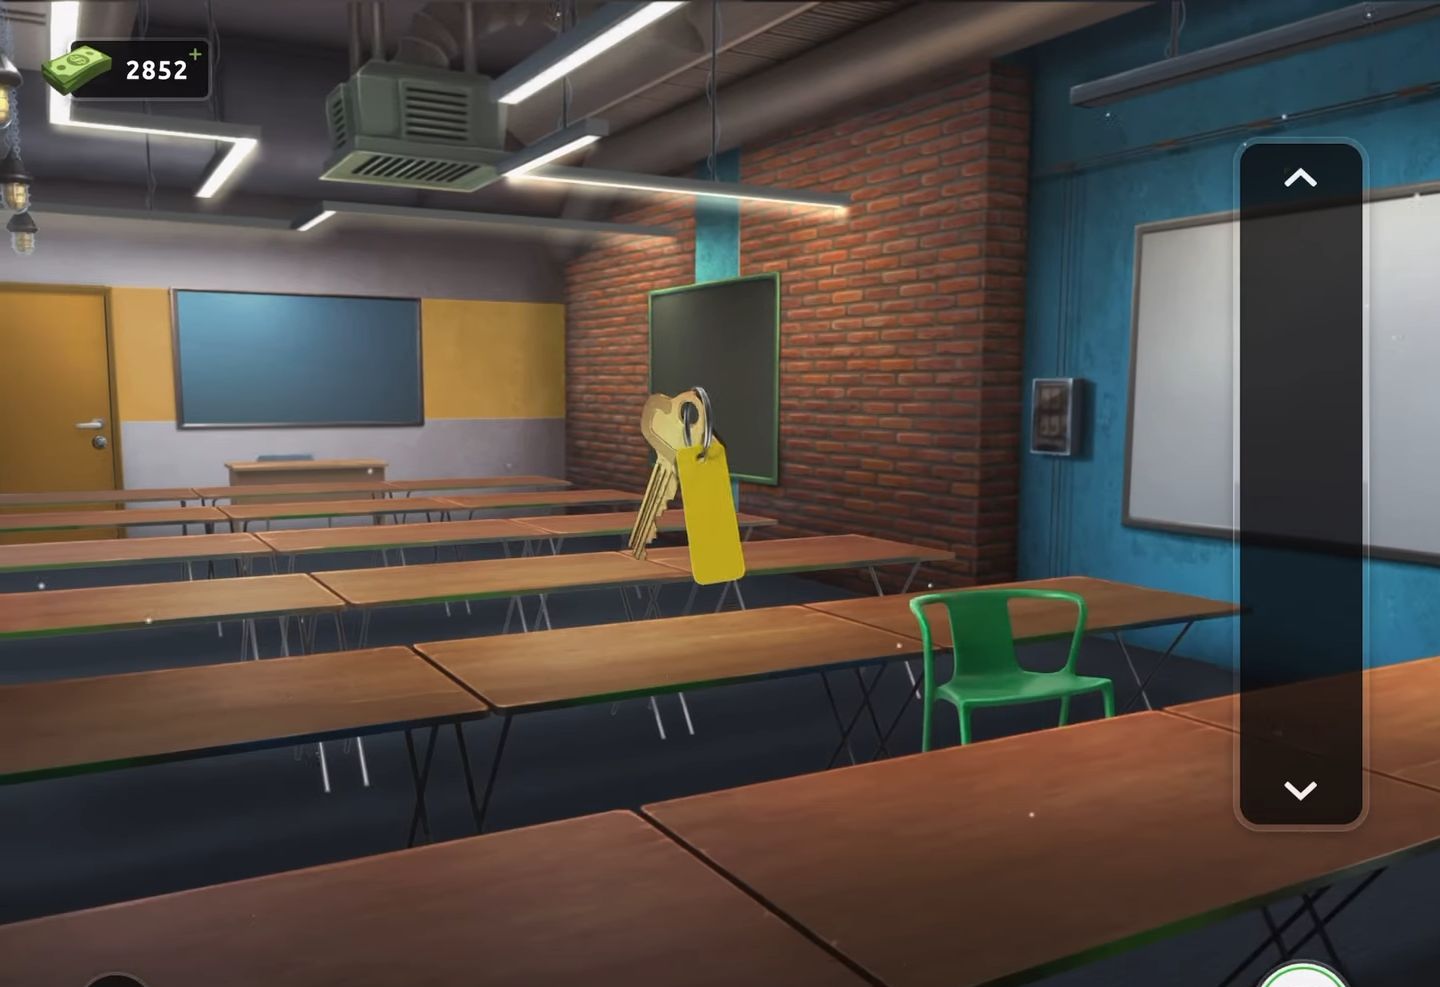
- Finally, use the key to unlock the room and escape.
Level 78:
To complete level 78, follow the instructions below:

- Firstly, collect a red spade from the yellow bucket on the left-hand table.
- Then tip over the yellow bucket to collect a pair of scissors.
- Now examine the pot plant in the back left corner to obtain a screwdriver and dig in the soil with the spade to discover a box.
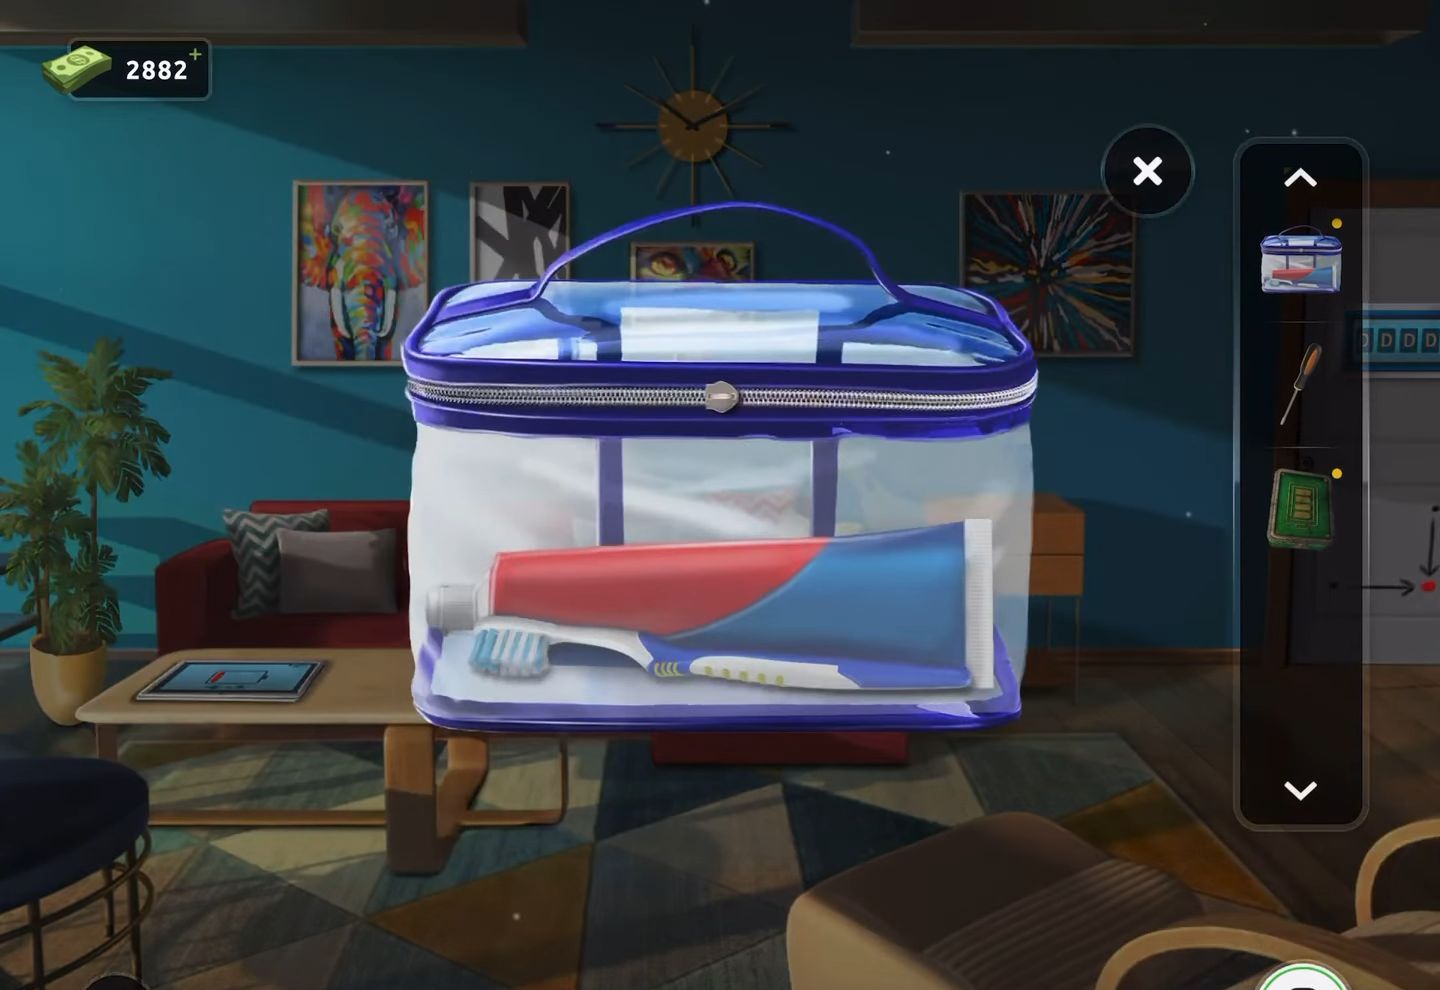
- Next, acquire a clear plastic case from the small drawer unit near the door and view it in your inventory.
- Then use the scissors to cut a hole in the bag and retrieve the toothbrush.
- Now inspect the dirty box in your inventory and use the toothbrush to clean it.
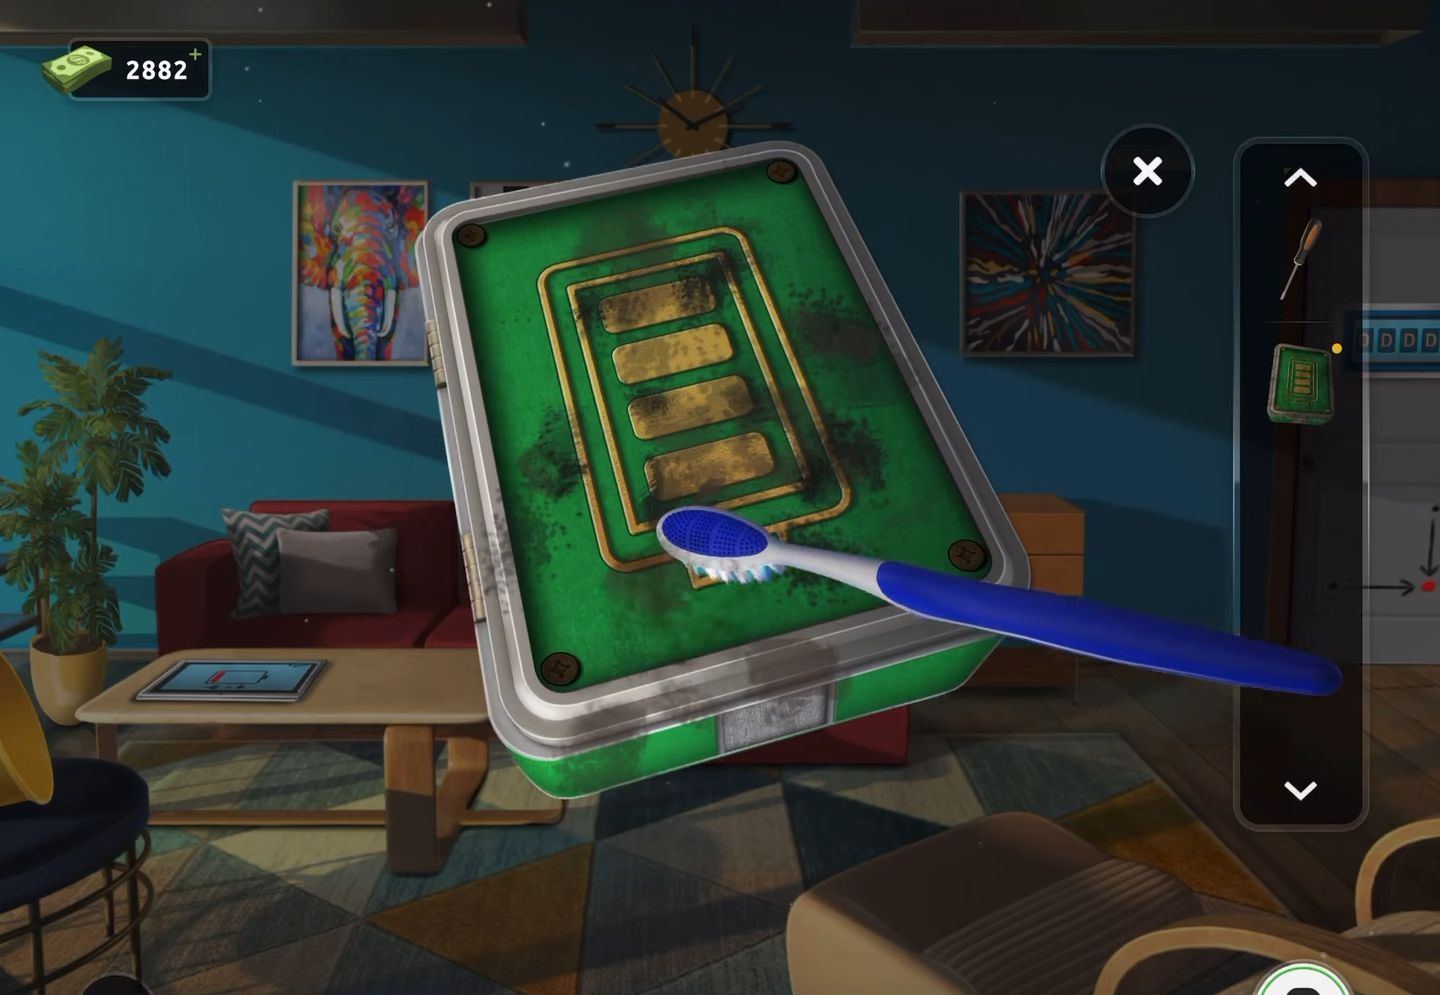
- After that, use the screwdriver to open the box and retrieve a battery pack.
- Tap on the tablet on the table and insert the battery pack to activate it. A clue with 4 sets of alphanumeric codes will be displayed.
- Now tap the arrow on the lower right to bring up a keyboard.
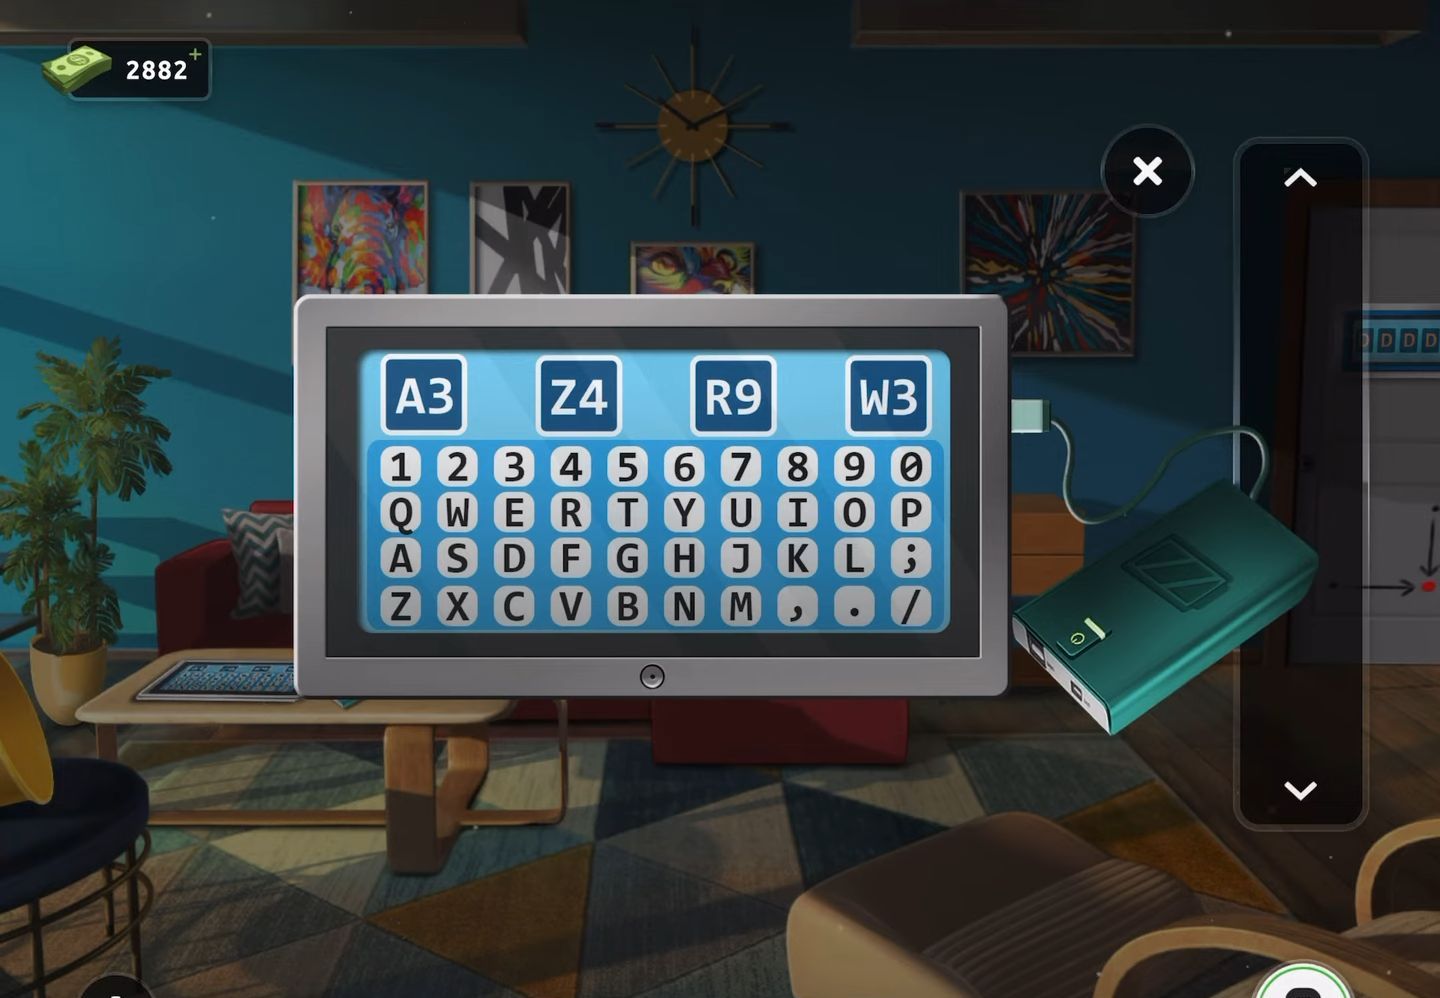
- Then examine the clue at the bottom of the exit door and use the information to get the code (D V O E) for the exit door lock.
- Finally, enter the code (D V O E) obtained from the clue into the exit door lock and leave the room.
Level 79:
To complete level 79, follow the instructions below:
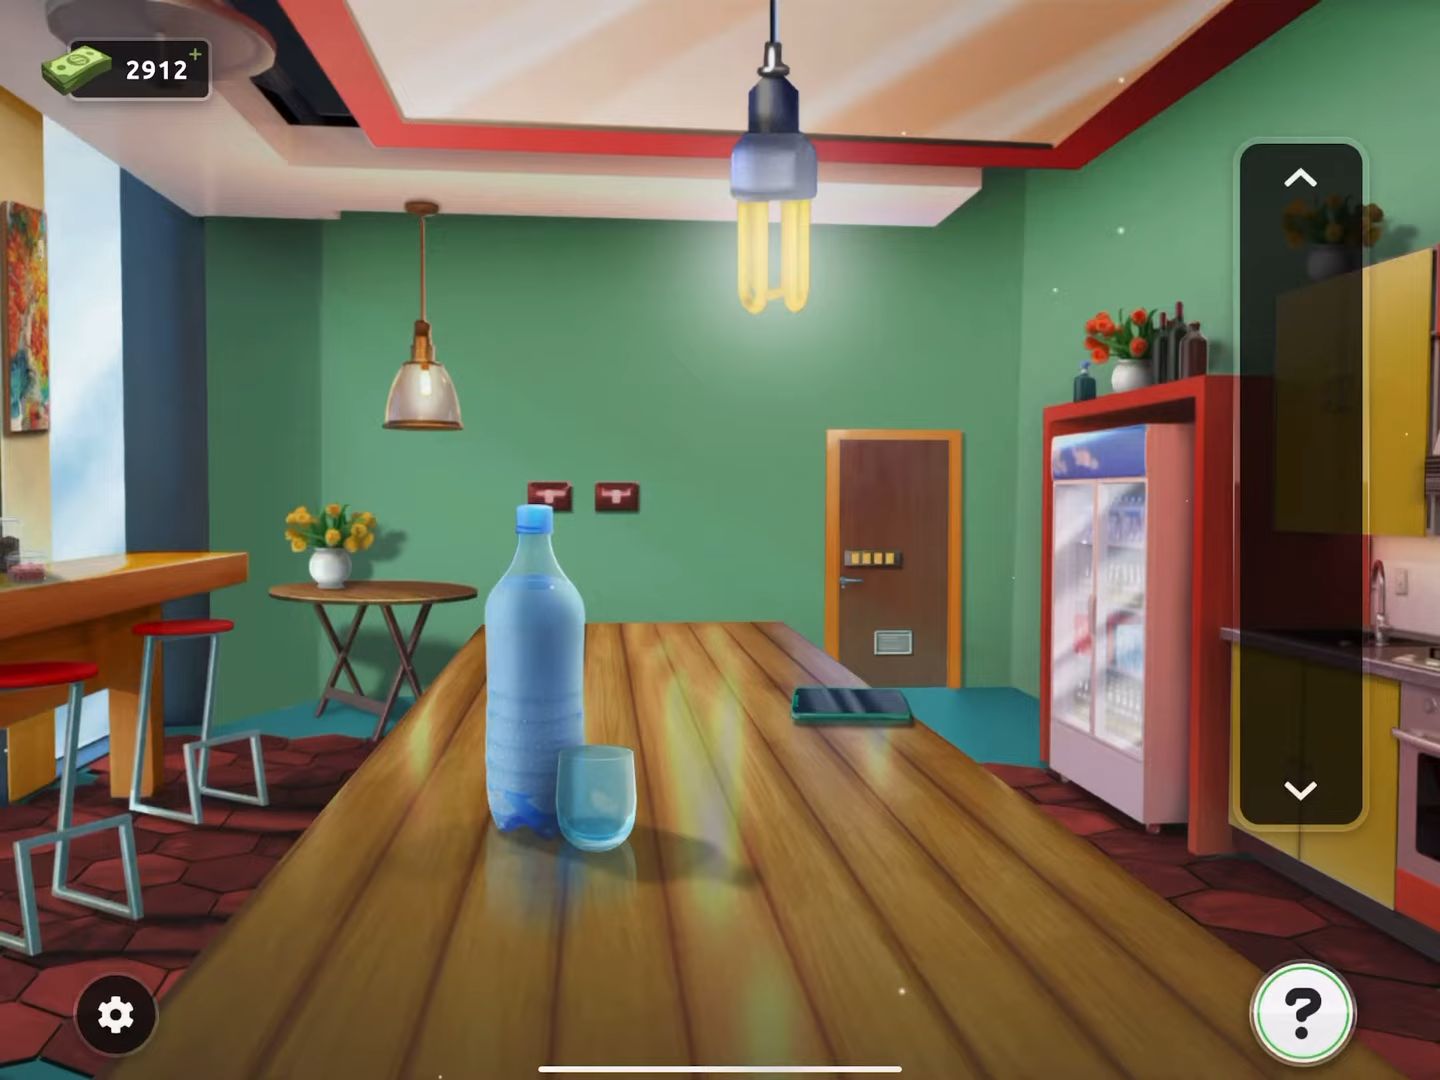
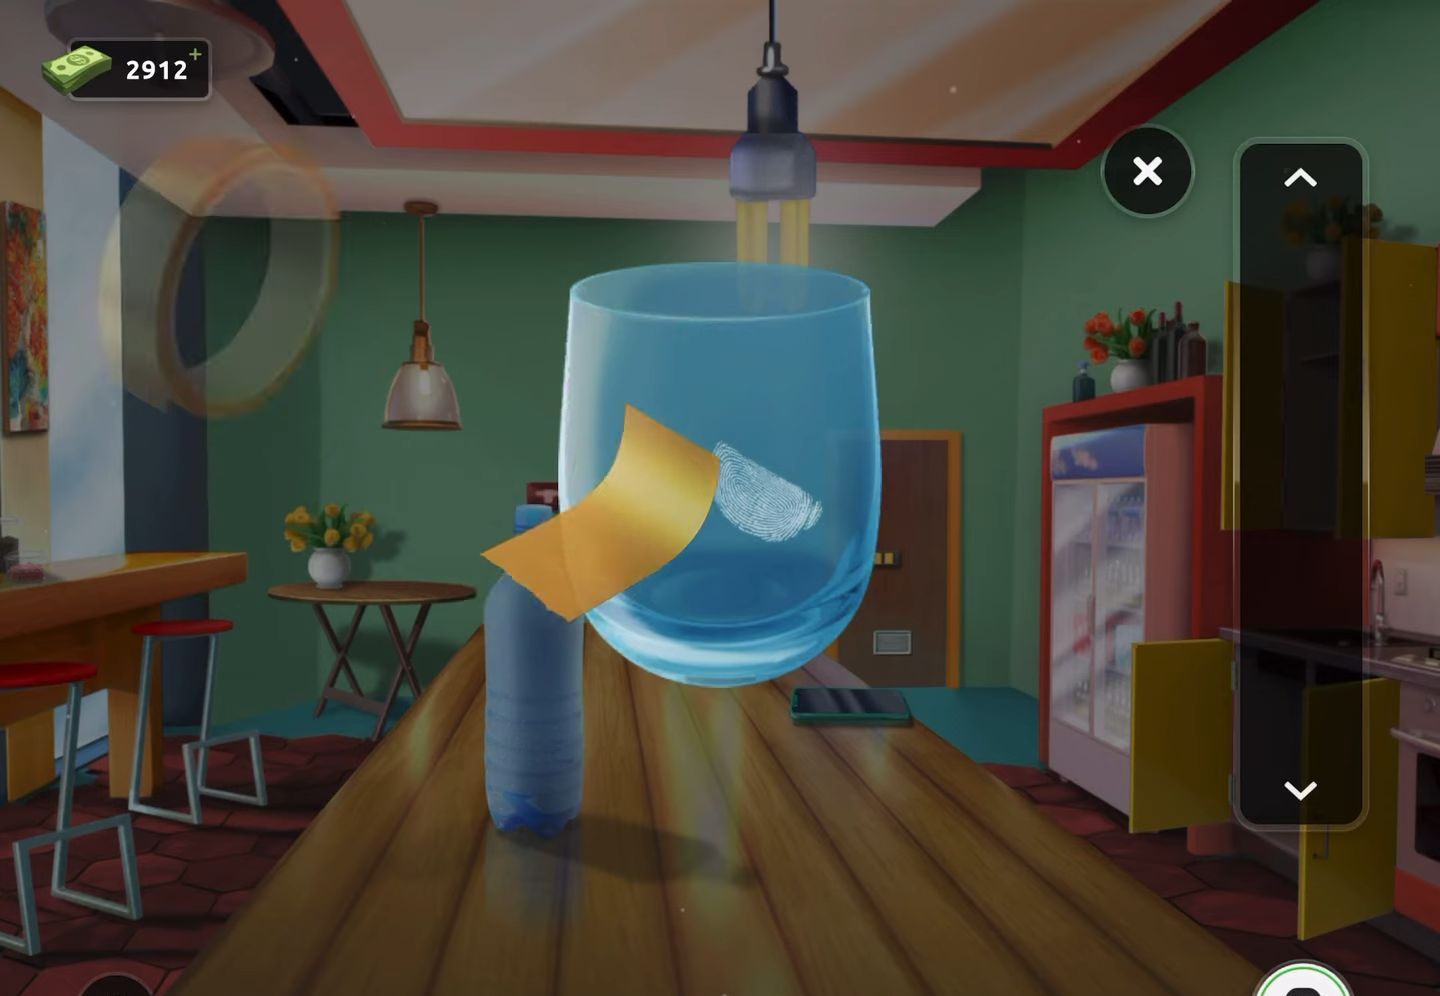
- Firstly, collect the glass from the table and open the top right yellow cabinet to obtain a roll of tape.
- Then go to your inventory and use the roll of tape on the glass to collect a fingerprint.
- Next, view the phone on the table and use the tape with the fingerprint on the sensor to unlock it.
- Now, a clue will appear on the phone once it’s unlocked.
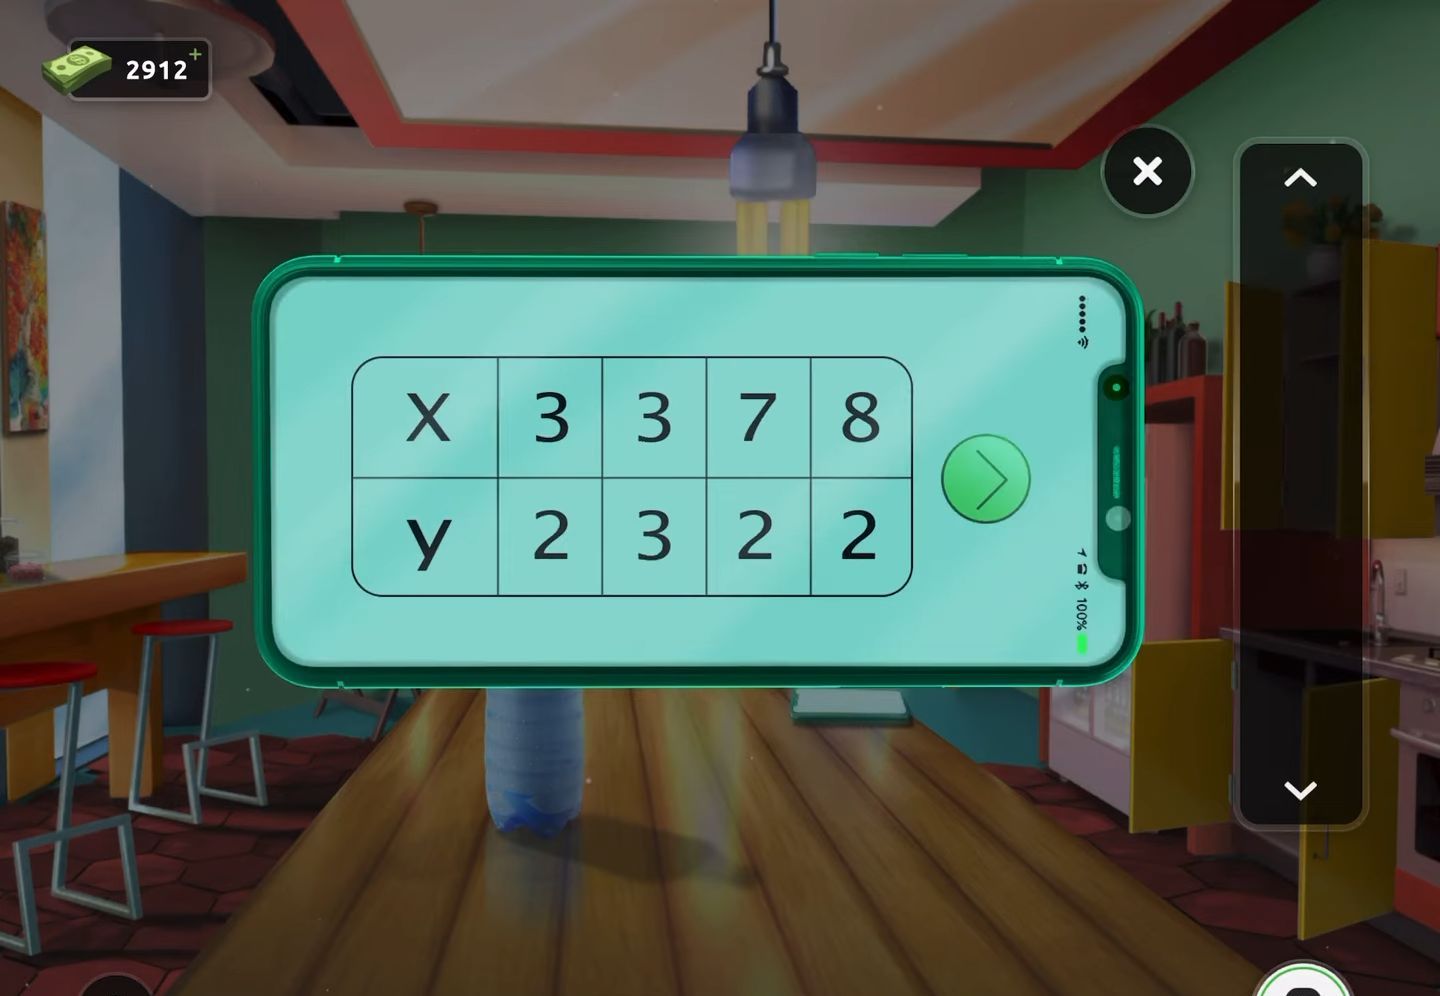
- Then tap the green arrow to navigate to the next screen, displaying a graph layout.
- After that, use the clue obtained from the previous screen to tap the correct squares on this graph layout.
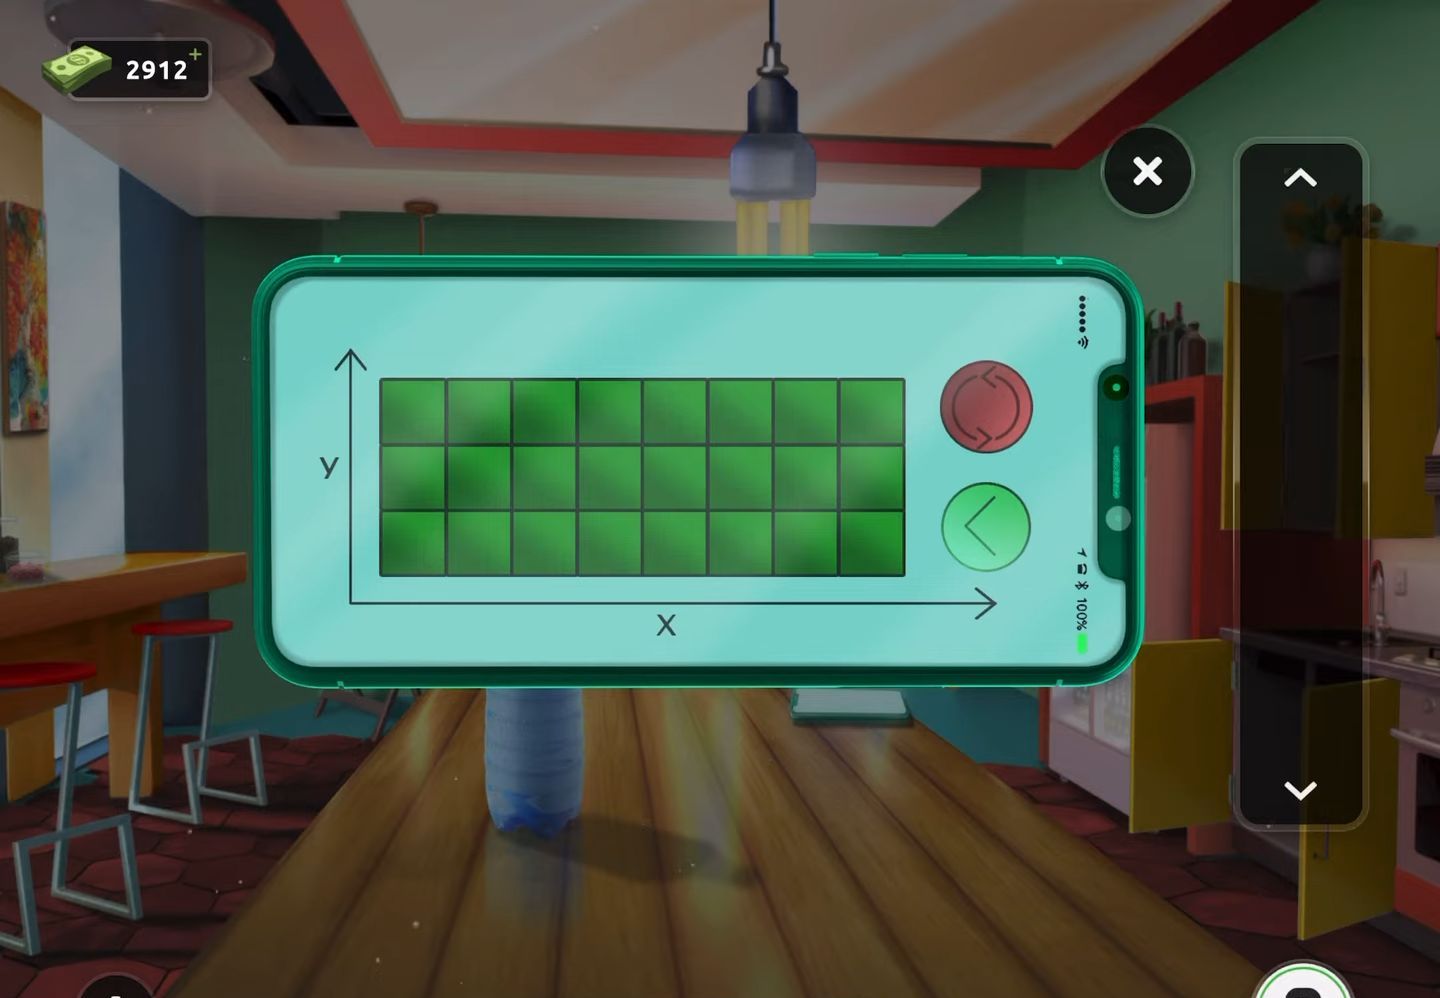
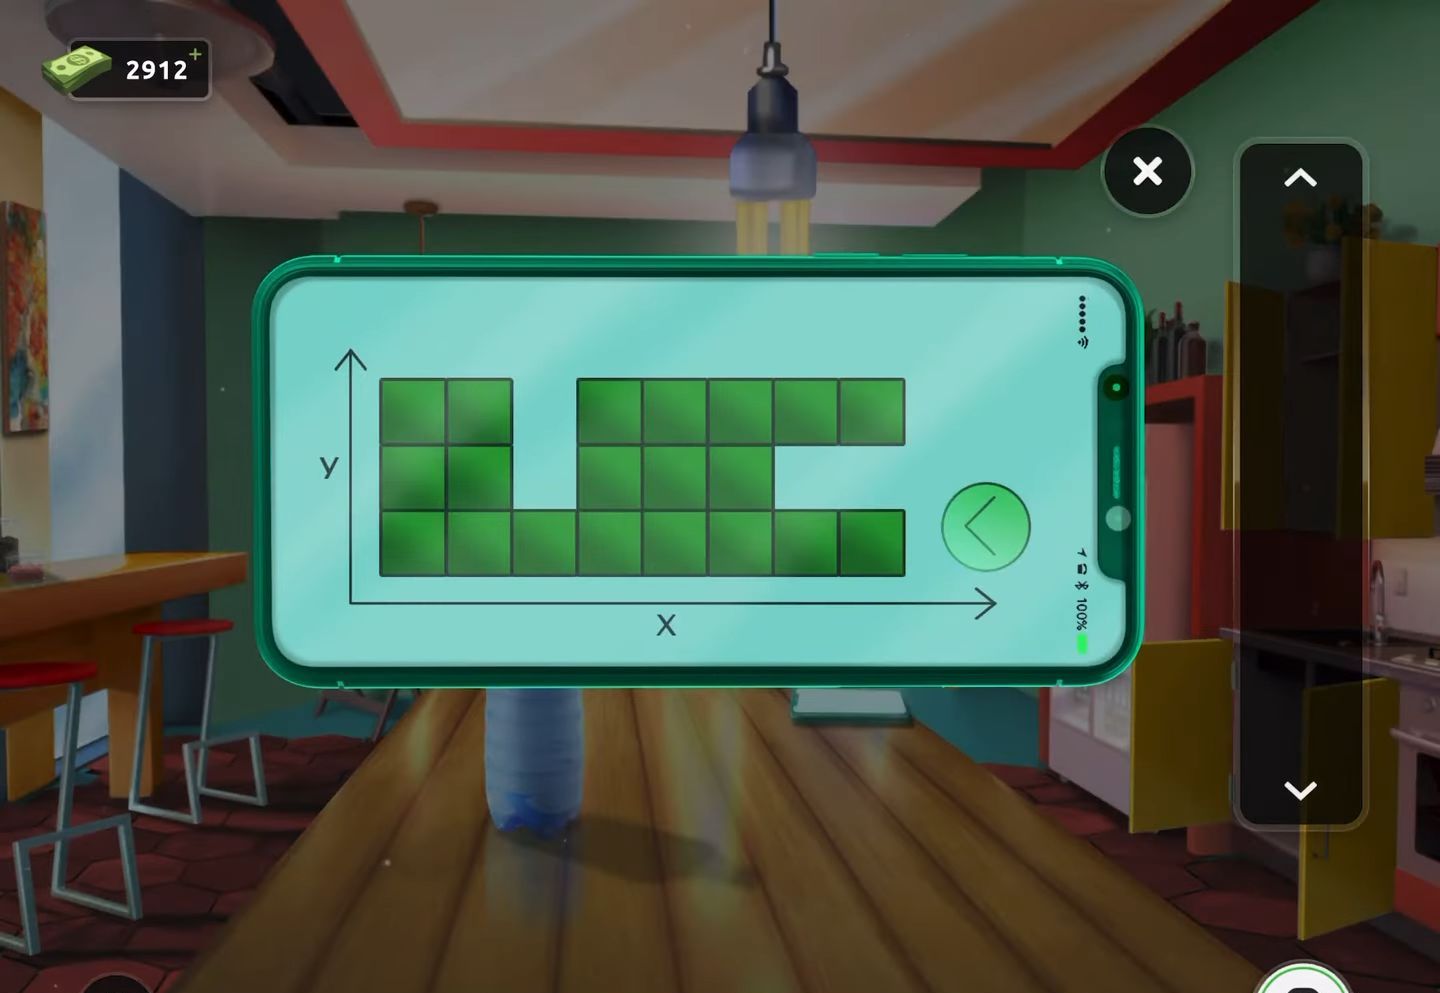
- This new graph serves as another clue.
- Now proceed to the exit door code lock and input the code based on the clues consisting of 4 letters (IUIC).
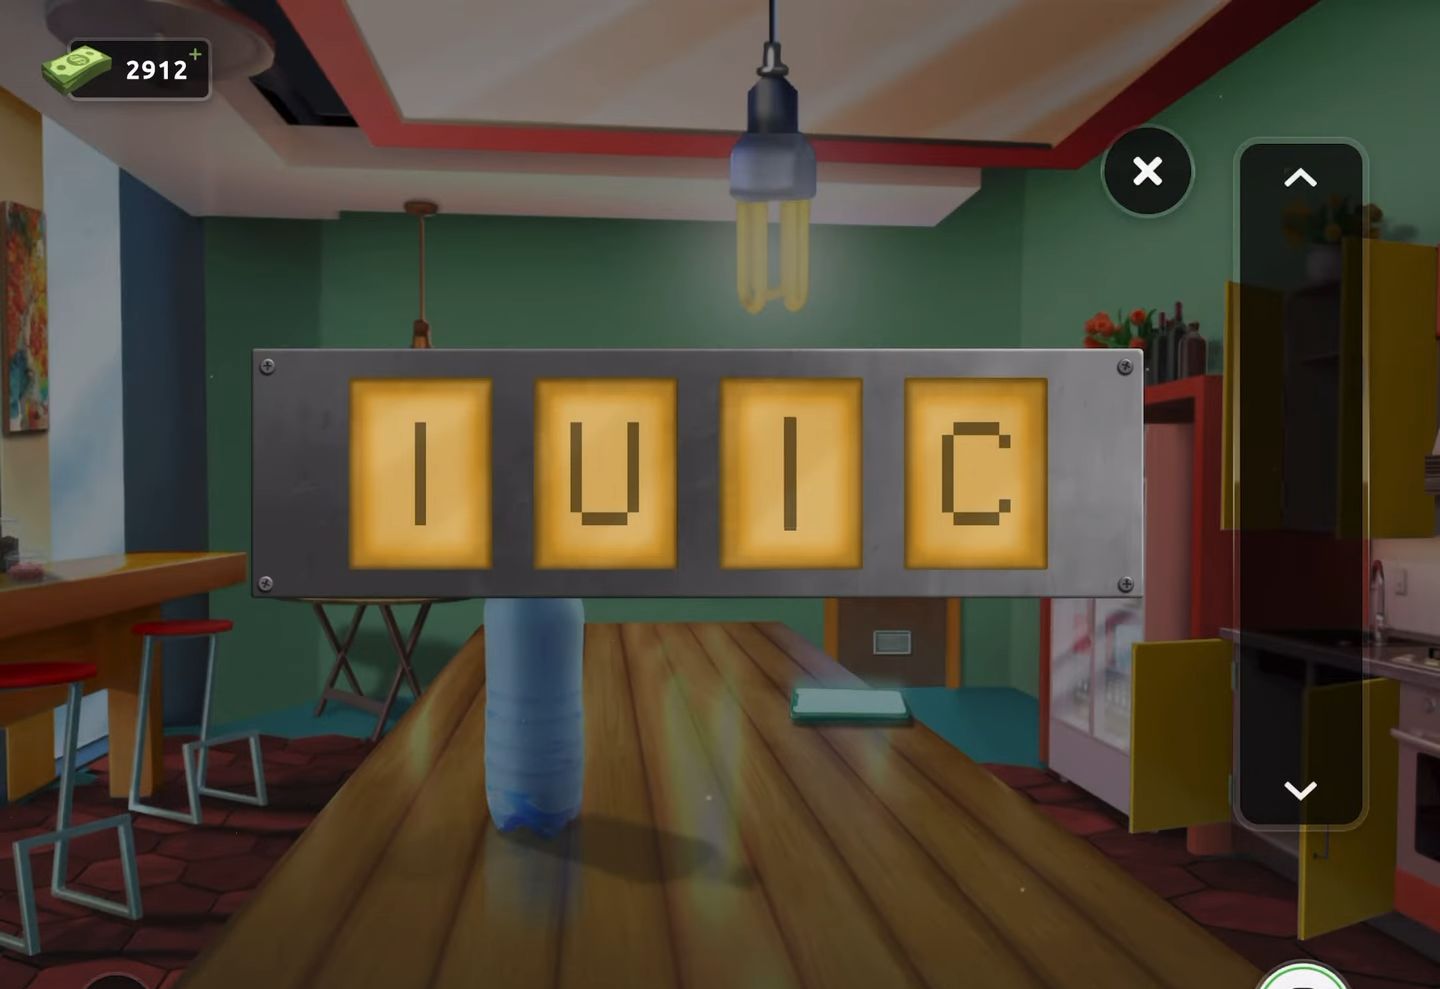
- Finally, exit the room and proceed to the next level.
Level 80:
To complete level 80, follow the instructions below:
- Firstly, collect a round token from the chairs located on the left side of the room.
- Then move the jacket on the chair positioned at the far right corner of the room and get another round token.
- There are two tables on the far side of the room.
- Now view the table on the left, where there is a glowing light.
- Next, retrieve a screwdriver from this table.
- Then, move to the other table, which features a clear box.
- Subsequently, use the screwdriver to detach the clamps and grab a magnet.
- After that return to the first table and apply the magnet to the glowing light to unveil a clue and open a panel.
- Gather the red button.
- Next, use the red button on the box located to the left.
- Then adjust the symbols on the front of the box by tapping the blue and red buttons until they align with the symbol on the right. Acquire another round token.
- After that return to the clear box placed on the right table and insert the 3 tokens to unlock it.
- Now obtain the remote control and use it to activate the large screen above.
- Finally, the door will open, allowing you to escape from the room.
Level 81:
To complete level 81, follow the instructions below:
- Firstly, investigate the bowl of fruit located on the left of the door. Rearrange the items to obtain a lemon.
- Then shift the vase on the round table positioned to the right of the door and collect a handle.
- Now open the briefcase situated on the sofa to the right, and retrieve a paper.
- Next, observe the exit door to examine the puzzle. Click on the small door at the bottom to access and collect a blade.
- In your inventory, examine the handle and attach the blade to assemble a knife.
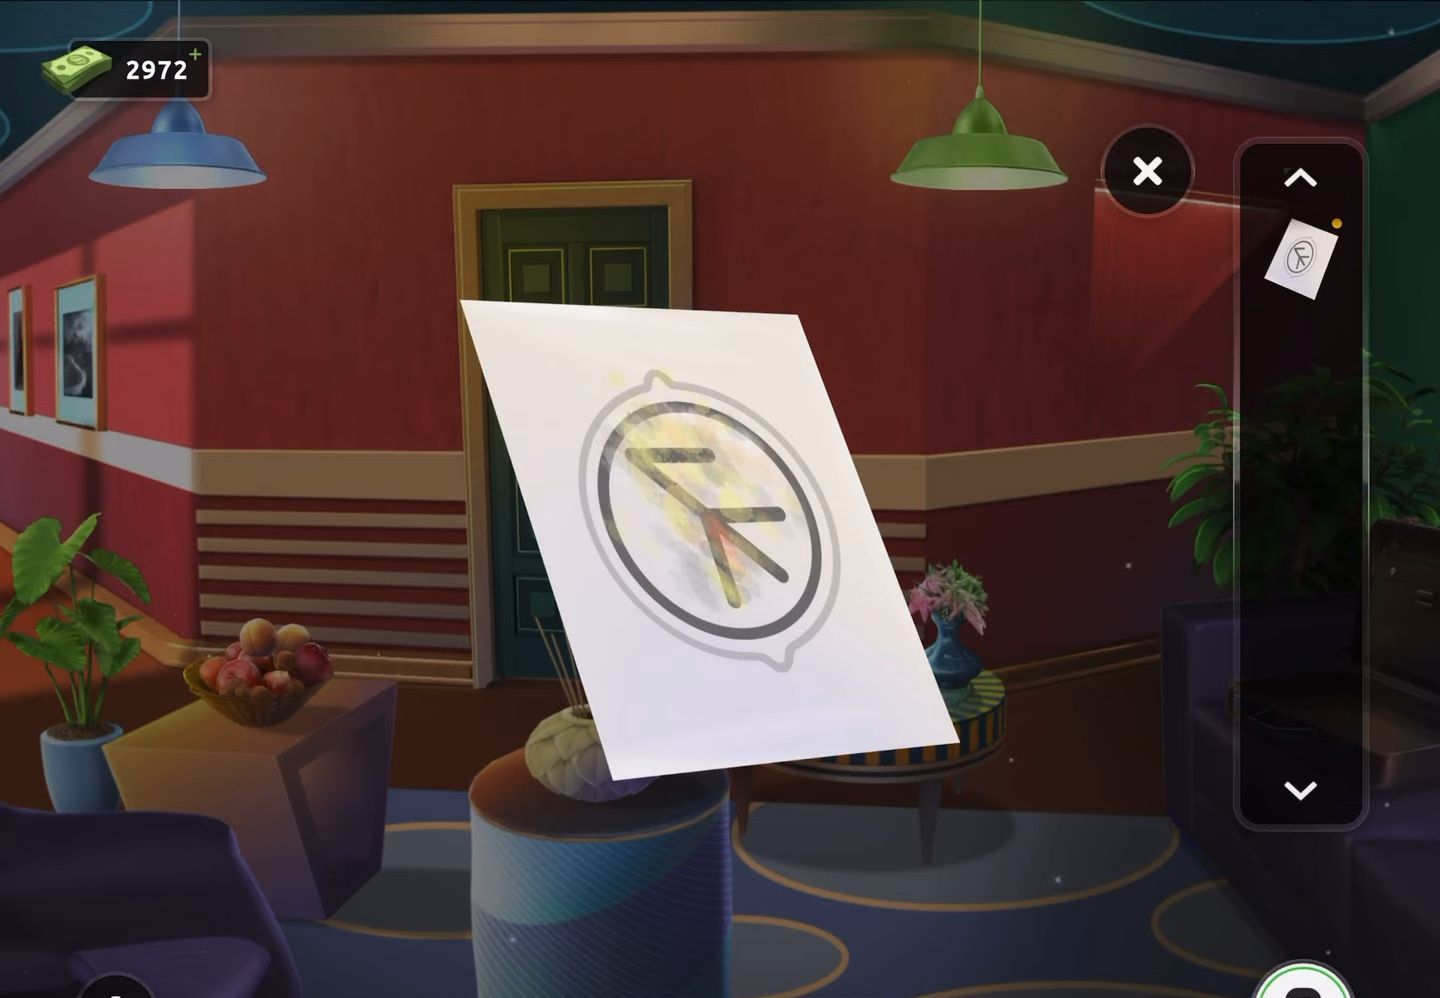
- Now focus on the lemon and use the knife to cut it.
- Then proceed to the paper in your inventory and apply the sliced lemon to unveil a clue.
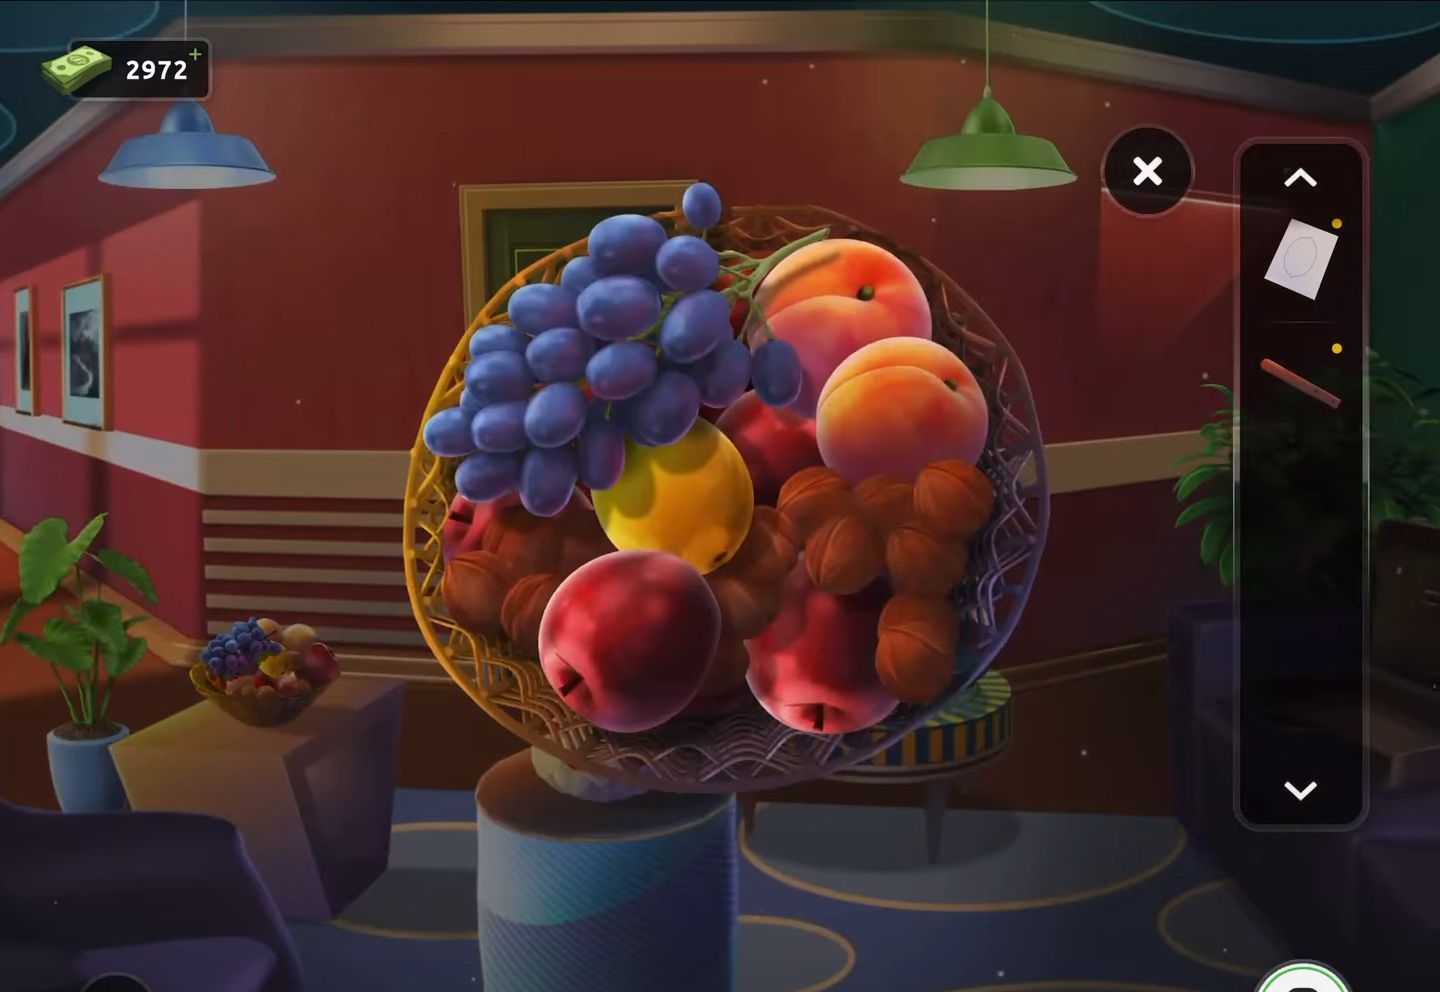
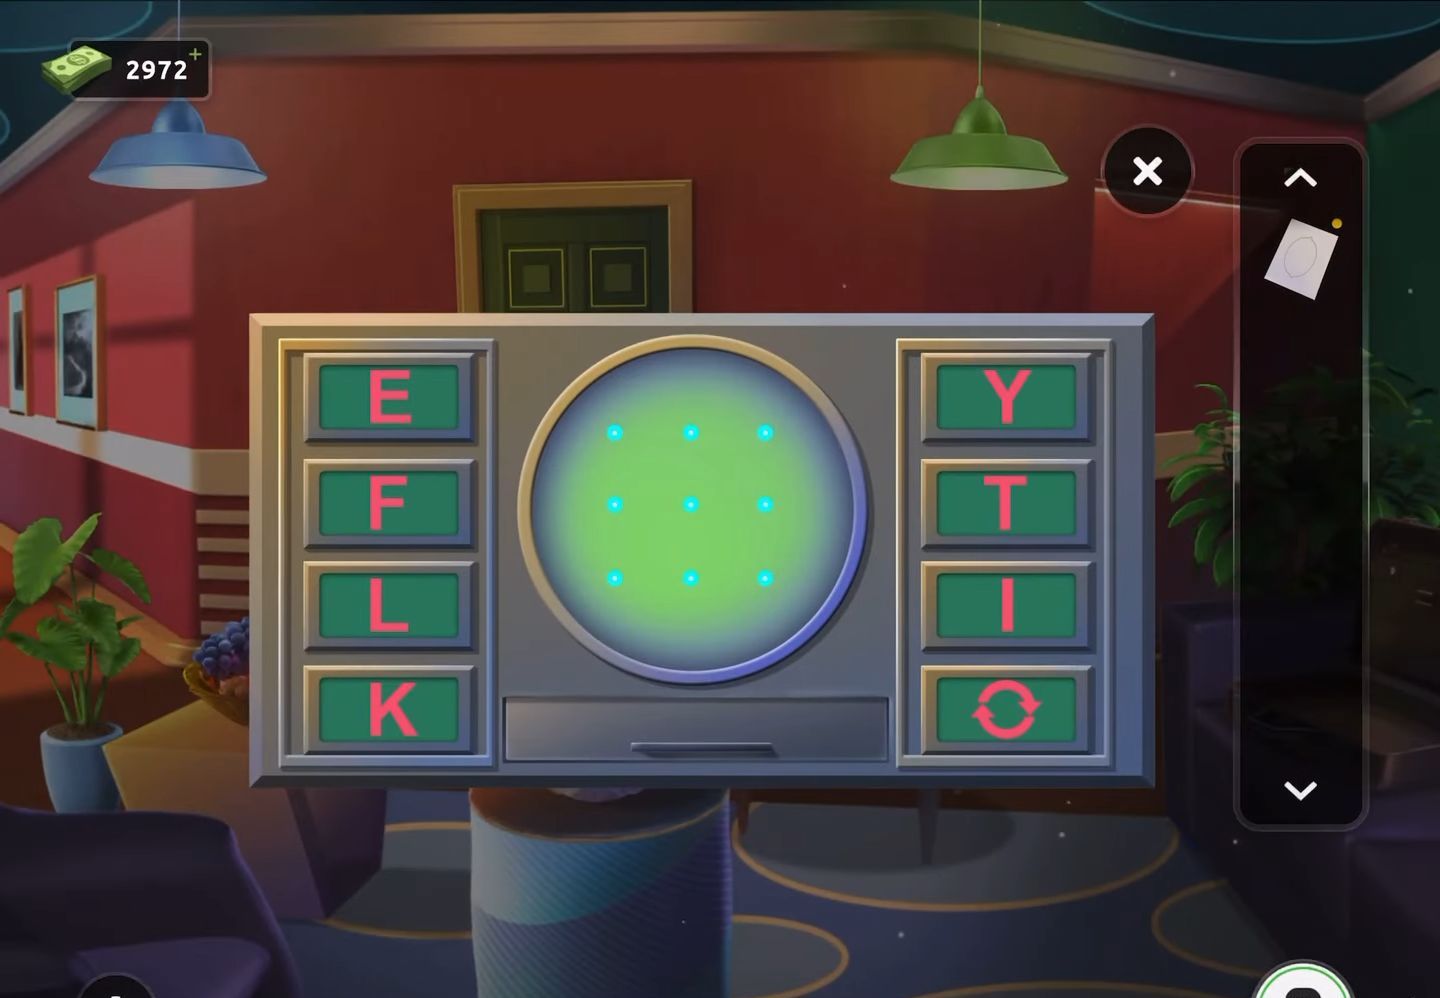
- After that utilize the clue obtained to solve the door puzzle. This puzzle involves adjusting the pattern on the grid by tapping specific letters.
- Each letter’s selection alters the lines on the grid.
- Choose the following letters: E, L, K, Y, and T to match the pattern on the paper.
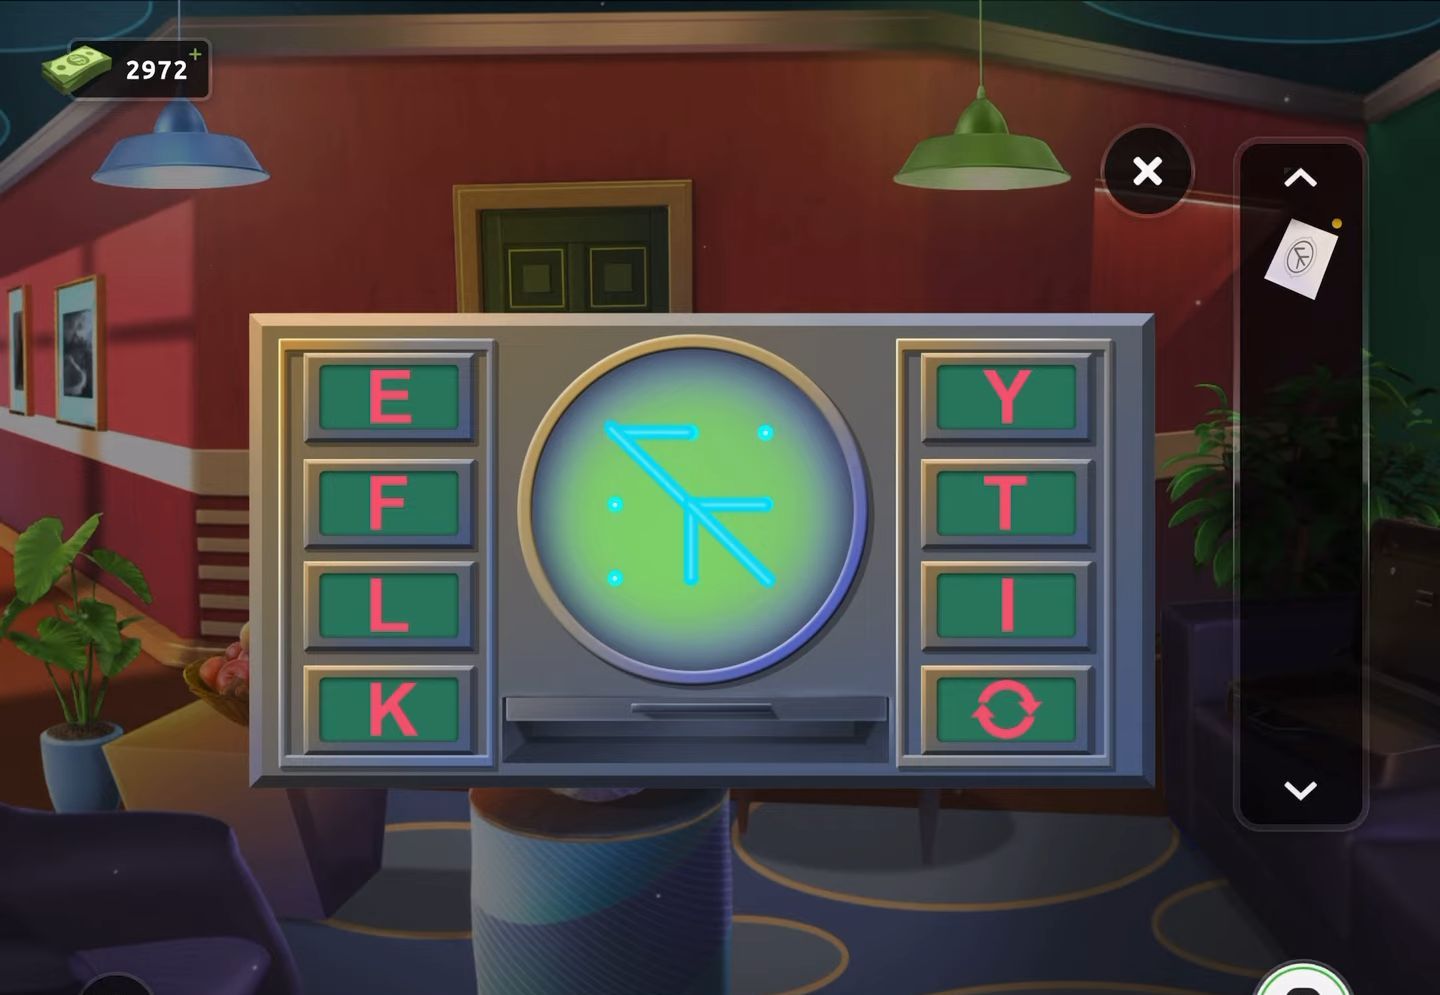
- Upon completing the puzzle, the door will unlock, allowing you to escape the room.
Level 82:
To complete level 82, follow the instructions below:
- Firstly, rearrange the orange vase on the wall shelf to reveal a gold disk.
- Similarly, obtain another gold disk from the fruit bowl placed on the table.
- Next, examine the notepad on the right wall and gather another gold disk while paying attention to the papers for a hint.
- Then check the laptop on the table to acquire the code (4531) derived from the clue found on the notice board.
- Now observe the clue presented on the screen after pressing the red button to activate the exit door puzzle.

- After that, proceed to view the exit door and add the three gold disks to initiate the puzzle.
- Next, utilize the clue displayed on the laptop to correctly arrange the four sets of circles on the exit door.
- Finally, the door will be opened, and proceed to escape through it.
Level 83:
To complete level 83, follow the instructions below:
- Firstly, collect an ice bucket from the chair positioned on the far left and obtain wire cutters situated on the floor to the right of the chair.
- Additionally, gather a knife from the snooker table.
- Then proceed to the table on the right of the room and view the fan.
- Next, use the knife to cut the ropes, revealing the interior and allowing the collection of a gold-colored button.
- Additionally, obtain the black and white knob located at the base.
- Then move to the small oven located on the bar at the back left. Insert the ice bucket inside and attach the knob to activate it, which will melt the ice.
- After that, retrieve the melted ice and find a piece of paper inside the oven, which contains a clue.
- Then proceed to the top left corner of the room, above the chair, where there is a small round grill.
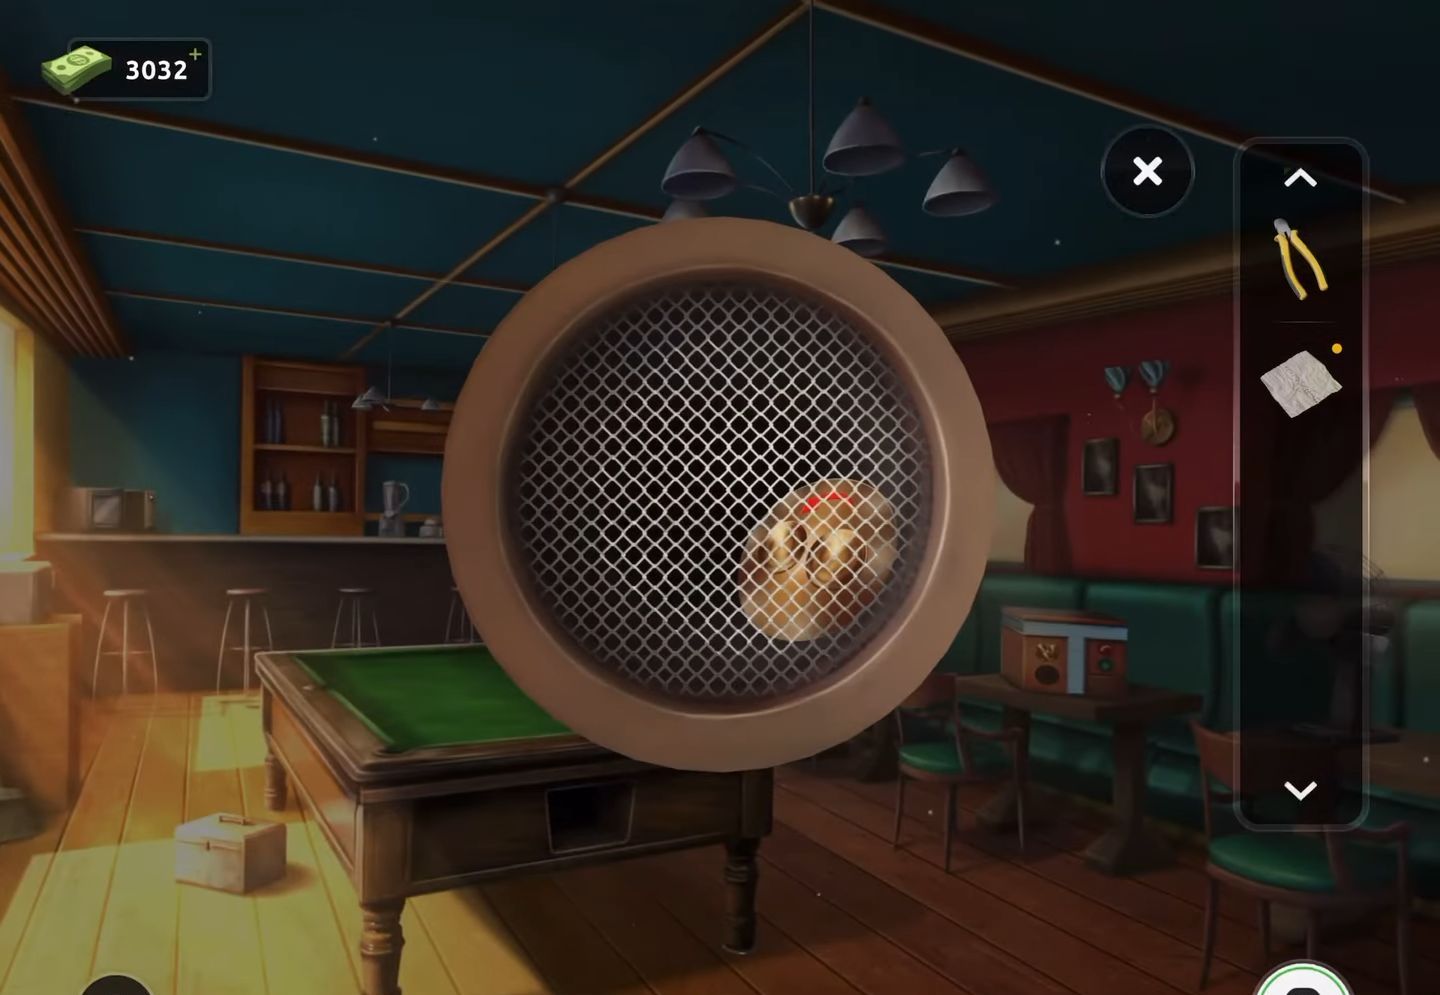
- Now employ the wire cutters to open the grill and collect the second gold-colored button.
- Ultimately, turn your attention to the box situated on the table to the right.
- Next, incorporate the two gold buttons into the box to initiate a puzzle.
- Tap the buttons to maneuver the row of numbers either left or right, moving three numbers at a time.
- Then utilize the green button to lower one number at a time into the vertical column.
- After that, collect the puzzle rings from this step. Proceed to the exit door and place these rings into the designated section of the puzzle.
- Now rotate the rings appropriately to form the complete shape.
- Keep in mind that adjusting one ring will affect the others.
- Once the puzzle is correctly aligned, the door will open, allowing your escape.
Level 84:
To complete level 84, follow the instructions below:
- Firstly, acquire the oil spray can from the left side of the truck and then collect a hex key from the table situated at the bottom right.
- Then move to the electrical box positioned on the right side of the door and utilize the hex key to unlock it.
- Upon opening the box, manipulate the switches inside to alter the color of the lights.
- Your goal is to ascertain the correct sequence of four colors.

- Now examine the colored circles located at the back of the truck. Some circles contain two colors, requiring you to determine the appropriate color combination by mixing them (Red Green Orange Purple).
- Then observe the wall for a lit-up clue.
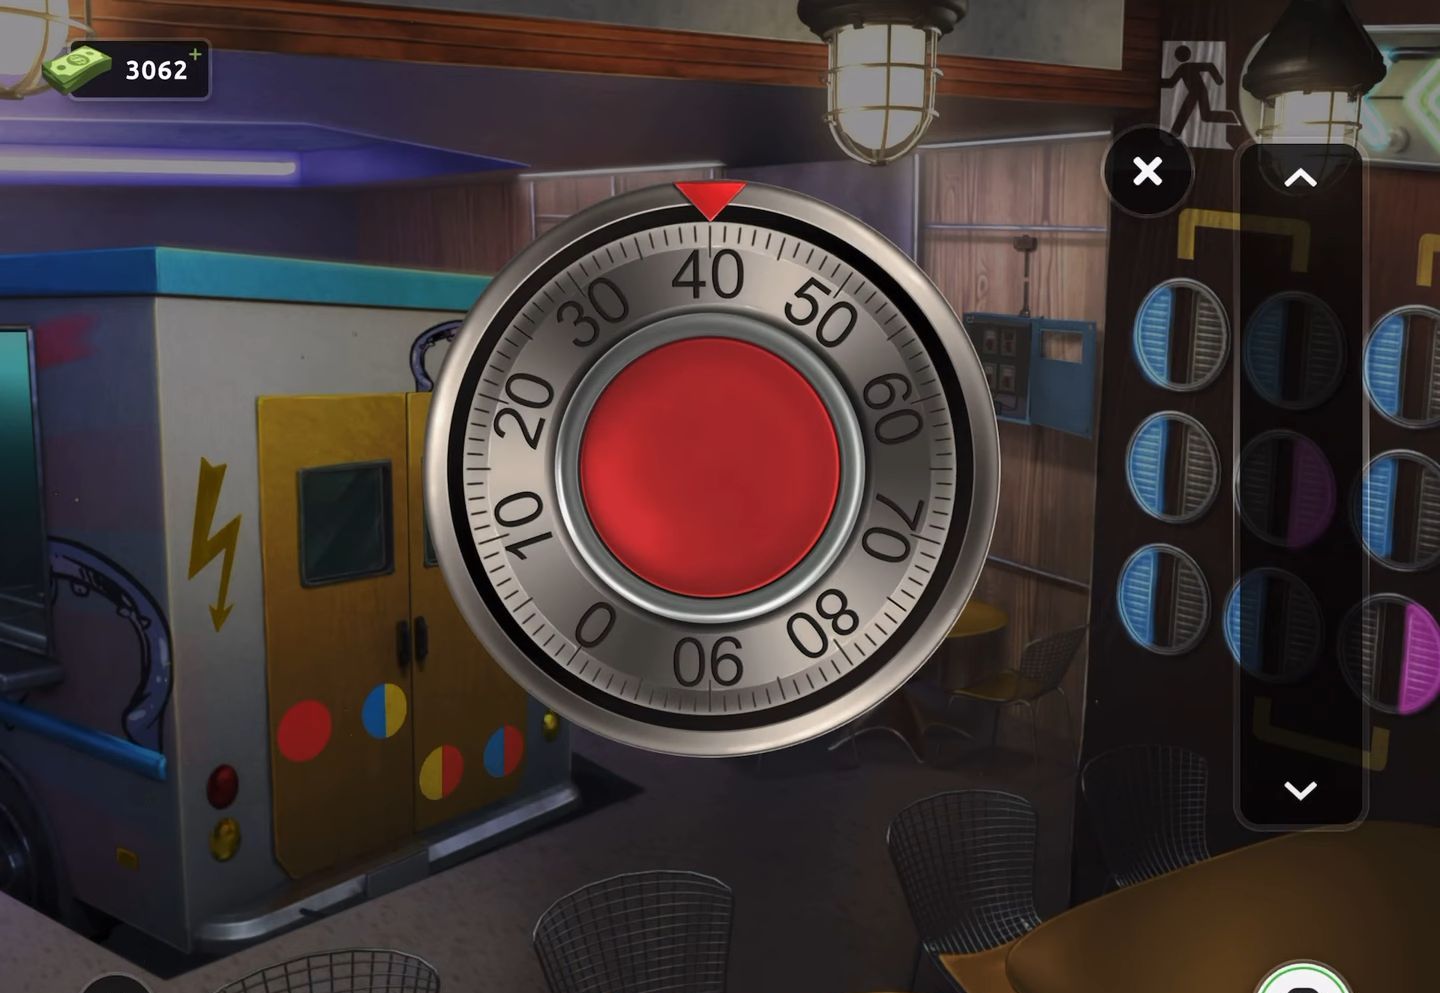
- After that, proceed to the exit door and utilize the spray can to clean the dial. Adjust the dial by turning it left or right.
- Now observe the right wall for the clue. Use the color indications (blue for left, pink for right) to determine the spinning direction. Follow the arrow line precisely to make the adjustments.
- Finally, the door will open, allowing you to escape.
Level 85:
To complete level 85, follow the instructions below:
- Firstly, inspect the book on the reception desk and retrieve the wooden ruler.

- Now place the ruler beneath the bench on the right to discover and collect a hairdryer and a set of three clock hands.
- Then revisit the book and apply the hairdryer to unveil a hidden clue on the right page.

- Next, observe the two shapes and the arrow sequence order.
- Then, proceed to view the exit door.
- After that, add the clock hands to the puzzle on the door.
- Subsequently, use the clock hands to select three shapes that compose the symbols required for opening the door. Two symbols are visible on the door itself and the other two can be found in the book.
- Follow the sequence indicated by the arrows in the book.
- Finally, the door will unlock, allowing your escape.
Level 86:
To complete level 86, follow the instructions below:
- Firstly, observe the bear situated on the left side, which holds a sign around its neck.
- Following this, tap the small panel located above the exit door.
- Now enter the code (0551) and press the red button.
- Next, retrieve a paper containing a clue.
- Then, tap on the green bench situated to the right of the door to inspect the chemistry equipment.
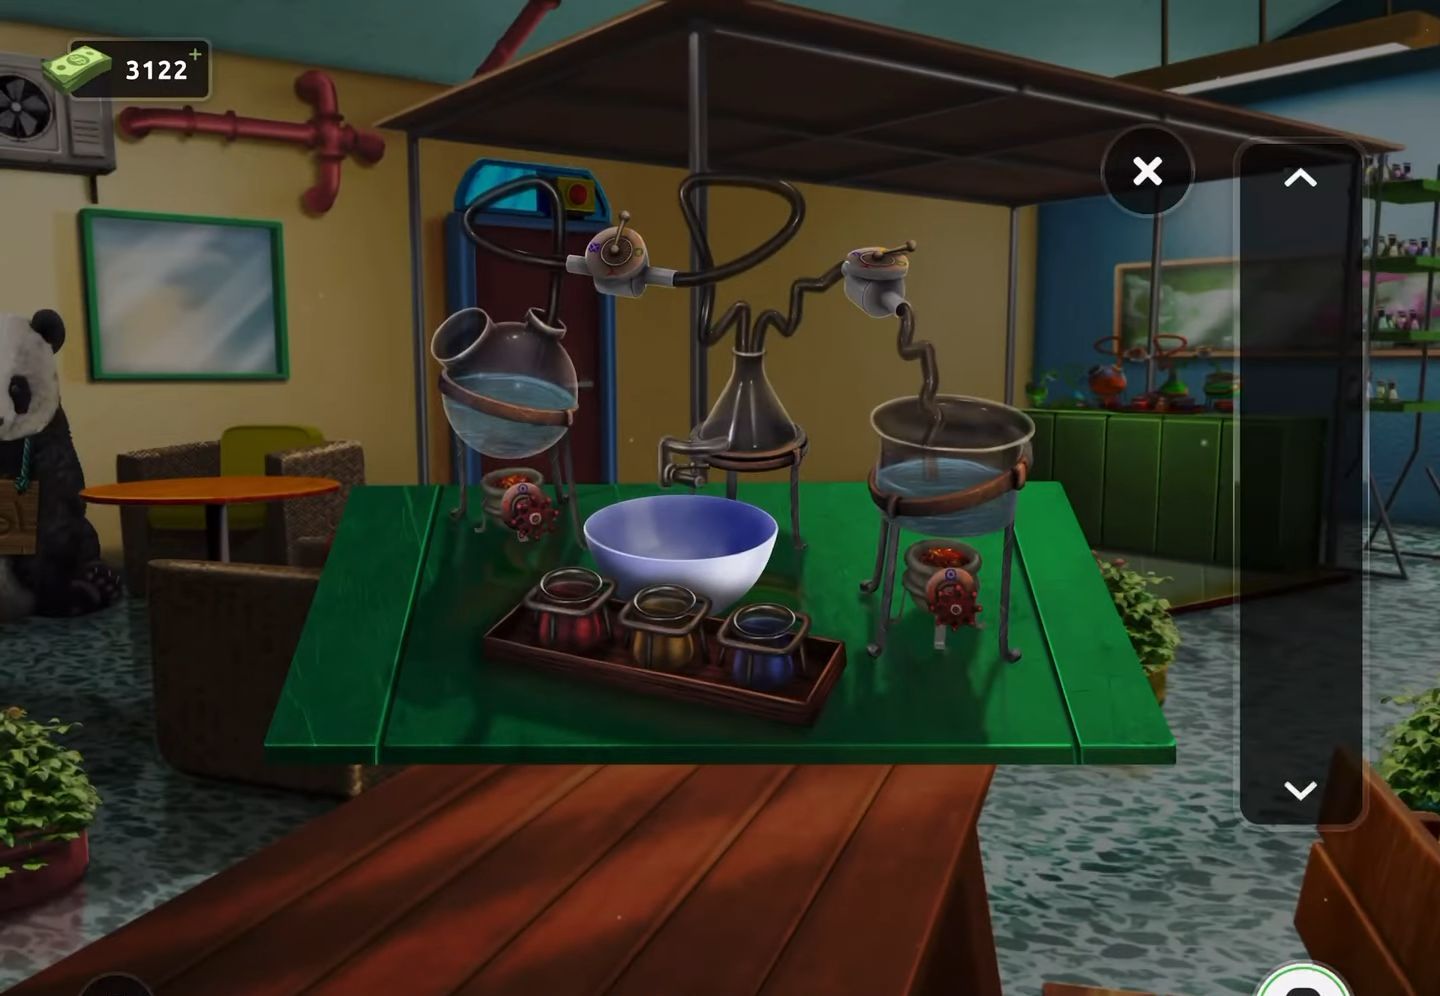
- After that, combine the paper with the equipment setup to access the instructions.
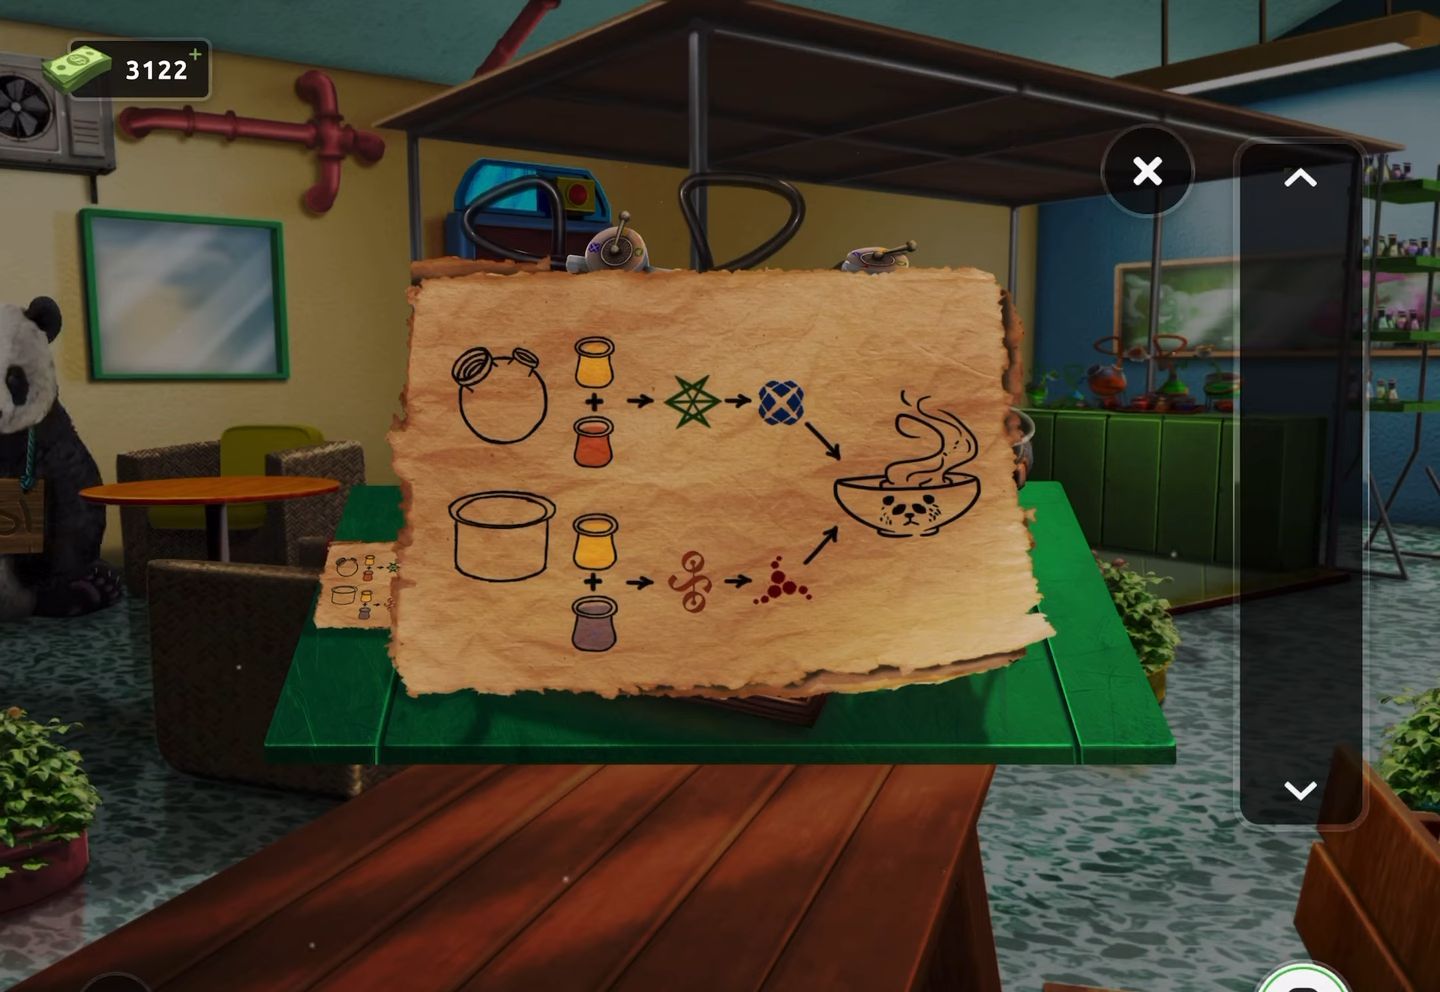
- Now, interact with the flask at the center to pour the purple liquid into the bowl.
- Then collect the bowl filled with the liquid and offer it to the bear, prompting it to move to the left and reveal a hidden hole.
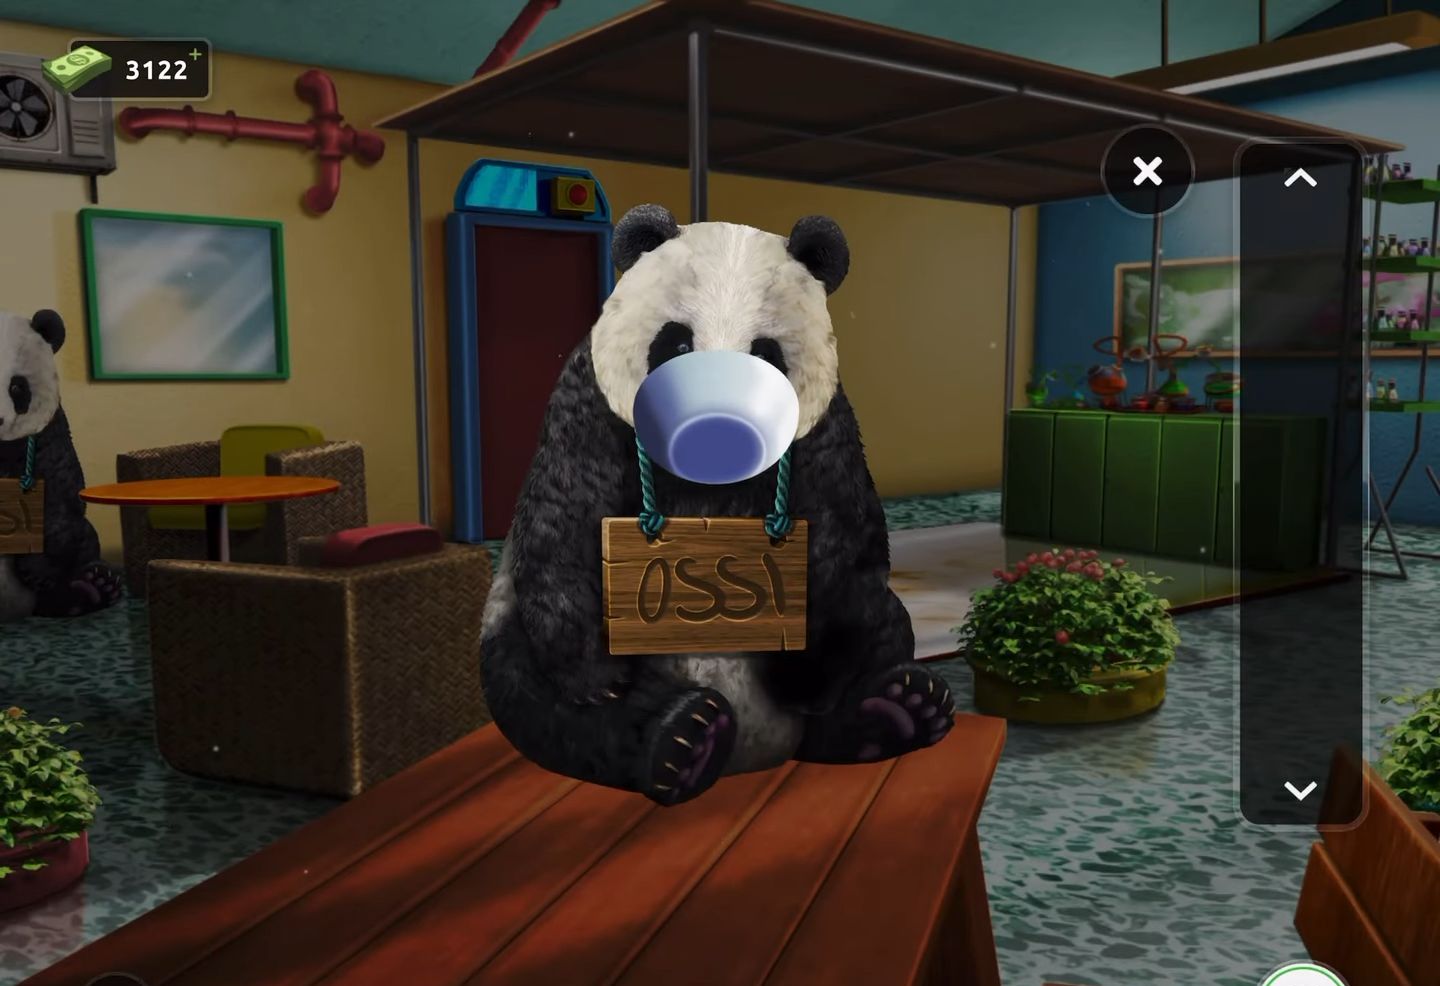
- Finally, acquire the key from the revealed space, enabling you to use it to unlock the room and make an escape.
Level 87:
To complete level 87, follow the instructions below:
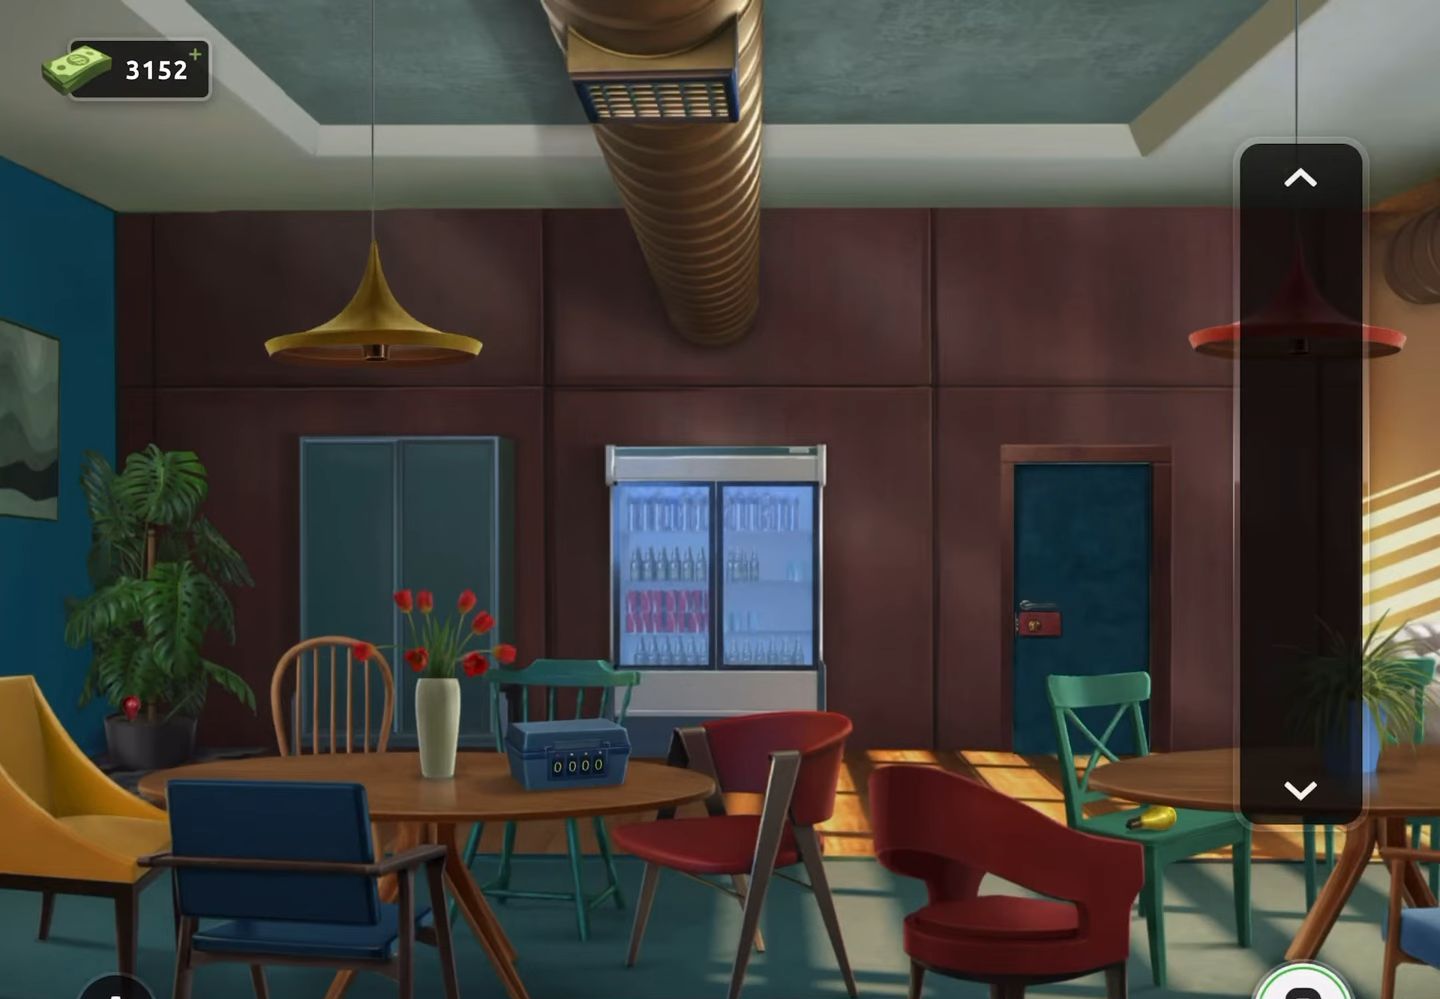
- Firstly, retrieve a red light bulb from the potted plant positioned in the back left corner.
- Then, obtain a yellow bulb located on the green chair situated at the right-hand table.
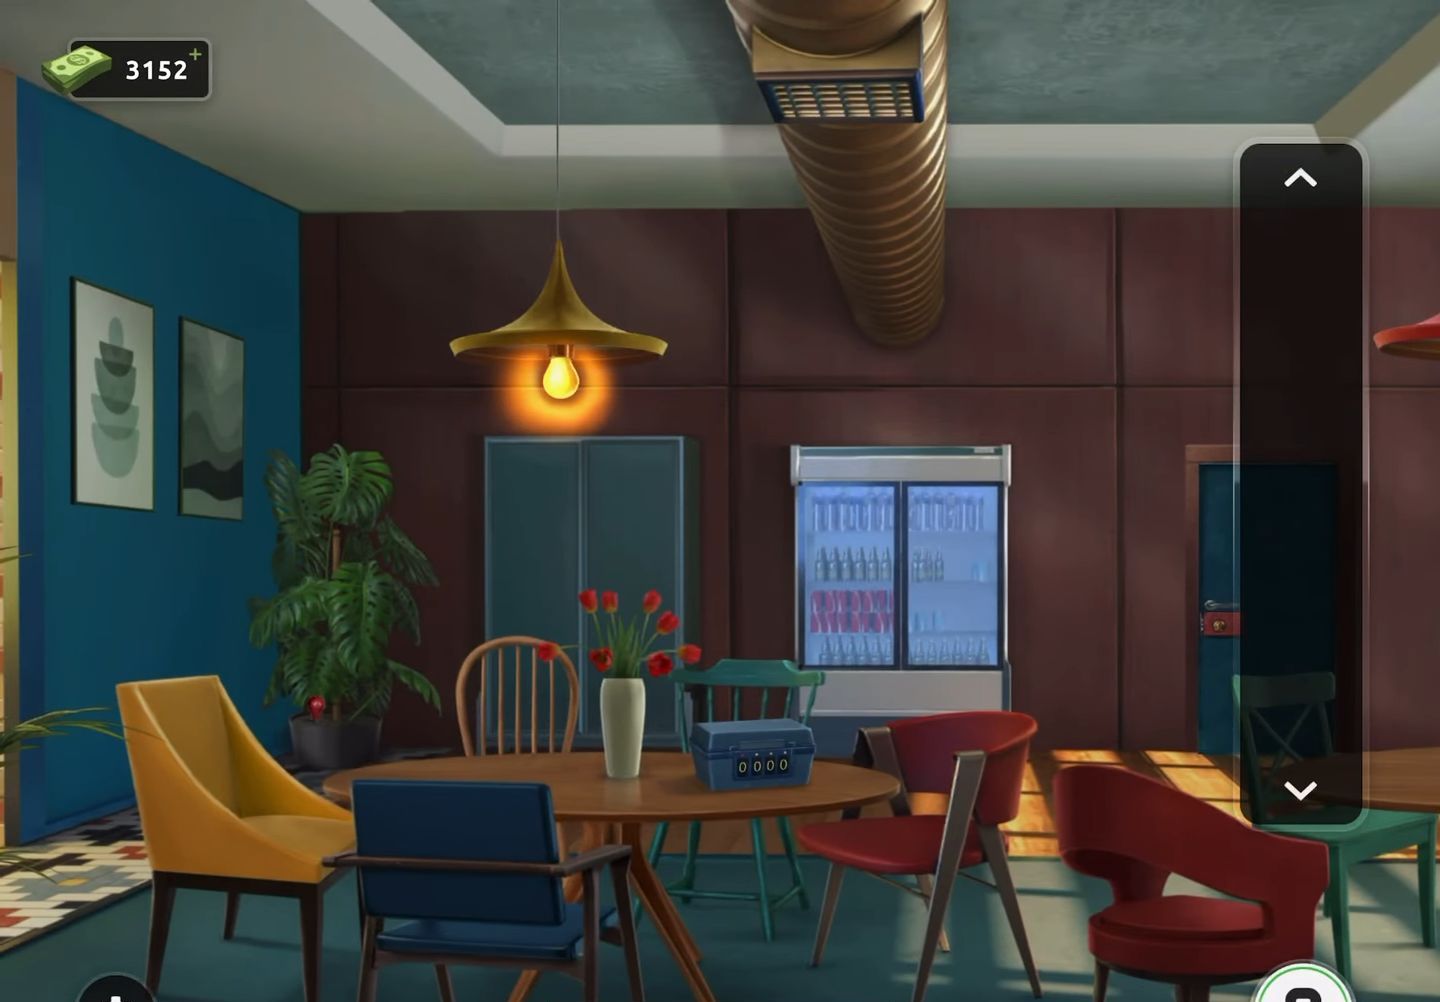
- Now place the yellow bulb in the yellow lampshade and the red bulb in the red lamp.
- Subsequently, count the number (5813) of times the bulbs flash when inserted.
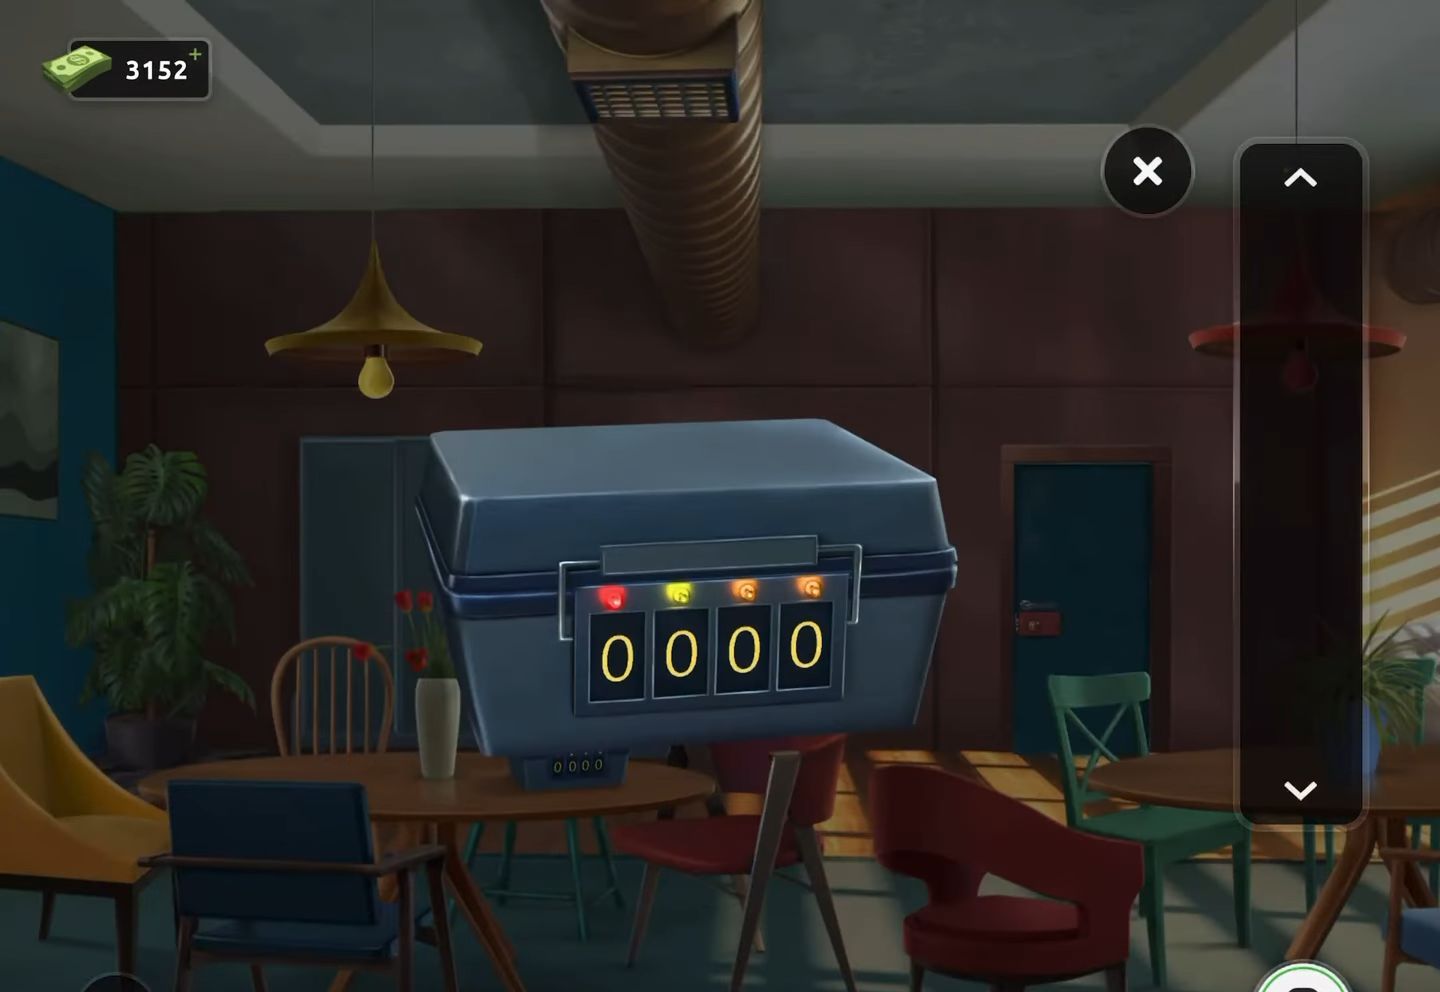
- Then obtain a key and proceed to the exit door lock.
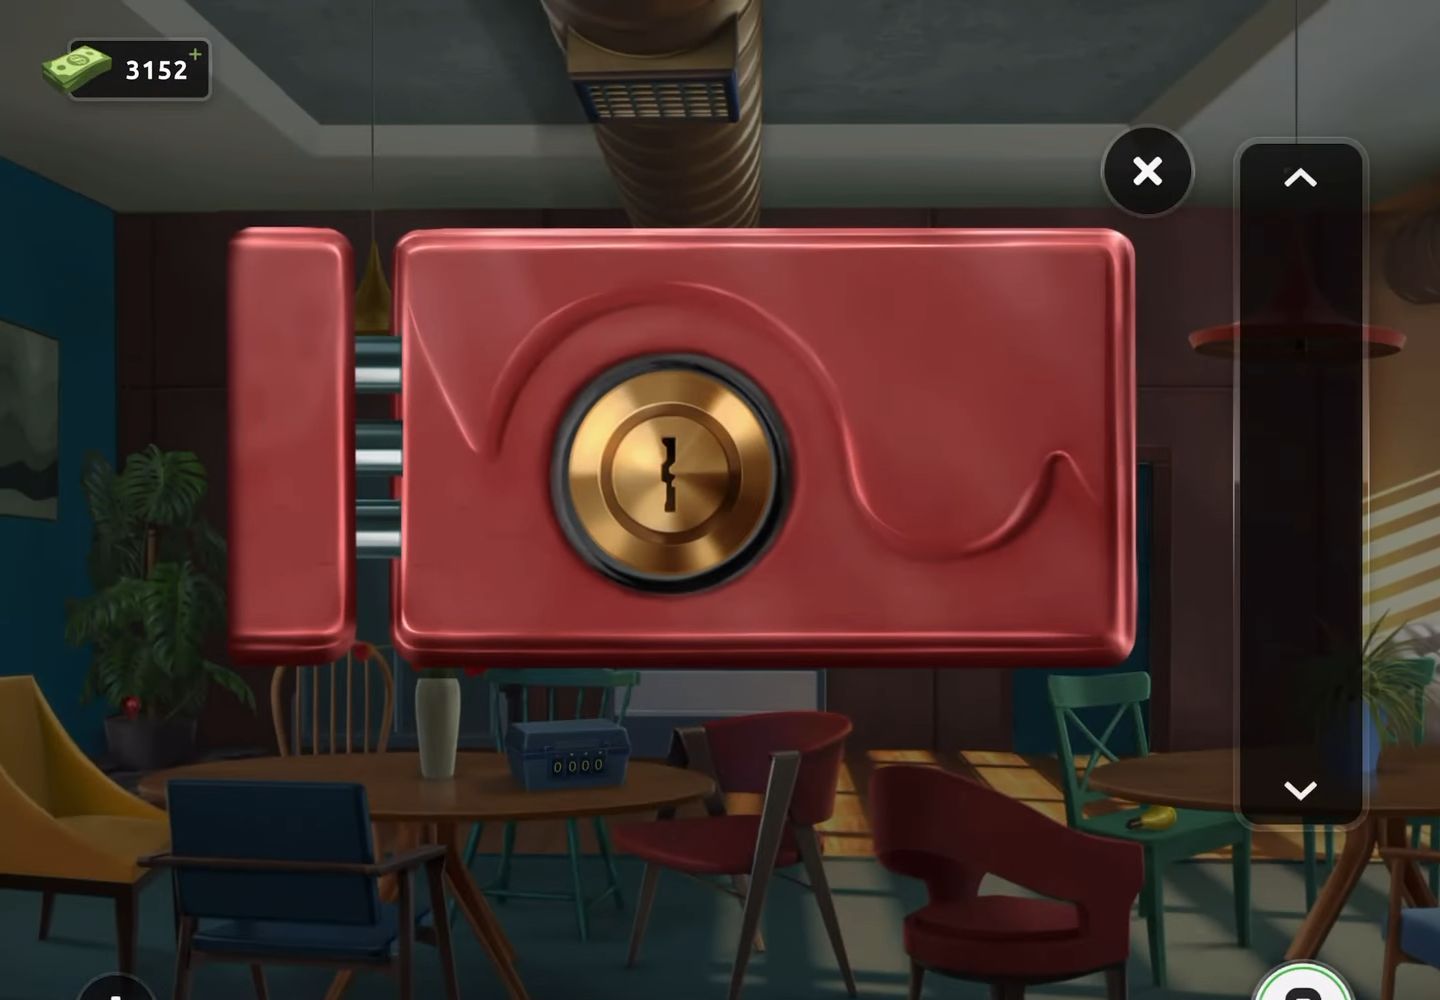
- Next, utilize the key on the lock, which will reveal another puzzle.
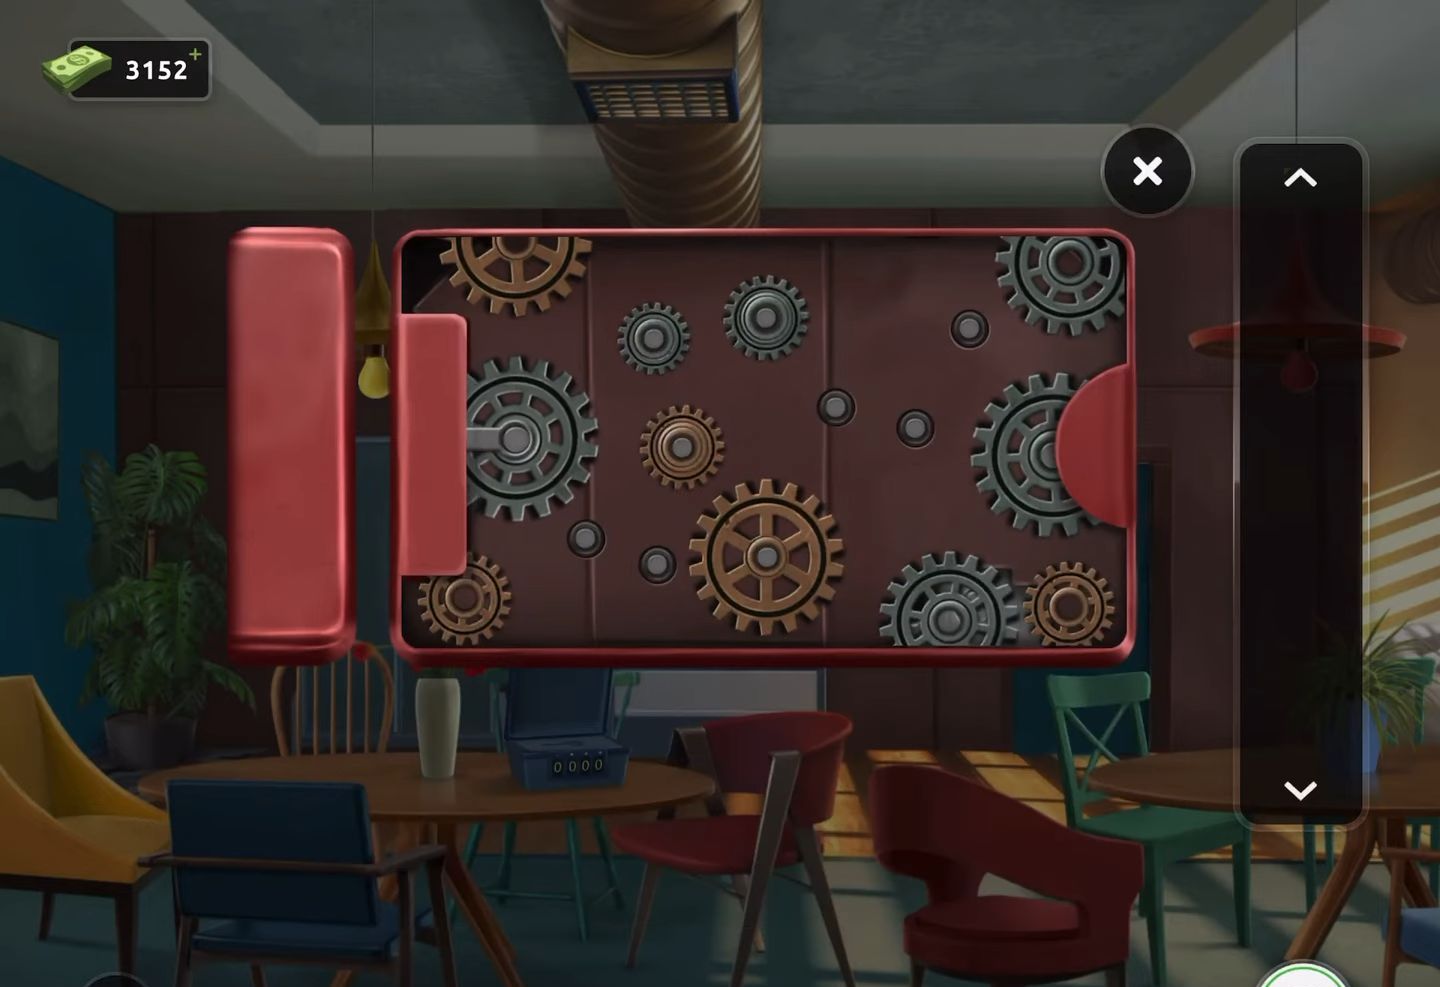
- After that, solve the puzzle by arranging the cogs in a manner that allows them to fit together. Turn the right cog to unlock and open the door.
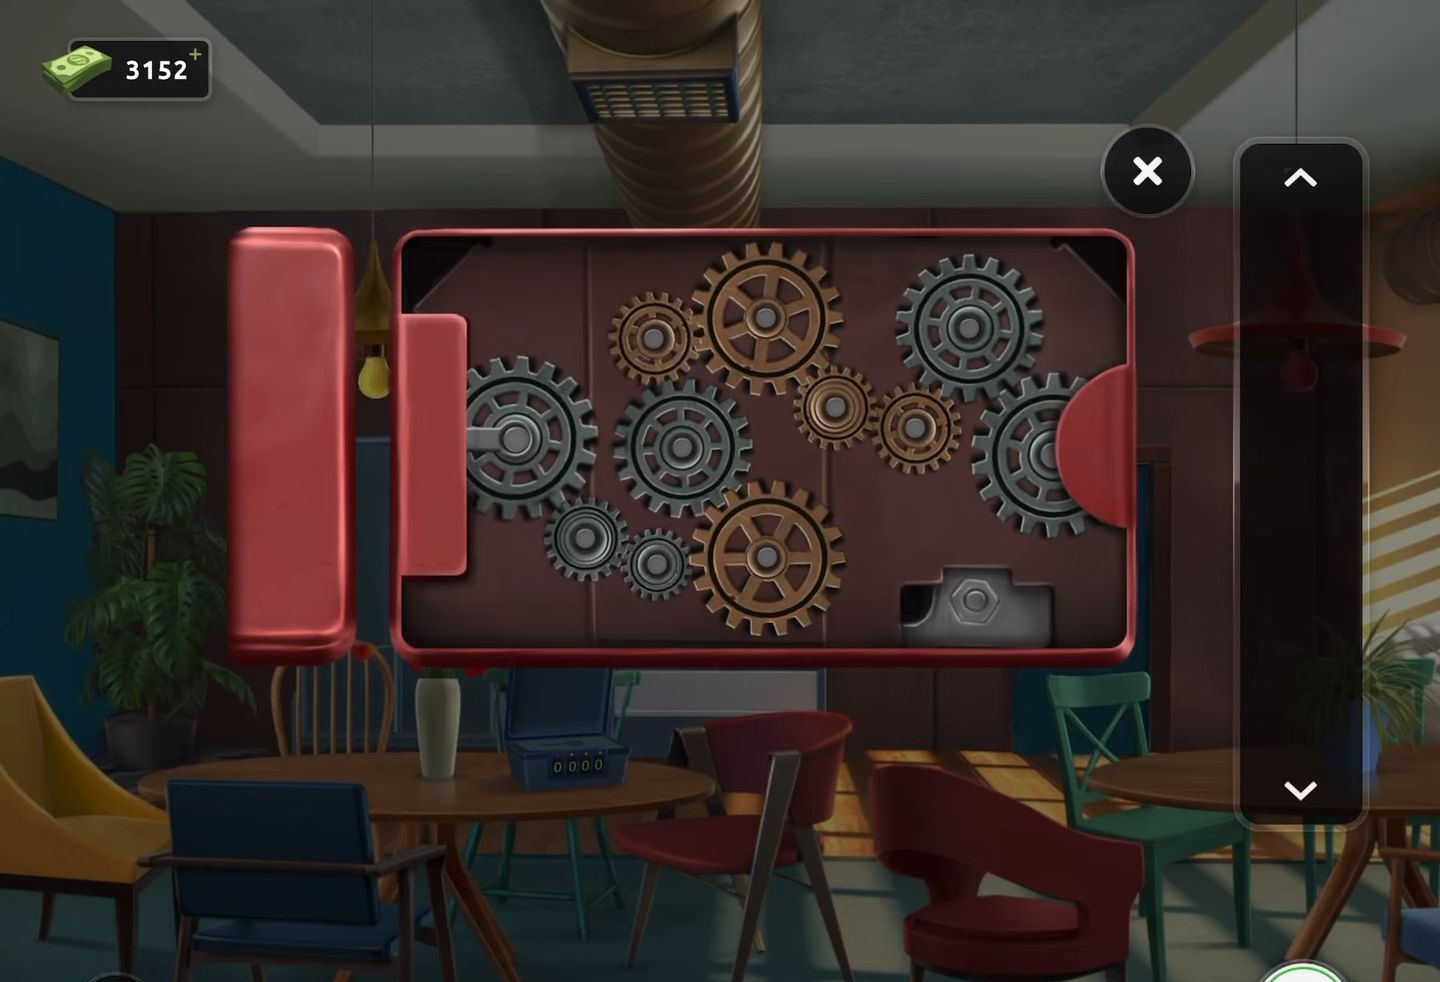
- Finally, exit the room upon completion.
Level 88:
To complete level 88, follow the instructions below:
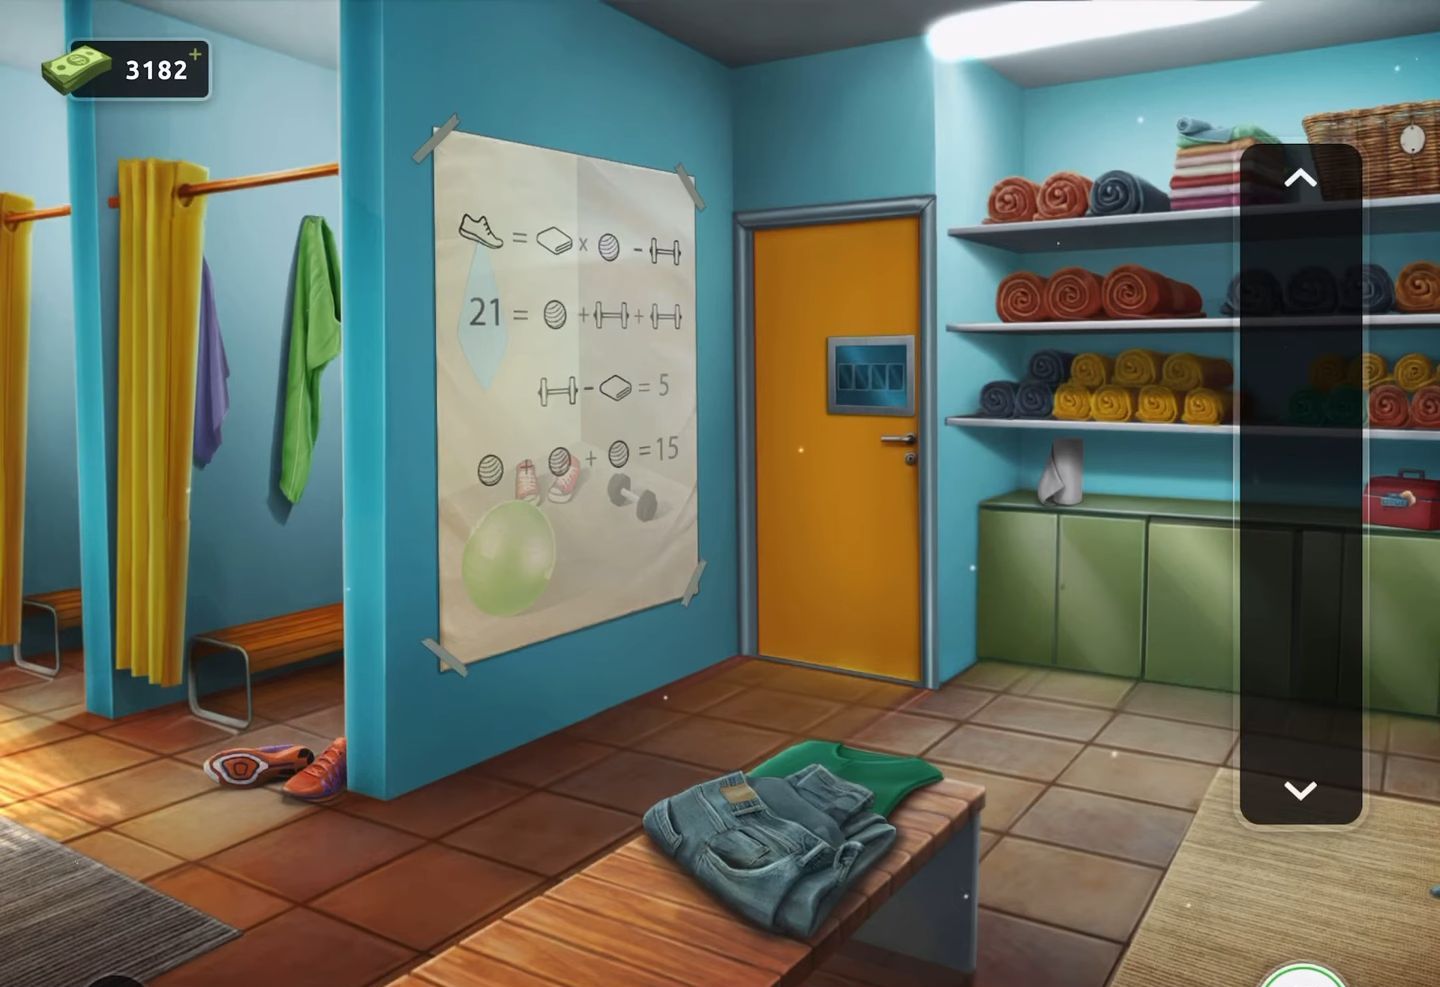
- Firstly, examine the prominent clue displayed on the wall, offering indications regarding the values of four specific objects.
- Now interact with the small red box located on the green cupboards situated to the right.
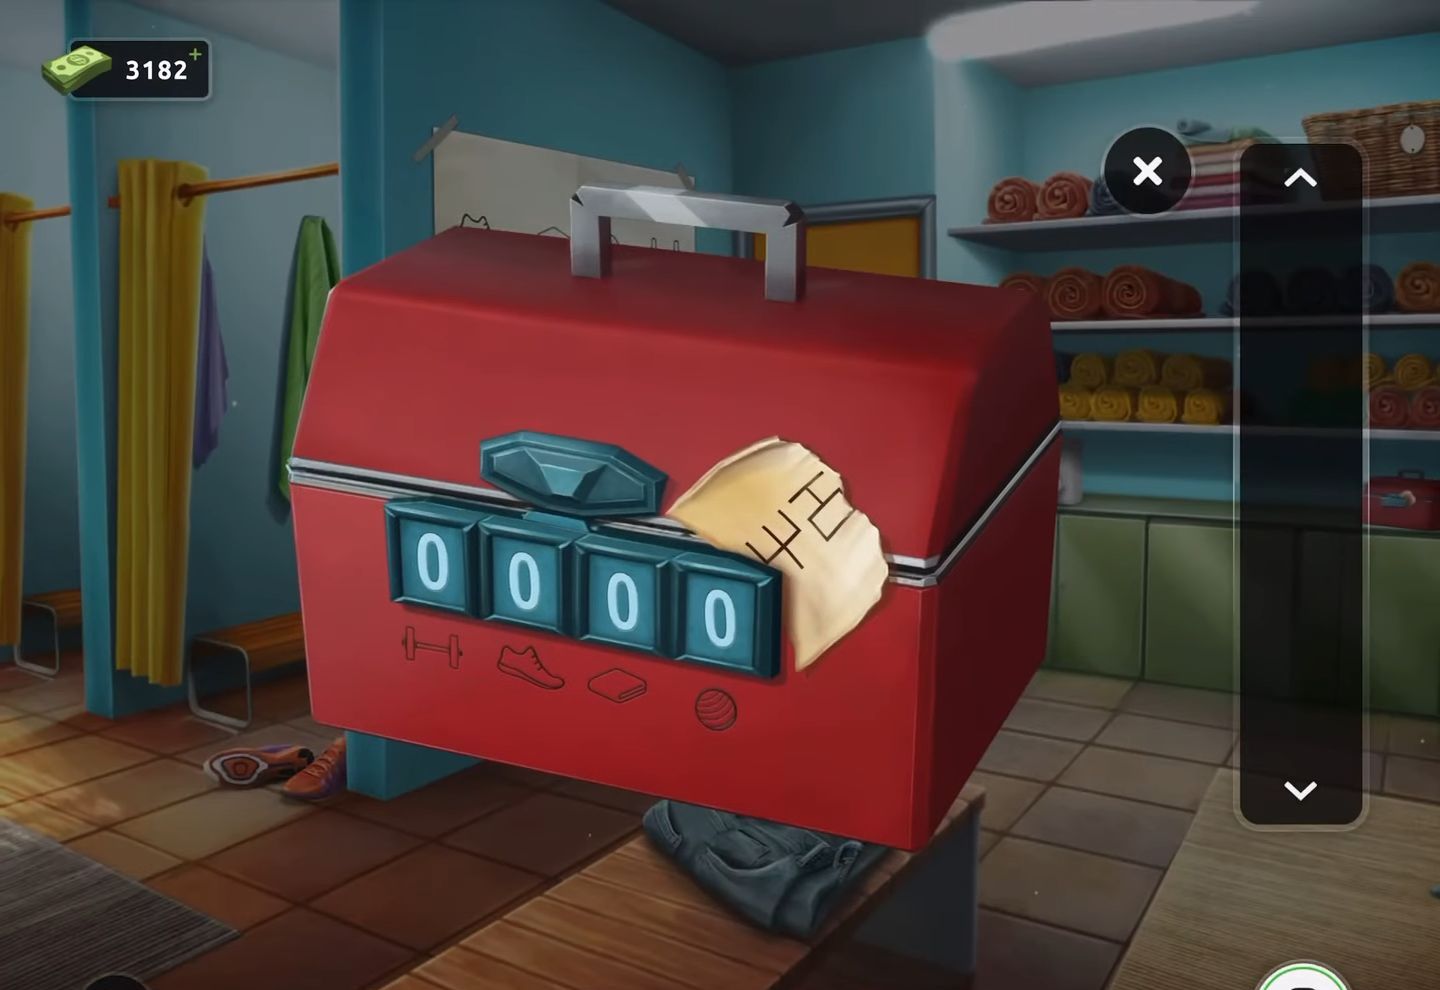
- Next, gather the torn paper clue provided within the box and use the clues to input the code (8735) which correlates to the symbols positioned above each dial.
- Then obtain the other part of the paper and unite it with the first half in your inventory to unveil the complete clue.
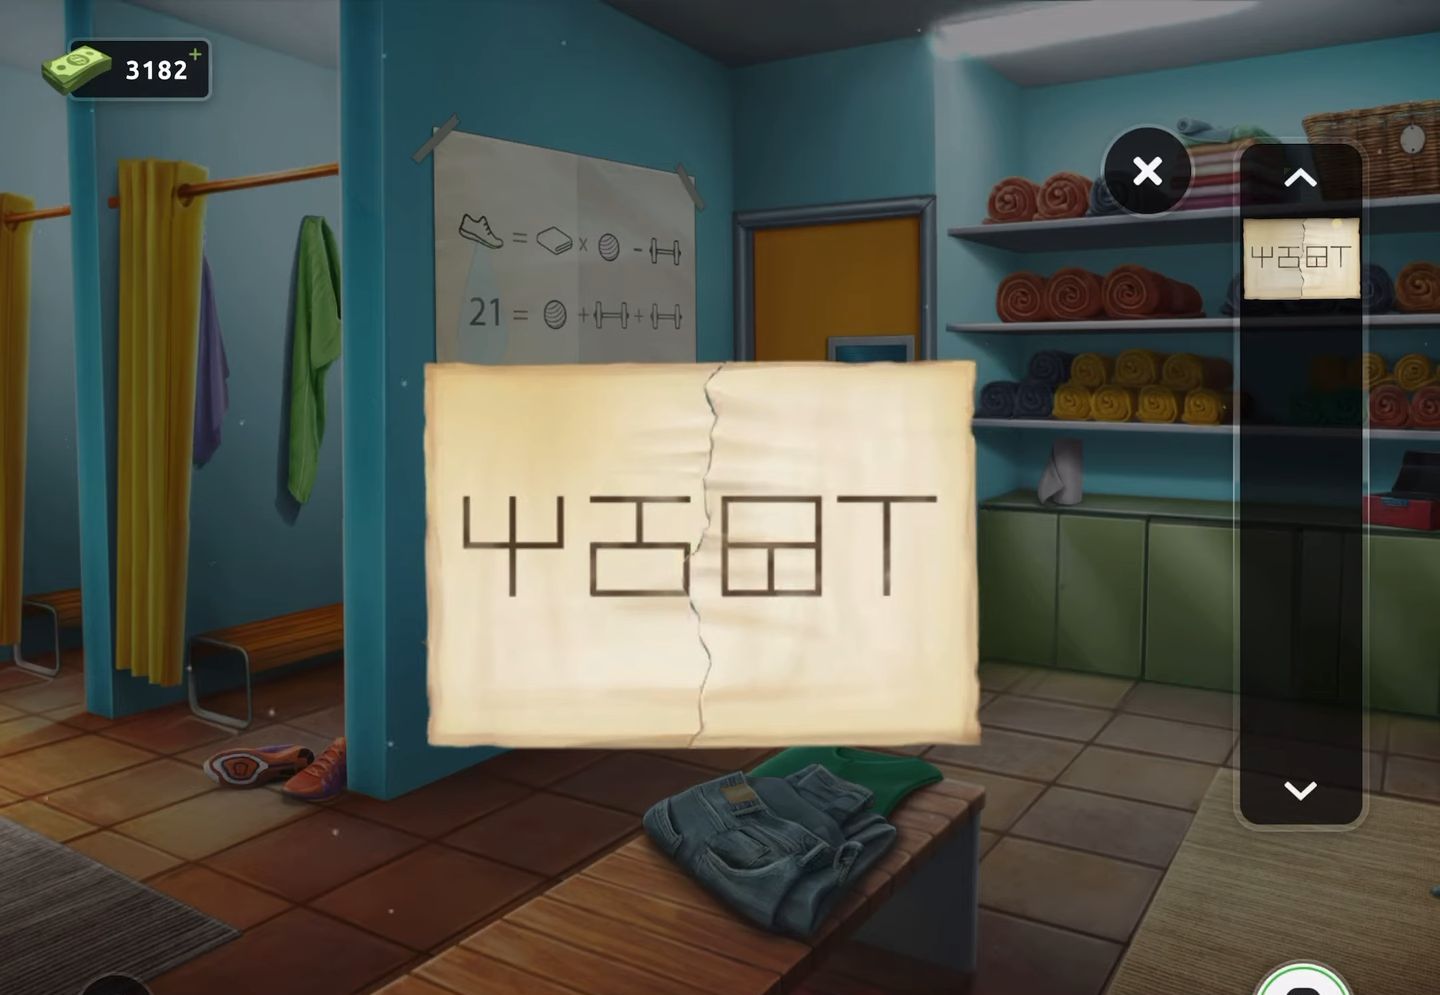
- After that, proceed to the exit door’s code lock and input the code (4267) based on the revealed clue.
- Finally, use the code to unlock the door and make your escape.
Level 89:
To complete level 89, follow the instructions below:
- Begin by picking up a purple tile from the log seat situated on the right side of the white table.
- Now move the red cushion from the chair beside the white table to the left to reveal and grab a mirror.
- Then access the exit door puzzle and gather the tweezers.
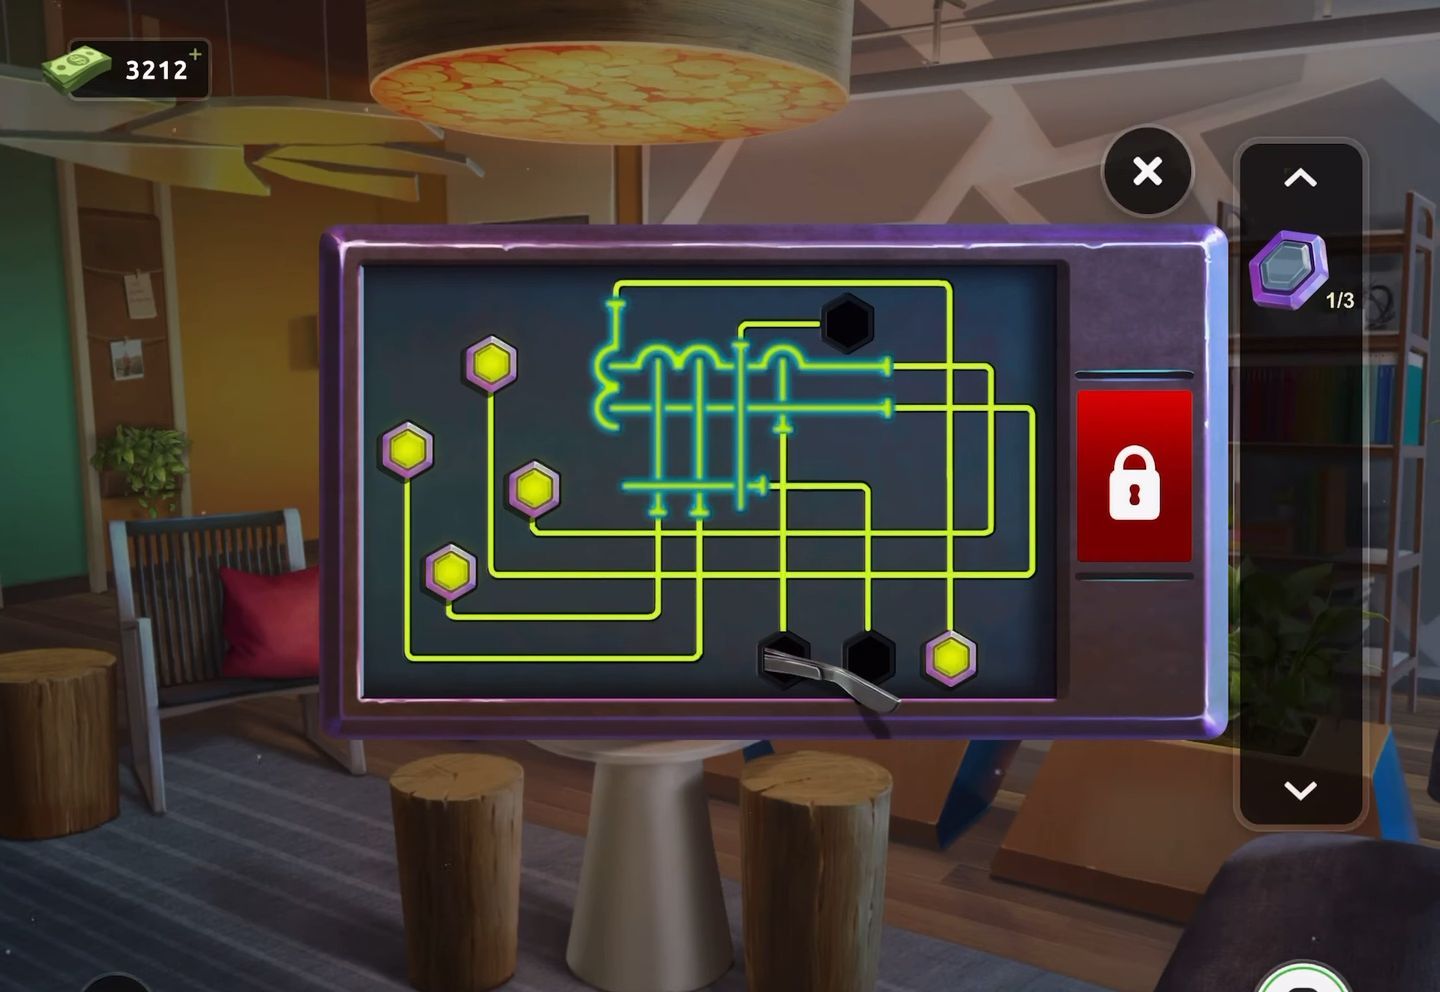
- Next, proceed to examine the box near the small plant on the right.
- Then utilize the tweezers to extract a second purple tile from it.
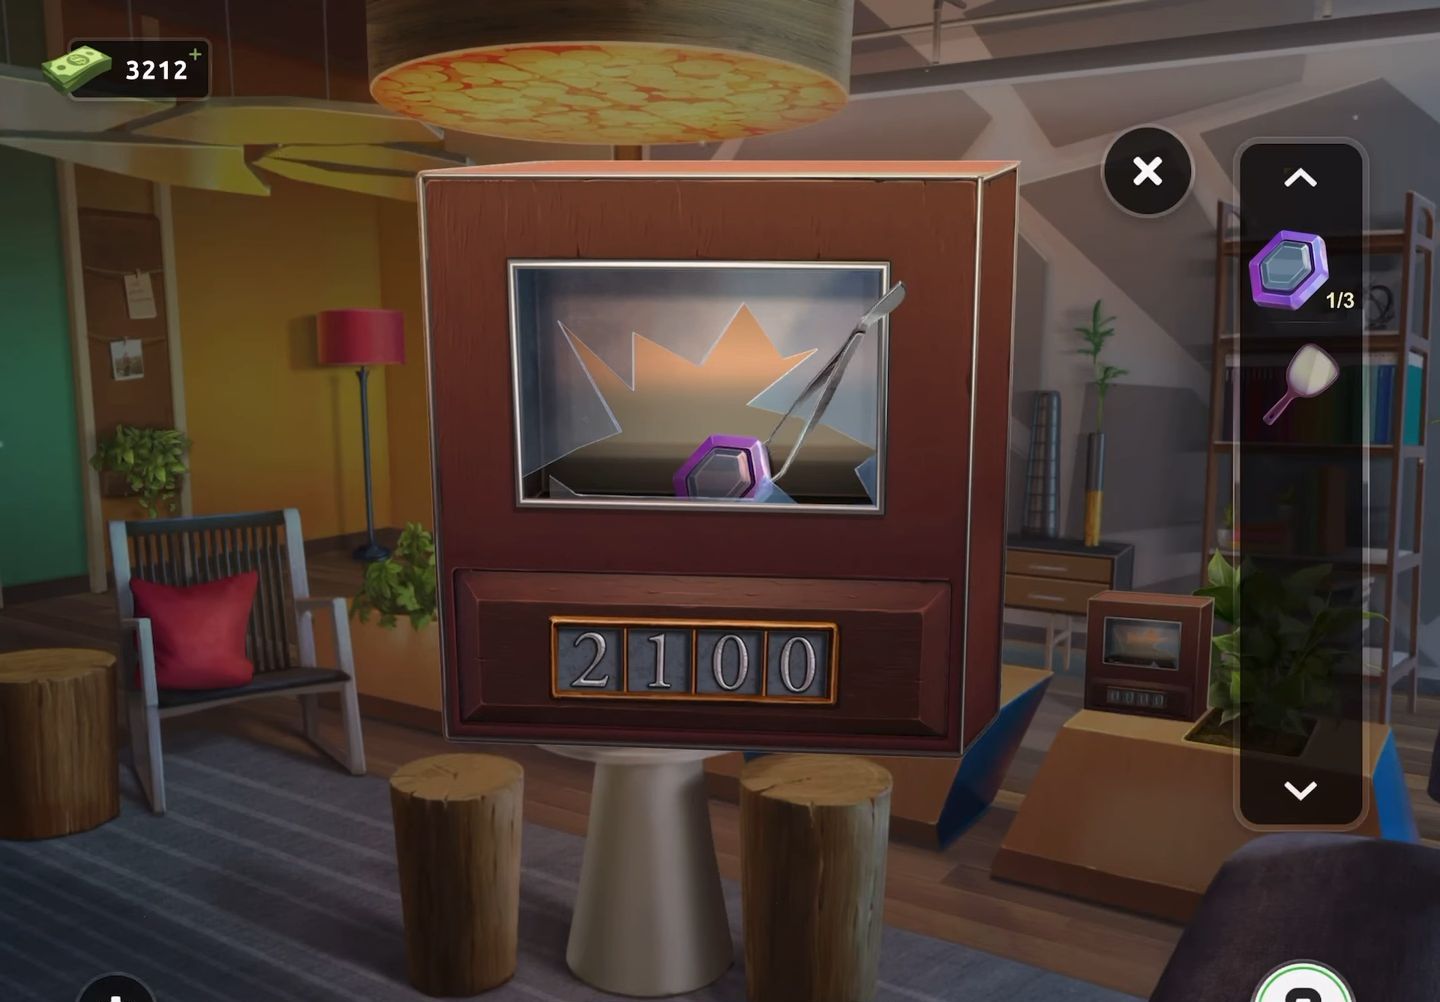
- Now employ the mirror on the box to reveal a concealed code.
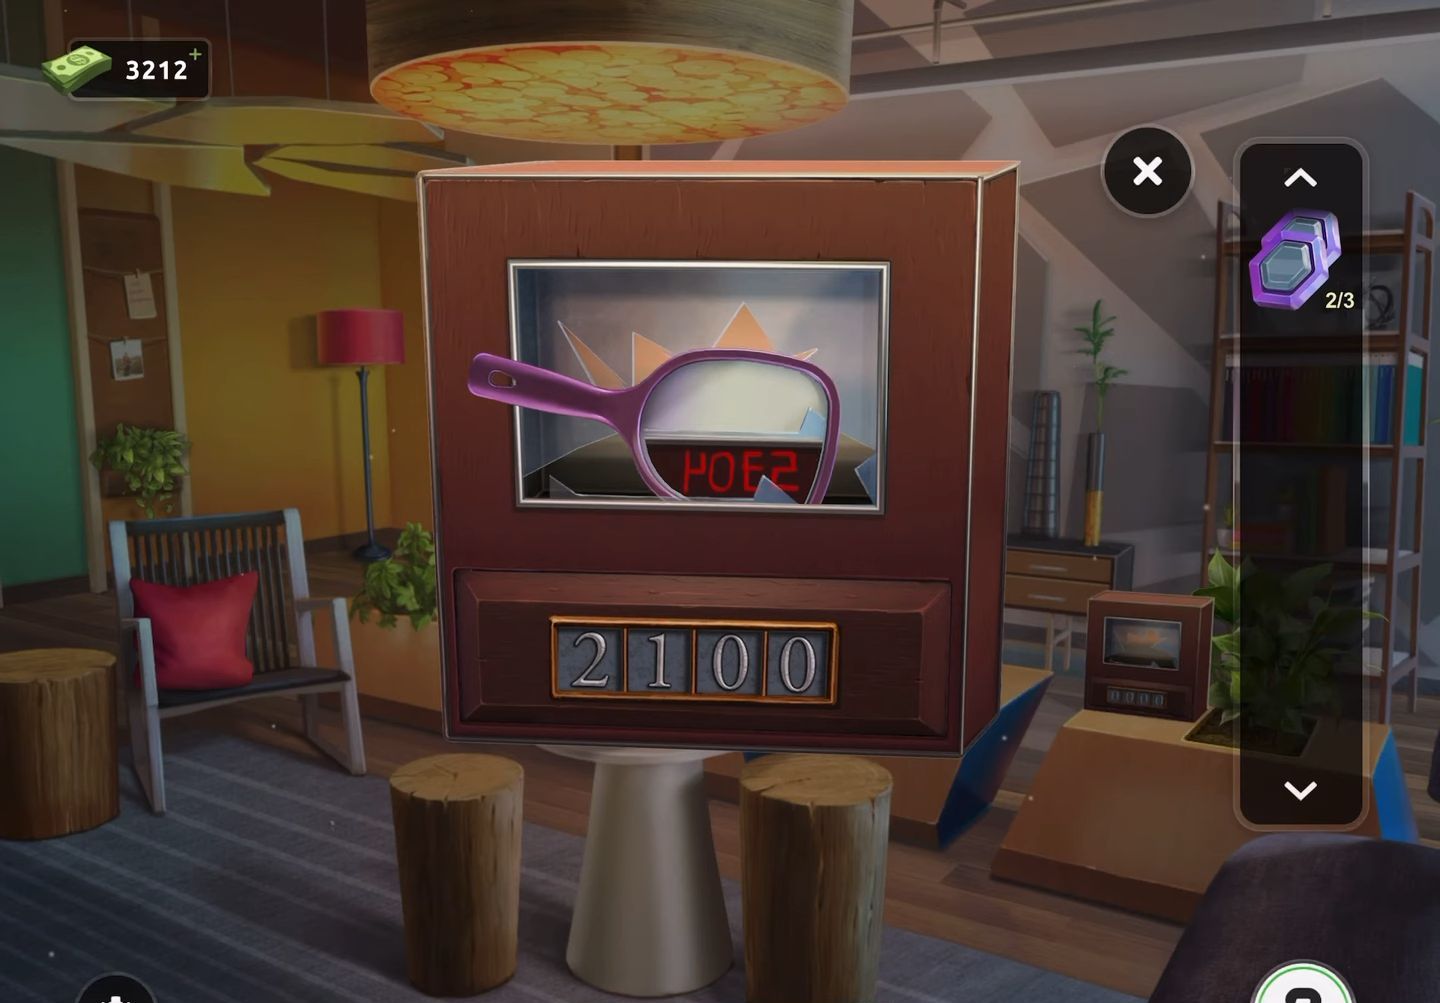
- Then use the revealed code (5304) to unlock the box and acquire the third tile.
- Now return to the exit puzzle and insert the 3 tiles to initiate the puzzle.
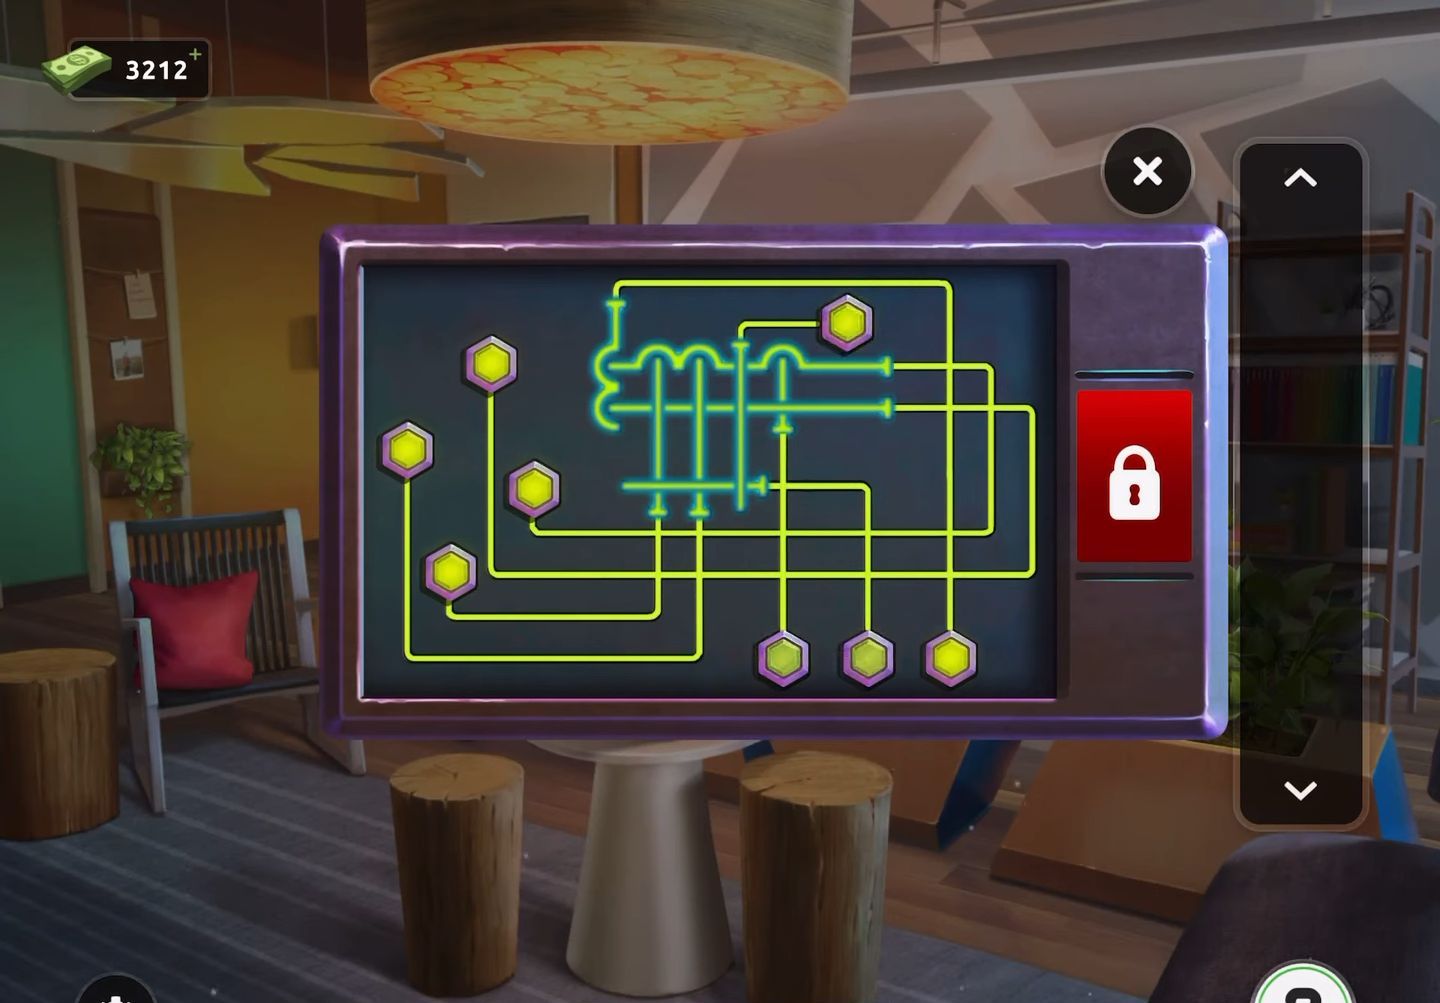
- The objective is to tap the buttons in a specific sequence to remove the glowing lines associated with each button.
- Start by removing the lines crossing over other lines, beginning with the one that intersects the most lines.
- Eliminate the lines that do not cross any others last.
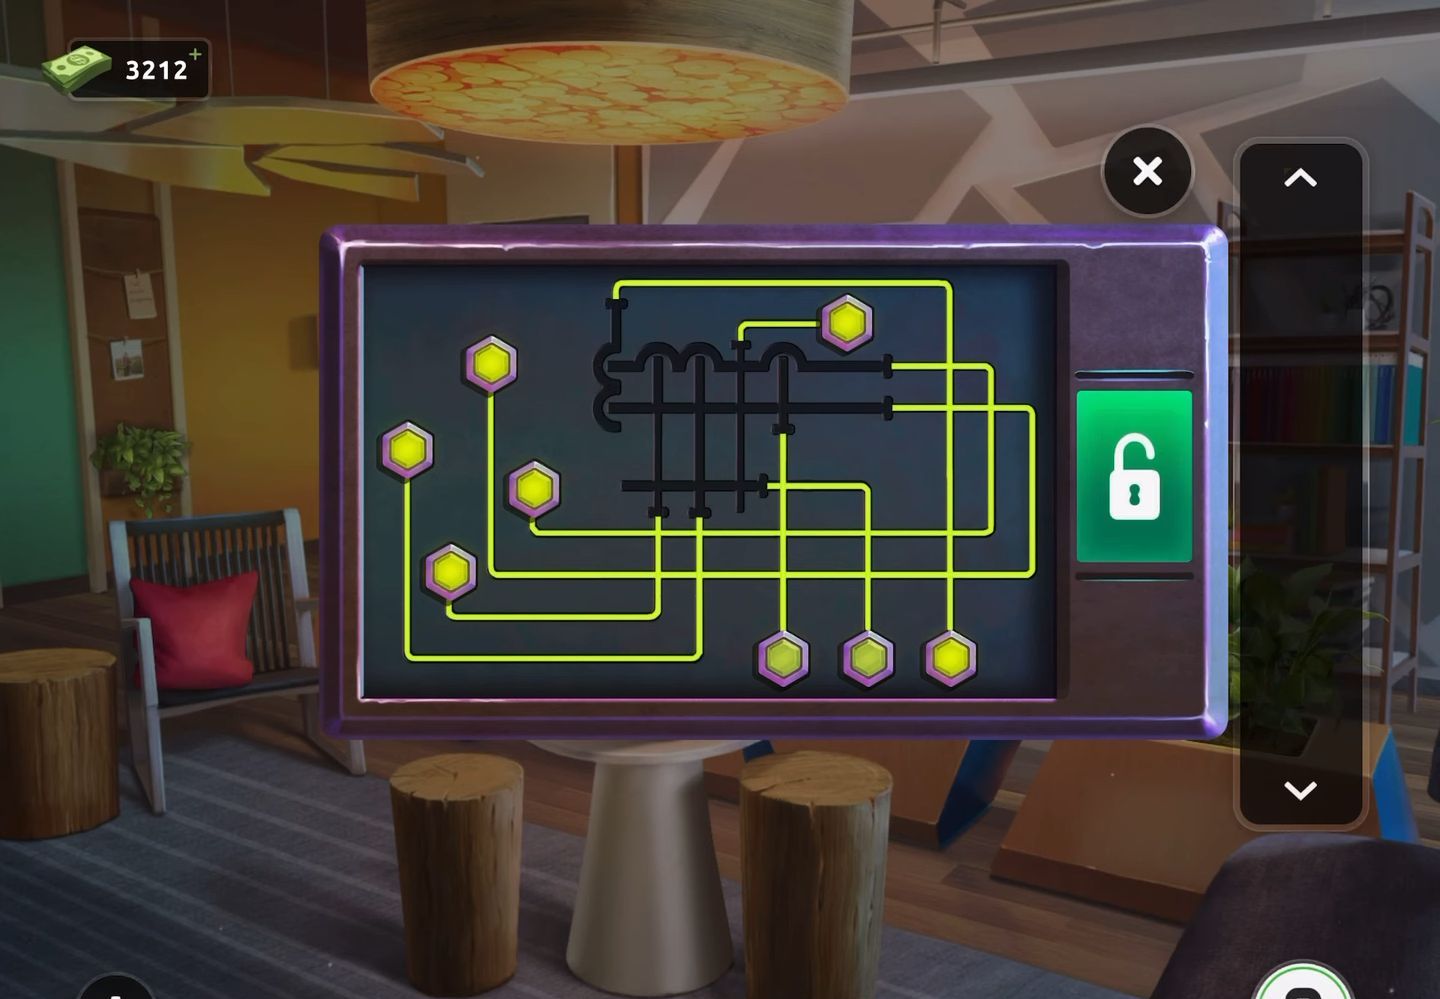
- Once the puzzle is successfully solved, the room will be ready for your escape.
Level 90:
To complete level 90, follow the instructions below:
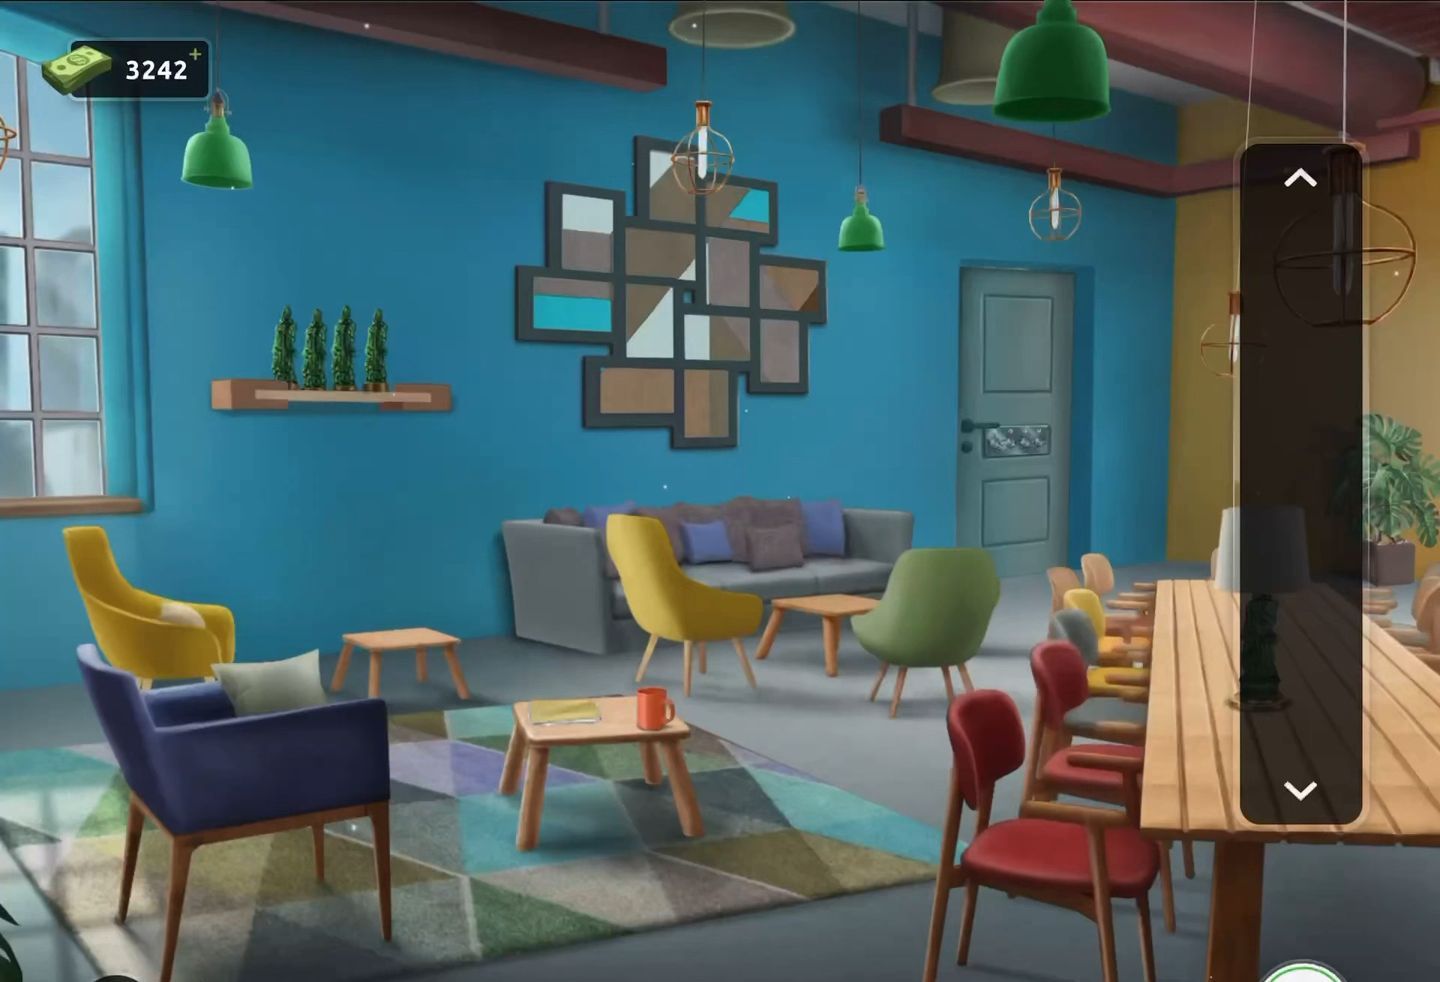
- Firstly, press the lamp situated on the extended table to remove the shade and collect the green figure.
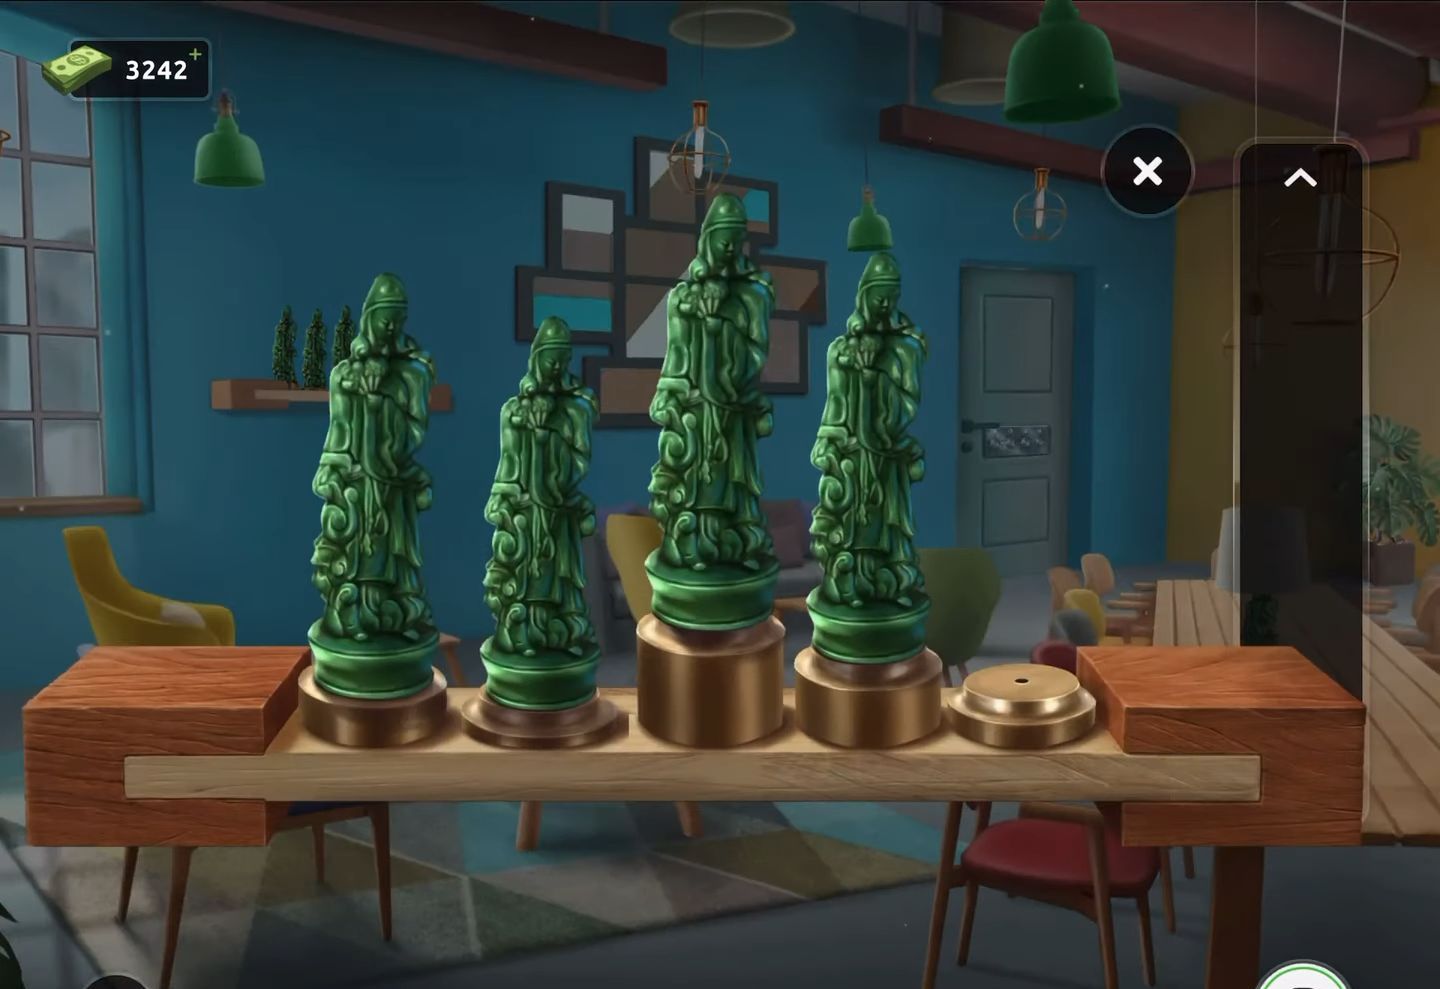
- Now view the shelf on the left wall which has 4 more green figures.
- Then add the collected figure to this set to prepare for the puzzle.
- After that solve the puzzle associated with these figures.
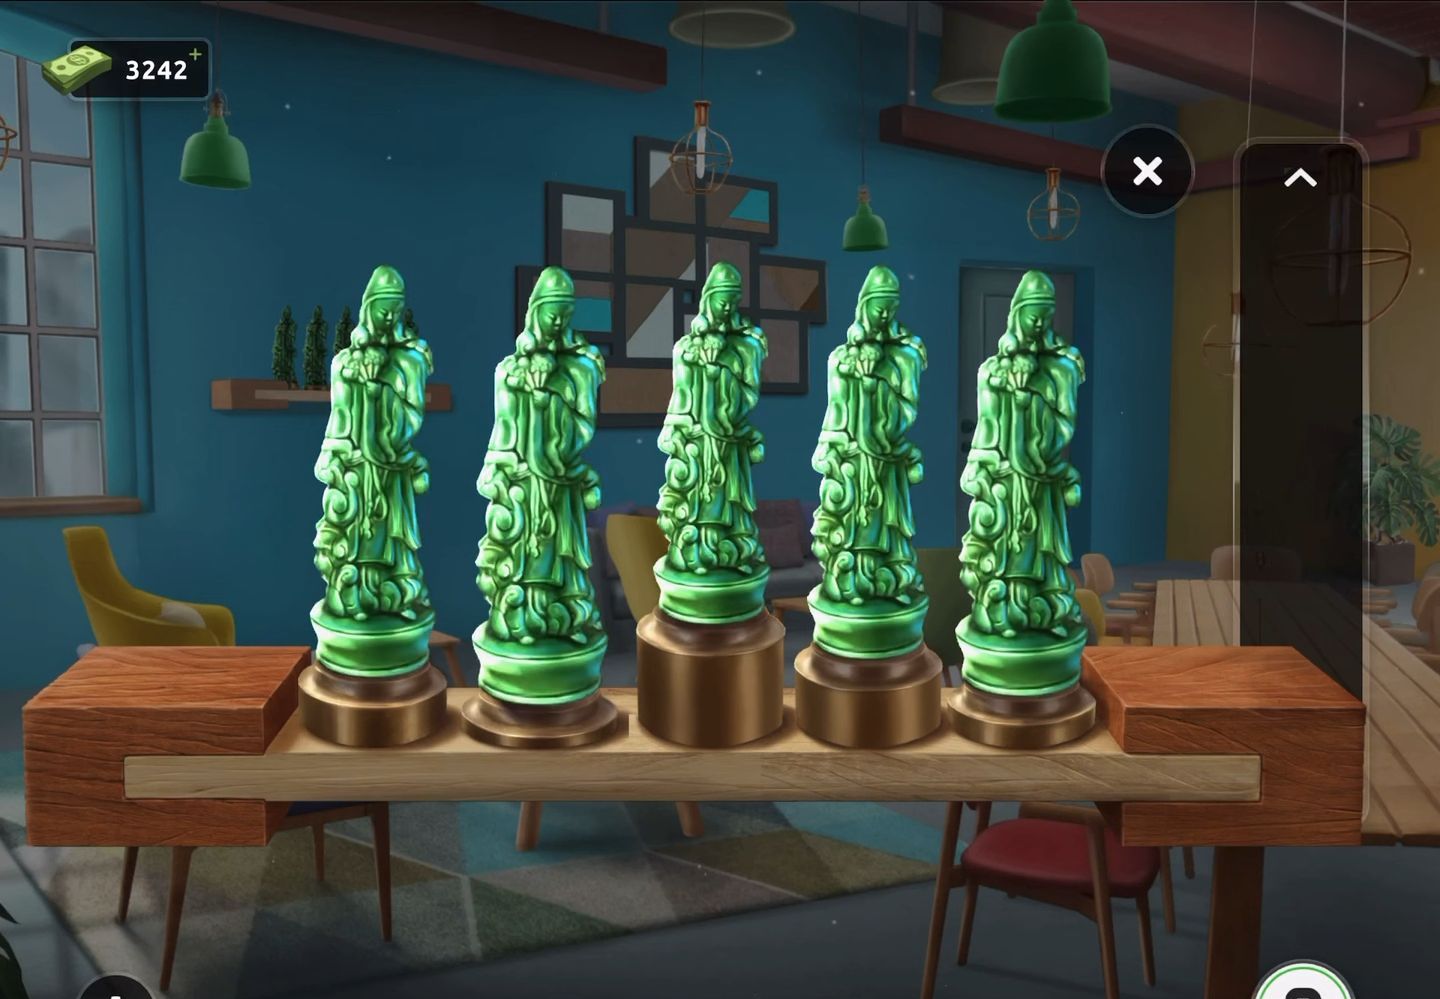
- Upon completing the puzzle, an important clue (A=3) will be revealed.
- Next, observe the small square table with the cup and shift the papers to unveil additional clues.
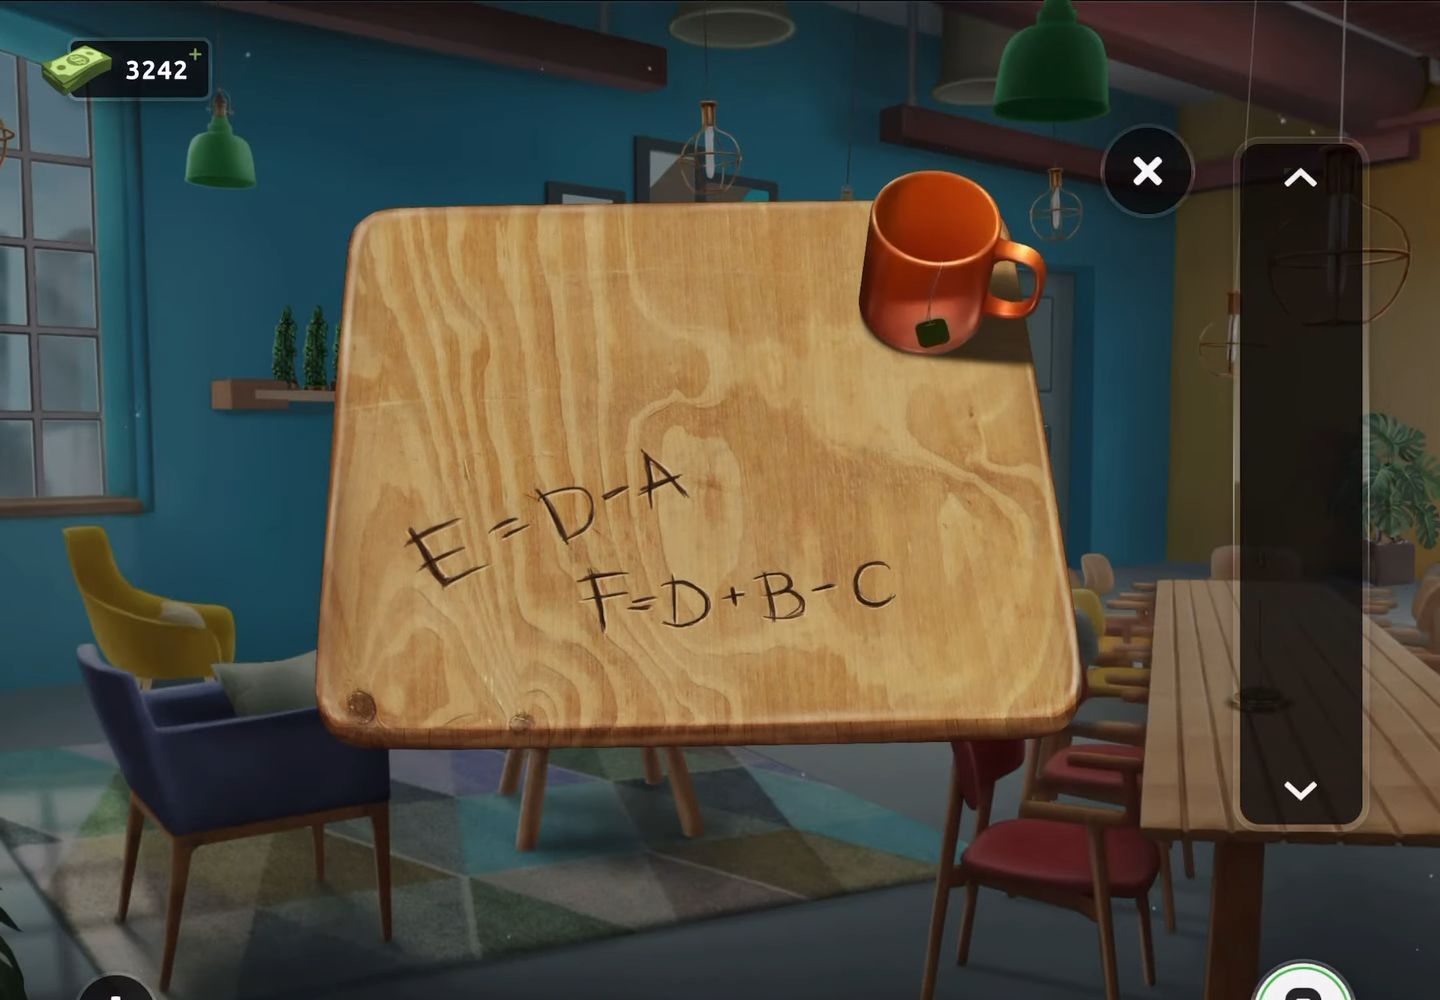
- Then proceed to view the exit door puzzle, which contains additional mathematical hints.
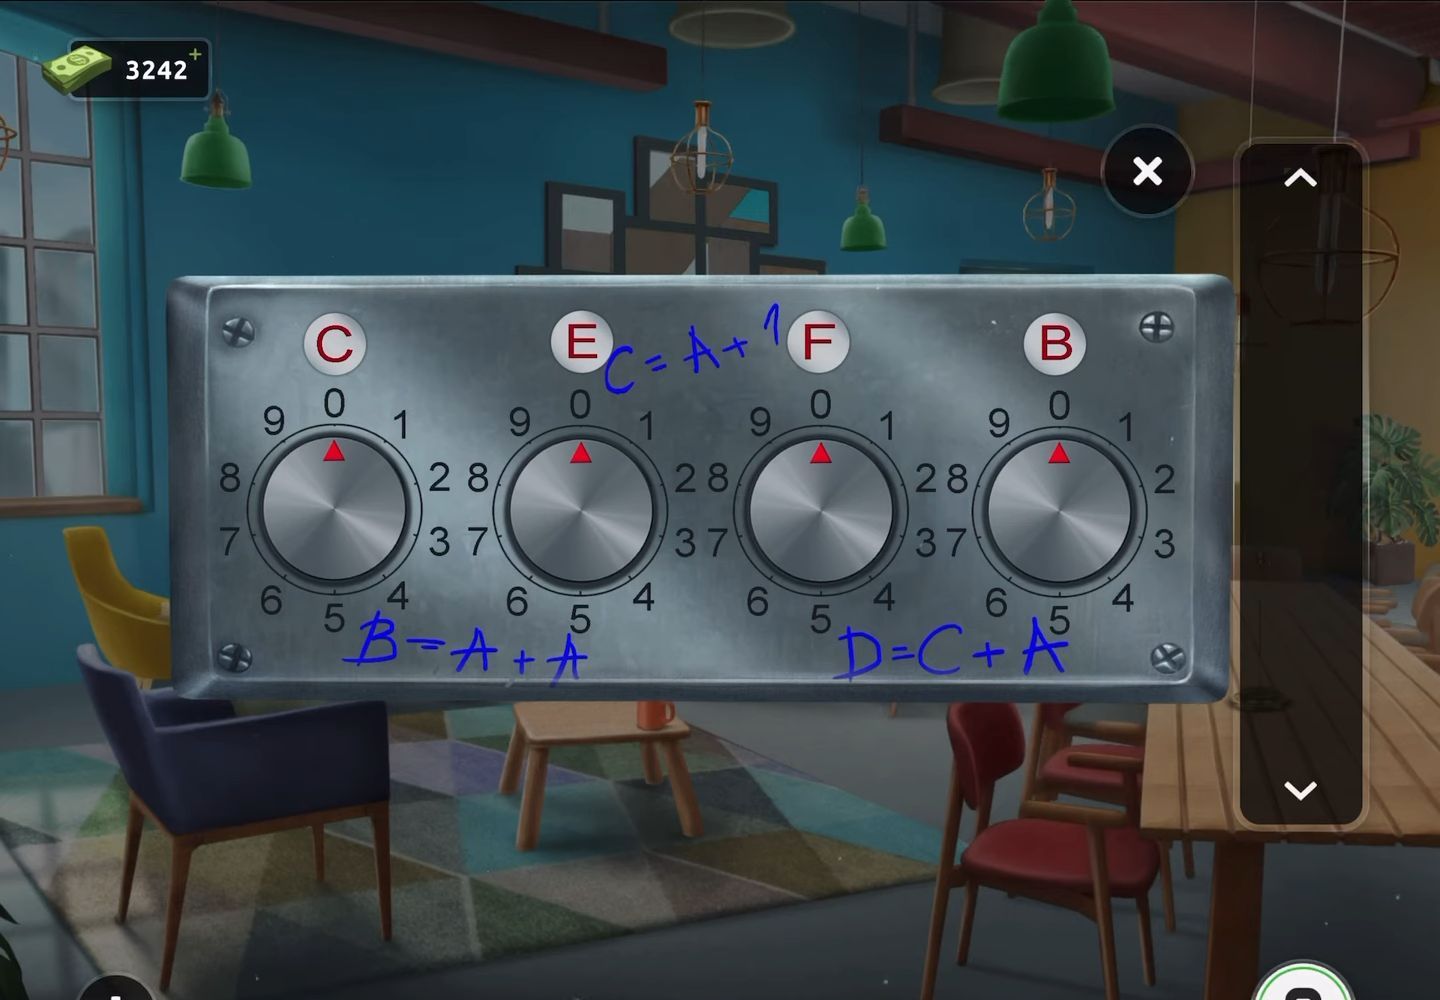
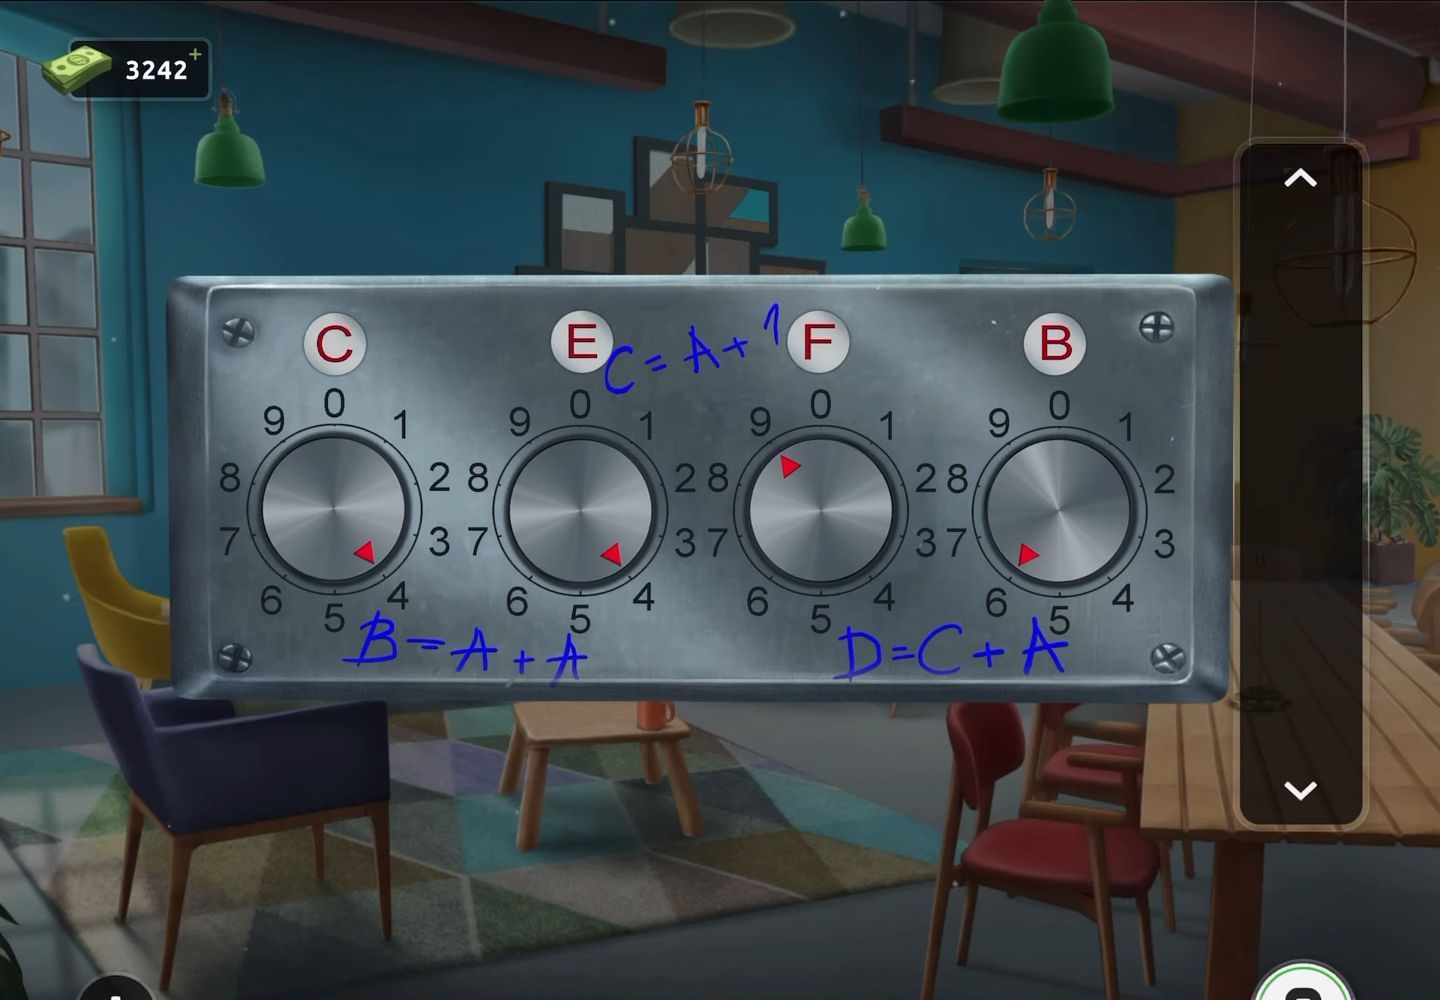
- Now utilize these clues to deduce the values for the four letters: C, E, F, and B.
- Finally, use the derived values (4496) to solve the puzzle and escape the room.
Level 91:
To complete level 91, follow the instructions below:
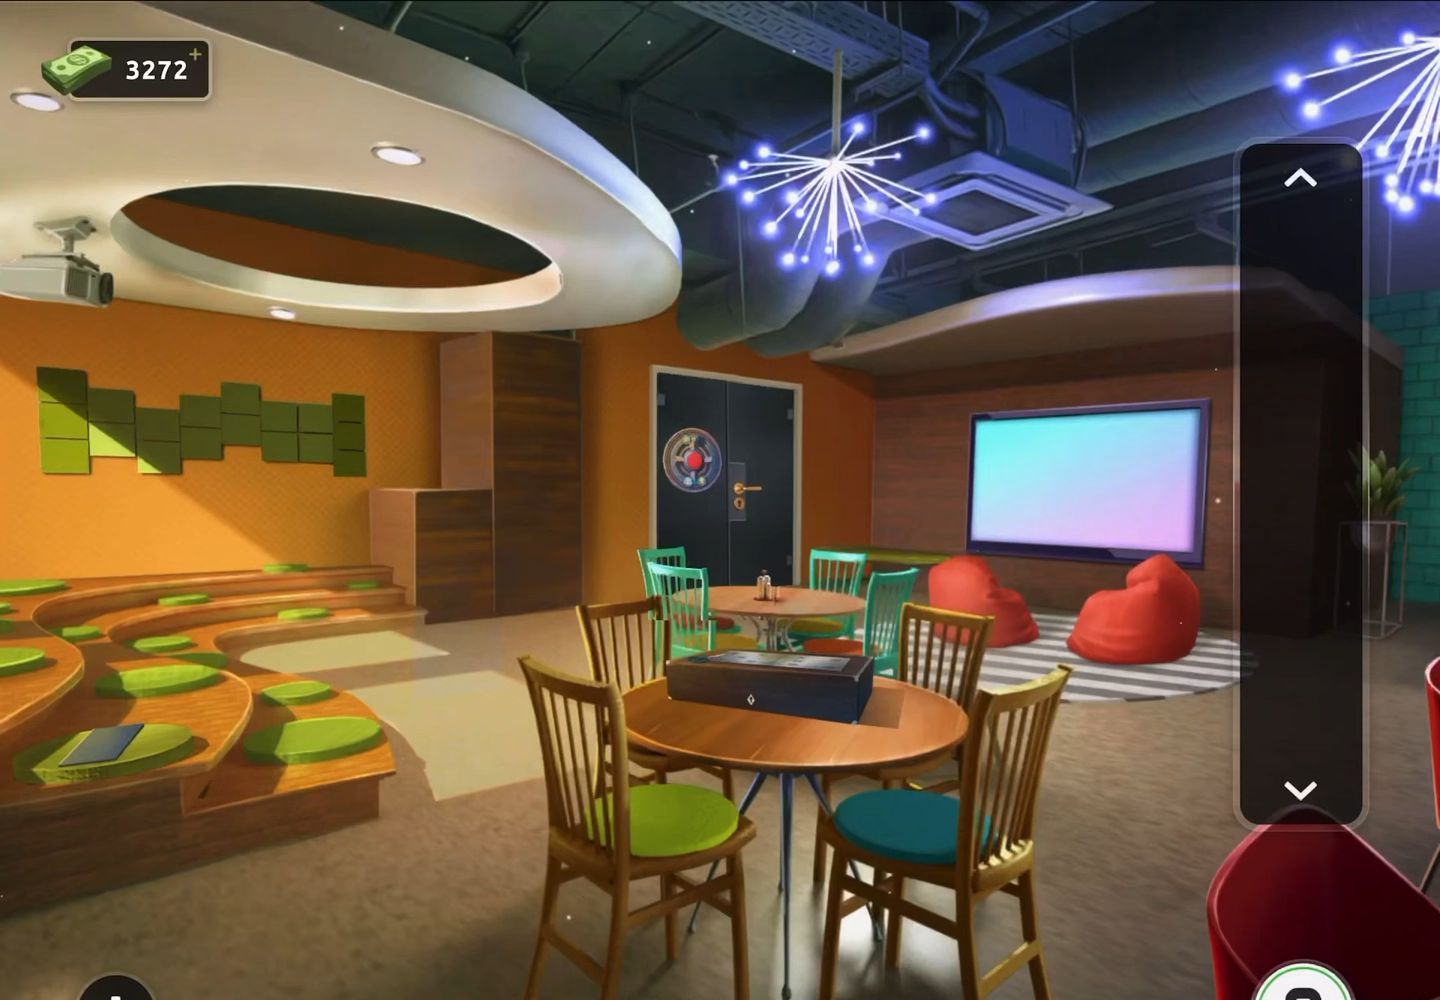
- Begin by interacting with the box situated on the round table to inspect its contents. Retrieve the pair of scissors located inside.
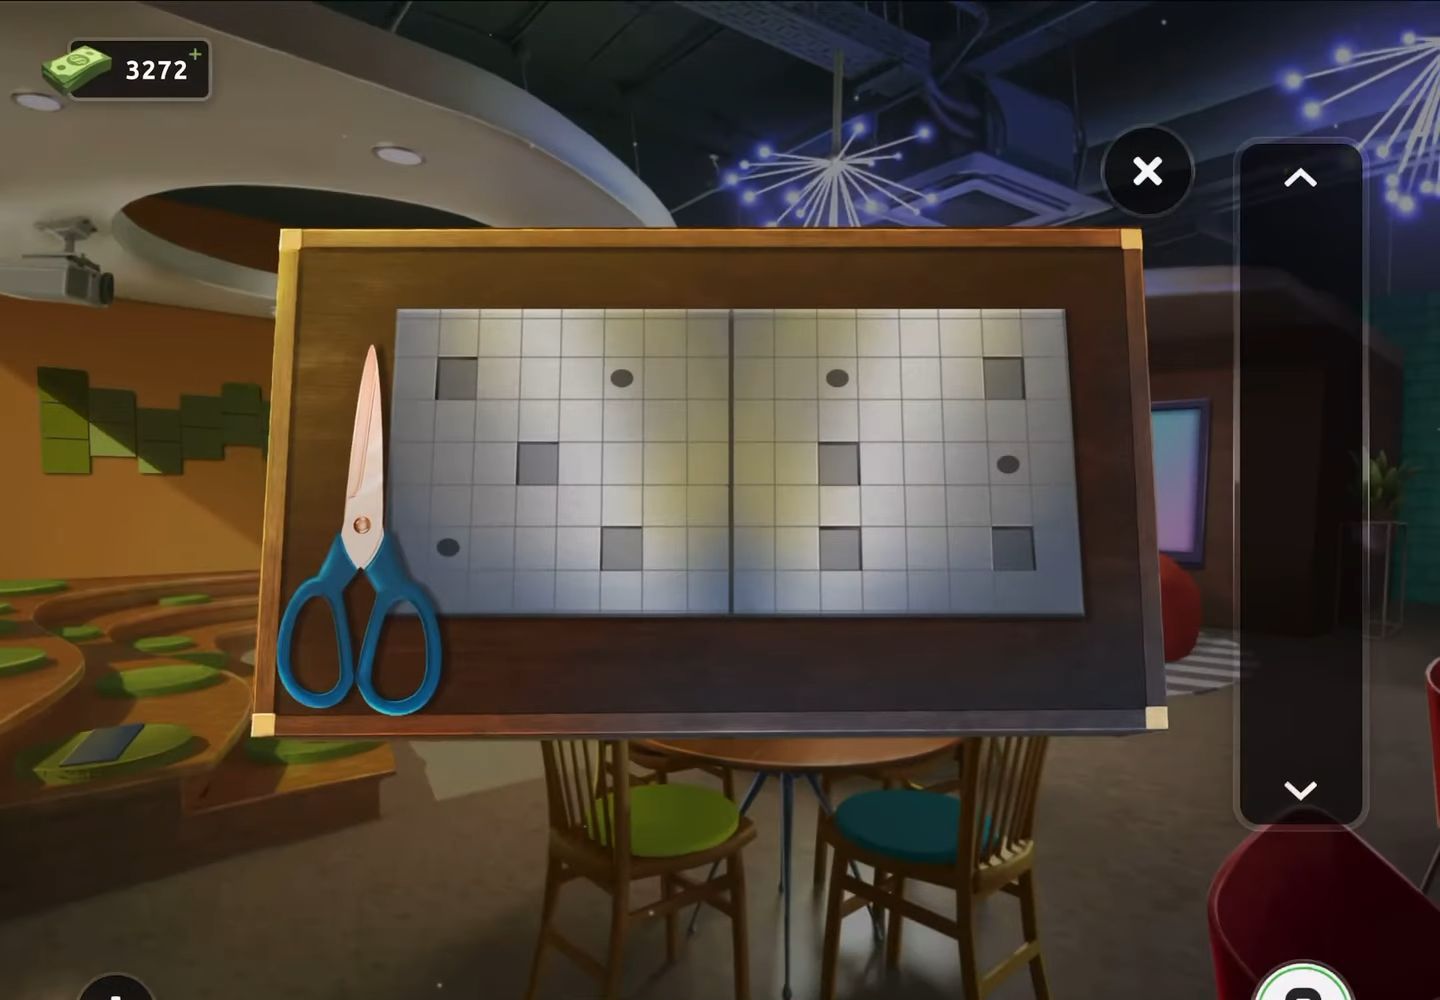
- Now proceed to examine the exit door puzzle. Extract a hex key tool from this puzzle.
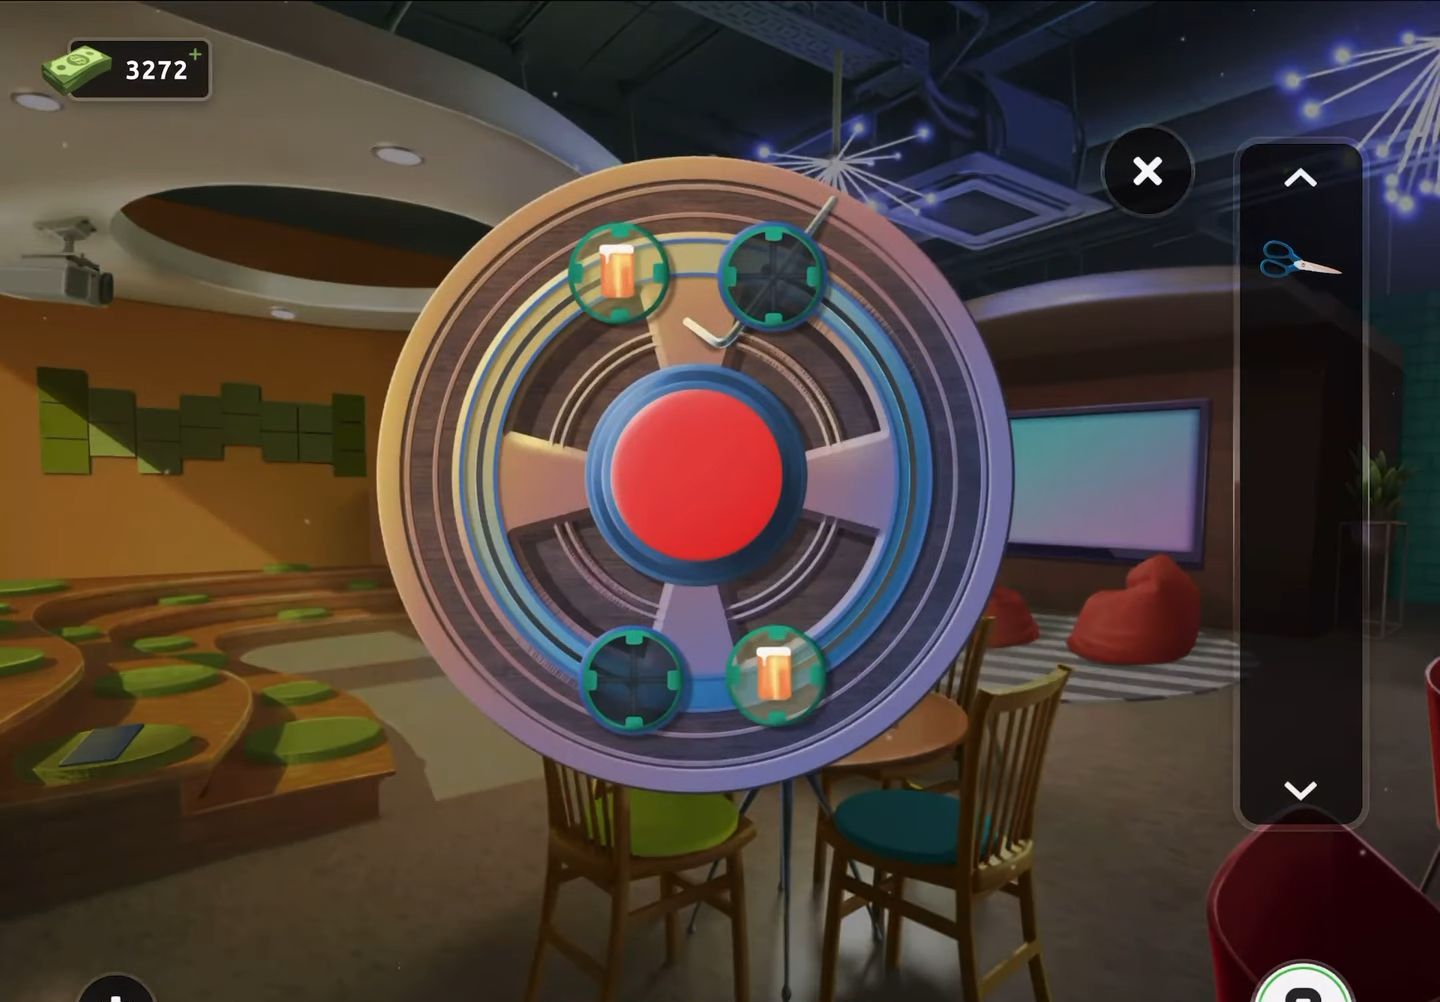
- Now, direct your attention to the plastic bag positioned on the counter at the back right of the room.

- Next, utilize the scissors to carefully open the plastic bag. Within it, locate and gather 7 dice. Five of these dice are readily visible; to obtain the remaining two, rearrange the cards nearby.
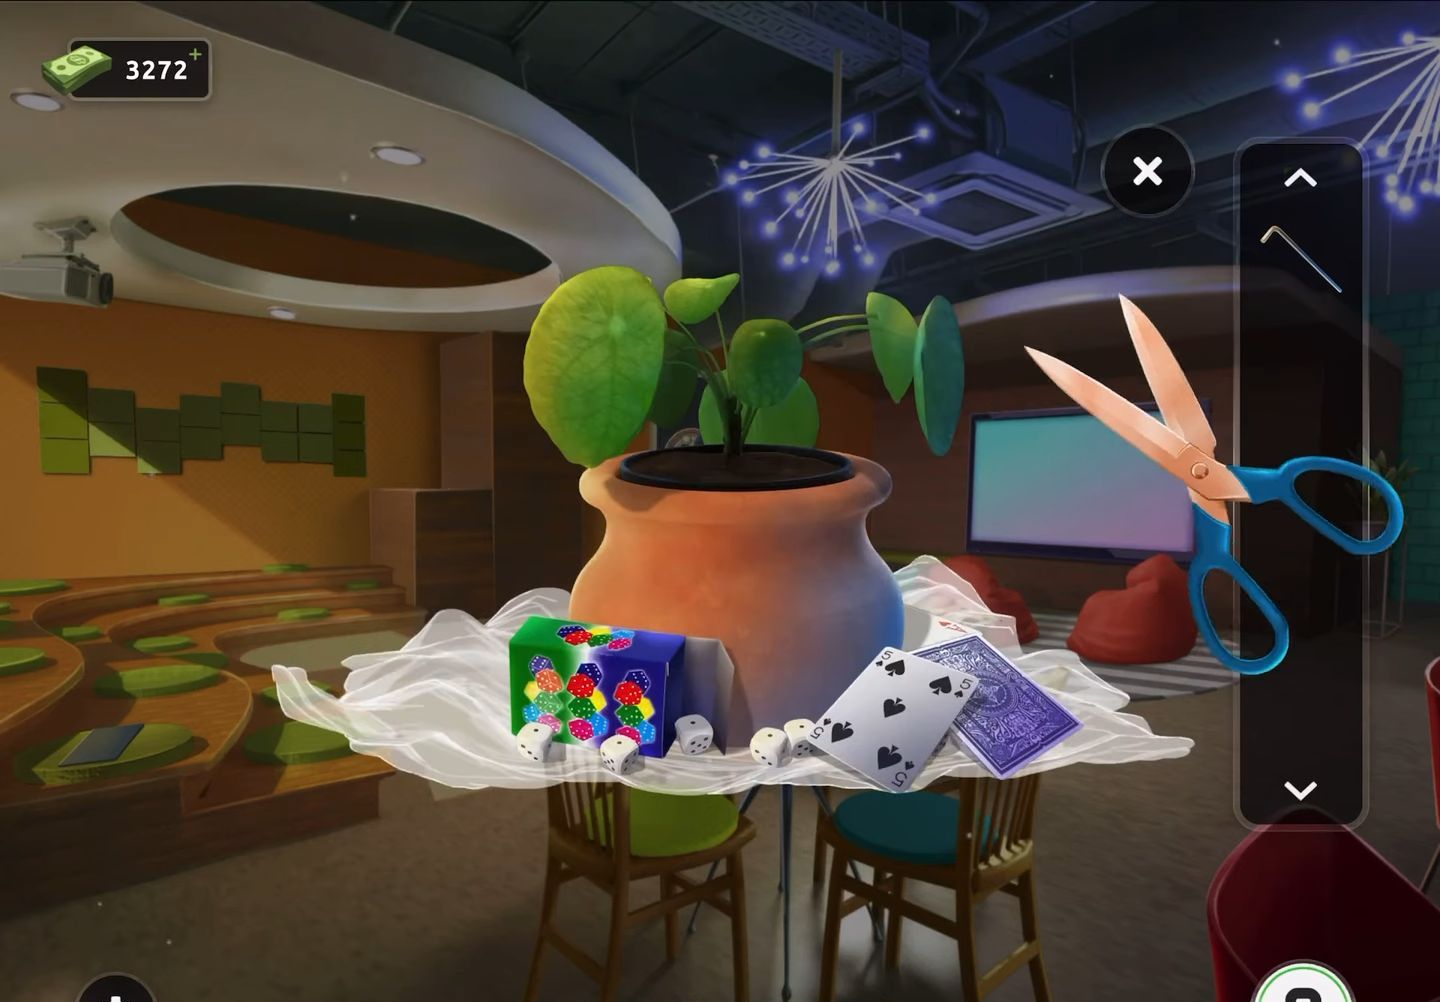
- Then return to the box on the round table and position the collected dice onto the designated slots on the puzzle board.
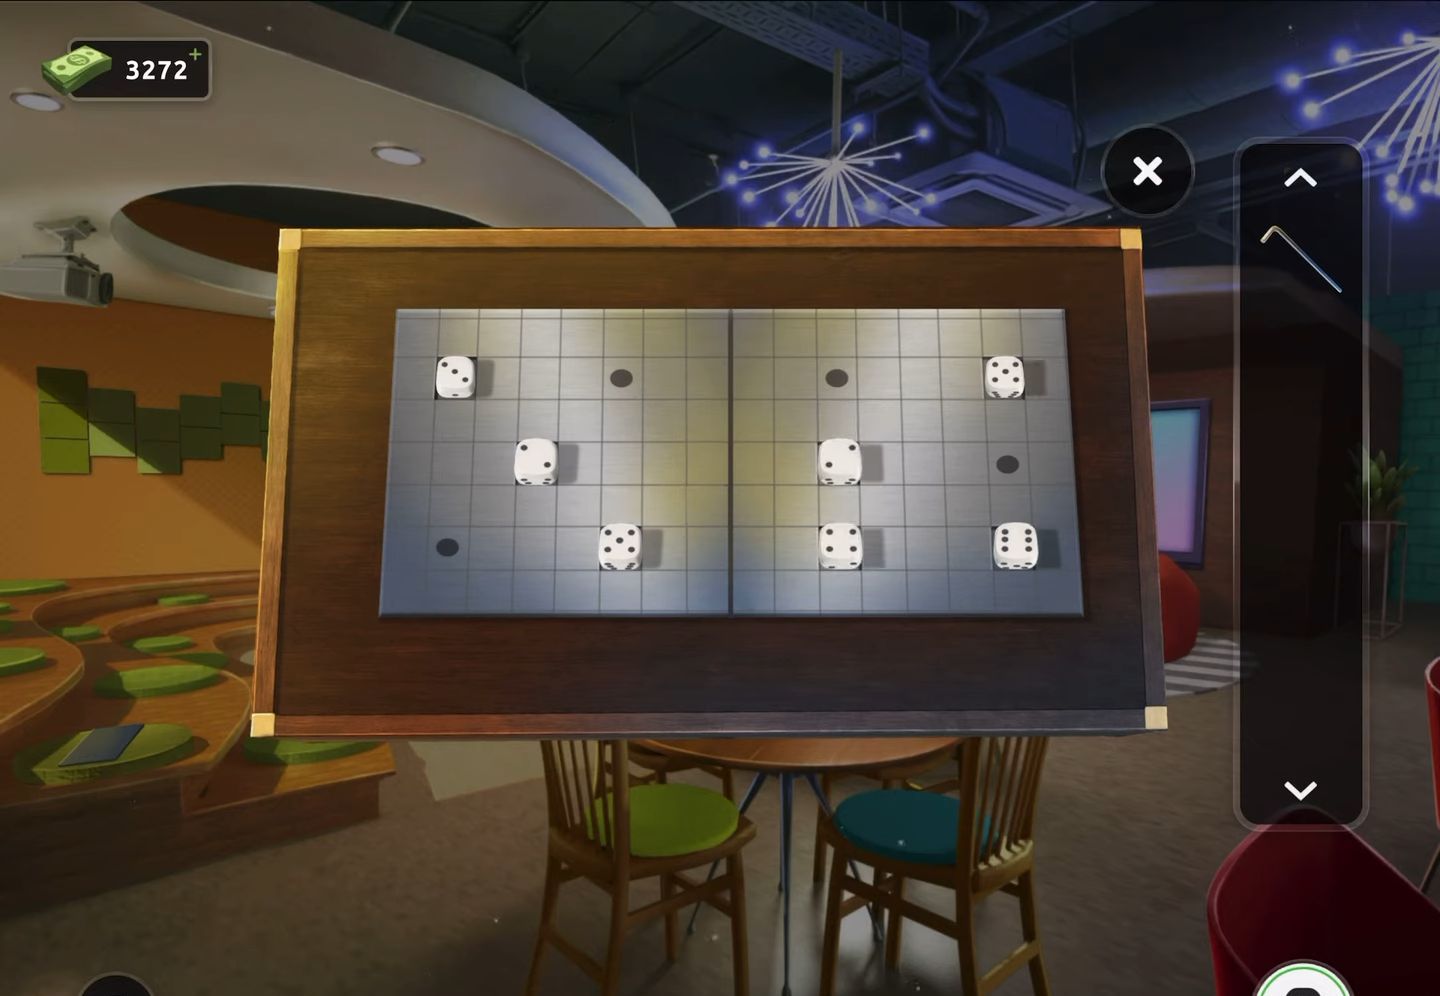
- After that, resolve the puzzle by adjusting all the dice to display a single dot on each face, aligning them with the existing dots.
- Upon successful completion, four bolt heads will become visible. Utilize the hex tool to open them.
- Then retrieve the round token revealed after unlocking the bolts. Take note of any hints or clues provided.
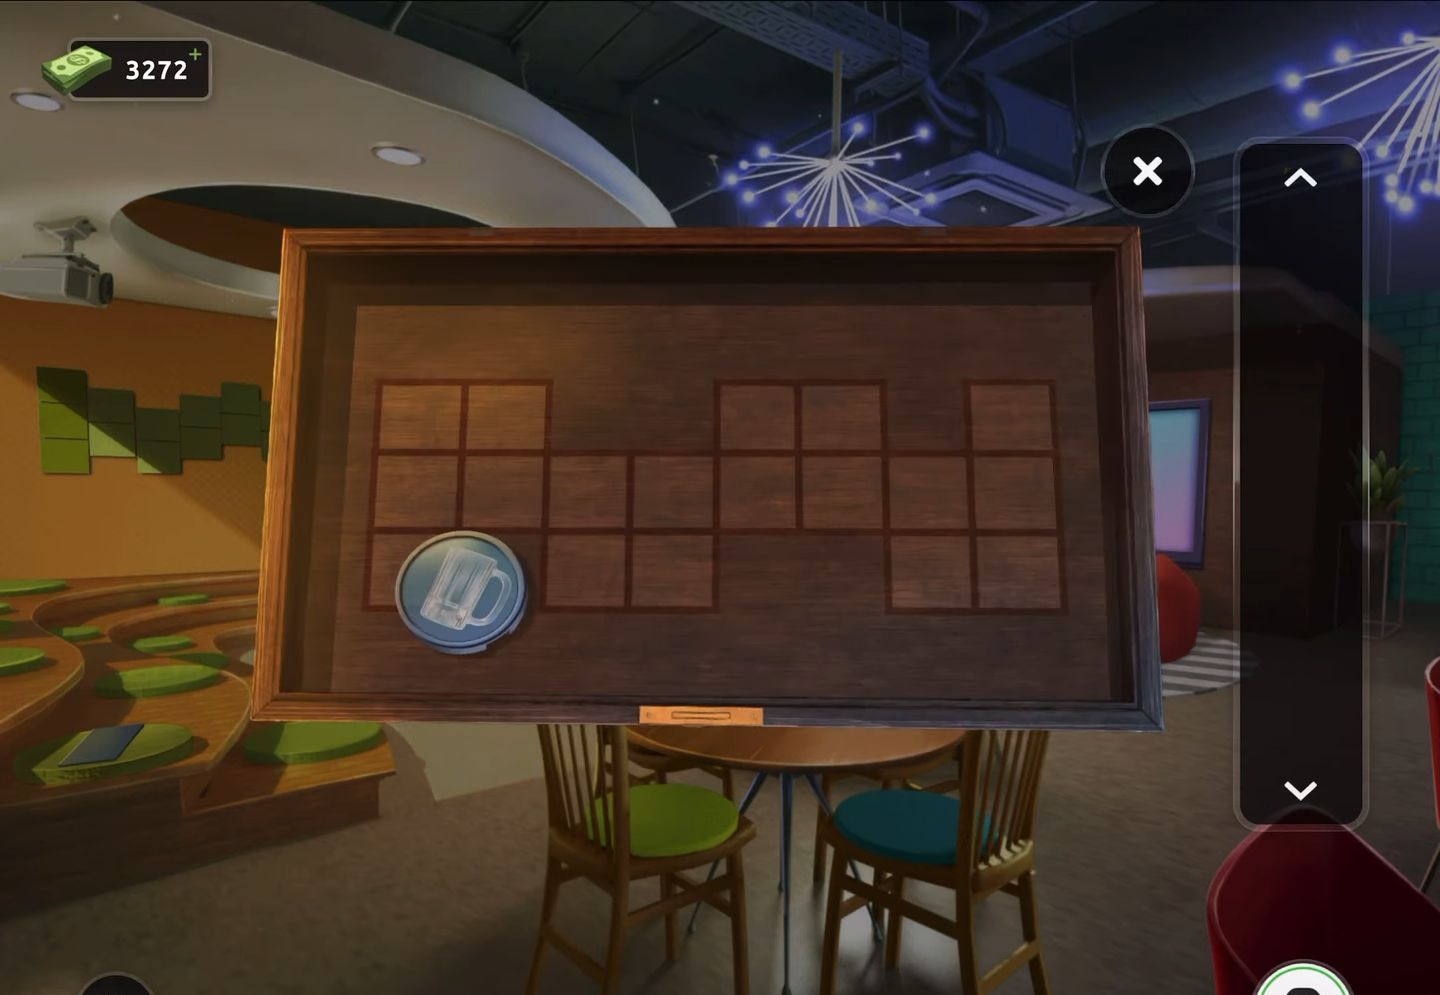
- Now examine the green design located on the left wall. This serves as a puzzle.
- Apply the clue gathered earlier to decipher and solve this particular puzzle.
- After completing the dice arrangement, a small panel will open on the lower left of the step seats. Retrieve the second round token from this panel.
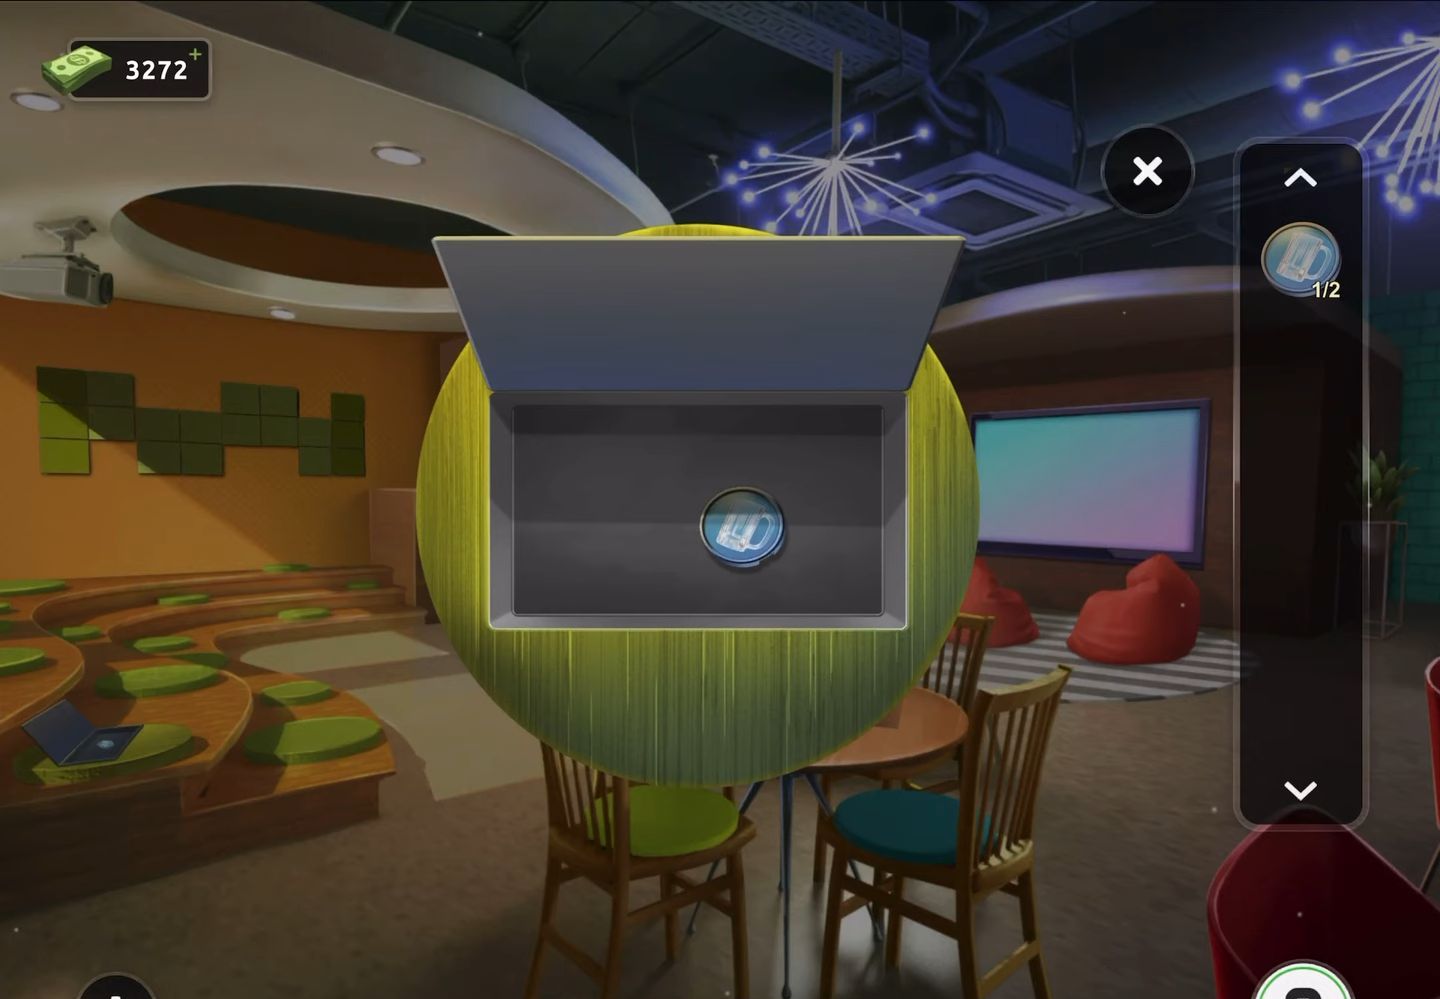
- Then revisit the Exit door lock and incorporate the two tokens into it. This action will effectively unlock the door.
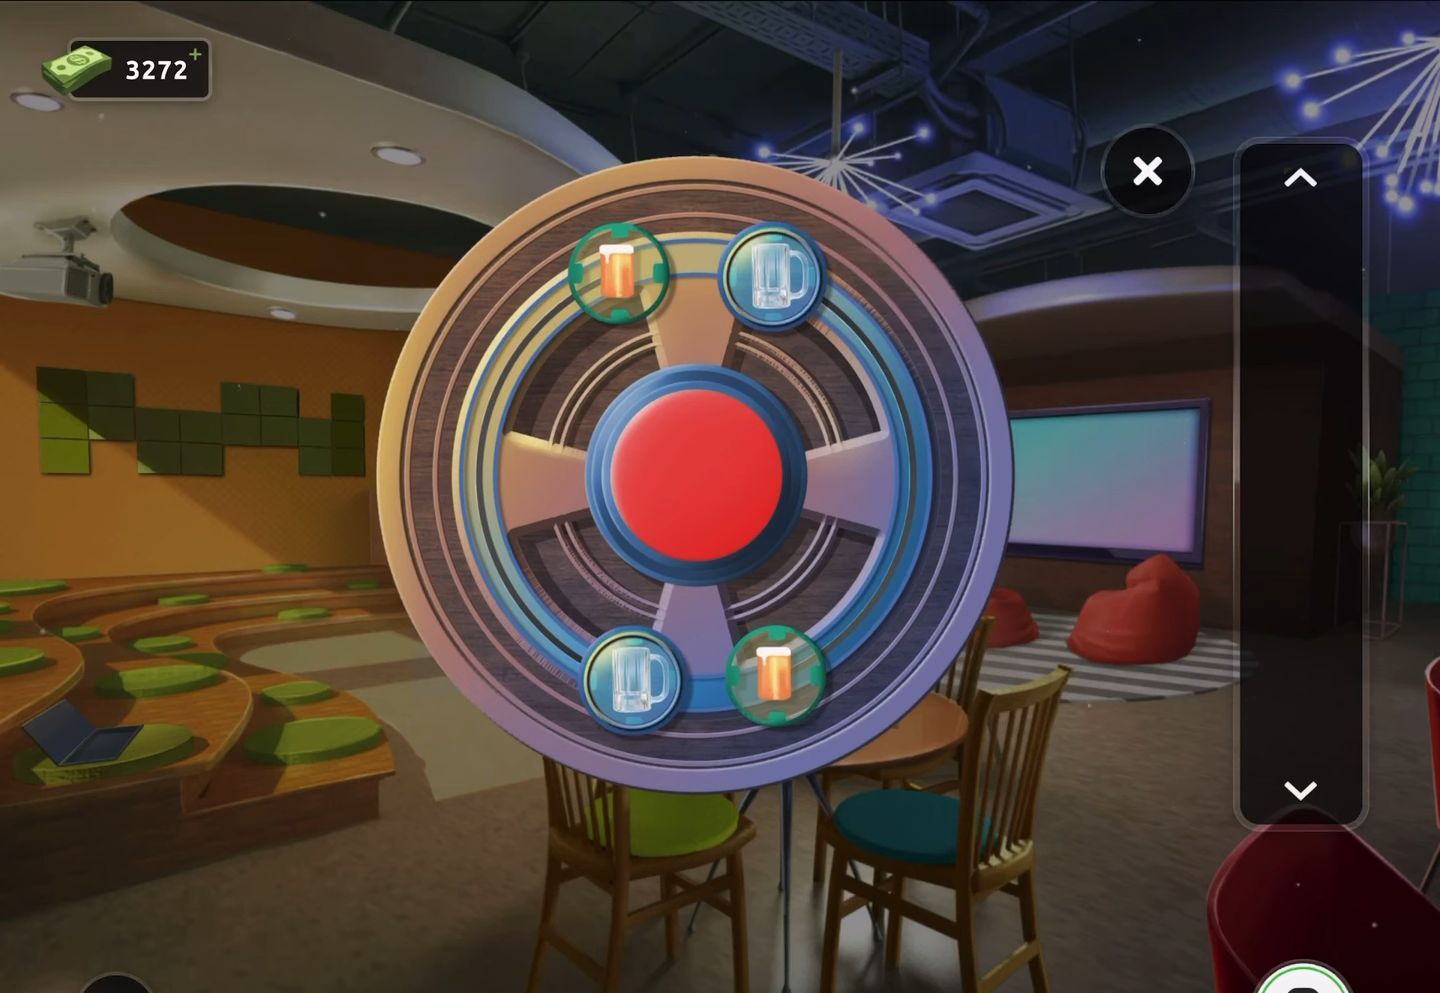
- Finally, exit the room by opening the unlocked door.
Level 92:
To complete level 92, follow the instructions below:
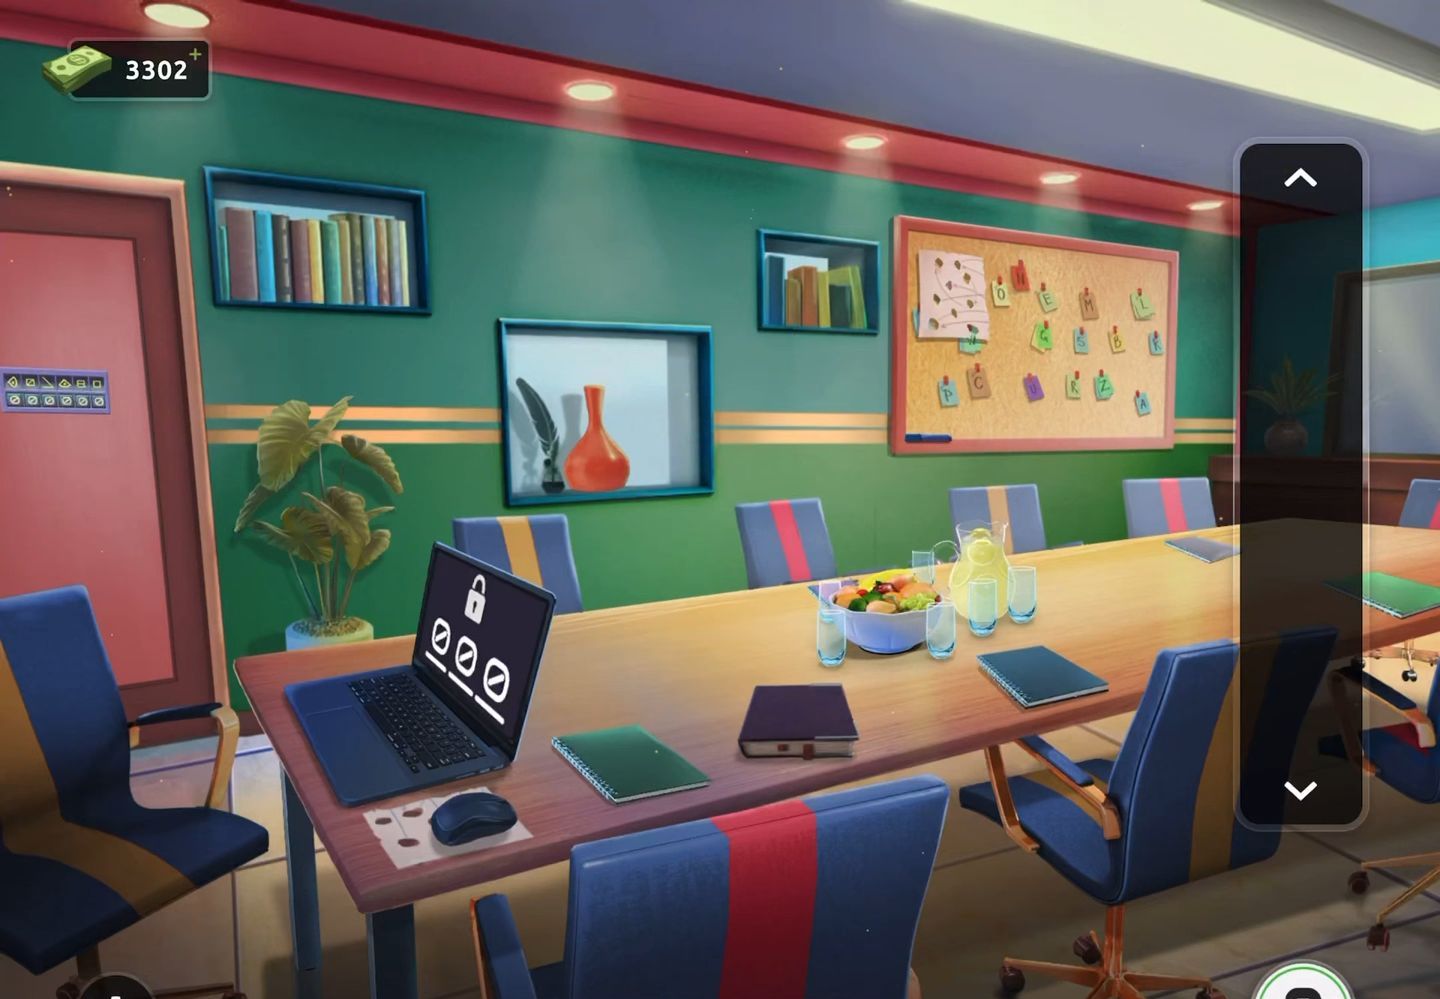
- Start by retrieving a paper clue situated under the mouse beside the laptop placed on the table.
- Following this, examine the note board positioned at the top right of the room.
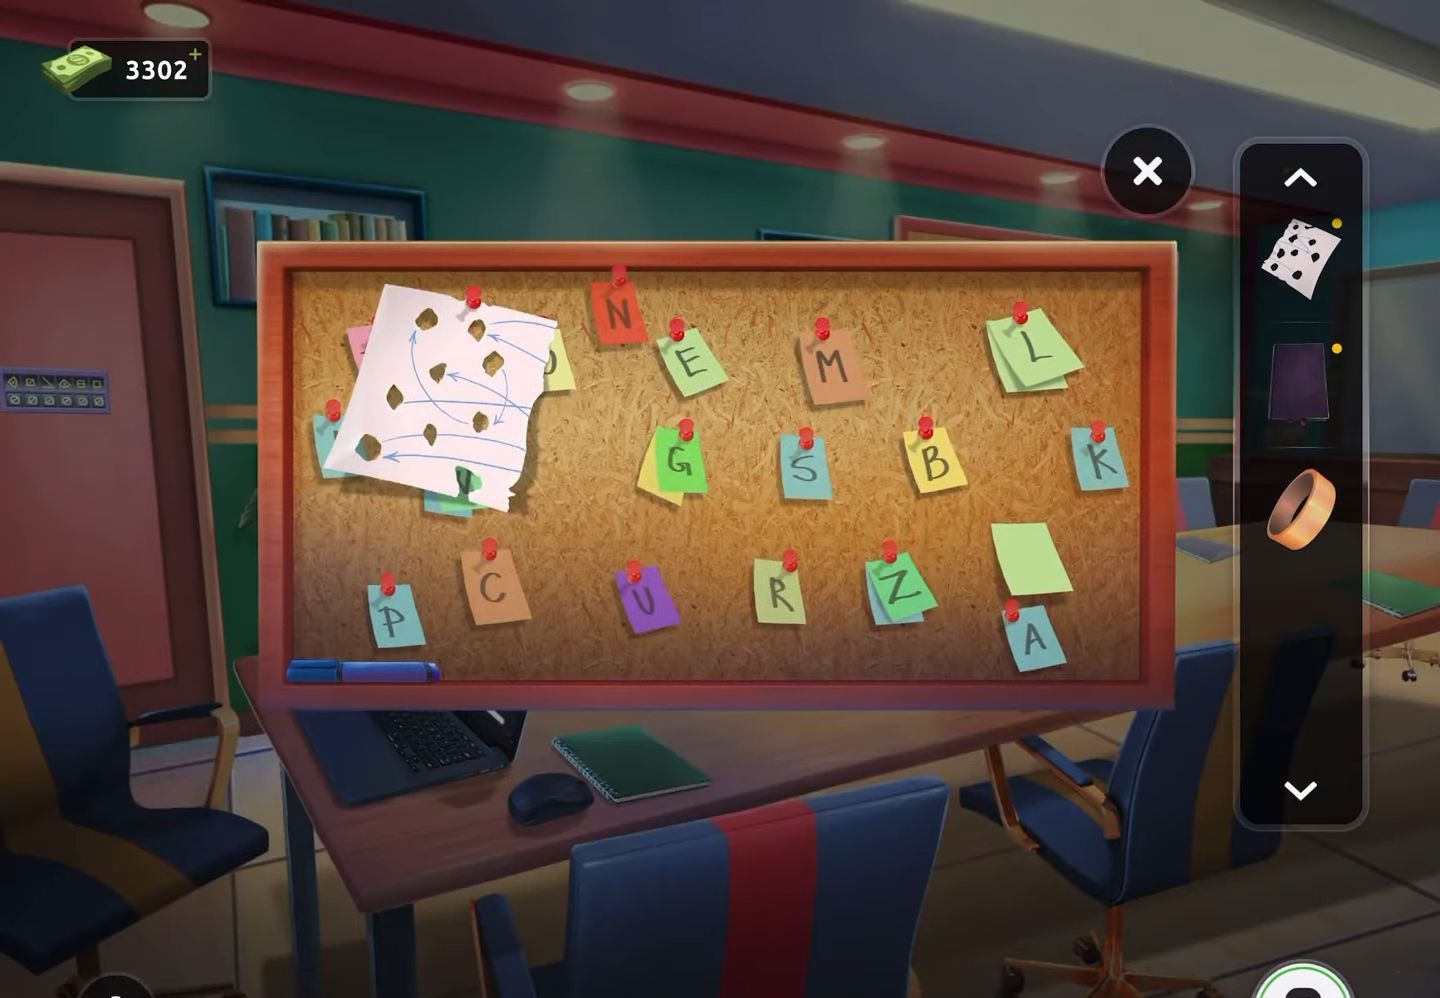
- Now gather a second paper clue and take note of the letters pinned onto the board.
- Then, interact with the red chair on the right to shift it, revealing a roll of tape that can be collected.

- Next, access the first paper clue in your inventory.
- Then combine it with the second clue and the tape, resulting in the creation of a unified paper clue containing holes.
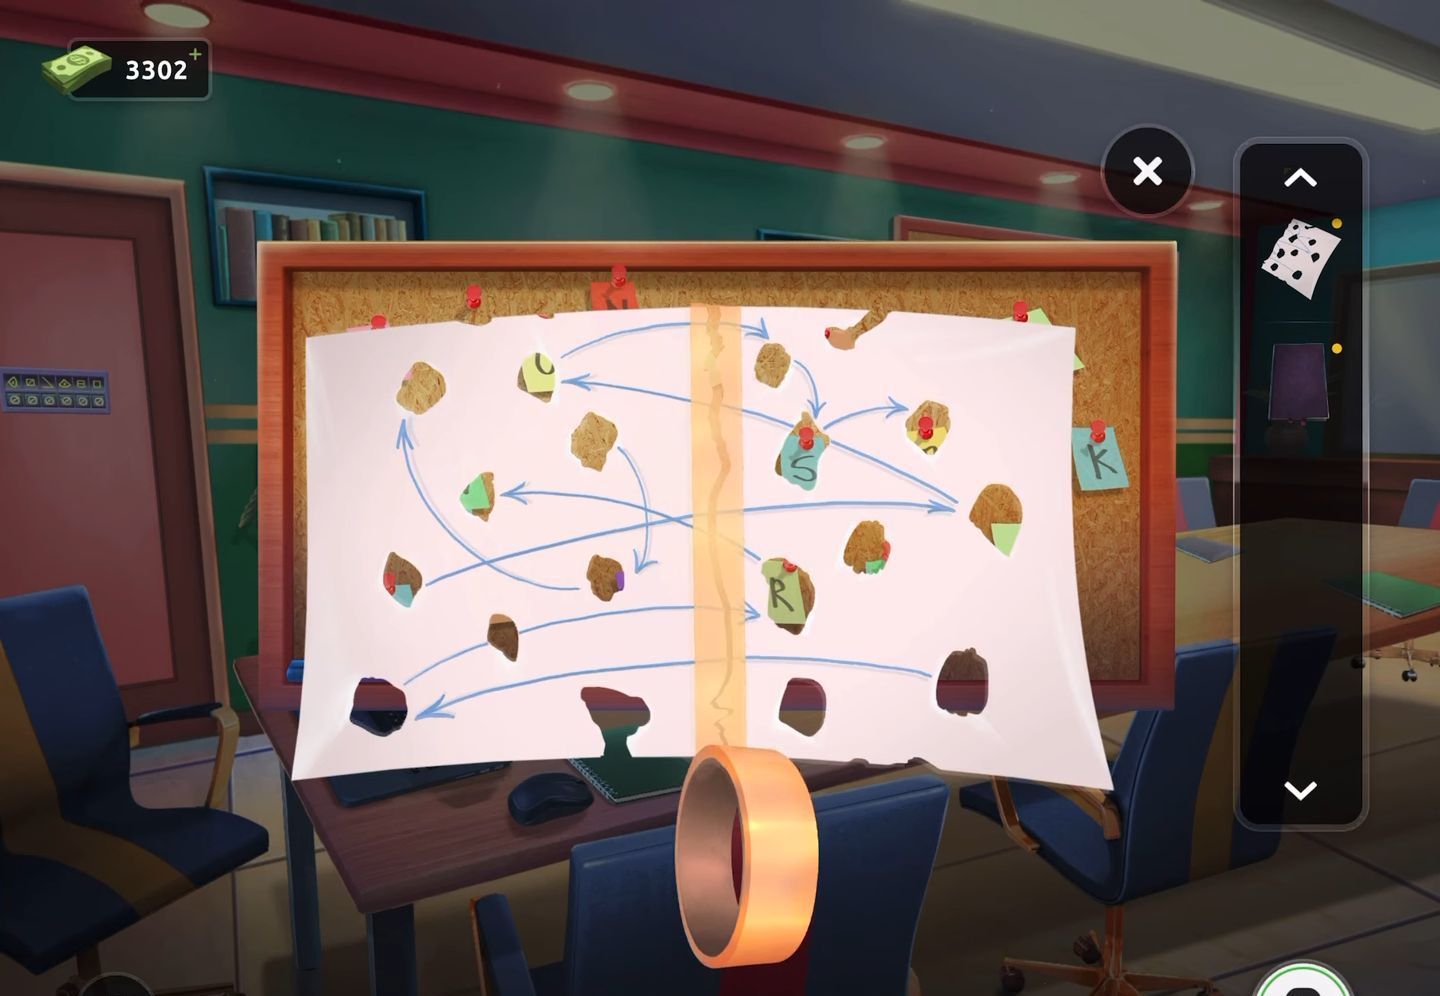
- After that, acquire the dark blue book positioned on the table to the right of the laptop.
- Then proceed to examine the book in your inventory and open it.
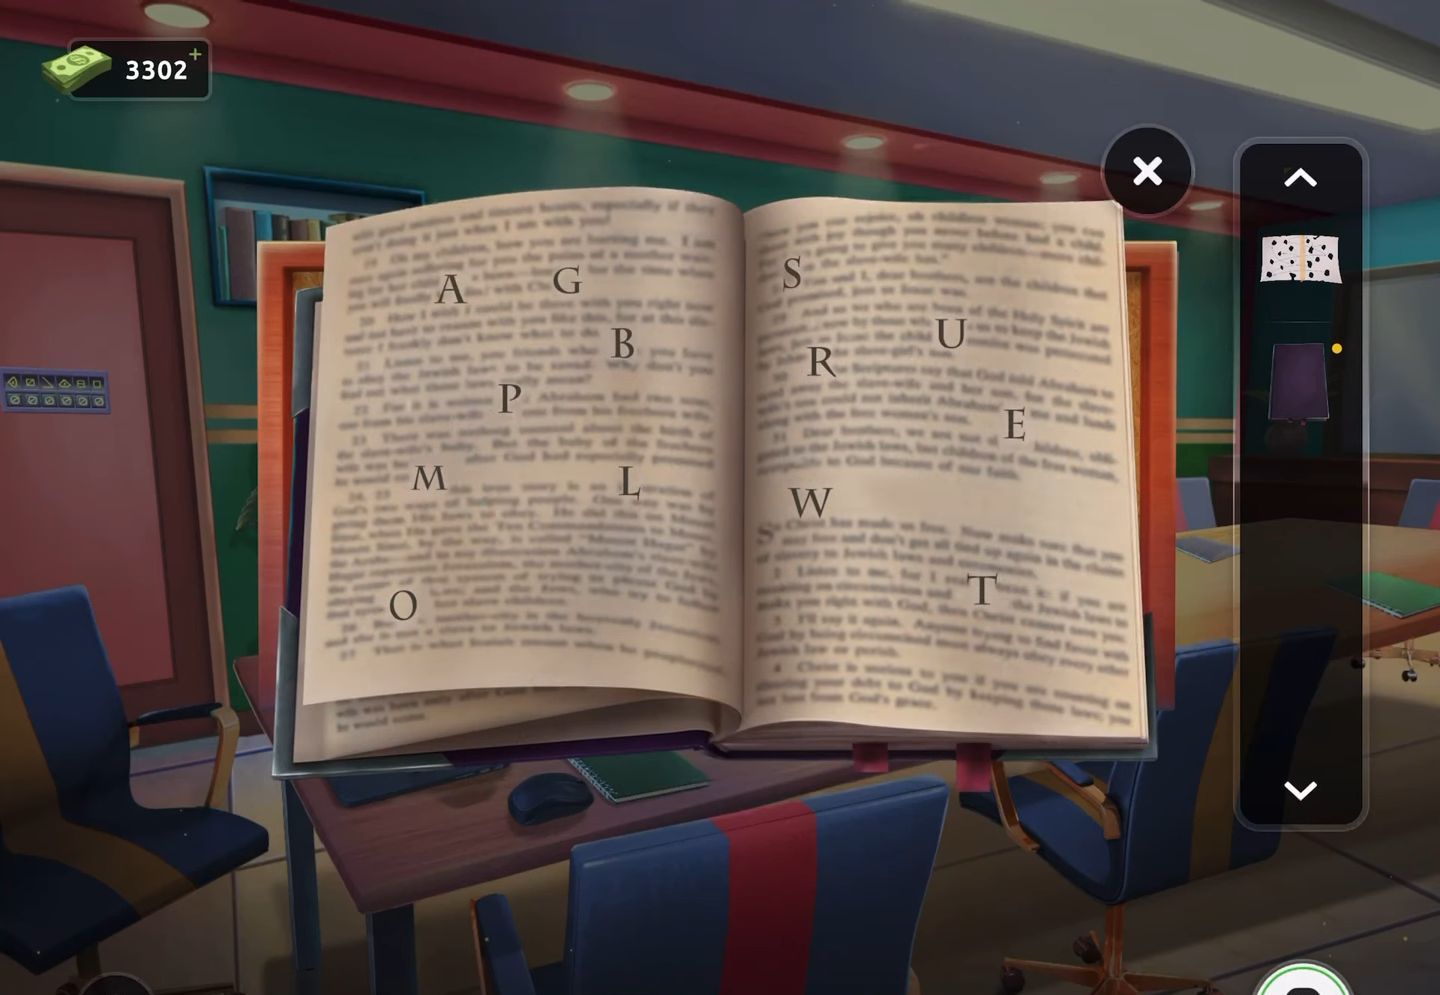
- Now incorporate the paper clue into the book, unveiling letters and arrows that denote a specific sequence.
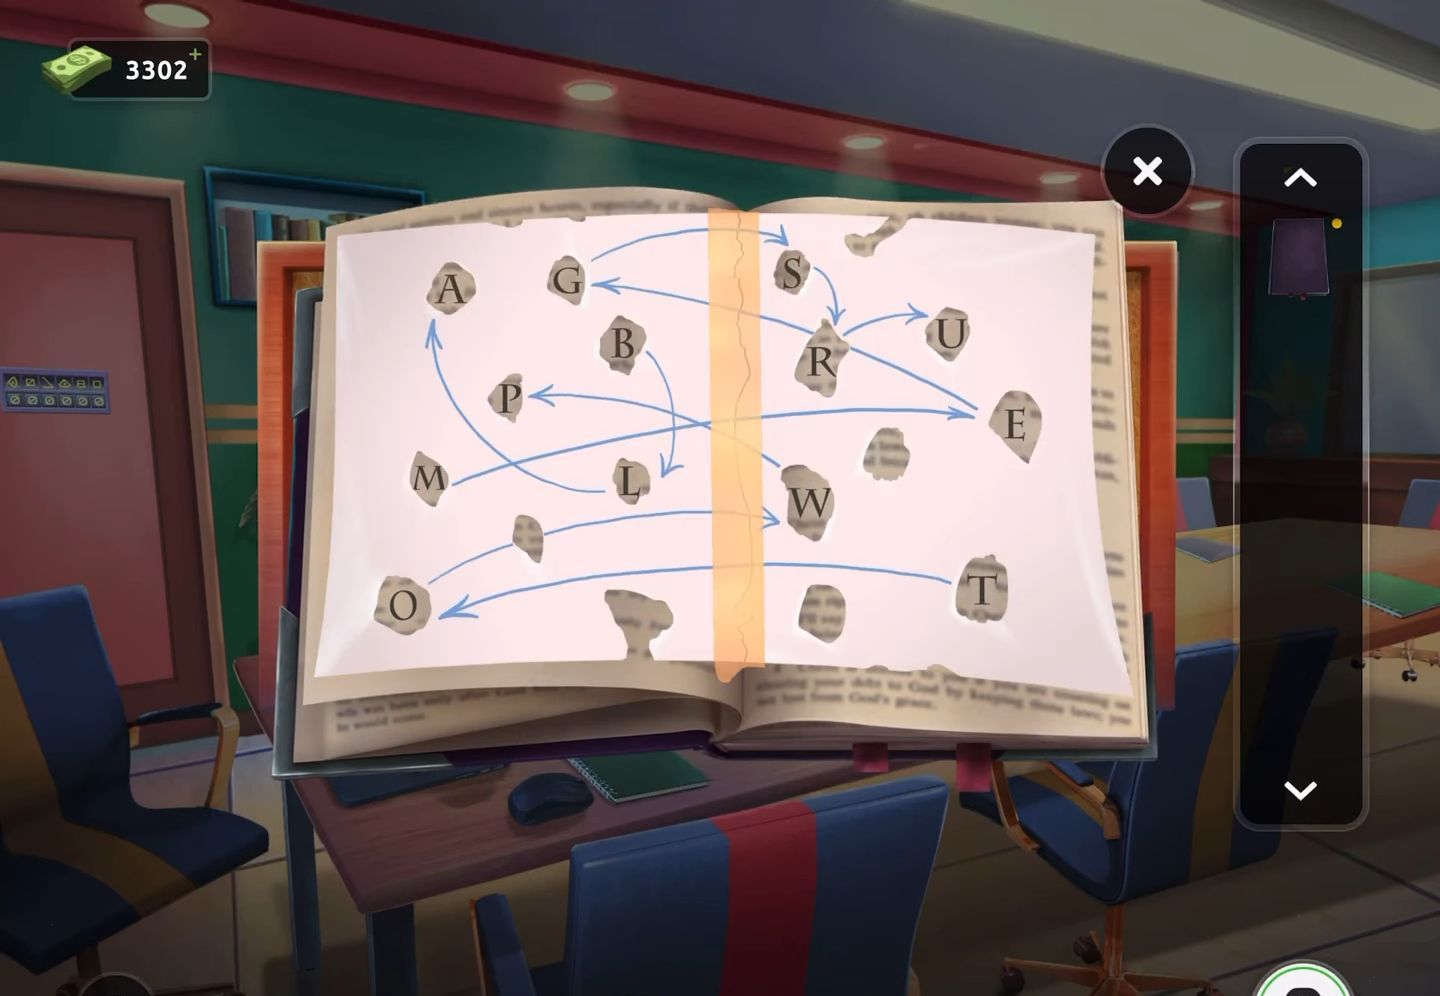
- Next, revisit the note board. Utilize the clue obtained from the book to accurately identify and select the appropriate letters, forming a new clue based on this information.
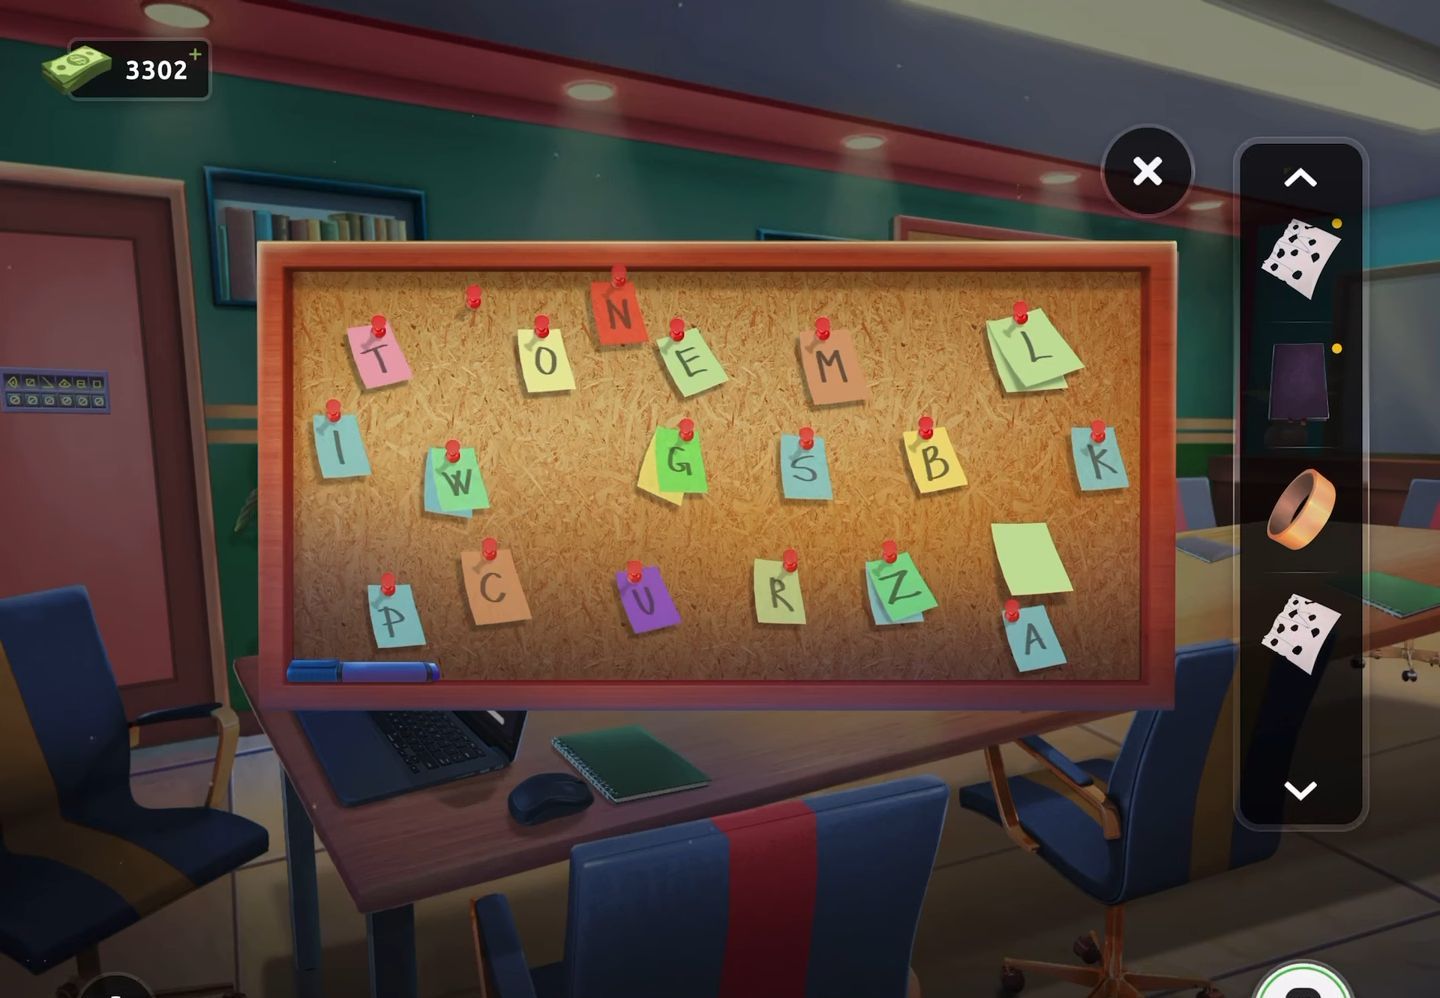
- Then proceed to the laptop and enter the code (751) to unlock it.
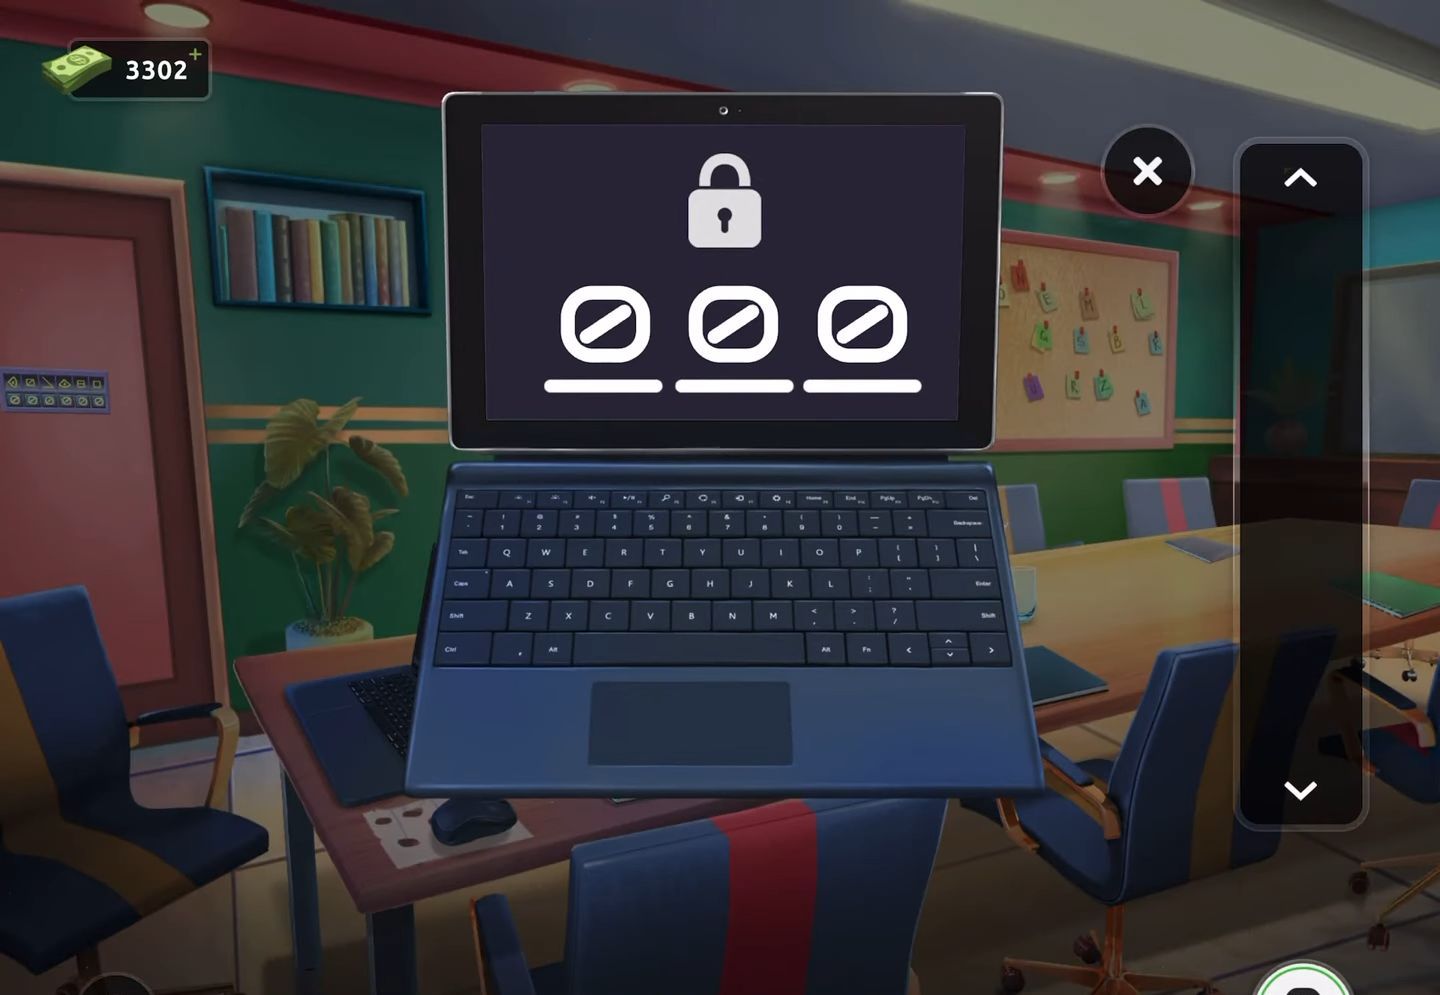
- Once unlocked, a new clue featuring shapes and numbers will be revealed.
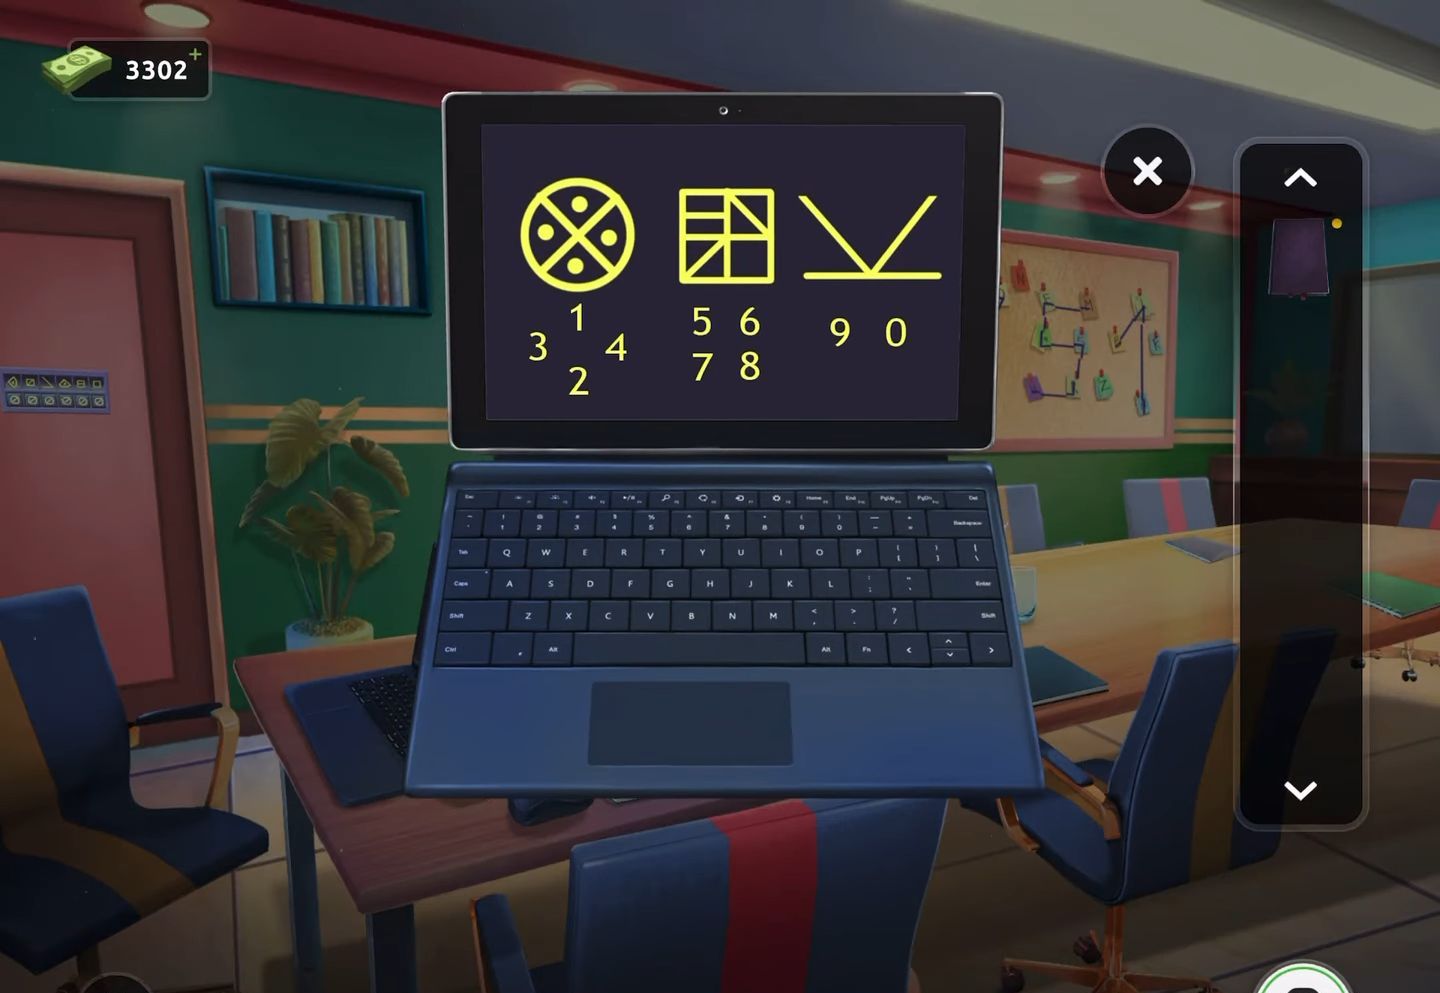
- Next, examine the exit door lock puzzle using the code (479258).
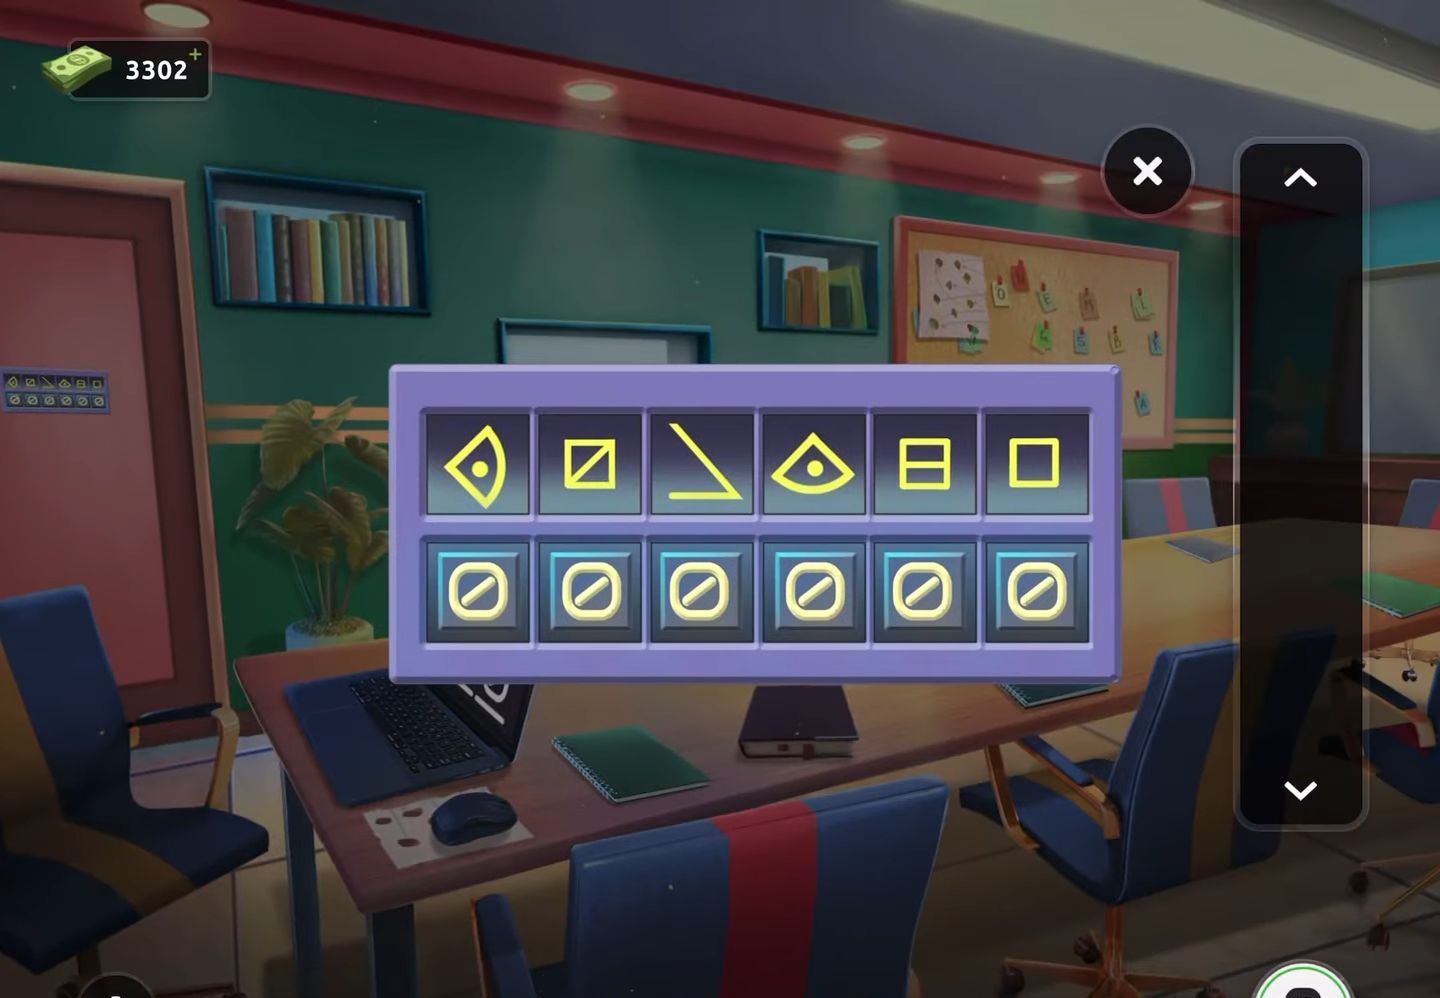
- Finally, use the obtained clues to successfully escape the room by solving the puzzle on the exit door lock.
Level 93:
To complete level 93, follow the instructions below:
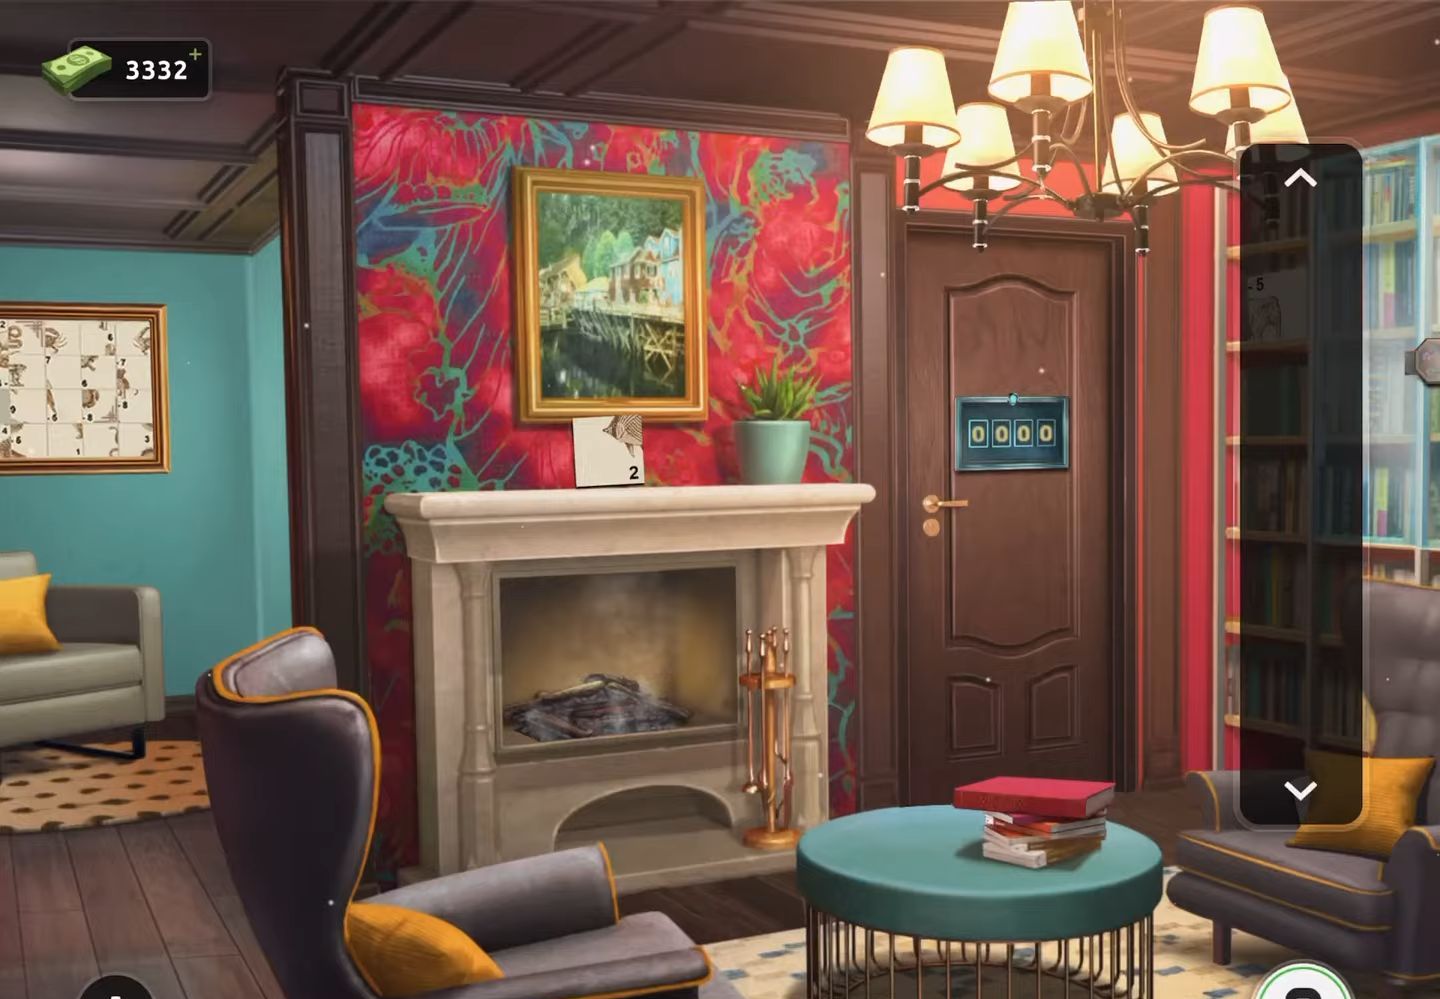
- Firstly, gather three puzzle tiles: the initial one is positioned on the top of the mantle, the second one is concealed behind the yellow cushion on the chair’s right side, and the third is located near the door on the bookcase.
- Then, inspect the fireplace.
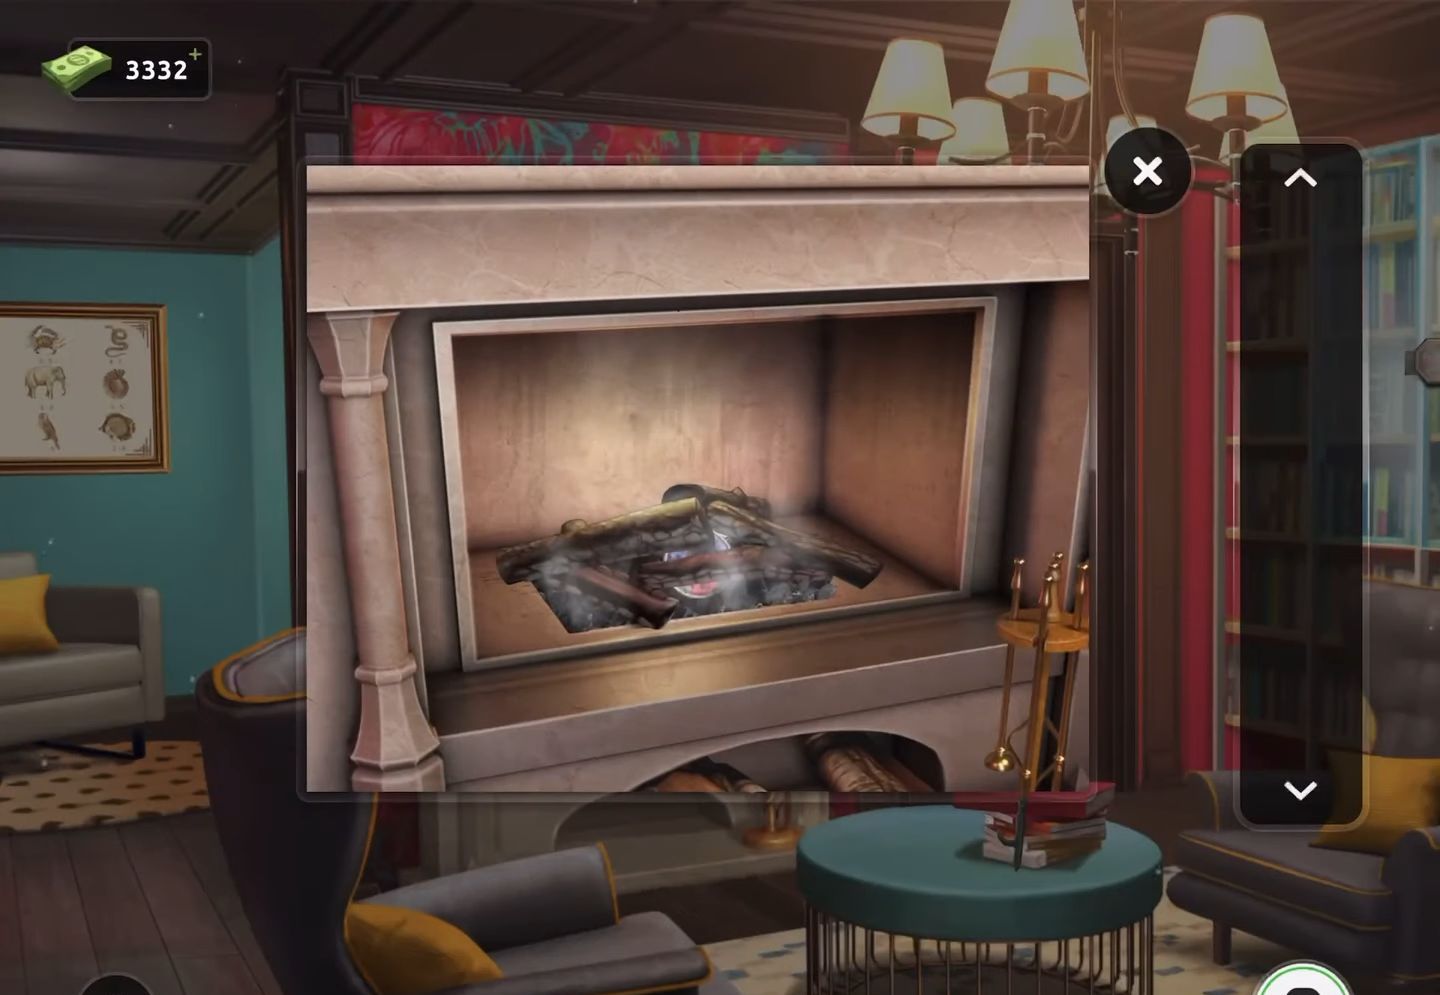
- Now retrieve a poker from the stand on the right side and utilize it to shift the ashes within the fireplace.
- Then collect a colored disk revealed among the ashes.
- Next, proceed to examine the glass cabinet situated on the bookshelves to the right. Study the lock mechanism and integrate the colored disk into it.
- Subsequently, solve the puzzle associated with the lock.
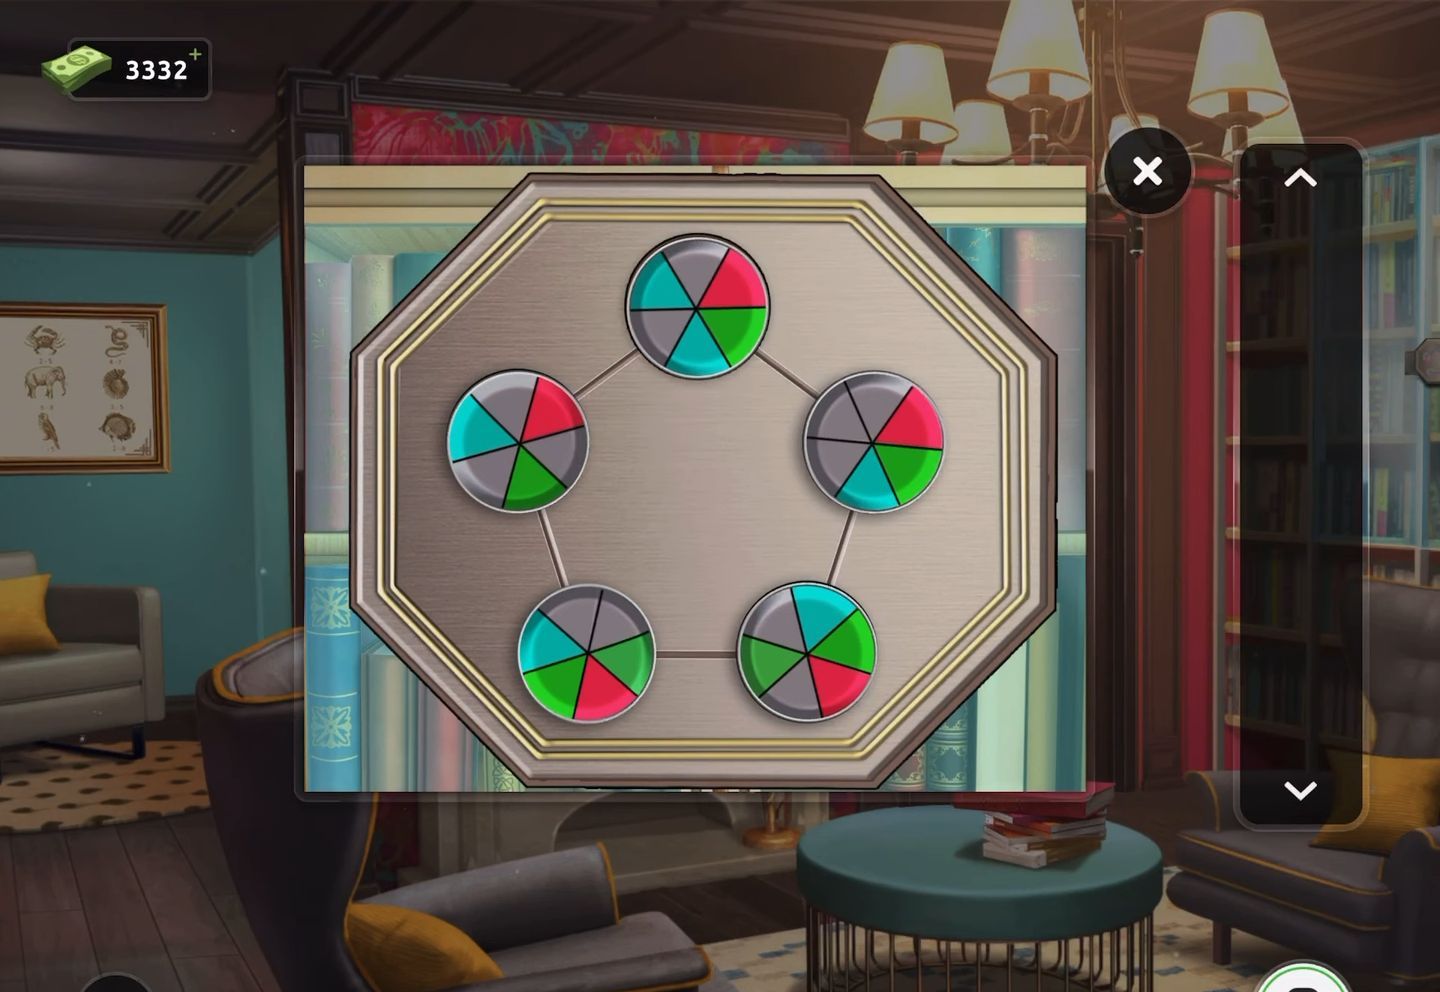
- After that, adjust the disks so that the colors aligned with the connecting lines correspond to one another.
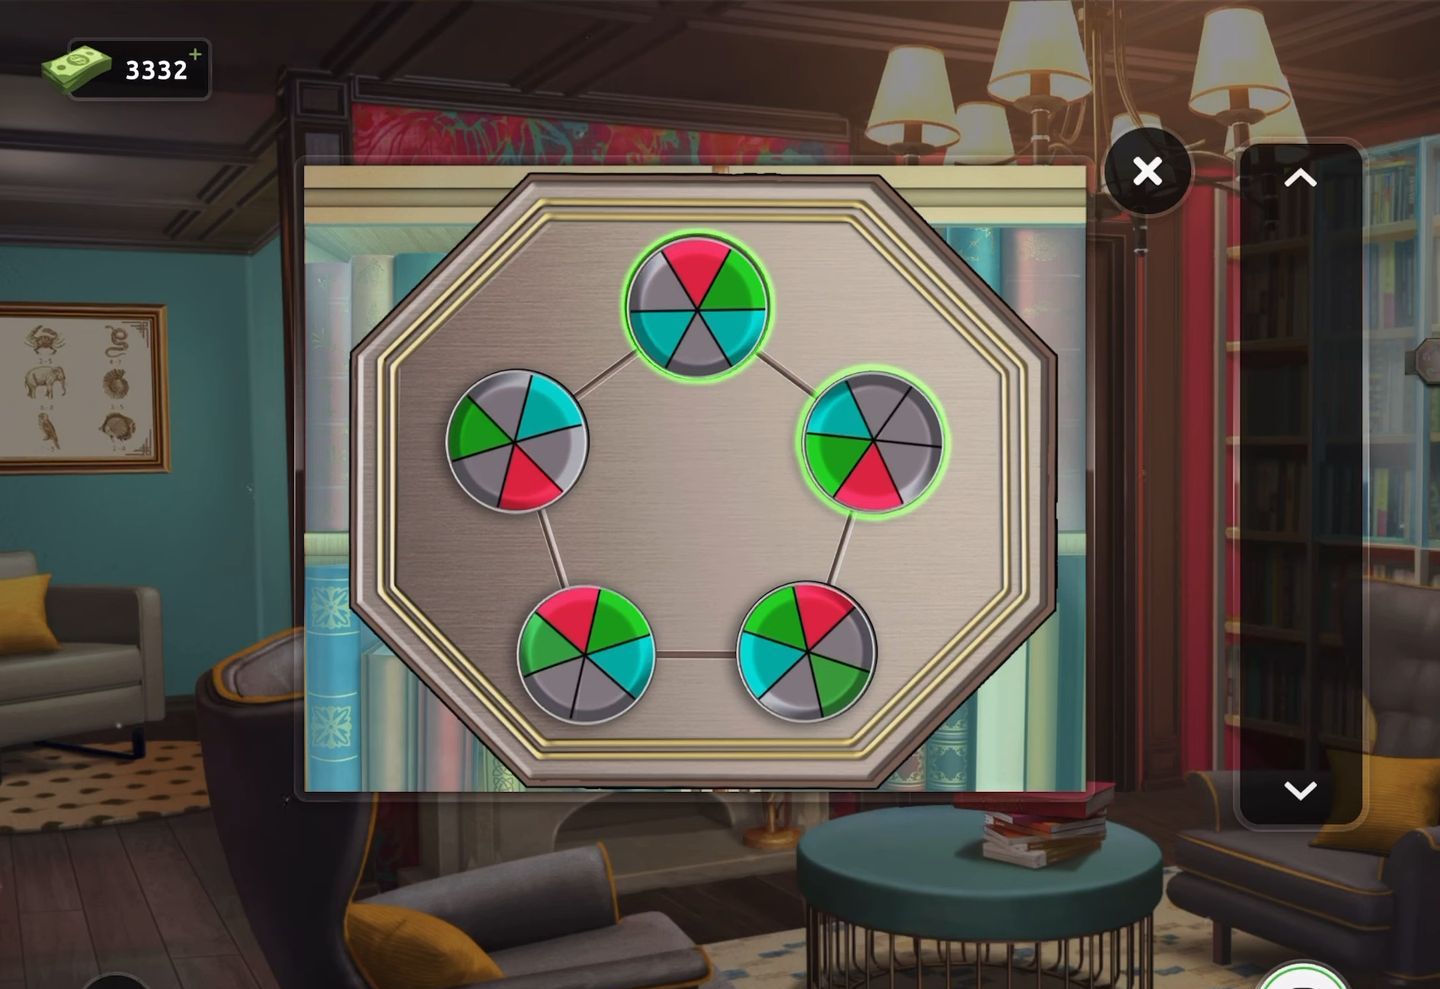
- Once the doors are opened, inspect the blue book located at the bottom right to discover a clue.
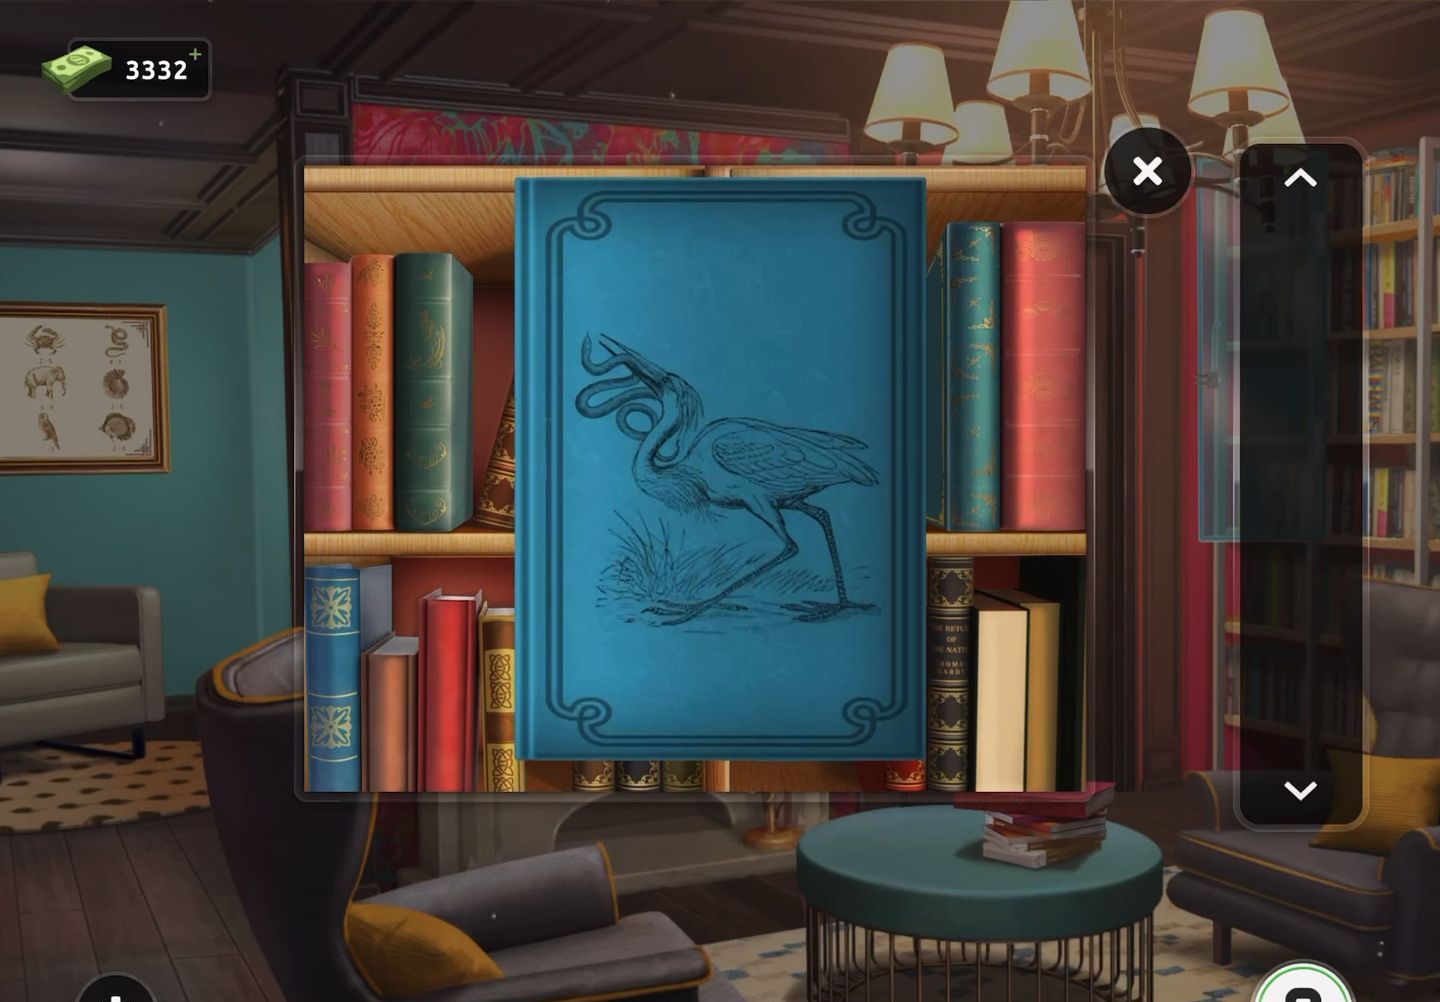
- Then proceed to view the picture frame positioned on the left side of the room.
- Start by incorporating the three puzzle tiles to initiate the next step.
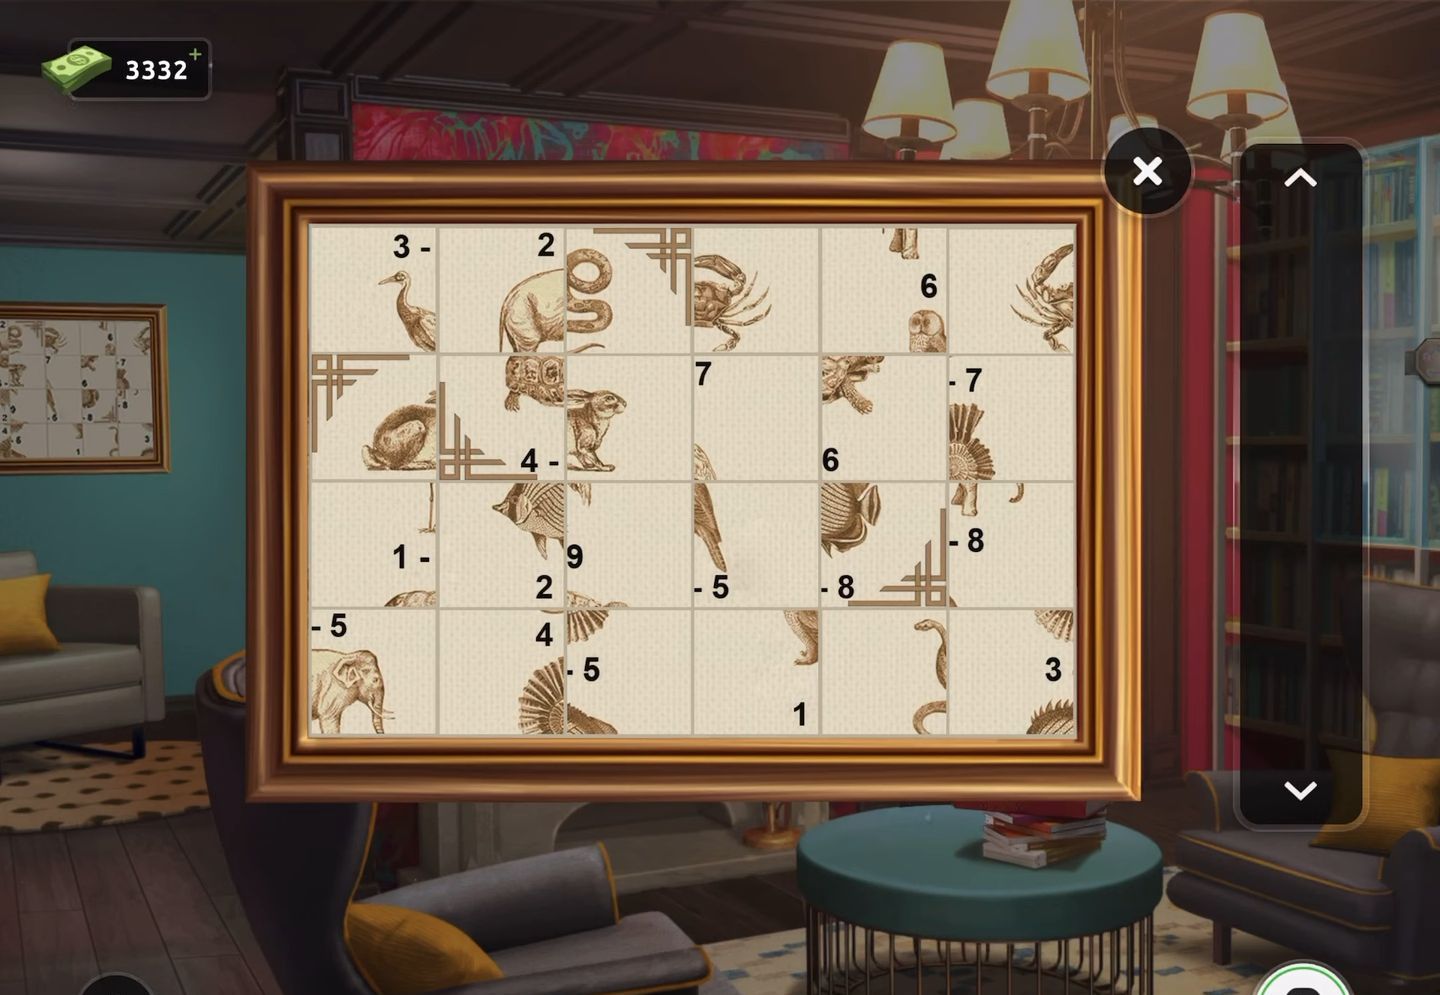
- Now rearrange the tiles to assemble the complete picture, which serves as another clue.
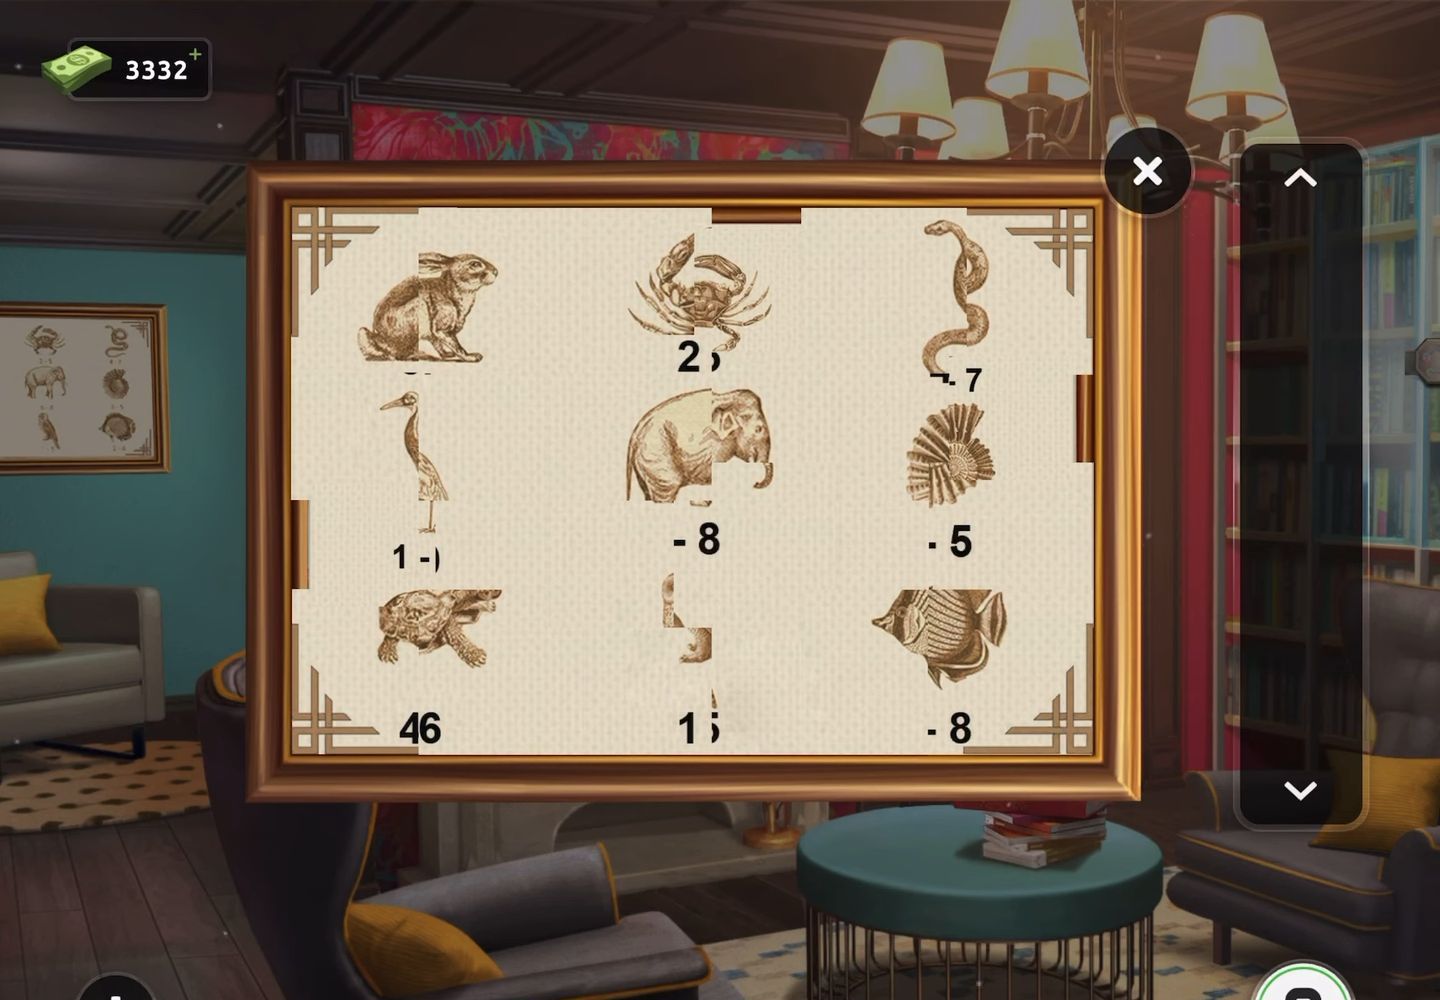
- After that, access the door’s exit code lock. Utilize the clues obtained earlier to determine the code (1947).
- Finally, use the code (1947) to unlock the door and successfully escape from the room.
Level 94:
To complete level 94, follow the instructions below:
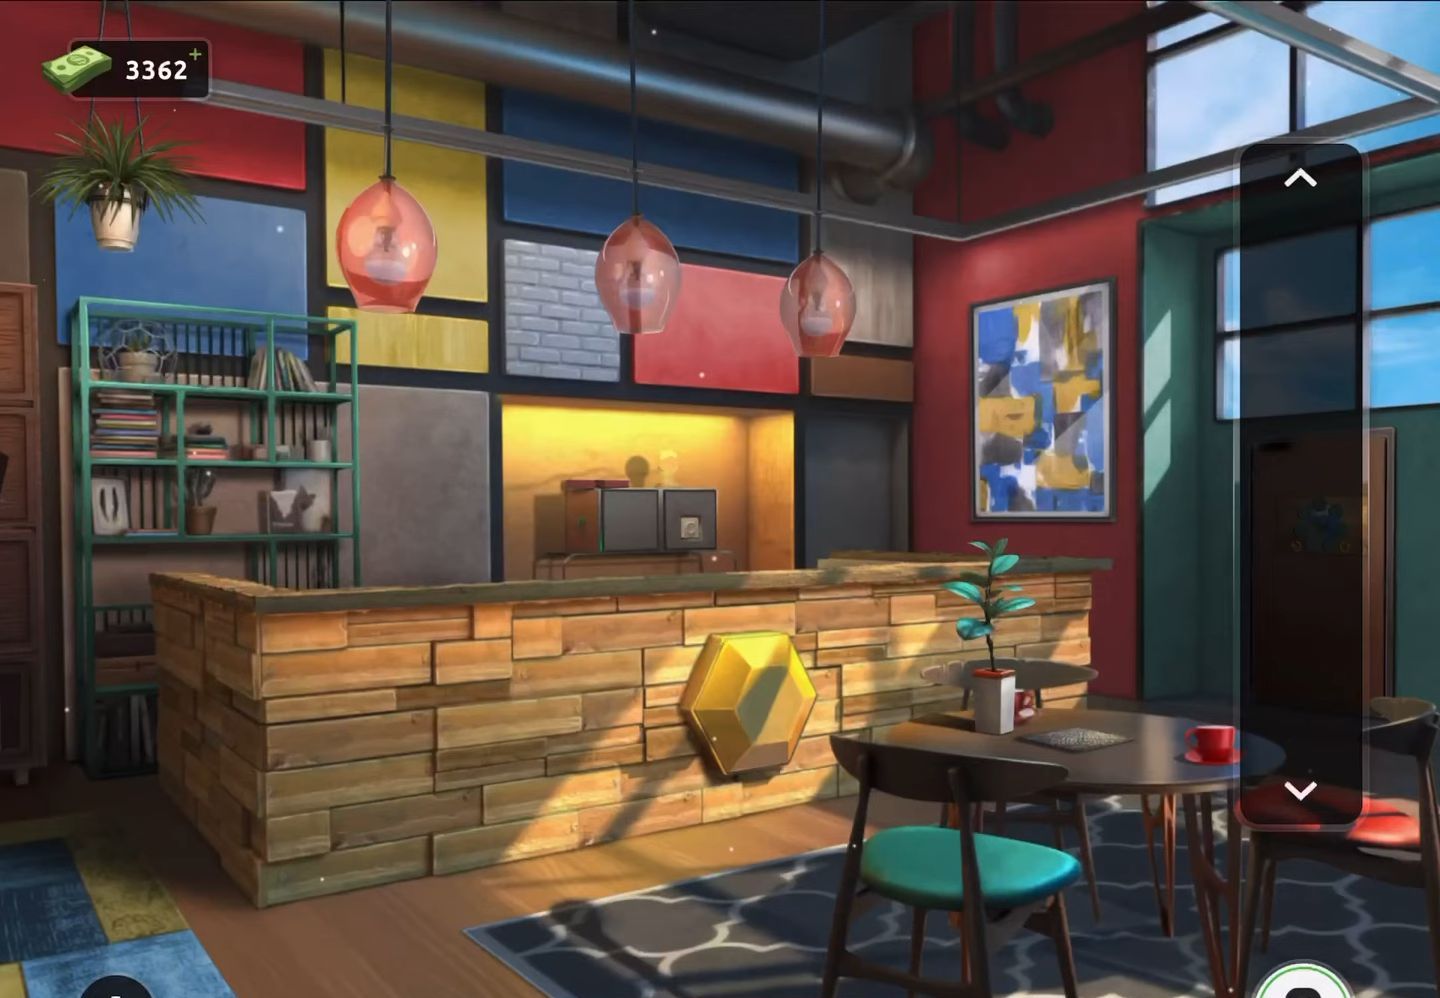
- Begin by interacting with a shelf located behind the bar, where a box with two compartments and a light is situated.
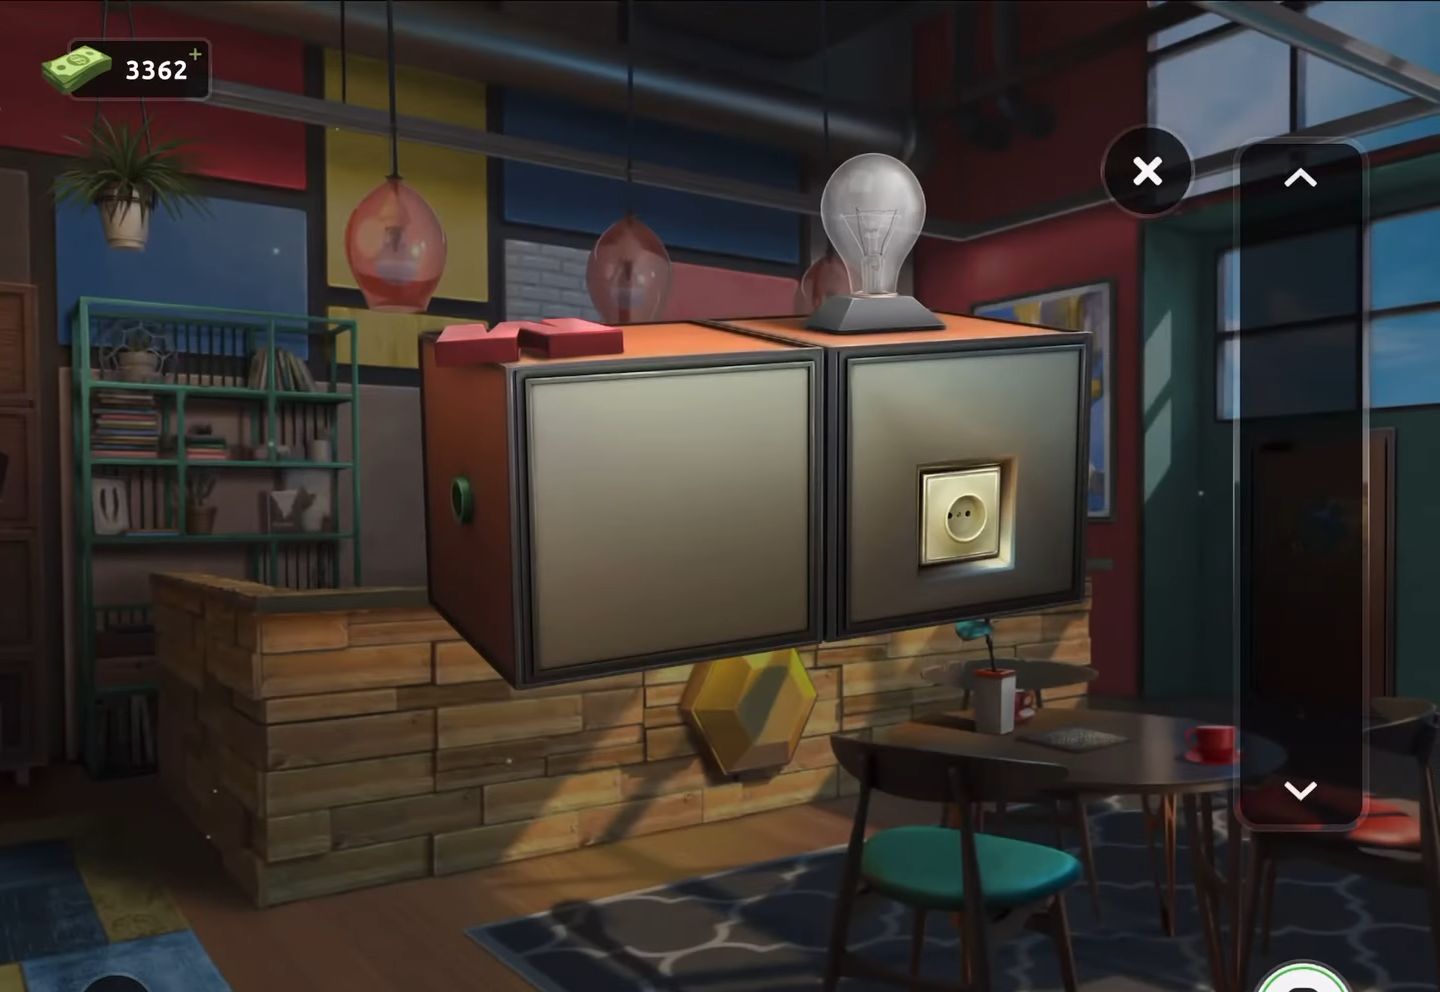
- Next, retrieve the M-shaped object from the top section of the box.
- Then, apply the M shape to the bottom compartment of the cabinet positioned on the left side of the room.
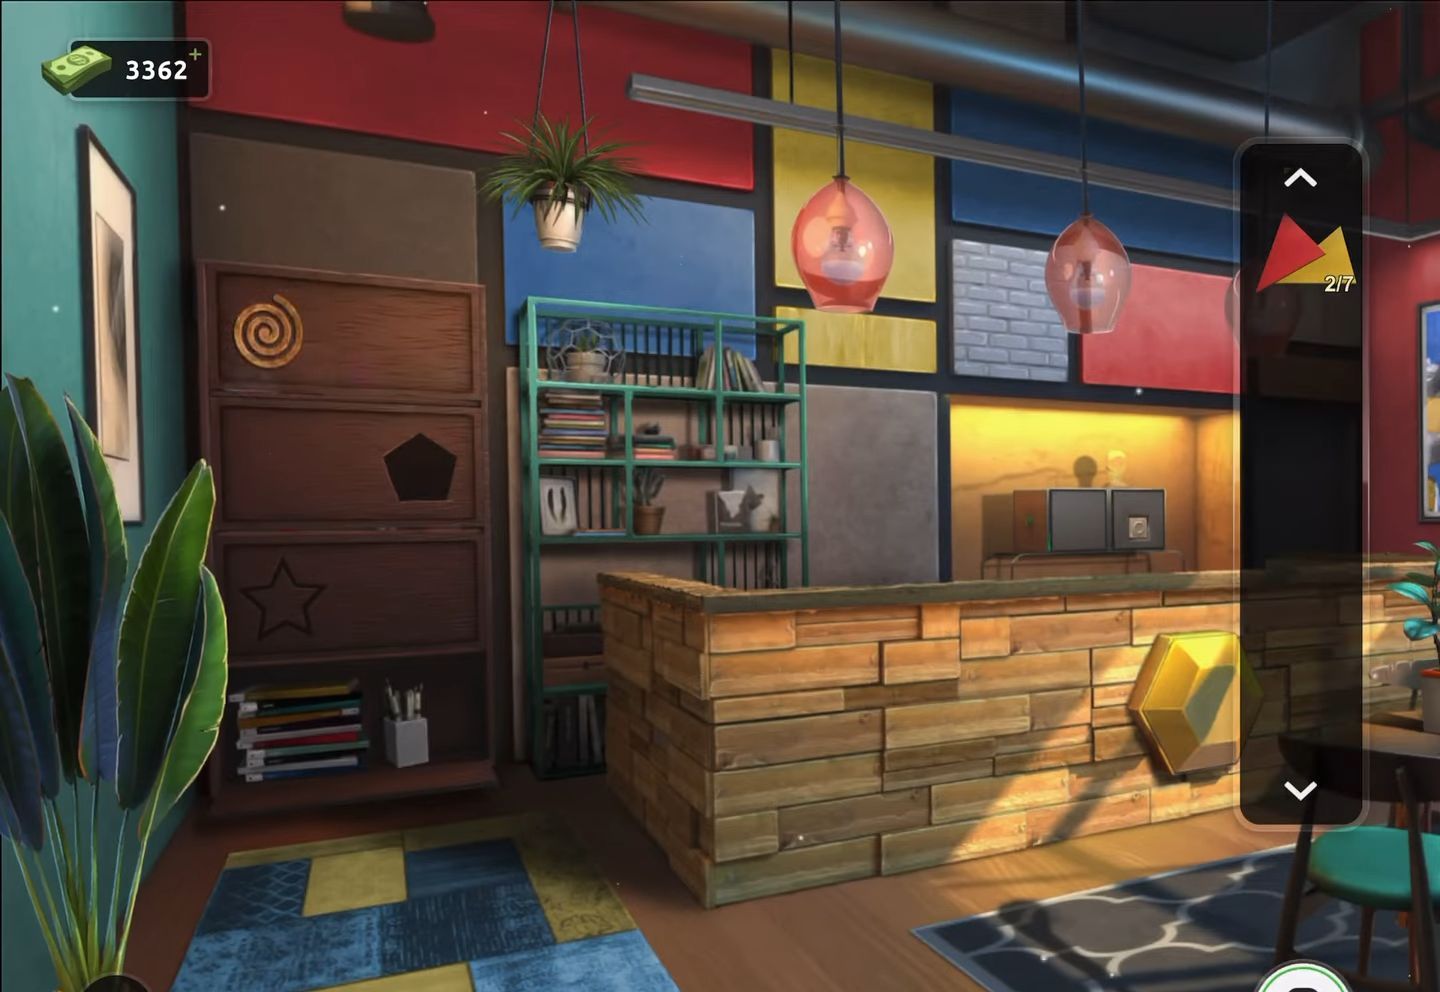
- Now gather a yellow shape, which is the first of seven, along with a pair of scissors.
- Then proceed to tap on the round table, revealing a panel in the center.
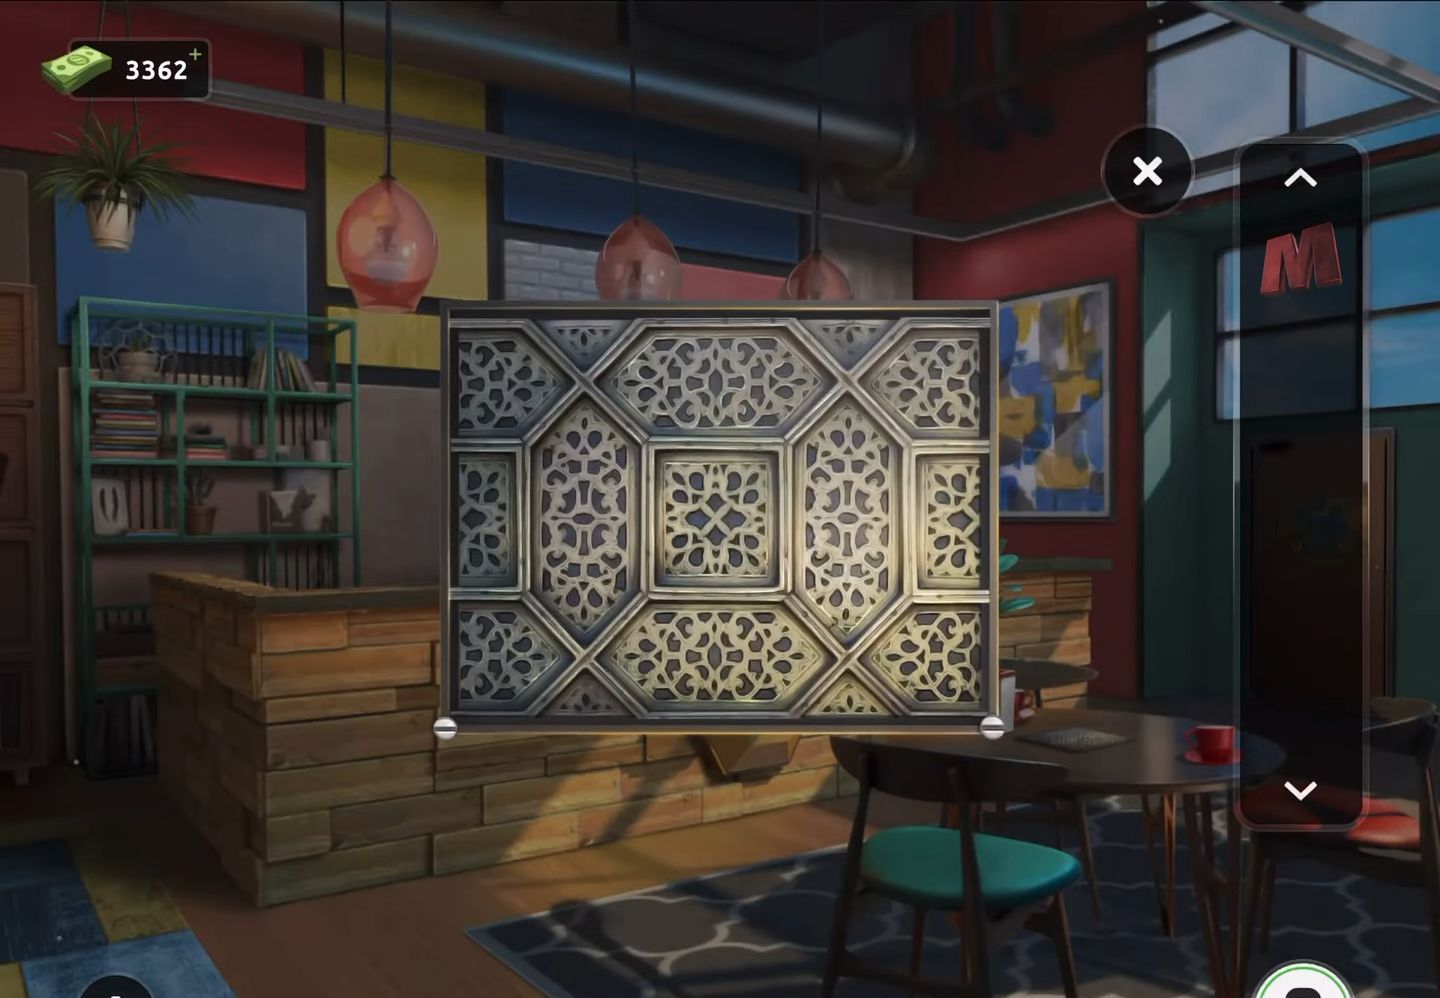
- After that, utilize the scissors to remove the screws on the panel, allowing it to open.
- Now collect the spiral piece and the red shape. Take note of the locked panel below.
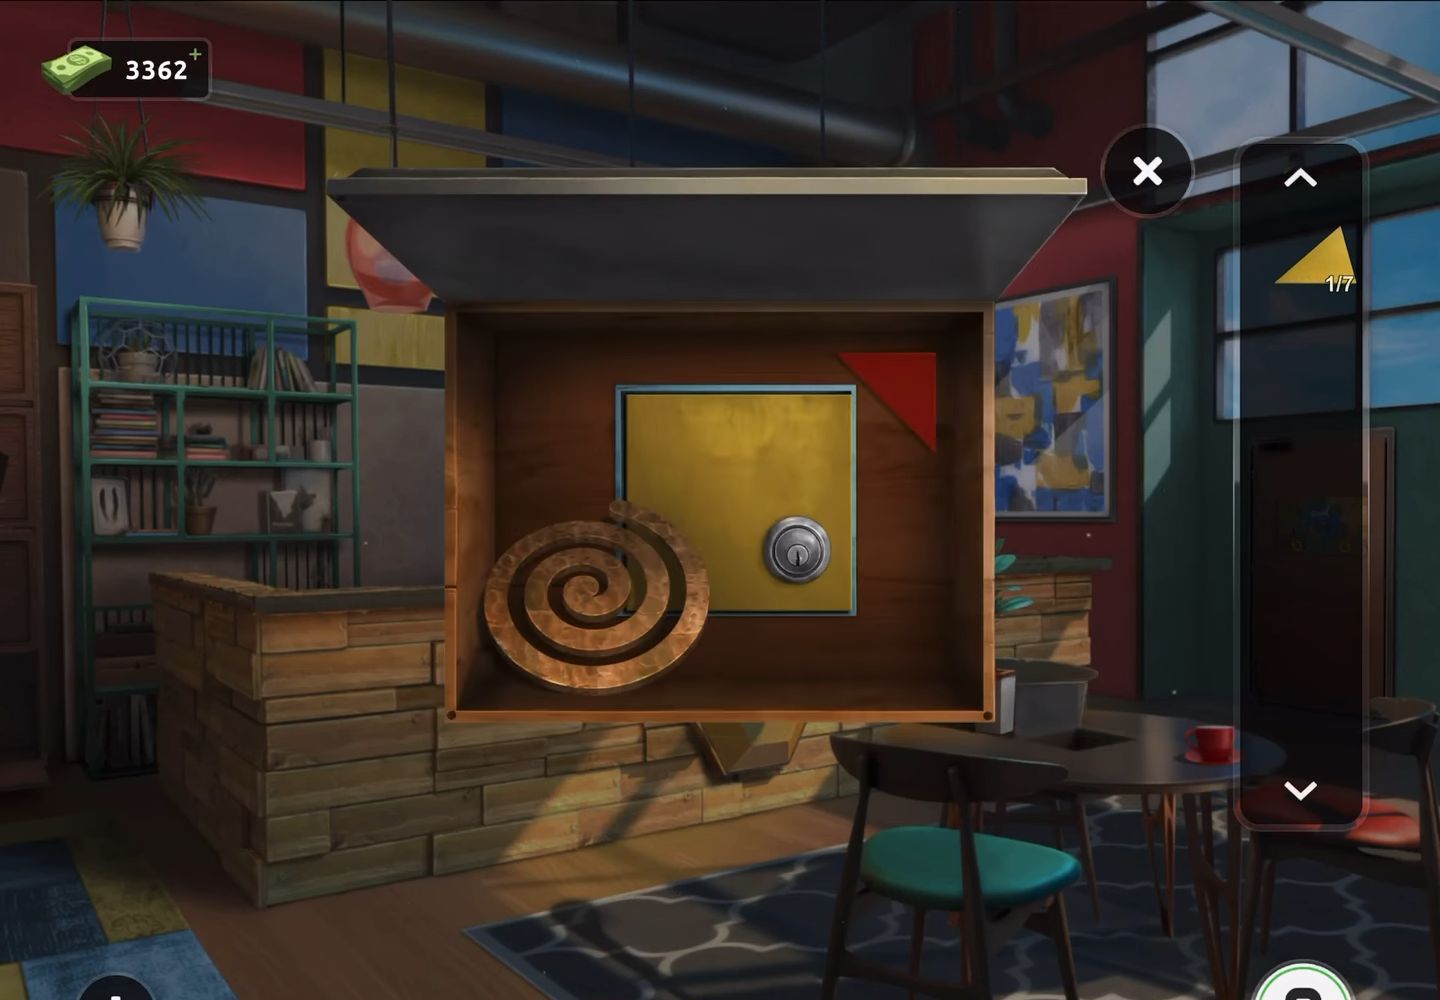
- Next, employ the spiral on the top compartment of the cabinet on the left, enabling it to open.
- Retrieve a pink shape (3 of 7) and a stun gun with a blue handle.
- Then revisit the box on the shelf behind the bar. Utilize the stun gun on the power socket located on the right side to illuminate the light bulb, opening the right side of the box.
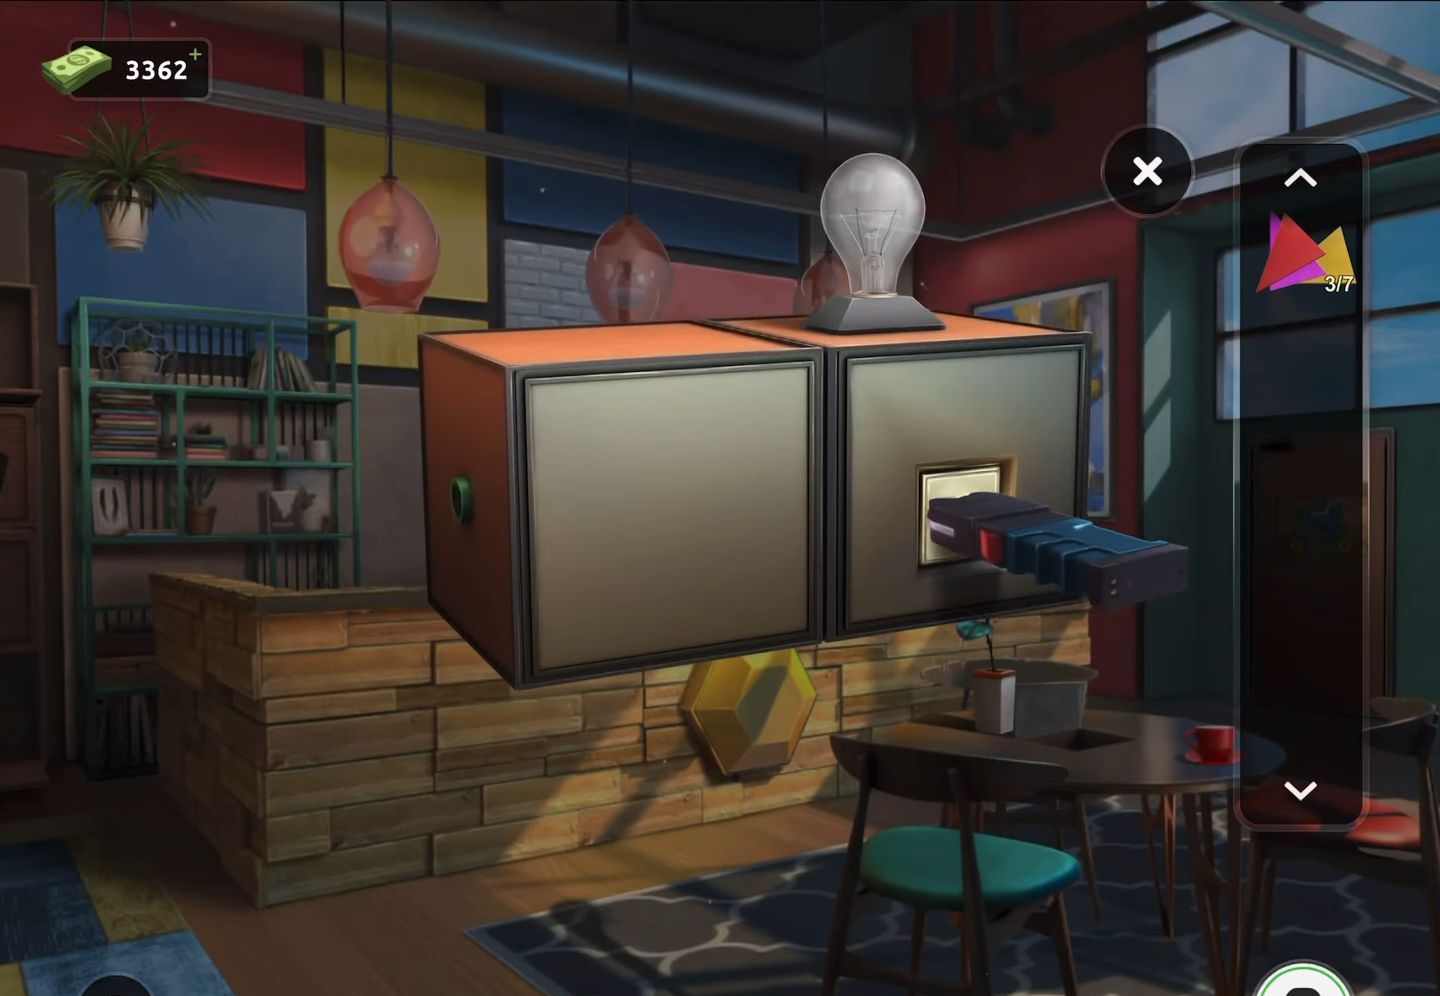
- After that, gather a star and a white shape (4 of 7). Use the star on the cabinet on the left to access another compartment. Obtain a blue shape (5 of 7) and a key.
- Now return to the round table and use the key to unlock the previously locked panel. Retrieve an orange shape (6 of 7) and a pentagon.
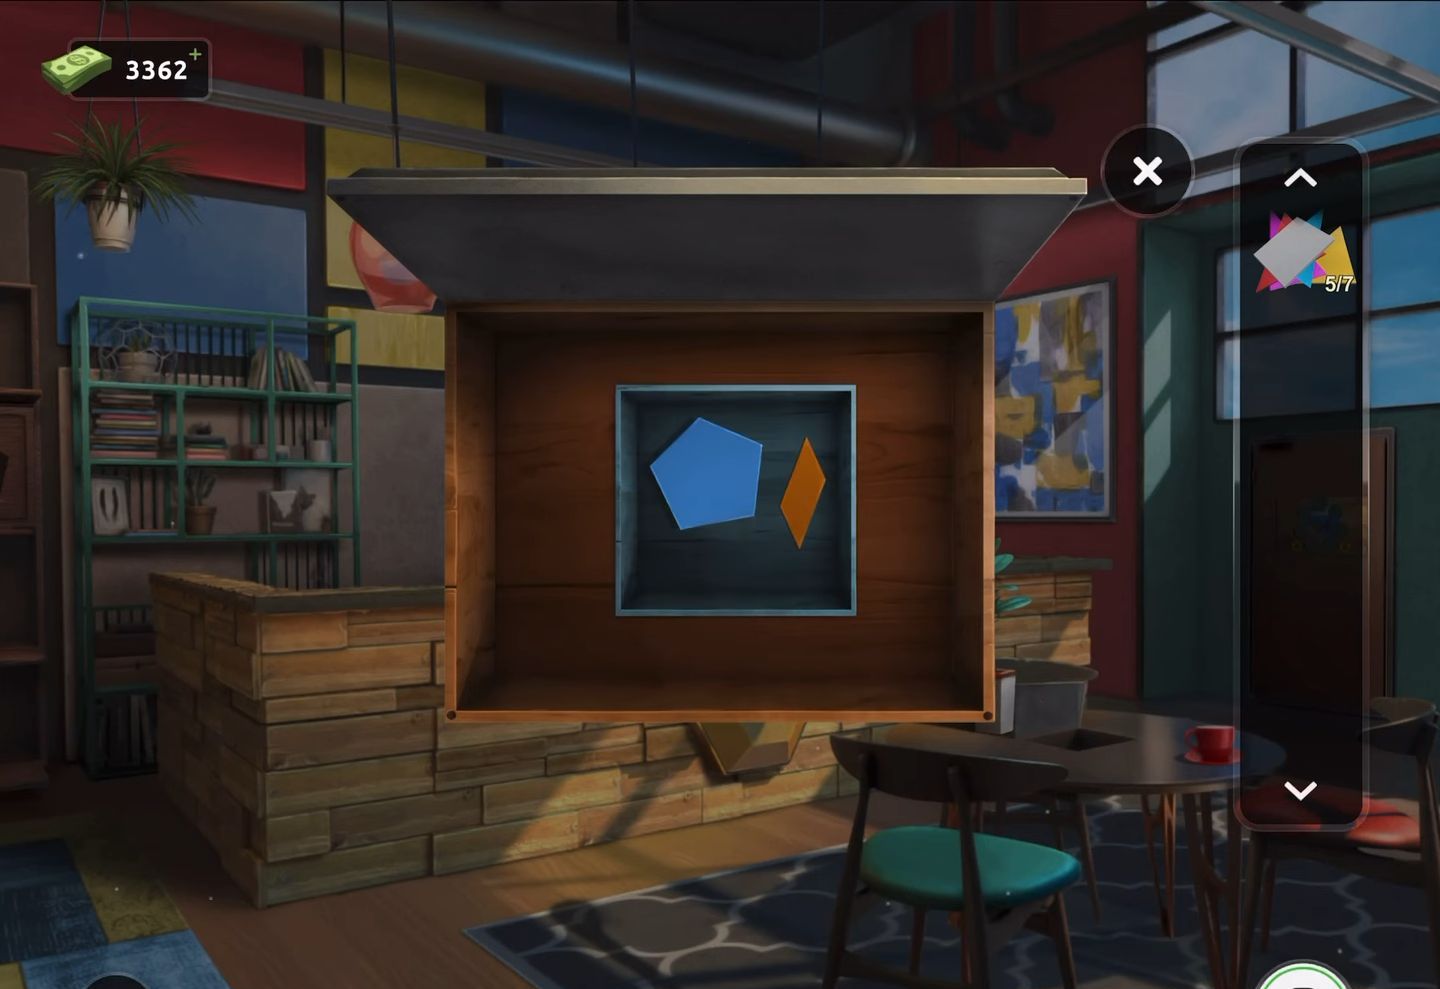
- Next, utilize the Pentagon to unlock the final compartment on the left-side cabinet. Retrieve a handle from inside.
- Revisit the box behind the bar and apply the handle to open its left side. Collect the green shape (7 of 7).
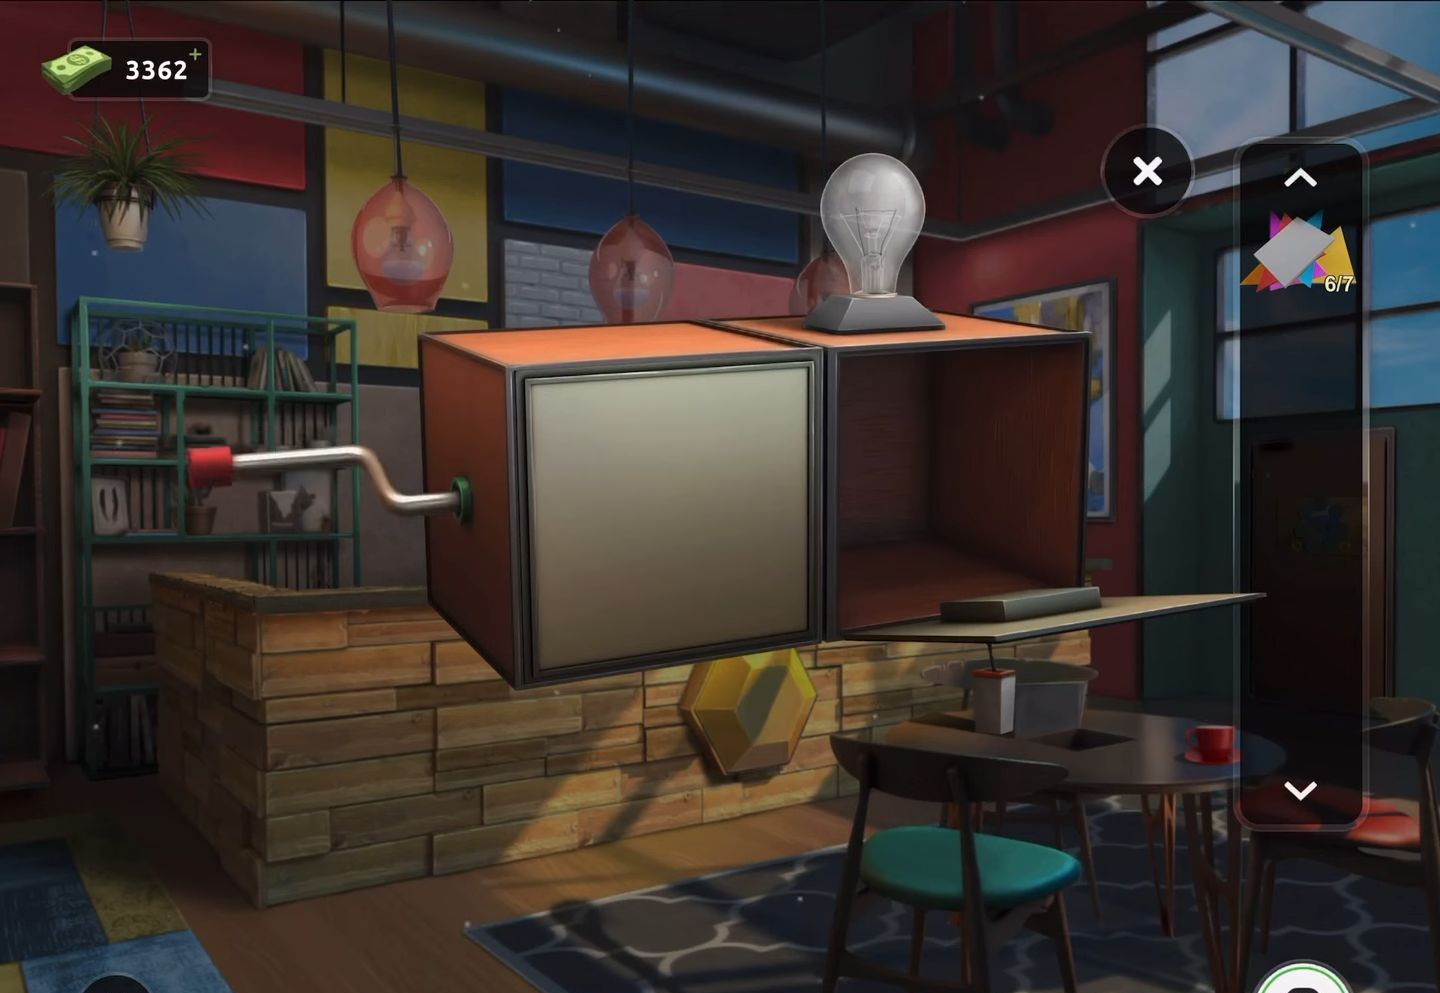
- Then proceed to view the exit door puzzle. Integrate the 7 shapes into the puzzle.
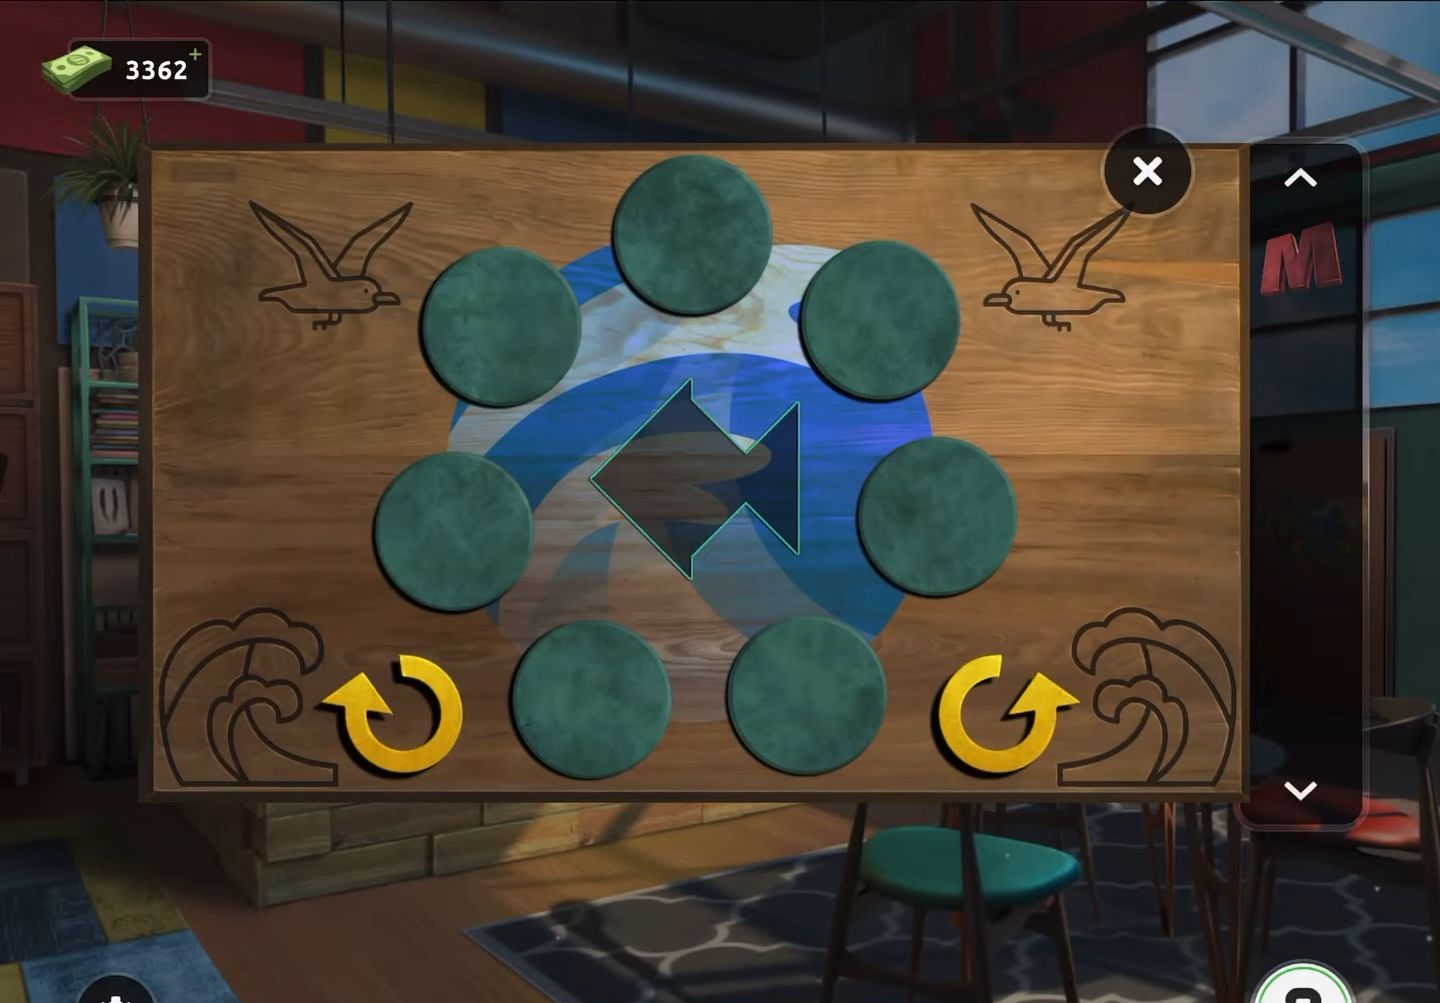
- After that, complete the puzzle by arranging the shapes to form a fish shape at the center. Some shapes may require rotation, which can be adjusted using the provided arrows before adding them to the puzzle.
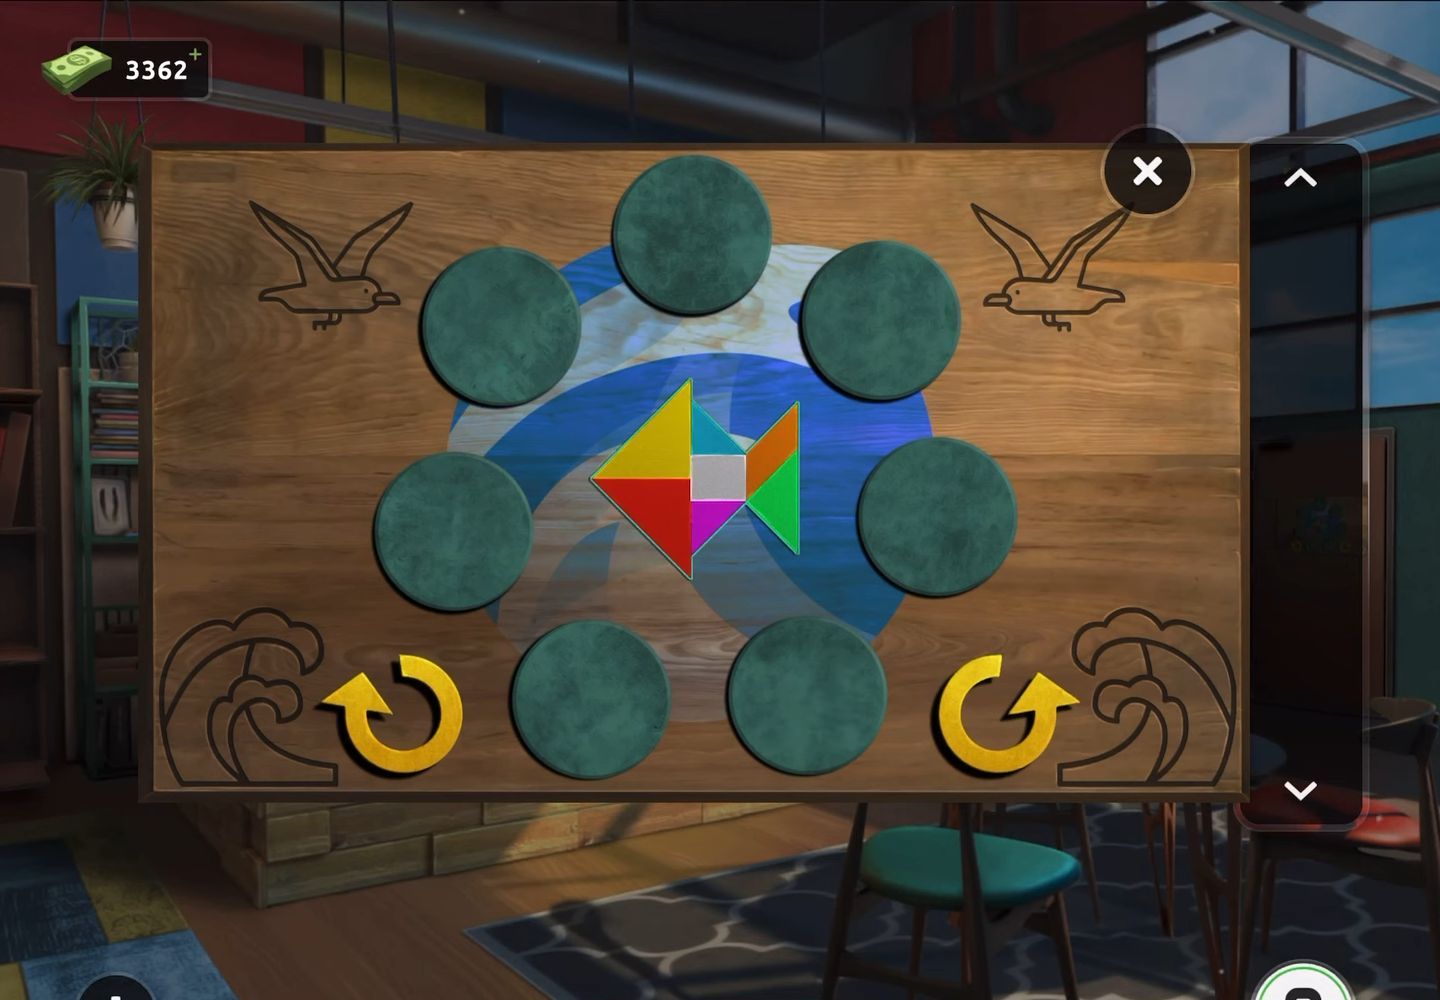
- Finally, once the puzzle is correctly arranged, the door will open, allowing you to escape.
Level 95:
To complete level 95, follow the instructions below:
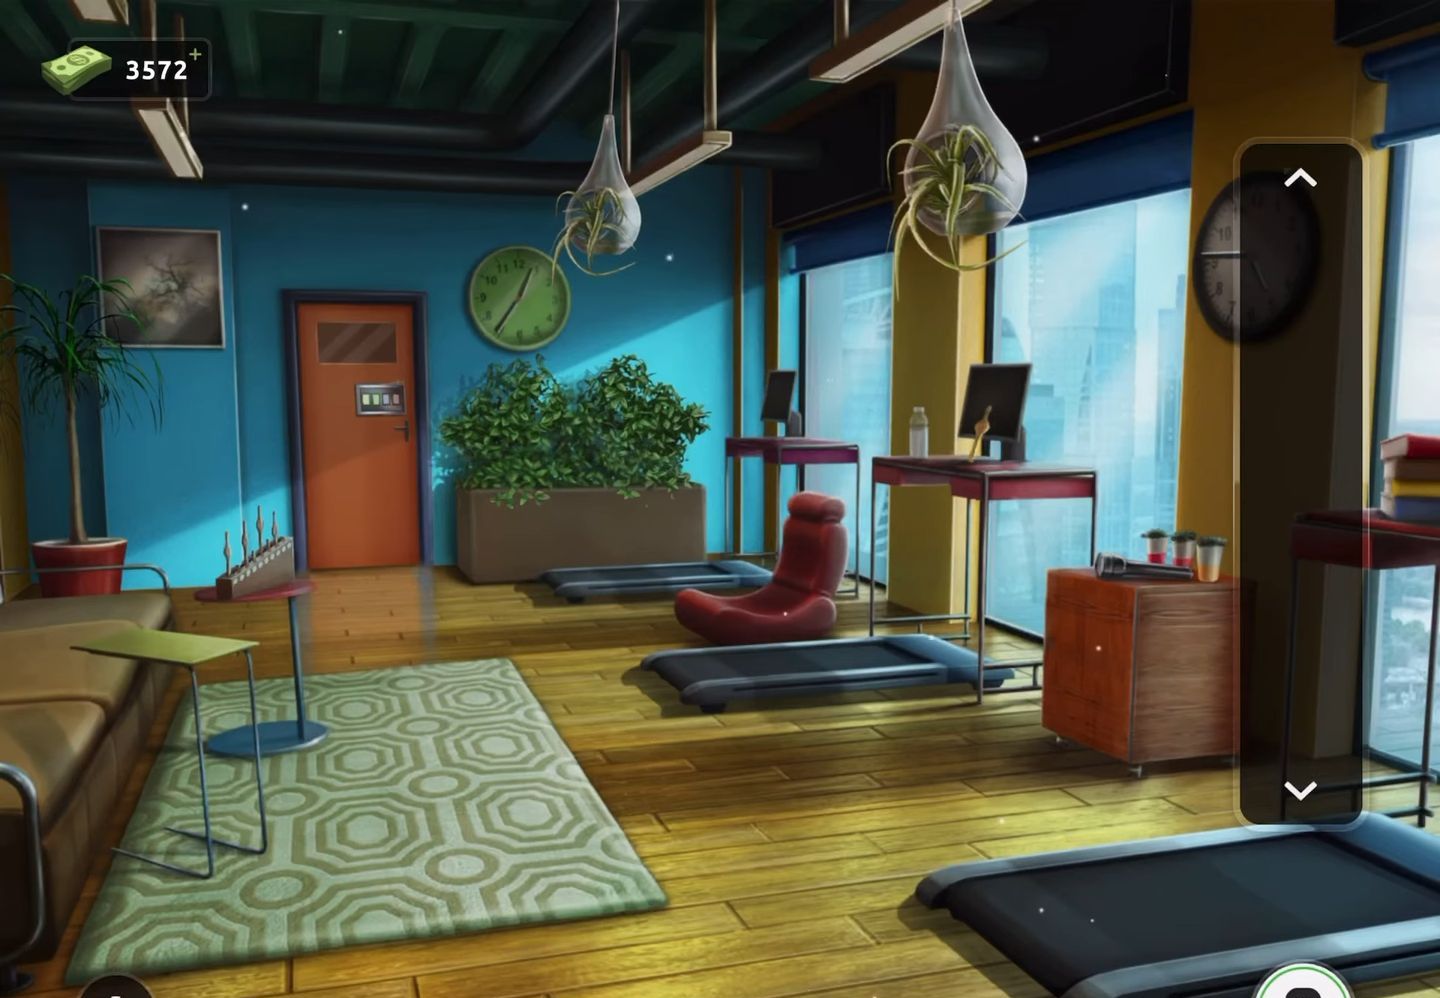
- Firstly, press on the small round-red table positioned by the left-side sofa.
- This action will reveal a stand containing bowling pin shapes, with five pieces missing.
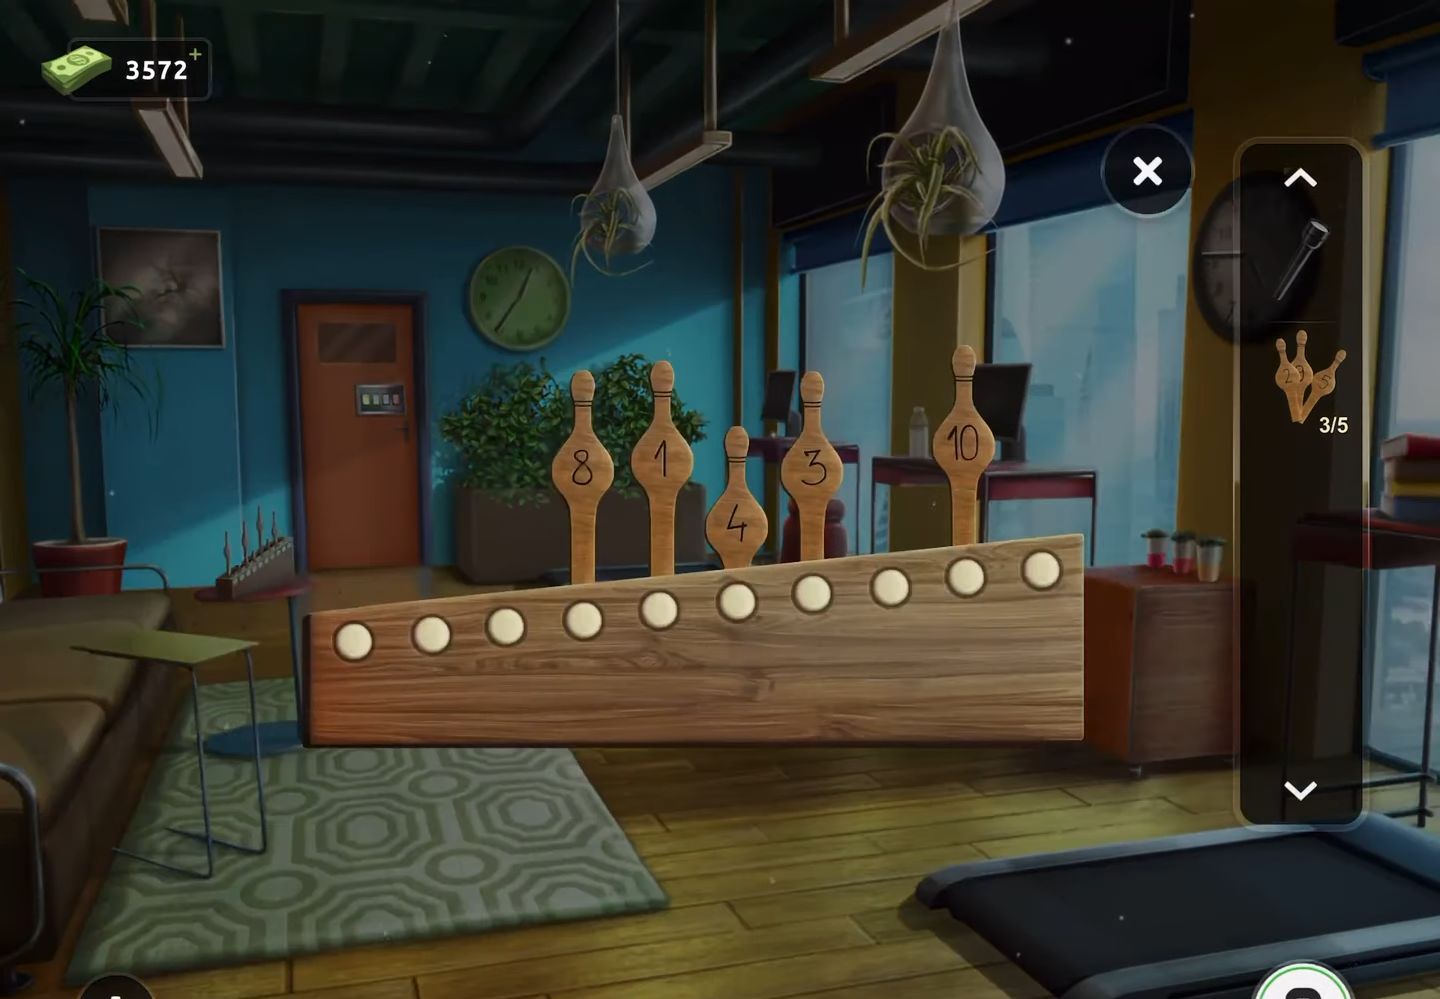
- Now collect the first piece from the sofa on the left.
- Then search within the bushes located to the right of the door to discover another piece.
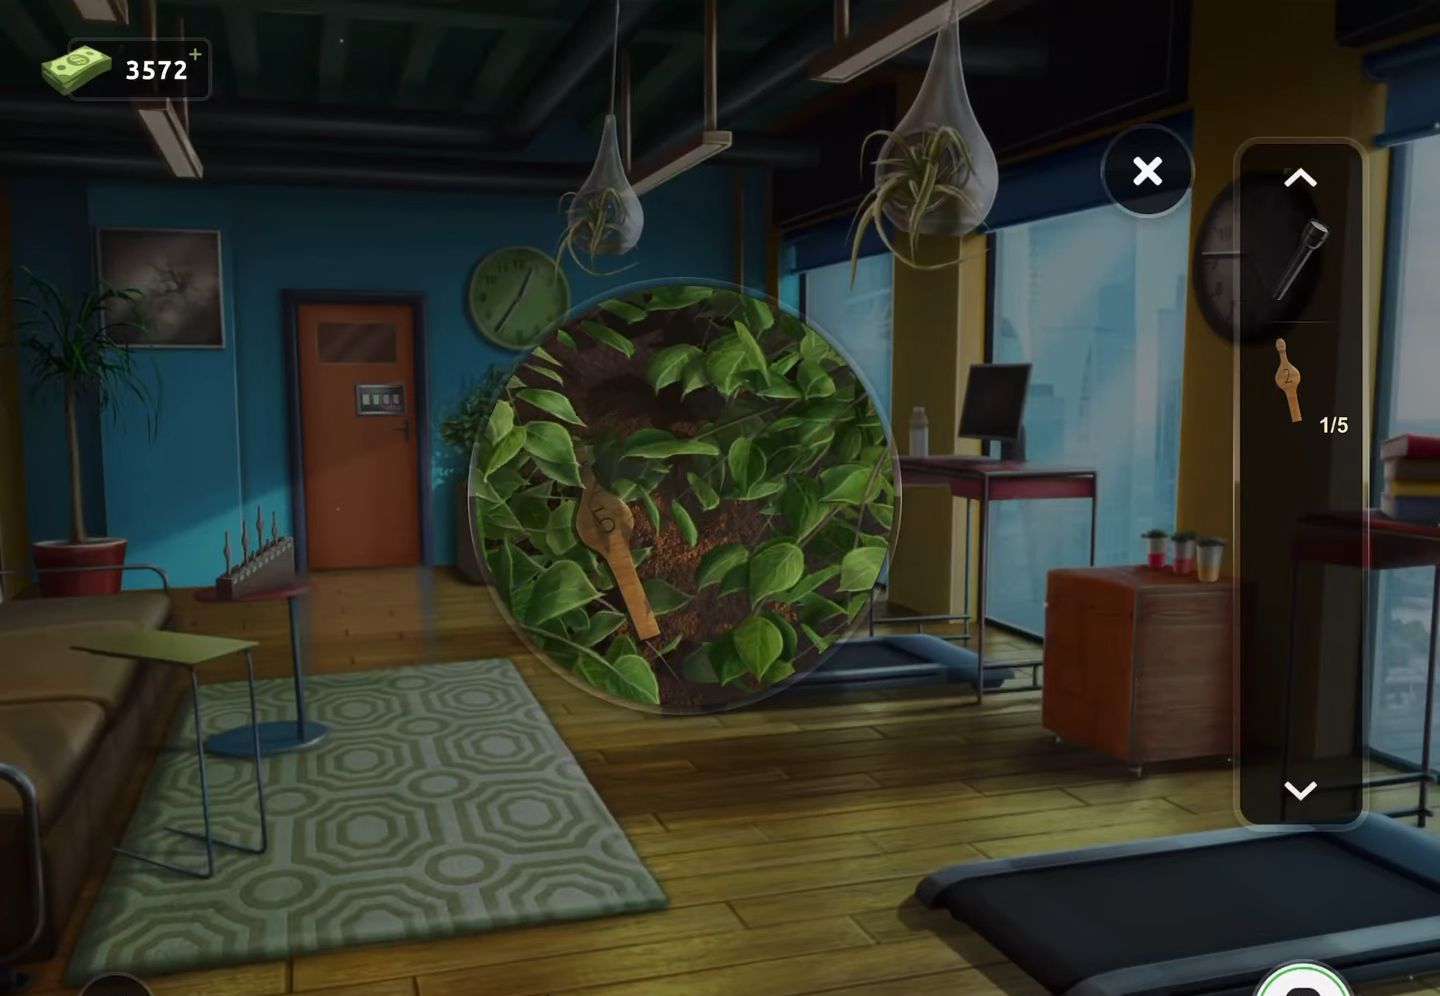
- Next, obtain the third piece from the middle desk situated on the right side.
- Additionally, inspect the exit door puzzle to find the fourth piece.
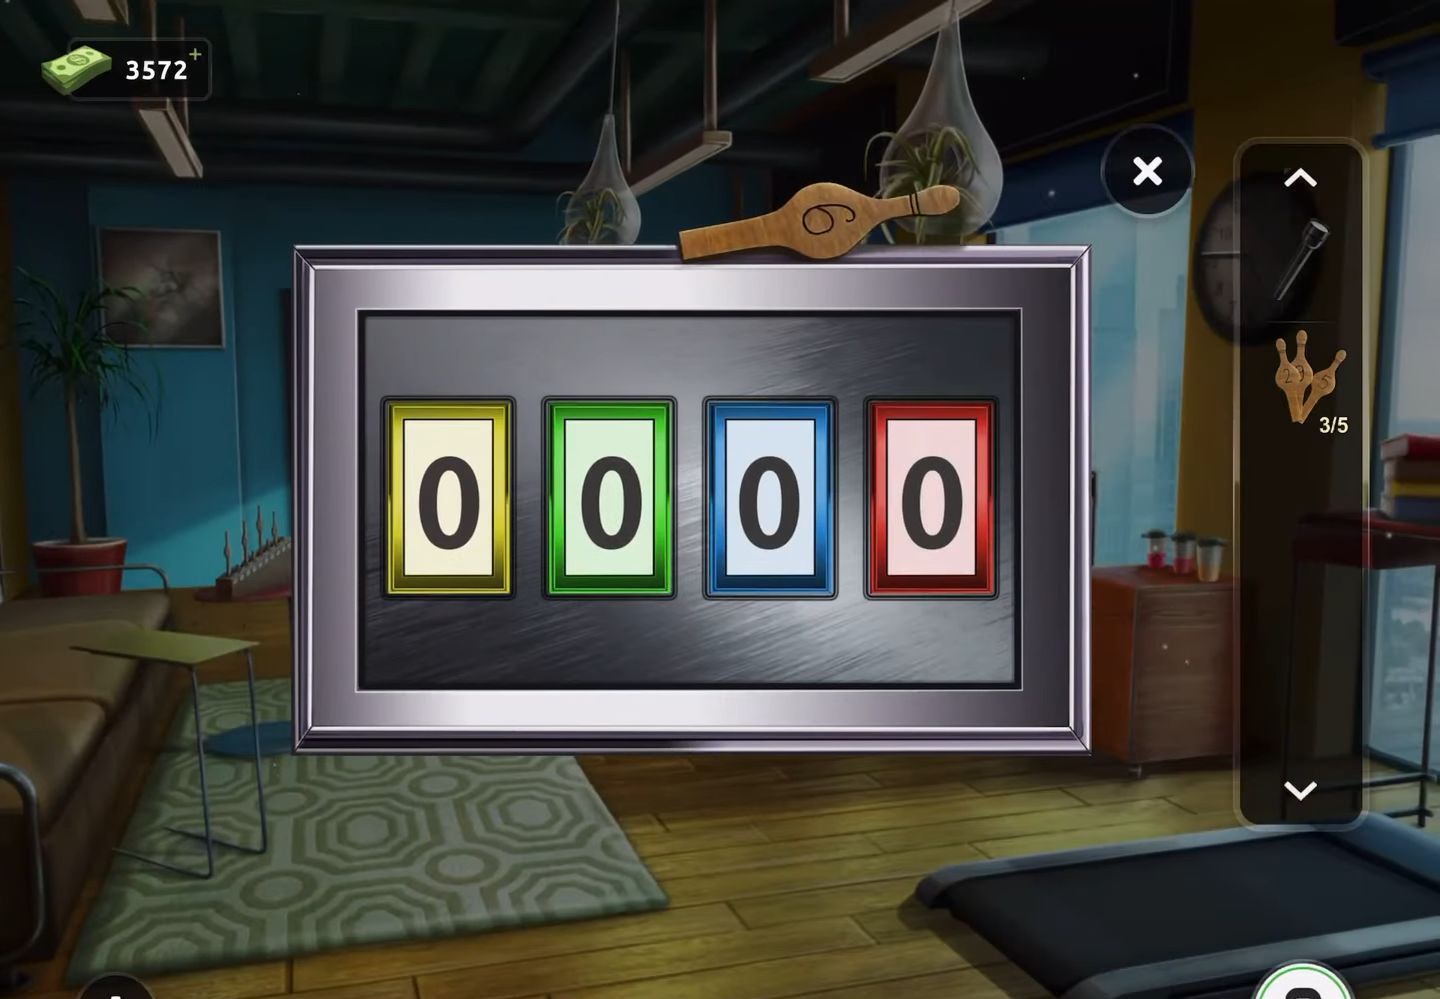
- After that, retrieve a torch from the small cabinet situated on the right-hand side.
- Then use the torch to examine underneath the sofa and collect the fifth piece.

- Now revisit the stand and attach the five collected pins to initiate the puzzle.
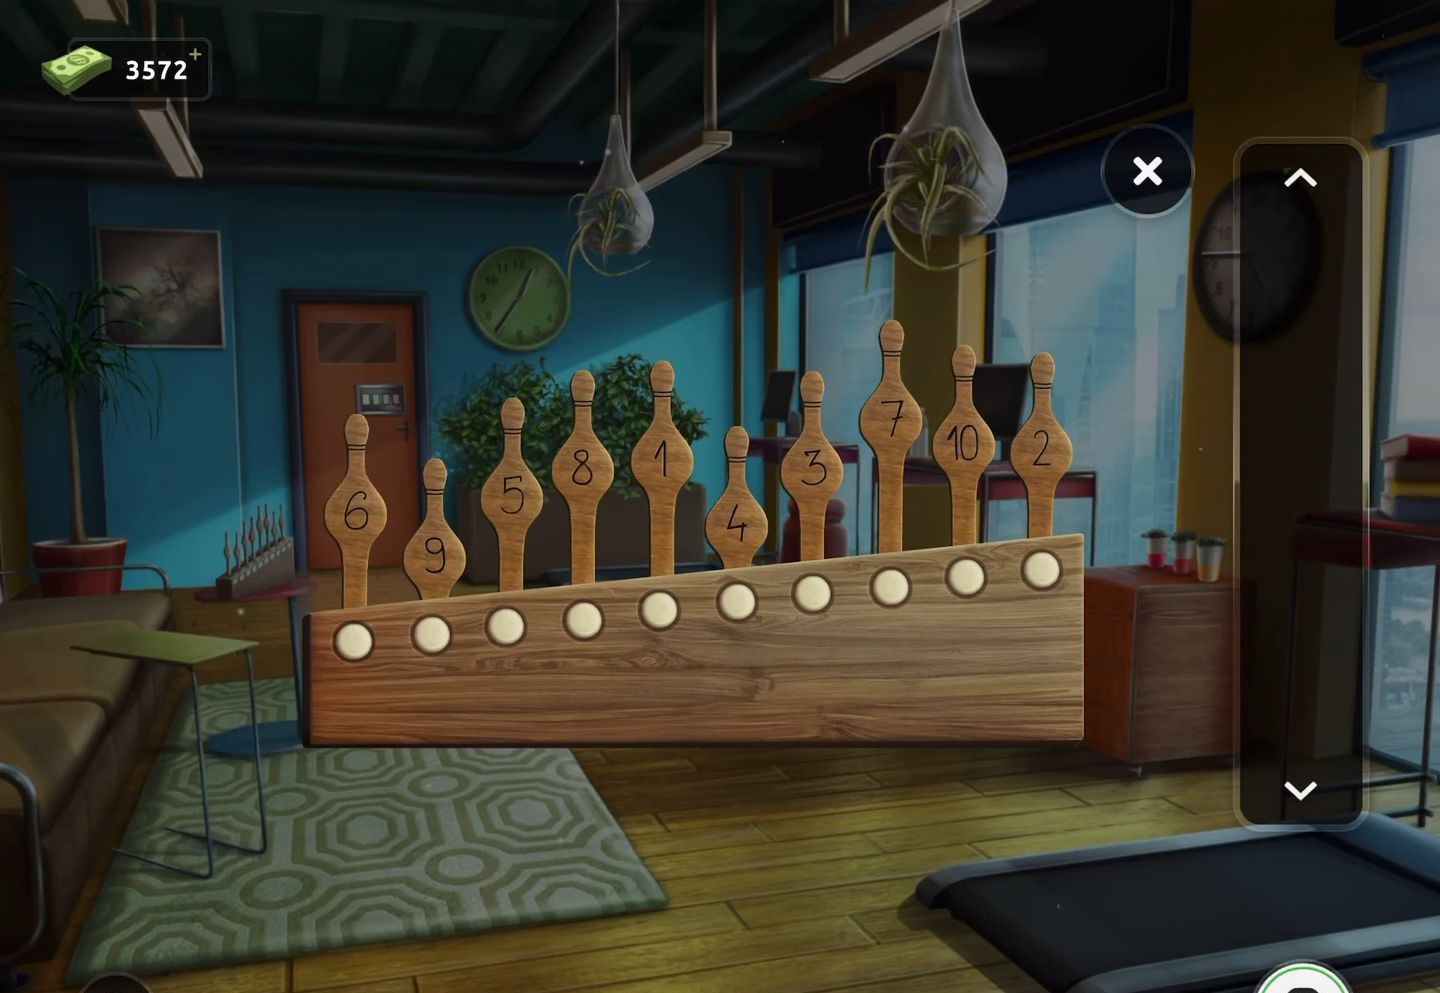
- Upon completion, the pins will illuminate with different colors.
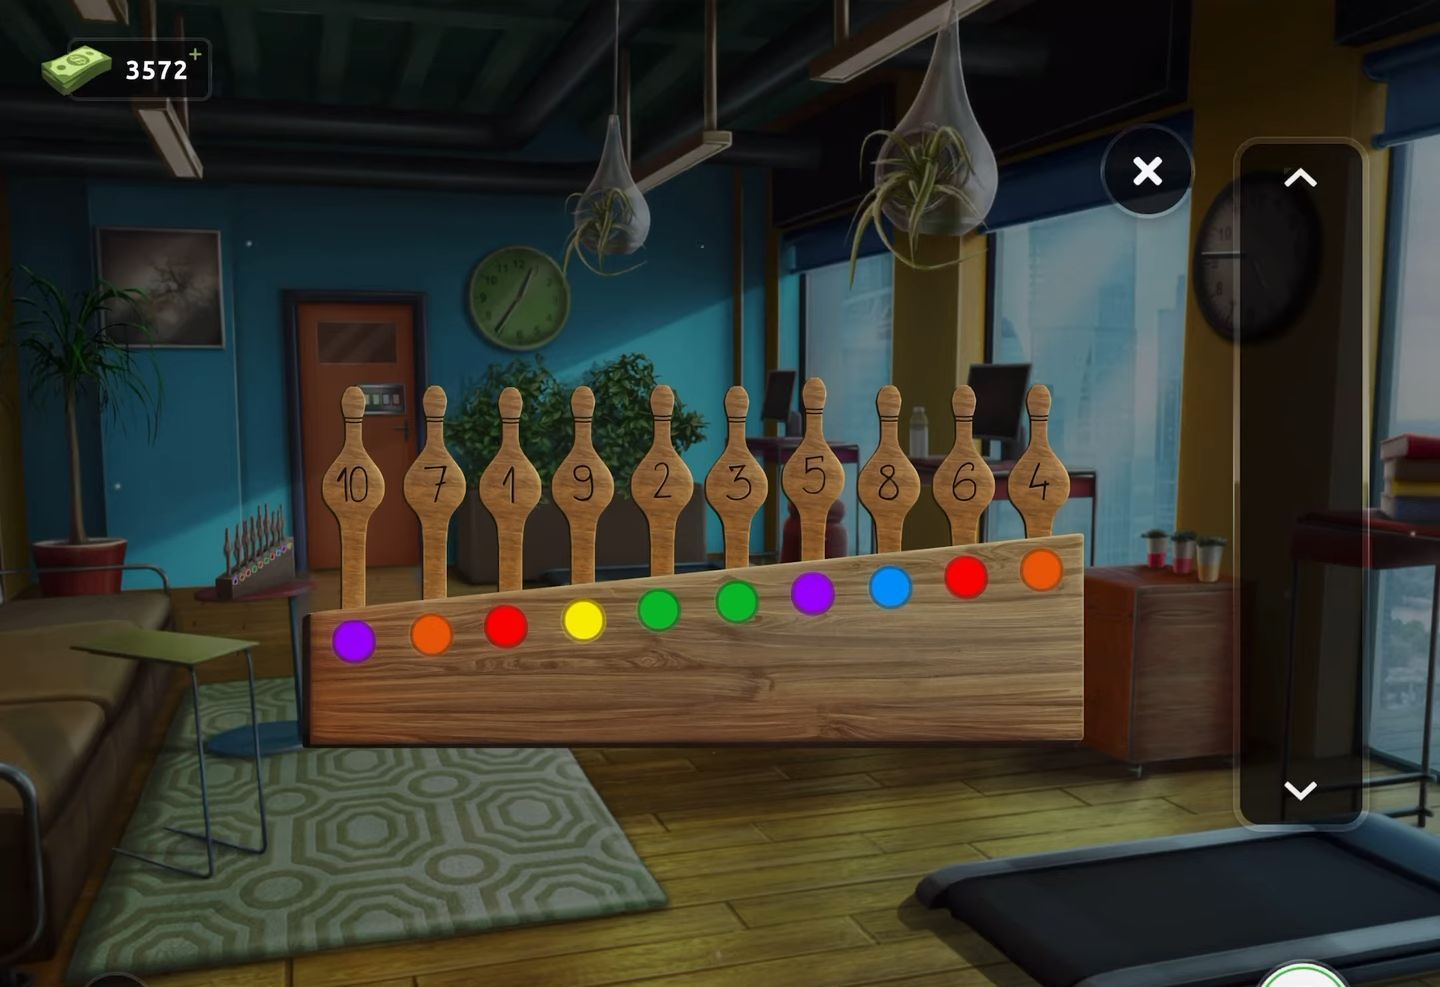
- Next, re-examine the exit door puzzle. Take note that each number is associated with a colored border.
- Then obtain the code derived from the colors observed on the pins.
- Finally, use the derived code (9587) to unlock the exit door and successfully escape from the room.
Level 96:
To complete level 96, follow the instructions below:
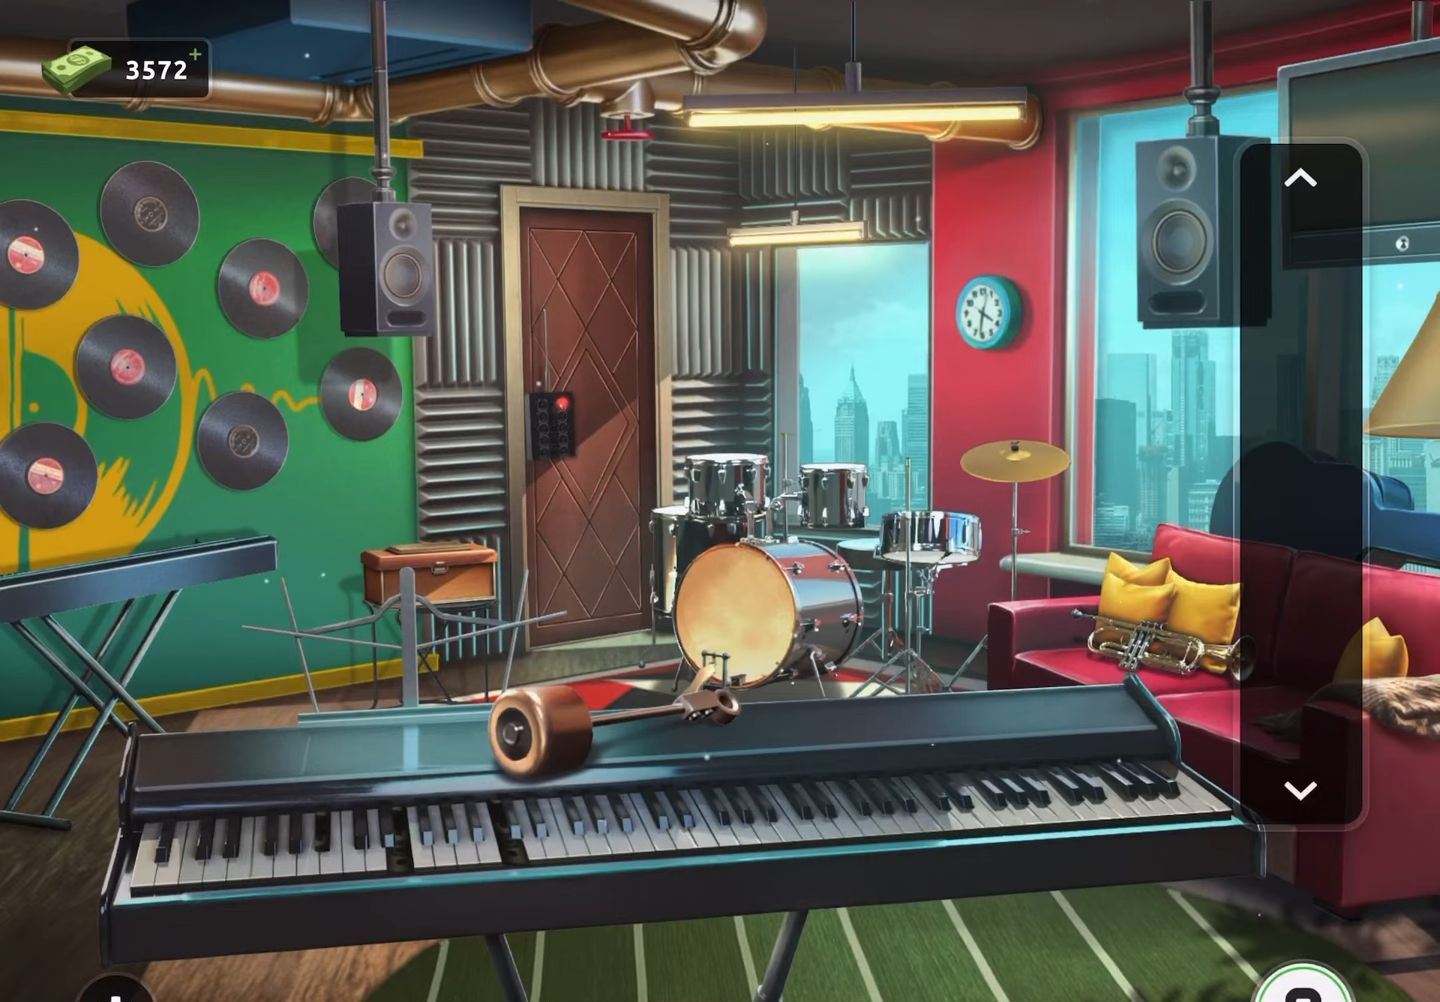
- Begin by acquiring the bass drum beater from the keyboard. Add it to the drum set located at the back of the room.
- Then proceed to tap the bass drum until it ruptures. Collect a piano key and a remote control from within.
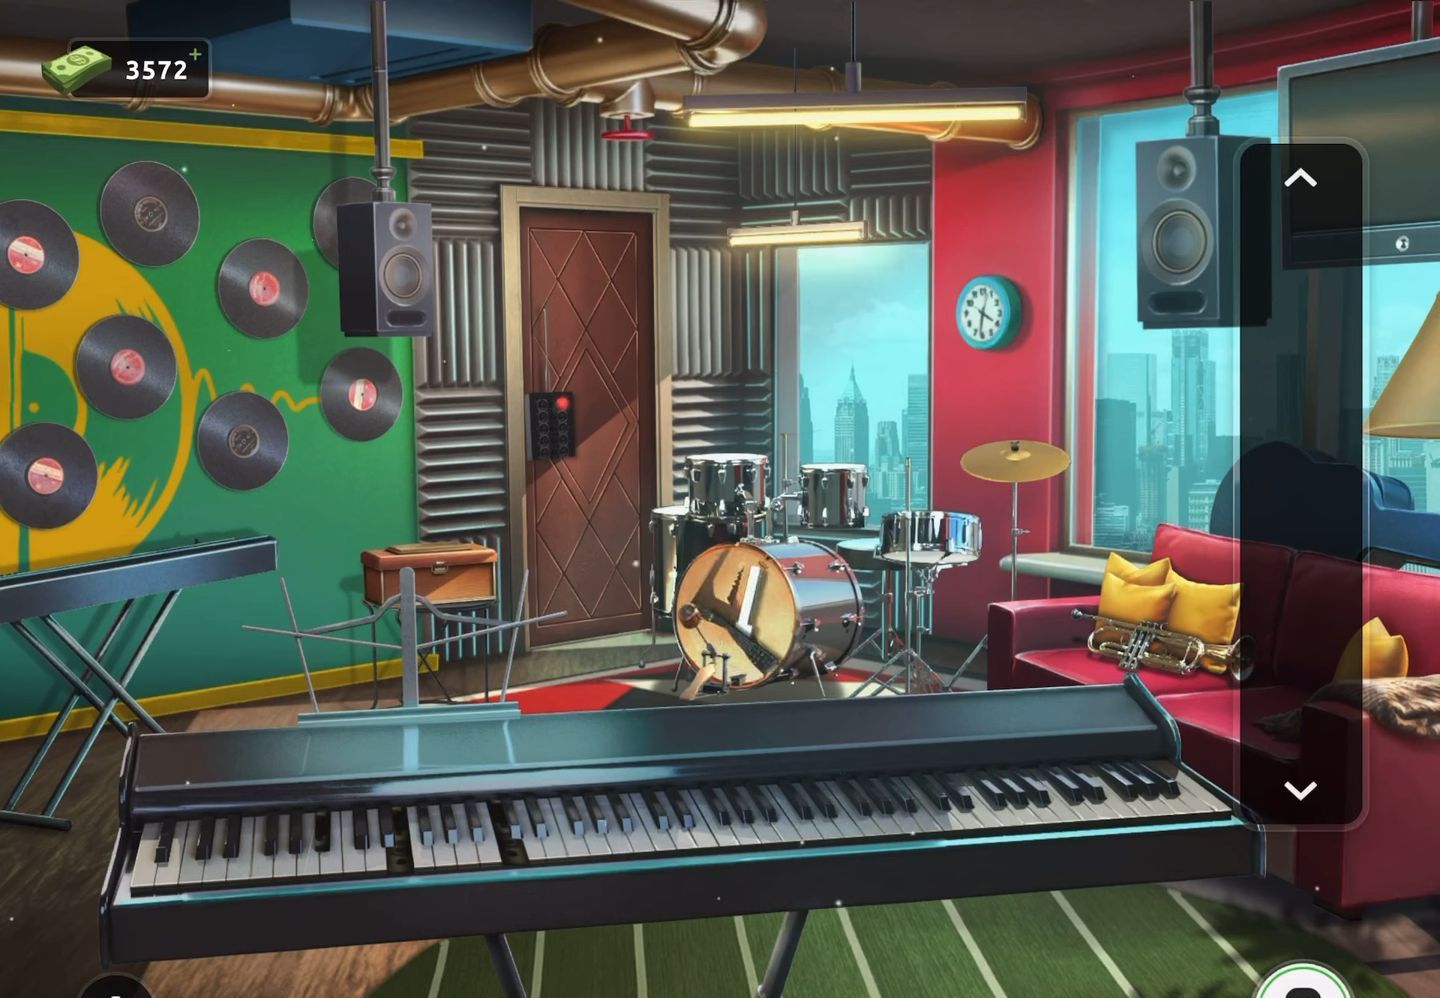
- Now utilize the remote control on the top right TV screen to receive a clue.
- Afterward, tap on the trumpet placed on the sofa.
- Engage with the three blue buttons on top of the trumpet to obtain a black piano key.
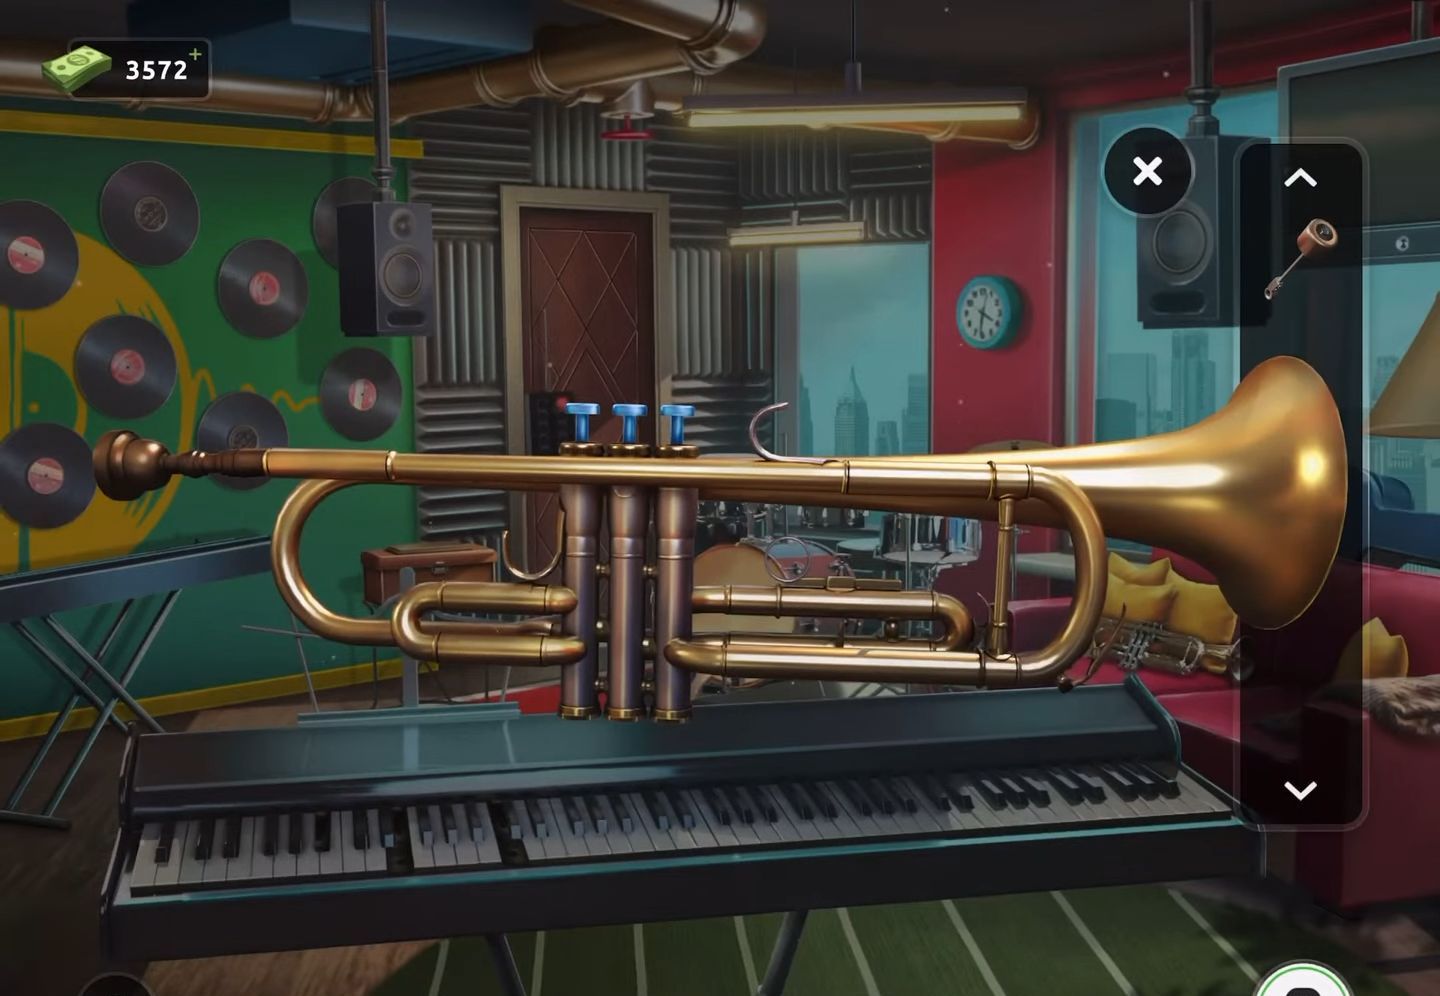
- Then direct your attention to a box positioned to the left of the door to observe a puzzle.
- Arrange the symbols correctly as indicated by the puzzle.
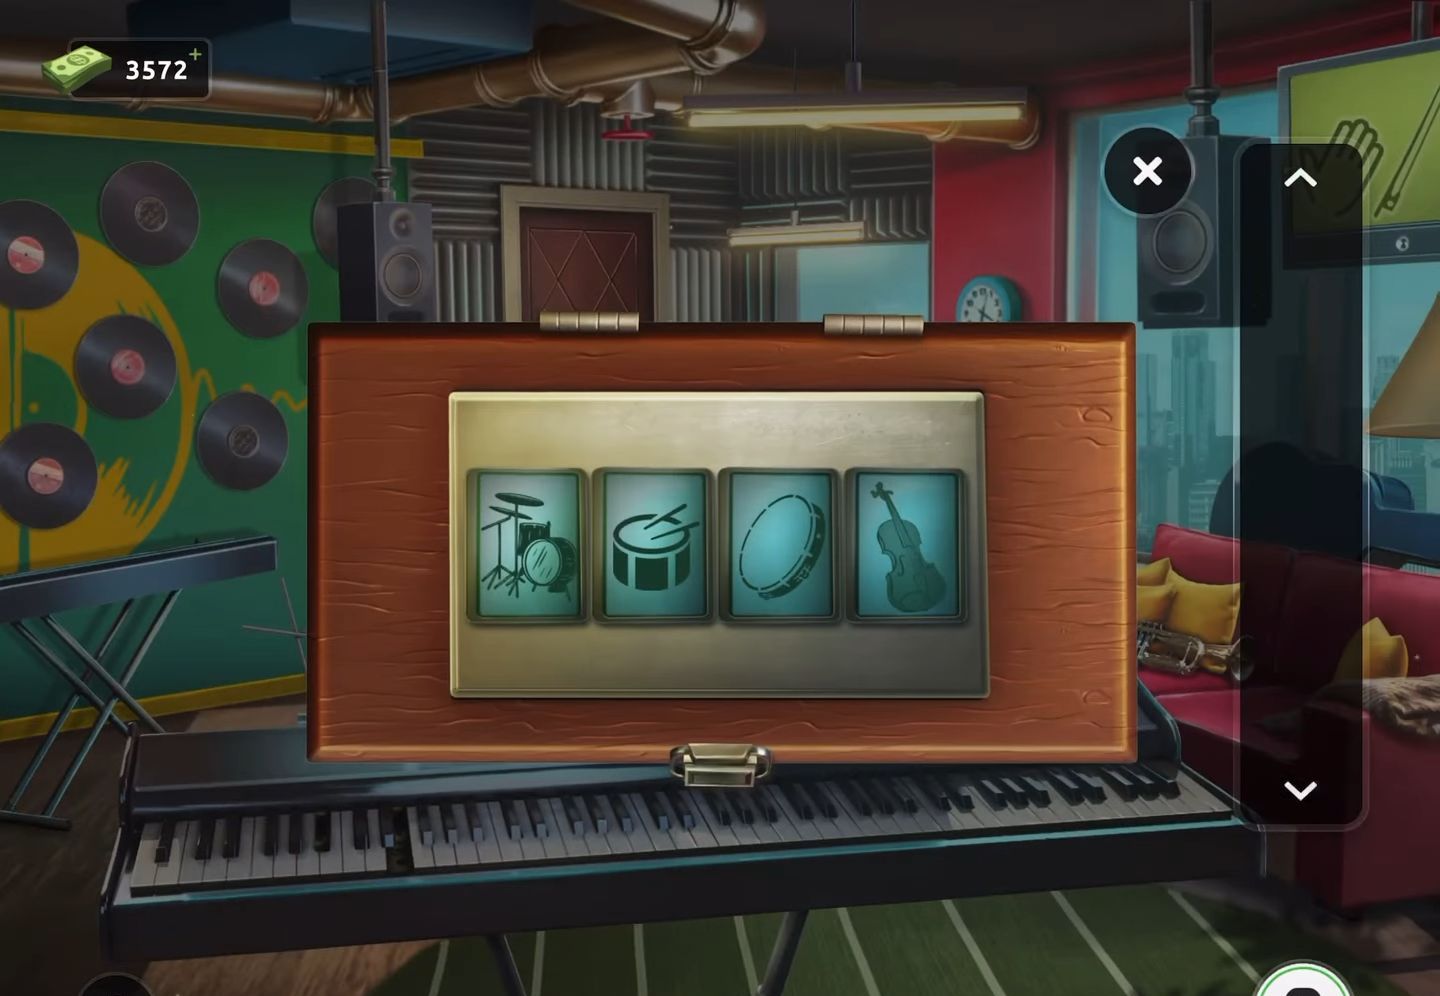
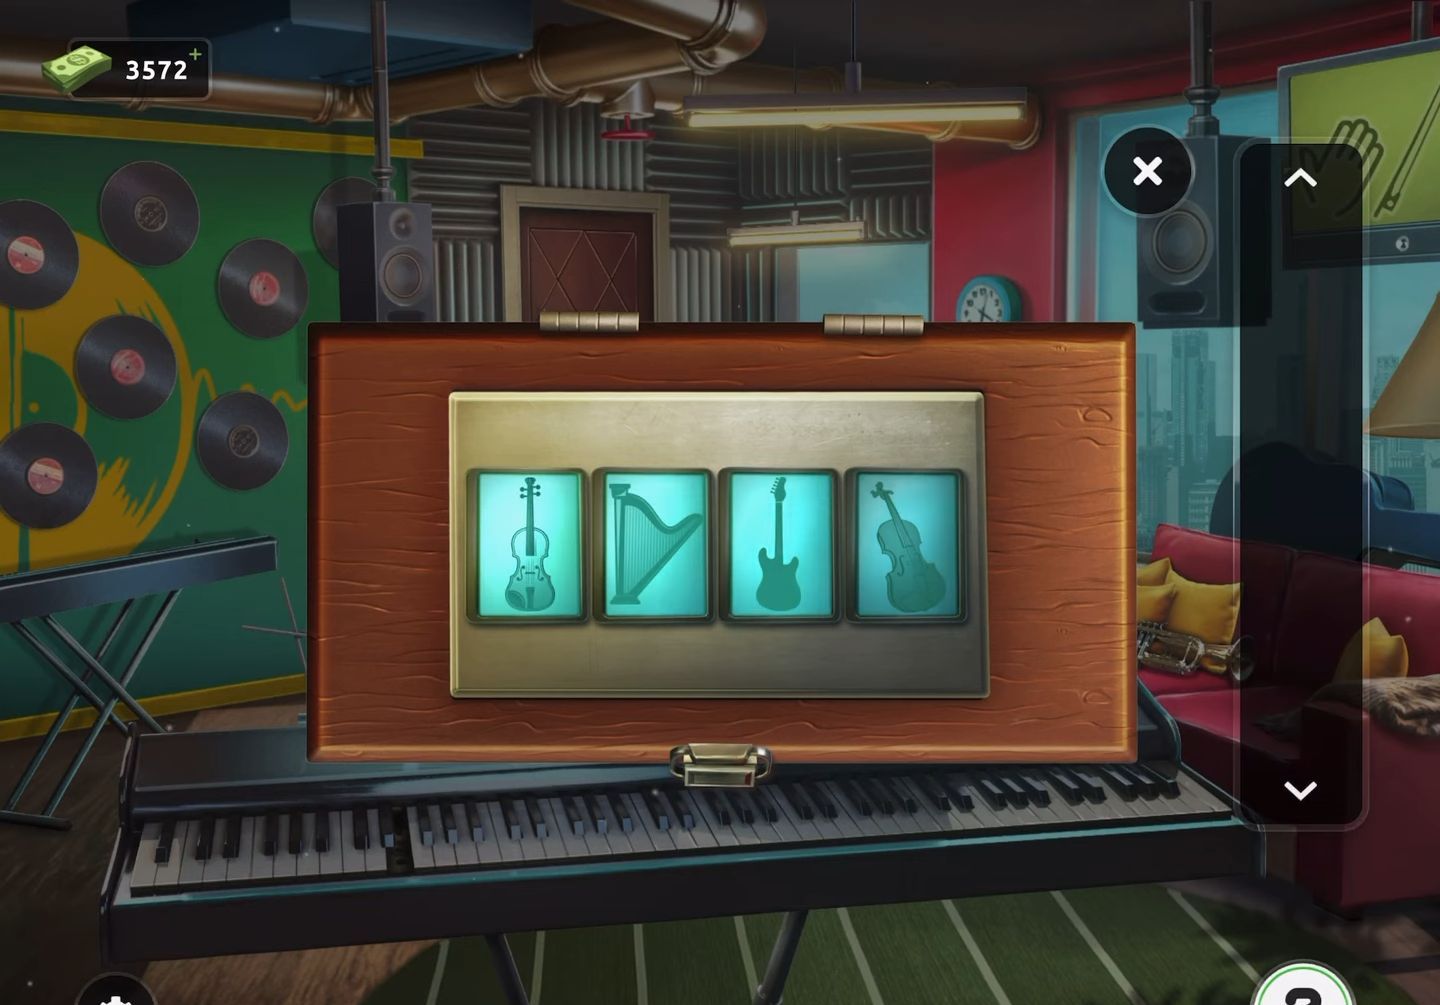
- Next, open the box once the puzzle is solved and collect the paper.
- After that, access this item in your inventory to retrieve another piano key and examine the clue provided.
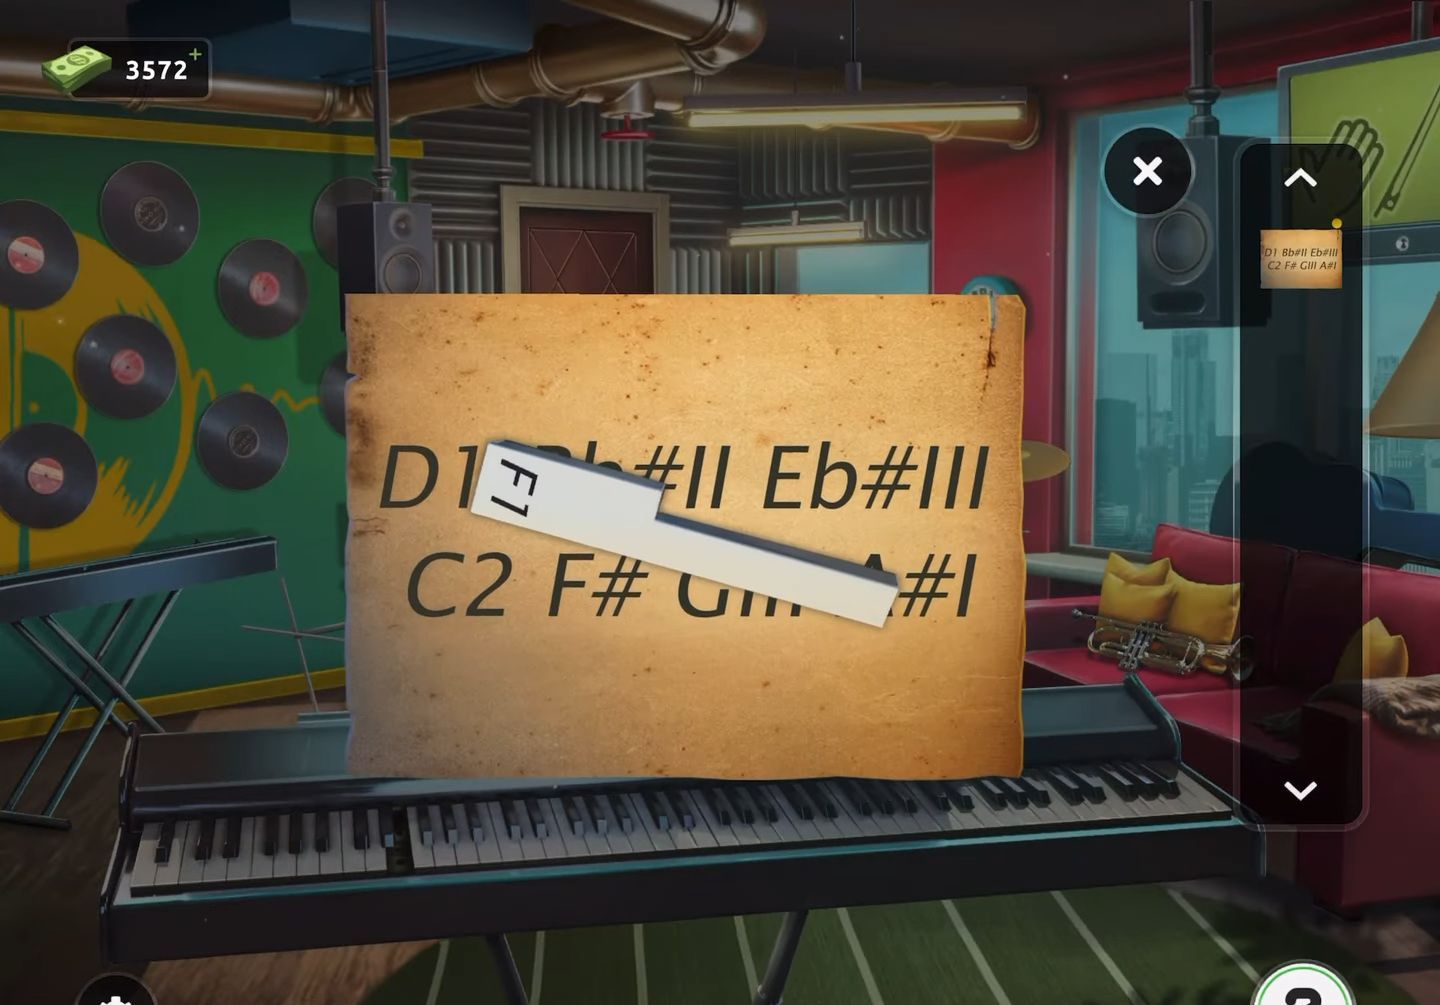
- Now click on the keyboard to identify the absent keys.
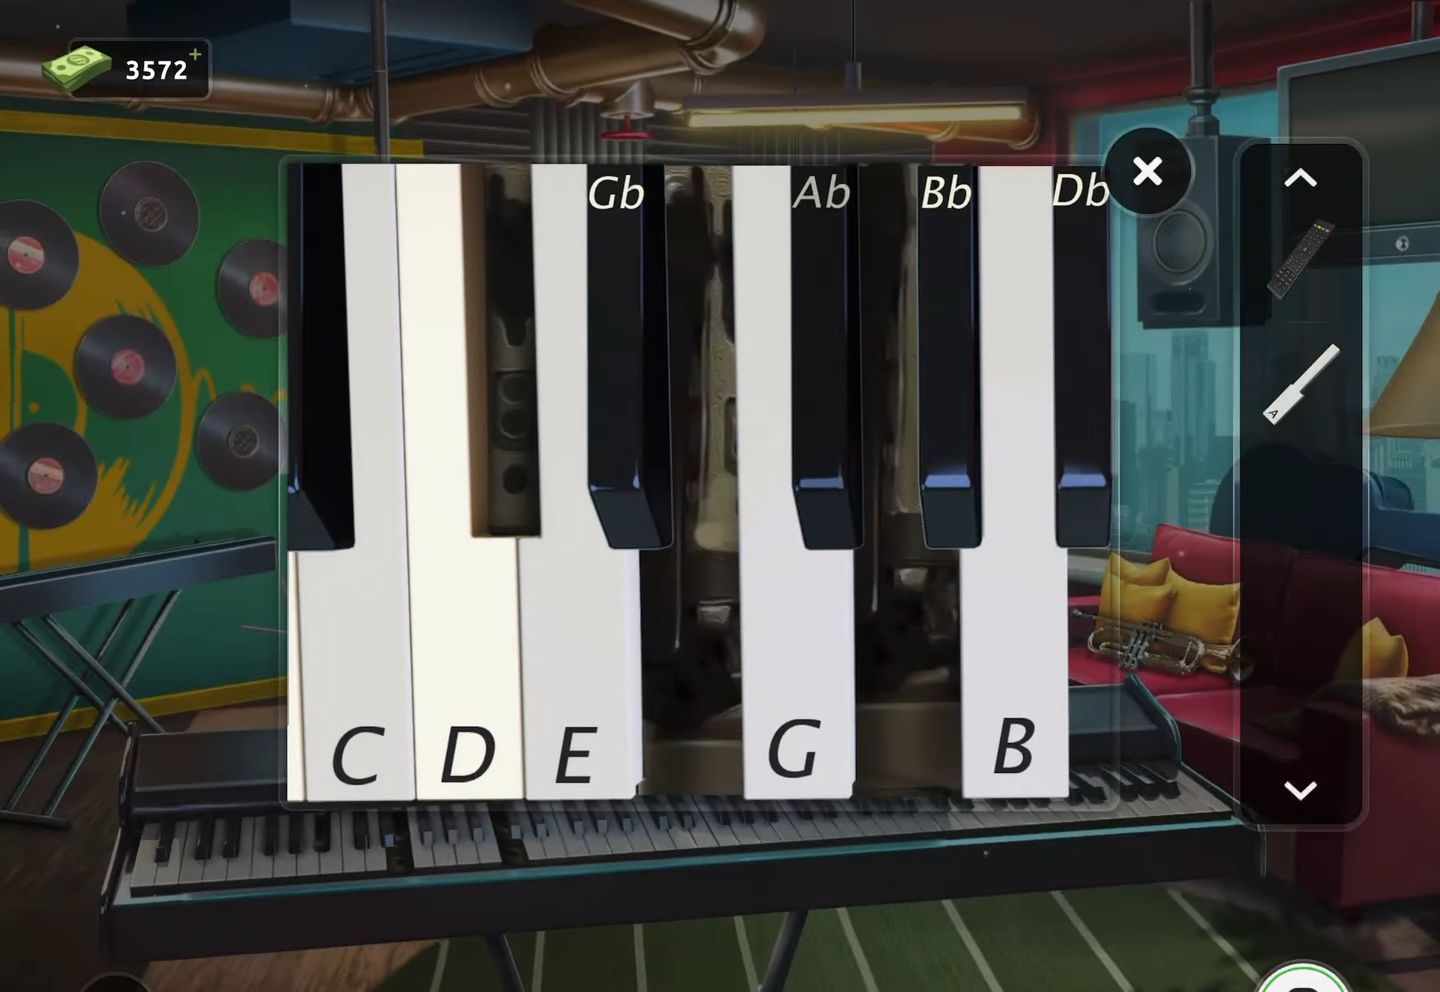
- Then add the missing keys to the keyboard and begin the puzzle.
- Referencing the clue on the paper, play the correct notes by tapping the keys in this order: D C G F A Bb Eb.
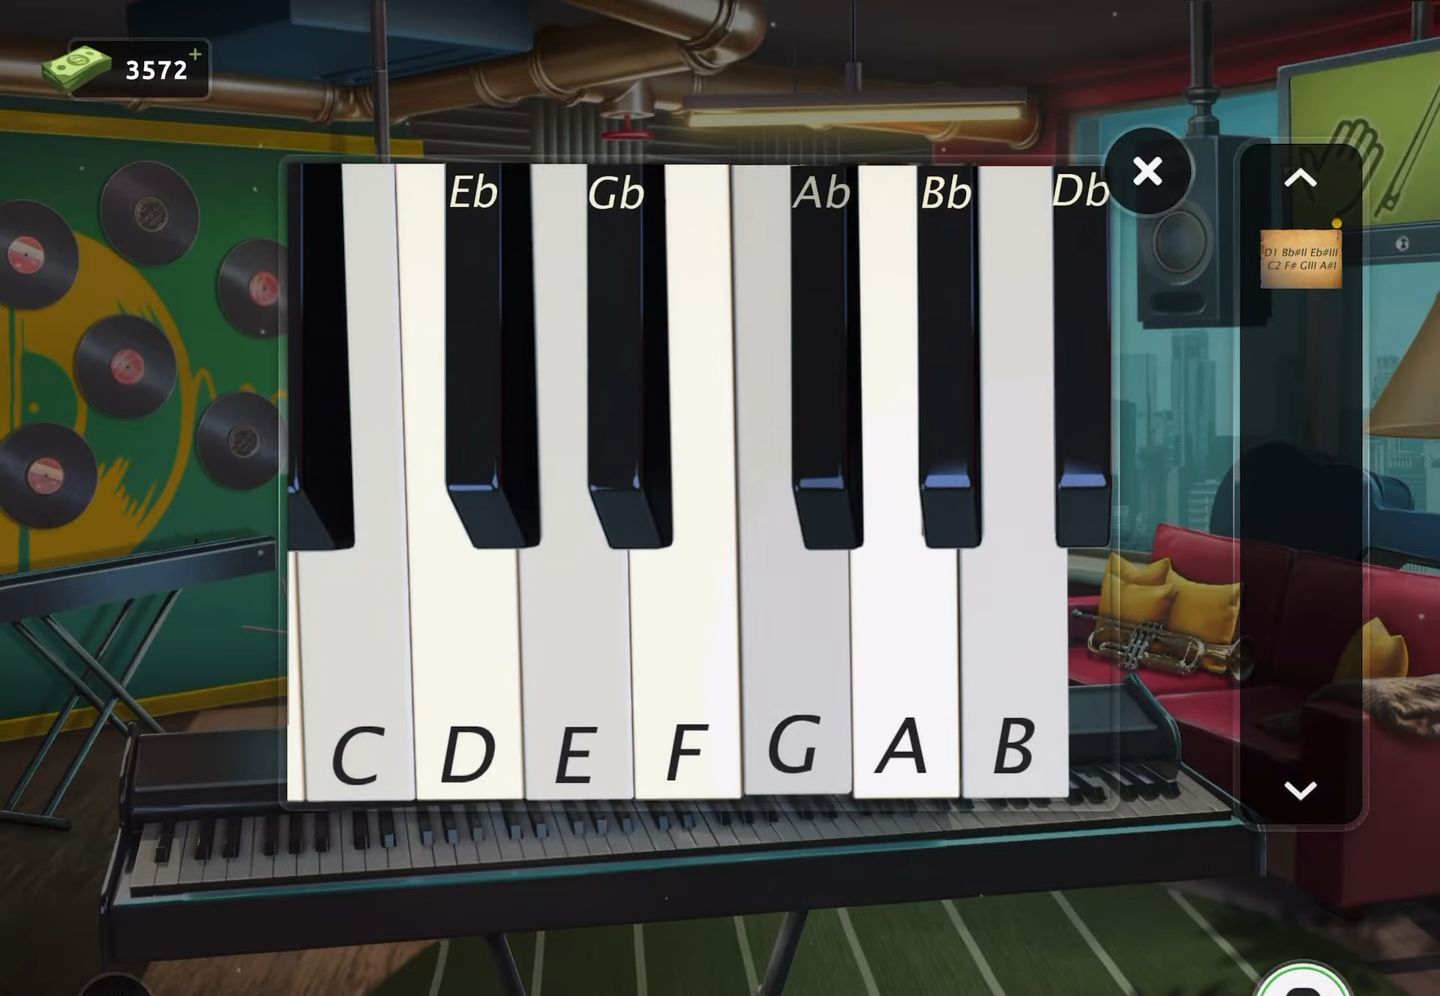
- Finally, upon correctly playing the sequence, the door will open, allowing you to escape.
Level 97:
To complete level 97, follow the instructions below:
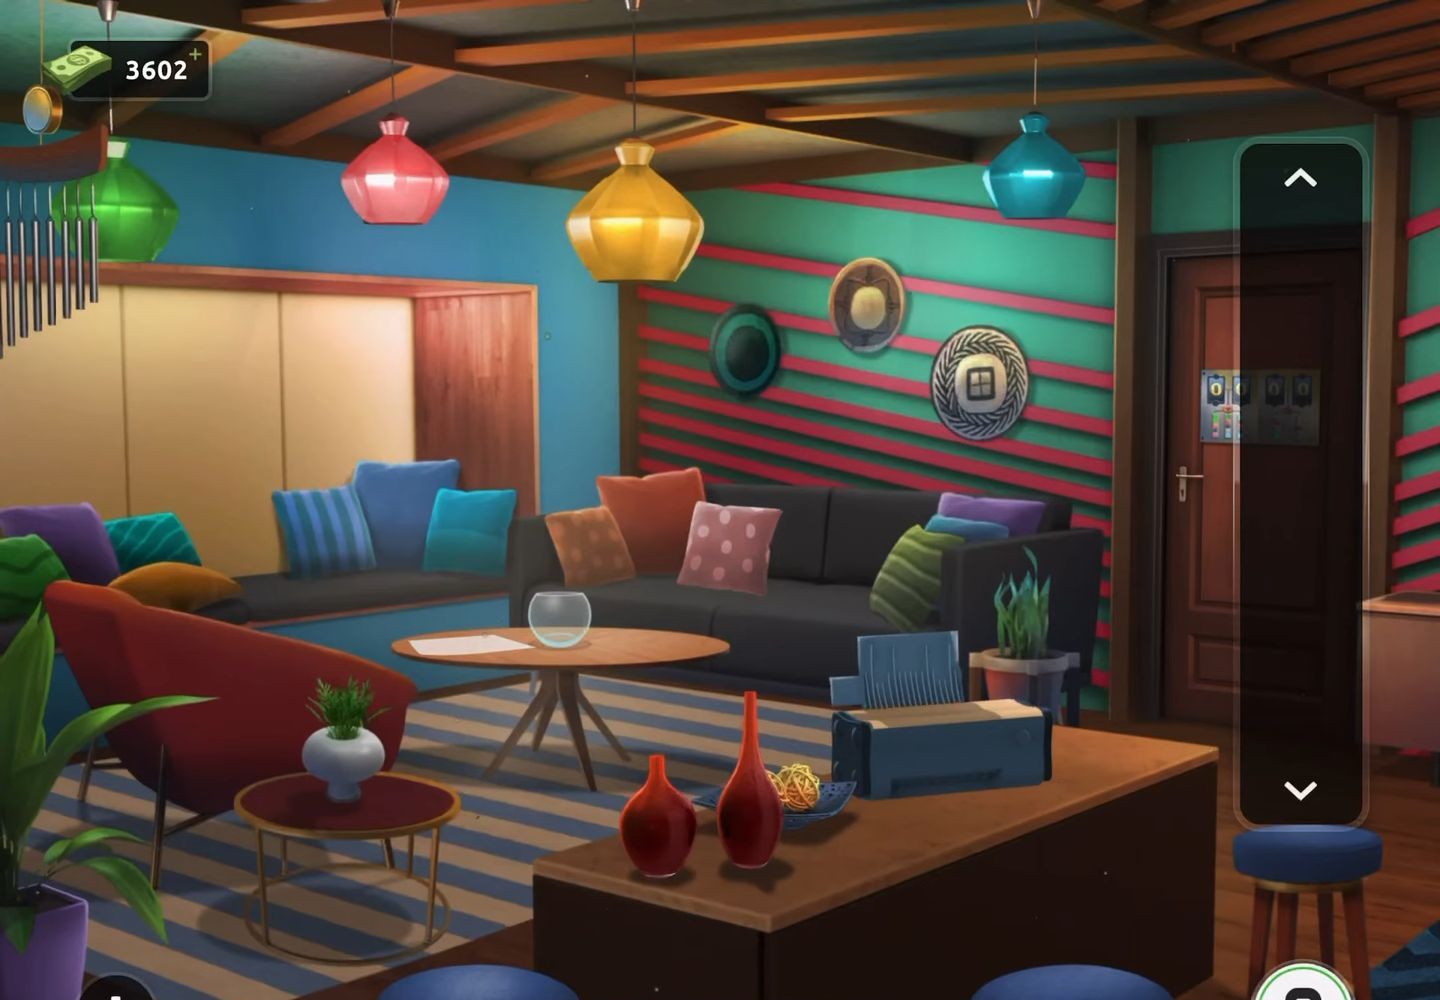
- Begin by collecting a piece of paper from the round table situated on the left.
- Proceed to view the printer and insert the paper into it.
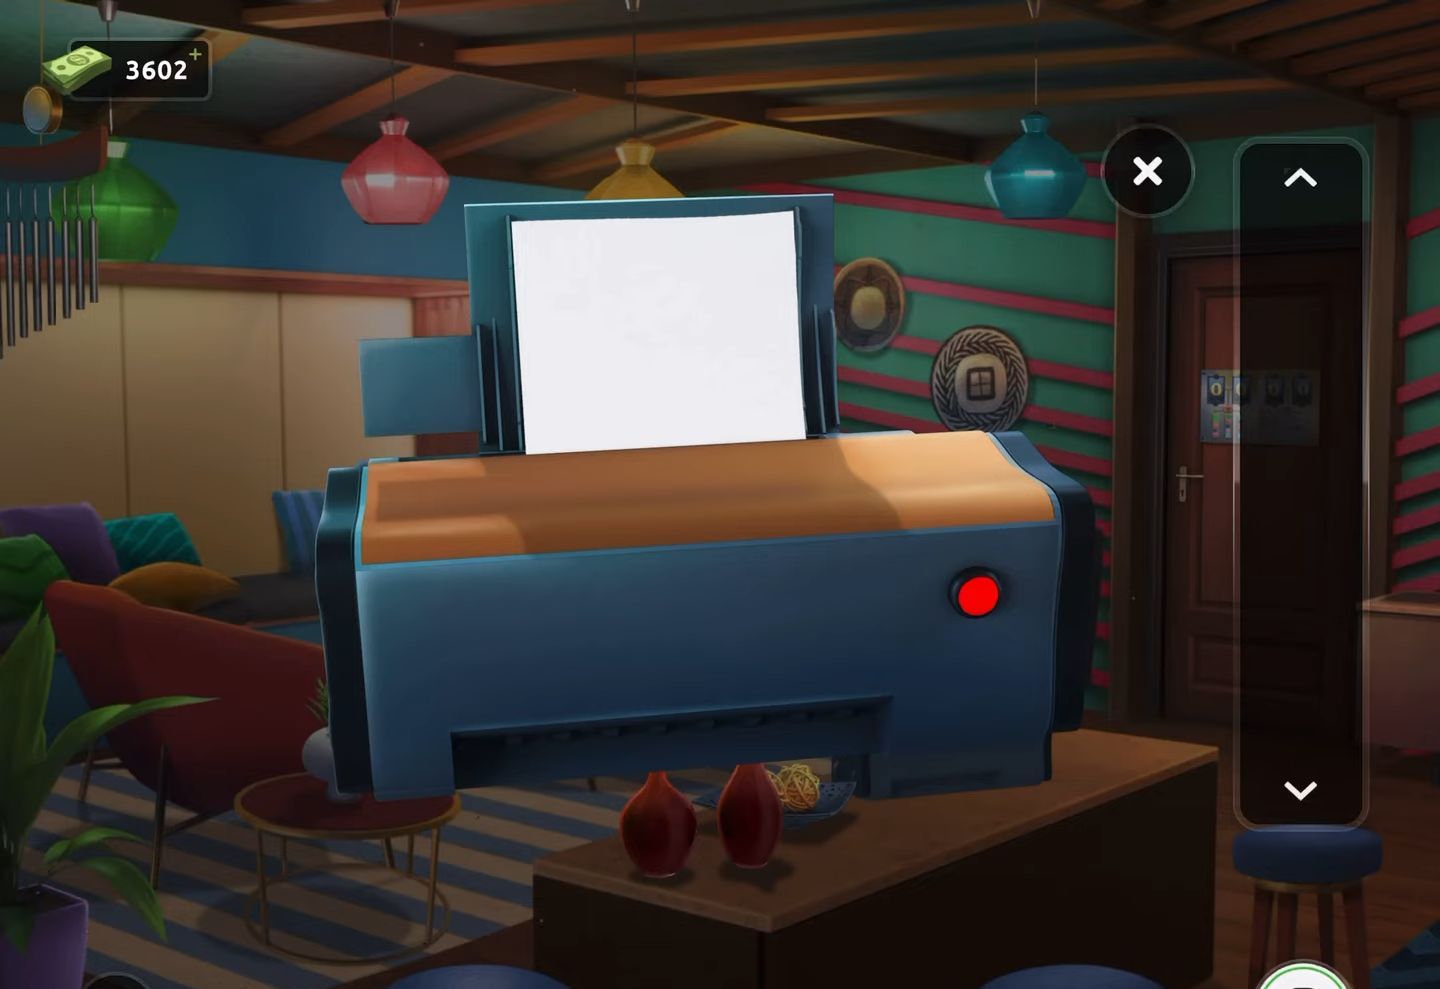
- Now, initiate the printing process by pressing the red button, then collect the printout.
- Examine the printout to acquire a clue.
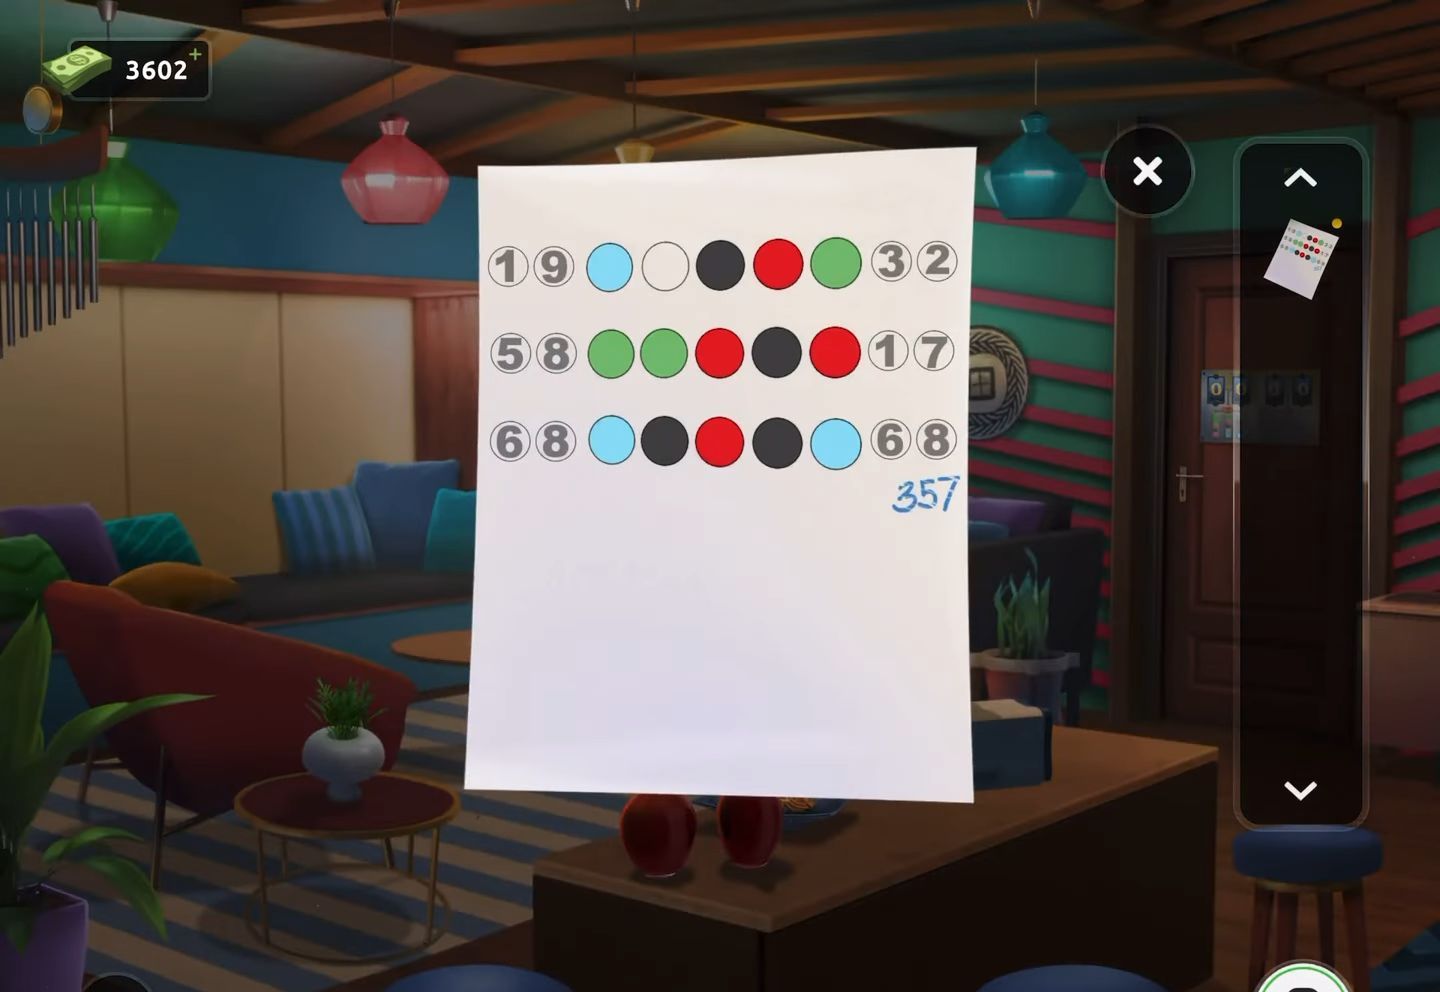
- Next, inspect the small blue box positioned to the right of the door.
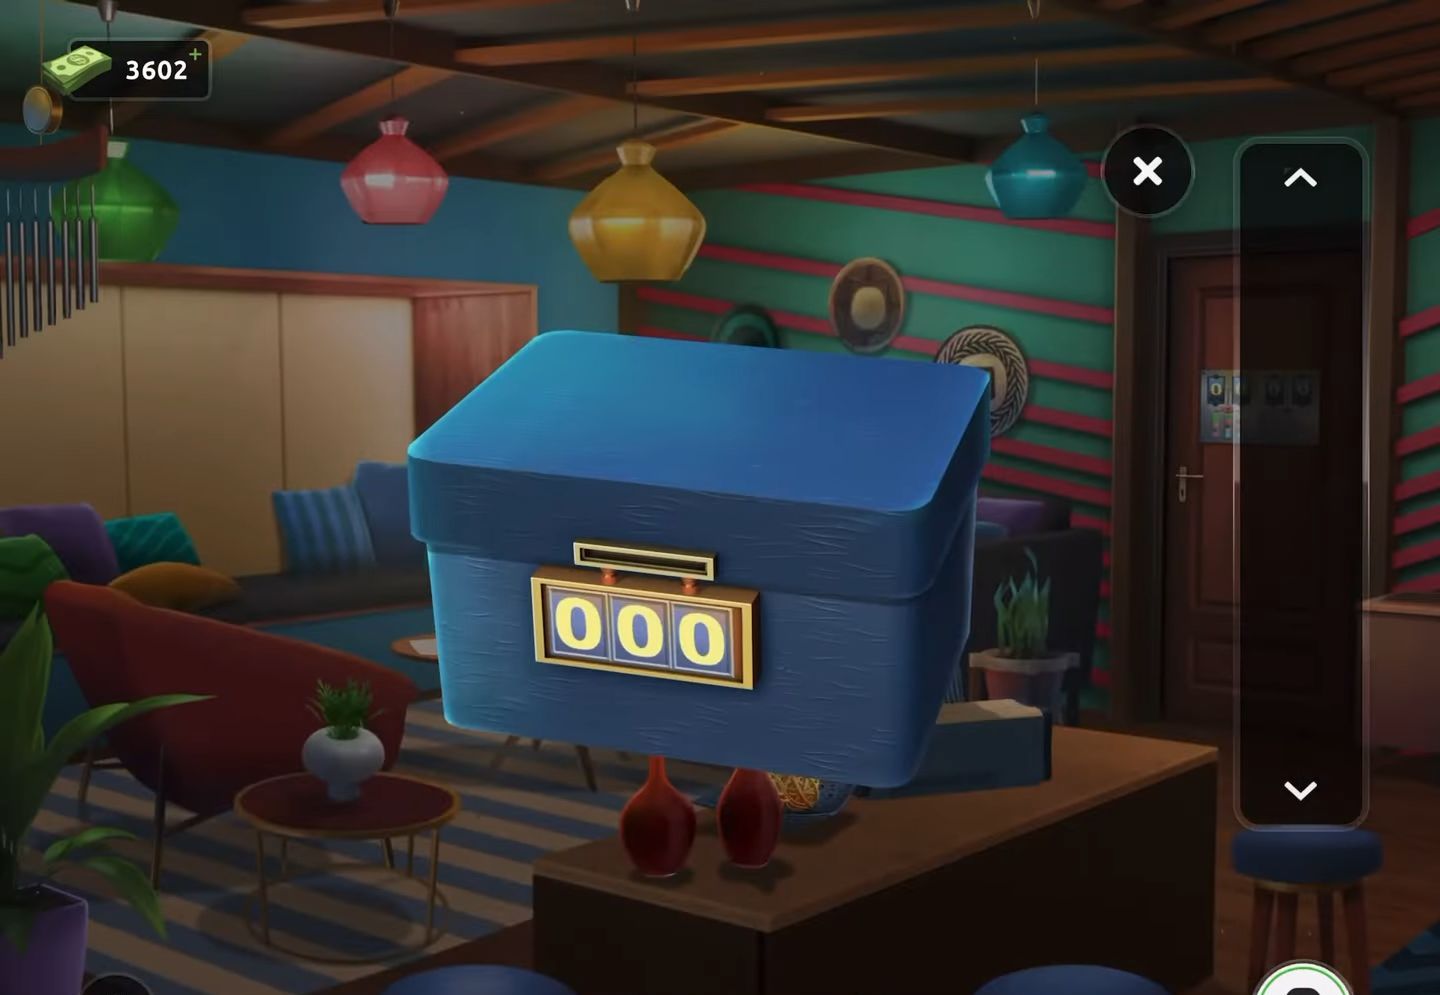
- Then utilize a code (357) obtained from the clue to unlock the small blue box.
- After that gather a paper template and a stamp.
- Subsequently, view the printed paper in your inventory and combine it with the template and stamp.
- This action will augment the information presented in the clue.
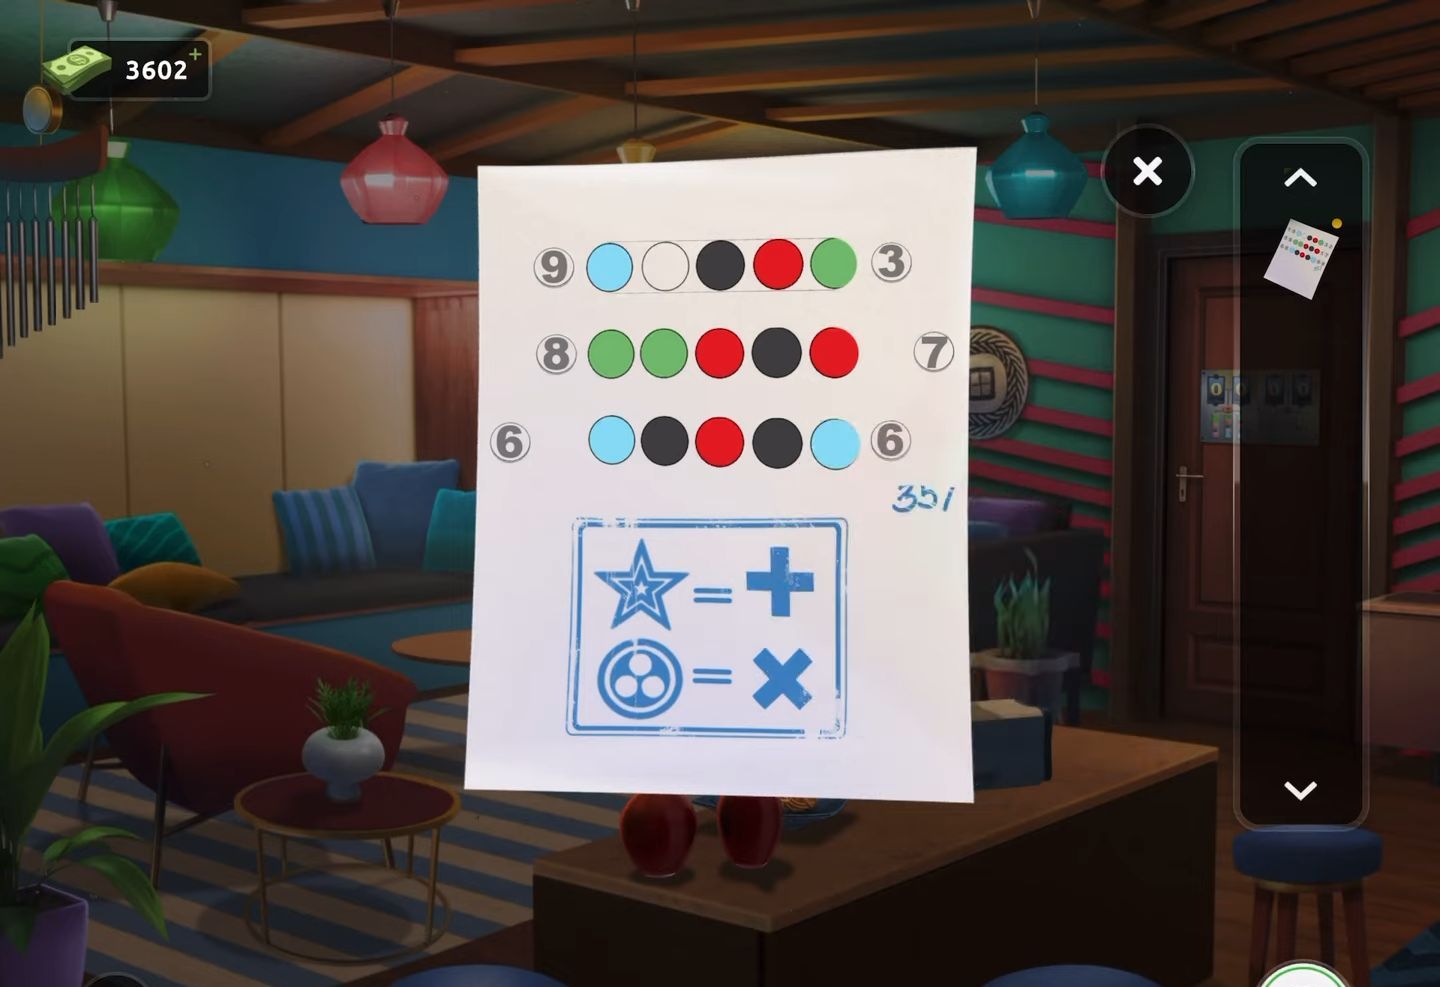
- Now access the exit door puzzle.
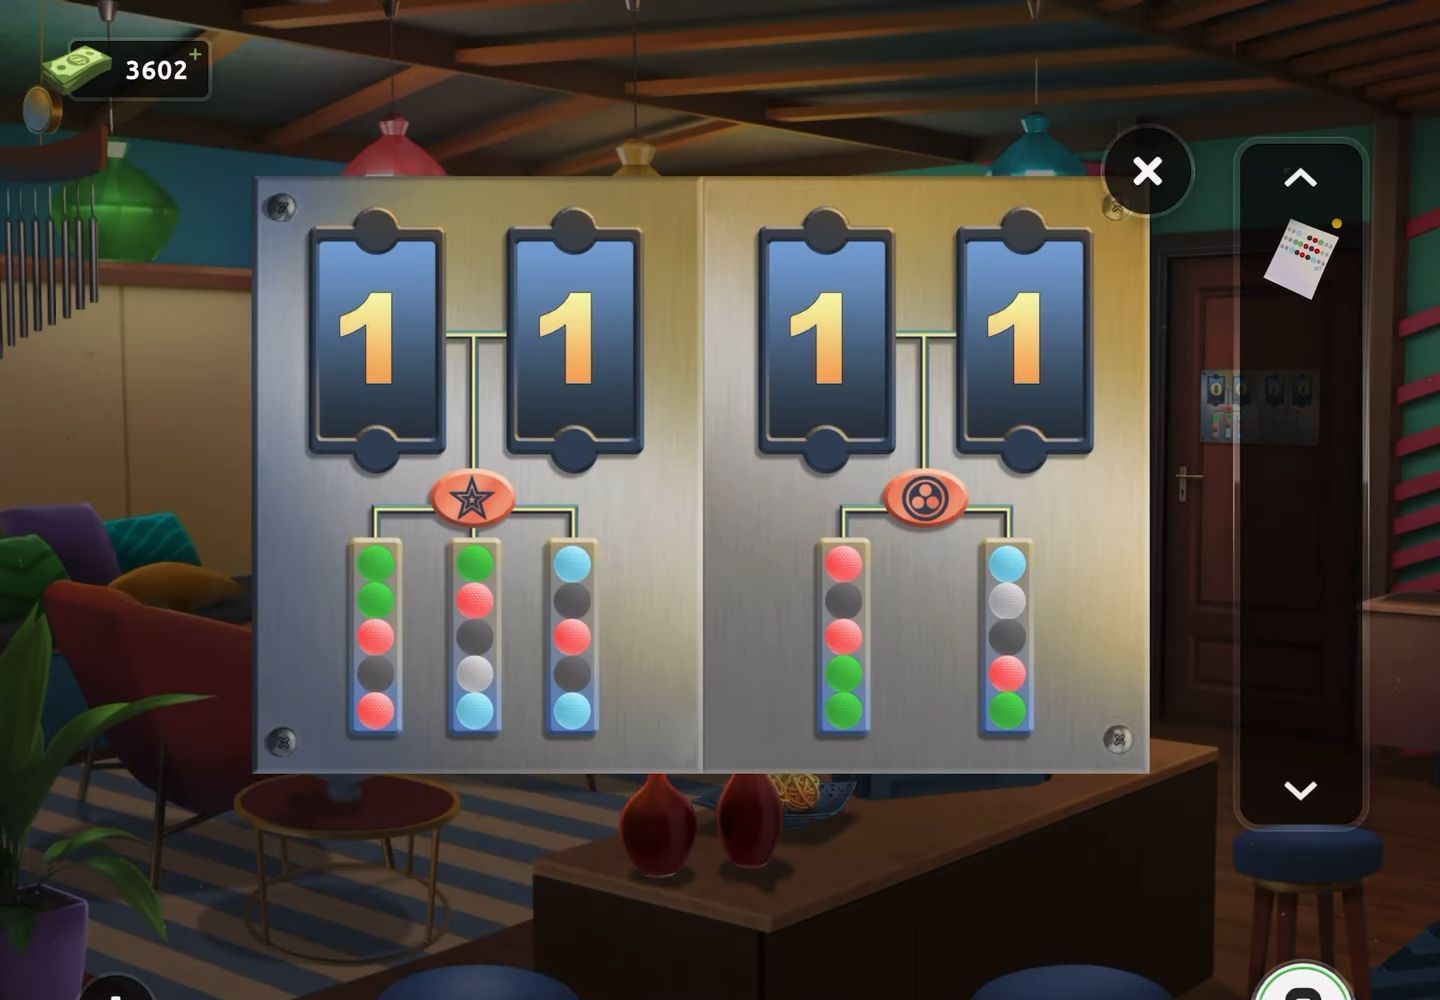
- Next, apply the clues provided on the paper to successfully solve the puzzle, deriving the code.
- Finally, use the code (1763) to unlock the exit door and escape the room.
Level 98:
To complete level 98, follow the instructions below:
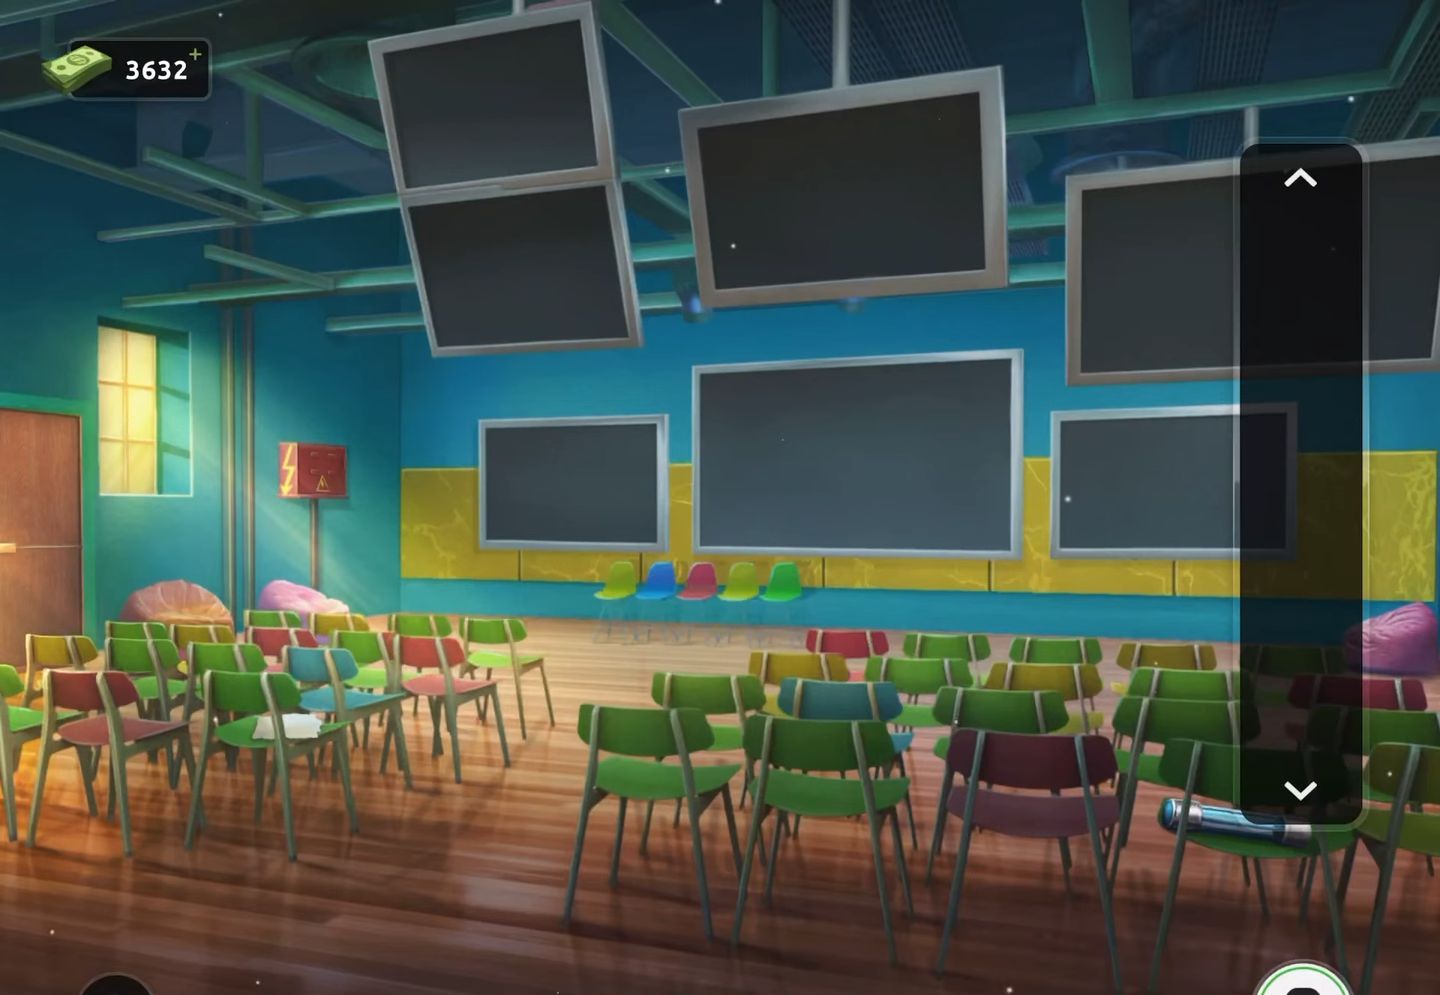
- Begin by retrieving a blue fuse from a chair situated on the right side of the room.
- Afterward, interact with the chair on the left, which holds a paper.
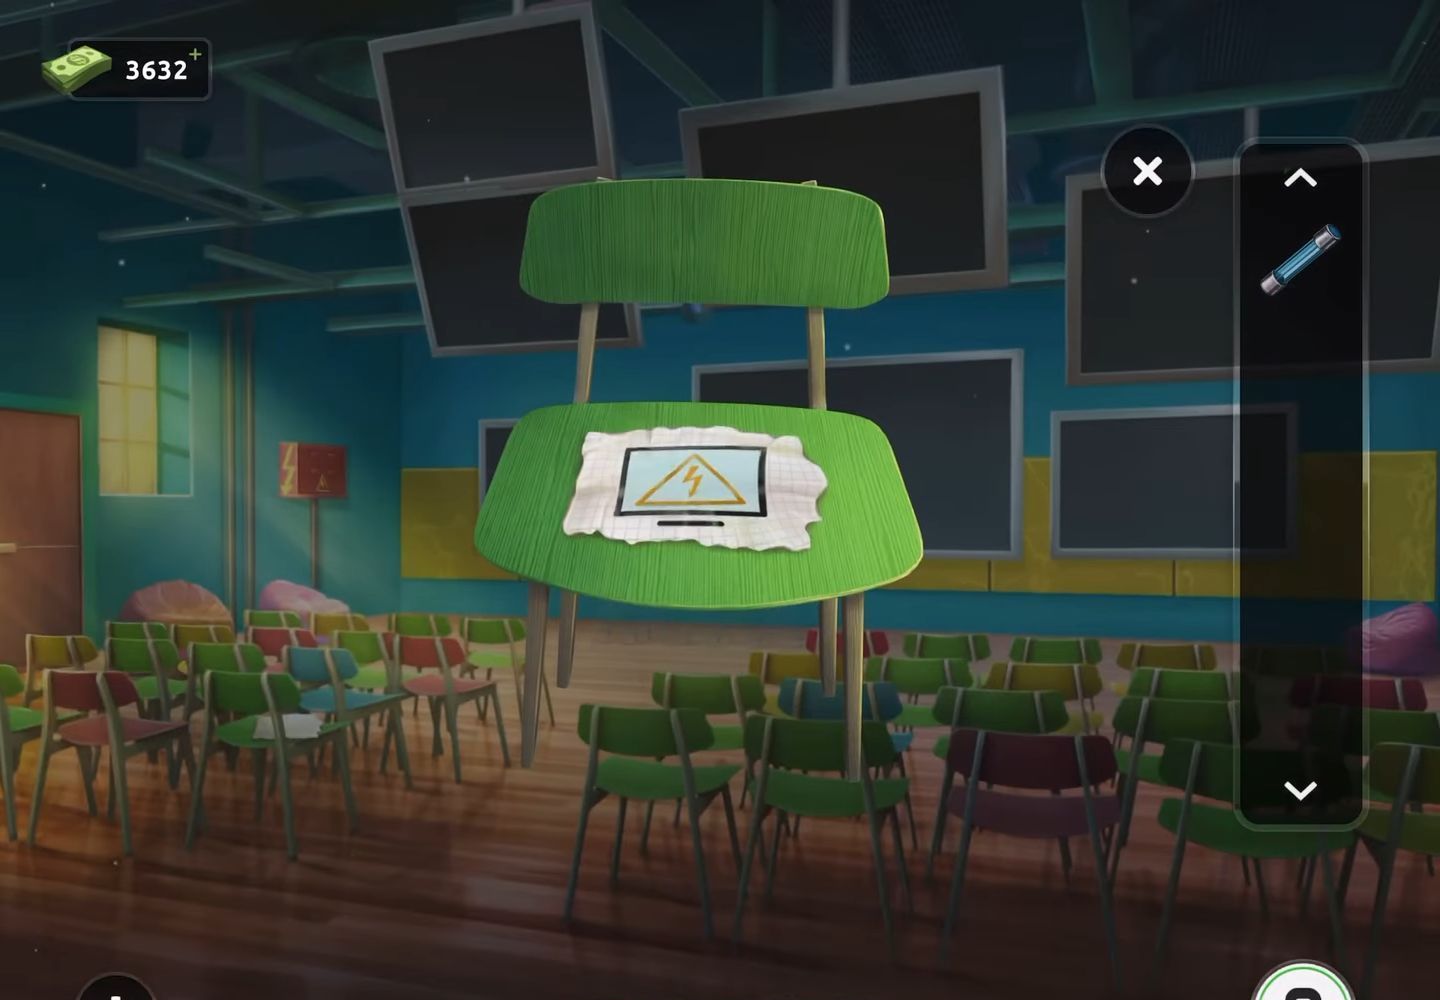
- Now, shift the paper to reveal and collect a yellow fuse.
- Next, inspect the red power box positioned on the left side near the door.

- After that, open the cover of the red power box and insert the two fuses into the puzzle to initiate the task.
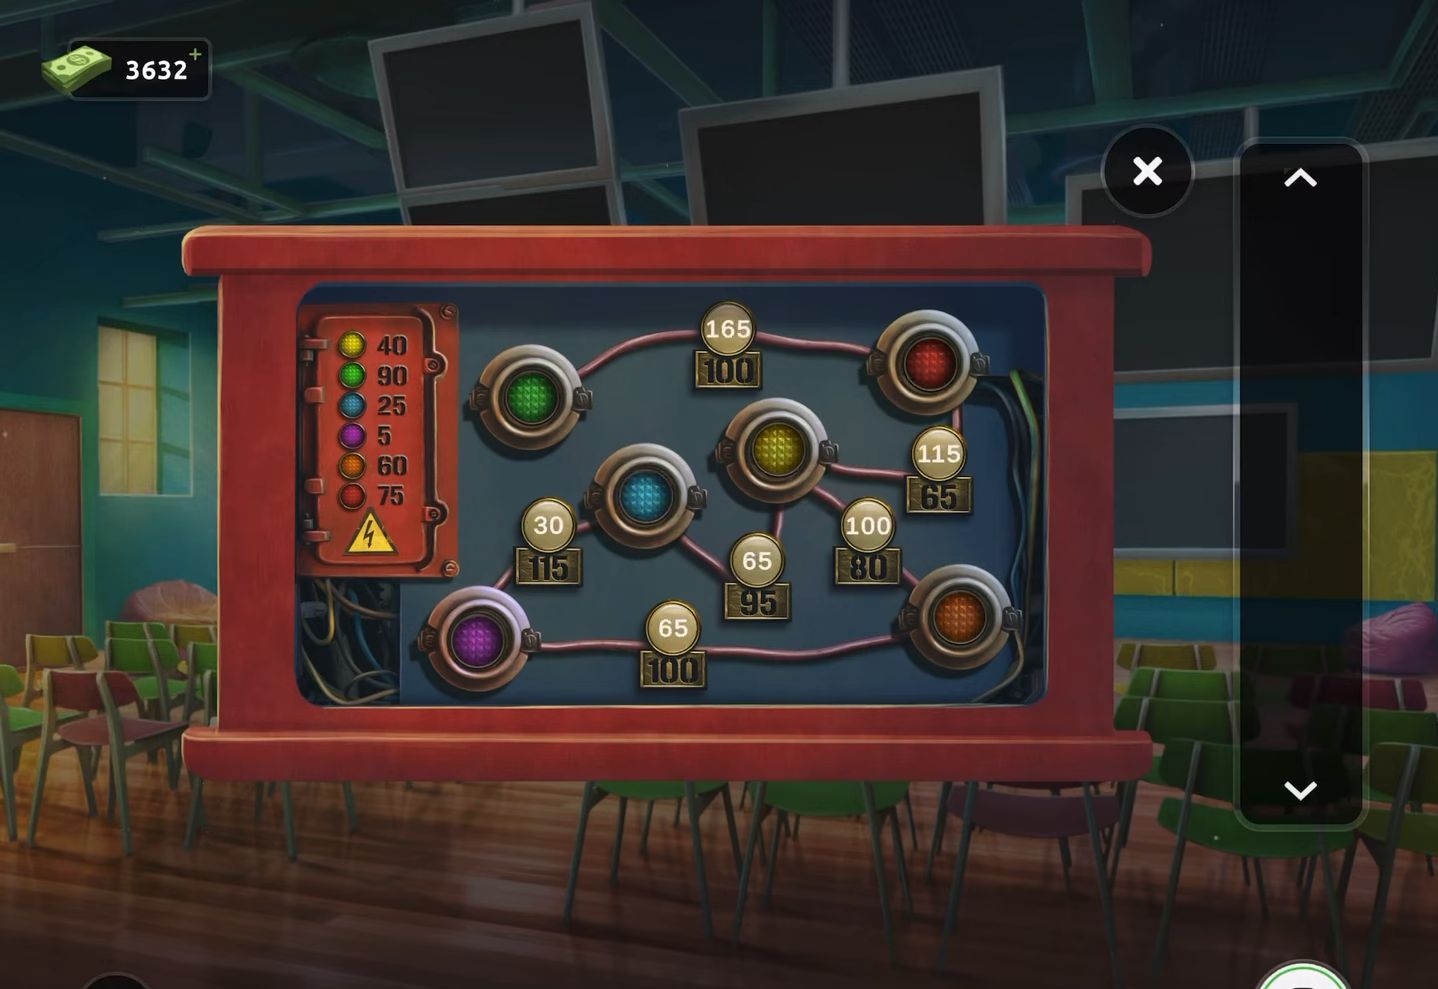
- Then rearrange the fuses to align the values on the cables between them with the values on the plates below.
- The numerical values of each color fuse are visible on the top left.
- Ensure that these values add up correctly on the cables.
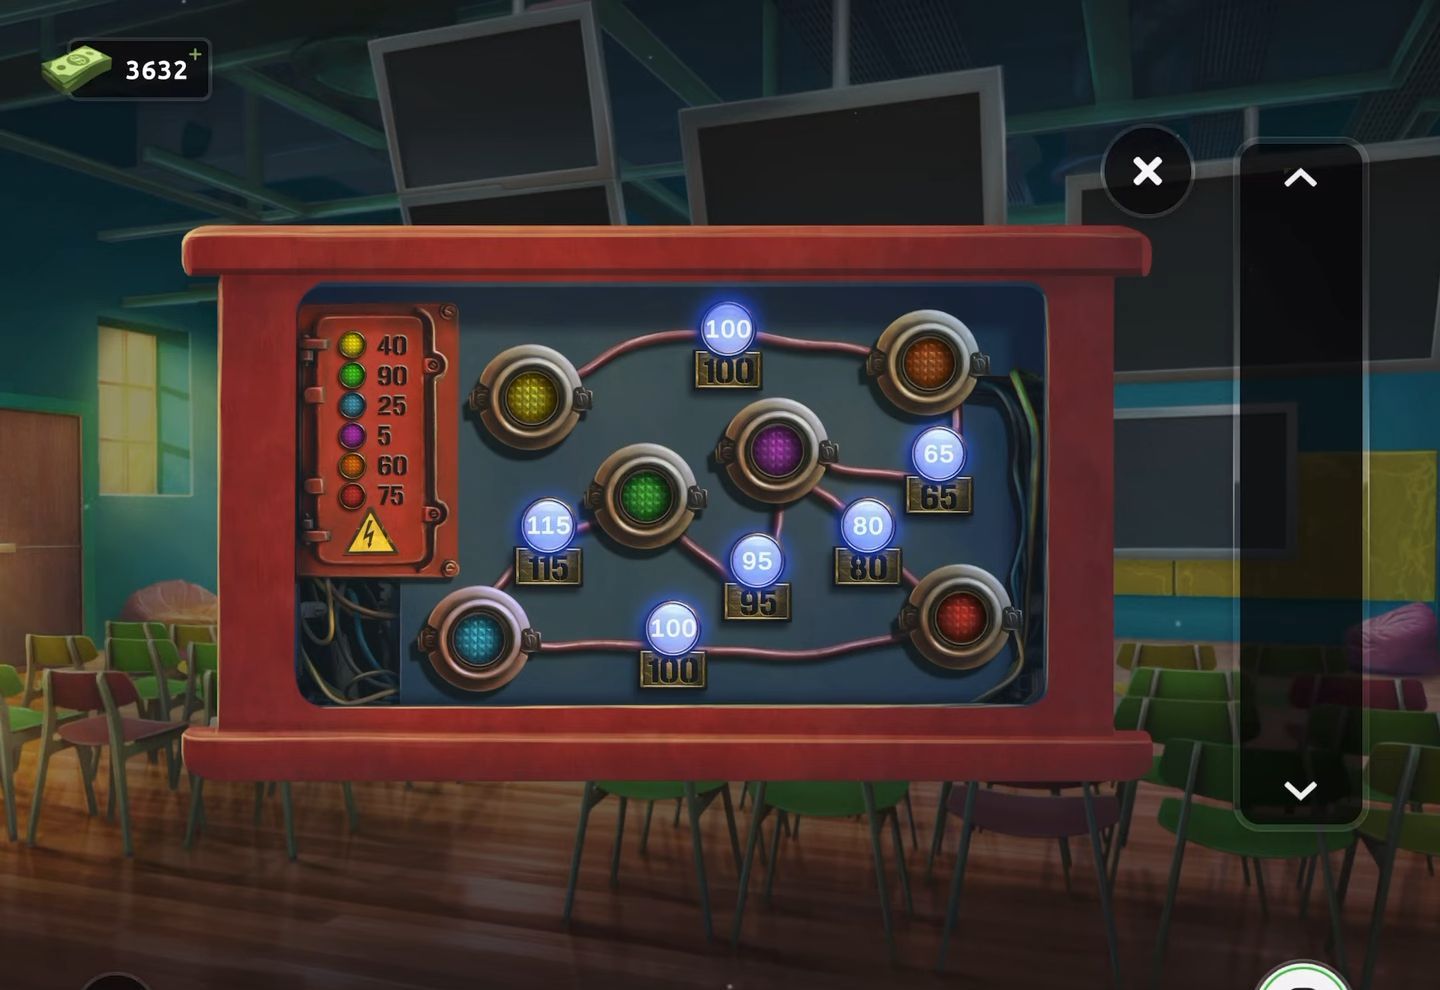
- Finally, once the fuses are correctly arranged, the power will be restored, and the door will subsequently open, allowing your escape.
Level 99:
To complete level 99, follow the instructions below:
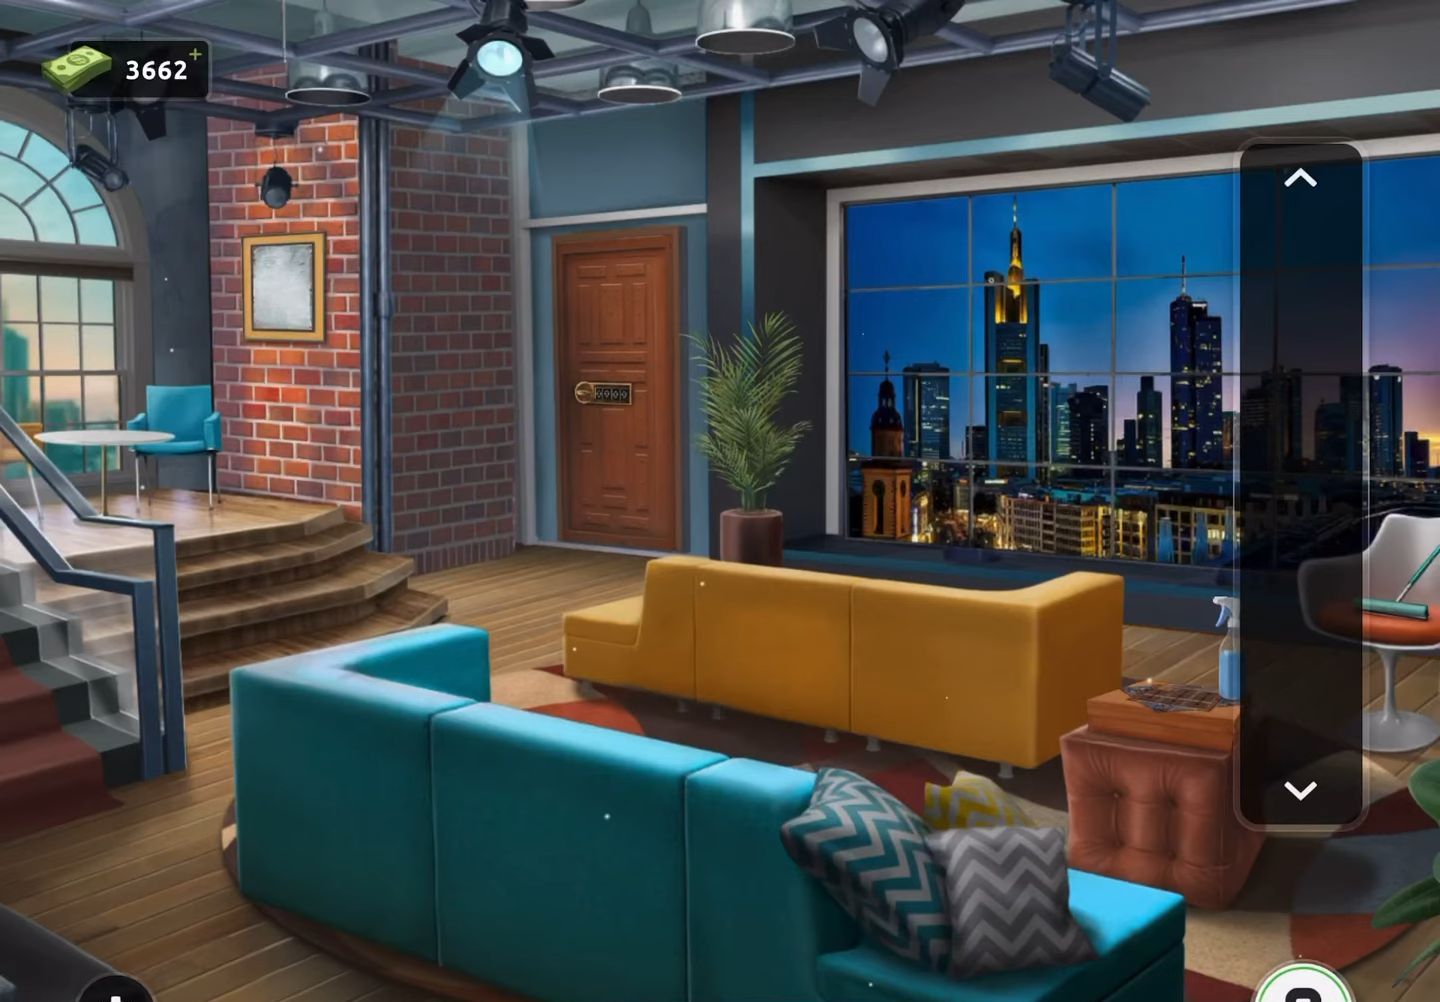
- Start by examining a box located on the right side of the room to acquire a blue spray bottle.
- Additionally, collect a sponge from the white chair situated on the right.
- Next, proceed to inspect a picture frame positioned on the brick wall to the left of the door.
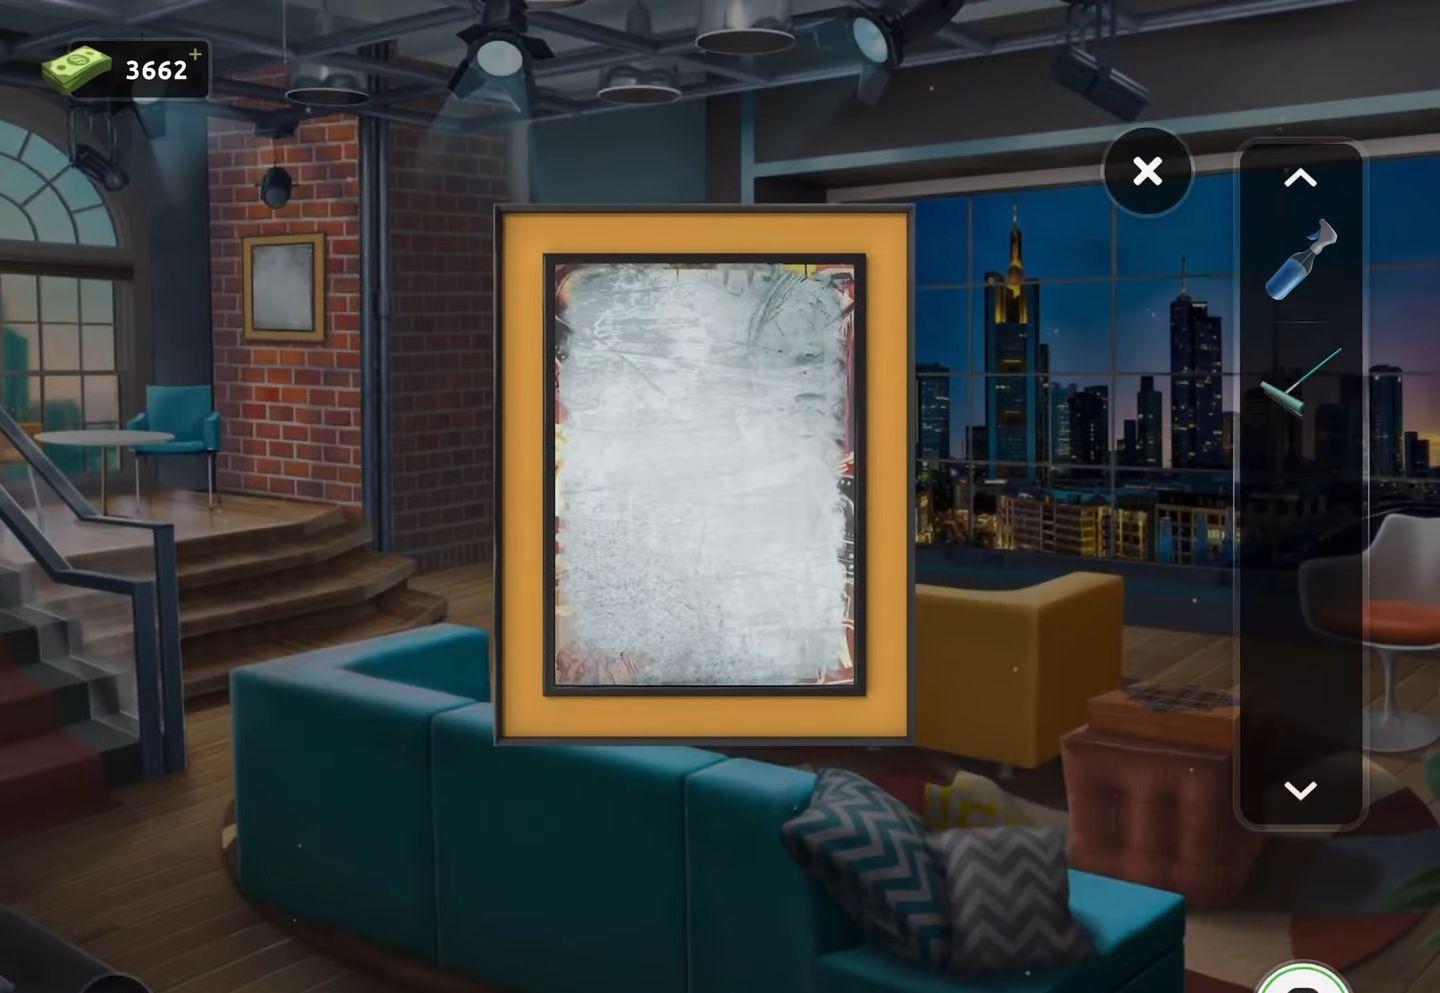
- Now apply the spray bottle on the picture frame and then use the sponge to clean it, revealing a hidden clue.

- After that, return to the box on the right with compass points and employ the clue obtained from the poster to maneuver the piece around the board as directed.
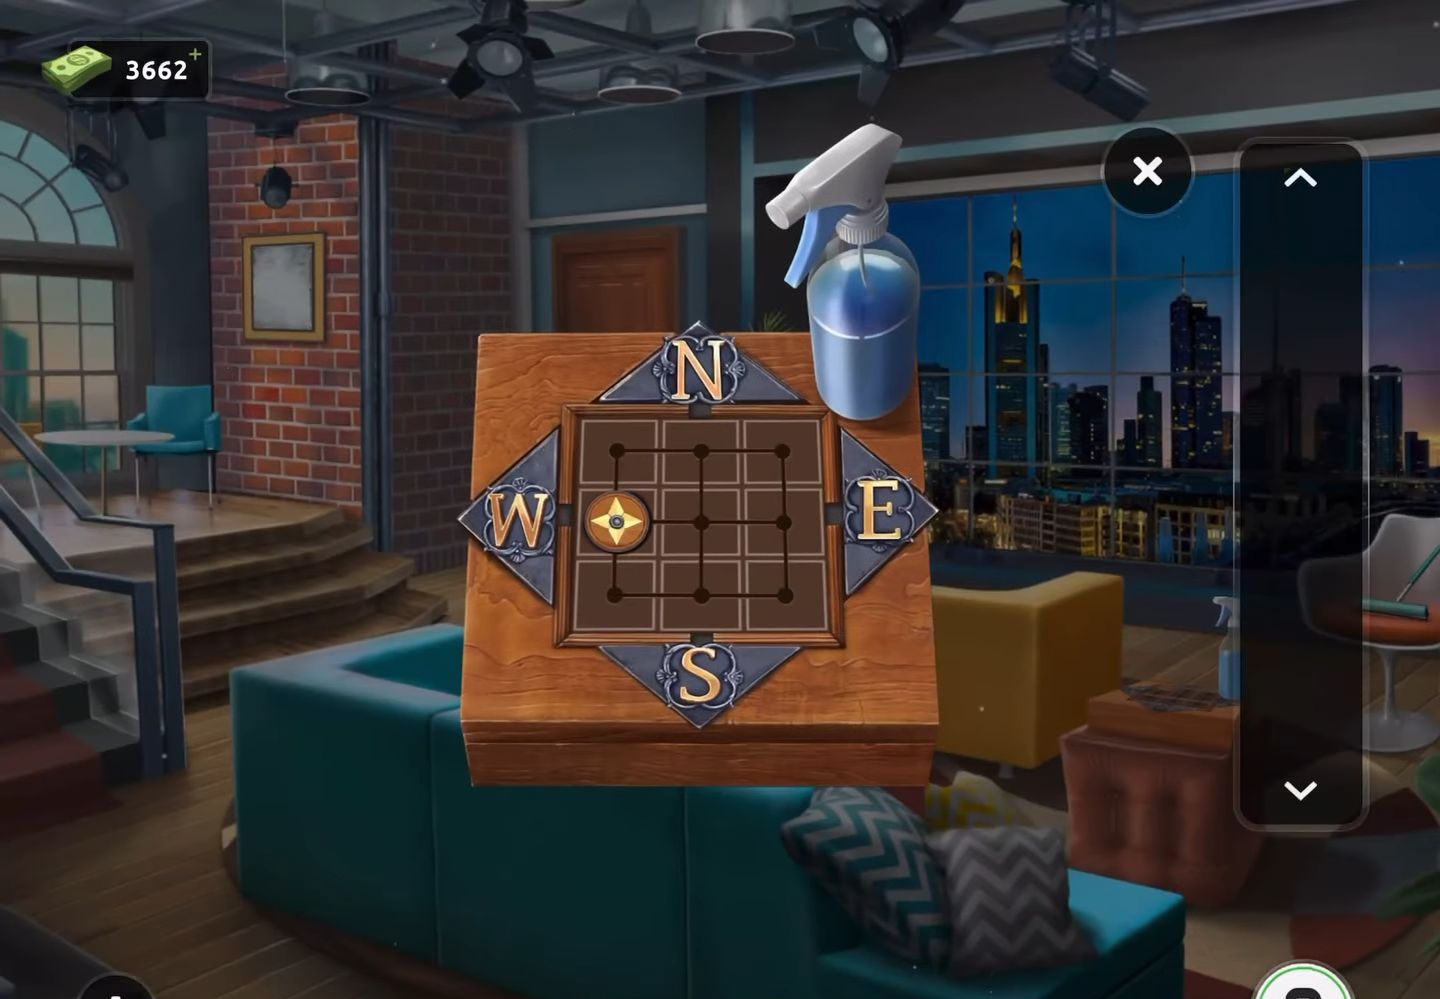
- Next, open the box to retrieve a paper clue.
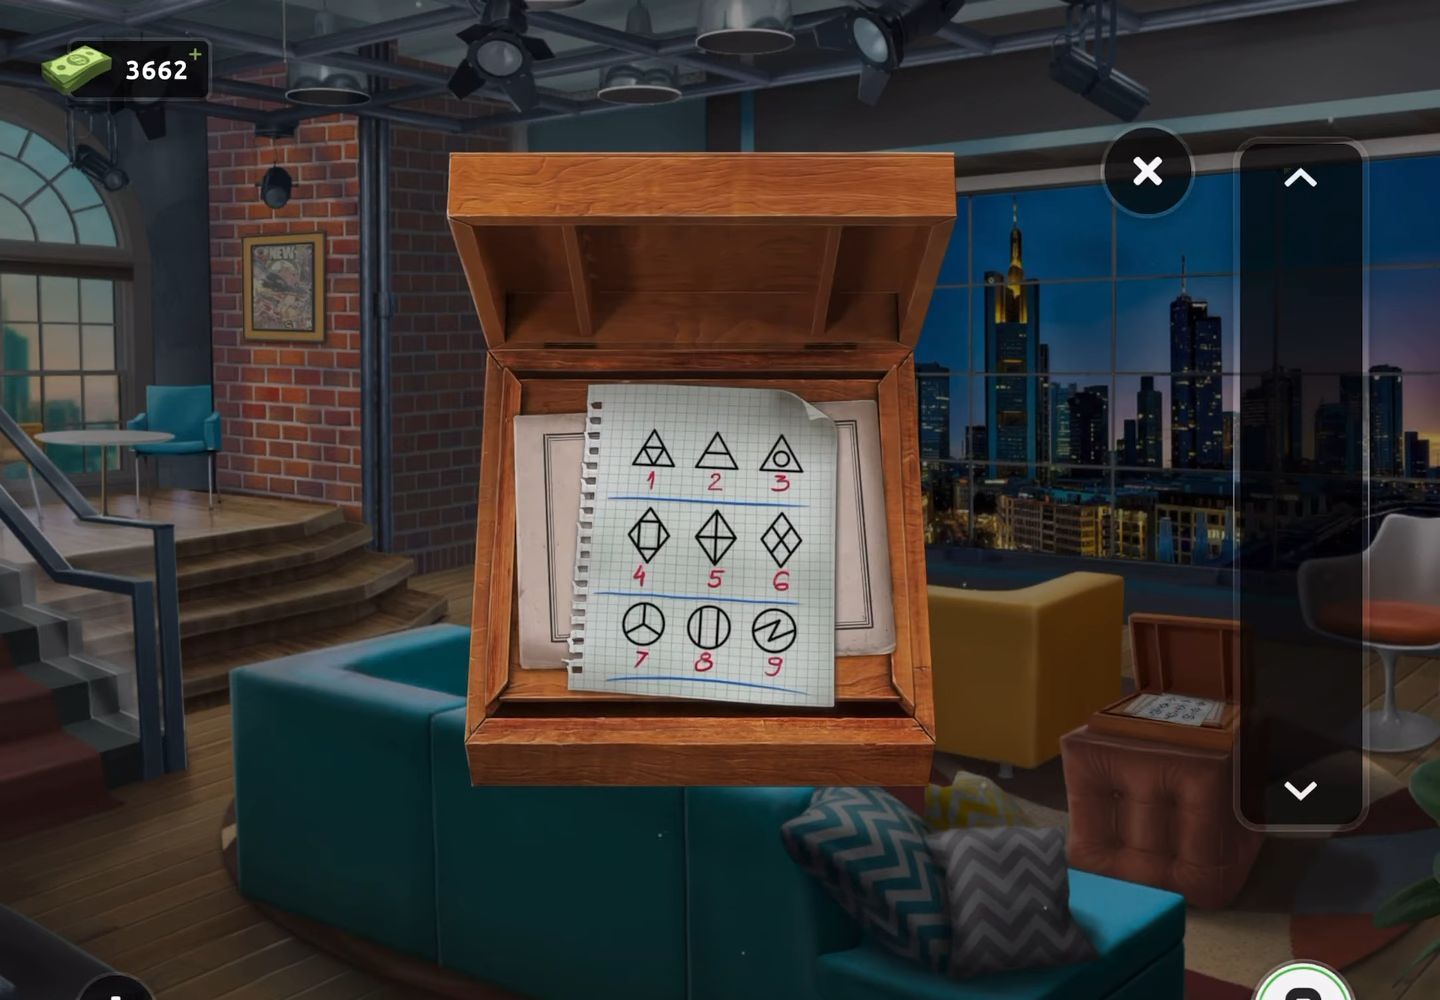
- Then access the exit door code lock. Employ the clues to determine the symbols required for the code.
- After that examine the lock, which consists of four sections with varying numbers of lines.
- Now count the lines within each section and match them with the corresponding symbols indicated on the paper.
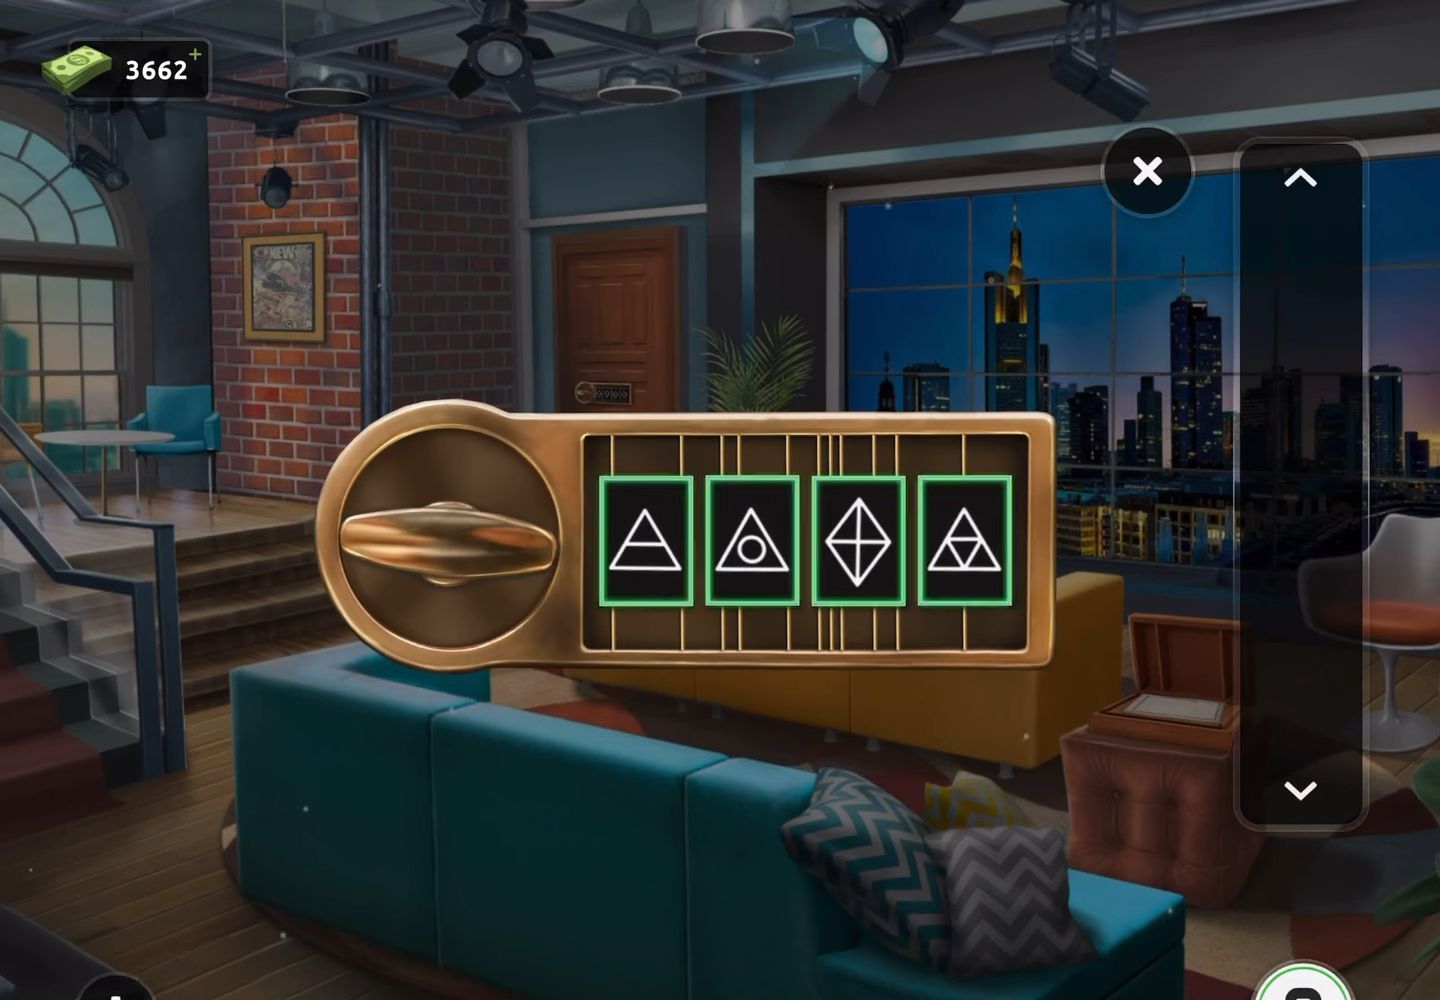
- Finally, use the identified symbols to unlock the door and exit the room.
Level 100:
To complete level 100, follow the instructions below:
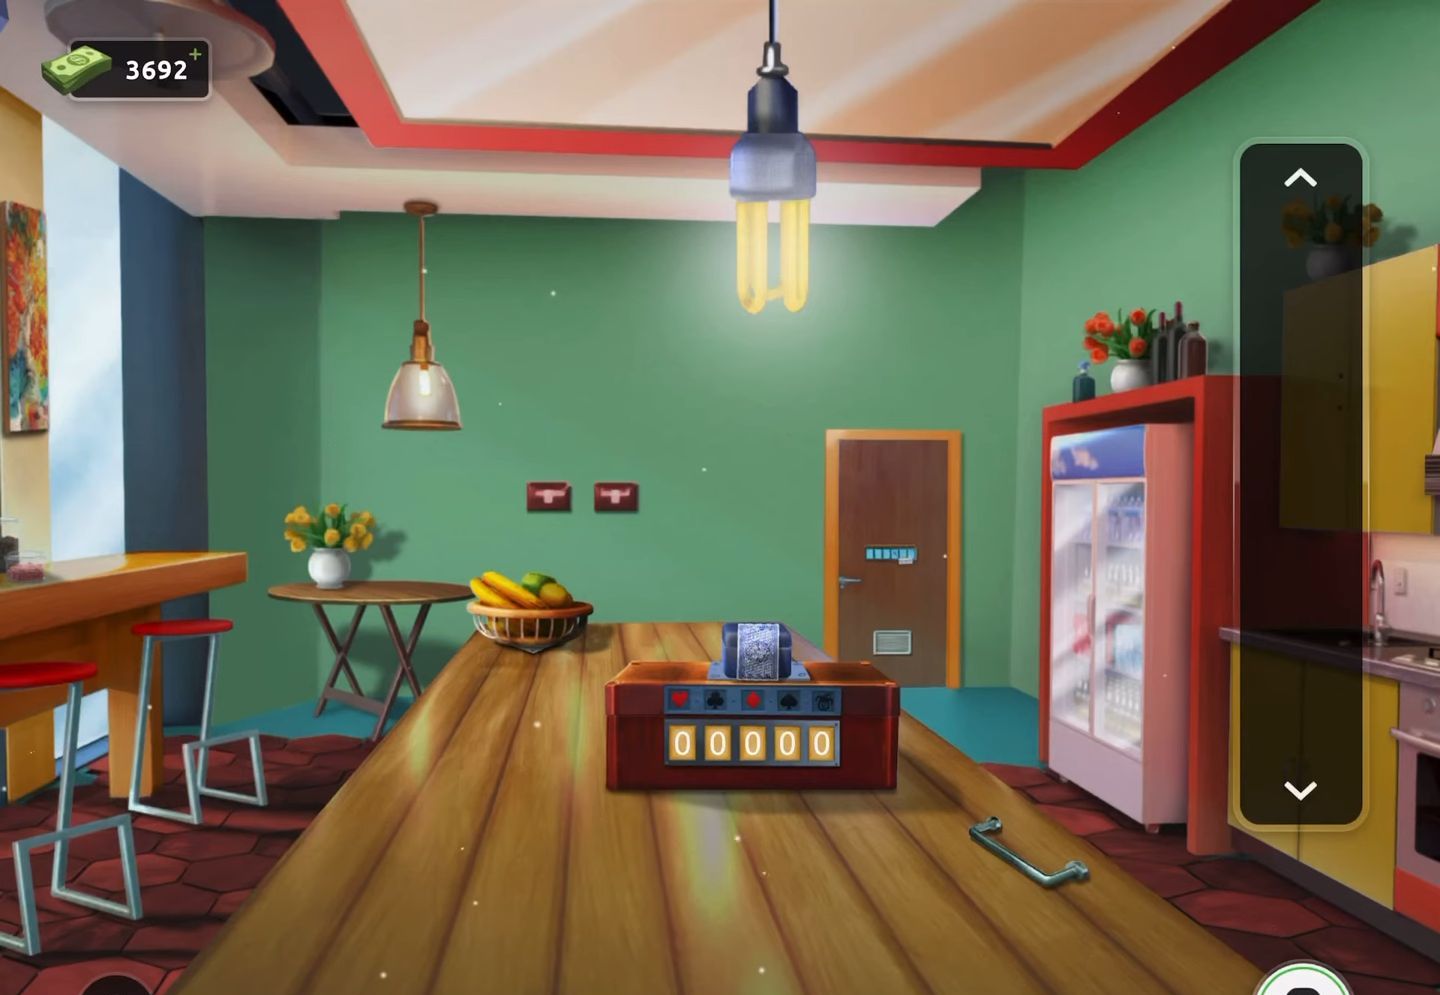
- Firstly, retrieve the handle from the table, then utilize it on the top yellow cupboard located on the right side.
- Then open the door of the cupboard to acquire a playing card.
- Next, proceed to shift the fruit bowl on the table to reveal a second playing card.
- Subsequently, tap the top left of the blue window blind to displace it.
- Now collect the key that falls out and discover another playing card on the window.
- Then proceed to examine the box placed on the table.
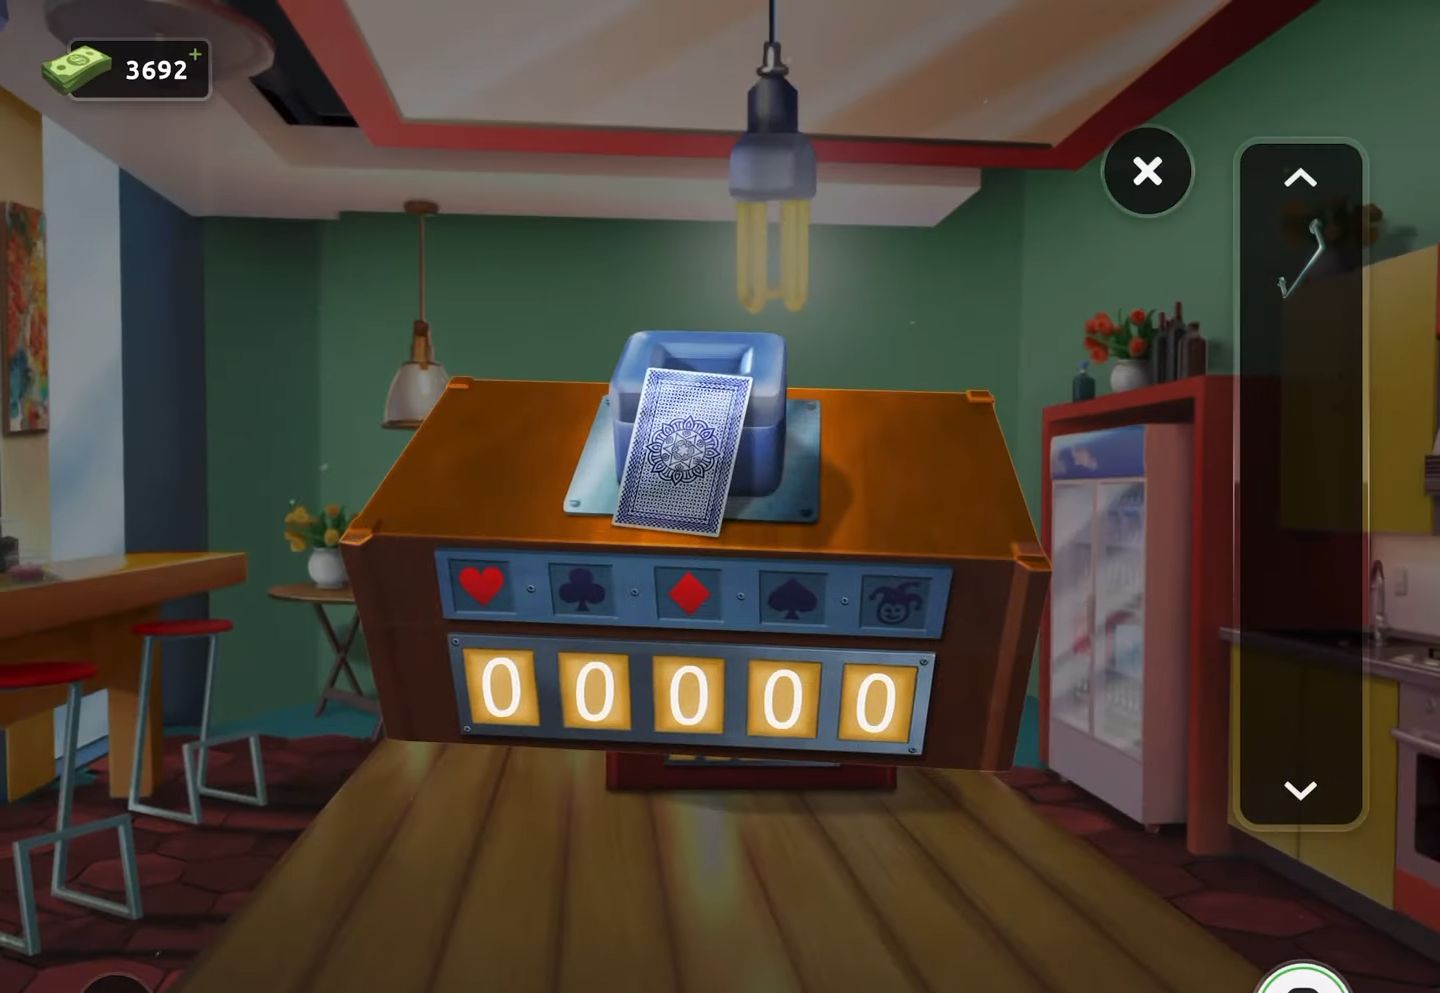
- After that, collect the fourth playing card from within the box.
- Then, utilize the key to unlock the small box on top, revealing a fifth card.
- Next, view the inventory showcasing the five collected cards to derive a clue.
- Now utilize this information to set the code (34751) for the large box.
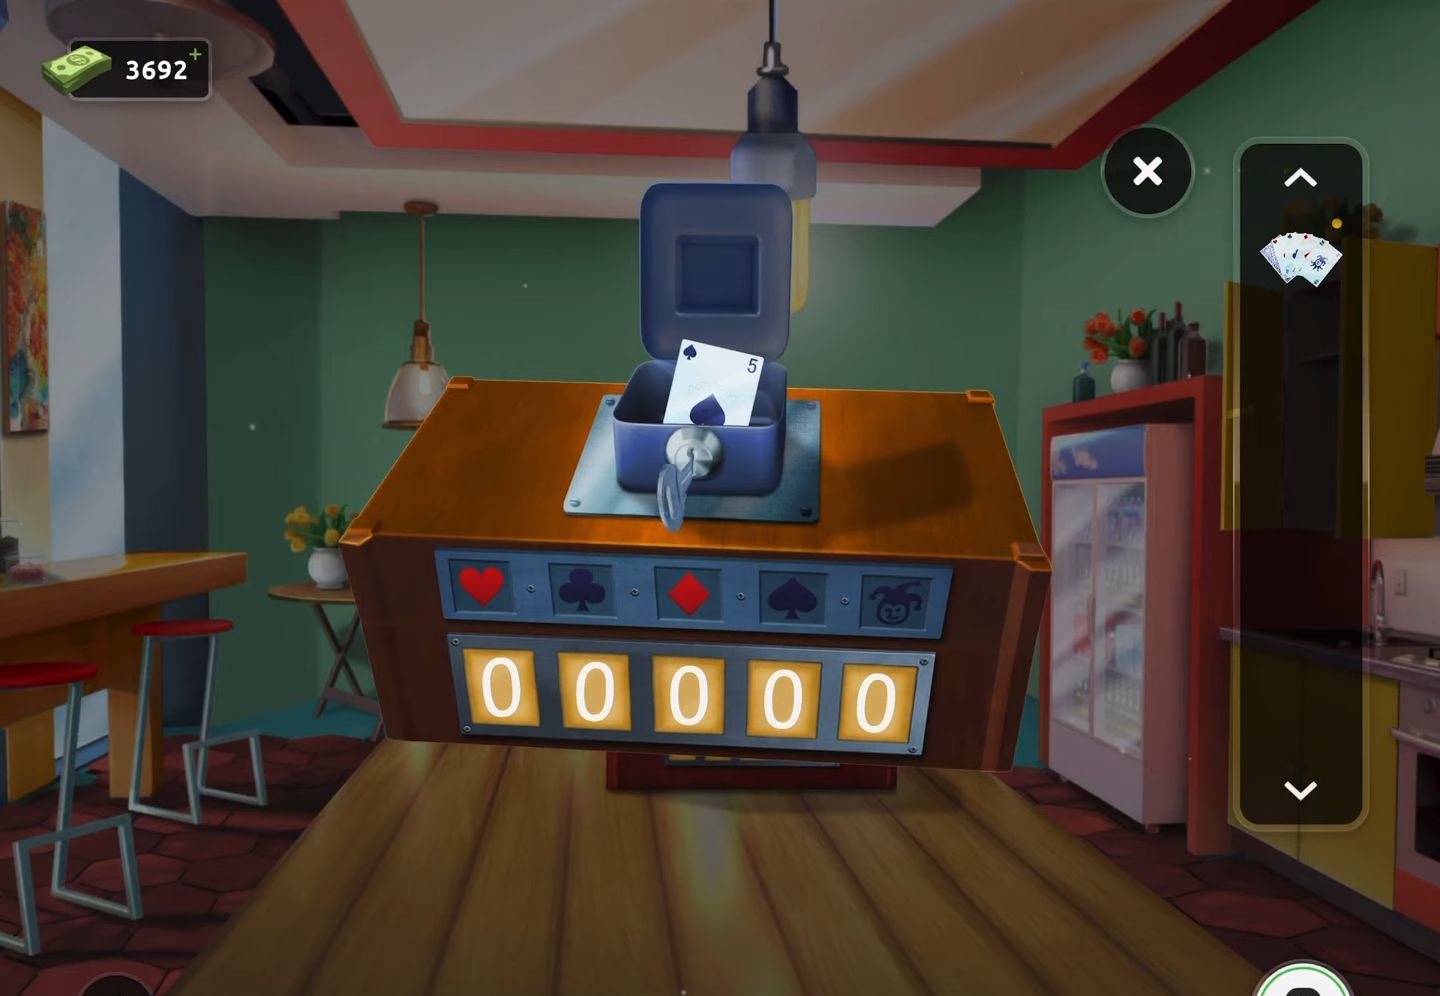
- Upon inspection, find a clue indicating the values associated with specific symbols.
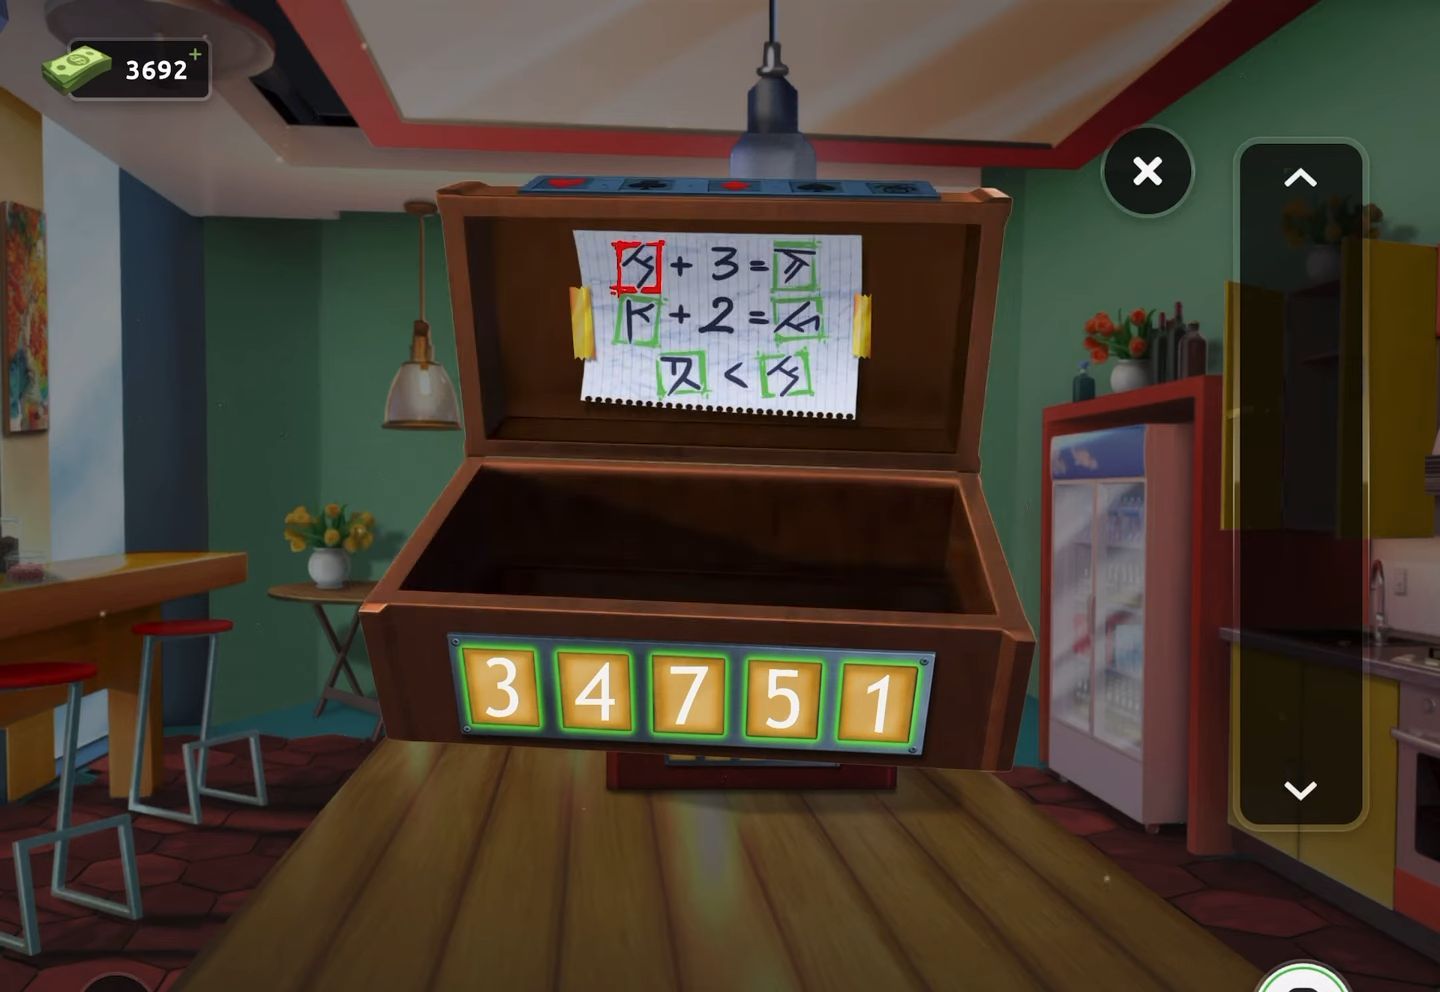
- Then access the exit door code puzzle.
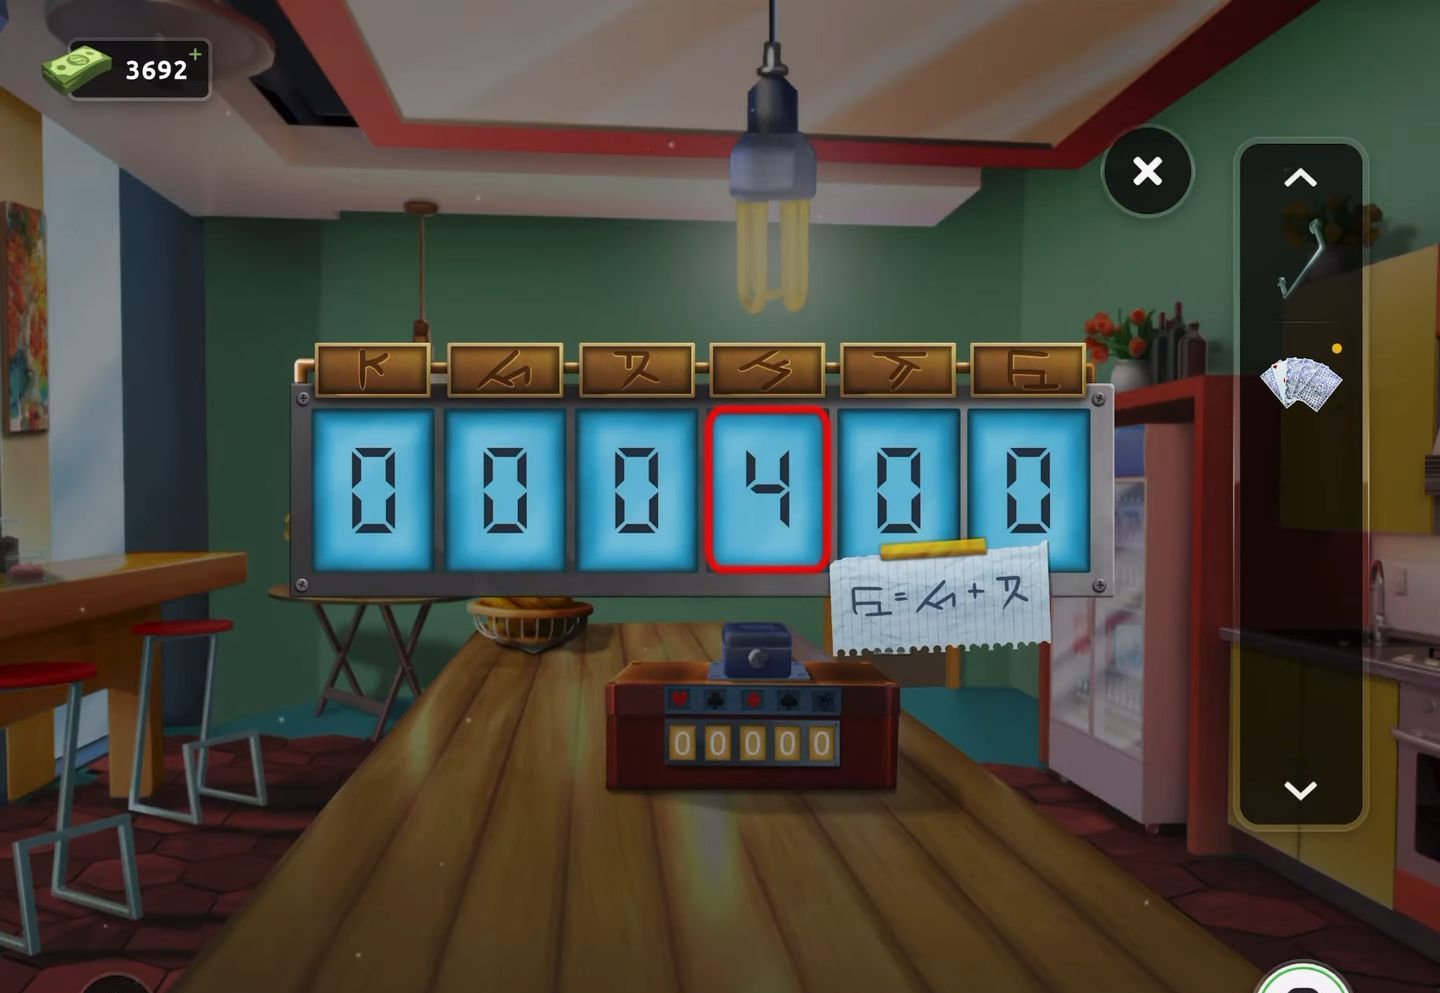
- Now discover an additional clue within this puzzle.
- Notice that the 4th digit of the code is fixed at 4.
- Subsequently, employ the symbols located above the numbers to deduce the remaining part of the code, resulting in the full code (351476).
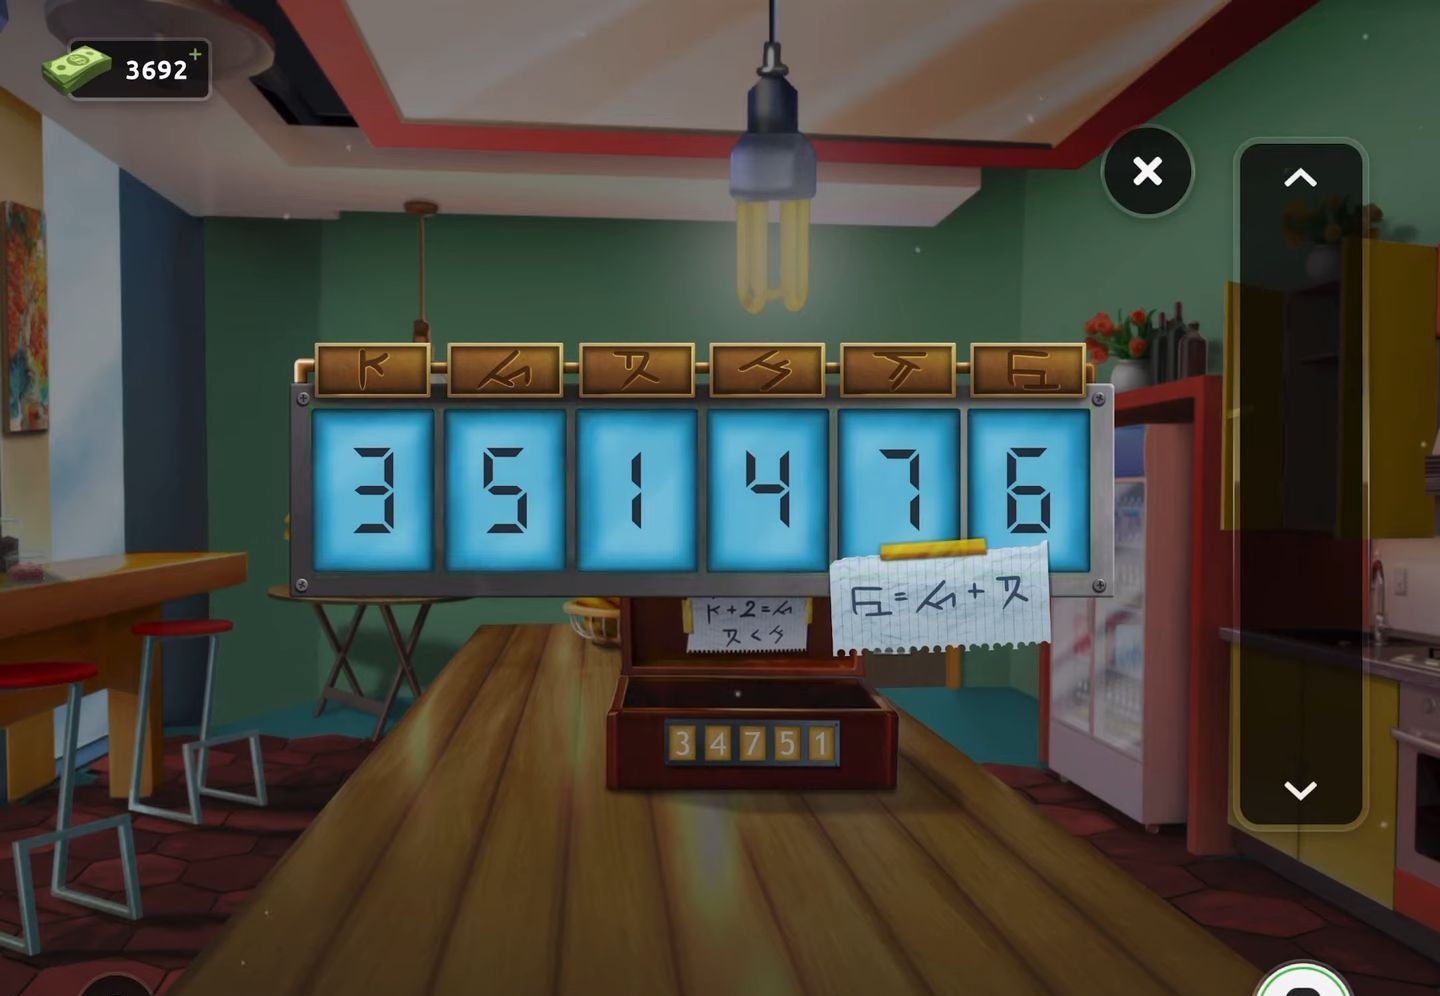
- Finally, use this code (351476) to unlock the door and successfully escape from the room.