This guide will let you know how to fix the PS4 Update Error SU-41350-3. You have to follow the steps in this guide to get rid of this error.
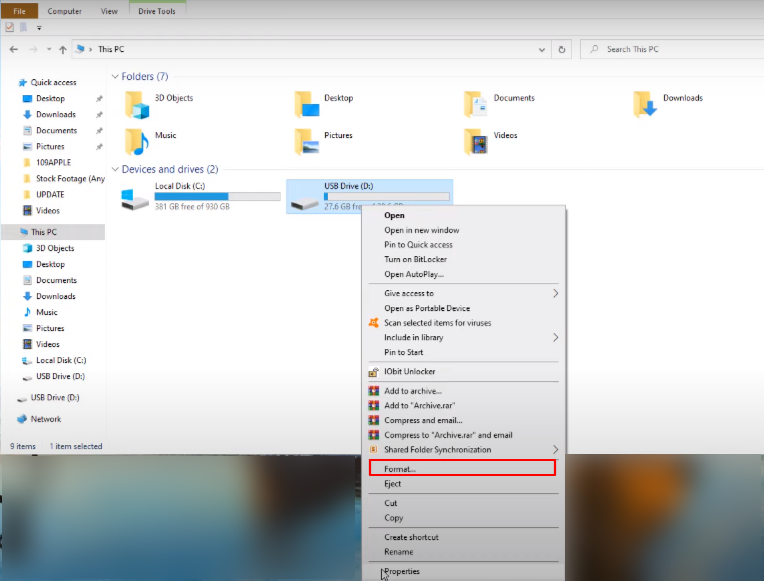
First, you will need a USB drive with at least 2-gigabyte storage and connect that USB to your computer. You have to right-click on the USB drive on your computer and then click on the format option, as shown in the image below.
It will open up a new tab, and you have to click on the file system drop-down menu. Select fat32 because the PlayStation only reads this format; you have to choose this option and then press the Start button, as shown in the image below.

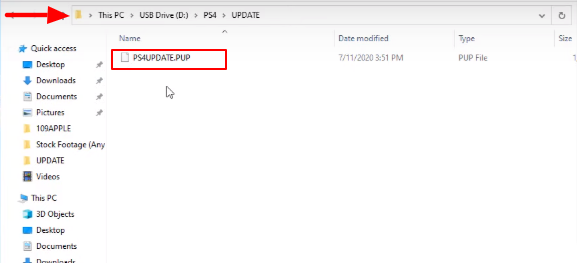
When it is fully formatted, you have to open the USB drive and create a new folder with the name PS4. Once it is done, you have to open it and create another new folder named UPDATE. Now, you will need to go to your web browser and open the following link.
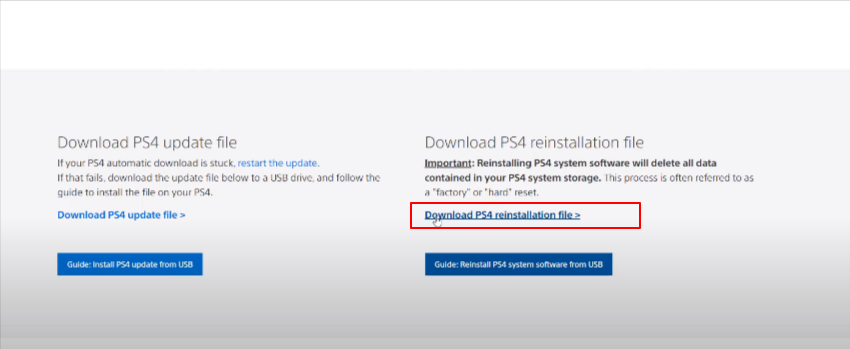
Once it is opened, you have to click on the Download PS4 reinstallation file, as shown in the image below.
It will start downloading the file, and then you have to drag and drop the file in the UPDATE folder, as shown in the image below.
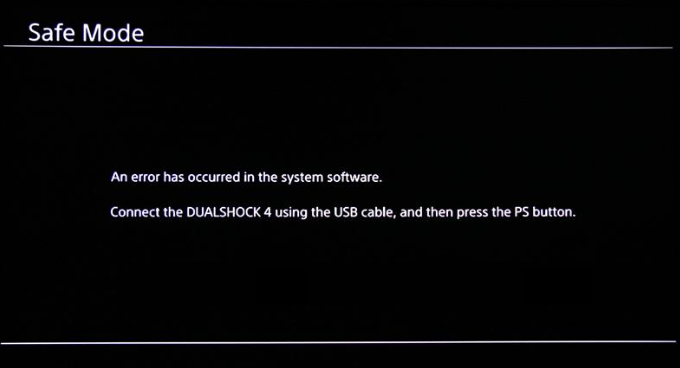
Now, you will need to connect the USB to your PlayStation 4 and make sure to turn off your PlayStation before connecting the USB. After that, you have to press and hold the power button for five to seven seconds until you hear two beeps and get entered into the safe mode, as shown in the image below.
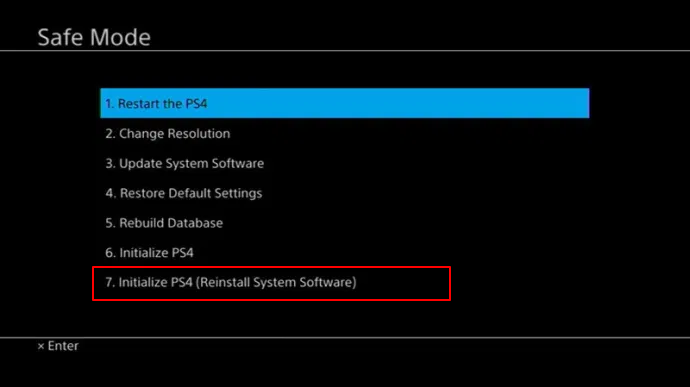
You need to make sure that your controller is connected to your PlayStation 4 through a USB cable. When you enter the safe mode, you will find seven options; click on the last option, “Initialize PS4”, as shown in the image below.
When you click on it, a new confirmation window will pop up, so you have to click on the OK button, and it will start the process to update through the USB. Once it is done, it will fix all of your errors, and your PlayStation will get the soft reset.