In this guide, you will find how to use the Keyboard and Mouse with Cemu using the easiest and most quick ways. First, try to map the Keyboard settings to check if Cemu detects the keyboard while playing the game. Then you have to download and install ViGEmBus Setup and mouse2Joystick Setup. After that, configure Keyboard and Mouse in Cemu, then adjust the Mouse2Joystick settings, and map Keyboard Inputs.
Trying To Map Keyboard Settings
In this section, we will take you through the steps to try to map Keyboard settings and check if Cemu detects the keyboard while playing the game.
- First, you need to launch the Cemu application on your computer.
- Click the options tab from the quick access toolbar and select the input settings from the listings.
- After that, map all the keys based on your choice and play the game.
At this place, the Cemu will not recognize your keyboard.
ViGEmBus Setup
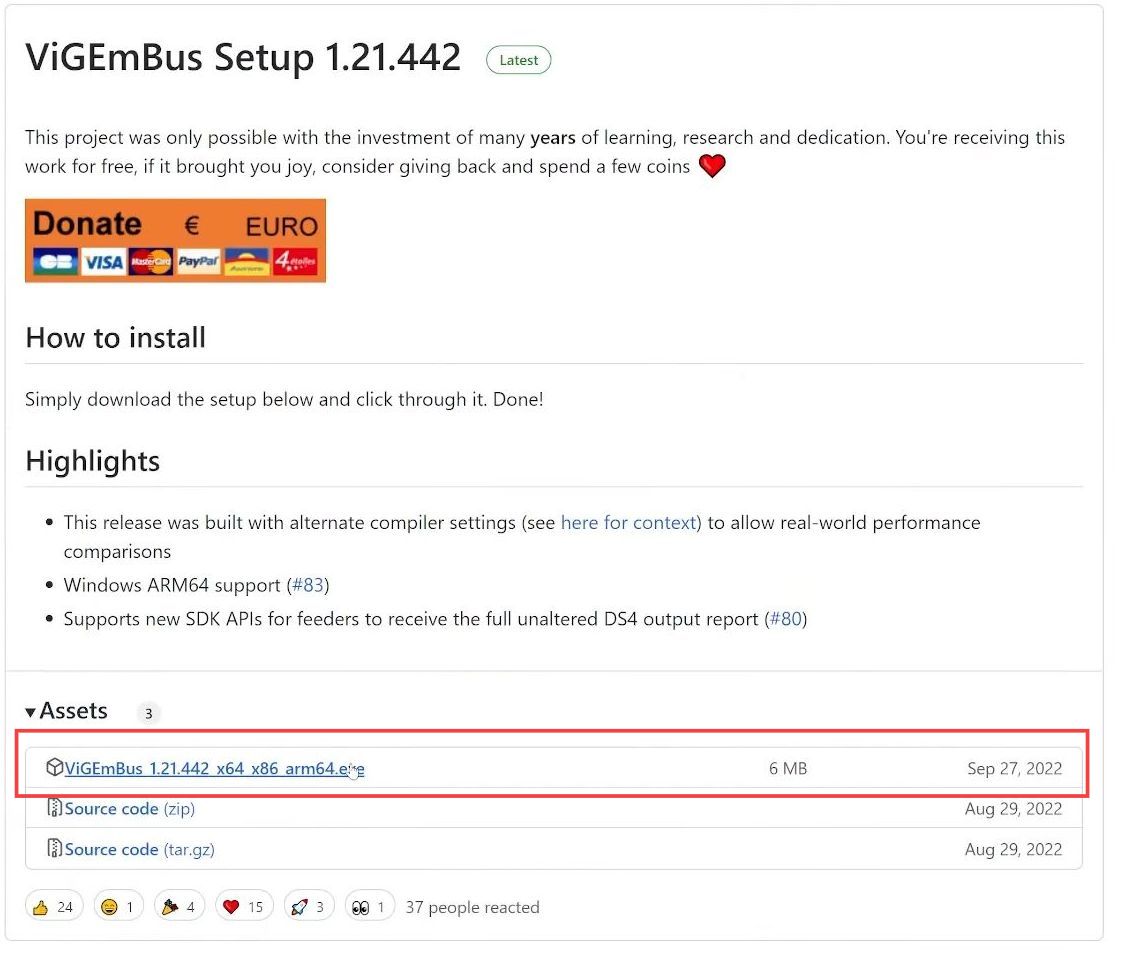
This section describes how to download and install ViGEmBus setup 1.20.432 to use the Keyboard and Mouse with CEMU while playing the game.
- Open up the web browser on your computer and download the ViGEmBus Setup 1.20.432.
- Once you reach the web page, you have to download it from the Assets section.
- Once the file is downloaded, install it on your PC.
- Now go to your start menu, write device manager in the search box, and open it up.
- Once the device manager is opened, click the view tab from the quick access toolbar and select the Devices by Connection option.
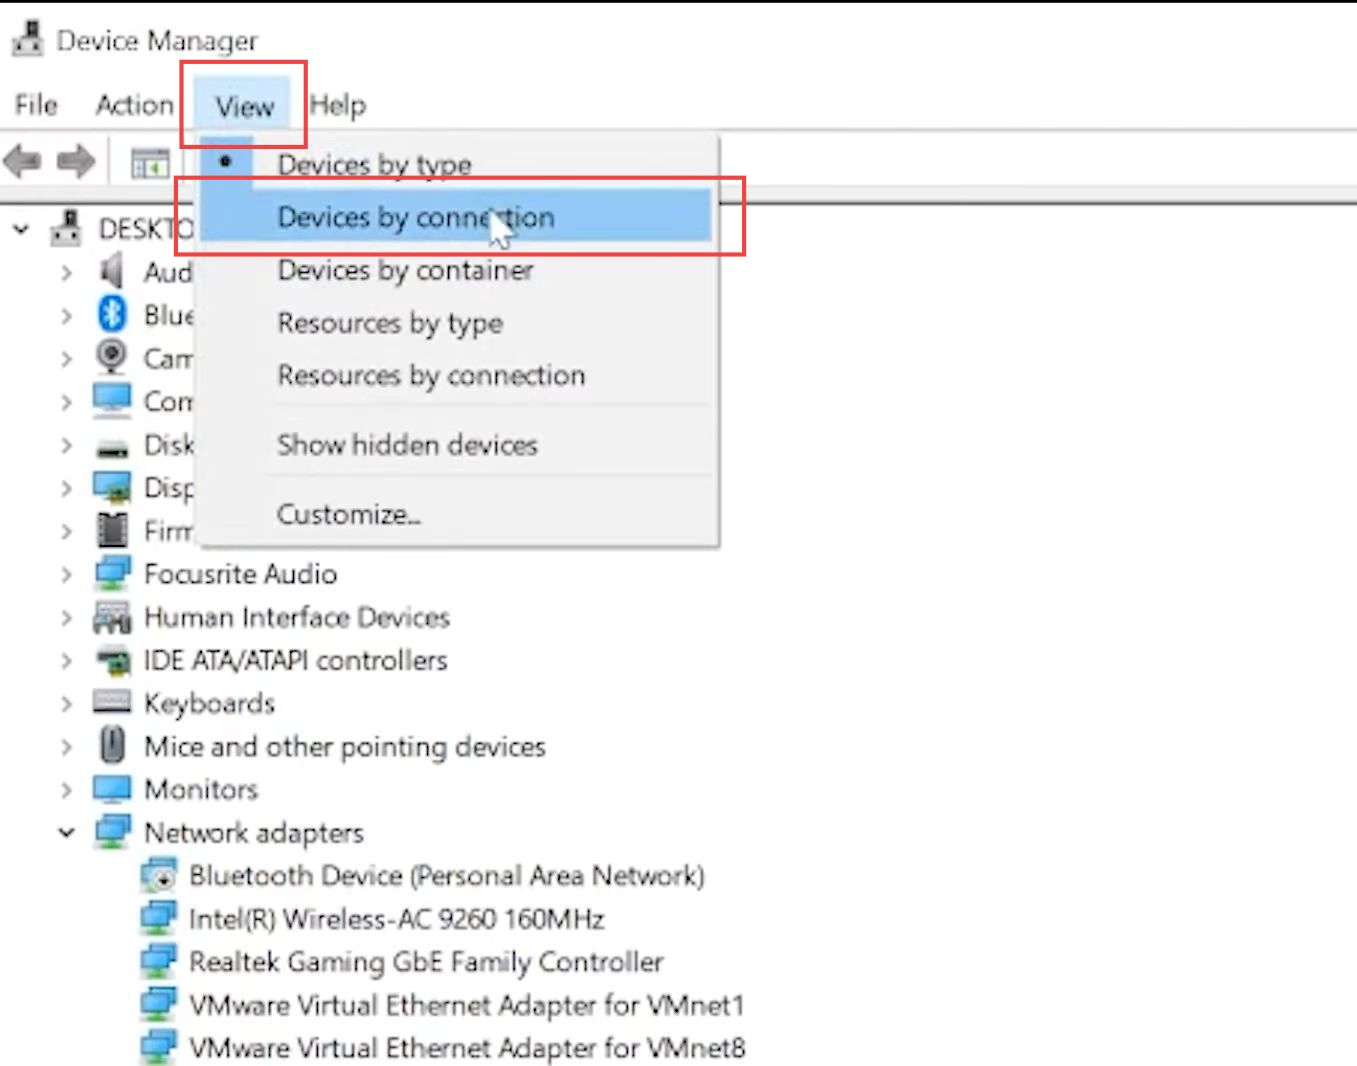
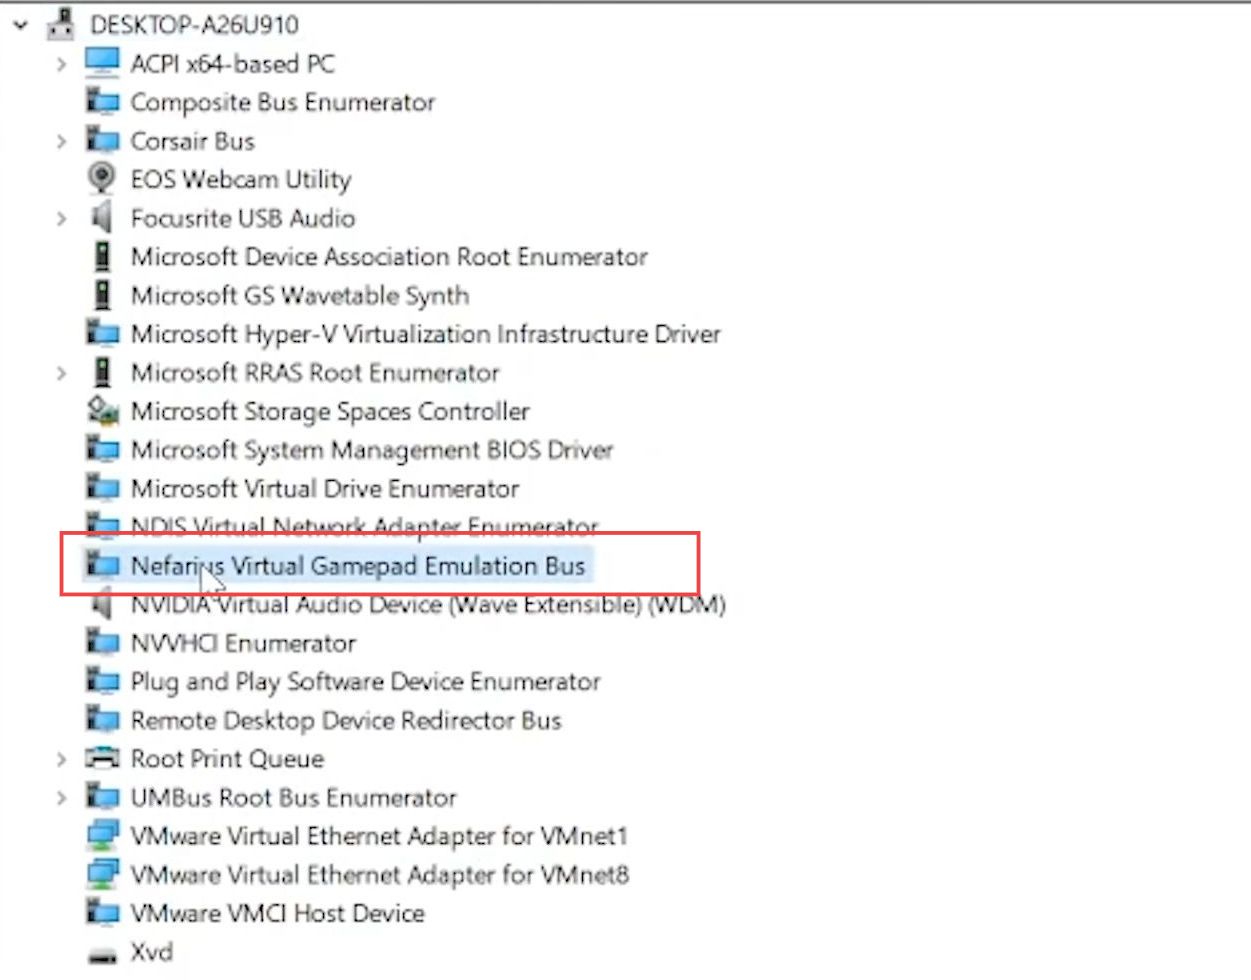
- Upon reaching the window, scroll down to Nefarius Virtual Gamepad Emulation Bus from the listings.
- If it is detected then the ViGEmBus Setup is installed correctly.
Mouse2Joystick Setup
This section explains how to download and install the Mouse2Joystick setup to use the Keyboard and Mouse with CEMU while playing the game.
- Now you need to download and install Mouse2Joystick Setup from the official web page.
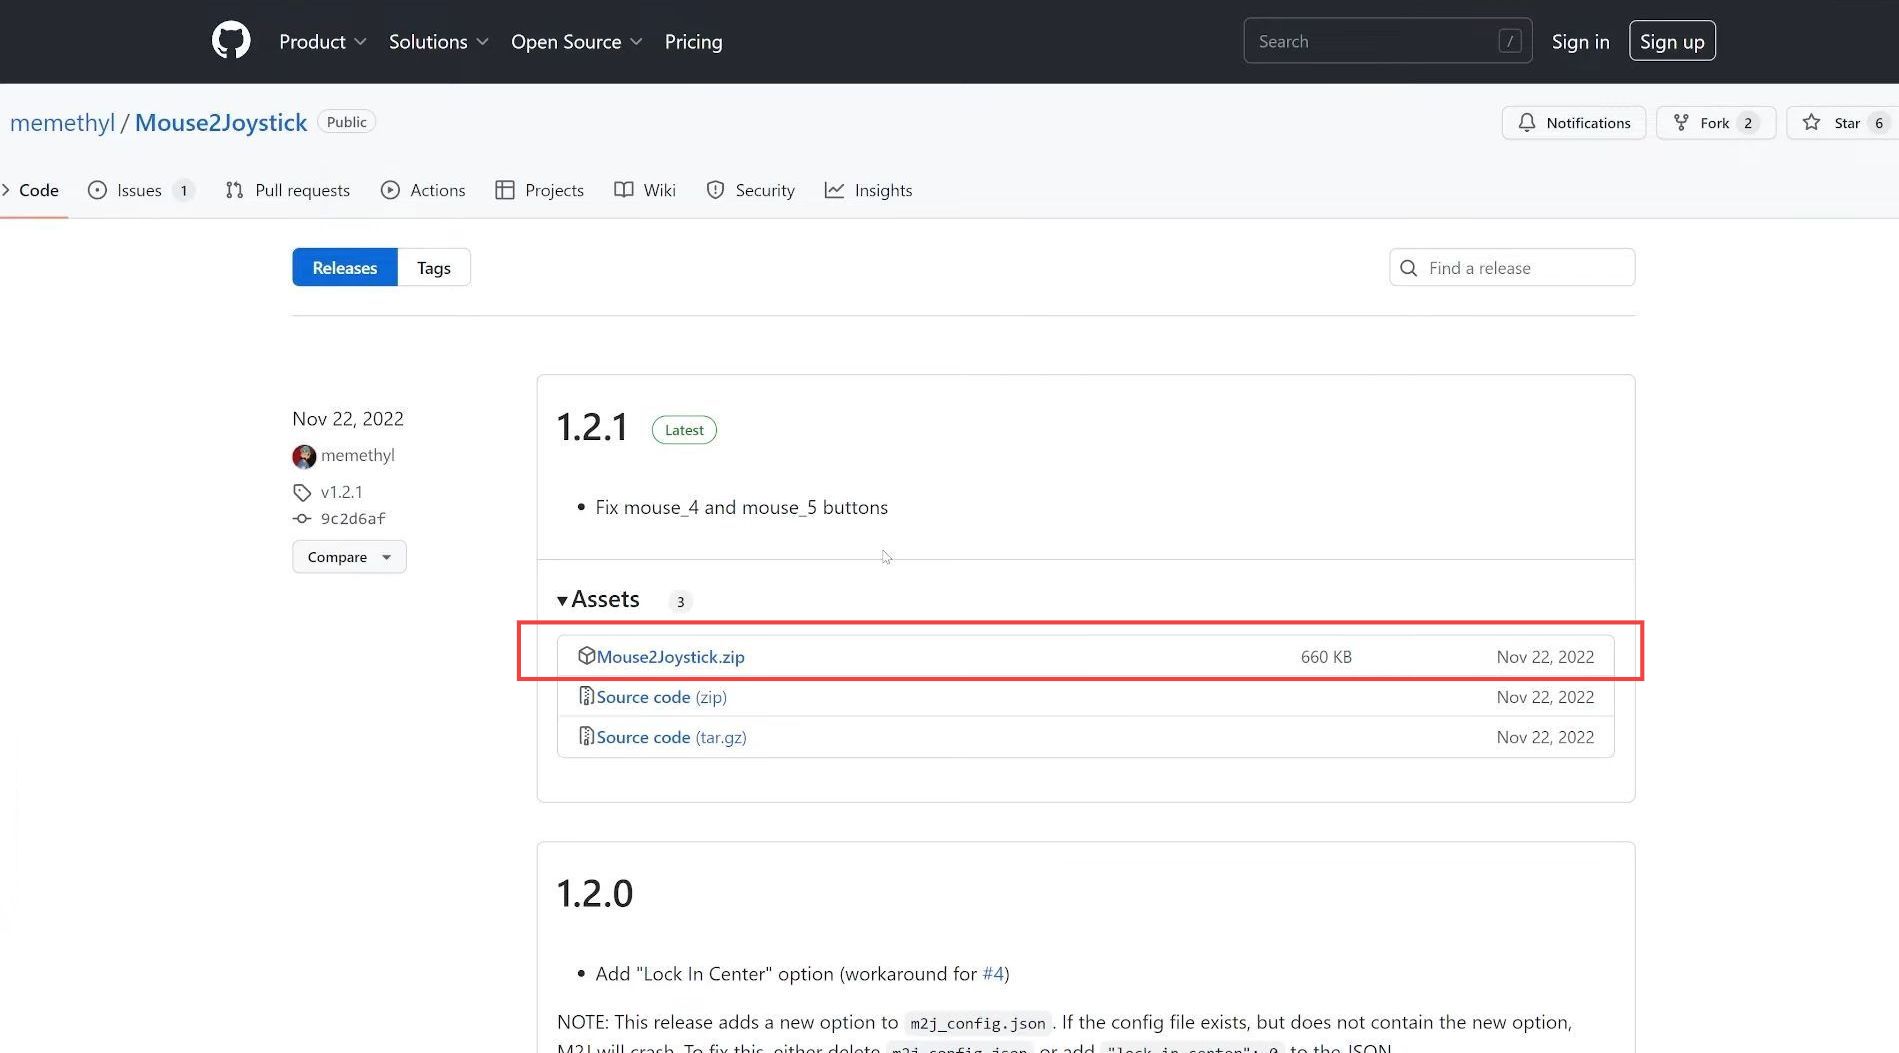
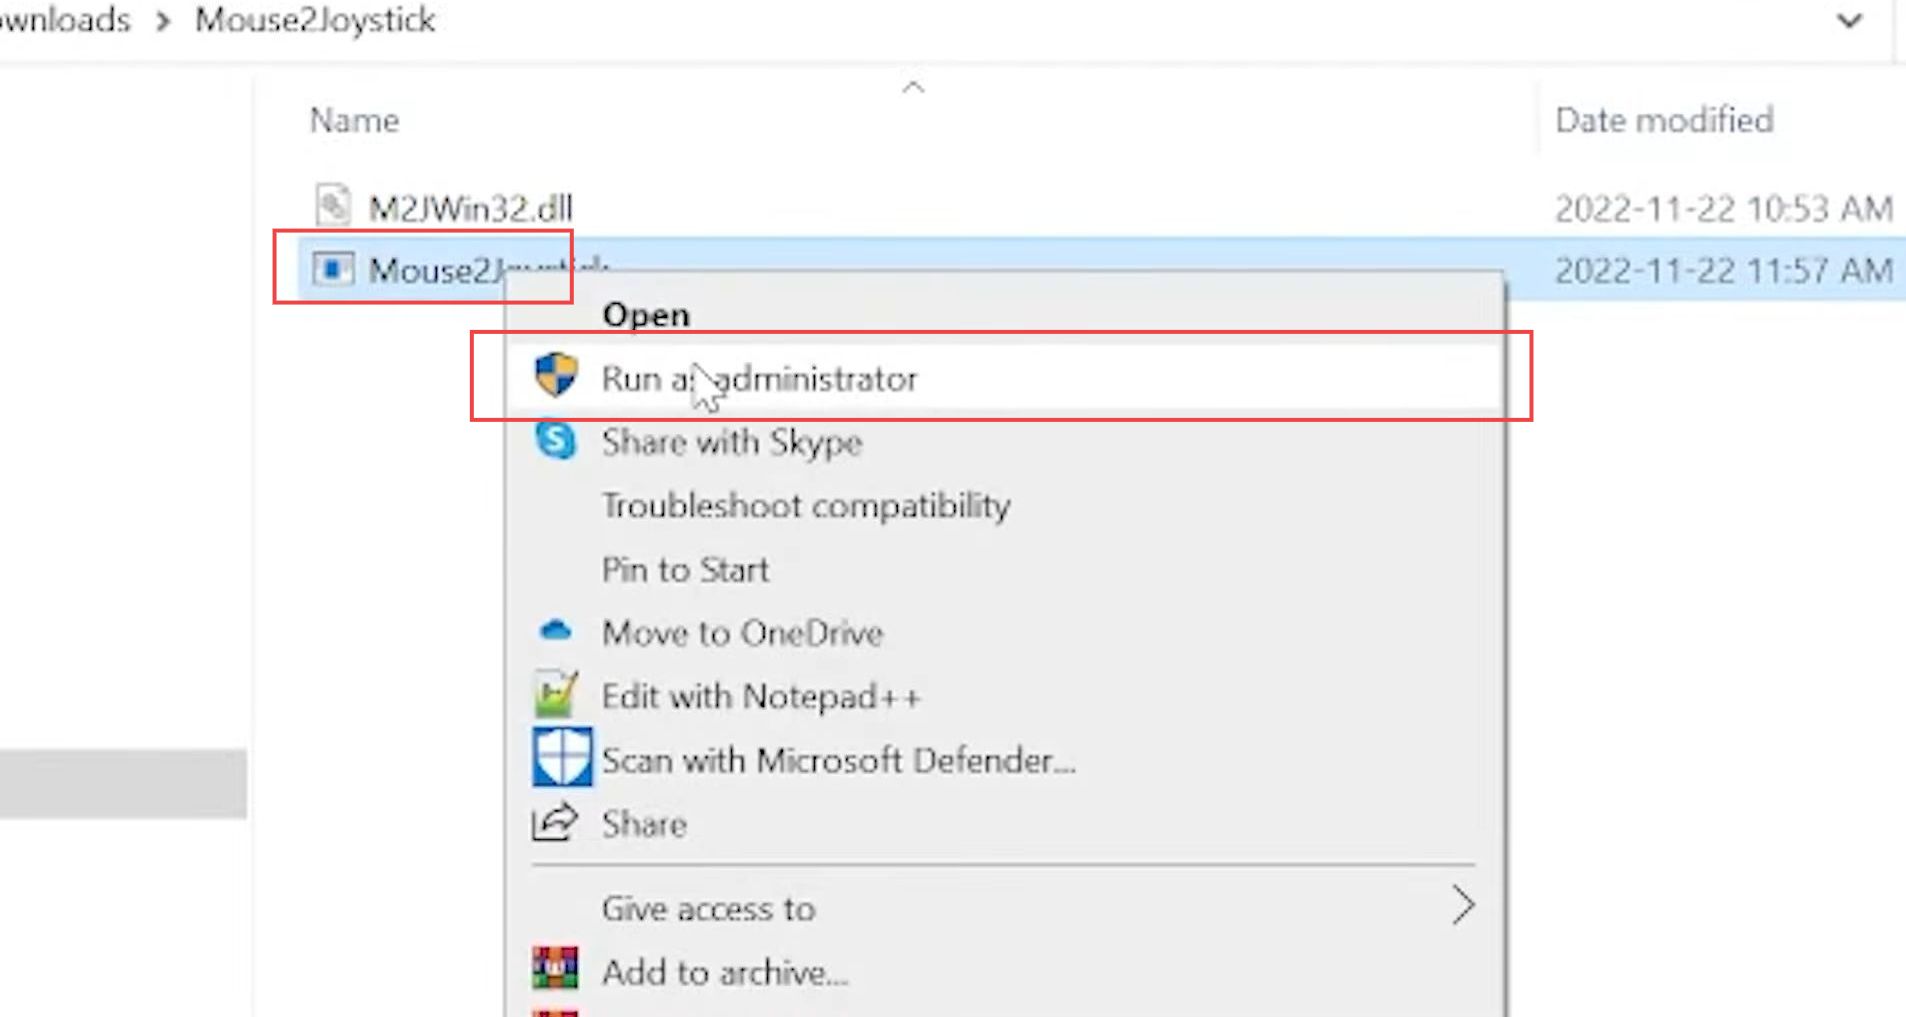
- Once the zip file is downloaded, you need to extract it.
- Then right-click the Mouse2Joystick application to run it with administrative privileges.
Configure Keyboard and Mouse in Cemu
This section describes how to configure the Keyboard and Mouse in Cemu to use the Keyboard and Mouse with CEMU while playing the game.
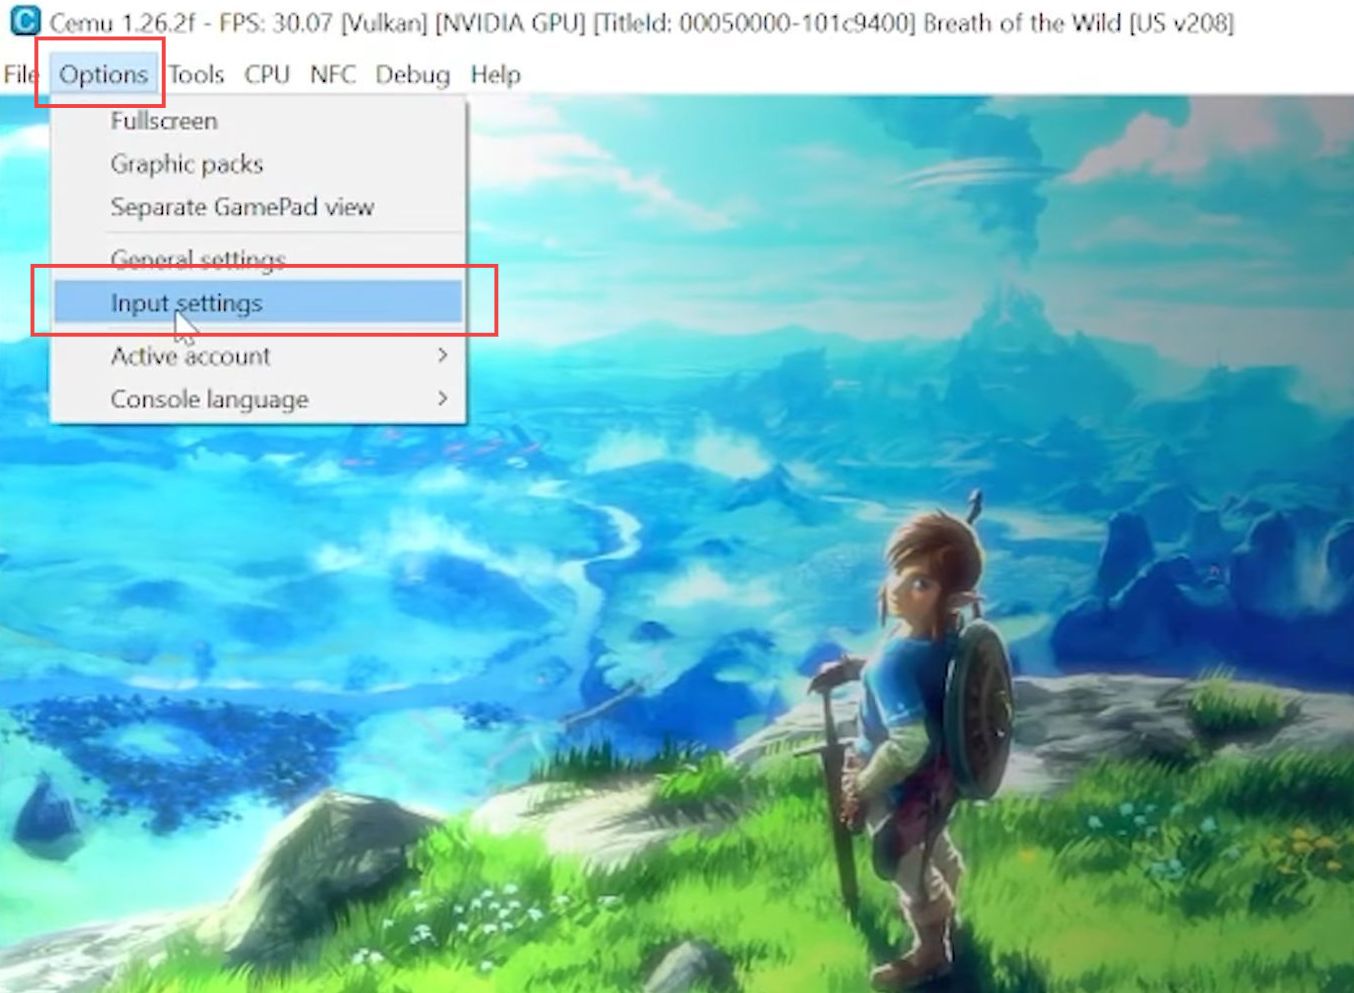
- Now you have to launch the Cemu application on your computer.
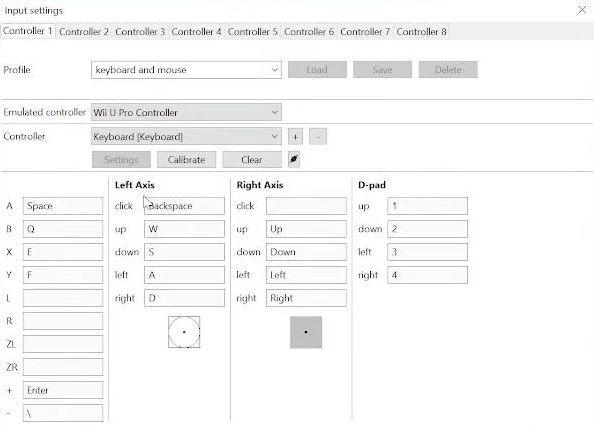
- Once the window is opened, click the options tab from the quick access toolbar and select Input settings from the listings.
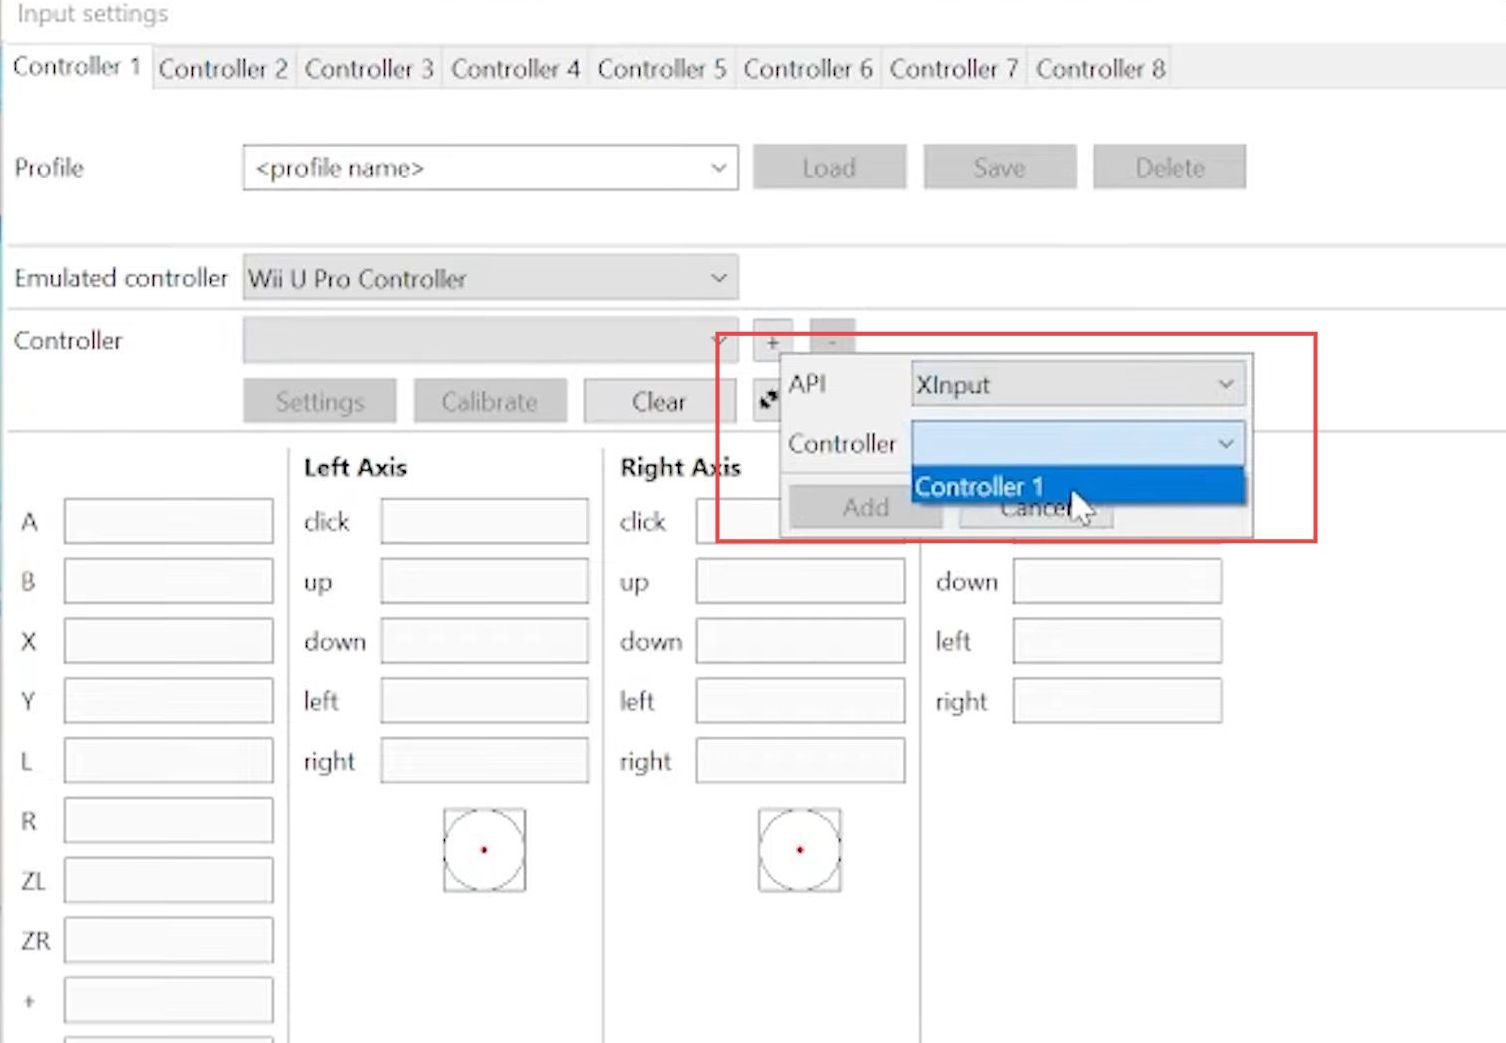
- Upon reaching the window, you need to select the Wii U Pro Controller option from the emulator controller section.
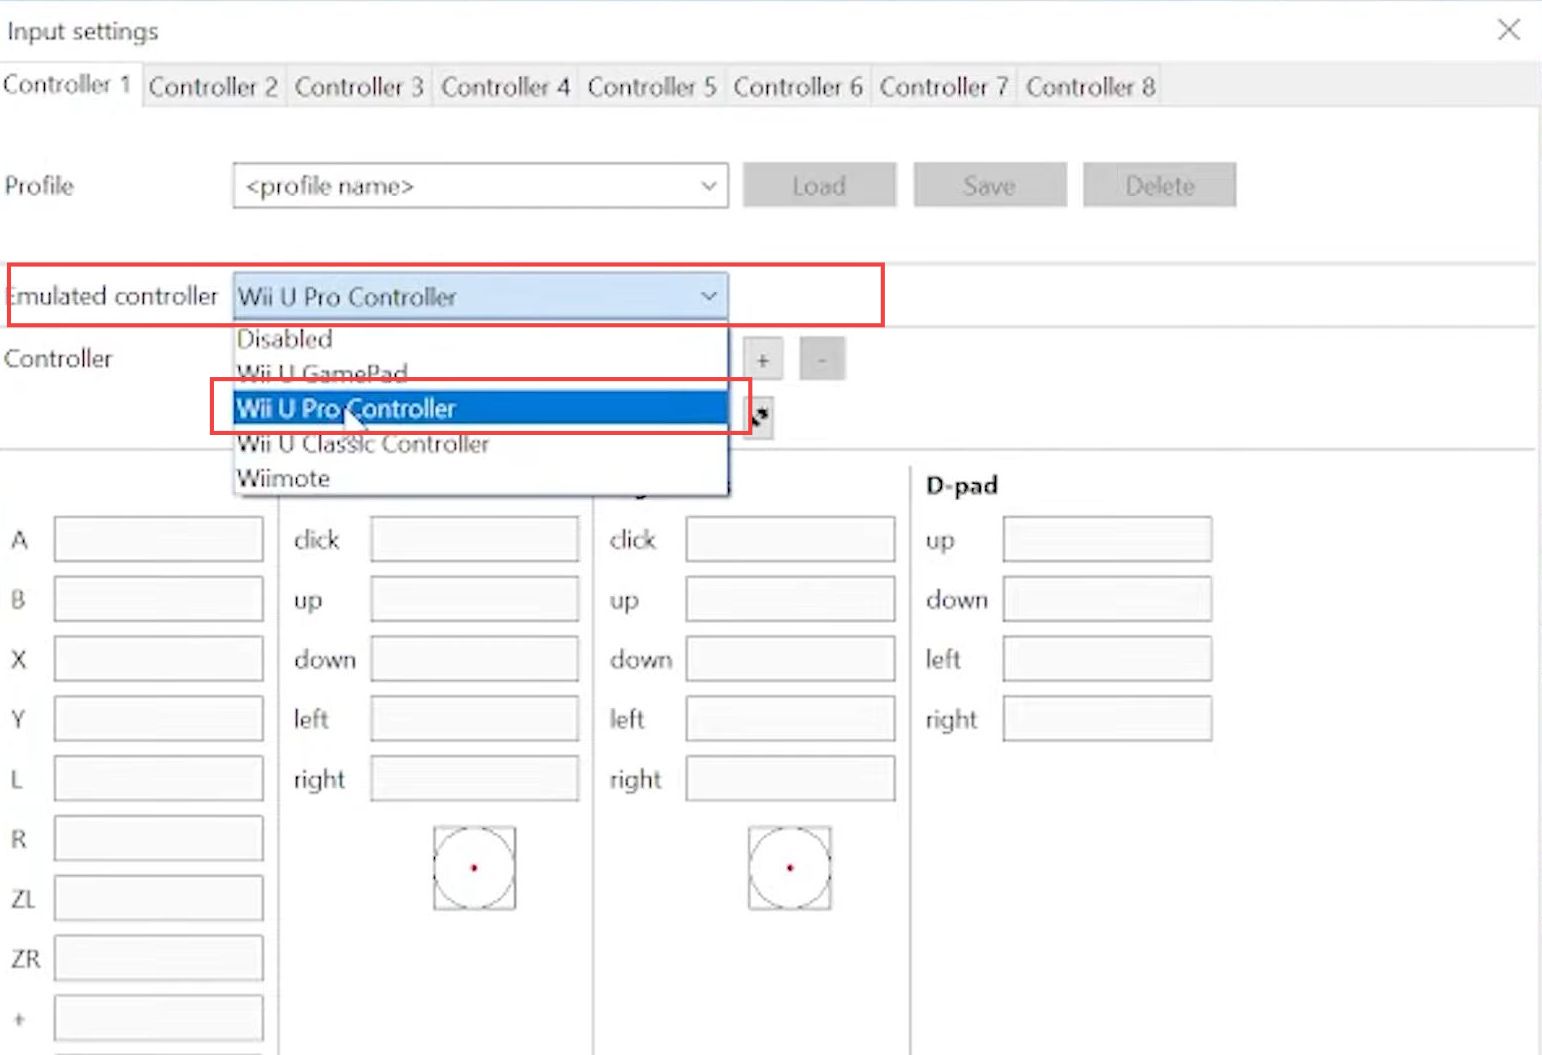
- However, you need to click the plus (+) from the controller section and set the API to XInput, and controller 1 is selected as the controller.
It will automatically remap all the controller’s settings. - Then click the Add button from the menu.
- Again you have to click the plus (+) from the controller section and set the API and Controller to the keyboard.
- Then click the Add button from the menu.
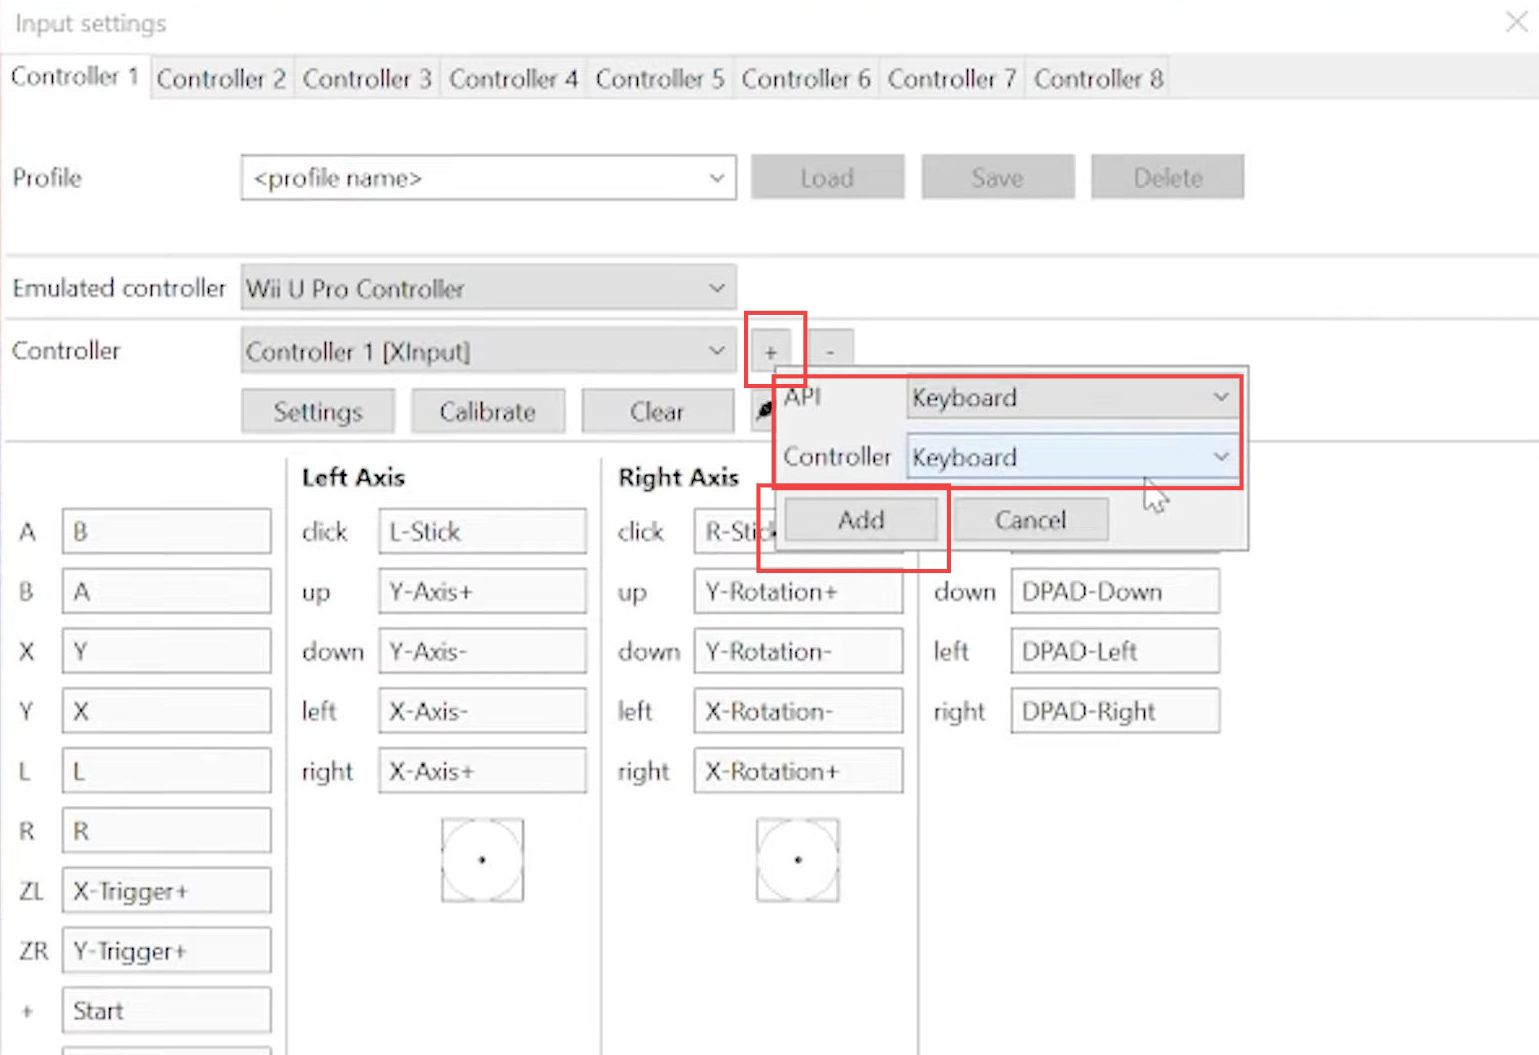
- Before configuring the keys you need to ensure that the keyboard is selected as the controller.
Then you can remap the key based on your choice.

- If you have changed the keys then you need to apply the settings by changing the controller to Xinput and checking the same remapping of the keys.
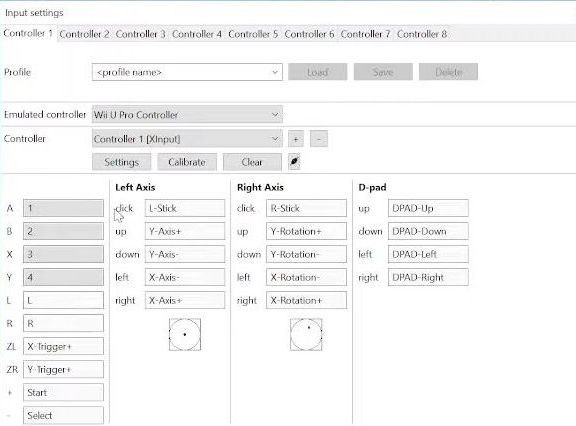
- After that, you have to play the game and check that the keyboard is working properly as a controller.

Mouse2Joystick Settings
This section explains how to configure the Mouse2Joystick settings to use the Keyboard and Mouse with CEMU while playing the game.
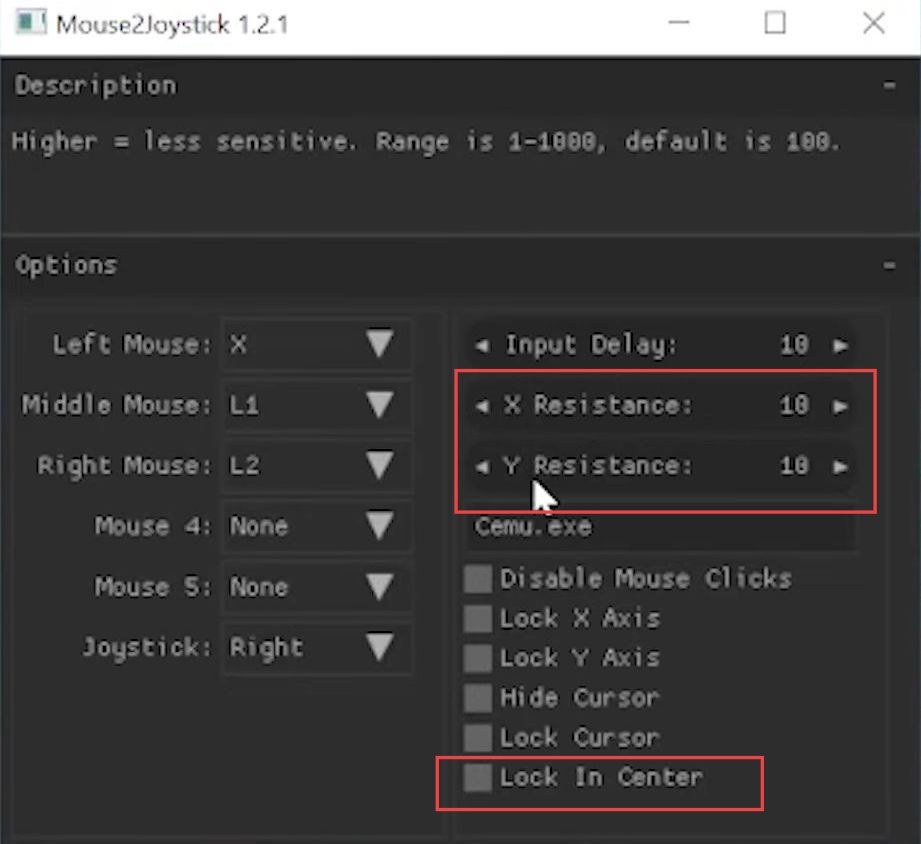
- To change the mouse settings you have to adjust the X and Y resistances.
- You will get better movement by lowering the resistance.
- You can play the game with the lock in the center, lock cursor, and hide cursor options.
- However, lock-in center settings are the most essentially required while playing the game as they assist to move in one direction by turning the camera.
Mapping Keyboard Inputs
This section describes how to configure the mapping Keyboard inputs to use the Keyboard and Mouse with CEMU while playing the game.
- You can adjust the key settings for your keyboard based on your choice from the Input settings window.