In this guide, you will learn how to fix 0x00001338 N on Intel.
Check CPU speed and Fix
In this section, we will take you through the steps to check CPU speed and fix it to resolve the error.
- First, open Task Manager on your Windows system and navigate to the Performance tab in Task Manager. Look for the CPU details and locate the CPU speed.
If your CPU’s speed is higher than 5 GHz, it might be causing issues with the game. - To resolve the issue, you need to lower your CPU clock speed to 5.0 GHz or lower by adjusting the base clock speed or, if applicable, through the multiplier setting.
- Lower the base clock speed from, for instance, 5.6 GHz to 5.0 GHz. If you’re using the multiplier, reduce it from 56 to 50.
- After that, start the game to check if the issue persists. However, ensure that after playing the game, you revert the clock speed to its previous setting.

Download Intel XTU
This section describes how to fix the error by downloading Intel XTU.
- You have to download Intel XTU Download. Once you reach the web page, click on the Download button.
The software will be downloaded to your system. - Locate the downloaded file and open it. Follow the installation instructions and prompts to install the Intel XTU software on your computer.

- Complete the installation, and restart your PC.
- Launch the Intel XTU application and you’ll find a screen with various options and controls to manage and tune your CPU.
Fix VBS Error
This section will take you through the steps to fix the VBS error.
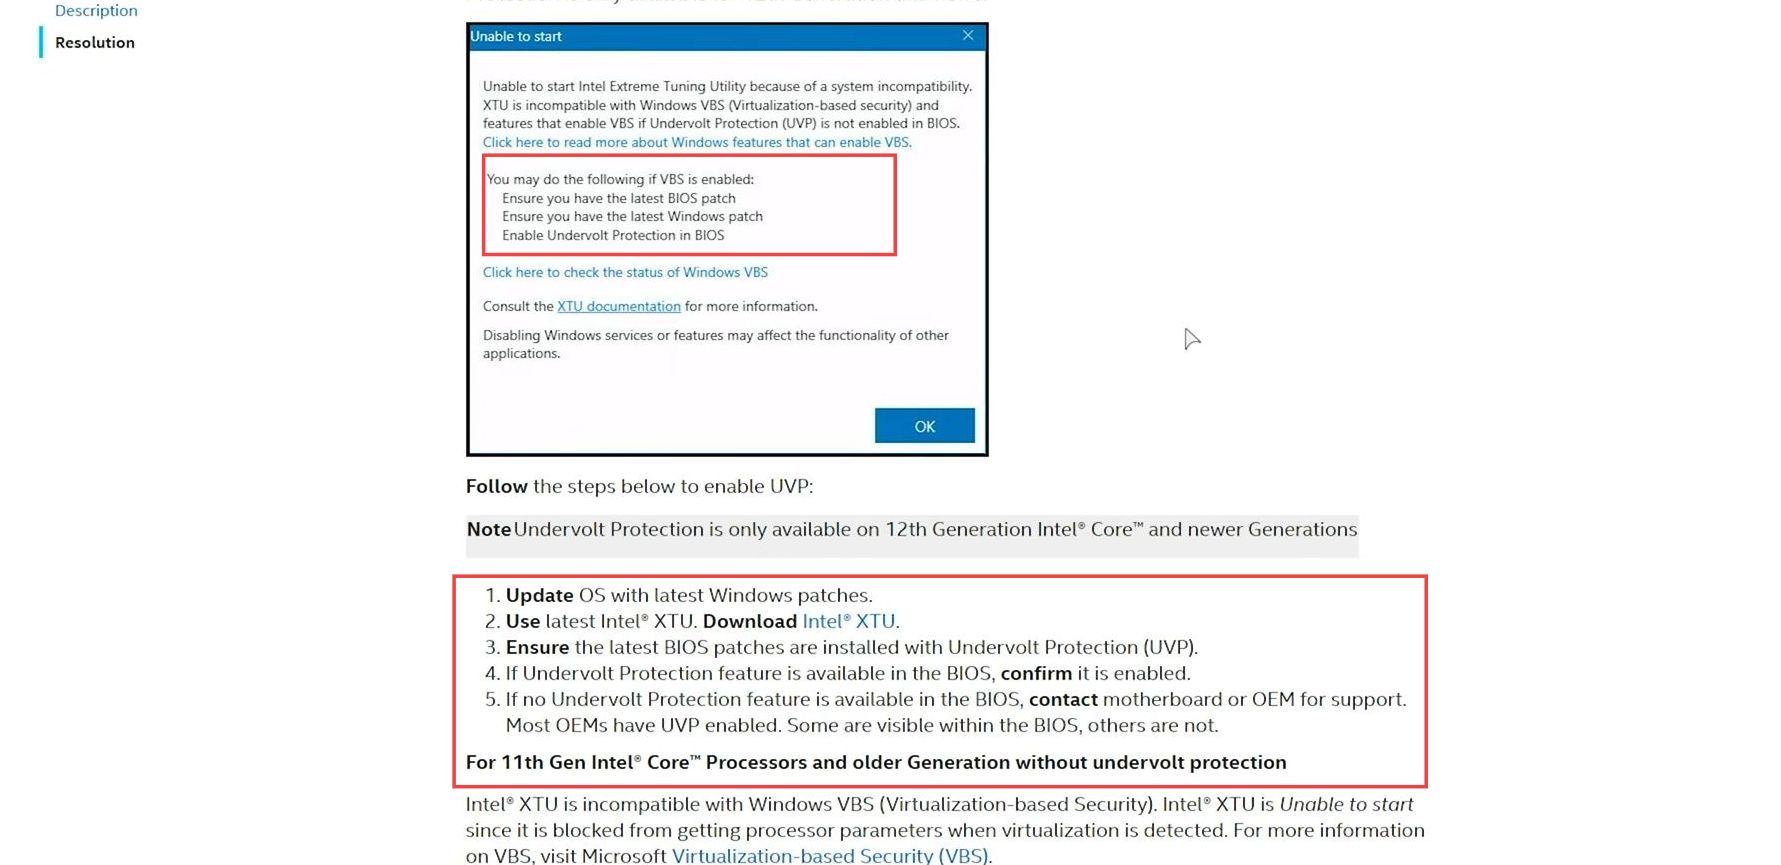
- If you receive an error about VBS during XTU’s startup, you can address this by enabling a feature in your BIOS.
- Restart your PC and access the BIOS settings. The method for entering the BIOS can vary.
- Find the undervolt protection or similar settings in the BIOS. If you don’t find it, check for a BIOS update or contact your device manufacturer.
- For Intel processors before the 11th generation, disable Virtualization-Based Security. For 11th-generation processors or above, enable Undervolt Protection in the BIOS settings.
This may be found in different sections based on your motherboard model. - Now restart your PC and open Intel XTU again.
The error related to VBS should be resolved, allowing you to make the necessary adjustments using XTU.
Fix the N errors in MW3/MW2/Warzone
This section explains how to fix the N errors in MW3/MW2/Warzone.
- Open the Intel XTU application after enabling Undervolt Protection via the BIOS and rebooting your system.
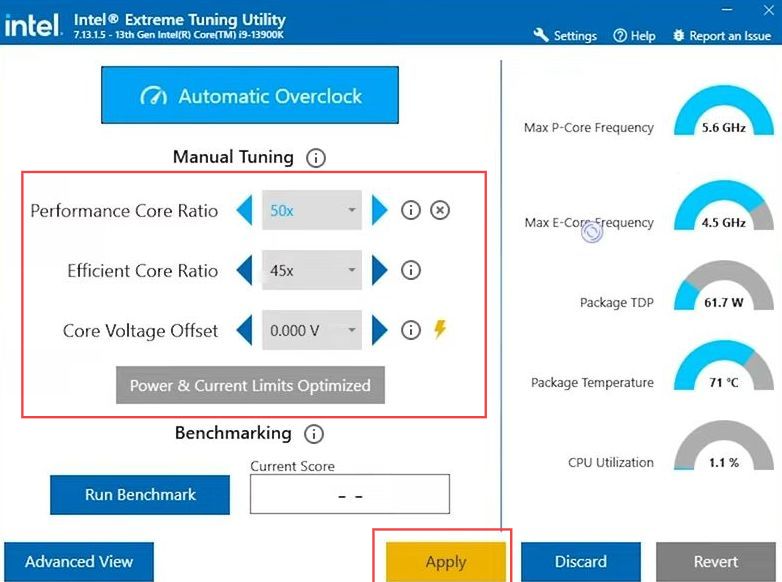
- Locate the setting for the Performance Core Ratio. This setting essentially controls the clock speed or frequency of your CPU cores.
- Decrease the Performance Core Ratio from its original setting which could be 56 or higher down to 50.
- Click on the Apply button within the Intel XTU interface to implement the changes. Verify the adjustment by checking the CPU frequency in Task Manager.
You should notice that the CPU speed has decreased, in this case, down to 4.9 GHz.
- Go back to the Intel XTU application on your system and locate the Performance Core Ratio setting in Intel XTU, which was previously set at 50.
- Change the Performance Core Ratio back to its default or previous setting, which was 56 or 5.6 GHz. Click Apply within the Intel XTU application to apply the newly adjusted core ratio settings.
- After reconfiguring the core ratio back to the original setting, attempt to run the game or application that previously caused the instability.
- Launch the Call of Duty to test if the crash occurs again, as expected, due to the CPU operating at a higher clock speed.

Launch the game
In this section, we will take you through the steps to launch the game after resolving the errors.
- Firstly, wait for the error message such as 1338 error to appear while attempting to launch the game. Once the error message appears, close the error prompt.
- Within the Intel XTU software, reduce the Performance Core Ratio setting to a lower value, like 50 or below. Address the new setting by clicking Apply.
- Attempt to relaunch the game and start playing it. After that, close the game, return to the Intel XTU, and set the Performance Core Ratio back to its original value. Ensure the changes are saved, and the software settings are retained across restarts.