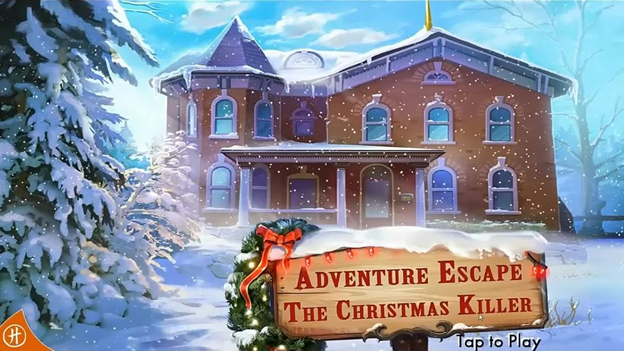
Adventure Escape: Xmas Killer is a mysterious puzzle game where you play Detective Kate Grey, a character from Mystery Games. The story takes place during Christmas, and you have to solve a murder mystery and stop a serial killer before they strike again on Christmas day.
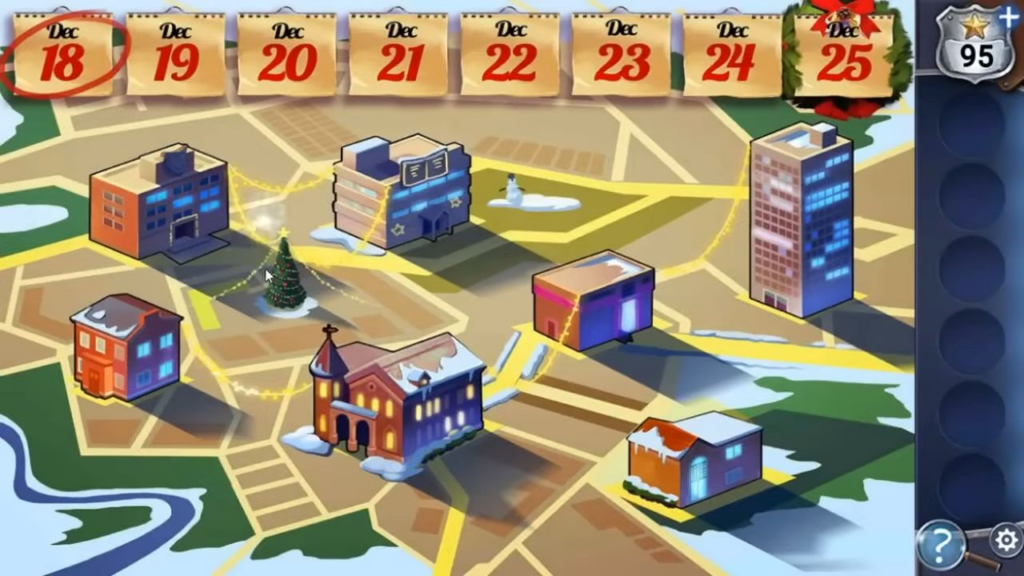
The game is divided into 7 chapters, each filled with clues, items, and characters to discover and interact with. By following this comprehensive guide, you will be able to put your police skills and puzzle-solving talents to use as you investigate and complete the game. Keep reading for a detailed walkthrough, including the locations of hidden stars.
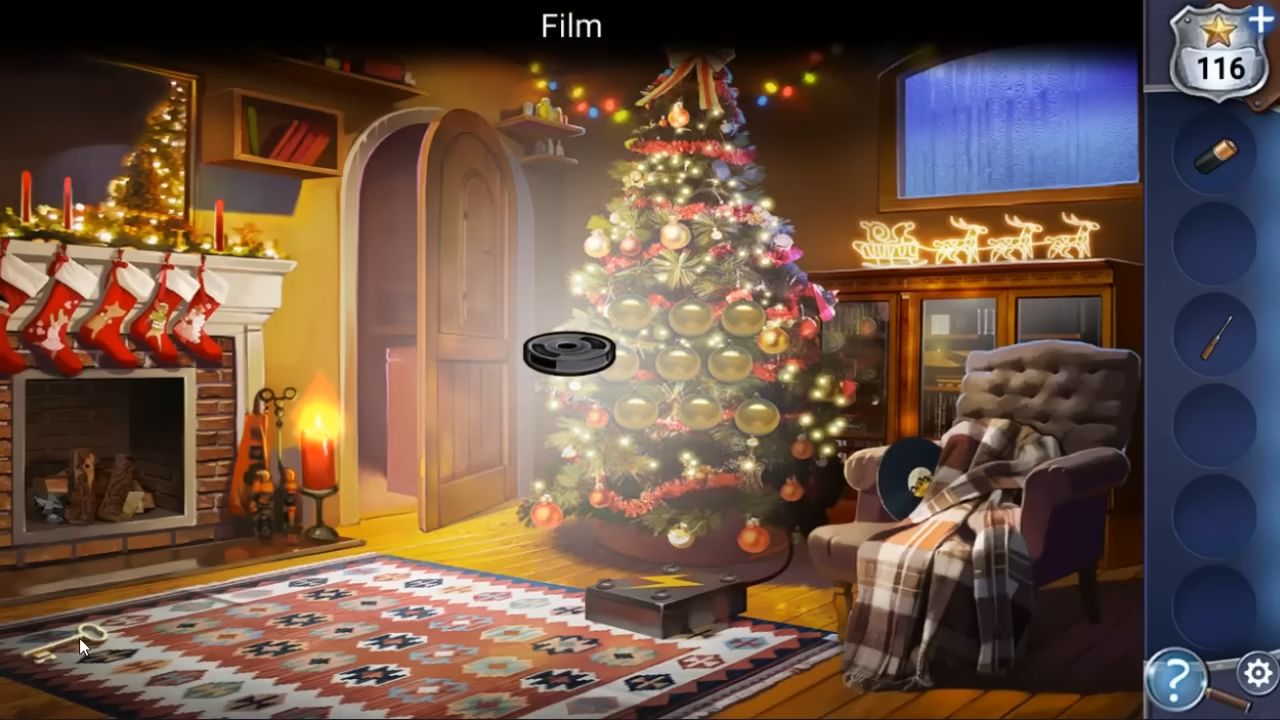
Chapter 1
Here’s the complete guide for chapter 1 of The Christmas Killer (Xmas Killer), a fantastic Adventure Escape Mystery game. The story begins on December 18th, just seven days before Christmas.
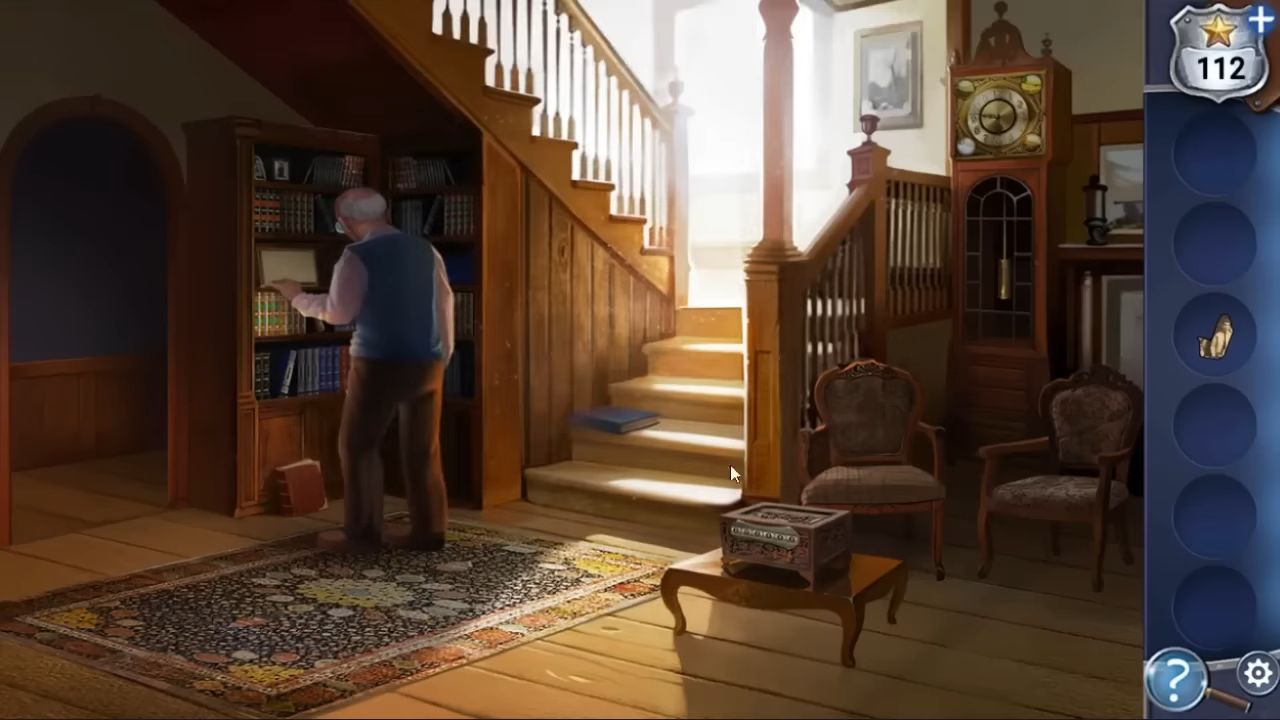
In the first chapter, there’s a brief introduction to teach you how to play. Start by grabbing the empty coffee cup first and then the blue file folder. Clean up the remaining garbage on the desk and toss it away to earn 4 extra stars.
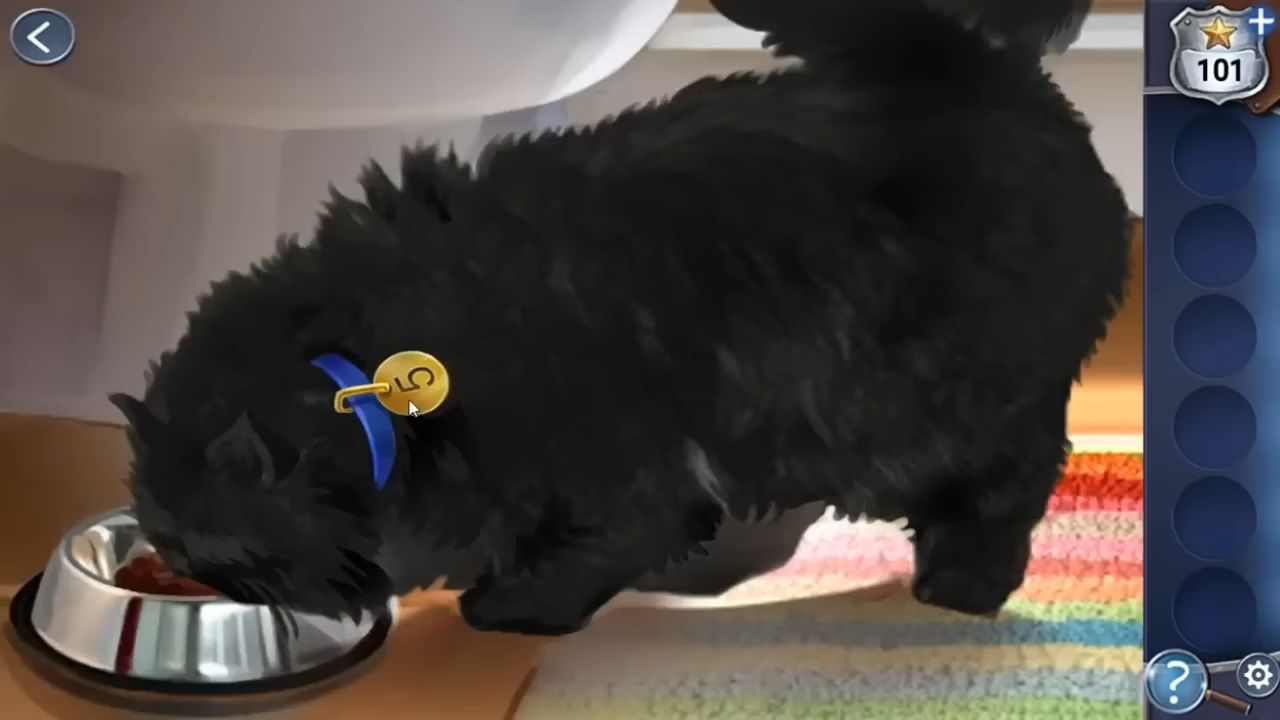
Give the fish some food from the bowl to earn an extra star and tap on the right to go to the next part. Grab the fish food and the red file folder. Take the yellow file folder from the shelf and open the big middle drawer to discover a green folder.

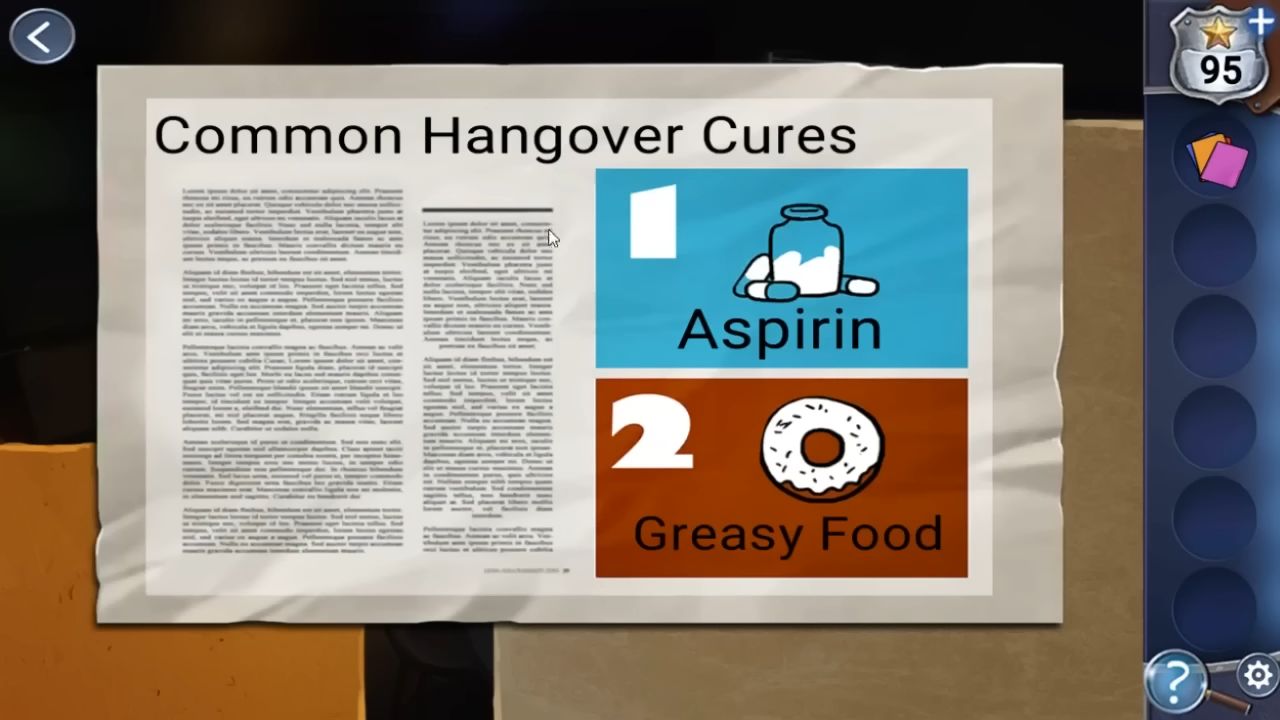
Pick up the purple file folder from the desk and tap above the window to find a clue; there are 4 police badges. Now, open the left door and go into the kitchen. Your task is to help Dan with his hangover. On the left wall, there’s a note. Tap it to see some common hangover cures. You’ll need aspirin and greasy food.
Open the upper cabinets to locate a paper cup and use it on the water dispenser to fill it up. Now, you have a Cup of water. Tap the first aid box on the back wall; it needs a 4-digit code to open (5364) and get the aspirin from inside. Next, tap the box on the counter to find donuts. Arrange the donuts in the correct order by tapping pairs of them; some can’t be moved.
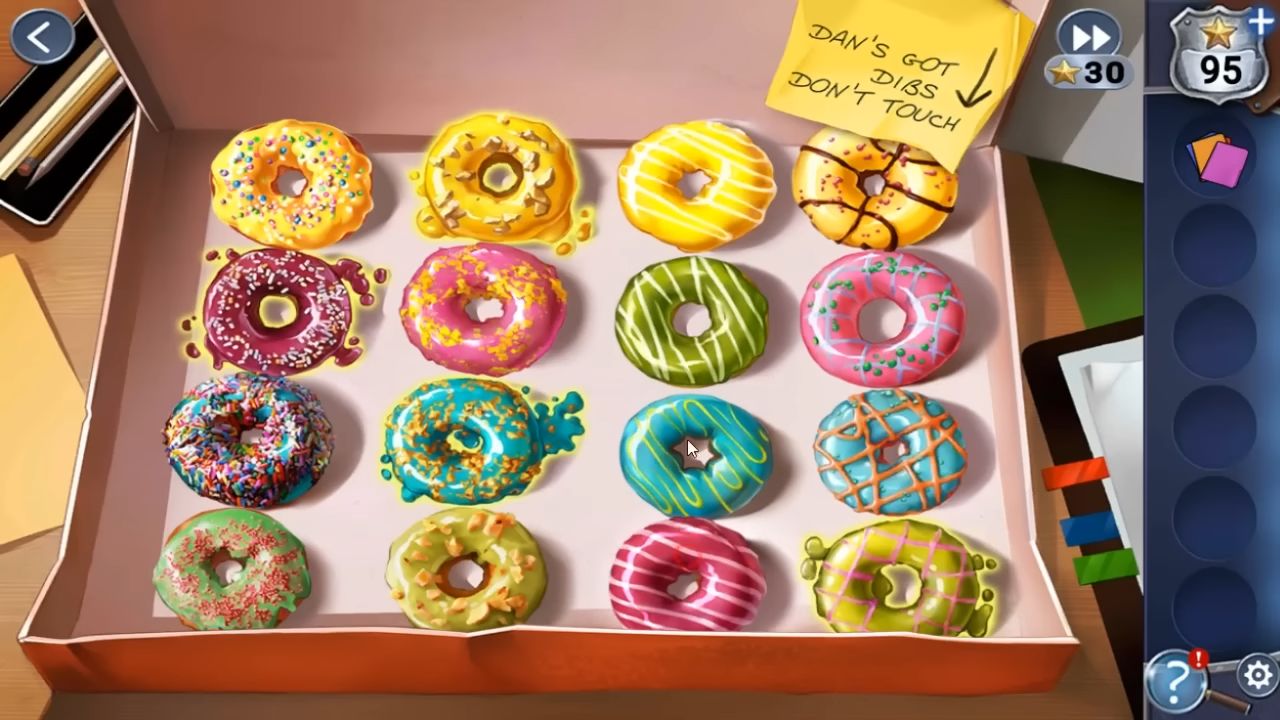
You need to get a donut for the Dan. Put the aspirin, water, and donut in front of Dan. He will feel better, and you can grab the red file folder. Return to the initial room and tap to open the bottom right drawer of the desk. Add all the files you found. Now, organize them by tapping pairs to swap positions. Arrange them so that the lines match up across all the files.
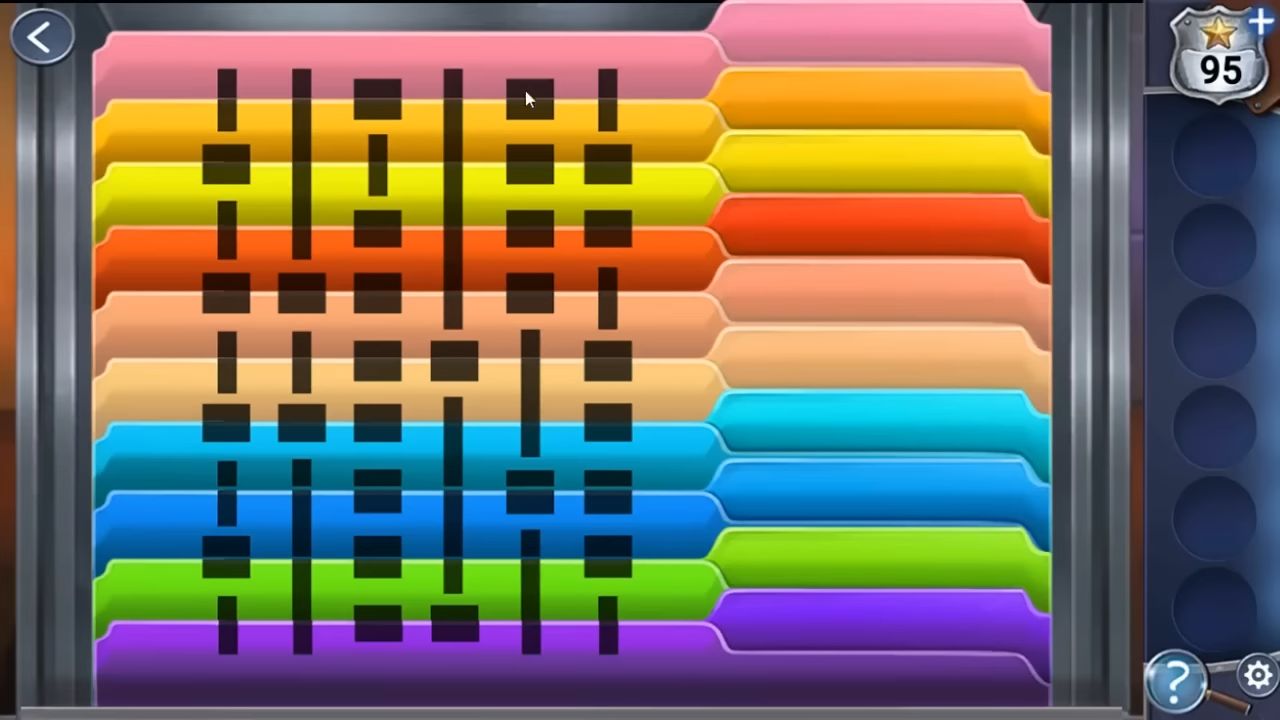
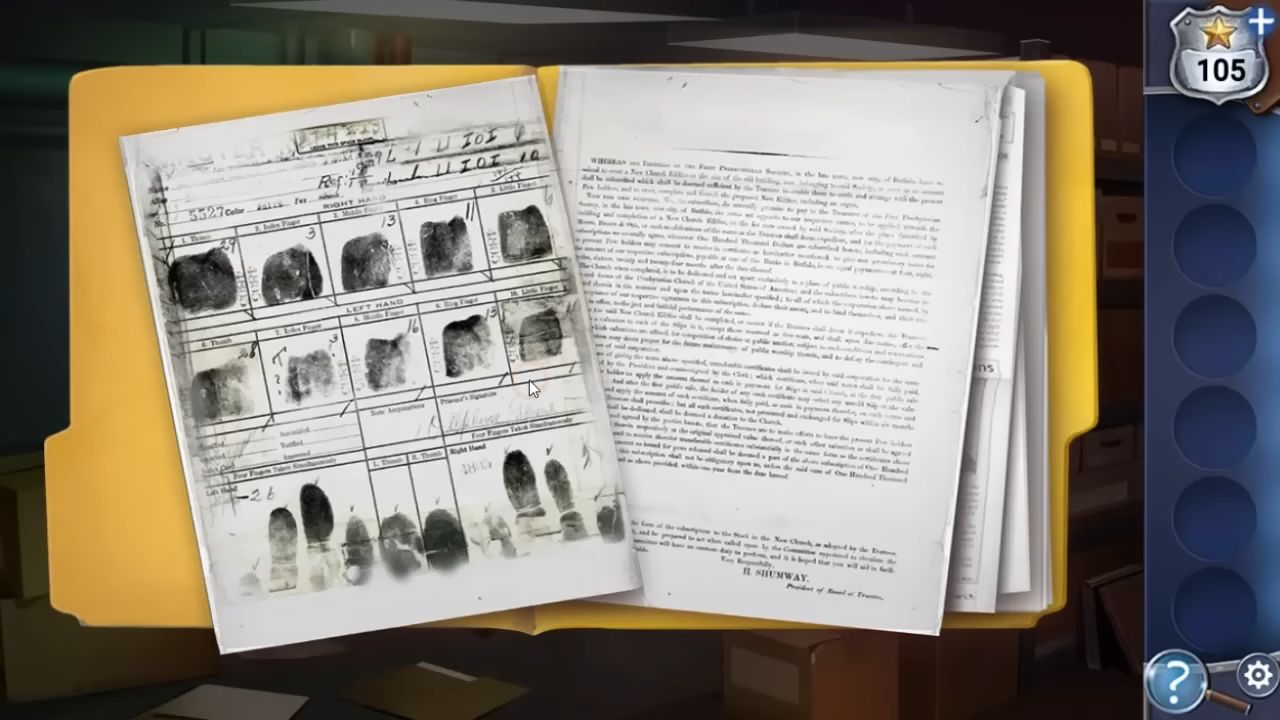
When you finish, you’ll get a star, and the patterns also give you a clue. Now, check out the safe on the shelf above the fish bowl. Pay attention to the clue with squares and numbers in the top right corner (428256).
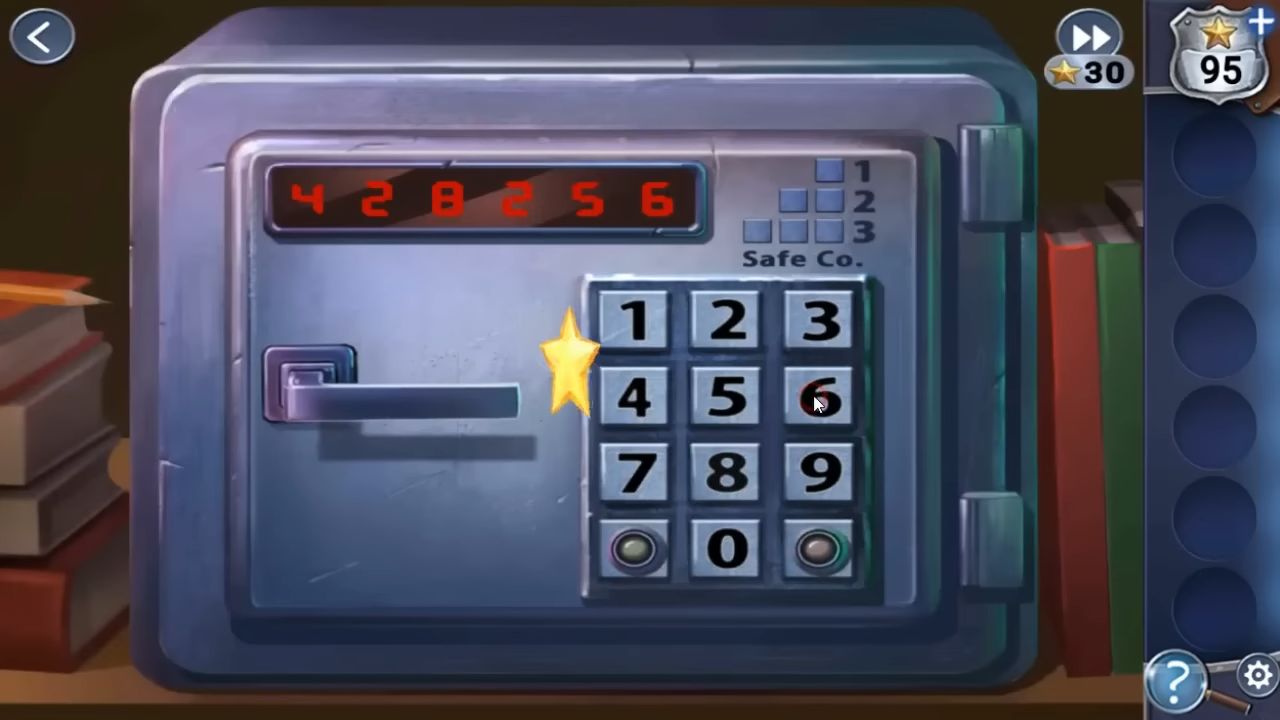
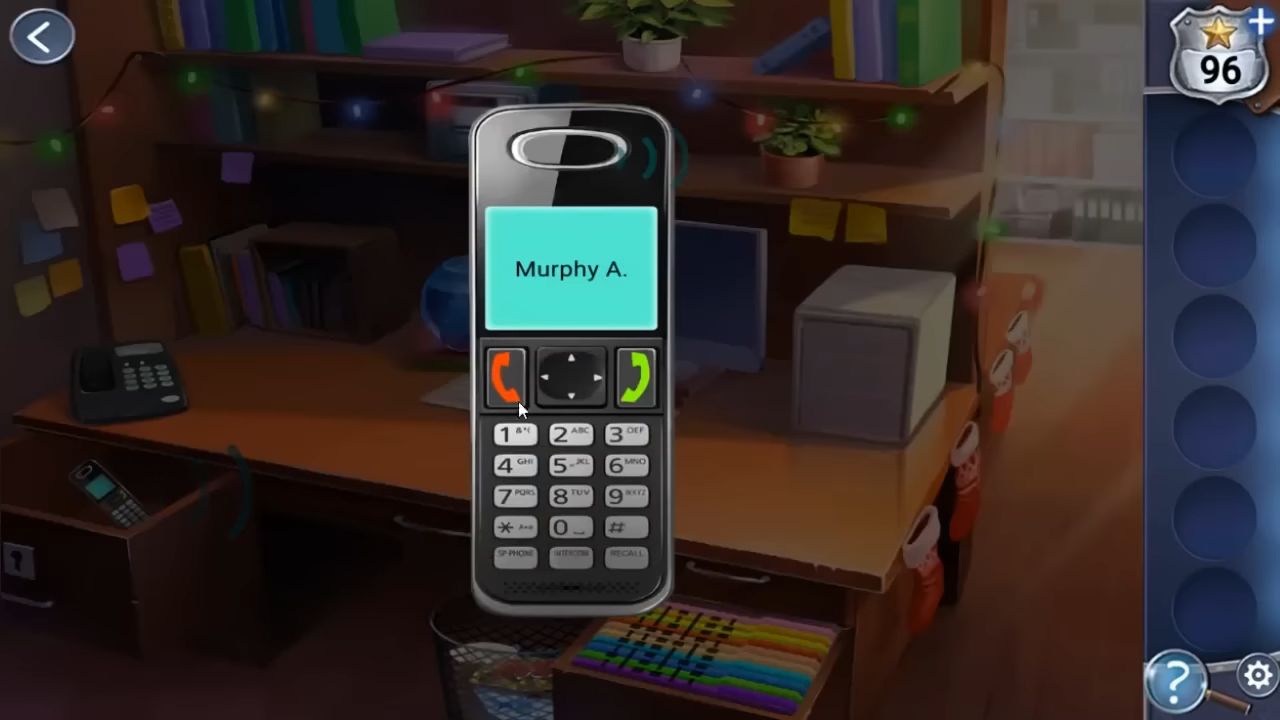
Unlock the safe, take the Case file folder, and give it to Sgt. Jacob. A phone will ring in the locked drawer and you’ll need a key. Clean up the trash on the desk for an extra star, then, get the ‘old key’ and use it in the drawer. Grab the phone, answer the call, and speak to Lt. Murphy. There’s a dead body to investigate, and that finishes Chapter 1.
Chapter 2
The date is December 19th, just six days before Christmas. Your adventure begins outside an old house where there’s been a report of a dead body.

Below the front window, tap to pick up a purple Scrap of quilting fabric. Now, tap on the front door to enter and open the top cupboard to the right to find a hidden star. Under the table on the right, you’ll find a can opener.
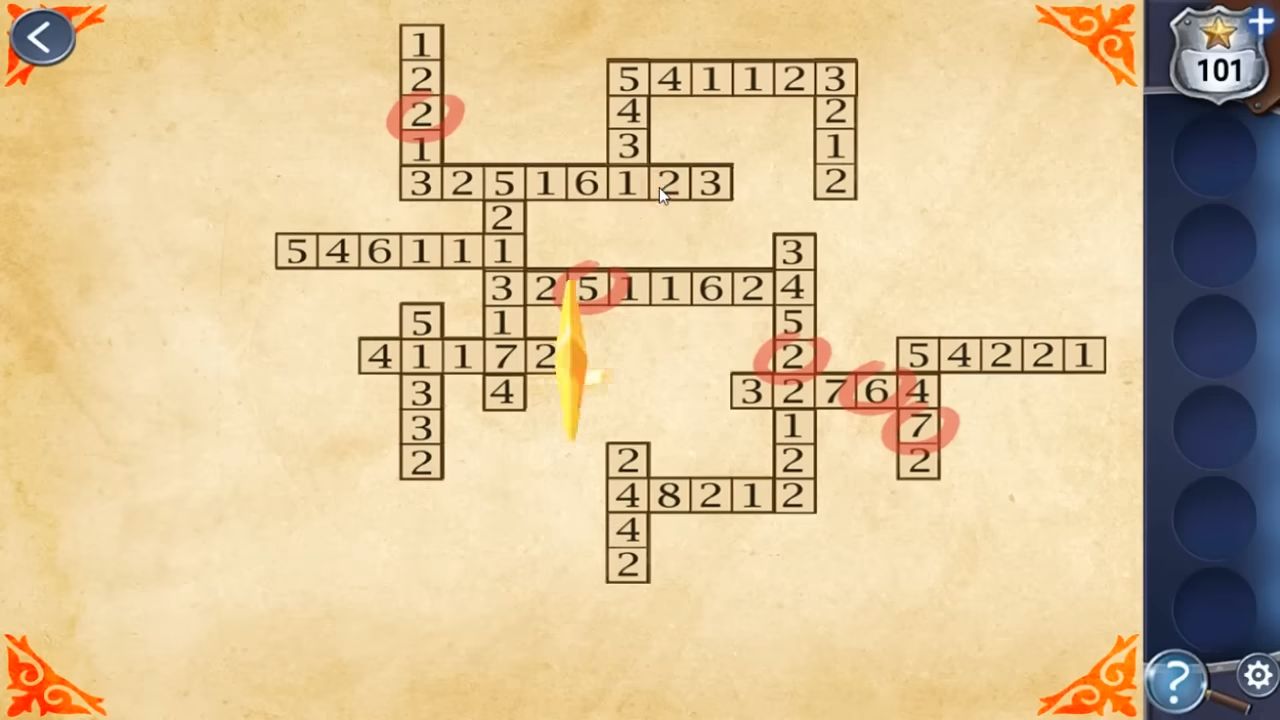
Open the lower two doors on the white dresser in the center to collect a second scrap of fabric. Then, use the can opener on the can of cat food on the left. Take it and add it to the food bowl on the floor. Pick up the bowl of cat food. Now, tap to check the book on the table, which has a crossword puzzle. Fill in the numbers to complete the puzzle.
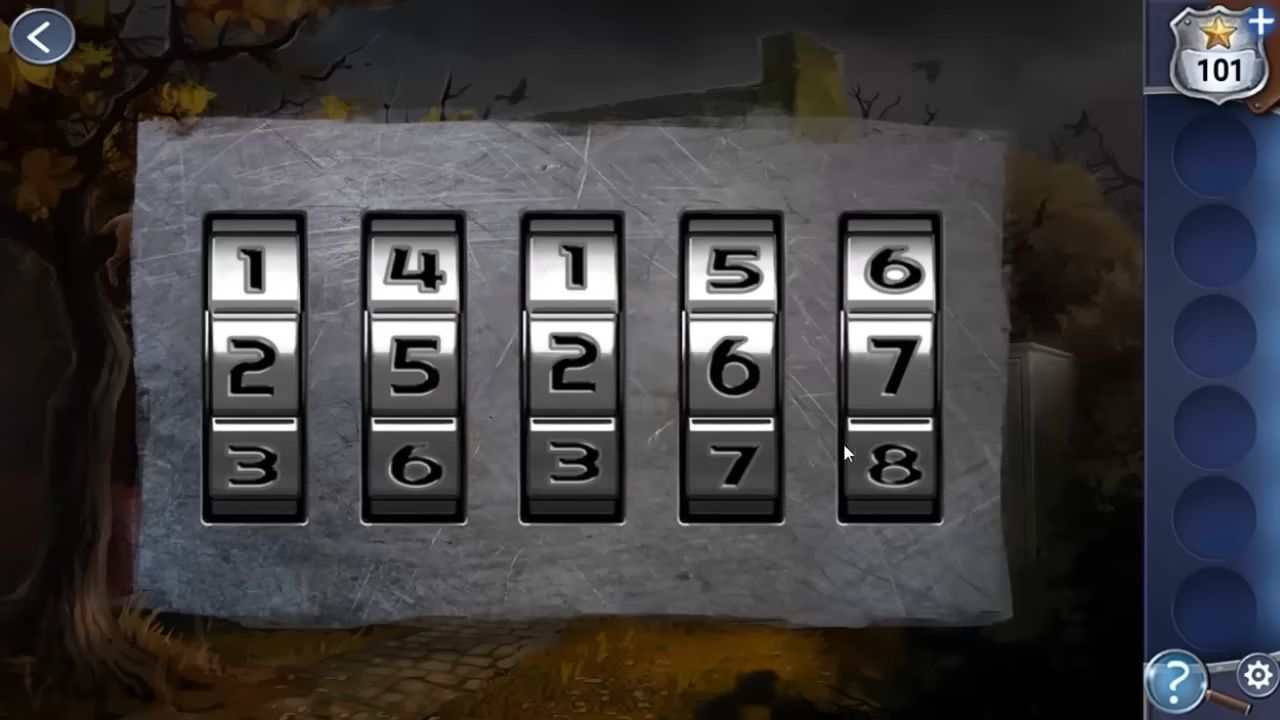
After finishing, you’ll have 5 circled numbers. Go back outside through the door on the left and tap to examine the shed on the right. Use the code you discovered to unlock the padlock (25267).
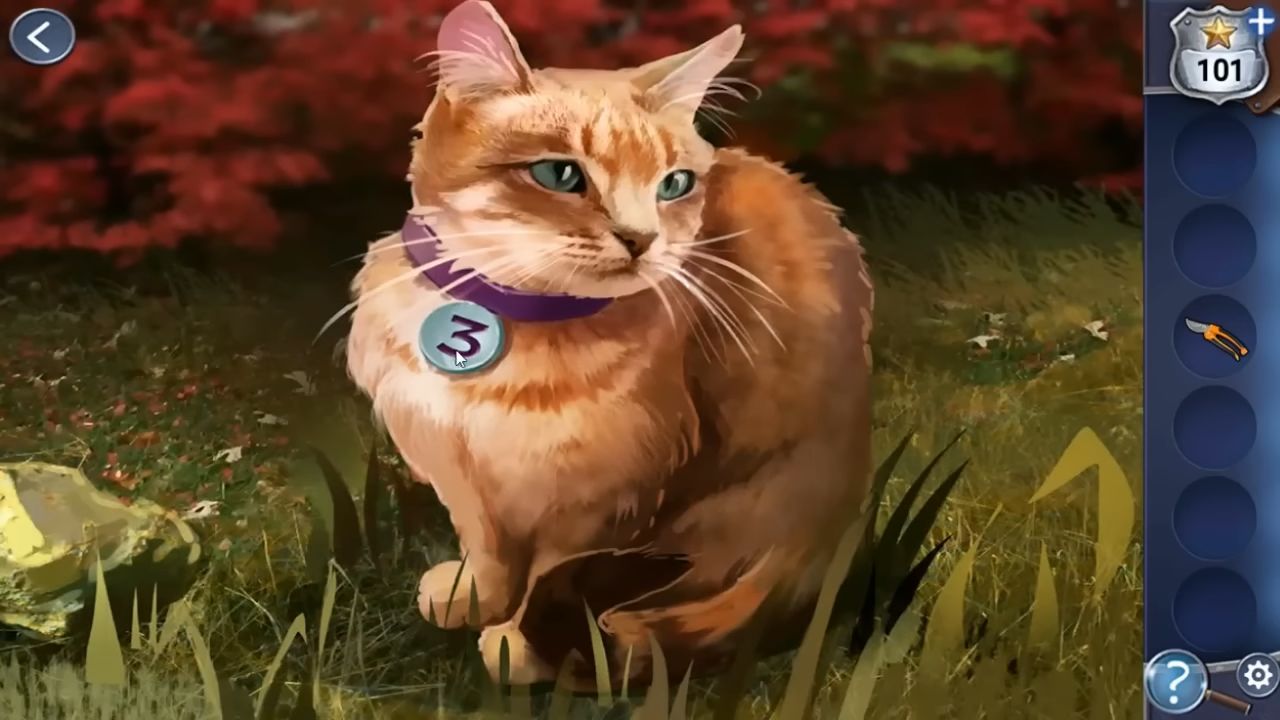
Get the gardening shears and the ladder. Use the ladder and tap on the cat to put it under the tree. Then, tap the cat again to bring it down and check the cat to see a clue on its collar. Return inside and then go upstairs.
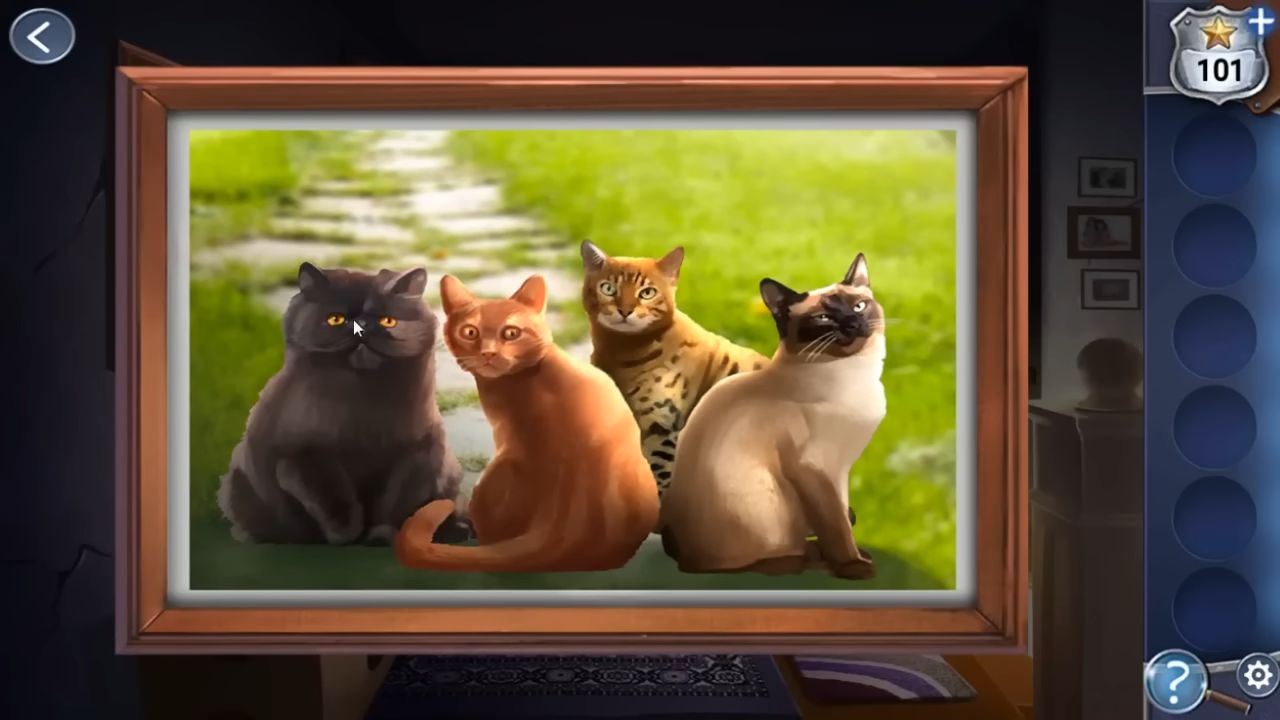
Look at the picture of 4 cats on the left and pick up another piece of fabric (green) from the floor.
Next, go through the door on the left to get into the bathroom and look at the lamp above the mirror to get a star. Open the small cabinet above the bath to discover another piece of fabric (yellow). Tap to open the window and use the shears on the grass in the window box to collect some Cat Grass.
Now, use the cat food bowl and tap on the black cat to bring it down. You can then check it to see the clue on its collar.
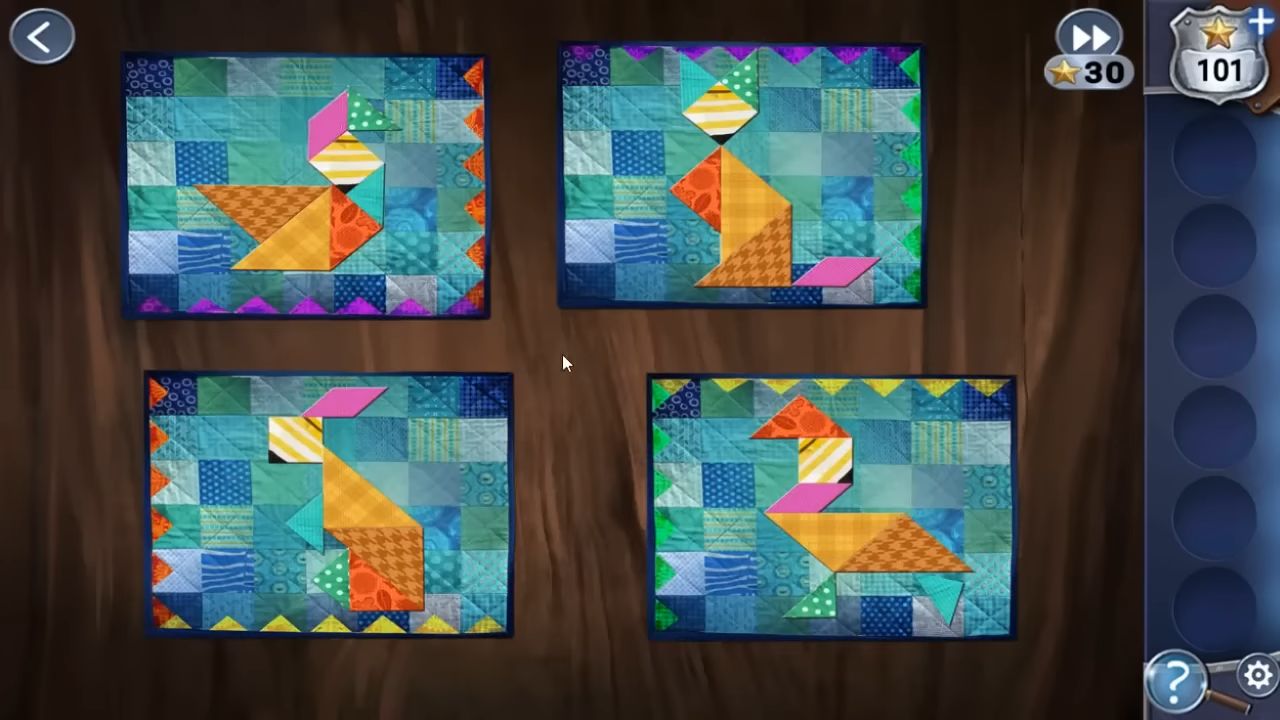
Return downstairs and give the cat grass to the cat hiding in the box. You can then inspect it to see its collar. On the chair on the left, there is an incomplete quilt; take a look at it. Add the four fabric scraps to it to begin a puzzle. Arrange the scraps in the empty spaces; you can tap the pieces to turn them around. The goal is to form four animal shapes.
Return upstairs and tap on the trunk to the right of the locked door. Tap the animals to change their positions. The box opens, and you discover the fourth cat.

Now, you can tap on the locked door and use the hints to figure out the combination (5367). Enter the bedroom to discover the body.

Now, start investigating to look for five different pieces of evidence around the room. Tap them to place evidence markers on them. Next, check the bed and tap to uncover it. Once again, tap to mark the four pieces of evidence: the cut on the hand, the snow globe, the blue lips, and the bruise on the neck. This marks the end of the chapter, and now you have a deadline to catch the killer before Christmas.

Chapter 3
Here’s a complete guide to chapter 3 of The Christmas Killer (Xmas Killer), another exciting Adventure Escape Mystery game and the date is December 20th.
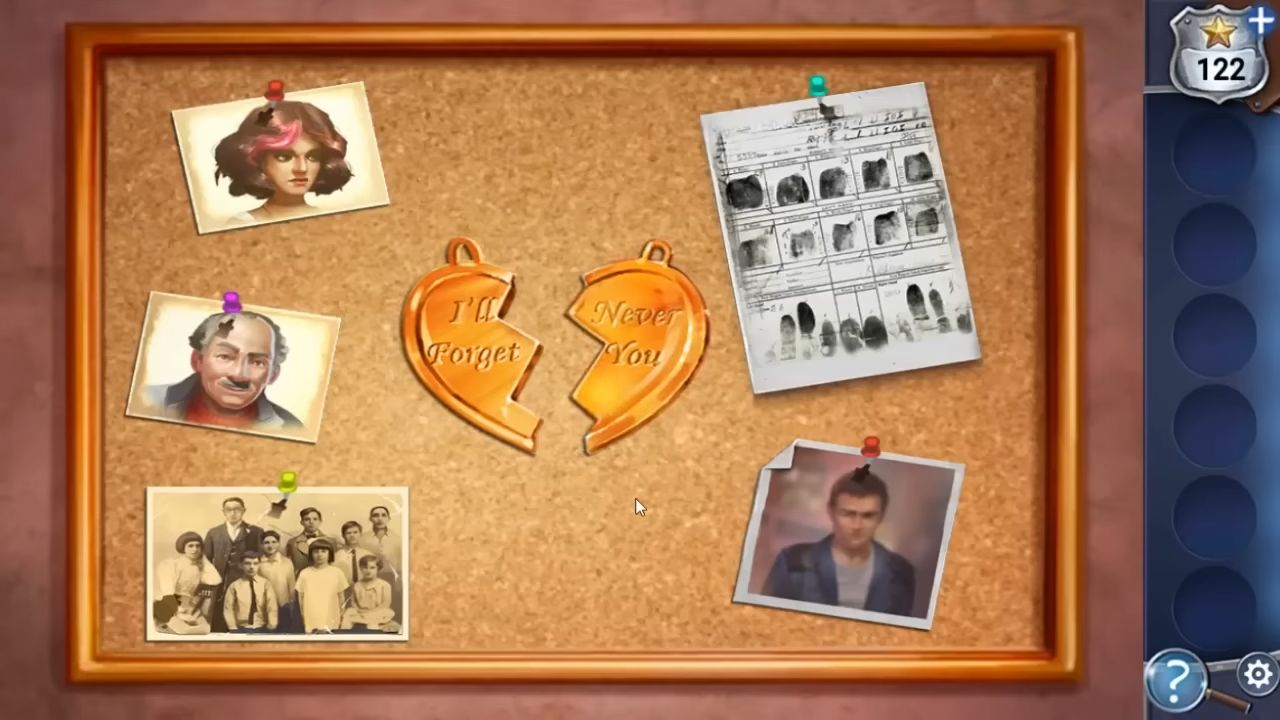
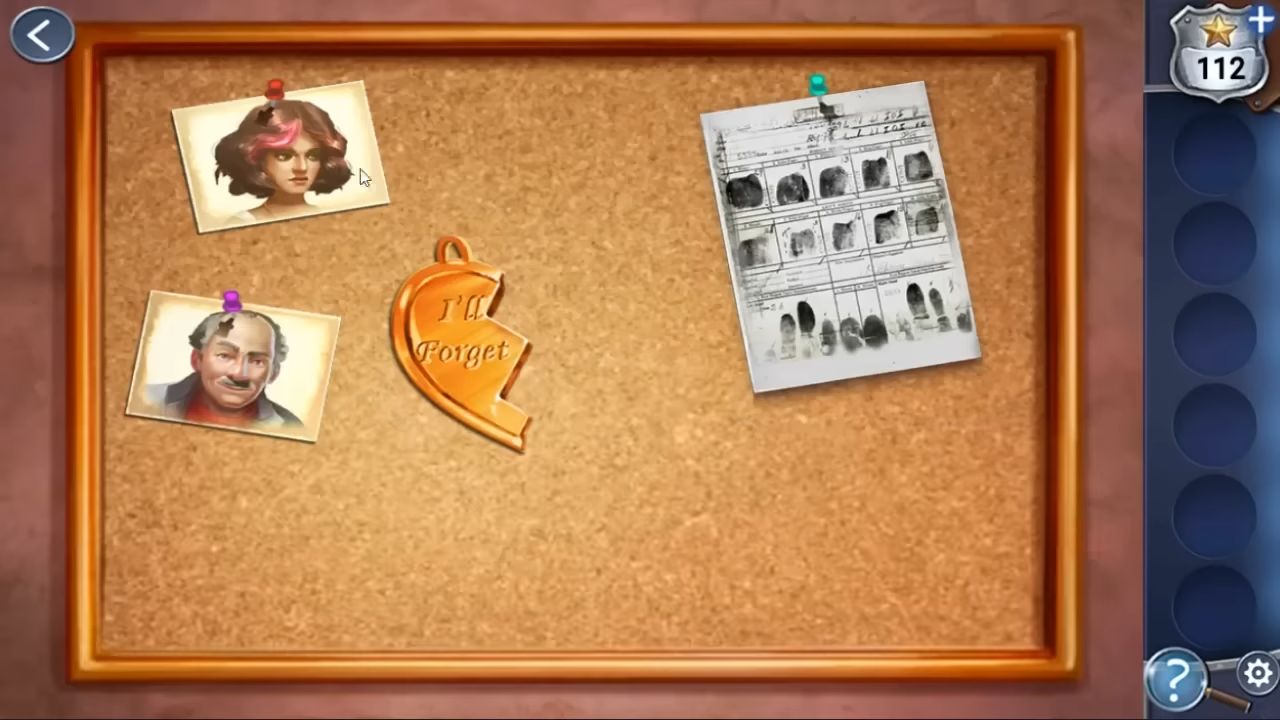
Firstly, you’ll see the evidence board with two photos on it – the victim’s daughter, Misty, and the brother, Antonio. In the office, you have the snow globe, and now you can enter the lab. Tap the door by the window to go into the lab.

Pick up the key from the floor and a blank tape from the right side. Also, open the wall cabinet by the door and get a magnifying glass. Now, tap the door to enter the second lab room, and for a star, look at the clock. Use the key on the pink case to open it and get a Powdering brush. Then, from the second tabletop, grab another blank tape.
Tap on the 2 PC screens on the right to see the clue on the sticky note.

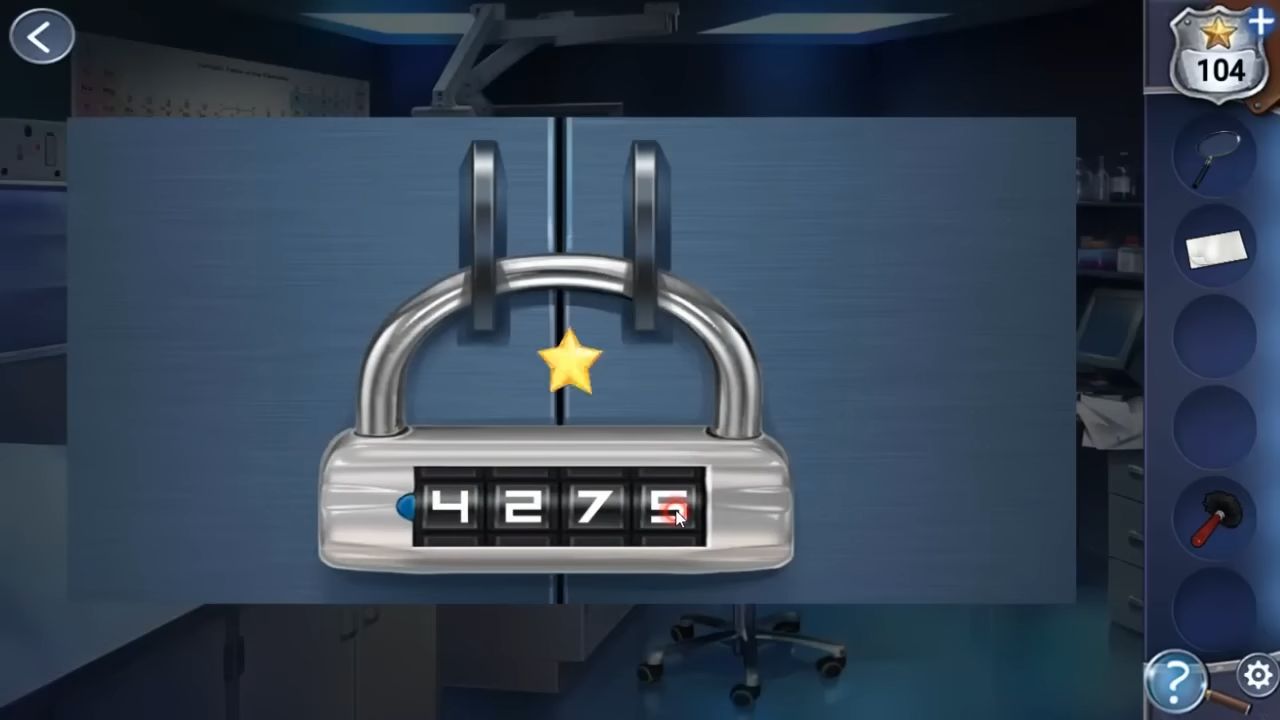
Afterward, check the periodic table on the left to find the list of Transition metals. Now, examine the lock on the big cabinet on the right. The note and the list of elements will be useful (4275).
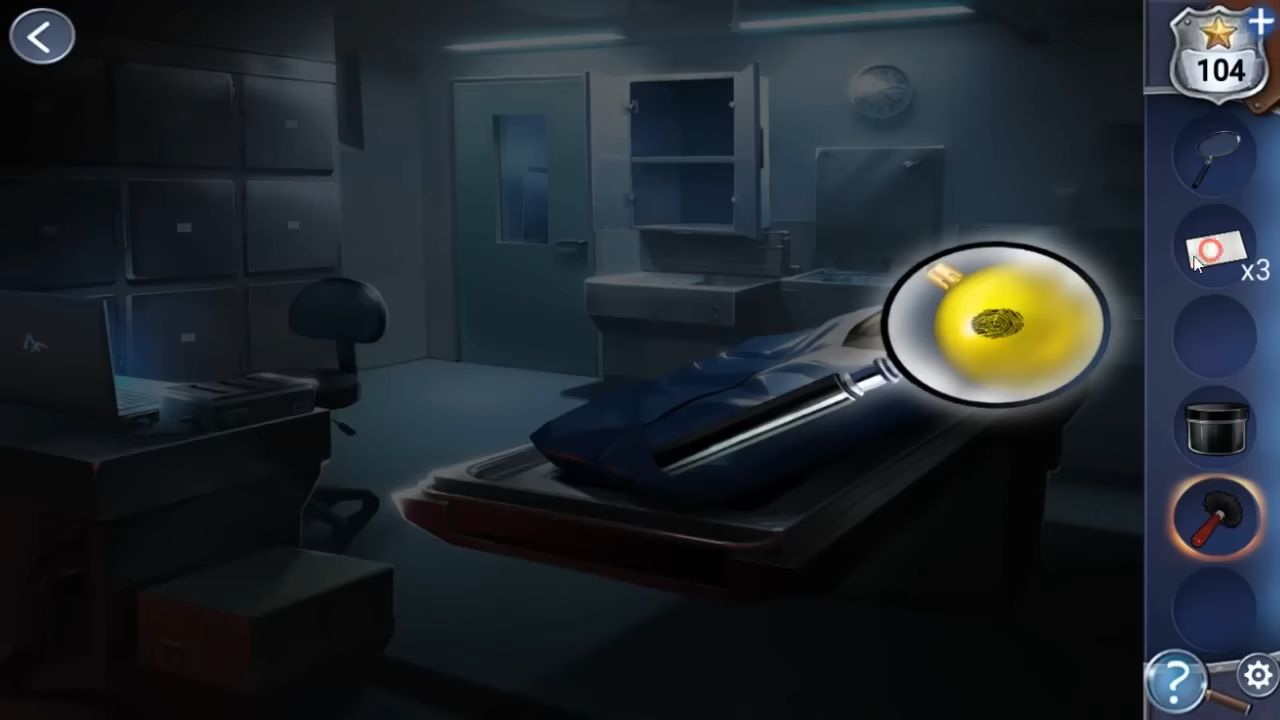
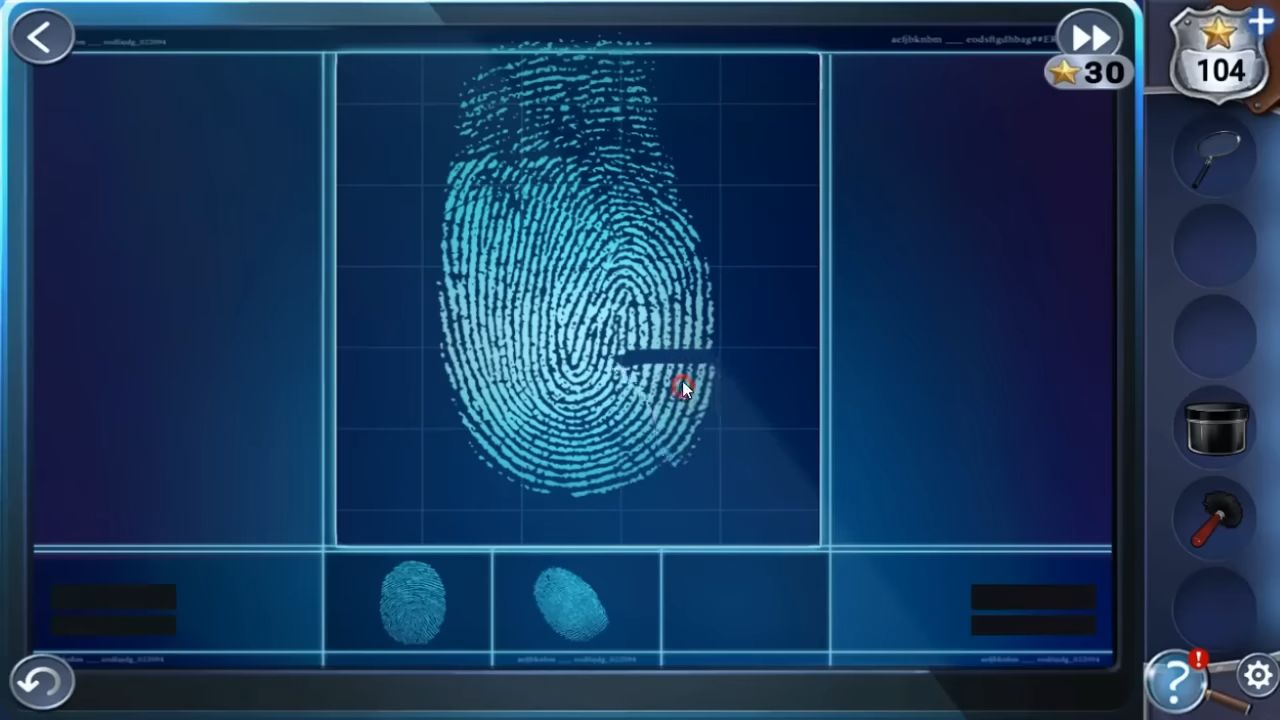
Get Dusting Powder and a third blank tape. Go back to the first lab room. Open the body bag to see the face of the body. Check the bag near the body – it has an ornament, and the case on the floor by the desk contains a broken lamp. You need to find fingerprints on them. Use the magnifying glass on the body, apply the black fingerprint dust, and then use the brush. You will see a fingerprint and use a blank tape on this fingerprint to lift it.
Do the same steps for the ornament in the bag and the lamp. On the desk to the left, there is a laptop and a fingerprint scanner. Put the three tapes on the fingerprint scanner, and then you can tap to see the computer screen. The images show three balls of gold, silver, and copper. They represent AU (gold), AG (silver), and CU (copper).

Now, you have a puzzle similar to a jigsaw to put together the fingerprints. Move the sections around, and you can tap to turn them. When two sections fit together, they will combine. The fingerprints don’t match anything in the database. You need to keep searching manually at the records office. In the reception area, pick up the key card from the floor.
Unlock the box on the floor to get the electric cord and open the lower orange wall cabinet to find a blueprint. Use the key card on the white cupboard next to Murphy to get a Voice Device. Put the device on the front desk and use the electric cord to plug it in. You will get 5 instructions on finding the files and Murphy will take notes to give you a list.
Tap on the stairs to figure out where to go and the floor plans show B1 through to B10. Choose a floor and a room number.
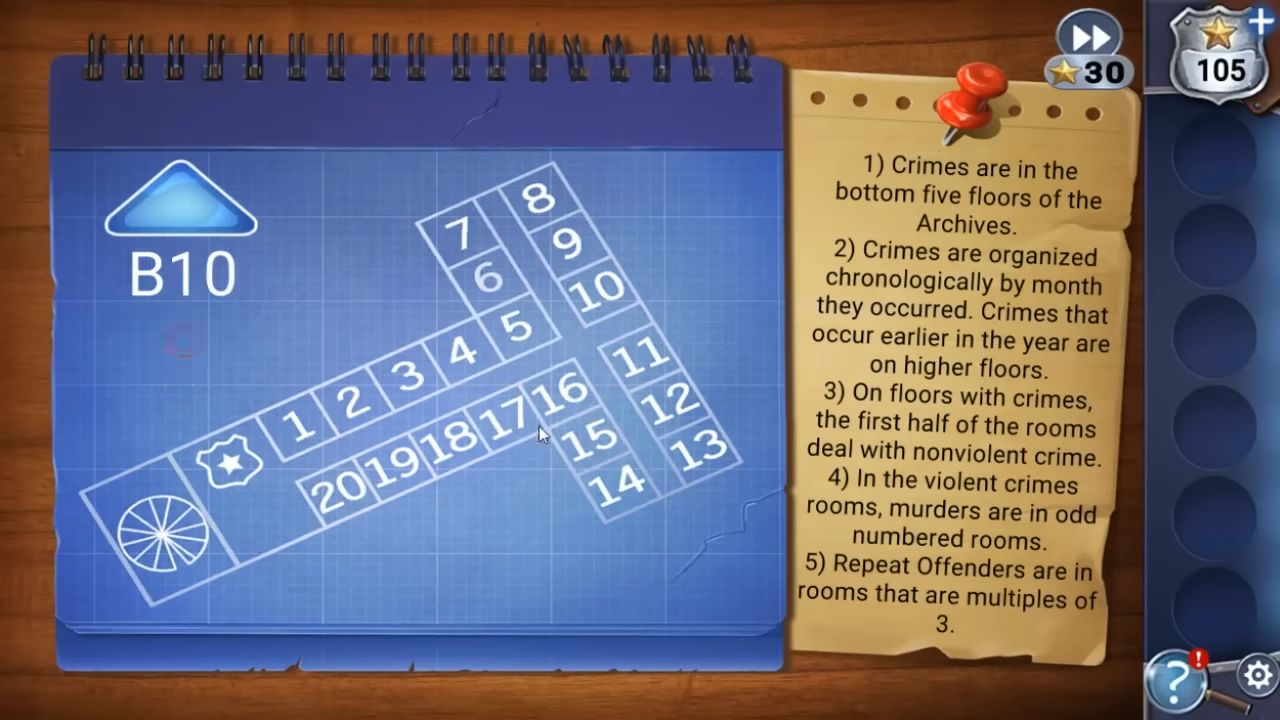
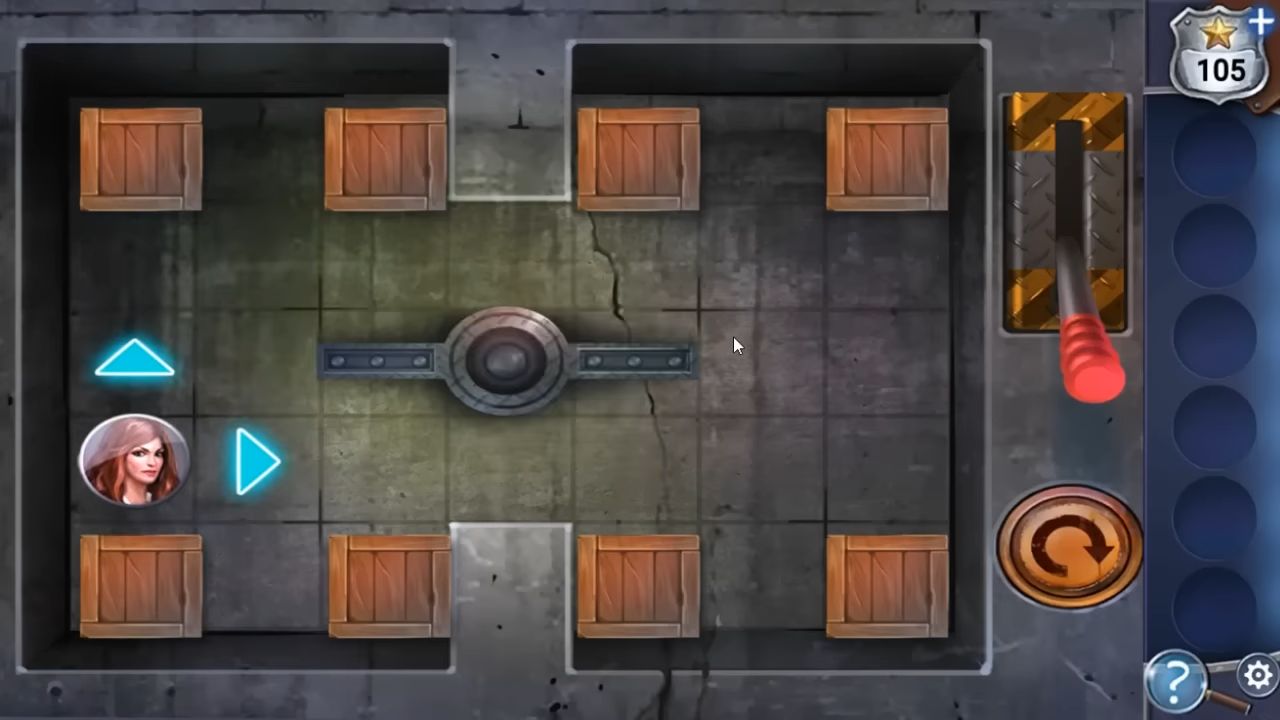
Choose the right room to begin another puzzle. In this room, you have to move four boxes onto the red plates. The lever on the right will open and close the central gate.
After completing that, you are in the records room. From the lower right, you can collect the oil spray and a long pipe.
Also, collect the square stool, and apply the oil spray on the red toolbox it is rusted shut so that you can open it. Collect a dry rag and place the stool below the broken water pipe, then use the long pipe to turn the blue valve handle. Water will drop out; use the rag on this to get a Wet rag.
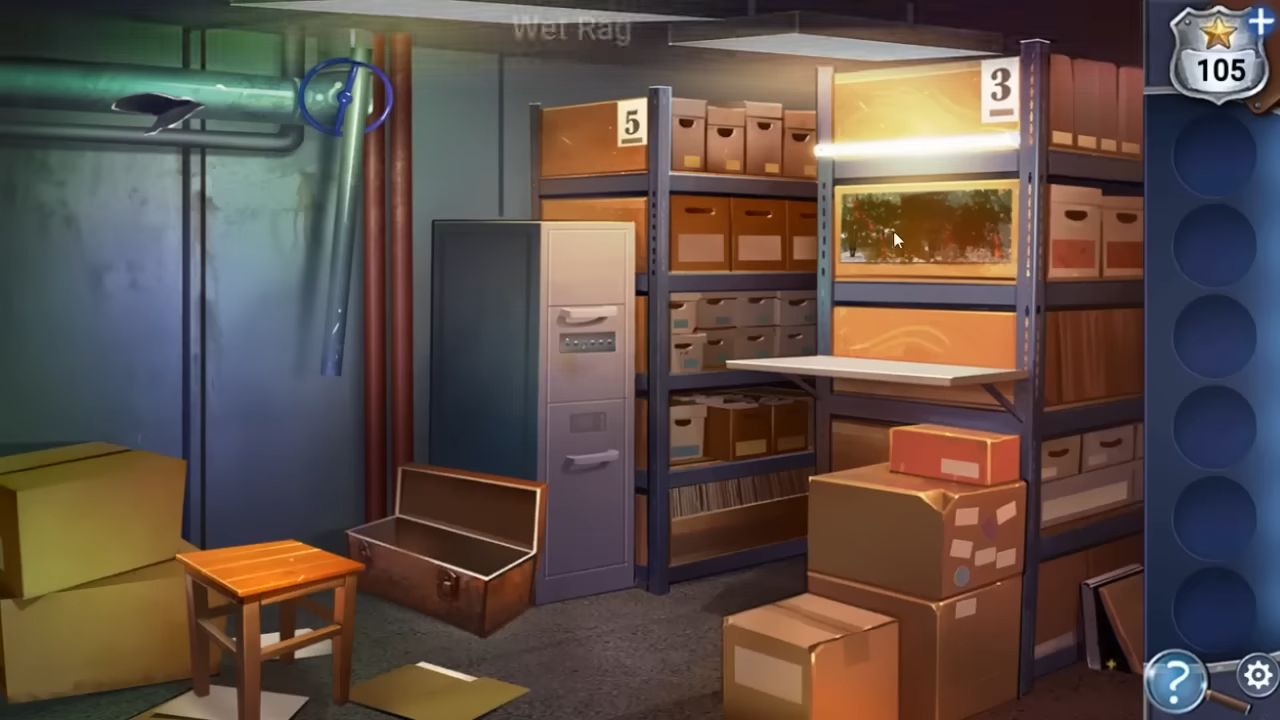
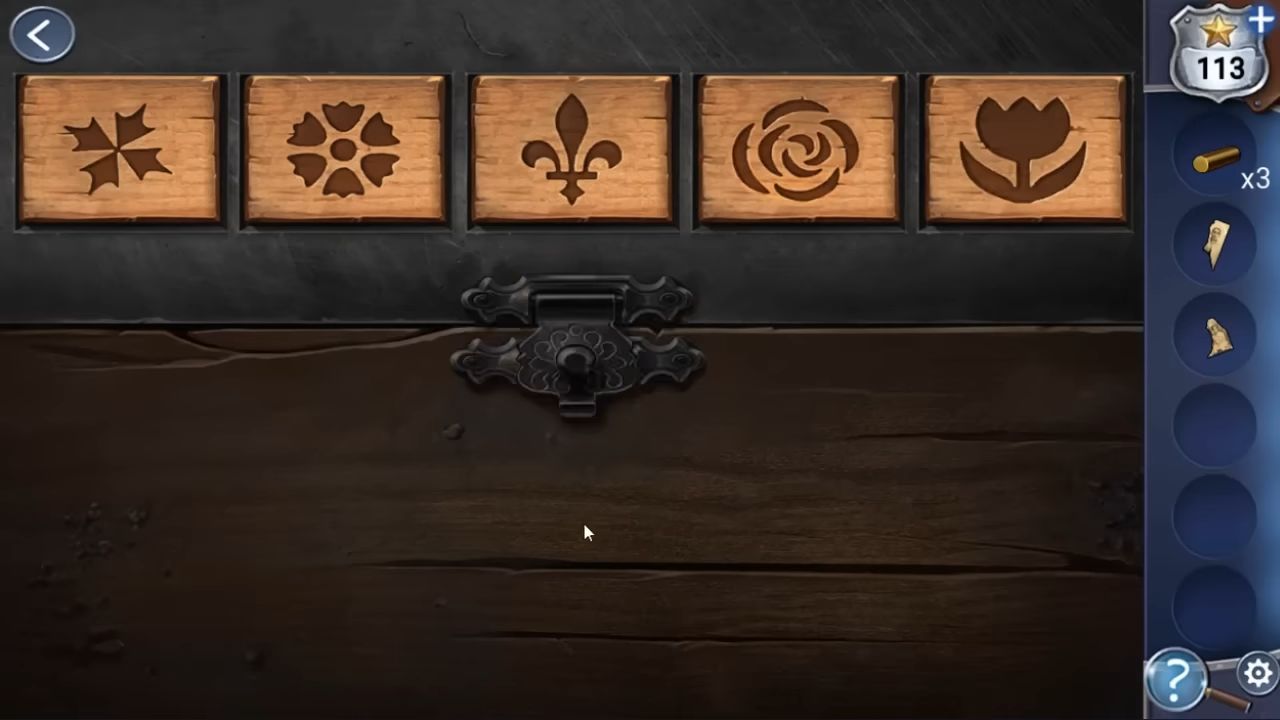
Look to the right, and you’ll find a messy painting next to the number 3. Grab a wet rag and wipe it clean to uncover a clue. After that, tap on the filing cabinet and adjust the switches to the right positions. Check out the case file in the cabinet to get more snow gloves and confirmation that the Xmas Killer is back. This finishes chapter 3.
Chapter 4
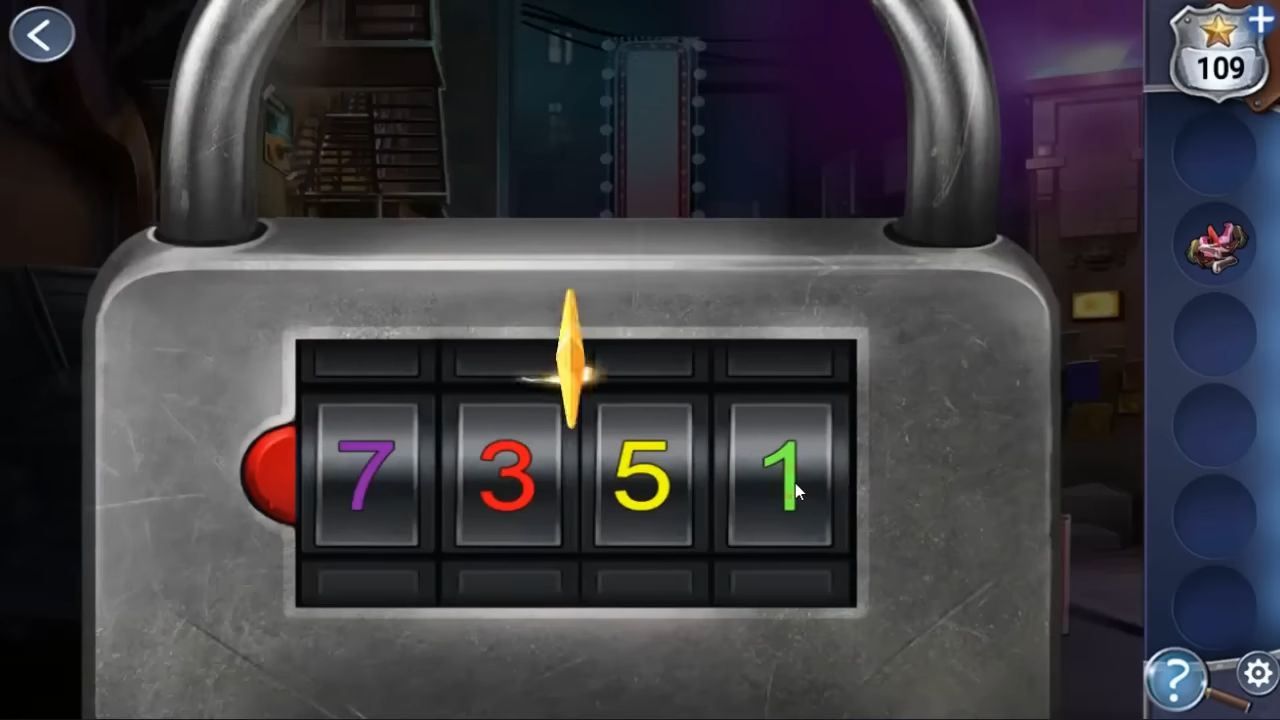
First, go to a nightclub and look at the poster on the ground for a clue (Red 3). Also, check out the blue poster on the wall (Green 1). Then, tap on the left to go down the alley and you’ll find another poster on the right to check out (Purple 7).
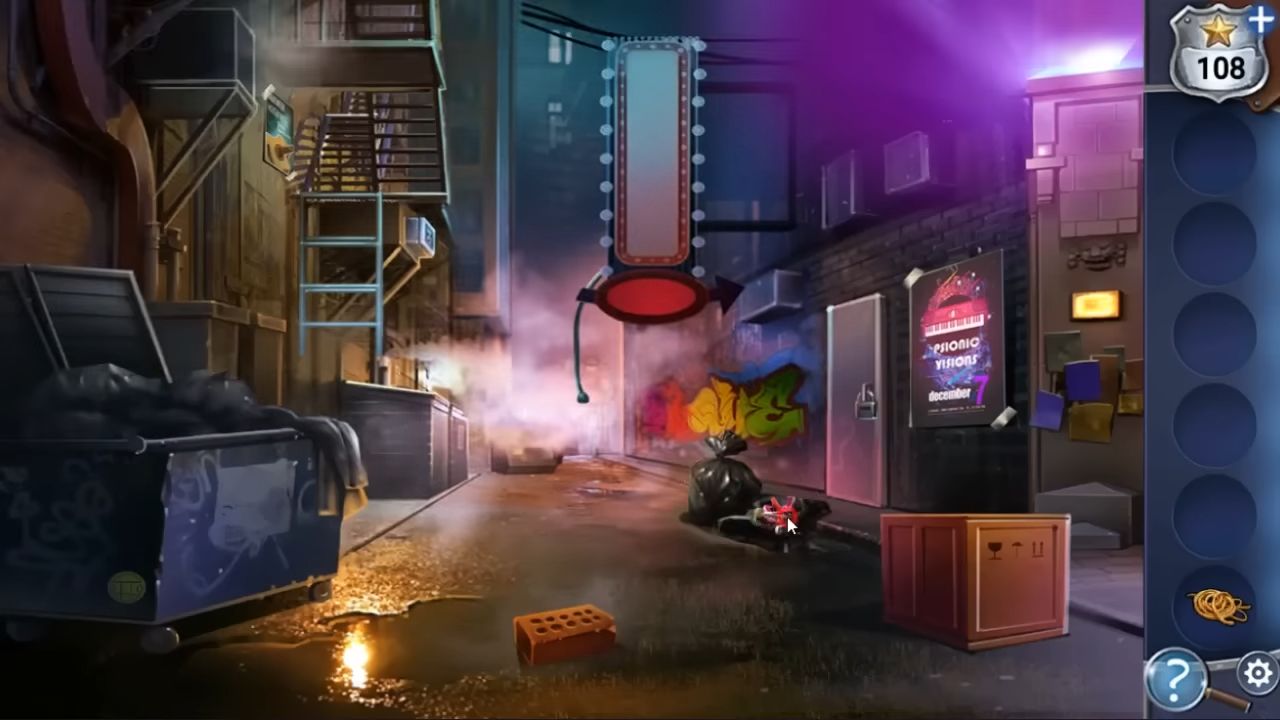
Tap on the two garbage bags on the right side and get some shoes. After that, tap on the dumpster on the left and collect the rope. Use the rope to tie the brick on the ground and then pick it up.
Next, use the brick on the ladder in the top left to throw it and bring it down the ladder. At the top of the ladder, there’s a fourth poster, check it for another clue (Yellow 5). Now, tap the Neon Sign in the middle to turn it on. It says VIPER ROOM. Tap the door on the right to see the padlock. You’ll need four colored numbers.
Enter the dressing room to open the white cupboard doors and get the dresses from inside. On the table to the left, there’s a lockbox and look at it. You’ll need a 5-letter code (VIPER) and then grab $20. Also, take the cosmetics from the table under the mirror.
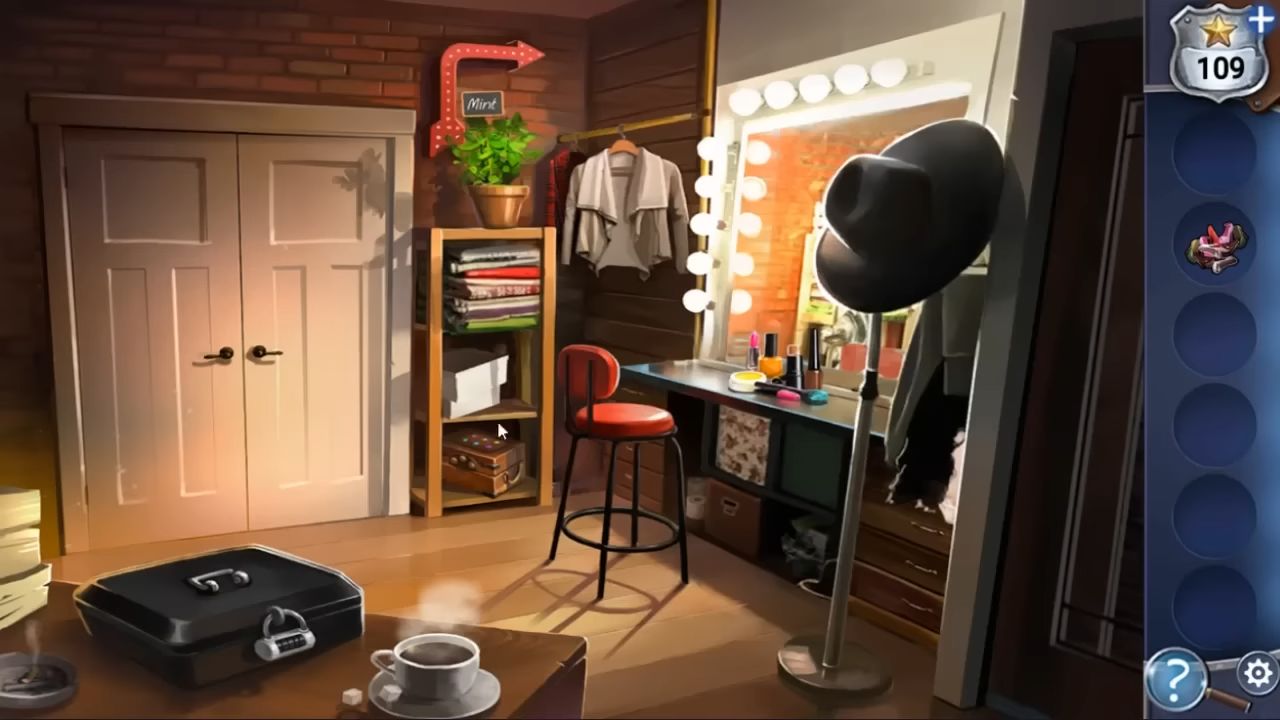
Underneath the small shelf, there’s a box with six colored gems on it. You have to figure out the correct order to tap the gems to open the box. It’s like a puzzle where you try different combinations until you get it right.

Gather some Accessories. Now, tap on the mirror because it’s time to pick out an outfit. Put all the dresses, shoes, cosmetics, and accessories on the screen. This is a game like Mastermind. Choose one of each item, and you’ll be told how many parts she likes, but not which ones. Keep changing your choices until you create the right outfit.

Leave the room by tapping on the right and return to the bouncer at the club’s entrance. Give him the 20 dollars to get inside. At the bar, pick up a small knife.

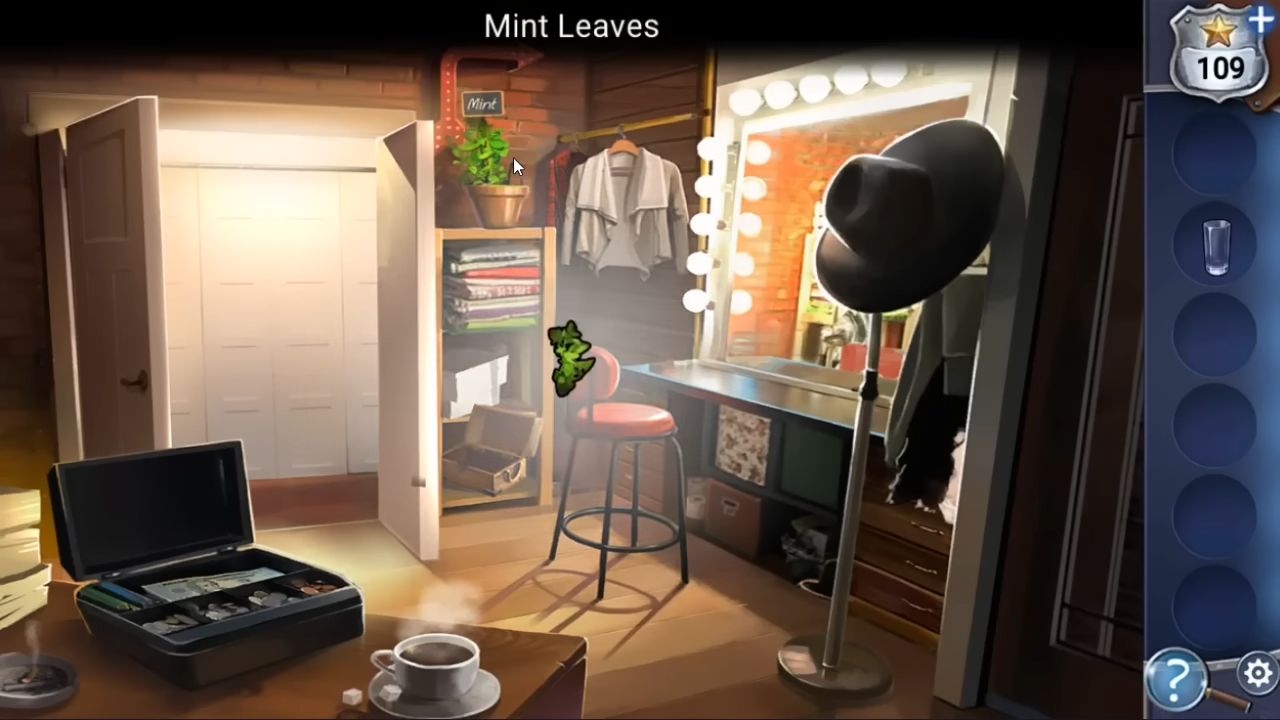
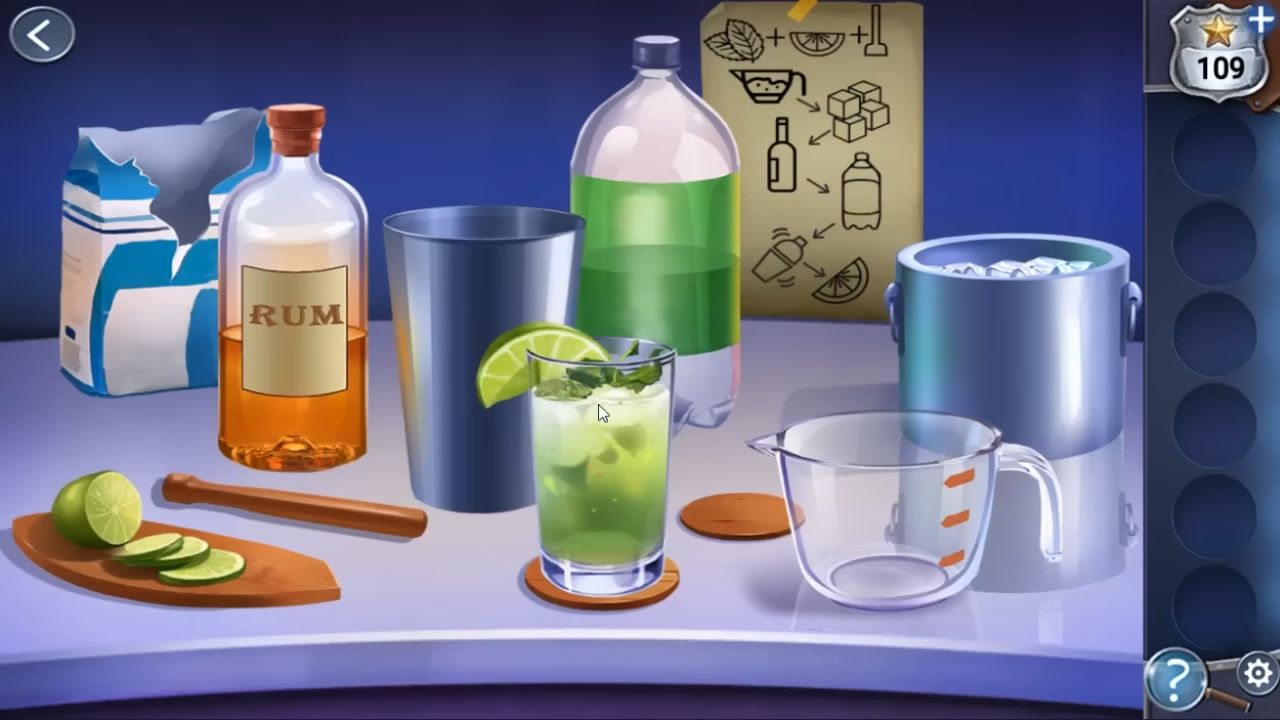
Open the cupboard under the bar and take a bottle of Rum and sugar. Then, from the left area, take a bottle of soda and a crowbar. Leave the club and return to the alley. Use the crowbar on the crate on the right to open it and collect a highball glass. Go back into the dressing room and use the knife on the mint plant to collect some mint leaves.
Now, go back to the club and tap on the bar top to check it out. Start by putting the highball glass, sugar, soda, mint, and rum with the other ingredients on the bar. Follow the recipe sheet on the back. Drag the mint and lime into the glass and use the pestle to crush them. Pour sugar into the measuring cup, then transfer it to the glass. Add ice, then rum, and finally the soda.
Drag this to the shaker to mix it. Pour it back into the glass and add a slice of lime. Congratulations, you’ve made a mojito.
Give the mojito to the bouncer and he’ll allow you into the VIP room. You meet the owner and now have to play a card game to move forward. You select a card, and Everett picks one at the same time. The highest card wins a point. To win, you must have the most points when you run out of cards.
The cards are arranged for you from lowest to highest, and Everett’s cards will be the same (lowest on your left). After that, you get to talk to Misty. She gives you a locket, and this marks the end of chapter 4.

Chapter 5
Here’s the complete guide for chapter 5 of The Christmas Killer (Xmas Killer), a fantastic Adventure Escape Mystery game. It’s December 22nd, and you’re back at the police station. You now have additional evidence on the board, including the old case file and the locket from Misty.
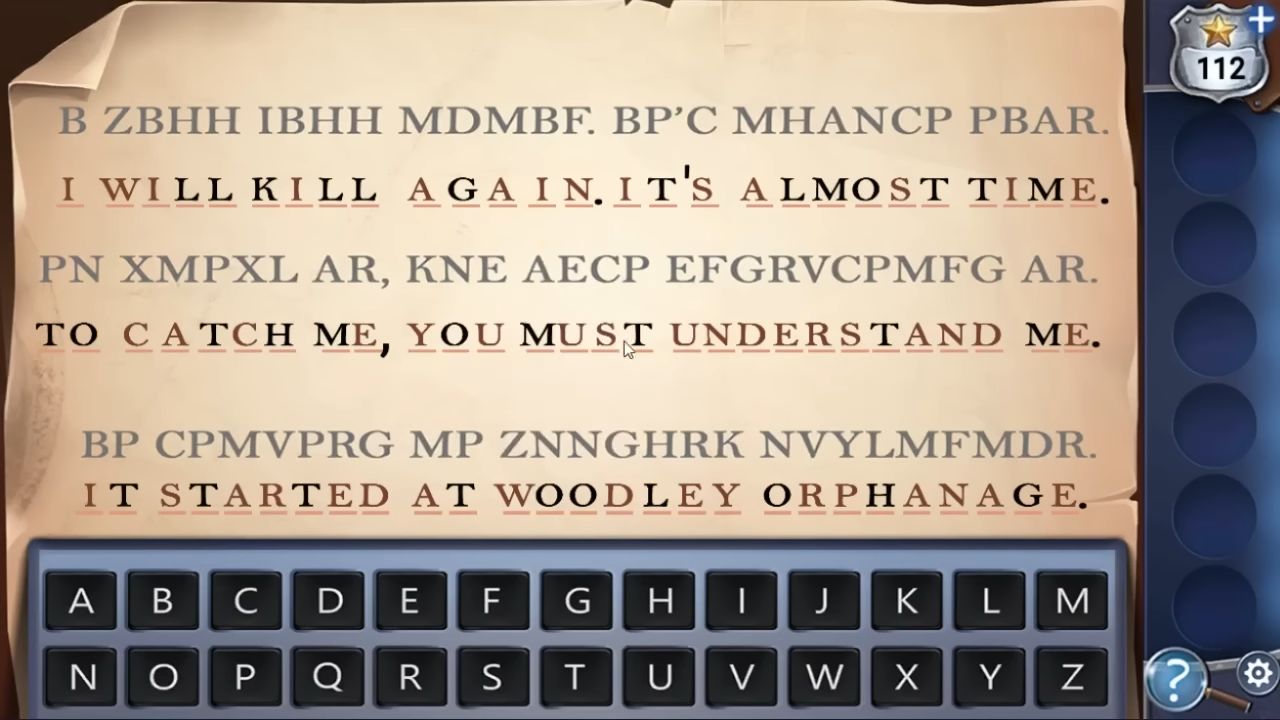
But now, you receive a package from the Christmas Killer, along with another snow globe. The letter inside is in code, but some letters are already filled in. Choose any empty spaces and try different letters to figure out what it’s supposed to say.
Now, go to the orphanage. Enter and have a conversation with Mr. Orson.
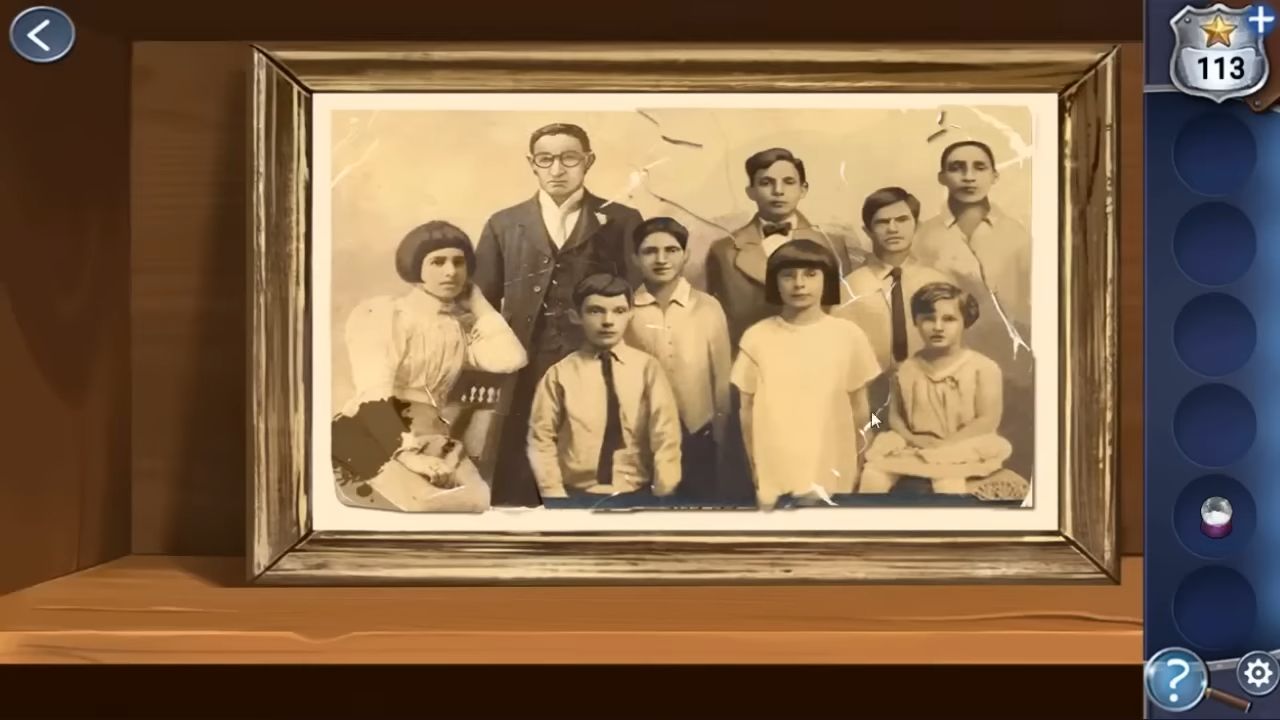
He tries to show you a photo, but some pieces are missing. Pick up a piece from the floor, right in the middle. Look at the red book on the floor and the blue book on the stairs for hints. Tap on the arch on the left to go into a classroom. Find a star in the box at the bottom right. Under the chair on the left, there’s a clock weight; grab it.
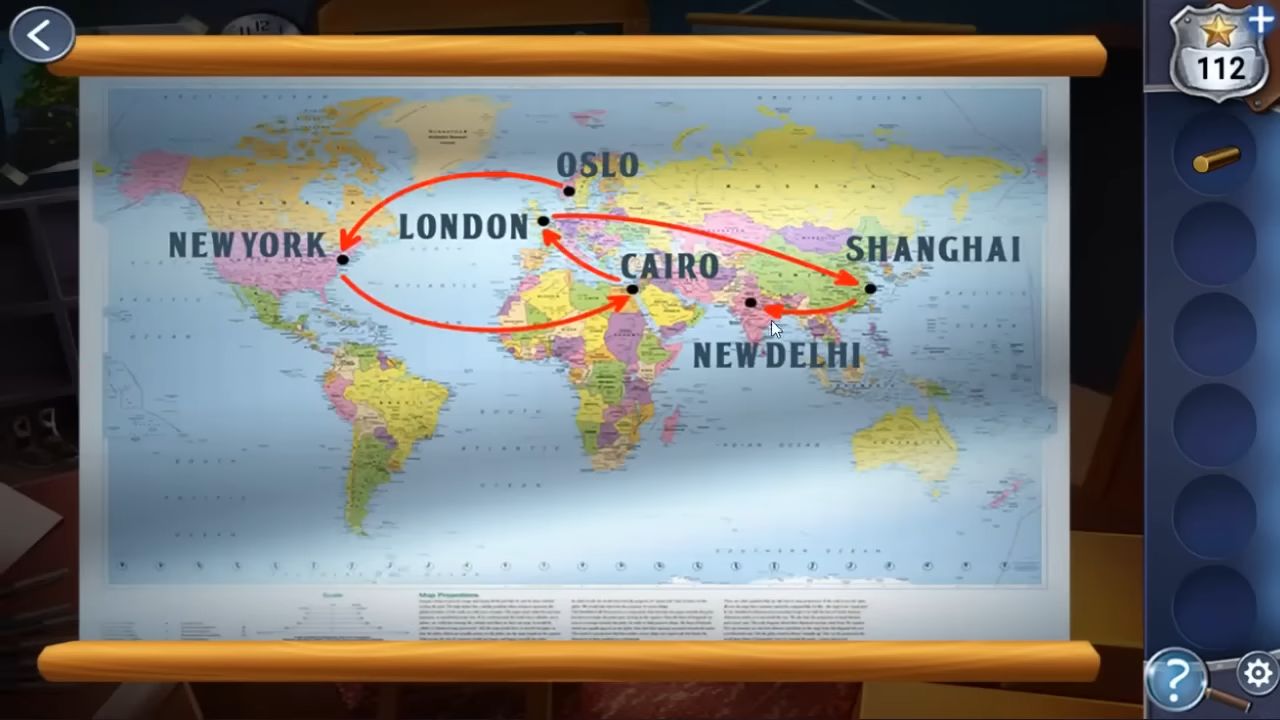
Then, check the book on the shelves to the left for another clue. Above the bookcase is a poster representing the four seasons, which is also a clue. On the blackboard, you’ll see the names of six cities. Some have numbers, and some don’t. There’s also a map with the same cities and directional arrows.
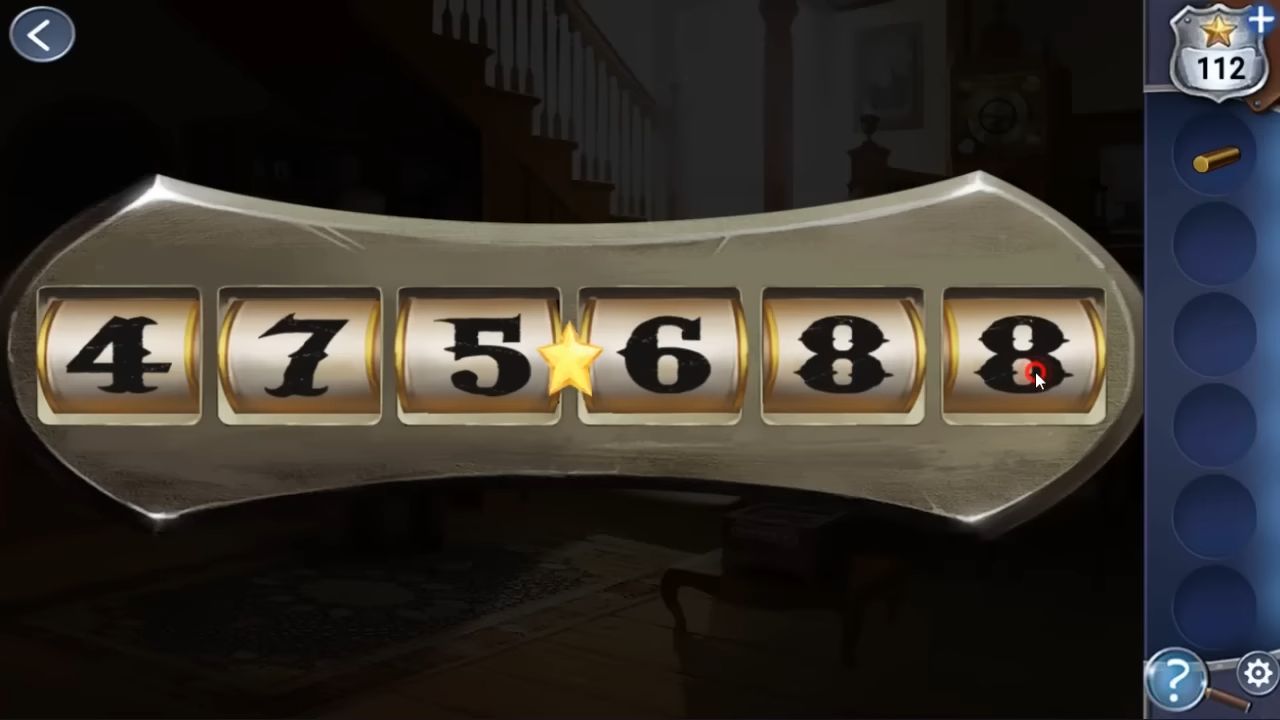
In the starting room, there’s a locked box on the small table. Look at it. Use the hints mentioned earlier to figure out the combination (475688). Unlock the box and take another photo scrap from inside. Look at the photo frame again and add the two scraps to it. Mr. Orson gives you an old key for upstairs.
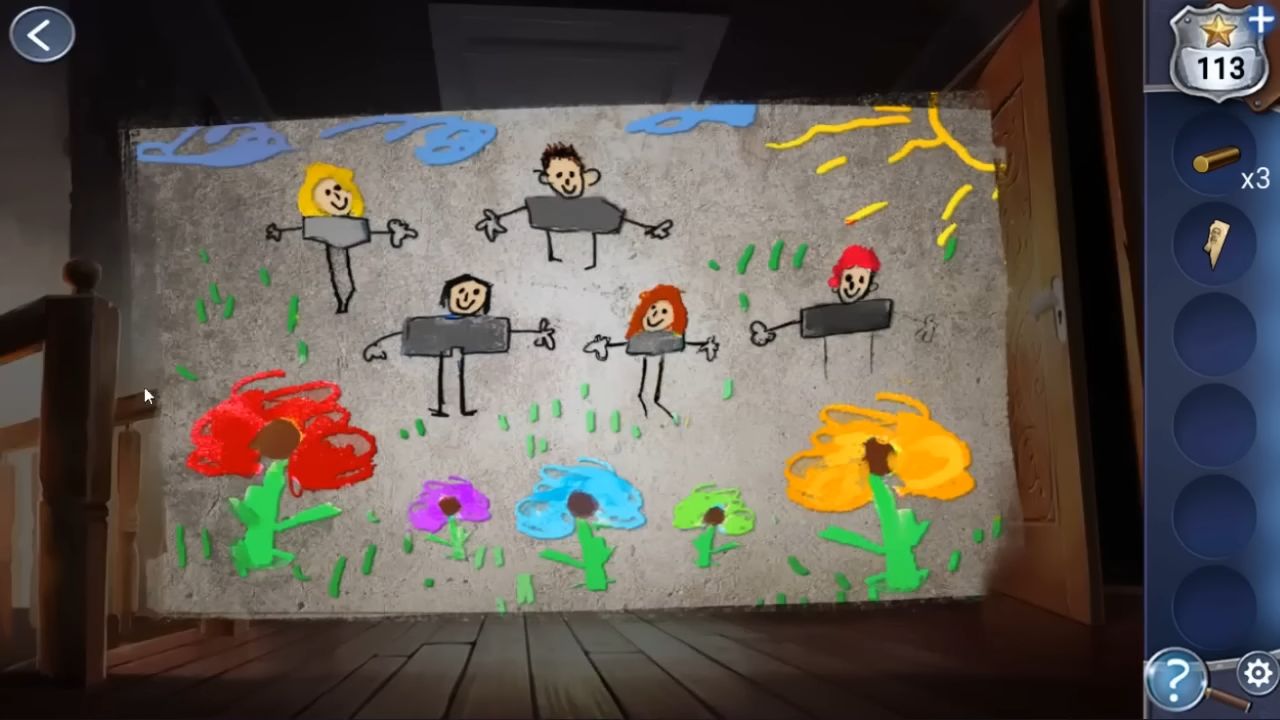
Head upstairs to find a star on the dresser unit to the right of the vases. Get another clock weight from under the dresser on the left. On the right wall, between the two doors, there’s a drawing and you need to look at it for a clue.
Afterward, use the old key to open the door on the far right. Walk into a bedroom. There’s a star on the top shelf on the left and get a third clock weight from the left bed. Tap the bed on the right side of the room to lift the mattress and discover another photo scrap. Then, touch the left bed sheets to move them and find a box with a jewel puzzle.
The jewels have the same colors as the flowers in the drawing on the wall.

Grab a photo piece. Look at another book for a clue at the bottom of the left shelves, and check one more on the small desk by the right window. Tap to lift the corner of the rug at the bottom of the scene and discover a locked box. The symbols for the combination have been seen in the books.
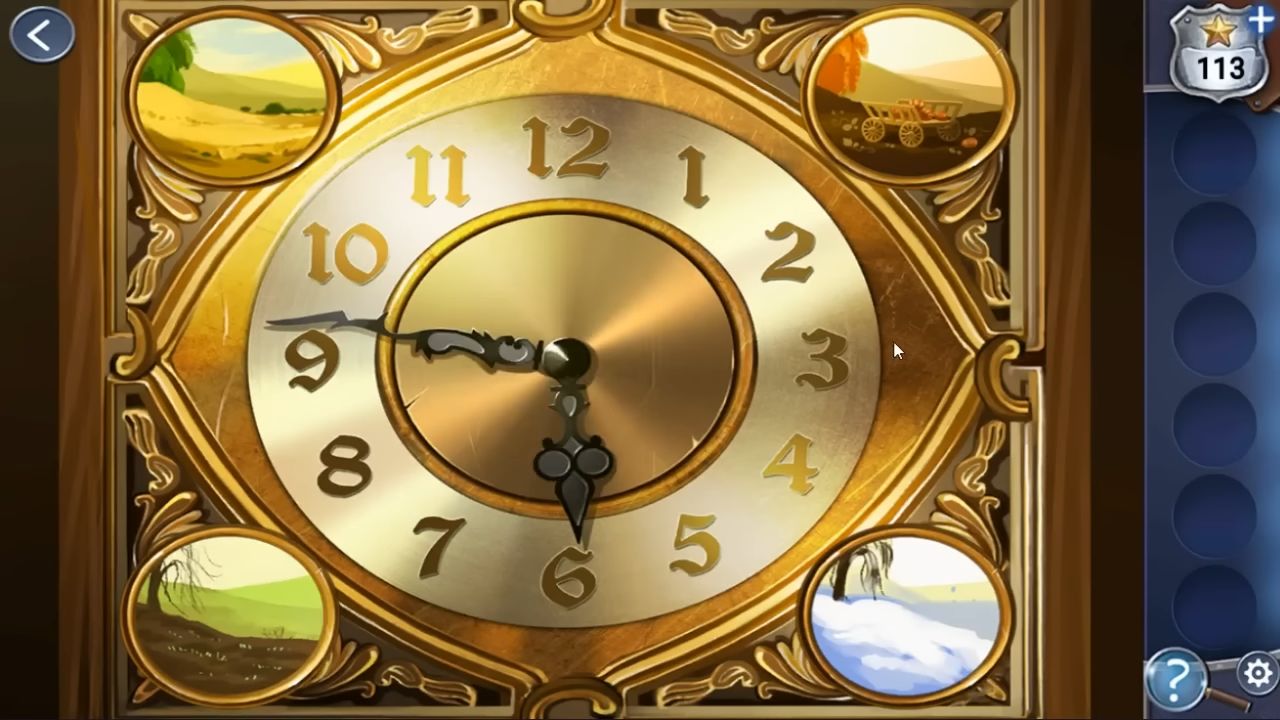
Pick up another piece of the photo. Now, go back downstairs and put the three clock weights on the clock. Look at the clock face, it’s a puzzle. Another piece of the photo will fall out of the clock; take it. Now, look at the photo again and add the four new pieces you have.
Mr. Orson will give you a long hook. Go back upstairs and use the long hook on the loft hatch above. Enter the Attic and notice the footprint; someone was here recently. In the center at the back is a blue Jack-in-a-box with 5 buttons. Pay attention to the Christmas lights on the ceiling.
Collect a journal, then read through it to find a clue at the end. This is a clue to a code (DUDUDU represents Down, Up, Down, Up, Down, Up. Set the switches in this way). Now you can collect the last photo scrap and another snow globe for your collection.
Return to Mr. Olson and put the last scrap into the photo. Get to know about Freddie, and this finishes chapter 5.
Chapter 6
Here’s the complete guide for chapter 6 of The Christmas Killer (Xmas Killer), a fantastic Adventure Escape Mystery game. It’s December 23rd, and you are heading to talk to Antonio, the victim’s brother.
Touch the piano to lift the lid and get a battery. Repeat the same action on the unit to the left to discover a screwdriver. Move through the doorway on the left to reach the living room.
Take a record from the chair on the right. Pick up the lit candle from near the door, a small key from the bottom left, and a film reel from the hearth of the fireplace. Use the candle to light the fireplace and take note of the clue that appears on the window.
Go back to the first room to utilize the key to open the cabinet on the top left and collect a horn. Add the horn to the record player (phonograph) and then place the record in it. Music will play, and you’ll receive a note of the lyrics. Tap the horn to view the scroll that has appeared; this is a clue.
Put the notes of the lyrics on it to assist you in solving it and tap pairs of tiles to swap their positions. Match the lyrics with the designs on the board. To determine the placement order, follow the direction arrow from the clue on the window in the living room.

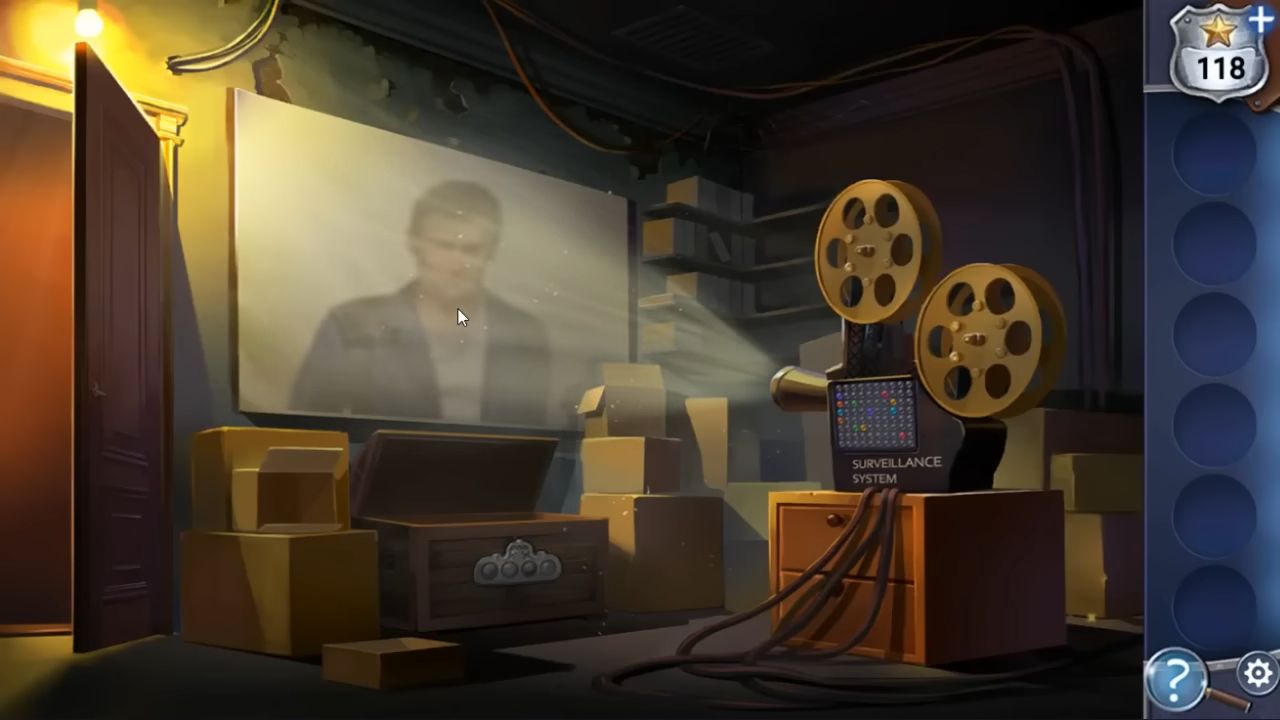
Go into the surveillance room to find a star at the bottom right of the scene. Open a box on the left to discover a second battery. Then, collect another film reel from the boxes on the right side of the screen.
Return to the living room and under the tree on the floor, there’s a power box. Use the screwdriver to open it and put the 2 batteries in it. Nine lights will turn on, you have to look at them. The symbols match those seen on a clue above (1574).
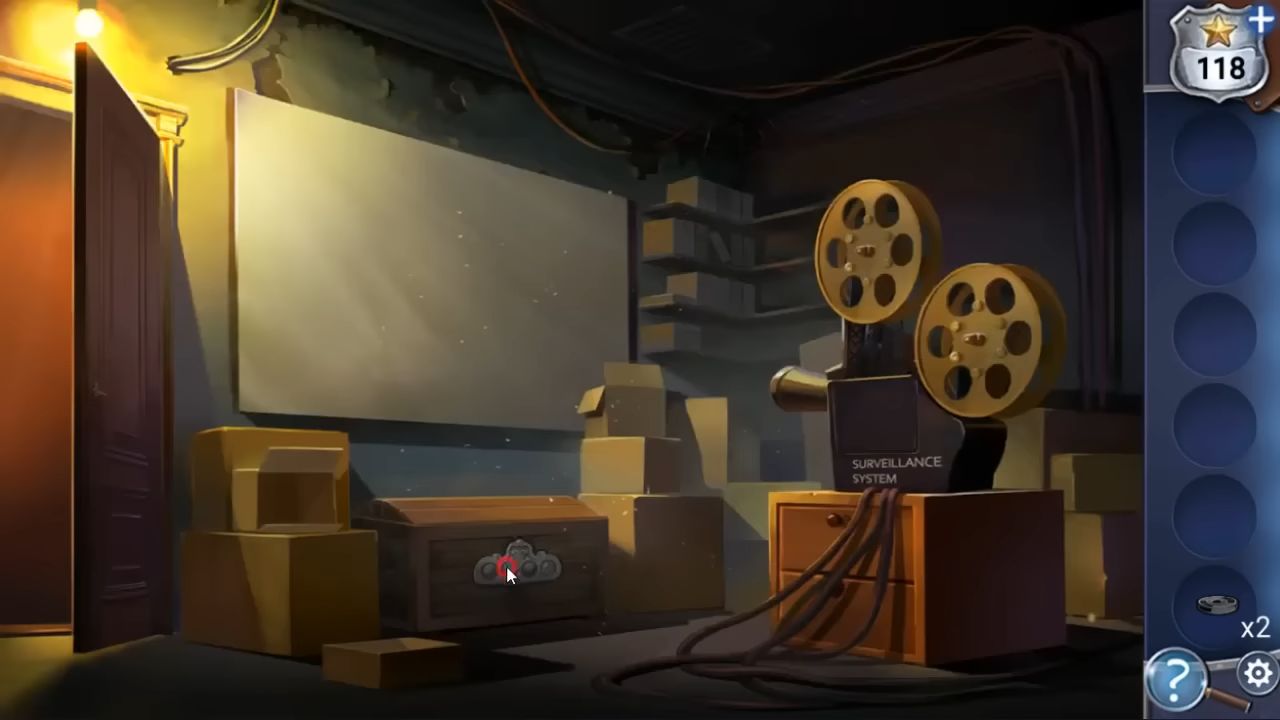
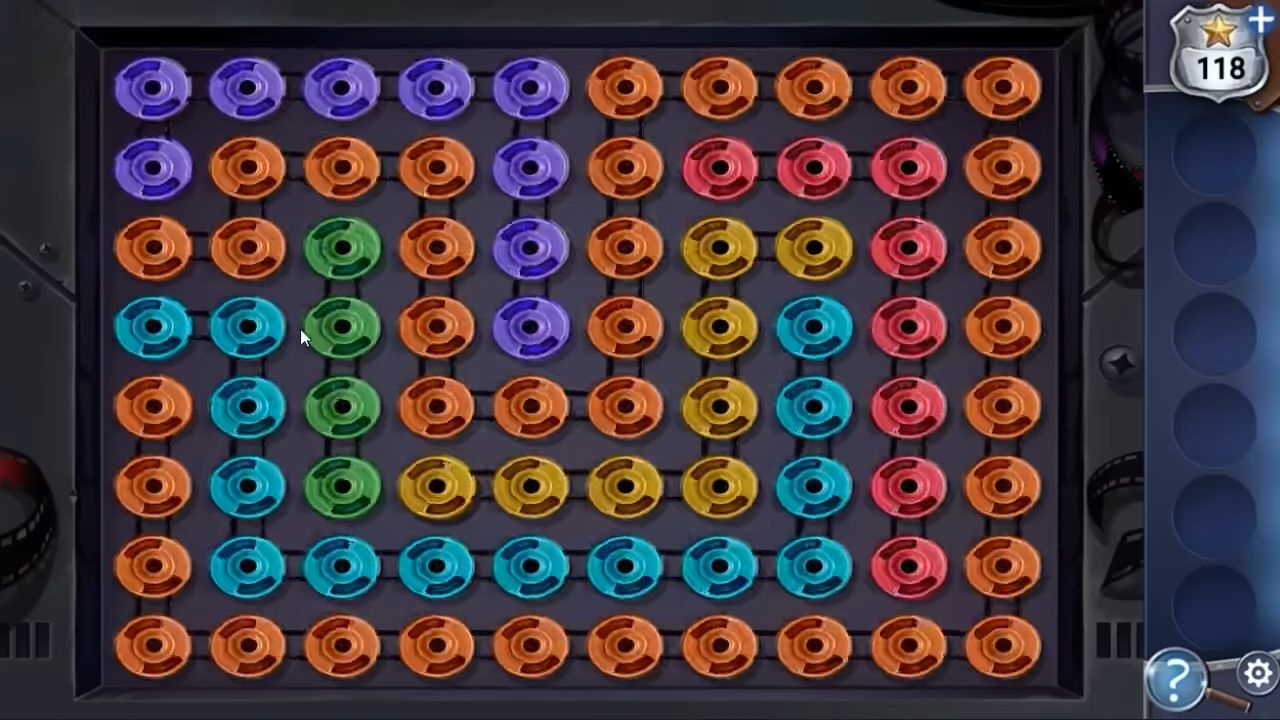
Return to the film room and check the large trunk under the screen for a code entry. Utilize the code mentioned above to open it and grab another film reel. Now, tap on the side of the projector to open the panel and view a puzzle. Add the three films to it to start. This is a connect/flow puzzle. Drag to draw lines connecting the same colored pairs of reels. They cannot cross, and you must use all the reels.
Now, you’ll see the picture of the suspect, and this finishes chapter 6.
Chapter 7
Now you are back at the police station, the phone is ringing.
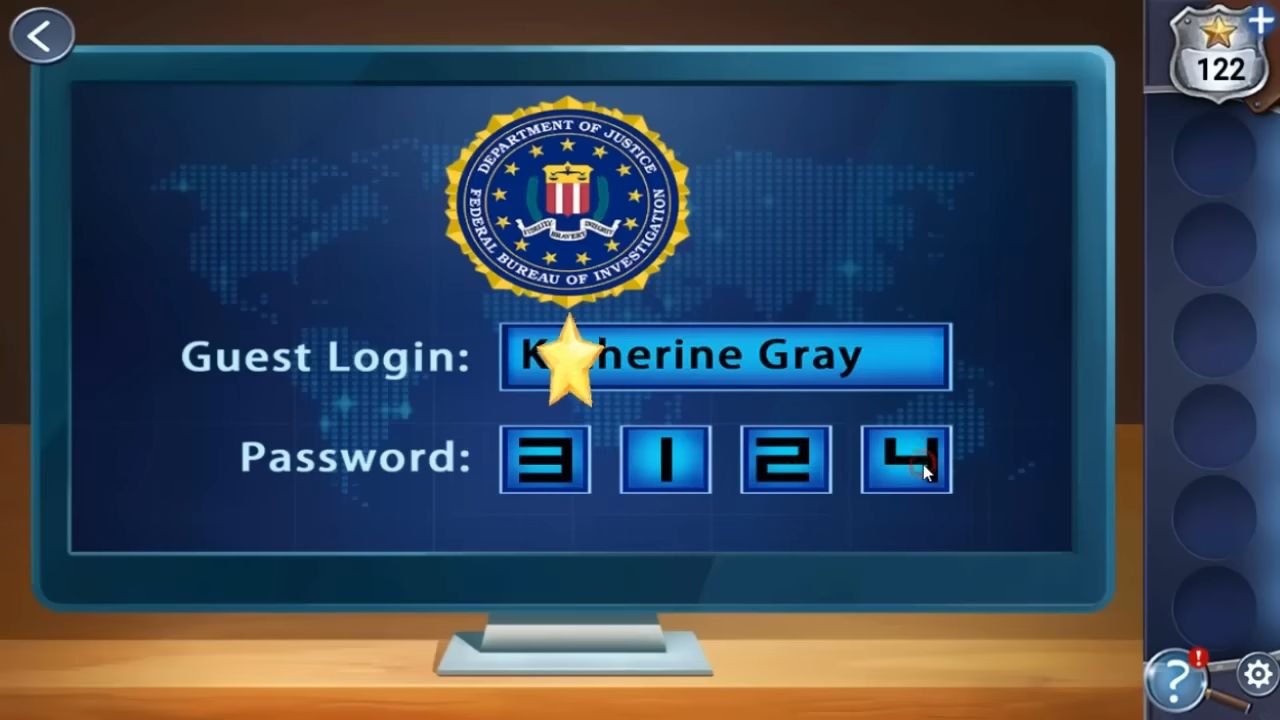
Pick up the phone and find out from Everett Kane that Misty hasn’t been seen for two days, and her apartment was broken into. Now, you have access to the FBI database. To know the password, tap to see the sticky note on the shelf to the left for a clue (3124).
Now, the computer displays a puzzle; it’s a memory game. Flip pairs of cards to reveal fingerprints and find the matches. There are three levels to play. Once completed, the database will show a fingerprint match for Frederick Gaines.

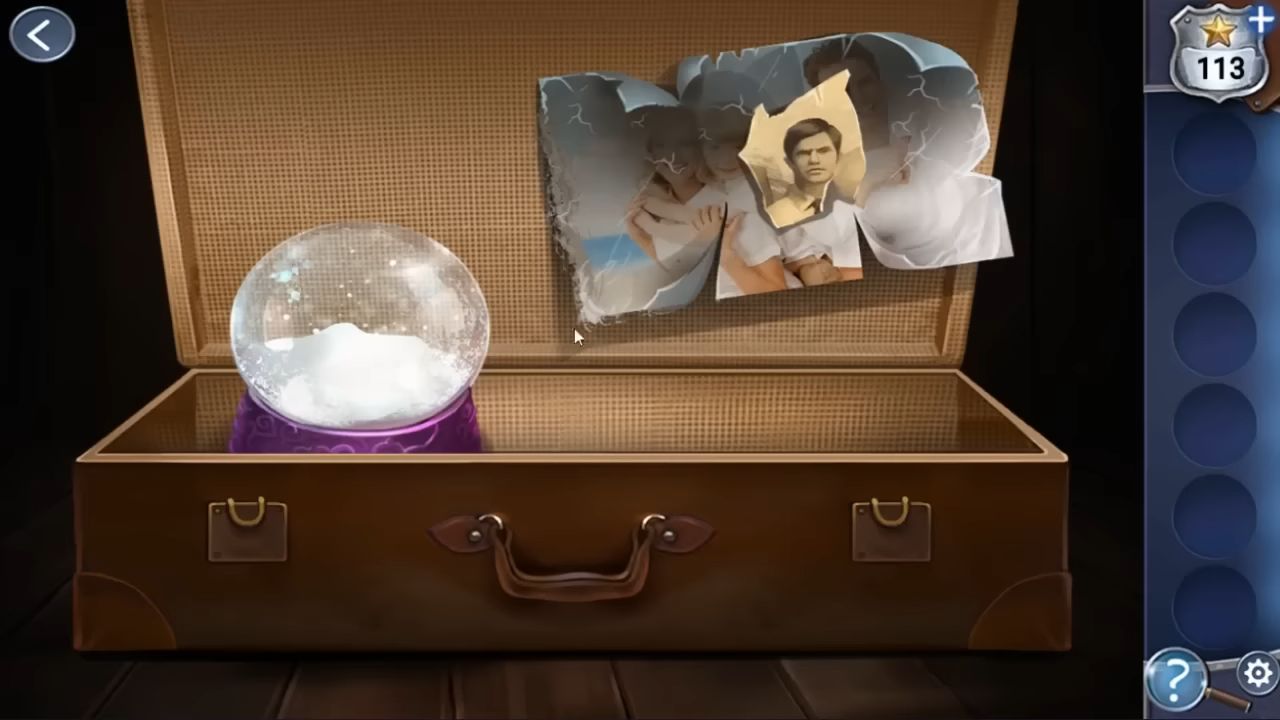
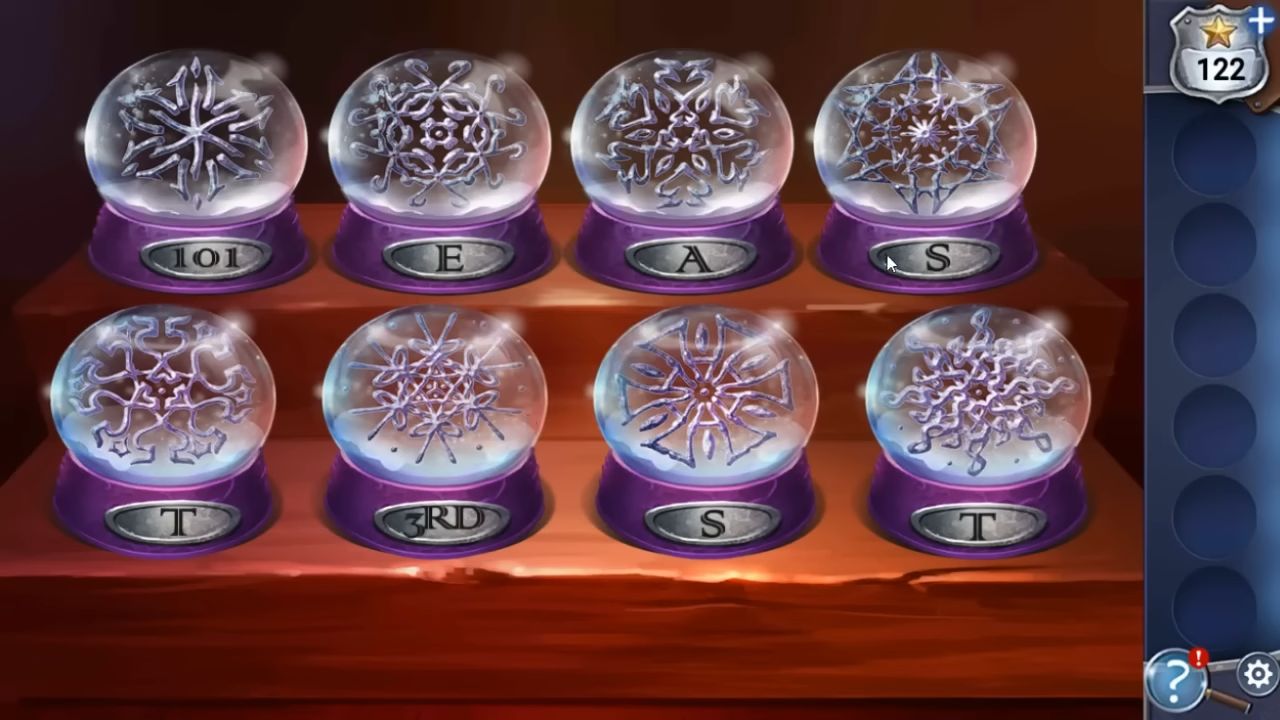
You have a new snow globe now. Tap to the right to go to the next room and discover the other seven globes. Examine the globes and include the last one. Observe the designs inside the globes closely. When you solve this, you’ll notice the next clue on the bases of the globes (101 East 3rd St.).
Now, head to that address to confront Freddy and look on the table to pick up a Scope. Then, at the bottom right, collect a chandelier piece. Tap the stairs to go upstairs.
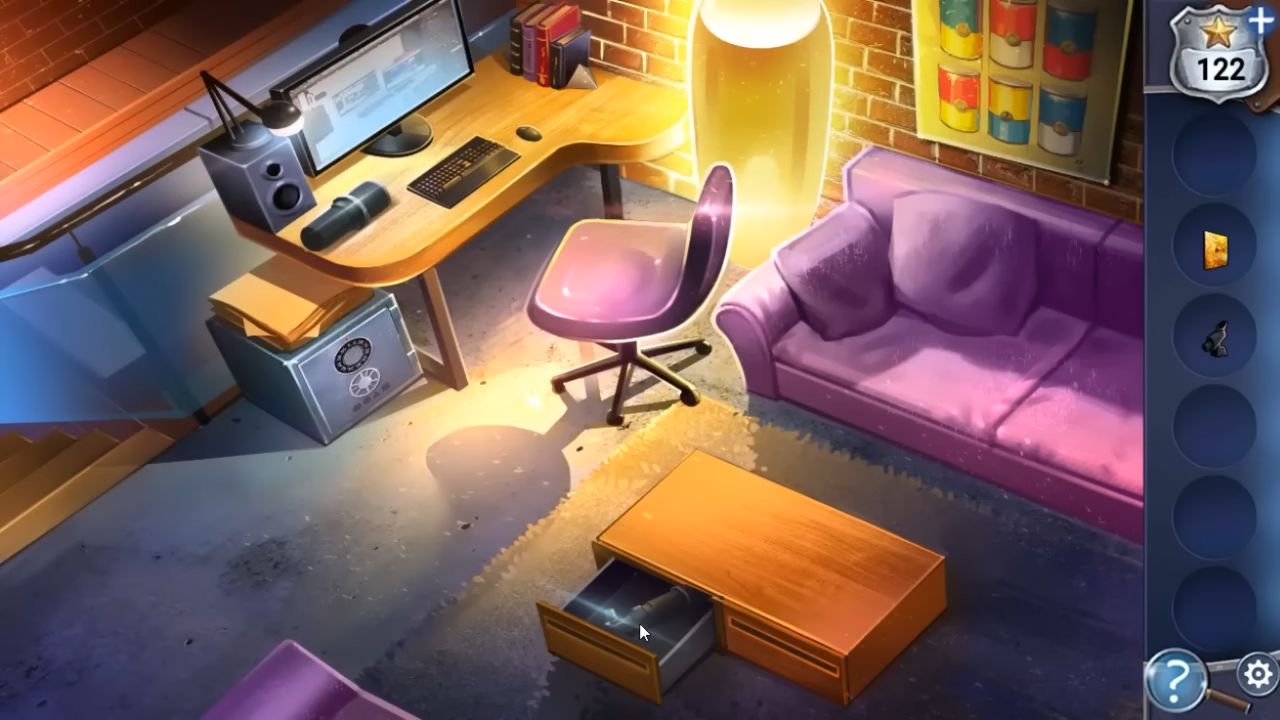
Tap to open the coffee table drawers and get a telescope body. Collect a Telescope Lens from the desk and look at the painting on the wall with tomato soup cans for a clue. Go back downstairs and put the telescope pieces onto the tripod on the right.
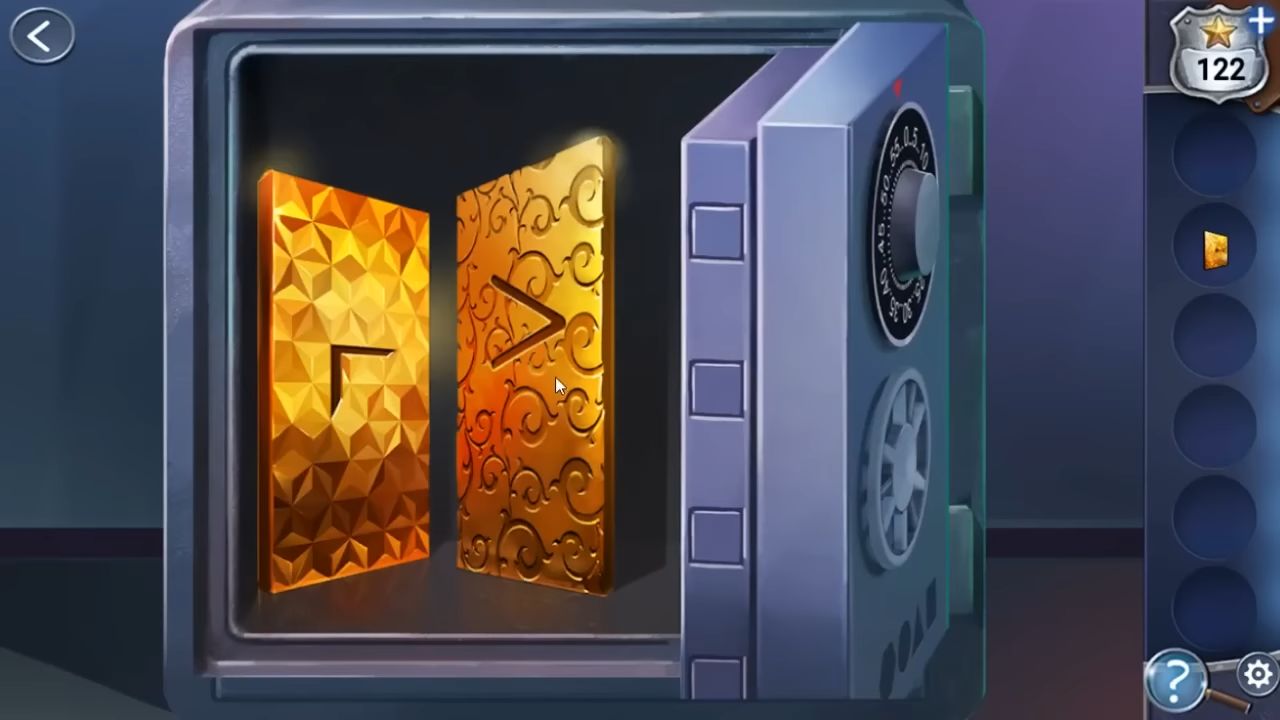
Tap the telescope to look outside. Drag to move the view around and find four signs. Each has a number and a direction. Return upstairs and check the safe by the desk. Note the shapes at the bottom (Right to 35, left to 5, right to 40, and left to 55).

After opening, gather two more chandelier pieces. Return downstairs and tap to view the chandelier. Add the three pieces to it to get a clue. Now, tap on the tablet to view the password screen. Use the chandelier clue to understand the order to tap the buttons.
A hidden passage opens on the left and you need to go through it. There, you’ll discover Misty locked in a cell.
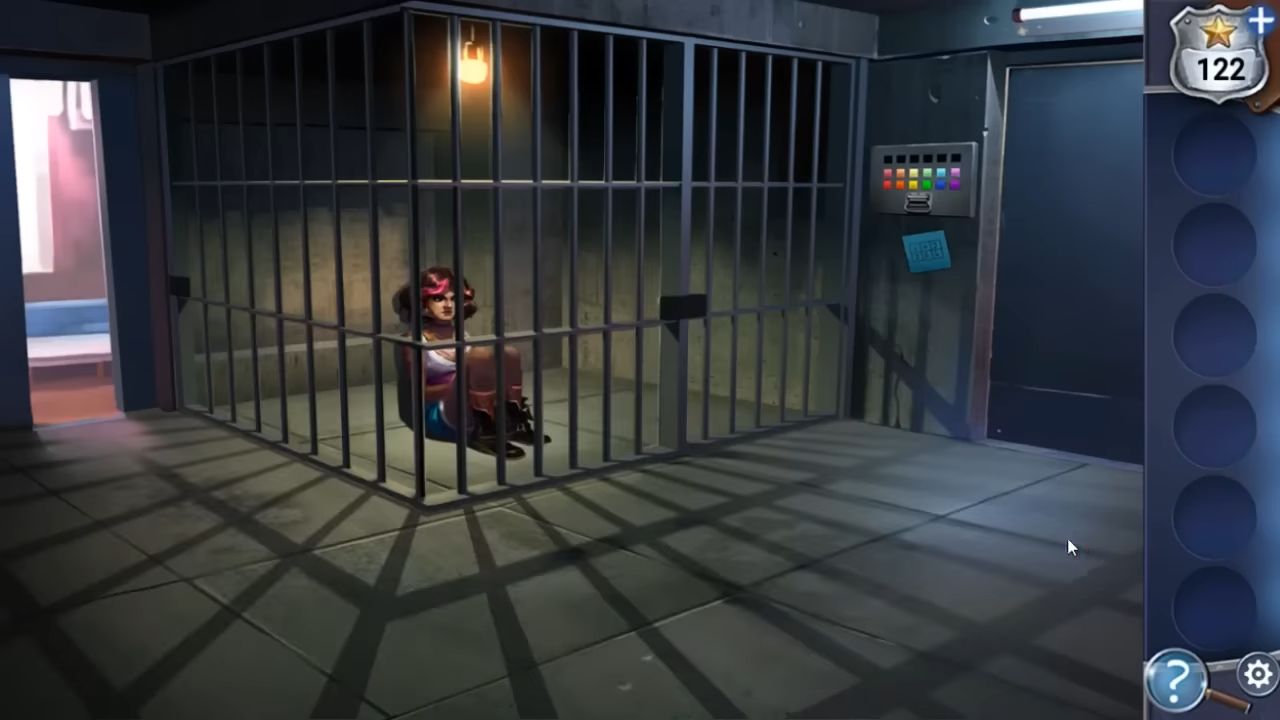
Press the colored buttons on the right panel and refer to the note below it for a clue.
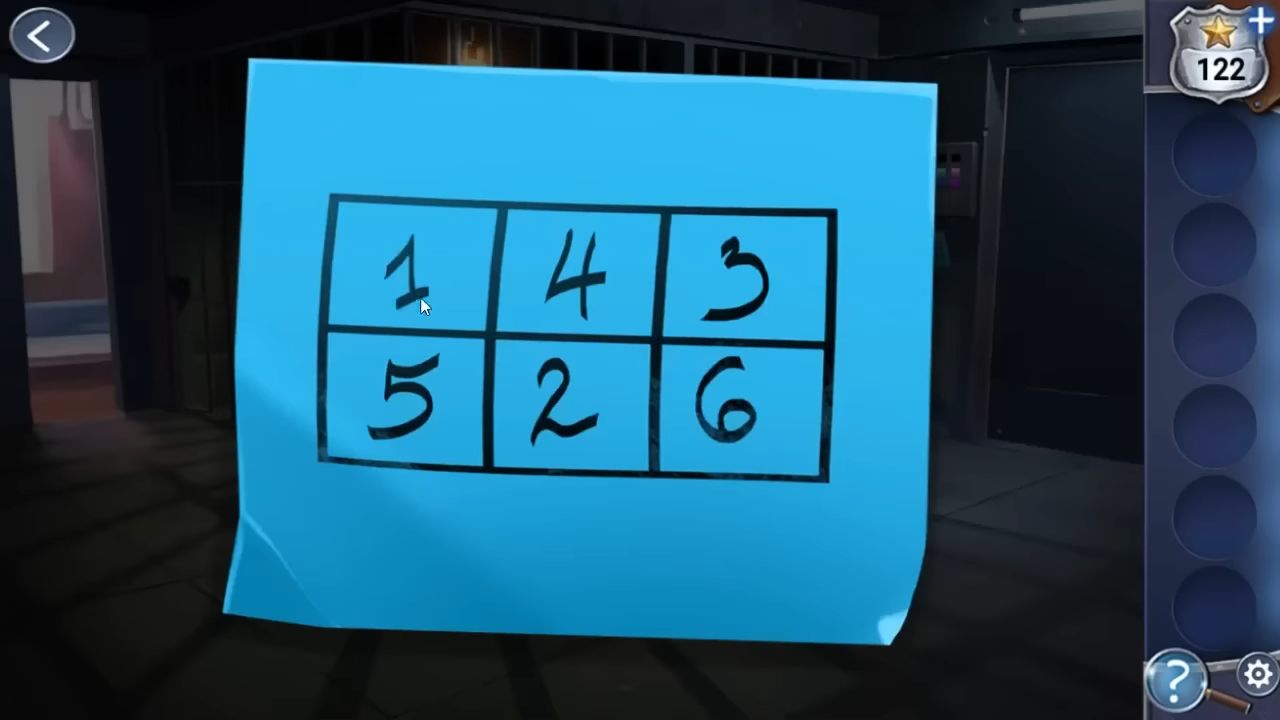
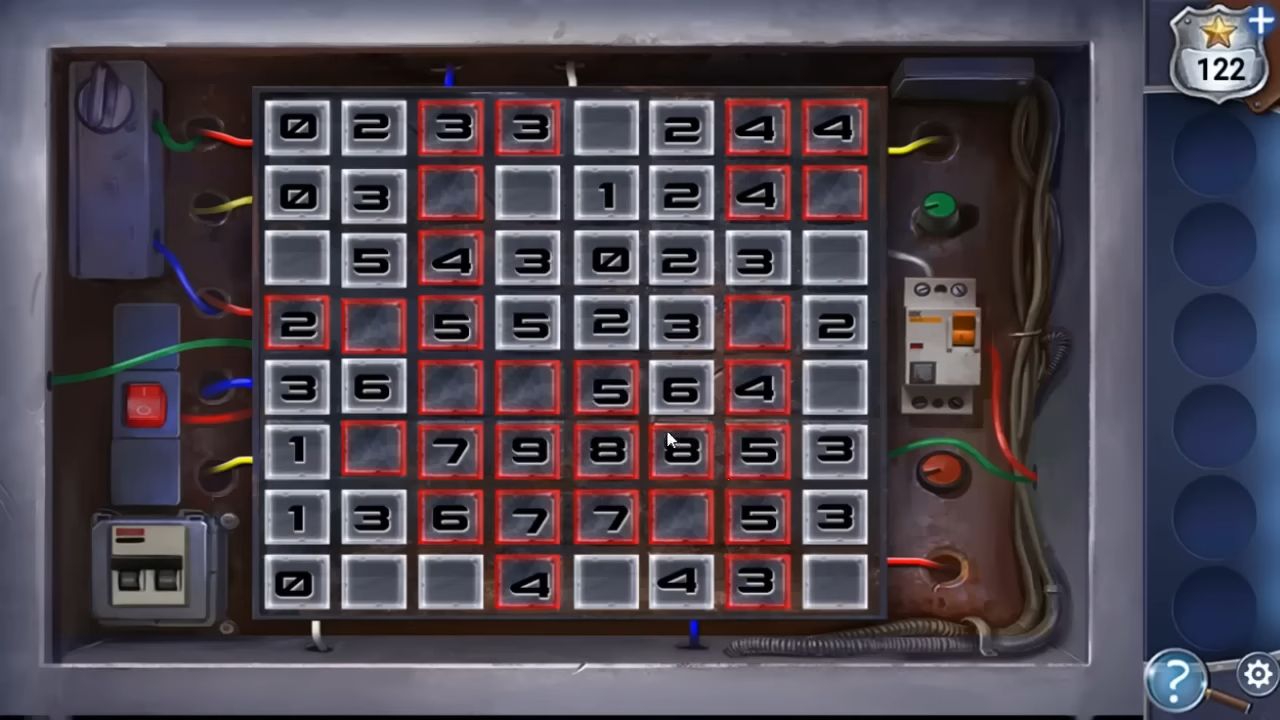
6 numbers provide an order, and they match 6 soup tins in the picture upstairs. This gives you a second puzzle to play. It is a Minesweeper-style game. Each square is either good or bad. The numbers tell you how many bad ones are next to (including itself) the square it’s on. Tap each square to toggle it between red (bad) or white (good).
This frees Misty from the cell and opens a door to go up to the roof. You need to grab the long pipe from the ground and use it to throw at the helicopter.

On December 25, back at the station, you now have the other half of the locket. Add this to the evidence board to combine the two locket pieces. This completes the game, and you caught the Christmas Killer.