Hogwarts Legacy introduces an open-world, immersive RPG experience for players to explore and discover. Among the various quests, collectibles, and magical beasts scattered worldwide, the game developers have also added easter eggs, hidden gifts, and treasures for those brave enough to discover them. Worry not, as this guide covers 25 different hidden Gifts, treasures, and puzzles most players will have missed. Without further ado, let’s dive in!

Hidden Diamond Door
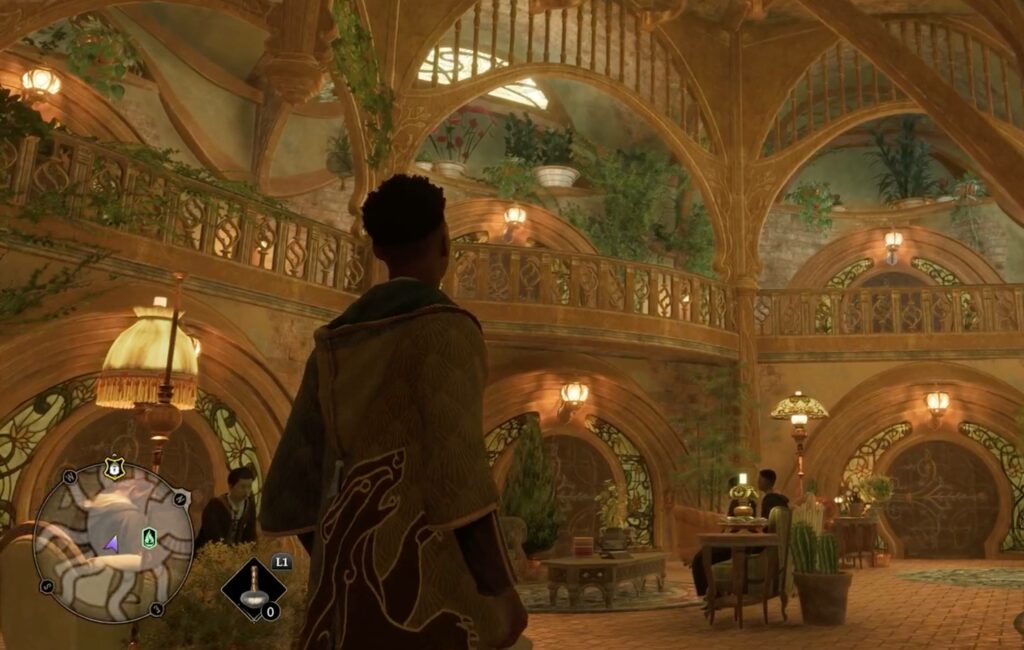
Inside Hogwarts Castle, players can access a hidden room by climbing the stairs from the Trophy Room toward the Headmaster’s Office. After ascending the stairs, players can see diamond-shaped panels to their left. Walking past, players will notice the diamond panels are in pairs except for the middle one, which only has a single diamond-shaped panel.

This is not a panel but a slyly hidden door; players can open it by moving toward it. Upon opening, players will find a set of chairs around a table with a crystal ball resting. There’ll also be a magical chest behind the chairs, and looting the chest will provide the player with Legendary gear. This room probably serves as a hidden closet room for the Headmaster, and the crystal ball signifies this room is used to read prophecies.
Musical Bells – Solved by the Bell quest
This treasure involves playing a very familiar tune to access a hidden chest. First, players must travel to Hamlet of Bainburgh and meet with the resident merchant Agnes Coffey. She’ll give us a quest to rescue her pet Niffler from a nearby crypt. The quest is taxing and interesting, and after rescuing her Niffler, players will come to a room at the end to find a parchment with a musical map drawn on it. The map has a place marked X on the southern part of the map and a set of musical notes to play.
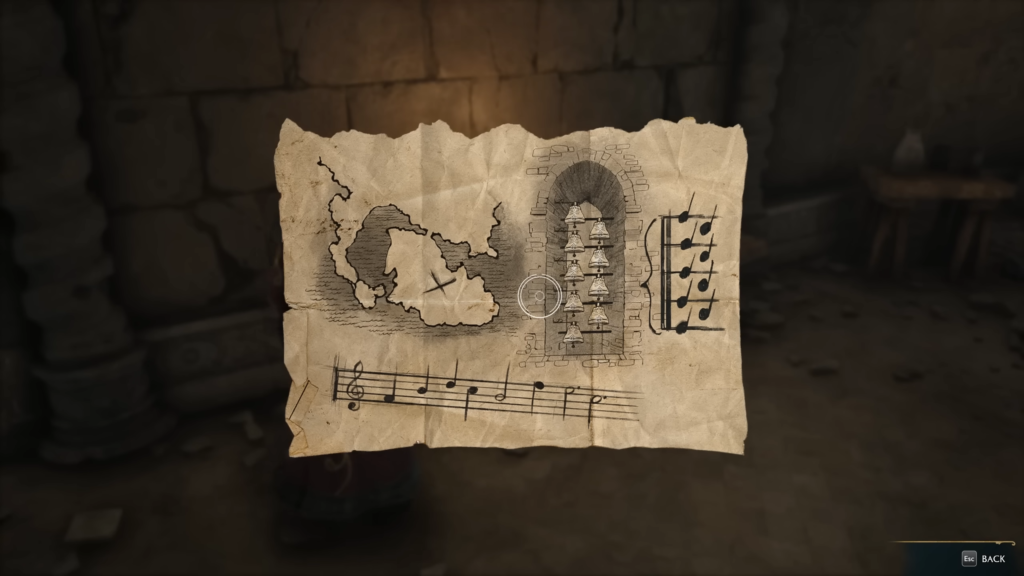
Upon further inspection, the place marked X is the Clagmar Castle. Be wary, as Clagmar Castle is an enemy hideout, so it would be wise to use your broomstick and fly over and land on one of the platforms in the castle facing the musical bells. This method will help you avoid detection and retrieve the treasure without engaging with the enemy. Next, play the musical bells shown in the musical map, which will play the iconic Harry Potter tune. Upon the right ringing of the bells, a chest will drop from the sky, and players will acquire the elegant Treasure-Seekers Longcoat as their reward.
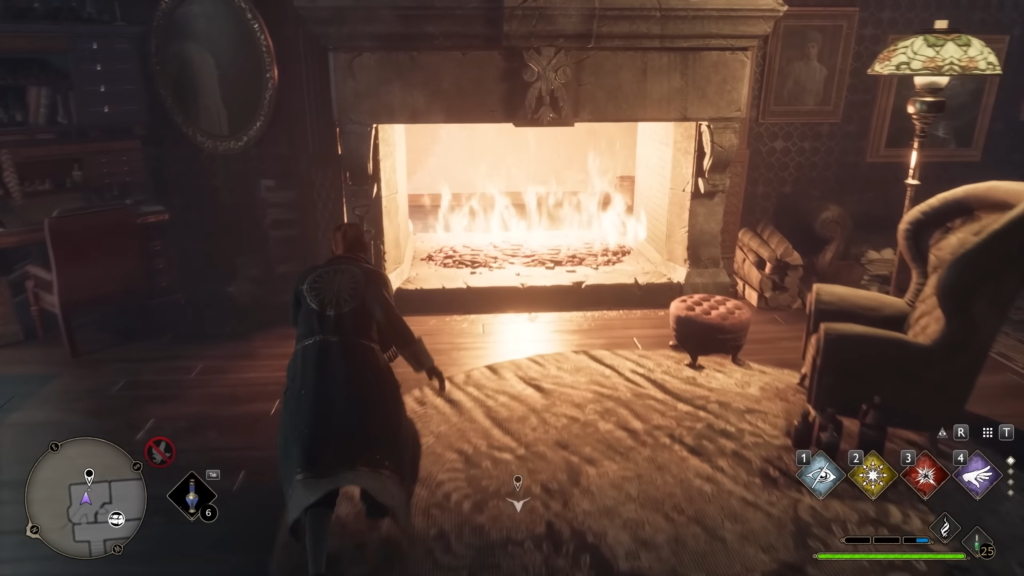
Library Fireplace
Head to the main Library in Hogwarts Castle. Within the Library, players will find a roaring fire inside the fireplace. Cast the Glacius spell to freeze and crawl inside the small makeshift space. Inside you’ll find a treasure chest and two Immortals locked in an eternal duel with each other. Retrieve the legendary loot from the treasure chest, the Elf-Made Ivory Gloves, for this guide.
Clock Tower Puzzle
This next section will provide players with four treasure chests in a single area. Head to the Clock Tower Courtyard and get inside it. There are two locked rooms on the ground floor and two on the Clock Tower’s upper ramparts. Players will notice that the sign above the door corresponds with the signs behind the swinging pendulum. To unlock these doors, players must have unlocked Level 1 Lock-Picking to make their way to the upper ramparts of the Clock Tower.

Next up, players must cast the Arresto Momentum spell on the swinging pendulum when it crosses the sign of the closest door. Players can cast it twice to bring the swinging pendulum to an absolute stop, but casting it at the wrong time will require players to wait at least one whole minute before it starts moving again. Players can utilize this method to unlock all four doors, acquire the legendary loot from all four treasure chests, and will also unlock a gift from the Challenges tab for discovering a Hogwarts secret. Not bad for a few minutes of running up and down.
Hedge Mazes
The Hedge Mazes are famously remembered as the third and last task of the Tri-wizard Tournament in The Goblet of Fire. Five such mazes in Hogwarts Legacy are spread throughout the open world. In Hogwarts Legacy, the Hedge Maze is accessed by walking through the Entrance Archway, two pillars of green hedges intersecting each other. When a player goes through them, the maze will spawn all around the player, and a treasure chest is at the end of each maze. There are no spiders, upside-down lights, or horrors in these mazes, and the hedge maze will disappear upon the treasure chest opening.

The five Hedge Mazes are located just south of Upper Hogsfield, just south of Lower Hogsfield, in the middle of the South Sea Bog, south of the Phoenix Cave near Marunweem Lake, and lastly, just south of Cragcroft at the bottom of the map. Players will have to look for their Entrance Archway as that’s the only visible part of the maze, as shown in the picture above. Another handy tip is to ride your broomsticks, making spotting the Archways much easier. The Hedge Mazes is a cool easter egg and harken players back to the more unforgettable part of the Goblet of Fire.
Muggle Studies & Alchemy
The next section can be accessed by ascending the stairs from the Map Chamber into an underground store. This underground storage room is filled with free loot and interesting discovery pathways. Players must unlock Lock-PIcking Level 1 to access all of it thoroughly. Additionally, players will encounter Frog Wormholes, which will swallow them up and cast them away to different sections of the underground storage.

Players should feel free to explore and collect the free loot and items available and hidden in each room. This guide suggests frequently using the Revelio spell to locate field guides and treasure chests in this section. Upon further exploring, players will encounter two new classrooms.
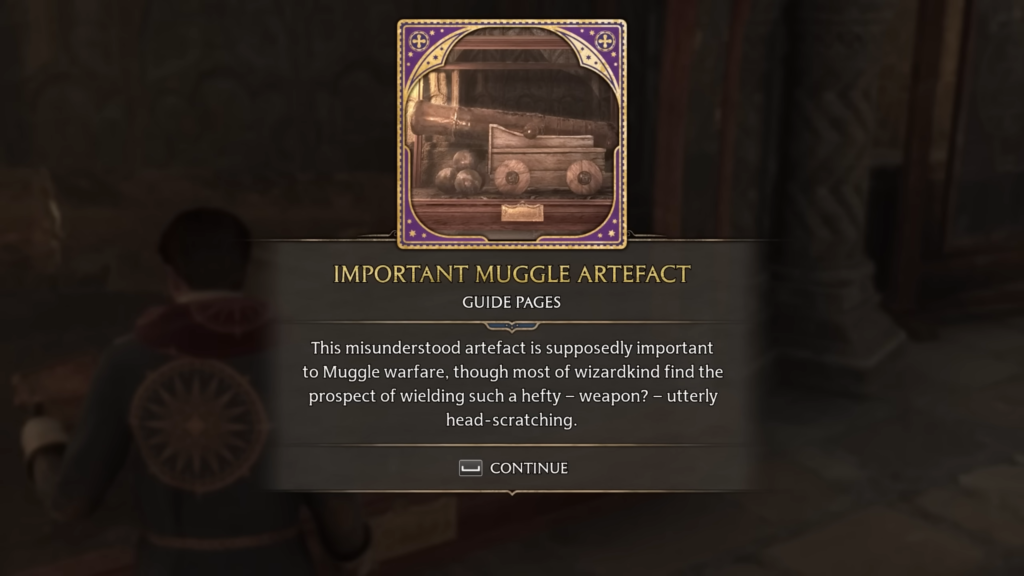
The first classroom is the Muggle Studies classroom, where players will encounter an 18th-century War Cannon, which will be displayed alongside a field guide page that explains why Muggles prefer this hefty weapon. Next up, the Alchemy classroom will also provide a handy guide page explaining the transmutation of elements.
Werewolf Tapestries
Similarly to the last section, heading up from the Map Chamber and skipping the underground storage, players will ascend to another set of stairs. After the first set of stairs, players notice a tapestry with a prominent “K” drawn in red. Walking towards the “K” will reveal a hidden door.
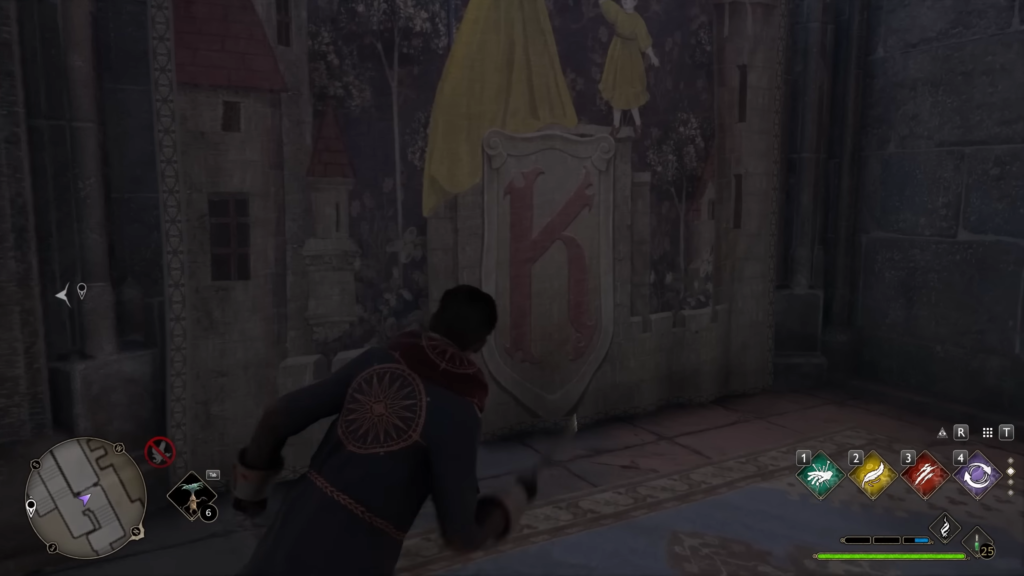
A couple of treasure chests are waiting to be looted, and upon further inspection, players will stumble into another room inside the hidden area. Inside this room is a series of Werewolf Tapestries that don’t reveal the full truth. Use the Lumos spell before each tapestry and discover the fascinating story behind the Werewolf Tapestries. Also, remember to loot the treasure chest beside the werewolf tapestries; it will give players Legendary gear.
Hogwarts Kitchens
Players playing as a Gryffindor or Hufflepuff will undoubtedly be familiar with Hogwarts Kitchens. The Kitchens are directly beneath the Great Hall and can be reached by descending the stairs from the Great Hall, turning right, and coming across a series of portraits on your left. One of the portraits will consist of a bowl of fruit, and tickling the pear in the portrait will unlock the entrance to the Hogwarts Kitchens.

The Hogwarts Kitchens are run by house elves who prepare all the food and place them on identical tables to the ones in the Great Hall. The House Elves then use magic to transport the food to the tables directly above in the Great Hall. It’s a smart Easter Egg and helps players understand that food can’t be magically created in the wizarding world. There are a couple of passageways teeming with loot away from the Kitchens. There are also a couple of Field Guides inside the Kitchens, which explains the process of transporting the food and the magic of the House-elves.
Viaduct Puzzle
Another one of Hogwart’s Secrets, Solving the Viaduct Puzzle, will help players earn a gift under the challenges tab. This puzzle is fire-based and takes place on the Hogwarts Viaduct. Players entering the bridge will see a symbol on the floor on both ends. They will also notice 4 un-lit braziers, two on each side of the bridge.

By inspecting the symbol on the ground, players must rotate and light all 4 braziers according to the Roman Numeral shown. When all the braziers are in the right configuration and lit, the symbol on the floor will give way to a passage to a second, hidden floor underneath the viaduct. A couple of RNG chests will yield loot, and a unique cosmetic item will be unlocked from the Challenges tab.
Greenhouse Secrets
The best way to earn money in this game is by looting Disillusionment Chests scattered all over Hogwarts and Hogsmeade. Each Disillusionment Chest provides 500 gaellons, and the Hogwarts Greenhouse has one nicely tucked away. Head over to the Hogwarts Greenhouse. Descend the stairs and walk toward the pond with a tree growing in the middle. Go in either direction around the tree, and players will stumble on secret descending stairs. Going down them will reveal a Disillusionment Chest and Professor Garlick’s private mushroom collection.

To open the DIsillusionment chest, players must be invisible by casting the Disillusionment spell or drinking an invisibility potion. The Hogwarts Greenhouse has other items too. Coming to the last Greenhouse, just above the Hidden Herbology Corridor, players can harvest and obtain Venomous Tentacula already growing there. On that floor, there are at least five Venomous Tentaculii that players can obtain for absolutely free. The Venomous Tentacula is a handy addition to combat, and before players can grow them in the Room of Requirement, they can be farmed for free from the Hogwarts Greenhouse.
Teacher’s Rooms
The first Alohamora quest brings you to the area called Teacher’s Rooms. Players will have to return here a while later, having learned Lock-Picking Level 2 and Level 3, as this area can’t be explored without picking these advanced locks. Once players can open the advanced locks, players will have access to multiple Teachers’ rooms, which are full of loot. Still, each room has an interesting letter, sometimes two, demonstrating the player’s understanding of these characters.
For example, Professor Ronan‘s room houses a cabinet nearly identical to one that houses a Boggart in the Prisoner of Azkaban. Similarly, in Professor Sharps‘s room, players can use the Glacius spell to extinguish the fire in the fireplace and crawl towards a make-shift art studio space, where players will discover a lot of paintings and each painting should be checked out for gifts, hidden secrets and most importantly, character development.
Professor Binn’s History of Magic
Collecting Field Guide Pages are one of the best ways to increase your XP, and they are scattered all around Hogwarts and the open world. Most of them are concentrated inside Hogwarts, and this section will help players find many of them in one go. Head to Professor Binn’s History of Magic class, a side-quest that introduces players to Professor Binn. An Immortal, Professor Binn’s ghost, floats around the class, teaching obscure history to sleepy students.
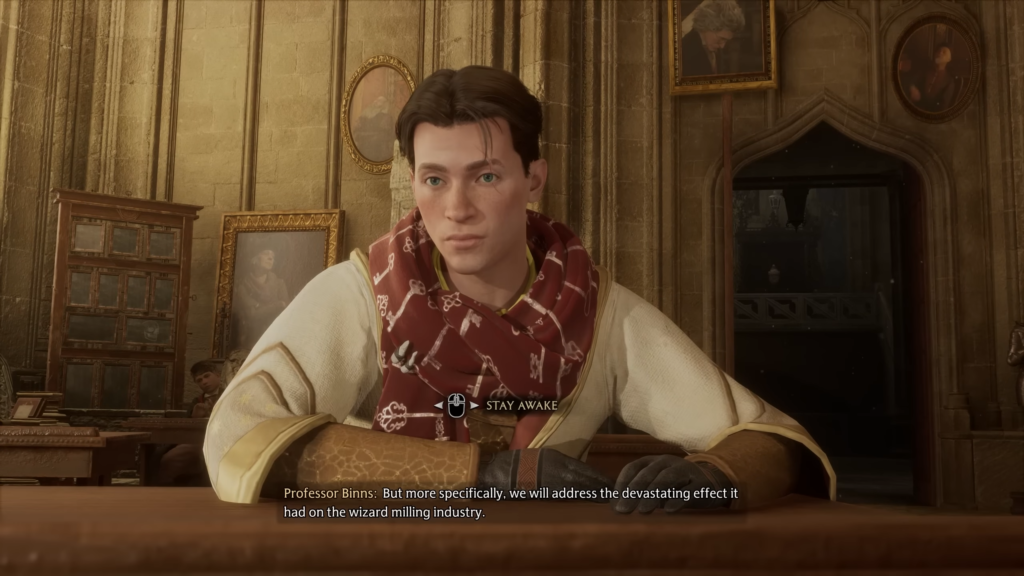
If the players remain awake long enough, Professor Bin will give us a tour of Hogwarts’s Memorabilia and multiple Field Guide Pages. Professor Bin will also gift us a Conjuration Spellcraft for the cherry on top. This side-quest is well-written and fascinating to play with if players can keep their eyes open during Professor Binn’s long and monotonous lectures.
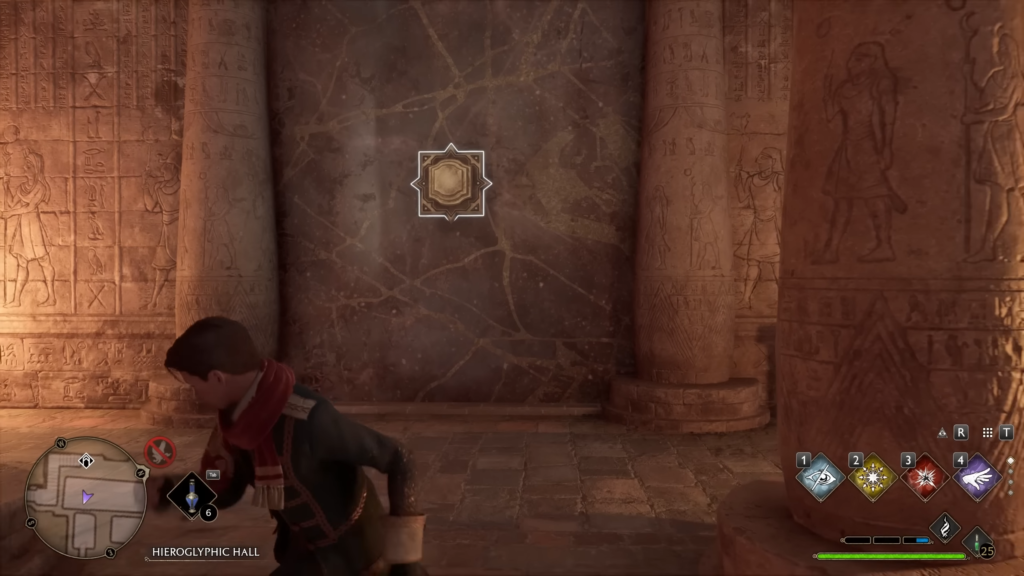
Extra Depulso Puzzle Rooms
After completing the History of Magic sidequest, players should go through the door at the back of the classroom and venture into a room full of Egyptian artifacts, with columns, a Sphinx, and, most importantly, a golden stone sticking out of the wall. Casting the Depulso spell on the stone will unlock a second Depulso Puzzle Room.
The first is a quest for a Ravenclaw student, but this one is a lot harder and requires all your thinking faculties to complete. It is the toughest puzzle this guide has faced in the game, so be wary. You’ll have to make your way across this room, but upon completion, there are tons of rewards to unlock and free loot to be acquired. Good luck!
Triple Interior Store
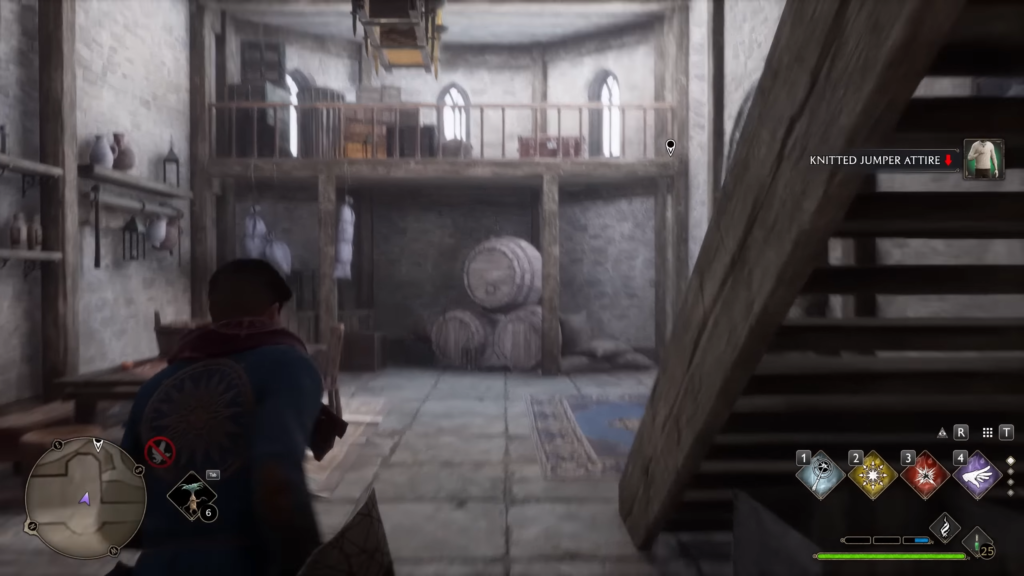
The Bingle and Blatch store in Hogsmeade is a wonderful addition by the developers, and it incorporates a fascinating magical concept in the game. Three different doors can enter the store, and depending on which we choose, the store’s interior will be completely different.

If you start from the right, round, and left, the store will either be a Bookshop, a Dressmaker’s, or a rudimentary Hardware store. There’s loot available in all three stores, so make sure to enter and exit and enter from a different door every time. From the game’s context, it’s one of those dazzling pieces of magic that makes you stand there in awe. It’s a fun in-game mechanic and is more exciting for players experiencing this effect for the first time. Don’t miss it.
Hidden Hogsmeade Cellar
Since you’re in Hogsmeade, this cozy village has at least three pathways or underground labyrinths. Most loot and rewards in Hogsmeade are found in these three labyrinths, and players should explore them all to unlock items and obtain treasures. The first labyrinth is an entire Ashwinder Hideout. Its entrance is a cellar behind a dodgy little pub on the southern outskirts of the village. Players should get equipped to rid the labyrinth of Ashwinders and collect XP and rewards while at it.

The second labyrinth is called Lawley’s Cellar, in the middle of the street. Be wary, as it’s a gigantic Spider Lair, and players must exterminate spiders to get their rewards. The last one is also famous, with a Gareth Weasley side-quest attached. It is called the One-Eyed Witch Passageway, which connects the Honeydukes Cellar with Hogwarts. It’s a sprawling labyrinth that, thankfully, doesn’t connect with either of the two passages and involves its unique challenges. Most of the Hogsmeade treasures and free loot are hidden below the surface, so players looking for free rewards should check out the subterranean passages underneath Hogsmeade.
Dancing Ghosts
After all the fighting and challenges, witnessing a running joke inside the game is fun. Players looking for a quick chuckle about Dancing Ghosts will have to head to a room in the dungeons. Players should head to the Lower Grand Staircase and descend the stairs. Upon descending, the players should take a right and stick on that path until a door on the left and a knight in armor are in front of them.
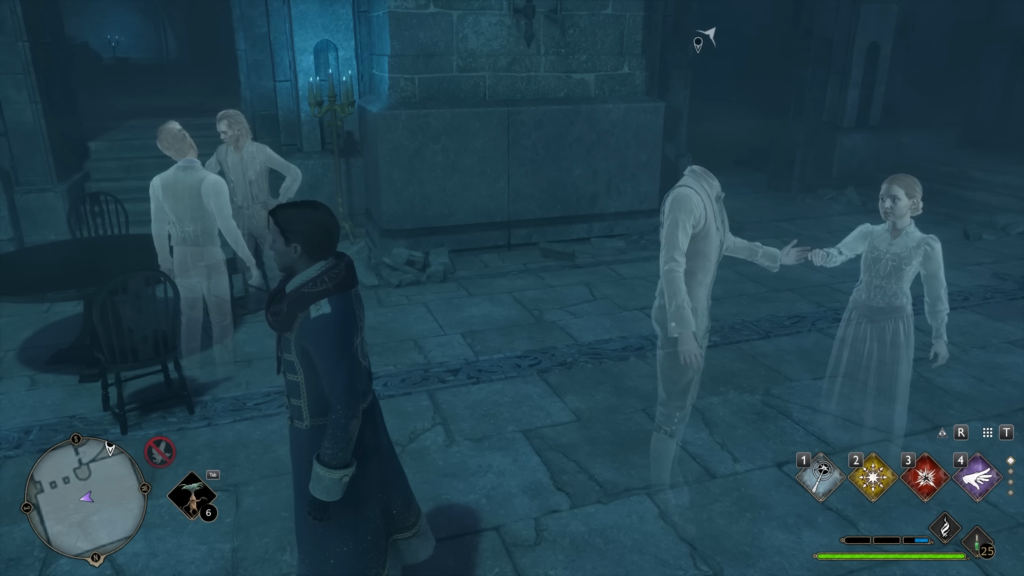
Take a right and another right, head up the stairs, take the second left, and go straight until you see a metallic gate on your left. It will require Lock-Picking Level 1 mastery to open this gate. Players will notice a mysterious blue light on the other side of the gate. Follow the light and witness the funny exchange of dialogue between ghosts. I won’t spoil it for the players, but it’s quite an entertaining three minutes.
Gorgon Painting
Players must start from the Potions Classroom to witness another tidy piece of magic. Descend the stairs and open the door towards the long corridor. Go straight down the corridor until you approach a set of stairs. After ascending the first set of stairs, you’ll find a second set of much grander stairs. You’ll notice a white room with its door open to the left of these grand stairs. Enter the room full of life-sized statues of centaurs, stags, lions, and even Merlin.

But the most interesting item in the room is a painting of a gorgon. By interacting with this painting, we will be transformed into stone and have to press the same button when hit with Petrificus Totalus. It’s a tidy bit of magic and an interactive set-piece in the game to interact with it. It makes you think whether all the statutes in the room were once living, breathing creatures turned to stone.
Basilisk Breeder
There’s evidence of another Basilisk roaming the southern coast of Hogwarts. One lays dormant underneath Hogwarts, which unveils itself in the Chamber of Secrets. During the “Shadow of the Mountain” quest with Sebastian Sallow, players can witness the aftermath of a Basilisk Breeder. While the player travels up this mountain, they will come to a little hidden cave protected by stone and Devil’s Snare. We can explore the cave using a damage spell to break the stony entrance and the Lumos spell to make the Devil’s Snare recede into the ground.
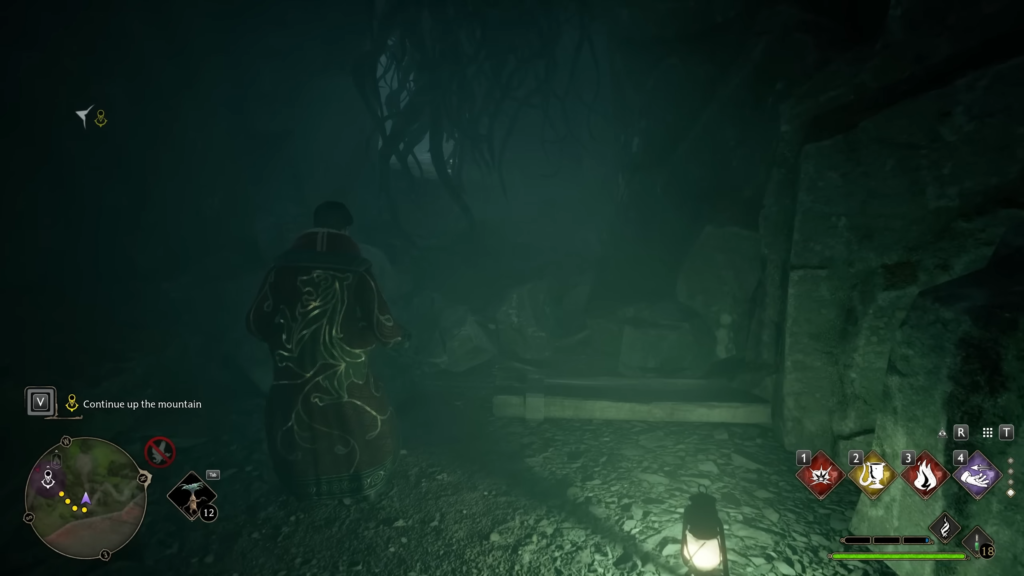
Players will find a Legendary Chest to give out a legendary piece of gear. Interestingly, players will come across some chickens, two coops, and a wide-eyed corpse on the ground. There’s also a letter next to the body. Upon reading the letter, it becomes obvious that the fellow was a fellow Basilisk breeder and met his untimely demise while looking straight into a basilisk’s eyes which is instant death according to the lore. It’s an interesting twist and a cool easter egg dropped by the developers.
Hagrid’s Grave
Robbie Coltrane is famous for playing Hagrid in the Harry Potter series. He sadly died last year, and the Hogwarts Legacy developers haven’t been ignorant of this fact and have added a small easter egg to the game. It is a homage to Robbie Coltrane and can be found near the Hut at the end of the wooden bridge or up from the Lower Hogsfield. Players will notice a Hut which resembles Hagrid’s Hut in the Harry Potter Series.
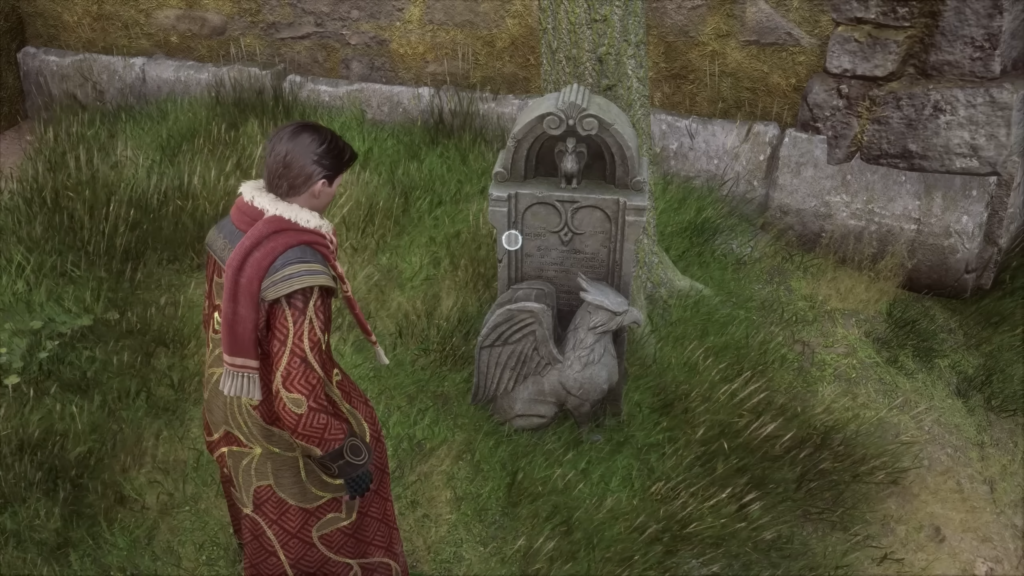
There’s a man outside carving pumpkins, and inside the Hut are posters of Quidditch etched on the walls. If we go around the hut and towards the side facing the black lake, we’ll see a gravestone with a stone Hippogriff lying down and Latin etchings on it. It’s a beautiful homage to Robbie Coltrane, who embodied the character of Hagrid, and the whole idea of honoring and memorializing Robbie seems wholesome and heartfelt.
Outer Hogwarts Battlements
Situated next to the Quidditch ground, the Outer Hogwarts Battlements are teeming with loot and treasure chests waiting to be opened. The main story quests never take the players inside these battlements, but now players can find many new items, acquire Field Guide Pages, and open a lot of chests. The Outer Hogwarts Battlements is also where Carriages and Thestrals are housed, an exhilarating sight.
More importantly, the living quarters of the school’s caretaker Gladwin Moon are also here. He suffers from an excruciating phobia of Demiguises. By reading his diary entry, players can notice that Gladwin’s sense of importance is quite overinflated as he claims that Hogwarts will fall into ruins if he abandons his post.
Well, Well, Well
One of the most elusive treasure hunts is the Well, Well, Well treasure quest. The quest can be started atop a hill south of Aranshire. Players must get up on their broom and ride to the top of this hill. At the top, players will notice a water well. But it isn’t any normal well; it’s a talking well. The talking well gives us a treasure map with vague and non-descript instructions involving an old bridge, a tree, and the Leviosa charm.
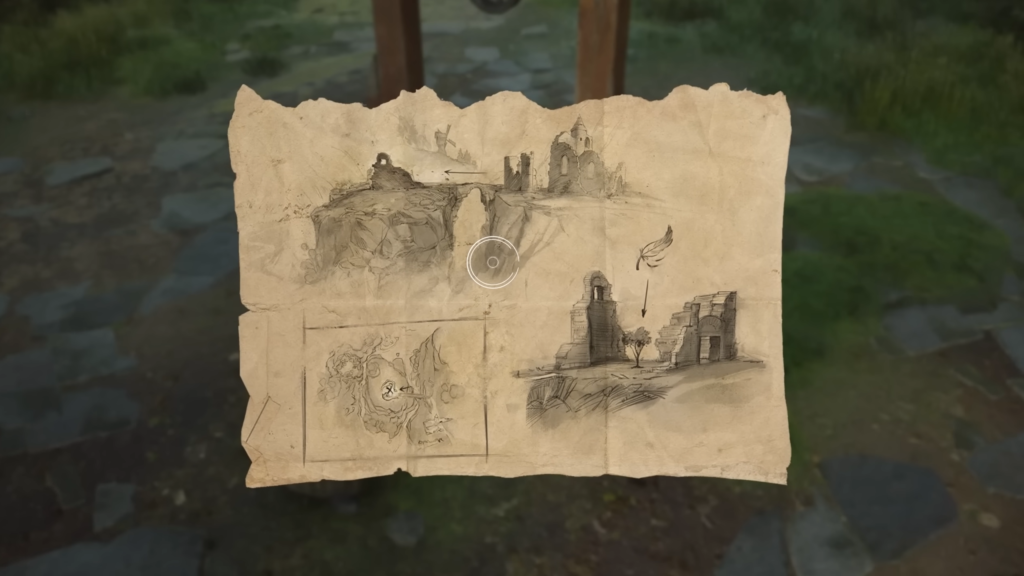
The puzzle’s toughest part is searching for the location the map refers to, but this guide has solved that problem. Located just south of the hamlet of Irondale, players will easily find the old bridge, with even our character commenting when he/she sees it. Just across the bridge is a tree, and players have to use the Leviosa charm to try and lift the tree. Lifting the tree will unveil the treasure chest trapped tightly around the tree’s roots. Players will then have to get close and obtain the treasure. For this guide, the treasure was a Treasure-Seekers Bicorne Hat from Treasure-Hunter set.
Daily Prophet Stand
Since all roads lead back to Hogsmeade, literally and figuratively, players can visit the Daily Prophet Stand in Hogsmeade. The stand has several piles of newspapers and gives players information about the activities of the wider wizarding world. Upon interacting with the newspaper, players will not fail to see an article about breeding basilisks. The article discusses how basilisks are bred by hatching a chicken egg beneath a toad.
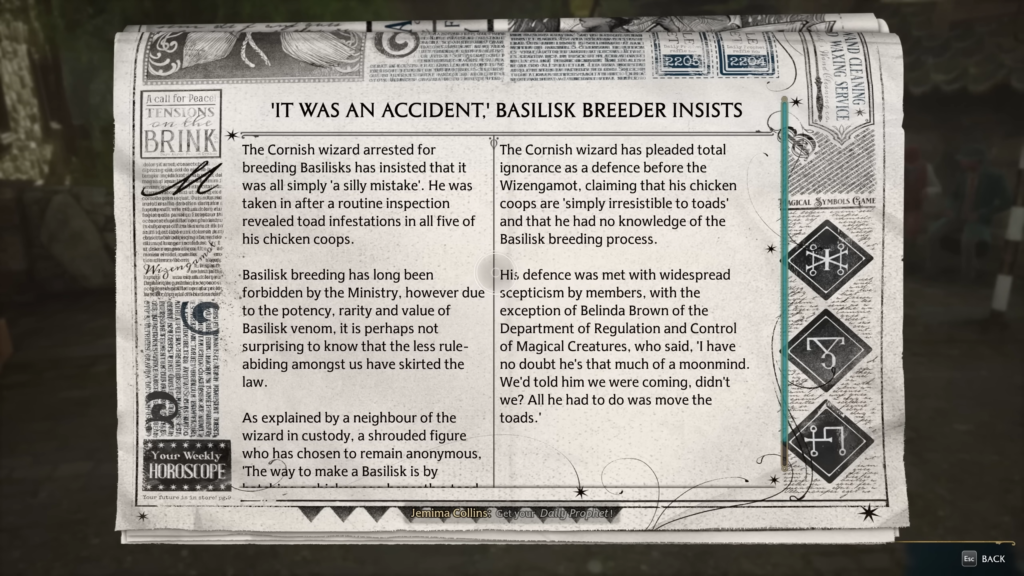
This fact also sheds some light while the Basilisk Breeder found dead in the cave had several chickens and chicken coops around him. It begs the question, why would anyone want to breed one of the deadliest creatures ever to exist? The answer is Basilisk Venom. It’s incredibly potent and rare to come by and is sold for a fortune by those lucky enough to obtain it. Still, it doesn’t justify the risk of obtaining the Basilisk Venom.
Cursed Tomb Treasure
The Cursed Tomb Treasure is a classic treasure Hunt with many lootable chests and interesting things to discover. This quest can be started by traveling to the southern part of the map and going toward the Old Manor. Players should venture behind the manor, where the entrance of a nearby crypt is located. A fire spell activates the entrance, and the player will almost immediately be forced to fight two consecutive Boss Battles. The first Boss Battle is with Alisa Travers, and the second fight is with the Lord of the Manor.

After defeating both of them, players will receive a cryptic map fragment, alluding to a treasure hidden in a little cave just beneath the Goblin Mine. This time, Hogwarts Legacy uses one of the oldest game tropes and hides the treasure in a cave behind a waterfall. Players must use their brooms to cross the waterfall and infiltrate the Tomb of Treachery. Players will have to fight spiders in the dungeon and use the map to solve the final puzzle. Finally, players will get the unique Treasure-Seekers Attire and not to mention plenty of treasure chests to loot from.
Book of Admittance
The last treasure/collectible on this list, The Book of Admittance, is a late-game item and beautifully connects to the first treasure. On the way towards the Headmaster’s office from the Map room, many players would have noticed the unique-looking door with four locks and a spiral of metal and locks. Players must collect enough Demiguises to unlock Alohohomara Level 3 as this hunt requires Level 3 Lock-Picking skills. Head to the Headmaster’s office and approach the balcony through a door. Secondly, take in the spectacular views visible from this balcony and thirdly, make your way towards the highest room.
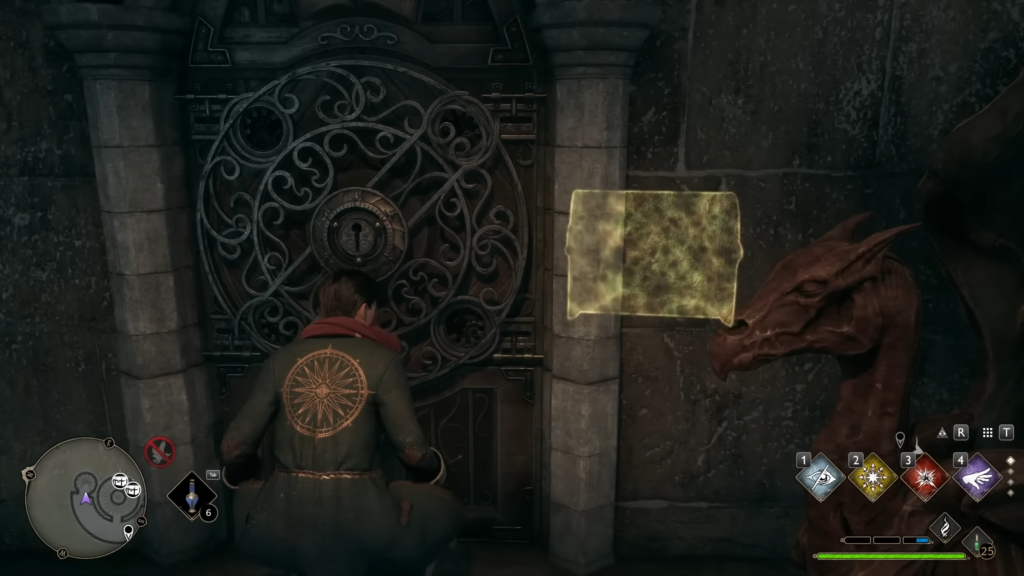
Inside this room, there will be a key on the desk. Pick up the Key of Admittance and return to the unique-looking door to use the key. This single key will magically open all four locks on the door, and a long, winding staircase will climb in front of you. Head up the infinitely long staircase until you come to the room which houses the Book of Admittance and Quill of Acceptance. There will also be two chests containing spell crafts or cosmetic loot, conditional on the player’s luck. Completing this will qualify as the third Hogwarts Secret, and a gift will be unlocked under the My Challenges tab. The gift will be familiar-looking robes, aptly named the “Fashionable Dress Robes.” These are the same Robes that Ron Weasley has to wear in the Goblet of Fire. Many fans of the series will remember this outfit.