This guide will help you to adjust the best in-game settings for XDefiant Open Beta. You have to adjust these settings as mentioned in the guide to get the best performance and optimum in-game playing experience.
Gameplay & UI Settings
In this section, we will take you through the steps to adjust the Gameplay & UI settings to get the best performance.
- Turn on your PlayStation 5 and launch the XDefiant Open Beta game from your game library.
- Once the game is open, navigate to the Gameplay & UI tab on the left side panel of the settings.
- Locate the option to adjust the Field of View (FOV) setting and set it to a value between 100 and 105.
The best value is largely based on personal preference. Note that higher FOV values make targets appear smaller at longer ranges, while lower FOV values make targets appear larger at longer ranges but reduce peripheral vision. - Find the option to adjust the ADS Field of View and keep this setting consistent with your chosen FOV.
It will maintain a more zoomed-out view when aiming down sights. - Scroll down into the ADS sensitivity transition (Low Zoom) setting.
This setting determines how your sensitivity changes when aiming down sights.
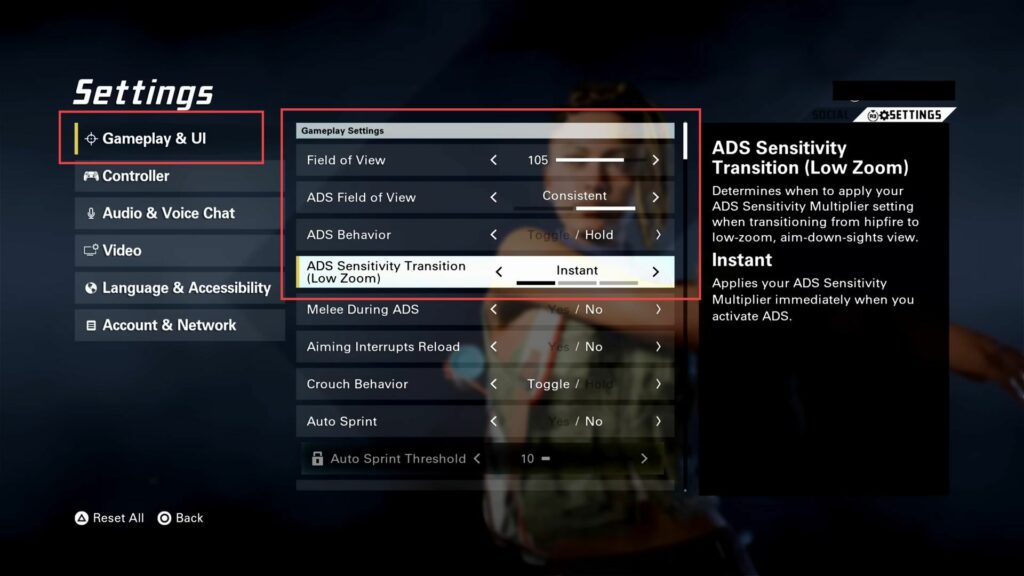
- Set this sensitivity value according to your preferences but instant mode is recommended.
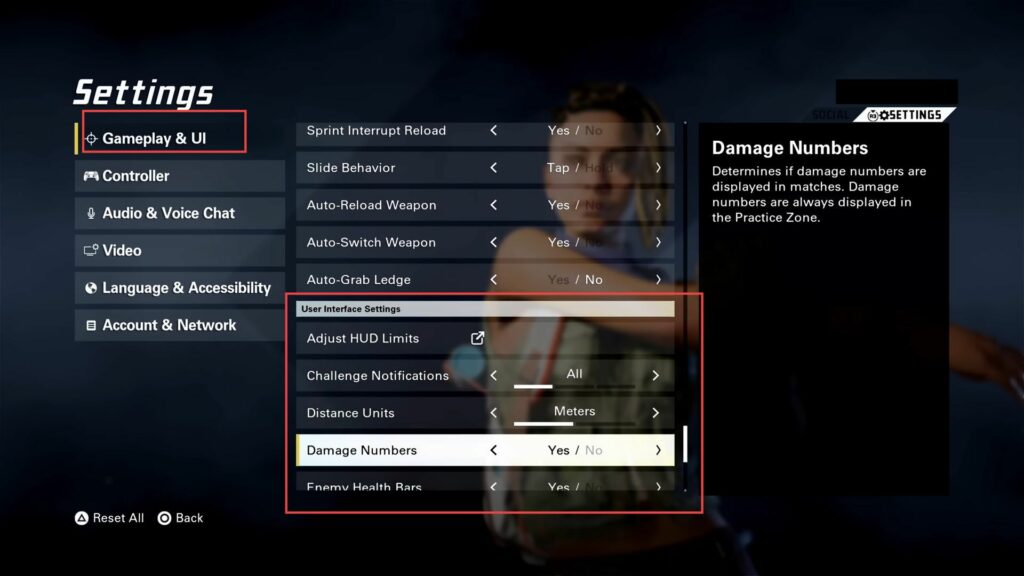
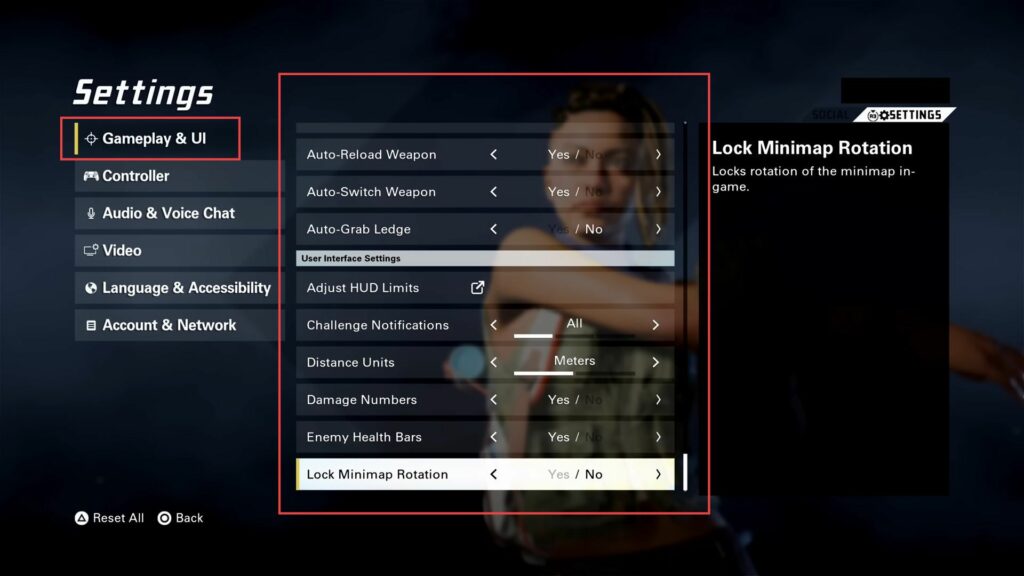
- You have to check all the other related settings from the menu of Gameplay & UI and set them as per your requirement.
- After making all the desired adjustments to the settings, make sure to apply and save the changes before exiting the Gameplay & UI section.
Controller Button Layout
This section describes how to adjust the controller button layout to get the best performance and optimum in-game playing experience.
- Now you have to click the Controller tab from the left side panel.
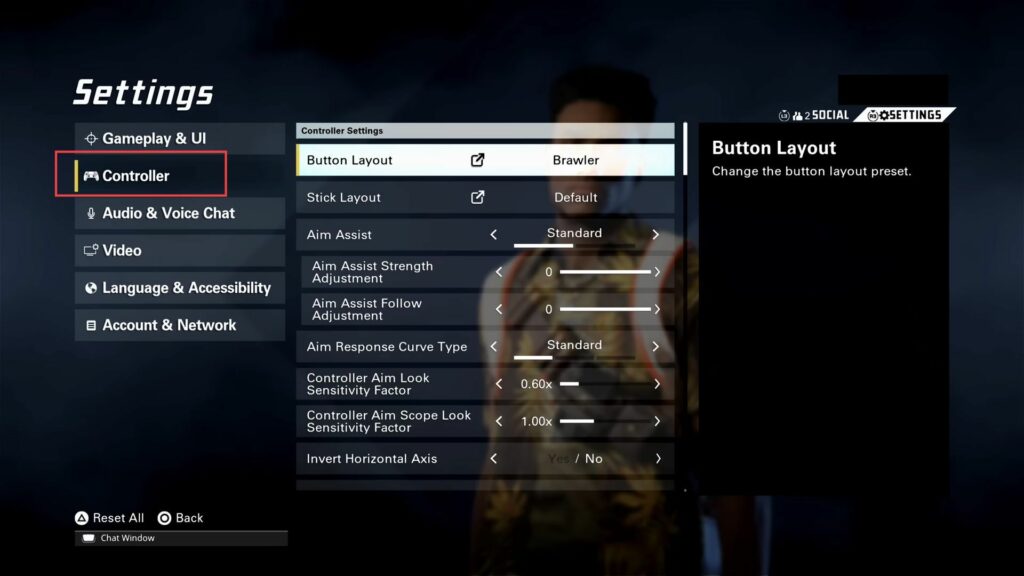
- In the game settings menu, find the Button Layout and look for the Brawler button layout option.
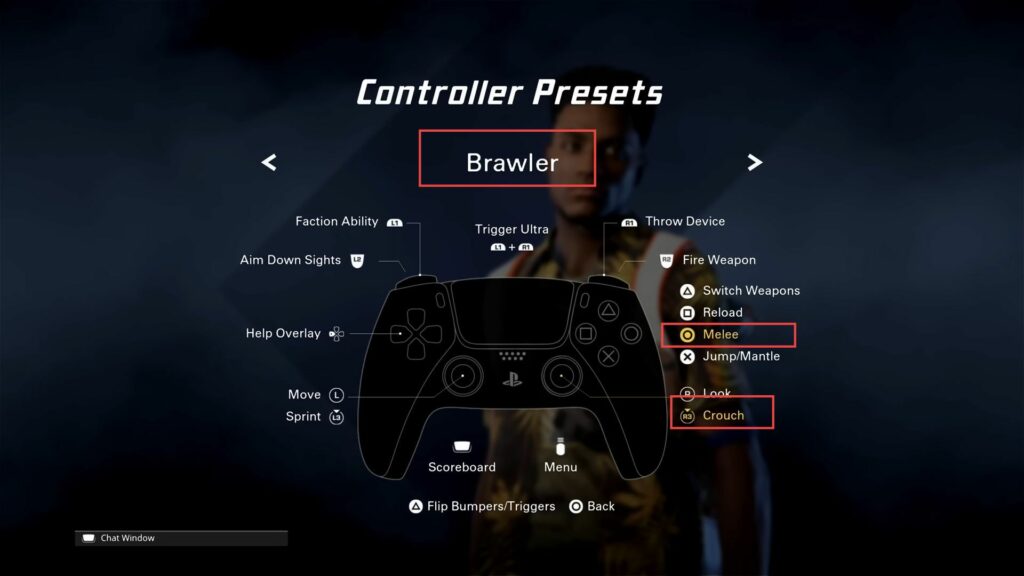
This layout is equivalent to the Tactical button layout used in Call of Duty games. - Choose the Brawler button layout by selecting it.
Within this button layout, the default setting may have the Crouch and Melee buttons assigned to different controls. - Swap the Crouch and Melee buttons so that crouching is done with the analogue stick, and melee attacks are assigned to a different button.
- Once you have adjusted the button layout to your preference, make sure to save the changes.
Aim Assist
This section explains how to adjust the aim assist to get the best performance.
- In the game settings menu, look for the section related to Aim Assist to adjust the Aim Assist Strength Adjustment.
This setting determines how much assistance the game provides in helping you aim at targets. - Set the Aim Assist Strength Adjustment value to zero.
This disables the aim assist feature completely. - Locate the option to adjust the Aim Assist Follow Adjustment.
This setting determines how much the aim assist follows towards the moving targets. - Set the Aim Assist Follow Adjustment value to zero.
This ensures that the aim assist does not actively track moving targets. - After adjusting the aim assist settings, make sure to save the changes before exiting the settings menu.

Response Curve & Sensitivities
This section will take you through the steps to adjust the response curve & sensitivities.
- In the game settings menu, find the section related to Aim Response Curve to adjust the Aim Response Curve type.
This setting determines how the game responds to your aiming inputs. - The recommended and preferred option is Standard mode for most players.
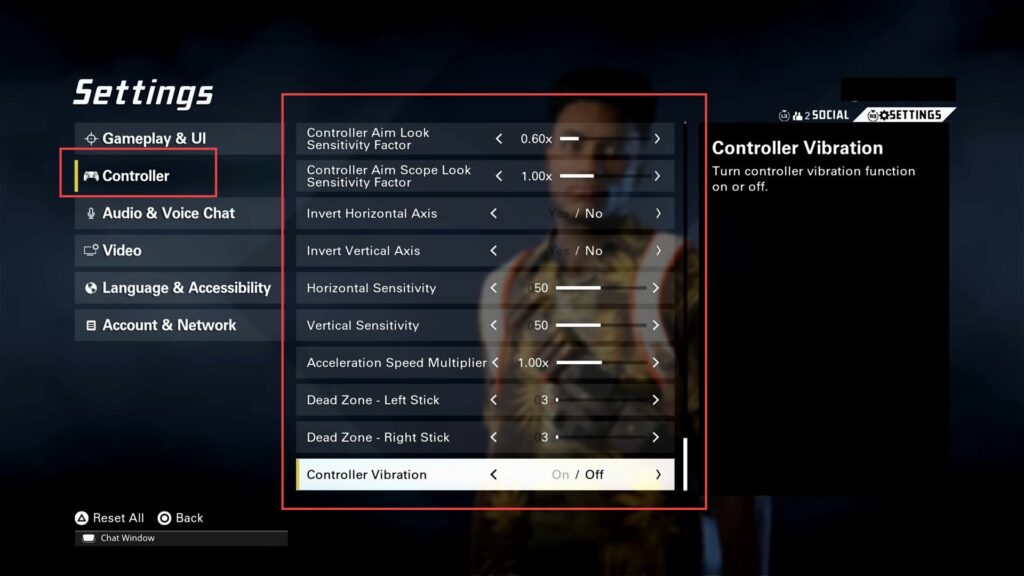
Optionally, if you prefer a different aiming feel, you can try Linear mode or Reverse S Curve mode. - Locate the option to adjust the Controller Aim Sensitivity Factor.
In Call of Duty, the recommended range is 0.7 to 0.75, but for X Defiant, it’s suggested to set it to 0.6 for better fine control when aiming down sights. - Find the option to adjust the Controller Aim Scope Look Sensitivity Factor and set this value to 1.
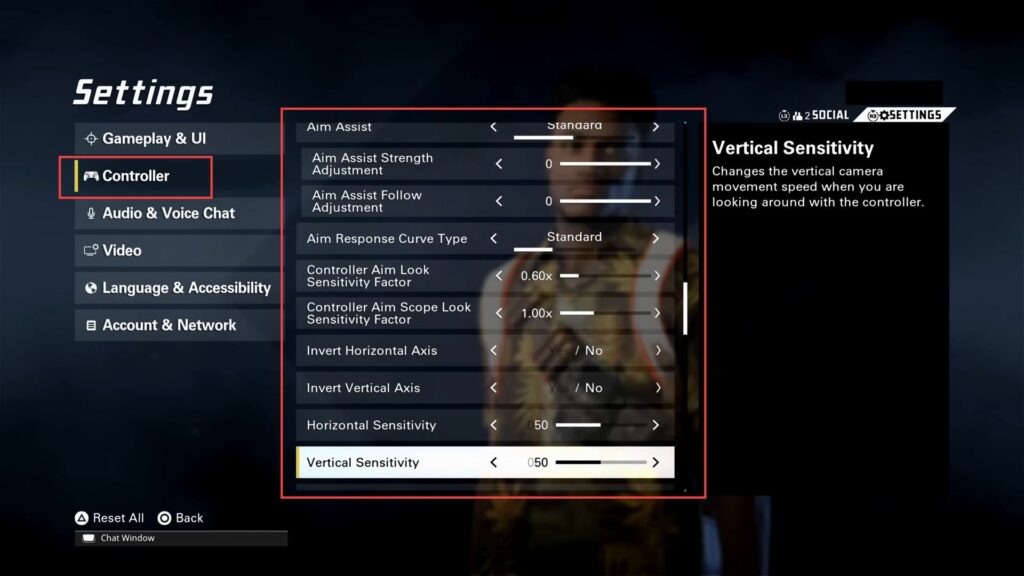
It will maintain consistent sensitivity when zooming in with scopes, making it easier to track moving targets. - Navigate to the Inverted Horizontal Axis and Inverted Vertical Axis settings and make sure both are set to No to have standard, non-inverted controls.
- Find the options to adjust the Horizontal Sensitivity and Vertical Sensitivity values and the suggested value is 50, which seems to work well for most players.
If you are used to a lower sensitivity, you may want to set these values below 50 for finer control.
If you prefer higher sensitivity, you can increase these values for faster spinning while still maintaining precision when aiming down sights. - After adjusting the aim response curve and sensitivity settings, make sure to save the changes.
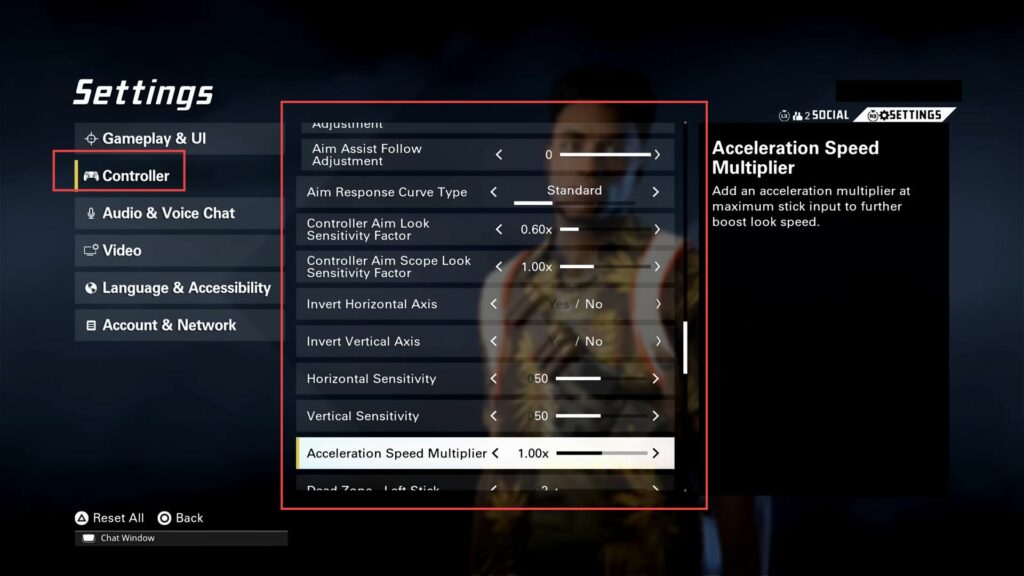
- In the game settings menu, find the section related to Controller Settings and look for the option labelled Acceleration Speed Multiplier.
This setting is used to add extra acceleration when you fully push the right stick in a direction. - Adjust the value of the Acceleration Speed Multiplier to your preference, however, 1 is recommended.
Higher values will provide more extra acceleration, allowing you to perform faster spins and quicker 180-degree turns.
Lower values will reduce the extra acceleration, providing a more standard and consistent aim response. - After adjusting the acceleration speed multiplier, make sure to save the changes before exiting the settings menu.
Find the perfect Dead Zone
This section explains how to find the perfect Dead Zone to get the best performance and optimum in-game playing experience.
- In the game settings menu, find the section related to Controller Settings and look for the options labelled Dead Zone.
These settings determine the area around the centre of the joystick where no input is registered. - Adjust the Dead Zone values to be as low as possible without experiencing stick drift and a value of 1 is often recommended.
- After setting the Dead Zone values low, put yourself in a firing range and set your controller down.
Observe whether the aim is moving without any input from you. If it does, you are experiencing stick drift. - Increase the Dead Zone values slightly until you no longer experience stick drift.
The exact value will depend on your specific controller, so find the point where stick drift is eliminated for your controller model. - Once you have set the Dead Zone values to eliminate stick drift, make sure to save the changes before exiting the settings menu.
- If you find controller vibration distracting or unnecessary, locate the Controller Vibration setting and turn it off.
This will prevent the controller from vibrating during gameplay.
Audio Settings
This section describes how to adjust the Audio settings to get the best performance and optimum in-game playing experience.
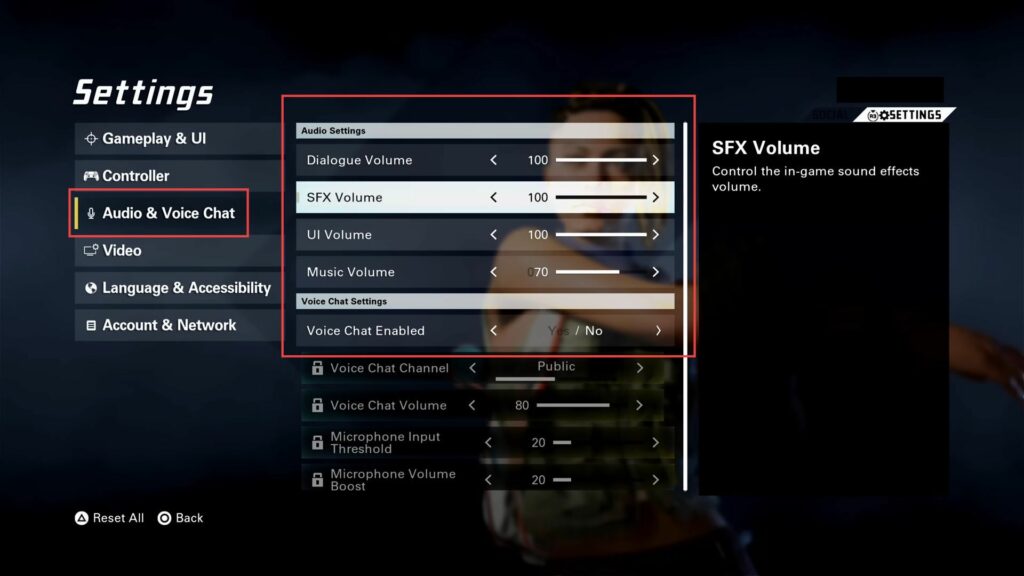
- In the game settings menu, look for the tab labelled Audio & Voice Chat on the left side panel of the settings menu.
- Locate the option for Music Volume in the audio settings and lower the music volume to a level that suits your preference.
Keeping it lower allows you to focus more on the game sounds and in-game communication. - It’s suggested to prefer not to use voice chat during gameplay, but this is a personal preference.
- If you are playing on a PS5 console, access the video settings for optimal performance.
The recommended settings for video will be set automatically for PS5 players. - Be aware that the available settings might differ depending on the platform you are playing on.
PC players may have access to additional video settings not available on console versions. - After adjusting the audio and video settings to your liking, make sure to save the changes before exiting the settings menu.
Video Settings (PS5)
This section explains how to adjust the Video settings to get the best performance and optimum in-game playing experience.
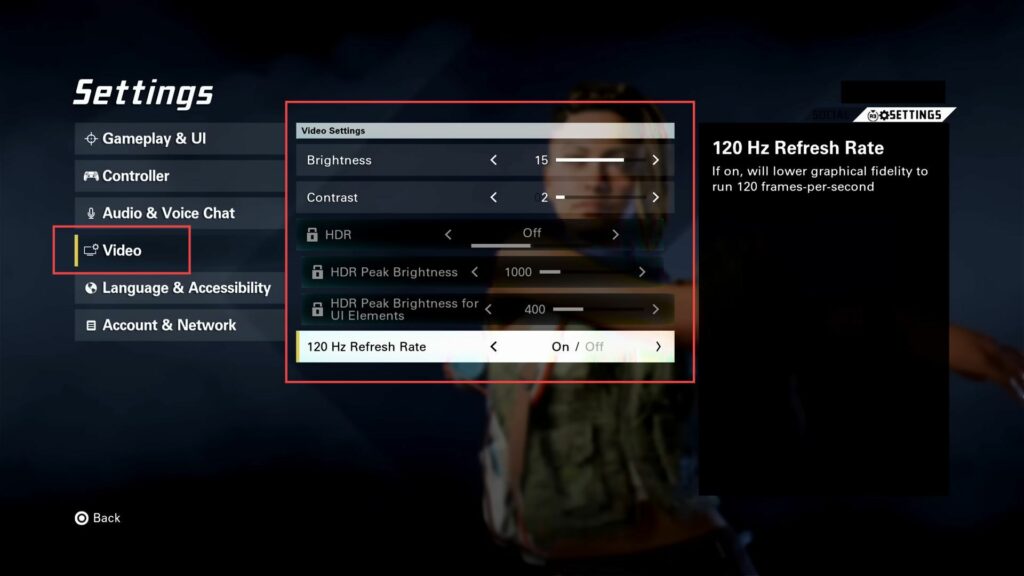
- In the game settings, look for the tab labelled Video on the left side panel of the settings menu.
- If you are playing on one of the newer generation consoles, such as the PlayStation 5, check for an option to enable the 120-hertz refresh rate.
Enabling this option allows the game to run at a higher frame rate, up to 120 frames per second, providing a smoother and more responsive gameplay experience. - Before enabling the 120-hertz refresh rate, ensure that your TV or monitor supports this feature.
Not all displays are capable of running at 120 hertz, so make sure to check your display’s specifications to ensure compatibility. - After adjusting the video settings, make sure to save the changes before exiting the settings menu.
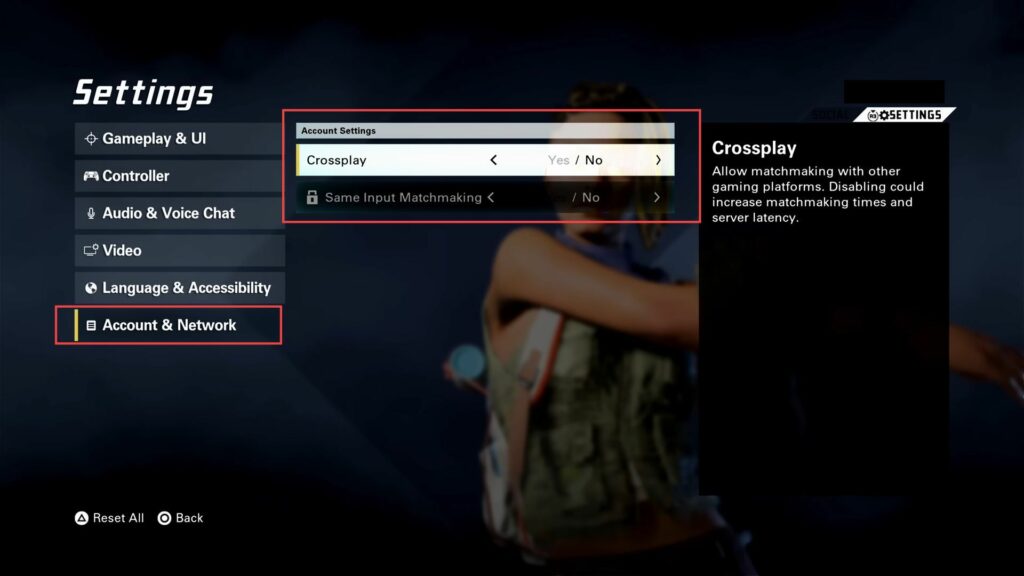
Crossplay Option
This section describes how to adjust the Crossplay option to get the best performance and optimum in-game playing experience.
- First, ensure that your monitor or TV supports the 120-hertz refresh rate.
- On consoles like the PlayStation 5, go to the console’s display settings and look for an option to set the refresh rate to 120 hertz.
- In XDefiant Open Beta, you have the option to enable or disable cross-play, and depending on your preference, enable or disable it.
If you want faster matchmaking and a broader player base, you can enable cross-play. - After setting your cross-play preference and any other video settings, make sure to save the changes before exiting the settings menu.