In this guide, you’ll discover optimal Nvidia control panel settings tailored specifically for enhancing your gaming experience in War Zone 3.
By following these configurations, you can significantly enhance your gameplay, boosting FPS for smoother performance, reducing latency for heightened responsiveness, sharpening visual clarity for improved immersion, and enhancing color vibrancy to make the gaming environment more vivid and captivating.
- First, open up the Nvidia control panel, go to Adjust image settings with the preview section, and select the “Use the advanced 3D image settings” option.
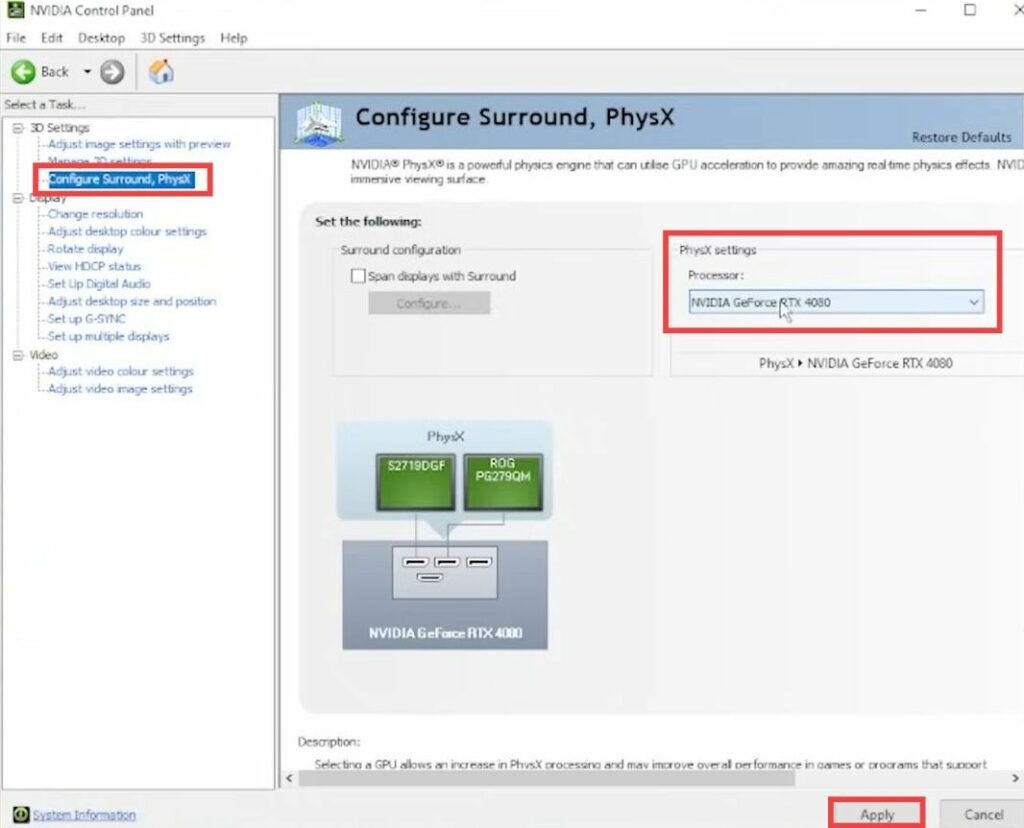
- Click on Configure, Surround, PhysX, and select your actual GPU under the PhysX settings section. After that, hit the Apply button at the bottom.
- Navigate to the Change Resolution tab and make sure that your Refresh Rate is set correctly. Go to Adjust Desktop Color Settings and set the Digital Vibrance to 65%.
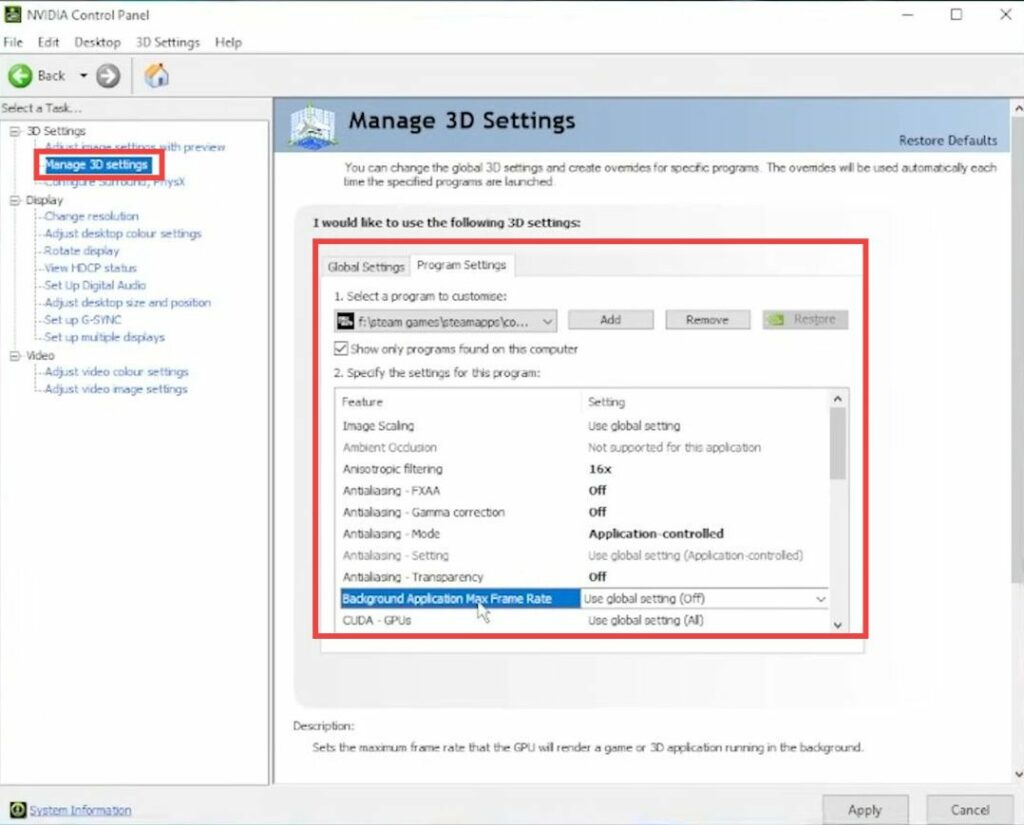
- Go to Manage 3D Settings and go to the Program Settings area. Select COD Warzone 3 in the drop-down menu and set Anisotropic Filtering to 16x to get better textures.
- Turn off Antialiasing-FXAA and Antialiasing-Gamma Correction, then set Antialiasing-Mode to application controlled. After that, turn off Antialiasing-Transparency, and Background Application Max Frame Rate.
- Turn off Low Latency Mode and Max Frame Rate because you can adjust it inside the game. Set the Monitor Technology to Fixed Refresh, turn off Multi-Frame Sampled AA(MFAA), and set OpenGL GDI compatibility to Auto.
- Select your GPU at OpenGL rendering GPU and set the Power Management mode to normal. Set the Preferred Refresh Rate to the highest available and set the Texture Filtering Quality to quality or performance.
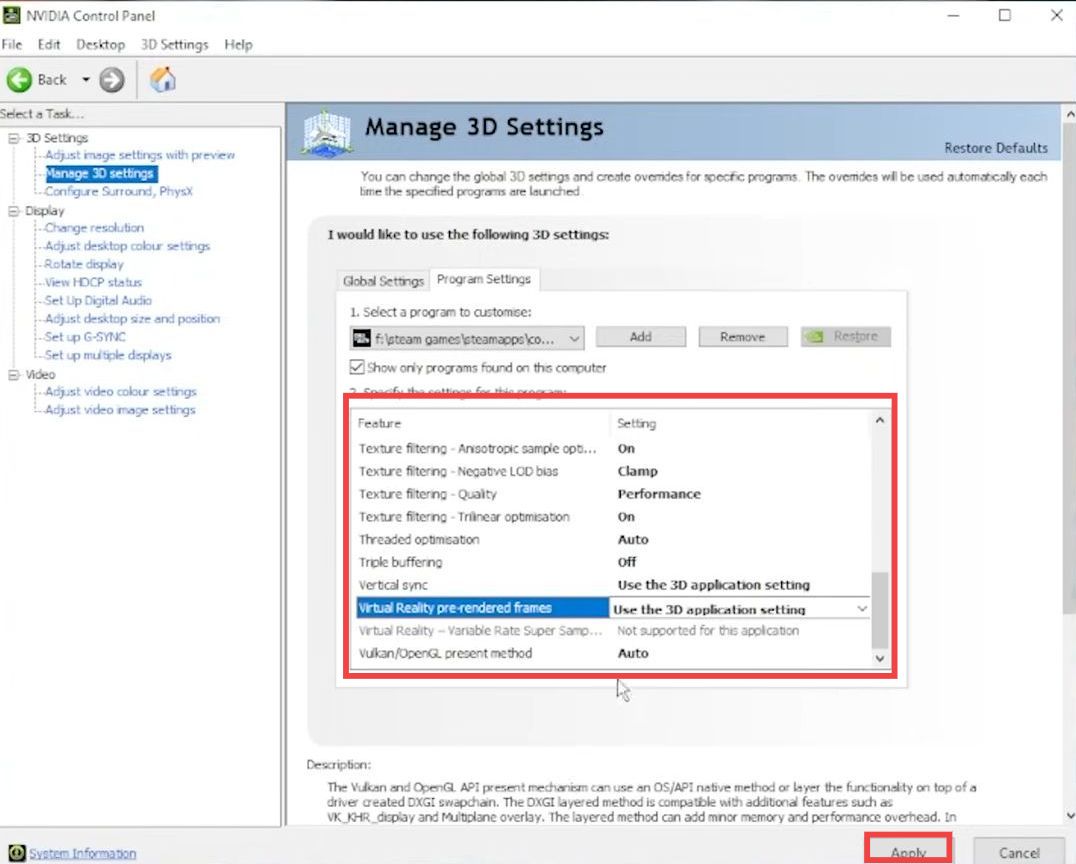
It will set up all the stuff around it. - Turn on Texture filtering – Anisotropic sample optimization, and Trilinear Optimization, then set Negative LOD bias to clamp. Set the Threaded Optimization to Auto and turn off Triple Buffering. Set the Vertical Sync and Virtual Reality pre-rendered frames to Use the 3D application setting. Set the Vulkan/OpenGL present method to Auto and then hit the Apply button.
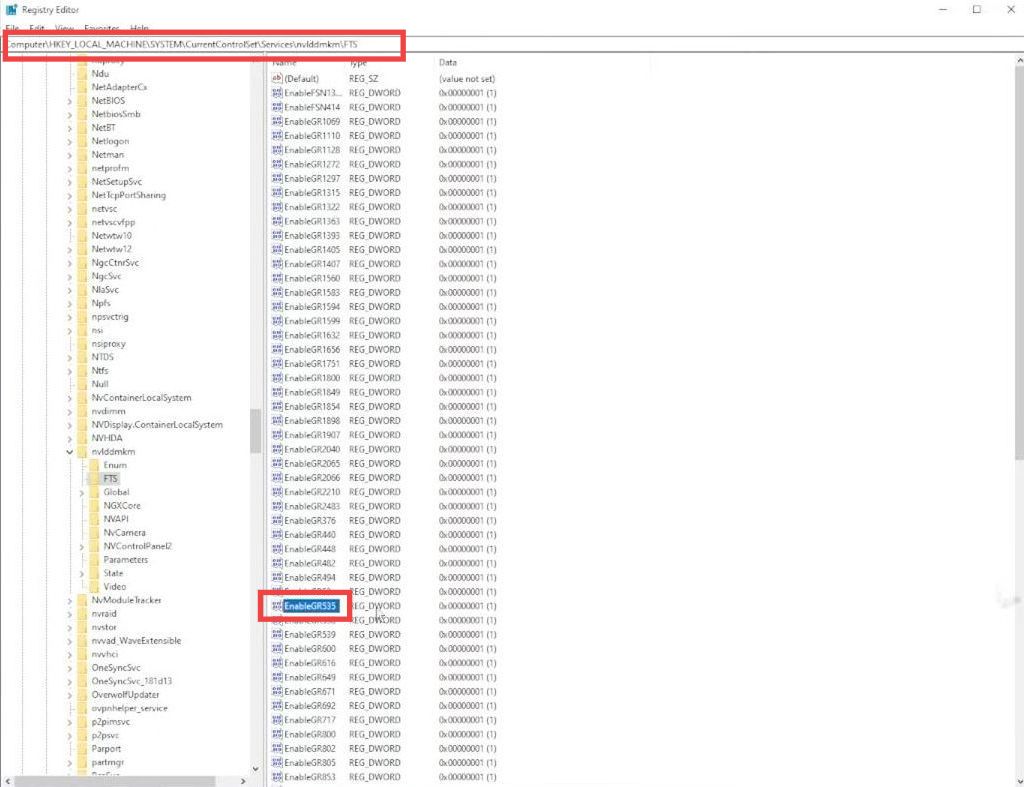
- Now close the Nvidia control panel and tap on the Windows button at the bottom. You have to open up the Registry Editor and navigate to the following directory.
\HKEY_LOCAL_MACHINE\SYSTEM\CurrentControlSet\Services\nvlddmkm\FTS
- Look for EnableGR535 and double-click on it. You have to change the Value Data to 0 and press OK.
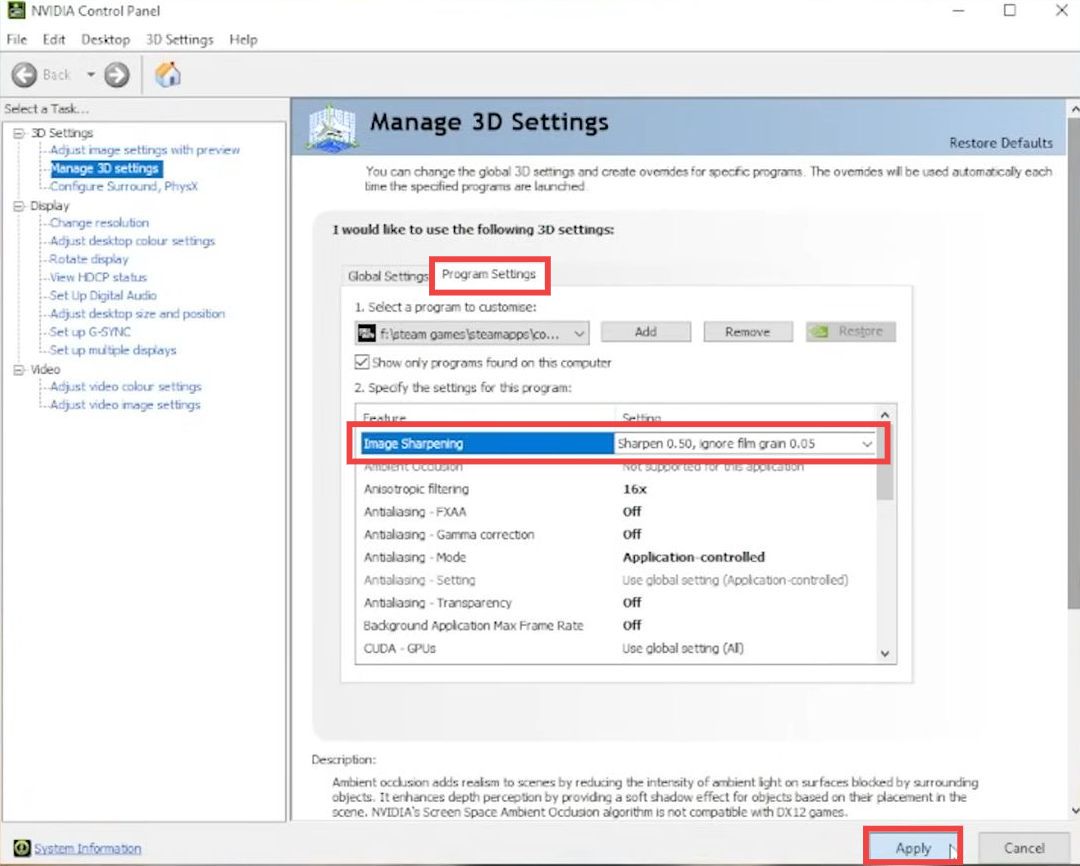
- Next, open up the Nvidia control panel and go to program settings.
You will find that Image Scaling has been changed to Image Sharpening. - Turn on Image Sharpening and set the Sharpen amount to 0.5. After that, set Ignore Film Grain to 0.05 and hit the Apply button.
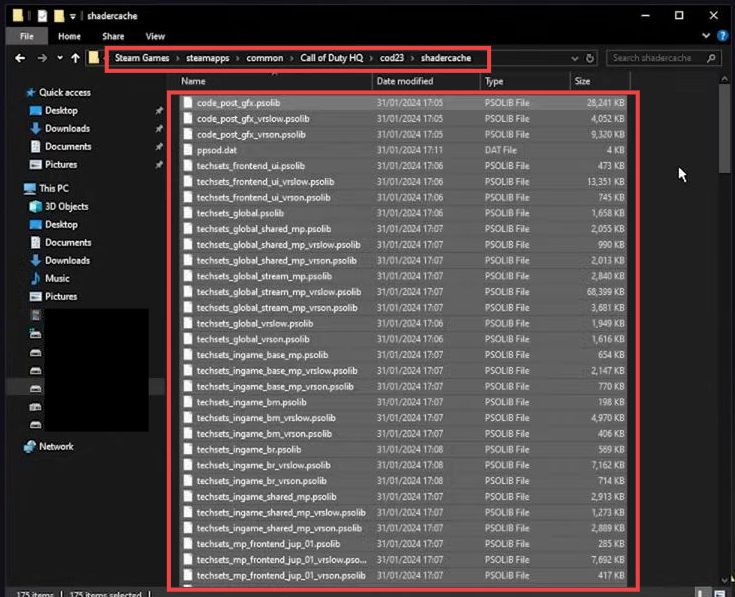
- Now if you have installed your game on Steam, then open the Steam application and go to your game. Right-click on it and go to properties. Click on Installed Files and press the Browse button.
- Go to Cod 23, and open the shader cache folder. Select all the files inside this folder and delete them to ensure the best in-game performance.