In this guide, you will find out the best PC settings for Skull & Bones. By applying all the following settings, you will get maximum FPS and visibility.
Windows optimization
In this section, we will take you through the steps to optimize Windows to get the best in-game performance.
- First, you have to go to the Windows search bar and search “Game Mode.” After that, click on Game Mode, and make sure it is turned on.
- Go to the Xbox Game Bar and disable it because it might cause stuttering in the game. Next, go to Capture to turn off Background Recording and Recorded Audio.

- Now go to Graphics settings and make sure to have an Nvidia card 1000 series or recent.
- After that, you can turn on Hardware- accelerated GPU scheduling to improve the graphics quality. After that, make sure that you have installed the latest GPU drivers.
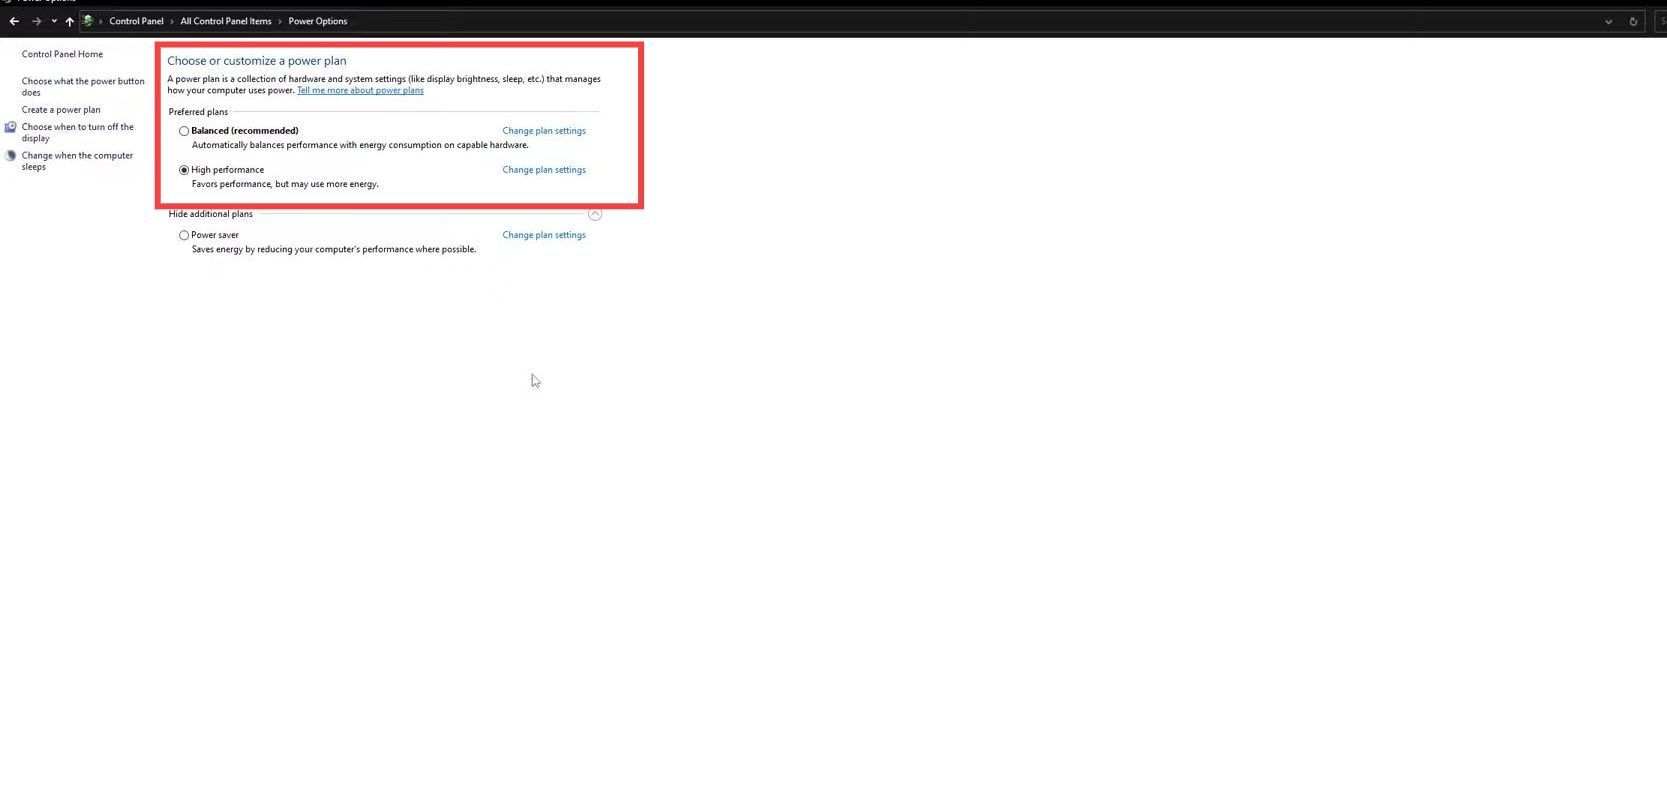
- You have to go to the Power option from the Windows search bar and set the Preferred plans to Balanced or High Performance.
- It is recommended to use the Intelligent Standby List Cleaner software if you don’t have a lot of RAM on your PC.
It will optimize your standby list and also free up the memory. It will also prevent stuttering. - Open the software, notice your total memory, and then half of your actual memory in the input “Free memory is lower than” box. After that, hit the Start button. and it will run automatically.
GPU settings
This section describes how to make necessary changes in GPU settings to boost the in-game FPS.
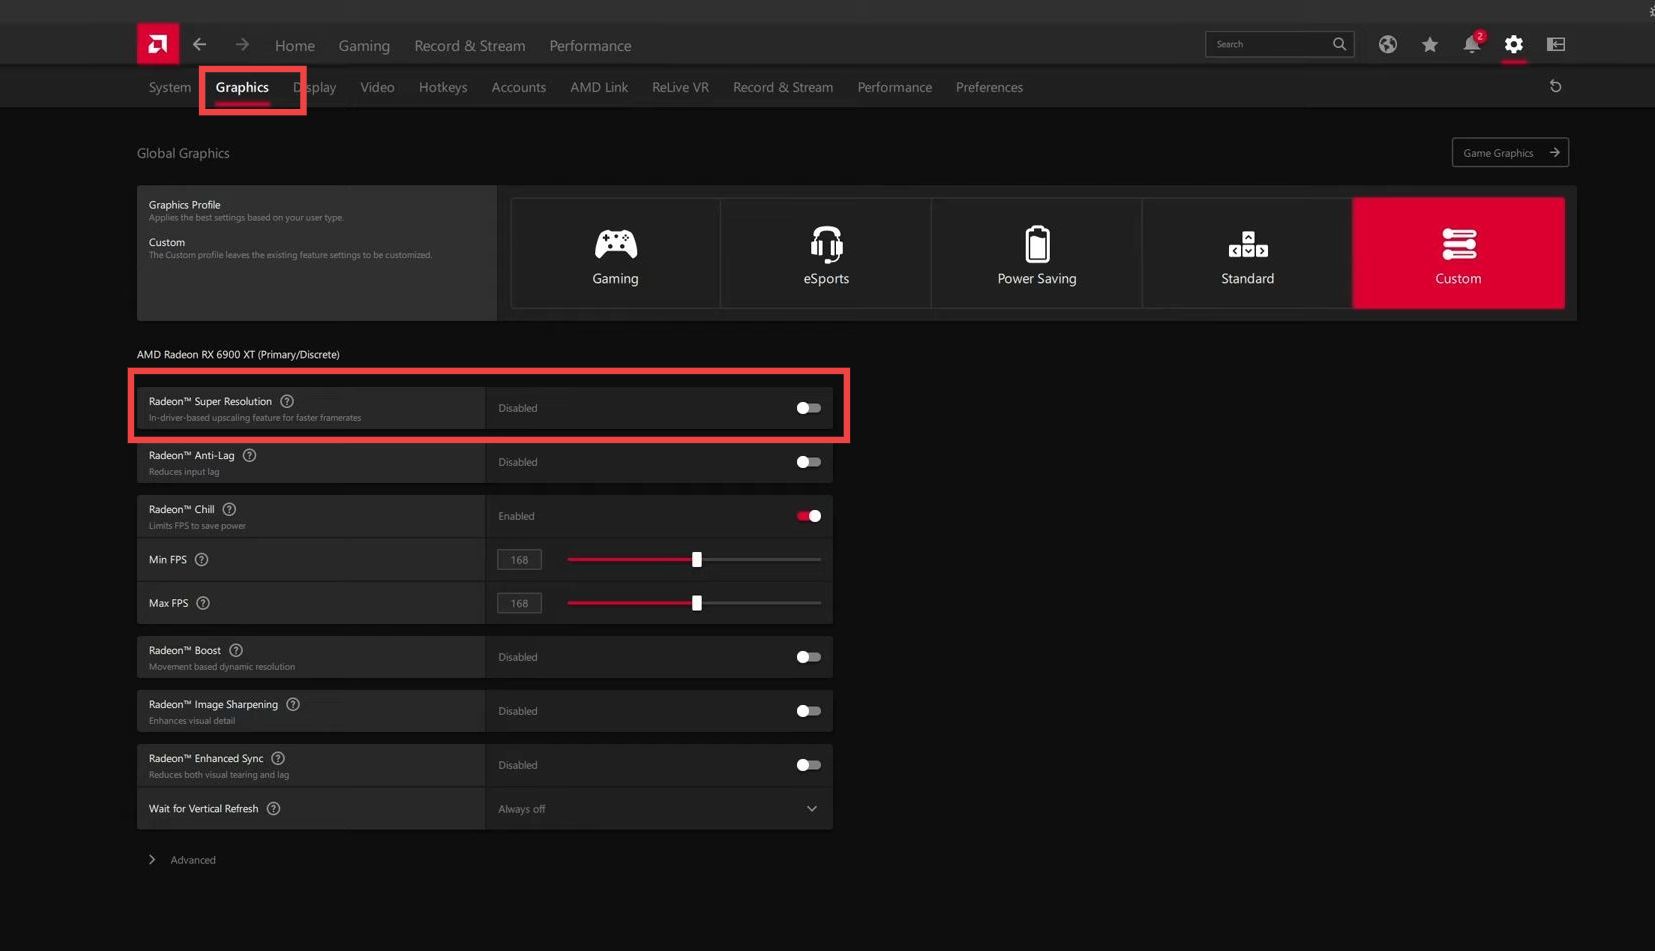
- If you are using Radeon GPU, then open up the Radeon control panel and navigate to the Graphics tab. You have to turn on Radeon Super Resolution if you’re struggling with your FPS.
With this, you can save 15 to 20% of FPS.
- If you are using the Nvidia graphics card, then open the Nvidia control panel and click on Manage 3D Setting on the left side. Turn on Low latency mode, and set the Max frame rate to less than 170 HZ if you want to stay in your g-sync range.
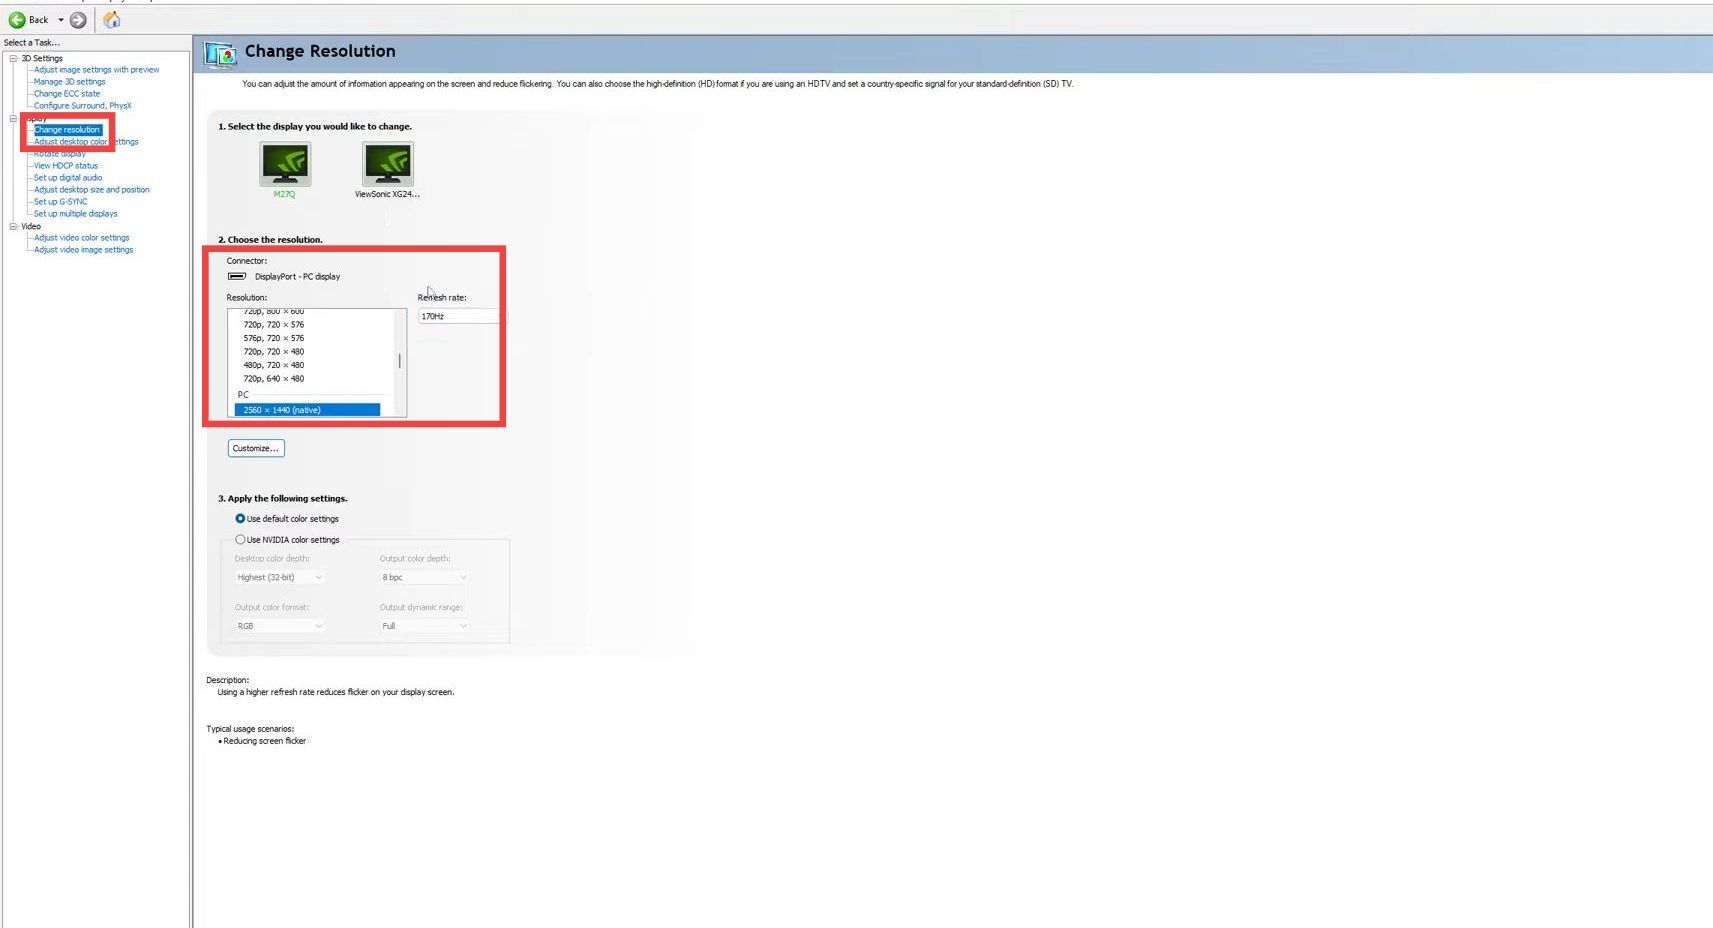
- You can uncheck Change ECC State if you have access to it. Now click on Change resolution and set the resolution according to your monitor. Make sure to use the maximum Refresh Rate available on your monitor.
- Now tap on Set up G-Sync on the left side and enable G-Sync. After that, choose your display screen.
In-game settings
In this section, we will take you through the steps to configure in-game settings to boost your FPS and overall performance.
- Launch the game and navigate to the settings. Go to the Visual tab, make sure that you’re playing on your native resolution on your monitor, and turn on Vsync. Navigate to the Graphics, turn off Adaptive Quality, and set the Shadows to medium.
It will increase 12% of your FPS. - If you don’t have the LSS or FSR, then you can set the Upscaling Type to TAA and set the Upscaling Mode to Quality. If you have a lot of Vram, then you can set the Environment Details to High or Very High. Otherwise, set it to medium.
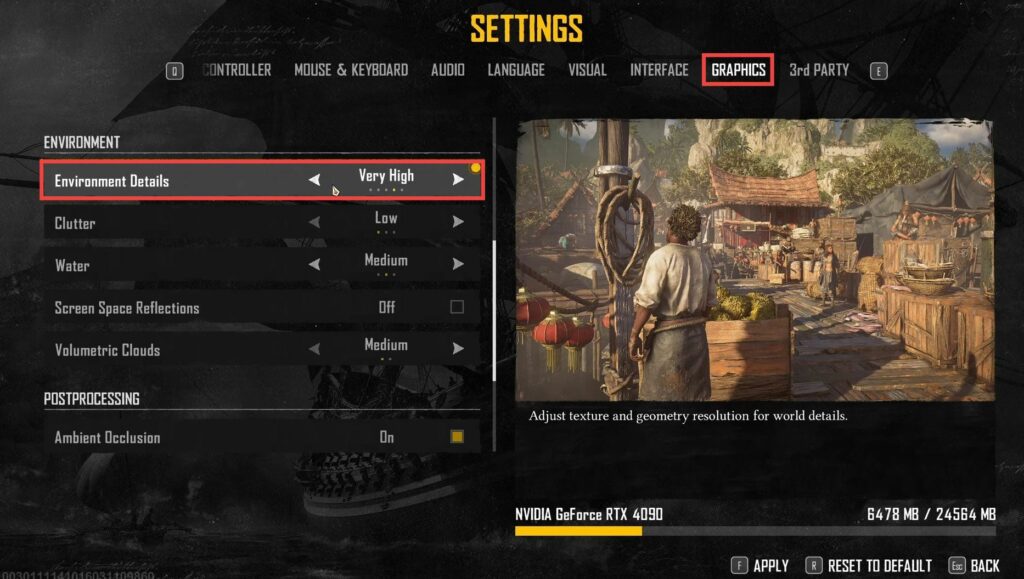
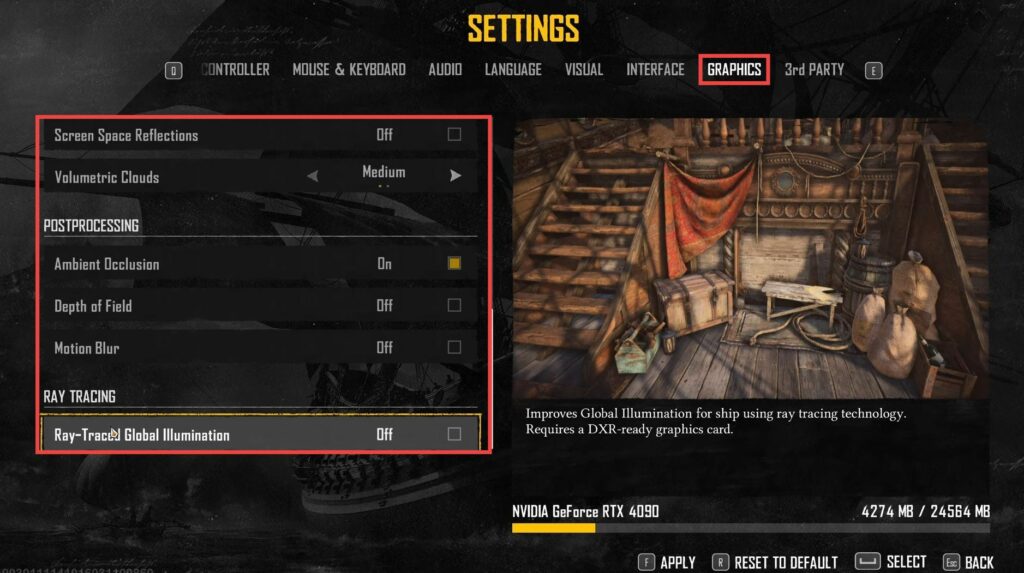
- Set the Clutter to low and the Water to medium. After that, turn off Screen Space Reflection to get a 5% boost in your FPS.
- Set the Volumetric Clouds to medium and turn on Ambient Occlusion. After that, turn off Depth of Field and Motion Blur to have the best visual quality. Finally, disactivate Ray Tracing to stabilize your FPS.