If you are getting the Content Servers Unreachable error in Steam, then you have come to the right place. This guide will let you know how to get rid of this problem.
Restart Steam
In this section, we will take you through the steps to Restart Steam. It may helo to fix the issue.
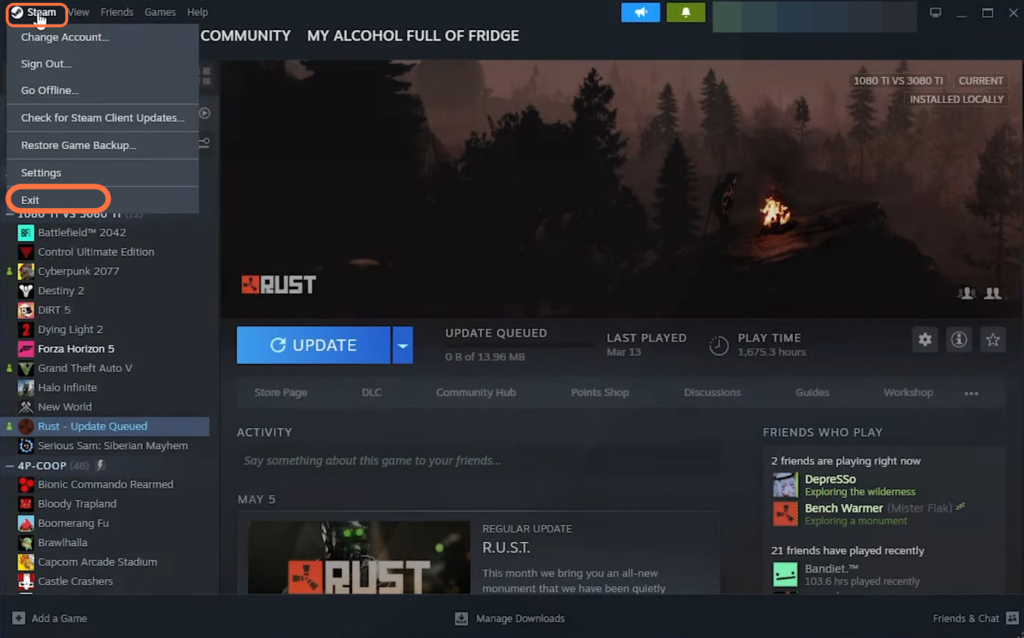
- The first thing you will need to do is locate the Steam application on your computer screen and click on the Steam logo at the top left corner of the screen.
It will open up a dropdown menu. - In the dropdown menu, click on the “Exit” option to close the Steam application completely.
- Once Steam is closed, wait a moment, and then relaunch the Steam application.
Change the Steam download region
This section describes how to change the Steam download region in order to fix the issue. If the closest server doesn’t work well, you can try a nearby one.
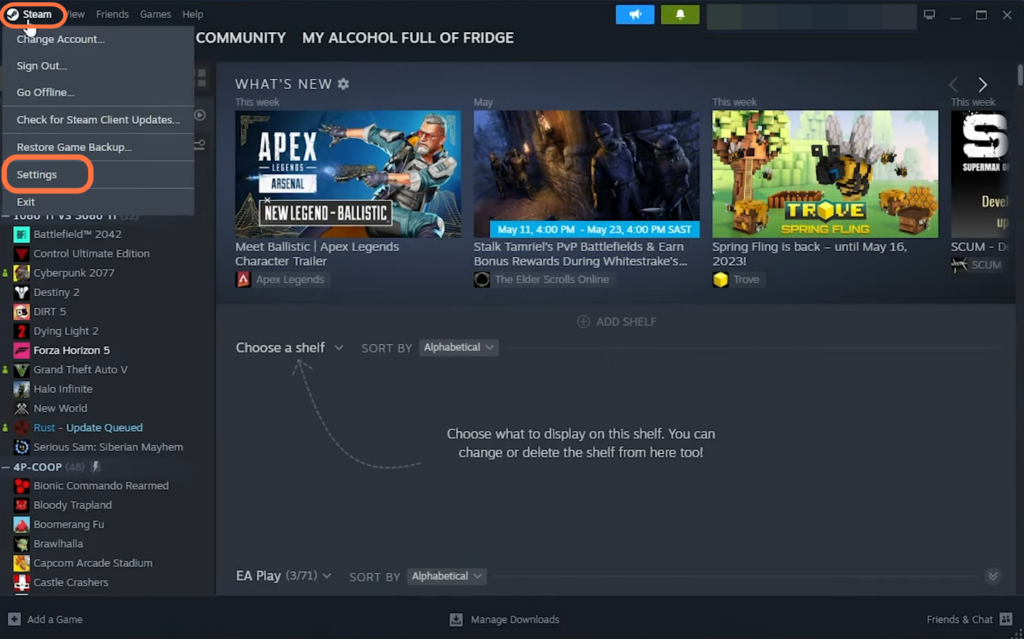
- You have to click on Steam at the top-left corner of the window.
It will open up a drop-down menu.
- In the dropdown menu, navigate to the “Settings” option and click on it.
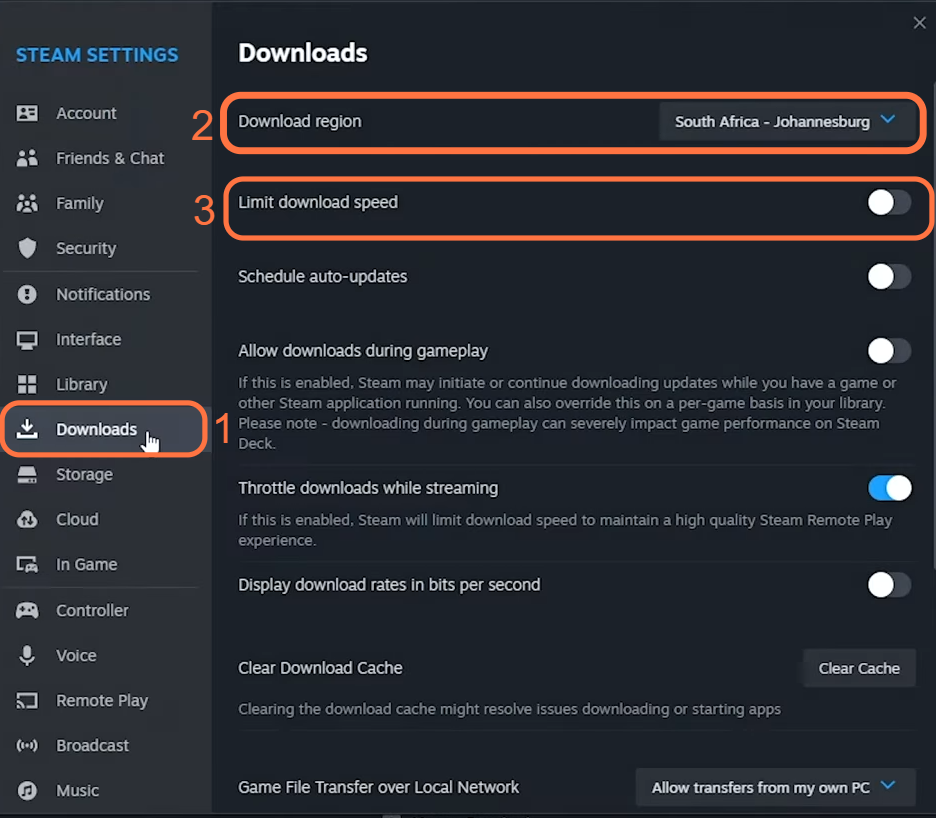
- Look for a tab labelled “Downloads” on the left-hand side of the interface and click on it.
You will be able to access the settings related to your downloads there. - Once you are in the “Downloads” section, navigate to the “Download Region” option and click on the drop-down menu next to it.
A list of available server options will appear. - From the list of server options, select the server that is closest to your location.
- If you experience any issues with your currently selected server, you need to choose an alternative server by selecting another one from the list. Look for nearby servers that are still geographically close to your location.
- After that, disable the Limit download speed.
Change DNS servers on Windows 11
In this section, we will take you through the steps to change DNS servers on Windows 11. This will result in a much faster internet browsing experience.
- If you are using Windows 11, you need to right-click the Networking icon at the bottom right corner of the screen.
This will bring up a context menu with various options. - From the context menu, select Network and Internet settings and navigate under your current connection.
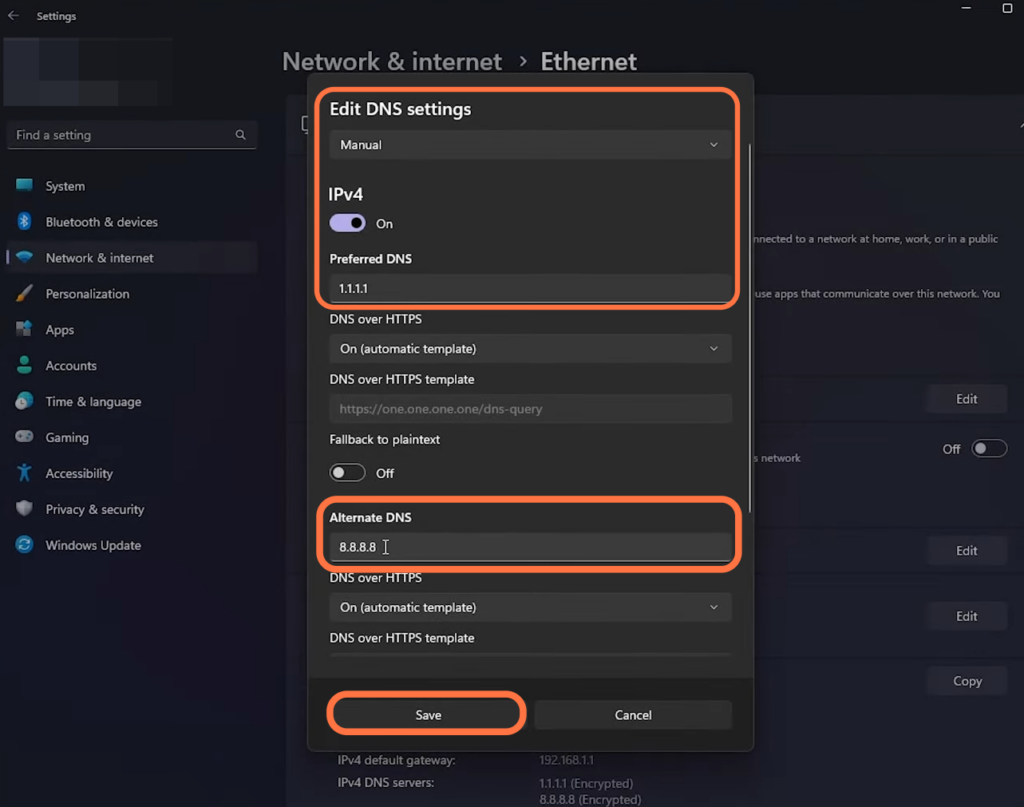
This could be your Wi-Fi network or Ethernet connection, depending on how you are connected to the internet. - Scroll down to find the DNS server assignment and click on the Edit button. Locate the option to change the assignment method and set it to “Manual.”
- After that, enable IPv4. Input 1.1.1.1 for your Preferred DNS, input 8.8.8.8 for the Alternate DNS and hit the Save button.
Change DNS servers on Windows 10
This section will take you through the steps to change DNS servers on Windows 10.
- Open the Start menu on your Windows 10 computer and search for “Control Panel“. Click on the Control Panel app to open it.
- Click on the “Network and Internet” category and you will find an option called “Network and Sharing Center” there.
You will see a section that displays your current internet connection. - Click on your internet connection to select it and go to properties.
- Scroll down to the “Internet Protocol version 4 (TCP/IPv4)” option, checkmark it and then click on properties.
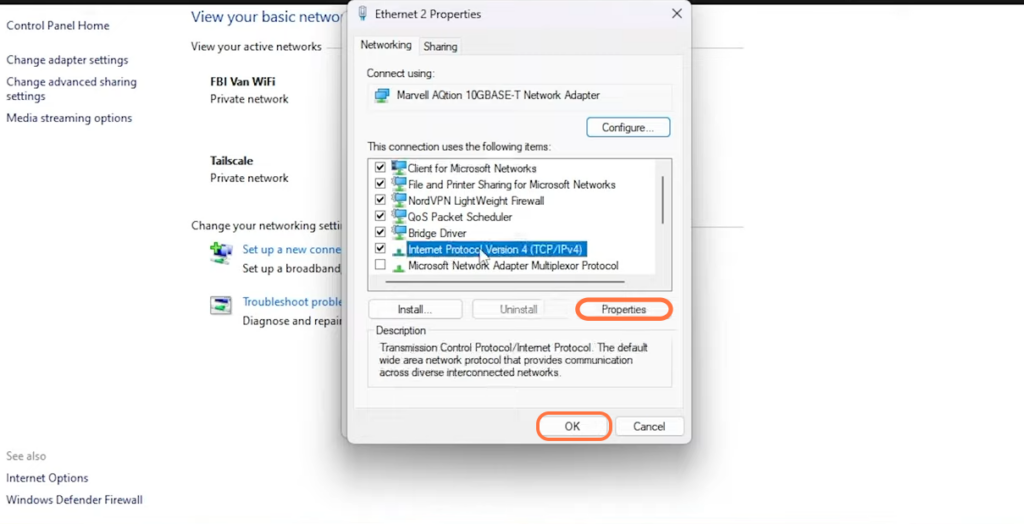
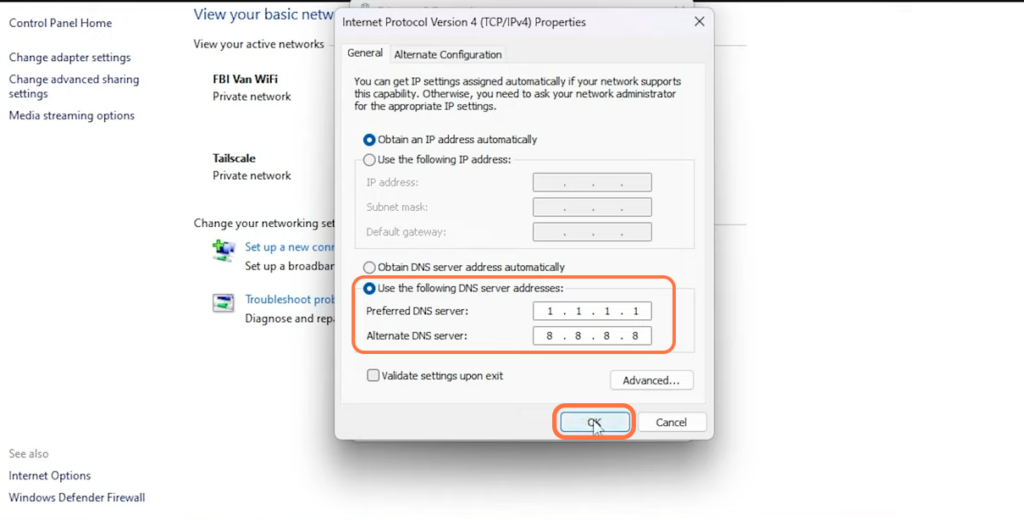
- Look for an option called “Use the following DNS server addresses:” and select the checkbox next to it.
- In the “Preferred DNS server” field, input the address “1.1.1.1” and in the “Alternate DNS server” field, input the address “8.8.8.8“. After that, click on the “OK” button.
Flush DNS
This section describes how to clear the DNS cache. By following the steps below, you will be able to flush it by using a command in the command prompt.
- Press the Windows key + R on your keyboard simultaneously.
This will open the Run window. - In the Run window, type “cmd” and press Enter.
- In the Command Prompt window, type “ipconfig /flushdns” and press Enter.
This command will clear your DNS cache.
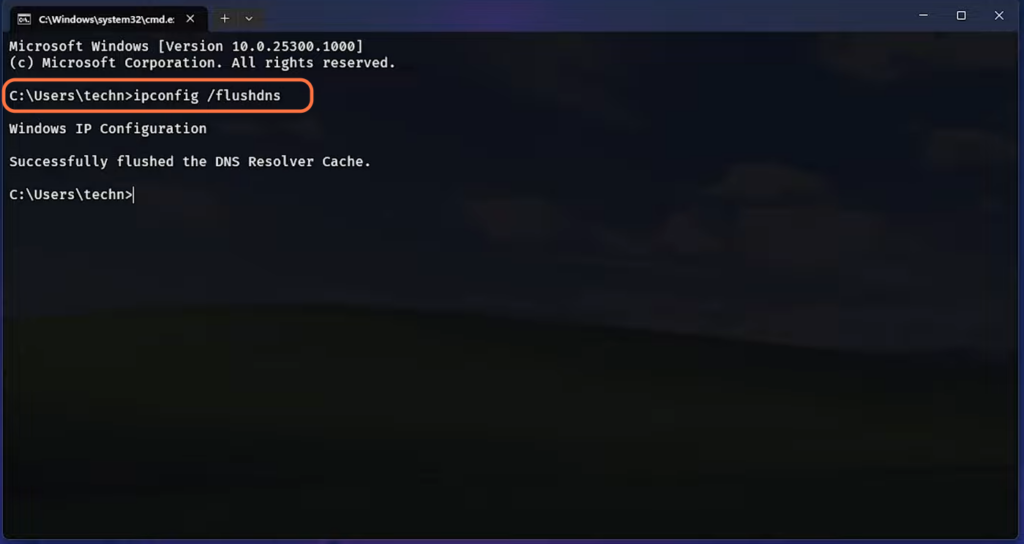
After that, restart Steam and check if things are working properly.
Use a Wired connection
If you are currently using a wireless connection and experiencing shaky or unstable internet connectivity, consider using a wired connection if it is possible.
This involves connecting your device directly to the router using an Ethernet cable.
Try a VPN
If you have access to a VPN service, you need to choose a VPN provider that suits your needs. There are numerous VPN providers available, so you can select one based on factors such as reputation, speed, and available servers.
After setting up VPN, restart Steam to ensure that it uses the newly established VPN connection.