In this guide, you will learn how to fix the controller not working/not detected in Assassin’s Creed Mirage. First, you have to download x360ce, copy x360ce to the Assassin’s Creed Mirage game folder, x360ce setup for AC Mirage, and add AC Mirage to x360ce.
After that, check controller bindings in-game, fix Playstation/Dualshock issues, toggle Steam configuration support, and toggle the Steam input. Next, launch via Steam Big Picture, and update controller firmware (Xbox controller) to resolve the issues.
Download x360ce
In this section, we will take you through the steps to download x360ce.
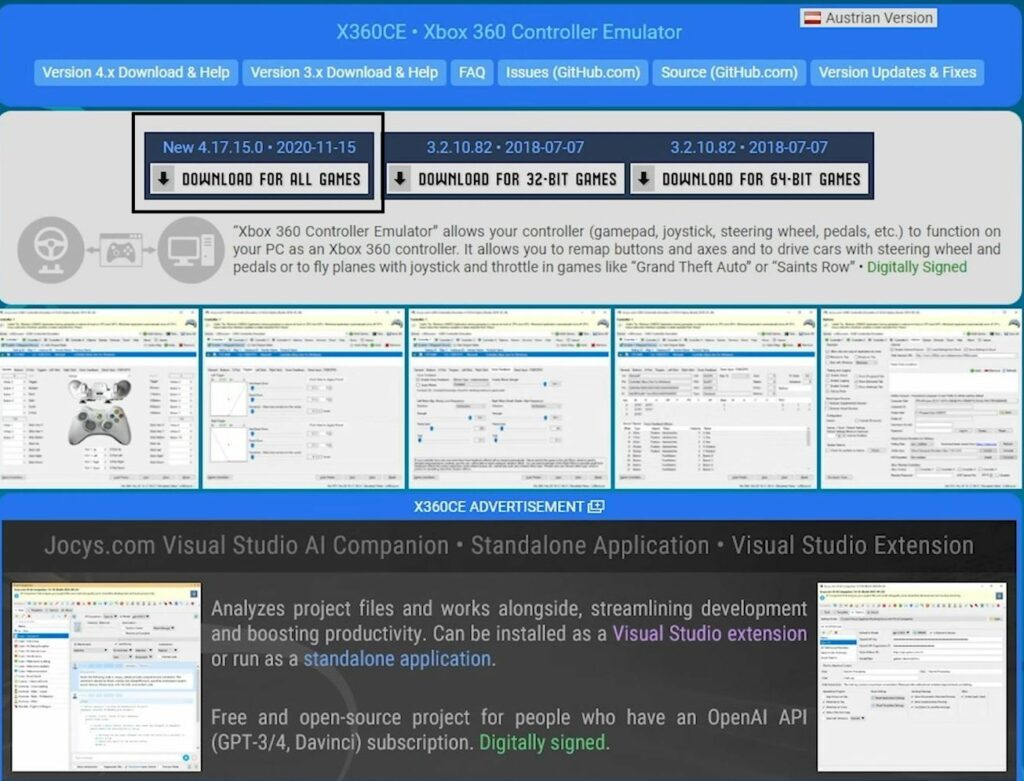
- First, you have to download X360 CE and then open the zip file to extract its contents.
Copy x360ce to Assassin’s Creed Mirage game folder
This section describes how to copy x360ce to the Assassin’s Creed Mirage game folder.
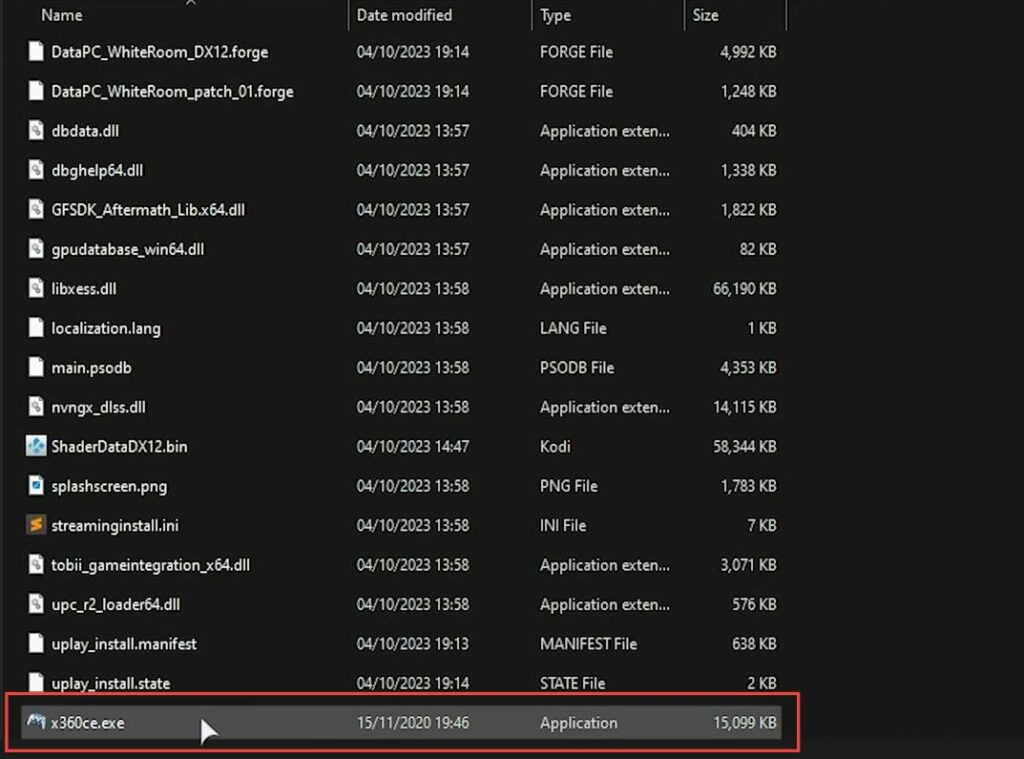
- Open File Explorer, and navigate to the directory where the game is installed. Copy the X360 CE file usually named x360ce.exe from your extracted folder, and paste the copied file into the game’s directory.
- Now, the X360 CE file should be in the same location as the game’s executable file.
This will enable your controller to work with Assassin’s Creed Mirage as you intended.
x360ce setup for AC Mirage
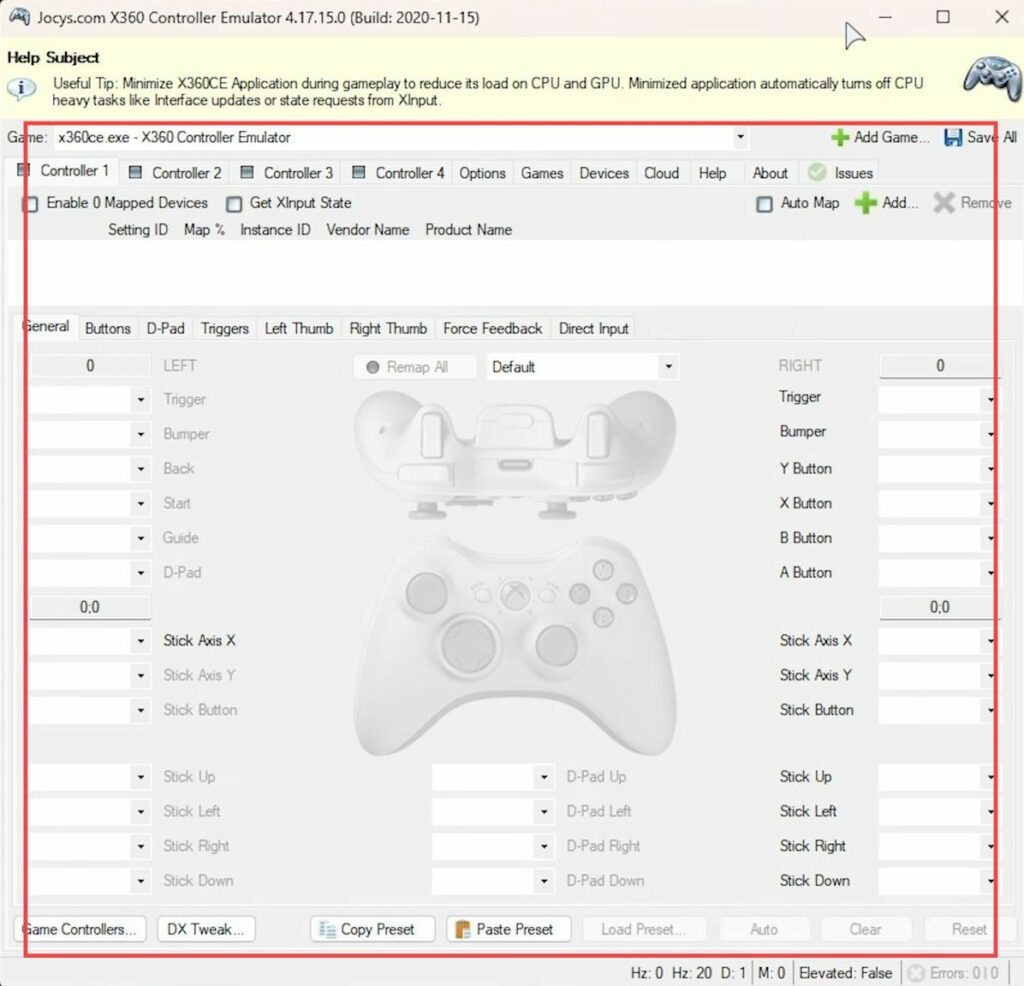
This section explains how to set up the X360 CE application.
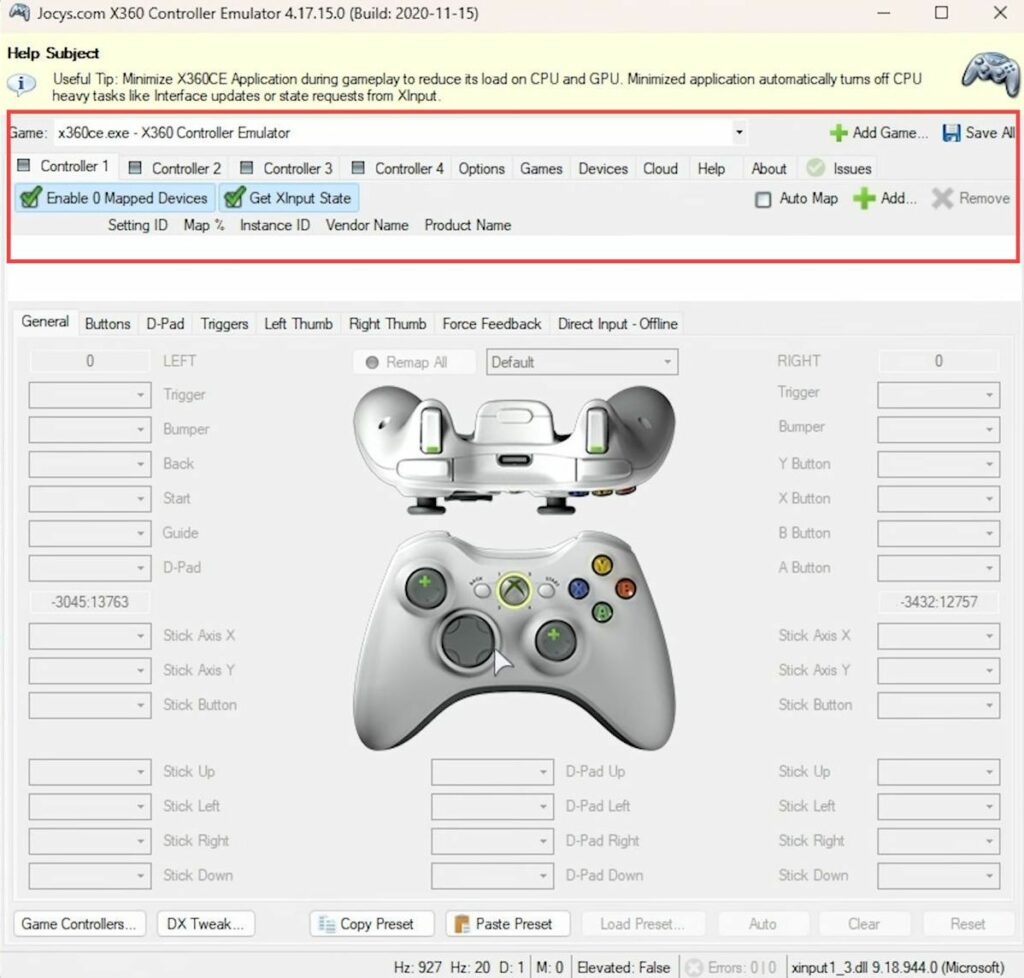
- Double-click the X360 CE application to launch it. If you encounter a warning about needing to download the XInput 1.3 DLL, then click on Create under Fix.
- If prompted to search automatically for settings for a new device, ensure that the option is checked and click Next. A driver will be downloaded and installed automatically. Click Finish once it’s done.
- If you don’t see any controller input when you move the sticks or buttons, make sure to Enable and Get XInput in the application.
You should see the controller inputs reflected on the image shown in the application.
Add AC Mirage to x360ce
This section will take you through the steps to add AC Mirage to x360ce.
- Open X360 CE and select AC Mirage from the drop-down menu at the top. If you don’t see it listed, click Add a Game and navigate to the acmarrage.exe file in the game’s directory.
- Make sure AC Mirage is selected, and in the Hook Mask section, ensure that com, p-i-d, v-i-d, stop, LL, and s-a are all checked. After that, click Save All to save the settings.
- Start the game by clicking Start in X360 CE. Your controller should now work properly in the game. If it doesn’t, follow these additional steps:
- On the Games tab, select AC Mirage and make sure that all the files listed under XInput Files have the x64 option ticked, and DInput is unticked.
- Click Save All again, select AC Mirage, and click Start to launch the game once more.
Check Controller bindings in-game
This section explains how to check controller bindings in-game to resolve the error.
- Open the game options by heading to the Options tab in the game, go to the Controls section at the top, and select Customize Controls. Ensure all of your settings are properly configured.
- Review and set up any key bindings or button mappings for various actions, including general controls, gameplay actions, and combat.
- If any of the options are not properly configured or if you’re experiencing issues with your controller, go back to the specific section and ensure that everything is set up correctly for your controller. Make sure that your Xbox 360 controller emulator is running.
- To play the game in the future, you should be able to launch it manually. If your controller still isn’t working, open X360 CE, go to the Games tab, select AC Mirage, and click Start.
- If you want quicker access to this setup, right-click on X360 CE and choose Create Shortcut to place it on your desktop or in a convenient location.
- While using this program, it’s advisable to minimize it in the background to reduce CPU and GPU load.
Avoid closing it, as that may cause issues with the controller modifications.
Fix Playstation/Dualshock issues
In this section, we will take you through the steps to fix Playstation/Dualshock issues.
- If you’re using a PlayStation controller and want to use it with the game, consider using a tool called DS4Windows to enable compatibility.
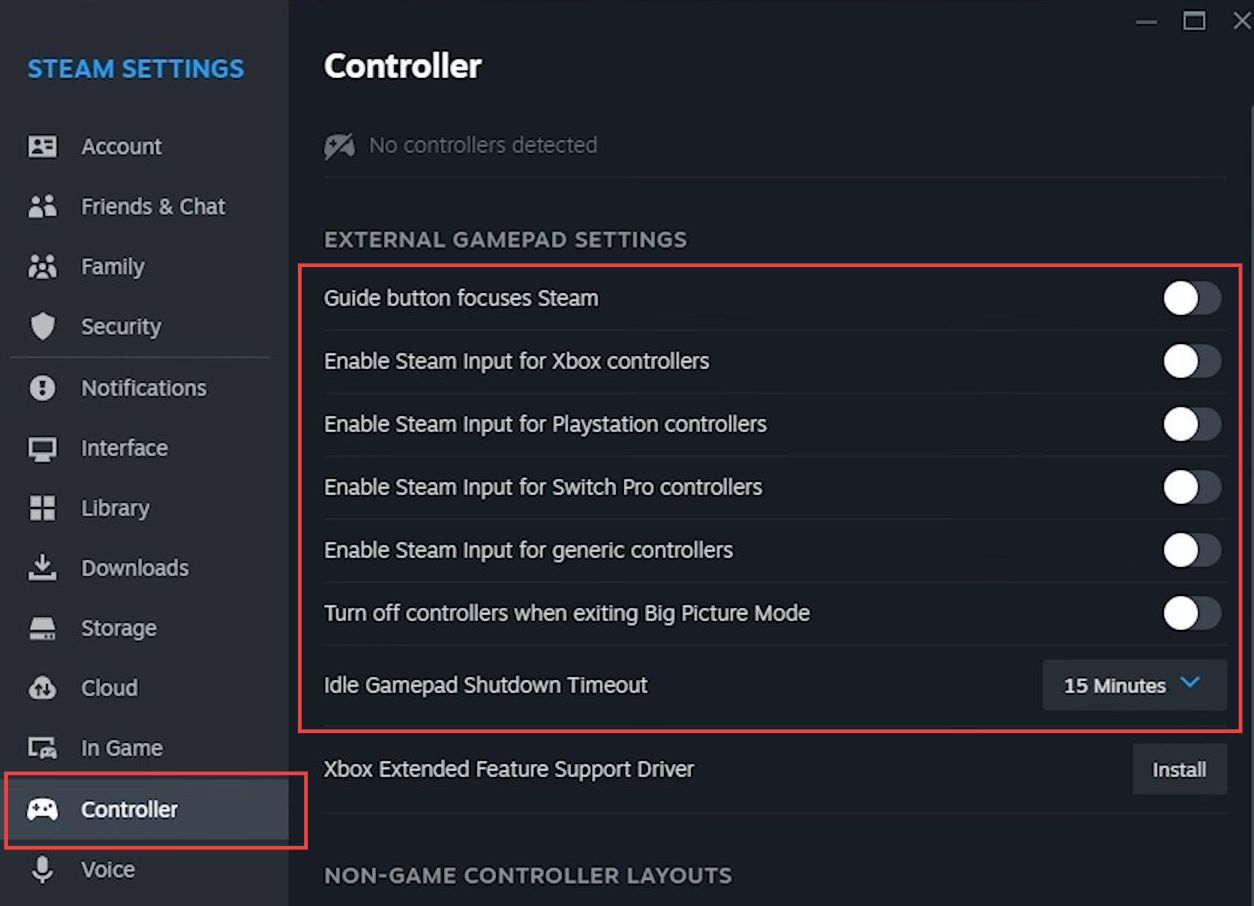
Toggle Steam Configuration Support
In this section, we will take you through the steps to toggle Steam configuration support.
- If you’re experiencing controller issues and want to try a different approach, you can toggle Steam configuration support for controllers.
This method is particularly useful if you own the game on Steam. - Open the Steam client on your computer, and click on Steam to access the drop-down menu. After that, tap on Settings.
- Now you need to go to the Controller section, where you will see an option to enable or disable controller support for various controllers. Depending on your controller type, you can either enable or disable support. If it’s currently enabled, try disabling it, and if it’s disabled, try enabling it.
- Adjust this setting to your preferences and needs.
Enabling it will allow Steam to manage your controller settings while disabling it leaves control to the game itself. - After making the changes, close the Settings window, and launch the game to see if the controller issues have been resolved with the new configuration setting.
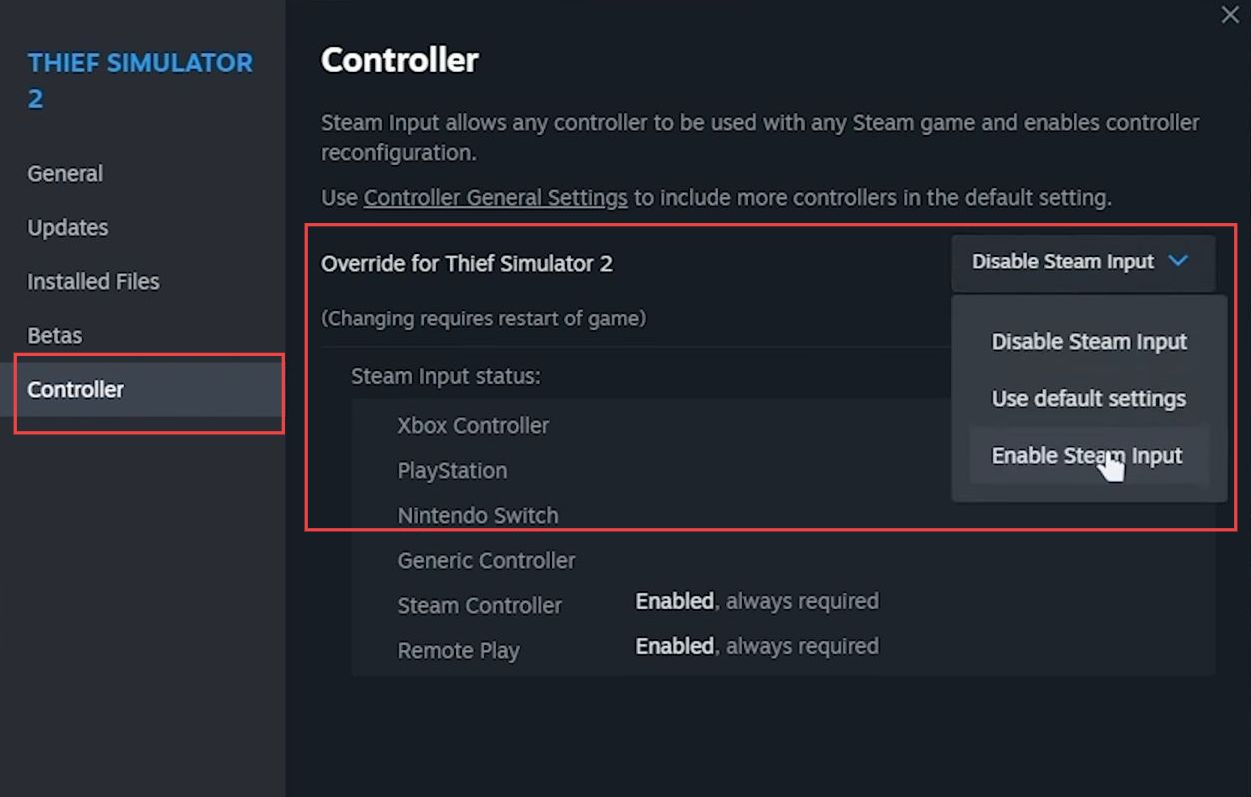
Toggle Steam Input
This section describes how to toggle Steam input to resolve the error.
- Right-click on the game in your Steam library, select Properties, and go to the Controller tab.
On the Controller tab, you will find a dropdown menu labeled Steam Input Per-Game Setting. This dropdown determines whether Steam Input is enabled, disabled, or set to the default configuration for the game. - Change the dropdown setting from Default to Disable Steam Input, and click the OK button to save your changes. Launch the game again to check if the controller is now functioning correctly.
- If the controller is still not working as expected, you can return to the Controller settings for the game and change the dropdown from Disable Steam Input to Enable Steam Input to see if that resolves the issue.
Launch via Steam Big Picture
This section explains how to fix the error by launching via Steam Big Picture.
- Open Steam on your computer and click the Big Picture Mode button in the top right corner.
This will switch you to Steam’s Big Picture Mode, which is designed for a controller-friendly experience. - Navigate to the game you want to play using your controller. You can browse your library or use the built-in search function to find the game.
- Once you’ve located the game, select it by highlighting it and pressing the appropriate button on your controller to start the game. Enjoy playing the game in Big Picture Mode with your controller and to exit this Mode, press the Escape button on your controller.
- In the power menu, select Exit Big Picture Mode.
This will take you back to the standard desktop version of Steam.

Update controller firmware (Xbox Controller)
This section will take you through the steps to update the controller firmware (Xbox Controller).
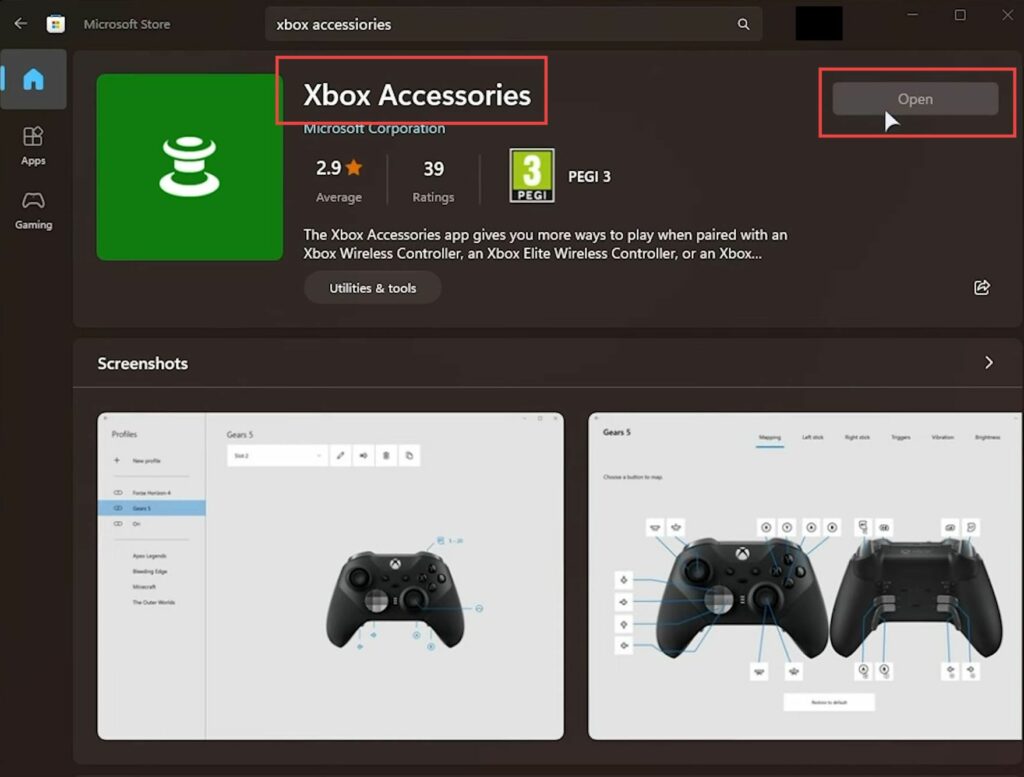
- Open the Microsoft Store on your computer, and use the search bar to search for Xbox Accessories. Locate the app, and click on it.
- On the Xbox Accessories app page, click the Get button to download and install the app.
- Once the app is installed, open it, and connect your Xbox controller to your computer using a USB cable or the wireless adapter. In the Xbox Accessories app, click on the image of your connected controller.
This will take you to the controller’s settings and details. - Look for options like Update firmware, If available, click on this option. Follow the on-screen instructions to update your controller’s firmware.
This process may take a few minutes. - Once the update is complete, your controller’s firmware will be up to date, and it may improve compatibility with your PC and games.