In this guide, you will find several methods to fix the crash on Startup/Not Launching errors in MW3. Y
Update Windows & GPU
In this section, we will take you through the steps to update the Windows and GPU to fix the error.
- First, make sure your Windows operating system is up to date. Go to Windows settings and install any available Windows updates.
- Additionally, ensure that your graphics card driver is also up to date. You can typically do this through the software provided by your graphics card manufacturer, such as Nvidia, AMD, or Intel.
Keep an eye on graphics driver updates, as the game may not explicitly prompt you to update Windows, but it might complain about an outdated graphics driver.
Verify Game Files (Steam)
This section describes how to fix the error by verifying game files for the Steam client.
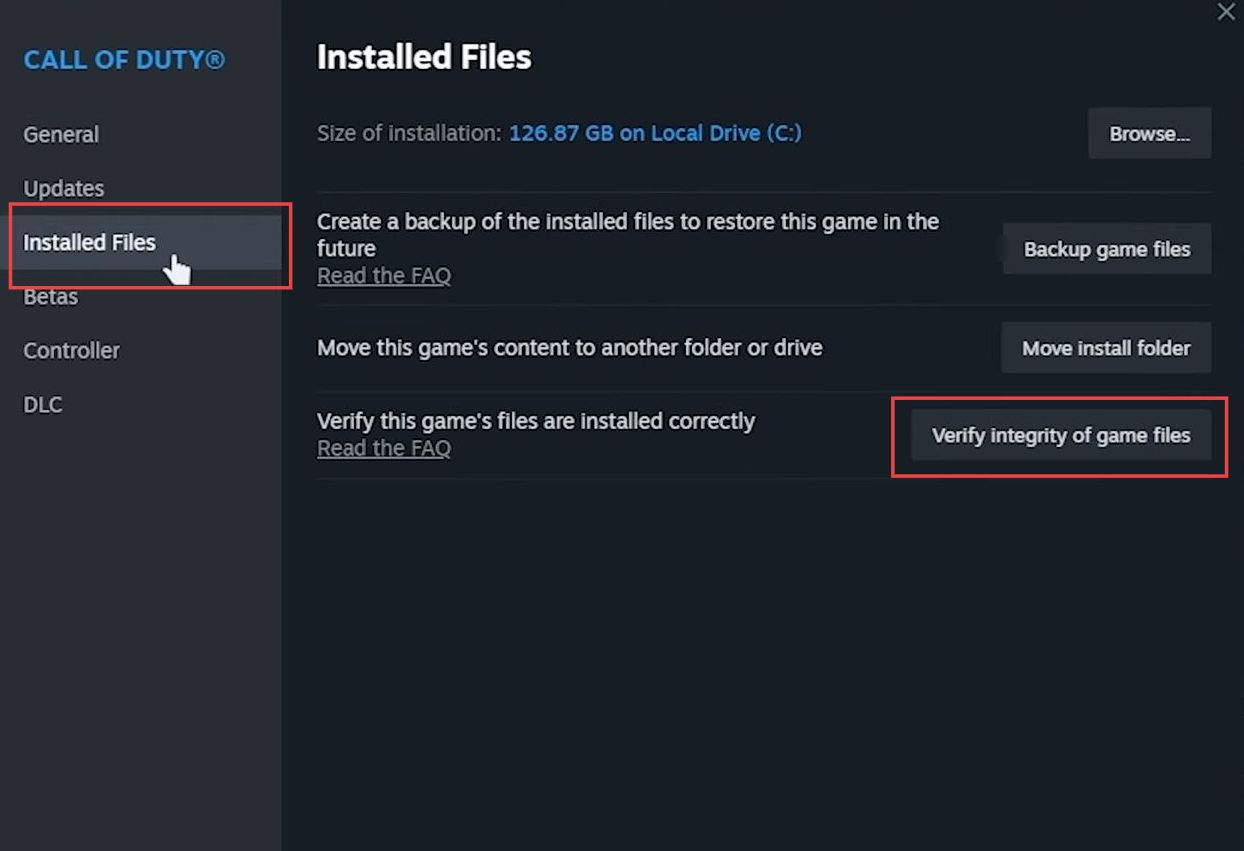
- Open the Steam client on your computer, and locate the Call of Duty game in your Steam library. Right-click on the game title to open a menu of options and select Properties.
- You have to navigate to the Installed Files tab and click on the Verify Integrity of Game Files button.
Steam will then check and repair any corrupted or missing game files, if necessary.
Verify Game Files (Battle.net)
This section will take you through the steps to fix the error by verifying game files for the Battle.net launcher.
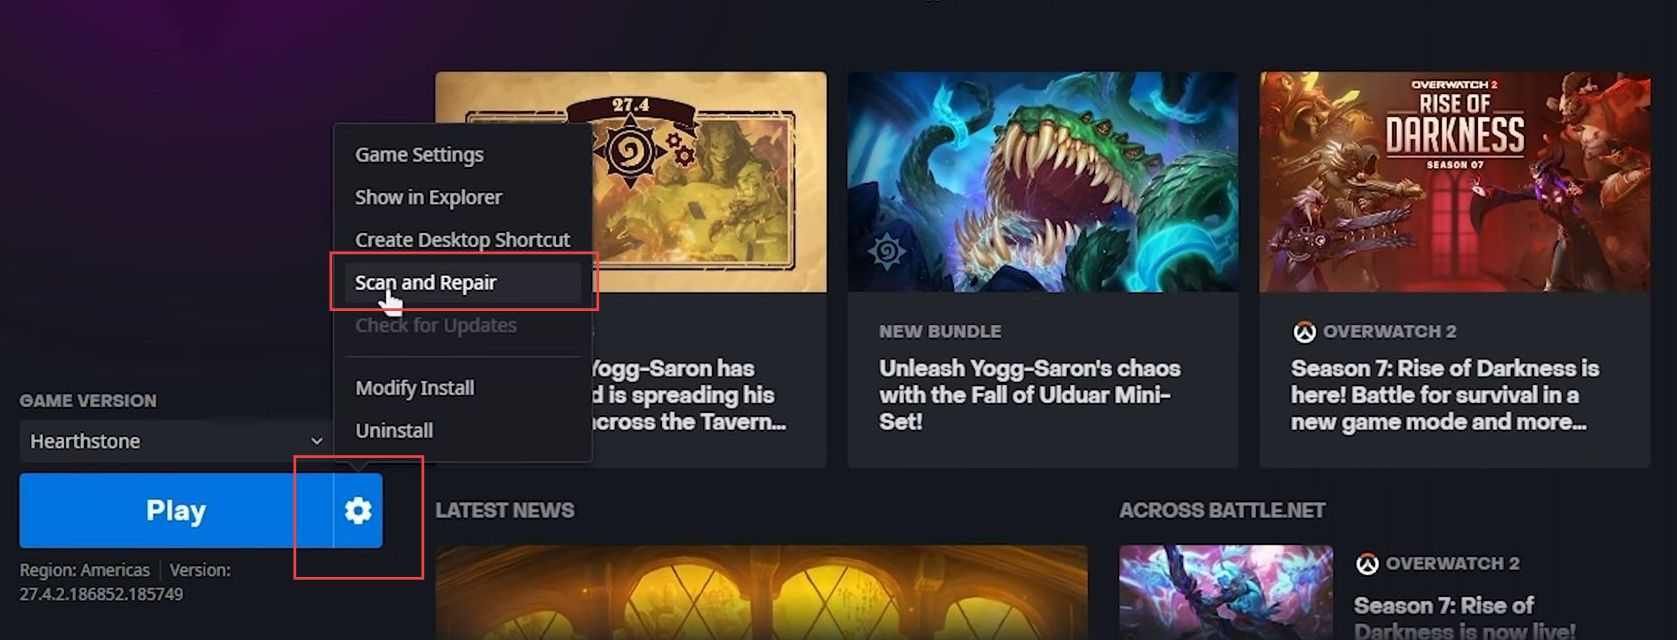
- Open the Battle.net launcher, locate the Call of Duty game to verify, and click on the game’s title.
- In the game’s screen, click on the settings wheel, and tap on the Scan and Repair option.
Battle.net will then run through all the game files on your PC, verify that they match the latest version on the server, and fix anything that’s different or out of date.
Close Background and Overlay Programs
This section describes how to close background and overlay programs to fix the error.
- You need to close all running programs on your computer, except for the game and the platform you’re using such as Activision or Steam.
These overlays can draw on top of the game and may not be compatible, causing instability.
This helps you troubleshoot the issue more effectively.
Reinstall (Without downloading anything) – Battle.net
In this section, we will take you through the steps to fix the crash errors by reinstalling the game without downloading anything in the Battle.net launcher.
- In the Battle.net launcher, navigate to the Call of Duty: Modern Warfare 3 or any other game you want to reinstall.
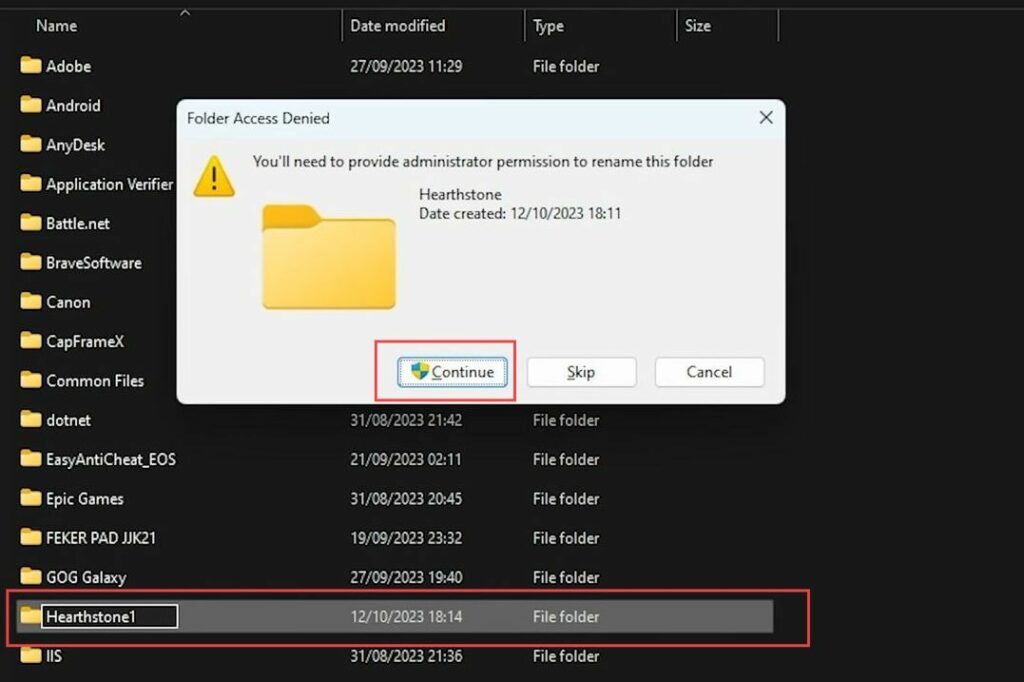
- Click on the settings gear which is provided next to the game and choose Show in Explorer from the menu.
This will open the folder where the game’s files are located. - Locate the game’s folder, and rename this folder to something different.
Remember what the original name was. - Close the Battle.net launcher completely and ensure it’s not running in the background.
- In the Battle.net launcher, click on your account name in the upper-right corner, and select Exit to close it.
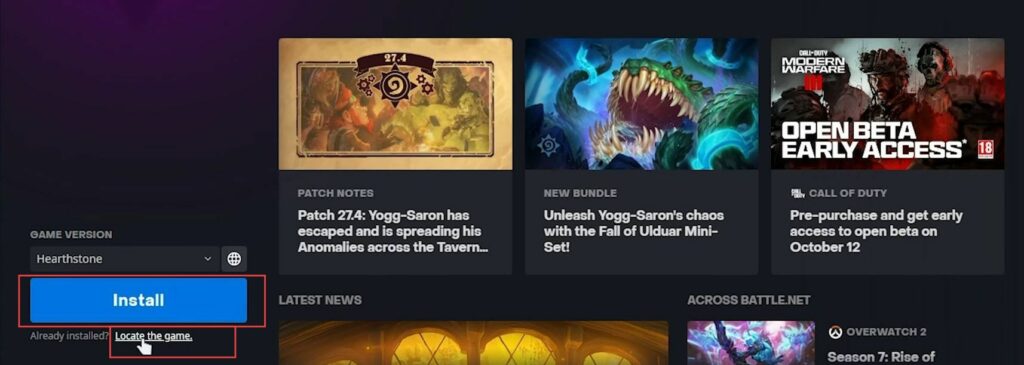
- Restart the Battle.net launcher and once it’s running again, go to the Games tab.
- After that, go back to where you moved or renamed the game files earlier. If you want to move the game to a different location, change the name back to what it was before and place it elsewhere.
You can also use this method to move the game to an SSD. - Click on Locate the game right underneath the Install button.
- A popup will appear, asking you to locate the game’s folder, select the game’s folder that you renamed earlier, and click OK.
- Now click Play immediately, and you should be able to launch the game.
You may receive a small update or it may ask you to verify files. When that process is complete, you should be able to play Modern Warfare 3.
Reinstall (Without downloading anything) – Steam
This section describes how to download anything in the Steam client.
- Open the Steam client on your computer, and locate Call of Duty: Modern Warfare 3 in your Steam library.
- Right-click on the game title, hover your cursor over Manage in the context menu, and choose Browse local files from the submenu.
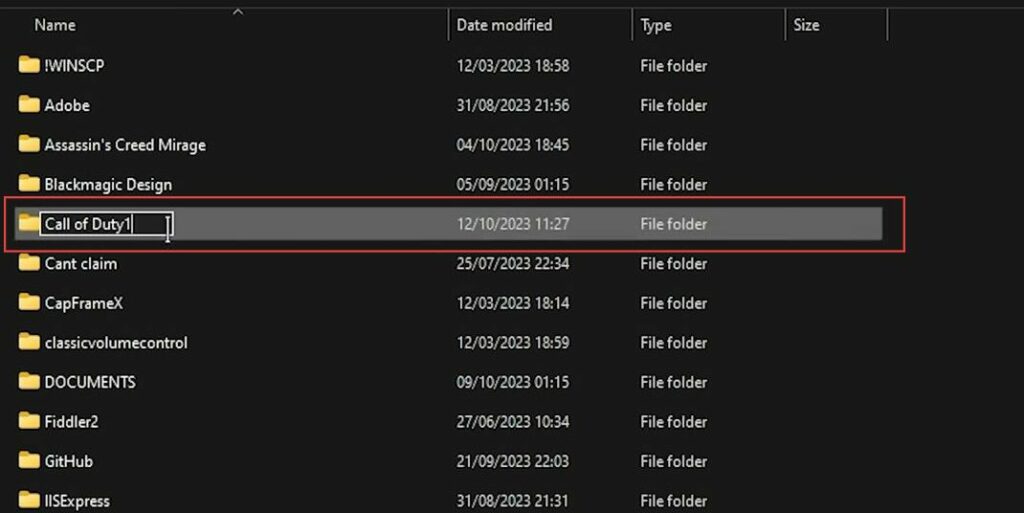
- Navigate up one folder level. You may see a folder named something like Call of Duty HQ and rename this folder to anything you like.
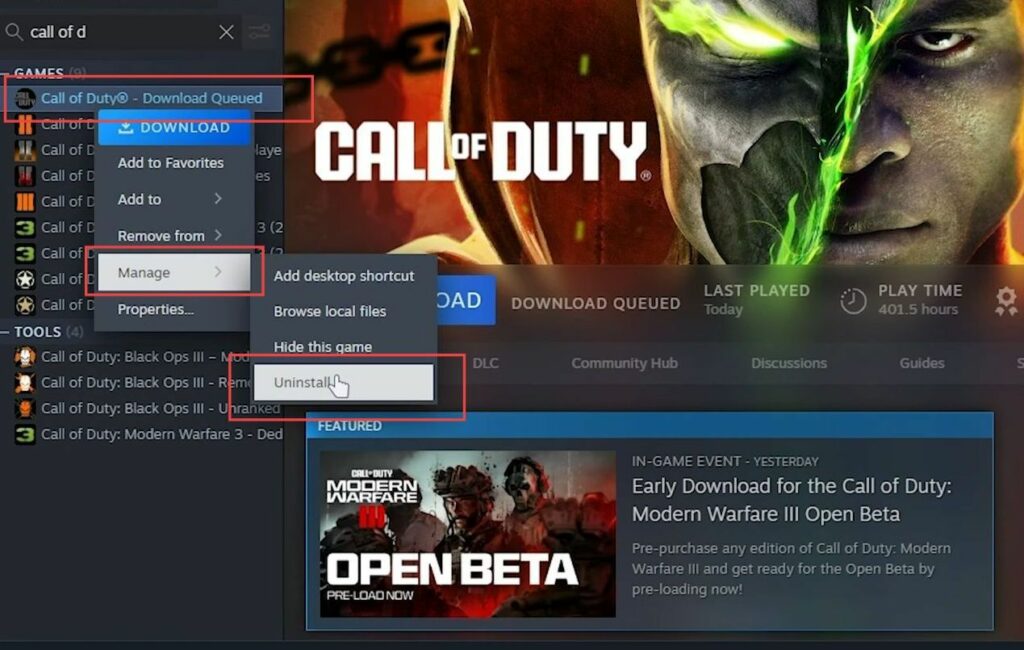
- Now, return to the Steam client, right-click on the game title in your library, choose Manage, and then select Uninstall.
Wait for the uninstallation process to complete.
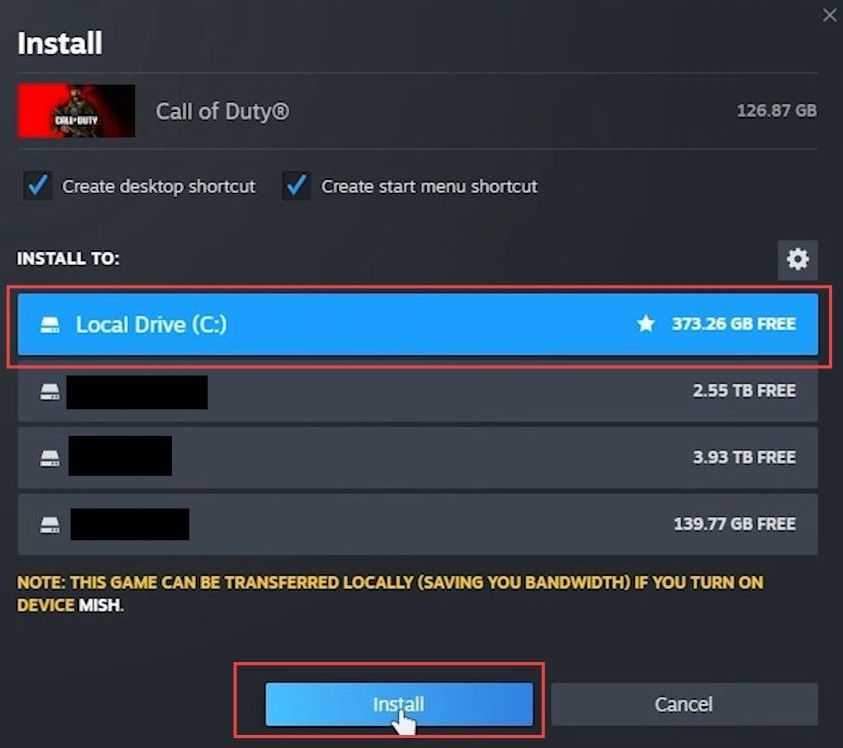
- In the Steam client, start the game installation process by clicking Install and choosing the destination drive for the installation.
- As soon as the installation starts, you need to click the pause button to stop the installation. Right-click on the game title in your library, select Manage and click the Uninstall button to uninstall the game.
You should now have two folders; the original one you renamed and the newly created Call of Duty HQ folder. - Go inside the folder you renamed, select all files, and cut them. Then you need to head back to the new Call of Duty HQ folder and paste everything there.
Wait for the files to move quickly from one folder to another. If you were moving the game between drives, it might take longer, but this method is efficient for moving the game. - Shortly after, you can delete the folder that’s now empty and was originally renamed.
- Go back to the Steam client, click Install again, and choose the same drive you selected before. Instead of downloading, Steam will validate the files on your drive. You can verify this in the Downloads tab.
You should see minimal network activity, with most of the process being disk usage. - Depending on the speed of your drive, this validation process might take some time. It’s preferable to have the game on an SSD for better in-game performance and load times.
- Once the validation is done, you will be able to play the game without any further downloads or installations.
Reset Game Settings (via Windows Explorer)
This section will take you through the steps to reset the game settings via Windows Explorer int order to fix the crash errors.
- First, you need to open a file browser, go to the Documents folder and you’ll find a folder named Call of Duty.
- To reset your game settings, simply rename the Call of Duty folder. You have to change the folder name to something different.
For example, you can add _backup to the end of the folder name. - The next time you start the game, it will recreate the Call of Duty folder with default settings.
This reset will affect everything from your graphics settings to your keybindings.
Manually Change the Resolution (via config files)
This section describes how to manually change the resolution via config files.
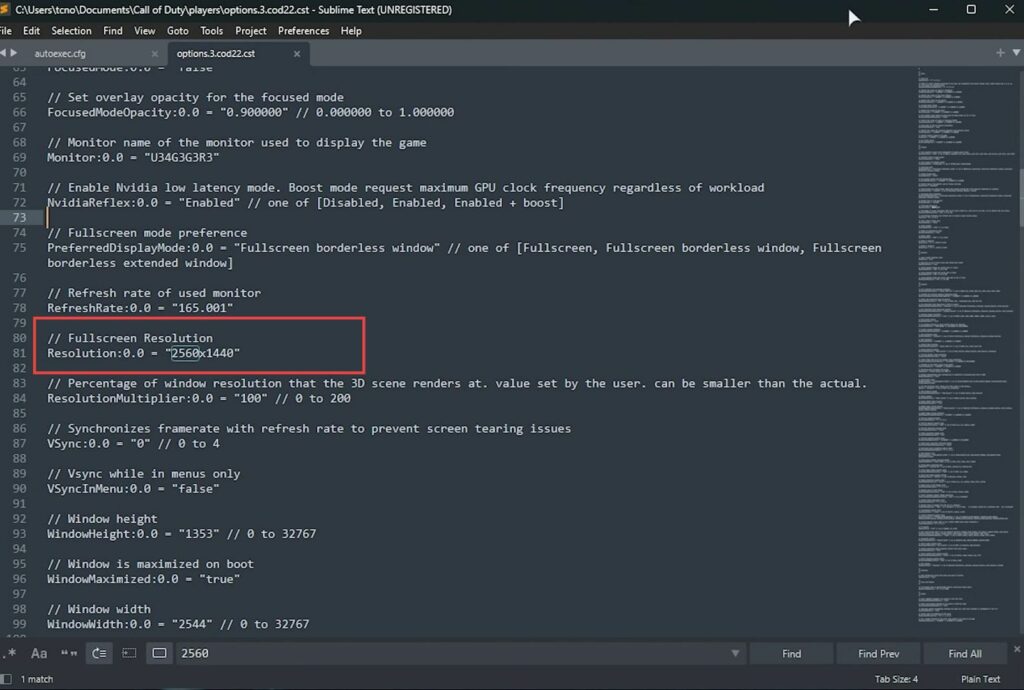
- Navigate to the configuration files and the file you need to edit is often named options.cod file.
- You have to open the configuration file using a text editor and search for the section related to the resolution. You can look for terms like fullscreen resolution from the rows.
- In this section, set your desired resolution. Such as you can set it to 1920 1080 for a resolution of 1920×1080 and save the changes to the configuration file.
The next time you start the game, it should use the resolution you specified. - Additionally, in some games, pressing Alt and Enter simultaneously during the game’s startup can toggle between full-screen and windowed modes.
This action might help resolve issues for some players.
Force MW3 to run as High Priority
In this section, we will take you through the steps to fix the error by forcing MW3 to run as High Priority.
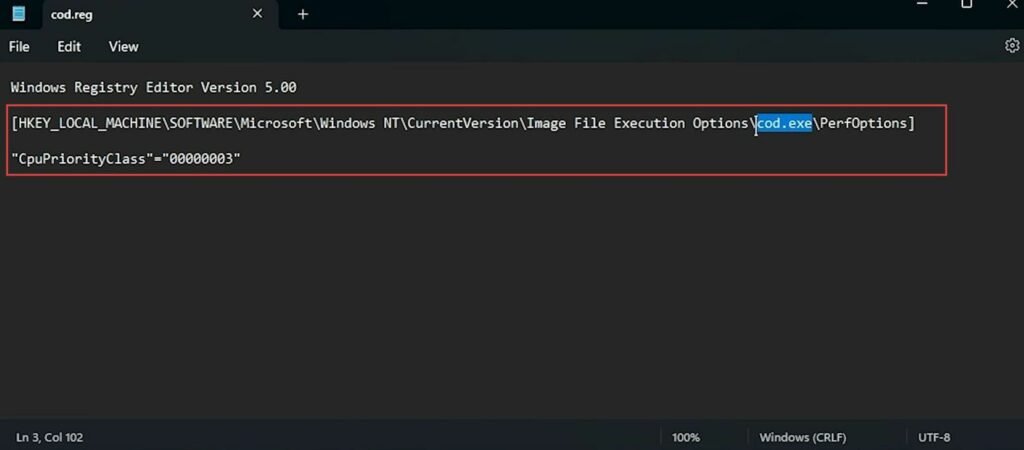
- Open Notepad on your computer, copy this code, and paste it.
Windows Registry Editor Version 5.00

[HKEY_LOCAL_MACHINE\SOFTWARE\Microsoft\Windows NT\CurrentVersion\Image File Execution Options\mp23-cod.exe\PerfOptions]

"CpuPriorityClass"="00000003"- You need to go to the File tab from the quick access toolbar and select Save As.
- Name the file anything you like, such as, you can name it cod.reg, change the Save as type to All Files, and click Save.
- Now, you should have a registry document on your desktop with the .reg file extension and double-click this registry file.
- When prompted for administrator permissions, click Yes, click Yes once more, and click OK.