In this guide, you will learn how to fix the DirectX Unrecoverable Error in Modern Warfare 3. You can either verify game files on Steam/Battle.net or attempt general fixes and updates.
You may also reset settings (via config files), compatibility issues, multiple GPU fixes, or make sure MW3 is running on the correct GPU to resolve the issue.
Verify game files on Steam/Battle.net
In this section, we will take you through the steps to fix the DirectX unrecoverable error by verifying game files on Steam/Battle.net.
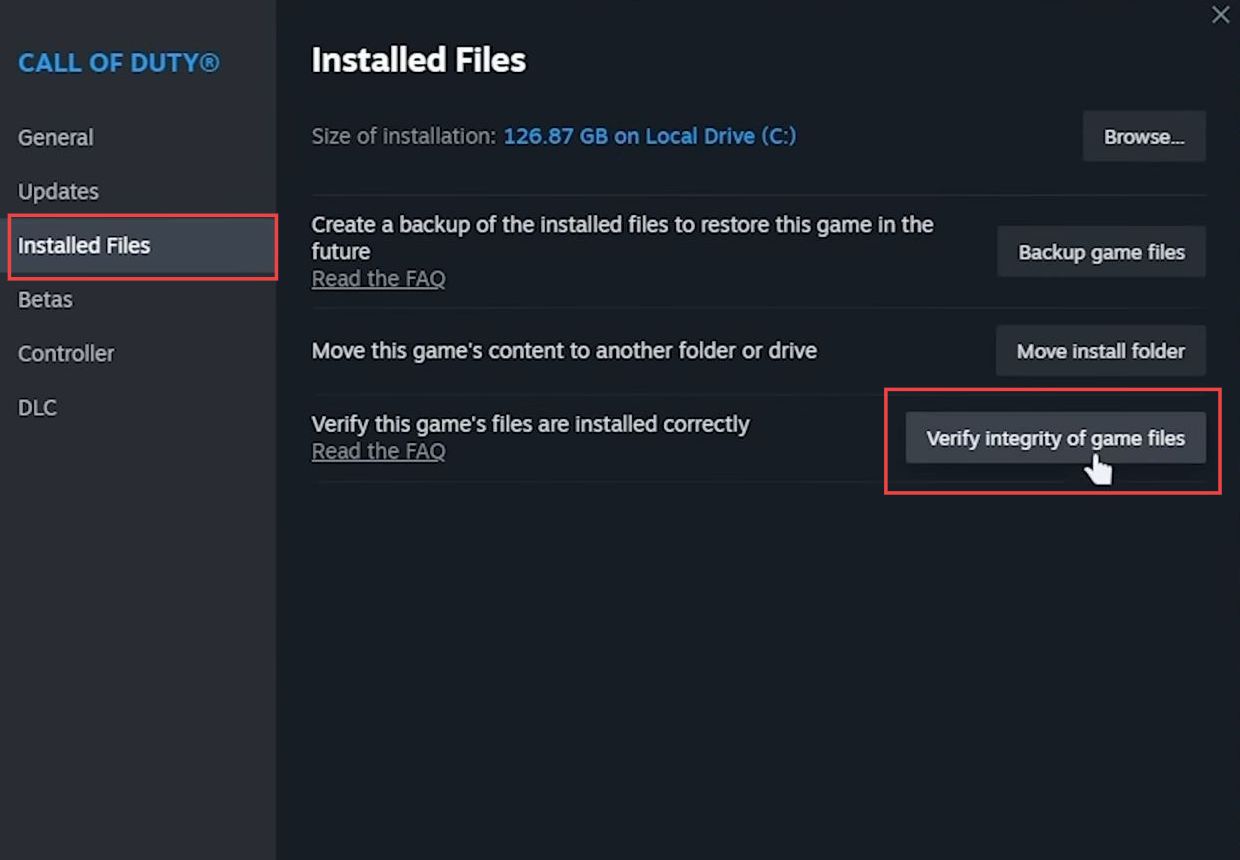
- Open the Steam client on your computer and click on the Call of Duty game in your Steam library. Right-click on the game title to bring up a menu of options and select Properties.
- Go to the Local Files tab and click on the Verify Integrity of Game Files button.
Steam will then check and repair any corrupted or missing game files, if necessary.
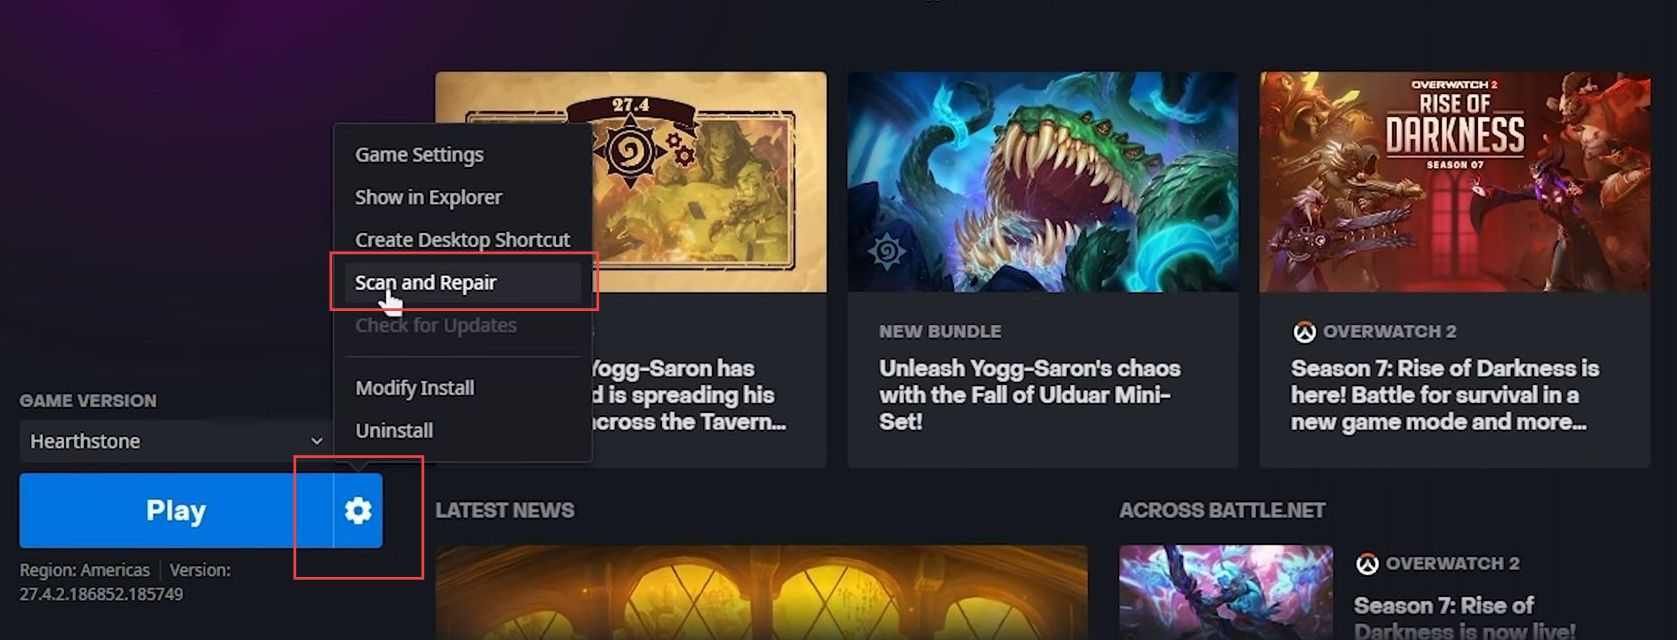
- Open the Battle.net launcher and locate the Call of Duty game in your list of installed games.
- Click on the game’s title and select the scan and repair game files option.
Battle.net will check and repair any corrupted or missing game files, if necessary.
General Fixes
This section describes how to adjust the general fixes in order to resolve the error.
- You need to restart your PC as it can fix many problems.
- As this is a DirectX error, ensure that your Graphics Processing Unit (GPU) is properly placed inside your computer and that all wires and connections are secure.
- If you have a custom-built PC, then you need to remove the GPU and reinsert it to solve issues. Always ensure that your hardware components are correctly installed in your computer to prevent potential issues.
Updates
This section will take you through the steps to fix the error by updating Windows and graphics card drivers.
- Start by updating your Windows operating system through the Settings app.
- Also, make sure to update your graphics card driver. Depending on whether you have Nvidia, AMD, or Intel, use their software to check for and install the latest driver updates.
Keeping your drivers up to date can help resolve issues and improve performance.
Reset settings (via config files)
This section describes how to reset the settings via config files to resolve the error.
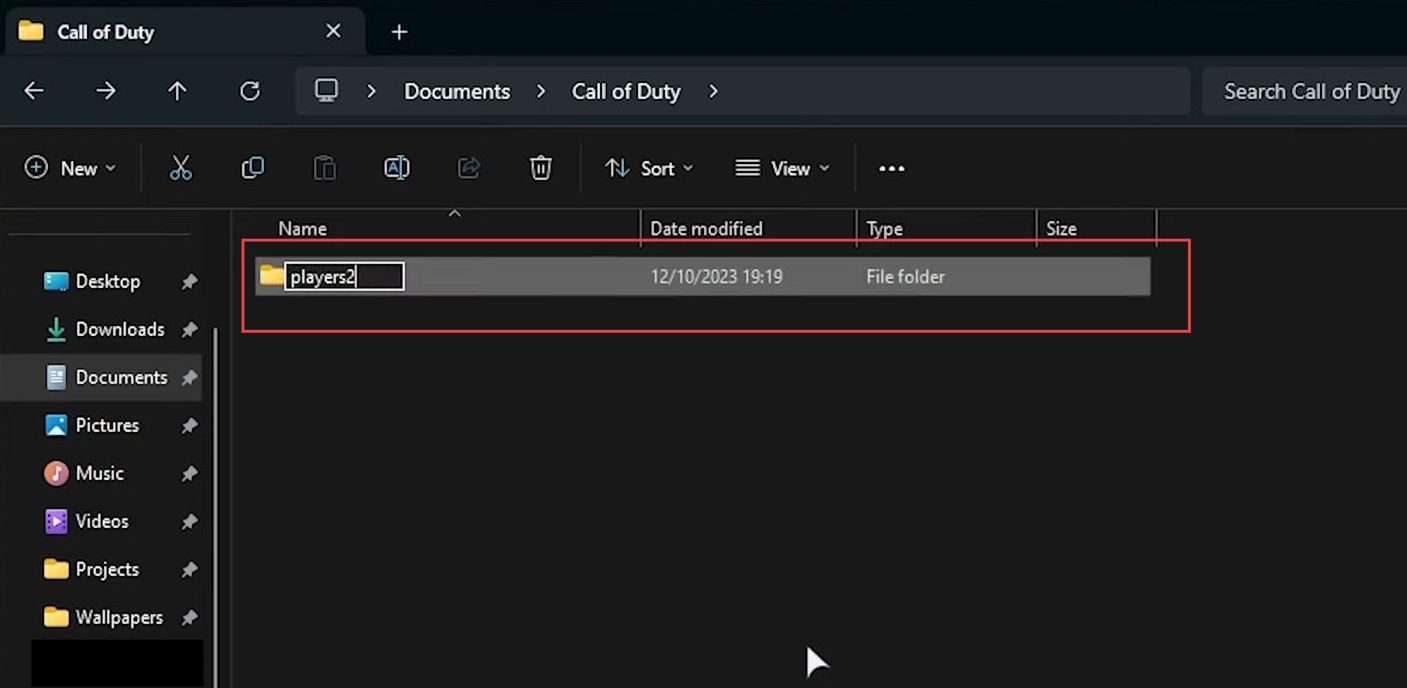
- Open the file browser, navigate to the Documents folder, and look for a folder named Call of Duty.
You’ll find a players folder that contains your game settings, you can either: - Rename the players’ folder.
- Delete the players’ folder entirely.
Doing this will force Call of Duty to create a new players folder with default settings the next time you start the game. - If you encounter an error when trying to rename the folder, ensure that both the Battle.net launcher and the game are completely closed. After that, launch the game again.
Your in-game settings should be reset, and the game should hopefully work properly.
Compatibility issues
In this section, we will take you through the steps to fix the DirectX unrecoverable error by adjusting compatibility issues.
- Close all running programs on your computer, especially those that interact with the game.
- Pay attention to less obvious overlays, such as FPS counters and crafting programs, as these can also lead to unseen crashes.
- The best solution is to reboot your PC to start with a clean slate.
- Now open the game and check whether the issue is resolved.
Multiple GPU Fix
This section describes how to resolve the error using multiple GPU fixes.
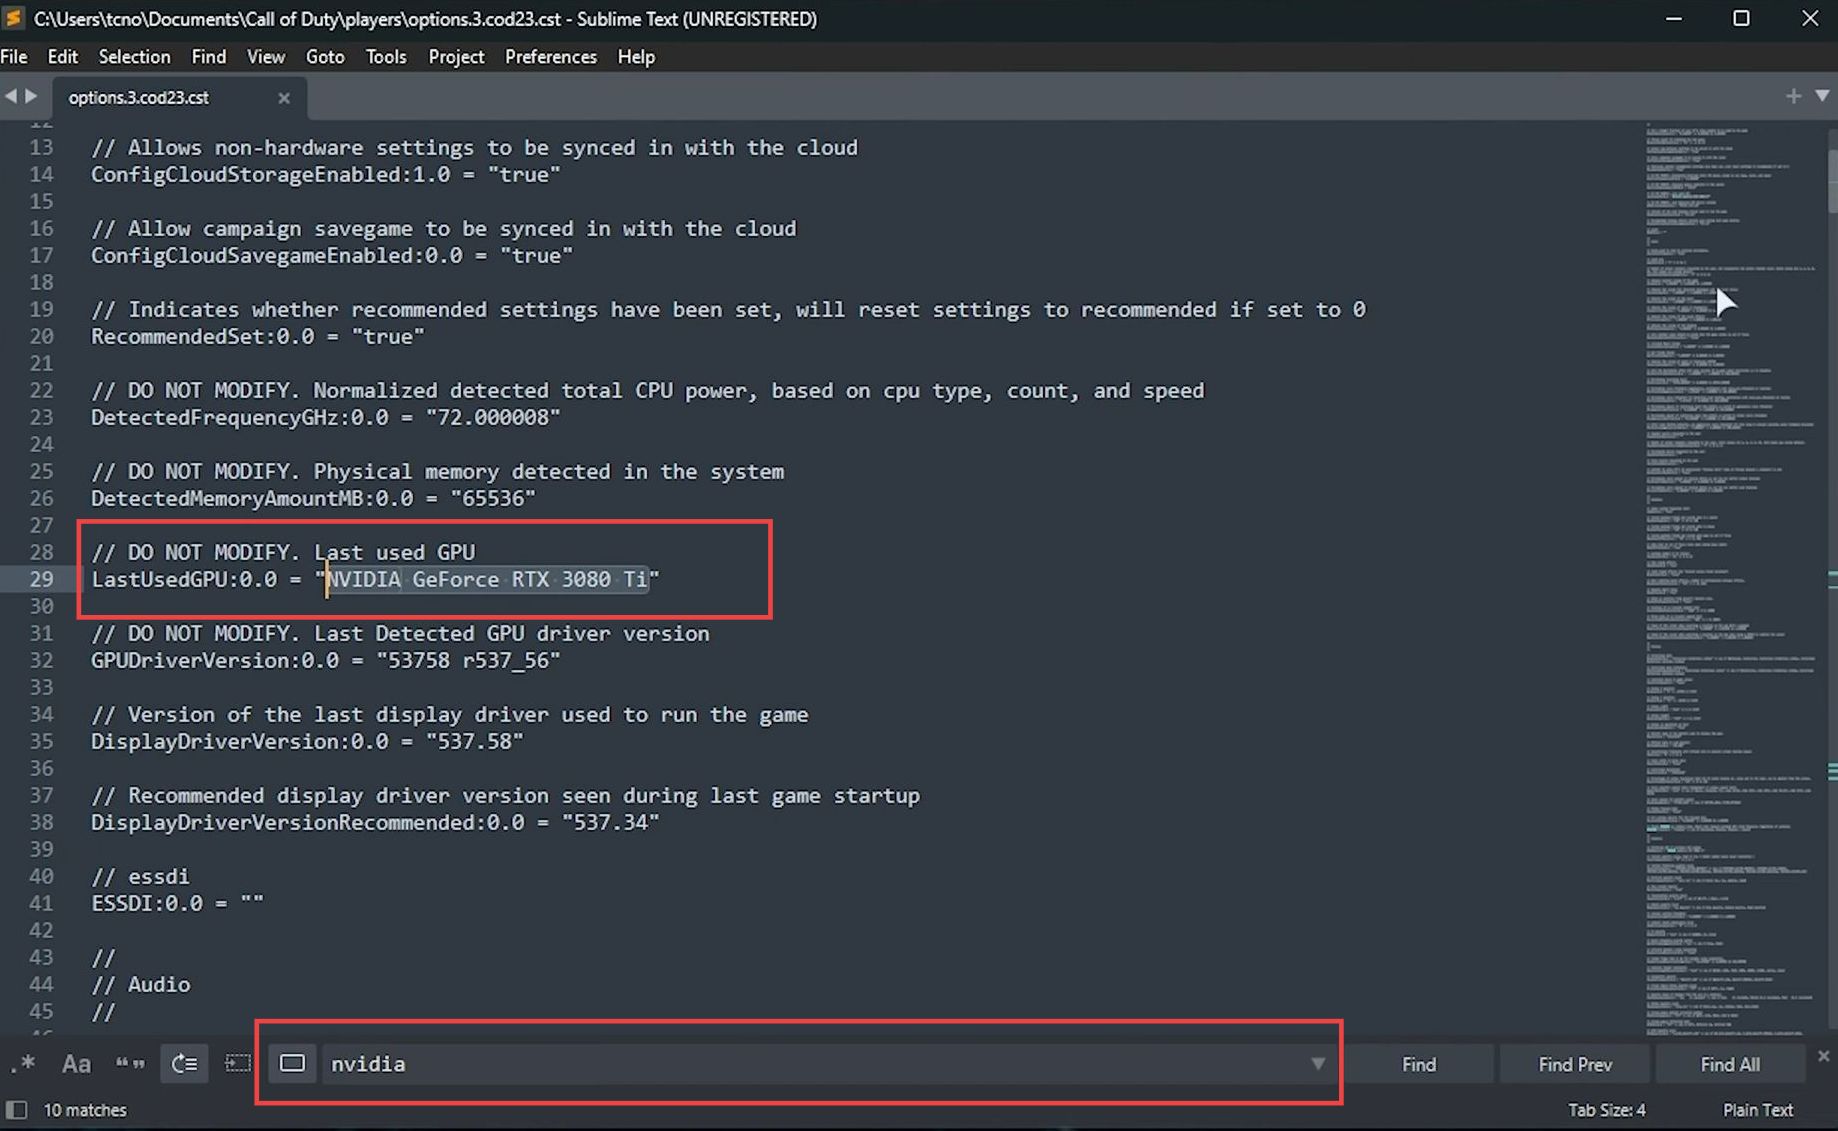
- Open your documents folder, go to the Call of Duty folder, find the players folder, and look for a file named Options. cfg.
This is a significant file. - Open the options.cfg file with any text editor and use the search function in the text editor to find the word NVIDIA. Jump to the first result, and you should see your graphics card listed there.
- If you have multiple graphics cards, you can change the listed GPU name to match the name of your other graphics card.
This step is only relevant if you have multiple discrete graphics cards in your PC. - Save the changes to the options.cfg file and restart the game to see if it now runs on the desired GPU.
Make sure MW3 is running on the correct GPU
In this section, we will take you through the steps to fix the error by making sure MW3 is running on the correct GPU.
- On your computer, click the Start button, and type graphics in the Windows search bar. After that, open the Graphics settings.
- If you’re using Windows 11 and see a specific screen for graphics settings, scroll down and select Graphics. Choose the Desktop app from the dropdown menu.
- Click Browse to navigate to the location where the game is installed. If you’re using Steam, locate the game by right-clicking it, choosing Manage, and then selecting Browse local files.
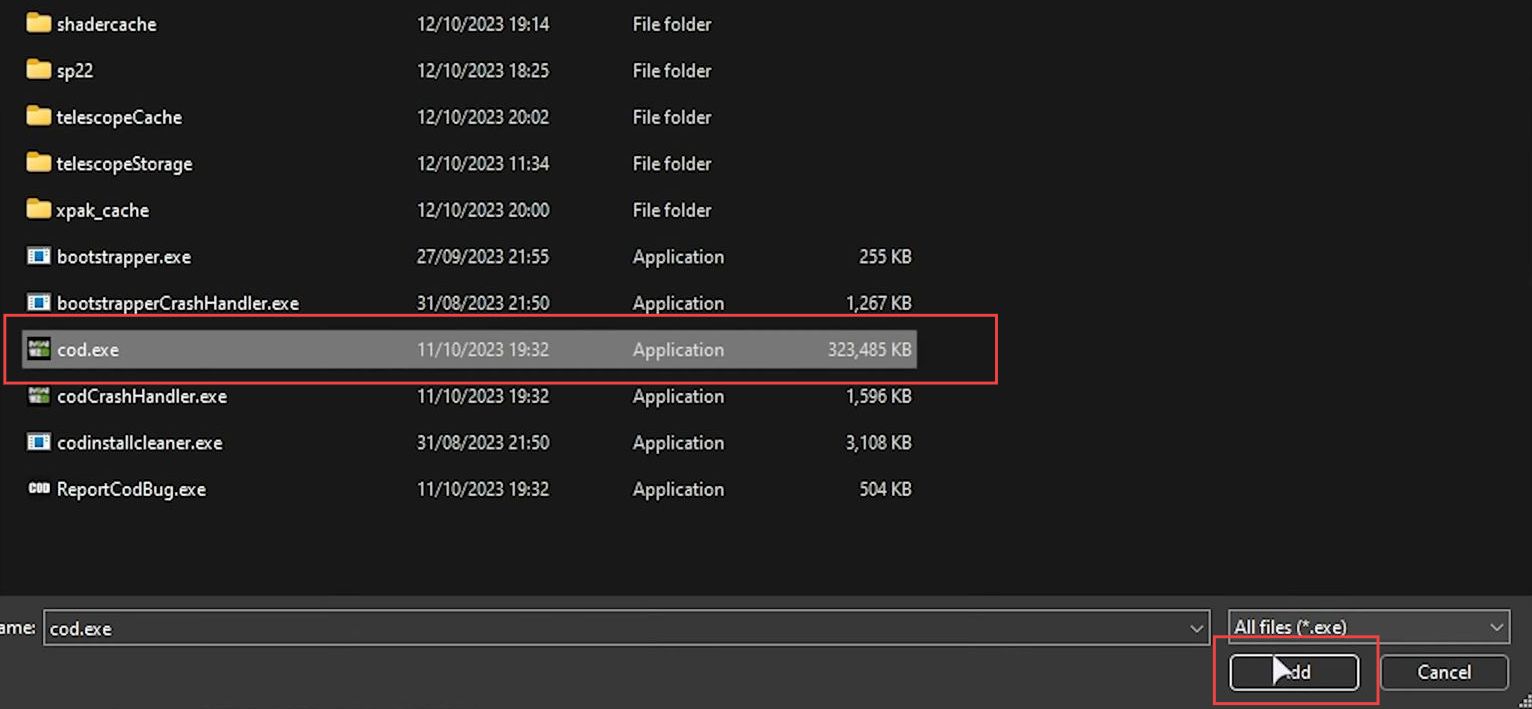
- For Battle.net, find the game by opening it, clicking the options cogwheel, and choosing Show in Explorer. In the game’s installation folder, find the game’s main executable file such as mp23 cod.exe.
- Click in a blank space at the very top of the File Explorer to select and highlight the path. Right-click the path and choose Copy address as text, or you can simply copy it in any other way you prefer.
- In the File Explorer window that appeared from the Graphics settings, click on the address bar at the very top and paste the path there. Press Enter to navigate directly to the game’s folder.
- Double-click the game’s main executable file, which is mp23 cod.exe.
This will add it to the list of apps in the Graphics settings. - Select the game from the list, then click Options, and choose High Performance to force the game to run on your high-performance dedicated GPU.
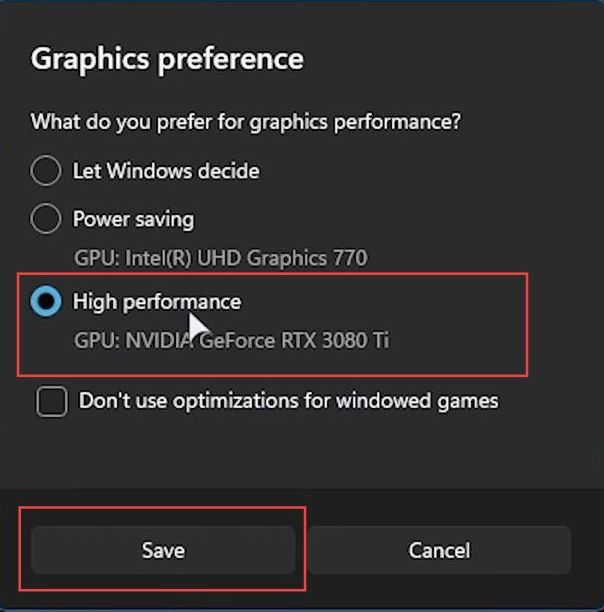
- Now look for an option that allows you to disable optimizations for windowed games. Turn off this option to potentially increase the game’s stability and click Save to apply the changes.
- If you want to apply the same settings to the main program itself, navigate back to the previous folder and add the .exe file for the main program.
- Select High Performance for this main program as well, close the settings window, and try launching the game to see if it works correctly.