In this guide, you will find how to fix MW3 crashing, freezing, and not launching errors on your PC. These methods include fixing MW3 and checking for Windows updates. You can also try to check graphics card updates, close conflicting programs, and verify the integrity of game files.
Attempt a Fix for MW3
In this section, we will take you through to Fix MW3 in order to resolve the error.
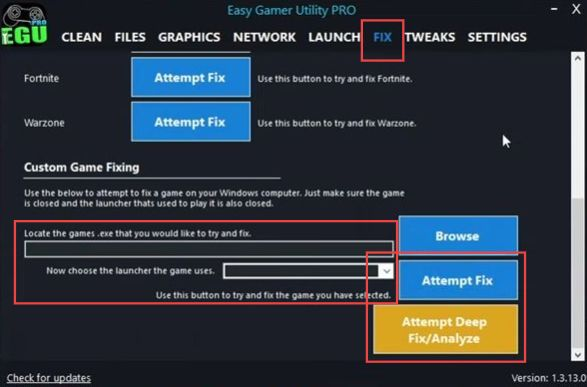
- Open the Easy Gamer Utility program on your computer and select the Fix tab. Scroll down to access additional options and settings.
- Look for a section labeled Custom Game Fixing. Locate the executable file (.exe) for the game Modern Warfare 3 on your computer and click on the Attempt Fix button.
The program will then analyze the game, detect any issues, and attempt to fix them automatically.
Attempt a Fix for MW3
This section explains how to fix the error by checking Windows updates. By following the steps below, you will be able to update your Windows to the latest version.
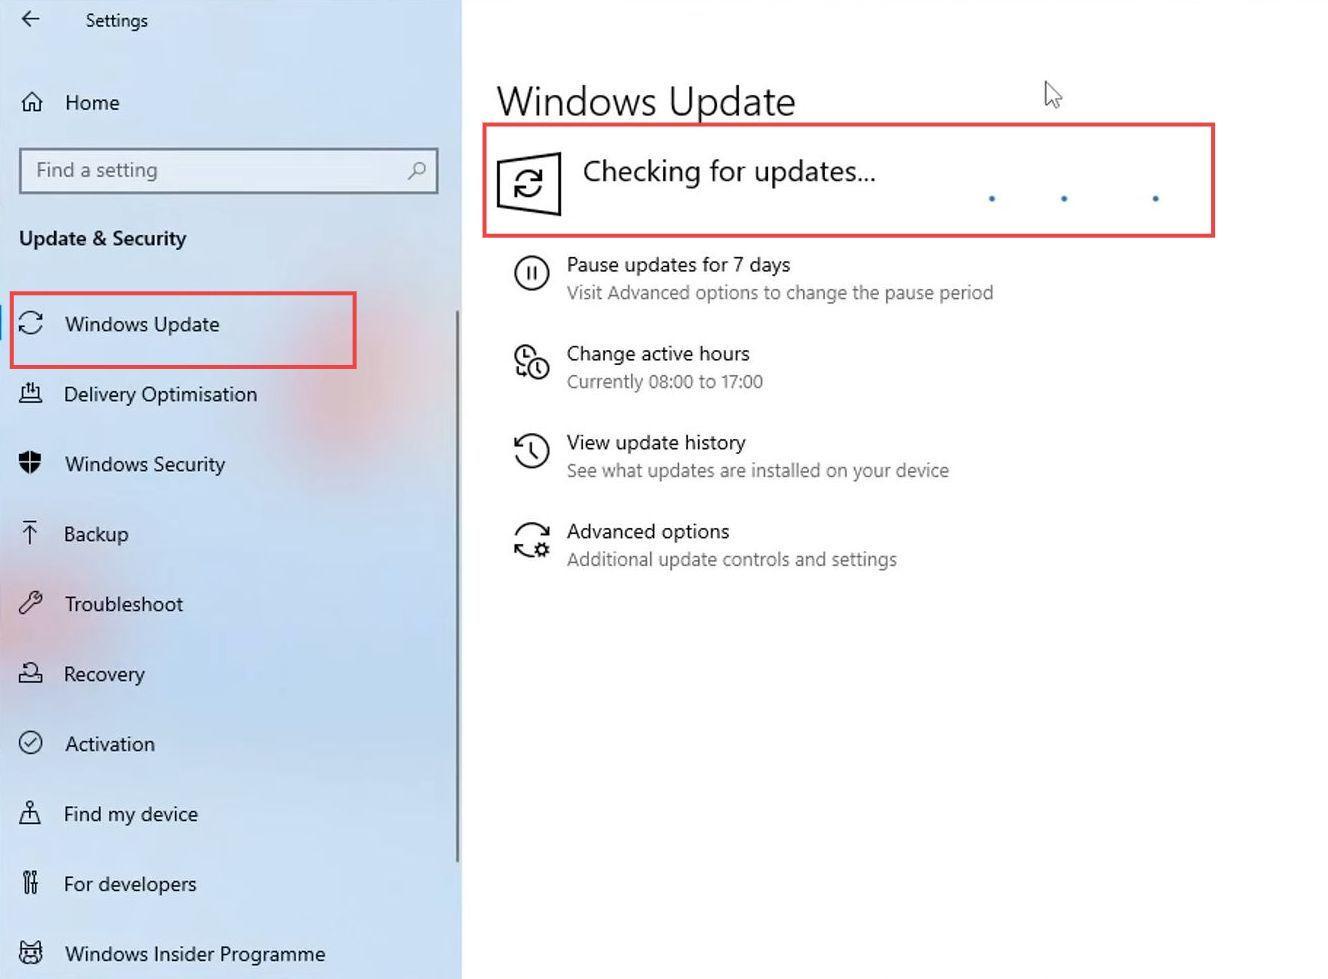
- If the error is still present, right-click on the Windows Start menu icon in the taskbar. From the context menu that appears, click on the Settings option.
This action opens the Windows Settings menu. - Click on the Update & Security option and look for the Check for Updates button to initiate the process of checking for available updates.
- Allow the system to check for updates, and if there are any updates available, proceed with installing them.
This ensures your Windows operating system is up to date. - After installing any available updates, restart your computer to apply the changes. Once your computer restarts, launch the game and see if the issue has been resolved.
Check Graphics Card Updates
This section describes how to check graphics card updates. If there is any update available, you need to download it to fix the error.
- Now you have to ensure that you have the latest updates installed for your graphics card driver.
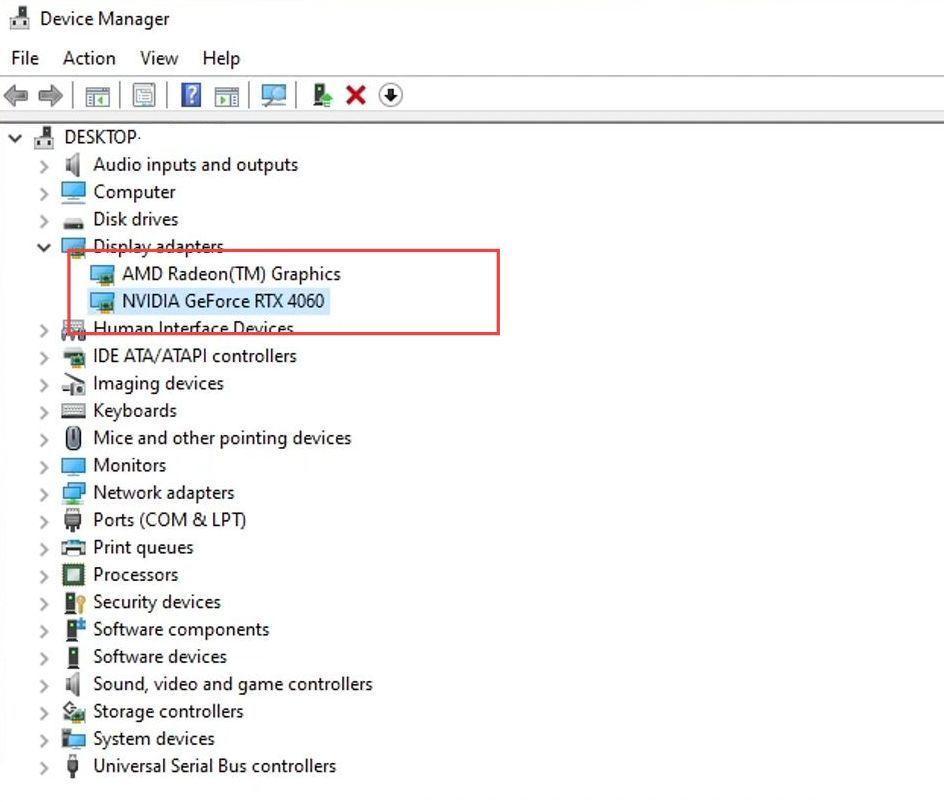
- Click on the Windows Start menu icon in the taskbar. In the search bar, type Device Manager and select it from the search results.
This opens the Device Manager window. - In Device Manager, expand the section named Display Adapters.
This will show you the graphics cards installed on your computer. Your graphics card’s name will be listed under the DisplayAdapters section. - On the graphics card manufacturer’s website, download the latest driver for your graphics card model. Follow the instructions provided on the website to install the driver.
- Restart your computer and update your graphics card driver.
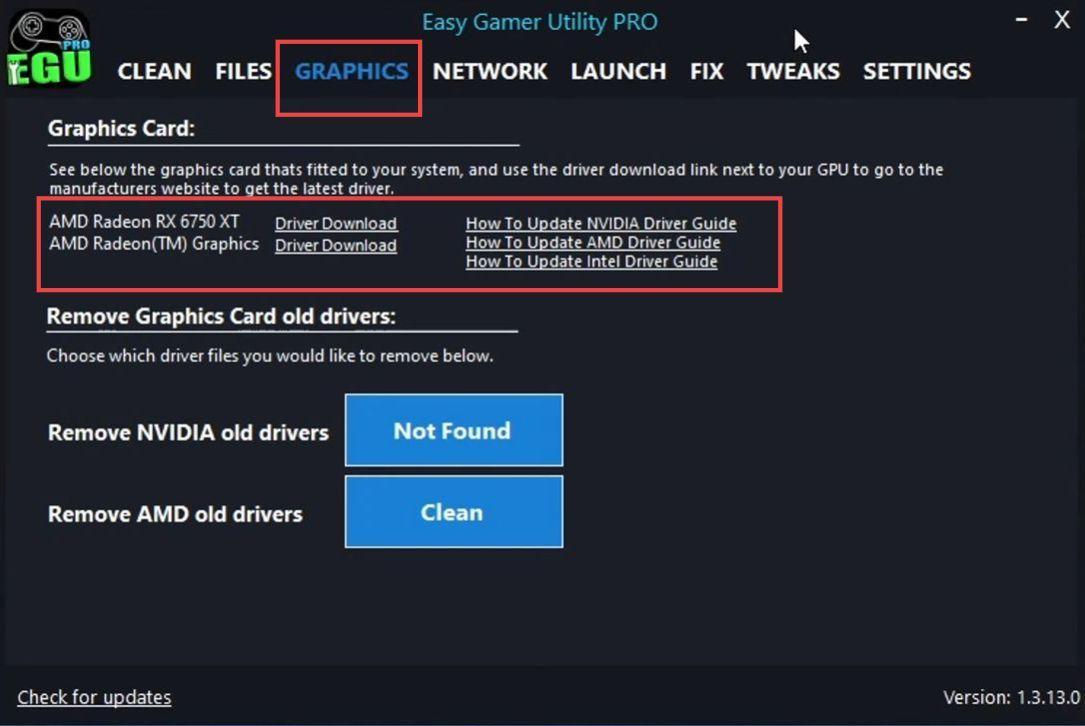
- Start the Easy Gamer Utility program on your computer and navigate to the Graphics tab.
- After that, look for an option within the program that says Driver Download.
It will take you directly to the website of the graphics card manufacturer.
Clear Cache Files
In this section, we will take you through the steps to clearing cache files in order to fix the issue.
- You need to open your browser and download the program called Easy Gamer Utility. After that, install the downloaded program and open it up.
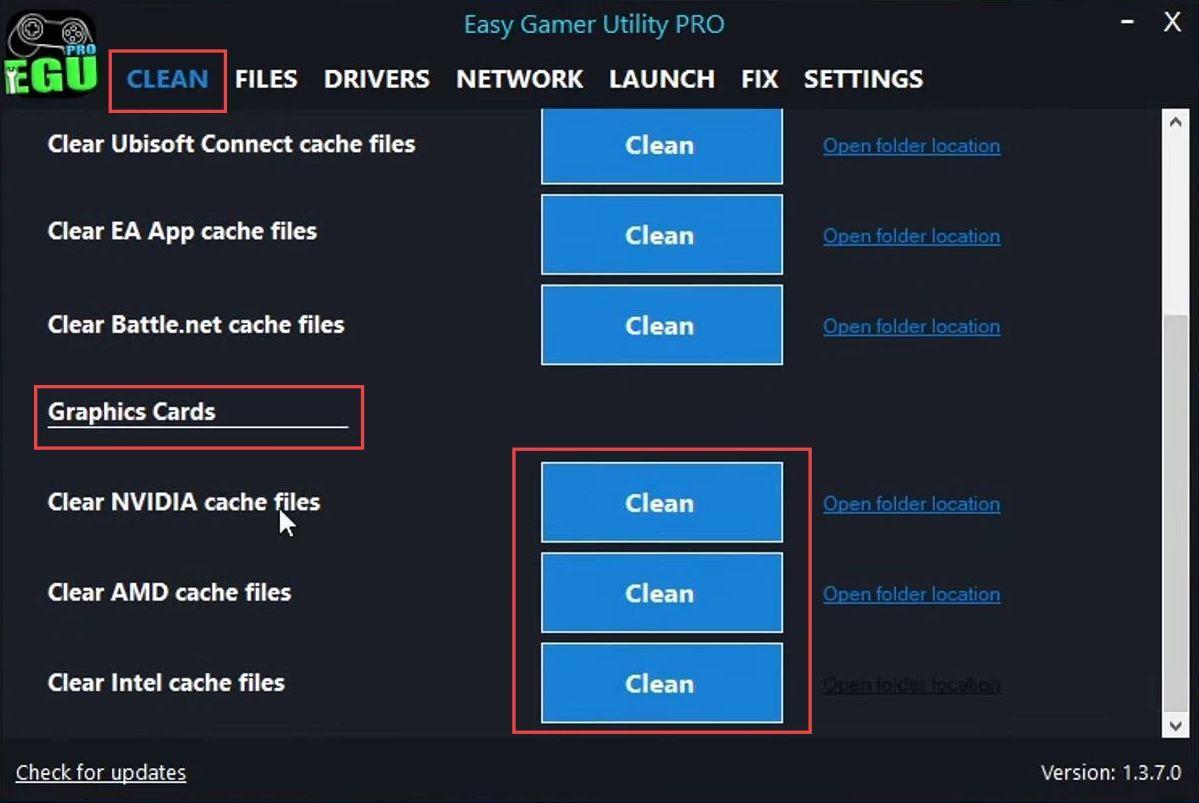
- Look for a tab labeled Clean on the quick access toolbar within the program’s window.
This section of the utility deals with cleaning and optimizing tasks. - Within the Clean tab, scroll down until you find a section related to your graphics card. Click on the option to Clear the Graphic Cards Cache Files.
The utility will begin removing old temporary cache files associated with your graphics card. - You might be prompted to confirm the action. Confirm it to proceed with the cache-clearing process.
Once the cache-clearing process is finished, you’ll receive a notification indicating it’s complete. - After that, click the OK button to close the cache-cleaning process.
Clean Up DirectX Shader Cache
This section describes how to clean up the DirectX Shader Cache to fix the crashing, freezing, and not launching issues.
- Open the Start menu and type disk cleanup in the search bar. From the search results, choose the Disk Cleanup Utility.
This tool helps you free up space on your computer’s hard drive. - In the Disk Cleanup window, select the drive you want to clean. In this case, choose your C drive. You need to uncheck all options except for DirectX.
You’ll be asked to confirm the deletion of the selected files. - Click the Delete Files button to proceed.
Allow the cleanup process to complete. This might take a few moments depending on the amount of data being removed. - After the cleanup is finished, proceed to launch the game once more.
- Test whether the changes made by the cleanup process have helped to resolve the issue with the game.

Rename User Settings File
This section will take you through the steps to fix the error by renaming the user settings file.
- Close all current applications, open File Explorer and select the Documents folder.
This is the directory where you store your documents. - Find the folder associated with the game you’re having issues with. Open the game’s folder by clicking on it.
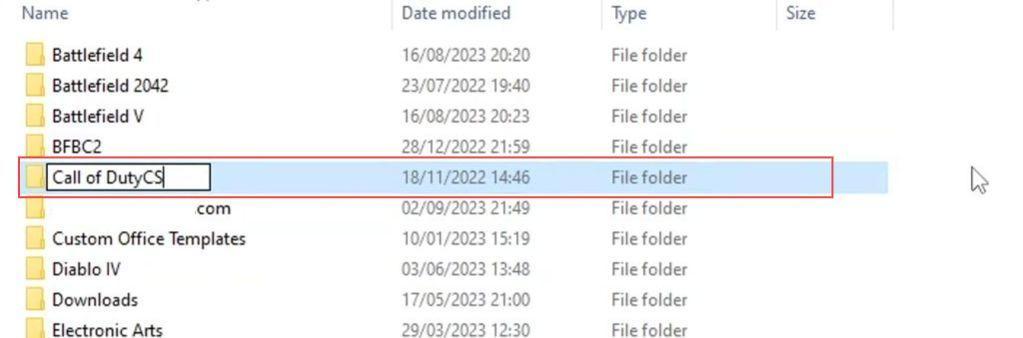
You should now be inside the specific folder for the game. - Look for a file named Call of Duty within this game folder. This file likely holds user-specific settings for the game.
- Right-click on the Call of Duty file and select the Rename option from the context menu. Add CS at the end of the file name.
- Save the changes, close File Explorer, and proceed to launch the game again.
You’re effectively restoring the default settings for the game. This might help resolve issues causing the game to crash.
Close Conflicting Programs
This section describes how to close the conflicting programs. It might help to resolve the error.
- Ensure that you have no other programs or applications running when attempting to launch the game.
- If you have MSI Afterburner, Discord, or any other software running, you need to close them.
The objective is to eliminate any potential conflicts that might be causing the game to crash. - You also need to unplug all the additional items from your USB ports except the controller used for the game. Now launch the game once more and check whether the issue has been resolved.
Temporarily disable your security software
This section explains how to resolve the issue by temporarily disabling your security software.
- First, identify the security software that you have installed on your computer.
This could be antivirus software, firewall programs, or any other security-related applications. - Open your security software’s user interface and look for settings related to application or program blocking, firewall rules, or application permissions.
- Add MW3 as an exception or allow it through the security software and then save changes. Now launch the game to see if the crashing issue has been resolved.
Verify the Integrity of Games Files
This section describes how to verify the integrity of game files in order to fix the issue.
- Launch the Steam application on your computer and click on the Library tab to access your game library.
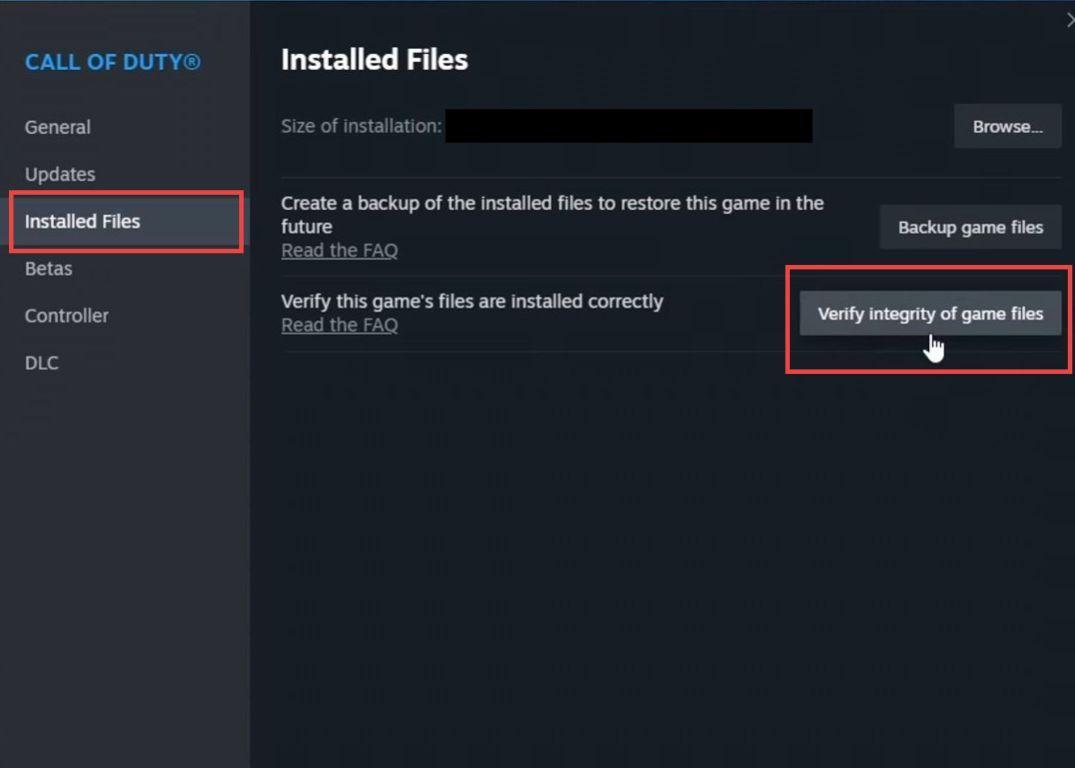
- Right-click on the Call of Duty entry in your game library and from the context menu, click on Properties.
- Click on the Local Files tab and tap on the button that says Verify Integrity of Game Files.
Steam will now begin the process of verifying the integrity of the game files for Call of Duty. - After the verification is complete, return to your game library, and launch the game.
Scan and Repair the Game
This section explains how to scan and repair the game.
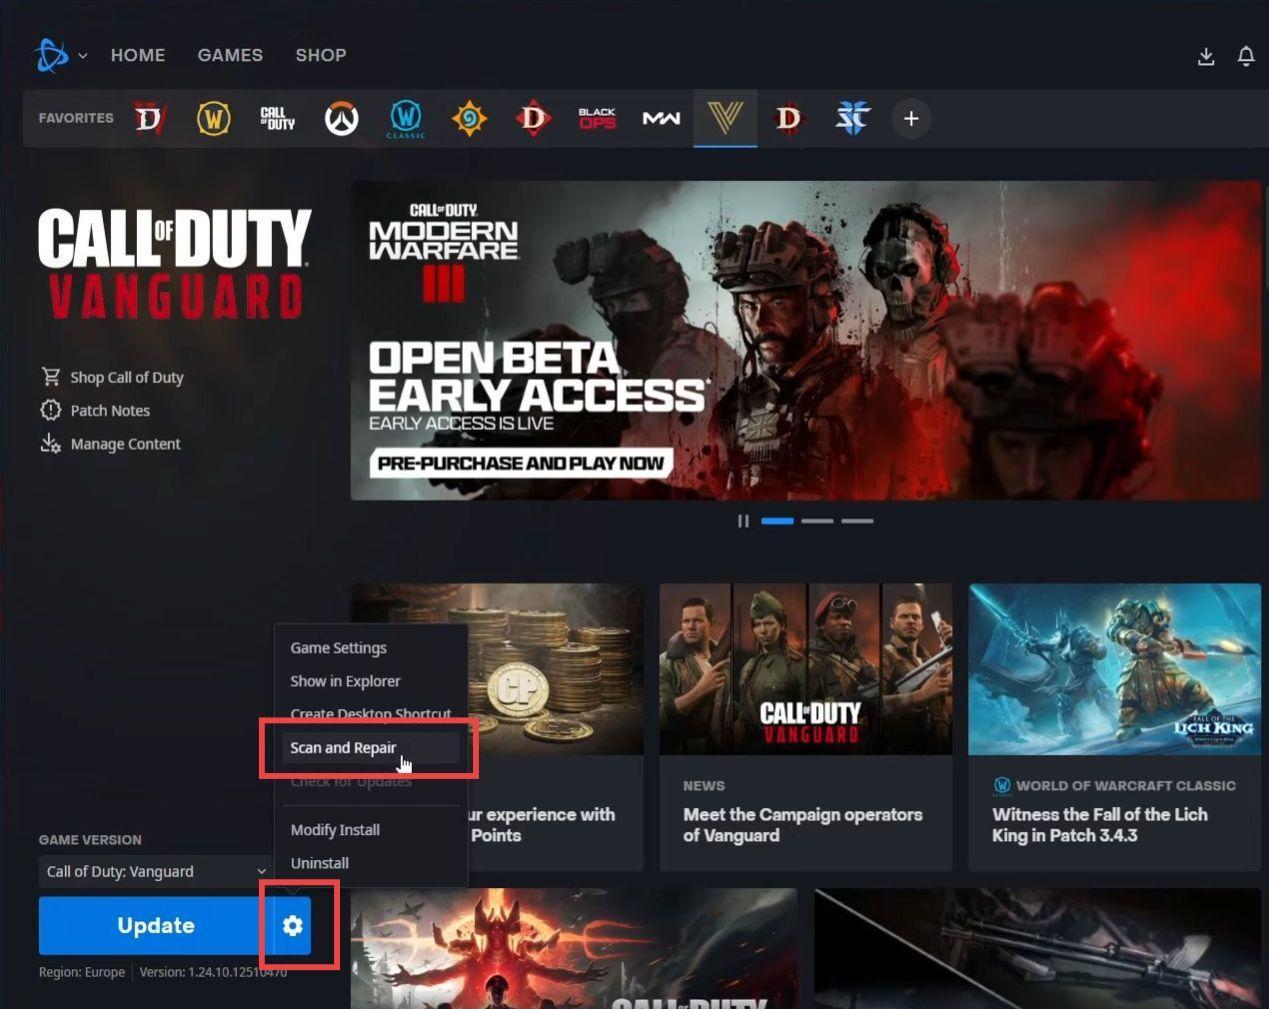
- Launch the Battle.net Launcher on your computer and click on the Games tab at the top of the window. Click on the Call of Duty game and tap on the Scan and Repair option.
Follow any on-screen instructions or prompts that appear during the scan and repair process. - After the scan and repair process is complete, check if it has resolved the issue.
- If you’re experiencing issues with a game, start by uninstalling it from your current drive. Determine which drive you want to reinstall the game on.
- It’s recommended to select an SSD (Solid State Drive) if you have one available, as it can improve game performance.