This guide will tell you how to add Mods to Aternos Server. Go through the guide and follow all the steps carefully to add mods.
1. You will need to go to https://aternos.org/:en/, login into your account, and then choose the server from the list of servers on which you want to install your mods. For example, GuideRealm.
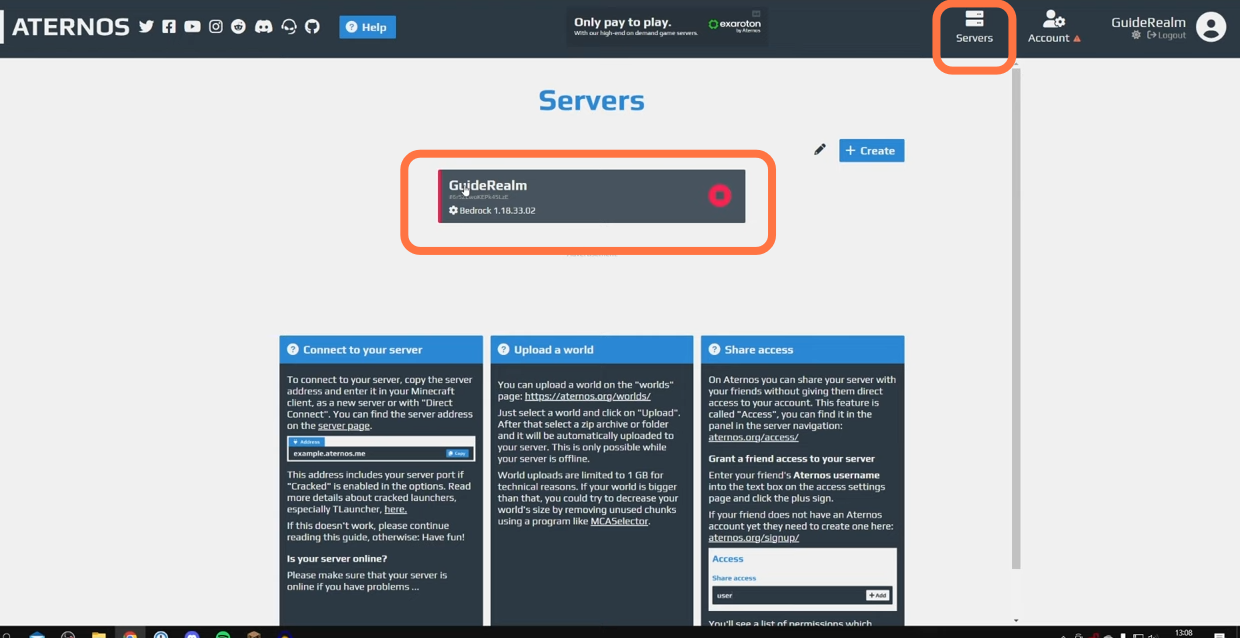
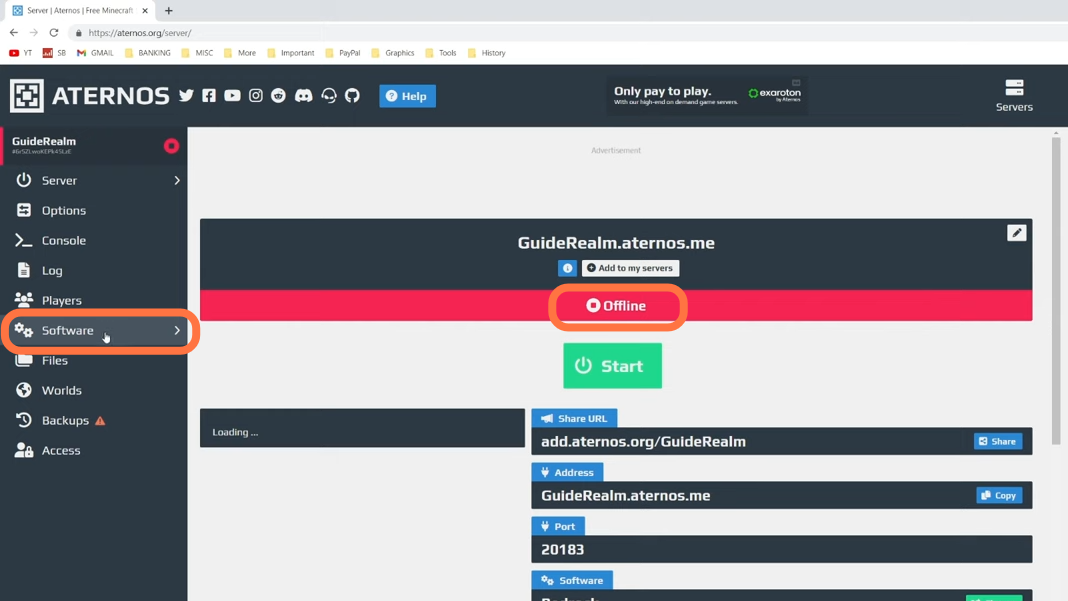
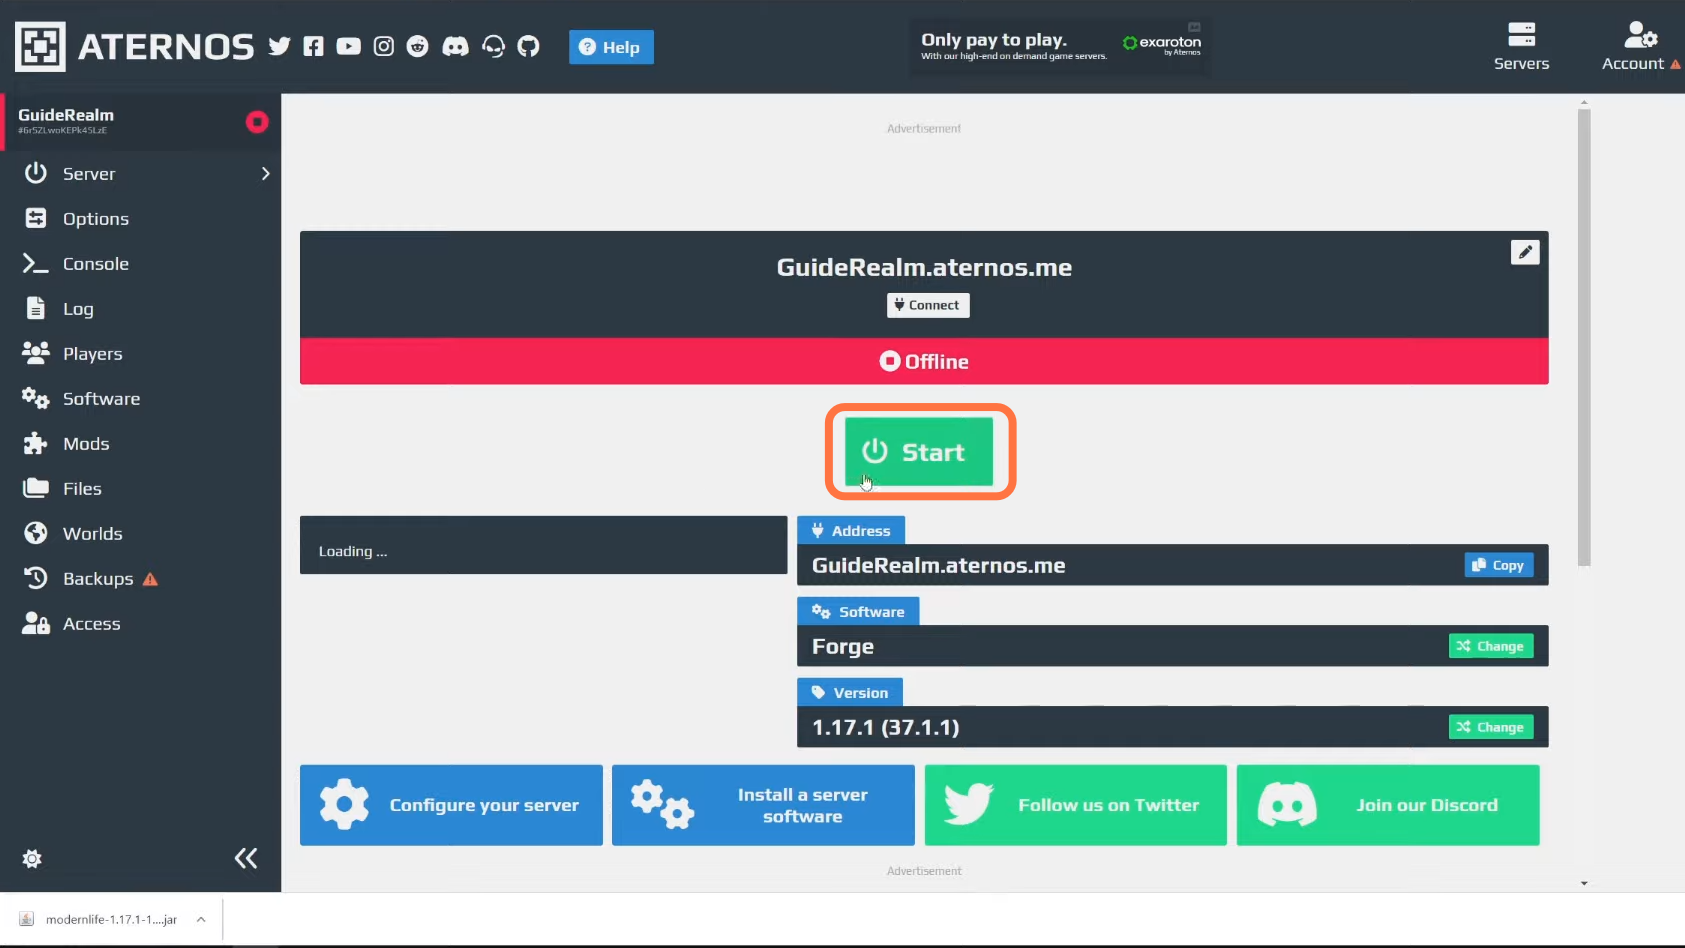
2. Your server will be in an offline state, which is best for now. You need to click on the Software Tab from the left-hand side dashboard.
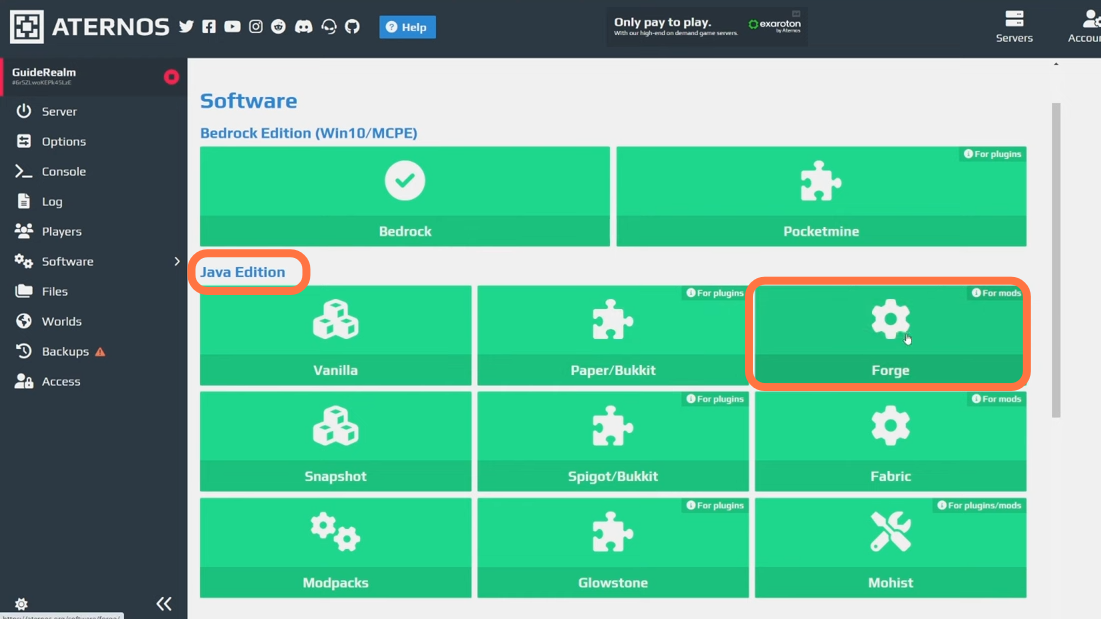
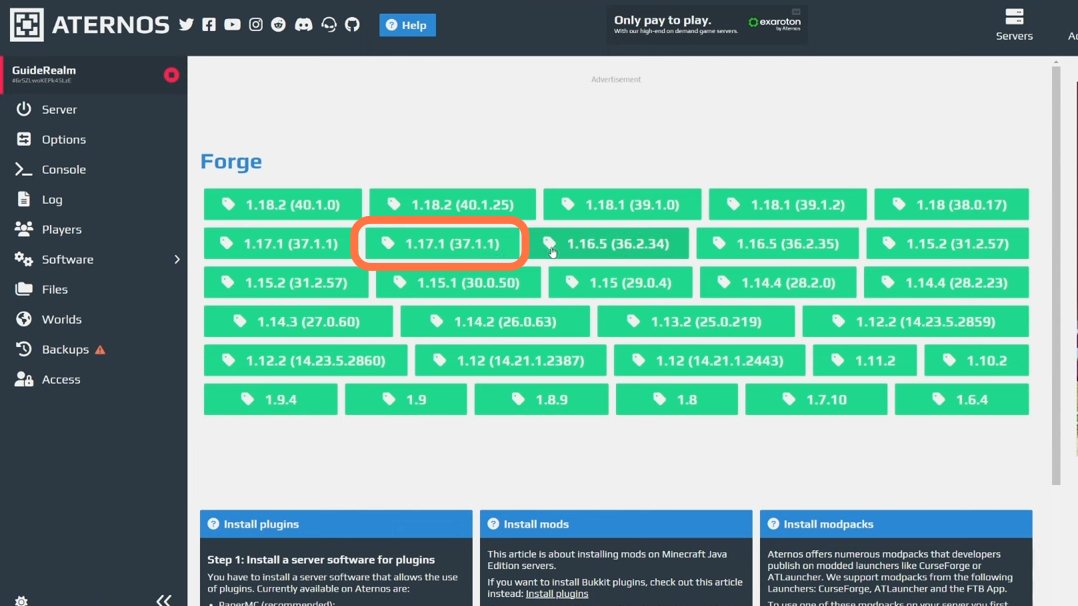
3. And then click on Forge under Java Edition.
4. Choose a version that will support the mod you want to install. Also, make sure the forge version you run on the Minecraft client and Launcher should be the same as on your server. Otherwise, you can’t join. So for the moment, you can select version 1.17.1.
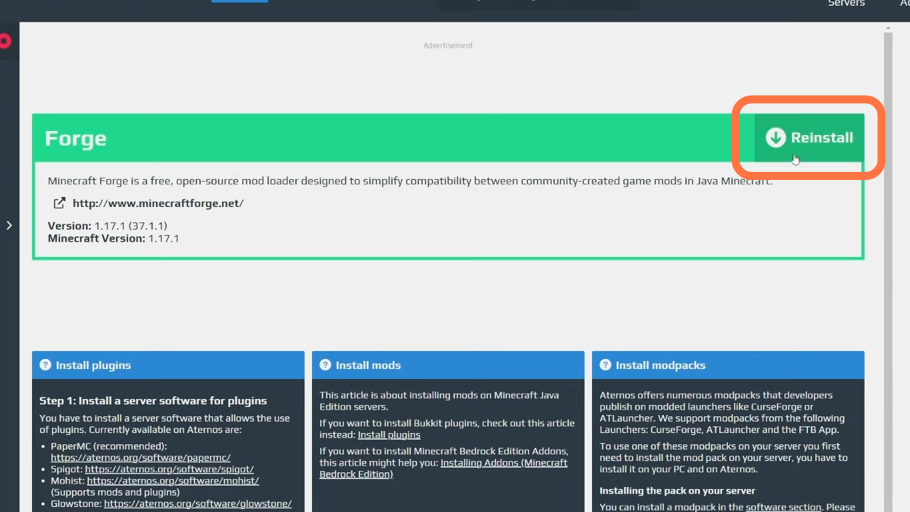
5. Now click on the Reinstall button on the Forge details page.
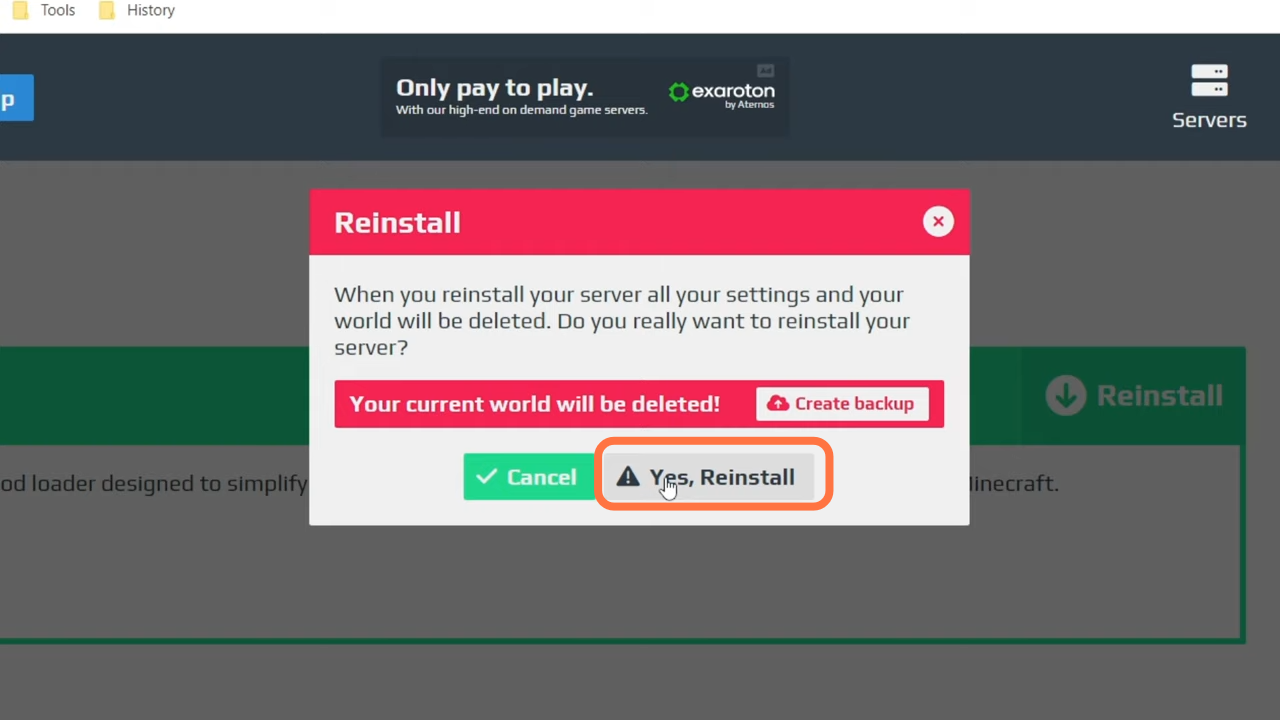
6. A pop-up will appear to indicate that the current world will be deleted. But still, you need to click on Yes!
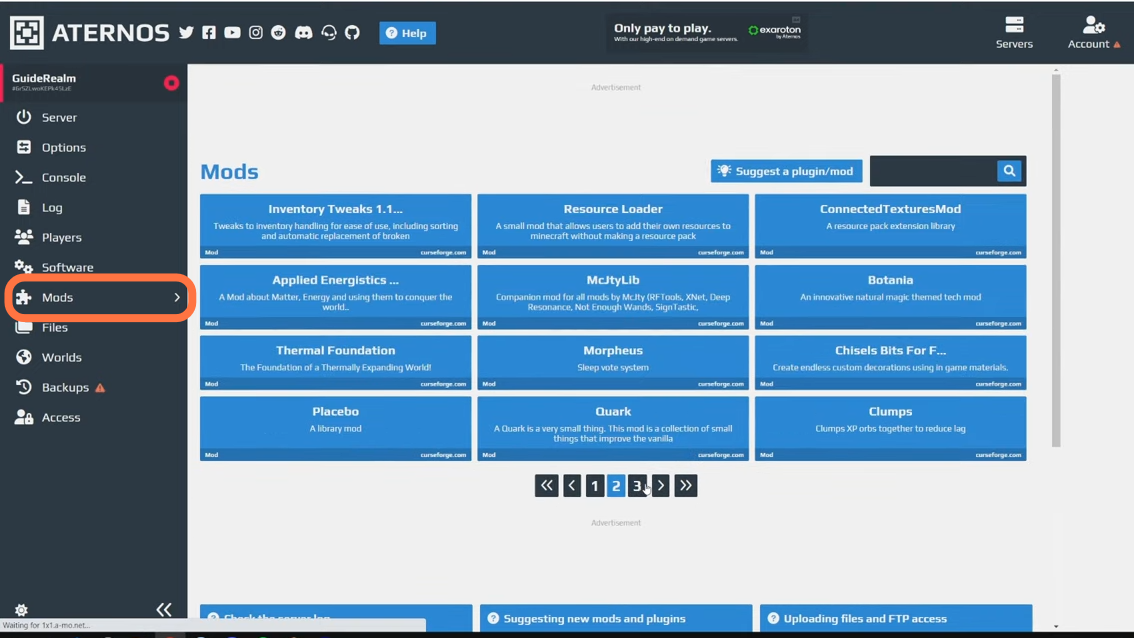
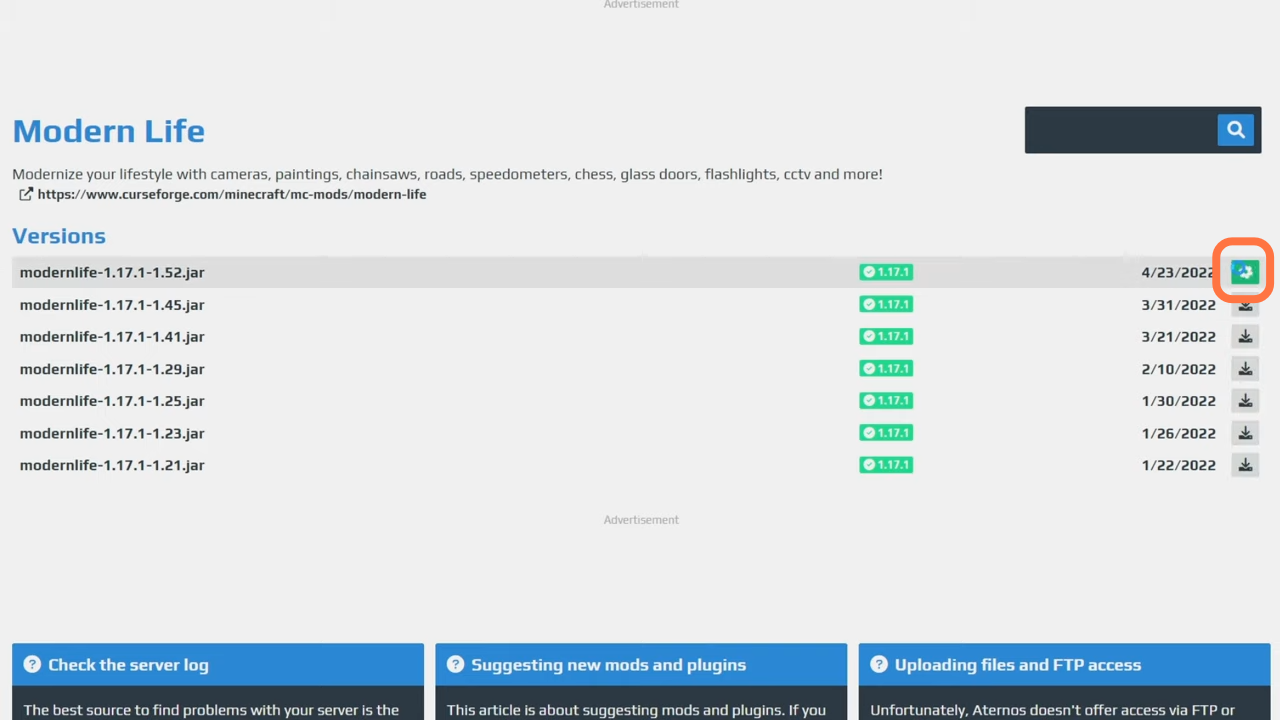
7. Now click on the Mods Tab from the dashboard and choose a mod from the available collection of Mods. You can search for a mod using the search bar on the top right side.
8. As an example, you can install the ‘Modern Life’ mod. Click on it to go to the details page where you will find different versions of the mod for Minecraft 1.17.1. Let’s select the first one. Click on the download icon and it will be added to your server.
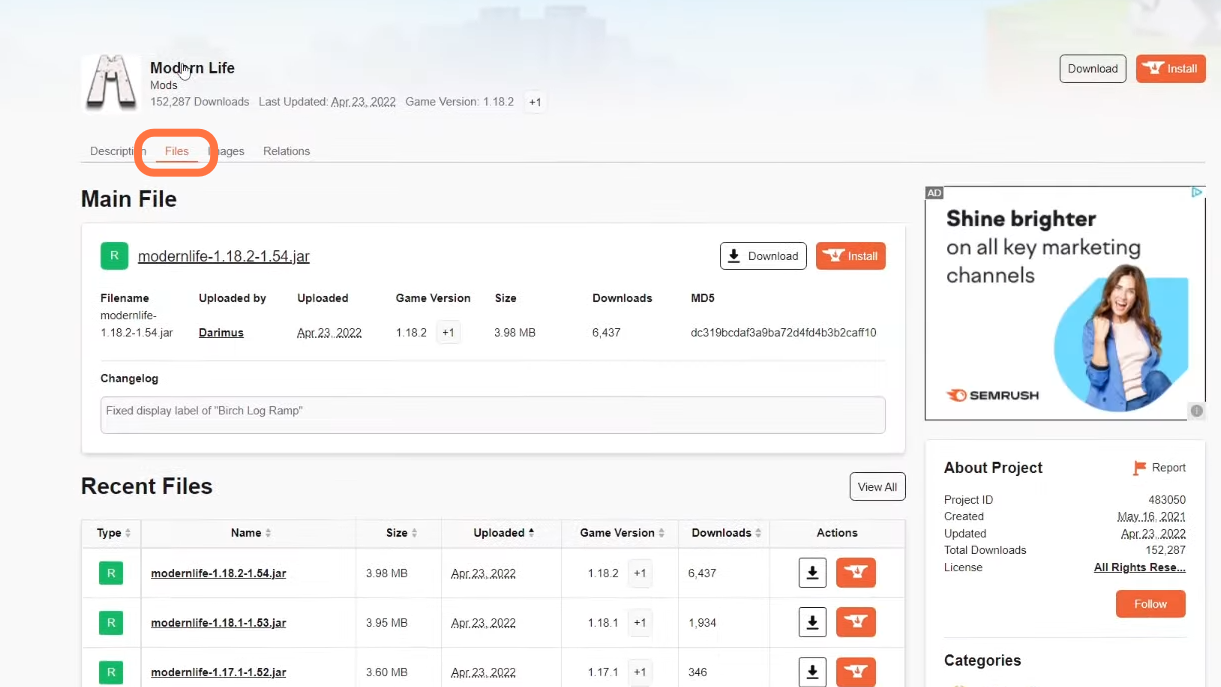
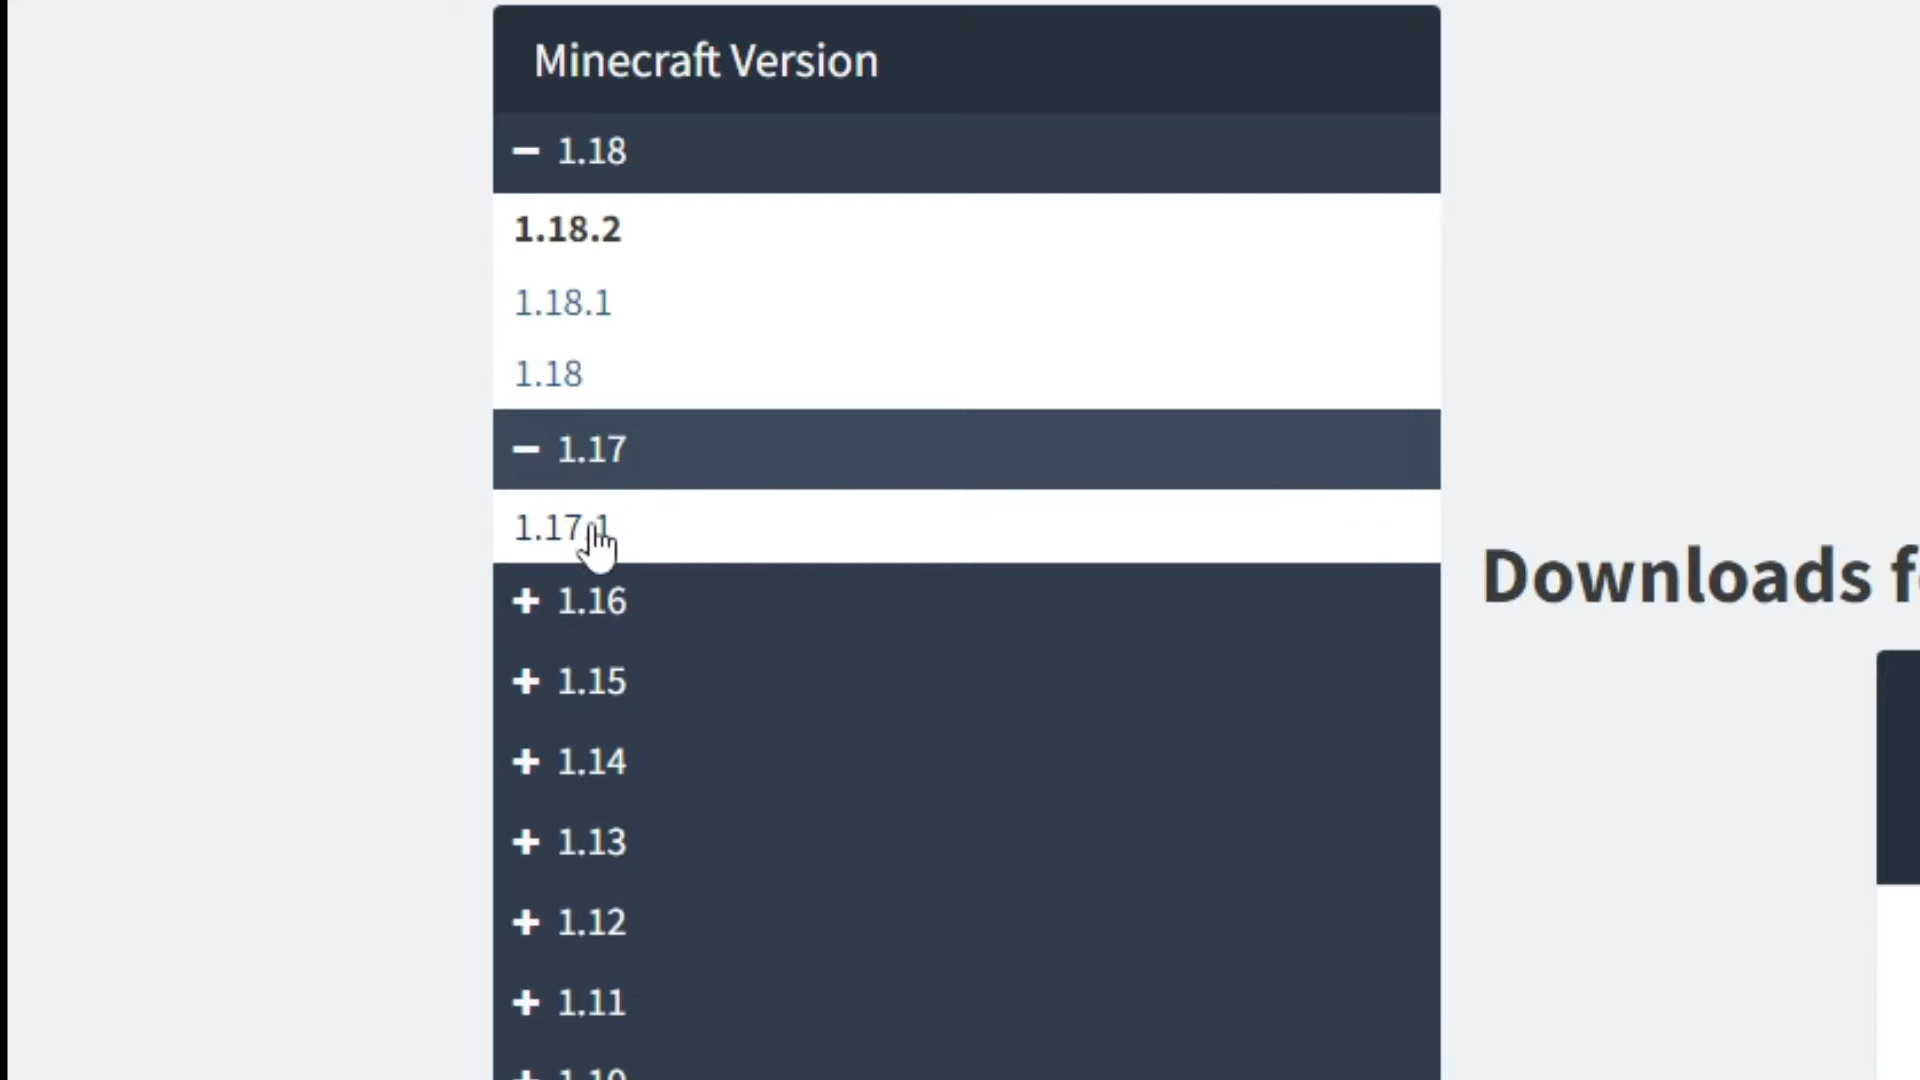
9. Now you need to make sure you have the same version of the mod on our PC. You can download the mod from “https://www.curseforge.com/minecraft/mc-mods/surge“. Search by mod name, then click on files and choose the exact same version which you added to your server. Click on the download arrow icon to begin downloading.
10. After that, download the Forge (mod loader) which you have also installed on your server. Install the same version which was on your server (1.17.1).
11. Go to the downloads folder on our computer and drag the downloaded ‘Forge’ file and also the ‘Modern life’ mod file onto the desktop.
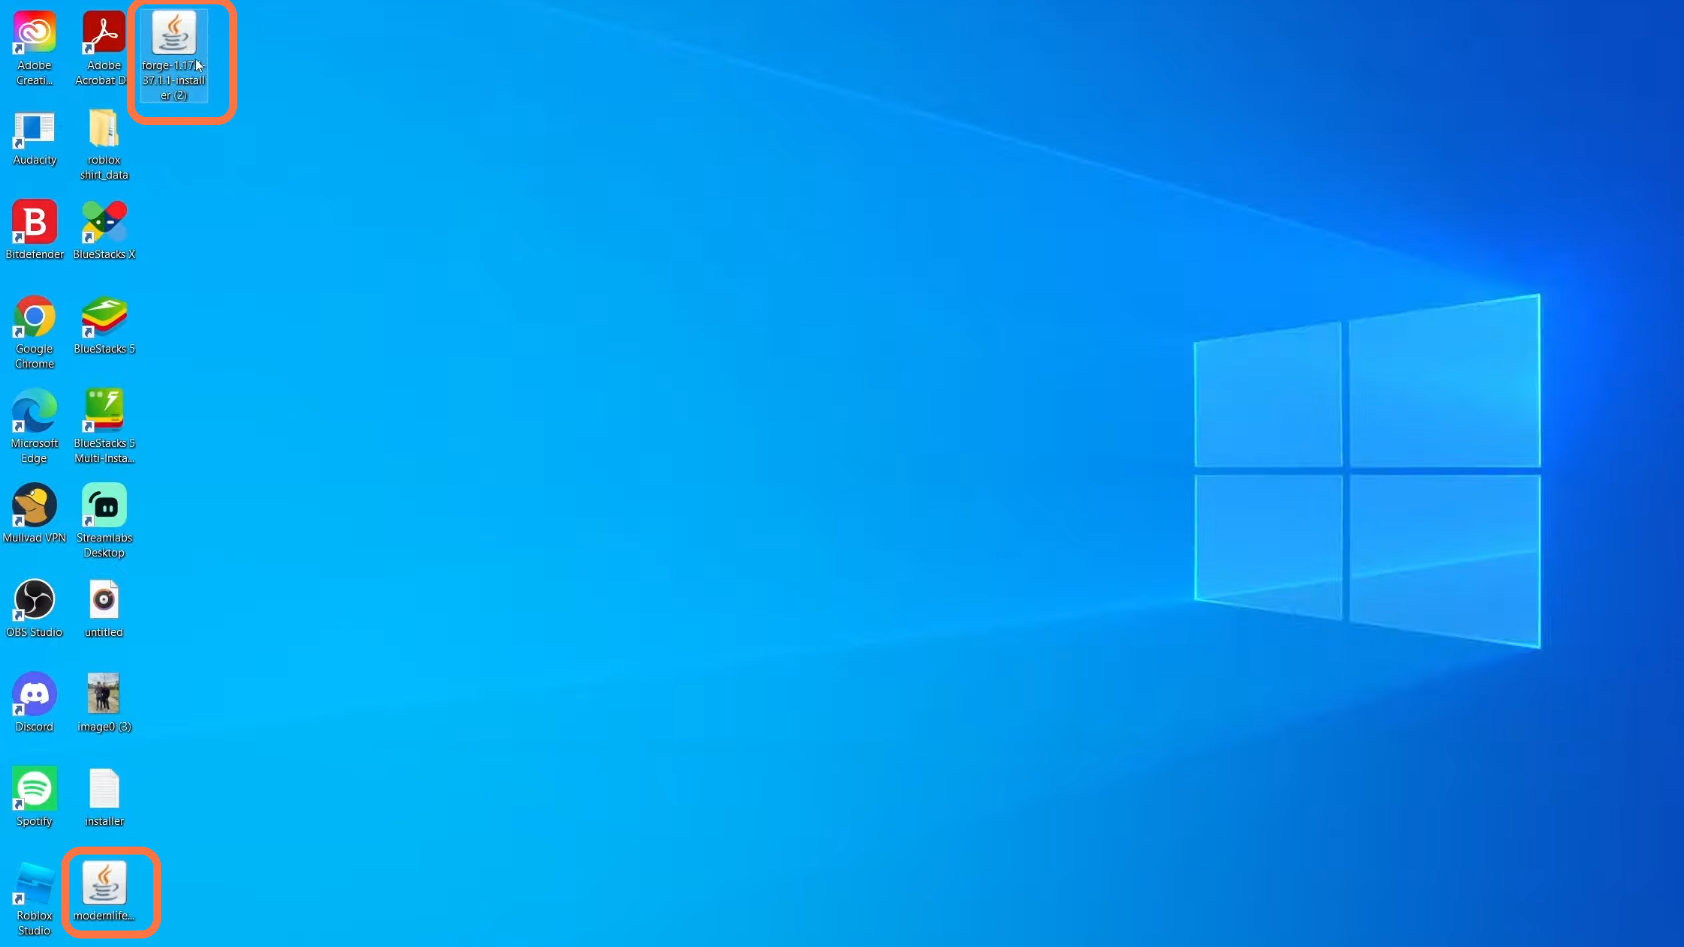
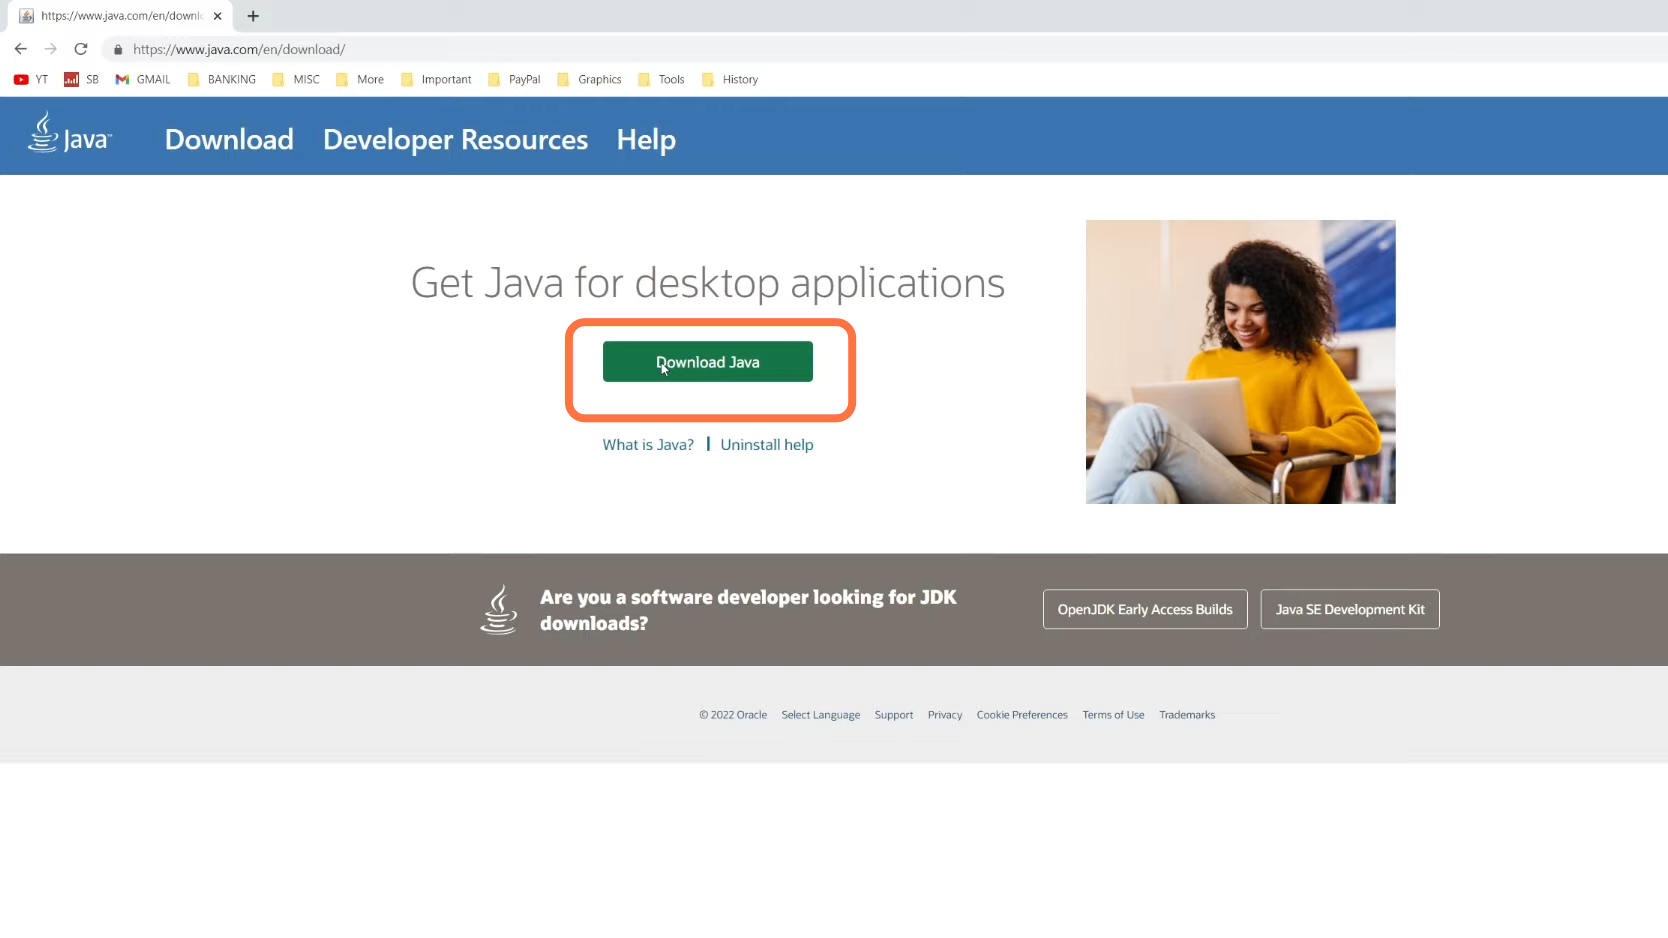
12. Double-click to launch the file and follow the instructions in the wizard. You will need Java to run this program. Download Java from here: https://www.java.com/en/.
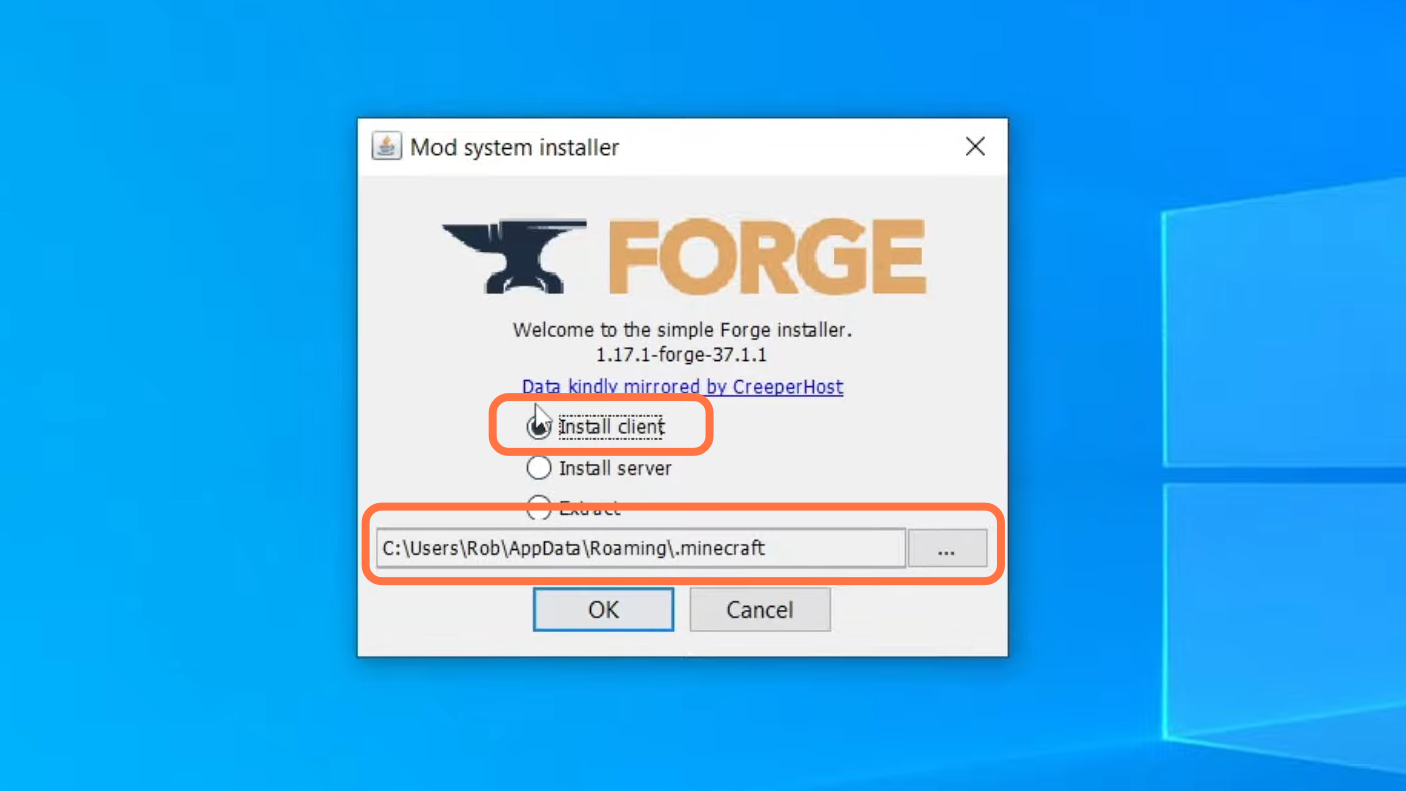
13. Now come back to the forge installation file and double-click on it to open it. Once the pop-up appears, choose the Install Client, set the installation path, and click OK. It will install & build all processors, you just need to wait for it to finish.
14. Once it completes, come back to the desktop and press ‘Windows Key + R’ to launch the Run which actually allows you to go directly to our folders.
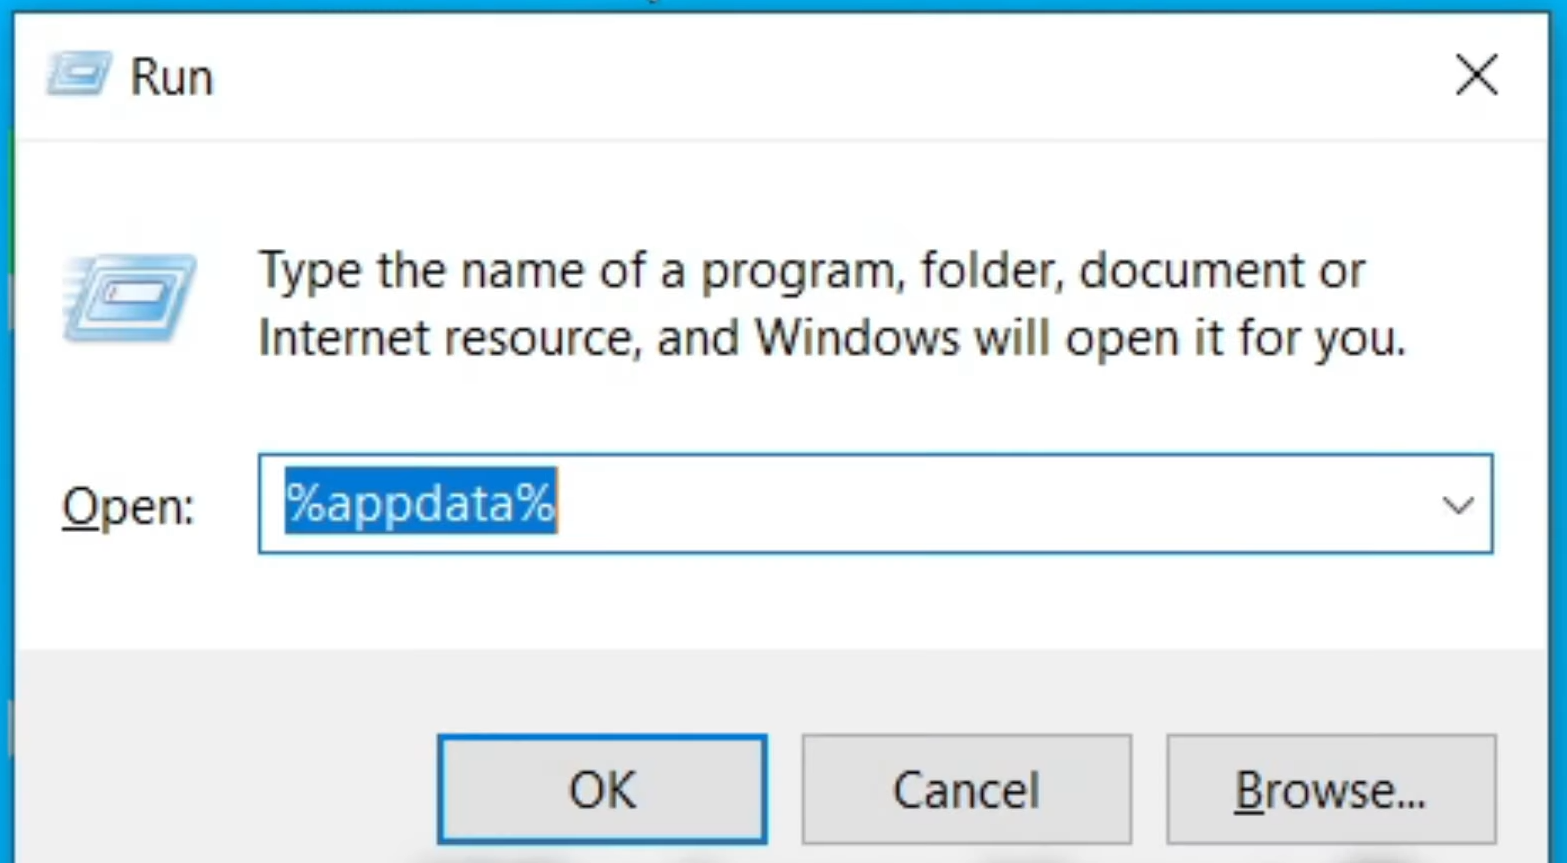
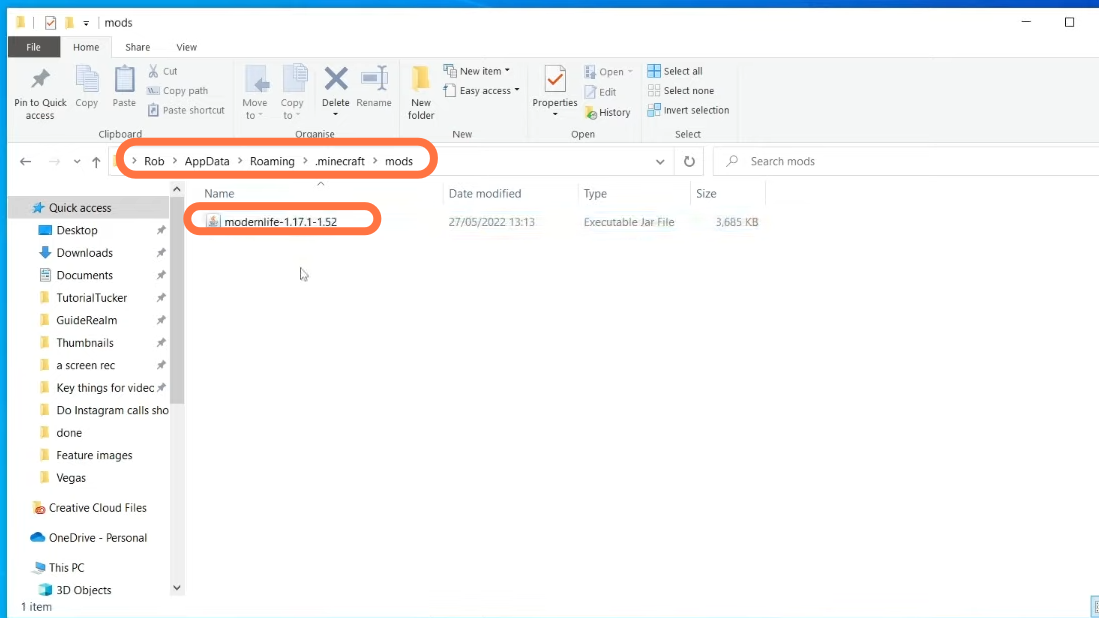
15. It will take you to the directory where your game folder is available. Open the .minecraft > mods and drag the “modernlife” jar file from the desktop to this mods folder.
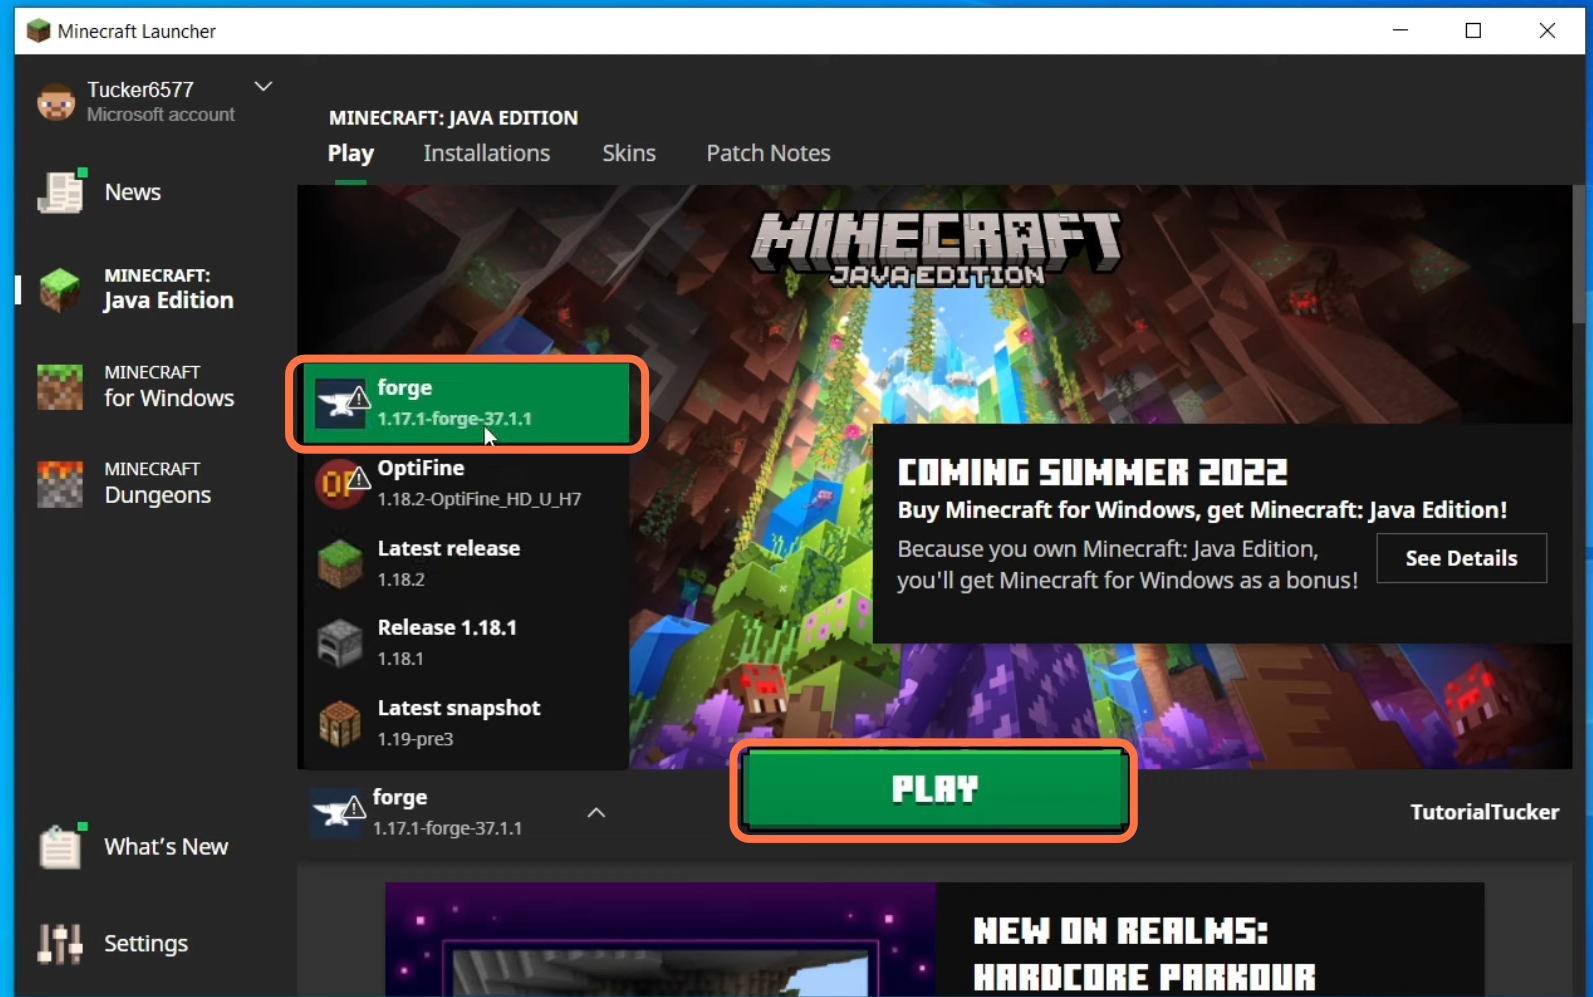
16. Now launch the Minecraft game and start the server. Your mod has already been added to the server.
17. Also, make sure select Forge before clicking on the Play button.
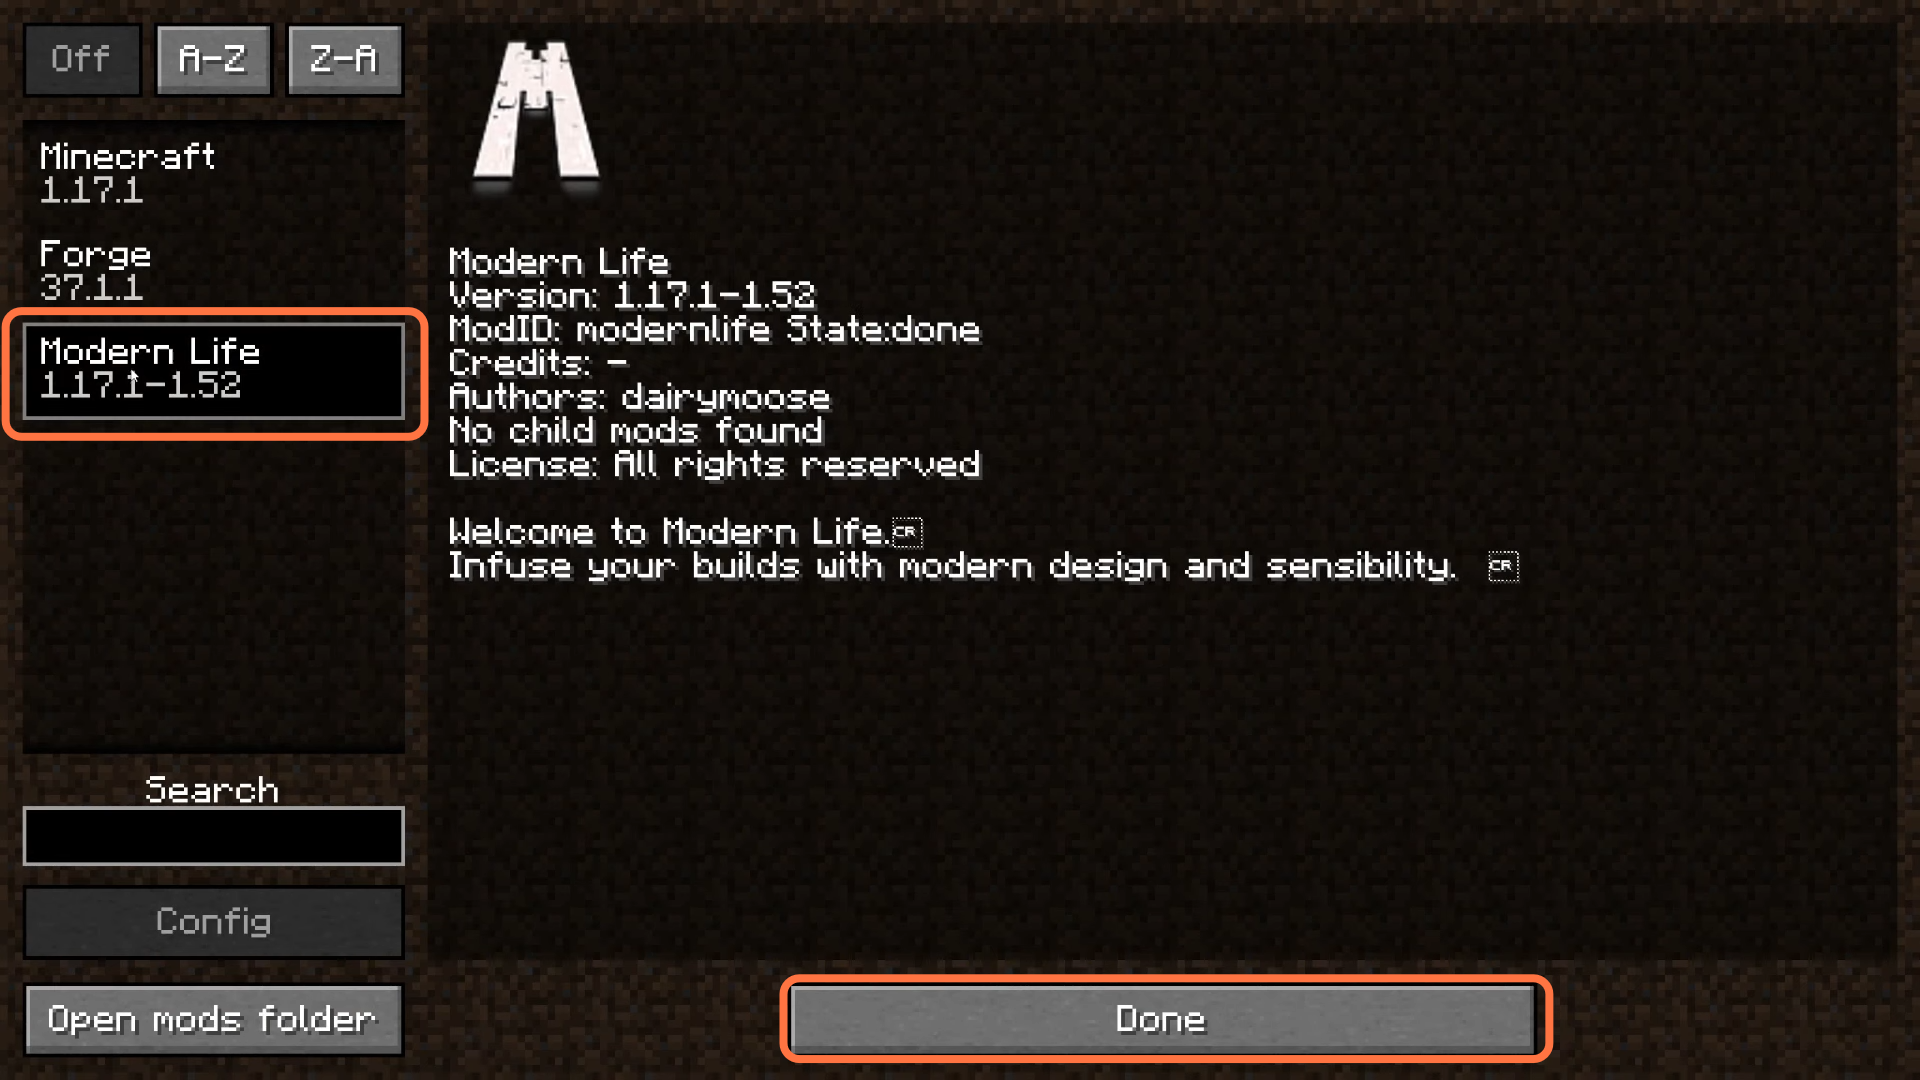
18. When the game loads up, you have to select Mods from the menu to check if mods have been installed.
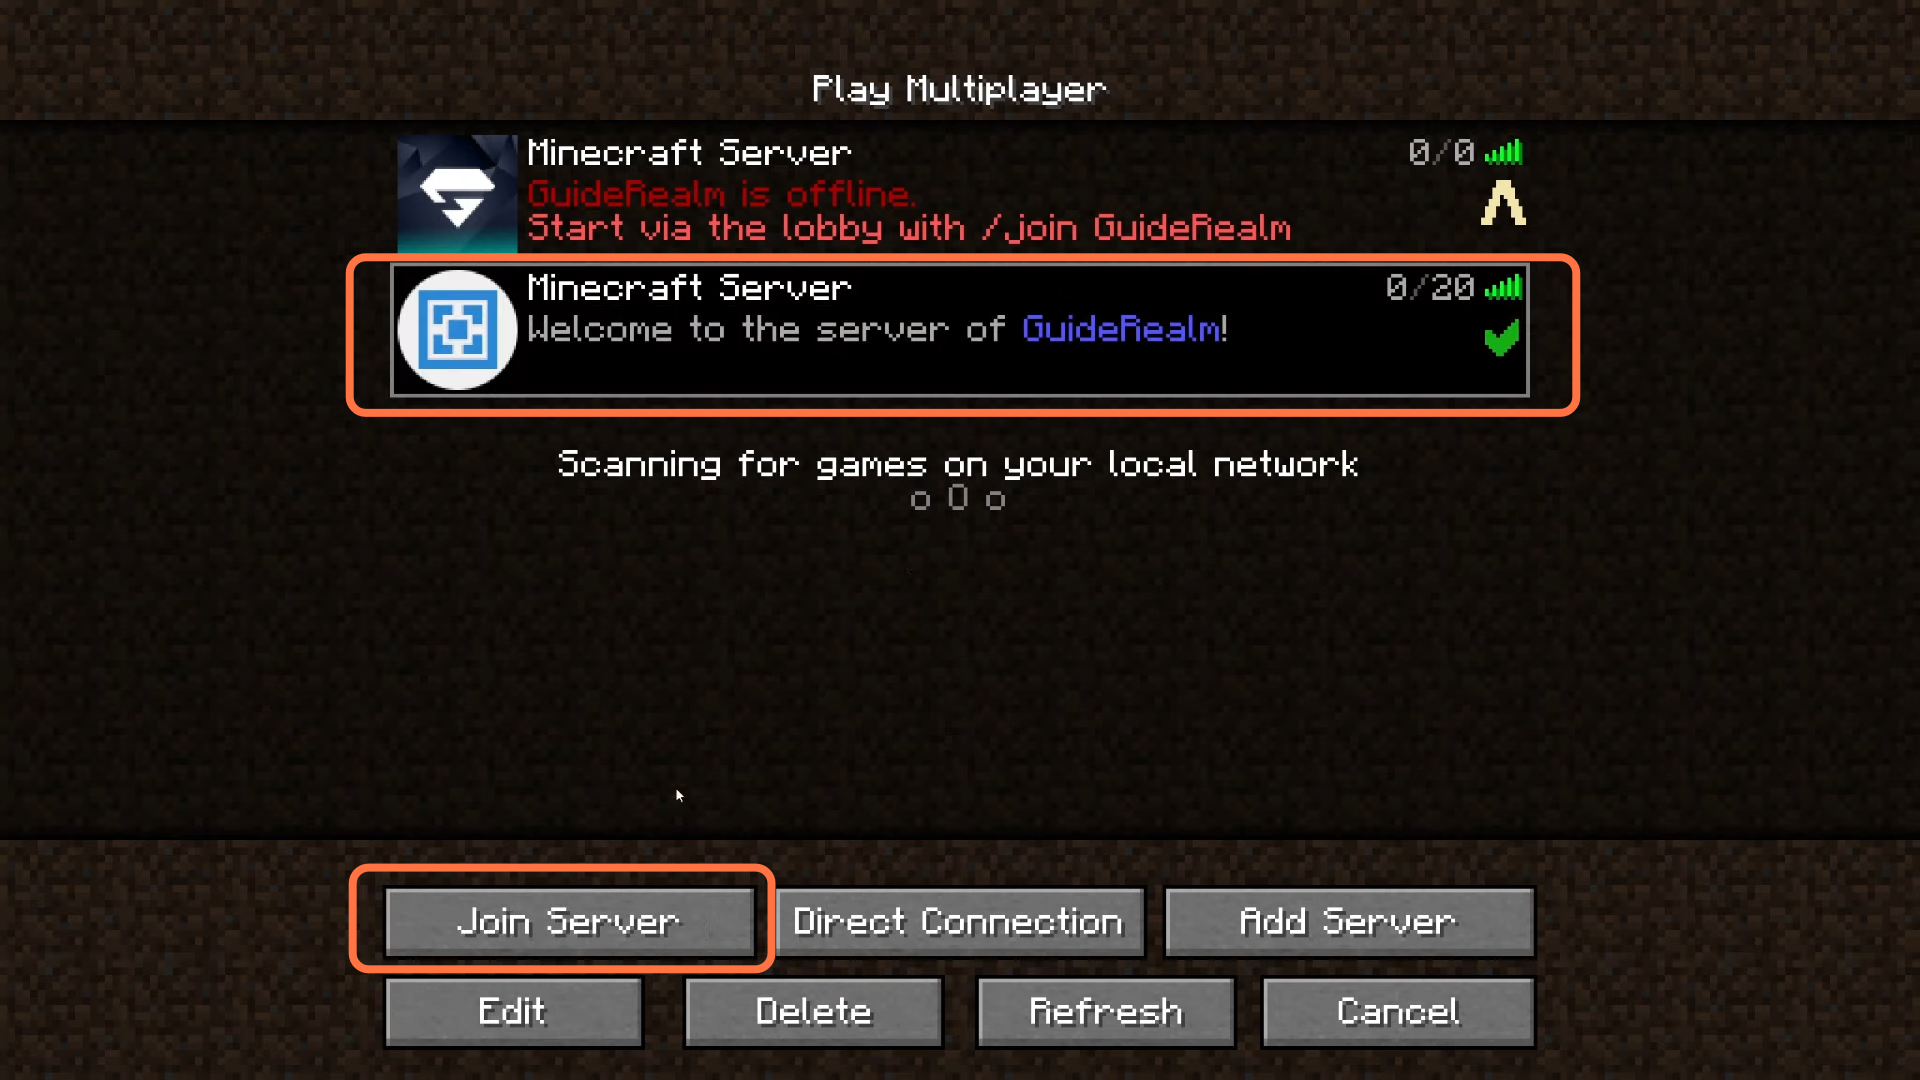
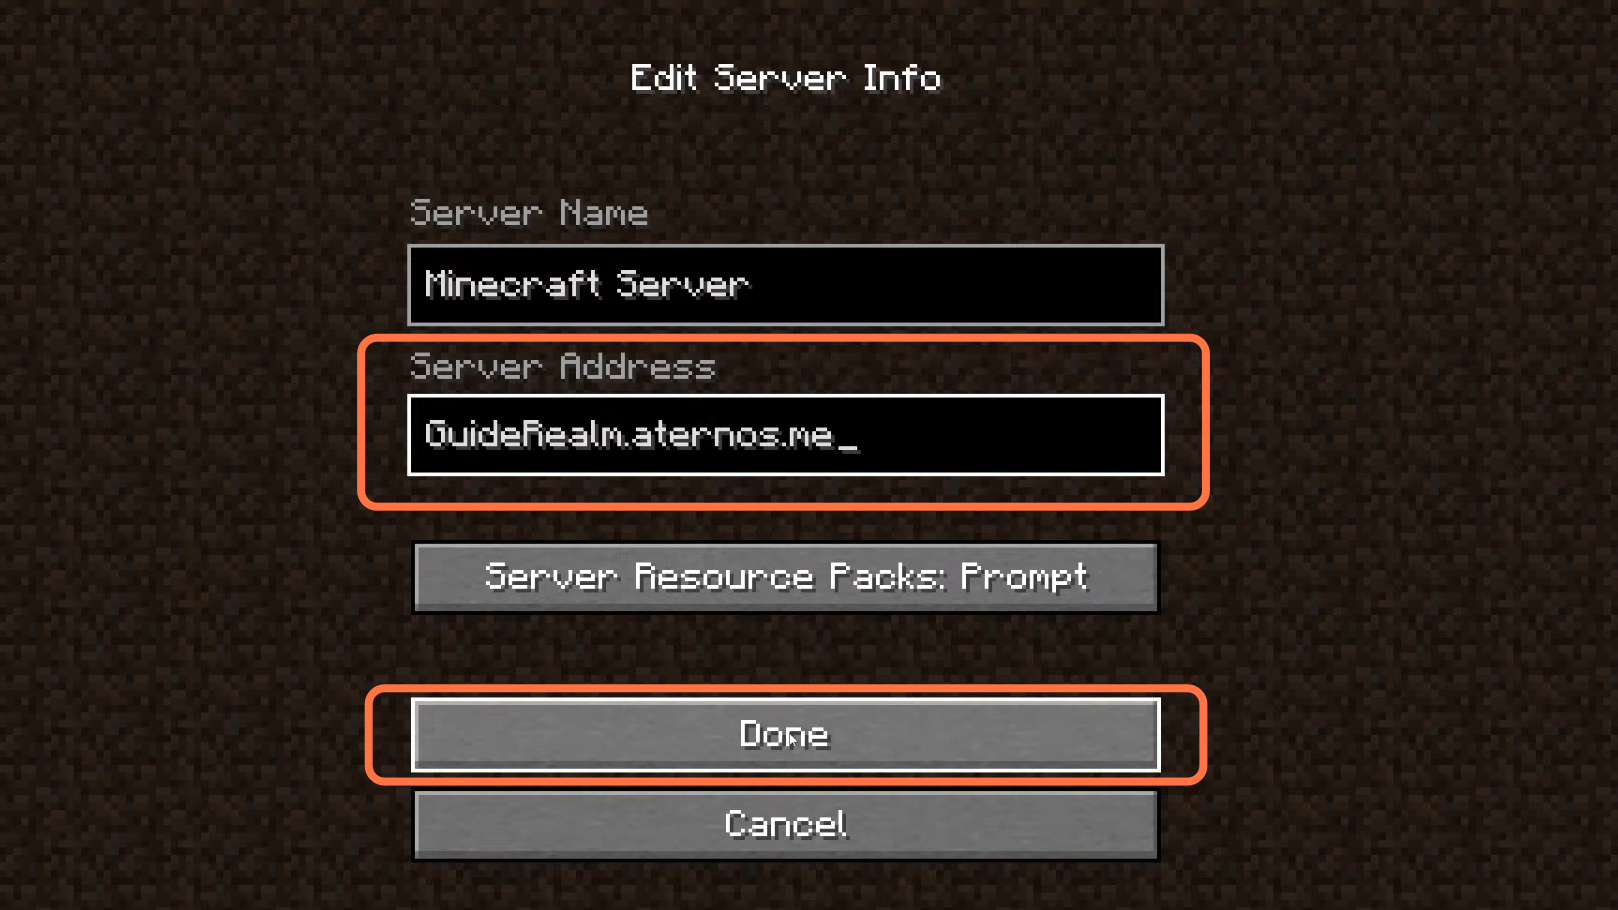
19. As mods show up now, let’s join your server. Click on multiplayer then press ‘Add Server’. Add your domain name in the Server address field and click Done.
20. After that, the server will be available online select it and click Join Server.