This guide will tell you how to add poses in Skyrim Legendary and Special Edition with the use of Poser Hotkeys Plus Mod.
1. There are some prerequisites for this mod to work properly such as you should have knowledge of how to run executables via a mod manager like Nemesis, FNIS, etc. Some essential mods which need to be installed are (SKSE, SkyUI, Mfg Fix, PapyrusUtil, UIExtensions, RaceMenu, JContainers, Address Library for SKSE Plugins, and ConsoleUtilSSE). Download the relevant versions of the mods to the game like if you are using Skyrim SE, download the special edition version of that mod. You can download these mods from “https://www.nexusmods.com/“. Click on the Files tab and then press the “Mod Manager Download” button to get these mods. You need to create an account to download any files.

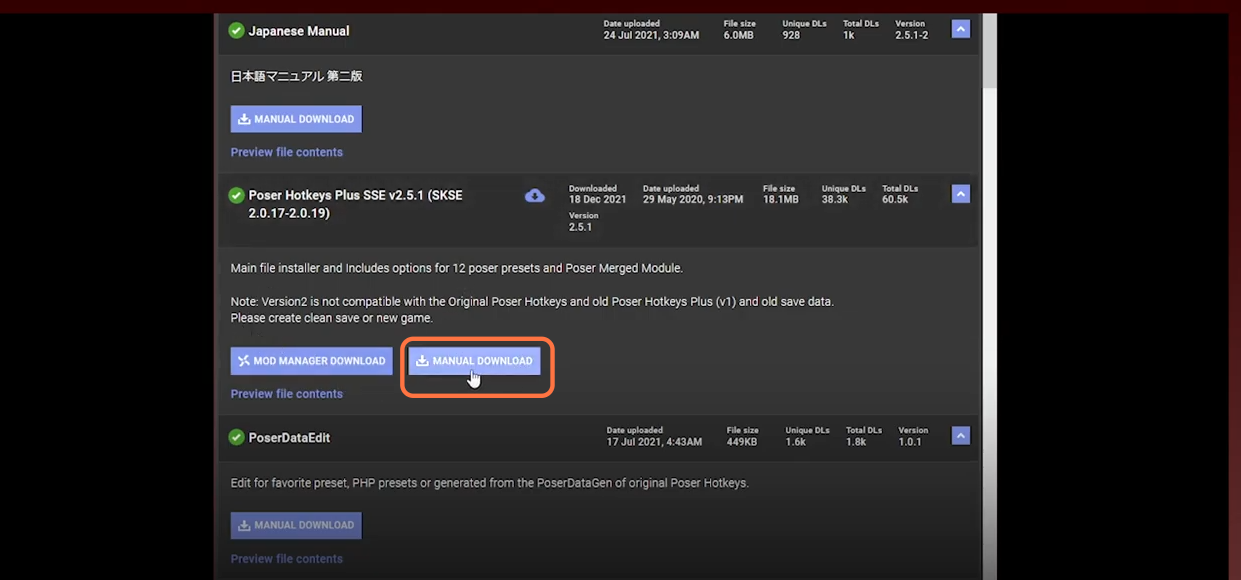
2. After that, download the Poser Hotkeys Plus mod from “https://www.nexusmods.com/skyrimspecialedition/mods/17743“. Click on the Files tab and press the Manual Download button to get the mod. Make sure to download the SE version of the mod if you are playing the special edition of the game.
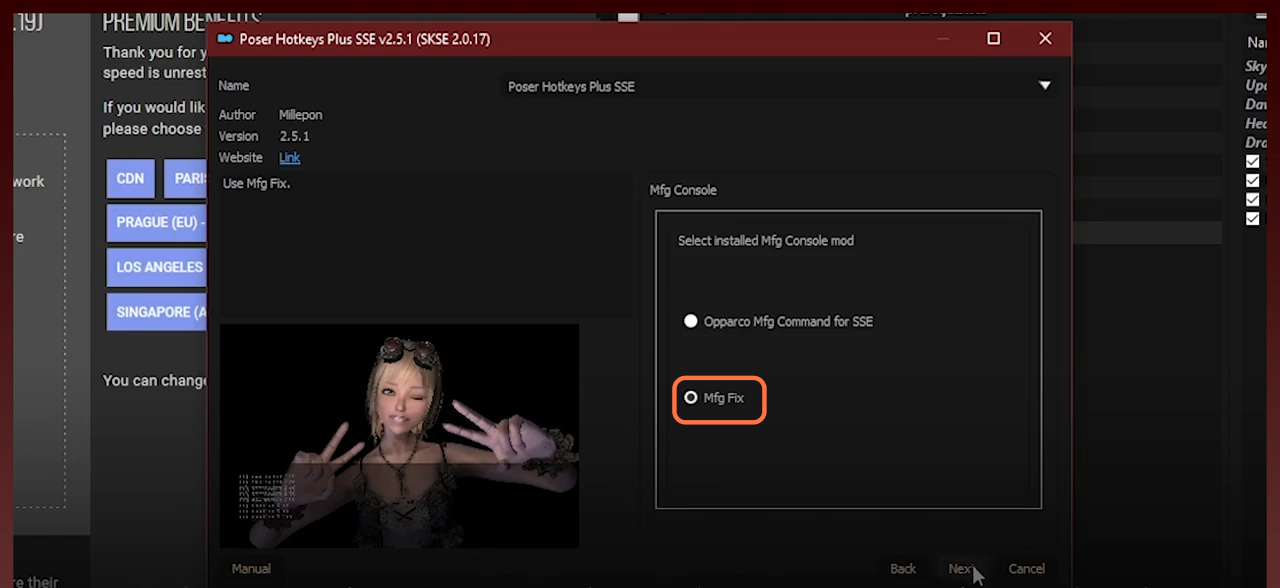
3. Open the downloaded file using WinRAR archiver and run the executable file, you will be greeted with the FOMOD menu, Click Next, select the Mfg Fix option and then press the Next button again to get the Optional Files window where you can pick the options you wish. But it is recommended to skip them and click the Install button to begin the installation.
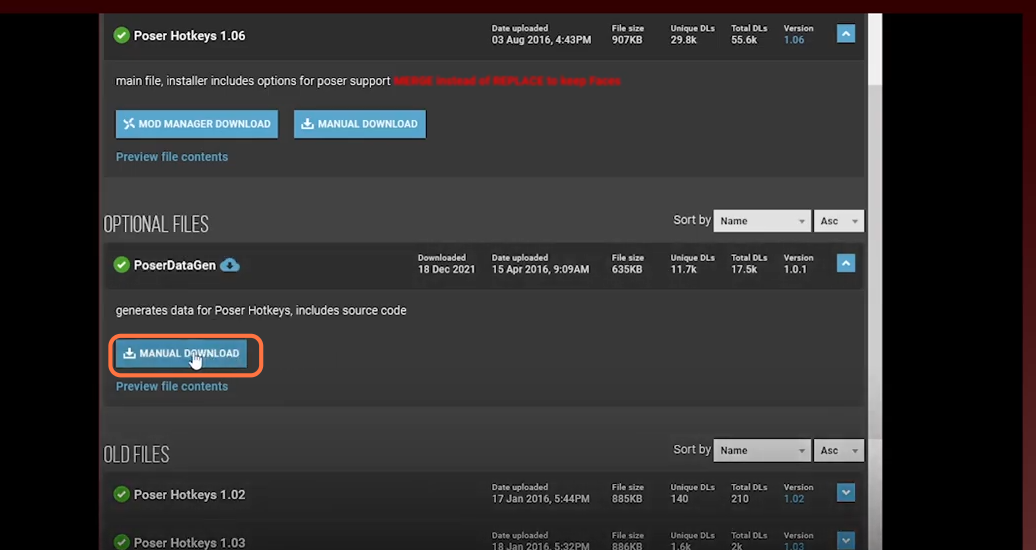
4. Next, you need to install the PoserDataGen mod which is available for Legendary Edition but will work for both LE and SE versions. You can download it from “https://www.nexusmods.com/skyrim/mods/72623?tab=files“. Click on the Files tab and press the Manual Download button for the file labeled as “PoserDataGen”.
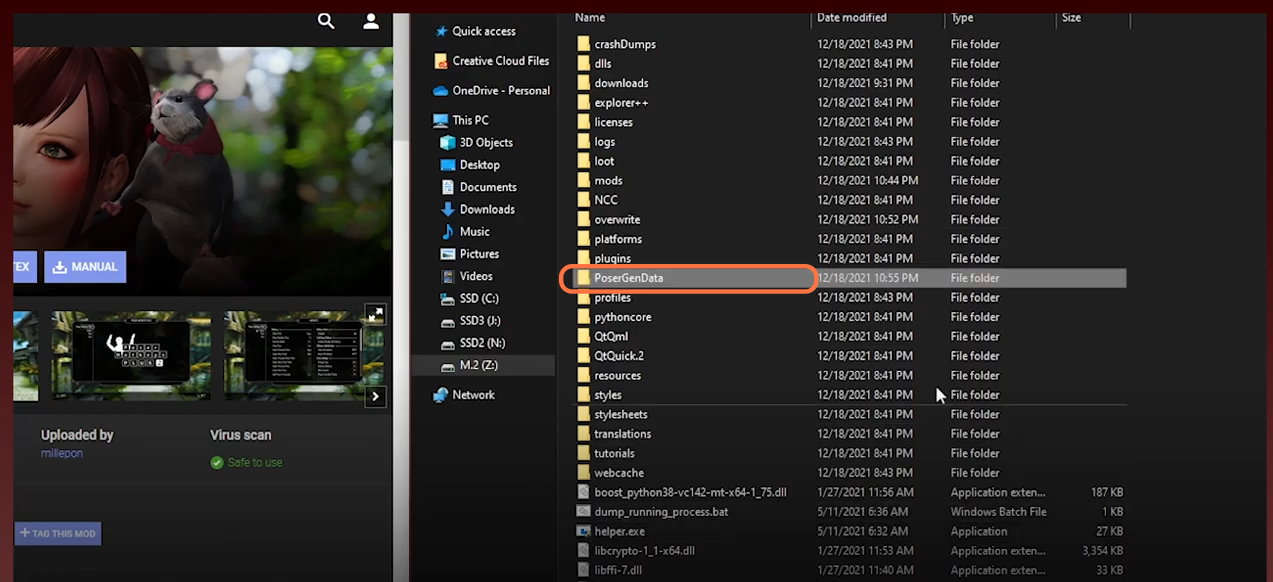
5. Now open the directory of Mod Organizer and create a folder and give it the name as PoserDataGen. Then extract everything from the downloaded file of the PoserDataGen into the newly created folder.
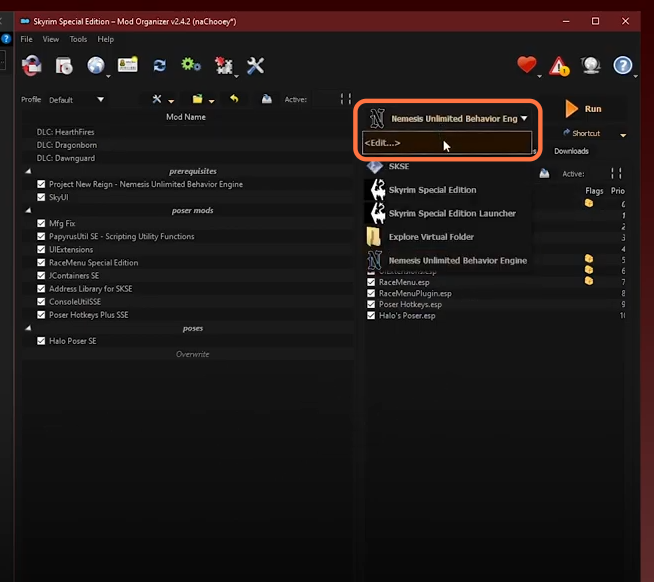
6. Now you have to add the PoserDataGen executable file in your Mod manager. Open the organizer, go to the dropdown list at the right side panel of the window and then click on the Edit option.
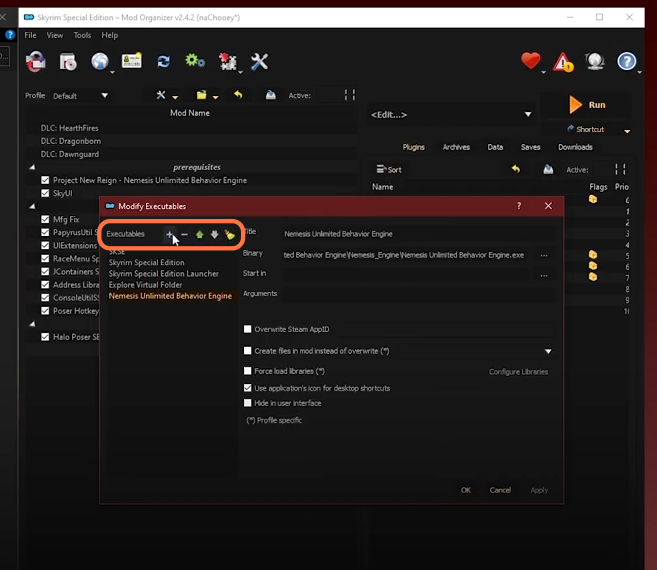
7. After that, you will get theModify Executables window. Click on the Plus icon, then go to the PoserDataGen folder and select the exe file. Click the Open button and press the Apply button.
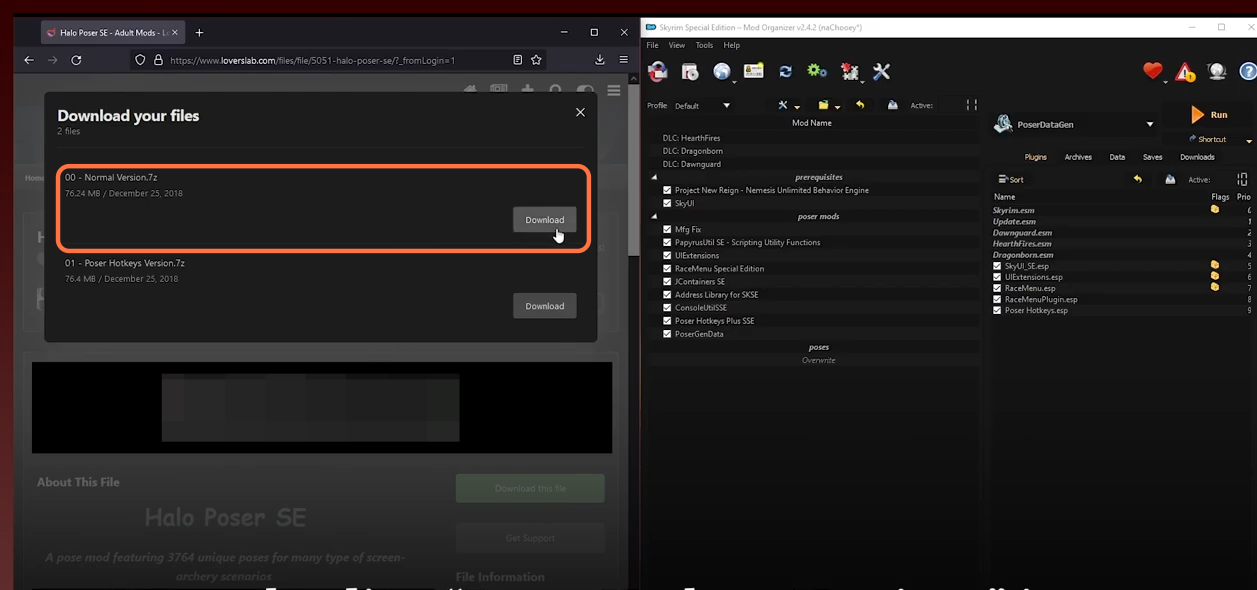
8. Now download some poses like Halo Poser SE from the Loverslab website. No need to download the Poser Hotkeys Version, just go for the normal version and install it like any other mod in the Mod organizer.
9. After that, run the PoserDataGen via the mod organizer. Select the PoseDataGen from the dropdown list and click on the Run button at the top right corner.

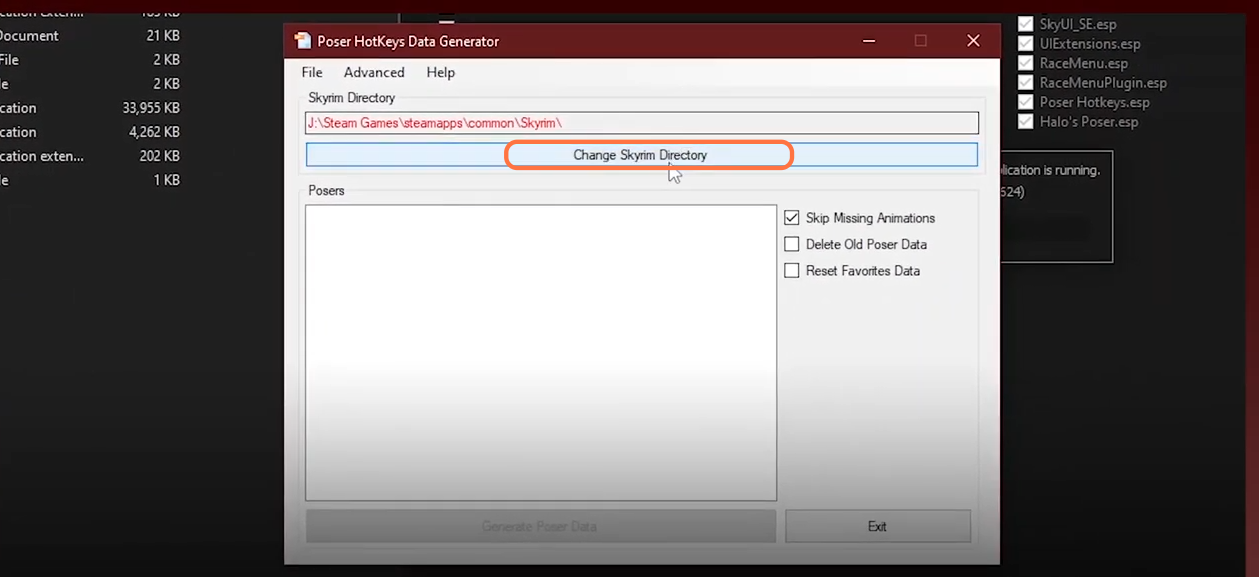
10. Select the “change Skyrim Directory” tab to properly locate your Skyrim directory if you face any error. The poses you install will appear under Posers section.
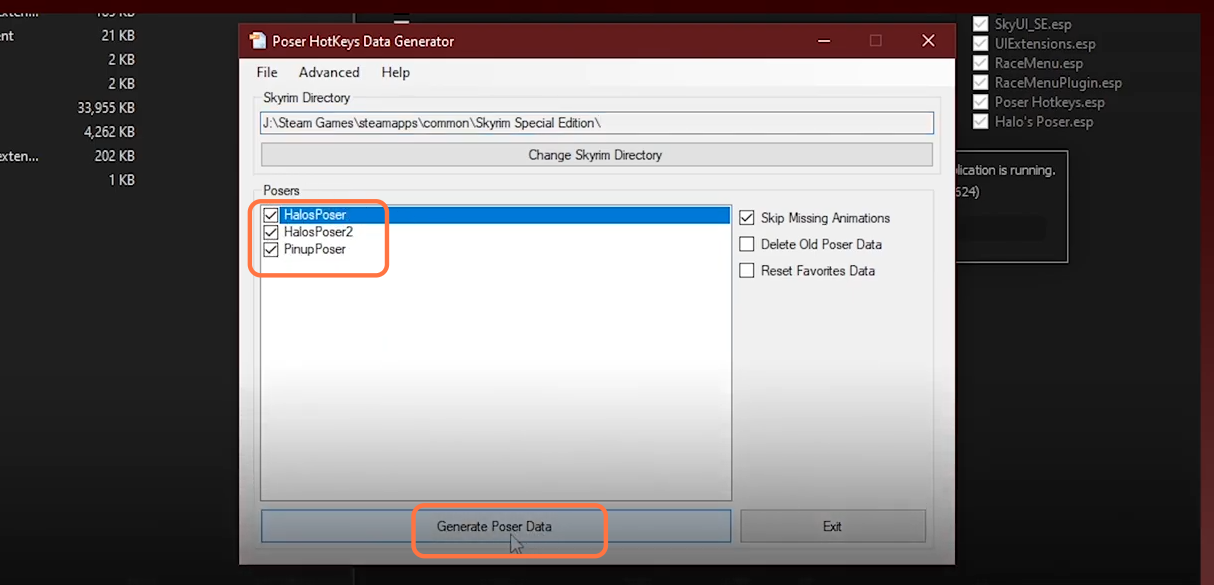
11. Check mark all the pose packs and press Generate Poser Data tab.
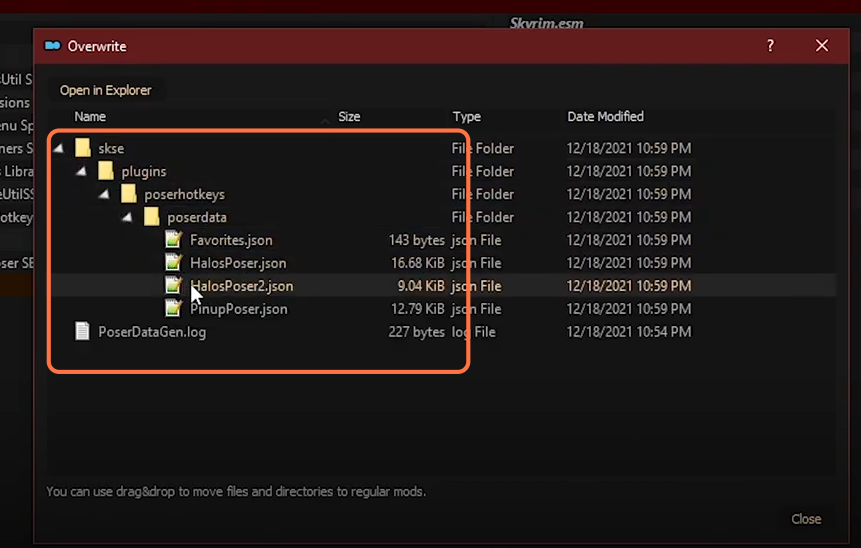
12. Then check to see if the files were generated by clicking on the Overwrite button. If you don’t get the skse folder, then you need to run it again.
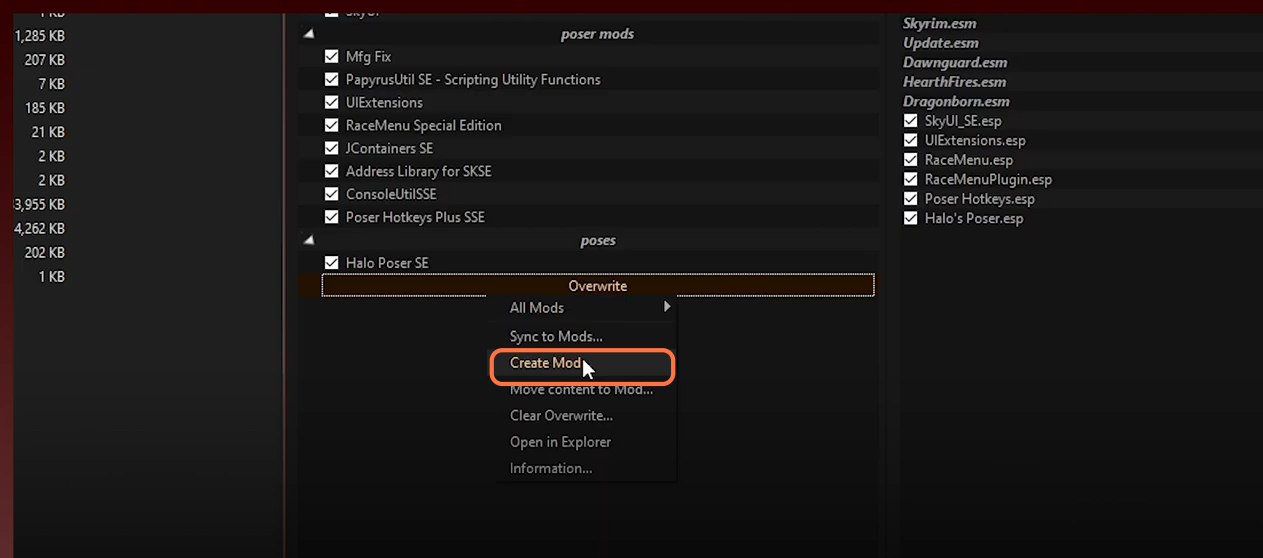
13. Now within Mod organizer 2, go ahead to use the “Create Mod” function and name this output whatever you want. Every time you run the PoserDataGen, you must put the generated files in this mod.
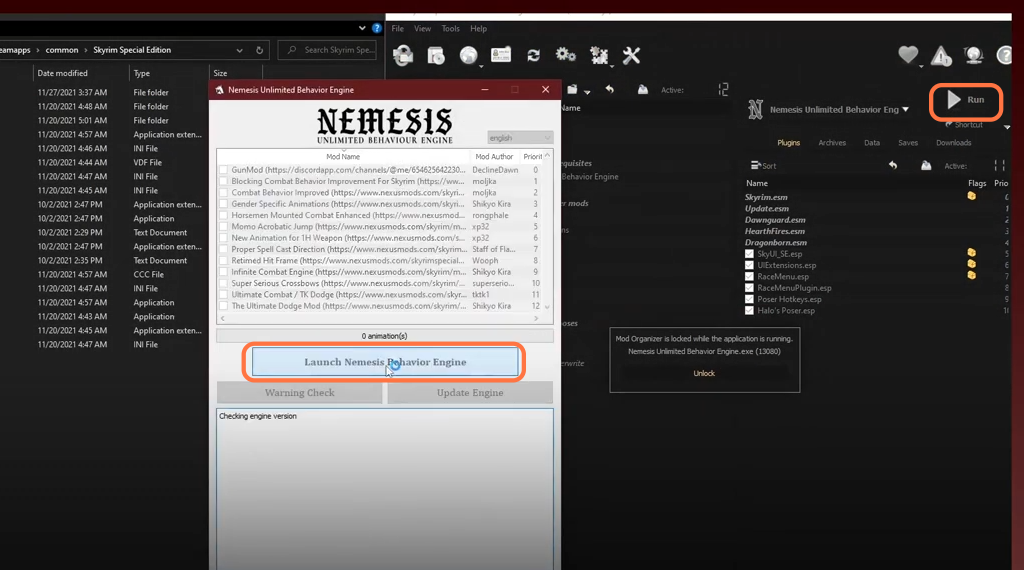
14. Now run the Nemesis from mod organizer 2 and click on the Launch Nemesis behavior Engine button. Then write click on the Overwrite tab and use the “Create Mod” function and name this output as Nemesis Output.
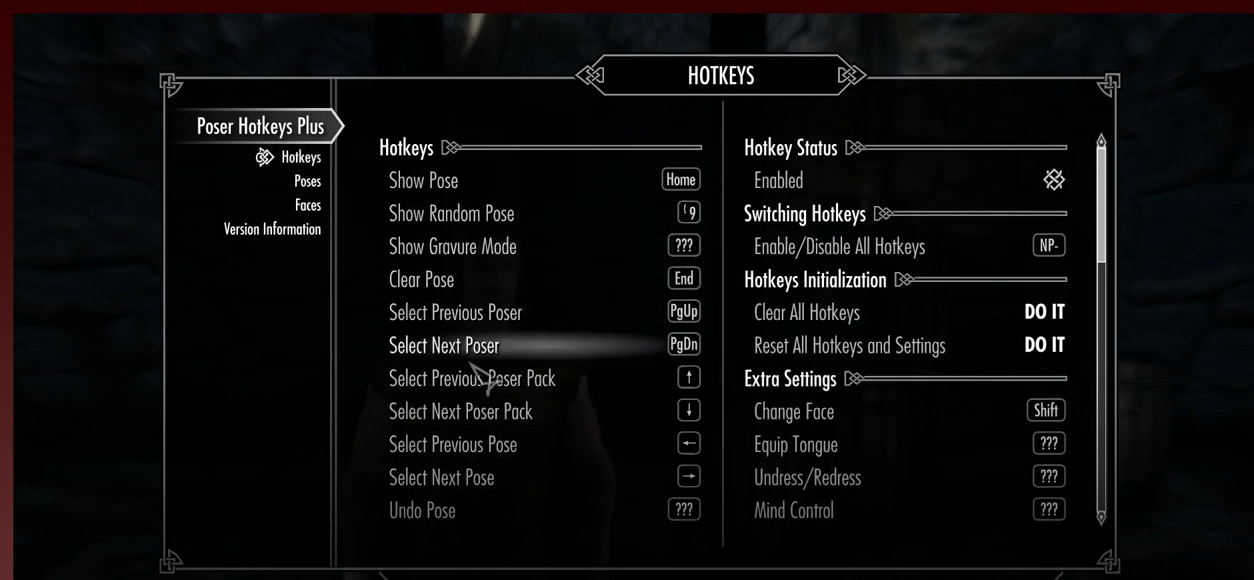
15. To use the Poser Hotkeys Plus, head to the MCM menu to find the key binds and you can select the poses manually from this Configuration menu.