This guide will help you to change the region and address in Warzone 2. You first need to log in to your PlayStation Network account associated with your Call of Duty account.
- Start by turning on your computer and go to the official Call of Duty.
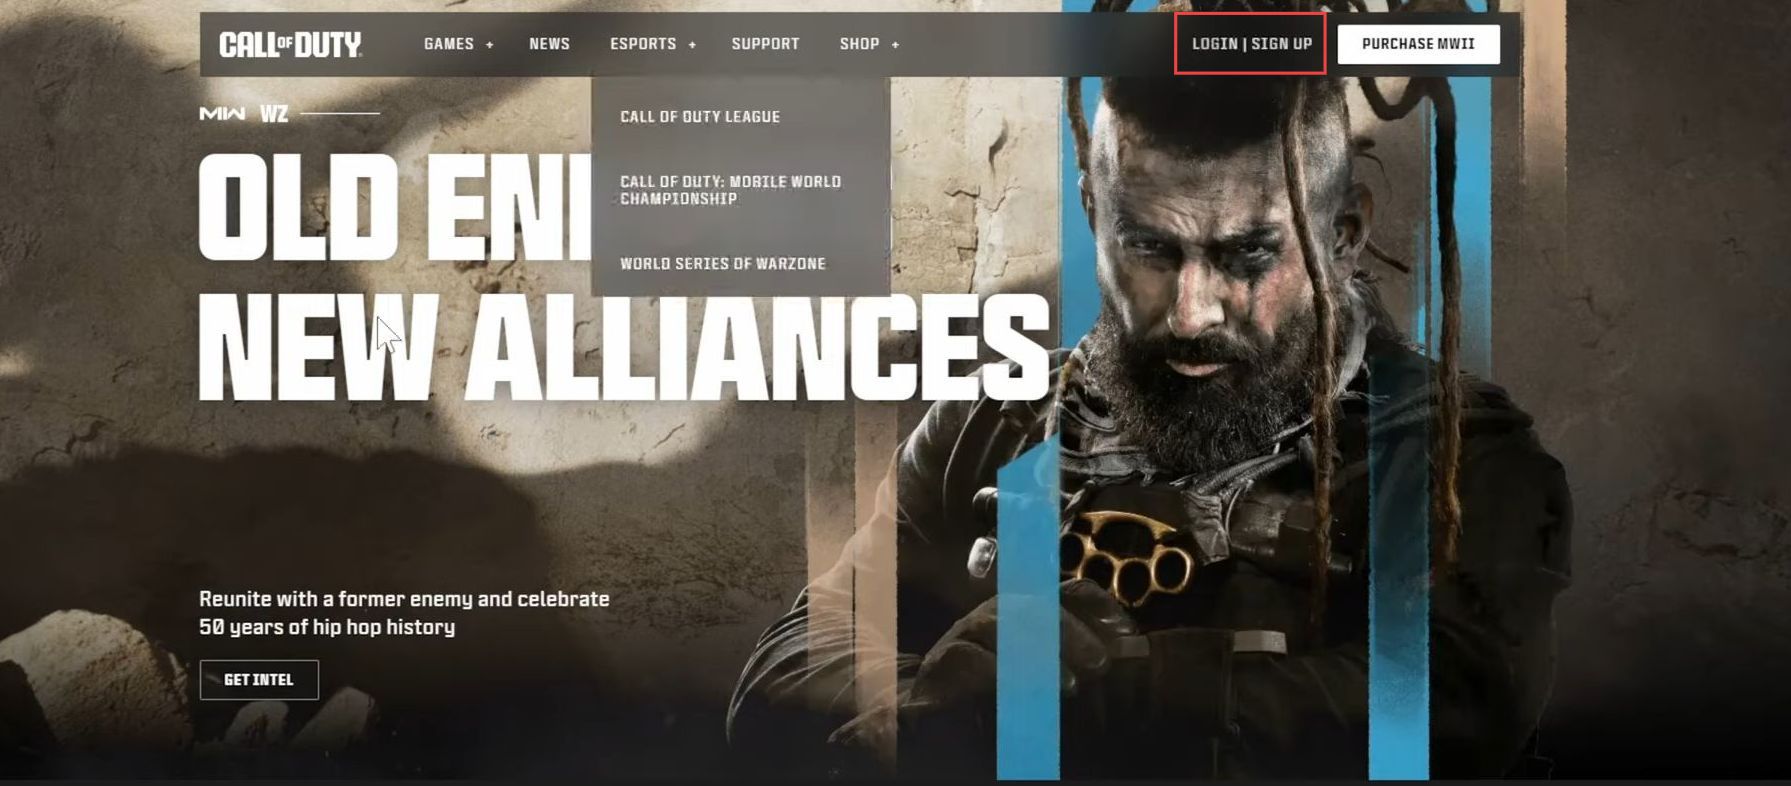
- Once the Call of Duty website loads, look for the log-in option and click on it.
This option is often located in the upper-right corner of the webpage.
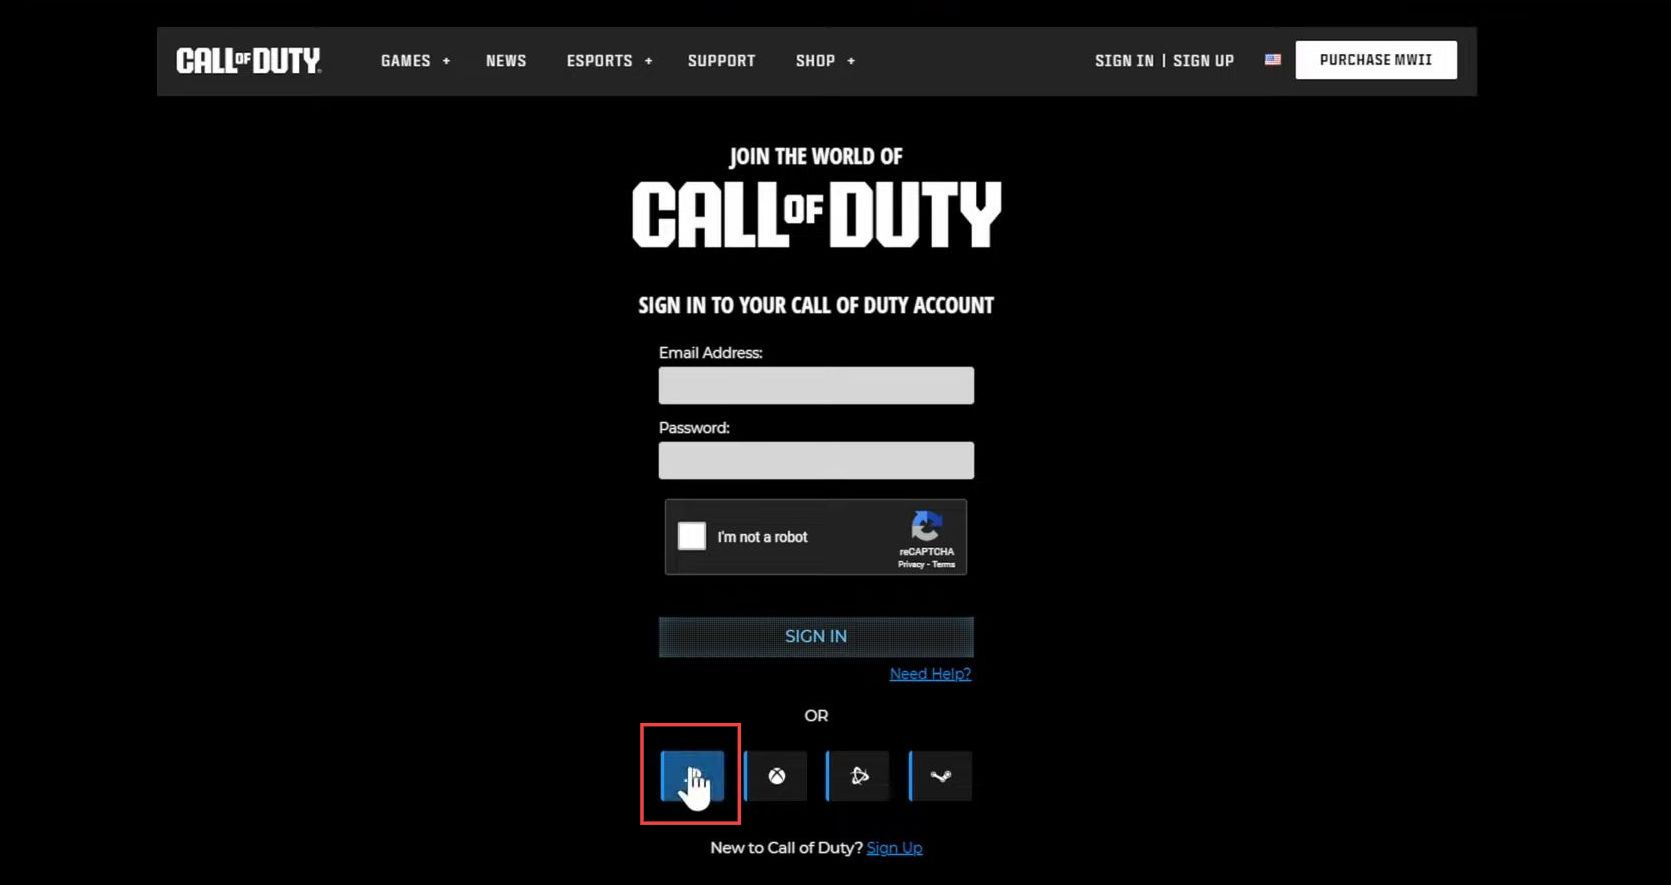
- In your account settings, look for an option that allows you to associate your Call of Duty account with your PlayStation Network account and click on the PlayStation Sign-In option. You will be redirected to the PlayStation Network login page.
- Here, you need to enter your PlayStation Network account’s email address, followed by your password, in the provided fields.
- Look for a section on the website’s interface that is related to your profile.
This could be located in the top menu, a navigation bar representing your account. - Click on the My Profile button which will take you to a dedicated page that displays your Call of Duty profile information and settings.
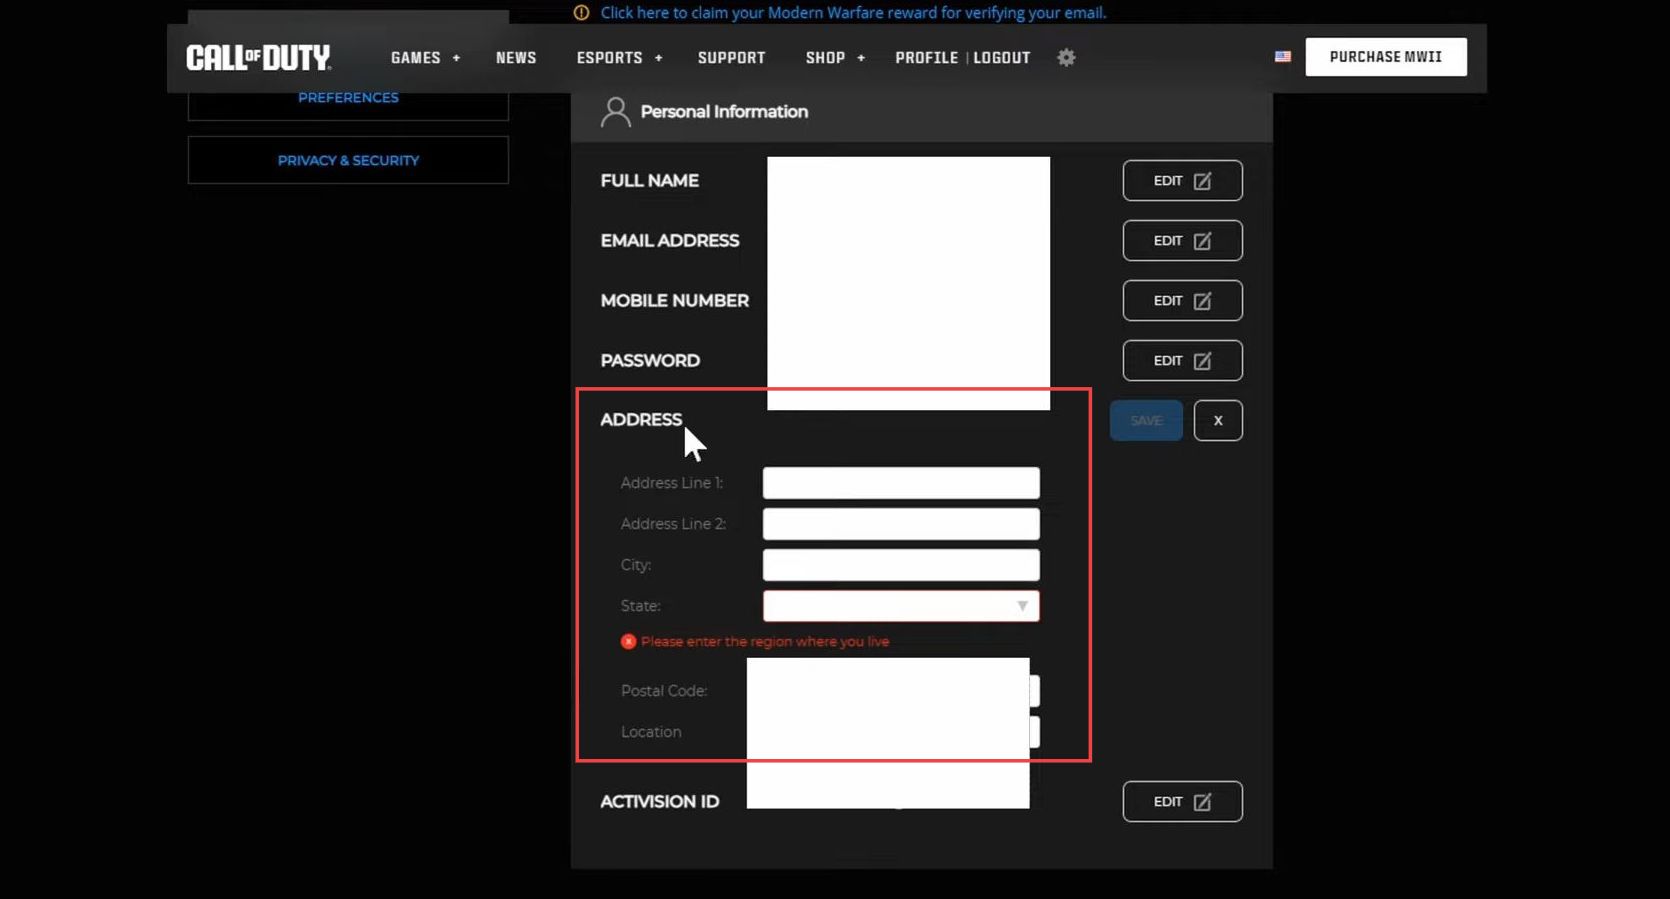
- Look for a section in the profile settings that are labelled Basic Information and click on it.
- Within the Basic Information section, locate the area where your current address is displayed.
- Type in the new address details, including the city, state, and postal code.
Make sure the information corresponds to the region you want to change.