This guide will tell you how to configure your controller in FIFA 22.
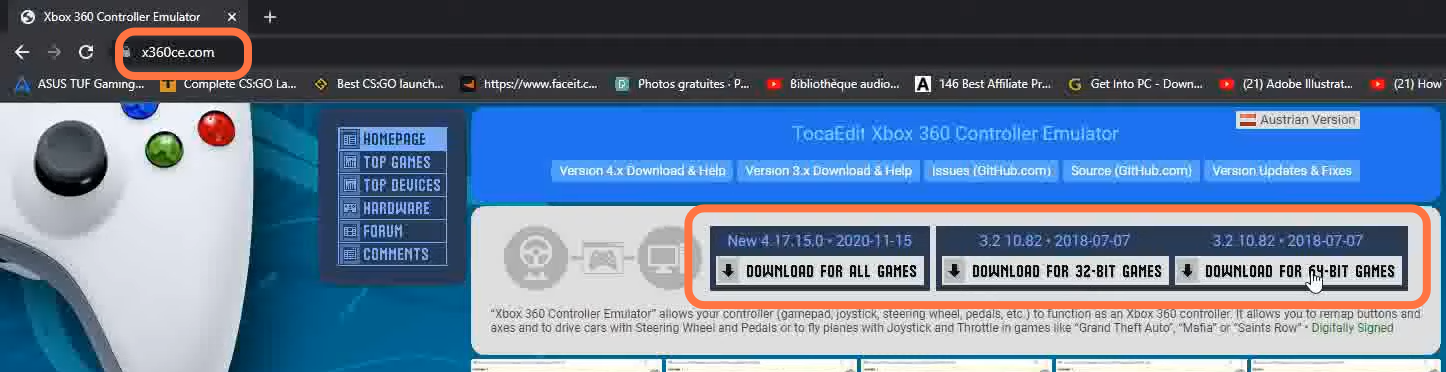
1- The first thing you will need to do is open your browser and then write x360ce. Open the first link in the result and it will take you to the official site of the Xbox360 controller. From the top, you have to select the download type and click on the Download button.
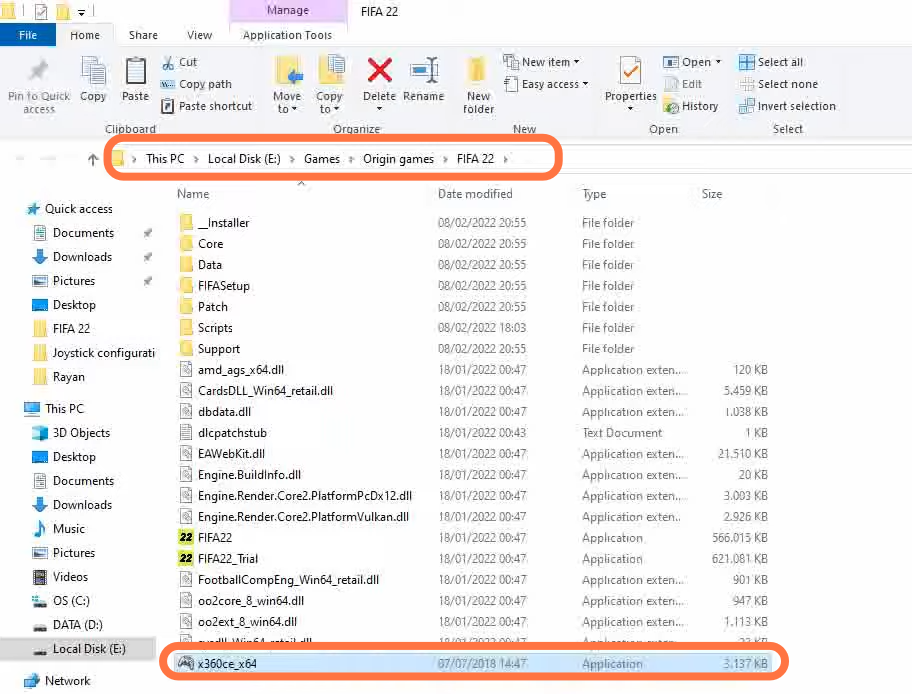
2- Once the download completes, you have to extract the downloaded file, then open the folder and copy the application file. Now you have to right-click on FIFA 22 application file and then click on the open file location and paste that file into the FIFA 22 folder.
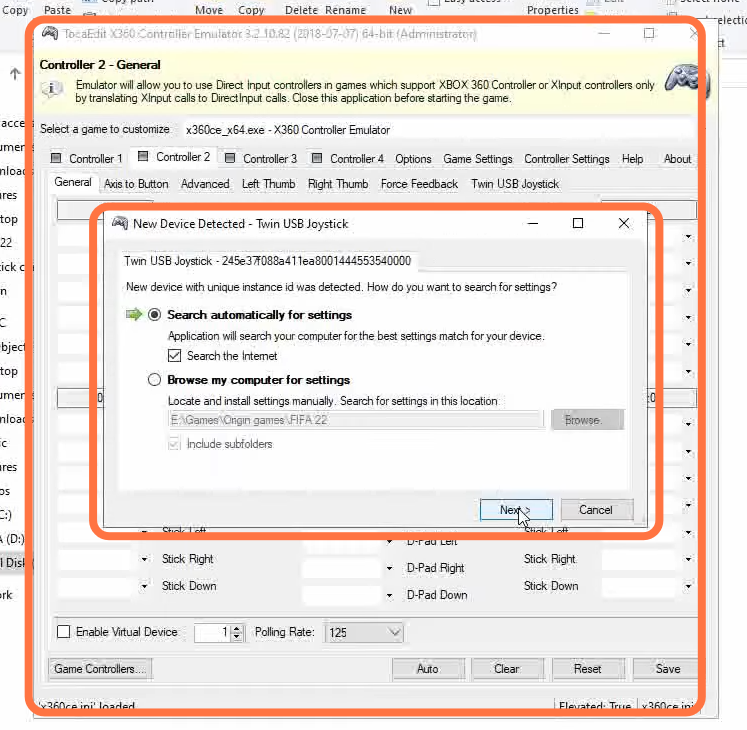
3- After this, you have to right-click on the x360ce application file and click on run this as an administrator. The small window of the x360ce application will open up in front of you. Sometimes there is a glitch in the missing file but don’t need t worry you have to click on create button then you have to click on next and then it will scan your gamepads or controllers connected to your PC. Then you have to click on next and then click on finish.
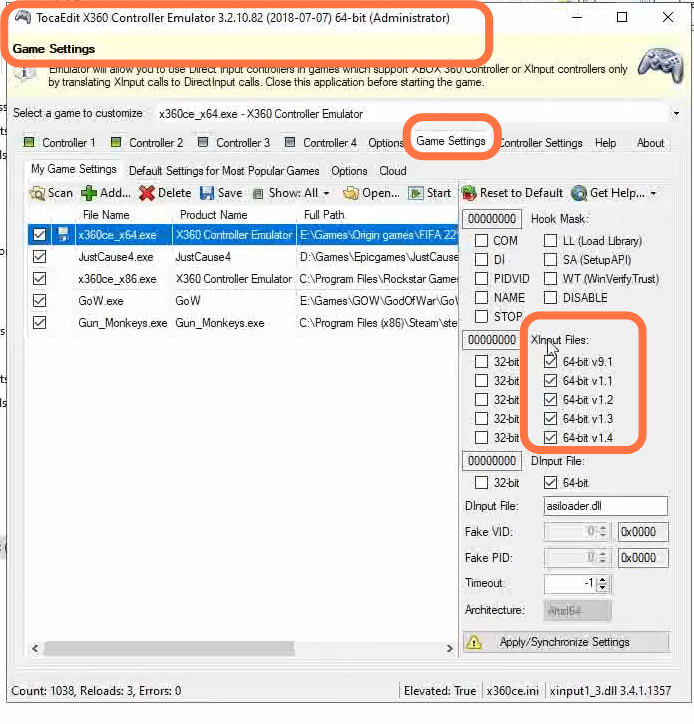
4- Now you will find your controller in the Xbox controller app. First, you can test your buttons and then click on the game setting from the top of your screen. You have to make sure that all the options under the Xinput files should be set to your application according to the version you have downloaded and then click on Finish.
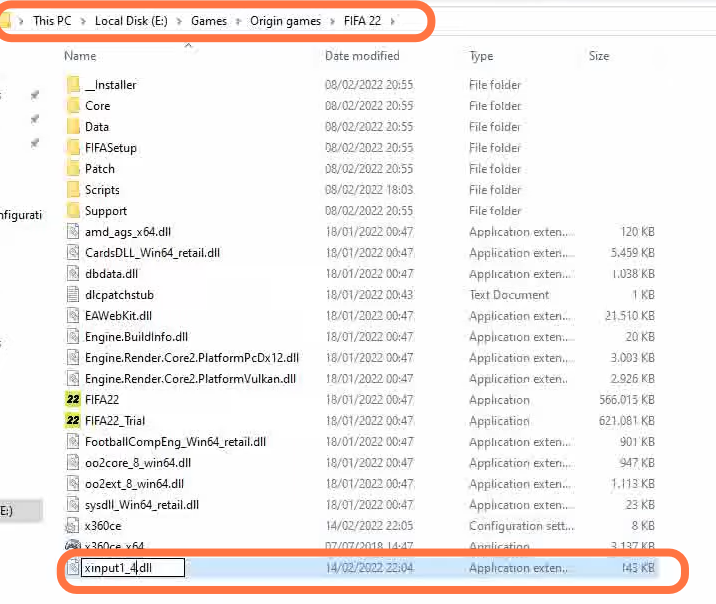
5- Now you will get a file xinput1_3.dll under the application file. You have to rename this file by changing the number, for example, change the 3 to 4.
After this, launch FIFA 22 and you will find that your controller or joystick is now working properly.