This guide will let you know how to create your own FiveM/OneSync server in the Grand Theft Auto V game.
- Before the installation of the server, make sure that Visual C++ Redistributable 2019 is installed on the pc.
- Navigate to the link below.
https://docs.fivem.net/docs/server-manual/setting-up-a-server/
- After that click on the artifacts server, if you want to install the updated version of the server(if it’s available).
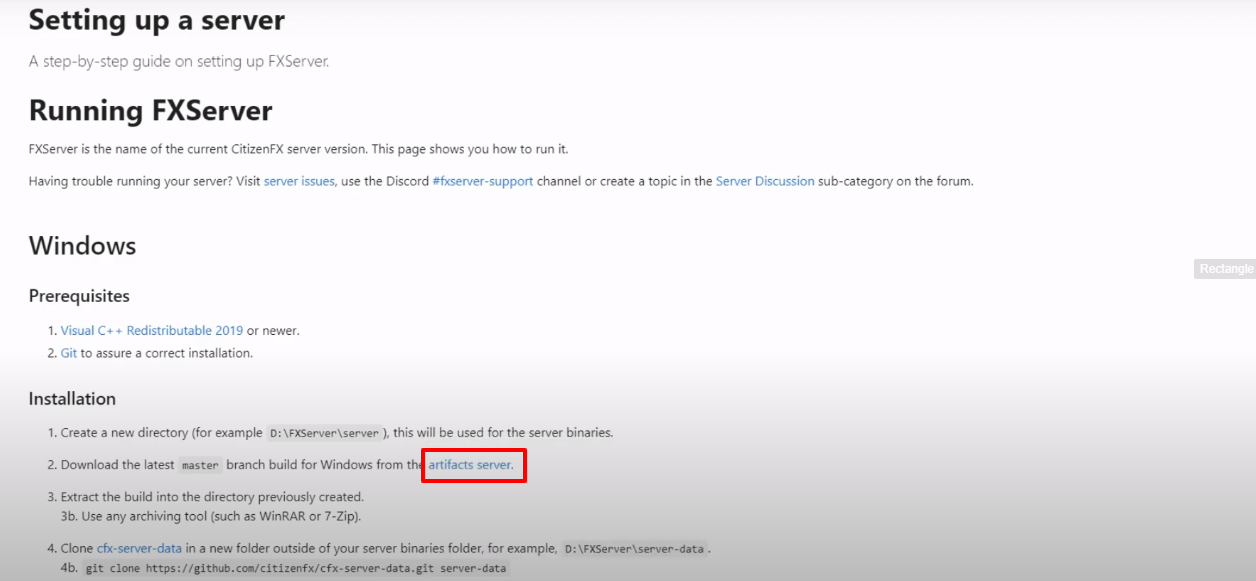
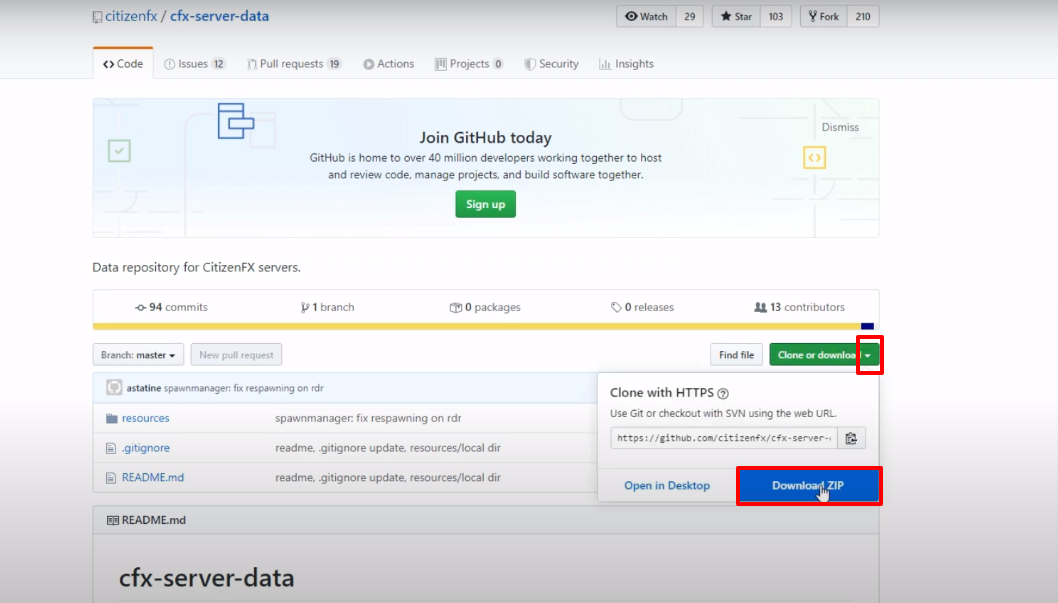
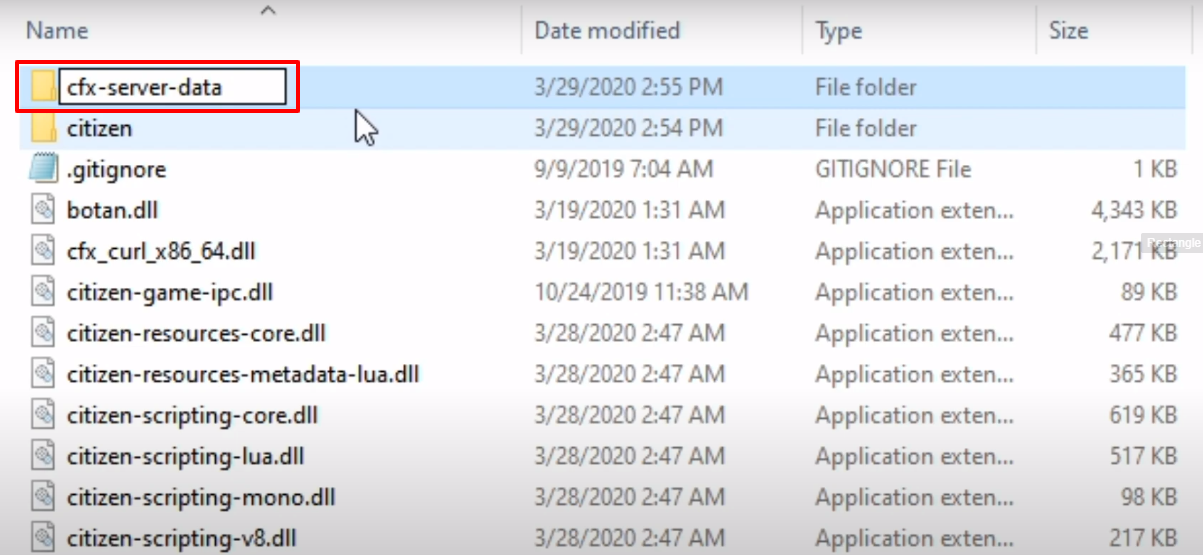
- After that, click on cfx-server-data.

- You will be directed to the page below. Here download the zip file.
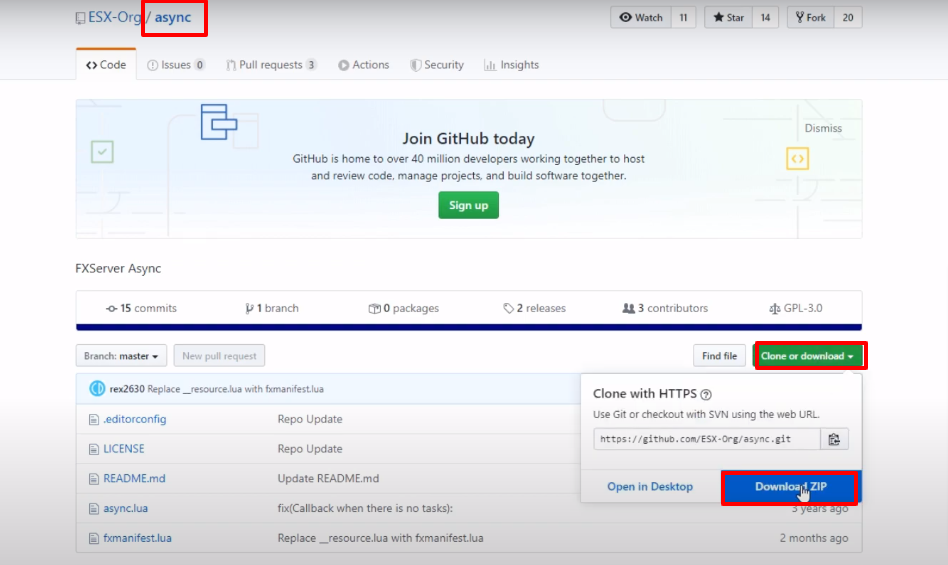
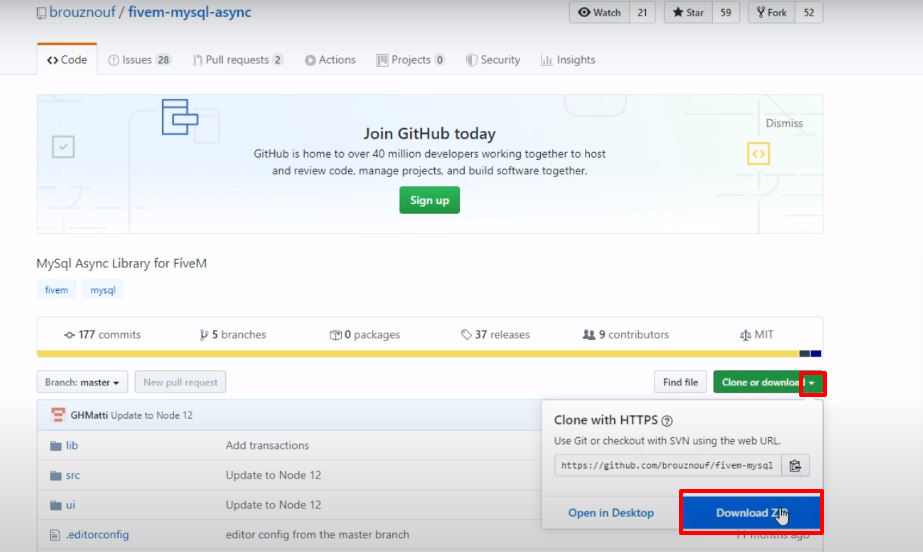
- After that, go to the link below and download the async file.
https://github.com/esx-framework/async
- After that, download the mysql-async zip file by navigating to the link below.
- Lastly, FiveM server must be installed in your pc, if it’s not, navigate to the link below, download and install.
https://fivem.net/
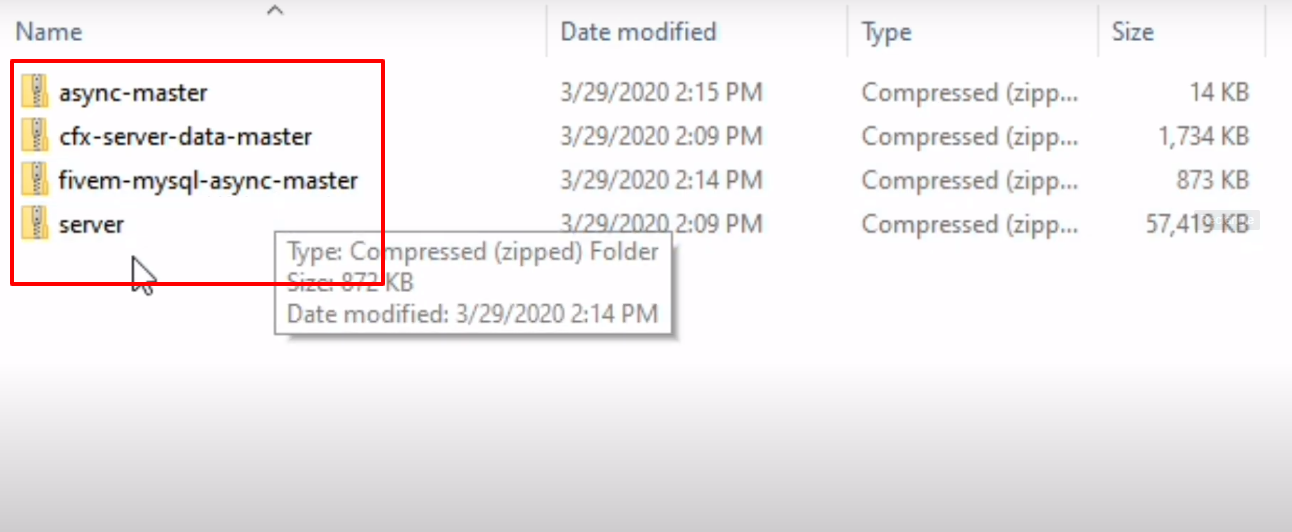
- In the below, you can see the all downloaded files.
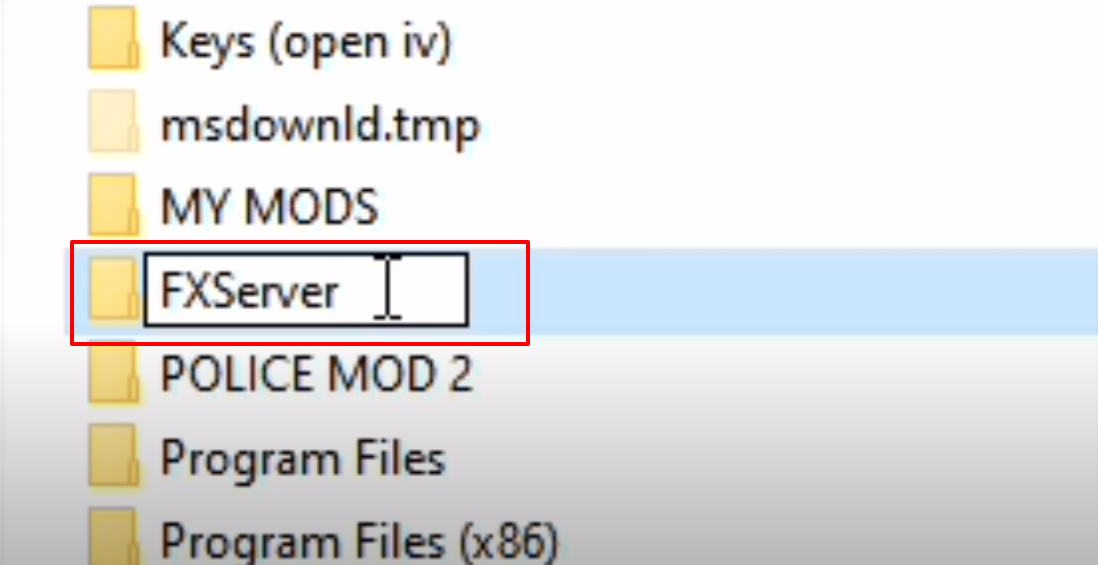
- Select your preferred one drive in which you want to install your program.
- After selecting the preferable drive, create a new folder with the name “FXServer”.
- After that, select the download server zip file and extract by Winrar or Winzip.

- Now open the unzipped/extracted server folder, press Ctrl+A to select all the files, then copy and paste all these files in the newly created FXServer folder

- After that, unzip the cfx-server-data-master file, then copy the unzipped folder and paste it in the FXServer folder
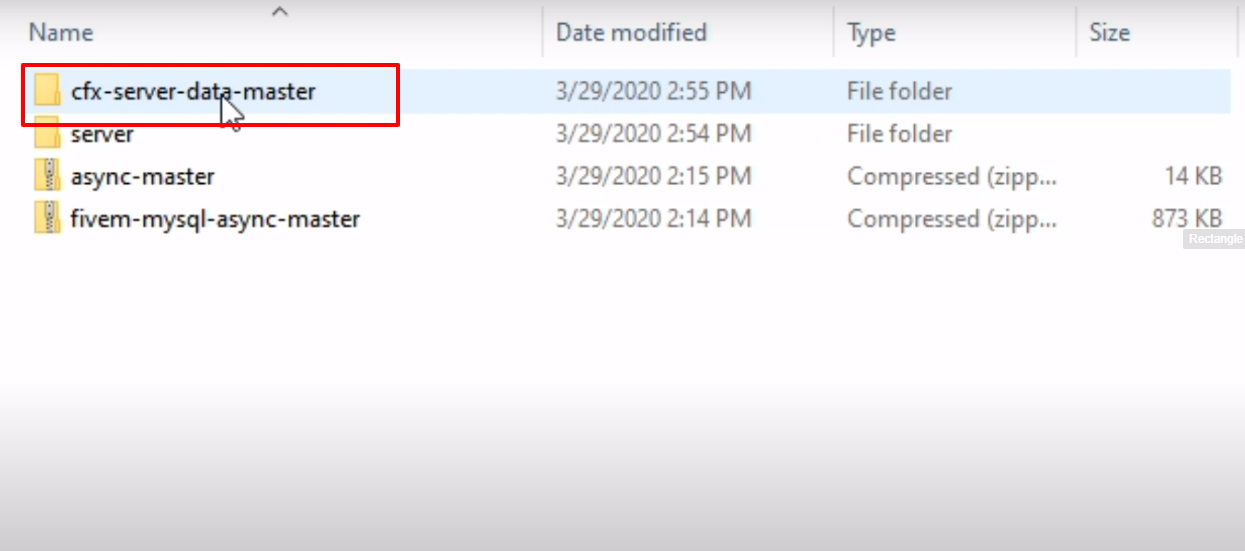
- After that, rename the pasted folder to cfx-server-data.
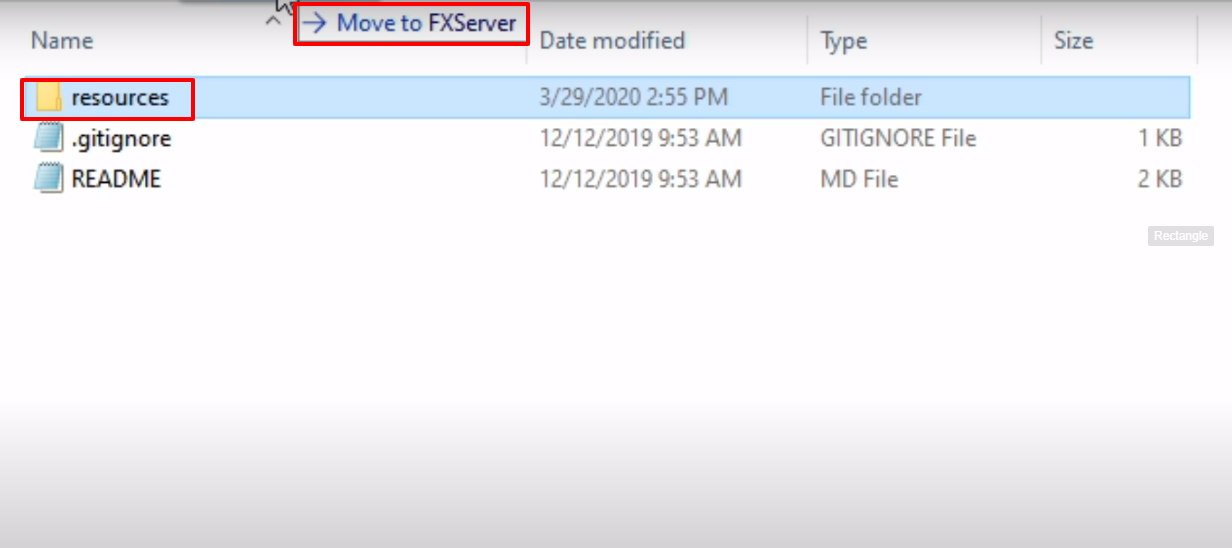
- And then, open the cfx-server-data folder, copy the resources folder and move it to the FXServer folder
.
- After that, unzip the async-master file, copy the unzipped folder and the paste in the resources folder.
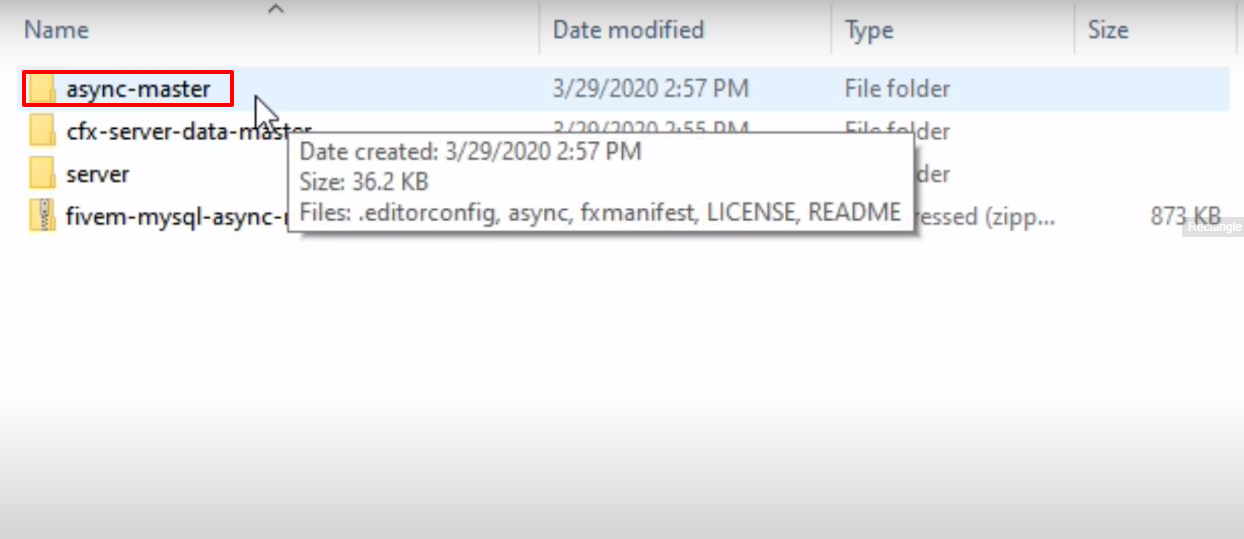
- Now change the name from async-master to async

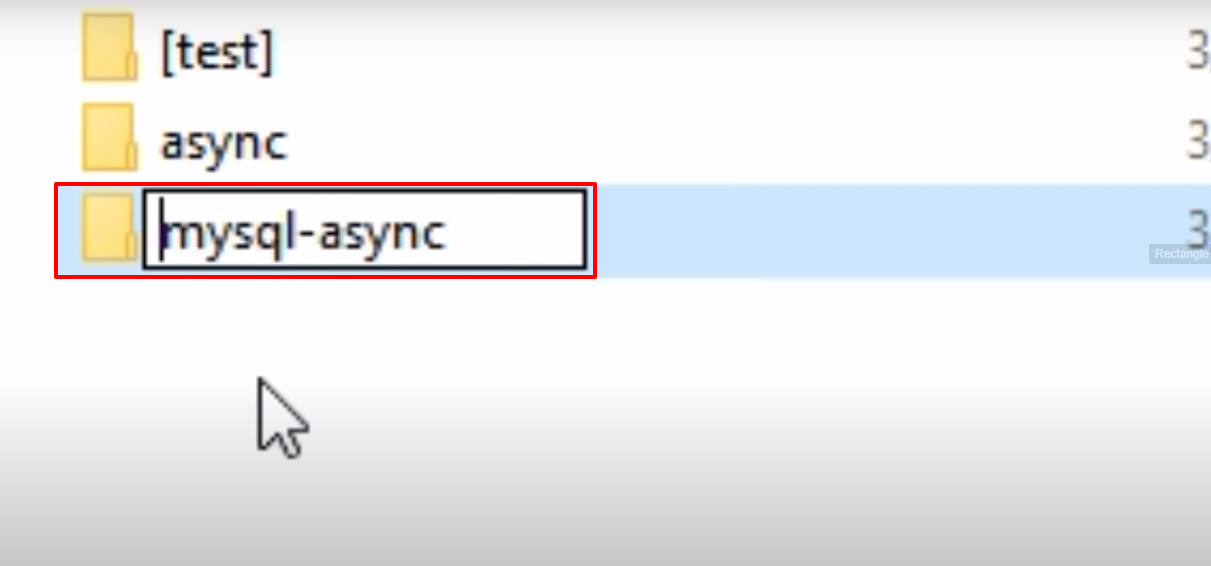
- After that, unzip the downloaded fivem-mysql-async-master file, then copy the unzipped folder and paste it in the resources folder.

- Highlight the pasted folder, change the name from fivem-mysql-async-master” to “mysql-async” and then press enter to rename the file.
- Navigate to the FXServer folder and create a new text document.
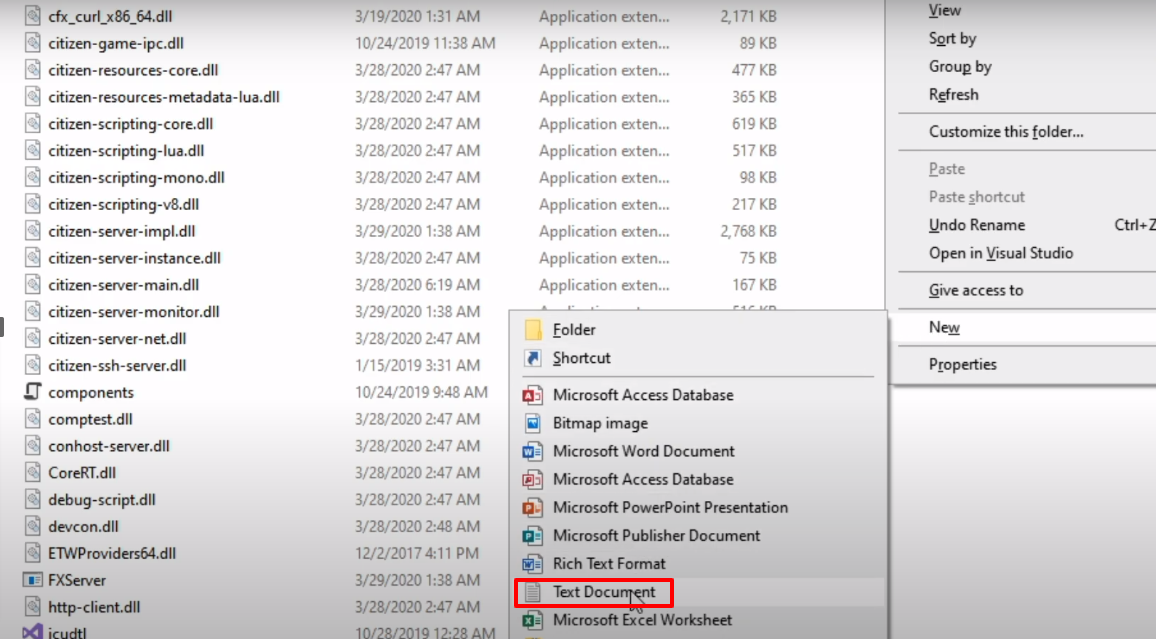
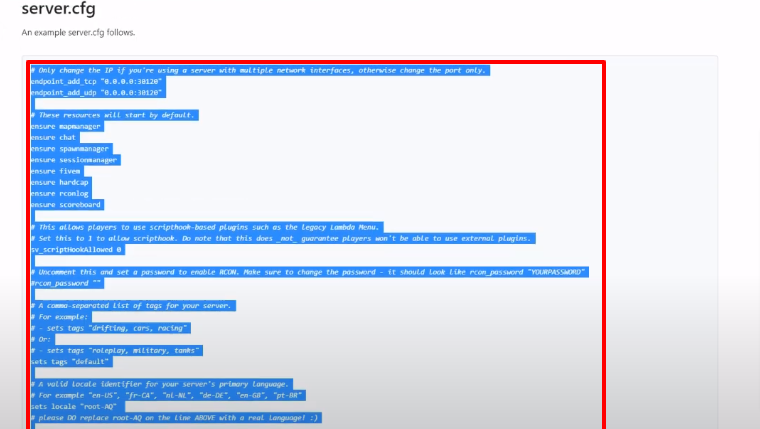
- After that, you have to open the link below and copy the text under server.cfg.
https://docs.fivem.net/docs/server-manual/setting-up-a-serve
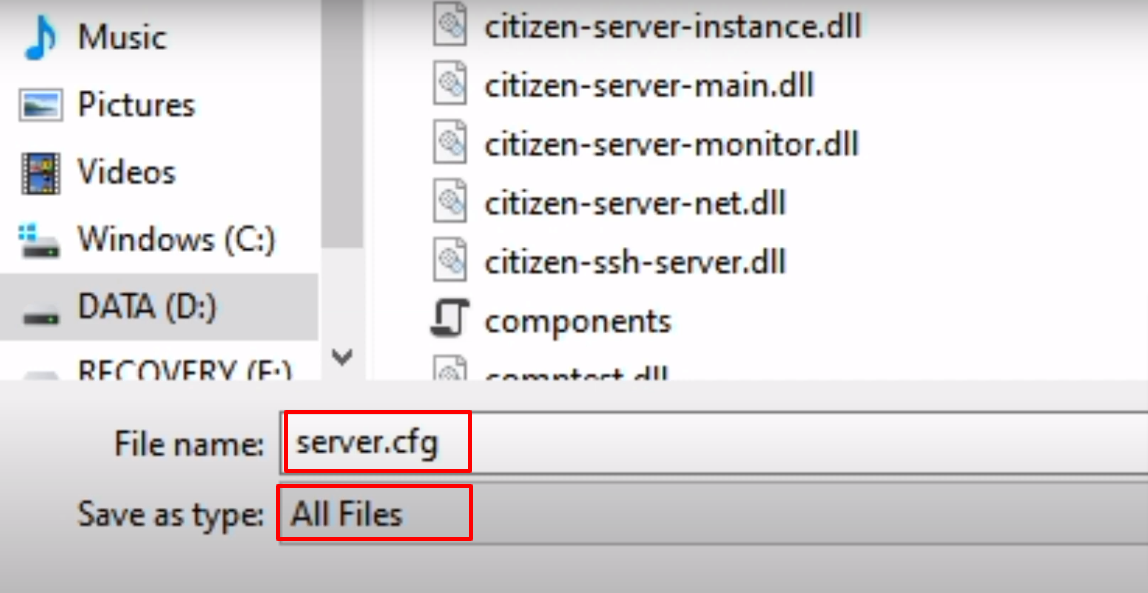
- Paste the copied text in the newly created text document and click “Save As”.
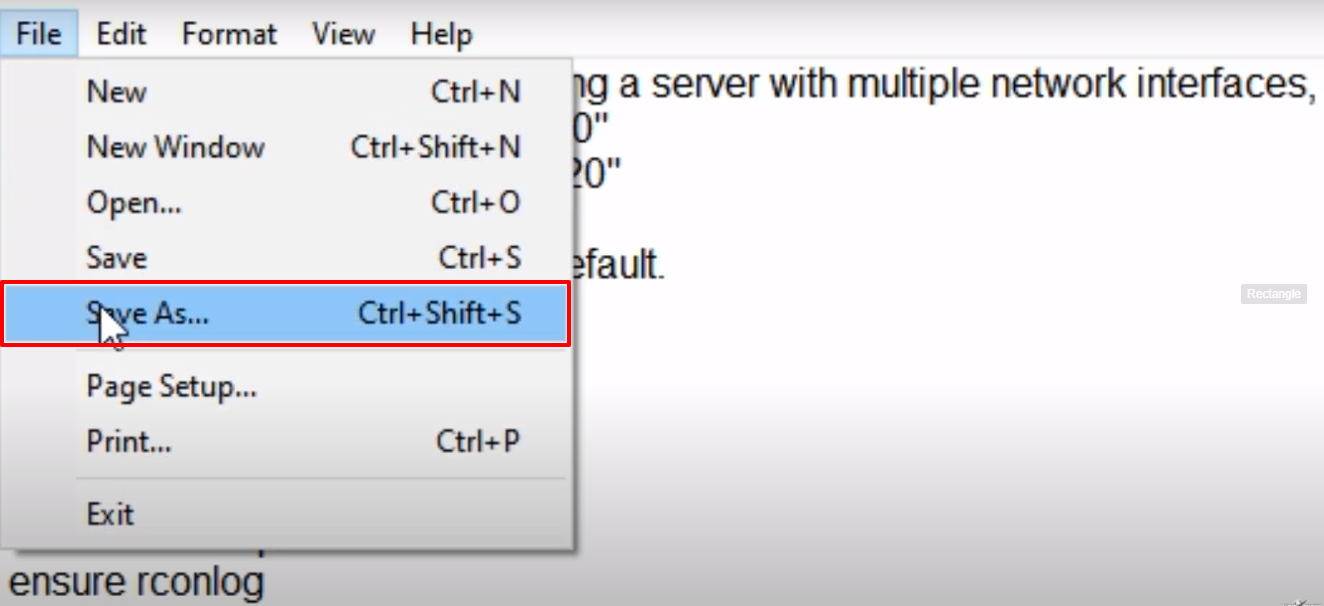
- Write the name “server.cfg”, then select all files and then click on Save.
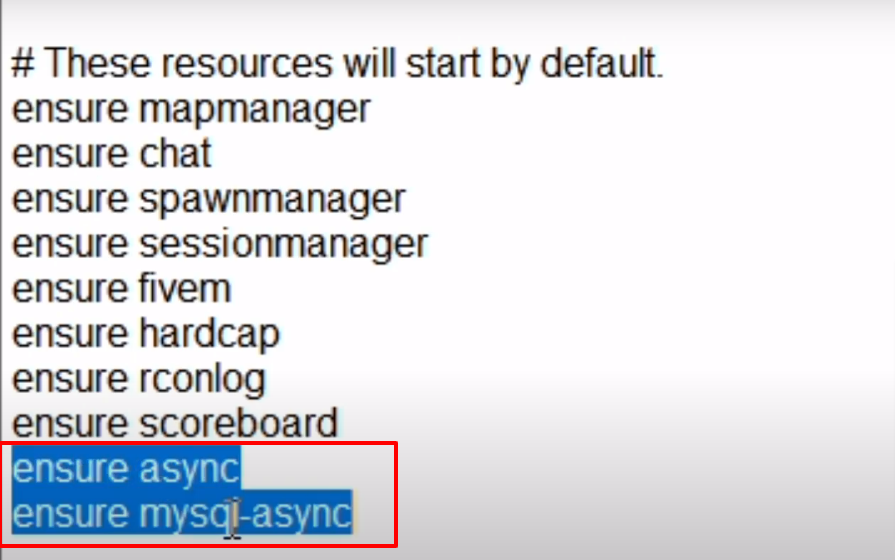
- After that, open the saved server file add “ensure async” and ensure mysql-async under esure scoreboard and then save the file.
- Again open the previously created New Text Document and navigate to the link below.
https://docs.fivem.net/docs/server-manual/setting-up-a-server/
- Copy the marked text under 8th step.
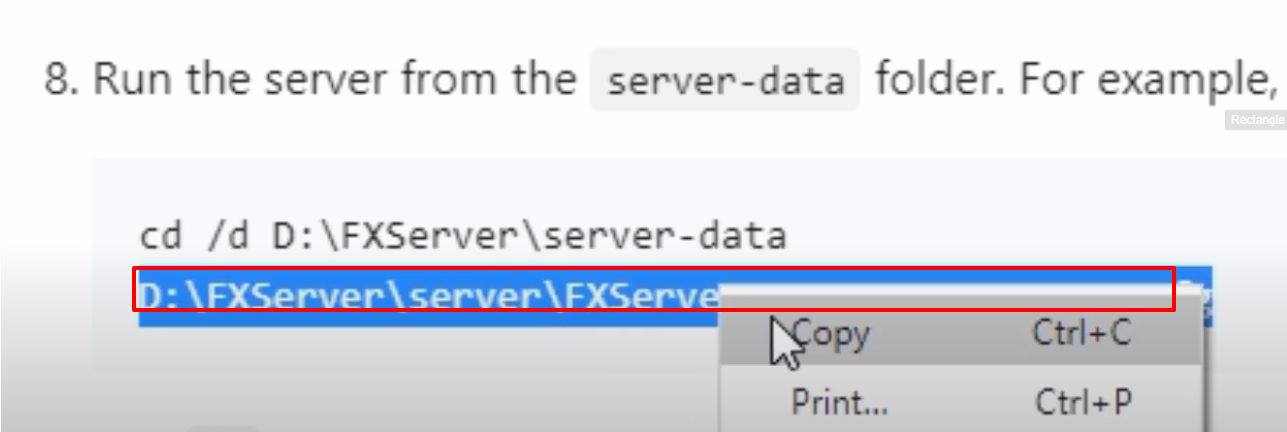
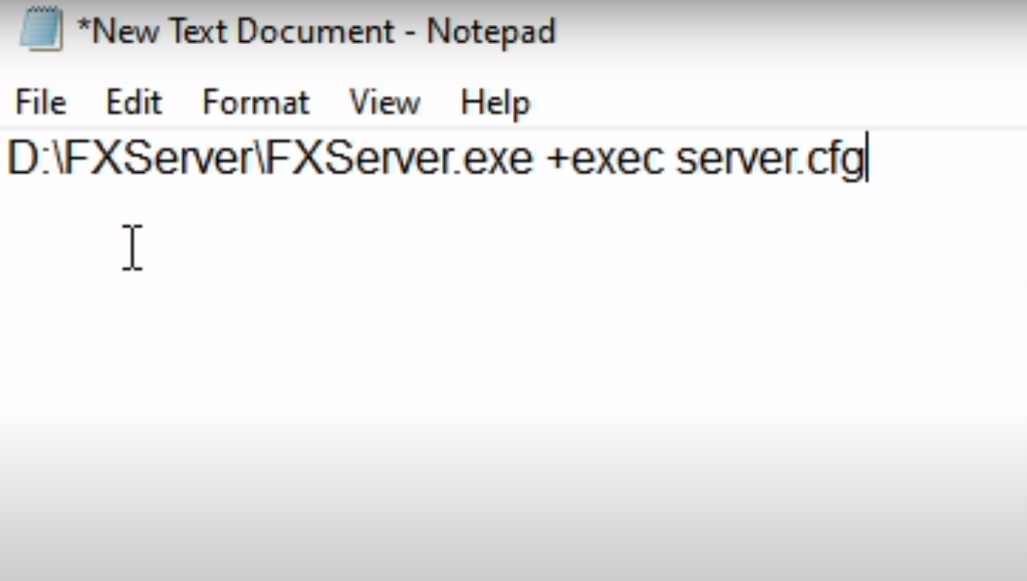
- Paste the copied text in the New Text Document and remove the server/.
- After that, navigate to Save As, right the name “run.bat”, select all files and then click on Save As.
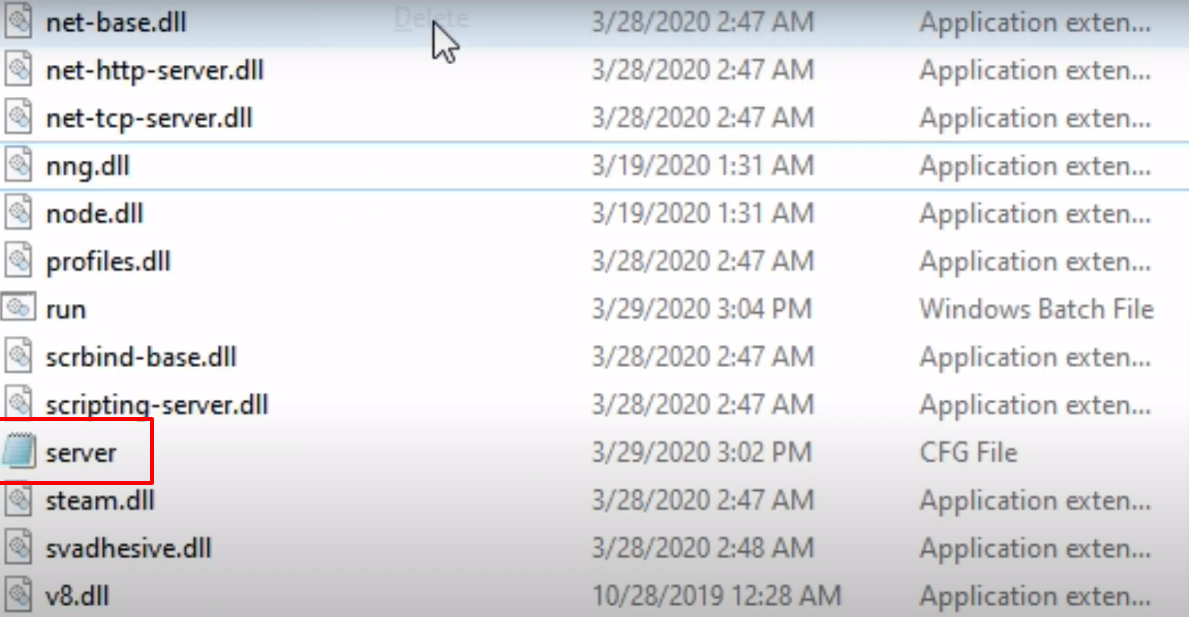
- Delete the New Text Document in the FXServer folder.
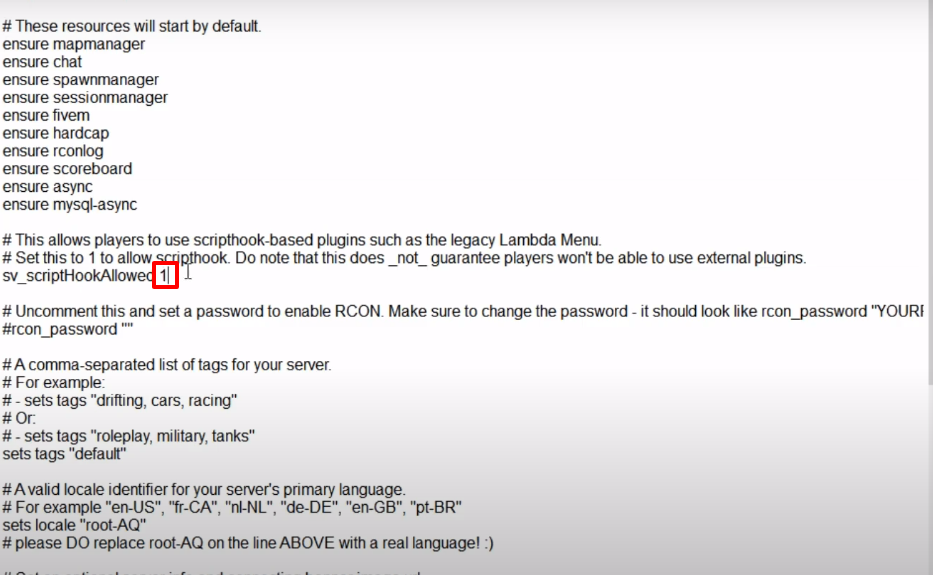
- After that, open the server.cfg file from the FXServer folder.
- Change 0 to 1 if you want a mods menu that uses ScriptHook.
- After that, copy the language that you want to use.
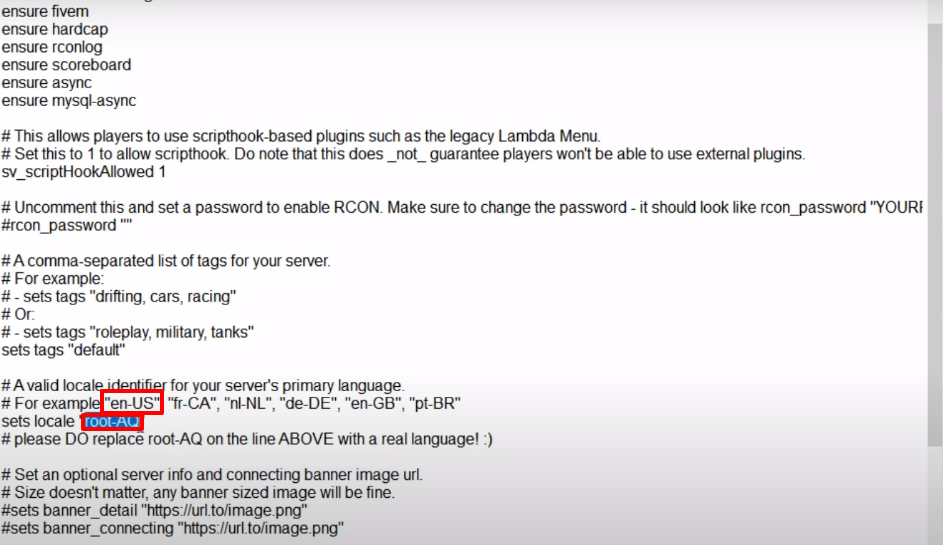
- Paste it in place of root-AQ.
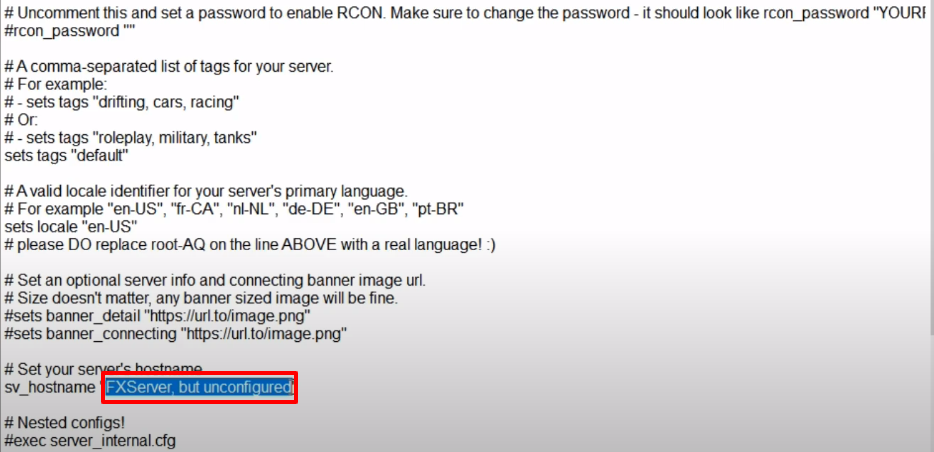
- Give the name to the server that you want to .
- After that navigate to the marked link in order to find the steam ID.

- Paste the ID in between inverted commas.

- After that, navigate to the link in order to get the license key.
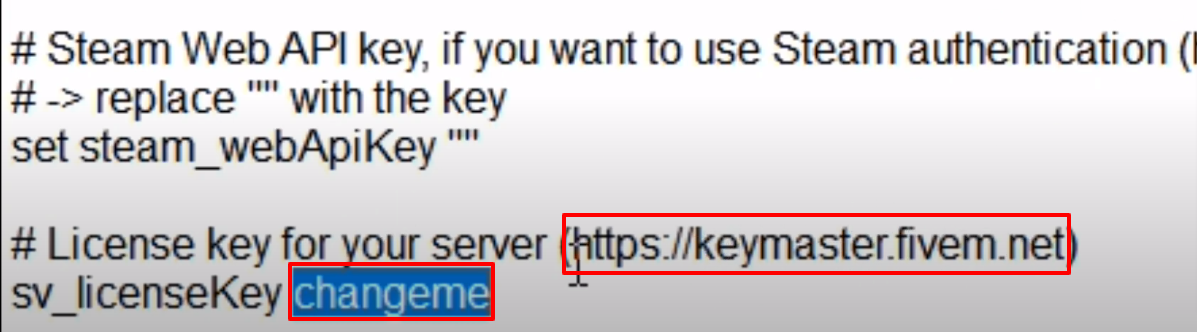
- Paste the license key in place of change name.
- After that, launch the steam app.
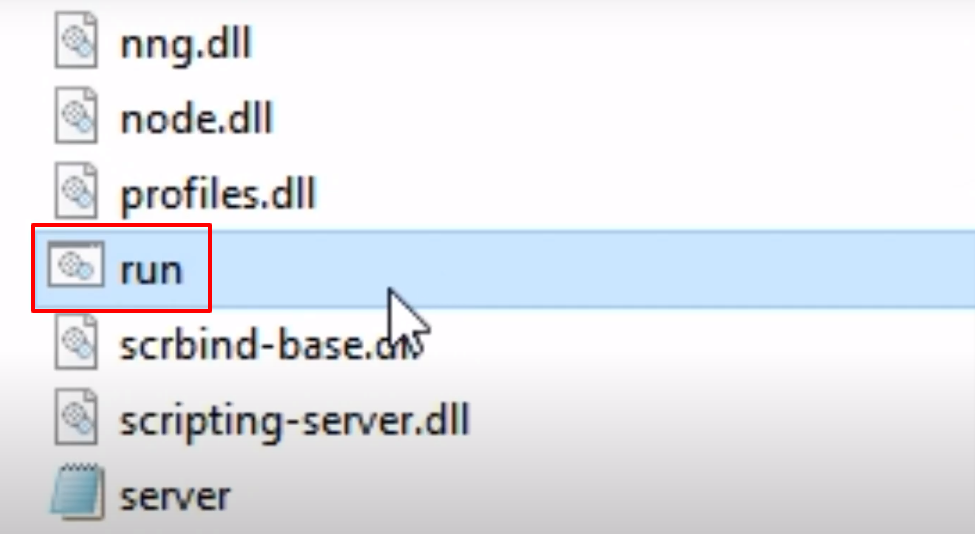
- And then open the FXServer folder and double click on the run file.
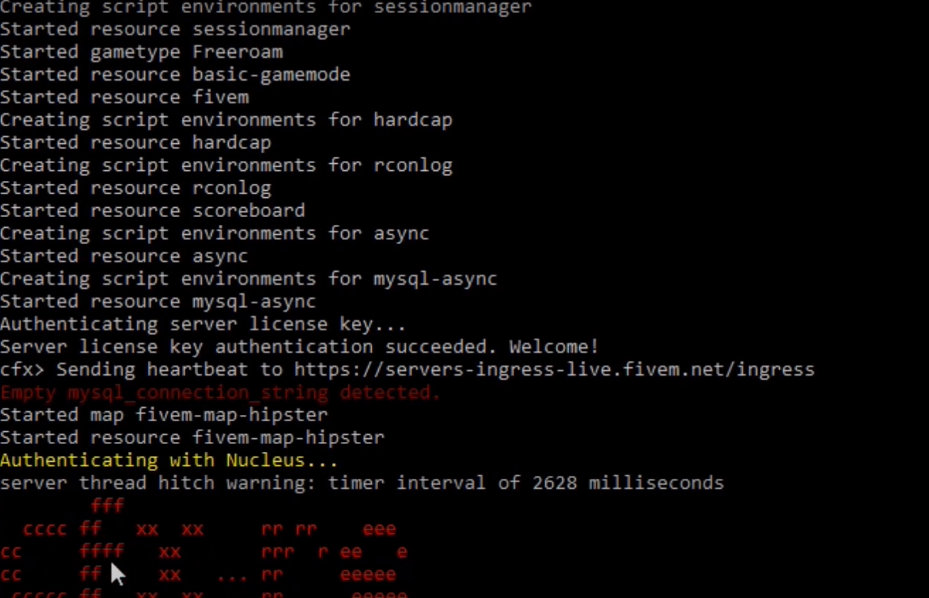
- Once you see the red text in the CMD, minimize the window.
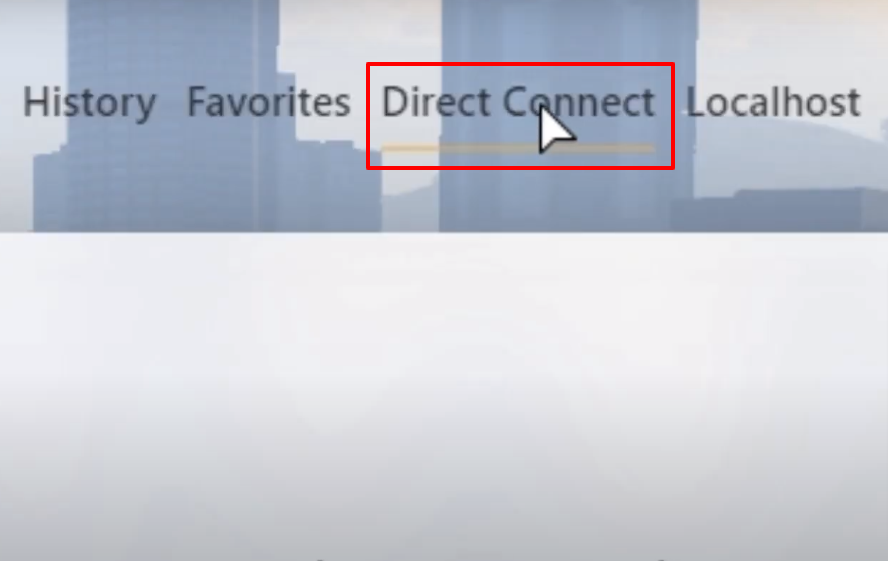
- After starting the FiveM and then clicking on Direct Connect.
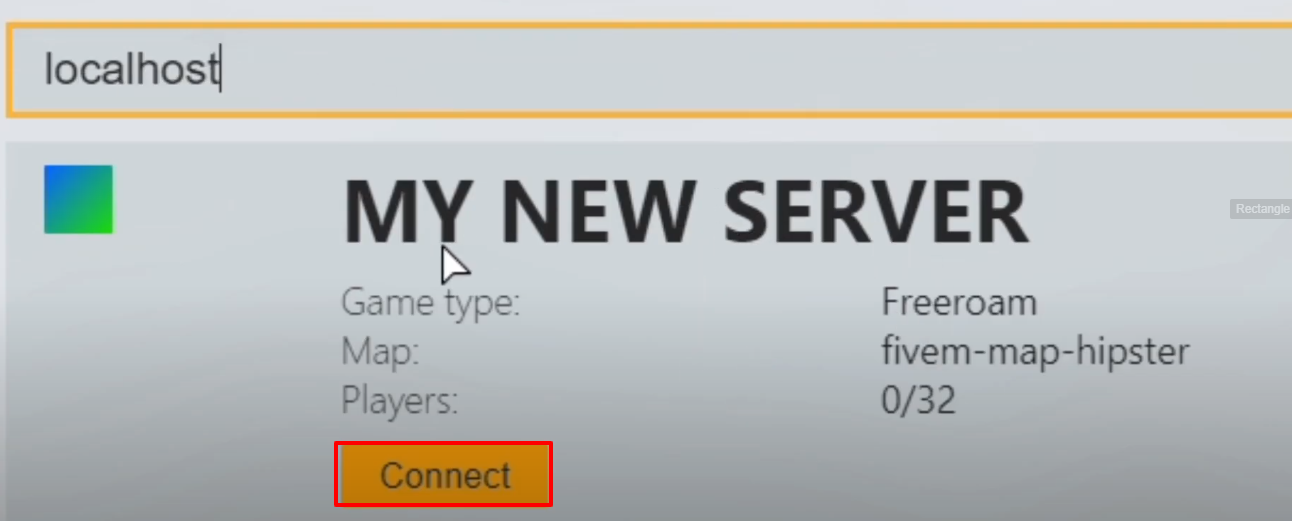
- Type localhost.
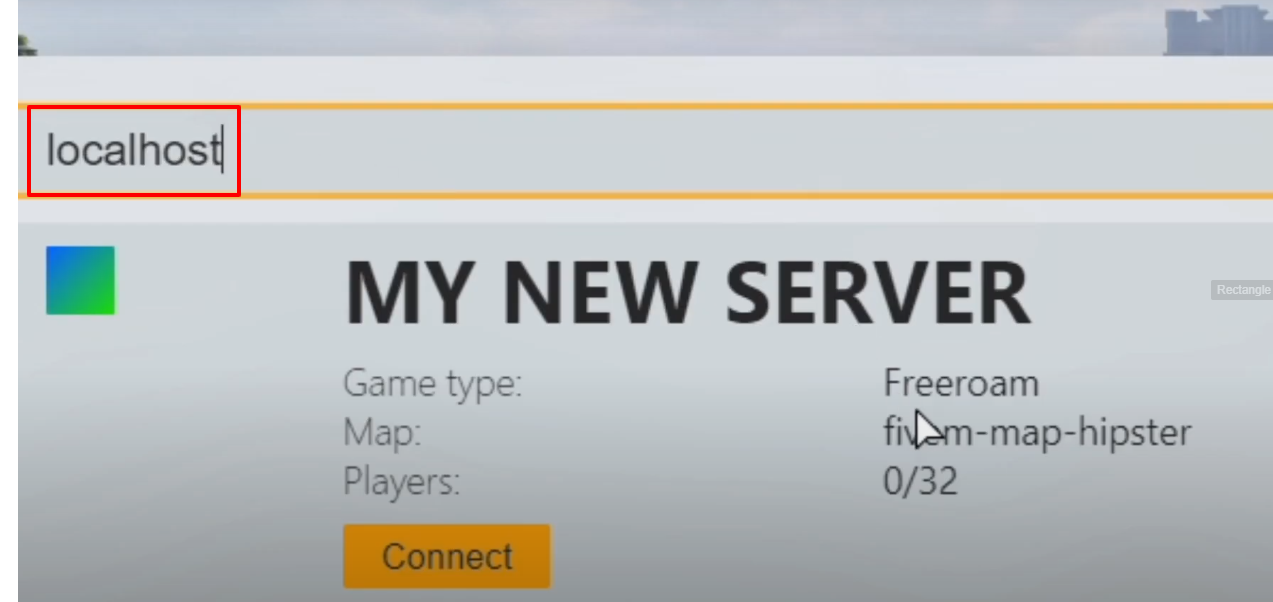
- Your server will popup, click on Connect.
- The game will load up, enjoy.