This guide will let you know how to fix Armored Core 6 Fires of Rubicon crashing, freezing, and not launching on your PC.
Download Easy Gamer Utility and Configure Game Files
In this section, we will take you through the steps to fix the crashing, freezing, and not launching by downloading Easy Gamer Utility and configuring game files.
- First, you need to open your browser and download the program called Easy Gamer Utility.
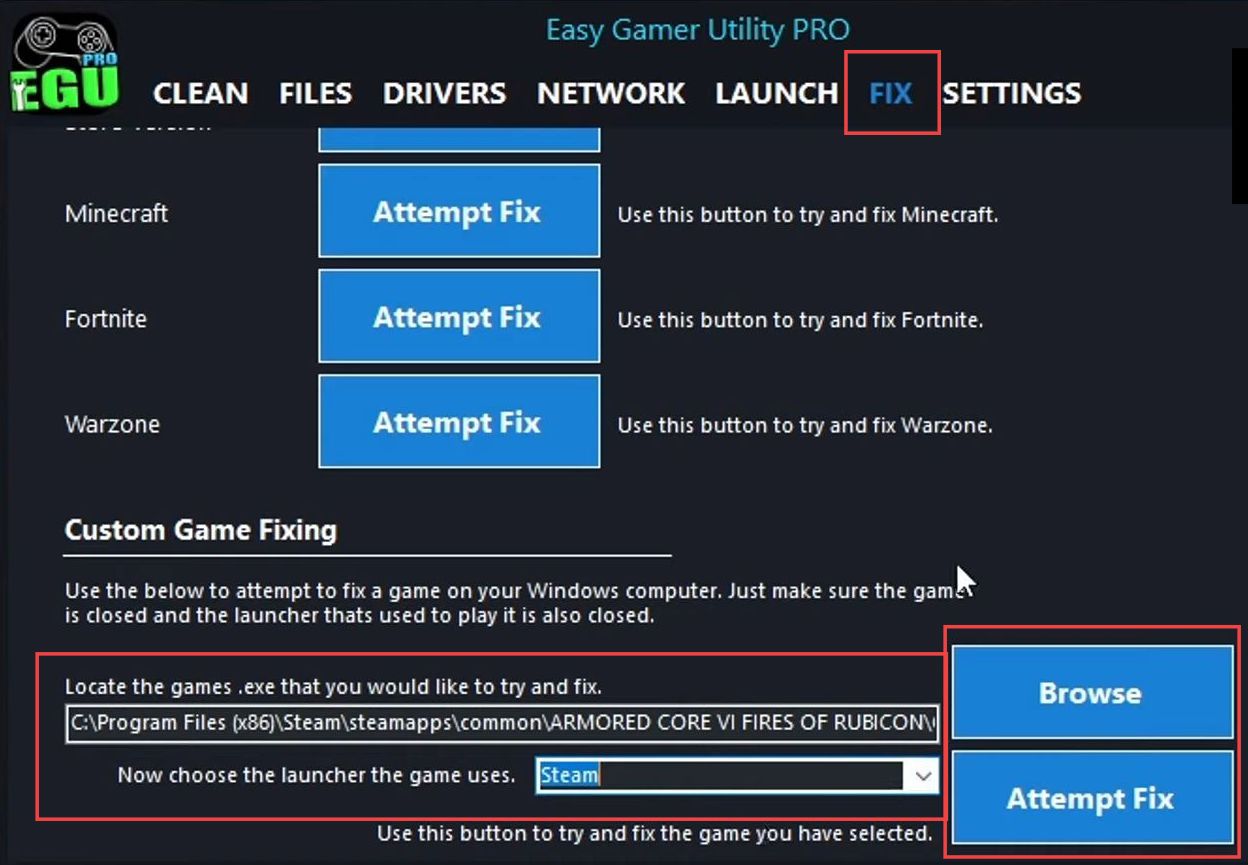
- After that, install the downloaded program on your computer and open it up. Look for a tab labelled Fix on the quick access toolbar within the program’s window.
- Click on the Fix tab and scroll down to explore the available options. Look for an option titled Custom Game Fixing.
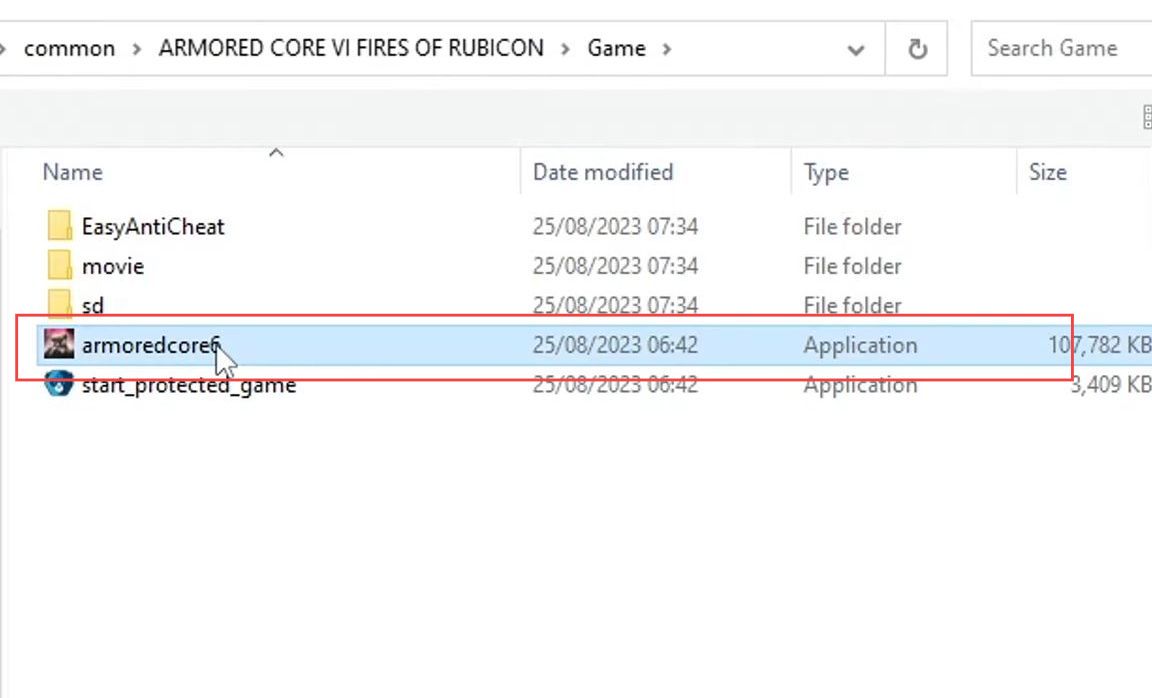
- Click on the Browse button and navigate through your computer’s directories to find the folder where the game is installed.
- Locate the executable file of the game you’re trying to fix.
In this case, the example given is Armored Core 6 Fires of Rubicon. - Once you’ve found the game e.g., Armored Core 6 Fires of Rubicon, select it and then click on the Open button.
- Click on the drop-down menu to open it and reveal the available options.
- From the list of options in the drop-down menu, you need to select your launcher.
- Click on the attempt fix button to initiate the repair process.
Once you’ve clicked attempt fix, the Easy Gamer Utility program will start working to resolve the issue you’re facing with the game.
The Easy Gamer Utility will attempt to fix the specific problem related to the Armored Core 6 Fires of Rubicon message that you’re encountering. - After that launch the game and check if the issue is resolved.
Check the Windows Updates
This section describes how to checking the Windows updates in order to resolve the error.
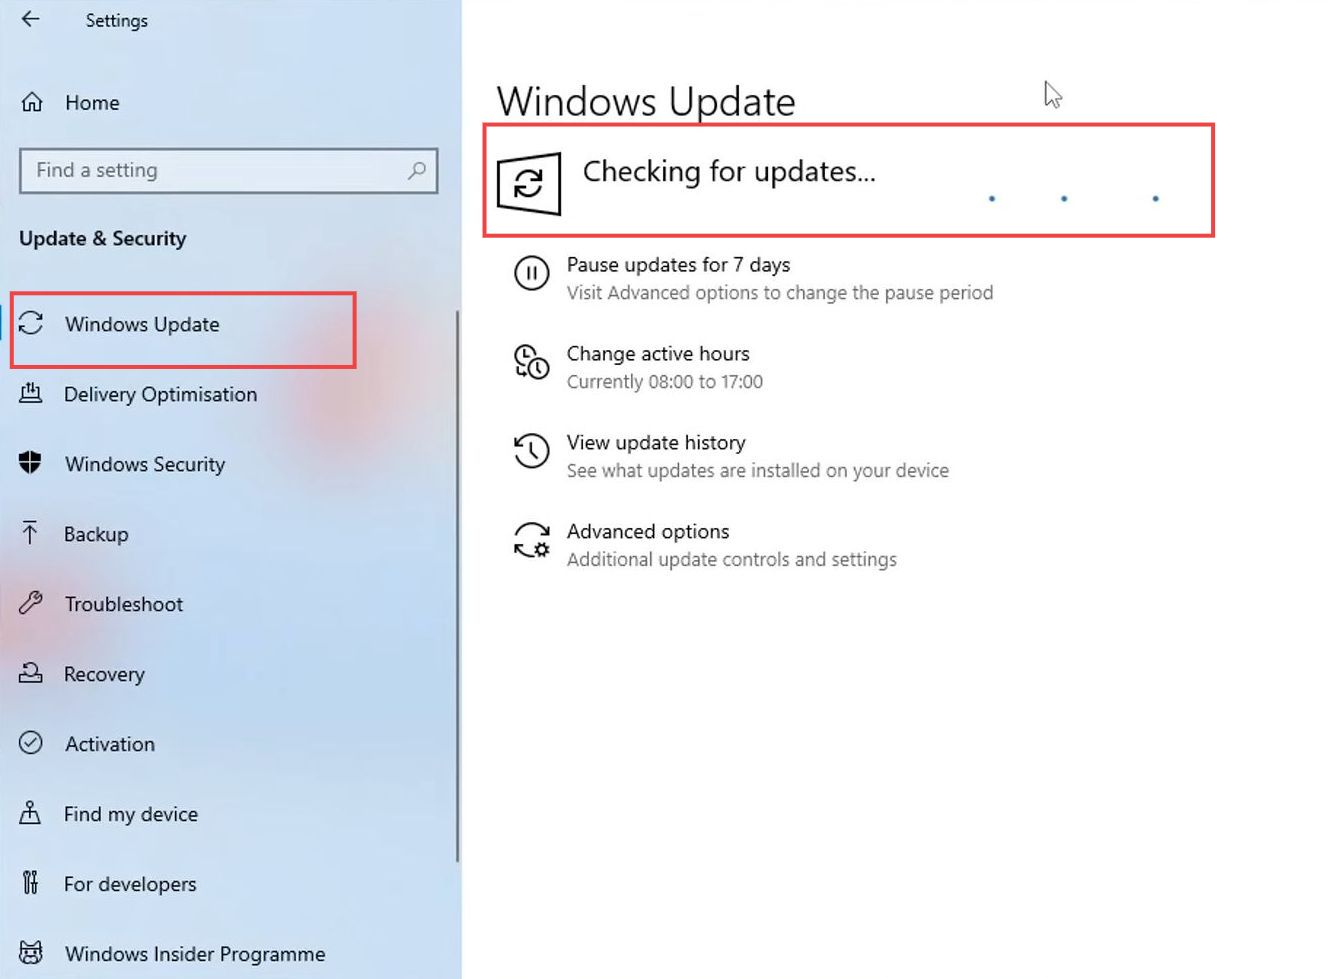
- If the issue is still present, right-clicking on the Windows Start menu icon located in the taskbar.
- From the context menu that appears, click on the Settings option. Within the Windows Settings, click on the Update & Security option.
This section manages Windows updates and security settings. - In the Update & Security section, look for the Check for Updates button. Click on this button to initiate the process of checking for available updates for your Windows computer.
- Allow the system to check for updates, and if there are any updates available, proceed with installing them.
This ensures your Windows operating system is up to date. - After installing any available updates, restart your computer to apply the changes.
- Once your computer restarts, launch Armored Core 6 Fires of Rubicon and see if the issue has been resolved.
Check Graphics Card Updates
This section will take you through the steps to fix the error by checking the graphics card updates.
- After updating Windows, the next step is to ensure that you have the latest updates installed for your graphics card driver.
- To begin, identify your graphics card. If you’re unsure about your graphics card, click on the Windows Start menu icon located in the taskbar.
- In the start menu search bar, type Device Manager and select it from the search results.
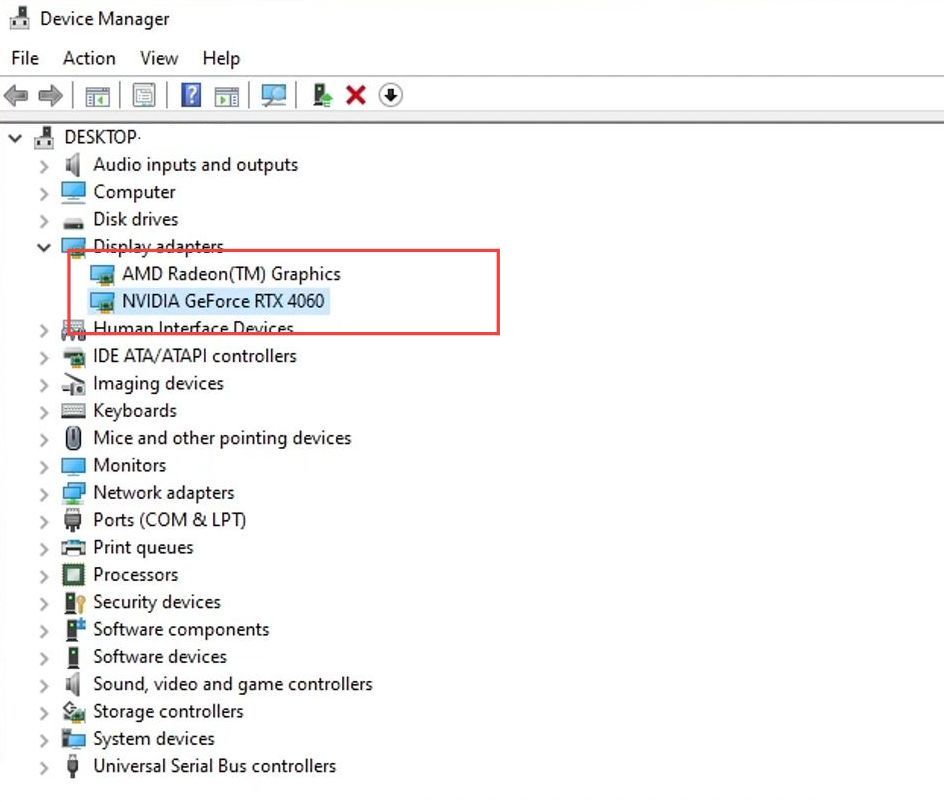
This opens the Device Manager window. - In Device Manager, expand the section named Display adapters.
This will show you the graphics cards installed on your computer. Your graphics card’s name will be listed under the Display adapters section. In the example, an RTX 4060 is mentioned. - After identifying your graphics card like RTX 4060, go to the website of the manufacturer. In this case, NVIDIA to download the latest driver for your specific graphics card model.
- On the graphics card manufacturer’s website, download the latest driver for your graphics card model. Follow the instructions provided on the website to install the driver.
Close Conflicting Programs
In this section, we will take you through the steps to resolve the error by closing conflicting programs.
- Ensure that you have no other programs or applications running when attempting to launch the game.
These programs might conflict with the game and cause crashes. - Review the list of potentially conflicting programs mentioned in the content, such as MSI Afterburner, Discord, or the Razer app.
These programs might have interactions with the game that lead to crashes. - If you have MSI Afterburner running, close it. Similarly, if you’re running Discord or the Razer app, close them as well.
- If there are any other programs or apps that might interact with games or affect system performance, make sure they are closed.
The objective is to eliminate any potential conflicts that might be causing the game to crash. - After ensuring that no conflicting programs are running, proceed to launch Armored Core 6 Fires of Rubicon once more.
- Launch the game and check whether the issue has been resolved. With potentially conflicting programs closed, the game might now work without crashes.
Disable the Overclock Settings
If you’re still experiencing issues with the game, consider the possibility that overclocking your hardware might be causing these problems. This section explains how to do it.
- Access your computer’s BIOS such as Basic Input/Output System settings.
- Restart your computer and during the boot-up process, typically press a specific key like Delete, F2, F12, or another key depending on your motherboard to access the BIOS.
- Within the BIOS settings, identify any overclocking settings you’ve enabled.
These could include settings like XMP (eXtreme Memory Profile) for RAM or overclocking settings for your graphics card or CPU. - If you’re familiar with the process of disabling overclock settings and have experience with it, turn off these settings.
- If you’re not confident about adjusting these settings, it’s best not to make changes as incorrect settings could potentially lead to system instability.
- If you made changes, ensure you save the changes and exit the BIOS settings.
- After making changes so that no overclocking settings are active, launch the game again and test whether the issues with the game have been resolved.
Rename Config Armored Core 6 Files
This section describes how to fix the error by renaming config Armored Core 6 files.
- You need to access the location where the configuration file for the game Armored Core 6 is located.
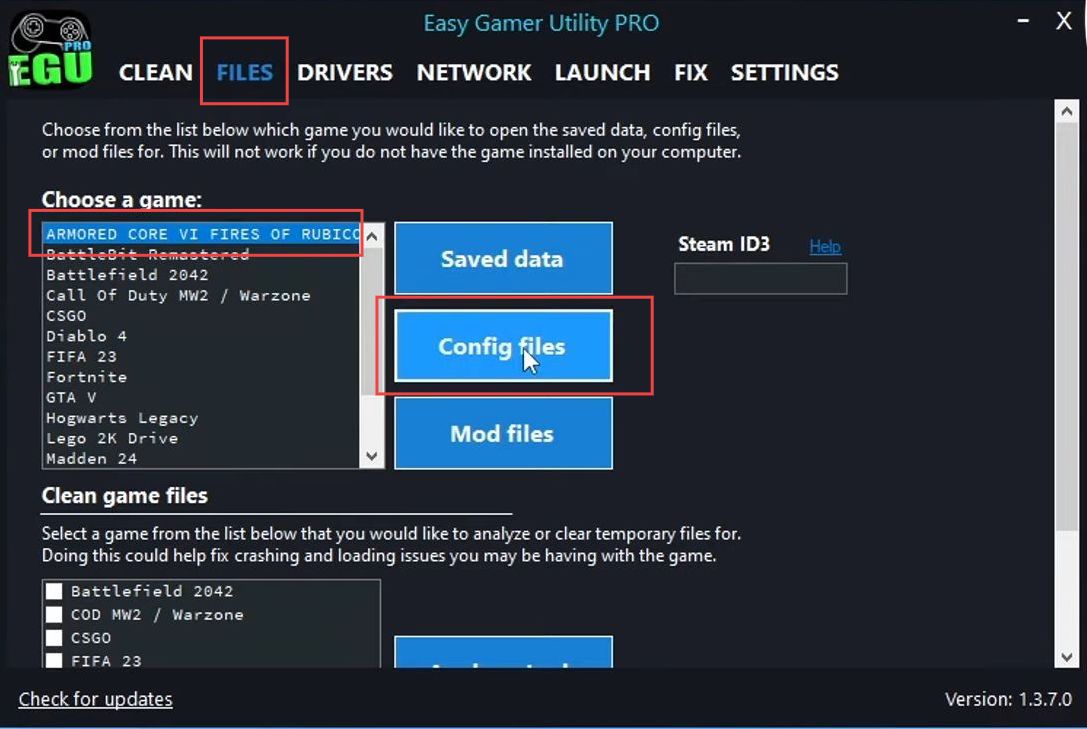
This configuration file might hold settings that could be contributing to the issues you’re facing. - If you have the Easy Gamer Utility, it can simplify the process. Open the Easy Gamer utility and select the Armored Core 6 game from the utility’s interface.
- Click on the Config Files option which will take you directly to the location of the game’s configuration files.
- Right-click on the config file and select the Rename option. Type BK at the end and press enter to save this name.
- Now launch the game and check if the issue is resolved.
- Begin by closing all current applications and then opening File Explorer, which allows you to navigate through your computer’s files.
- In File Explorer, locate and select the Documents folder.
This is the directory where you store your documents. - Within the Documents folder, find the folder associated with the game you’re having issues with. In this case, the example is Armored Core 6 Fires of Rubicon.
- Open the game’s folder by clicking on it. You should now be inside the specific folder for the game.
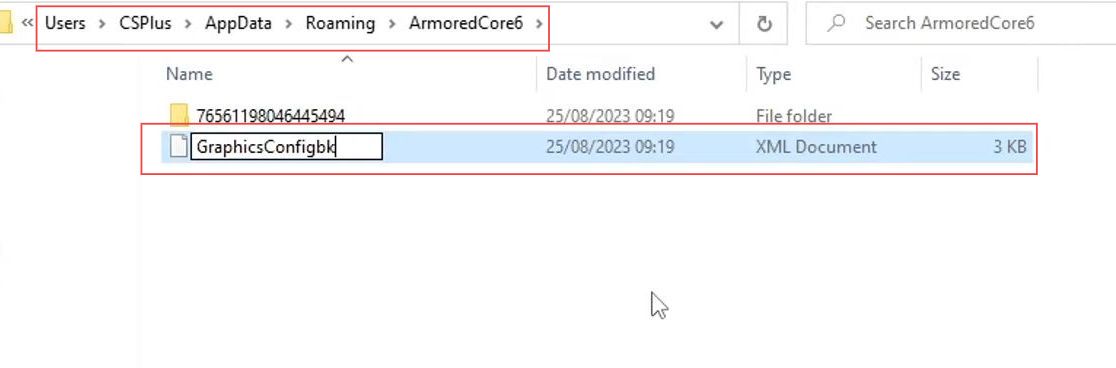
- Then you have to look for a file named Graphic Config XML Document within this game folder. This file likely holds user-specific settings for the game.
- Right-click on the Graphic Config XML Document file and select the Rename option from the context menu.
- Add bk to the end of the file name, which is done by typing bk at the end of the existing file name.
- After renaming the file, save the changes, close File Explorer, and proceed to launch the game again.
By renaming the Graphic Config XML Document file, you’re effectively restoring the default settings for the game. This might help resolve issues causing the game to crash.
Power Option
In this section, we will take you through the steps to fix the error by adjusting the Power Option.
- Start by right-clicking on the Windows Start menu icon located in the taskbar.
- From the context menu that appears, click on the Power Options entry.
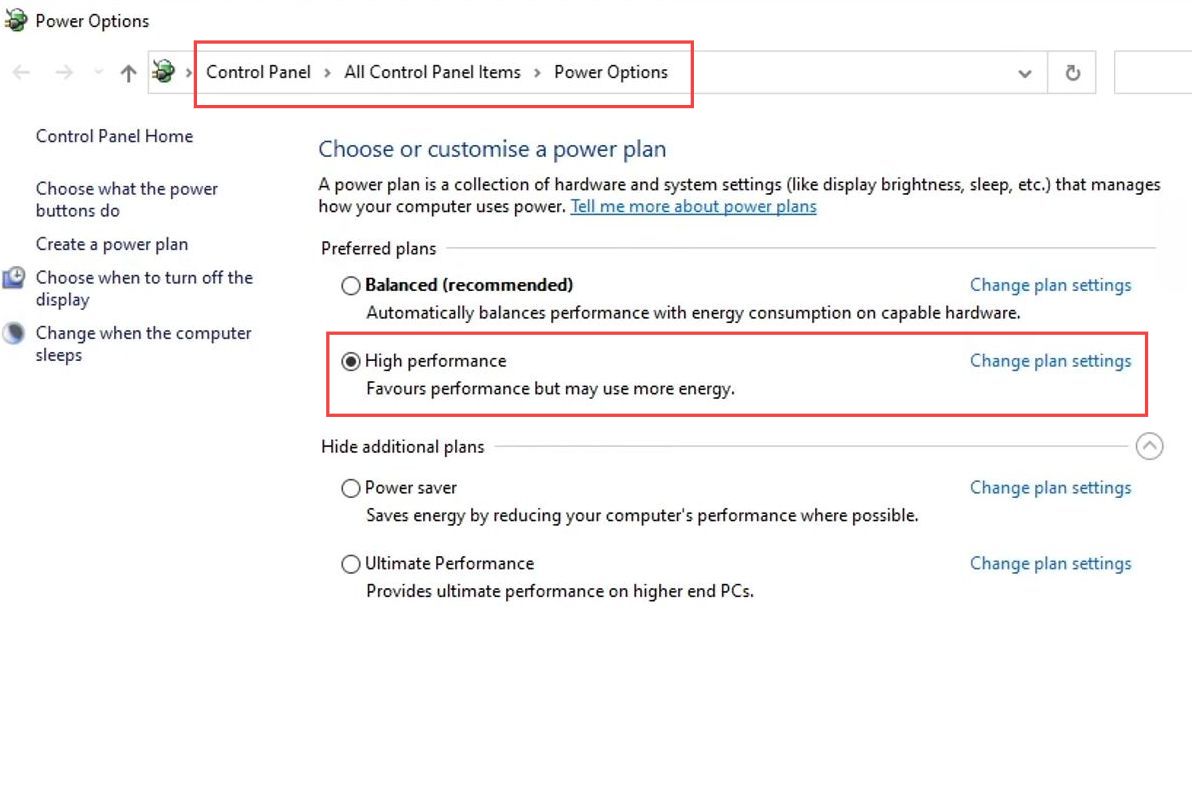
This will open the Power Options settings. - Within the Power Options settings window, click on the Additional Power Settings link.
This will lead you to further power configuration options. In the Additional Power Settings section, you’ll find different power plans. - Select the High-performance option from the menu.
- Confirm that the High-performance power plan is selected.
This power plan prioritizes performance over energy efficiency, which can help in resolving crashing issues.
Temporarily disable your security software
This section describes how to temporarily disable your security software in order to fix the crashing, freezing, and not launching errors.
- If you are using a third-party security program, you must consider temporarily disabling it as it might still be blocking the Armored Core 6 Fires of Rubicon.
- Try launching the game Armored Core 6 Fires of Rubicon again while your security software is temporarily disabled.
This will help you determine if the security software is causing the issue. - If the game works fine when the security software is disabled, it indicates that the security software might be causing the problem.
- Be cautious when disabling your security software. While it’s disabled, your computer might be vulnerable to security threats.
Exercise care and only disable it temporarily for testing purposes.
Verify the Integrity of the game files
This section will take you through the steps to fix the error by verifying the integrity of the game files.
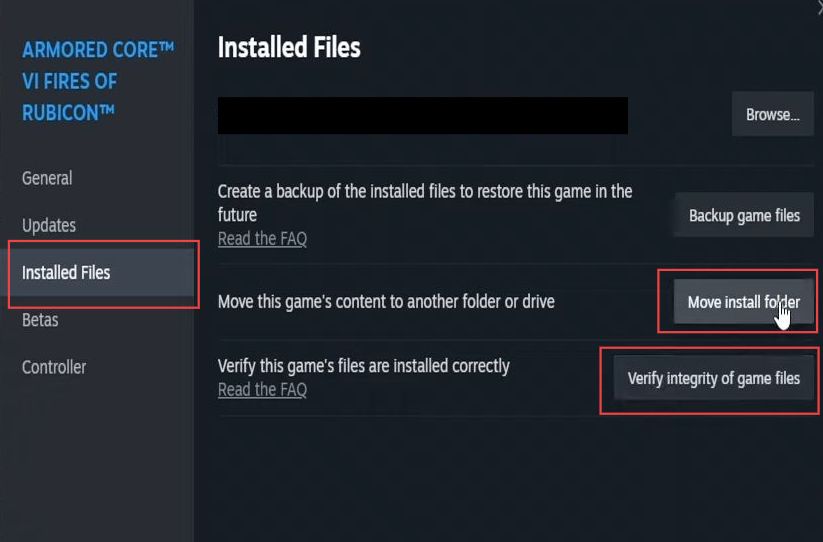
- Launch the Steam application and click on the Library tab at the top of the Steam window.
- Click on Properties in the submenu that appears and then tap on the Local Files tab.
This tab contains options related to the game’s files on your computer. - Click on the Verify Integrity of Game Files button.
This will initiate a process where Steam checks the game’s files on your computer against its records. Steam will now scan your computer’s game files, checking for any corrupt or missing files.
It will automatically repair the files by downloading the necessary components from the Steam servers. Steam will display a message indicating the outcome. If no issues are found, it will notify you that no files need to be repaired.
- If the game allows you to choose the installation location, consider moving it to a different hard drive on your computer.
- Ensure that you have sufficient free disk space on the drive where the application is currently installed.