New players want to know so many things about CS GO, and they are very passionate about learning new things; if you are one of them, it is the right place for you. In this guide, you will find how to fix in-game MIC in Counter-Strike: Global Offensive.
There are three methods to fix it and you can try any of them.

Here are some steps you have to follow to get this done without any trouble:
Step 1: Go to the in-game settings and navigate to Audio, where you will find the option to enable voice. After that, set this to Press to use Mic.

Before taking any other step, ensure this option has already been set to as directed above since this could be your only problem. Sometimes it is automatically disabled when you restart your PC or exit CS GO, the reason for which is unknown.
Step 2: Go to the Keyboard/Mouse and scroll down to the Use Mic option.

You must make sure that it has been attached to something. But if this does not fix your issue, you should learn how to set up the console.
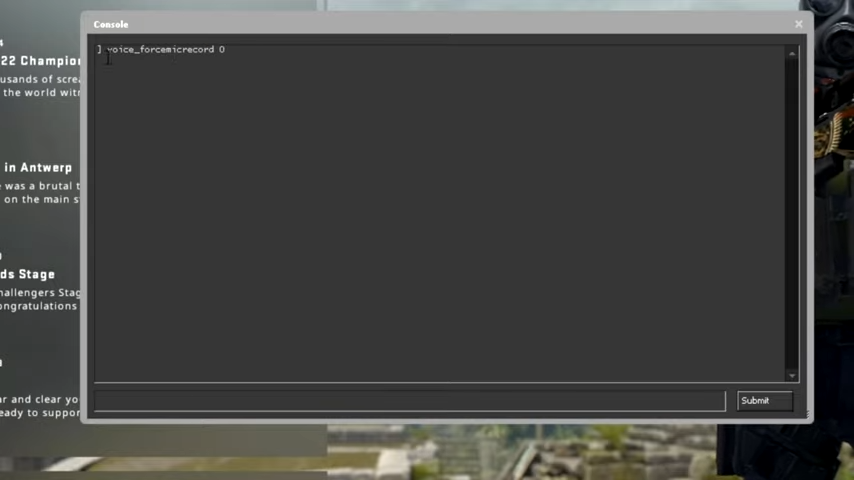
The Console Setup
Go to the menu of settings, navigate to the game, and you will find an option to “enable developer console.” there. You need to change this to yes.

Then again, to the Keyboard/Mouse, and you will see an option for Toggle console under the UI Keys. Change this to some button that you use sparingly. It could be zero most of the time.

Now, use a command of voice_forcemicrecord0.
There is another method if it does not work.
The Sound Control Settings
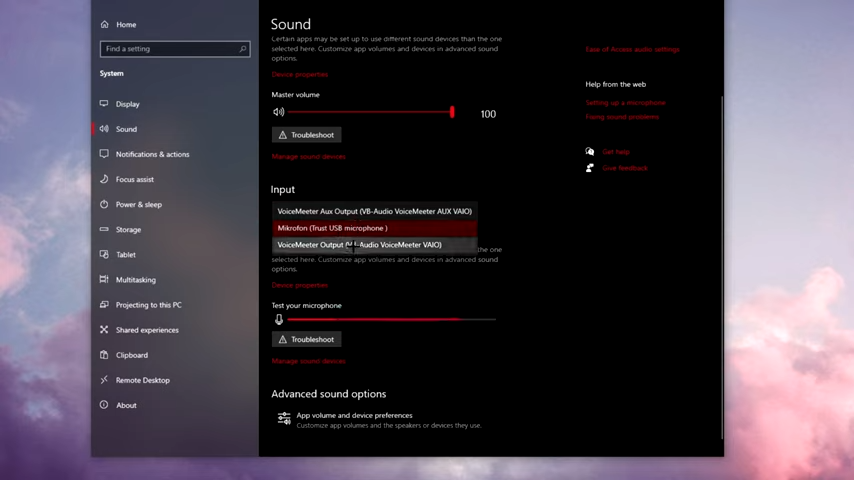
Step 3: Go to your desktop, then to the taskbar. You will find the volume icon there, right-click and go to the sound settings.

Find “change your input device” under Input. Choose your input device here. It could be set to the wrong one, like a webcam microphone. In Windows, sometimes, it happens automatically.
Now, go to the sound control panel. Go to the recording section after opening it and you will find your microphone by scrolling down. Some bars move as you speak through your Mic. It lets you know which microphone you are using and which is working. Now select your microphone and set it to default.
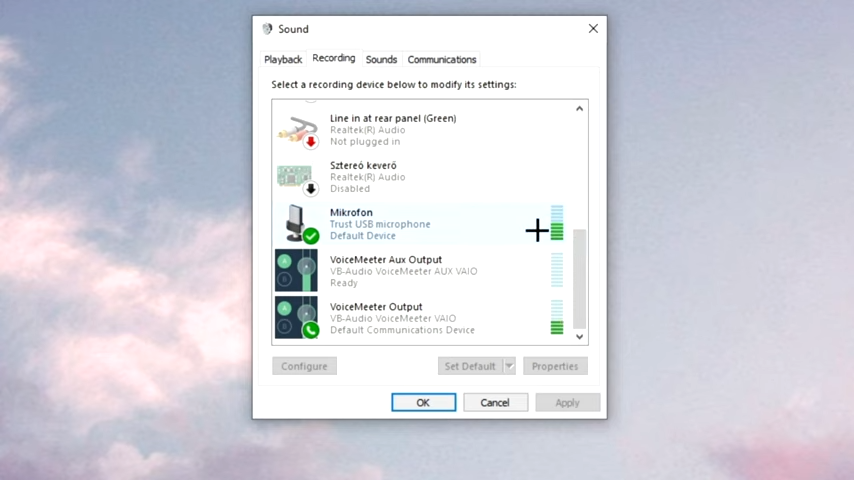
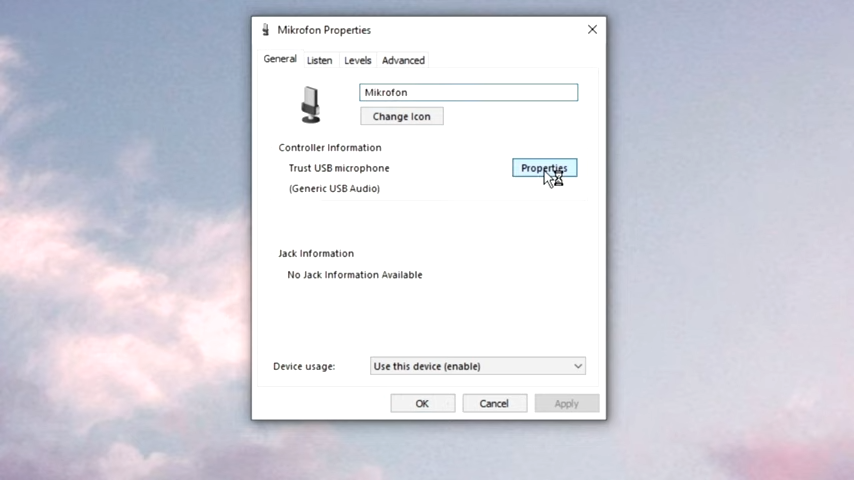
Step 4: Go to your sound control panel and the recording section. Scroll down to see your microphone. Right-click on it to see its properties.
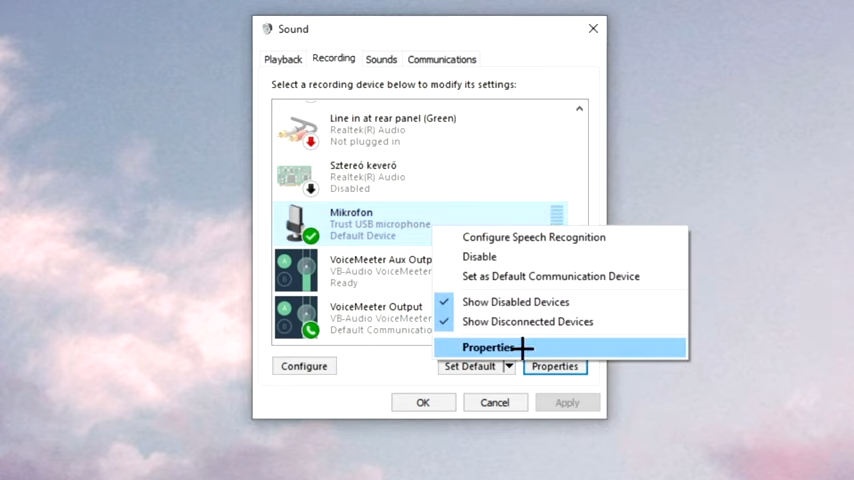
Then again, press the Properties button.
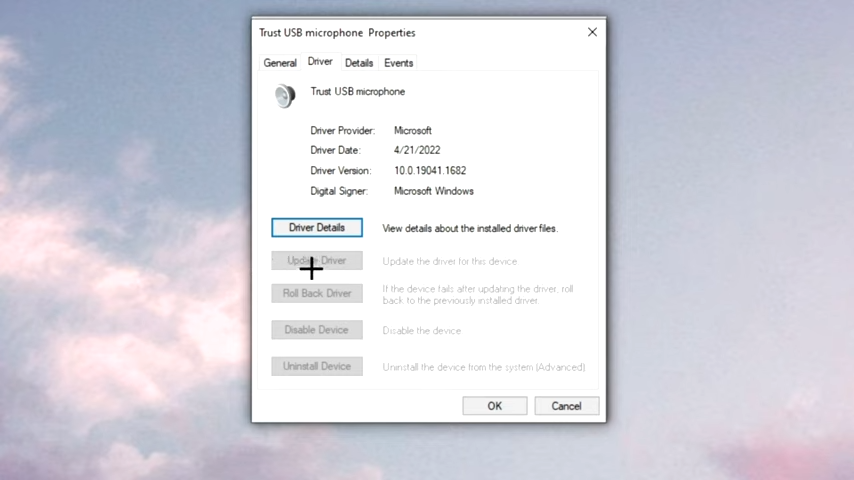
You will find the options Driver Details and Update Driver below. You can find Update Driver is disabled. Because if your Driver is already updated and no new update is available. It will stay disabled. The availability of this option means you need your Driver to be updated; the system will do it automatically. Now click OK.
Hence, these steps can be followed to fix your in-game Mic in CS GO.