This guide will let you know how to fix the PlayStation 4 error code NP-34954-5. There are multiple methods that you can try to fix the issue.
Restart your console
In this section, we will take you through the steps to restart your console in order to resolve the error.
- The first thing you will need to do is restart your console.
This can often resolve various issues, including error NP-34954-5. - Simply turn off your console, wait for a few seconds, and then turn it back on.
- After restarting your console, check if the error NP-34954-5 is fixed.
Activate as Your Primary PS4
This section will take you through the steps to activate Your Primary PS4. By following the steps below, you will be able to navigate to settings and select the option called “Activate as Your Primary PS4.”
- If the error still persists, you’ll need to access the settings on your console.
- Within the settings menu, select the “Account Management” option.
- In the Account Management menu, select the option called “Activate as Your Primary PS4.”
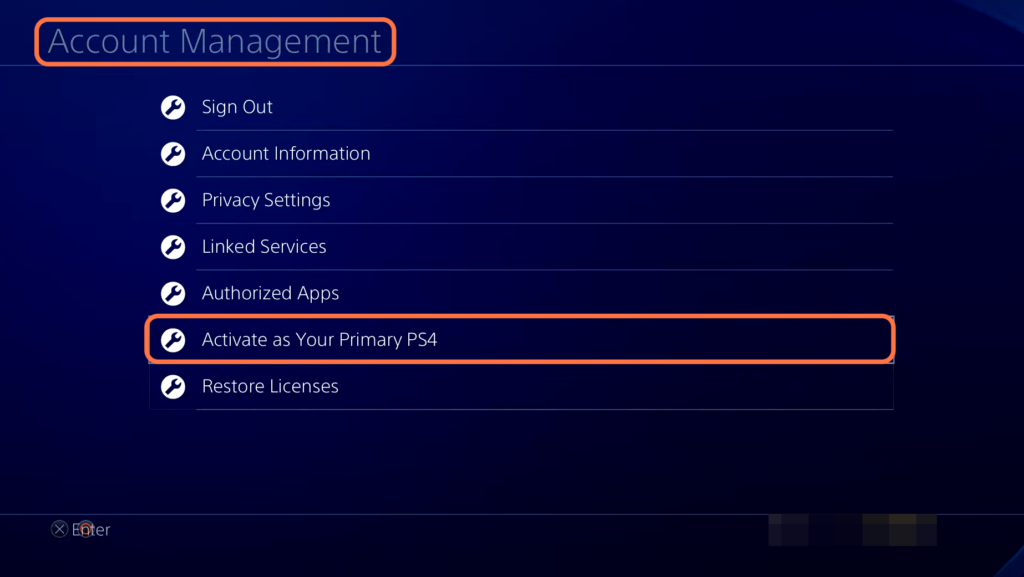
- If the option is already activated as your primary PS4, you will need to deactivate it first.
- After deactivating it, try activating it again as your primary PS4.
Restore Licenses
This section describes how to resolve the issue by restoring licenses.
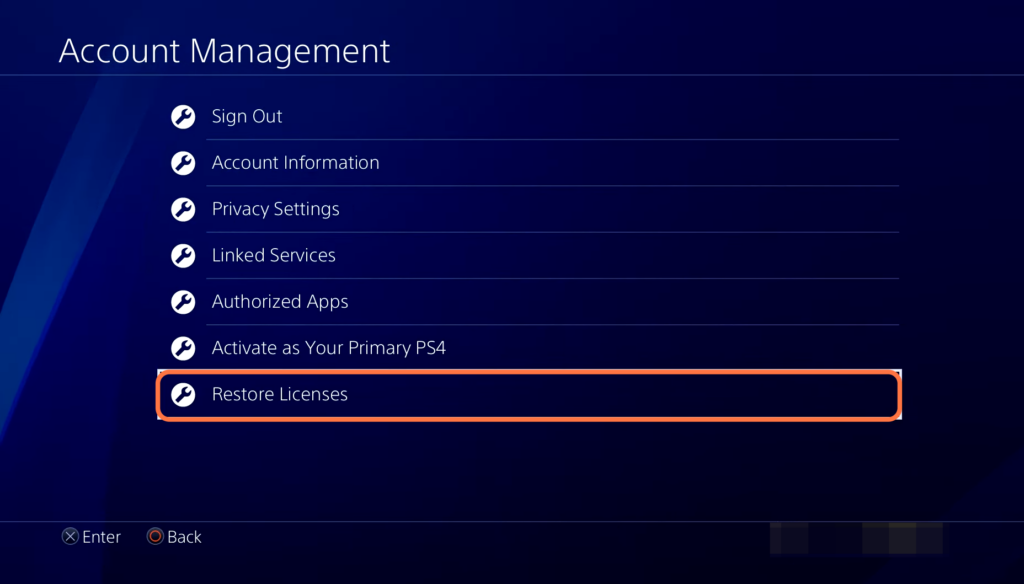
- Open the Account Management window on your device.
- Look for the option labelled “Restore Licenses” and click on it.
It will initiate the process of restoring licenses associated with your account. - Once the process is finished, check if the error or issue you were encountering has been resolved.
Restart your internet router
In this section, we will take you through the steps to restart your router in order to fix the error.
- The other thing you can do is restart your internet router.
- Or change the router you’re connected to a different Wi-Fi network or mobile hotspot.
It might help to fix the issue.
Configure DNS settings
This section describes how to configure DNS settings. By following the steps below, you will be able to go to the “Network” settings and change the DNS settings to fix the error.
- If the error still exists, go to the settings menu and navigate to the “Network” settings.
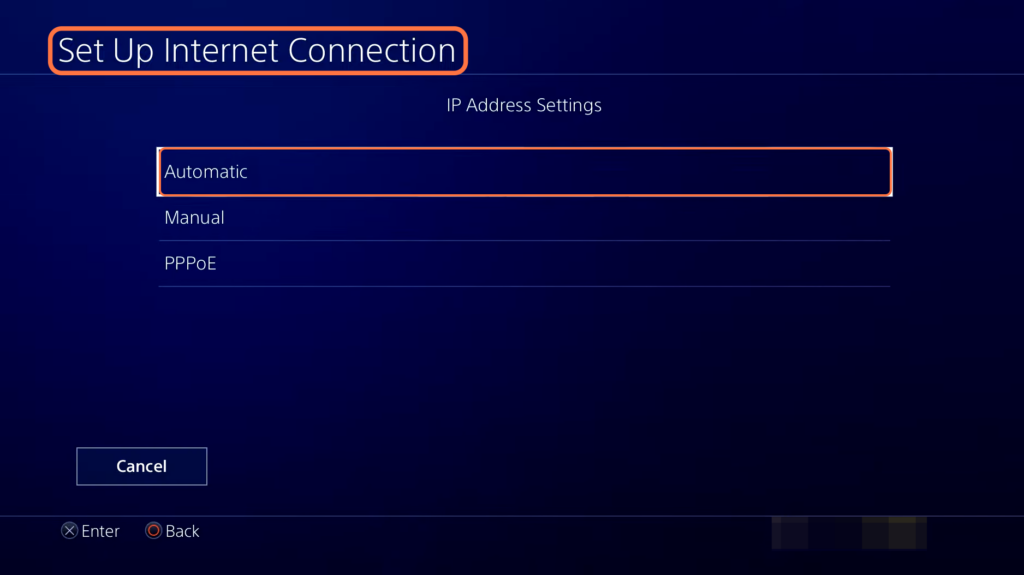
- Within the Network settings menu, look for the option labelled “Set Up Internet Connection” and tap on it.
- Select Use a LAN Cable preferably, click on Custom and then select Automatic under IP Address Settings.
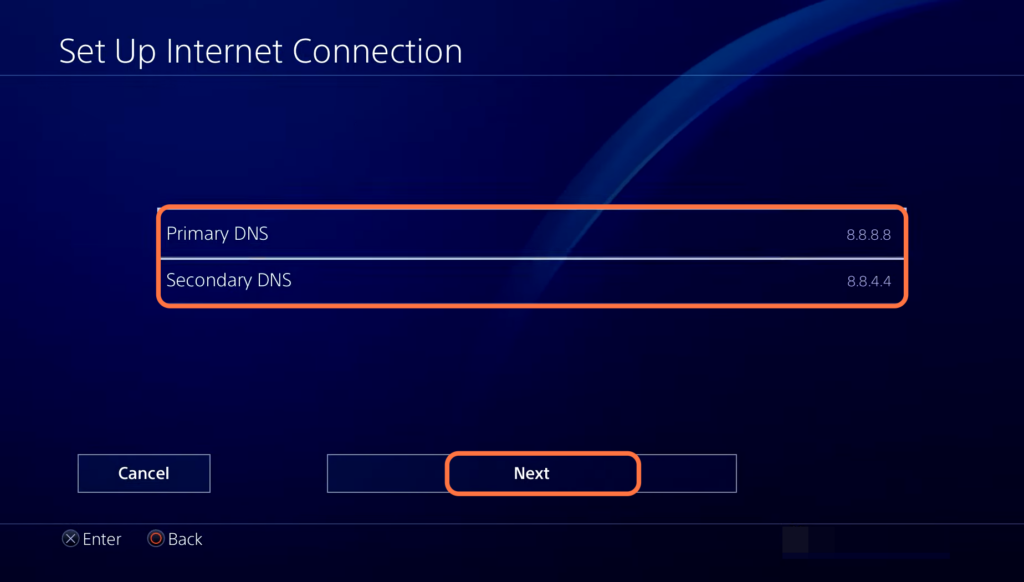
- Tap on Do Not Specify and select Manual under DNS settings.
- You have to change your Primary DNS to 8.8.8.8 and the Secondary DNS to 8.8.4.4.
- If it doesn’t work, change the Primary DNS to 1.1.1.1 or the Secondary DNS to 1.0.0.1.
- After that, press Next, select Automatic and tap on Test Internet Connection settings.
Everything will run successfully now and it will fix the error.