This guide will tell you how to fix Warzone 2 & MW2 Hueneme Concord Connection Errors.
1- First, ensure that the Warzone and Modern Warfare 2 servers are currently online because if they’re not, then you will get a connection error. To check this, click on the following link https://support.activision.com/onlineservices
2- This link will take you to the Activision page. Once you reach this page, then in the middle of the screen it says, Modern Warfare 2 online and Warzone 2 online.
3- If you do not see these games here, then you must click on the select game on the drop-down list and select each one to check the status. Once you have checked and you can see the online services are online, then they will work absolutely fine.

4- Now, close down the web browser, and right-click on your network adapter on the bottom right side of the screen. Select open network and internet settings from the pop-up menu.
5- Once you have done this, you need to click on the change network adapter and right-click on the Network Adapter. Select Disable, then again click on it and enable it.
6- It will reconnect to the internet and give the adapter a fresh start. Once it’s finished, try the game again and see if it helped.

7- If you are still facing the issue, click on the Start menu at the bottom left side of the screen and then type CMD. After that, run the command prompt as an administrator by clicking on run as administrator.
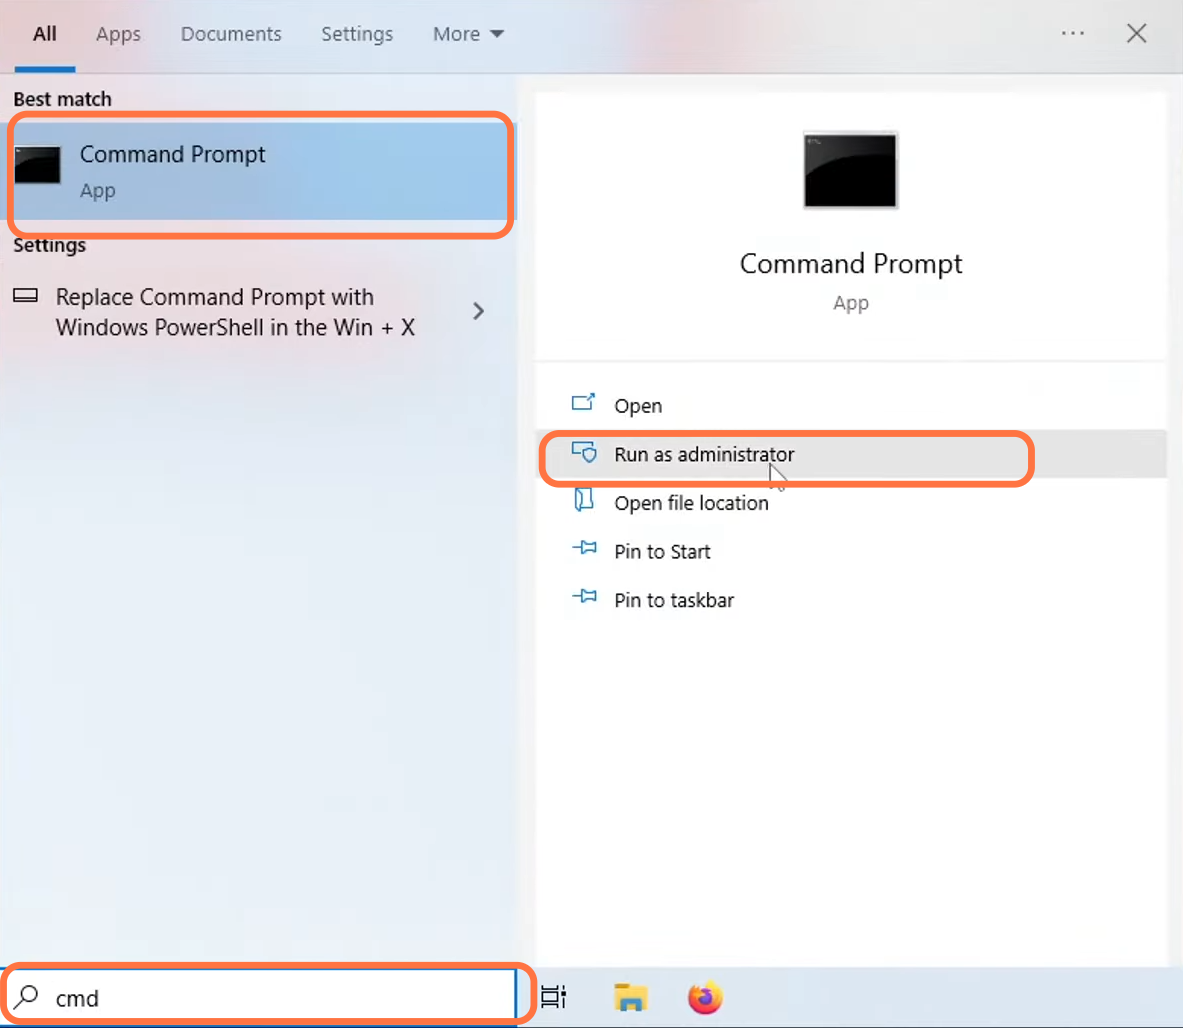
8- Now enter the command ipconfig /flushdns and press enter. After that, launch Modern Warfare 2 or Warzone and see if your issue is solved or not.

9- In case, you are still facing the issue, then right-click on the network adapter again in the bottom right side of the screen and this time click on open network and internet settings.
10- Click on Change adapter options, right-click on your Network adapter and go to properties. Now you need to select Internet Protocol version 4.
11- Go to properties and click on Use the following DMS server addresses option. Then enter DNS, write 1.1.1.1 for preferred DNS and click on Ok.

12- After that, right-click on the Network adapter, go back to Internet Protocol version 4 properties and select Obtain DNS server address automatically. Then click on OK, launch the game and see if it fixes your issue.

13- You also have to make sure that your internet connection is working properly; if you are using Wifi, then try to use an ethernet cable as it provides better stability and speed. It will also reduce the chances of lag within the game. Also, try to go close to the router in case you are using boosters. Also, one time remove your Wifi from the socket and then plug it back in.
14- In case you are using any VPN, you have to turn it OFF as it causes problems.
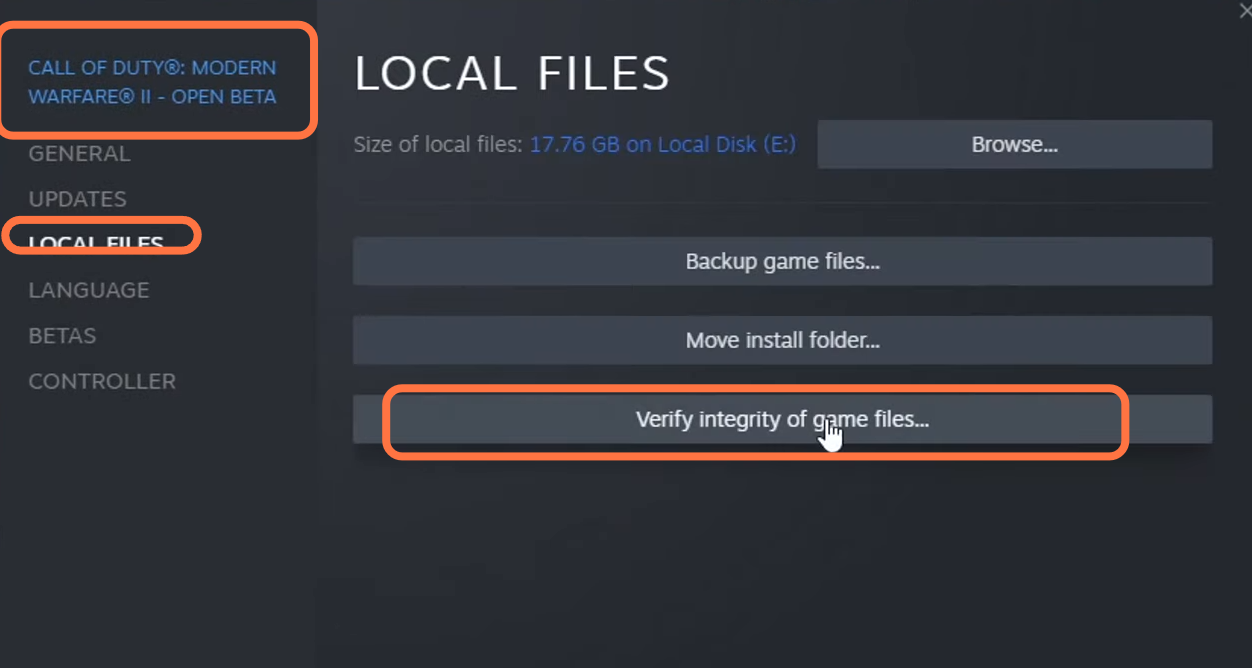
15- After that, open Steam, then find COD, right-click on it and go to properties. Click on local files on the left side of your screen, and tap on Verify integrity of the game files.
16- It will make sure that no file of the game is missing and also it will see if any of the game files are corrupted. After that, launch the game and see if this fixes your issue.
17- In case you are using the battle.net launcher to launch your game, then open the battle net launcher and find the COD game. Click on the Settings button and then click on the Scan and repair option. It will make sure that no file of the game is missing and it will see if any of the game files are corrupted. After that, launch the game and see if it fixes your issue.

18- Make sure that your security software is not blocking the easy entity. You have to put this in game mode or in passive mode or you can just disable it for some time. Hopefully, it will fix your issue.
19- In case you are using windows defender, you must click on the Windows button, then write defender and open it up. Click on Allow an app or feature on the left of your screen, press C, and make sure that COD is check-marked in the public column. After that, launch the game and see if it fixes your issue.

20- You have to make sure that all the programs in the background all close. As these background programs take space from your ram and this cause issue.
21- Also you have to make sure that you must close all the programs running in the background as they cause issues in the game launching, so before launching the game close all the programs running in the background.
22- You need to unplug any devices plugged into your PC. Then unplug the USB, microphones, etc just don’t unplug the keyboard and mouse. After this launch the game and see if this fixes your problem.