This guide will help you to improve Graphics, FPS, and resolution on the PS5 console. You can either enable the colour filter, adjust high contrast, and set the video output. After that, adjust the resolution, display area, performance mode or resolution mode to resolve the issue.
Enable Color Filter
In this section, we will take you through the steps to enabling the colour filter. By following the steps below, you will be able to navigate to settings and choose the colour you want.
- First, you have to click on the Settings icon on your screen and then tap on the Accessibility tab to access the accessibility settings.
- On the left side panel, click on the Display and Sound option, locate and click on the Color Correction tab.
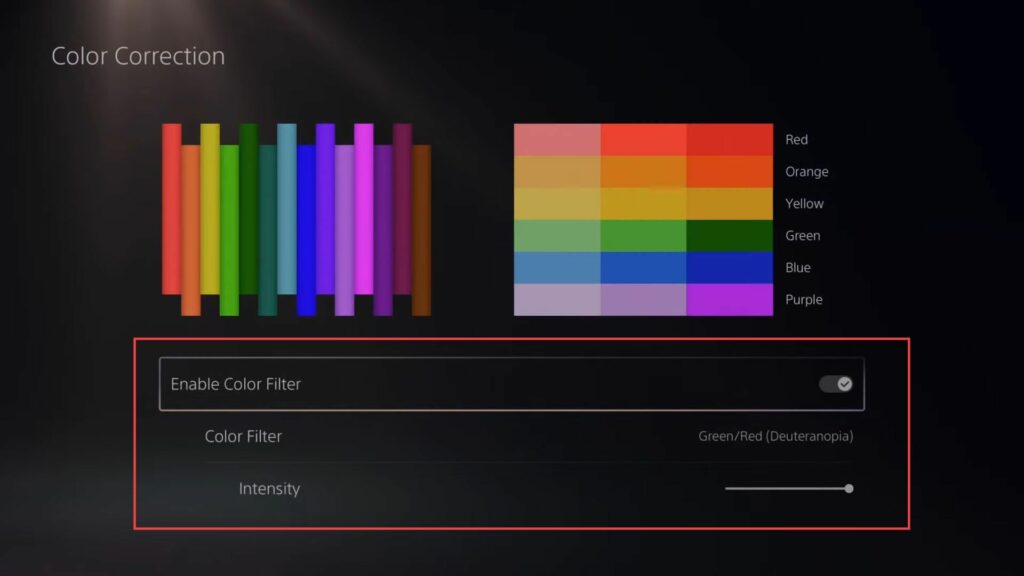
This will take you to the colour correction settings. - To enable a colour filter or correction, toggle the corresponding option.
- If you are colourblind or have sensitive eyes, proceed to the next step to choose a specific colour correction.
- From the Color Filter dropdown menu, choose the appropriate option based on your needs. Options might include Grayscale, Red/Green (Protanopia), Green/Red (Deuteranopia), or Blue/Yellow (Tritanopia).
- Use the provided slider to adjust the intensity of the chosen colour correction.
This allows you to fine-tune the effect to your preference.
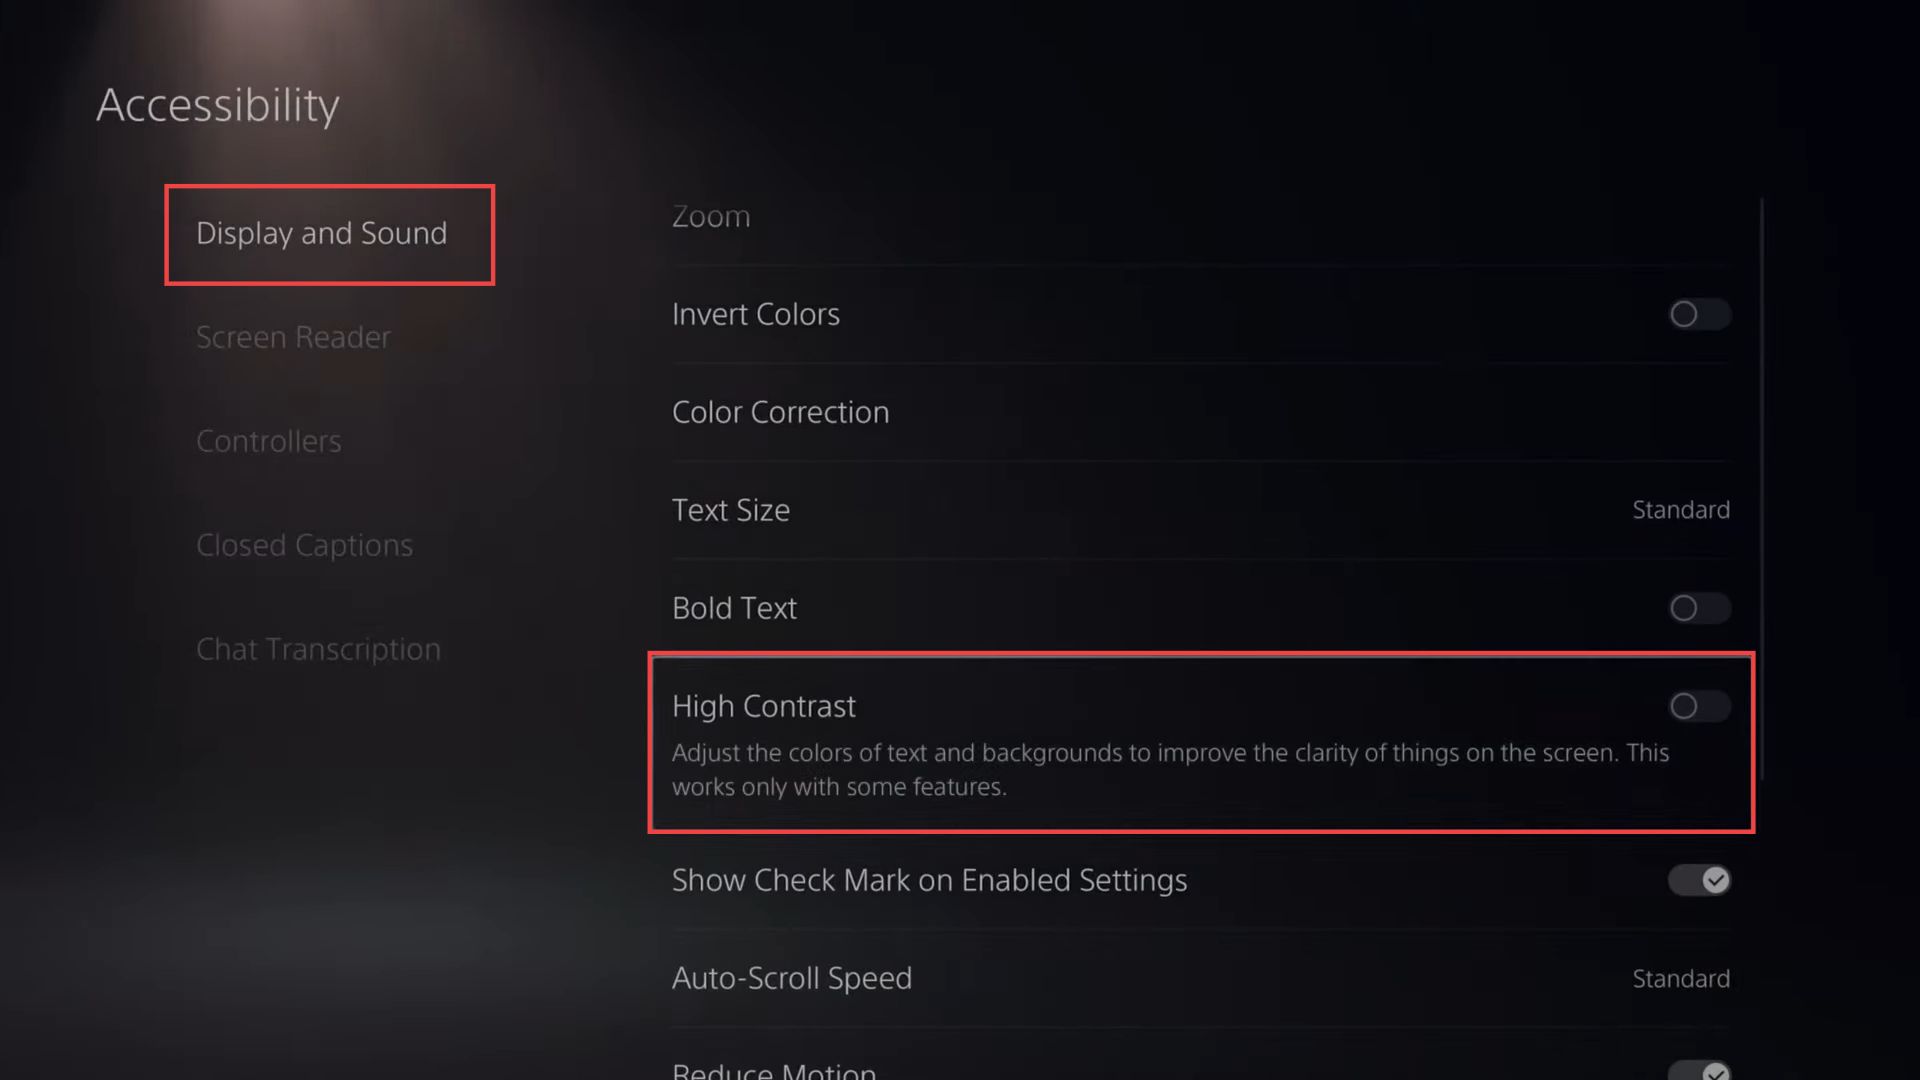
Adjust High Contrast
This section describes how to improve graphics, and resolution by adjusting the high contrast.
- Navigate back to the main settings menu, and scroll down until you find the High Contrast tab.
This tab is used to adjust the colour of text and backgrounds for enhanced clarity on the screen. - High contrast settings are designed to enhance the visibility and clarity of elements on the screen.
Keep in mind that this function might only work with certain features and user interface elements. - You need to turn on the High Contrast option.
This will activate the high-contrast settings.
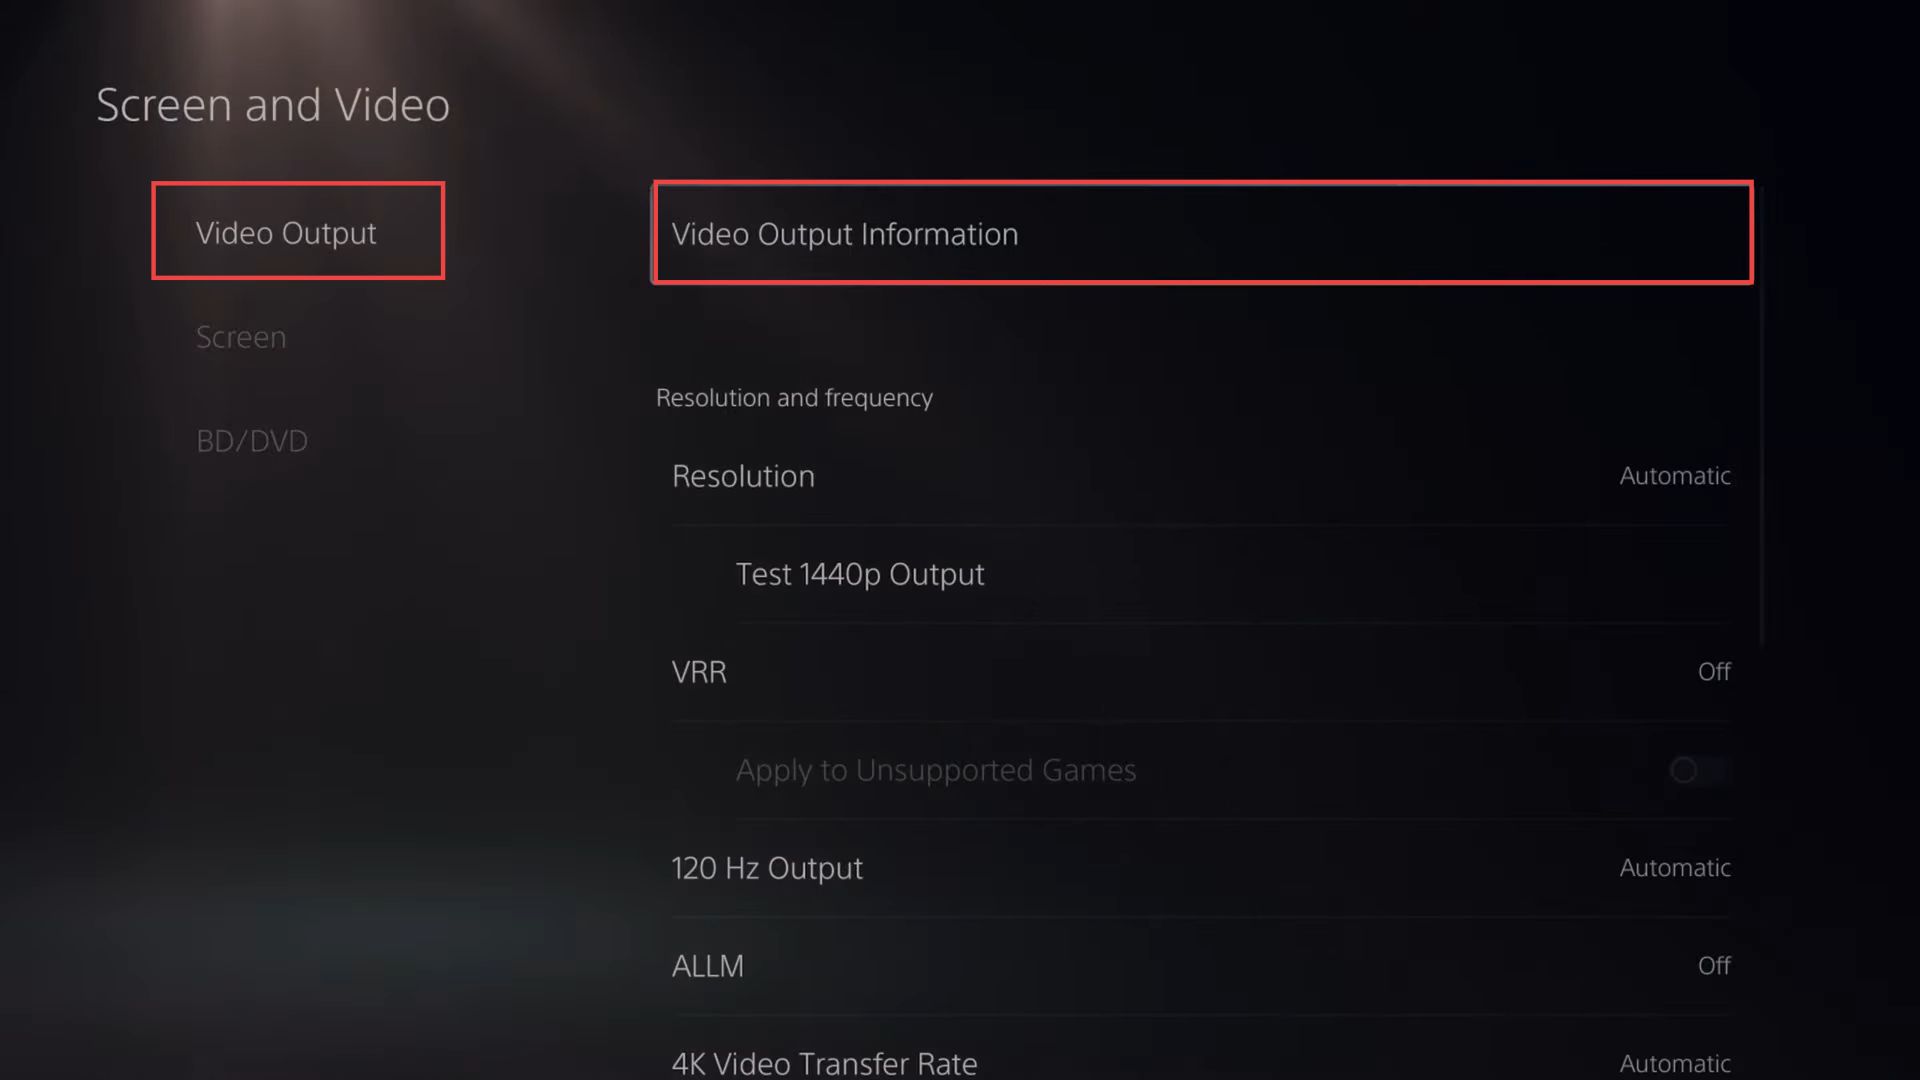
Setting Video Output
This section will take you through the steps to set the video output.
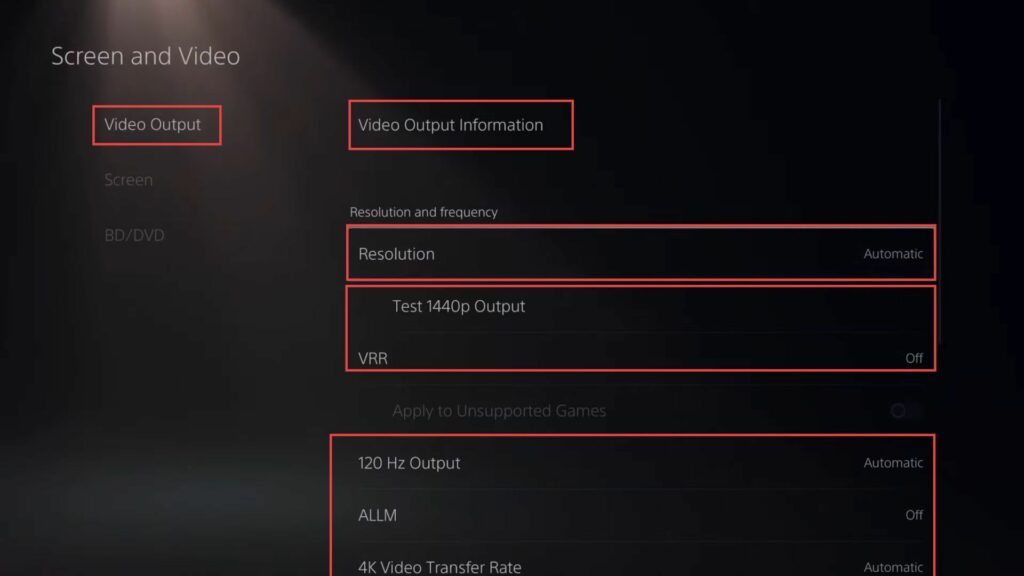
- Navigate back to the main settings menu and scroll down until you locate the Screen and Video tab.
- Click on the Video Output tab from the left side panel.
This is where you can customize video output settings. - Select the Video Output Information option and View the information provided about your connected display device.
This information may include details such as resolution, colour format, variable refresh rate (VRR), and more.
Adjustment of Resolution
In this section, we will take you through the steps to adjust the resolution to improve graphics.
- Now navigate back to the main settings menu and scroll down to select the Screen and Video tab.
This tab contains settings related to your display and video output. - Scroll down to the Resolution section and choose between setting the resolution to Automatic or adjusting it to your desired point.
You can set it to the highest available resolution. - Test the 1440p Output option from the list and close all other running processes before attempting this.
- Turn off the VRR option which allows the refresh rate to adjust in real-time, primarily for TVs and games that support Variable Refresh Rates.
- Turn on the 120 Hz Output option and turn on the ALLM (Auto Low Latency Mode) option if your TV supports it.
This setting enables automatic low-latency mode while playing games. - Turn on the 4K Video Transfer Rate option and set it to Automatic.
- Go to the colour section, and turn on the HDR option when supported to activate the High Dynamic Range.
Note that it will be disabled for non-HDR-compatible games or apps. - If needed, click the HDR option to access and adjust HDR settings.
- Set Deep Color Output to Automatic.
This enhances the display of finer colour grades. - Finally, adjust the RGB Range by setting it to Automatic or adjust it according to your preference and playstyle for the game.
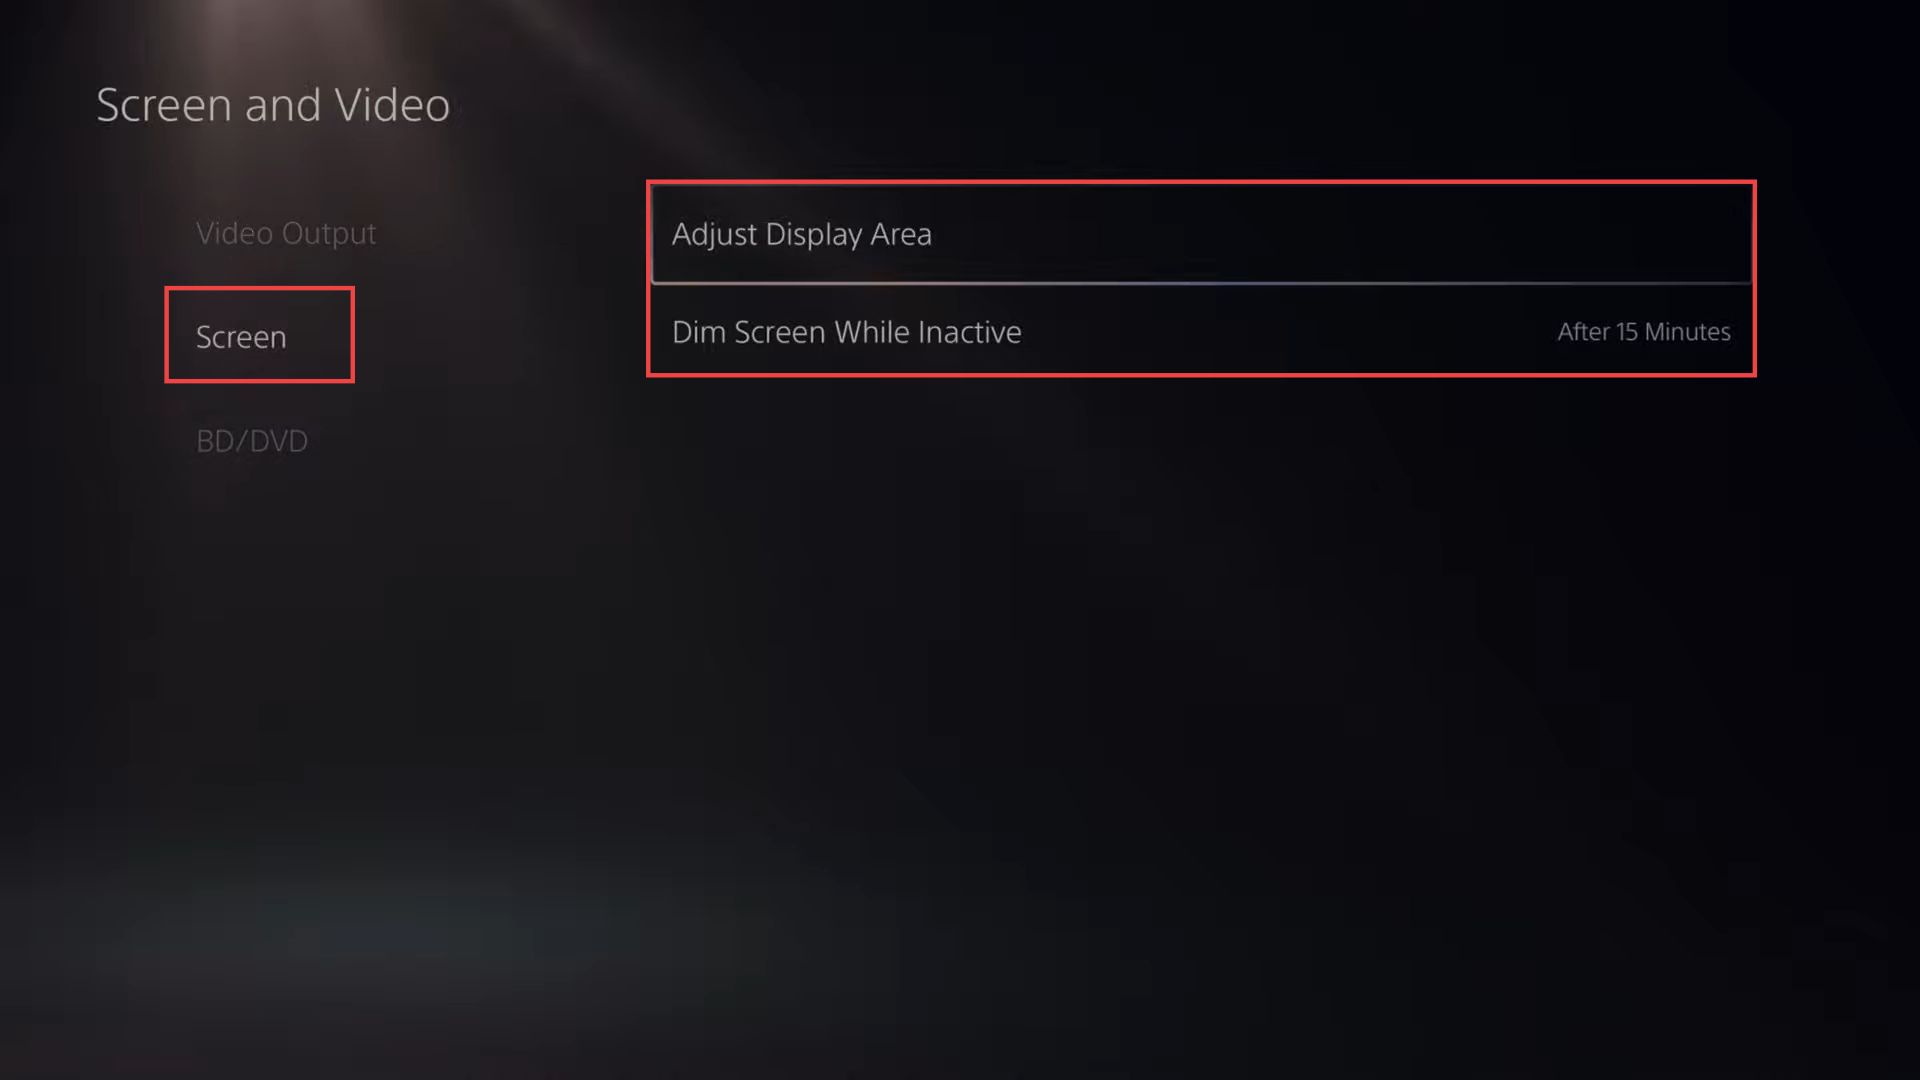
Adjust Display Area
This section explains how to adjust the display area. You will have the option to expand or shrink the display area.
- Click on the Screen tab located on the left side panel.
This tab is used to manage display-related settings. - Select the Adjust Display Area option from the right-side listings. If you want to shrink the display area, press the smaller button on your D-pad.
- If you want to expand the display area, press the larger button on your D-pad.
- Look for the option labelled Dim screen while inactive. Set the inactivity timer to After 15 Minutes or choose a timeframe based on your preference.
This determines how long the screen remains active before dimming due to inactivity.
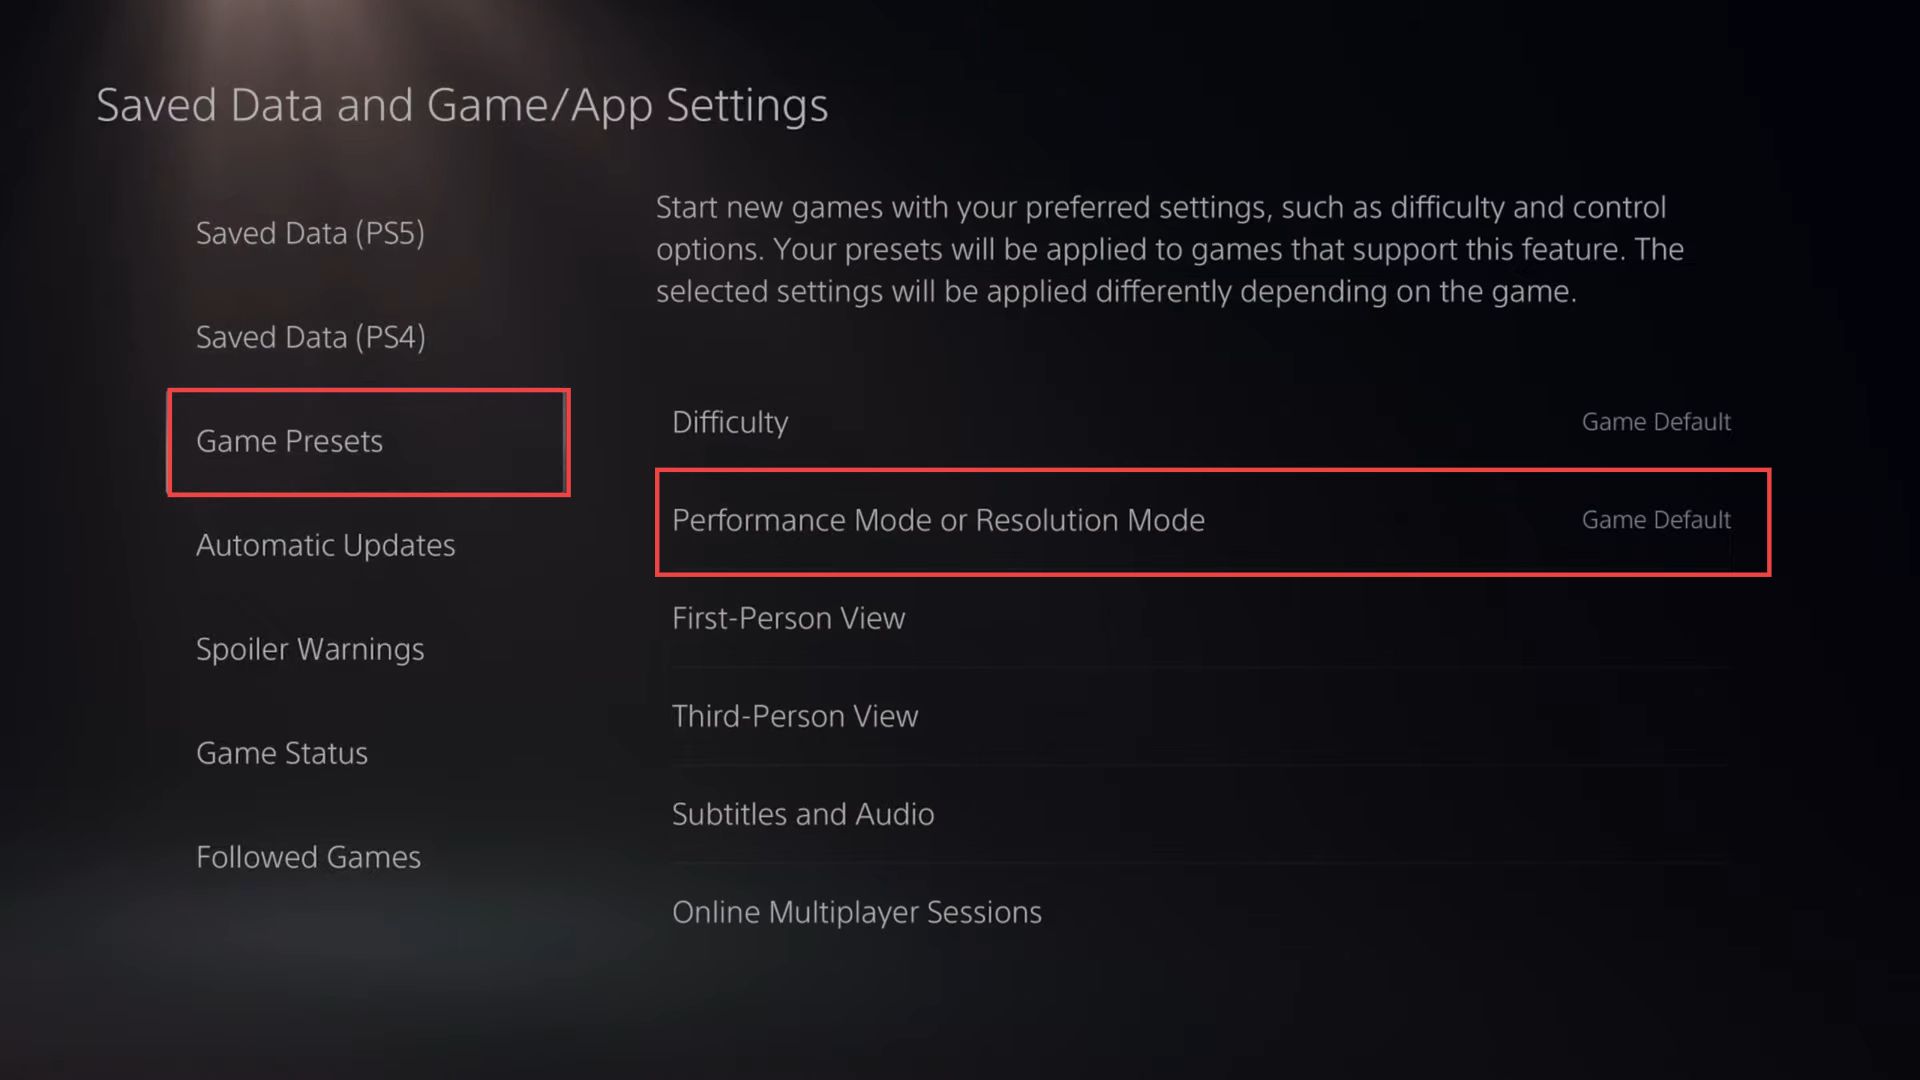
Performance Mode or Resolution Mode
This section will take you through the steps to improve graphics, FPS, and resolution by setting the performance mode or resolution mode.
- Navigate back to the main settings menu, and scroll down to Saved Data and Games/App Settings.
- Click on Game Presets from the options presented on the left side panel.
This allows you to customize game settings based on presets. - Choose either Performance Mode or Resolution Mode based on your preference.
These modes typically optimize the game for either better performance or higher resolution. - Adjust the mode to Resolution Mode if you want higher-resolution graphics.
However, using the Game Default option is often recommended for balanced settings.