For players who want to see more chunks while exploring in the game but the Minecraft server’s limited render distance frustrates them then, with the Bobby Mod, you can extend your render distance and enjoy other features like shaders and zoom capabilities. In this step-by-step guide, we’ll walk you through the process of installing and configuring the Bobby Mod to enhance your Minecraft experience.
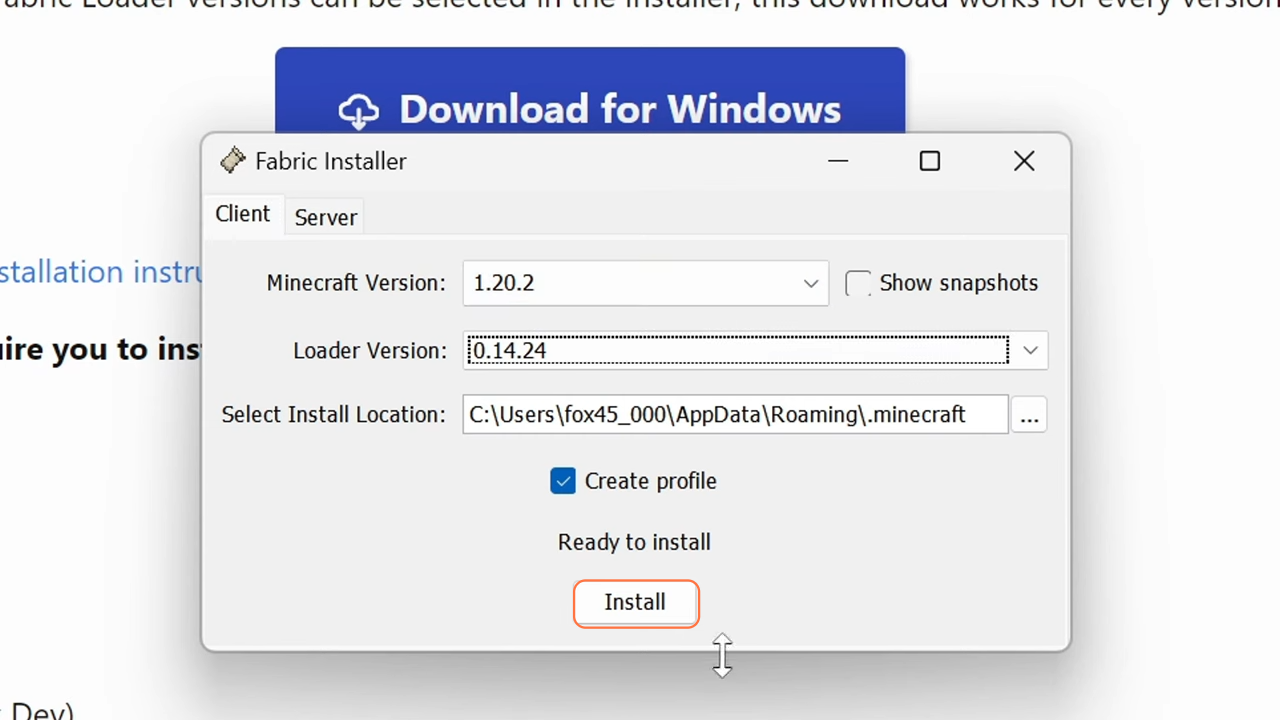
Step 1: Install Fabric Loader
- Fabric is a mod loader that allows you to use the Bobby Mod and other cool mods.
- Visit the official Fabric website.
- Download the Fabric installer for your operating system (Windows or Universal jar). Run the installer.
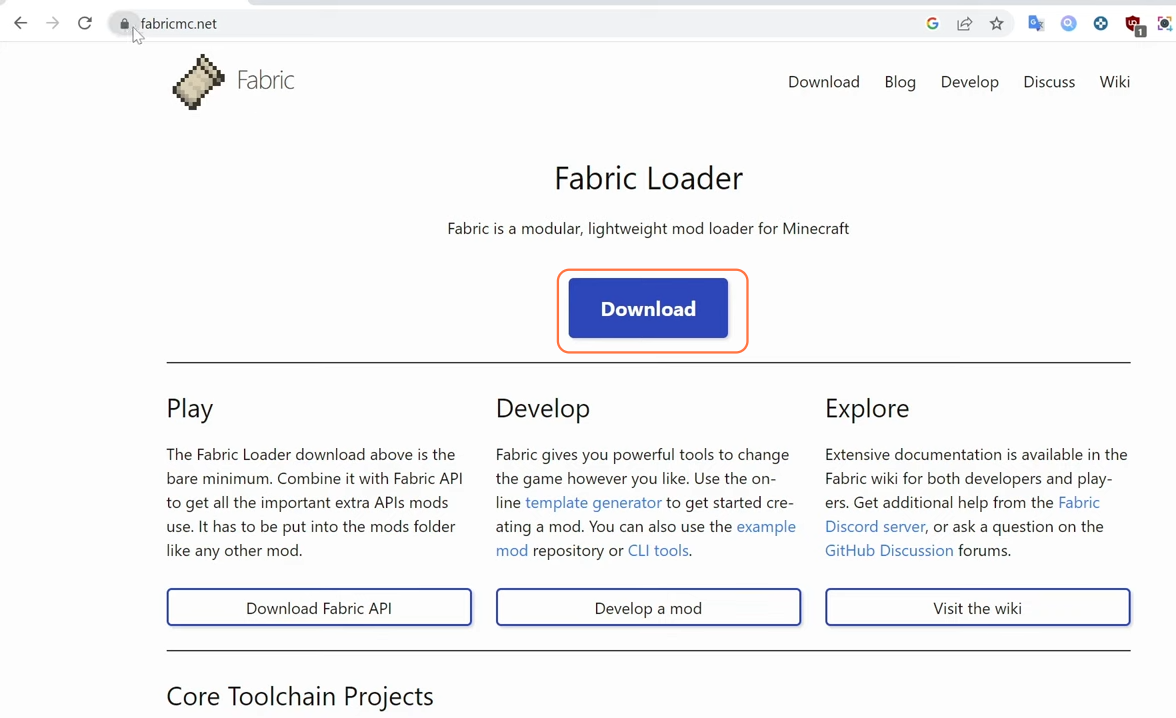
- Make sure you have Minecraft version 1.2.2 installed before proceeding.
- Follow the installation prompts, and the Fabric loader will install for your selected Minecraft version.
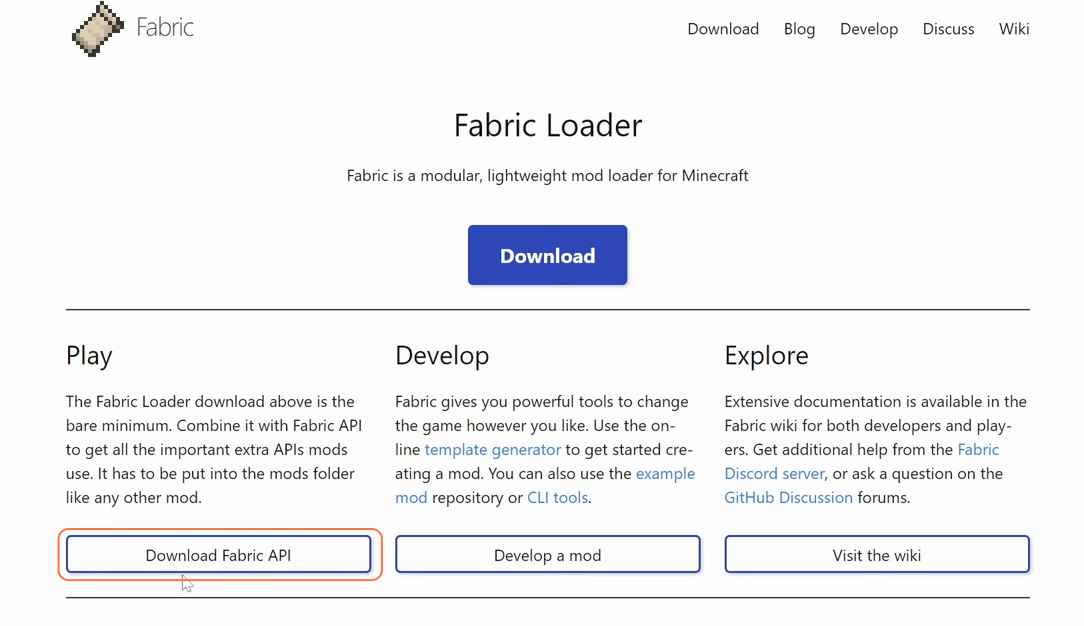
Step 2: Download Fabric API
- Go back to the Fabric website.
- Find the “Fabric API” download link, which will redirect you to the curseforge website where you’ll see all versions of Fabric API.
- Download the version that matches your Minecraft version (1.2.2 in our case).
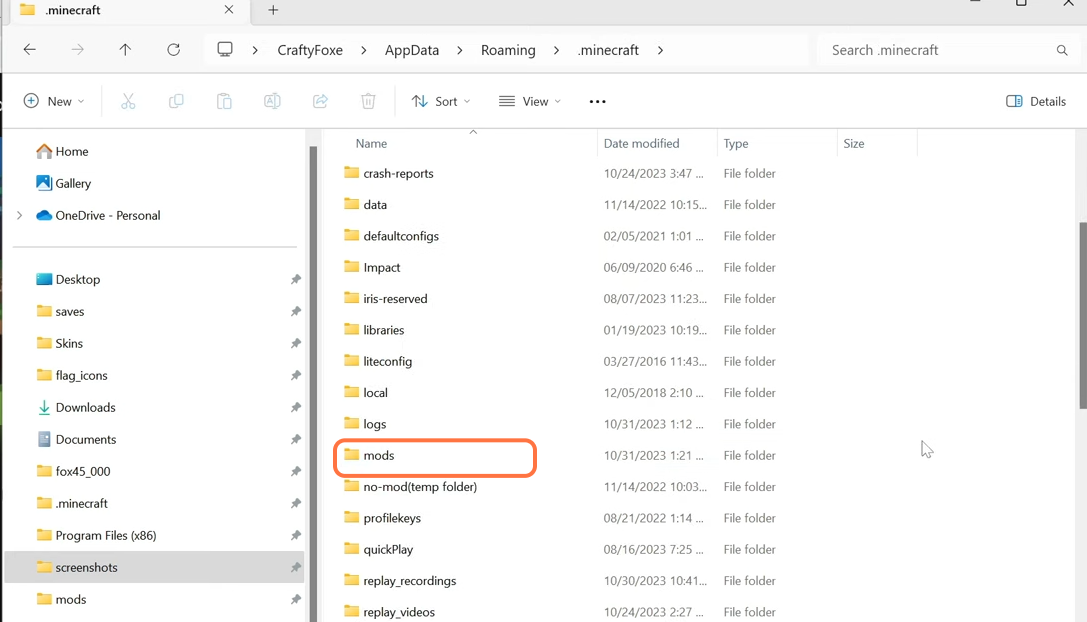
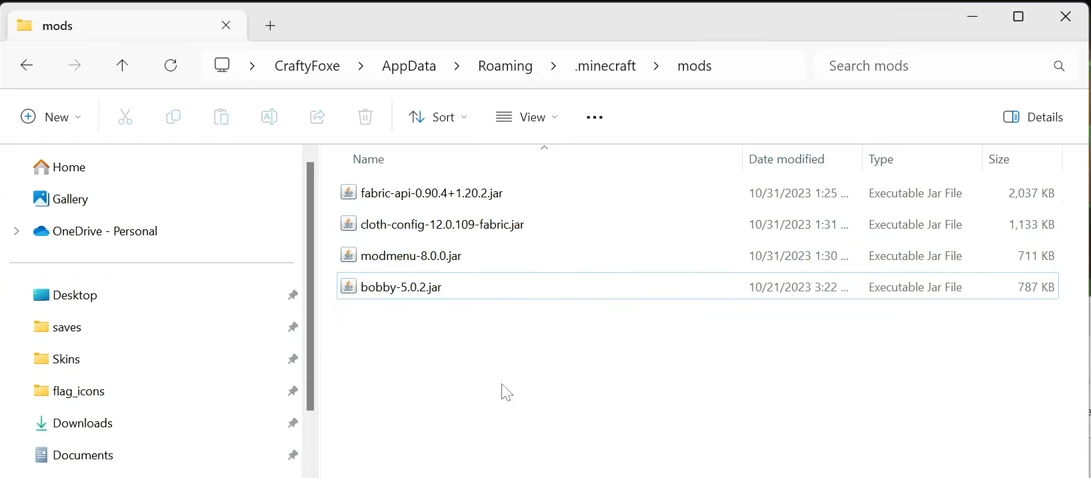
Step 3: Create the Mods Folder
- Navigate to your Minecraft game directory. If a “mods” folder doesn’t exist, create one and place the downloaded Fabric API file into the “mods” folder.
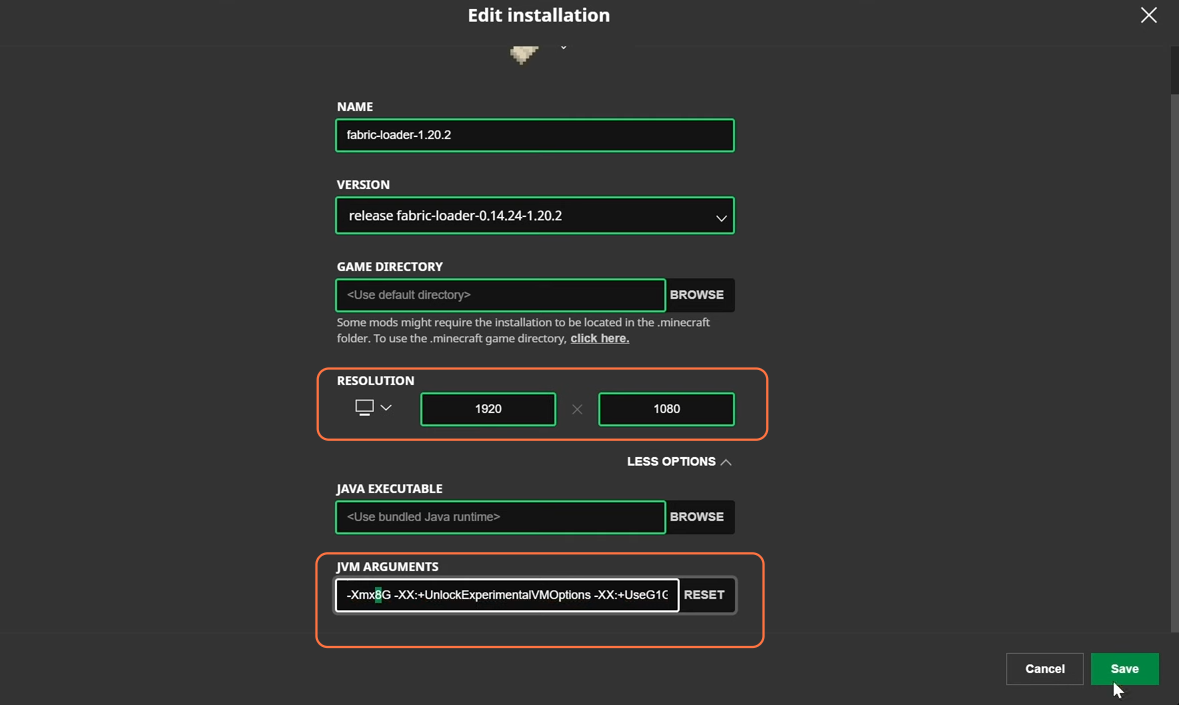
Step 4: Configure Minecraft Launcher
- Open your Minecraft launcher and select the Fabric profile (1.20.2).
- Adjust settings such as resolution and allocated RAM (e.g., 8GB is recommended) in the launcher.
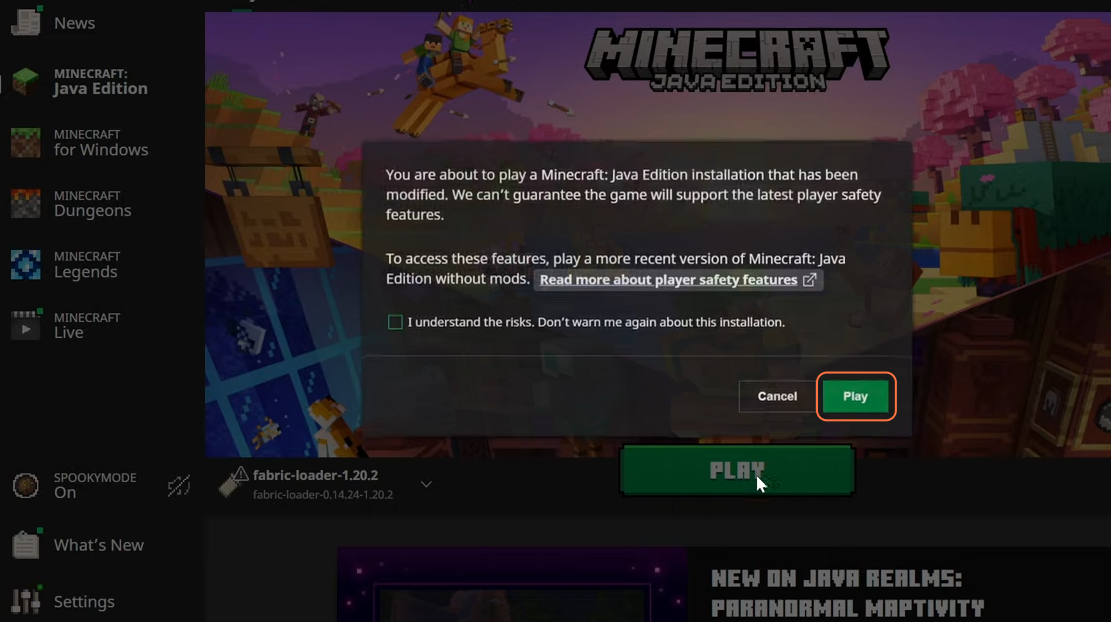
Step 5: Launch Minecraft with Fabric
- Click “Play” and agree to any prompts regarding potential risks.
- Wait for Minecraft to load with the Fabric profile.
- Once Minecraft loads, confirm that the Fabric profile (1.2.2) is displayed.
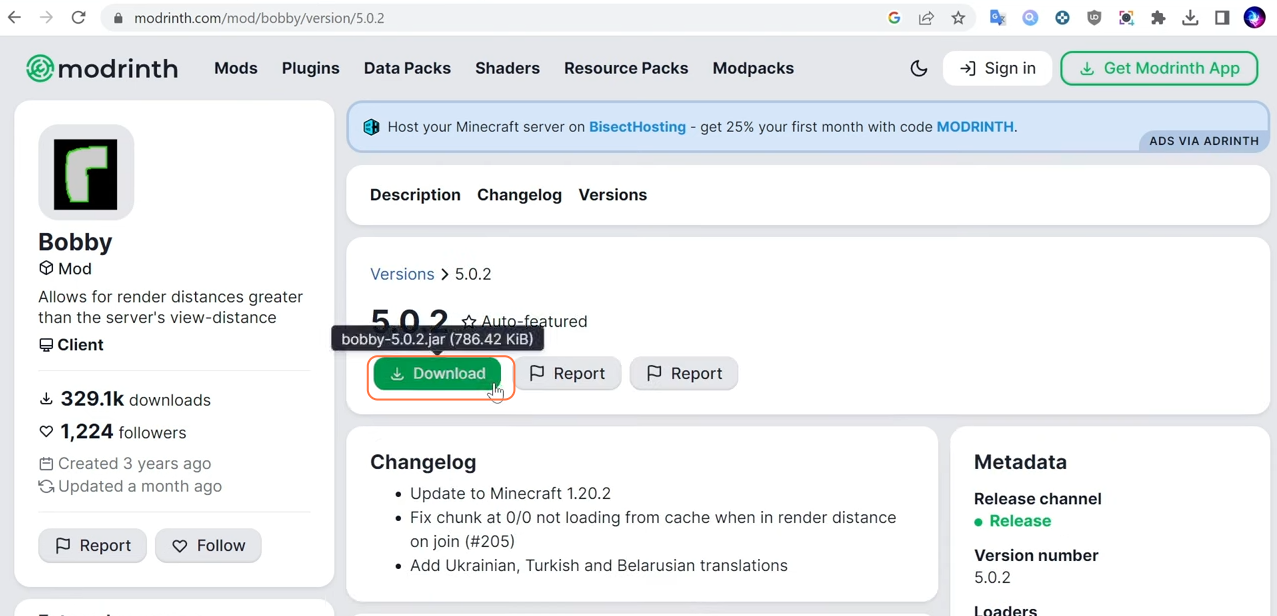
Step 6: Download Bobby Mod
- Now download the “Bobby Mod” from the Modrinth website.
- Download the Bobby Mod compatible with Fabric (1.2.2).
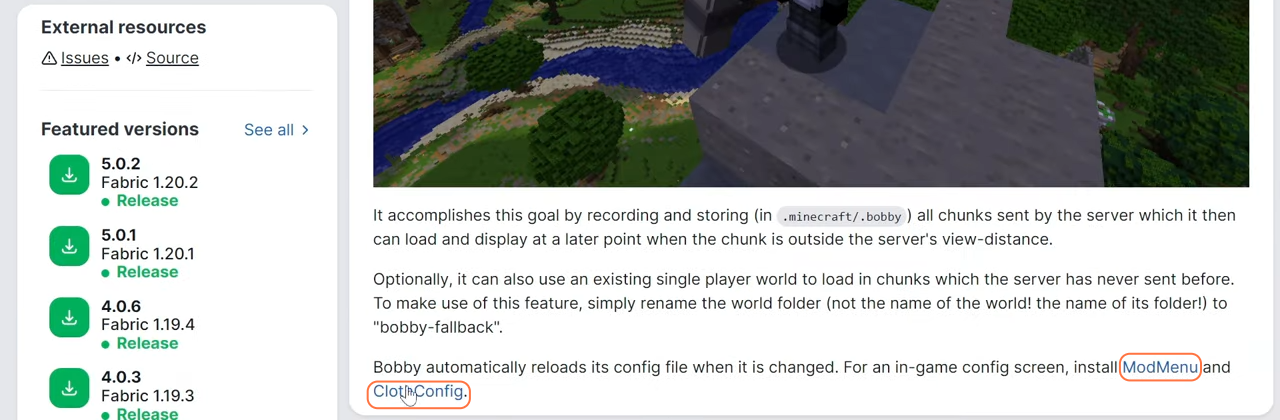
Step 7: Download Additional Mods
- While you’re on the Bobby Mod’s page, you also need to download “Mod Menu and Cloth Config” from the same website.
- Ensure the versions match (1.2.2).
Step 8: Install Mods
- Place the downloaded .jar files of the Bobby Mod, Mod Menu, and Cloth Config into the “mods” folder of the Minecraft directory.
Step 9: Configure Bobby Mod
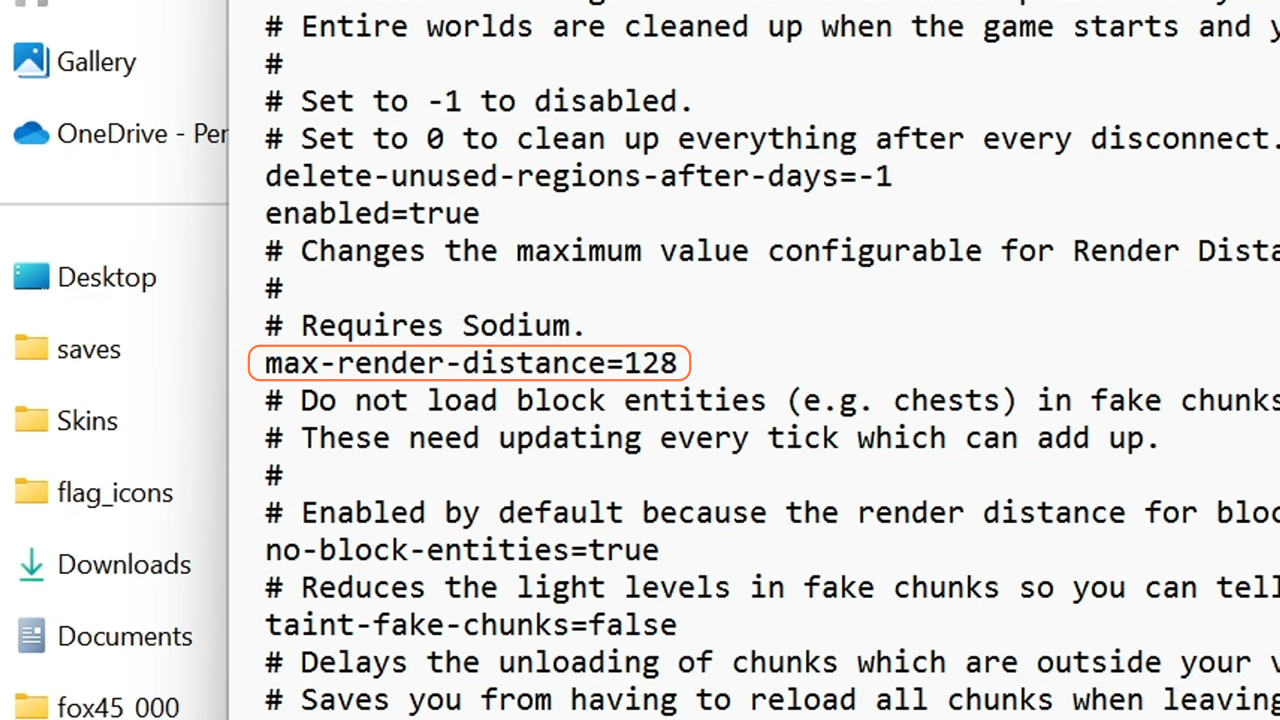
- Bobby Mod may require some initial setup. Go to your Minecraft folder and locate the ‘config’ folder.
- Find the ‘bobby.conf’ configuration file and open it with a text editor (e.g., Notepad).
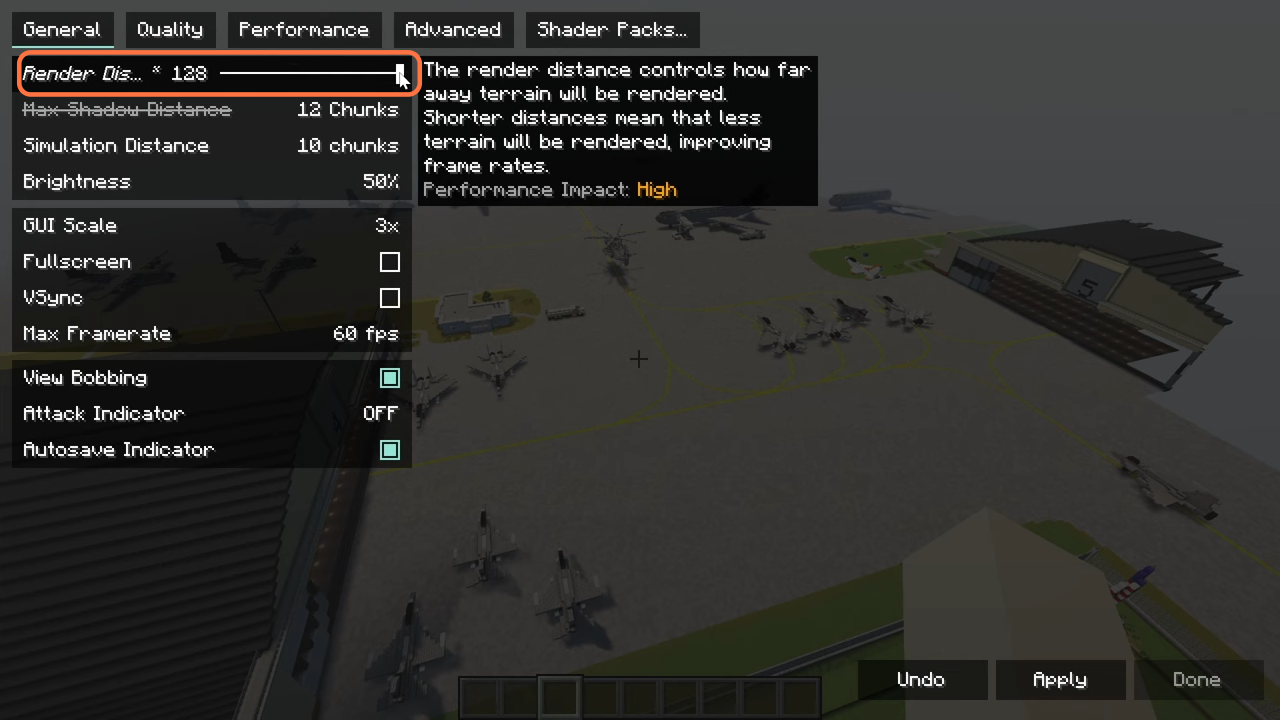
- Look for the ‘max-render-distance’ option, set your desired render distance (e.g., 128), and save the file.
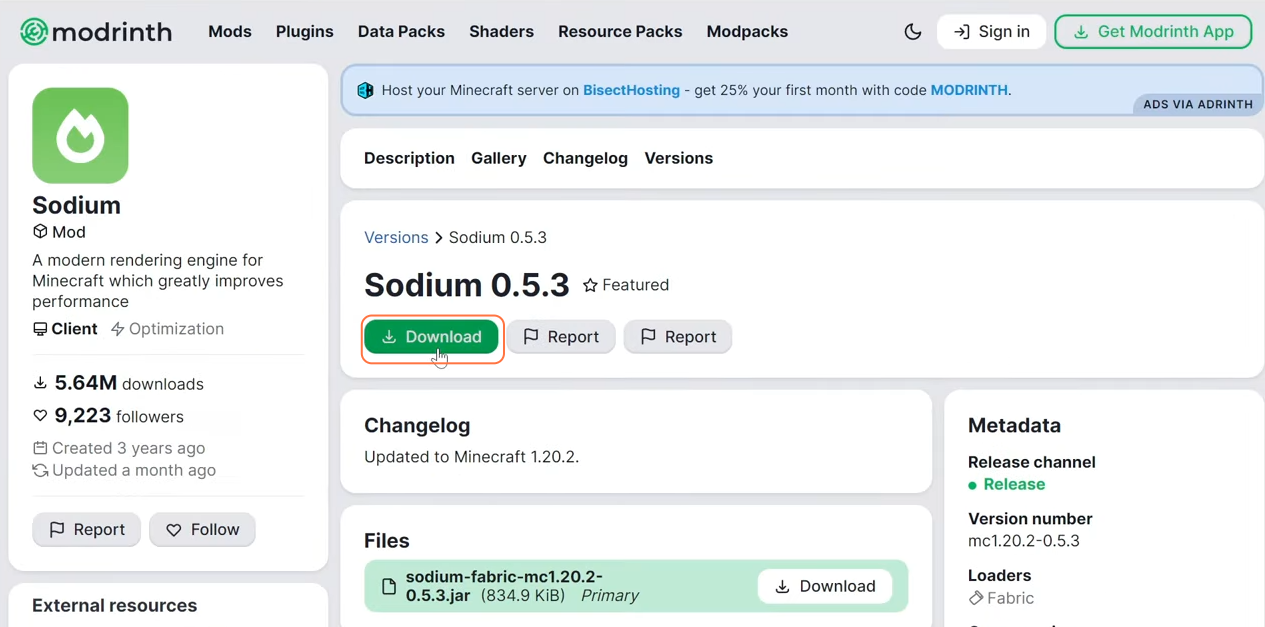
Step 10: Download and Install Sodium
- Now we are also required to download the Minecraft Sodium Mod.
- Find a compatible version for Fabric (1.2.2) and place it in the “mods” folder.
Step 11: Download Additional Mods (Optional)
- If you want to enhance your Minecraft experience further, download other Fabric mods like Zoomify, Iris Shaders Mod, Kotlin, and Yet Another Config Lib.
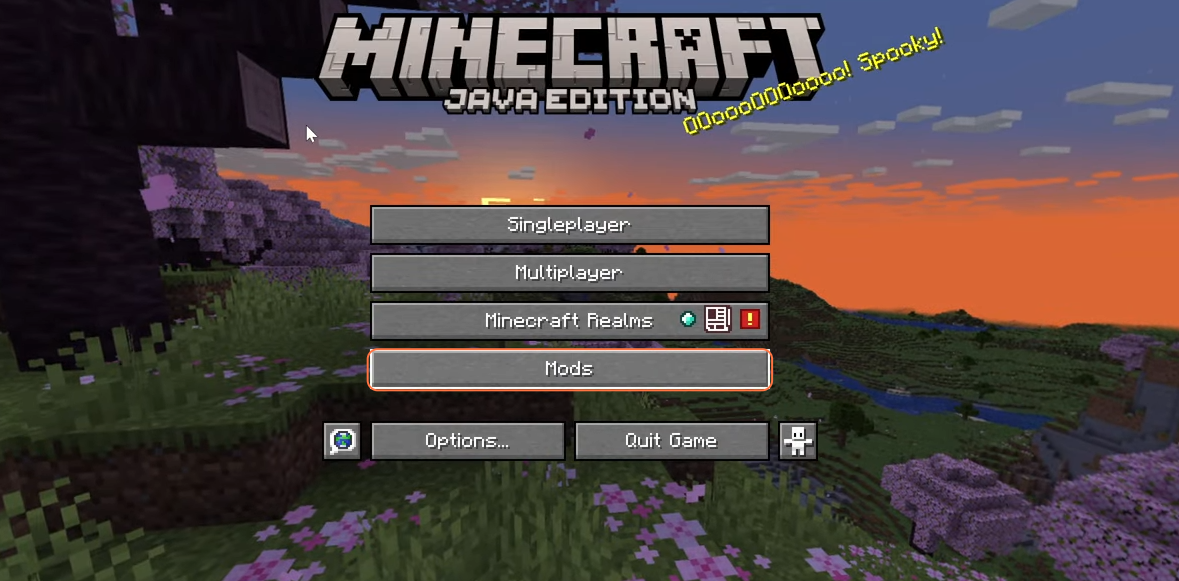
Step 12: Launch Minecraft with Mods
- Start Minecraft with the Fabric loader.
- Open the “Mods” section to verify that all installed mods are active.
Step 13: Adjust Render Distance
- In the game, go to “Options” > “Video Settings” > “Render Distance”.
- Increase the render distance to your preference.
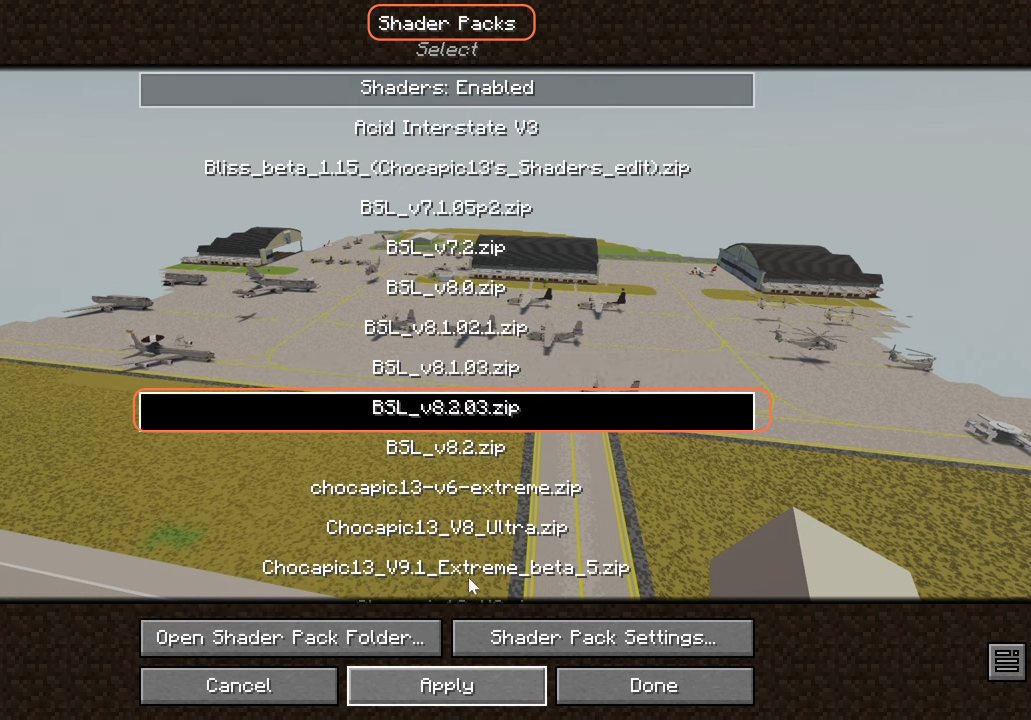
Step 14: Enable Shaders (Optional)
- To enable shaders, go to “Options” > “Video Settings” > “Shader Packs”.
- Select the shaders you want to use or add new ones to the Shader Packs folder.
Step 15: Use Zoom Function (Optional)
- If you prefer the OptiFine-like zoom feature, press the “C” key. You can also configure it through the Zoomify mod in the “Mods” section.

By following these steps you can easily extend your render distance on Minecraft servers with the Bobby mod.