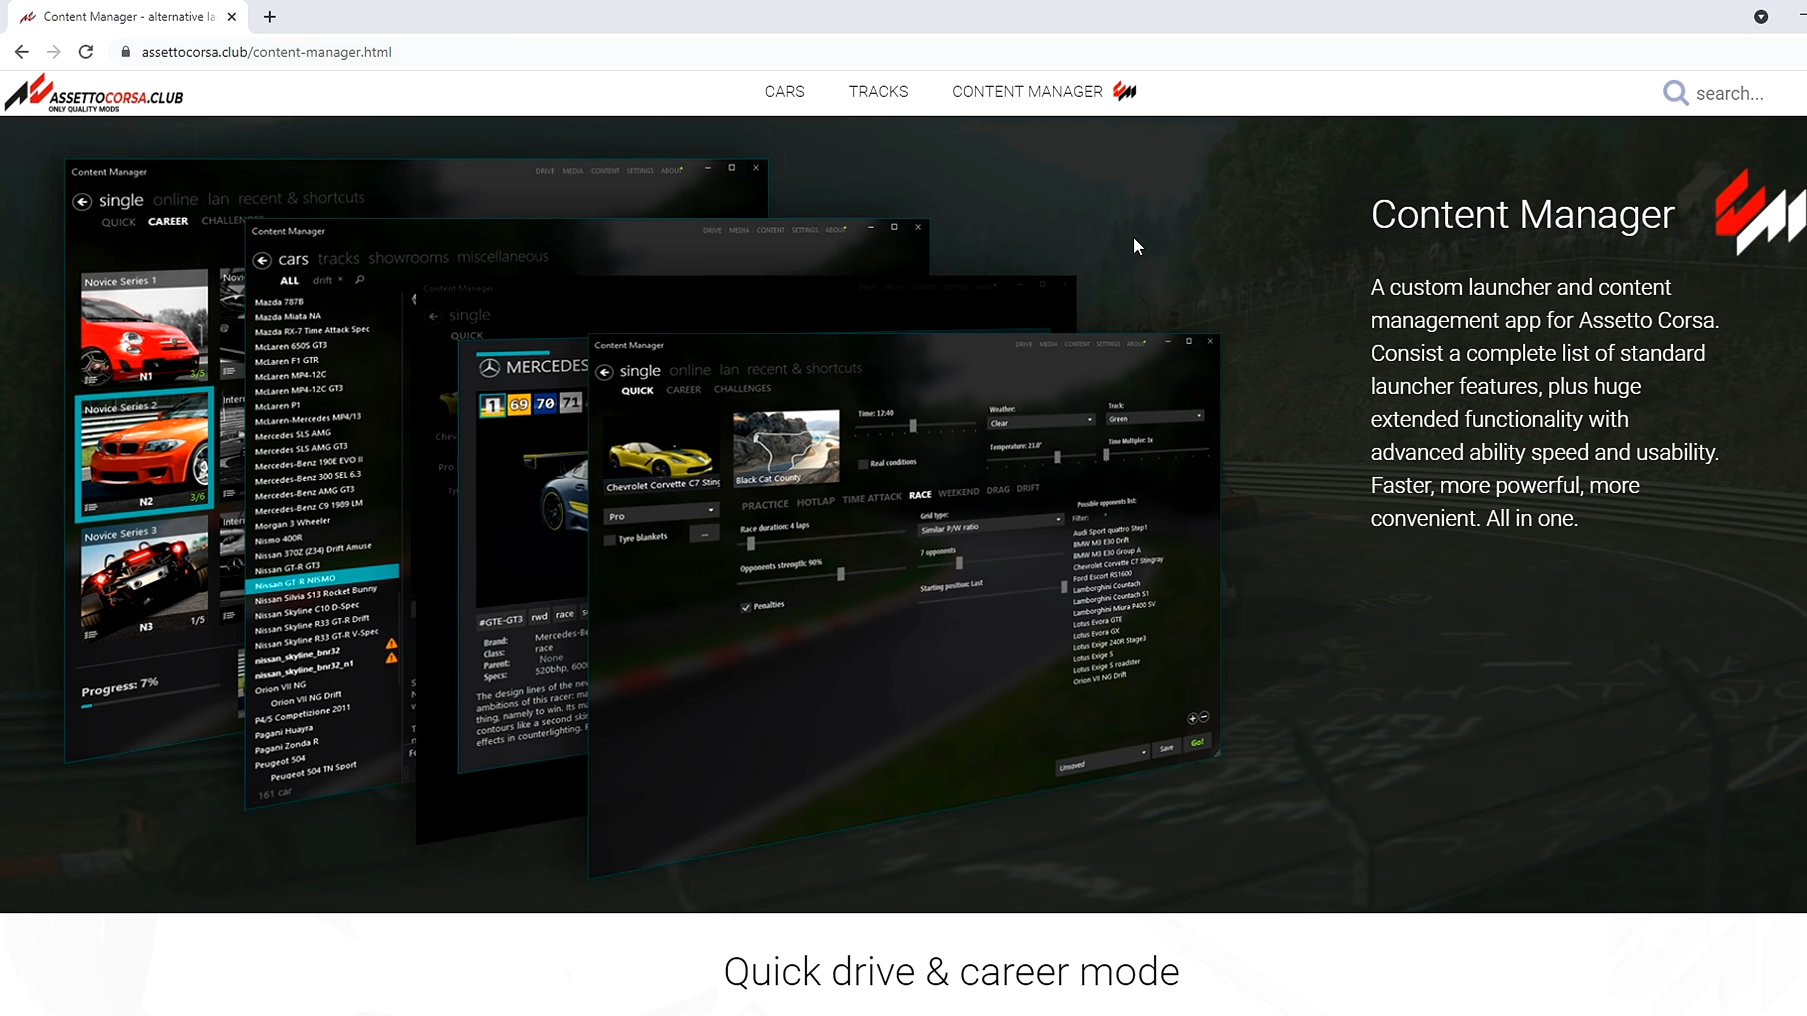
- To install custom mods in Assetto Corsa, you will need to get the “content manager” file, the “custom shaders patch” file, and “sole weather.” After that, you can install different cars and tracks mods. You can start out by installing a fresh Steam of Assetto Corsa on our PC. First, you have to download the Content Manager app from “https://assettocorsa.club/content-manager.html“. It is an alternative Launcher for Asseto Corsa. Content Manager allows you to take a look at stats for your games, edit individual settings or map layouts, and manage screenshots and replays. Not only that, but it also lets you interact with the community by interacting in Discord.
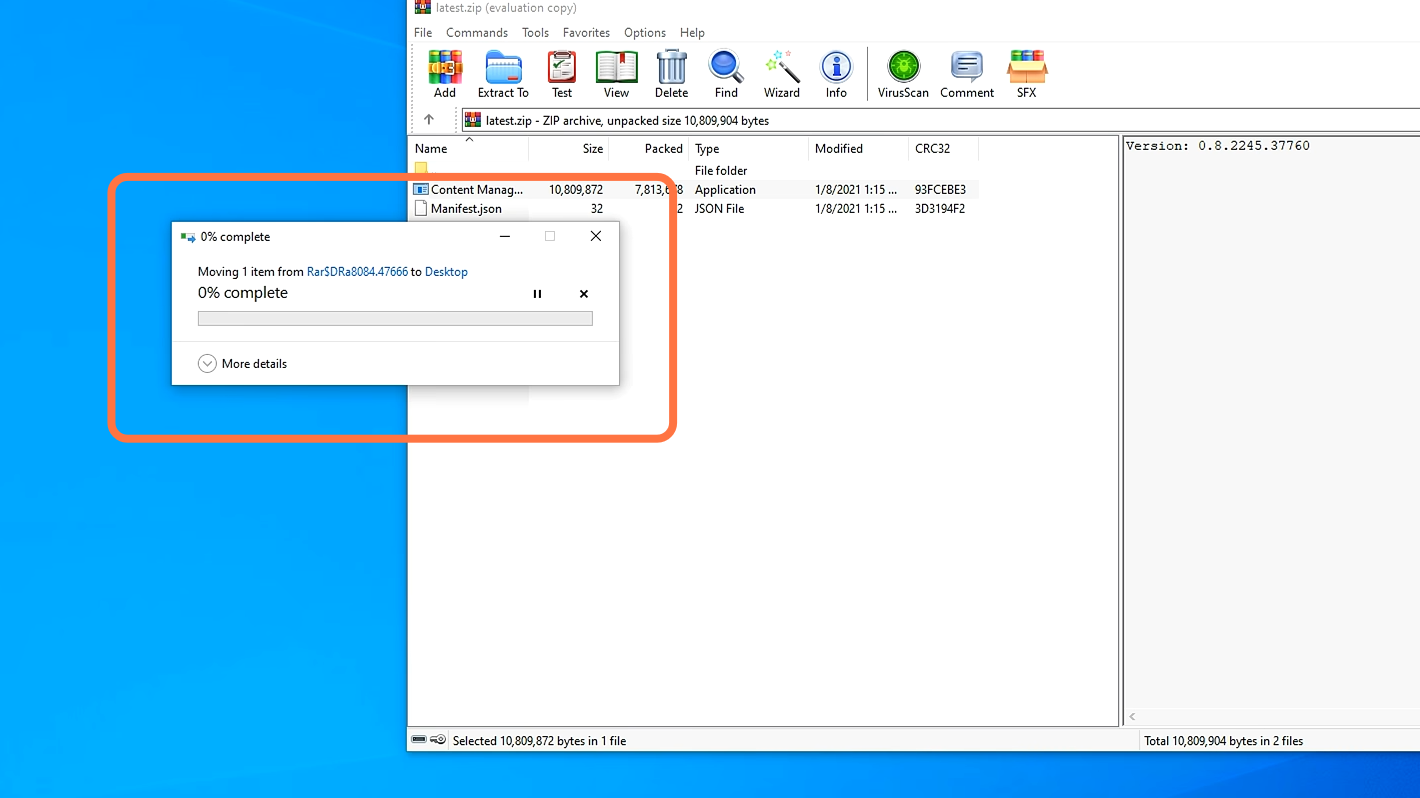
2. You have to open the downloaded file using WinRAR or 7zip and drag the content manager executable file to your desktop.
3. Once you run the Content Manager for the first time, it will ask you to verify the installation directory of ‘Assetto Corsa’. You need to give the path that depends on where you have installed the game. The content Manager usually automatically finds it out on its own.
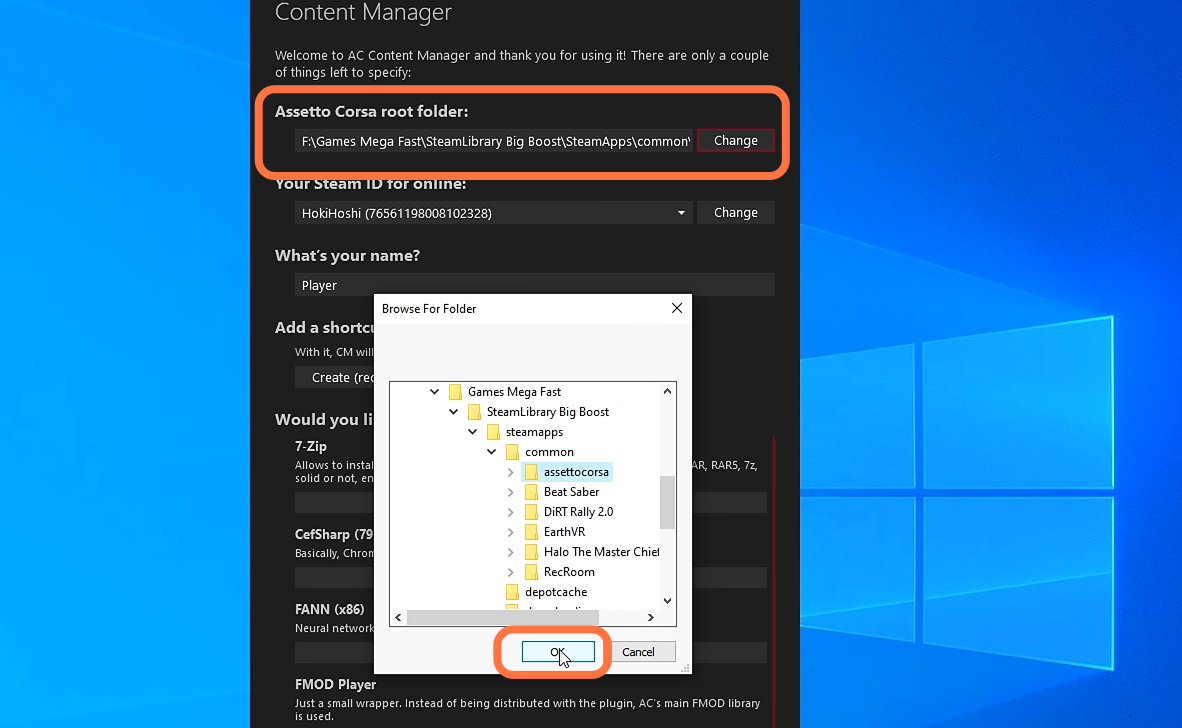
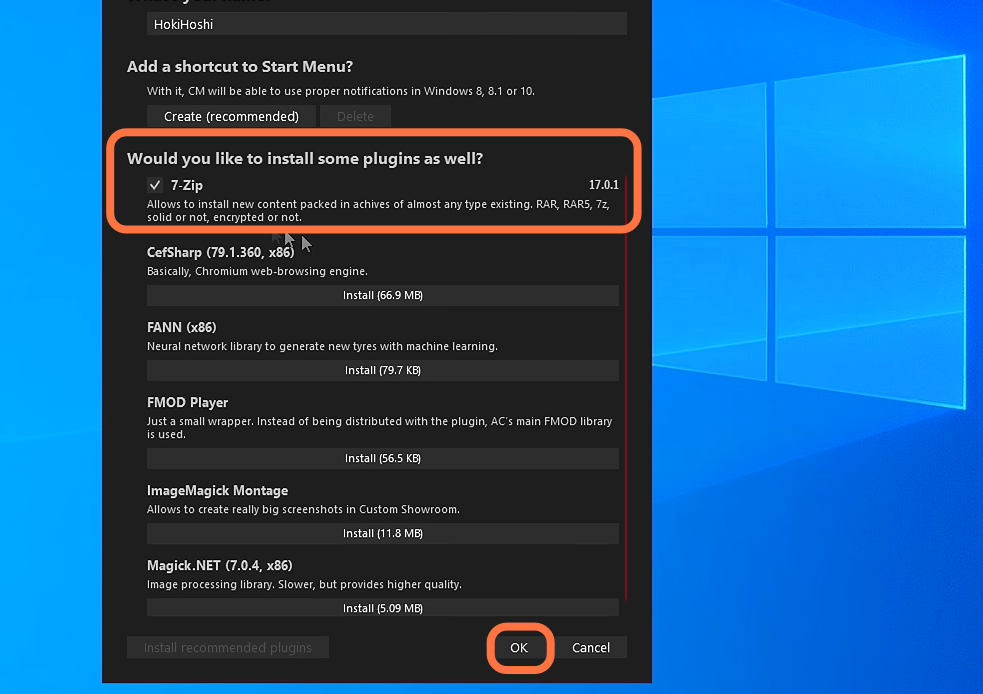
4. After that, give your name and then choose to install any plugin with it. As in this case, it is 7-zip. Once you have given all the necessary information, you need to press OK.
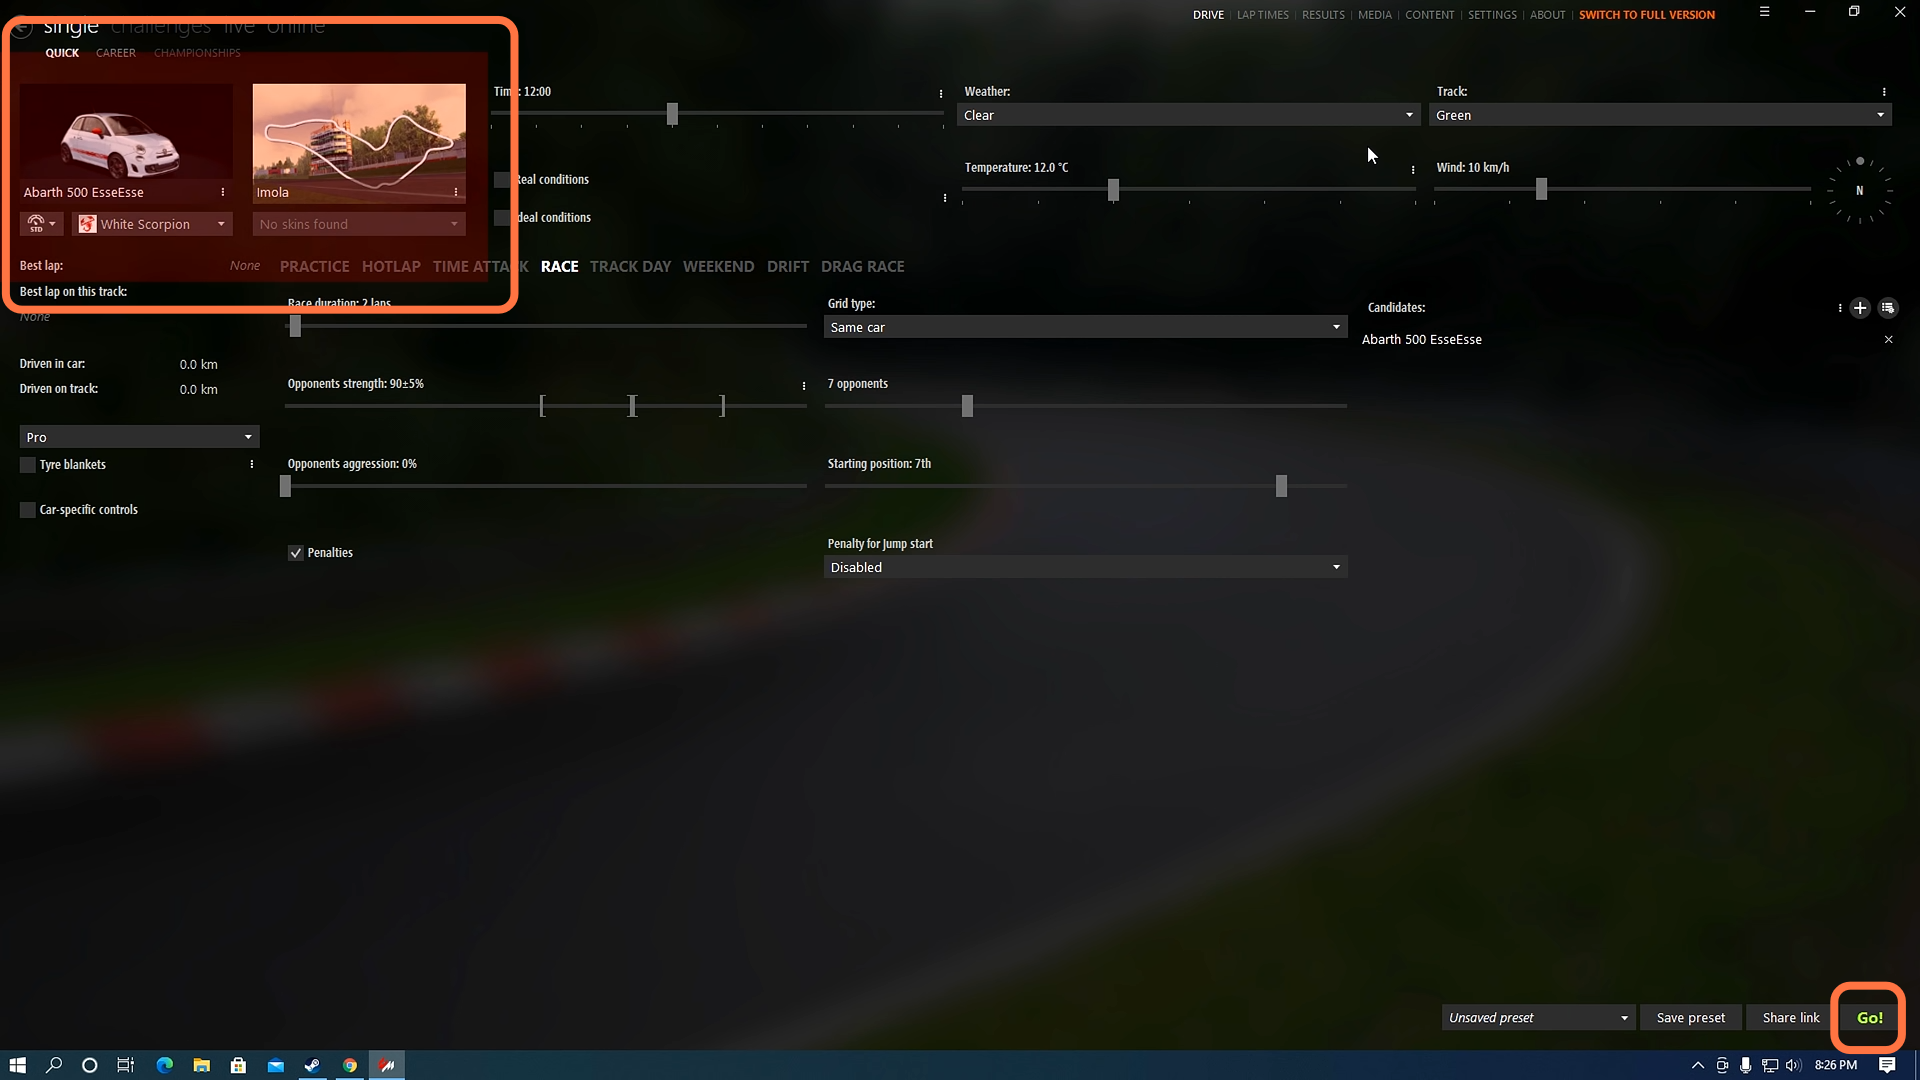
5. After that, you will be entered into the Content Manager to enhance your experience with Assetto Corsa. On this screen, you can select your ‘vehicle’ and ‘track’ from the top left of the screen. You can also choose different weather conditions or settings for your race. Once you have chosen your settings, press the “Go!” button in the bottom right corner to start your race.
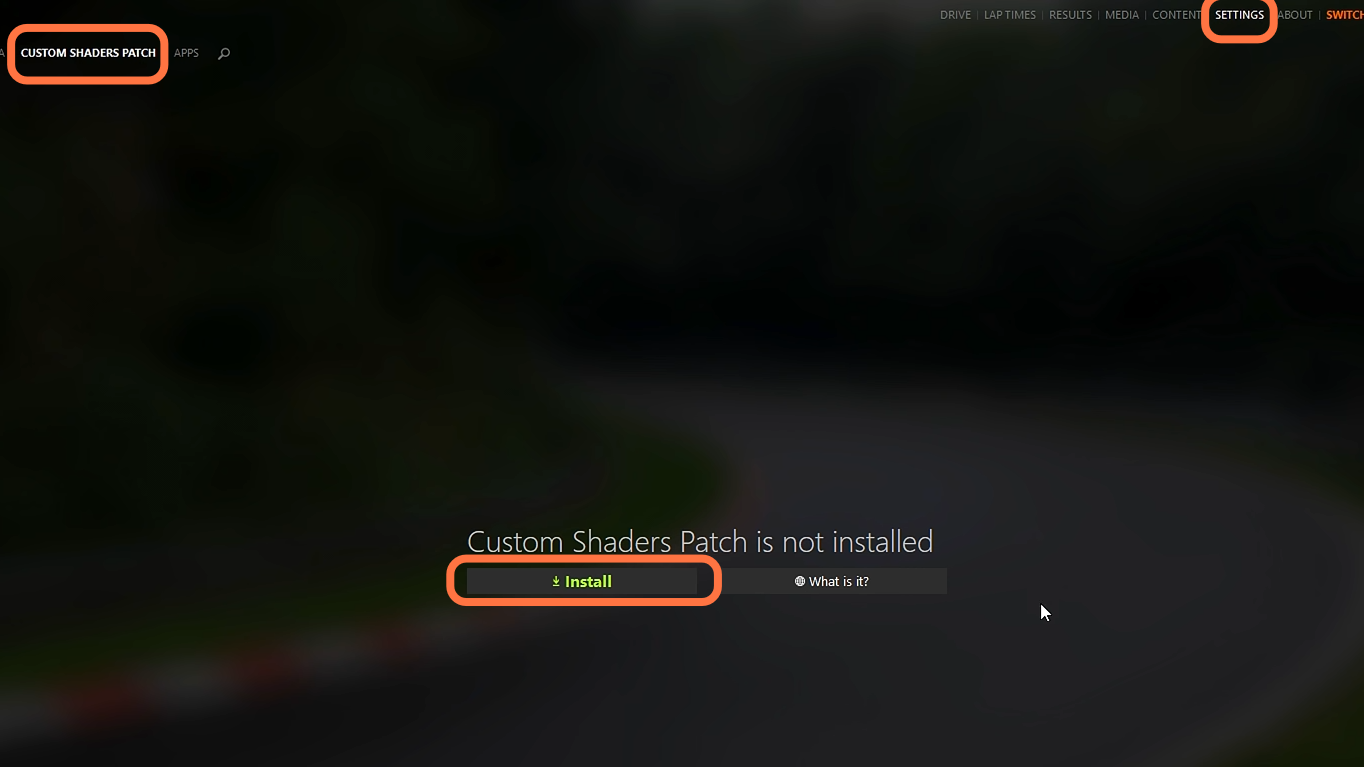
6. Now let’s go to the next step and click on the settings at the top right. After that, select the Custom shaders patch on the top left. You will be given a pop-up that asks you to install the shader pack. Click on the green button labeled Install.
7. After the patch installation process is complete, you’ll find plenty of new options to explore on the left side of the dashboard.
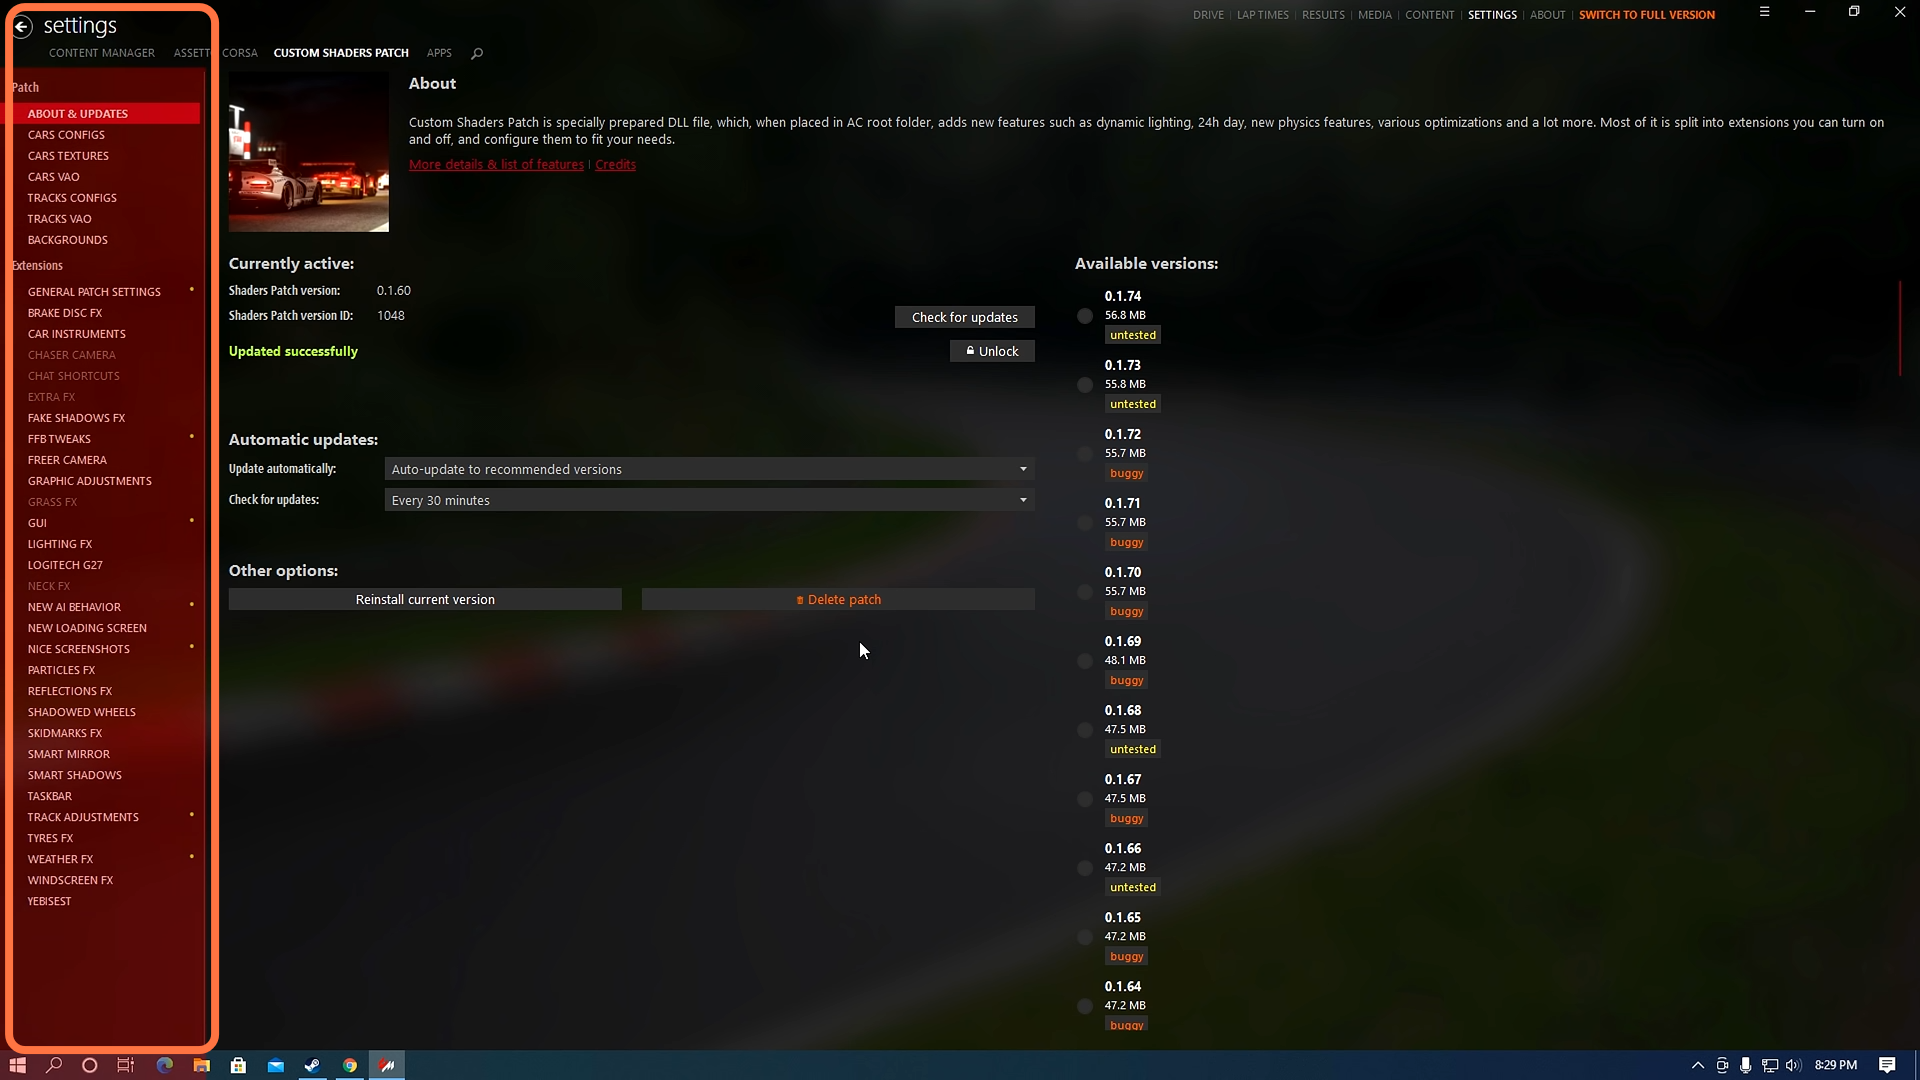
8. With the no-hassle installation, you’ll have the option to choose between different versions of a patch depending on your needs and preferences. By default, it will always install the newest recommended version.
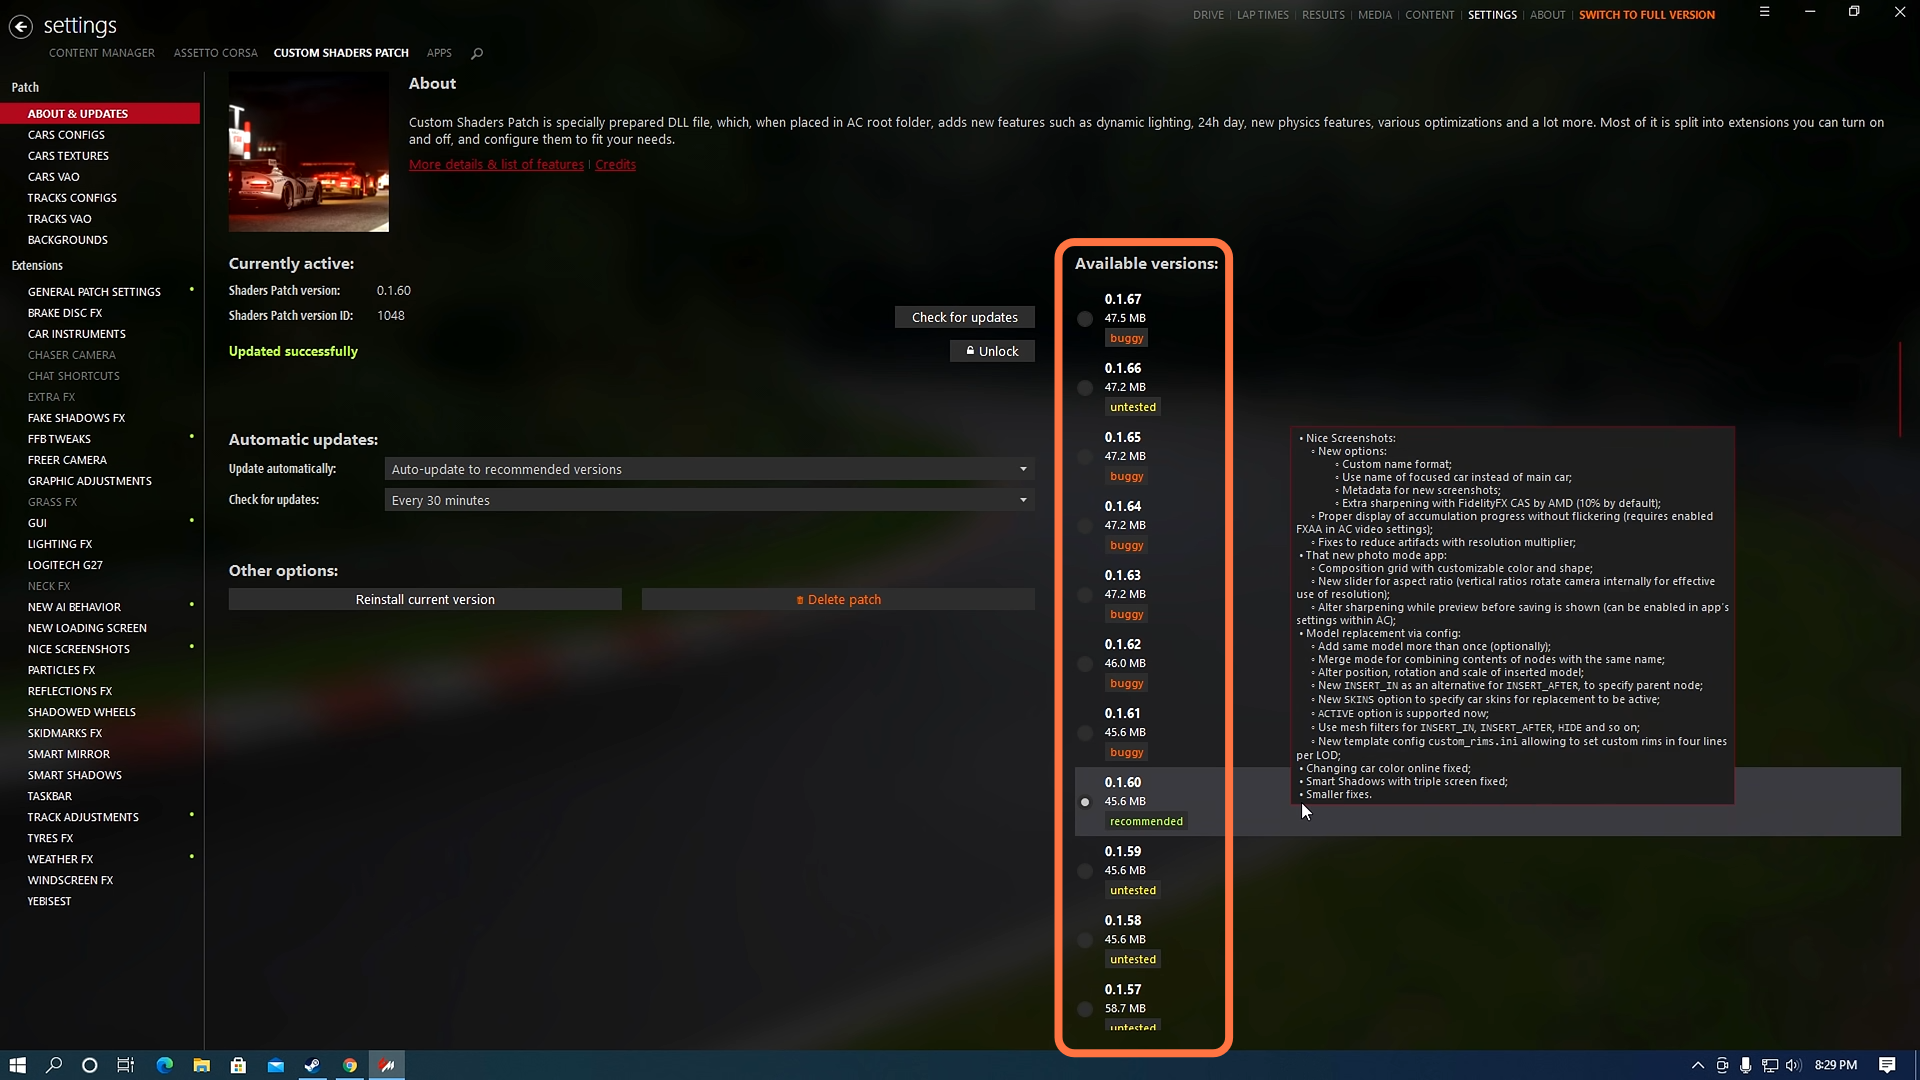
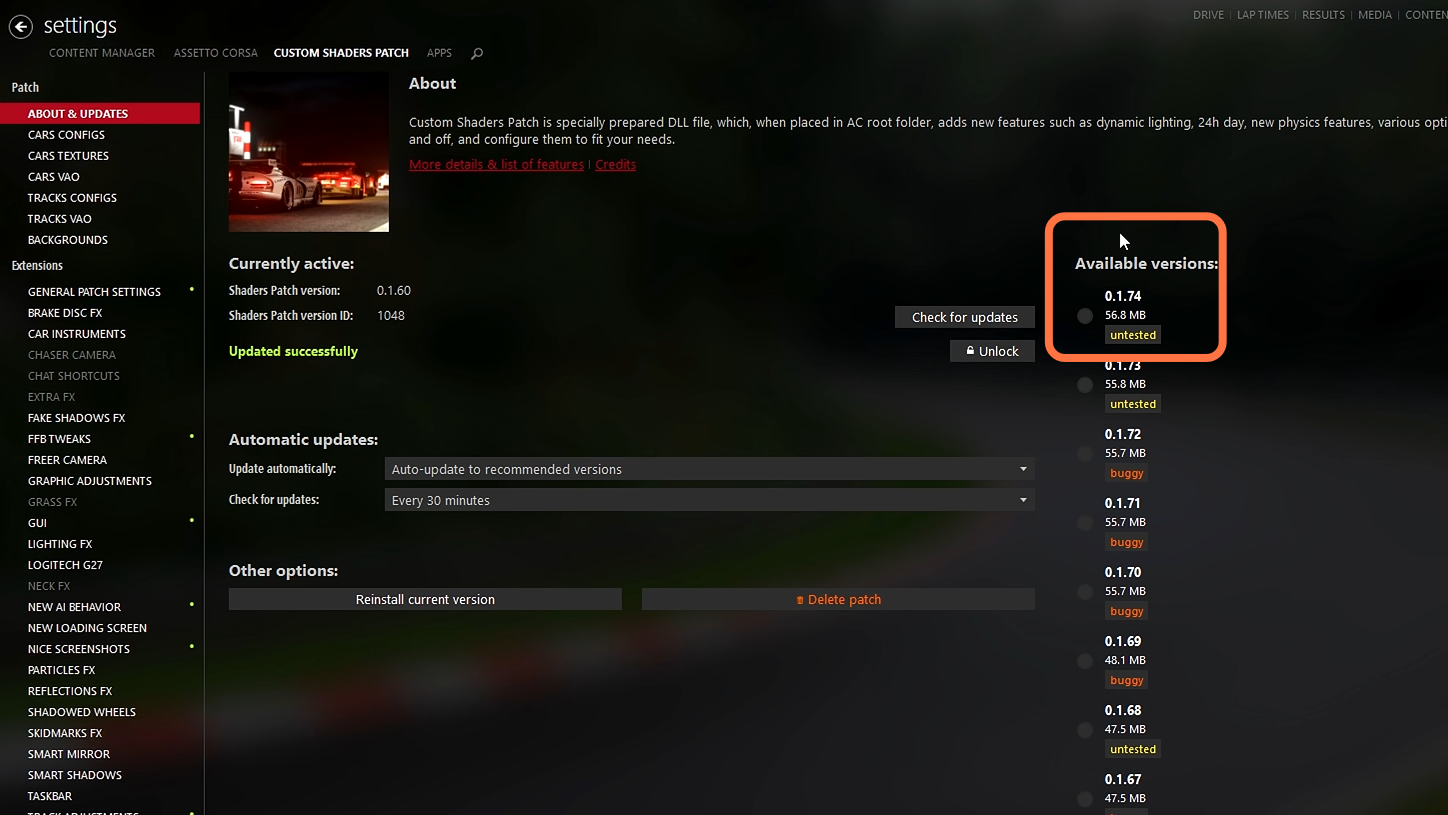
9. However, many mods require you to use newer versions of the patch or plugins. For example, ‘sole weather’ needs to be at least 0.1.2. If you’re running into strange graphical issues like blurry text or images, it’s a good idea to update your CSP. This guide will use the .1.74 version by the way.
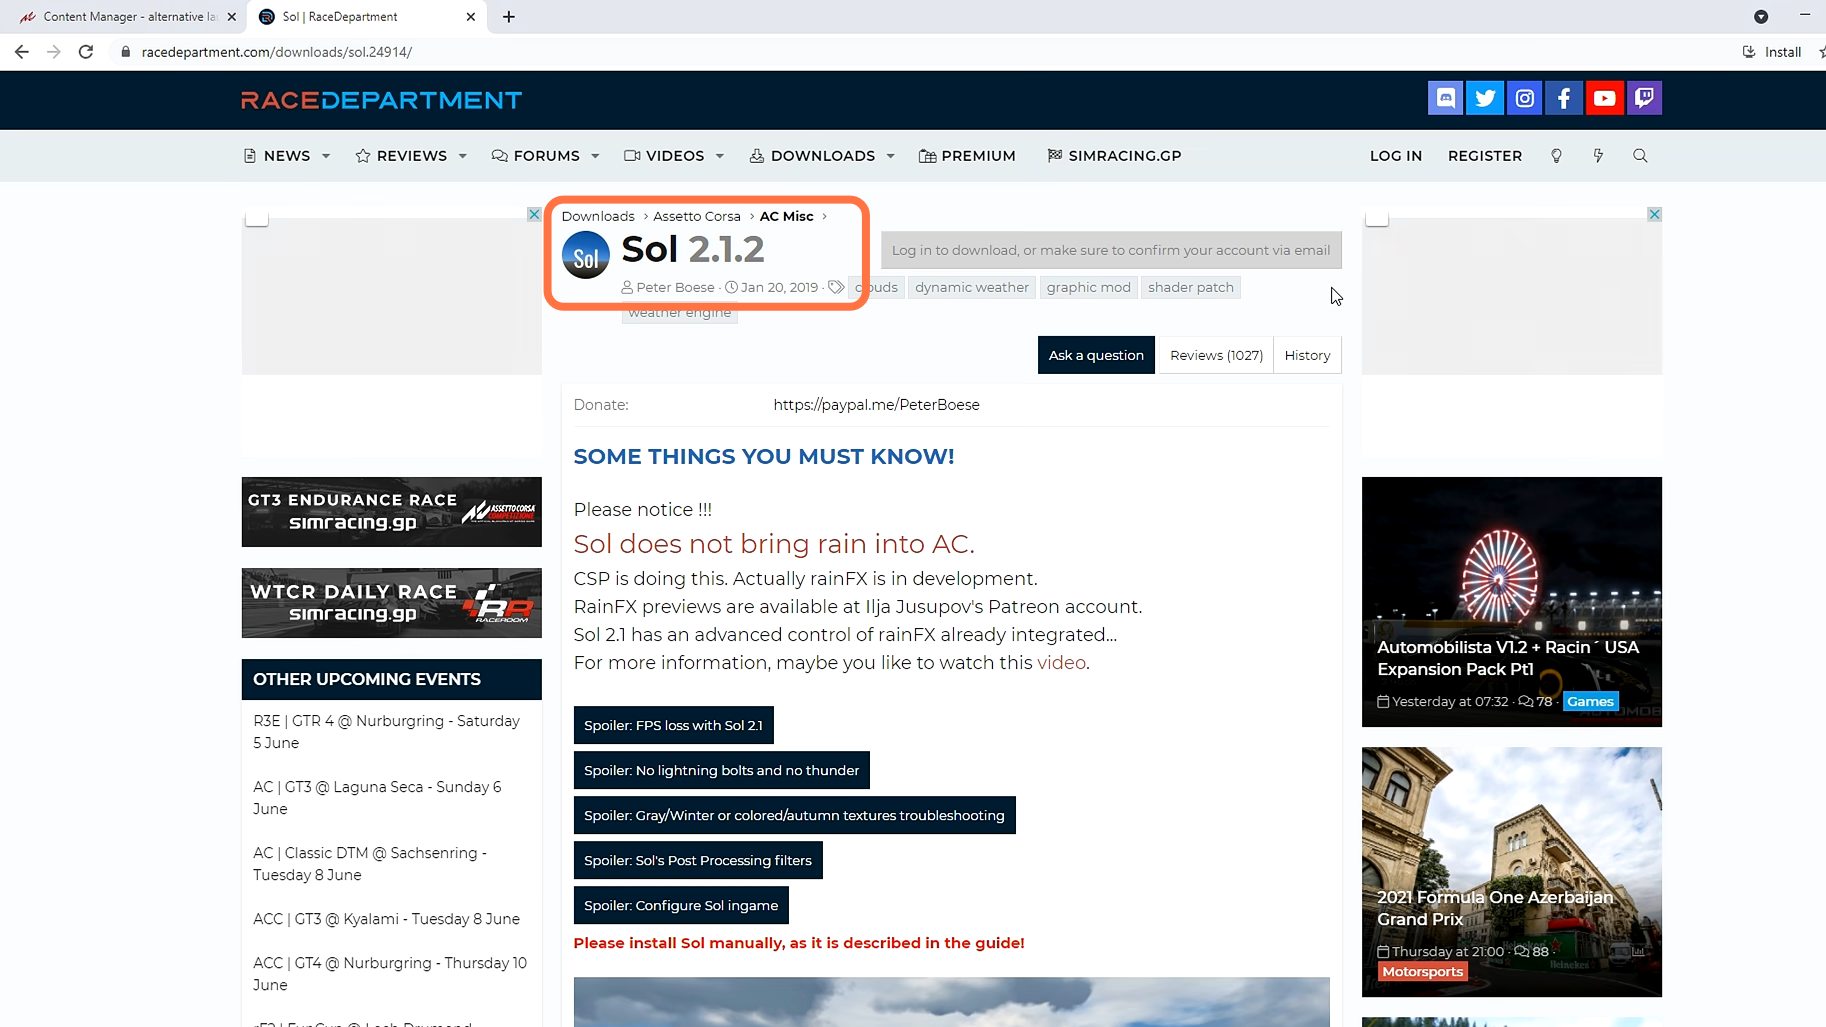
10. Next, you need to download the Sol mod from “https://www.racedepartment.com/downloads/sol.24914/“. You need to make an account first so that you can download the Sol mod from this website. The sol mod allows you to find mods for any racing game. It includes a wide variety of cars and tracks to choose from, so it’s an amazing resource for finding the ones you want.
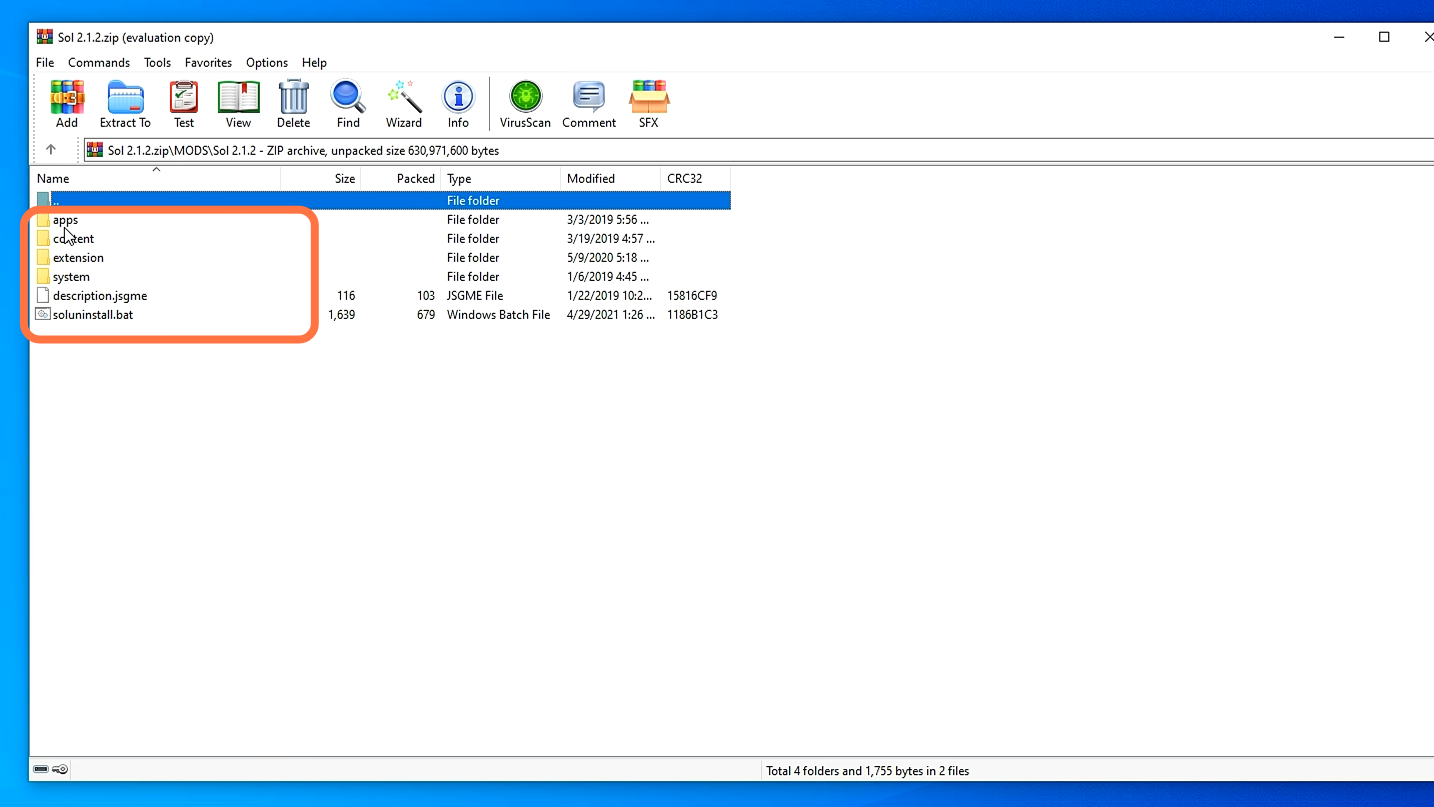
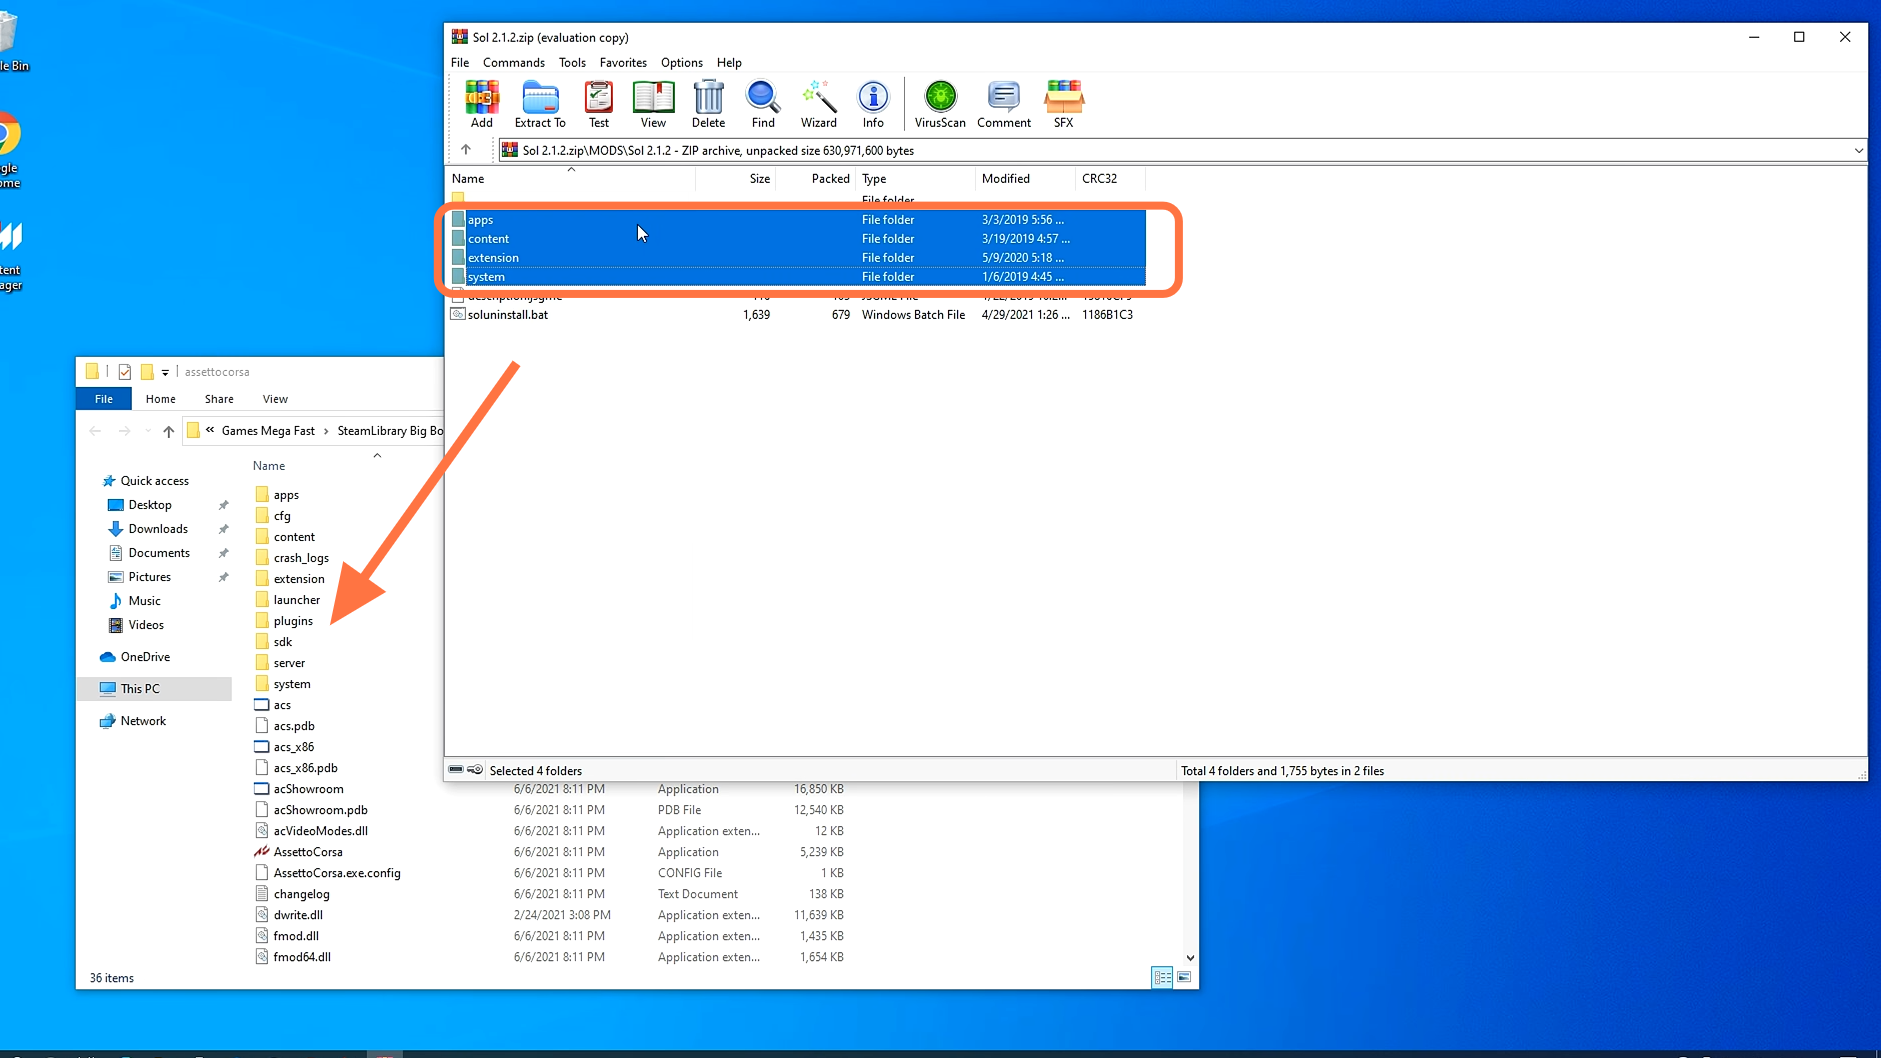
11. To get the Soul v2.1.2 mods onto your game, you need to open up the downloaded file with 7zip and you will find there is a detailed install guide here you can read it if you want. Then navigate to the soul 2.1.2 folder and you will see that we have four folders and two files inside it
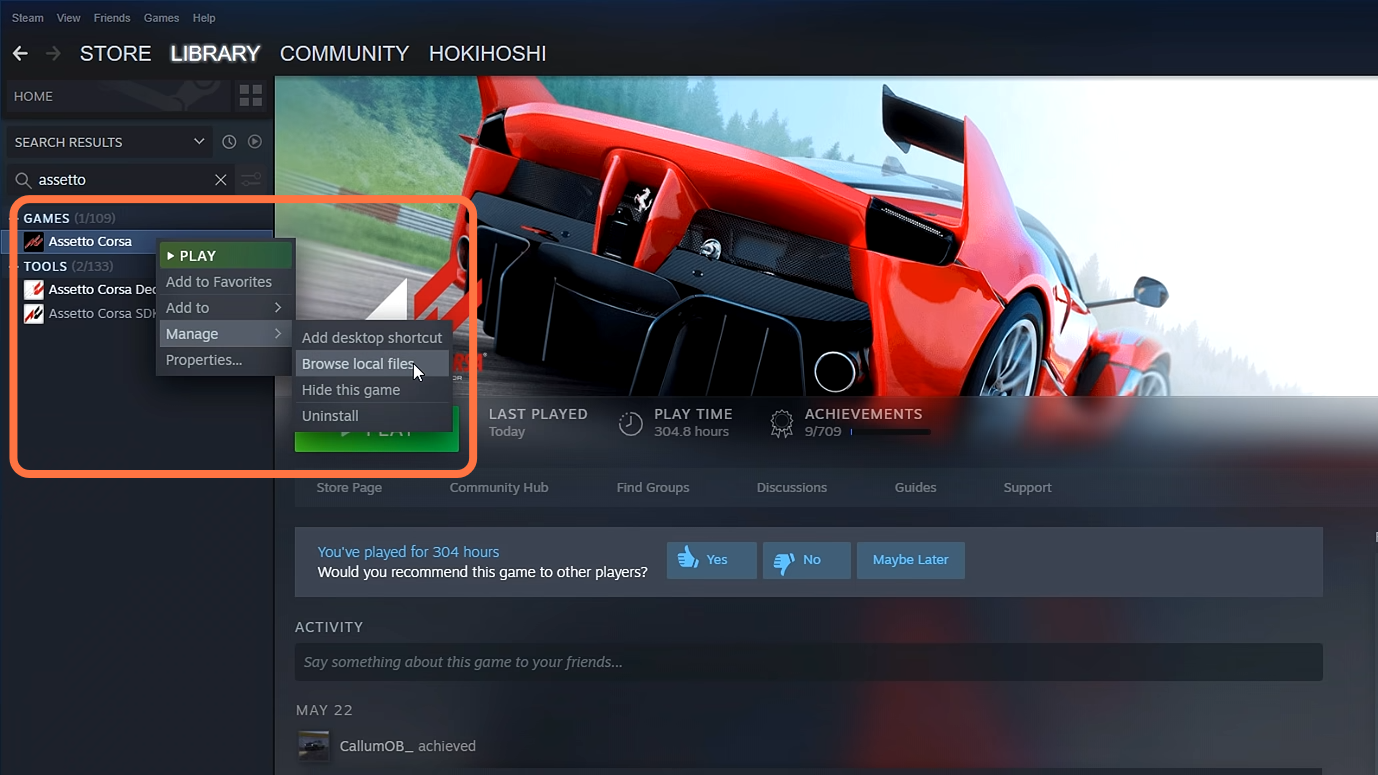
12. Now you need to copy these four folders into our main game (Asseto Corsa) directory. That way, those files will be available to the game itself at all times. If you’re unsure of where your game is installed, then most likely you’ve installed it through Steam. Open the Steam app, click on the Library then right-click on the game > select Manage > Browse Local Files. It will take you to the Assetto Corsa root directory.
13. Now keep both windows (the Game’s root directory and downloaded mod folder) open side by side. Now copy the four folders from the downloaded file and paste them into the game’s directory. The Sol has been installed now.
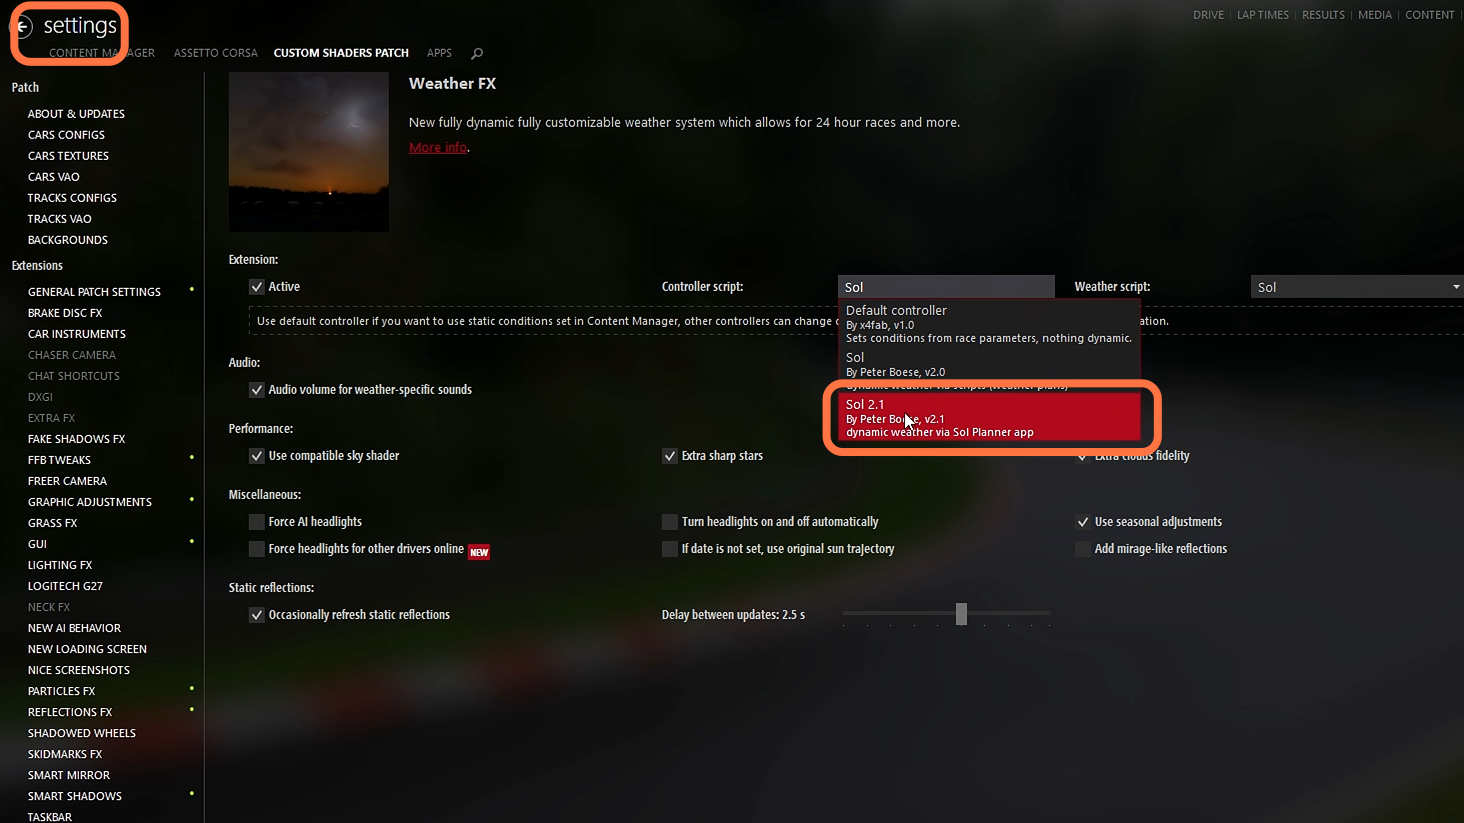
14. Now come back to the content manager and go into the settings and set the Controller script to sol 2.1.
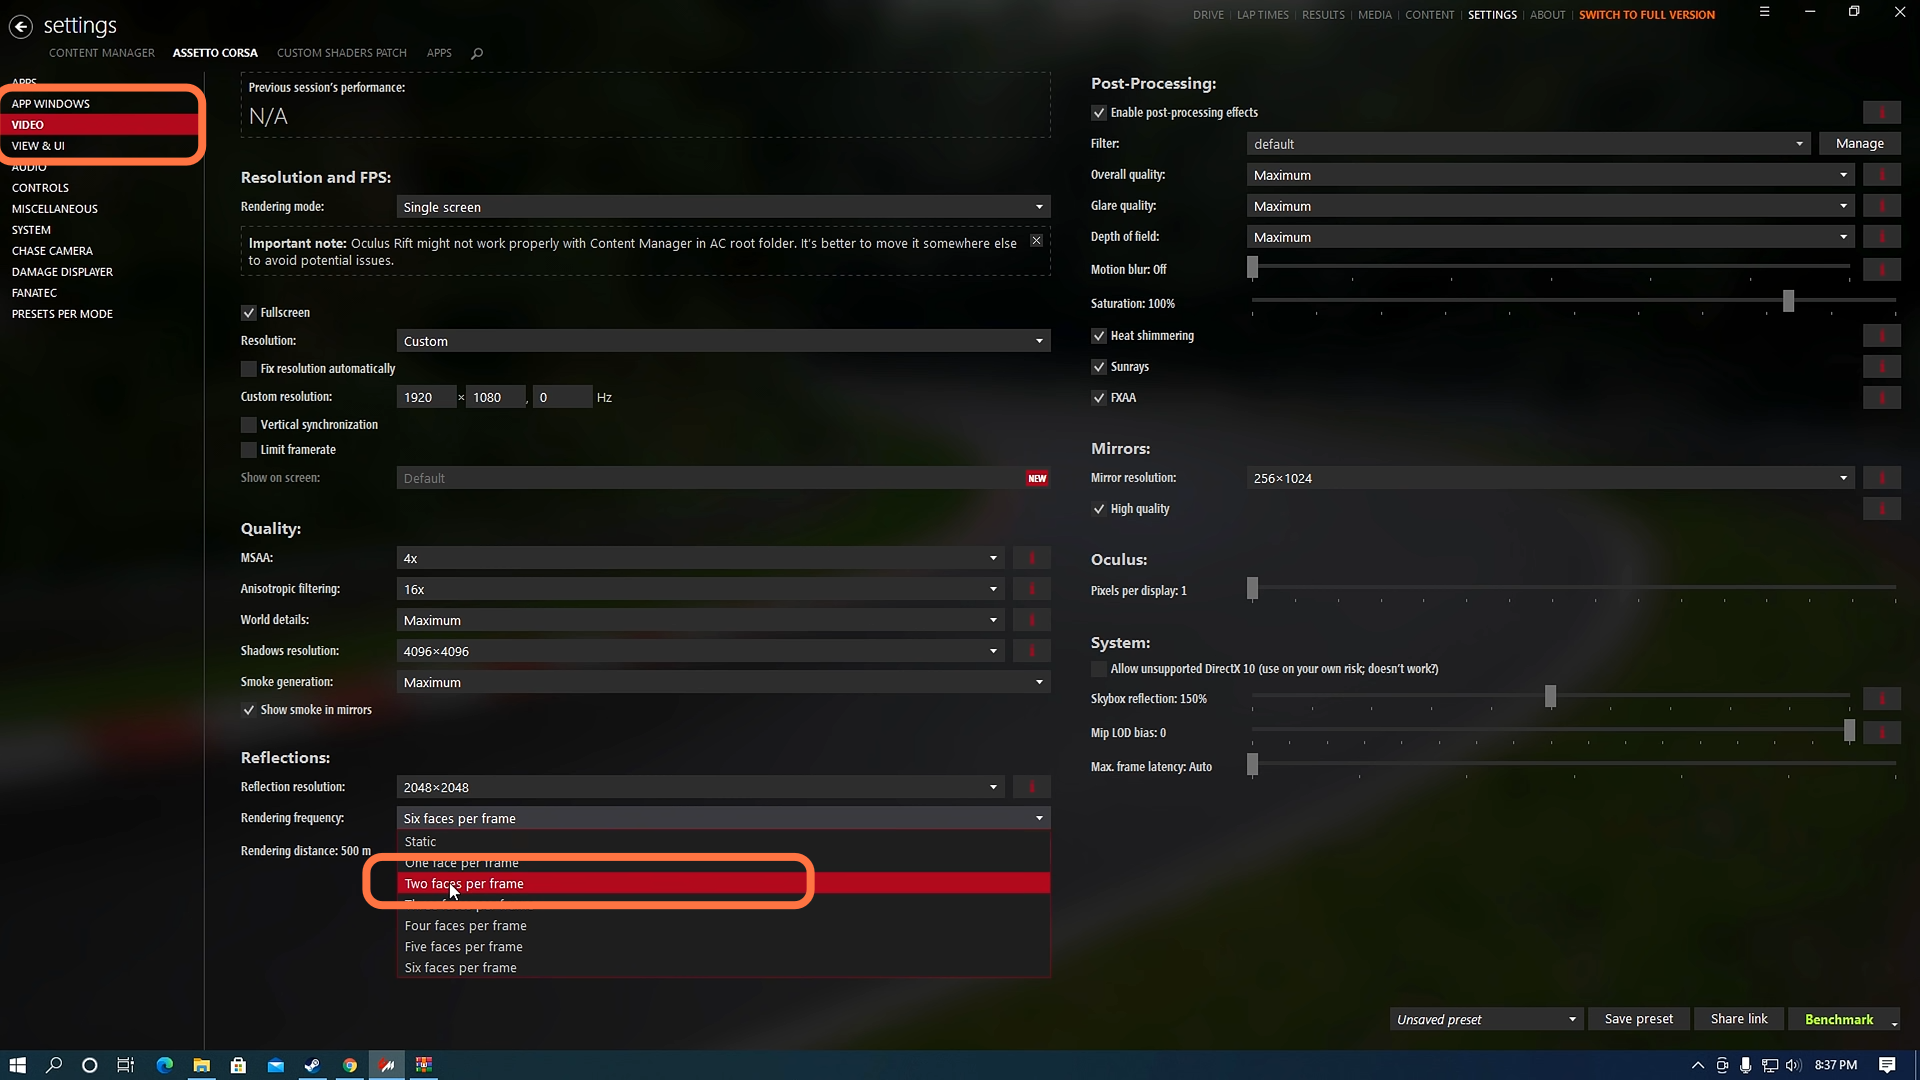
15. After that, move to the Assetto Corsa Video settings and set your rendering frequency for reflections to “Two faces per frame”. You can also set it to low but not higher than two faces.
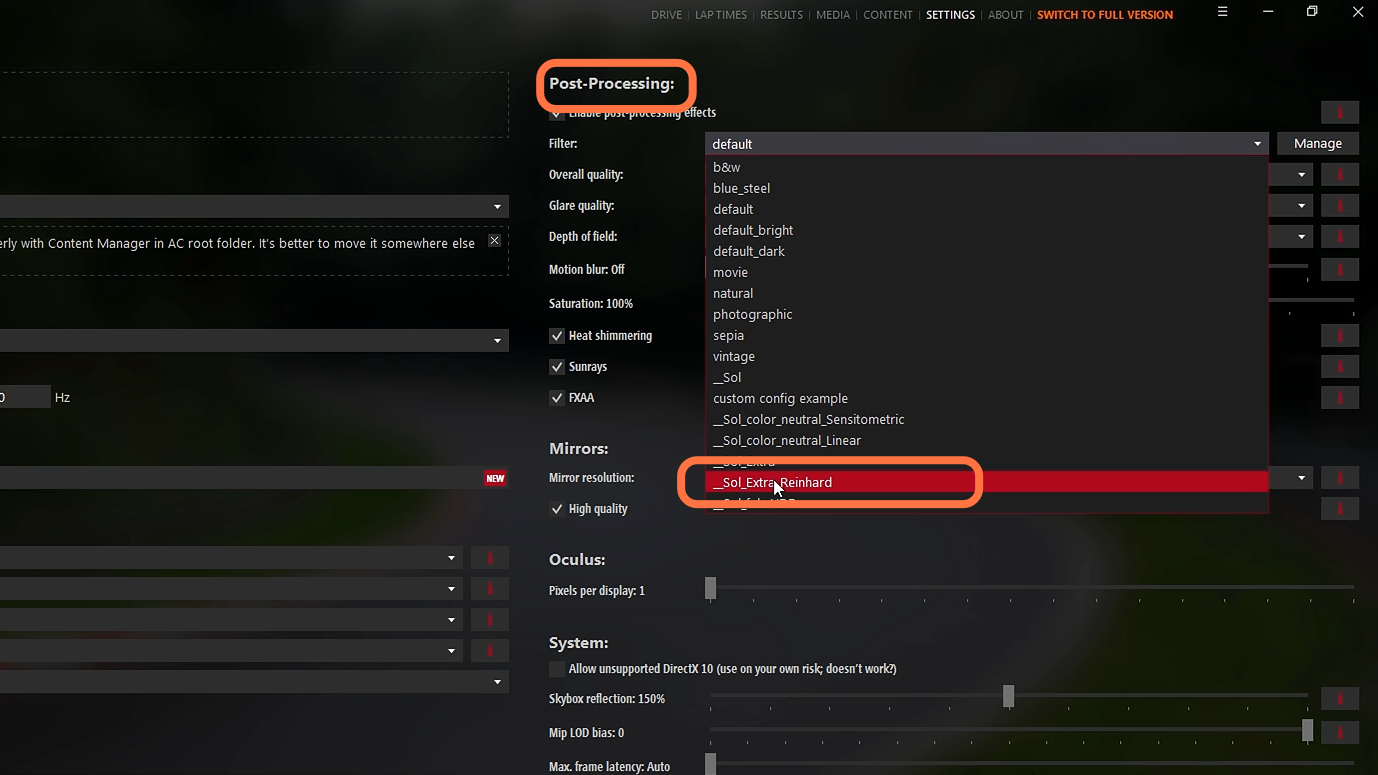
16. On the same screen, you need to move to the Post Processing filter. Sol mod should give you a few filters to choose from, but you can find more by using the internet.
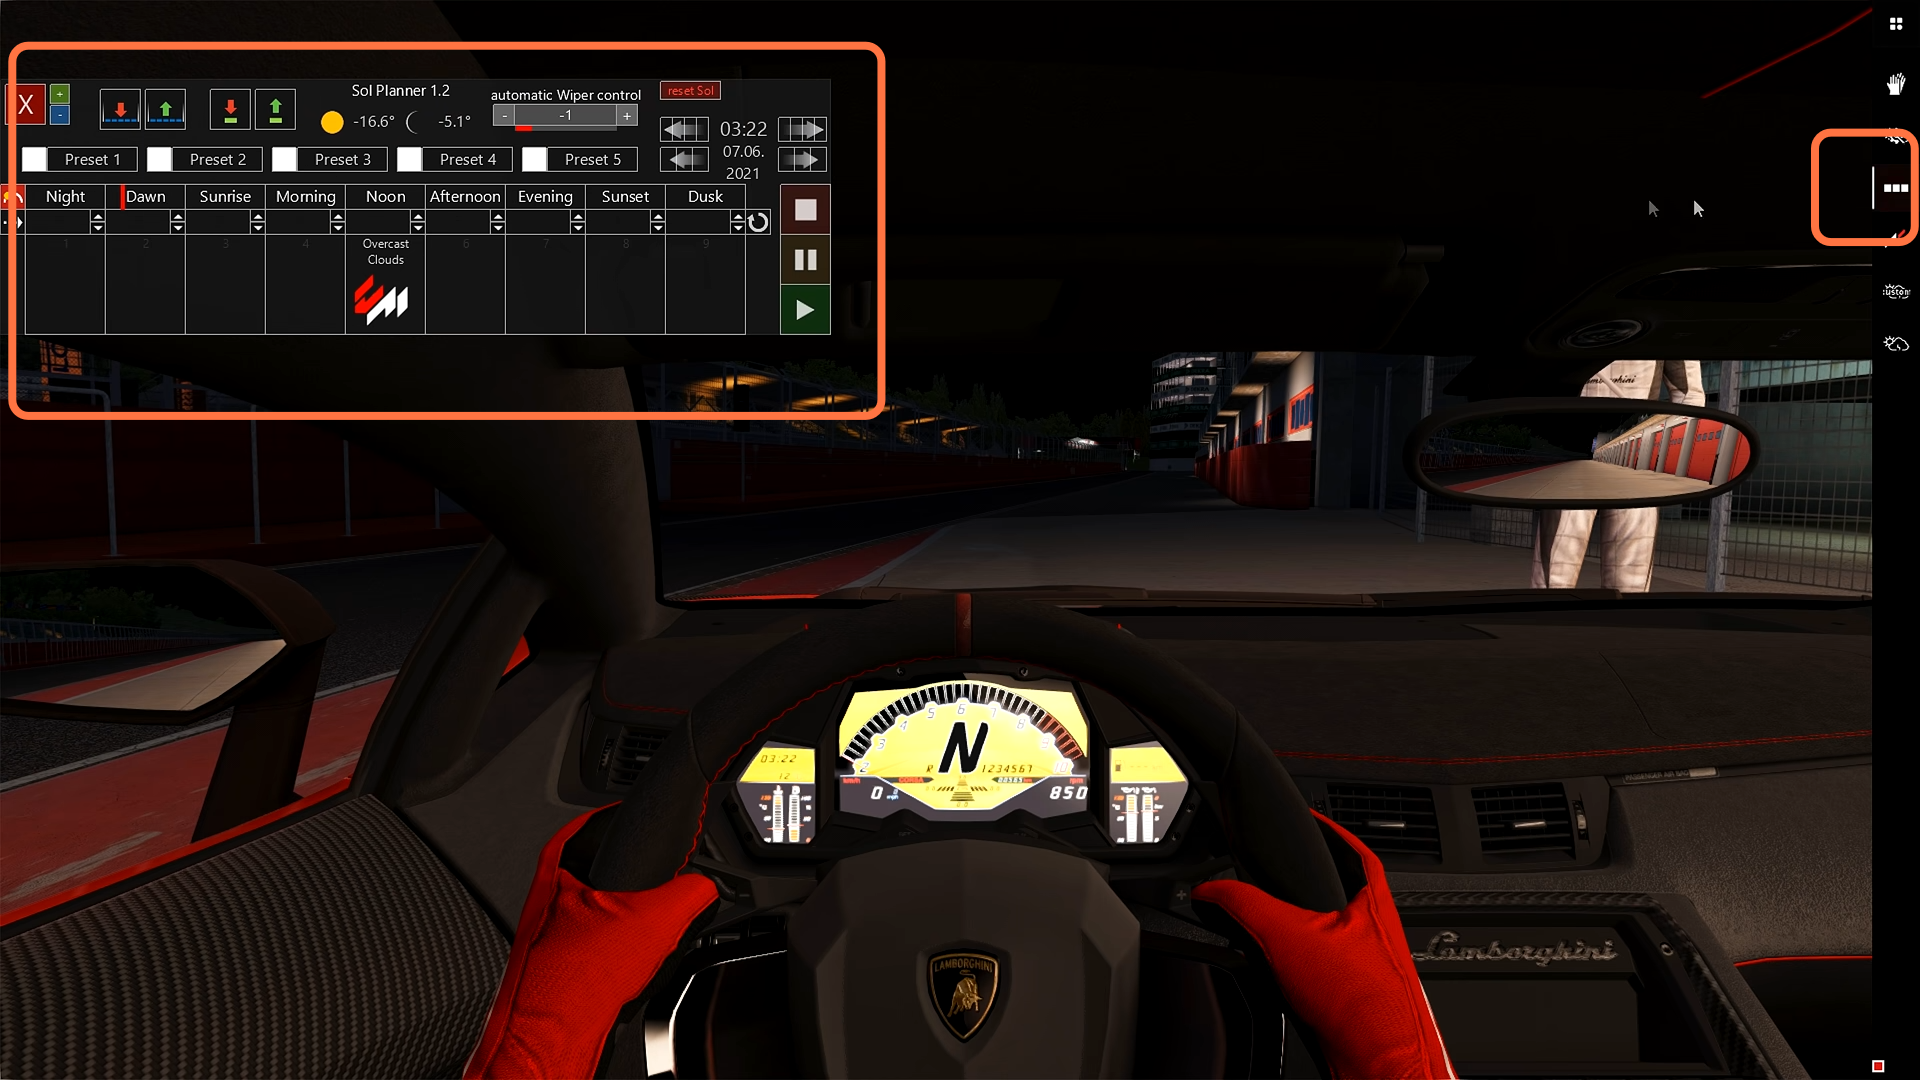
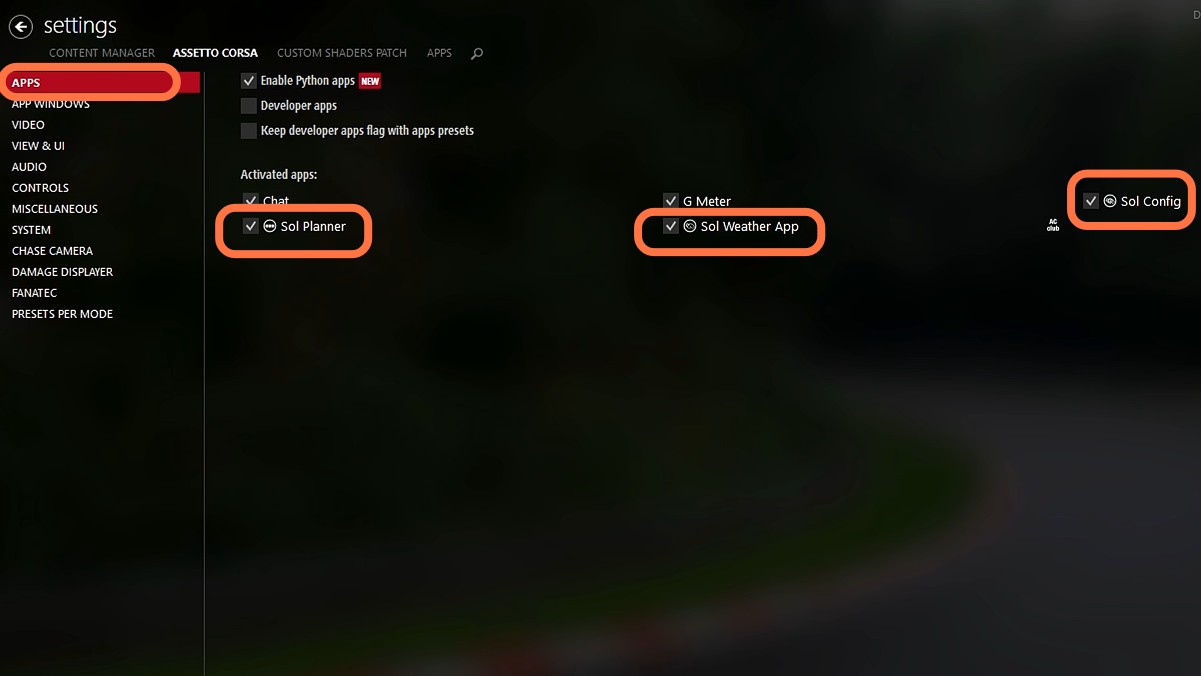
17. The final thing you have to do here is going over to the Assetto Corsa Apps settings and enable all of the sol apps. It will let you do changes or customize weather settings while you’re in-game.
18. Now as you have installed all three files (content manager, custom shaders patch, and sol) you can now install the Fun Modes. You’ll be able to have a race in the dark that was actually not possible in the vanilla game, and on the right side of this screen where you access your apps, you can now control the sol settings.
19. If you’re experiencing issues or want to customize your graphics, there are some preset modes available. You can opt for the low preset to improve performance and use the high-performance mode if you’d like to bump up the graphics a bit more.

20. From the right side sol settings panel, you need to make adjustments for your weather throughout the course of your race in order to keep up with the sol weather. It’s important to note that the sol weather does not automatically add the rain itself, but instead is coming in through custom shaders.