This guide will let you know how to install Battle.net on the Steam deck and Proton compatibility layers. You will also learn how to change the save location from the main memory to the SD card.
Download battle.net application
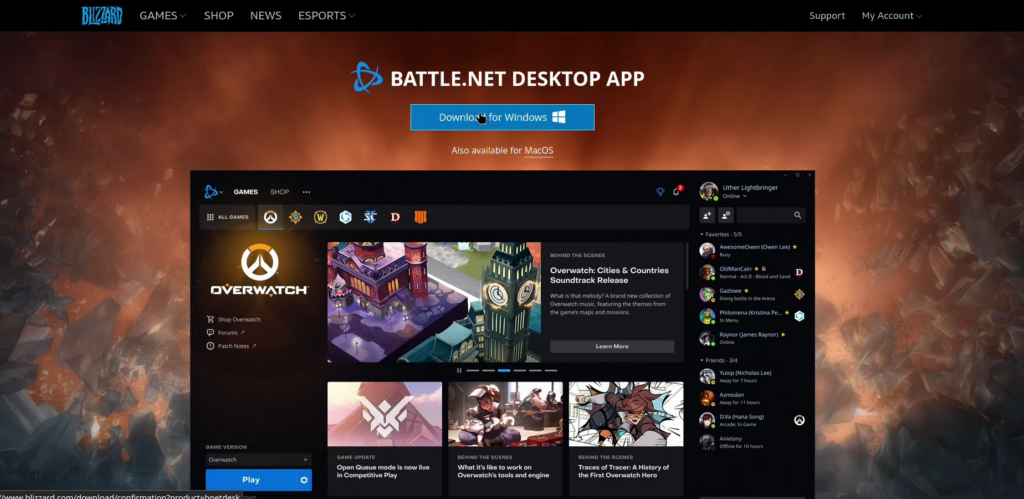
First, you have to open up your internet browser and download the Battle.net application (Windows version).
Add battle.net to Steam
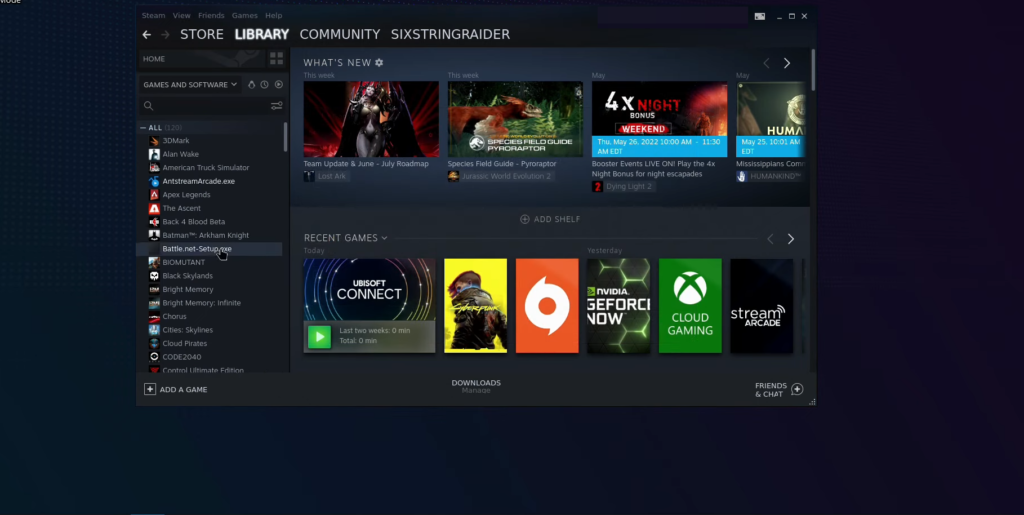
In this section, we will take you through the steps to add battle.net to Steam. Users need to open the Steam application, navigate to the Library tab, click on “Add a Game”, then select “Add a Non-Steam Game”.
- First, open the Steam application on your computer.
- Navigate to your library by clicking on the “Library” tab in the top-left corner of the Steam window.
- Click on the “Add a Game” button, then click on Add a Non-Steam Game and hit the Browse button to navigate to the location of the non-Steam game you want to add.
- In the search bar, click on “home deck” and navigate to the “downloads” folder.
- Set the file type to “All files” and look for the Battle.net installer.
- Tap on Open and then click on Add Selected Programs.
It will now appear on the left-hand side.
Add a Compatibility layer
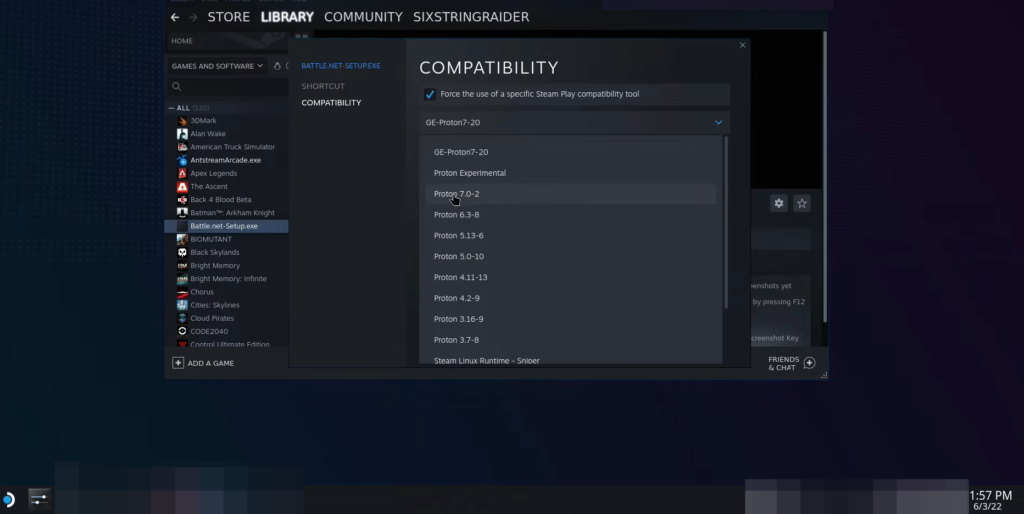
This section describes how to add a compatibility layer to the Steam application. Users need to click on the “Compatibility” tab, checkmark “Force the use of a specific Steam Play compatibility tool” and choose between Proton GE or the official version.
- Click on the “Settings” icon on the Steam application window.
- In the dropdown menu, click on “Properties” and navigate to the “Compatibility” tab.
- You need to check the box labelled “Force the use of a specific Steam Play compatibility tool“.
- After that, select the version of Steam Play you want to use. You can choose between Proton GE, the experimental version, or the official one.
Remove the setup.exe
This section will take you through the process of removing the setup.exe file after launching a game through the Steam application.
- Go back to the Steam application window and click on the “Play” button for the game you added to your library earlier.
This will launch the Battle.net installer. - Log in to your Battle.net account using your username and password.
- After that, close the Battle.net installer and go back to the Steam application window. Find the “setup.exe” file and delete it.
Add battle.net launcher
This content provides instructions on how to add the Battle.net launcher to the Steam library. Users need to follow the steps to click on the “Add Selected Programs” button to add it to the Steam library.
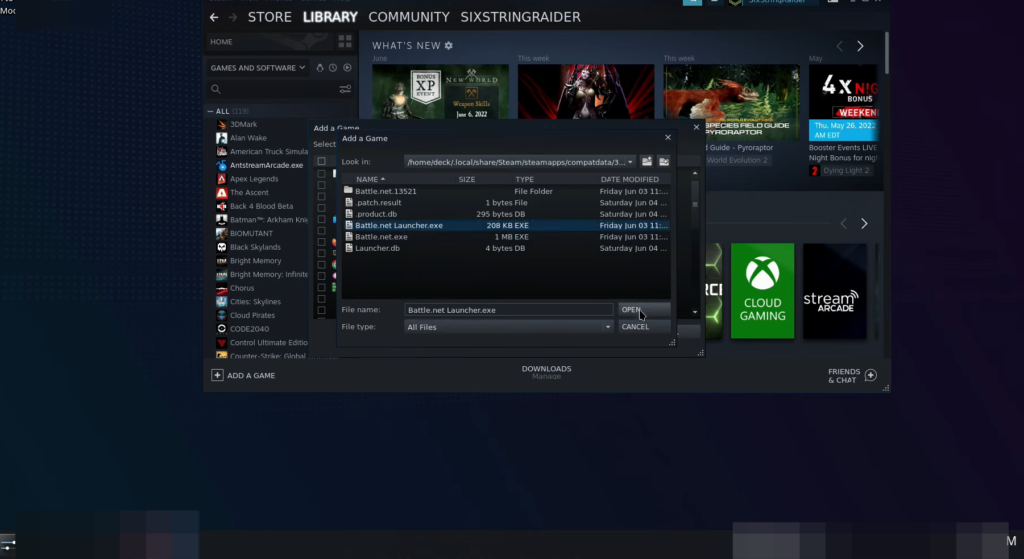
- Click on the “Add a Game” button, then click on Add a Non-Steam Game and hit the Browse button to navigate to the location of the non-Steam game you want to add.
- In the search bar, click on “home deck” and navigate to the “Local” folder, go to the “Share” folder and open the “Steam” folder.
- Navigate to the “Steam files” folder and double-click on the “compat data” file.
- Find the file that contains your Battle.net installer, click on it and go to the “pfx” folder.
- Navigate to the “C drive“, open the “Program Files (x86)” folder and then open the “Battle.net” folder.
- Find the exe launcher file for the game and select it. Click on the “Open” button.
- Finally, click on the “Add Selected Programs” button to add the game to your Steam library.
Add a Compatibility layer
- Now you need to add a compatibility layer to run the launcher and the games inside of it. So click on the settings icon, go to the “Properties” option and click on it.
- Navigate to the “Compatibility” tab in the Properties window.
- Look for the “Force the use of a specific Steam Play compatibility tool” checkbox and select it.
- After that, Choose the compatibility tool you want to use from the options available; Proton GE version, experimental, or official.
Change the Save location to SD card
This section provides instructions on how to change the save location to an SD card in the Battle.net launcher. Follow the steps below and you will be able to change the location.
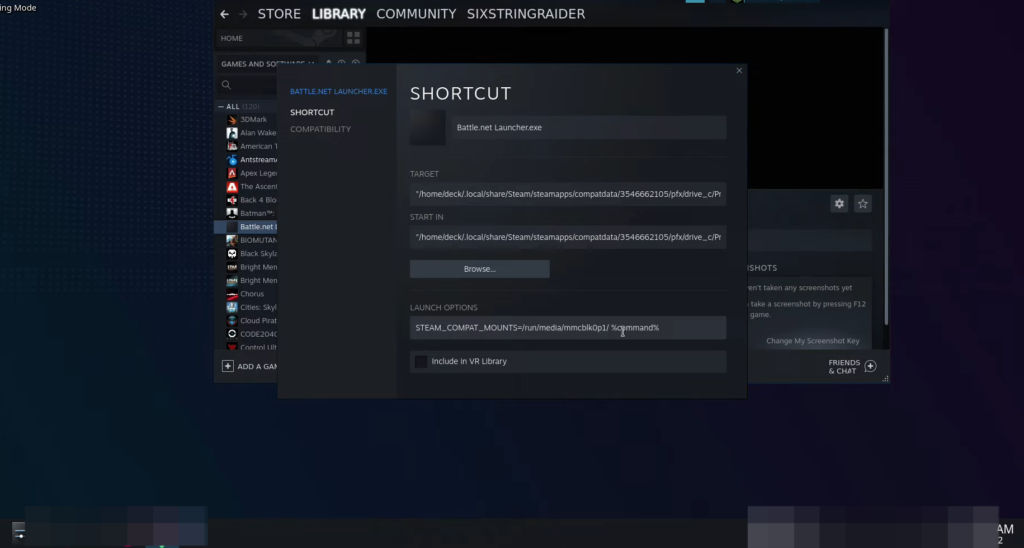
- Now you have to add a little launch file path to save the games to your SD card. Open the Epic game launcher click on the settings icon and select the “Properties” option from the menu.
- Look for the “Launch Options” section and copy the text under it.
- Open the properties of the Battle.net launcher, look for the “Launch Options” section and paste the text you copied from the Epic game launcher.
It will allow you to access that card and run games from it.

- Open your file manager and locate the “Primary” option at the bottom.
- Look for the icon on the left side of the “Primary” option. Click on it to open the path of your SD card.
It will bring up the path of your SD card. - Copy the address of the SD card path from the file manager.
- Create a new folder in a location of your choice and name it “BattleNet Games“.
- Open the properties of the Battle.net launcher and scroll down to the “Launch Options” section.
- Input the following text in the “Launch Options” field: STEAM_COMPAT_MOUNTS=(PASTE THE COPIED ADDRESS HERE) %command%.
Replace “(PASTE THE COPIED ADDRESS HERE)” with the address you copied earlier.
Install the game on SD card
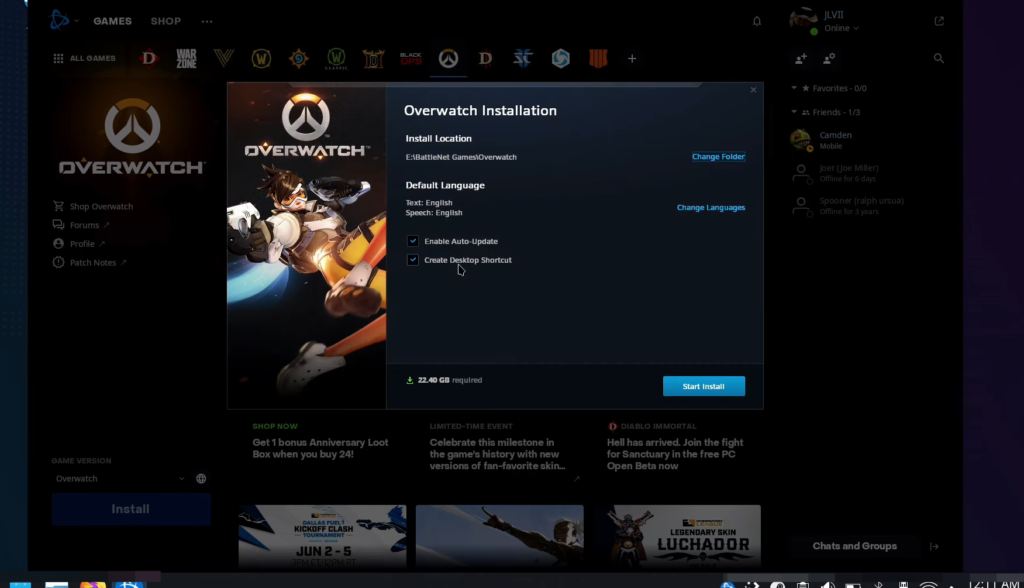
This section describes how to install a game, Overwatch, on an SD card using the Battle.net launcher.
- Launch the Battle.net launcher and select the game you want to install. In this case, it is Overwatch. Click on the “Install” button to begin the installation process.
- Look for the “Change Folder” option and click on it. Click on “My Computer“, locate your SD card in the file manager and open it.
- Look for the folder you created earlier named “BattleNet Games” and click on “Open“.
- Click on “Install” to start the installation process on the SD card.
Add pictures to Steam
In this section, we will take you through the steps to add custom backgrounds and icons to the Steam Deck. First, you need to right-click on the Battle.net launcher icon in the taskbar, select “Custom Background” and download the icons and banners you want to use.
- Right-click on the Battle.net launcher icon in the taskbar and select the “Manage” option from the context menu.
- From the Manage menu, select the “Custom Background” option.
- Download the icons and banners you want to use from Google or any other source of your choice.
- Open the file manager and locate the downloaded files.
- Select “All Files” as the file type option to display all files in the folder. Select the files you want to add as custom backgrounds and icons.
- You can also add custom backgrounds and icons to the actual game tab by clicking on the game’s icon and selecting the “Custom Background” option.
After that, your steam deck will look nice and clean.
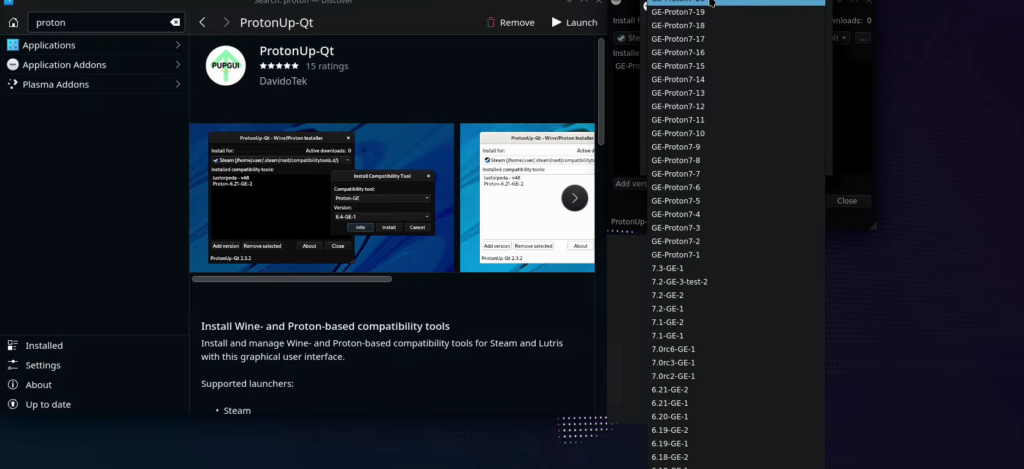
Install proton compatibility layers
The content describes how to install additional proton compatibility layers for running Windows games. The steps include launching the Discover application, searching for “ProtonUp-Qt”, installing it, launching ProtonUp, and installing the latest version.
- To get other proton compatibility layers that are great for Windows games, launch the Discover application, search for “ProtonUp-Qt” and select it from the search results.
- Click on the “Install” button to begin the installation process.
- After the installation is complete, launch the ProtonUp application. In the ProtonUp interface, select “Add version” to view available Proton versions.
- Choose the latest version of Proton you want to use (in this case, version 20).
- Click on the “Install” button to begin the installation process of the selected Proton version.
- Once the installation is complete, the new Proton version will automatically show up in Steam. After that, you can choose it in the Compatibility tab in properties.
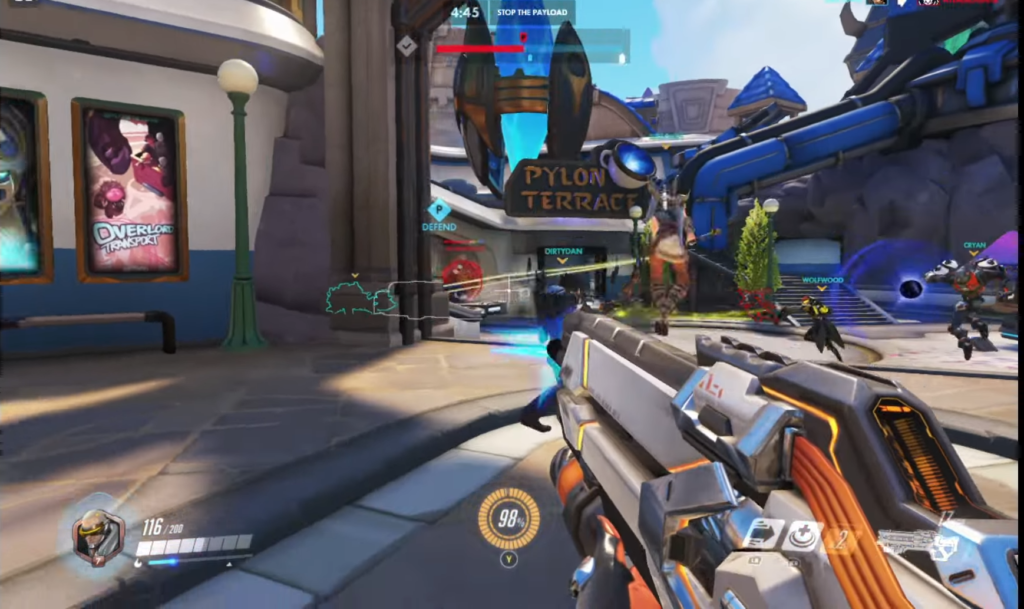
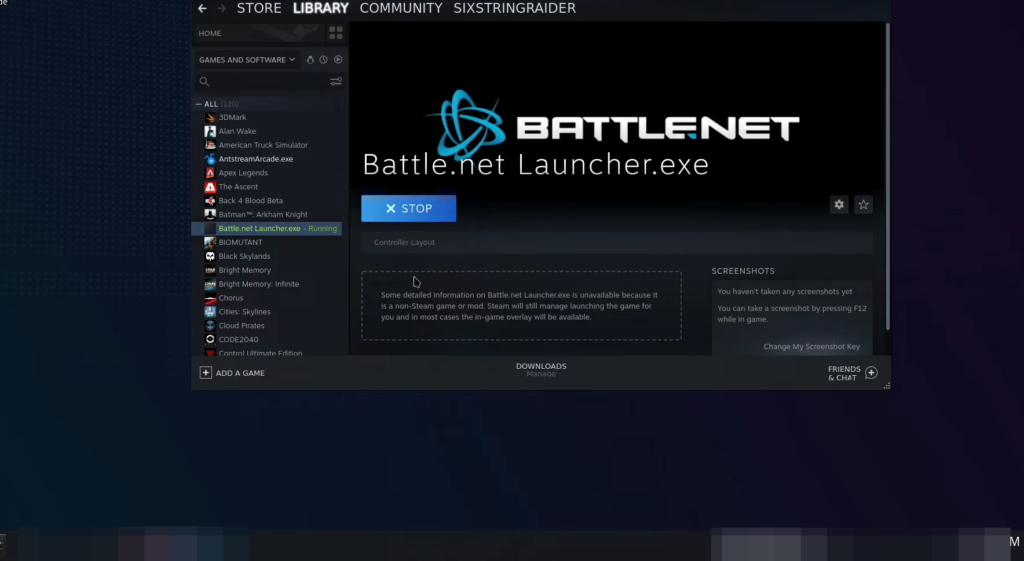
Launch the battle.net launcher and get straight into the Overwatch game. The game will look great even on a small screen and everything will be responsive for the most part.