In this guide, you will find out how to Install Cemu With Maximum Performance Settings.
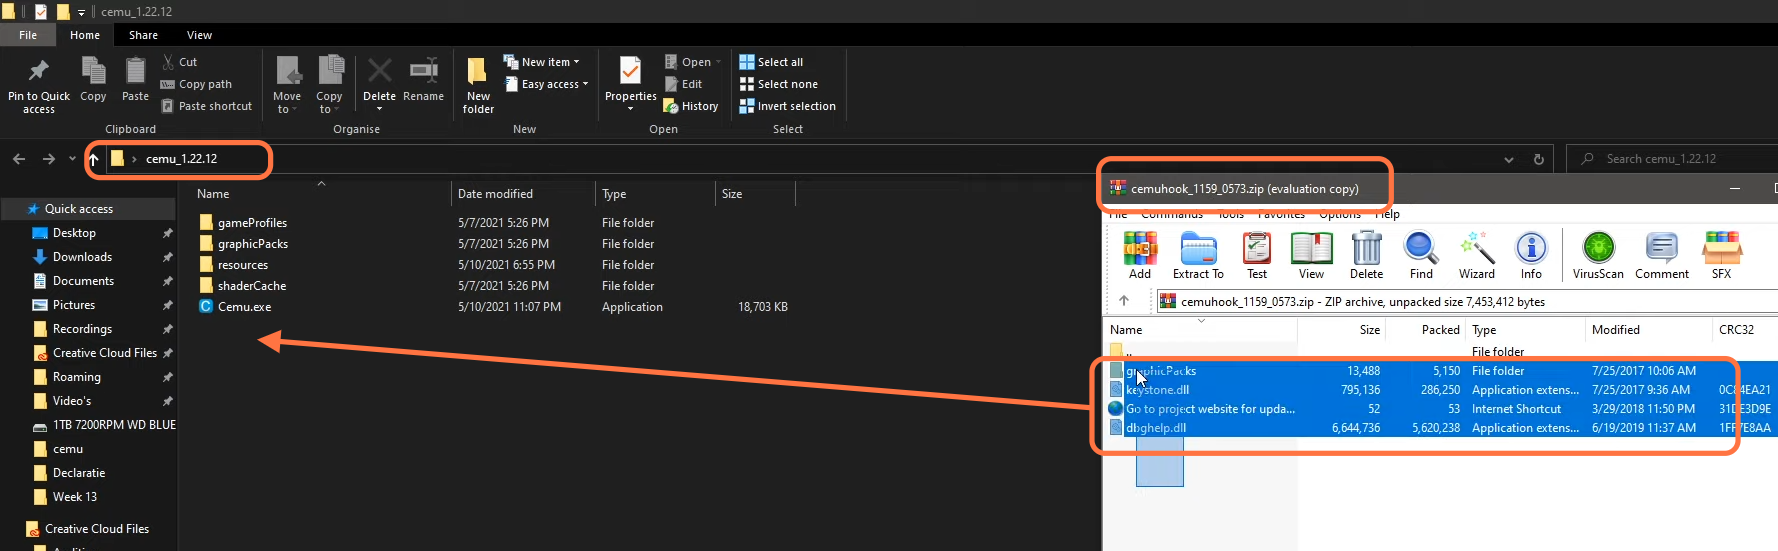
First, you have to click on the following link https://cemu.info/ as it will take you to the download page of the Cemu emulator. After reaching this page, you need to scroll down and click on the download links. After that, download the Cemu hook. For this, you have to click on the following link https://cemuhook.sshnuke.net/ Once you have downloaded both of the files, you have to unzip them and then paste the Cemu file on your desktop. Copy all the files in the Cemu hook folder, and then paste them into the Cemu folder.
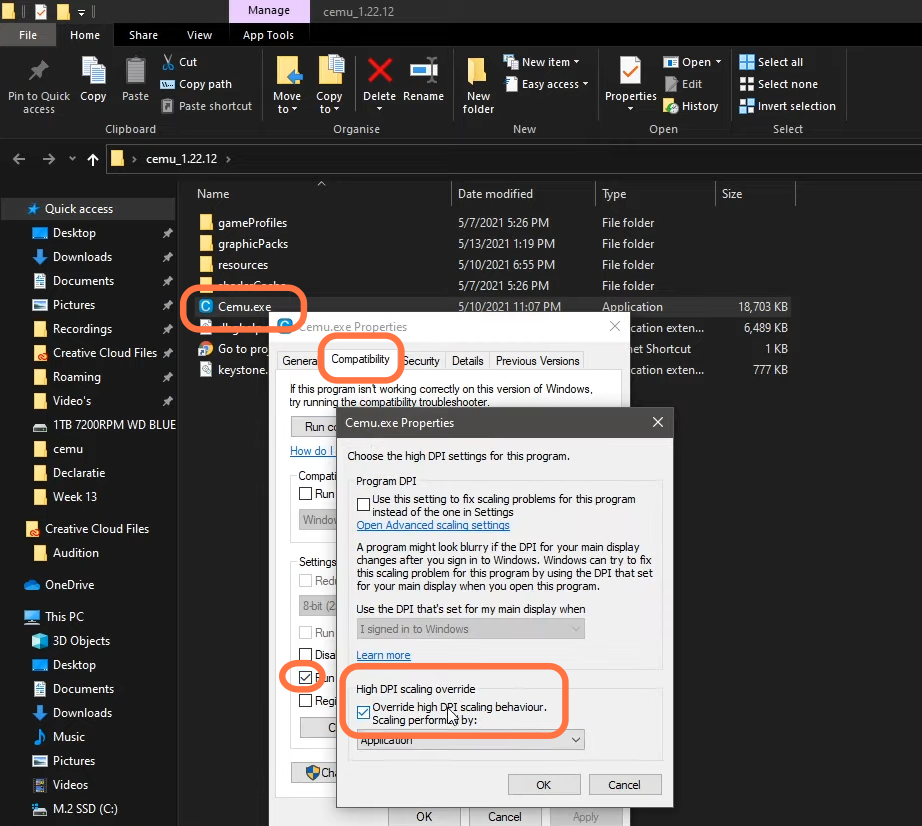
Then you have to right-click on the Cemu.exe file and go to properties. Click on the Compatibility tab and ensure that running this as an administrator is selected. Then you have to click on change High dpi settings and make sure that override high dpi scaling is check-marked.
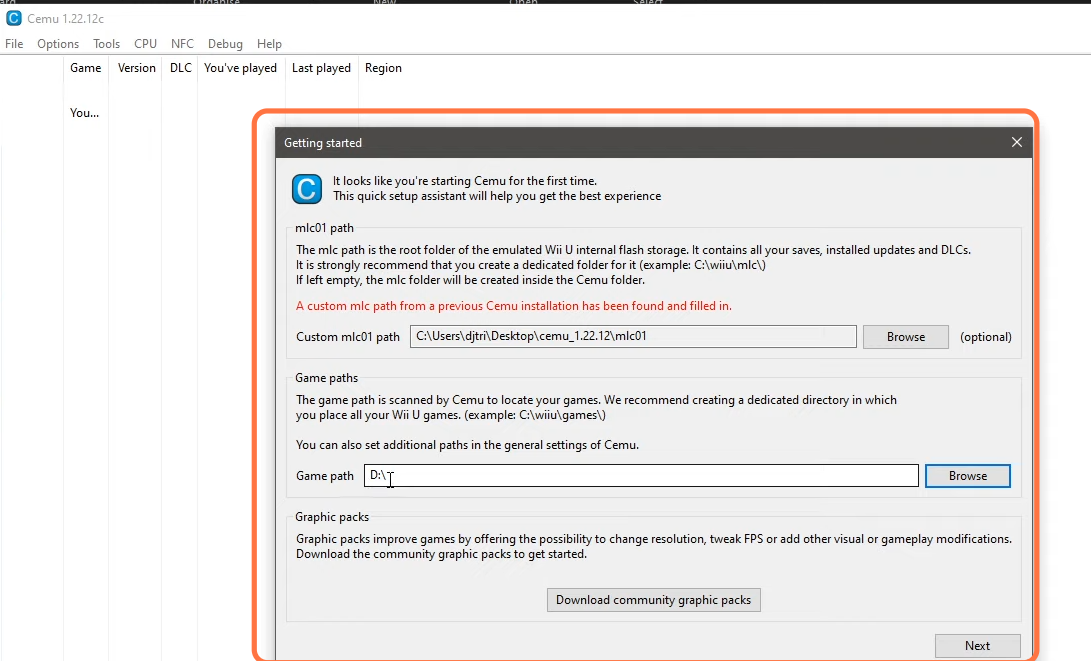
Now you have to open the Cemu.exe application file, then give the mlc01 folder path, and give the game path where all your games are installed. Click on next and ensure that the automatic check for an update is check-marked. After that, click on close and it will start updating your game list.
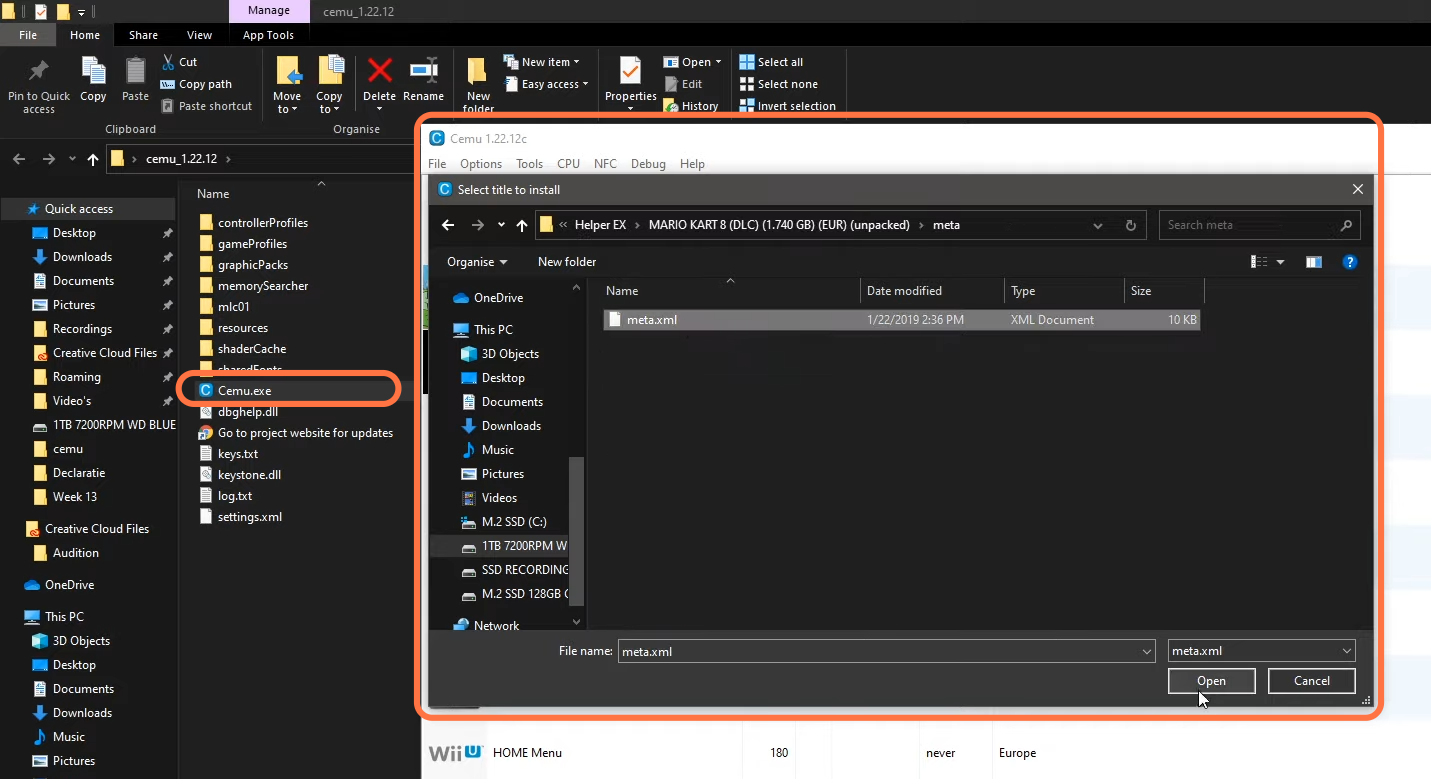
Once the scanning finishes, then it will show you all the available games on your PC. Now you have to click on the file button in the top left corner of your screen and then click on install game titles and update DLC option from the drop-down menu. Go to the meta folder and select the meta.xml file. Then it will install the DLC.
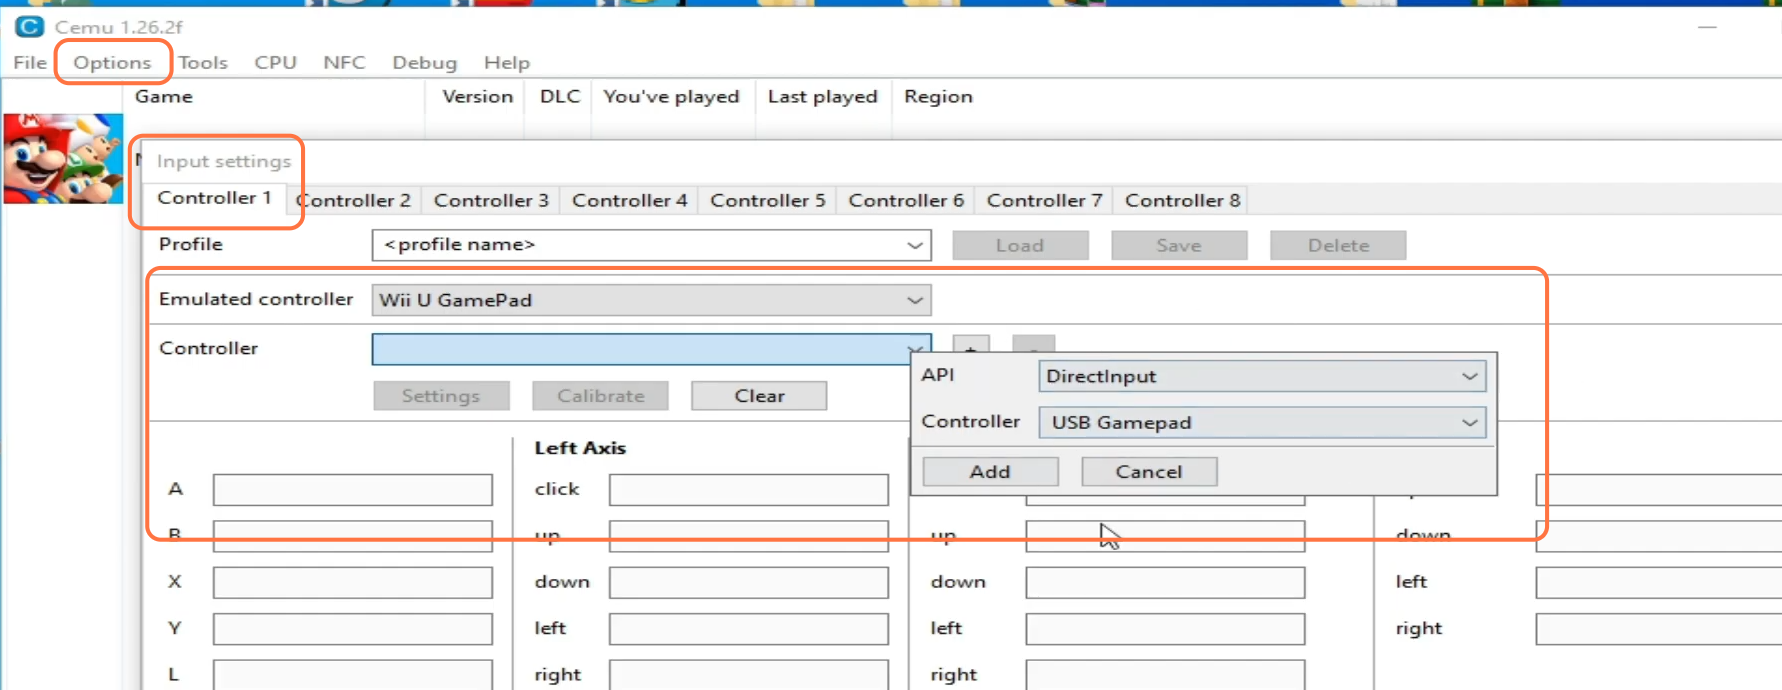
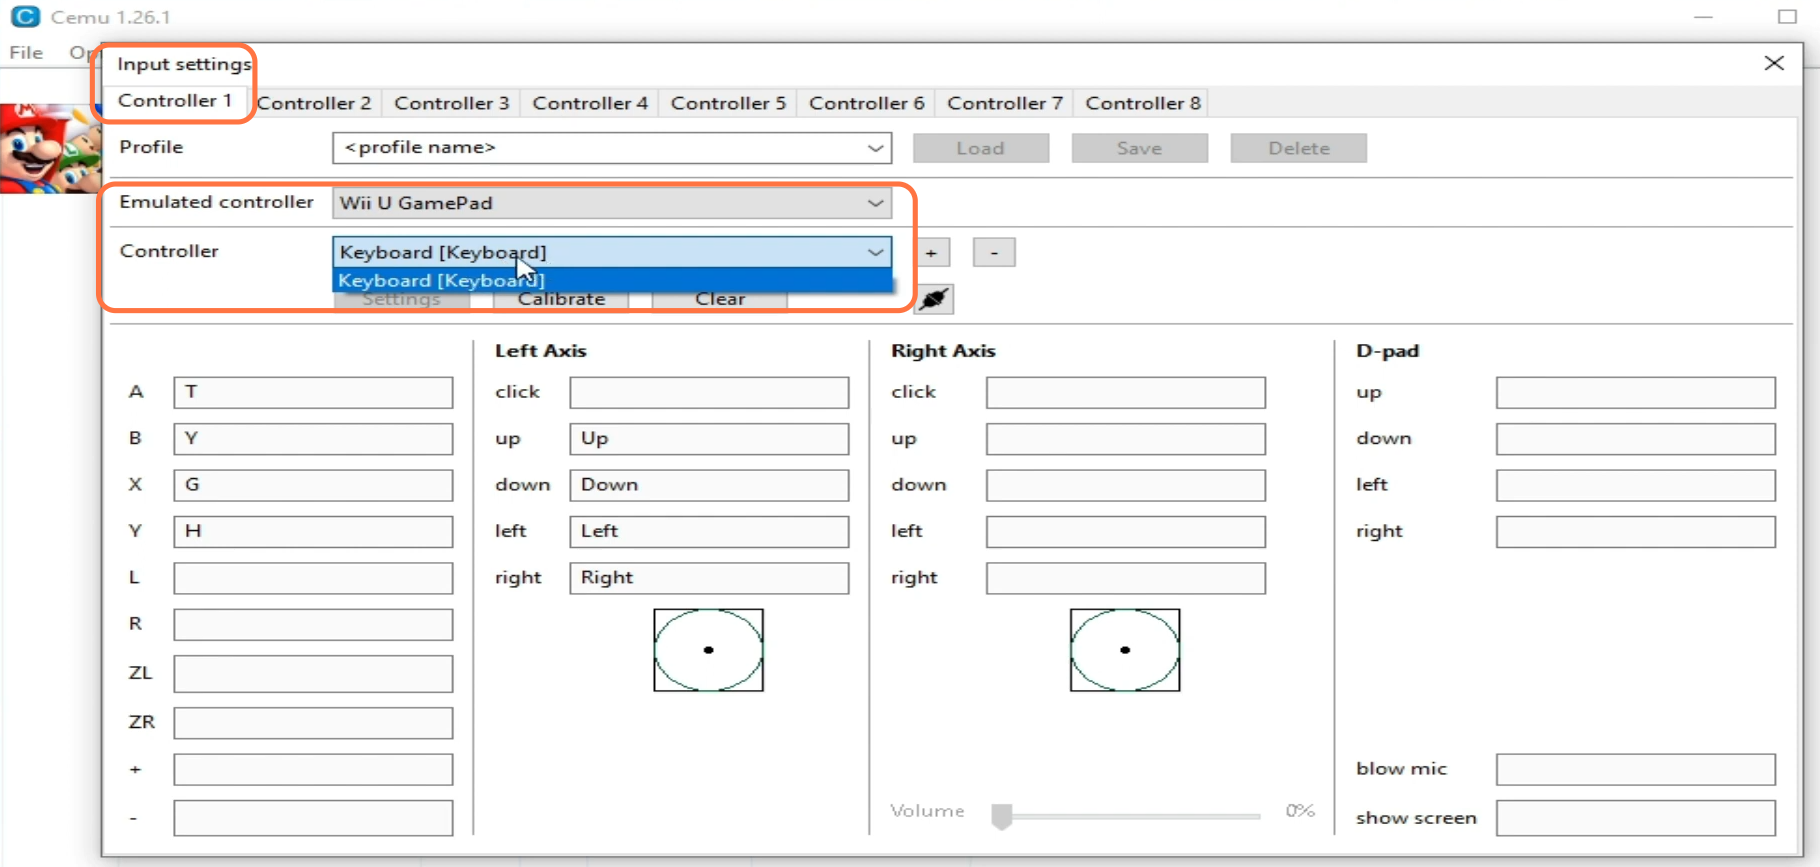
You have to click on options from the top and then click on input settings. Under controller 1, you have to set the Emulated controller to Wii U pro Controller. Then see in the controller drop-down menu, you will find the Gamepad controller option.
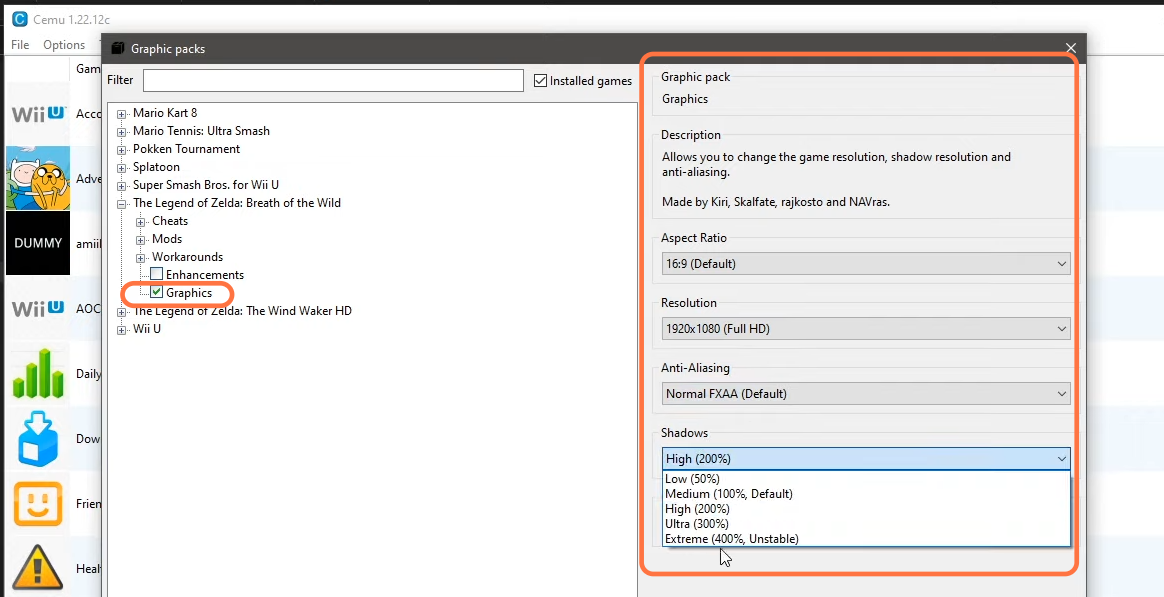
Click on Options and then click on graphics pack. After that, click on download the latest community graphics pack from the bottom right side of your screen. Once the download completes, you will find all the games on the left side, you have to select open and then expand it. Click on Graphics, keep the aspect ratio to default, and then set the screen resolution according to your monitor’s native resolution. Don’t change anti-aliasing keep it on default. Set the shadows to high.
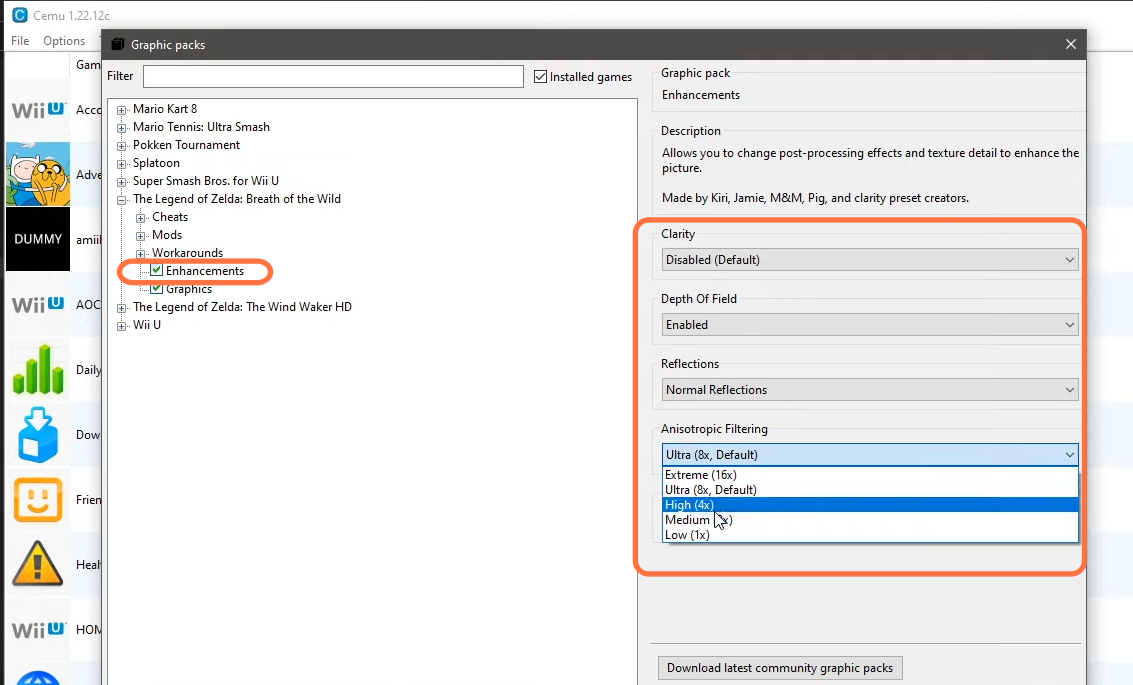
Then you have to checkmark the enhancement from the left side and make sure that clarity is disabled. You also have to ensure that depth of field is enabled and set the reflection to normal reflection. You need to set the anisotropic to lower values as it will enhance your performance.
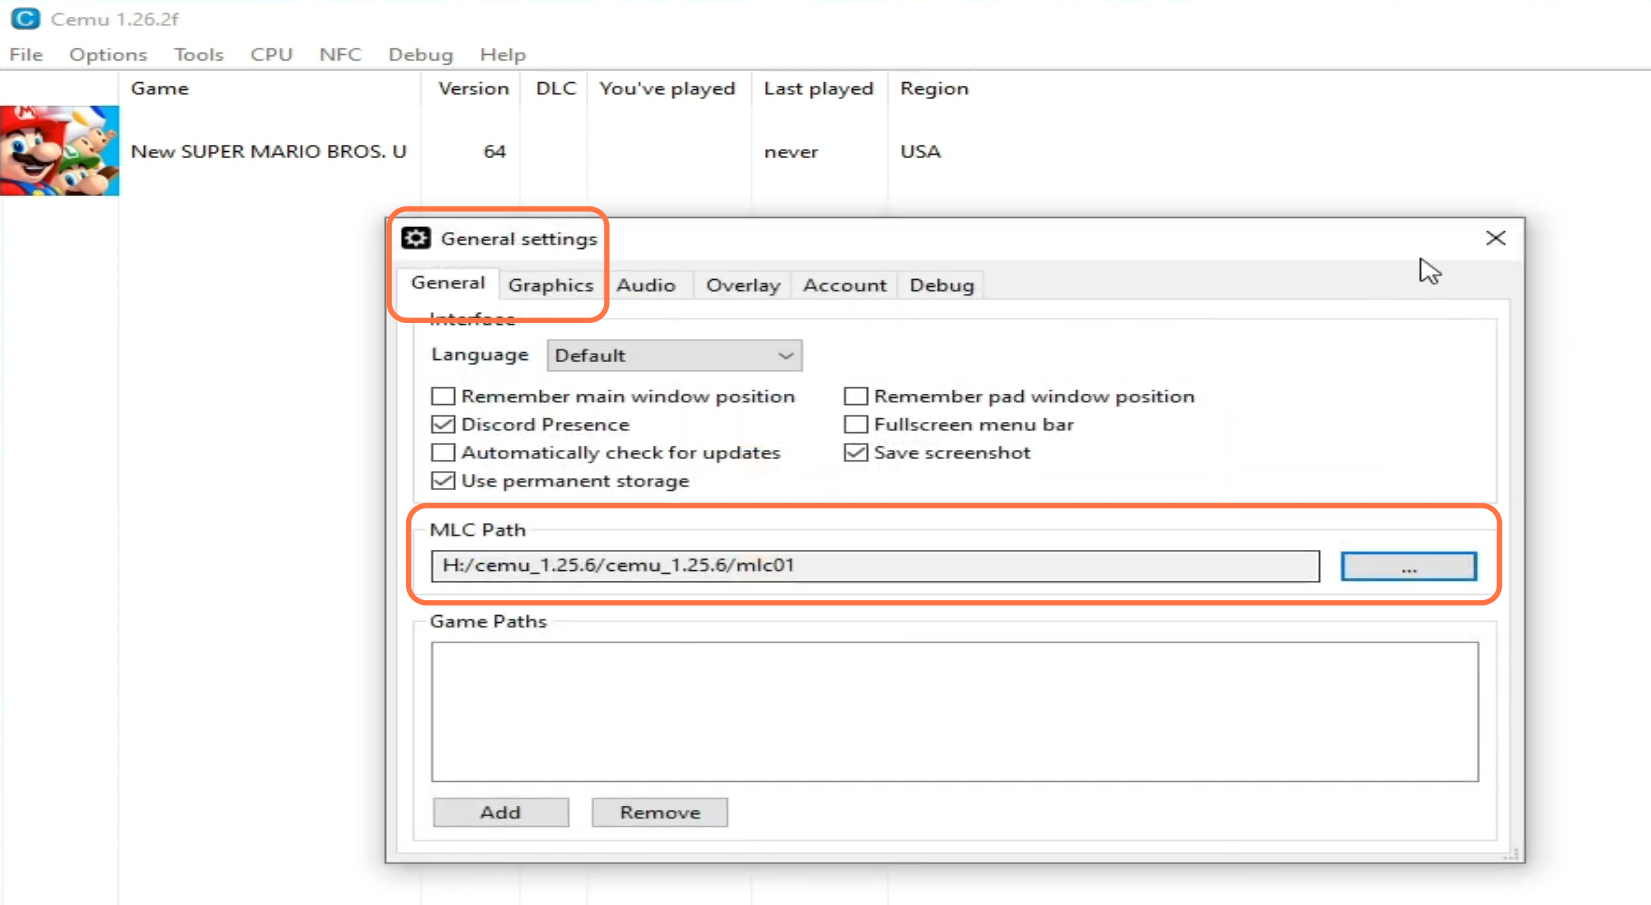
After that, open the emulator, then click on the options and tap on General settings. Then click on the Browse button and under the MLC path, you need to go to the emulator folder and go to the cemu_1.25.6 folder. Go to the same folder and then select the mlc01 folder, now this folder will be added under the MLC path.
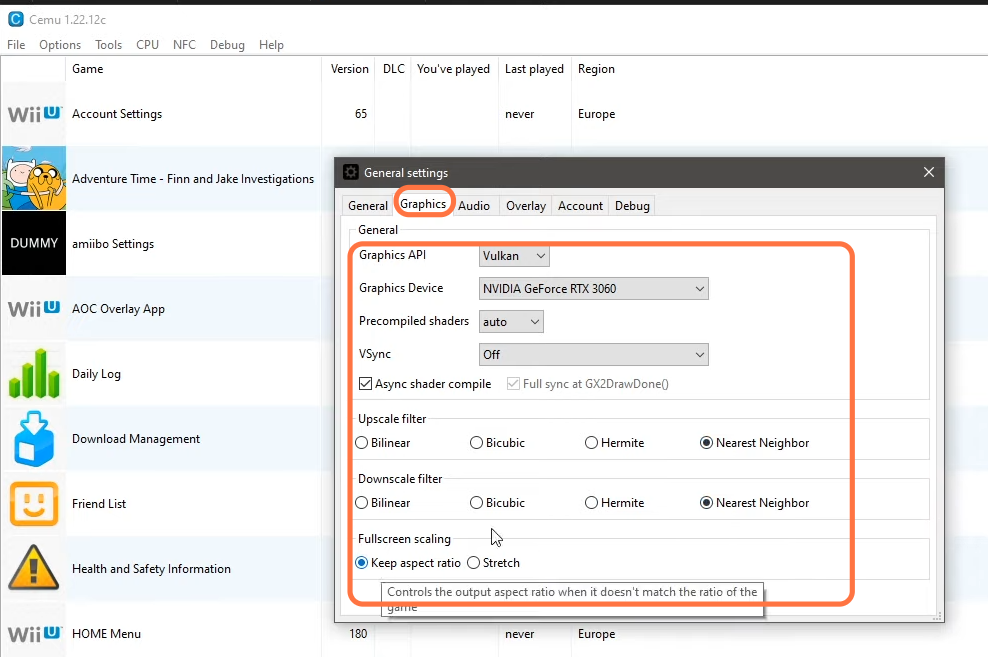
Then you have to select the graphics tab and set the API to Vulkan. Set the graphics device according to the graphics card that you are using on your PC. You have to make sure that the V-sync is turned OFF. You have to set the upscale and downscale filter to the nearest Neighbor and then set the full-screen scaling to aspect ratio.
Then you have to open the Cemu Emulator and click on options from the top. Click on input settings again and under Controller 1, you have to set the Emulated controller to Wii U pro Controller and then see in the controller drop-down many you see the Gamepad controller option. Now you will find your controller option and then you have to click on add. Now you can map your keys for this you have to go to the columns in front of the alphabet and then you have to press the buttons on your controller.