The recently launched Circle Map mod changes the mini-map/radar into a circle shape. This comprehensive guide walks you through a hassle-free installation process, ensuring you seamlessly integrate the mod to unlock the novel map design.
Step 1: Download the Mod
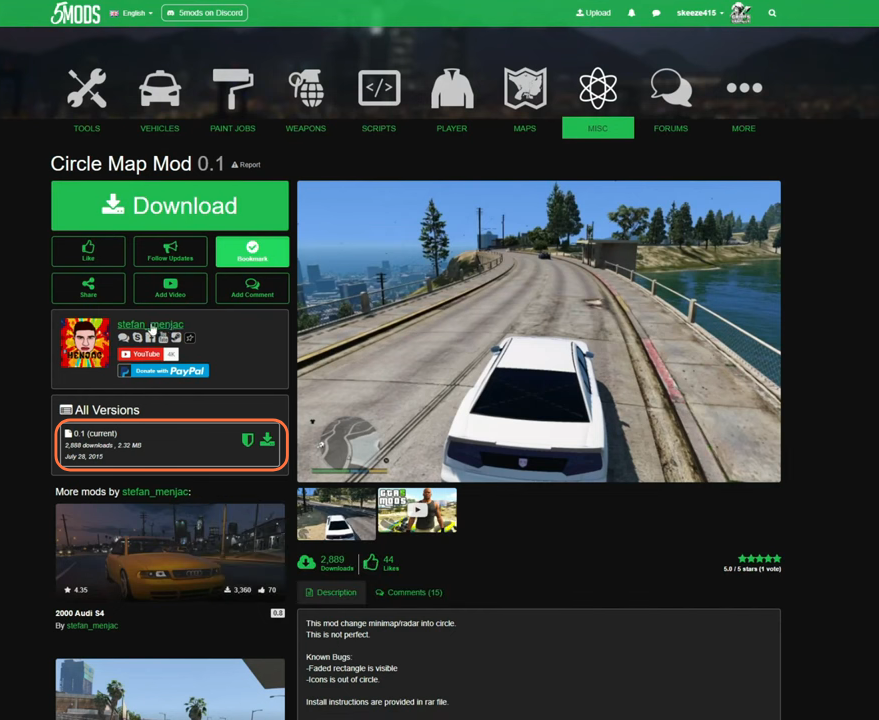
- The first step is to download the Circle Map mod from a trusted source such as gta5-mods website.
- Open the link and click on the green download arrow icon for the current version under the ‘All Versions‘ section to get the mod’s compressed zip file.
Step 2: Install Open IV
For seamless integration, we require a tool known as the Open IV archive manager. Open IV allows you to access and modify GTA V’s game files. Once you have downloaded the required files, you have to go to the downloads folder to proceed with installation.
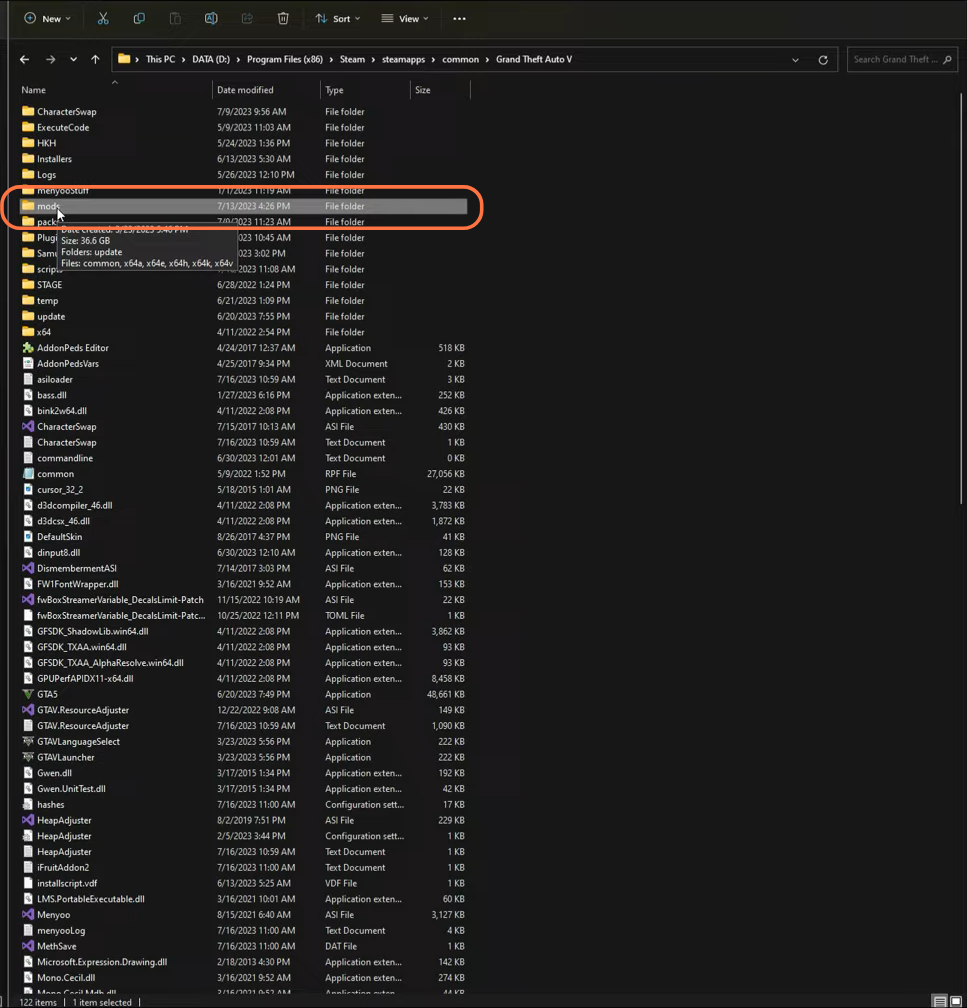
Step 3: Navigating the Mods Directory
Having gathered the essential components, it’s time to delve into the core directory housing your GTA V installation. Within this context, locate or create a “mods” folder within the GTA V directory. This step is crucial for accommodating the mod’s functionalities.
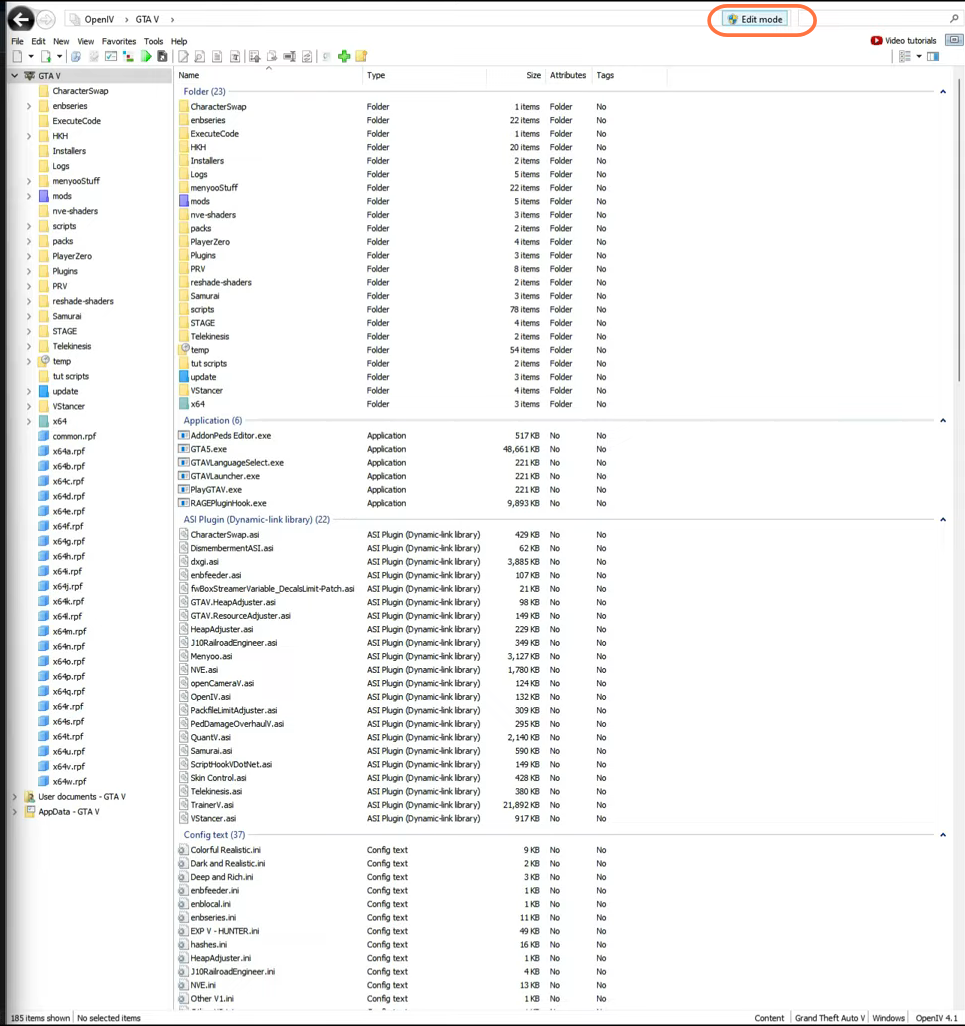
Step 4: Launching Open IV
Initiate the Open IV application, ensuring its synchronization with your GTA V installation directory. Remember to activate the Edit Mode within the application, as this unlocks the capability to modify game files as needed.
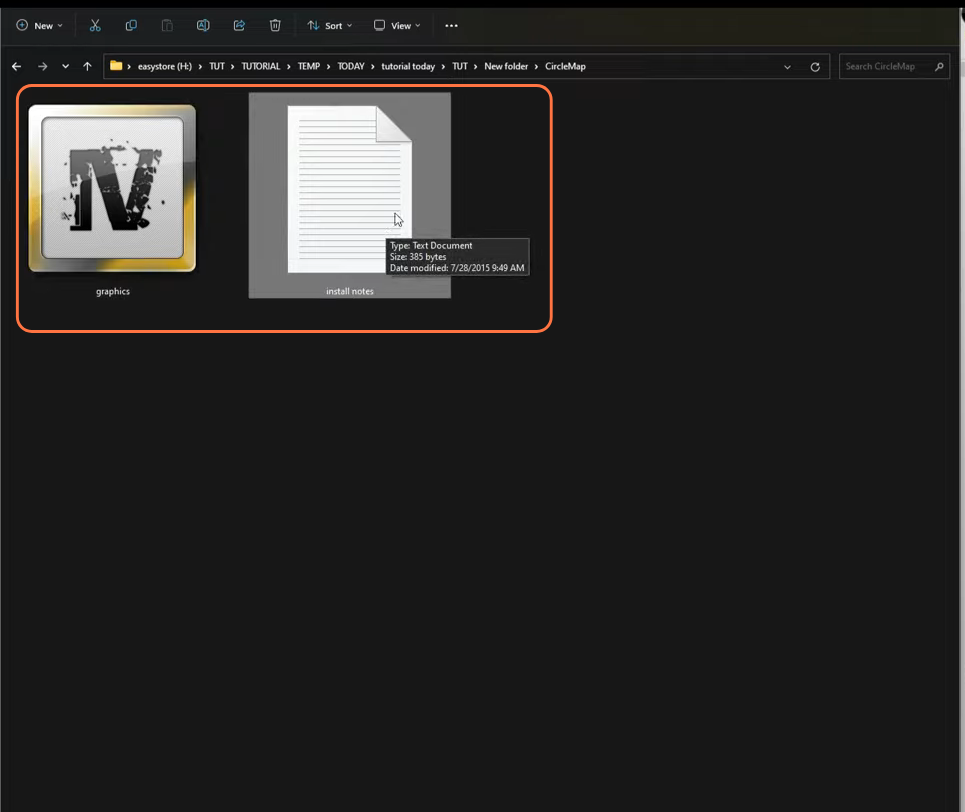
Step 5: Unveiling the Downloaded Mod
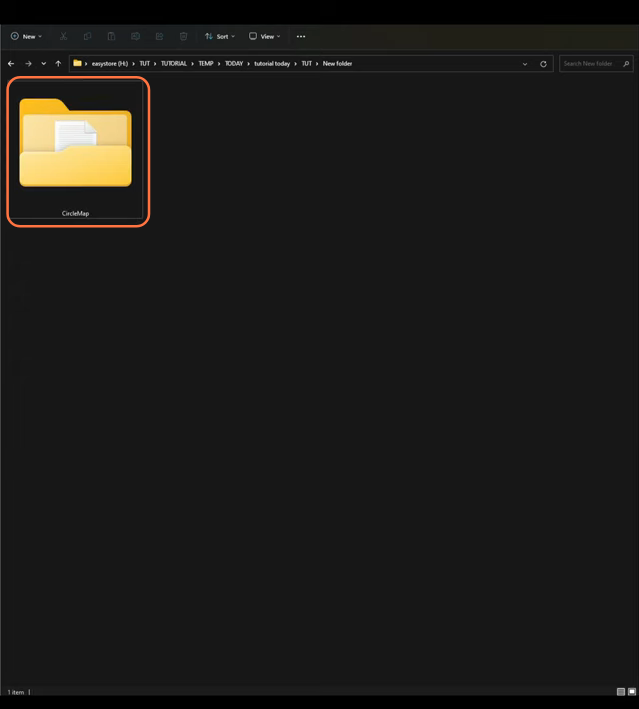
Proceed to open the CircleMap folder, nestled within your downloads repository. Inside this folder, you’ll uncover an OIV package, named graphics.ytd, accompanied by a text file containing precise instructions on where to place the file.
Step 6: Seamless Mod Installation
Execute the following sequence within the Open IV application to seamlessly install the mod:
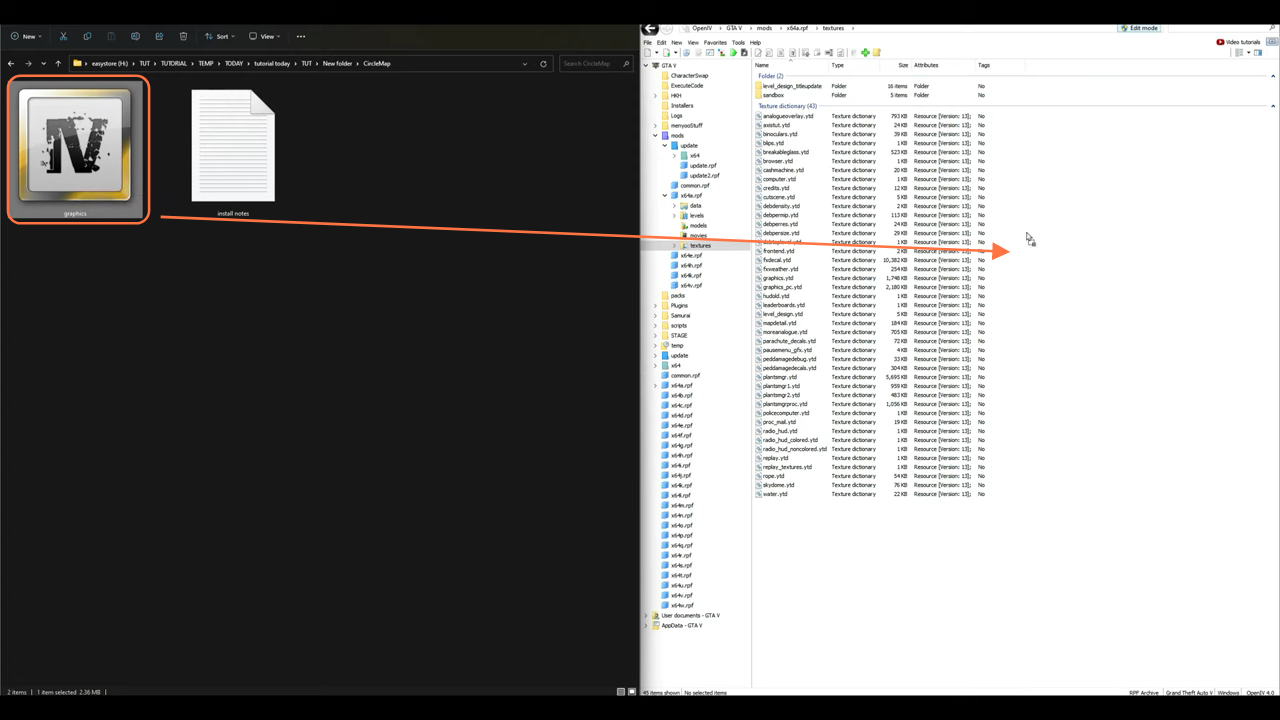
- Traverse the side column to navigate the path: mods > x64a.rpf > textures.
- If you’re not already within the “mods” folder, a red banner might appear, prompting you to either ‘Copy to “mods” folder’ or ‘Show in “mods” folder’. This is the location where the game files are stored.
- Swiftly drag and drop the graphics.ytd file into the textures folder within Open IV.
- For users of VisualV, an additional step is required. Install the graphics.ytd file to the subsequent location: mods > update > update.rpf > x64 > dlcpacks > textures.
- After completing both installations, proceed to the ‘File’ option in the upper left corner of Open IV and select the ‘Close All Archives’.
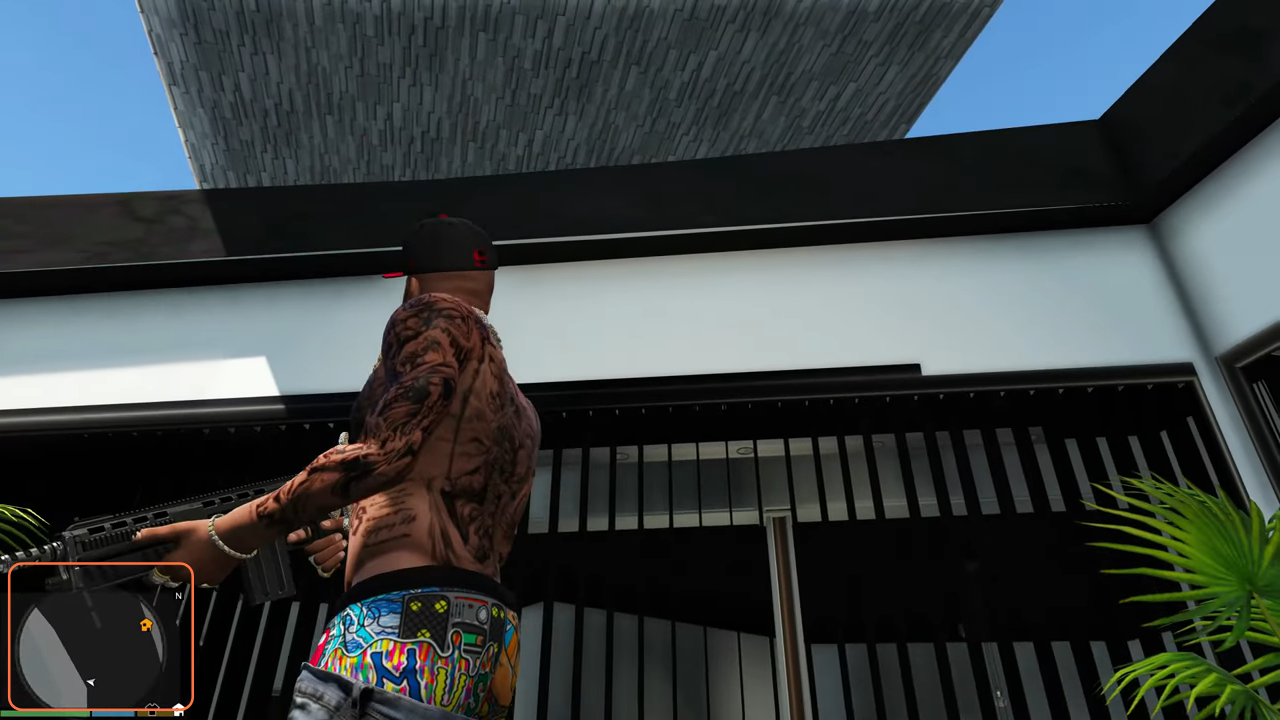
Step 7: Immersive Mod Testing and Exploration
With all components flawlessly integrated, launch GTA V and step into the virtual realm. Upon entering the game, your attention will immediately be captivated by the novel circular mini-map residing at the bottom left corner of the interface. This transformation redefines your navigation experience, enhancing your gameplay with its innovative design.