This guide will let you know how to install Custom maps in the BeamNG drive game.
Step 1: Download Maps
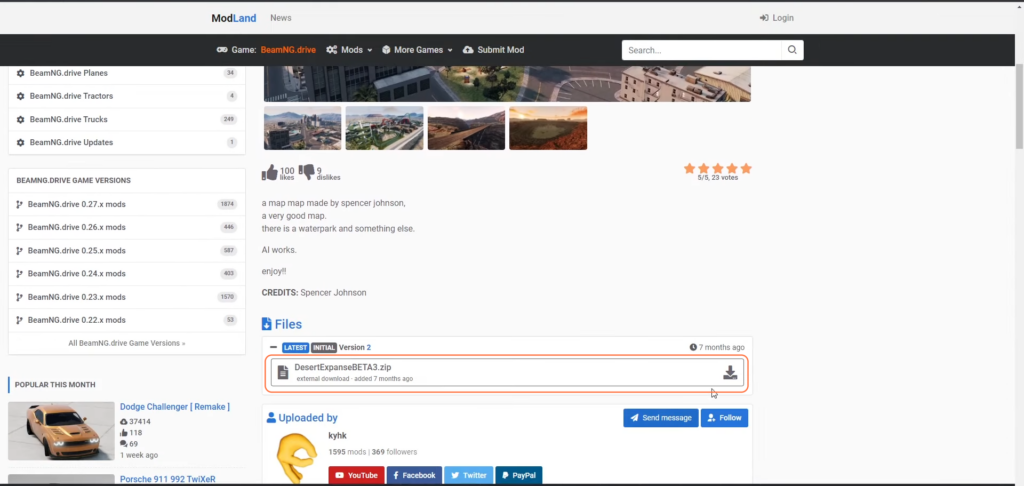
- Firstly, visit the ModLand website to access a collection of downloadable maps.
- Explore and select the desired map for download.
- Click on the chosen map and initiate the download process by pressing the download icon.
- Wait for the download to complete before proceeding further.
Step 2: Accessing Steam Library
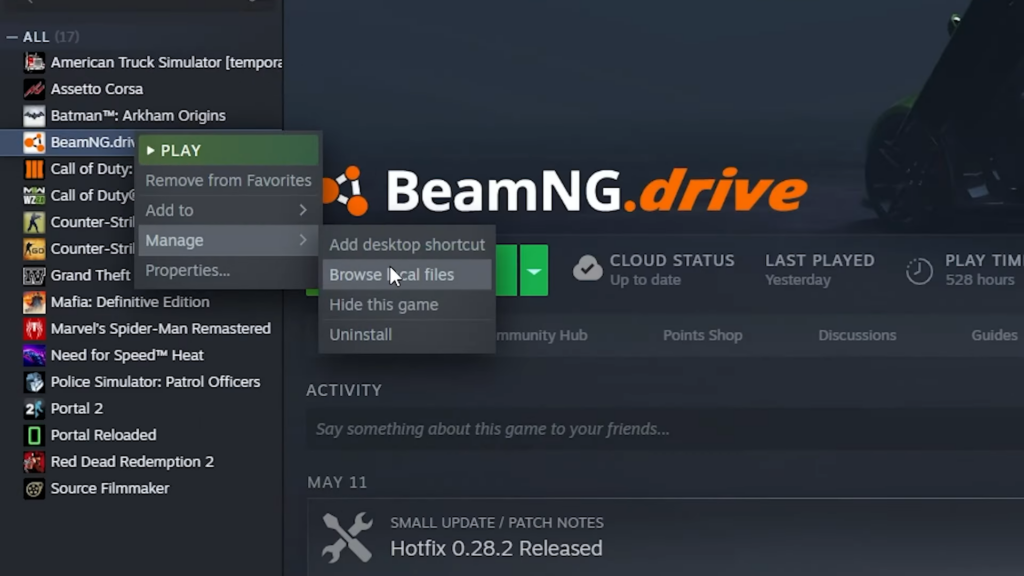
- Open your Steam client and navigate to the ‘Library’ section.
- Right-click on the BeamNG.drive game.
- From the dropdown menu, select ‘Manage’ and then ‘Browse Local Files’.
- This action opens the game’s local directory in your file explorer.
Step 3: Locating ‘Levels’ Folder
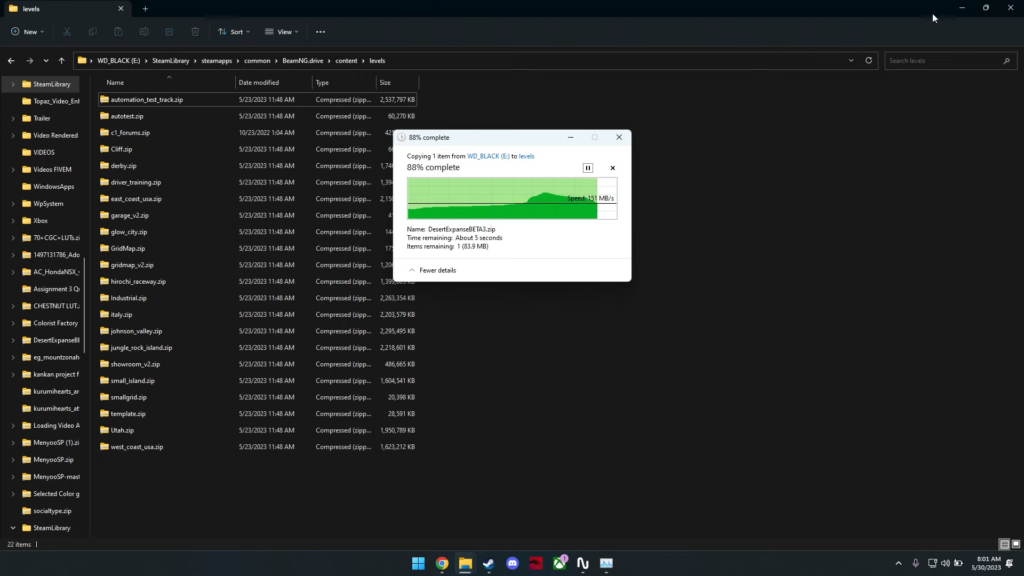
- Within the game’s local files, find and access the ‘content’ folder and then the ‘levels’ folder.

Step 4: Installing the Downloaded Map
- Locate the downloaded map file.
- Drag and drop this file into the ‘Levels’ folder within the game’s directory.
- Wait for the file transfer to complete.
Step 5: Launch the Game and Access Installed Map
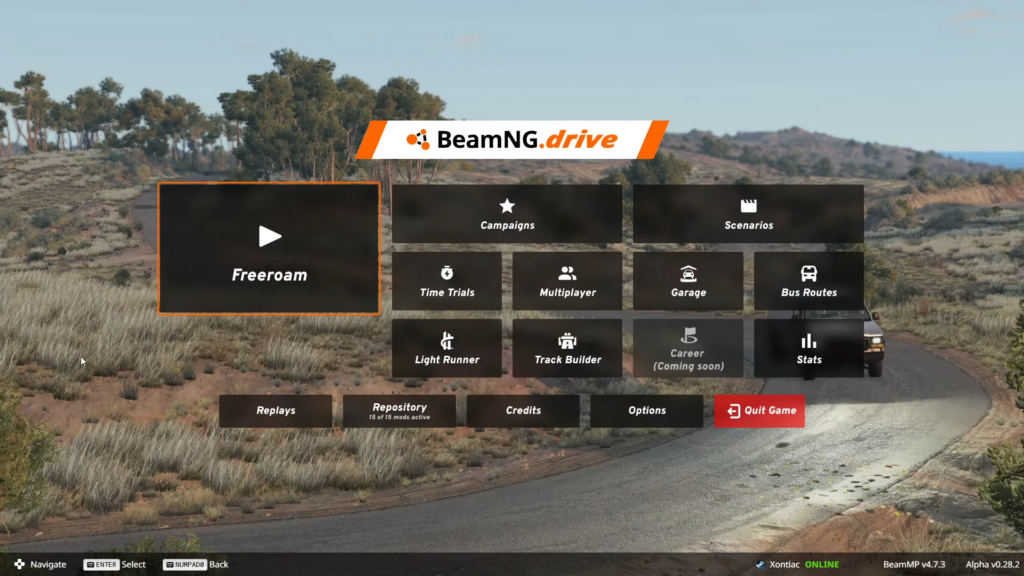
- Start or relaunch the game through the Steam application.
- Within the game, select the ‘Freeroam’ mode.
- Look for the newly installed map among the available options.
Step 6: Confirm Installation
- Open and explore the newly installed map within the game to ensure it functions properly.
By following the above steps carefully you can successfully install and access the desired map in the game.