This guide will let you know how to install the custom texture packs for Standalone dolphins on Xbox Series X. Go through the guide and follow all the instructions carefully to install it. You will also learn how to install the custom config file.
- The first thing you will need to do is open up your web browser and download Texture packs.
- Wait for the download to finish and locate the downloaded Texture Pack file on your computer. Extract the contents of the file on your desktop.
- After that, turn on your Xbox console and navigate to the FTP application.
- Within the FTP application on your Xbox, find the option that displays the address of the device and copy it down.

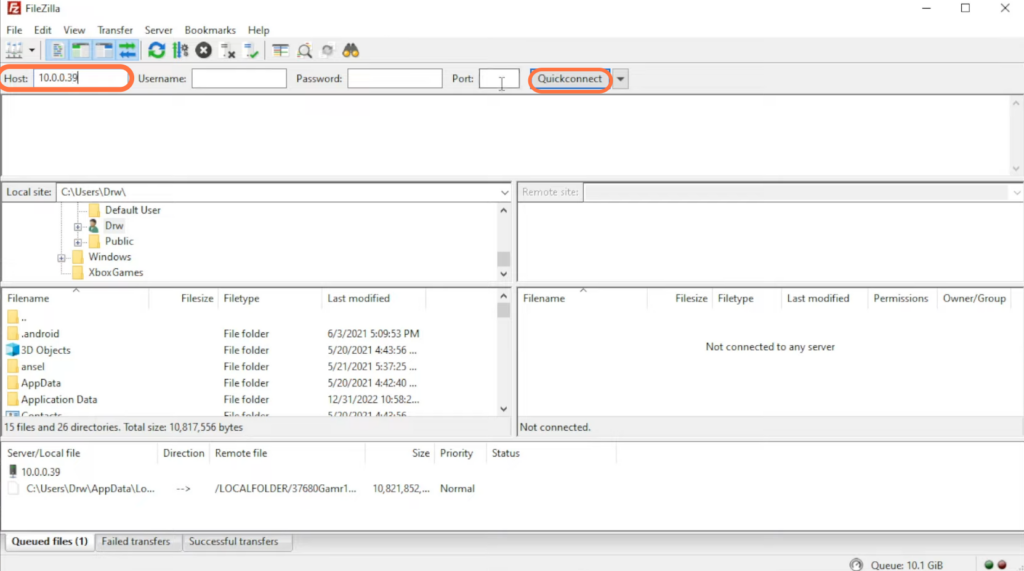
- Now switch back to your computer and launch the FileZilla application.
- In the FileZilla interface, locate the “Host” section at the top and paste the address you copied earlier from the FTP application.
- Navigate to the “Port” section and input “21” in this field. After that, hit the Quickconnect button.
- Locate and tap on the local folder. Inside the local folder, open up the vapi folder.
- Navigate further to find the Local state folder and check if there are specific folders named GBA, GC, load, resources, and packs inside the Local state folder.
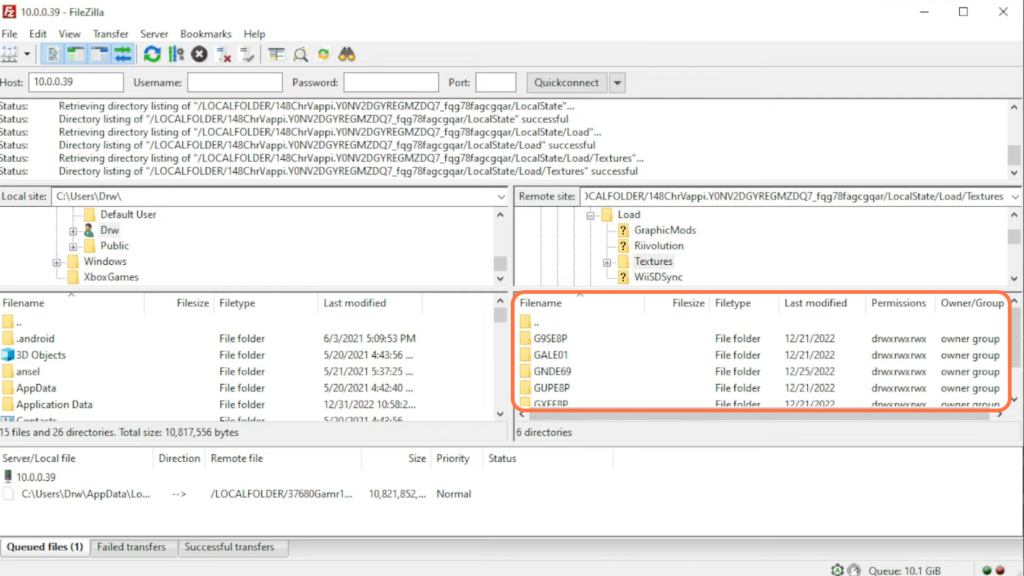
- Now, enter the load folder and navigate to the textures folder.
Here, you will find all the texture packs that are available.
- Go to your desktop and drag & drop the extracted file into the FileZilla application and hit the OK button.
- After that, open up your web browser and download the Custom Config file.
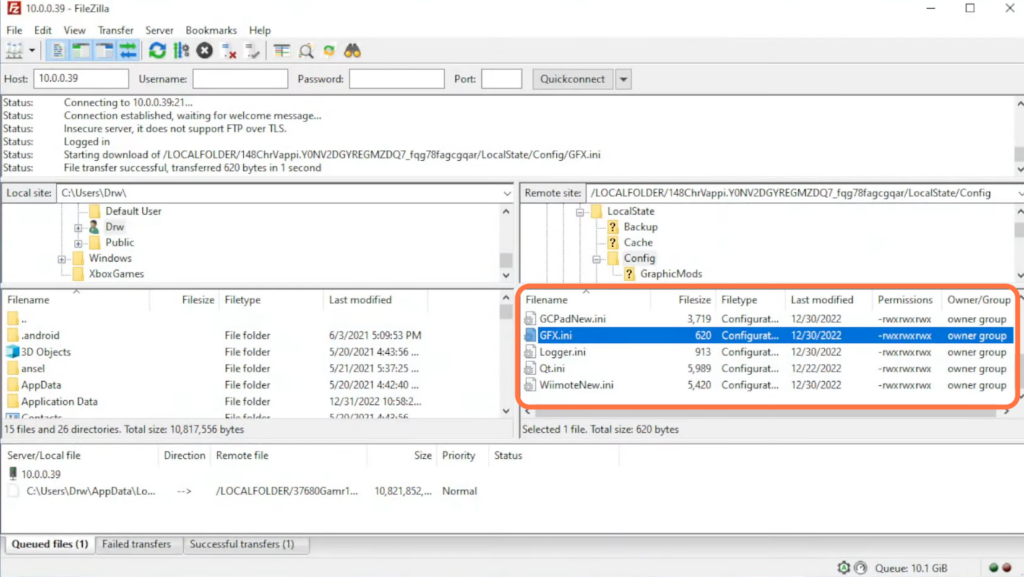
- Once the download completes, you have to drag & drop it into the local state config folder.
It will load the textures before the emulator starts.