In this guide, you will find out how to install the Fallout 4 SE with Vortex and Mod Organizer.
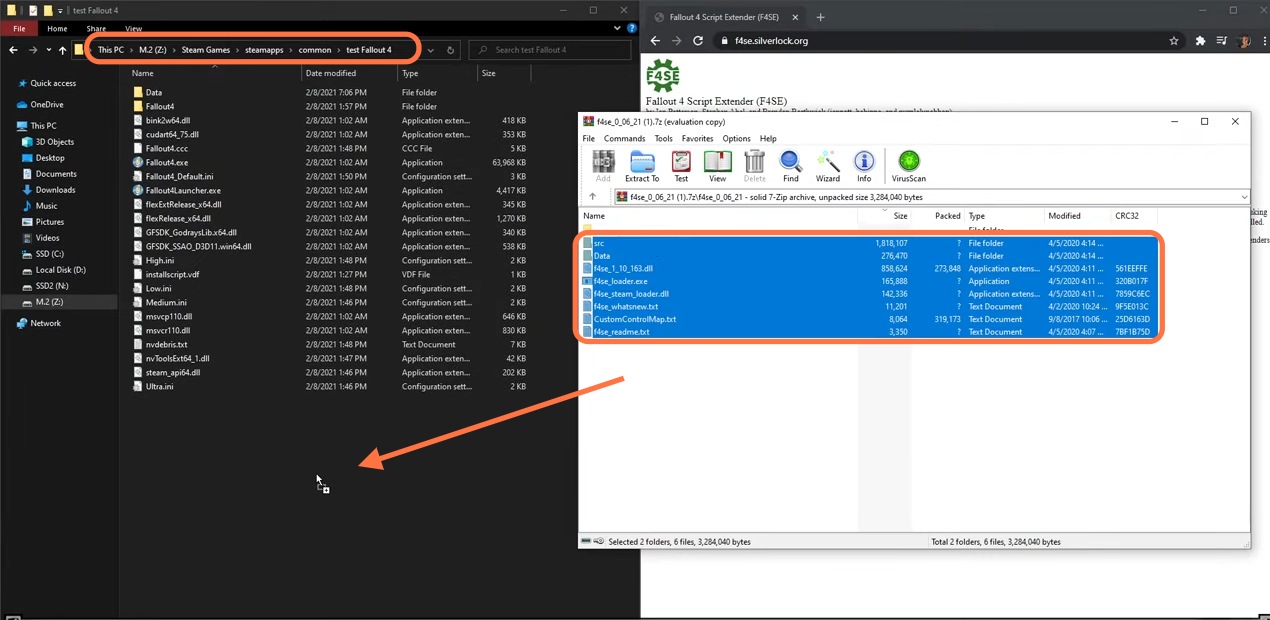
1. The first thing you will need to do is download the F4SE from “https://modfiles.b-cdn.net/f4se_File.7z“. Open the file from the downloads folder and drag all the contents into your Fallout 4 directory.
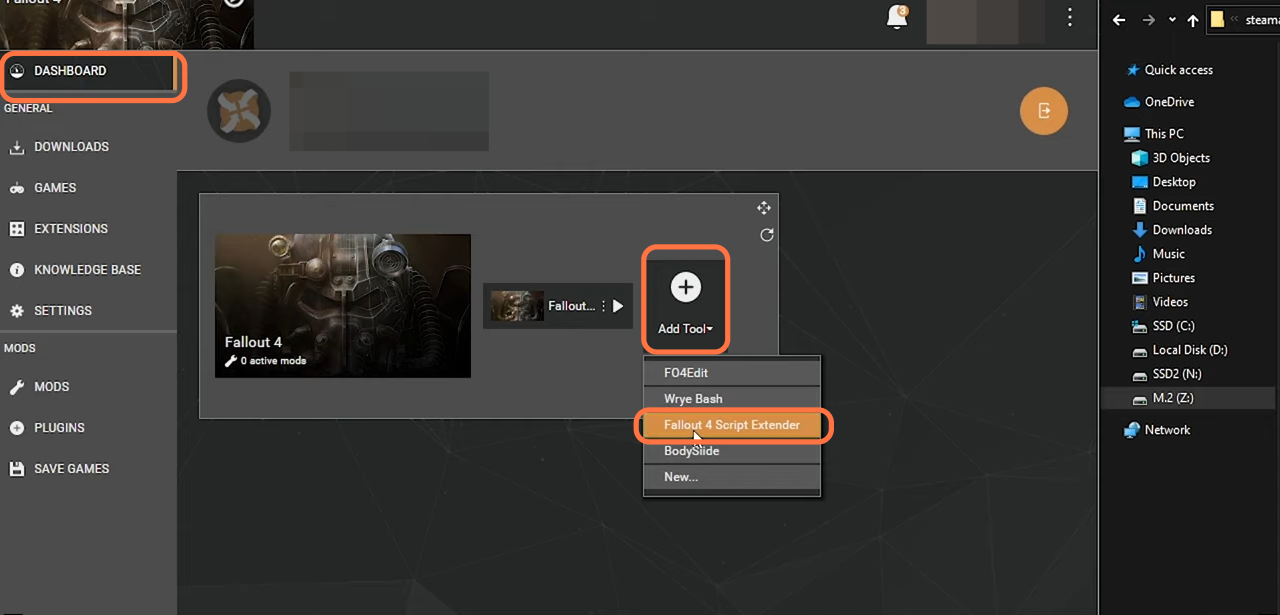
2. Now let’s install it with Vortex Mod Manager, open the Vortex, and navigate to the Dashboard > Add tool > Fallout 4 Script Extender. It will add it automatically.
3. If that doesn’t work, then you can try to add F4 Script Extender manually. Click on the Add Tool option and tap on New.
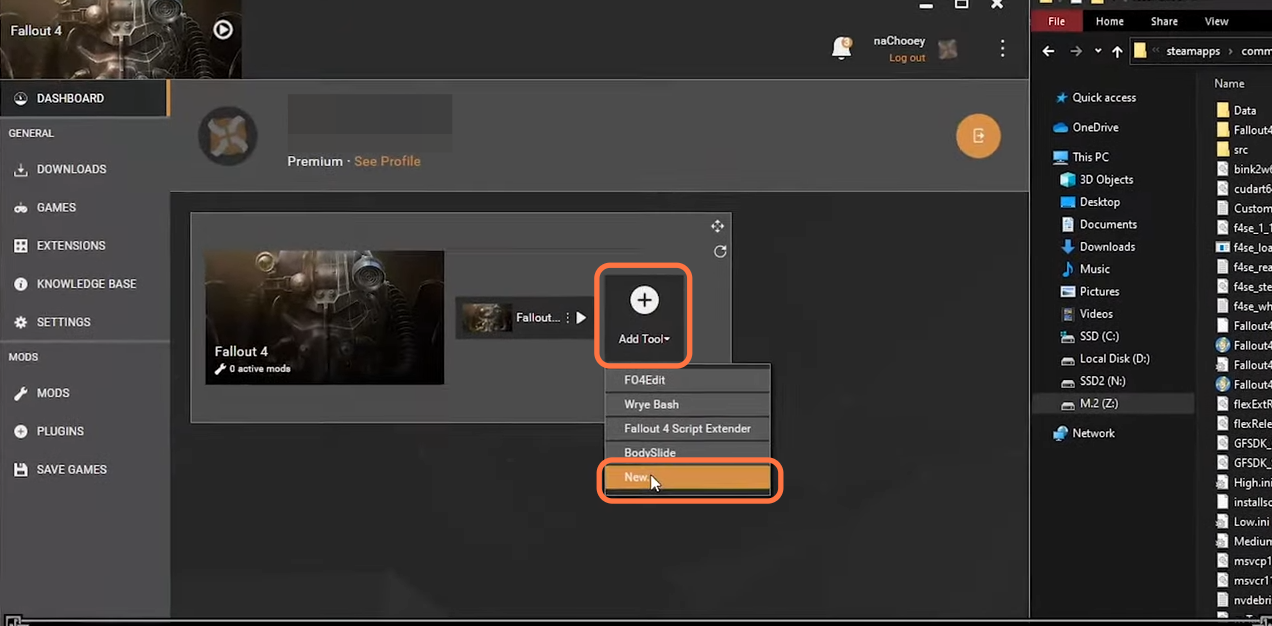
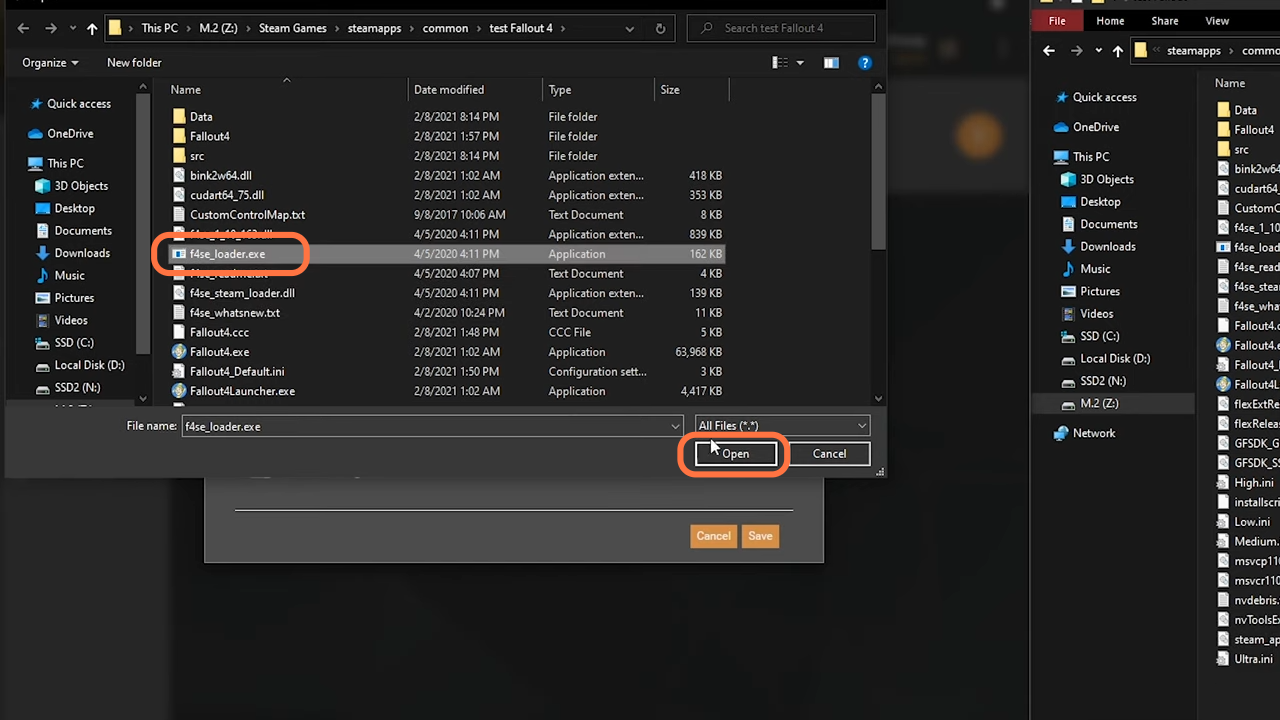
4. Type in F4SE in the text box for the name, click the folder next to Target and select “f4se_loader.exe” from the Fallout 4 directory then click open. Click on the save button and you are ready to play.
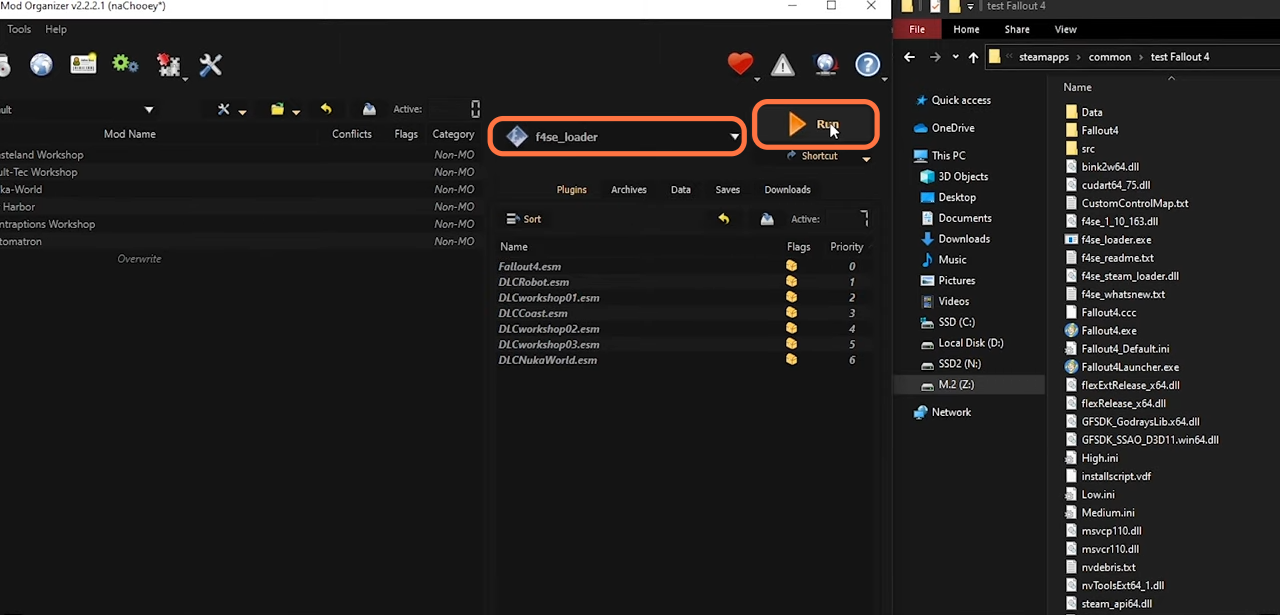
5. Now it’s time to install the F4SE with Mod Organizer. Open the MO, go to the dropdown menu and F4SE should automatically be on the list. You need to choose it and click on the Run button at the top right corner.
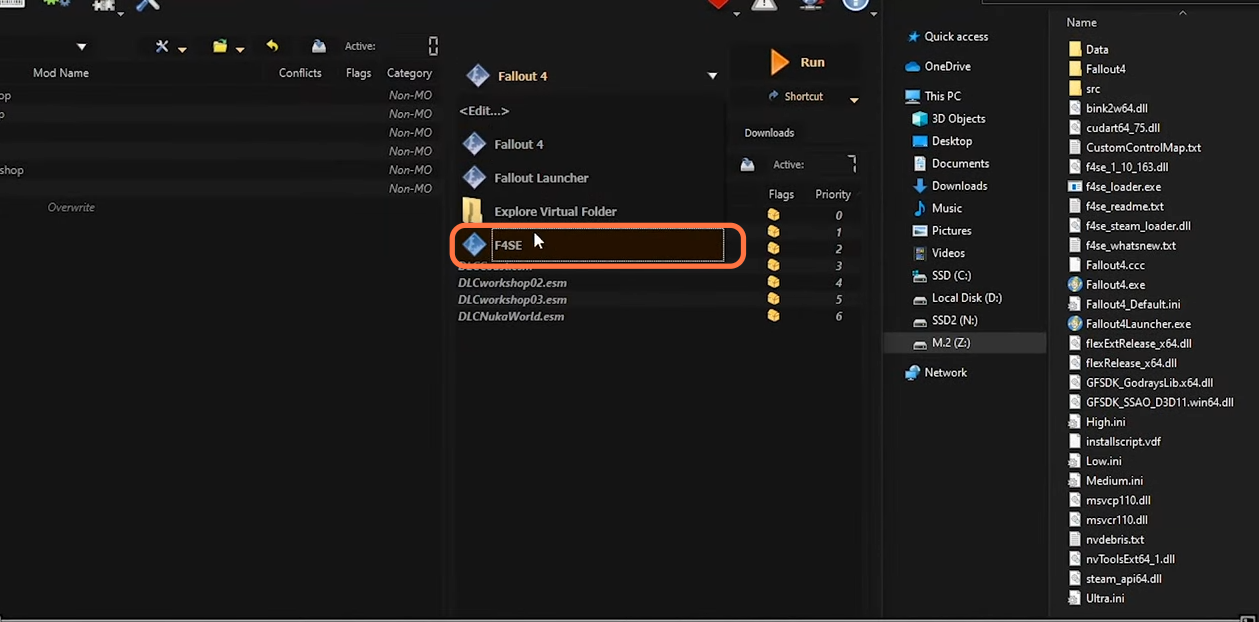
6. If that doesn’t work, you can try to add F4 Script Extender manually. You need to go to the Drop down menu and press the <Edit> option. You will find Modify Executables window where you need to click on the Plus icon and then select “Add from file”. Choose the f4se_loader.exe file and click the open button, then check the box against the “Use application’s icon” and press the Apply button.

7. Now choose the f4se_loader.exe from the drop-down menu and you can play by pressing the Run button at the top right corner.