For players who relish decking out their GTA V characters with a touch of bling, the ‘All Ice Everything’ mod is a must-have for them. This extensive mod brings an array of accessories including earrings, watches, chains, grills, glasses, gold teeth, rings, and bracelets, allowing players to add a personalized touch to their in-game heroes.
Step 1: Downloading the Mod
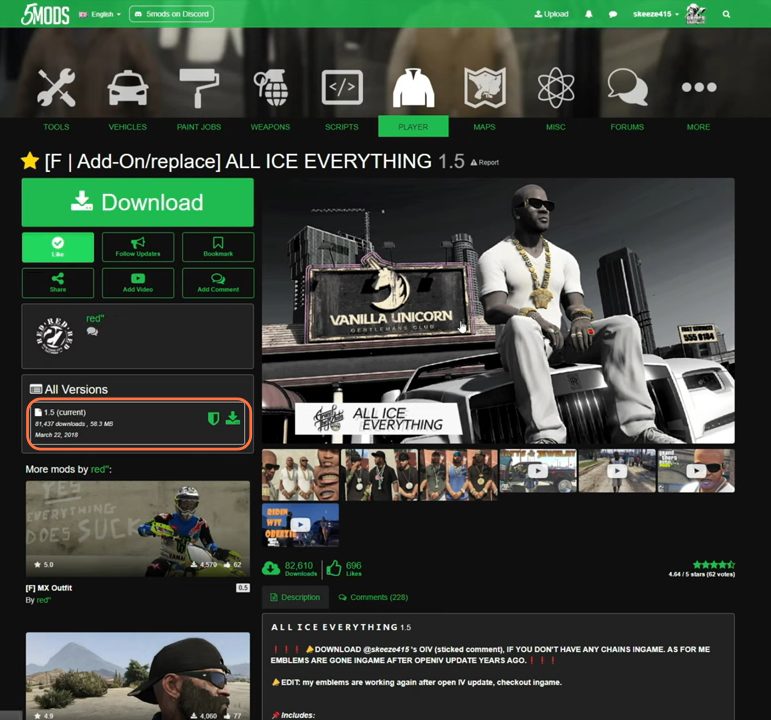
- To experience the style-enhancement of in-game characters, begin by downloading the ‘All Ice Everything’ mod from a trustworthy source such as gta5-mods.com.
- Head to the designated website, and under the ‘All Versions’ section, click the green download arrow icon corresponding to the current version. This action will fetch the mod’s compressed zip file.
Step 2: Download and Set Up the Necessary Components
- To ensure a seamless fusion of the mod’s expansive features, a handful of prerequisites must be in place. The mod calls for the incorporation of Script Hook V, Script Hook VDotNet, Open IV archive manager and MenyooSP Trainer.
- Open IV allows you to access and modify GTA V’s game files.
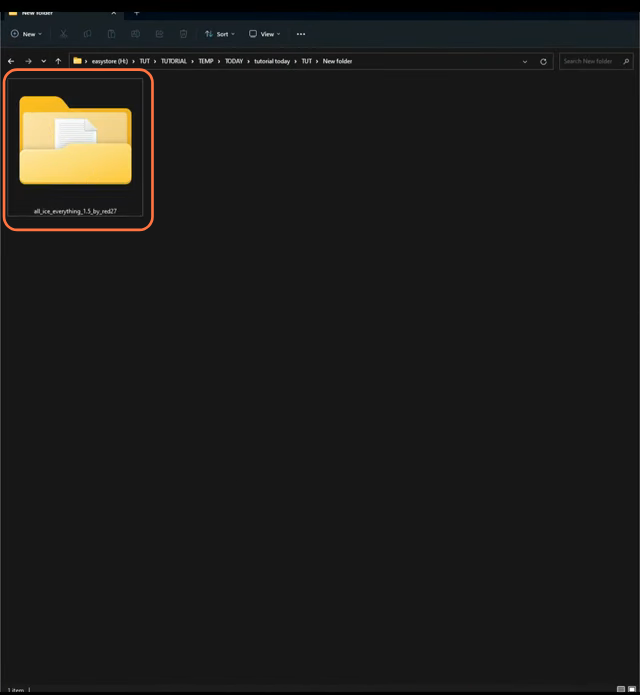
- Once all the files are in your possession, proceed by navigating to your downloads folder, for installation.
Step 3: Launching Open IV
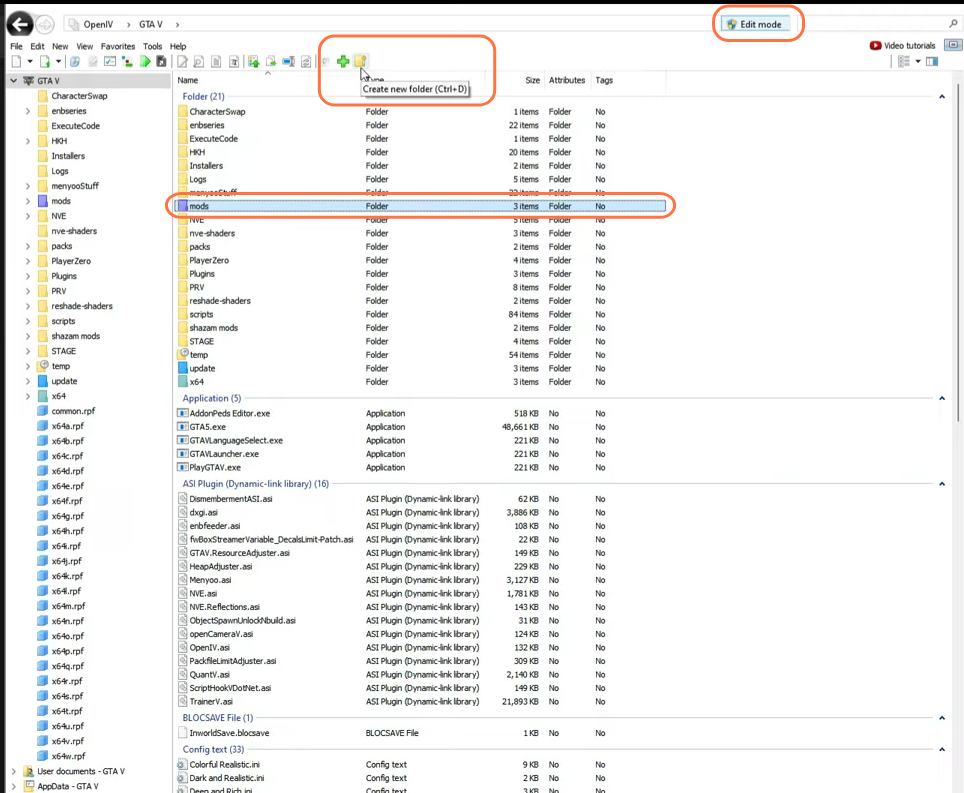
Initiate the Open IV application, ensuring its synchronization with your GTA V installation directory. Remember to activate the Edit Mode within the application, as this unlocks the capability to modify game files as needed. In your GTA V directory, there should be a ‘mods’ folder. If it’s absent, you can create one by clicking the ‘+’ icon in the toolbar and naming it ‘mods’ from the Open IV.
Step 4: Unveiling the Downloaded Mod
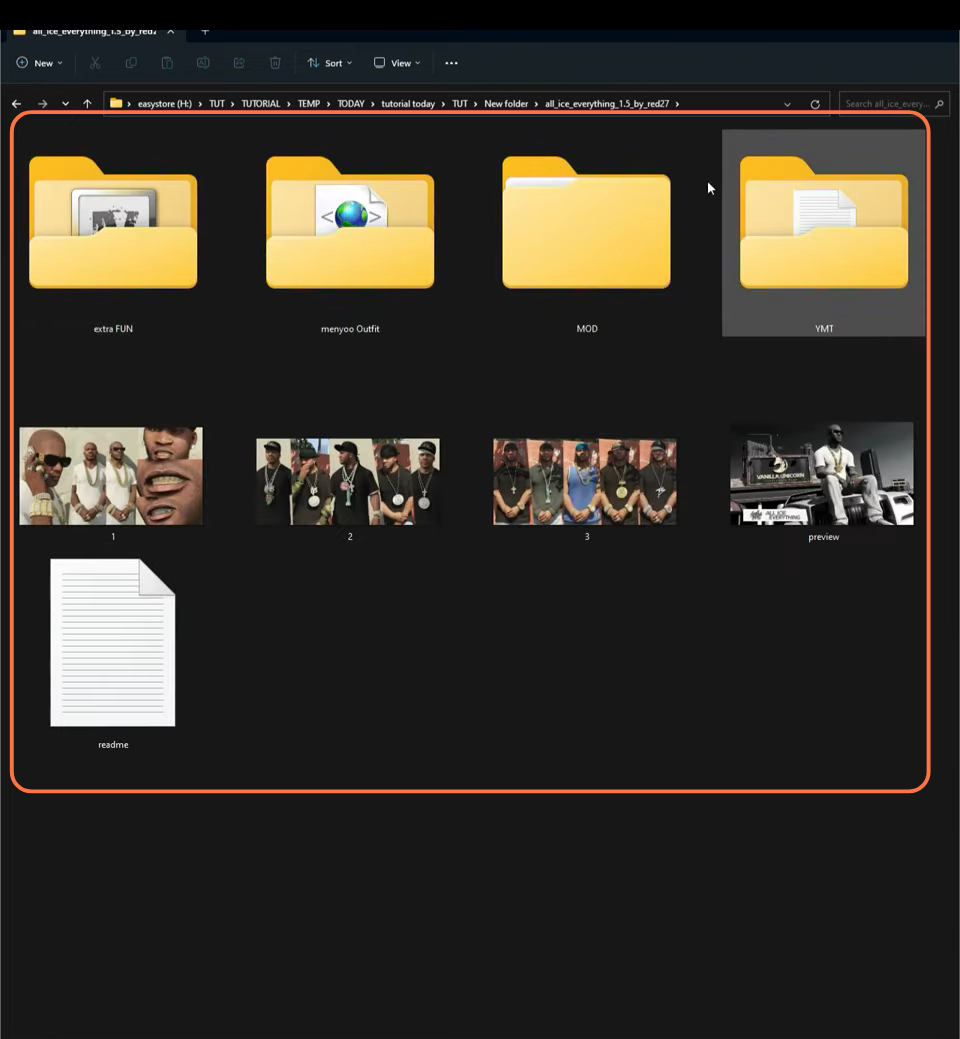
Navigate to the ‘All_Ice_Everything’ folder within your downloads repository. Inside this folder, you’ll encounter four distinct folders: Extra FUN, menyoo Outfit, MOD, and YMT. While the first folder is optional, the remaining three are essential and must be installed.
Step 5: Enhancing the Wardrobe with ‘menyoo Outfit’
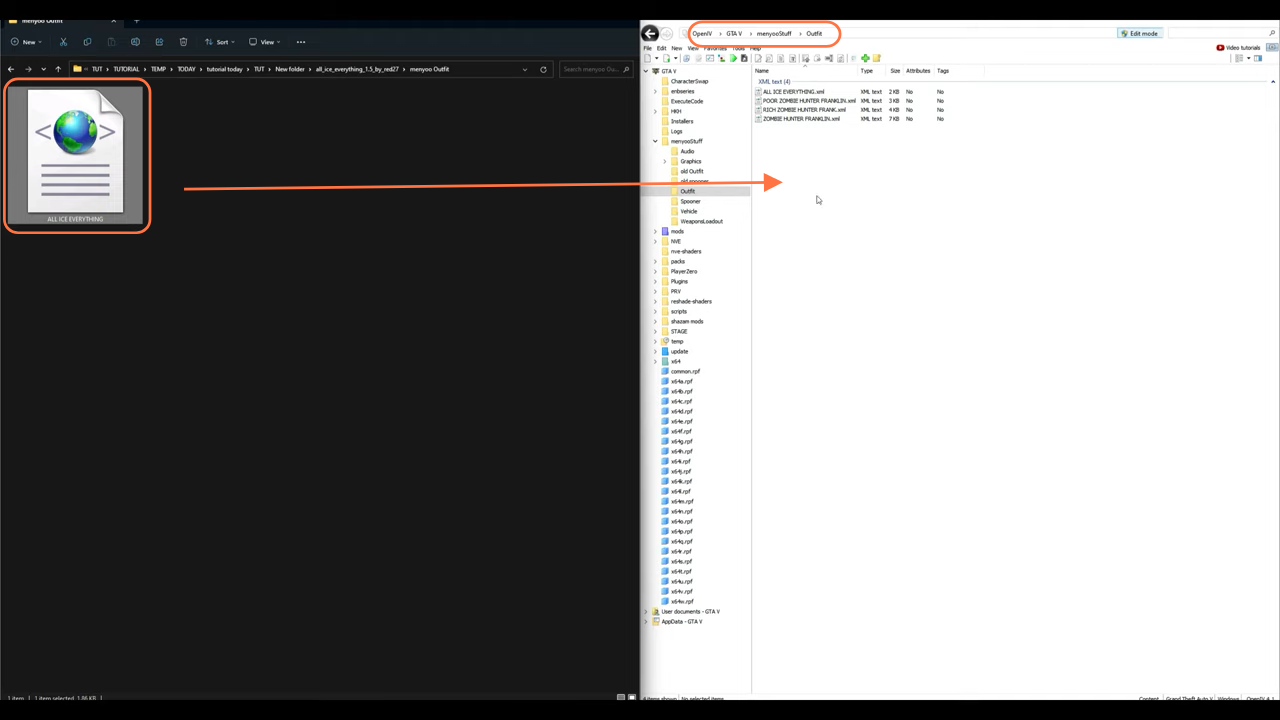
Begin by focusing on the ‘menyoo Outfit’ folder, housing an XML file. Navigate to GTA V > menyooStuff > Outfit within Open IV, and drop the selected XML file here to enrich your character’s wardrobe.
Step 6: Accessorize with the ‘MOD’ Folder
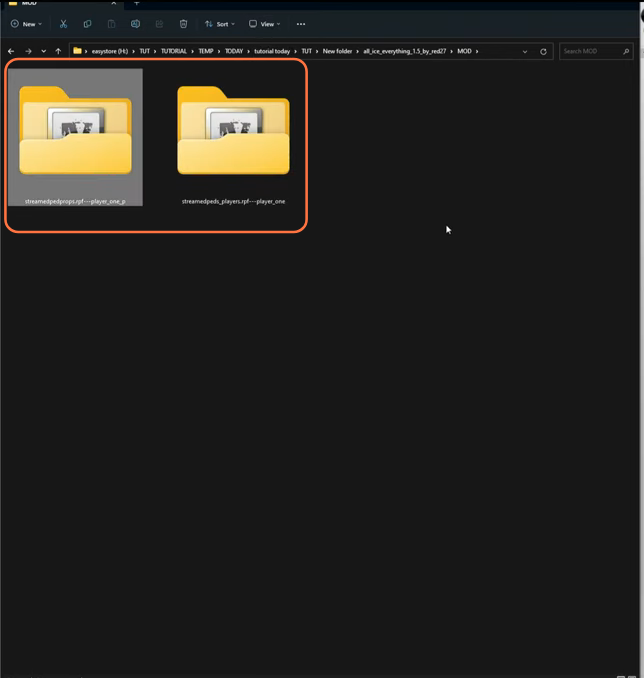
Head back to the main folder and delve into the MOD folder. Inside, you’ll find two subfolders: player_one_p and player_one. These contain props such as sunglasses and various jewellery items.
Step 7: Seamlessly Installing the Mod
In the Open IV application, follow this sequence to install the mod seamlessly:
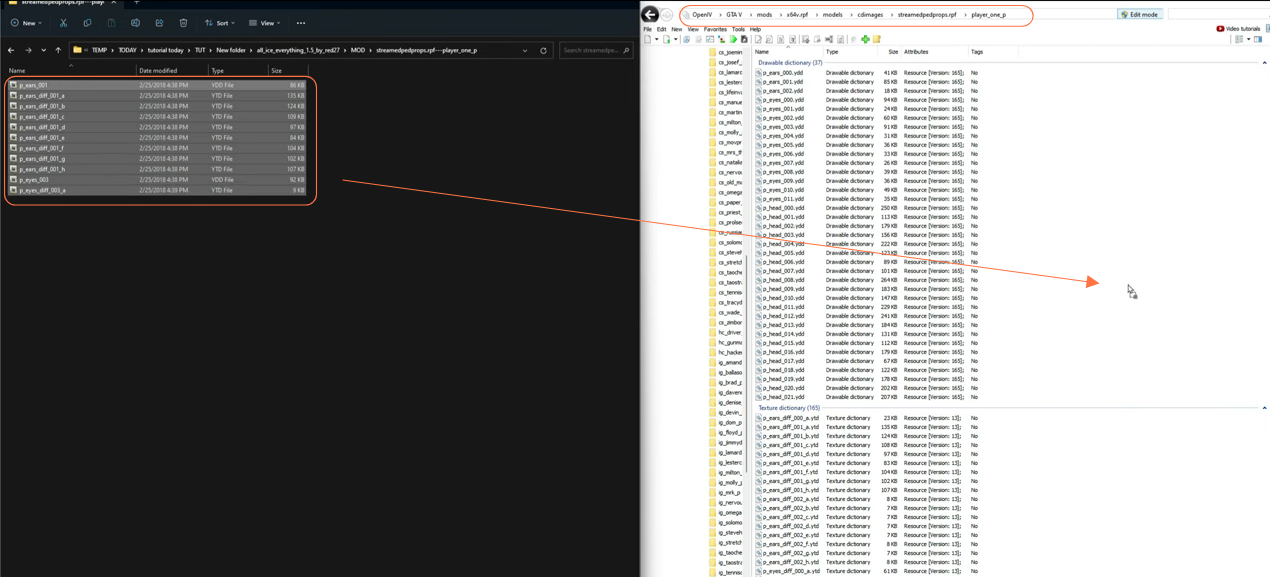
- Navigate to mods > x64v.rpf > models > cdimages > streamedpedprops.rpf > player_one_p using the side column.
- If you’re not already in the “mods” folder, you might see a red banner suggesting you to ‘Copy to “mods” folder’ or ‘Show in “mods” folder’. This is where game files are stored.
- Efficiently drag and drop all the YTD files into the player_one_p folder within the Open IV directory.
Step 8: Integrating the ‘player_one’ Folder
Next, open the ‘player_one’ folder within the MOD folder to copy its contents to the following Open IV directory:
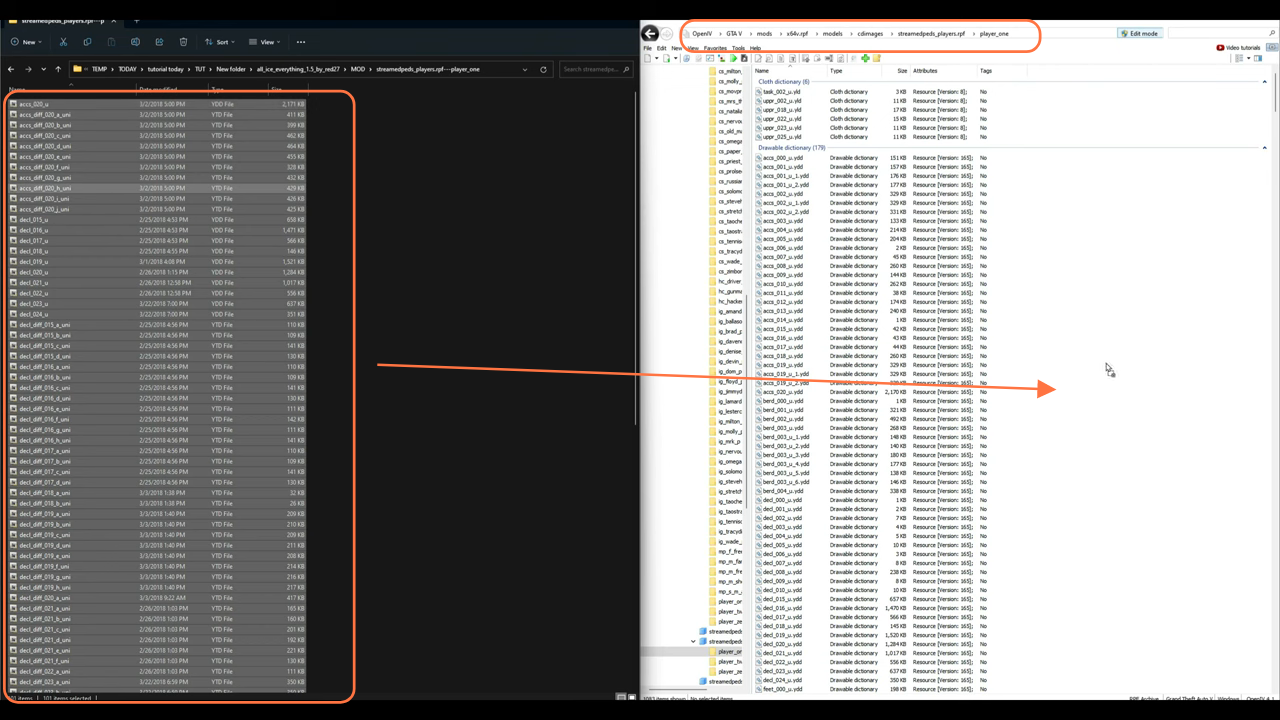
- Navigate to mods > x64v.rpf > models > cdimages > streamedpeds_players.rpf > player_one using the side column.
- Similar to earlier, If you’re not already within the “mods” folder, a red banner might appear, prompting you to either ‘Copy to “mods” folder’ or ‘Show in “mods” folder’. This is the location where the game files are stored.
- Swiftly drag and drop both the YTD and YDD files into the player_one folder within Open IV’s directory.
- After successfully installing the Jewellery items, navigate to the ‘File’ option in the upper left corner of Open IV and select ‘Close All Archives’.
Step 9: Configuring the YMT File
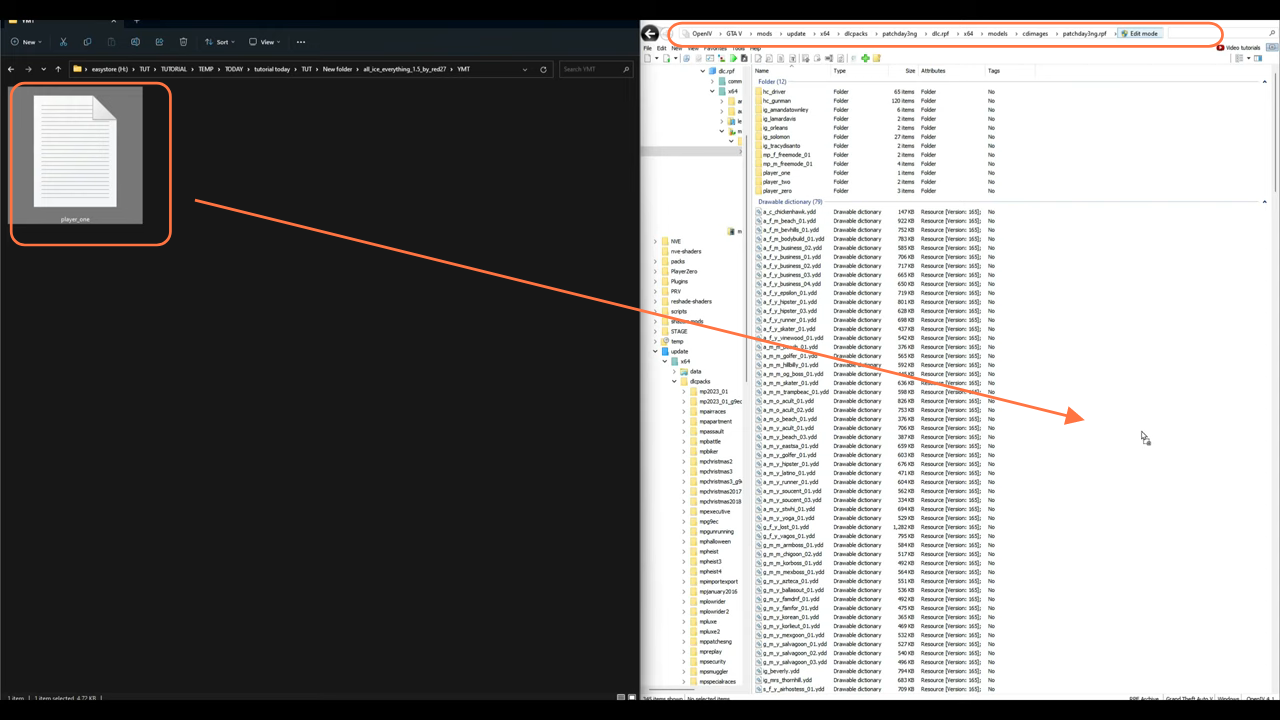
Proceed to the YMT folder, containing a lone file. To place this file, navigate within Open IV to the following directory:
- Now navigate to this path: mods > update > x64 > dlcpacks > patchday3ng > dlc.rpf > x64 > models > cdimages > patchday3ng.rpf.
- Same way if you’re not already in the “mods” folder, a red banner might prompt you to ‘Copy to “mods” folder’ or ‘Show in “mods” folder’.
- Simply drag the solitary YMT file into the directory opened within Open IV.
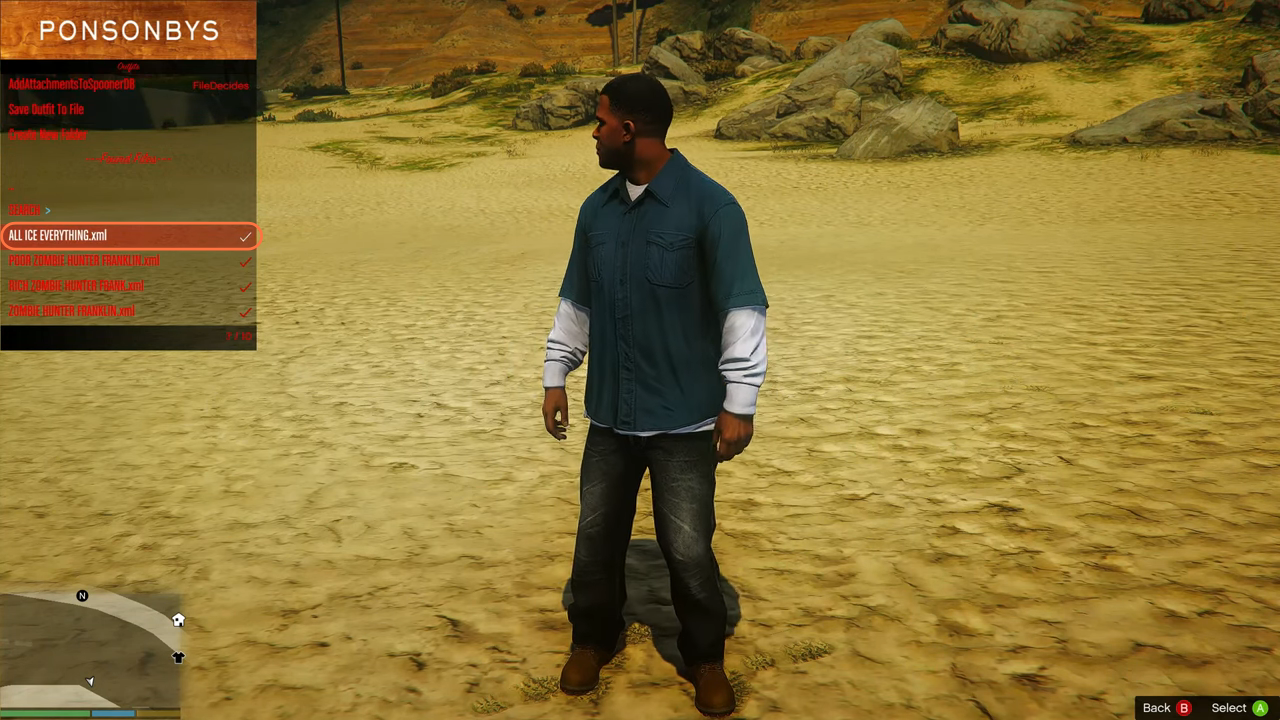
Step 10: Testing and Exploring the Mod
With everything in place, run the game to test your newly installed mod. Upon spawning in the game, press ‘F8’ twice to access the Menyoo menu. Once the Menyoo trainer menu appears in the upper left corner, navigate to Player Options and select Wardrobe. Choose Front View, then scroll down and opt for Outfit, specifically the “All Ice Everything.xml” option. This grants you access to a plethora of Clothing and Attachments choices, allowing you to explore and personalize your character’s appearance to the fullest.