In this guide, you will find out how to install the Gang War [.NET] in Grand Theft Auto 5.
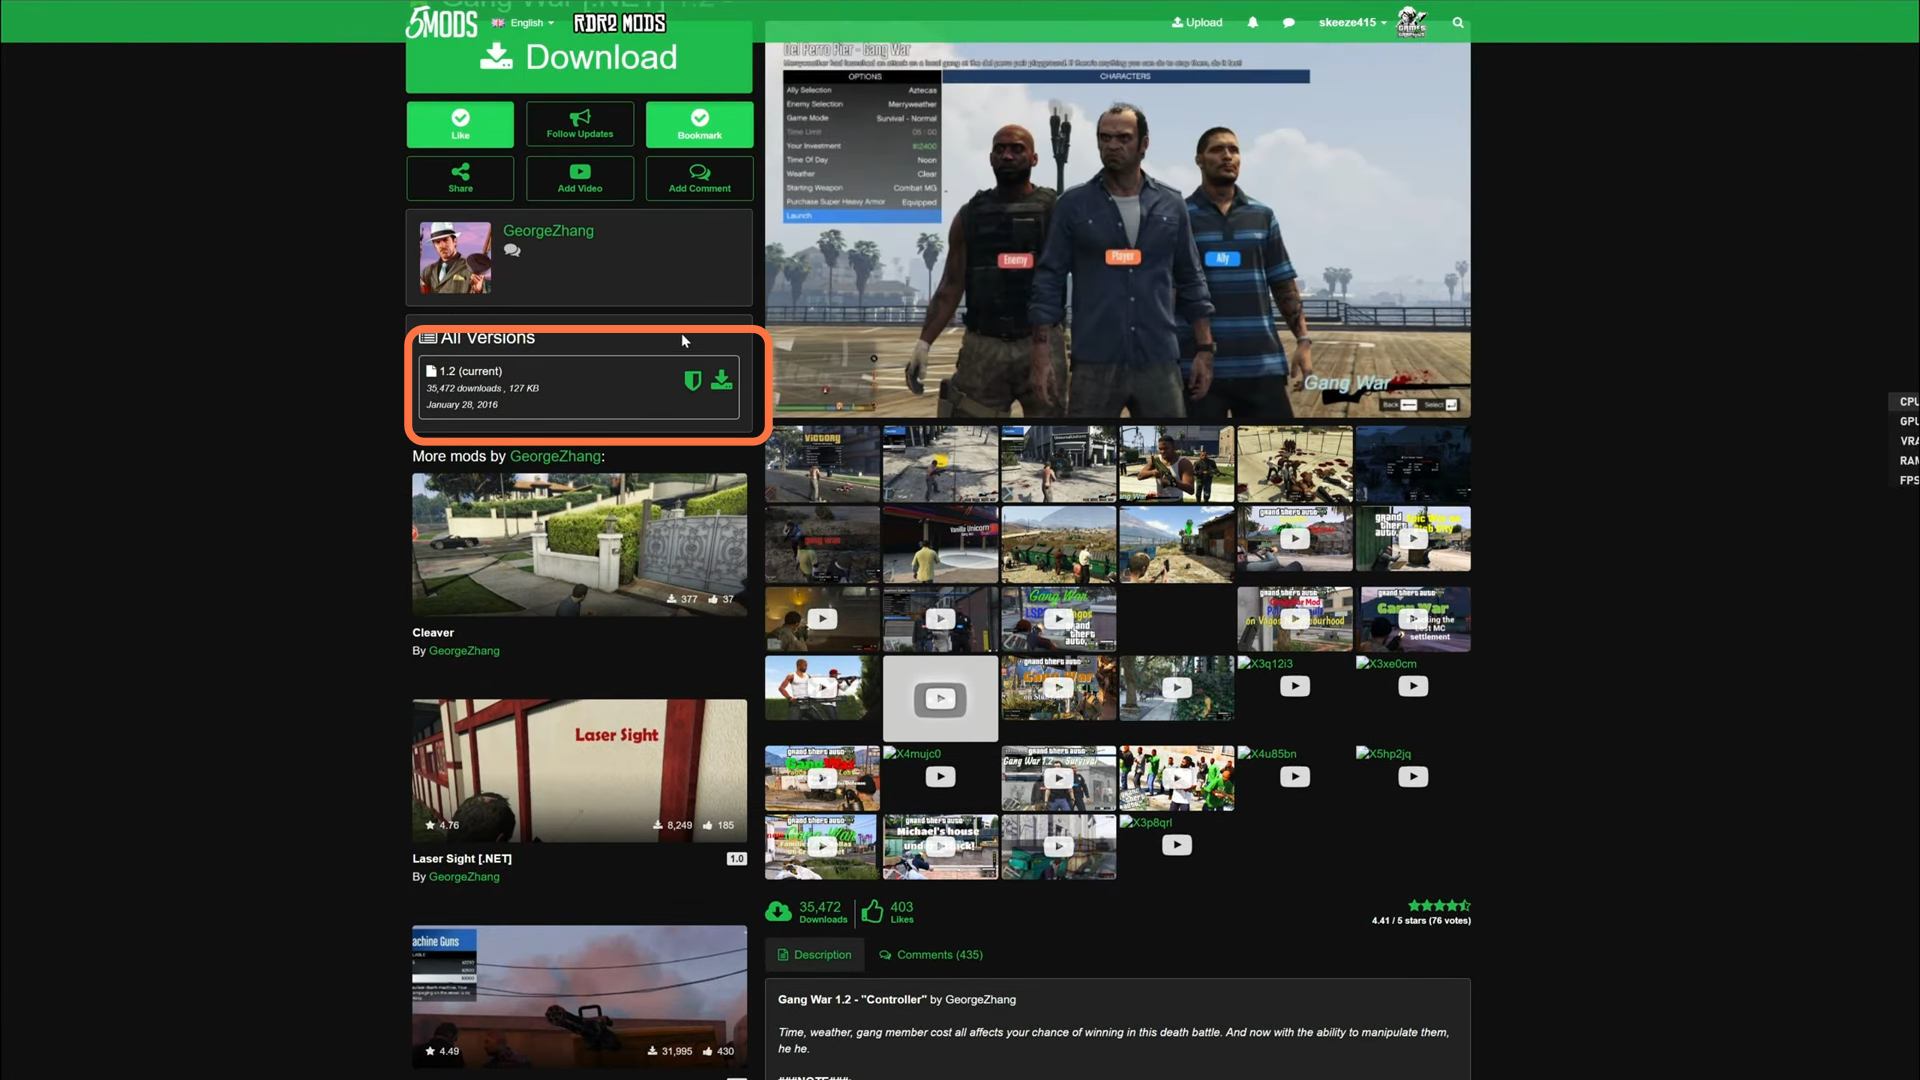
2. The things you will require for this mod to work are “Scripthookv”, “ScripthookDotNet” and “Native UI 1.9.1”. You can download Scripthookv from “http://www.dev-c.com/gtav/scripthookv/“, ScripthookDotNet from “https://github.com/crosire/scripthookvdotnet/releases” and ‘Native UI’ from “https://gtaforums.com/topic/809284-net-nativeui/“. Once you have installed the requirements and downloaded the Gang War [.NET]’ Mod, you have to go to the downloads folder to open the file.
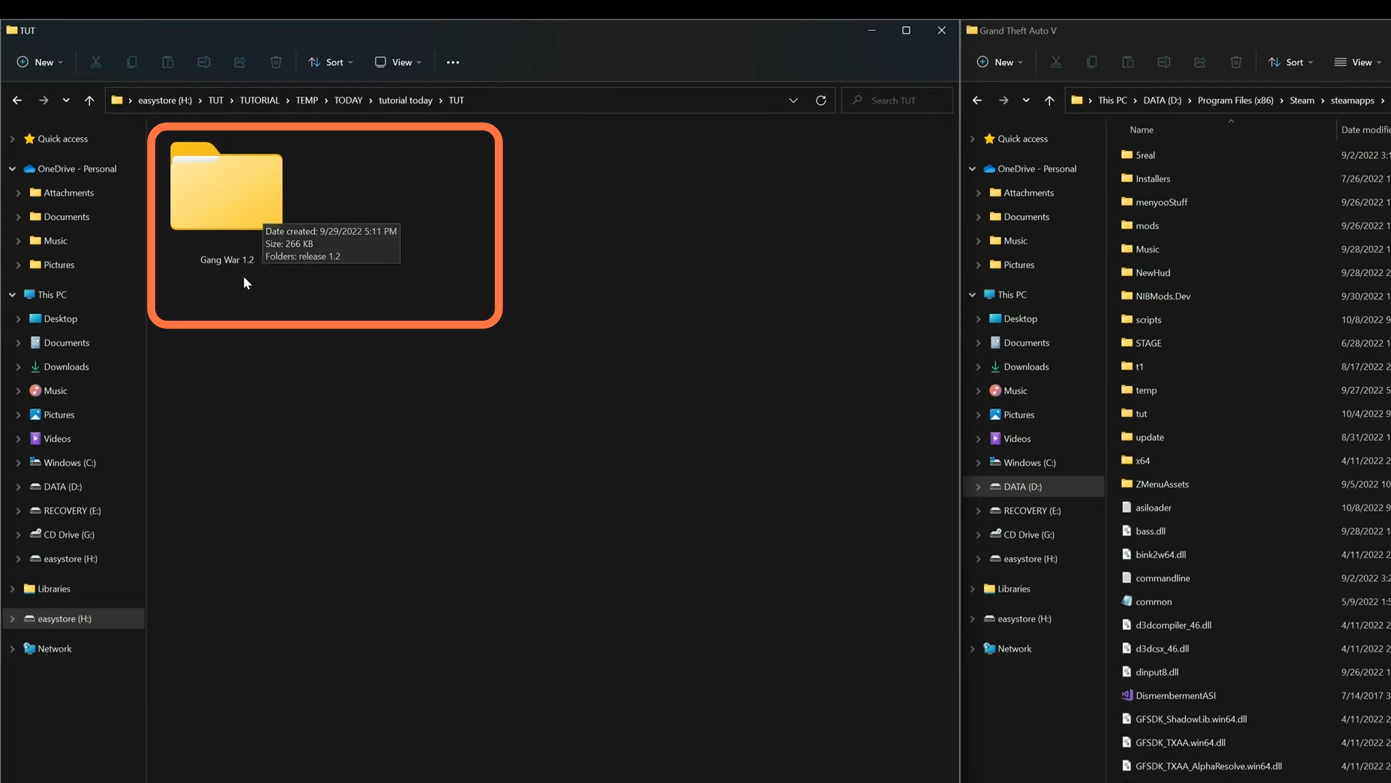
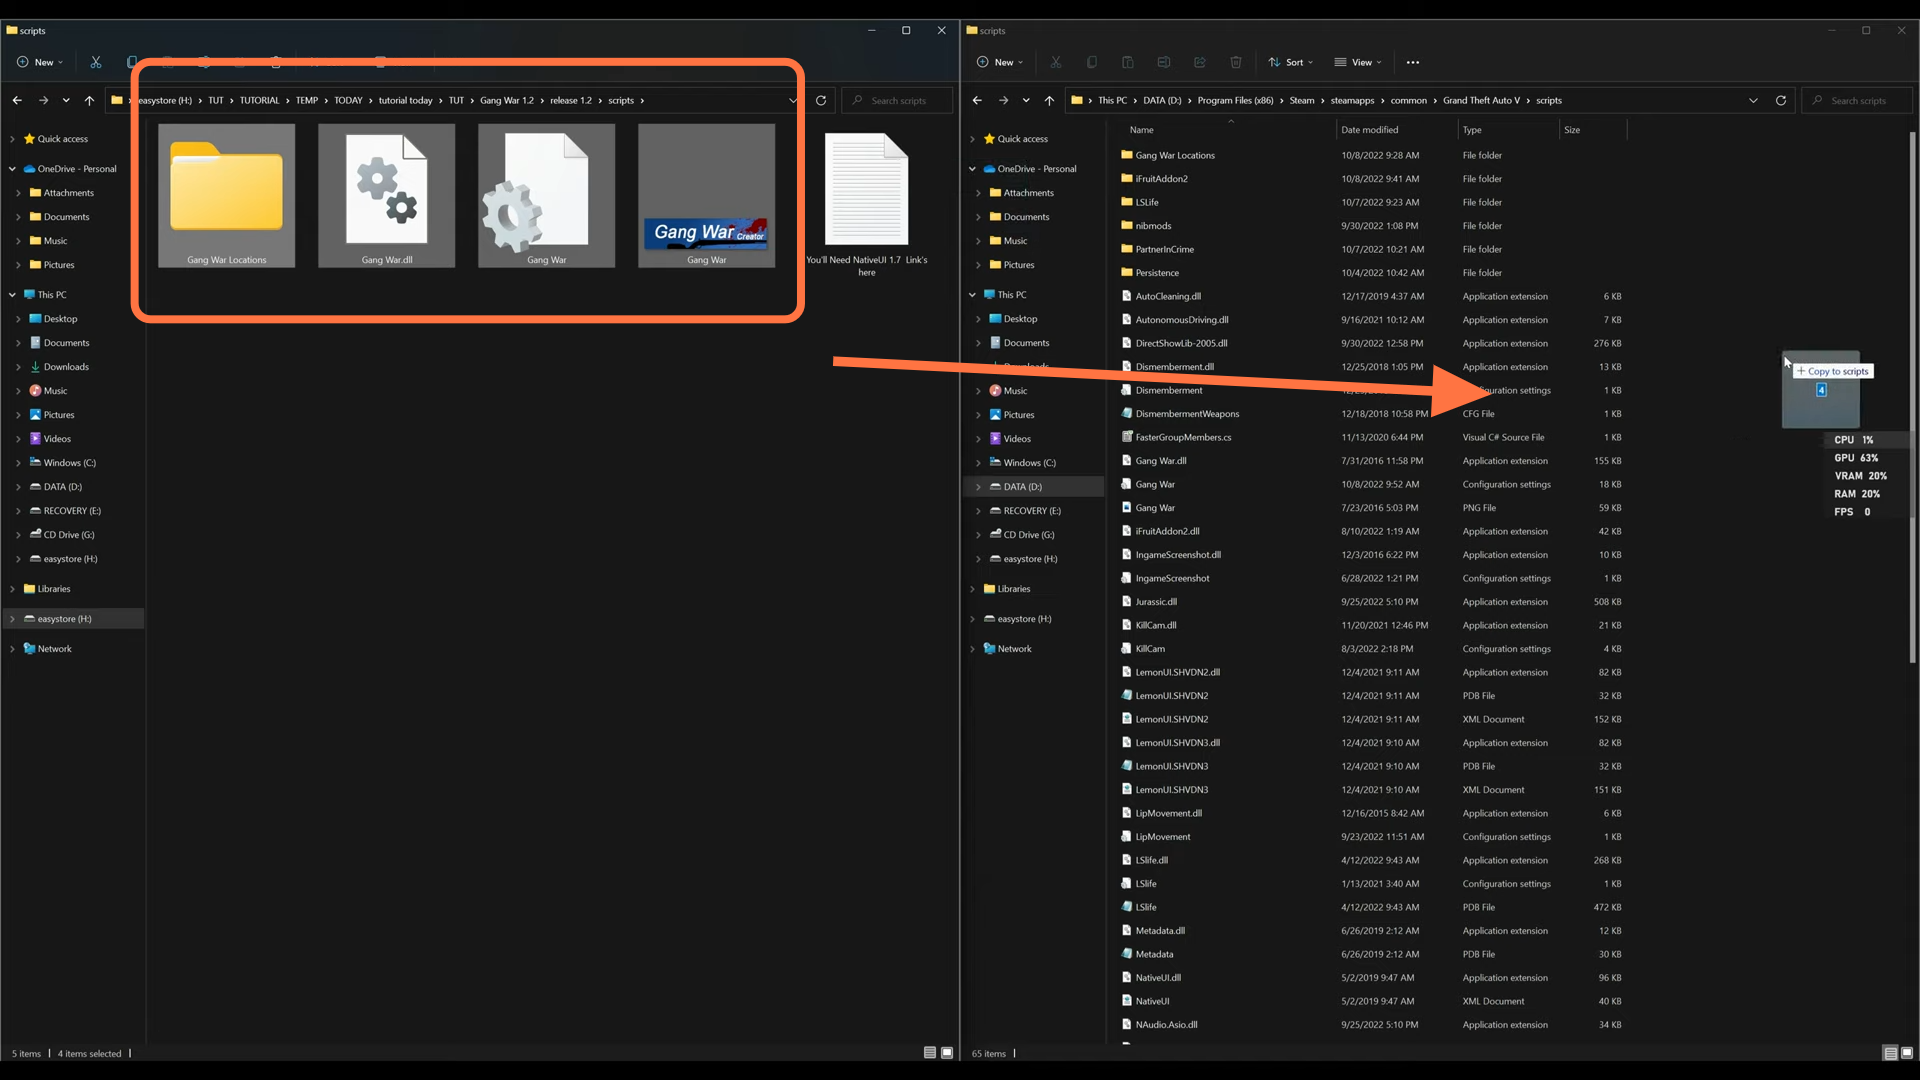
3. On the other hand, open the Grand Theft Auto V main directory side by side with the downloads folder. Then open the scripts folder and if you don’t find a scripts folder, then you need to create an empty folder and name it scripts with all small letters. After that, open the scripts folder.
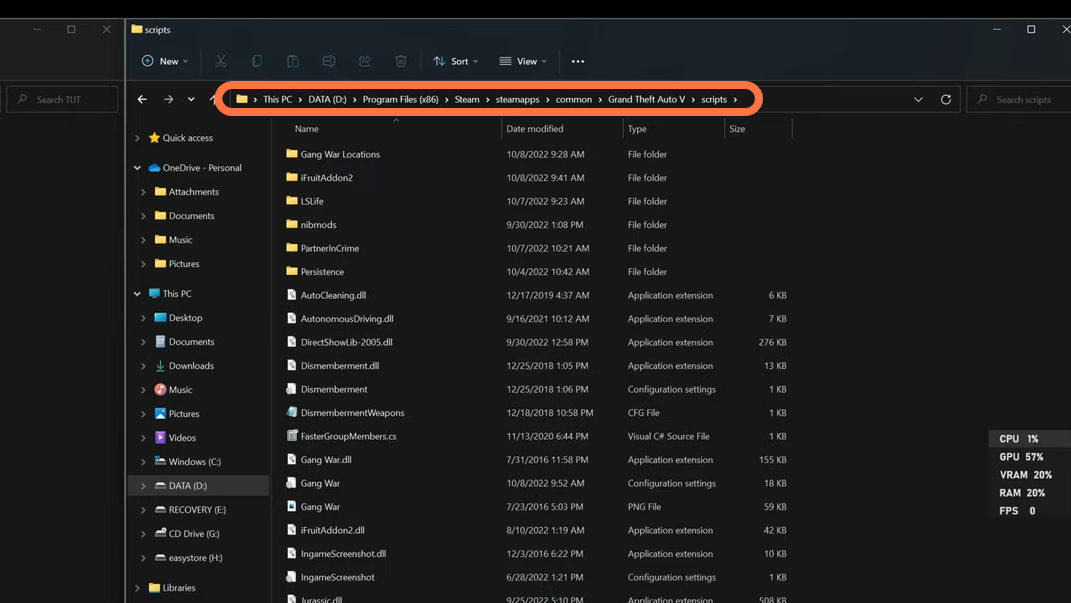
4. Now move back to your downloads folder, open the ‘Gang War’ folder and you will find another folder. Open it up, copy all the files and folders except the text document and drag them into the scripts folder of the GTA V main directory.
5. Once you are done with the installation, close all the windows and launch the game. After spawning into the game, you have to open the pause menu and check the map. You will find red skull blips next to each other on the map which represent gang wars.
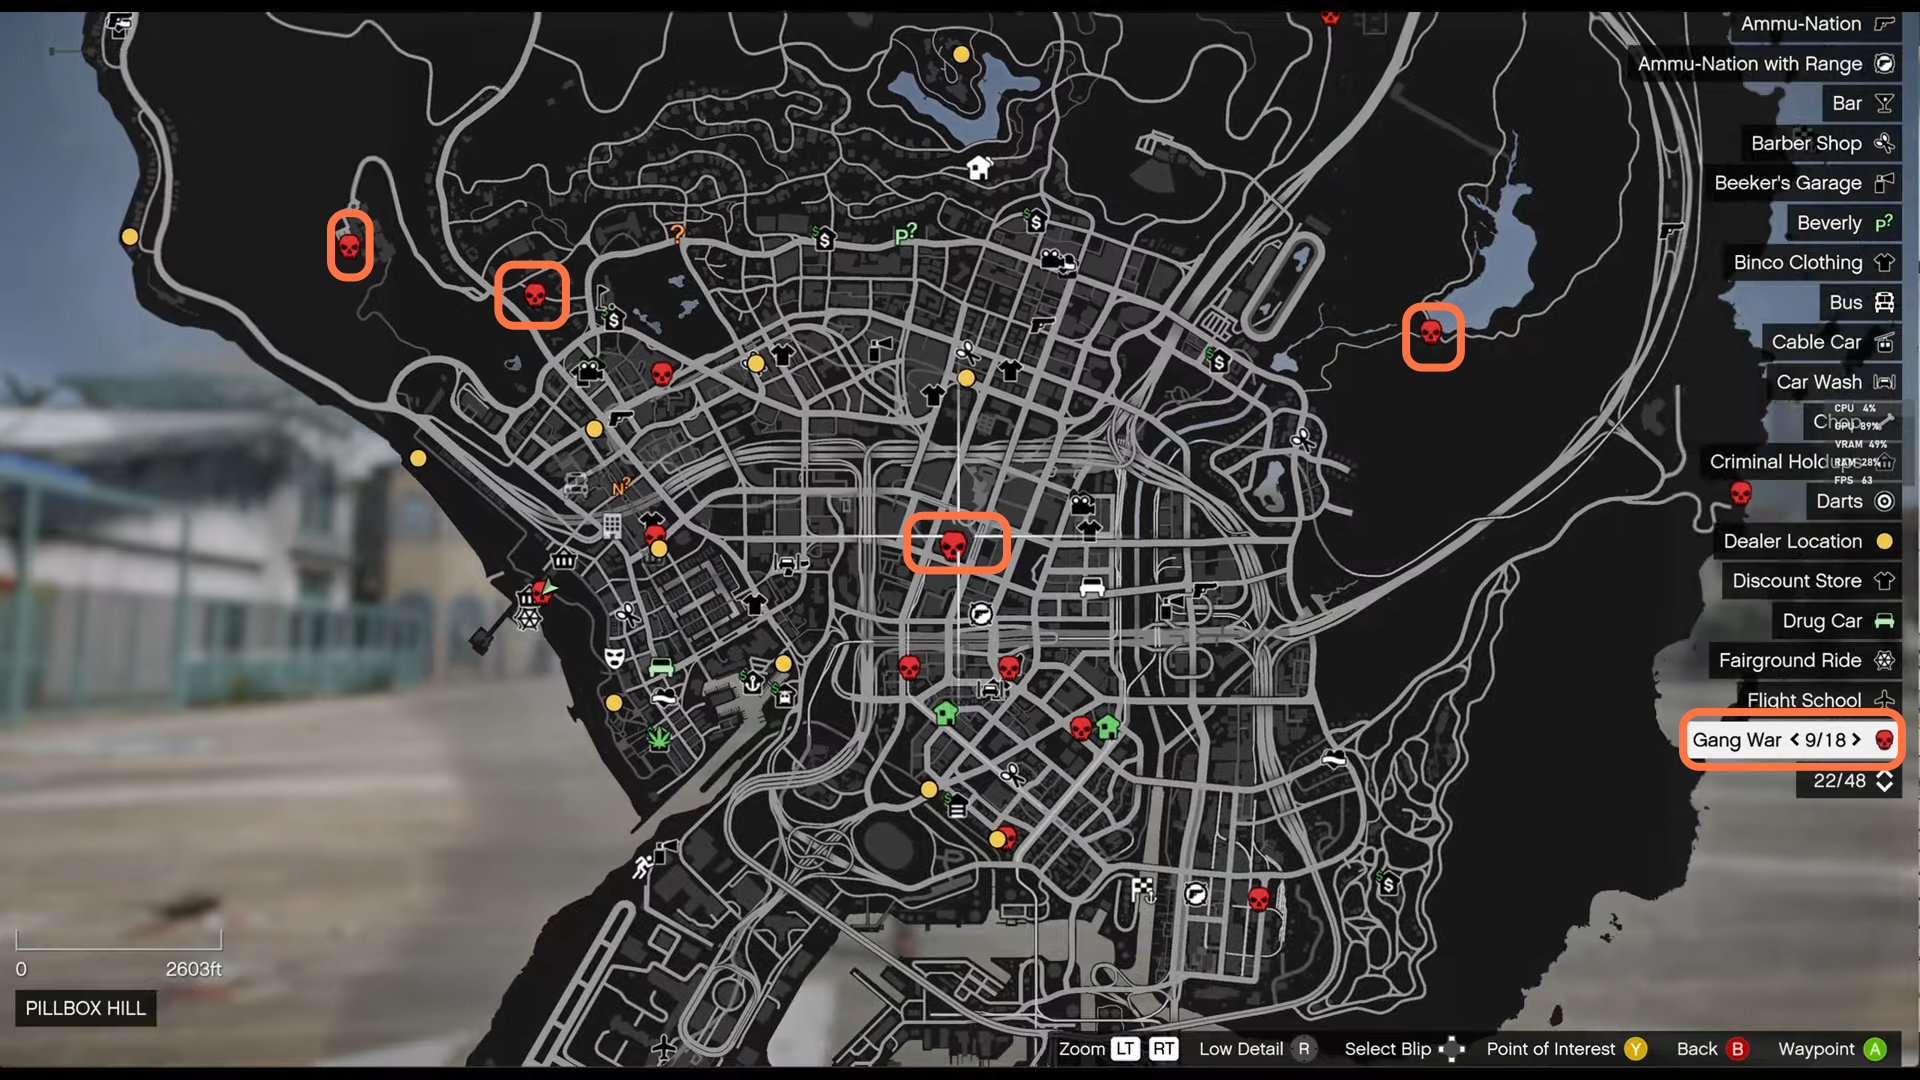
6. There are 18 gang wars that have been already created which are like game boards. You can also create your own as well. For the moment, you can start at the Del Perro Pier.
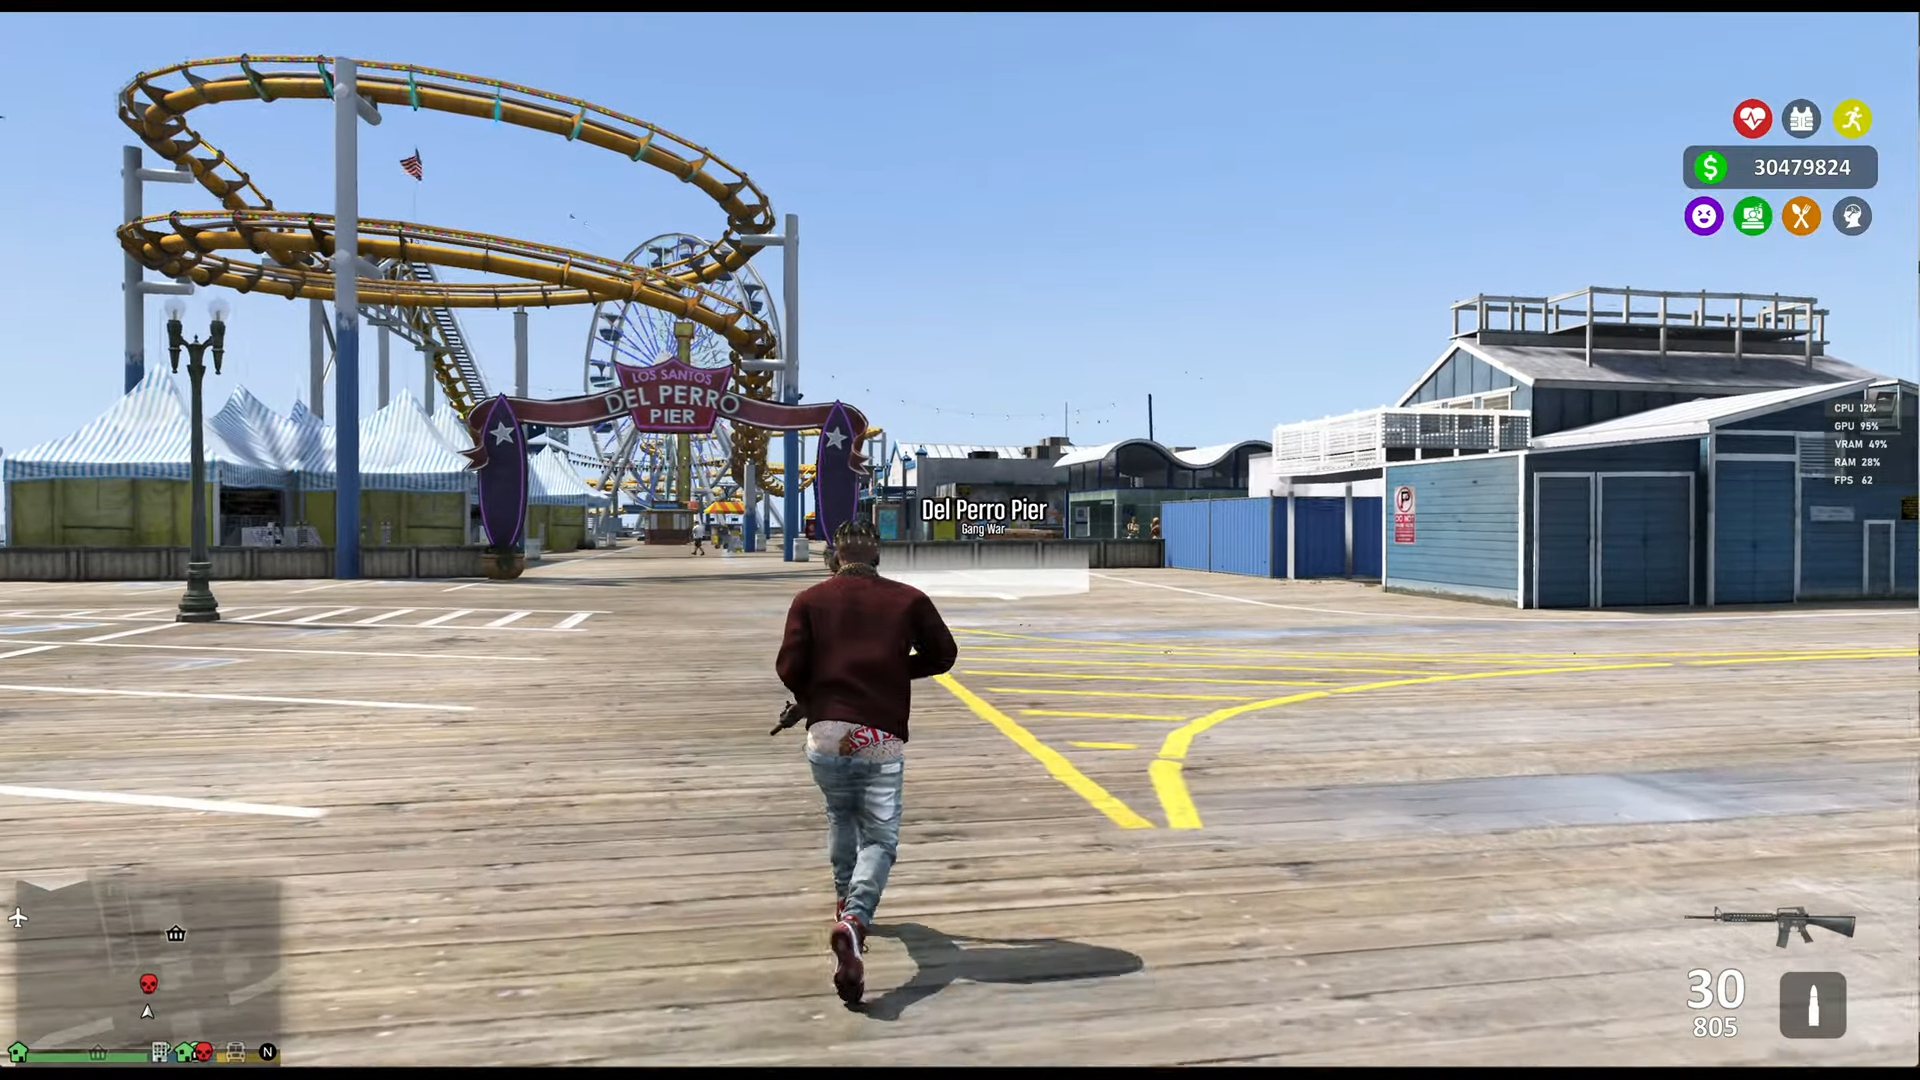
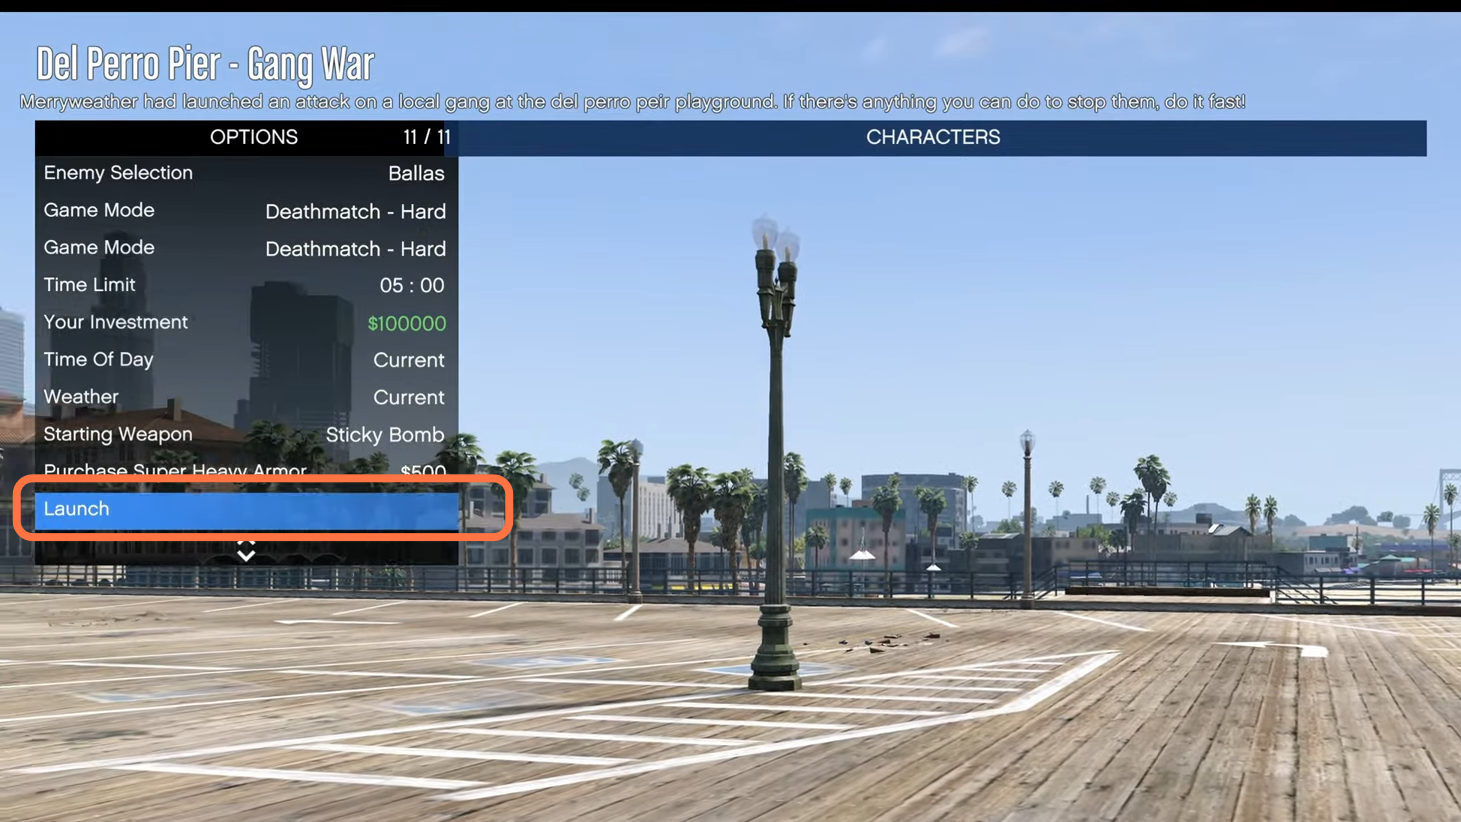
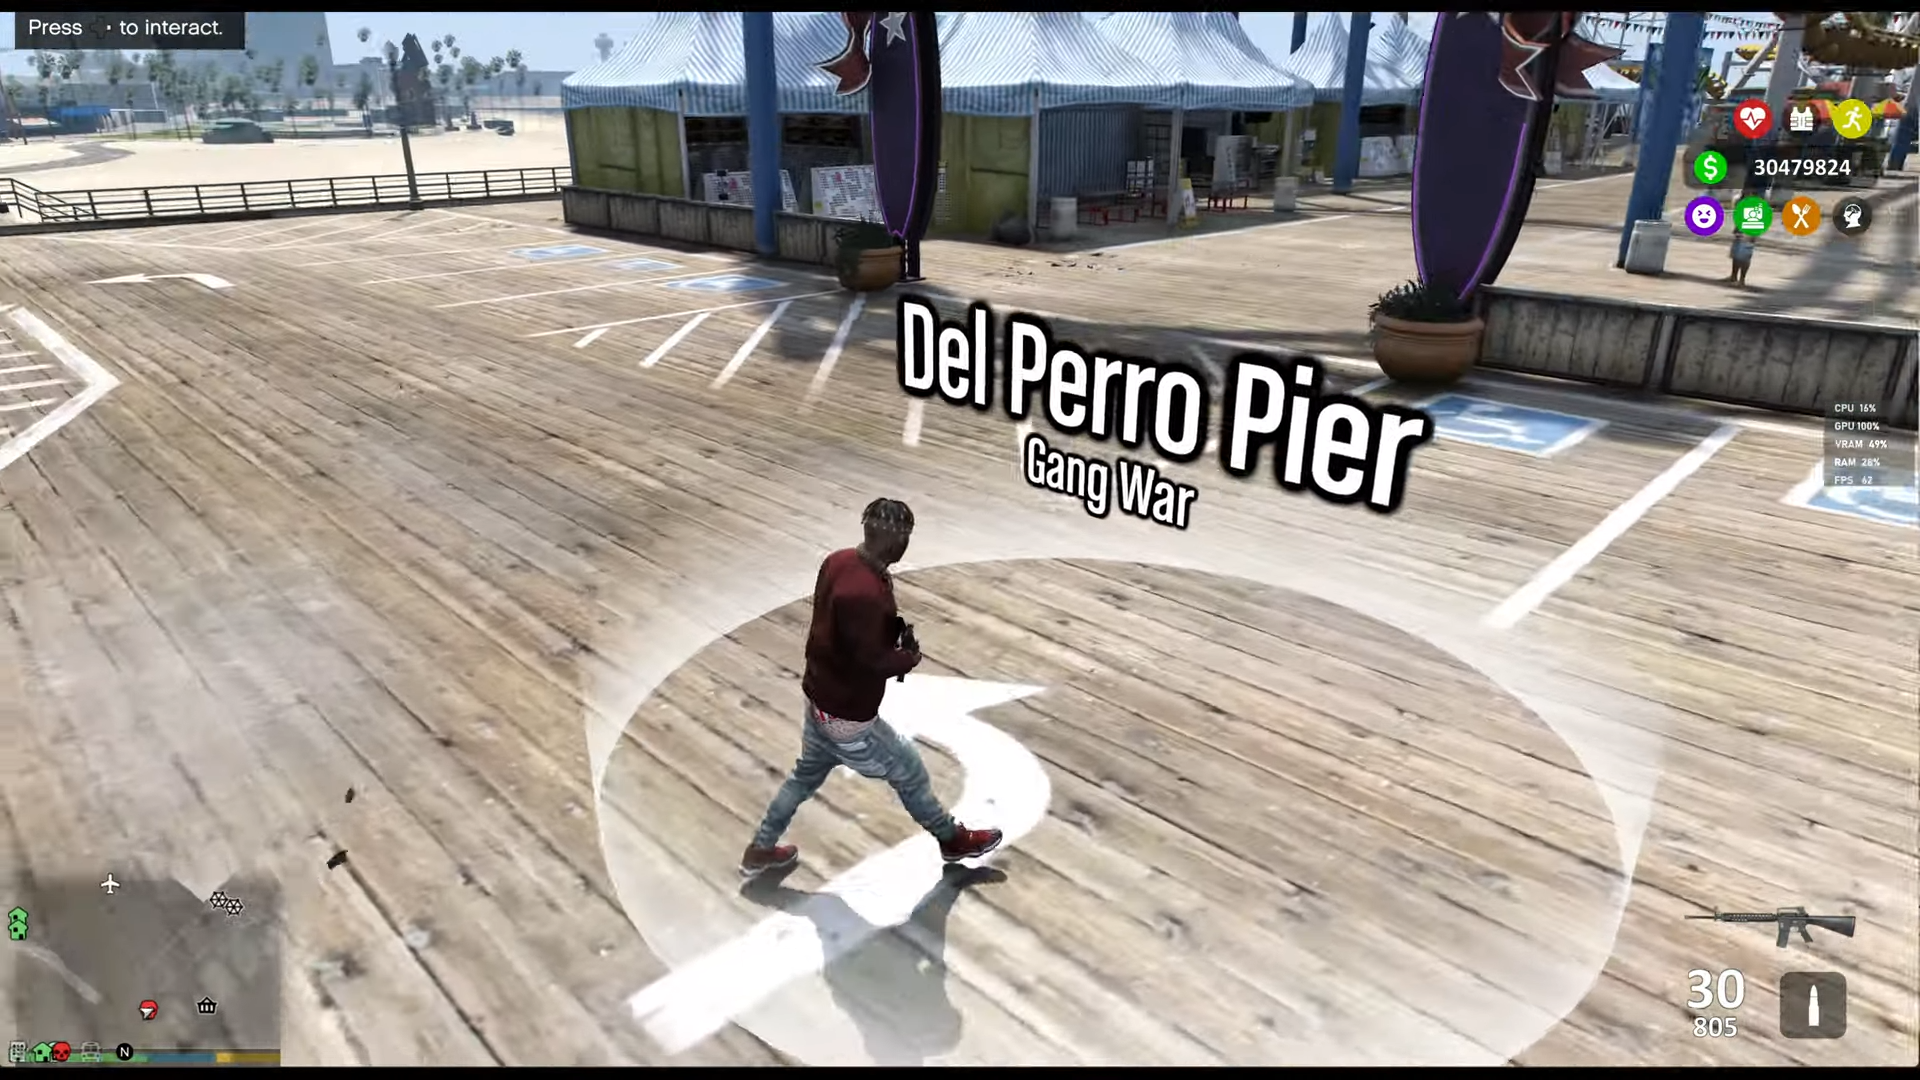
7. As you can see, right next to the white circle, there is the Del Piero Pier War Gang. You need to enter right into the white circle representing Del Perro Pier. When you enter the circle, you will get instruction about which button to press at the top left corner.
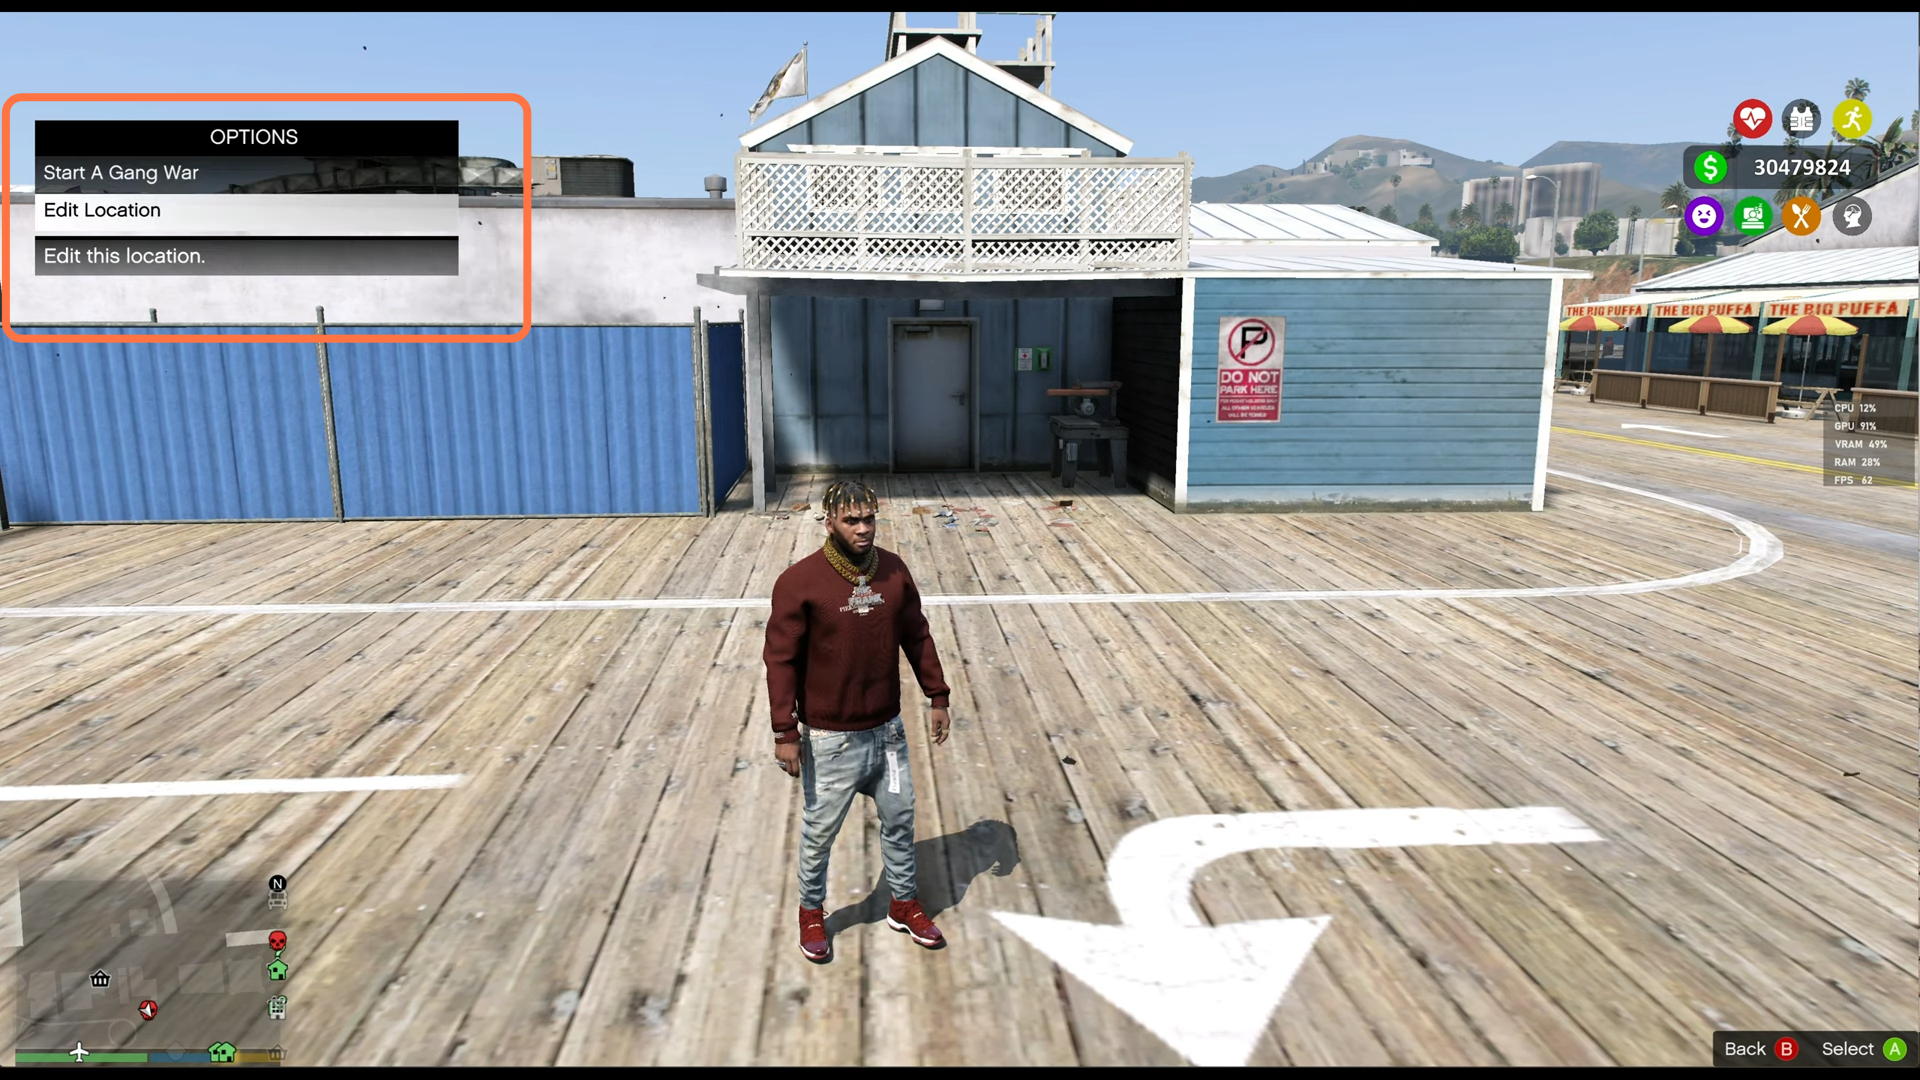
8. Once you’ve selected your gangs, then press the options button and a pop-up menu will open with two options, “start a gang war” and “edit location.” If you choose to edit, it will allow you to change which gangs are going to appear at this location.
9. When you choose to start a gang war, the screen will fade out and then back in. After some gang members drop down, you’ll have a short scene where you’re speaking with your accomplice.

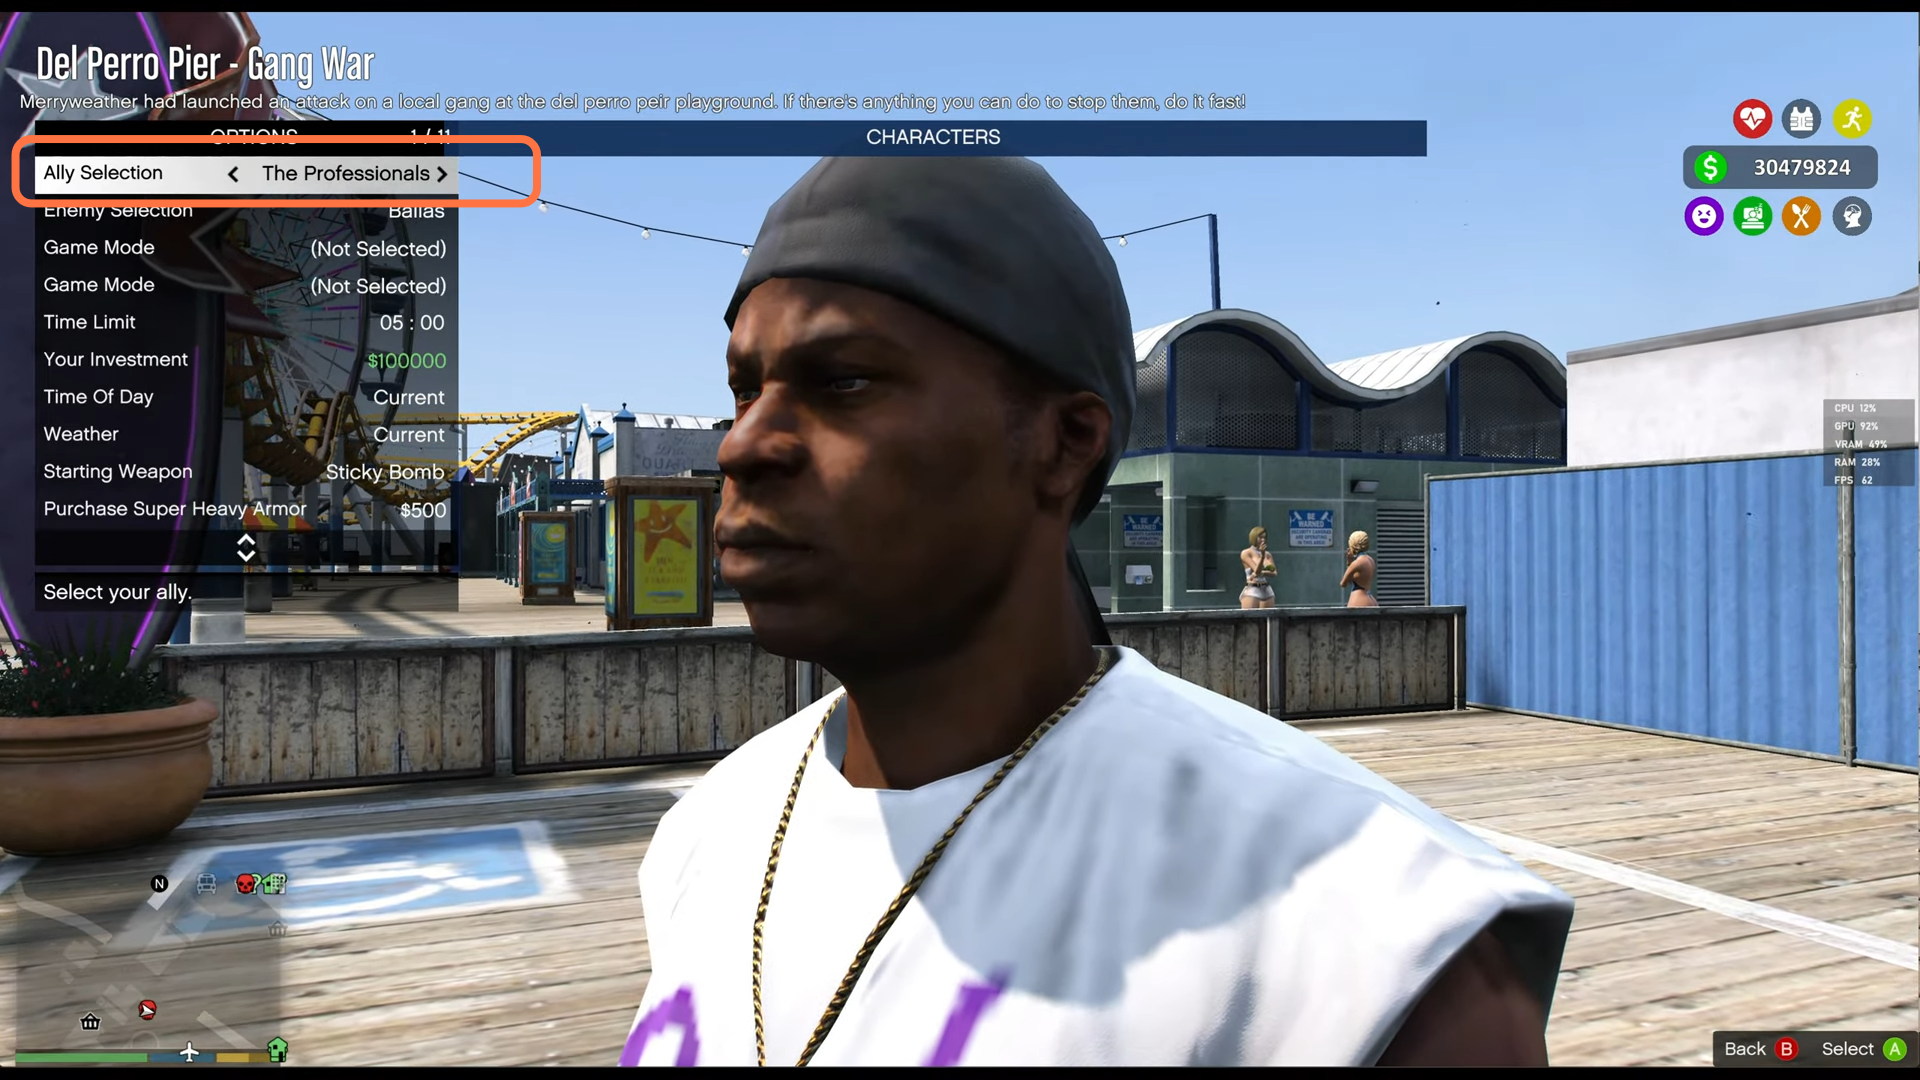
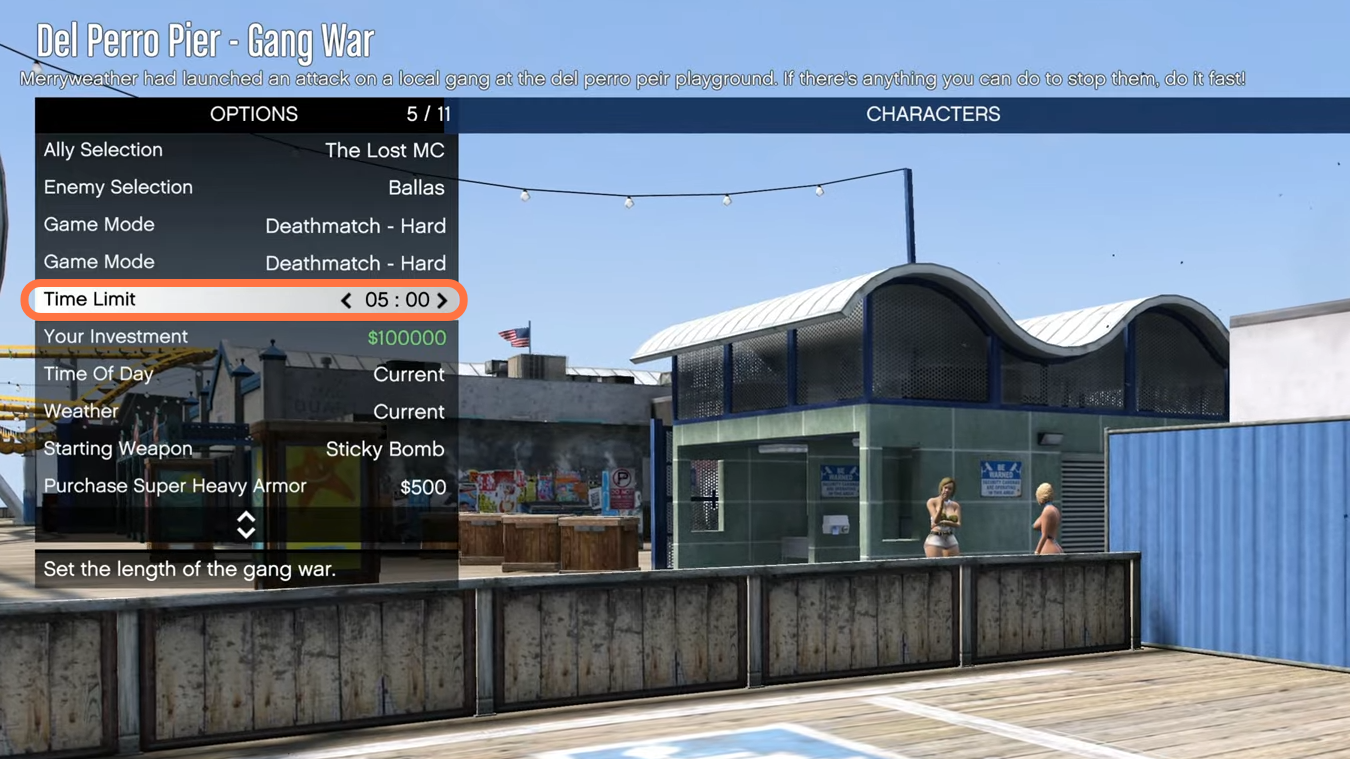
10. And then there are your options. You have your ally selection at the top of your options, and your allies will be the ones that fight with you. For the Allies, you also have the option to change them from the Lost MC to the ballers, to the families, survivors, Merryweather, Marine LSPD, the professionals, and many others as well. And in the second option in the menu, you have the same selection for Your Enemies.
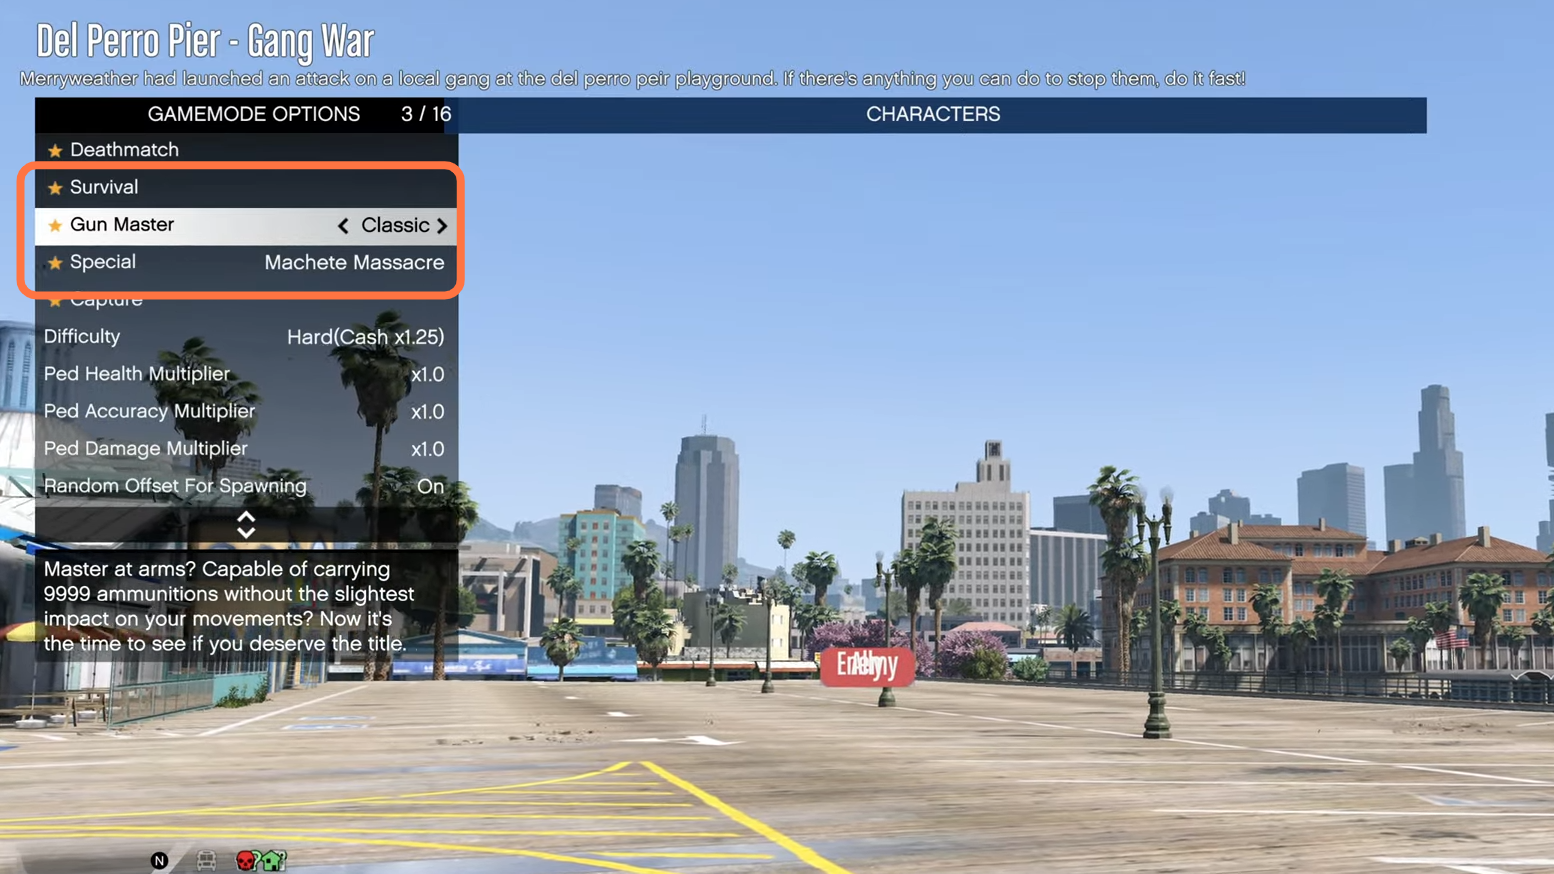
11. After selecting the enemy, you have to move to the game mode where you can choose to play Death Match. It is where your team plays against another team that’s on the same level. Whoever has the most wins at the end of time will be declared the winner.

12. Next is Survival. With the Survival 10 Men 10 Waves, you will have a chance to survive 10 times in a row. When you finish the 10th survival wave, victory is yours! Then you have Gun Master which is a skill-based game that has the player trying to dodge shots fired at him or her–all while carrying 9999 ammunition. There are different types of game modes here which you can try.
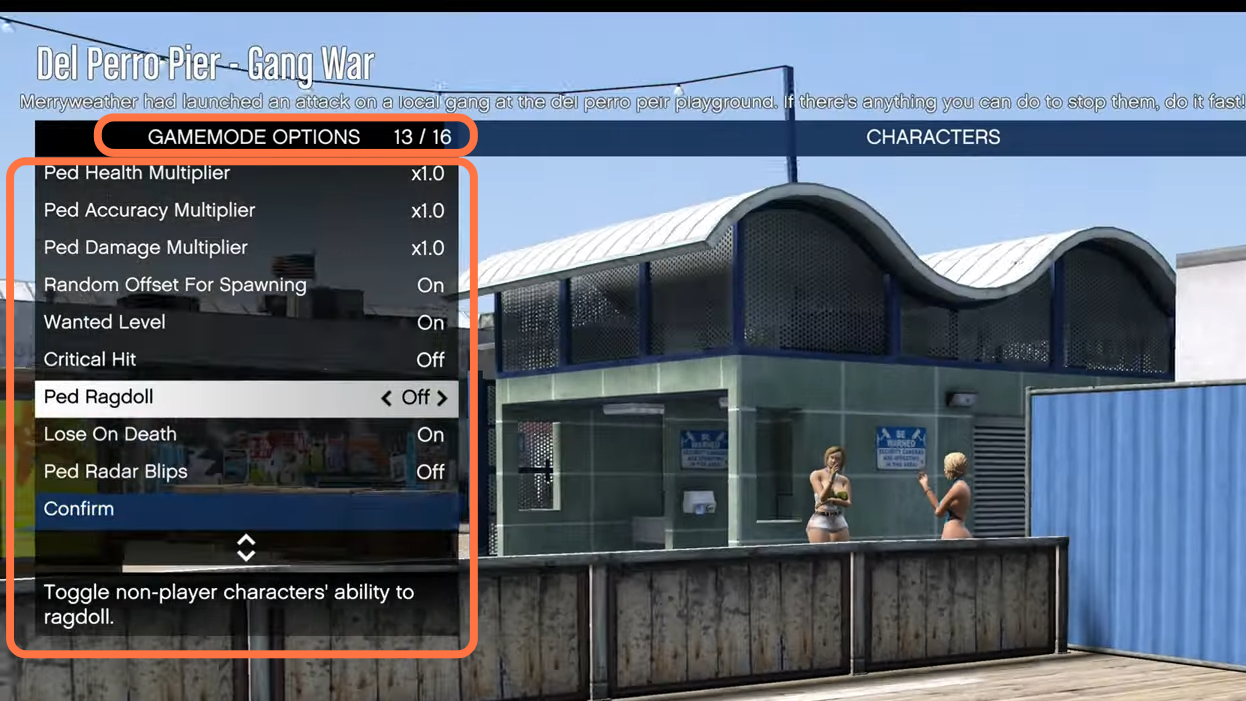
13. There are a lot of settings that you can customize in the game. If you scroll down, you’ll find that there are options to change the difficulty and other settings as well. From normal difficulty to Hard, and then you will have your ped health multiplier, accuracy multiplier, and damage multiplier can all be customized to your preferences. You also have a random offset for spawning, wanted level, critical hit, Ped Ragdoll, Lose on death, and even picking your radar blips. Then go ahead and confirm by selecting “confirm” at the end.
14. After that, you will have your time limit set to five minutes by default, but you can go ahead and change this if you’d like. You can choose to put it on random or change it to the time span you want.
15. Once you choose your game mode and make all the adjustments, then you’re ready to play the game.