In this step-by-step guide, we’ll show you how to install an awesome animated Glock mod for GTA 5. The installation process is quick and easy.
Step 1: Download the Mod
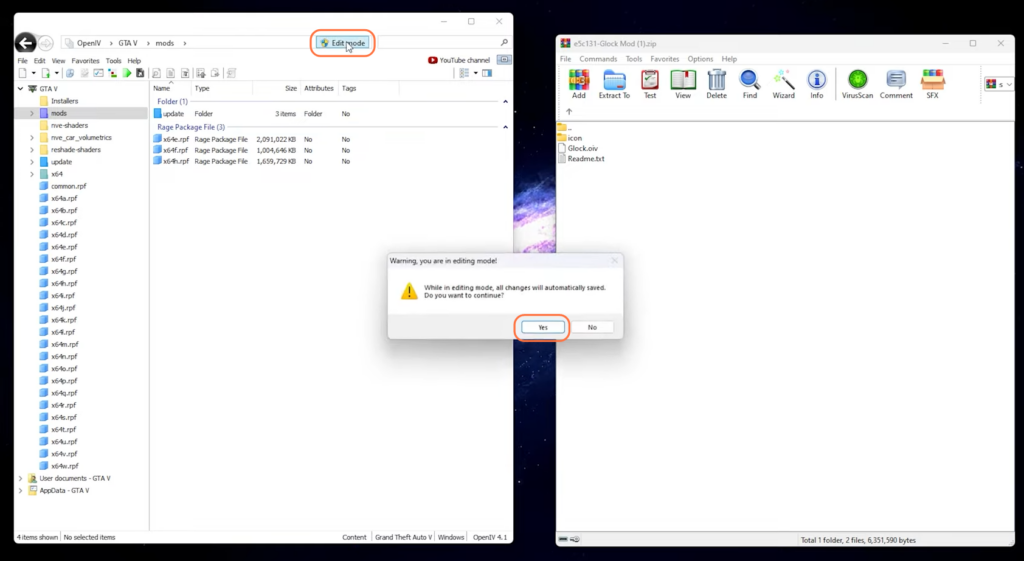
Start by downloading the latest version of the Max Payne 3 Glock mod. You will find three essential files in the download file such as a readme text file, a Glock OIV package, and an icon folder. Make sure you have these files ready before proceeding.

Step 2: Prepare OpenIV
- To begin the installation process, you’d need to have the OpenIV archive manager. If you haven’t installed it yet, you can download it from here.
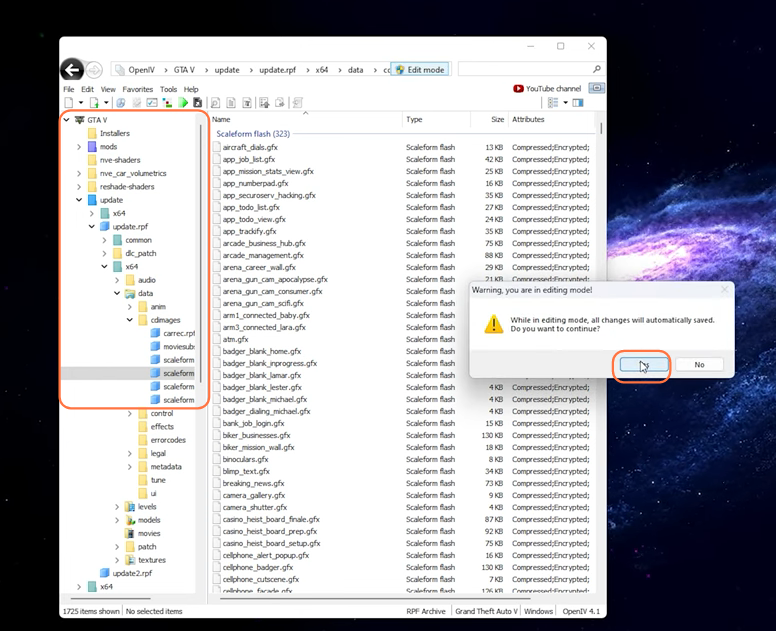
- Once OpenIV is running, make sure to enable “Edit Mode” within the program.
Step 3: Install the Glock Mod
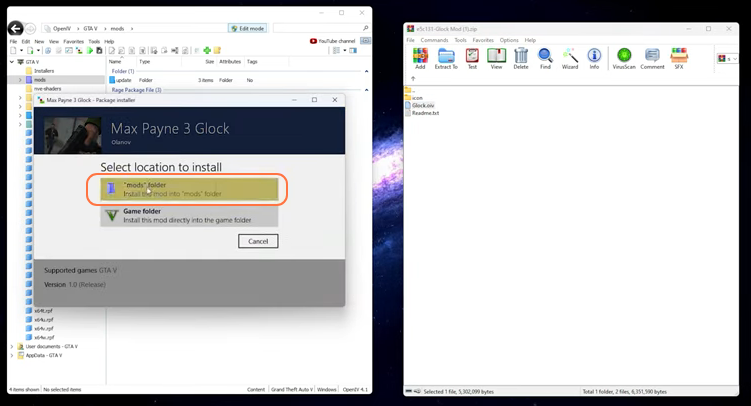
Now, take the Glock OIV file and simply drag it into OpenIV. To complete the installation, follow these steps:
- Click on the ‘Install’ button.
- Choose the “mods” folder as the installation location.
- Click on the ‘Install Confirm Installation’ tab.
Step 4: Place the Icon Folder’s Content
Next, let’s replace the icon for the Glock mod. Refer to the readme file from the downloaded mod for accurate guidance.
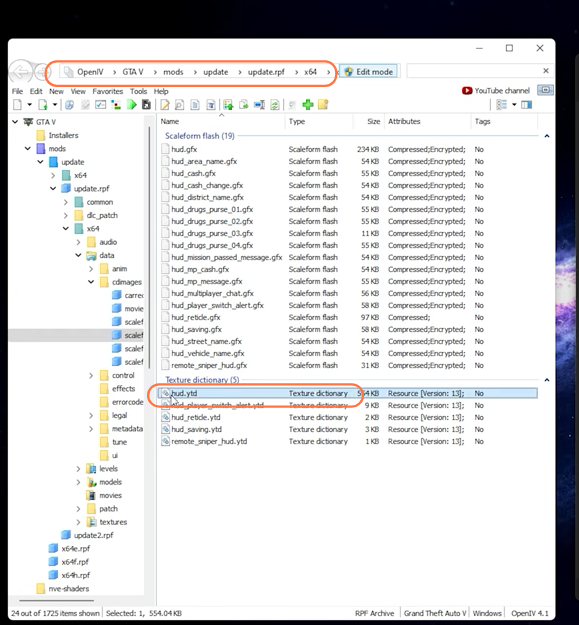
- Go to the “mods” folder within OpenIV.
- Navigate to “update/update.rpf/x64/data/cdimages”.
- Open the “scaleform_generic.rpf” file.
- Look for a file called “HUD.ytd” within this directory.
Step 5: Locate the Icon and Replace
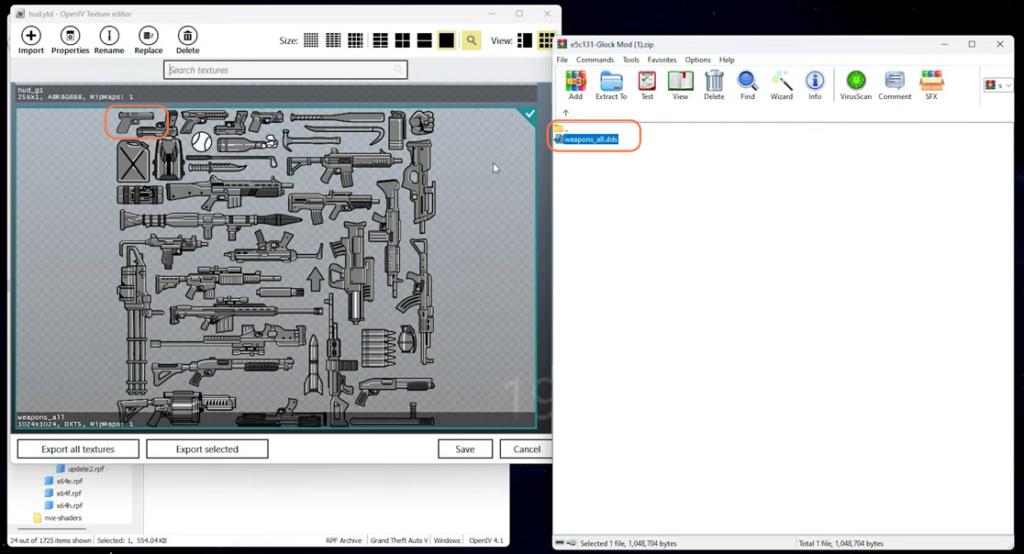
- Inside the “HUD.ytd” file, you will find several images.
- The one we are looking for is labeled “weapons_all”. You can also identify it by its appearance.
- After that, open the icon folder from the Glock mod’s downloaded file.
- Drag and drop the icon file into OpenIV to replace the existing one. You’ll notice the new icon in place of the old one.
Step 6: Troubleshooting
If you encounter issues locating the “update” and “update.rpf” folders in your “mods” folder within OpenIV, follow these additional steps:
- Disable “Edit Mode” in OpenIV.
- Exit the “mods” folder and find the “update” folder.
- Open “update” and follow the path: “update.rpf/x64/data/cdimages”.
To ensure the pathway appears in your “mods” folder without causing issues, enable “Edit Mode” after completing the steps above.
Step 7: Save and Play the Modded GTA V
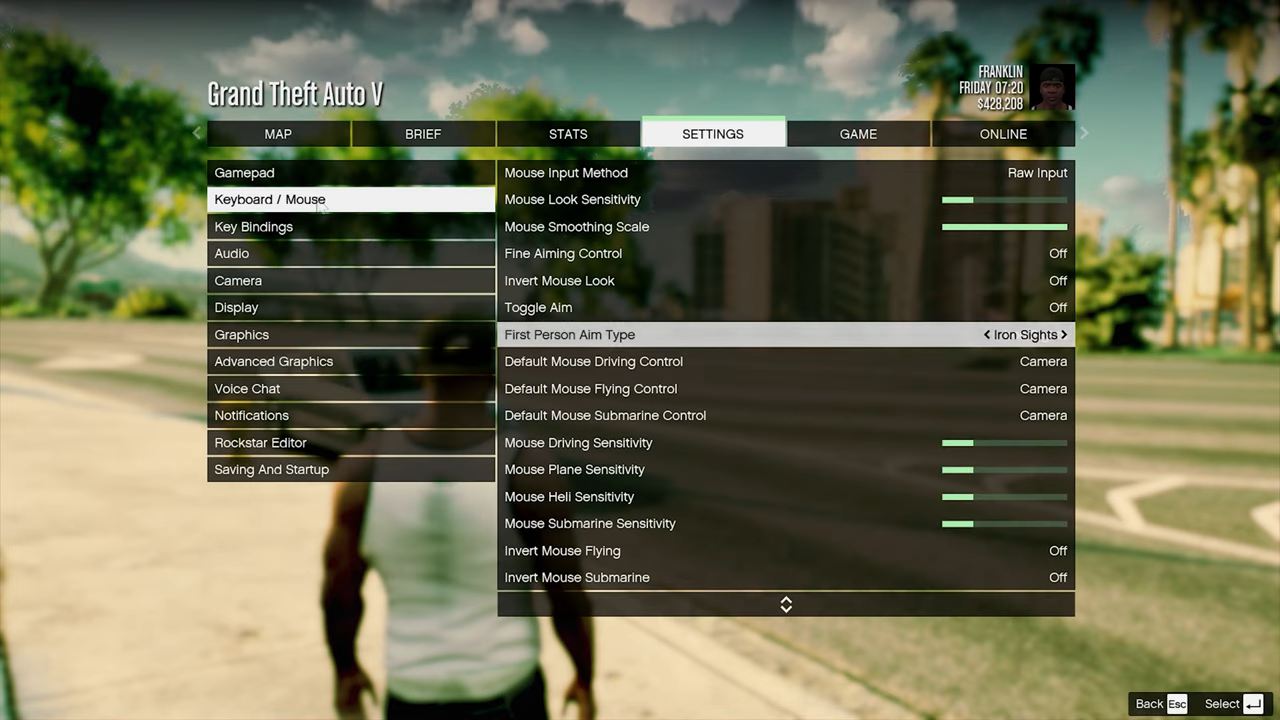
Once you’ve replaced the icon successfully, make sure to save your changes within OpenIV. Launch GTA 5 and see how it looks in-game. You can also customize your first-person aim settings to match your preferences in the GTA 5 settings menu.
By following this guide, you can easily install the Glock mod for GTA 5.