This guide will tell you how to install the Cutscene Player Mod provided by HKH191 in Grand Theft Auto V.
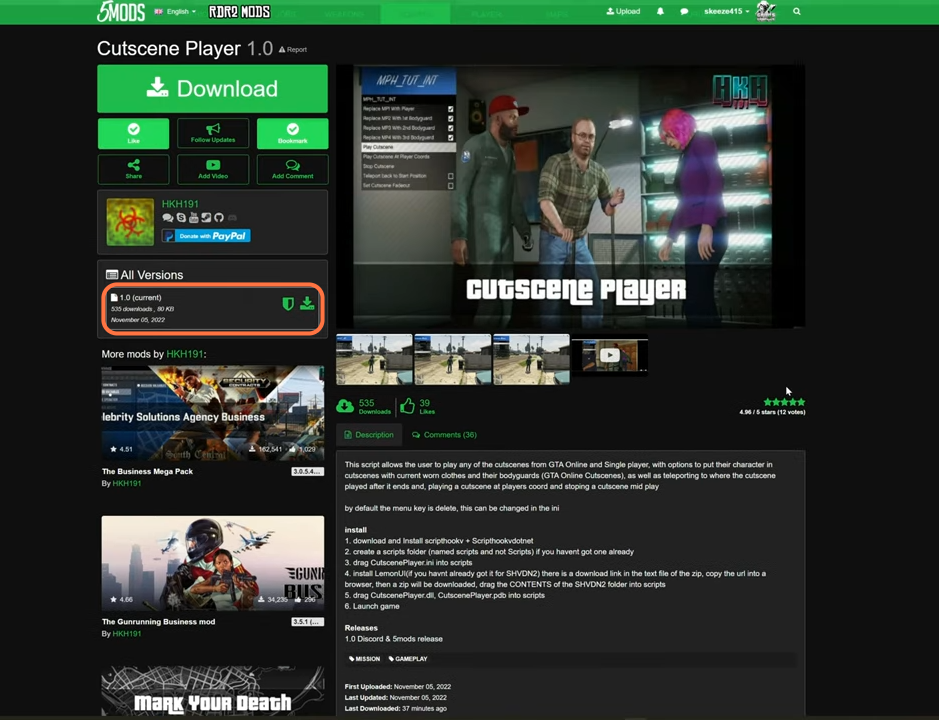
1. The first thing you will need to do is download the Cutscene Player Mod from “https://www.gta5-mods.com/scripts/cutscene-player“. Open the link and click on the green arrow icon under the ‘All Versions’ section to download the mod.
2. You will require some files (A Library, an ASI plugin, and a Framework) for this mod to work which are “Script Hook V”, “ScriptHookVDotNet” and “LemonUI” respectively. You can download the library from “http://www.dev-c.com/gtav/scripthookv/“, ASI Plugin from “https://github.com/crosire/scripthookvdotnet/releases” and LemonUI from “https://github.com/LemonUIbyLemon/LemonUI/releases“. Once you have downloaded the required files and the Cutscene Player Mod, you have to go to the downloads folder to open the files.
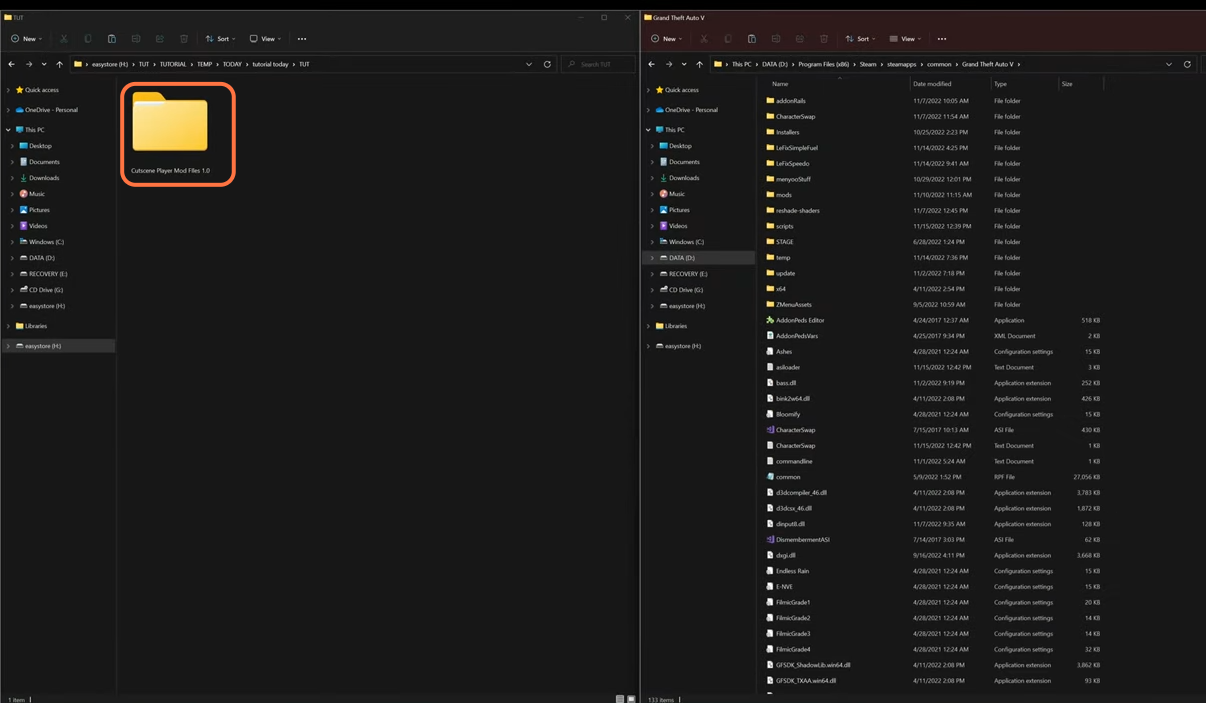
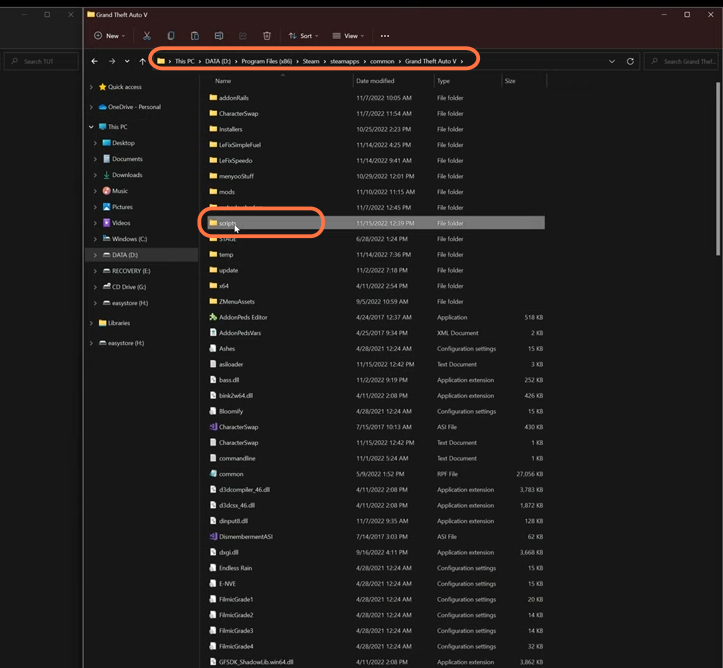
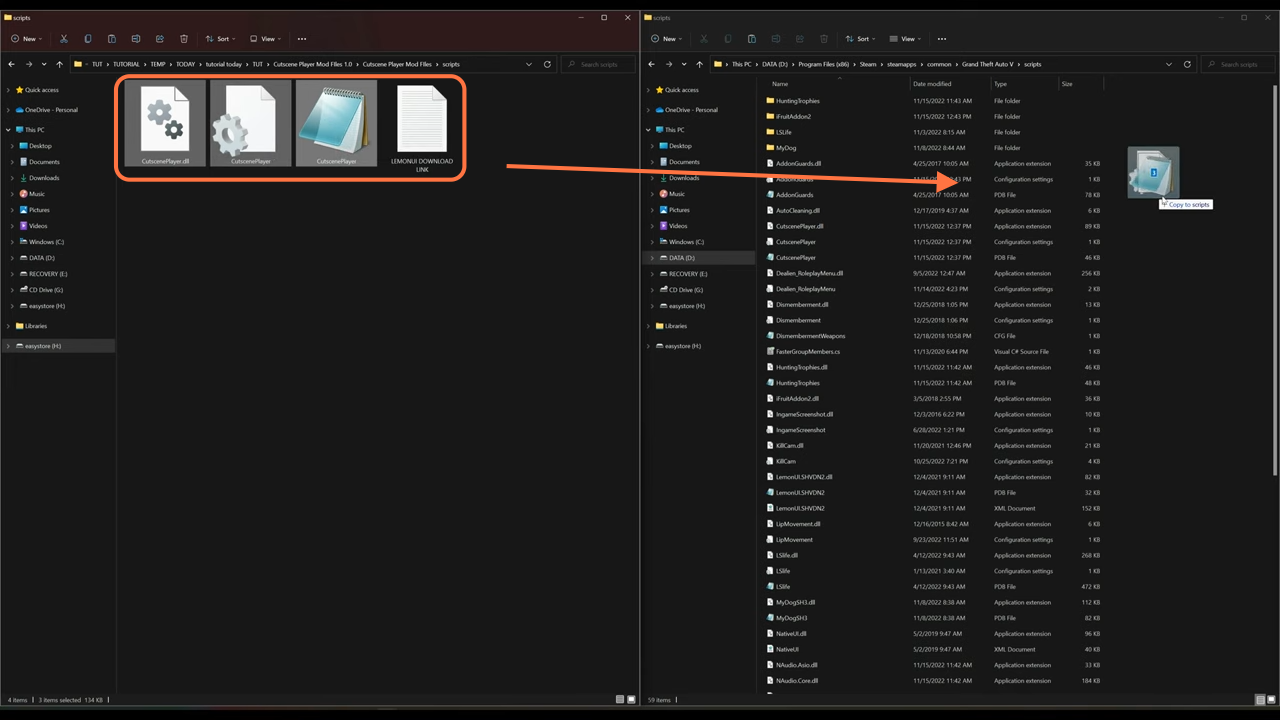
3. On the other hand, open the “GTA V” directory side by side with the downloads folder. Now open the scripts folder of the “GTAV” and if you don’t see a scripts folder here, then you need to create an empty folder and name it “scripts”.
4. Now open the “Cutscene Player Mod Files” folder from the downloads folder inside which you will have a scripts folder.
5. Then you need to open the scripts folder as well and drag everything from it into the scripts folder of the GTAV. Now, this mod has been installed just make sure you have installed all the requirements.
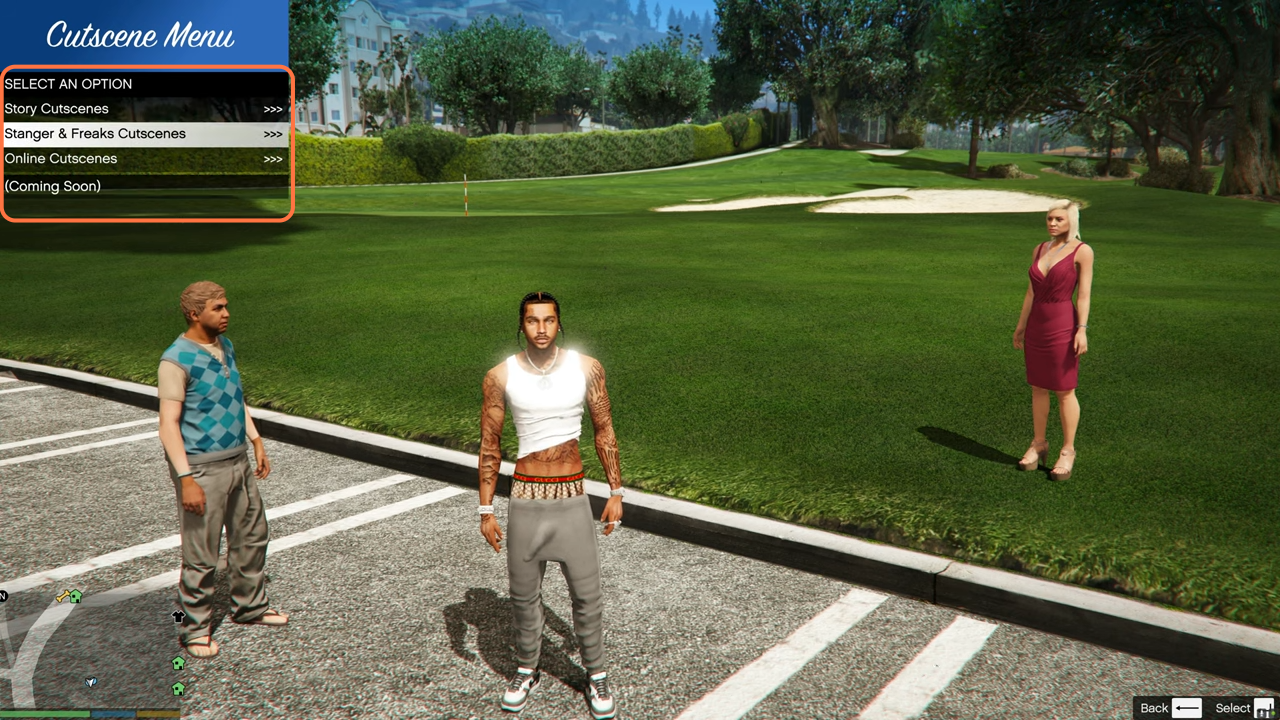
6. Now you can close all the windows and run the game. Once you spawn into the game, you need to change to the character that you want to use to replace other characters and cutscenes. Now press the delete key on your keyboard and it will open the cutscene menu.
From this menu, you can select Story cutscenes, Stranger & Freaks Cutscenes, or Online Cutscenes.