In this guide, you will find how to download the Meteor Client for Minecraft 1.20. You have to install the Fabric Installer and then you will be able to add the client into the game.
Download Meteor Client
In this section, we will take you through the steps to download Meteor Client. It will also show you how to download the Fabric Installer.
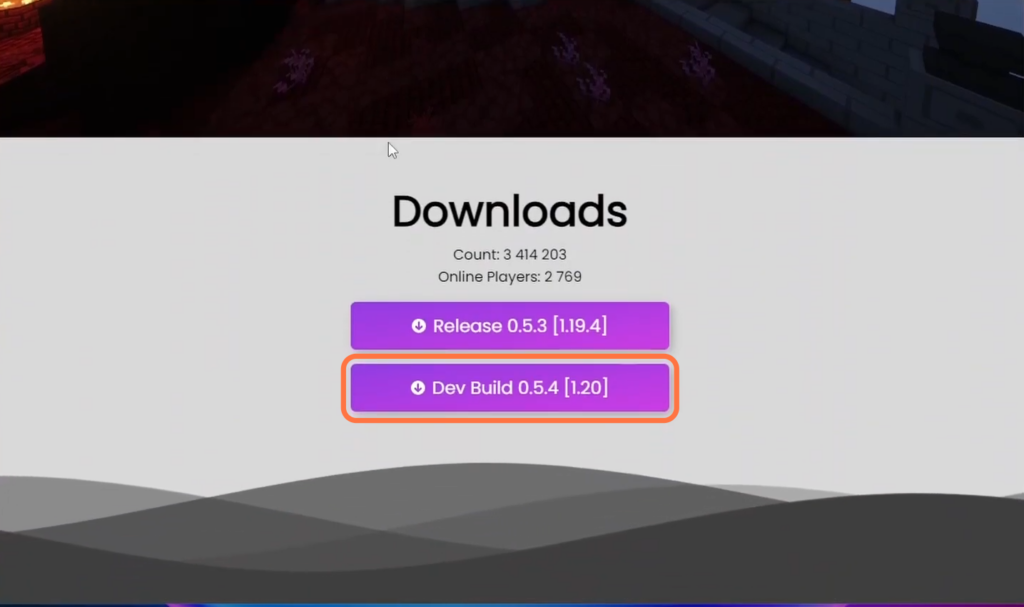
- The first thing you have to do is download the Meteor Client.
- Once you reach the web page, scroll down to the Downloads section and download the 1.20 version.
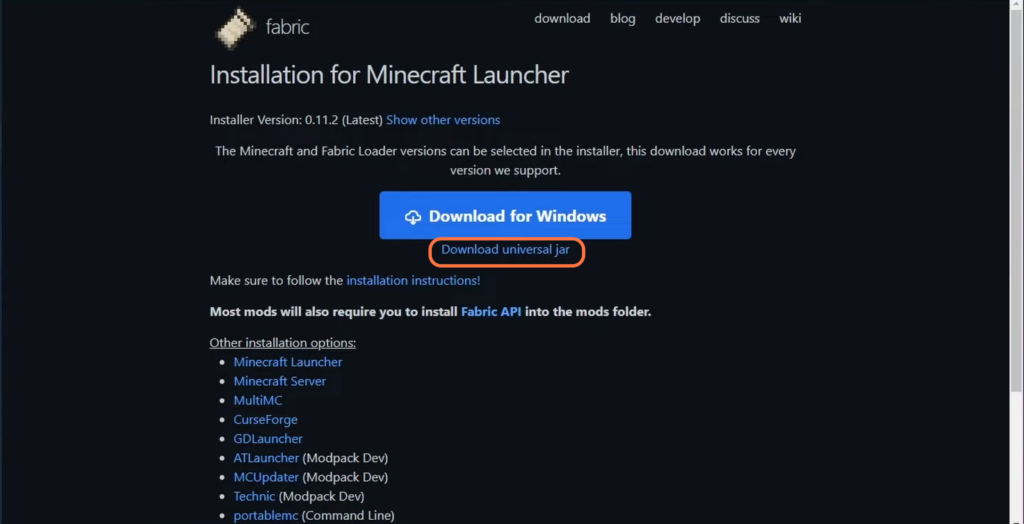
- Next, you have to download the Fabric Installer.
- Once you get there, click on Download Universal jar instead of clicking on the Download button.
Install Meteor Client
This section describes how to install the Meteor Client after successfully downloading it. By following the steps below, you will be able to drag the Meteor Client into the Minecraft game.
- Locate the downloaded files on your computer and drag them to your desktop.
- Find the Fabric Installer file on your desktop. Right-click on it to open a contextual menu. From the contextual menu, hover over “Open With” and select “Java” from the list of available options.
If you don’t have Java installed on your computer, you will need to install Java 17.
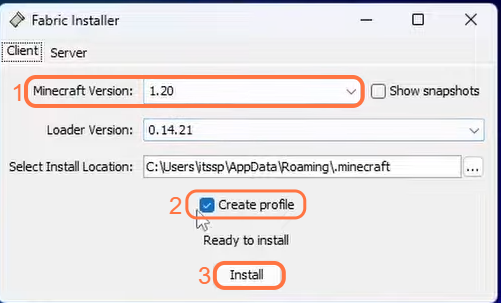
A new window will appear, which is the Fabric Installer interface.
- Make sure to select Minecraft version 1.20 and checkmark the “Create Profile” checkbox.
- After that, click on the “Install” button.
- Once the installation process is complete, close the Fabric Installer window.
- Locate and open the Minecraft launcher on your computer.
You will find the fabric loader 1.20 down there. - If you don’t see it, navigate to the Installations tab and make sure that the Modded checkbox is check-marked.
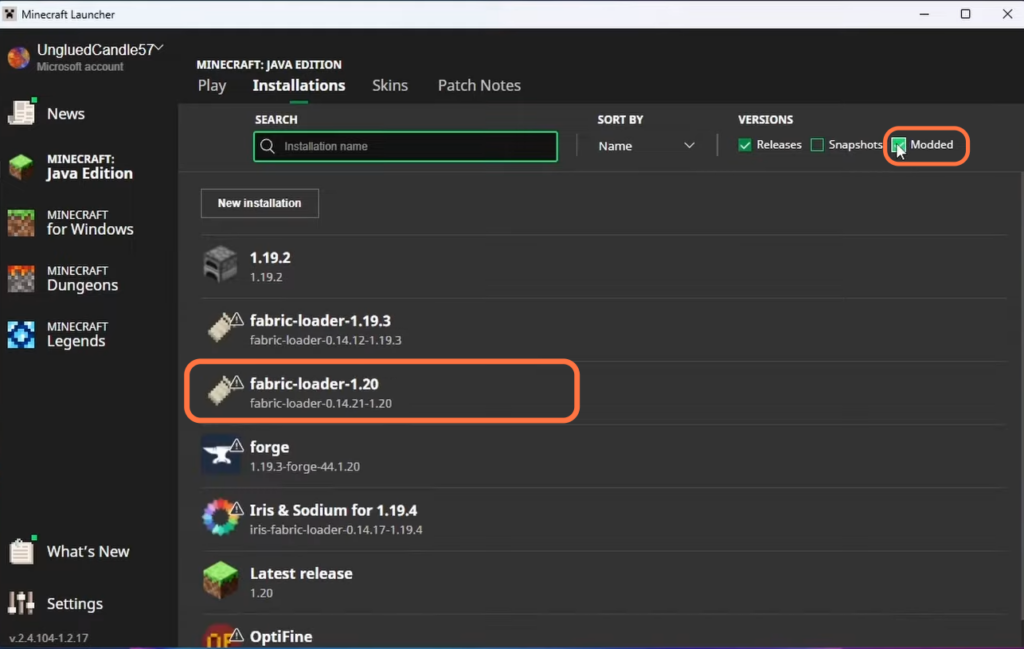
- In the Minecraft launcher, locate the “fabric loader 1.20” and click on the folder icon.
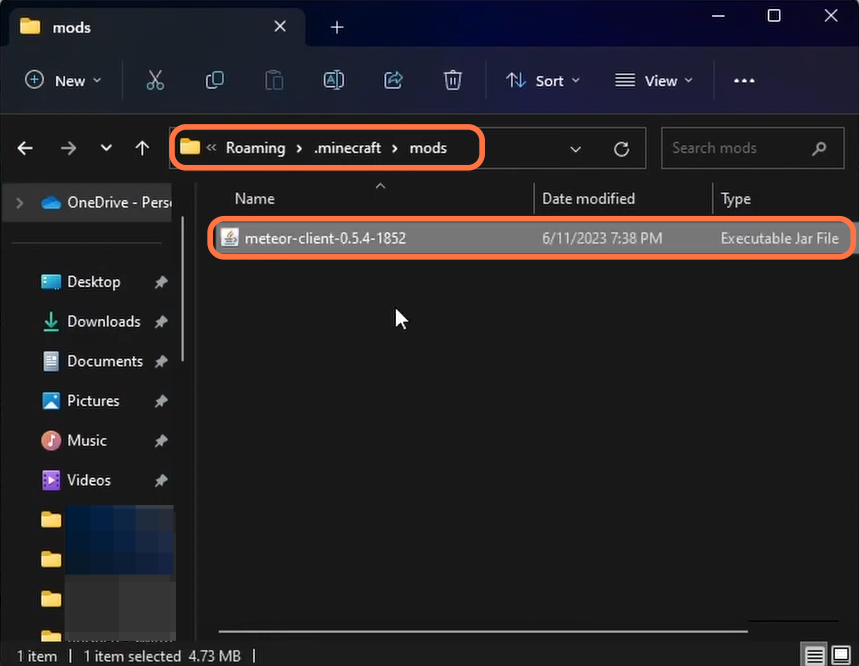
This will open up the Minecraft files associated with this installation. - Within the Minecraft files, scroll down until you find the “mods” folder. If you don’t have a “mods” folder already, you will need to create a new folder and name it “mods.”
- Open the newly created or existing “mods” folder and drag the Meteor Client into this folder.
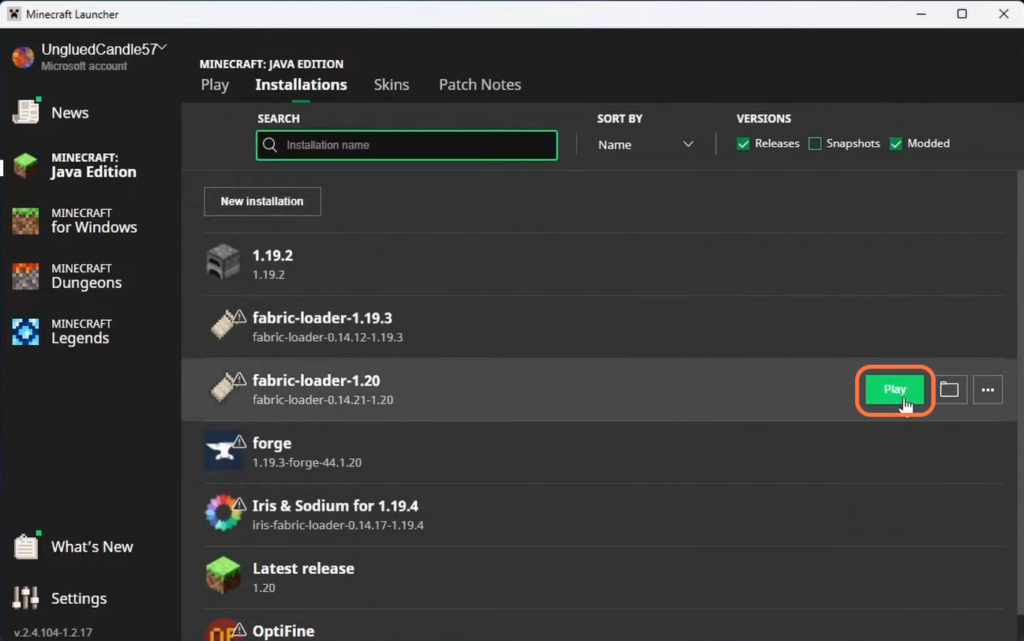
- Return to the main screen of the Minecraft launcher and locate the “fabric loader 1.20” installation in the installations section.
- Click on the “Play” button associated with the “fabric loader 1.20” installation.
It will take you straight to the game.
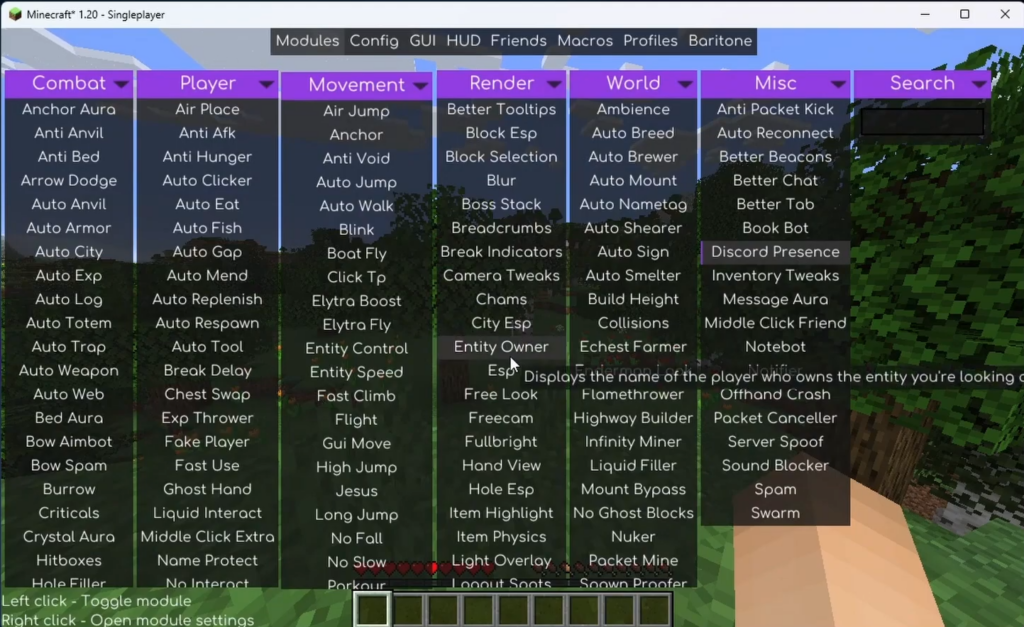
You will find Meteor Client in the top corner. Click on the right shift button on your keyboard and you will find everything is opened up.