This guide provides step-by-step instructions for installing Microsoft Visual C++ on your Steam Deck in order to play compatible games.
Installing Microsoft Visual C++ for Steam Deck Games
In this section, we will take you through the steps to install Microsoft Visual C++ for Steam Deck games.
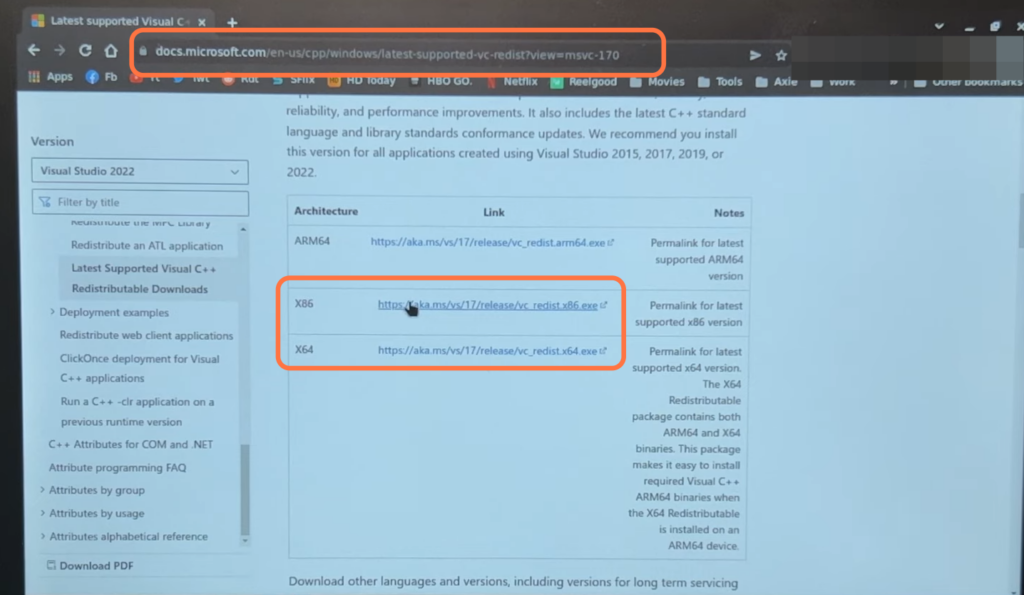
- First, you will need to open up the web browser on your Steam Deck and go to “VC redist.”
- Once you reach the web page, scroll down and download both the x86 and x64 versions of the software.
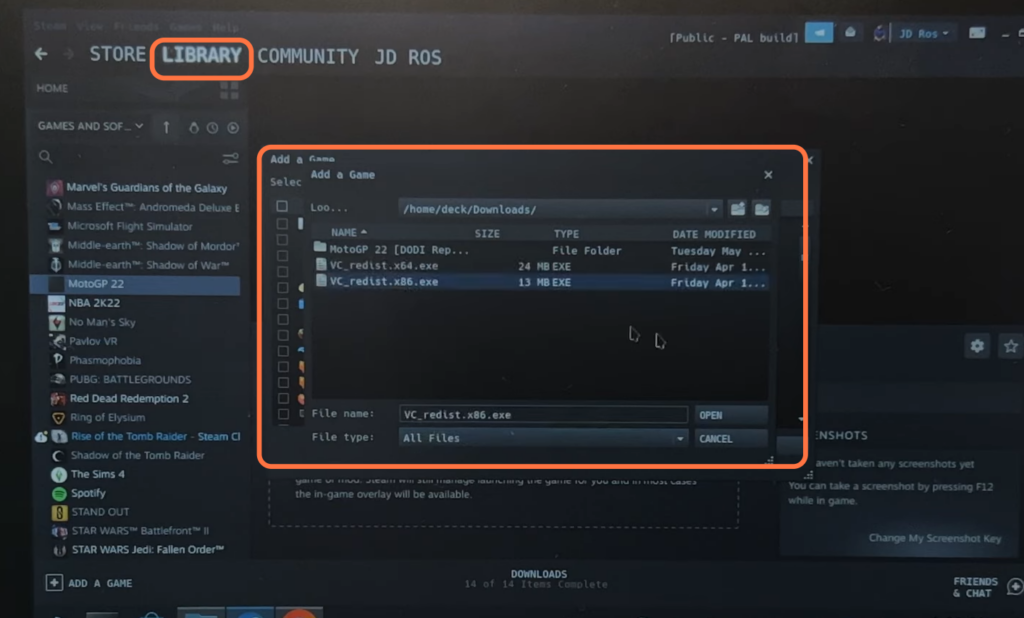
- Once downloaded, navigate to your downloads folder. Open Steam, click on “Games” at the top and select the “Add a non-Steam app” option from the drop-down menu.
- Click on the Browser button to open the file explorer window and navigate to the downloads folder.
- Set the file type to “All Files,” select the x86 VC file and hit the “Open” button. You have to repeat this for the x64 VC file.
- After that, checkmark the x64 and x86 files and press the Add Selected Programs button.
Installing VC files:
This section describes how to install the VC X86 and X64 file.
- Reopen Steam and go to the library. Locate the VC X86 file in the game’s list on the left and click “Settings.”
- Go to properties and navigate to the “Compatibility” tab to checkmark the “Force the use of a specific Steam…” checkbox. After that, change it to “Proton experimental.”
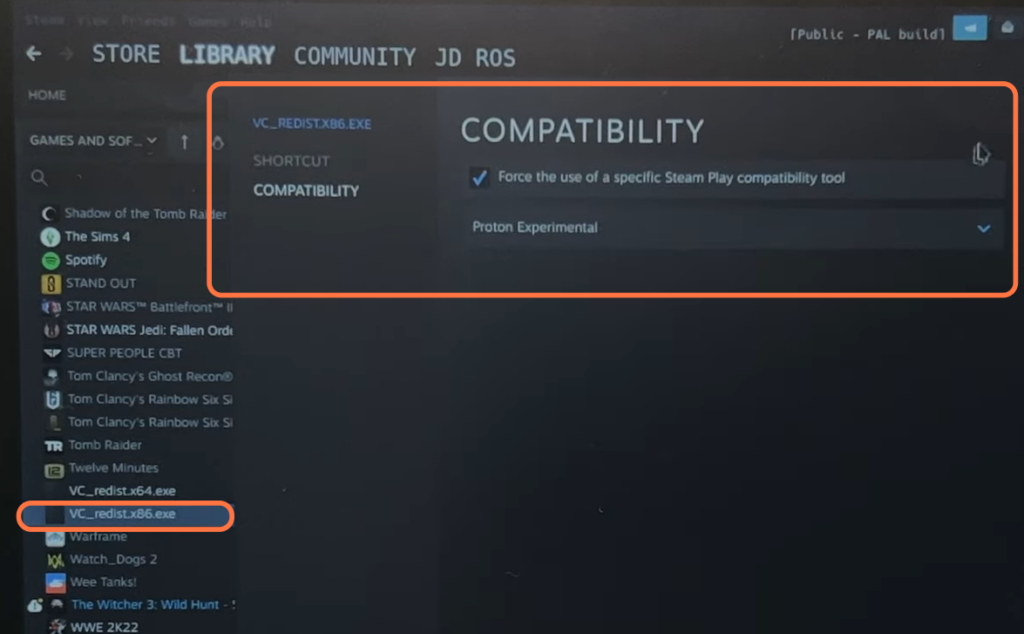
- Hit the “Play” button.
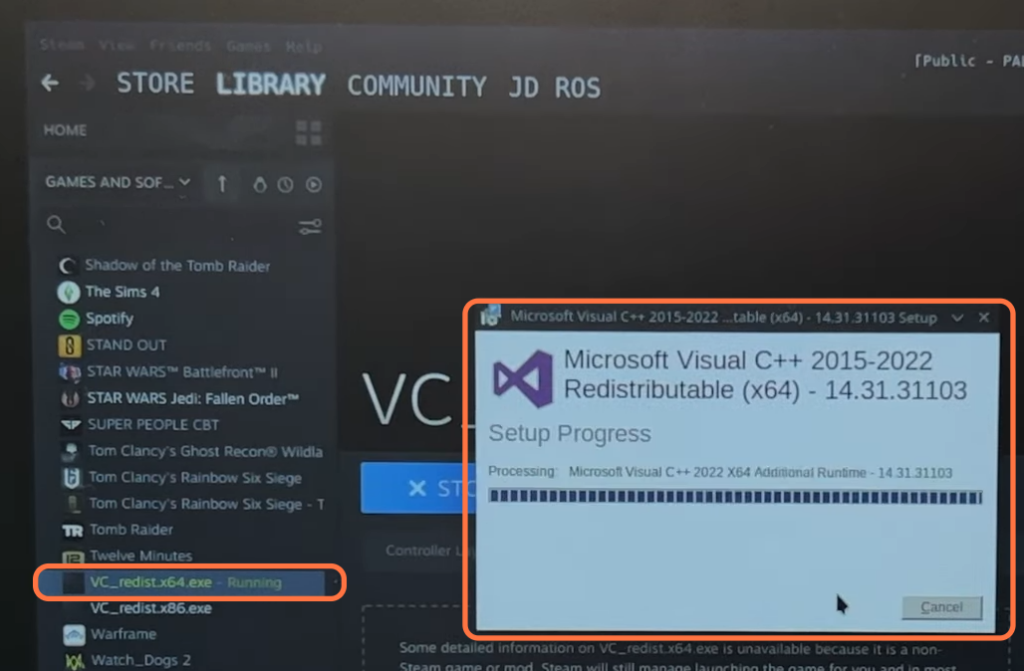
The setup window will open. - Agree to the terms and conditions, then click on the “Install” button.
- Next, reopen Steam and go to the library. Find the VC X64 file in the game’s list.
- Step 2: Click “Settings”, go to properties” and navigate to the “Compatibility” tab to checkmark the “Force the use of a specific Steam…” checkbox.
- After that, change it to “Proton experimental” and hit the “Play” button.
The setup will open. - Agree to the terms and conditions and click on the “Install” button.
- After both files are installed, remove them from Steam. Go to your home folder in the Dolphin file explorer, then to the “.local” folder.
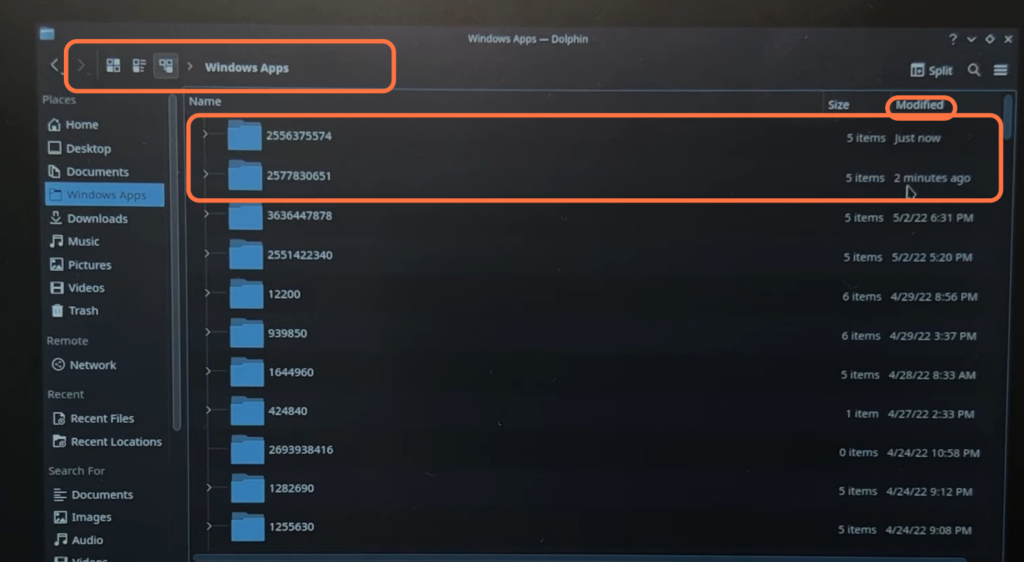
- Access the “share” folder and then open up the “steam” folder. Navigate to the “Steam apps” folder, go to the “compact data” folder, and click the “Modified” button at the top right corner.
- Click through until you find new folders based on their creation time.
- Right-click the x86 file, and select the “Copy location” from the drop-down menu.
- Open the Steam application and choose the game you want to play. Click “Settings” and go to “Properties.” Under the “Launch” option, input:
STEAM_COMPAT_DATA_PATH= "PASTE THE ADDRESS THAT YOU JUST COPIED (x86)"

STEAM_COMPAT_DATA_PATH= "PASTE THE ADDRESS THAT YOU JUST COPIED (x86)" %command%

Launch the game, and you’re good to go!