This guide will provide an easier way to install Minecraft on your Steam Deck. You don’t need to do much except to stick around. You will find how to run Minecraft utilizing the GD launcher.
There are many options to install Minecraft, such as the multi MC, 18 launchers, and more. So, you may switch if any of these does not fulfil your requirements.
Download GD launcher
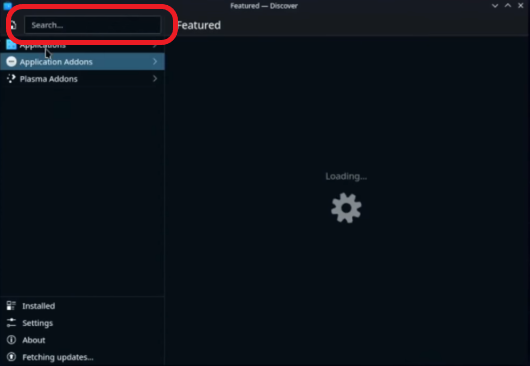
In this section, we will walk you through the steps to download and install the GD launcher on the Steam Deck. It instructs users to switch to desktop mode, open the Discover Store, search for the GD launcher, download it, and then install it.
- The first step in the process is to switch to desktop mode on your Steam Deck.
The GD launcher can only be installed on the desktop version of Steam. - Next, you need to open the Discover Store on your Steam Deck by clicking on the “Discover” icon on the taskbar. Once you’re in the Discover Store, you need to search for the GD launcher by typing “GD launcher” into the search bar.
- Once you’ve found the GD launcher, click on the download button to start the download process.
- After the download is complete, you need to click on the install button to install the GD launcher on your Steam Deck.
Launch GD Launcher
This section provides instructions on how to launch the GD launcher after it has been installed on the Steam Deck. Users can launch the launcher either through the Discover application or from the Steam Deck menu by typing either “GD launcher” or “Minecraft” and then launching it.
- Wait until the installation of the GD launcher on your Steam Deck is complete.
- After the installation is finished, launch the application. You have two options to do this:
a. Use the “Launch” button in the Discover application. To do this, go to the Discover application on your Steam Deck. Find the GD launcher and click on the “Launch” button to start the game.
b. Run the GD launcher or Minecraft game from the Steam Deck menu. To do this, go to the Steam Deck menu. You can access it by clicking on the Steam icon on the taskbar. Once you’re in the Steam Deck menu, type (GD launcher or Minecraft) and then launch it.
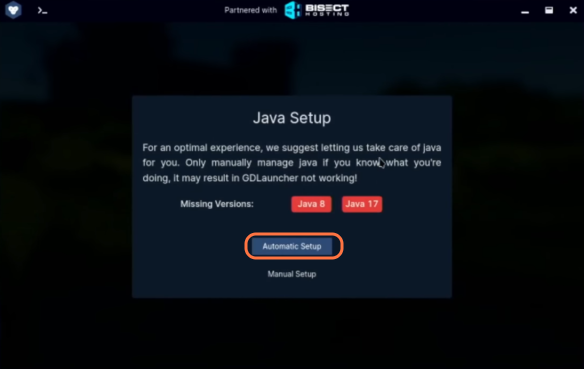
Set Up Java
This section provides will take you through the steps to set up Java on a device before using the app. Users need to click on the “Automatic Setup” button to start the download and configuration process and wait for it to finish before using the app.
- If you haven’t already set up Java on your device, you will need to do so before you can use the app. Look for a button that says “Automatic Setup” and click on it.
- Once you click the “Automatic Setup” button, the app will start downloading and configuring Java.
- Wait for the download and configuration process to finish.
Once it’s done, you should be able to use the app without any issues.
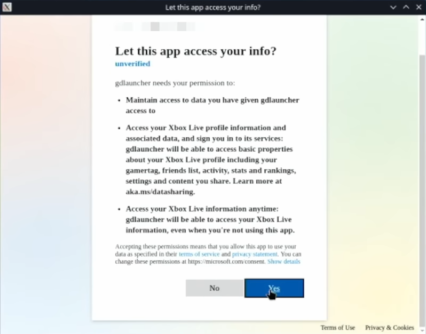
Sign in to your Minecraft account
In this section, we will walk you through the steps to sign in to a Minecraft account. Users need to enter their login information or use their linked Microsoft account to sign in and will then be taken to the Minecraft main menu.
- Open the launcher and you will be prompted to sign in to your Minecraft account. If you already have a Minecraft account, enter your login information and click “Sign In“.
- If you have already linked your Minecraft account with your Microsoft account, you can sign in using your Microsoft account.
Once you have signed in, you will be taken to the Minecraft main menu.
Load up GD Launcher
This section provides instructions to load up the GD launcher by clicking on the GD launcher icon on the desktop or applications folder. Users need to look for a down arrow icon, go through the welcome introduction, and close down any announcement screens before being taken to the main menu of the GD launcher.
- Launch the GD launcher. You can do this by finding and clicking on the GD launcher icon on your desktop or in your applications folder.
- Once the launcher starts up, look for a small down arrow icon. This should be located somewhere on the launcher interface.
- Go through the welcome introduction, and close down any announcement screens that appear. Once you have closed all the announcement screens, you should be taken to the main menu of the GD launcher.
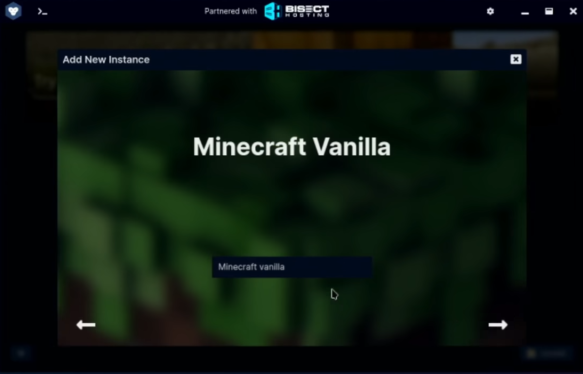
Create a new instance
In this section, we will walk you through the steps to create a new instance of Minecraft by clicking on the plus icon. Users need to select the version of Minecraft they want to install
- To create a new instance of Minecraft, click on the plus icon in the bottom left corner of the launcher. This will bring up a window where you can select the version of Minecraft you want to install.
- From the dropdown menu in the window, select the version of Minecraft you want to install. In this case, you want to select the Vanilla Minecraft version 1.19.2.
Note:
Remember, you can download more than one instance of Minecraft; it is very easy.
Set game resolution
The section explains how to set the game resolution in the GD launcher window while waiting for the game to load. Ensure that it is set to 1080P or higher if running on a 16×9 display.
- While waiting for the game to load, look for the gear icon at the top of the GD launcher window. Click on it to go to the settings panel.
- Once you are in the settings panel, look for the display settings section. This should have options for adjusting the game resolution.
- Check the resolution of your Steam Deck by going to its display settings. Then, set the game’s resolution in the GD launcher accordingly. If you are running the game on a 16×9 display, make sure to set the resolution to 1080P or higher.
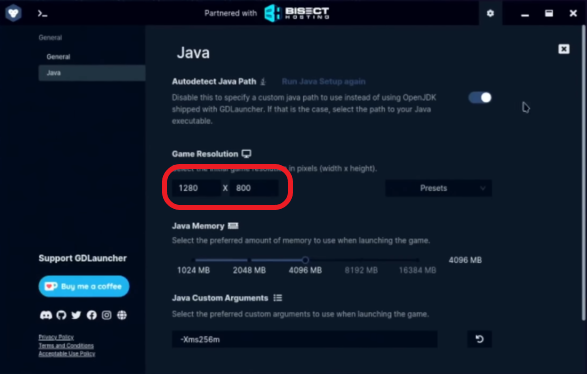
This will ensure that the game fills the entire screen without letterboxing on the sides.
When the setup process is finished, launch Minecraft to ensure it works.
Add the GD launcher to Steam
This section will take you through the steps to add the GD launcher to Steam on the Steam Deck. The process involves opening the Steam Deck menu, locating the GD launcher, and adding it to the Steam library.
- Open the Steam Deck menu by pressing the Steam button on your device.
- Look for the GD launcher in the Steam Deck menu. If you don’t see it, try holding the Steam button and pressing X to take out the virtual keyboard.
- If you prefer, you can also connect a keyboard to your Steam Deck and type in the name of the launcher you want to open.
- Once you find the GD launcher or Minecraft, click on it to launch the game.
- Before switching back to the game mode, make sure that you have added the GD launcher to your Steam library.
- Open Steam and locate the option to add a new game to your library. Right-click on the GD launcher and select the option to add it to Steam.
- Once the launcher is added to Steam, you can launch the game through Steam by selecting it from your library.
It’s important to note that the version of the game launched through the GD launcher does not save your login details.
- This means that if you log out, you will need to enter your login details again to log back in.
To avoid this inconvenience, it’s recommended to use the GD launcher.
Launch The Game
This section describes how to launch the game from the Non-Steam Games tab and create a new world from the game’s main menu.
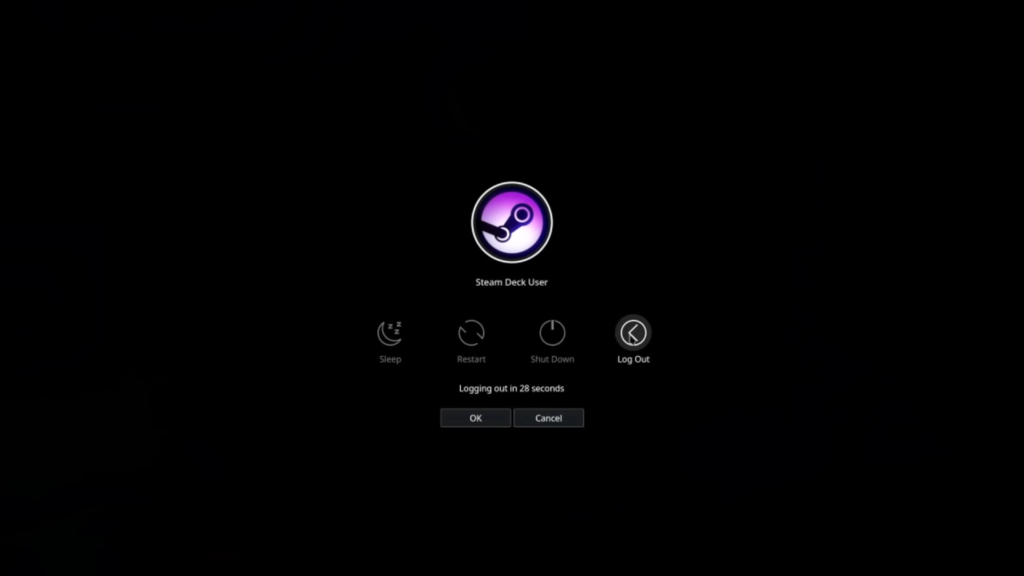
- If you’re currently signed into your desktop mode, you’ll need to sign out.
Once you’ve signed out of your desktop mode, you should be able to switch to the Game Mode.
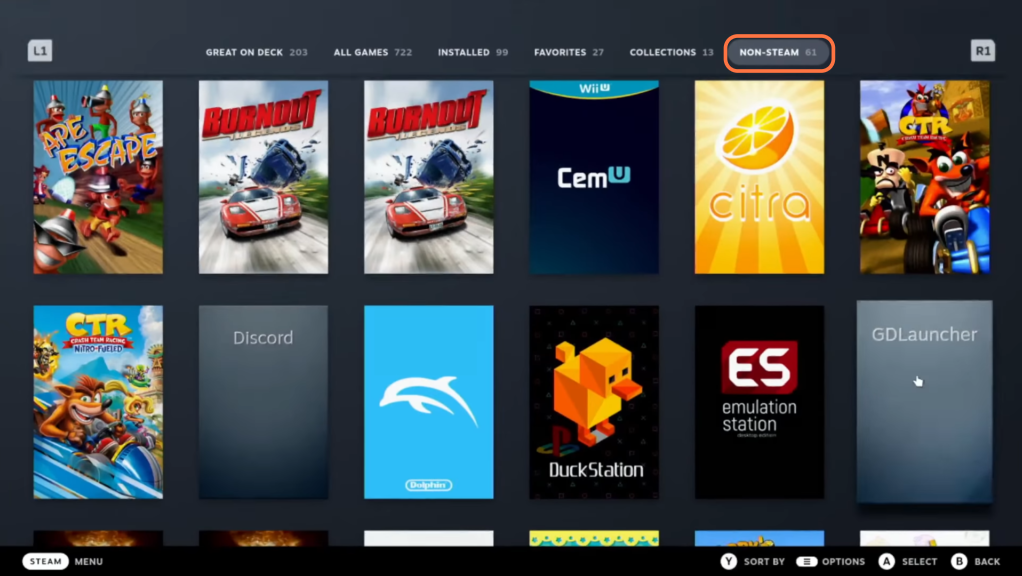
- Once you’re in the Game Mode, you can access your Steam Library by clicking the Steam button on your home screen.
- After that, navigate to the Non-Steam Games tab. This can typically be done by pressing the R1 button on your controller.
- In the Non-Steam games tab, you should see a list of all the non-Steam games installed on your computer. Look for the GD launcher in the list and select it.
- Once you’ve selected the GD launcher, launch it by pressing the corresponding button on your controller.
- Create a new world by selecting “New World” from the main menu.
While creating your new world, you can also set up your controls.
That is how you can install Minecraft on your Steam Deck easily.