For devoted Sims 4 players who revel in the world of custom content installation, particularly presets, hairstyles, makeup, dresses, and clothing, the conundrum of navigating through an abundance of options within only two columns in Create A Sim mode is all too familiar. Follow this step-by-step guide to streamlining your Sims 4 Create A Sim experience with More Columns Mod.
Step 1: Downloading Mod
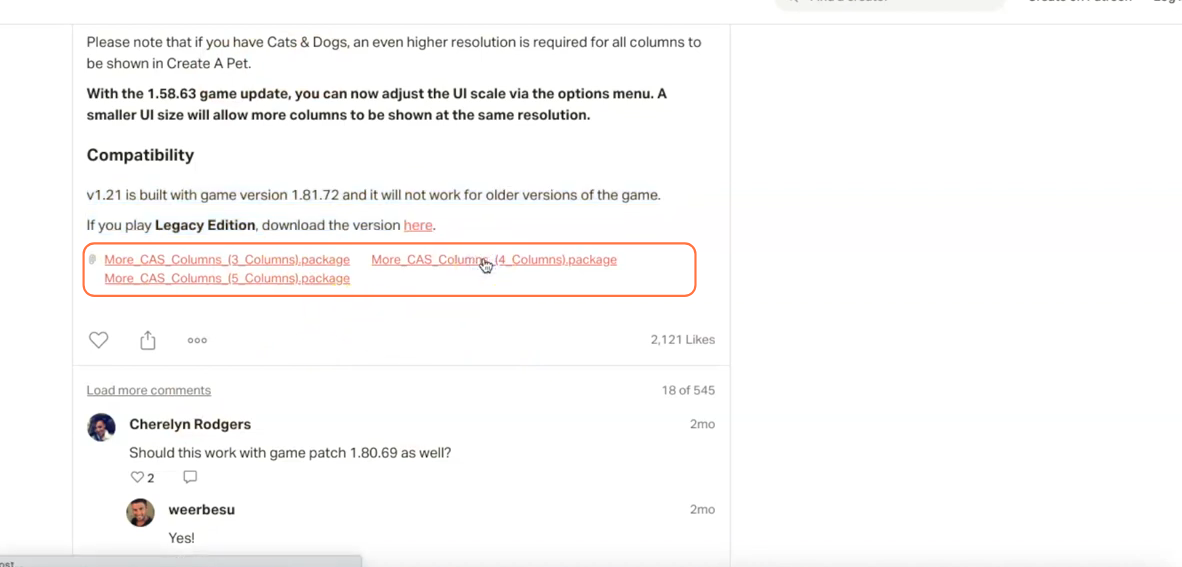
To experience enhanced customization, the first step involves procuring the More Columns mod. On the designated webpage, a variety of options await – choose from package files offering 3, 4, or 5 columns to suit your preference and interface comfort.
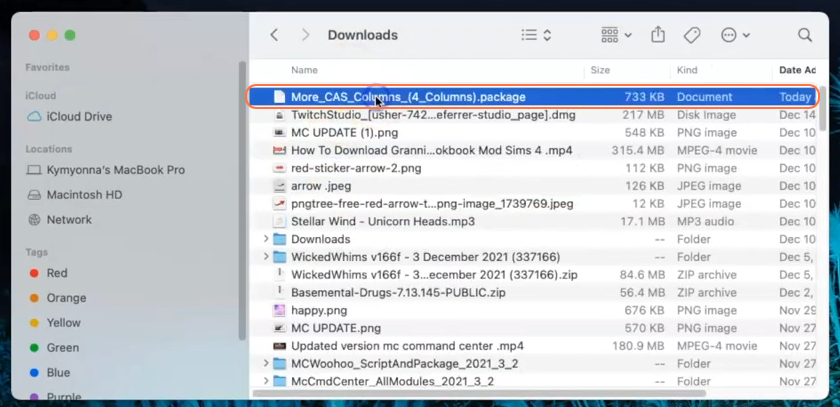
Step 2: Locate the Downloaded File
Upon the completion of the download, immerse yourself in the file system. On Windows, navigate through File Explorer; on Mac, embrace the Finder application. Locate the downloaded package file, a pivotal component in the transformation of your Sims 4 Create A Sim (CAS) experience.
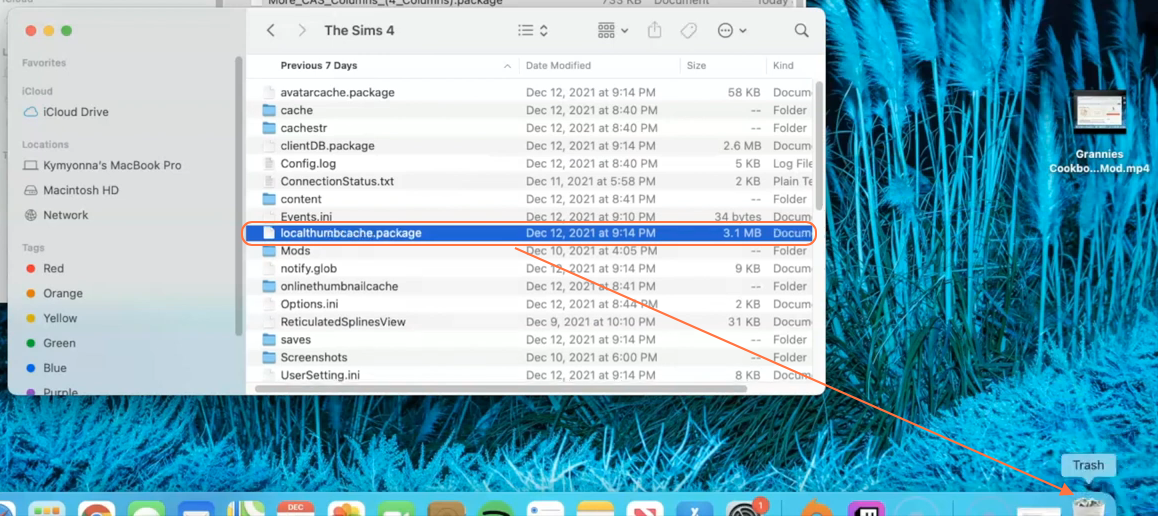
Step 3: Accessing the Sims 4 Mods Repository
Next, open another Finder application window and navigate to the Mods folder in your Sims 4 game directory. Typically, you can find the game directory at Documents > Electronic Arts > The Sims 4.
In case you don’t have a Mods folder or have never installed mods before, create one inside “The Sims 4” folder. Alternatively, launching the game at least once and then exiting will generate the necessary folders, including Documents, Electronic Arts, and Mods. As a precautionary measure, ensure the game remains inactive during mod installations, and consider removing the “localthumbcache.package” file from the Sims 4 folder.
Step 4: Installing the Mod
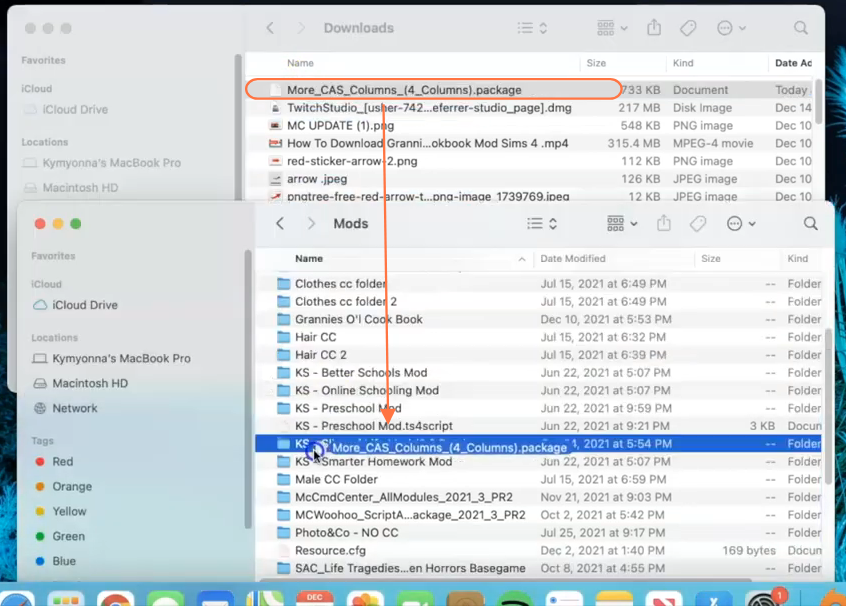
With the Mods folder ready, access your downloads folder and select the package file. Drag and drop this file into the Mods folder of the game directory. This meticulous action ensures that the More Columns mod is seamlessly integrated for the game to effortlessly recognize and activate it. It’s prudent to eliminate any previous iterations of the “More Columns” mod or mods boasting fewer columns from the Sims 4 Mods folder before ushering in the new version.
Step 5: Enable Mods and Script Mods in the Game
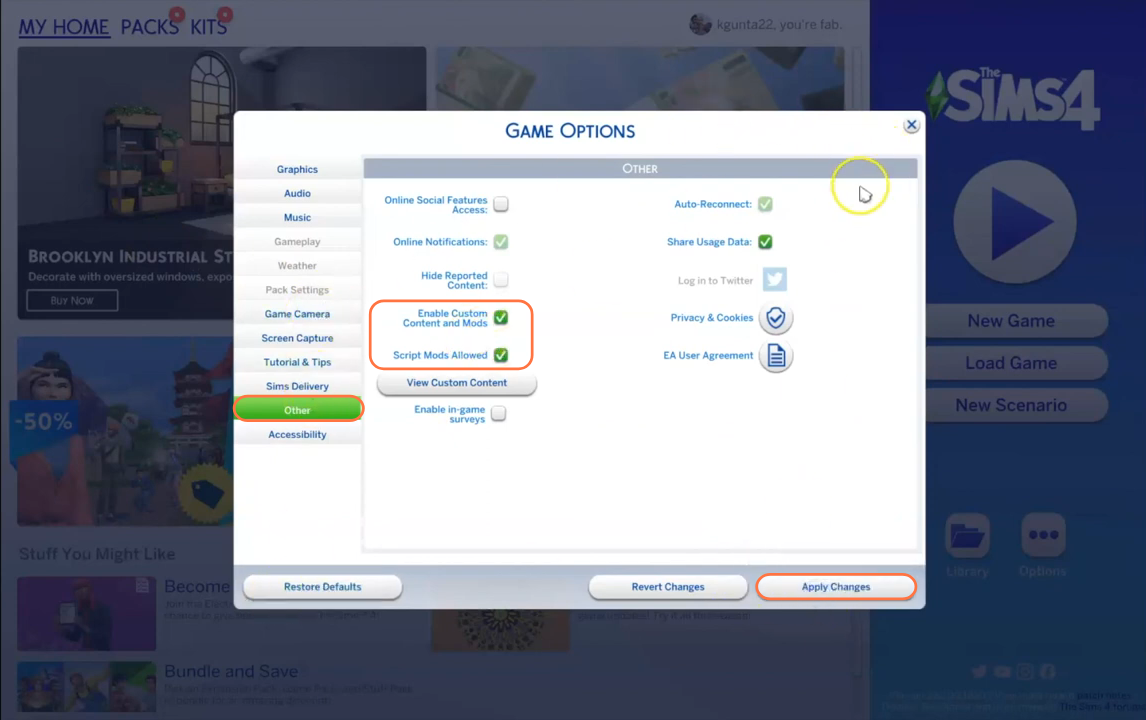
Now Launch the game and navigate to the main menu. Click on the Options tab, then select Game Options. In the Game Options window, go to the “Other” tab. Locate the options labelled “Enable Custom Content and Mods” and “Script Mods Allowed” and make sure the boxes next to them are checked. Click the “Apply Changes” button at the bottom right corner of the screen to implement the changes.
Step 6: Unveiling Your Revamped CAS Mode
Enter the game realm to witness the transformation within the Create A Sim mode. Behold the newly expanded four columns, although slight disparities might arise – the scrollbar and the Winter Weather option situated at the upper right corner of the grid could be obscured, contingent on the screen width of your laptop. In most instances, the three-column mod should harmoniously fit, particularly if you possess a laptop or desktop with a less-than-average screen width.
