In this comprehensive guide, you’ll learn how to install the Preteen Mod in The Sims 4. Are you tired of your teenage Sims appearing overly mature, as if they’re already adults? Look no further! This mod offers a perfect solution, introducing a realistic and appropriate transitional phase between childhood and adolescence. By incorporating a new, streamlined Hygiene system and introducing fundamental middle school features for preteens, this mod enhances the gaming experience. To ensure the smooth functioning of certain animations, it is necessary to have both The Sims 4 Parenthood and Snowy Escape packs installed.
Additionally, please make sure to have Lumpinou’s Mood Pack Mod installed on your system, as it is a prerequisite for using this mod effectively. Now, let’s dive into the step-by-step installation process to bring the Preteen Mod to life in your Sims 4 game!
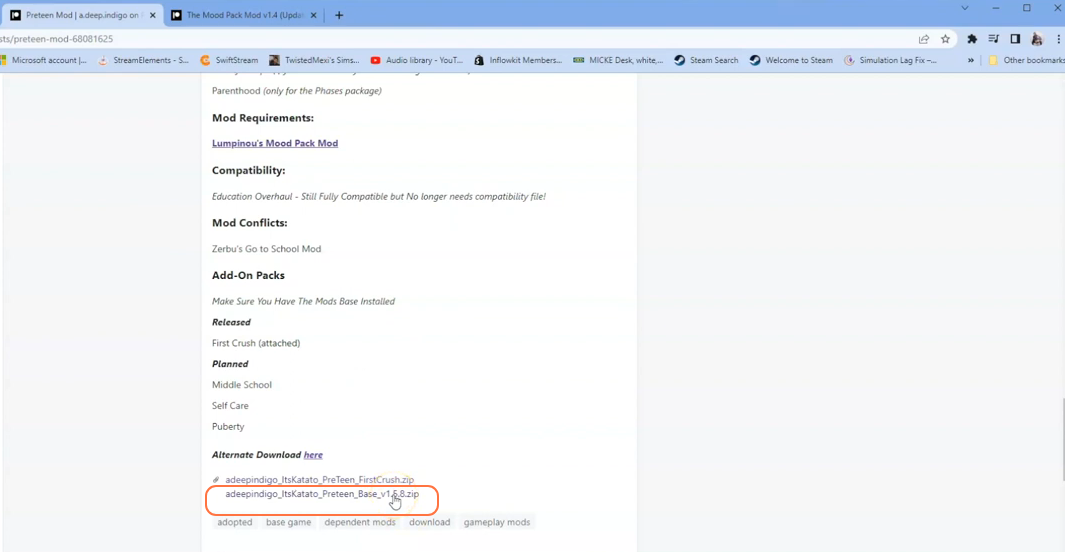
Step 1: First, download the complete package of the Preteen Base Mod from the following official patreon source “https://www.patreon.com/posts/preteen-mod-68081625“. Once you open the link, scroll down a bit to locate the zip file. Click the file and it will prompt you to save the file to your PC. It is recommended to save it in a location that is easily accessible, such as your Downloads folder.
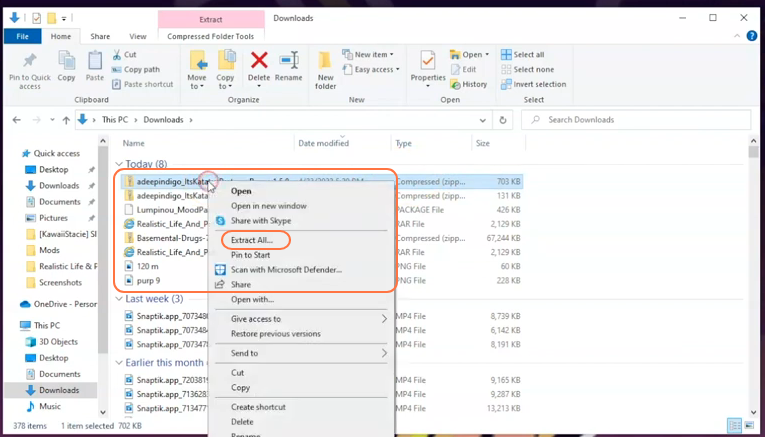
Step 2: After the download is complete you need to navigate to the location where the package have been saved. Typically, the file will be in the Downloads folder on your PC. As the downloaded file is compressed, you will need a tool like WinRAR to decompress it. Right-click on compressed file and select the “Extract All” option. For Mac users, simply double-click the file to unzip it.
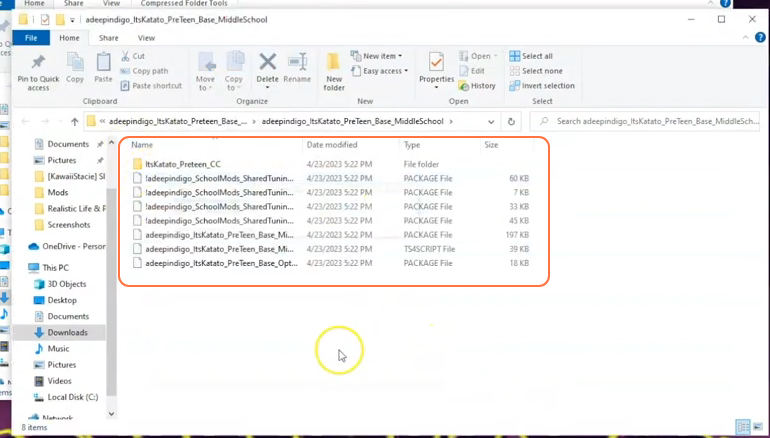
Step 3: Now open the extracted folder and you’ll see two zip files (Preteen Base Middle school & Preteen Base Junior High) inside it, but you can only choose one for your game. You need to extract these zip files also, otherwise the mod isn’t going to work. There will be some package and TS4script files in these extracted folders.
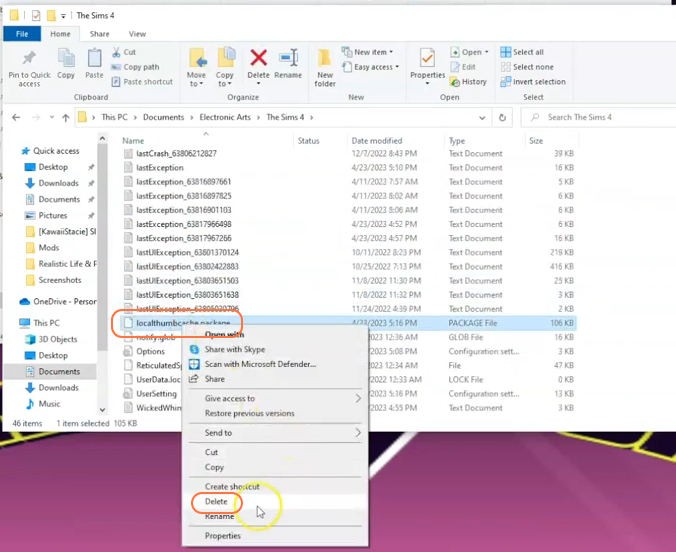
Step 4: Now, open the Mods folder from your Sims 4 game directory. Usually, the game directory can be found at Documents > Electronic Arts > The Sims 4 > Mods. This folder serves as the designated location for all custom content and mods, allowing the game to recognise and utilise them effectively. It’s also recommended to delete the “localthumbcache.package” in your Sims 4 folder.
In case you don’t have a Mods folder in your game directory, you can create one yourself as it is required to store the mod files. It’s important to note that if you haven’t installed any mods before, you need to load up the game at least once and then exit to generate the necessary folders, such as Documents and Electronic Arts, for a seamless mod installation process. Additionally, ensure that the game is not running while you install the mod.
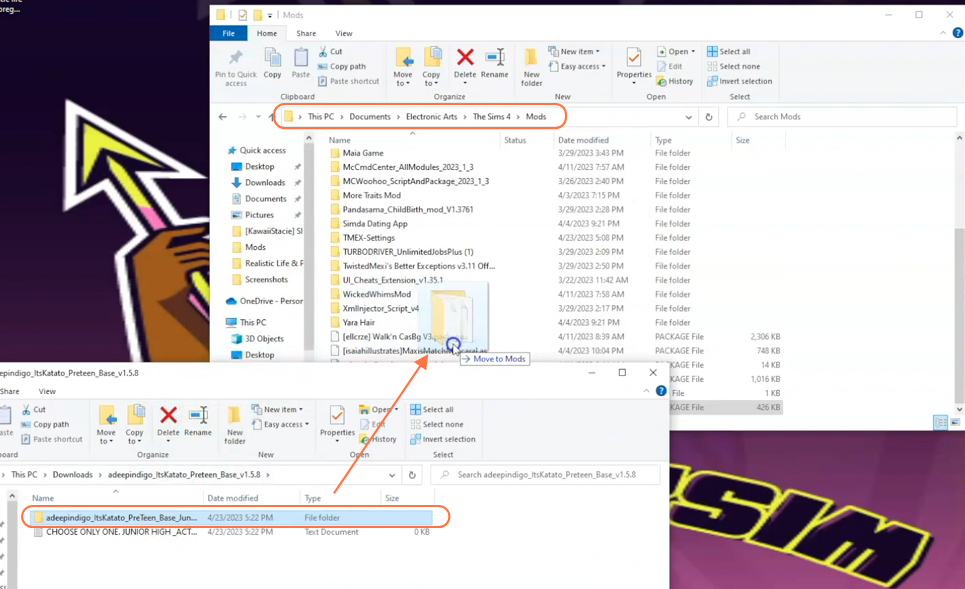
Step 5: Now open the extracted file folder (Preteen Base) from the downloads folder and just take and drag one of the two folders (Preteen Base Middle school or Preteen Base Junior High) of your choice into the Mods folder of your Sims 4 directory. This folder contains all the package and TS4Script files. This action ensures that the mod files are installed correctly and ready to be used in the game.
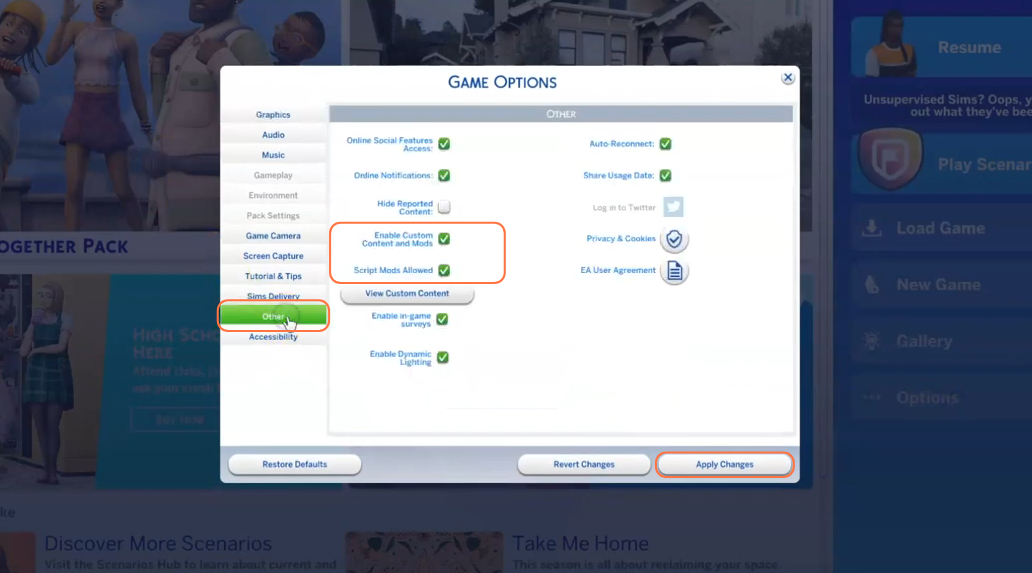
Step 6: Now, it’s equally important to enable the “mods” and “script mods” options in The Sims 4 game settings to ensure proper functioning of the mod. Once you are in the game, click on the “Options” tab, then select “Game Options,” and further choose the “Other” tab.
Here, check the boxes for “Enable Custom Content and Mods” as well as “Script Mods Allowed”. After making these selections, don’t forget to click the “Apply Changes” button located at the bottom right corner of the screen.