This comprehensive guide will walk you through the process of installing a QBCore framework for your FiveM server along with the TxAdmin web-based management tool for GTA V. QBCore framework offers extensive customization and and active support for Grand Theft Auto V. This framework utilizes the FiveM platform.
Step 1: Download the FiveM Server Client
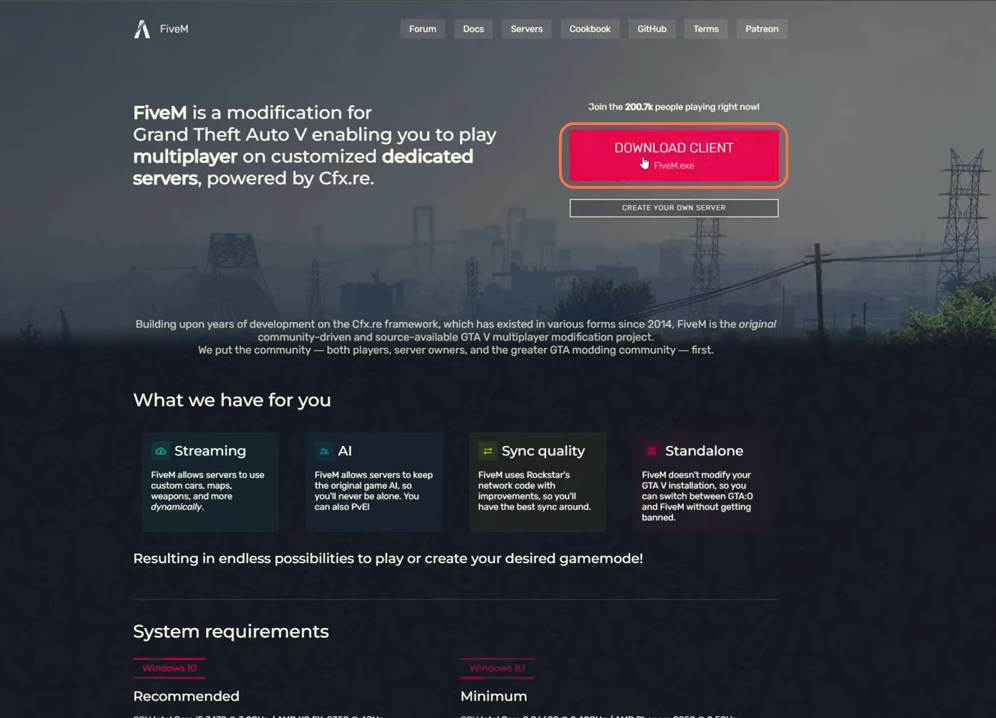
- To begin, you’ll need to download the FiveM client.
- After that, navigate to the Forum button on the same page to access valuable resources for setting up your server.
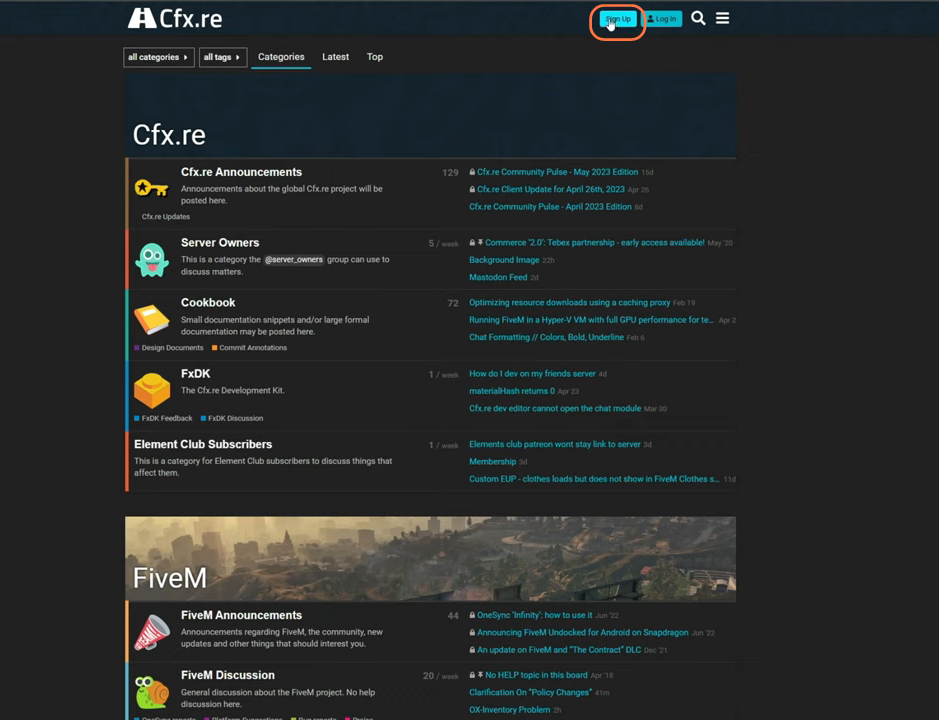
Step 2: Register on the FiveM Forum
- Click on the ‘Sign up’ button in the upper right corner to create an account.
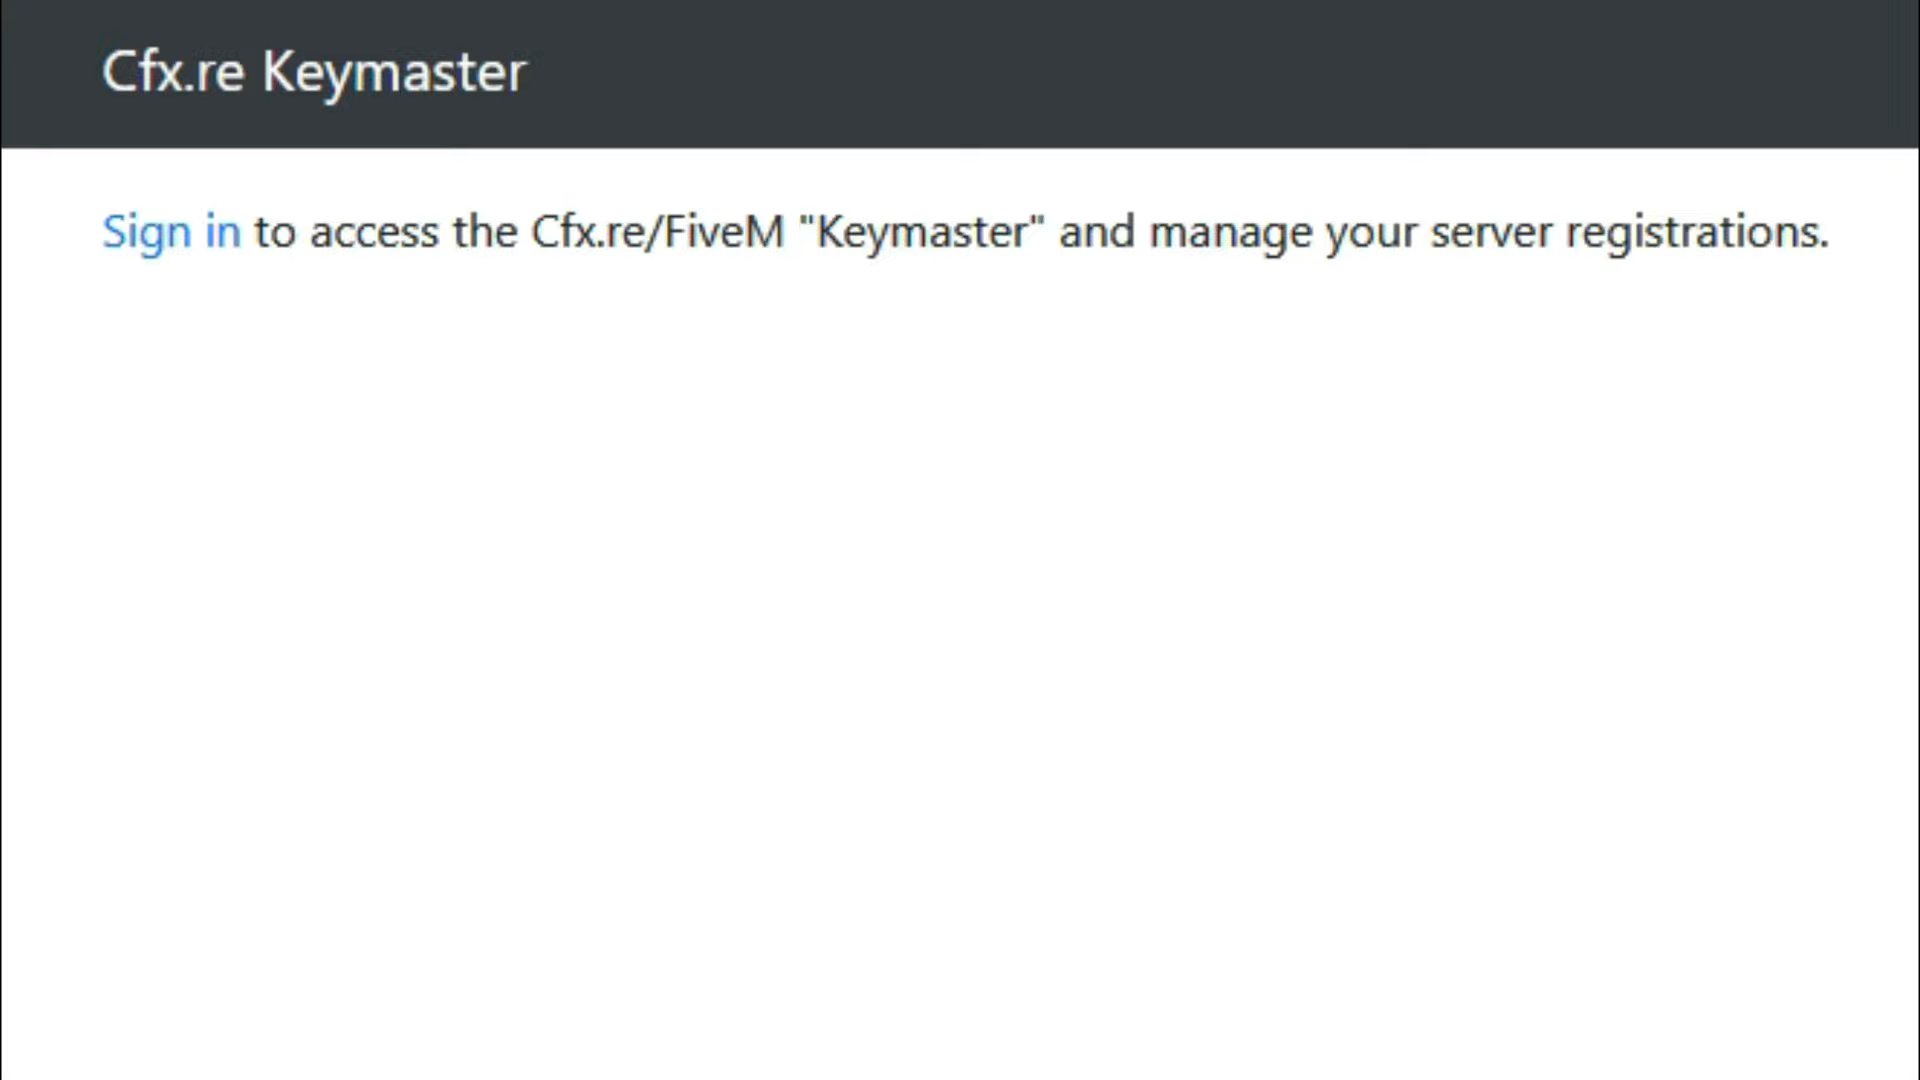
Step 3: Obtain a License Key
- To run your server, you’ll need a license key. Register for a free license key on the Cfx.re Keymaster using the same login credentials you created for the Forum.
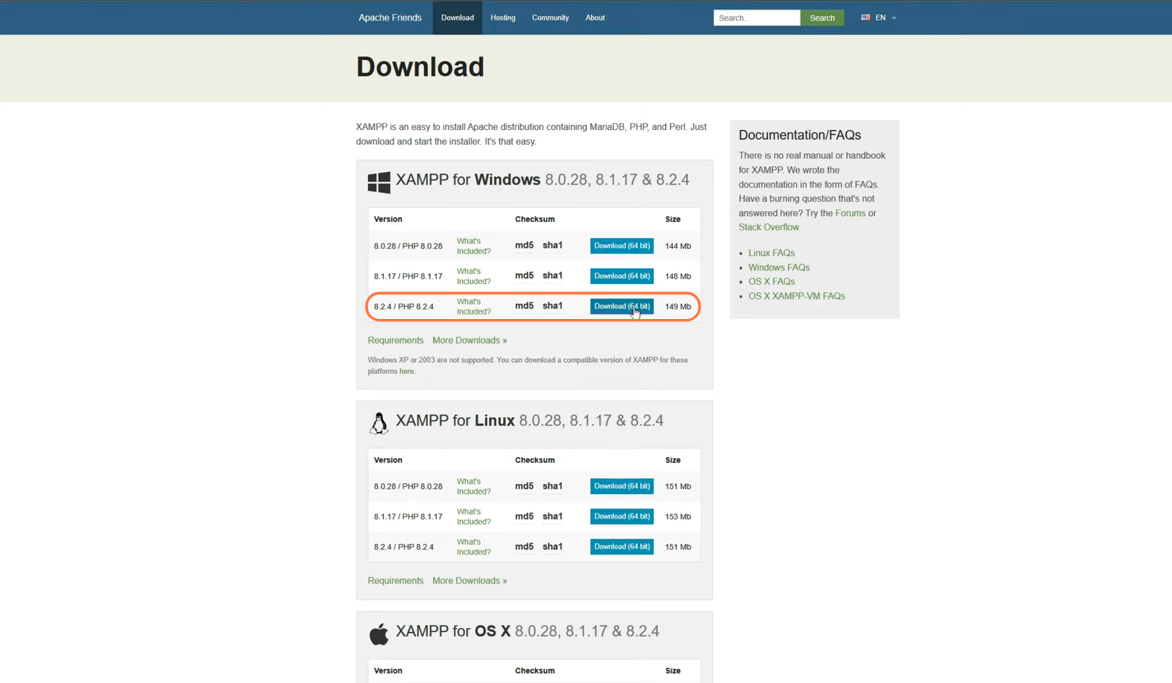
Step 4: Download XAMPP Server
- Next, download the XAMPP Server, which is compatible with various operating systems.
- Ensure you choose the 64-bit version.
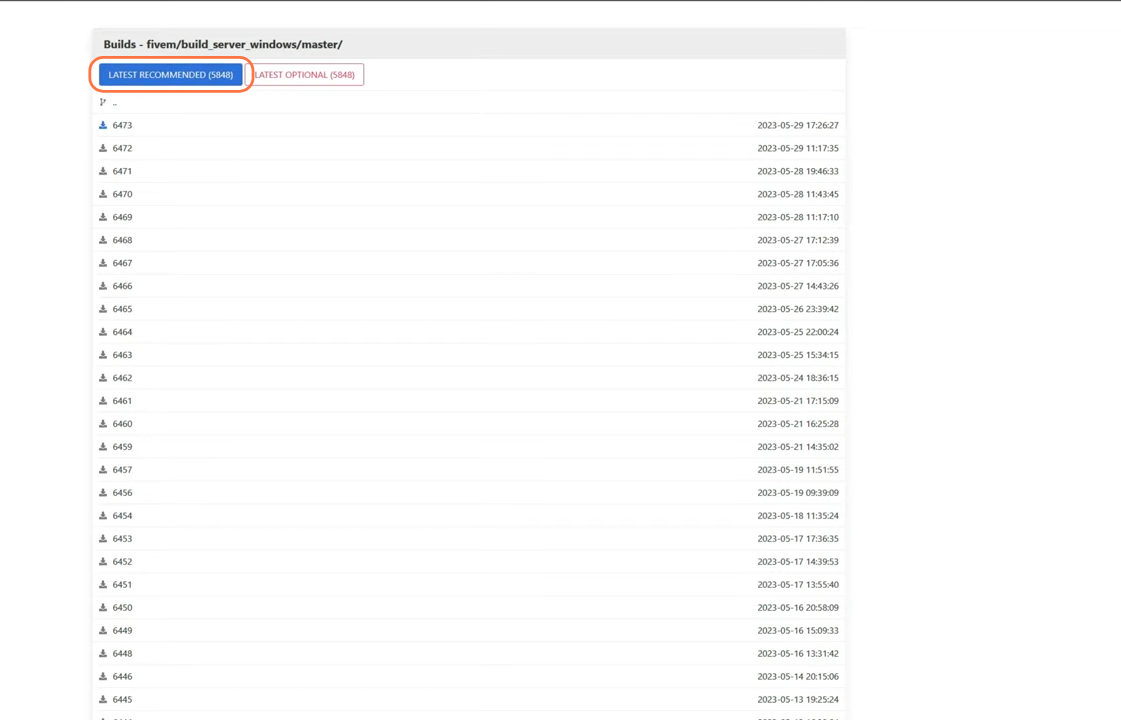
Step 5: Download the FiveM Build
- Visit the FiveM Build Server and click the “Latest Recommended” button to download the server build.
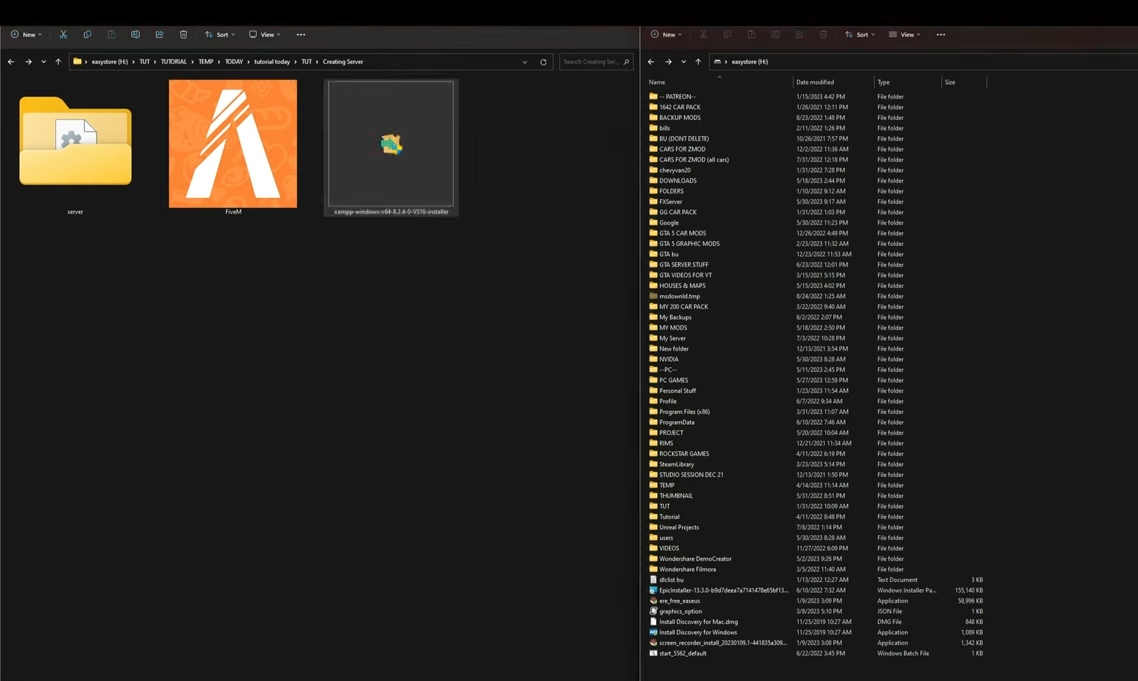
Step 6: Organize Your Downloads
- Once you have all the necessary files, locate them in your downloads folder.
- On the other hand, open up any drive on your PC in a new window.
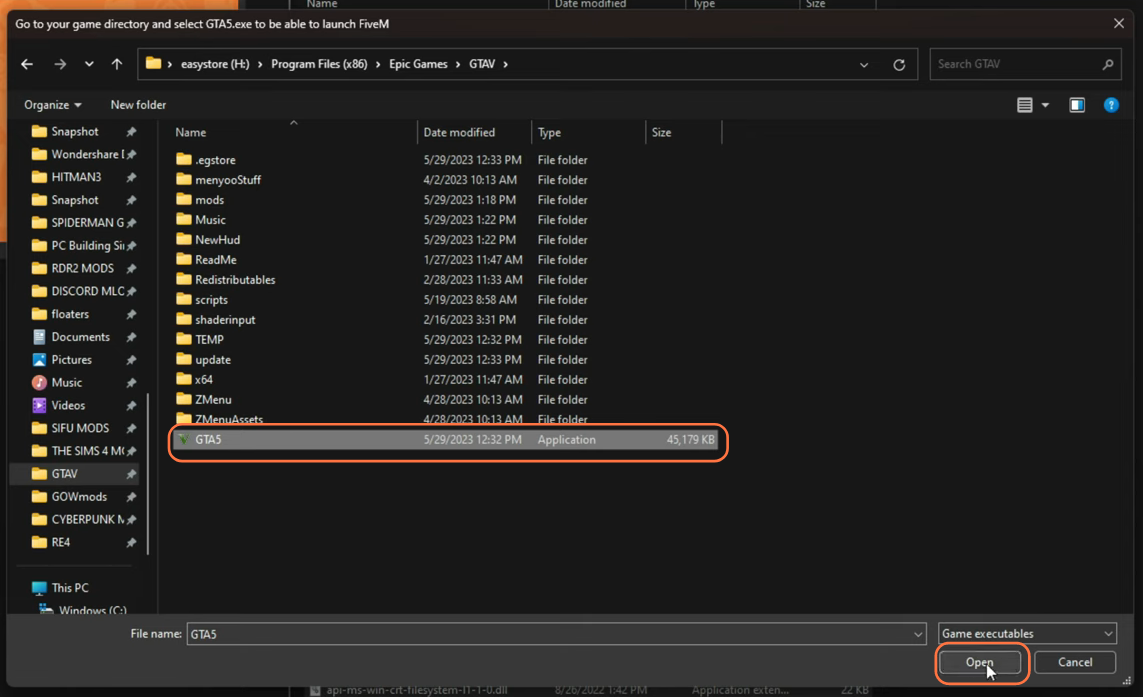
Step 7: Launch FiveM
- Double-click the FiveM file to open it. It will begin loading and adding necessary folders as it updates.
- A new window will prompt you to navigate to your GTAV directory and select the GTA5.exe file.
- After configuring this, FiveM will open up, and you need to close it.
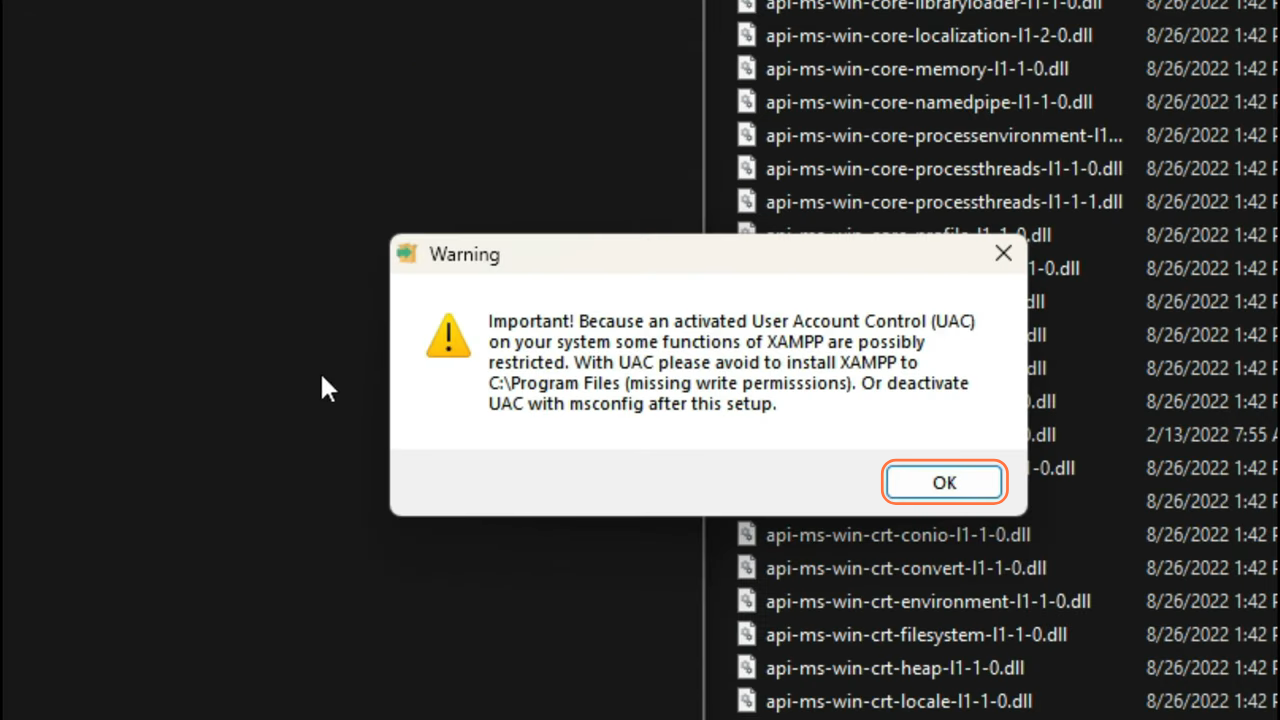
Step 8: Install XAMPP Server
- Double-click the XAMPP setup file, and a warning window will appear. Click “OK” to proceed.
- Follow the setup wizard’s instructions, leaving all settings as default.
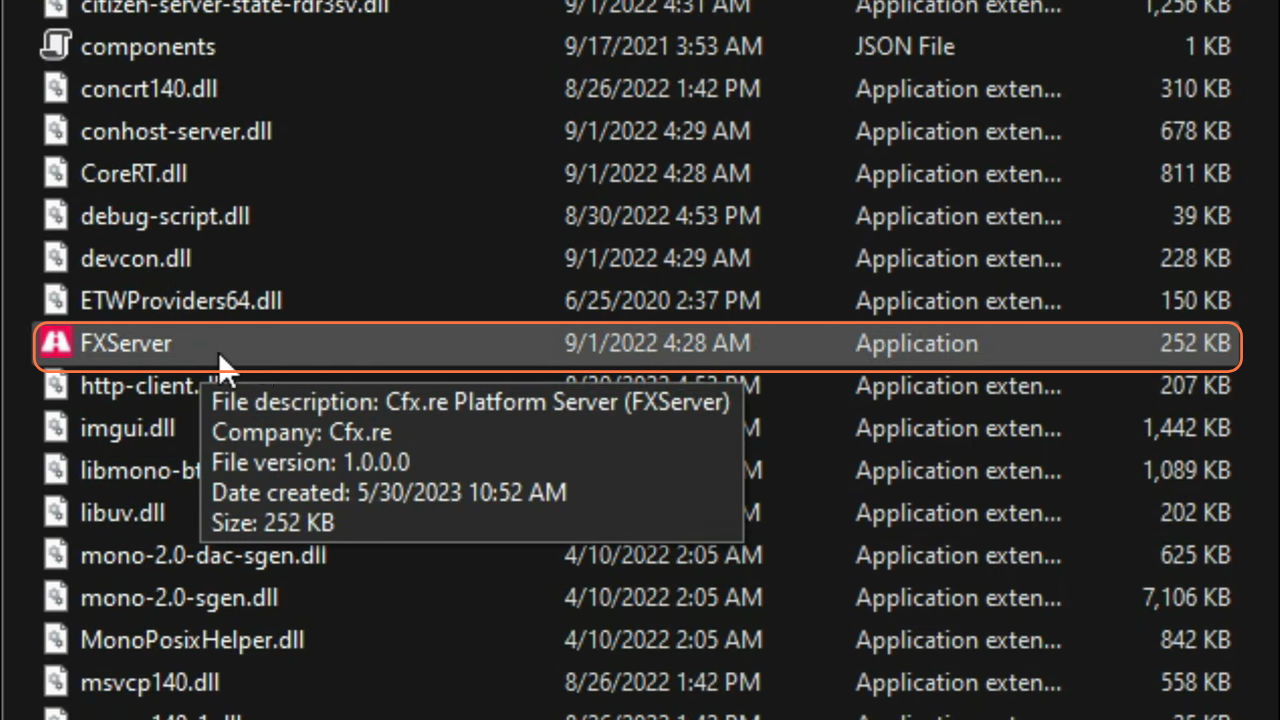
Step 9: Access the Server Folder
- Return to your downloads directory and open the server folder.
- Locate the ‘FXServer’ application file and double-click to run it.
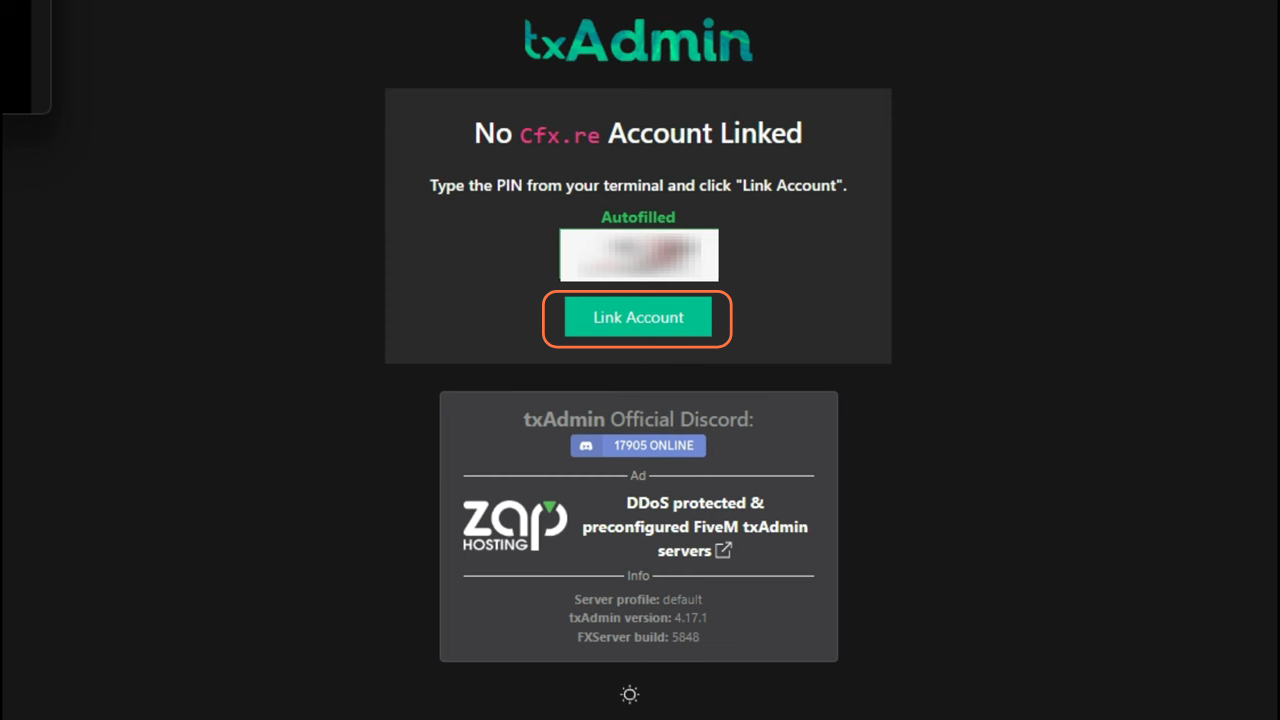
Step 10: Configure TxAdmin Web Interface
A browser window will open, displaying the TxAdmin Web Interface.
- Here, you’ll need to link your Cfx.re account by entering the PIN.
- Click the ‘Link Account’ button, which will verify the PIN, and then prompt you to create a backup password.
- Afterwards, click ‘Create Master Account’ to proceed.
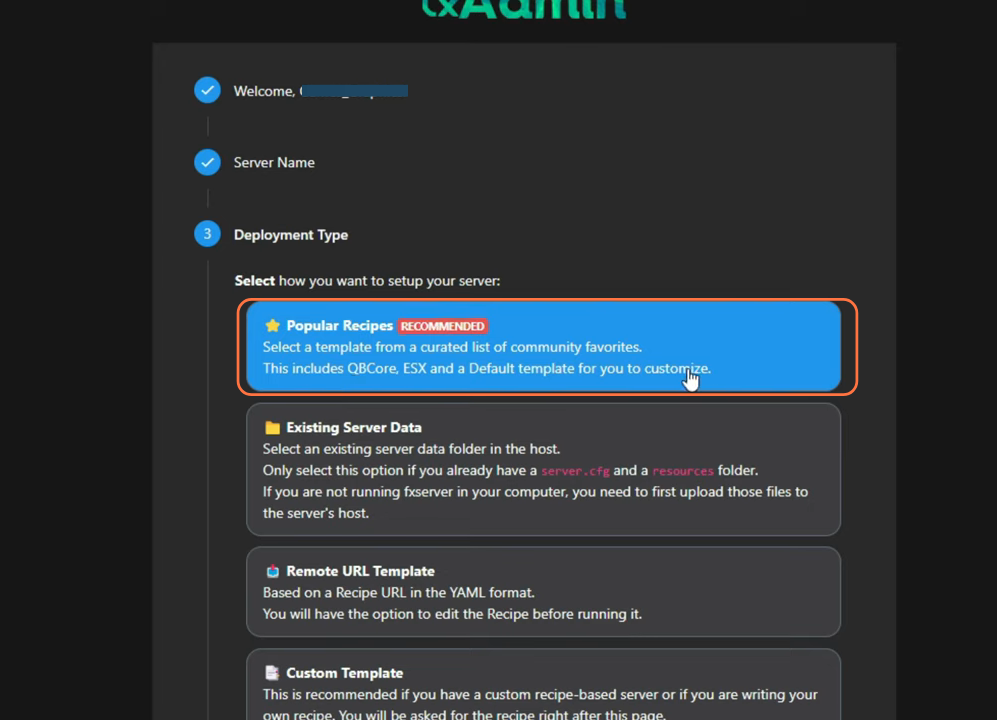
Step 11: Profile Configuration
- Select the default profile, and then enter a short server name.
- Choose the “Popular Recipes” for the Deployment type. Select the “QBCore” option from the available templates.
- For the Data Location, use the suggested path provided by them.
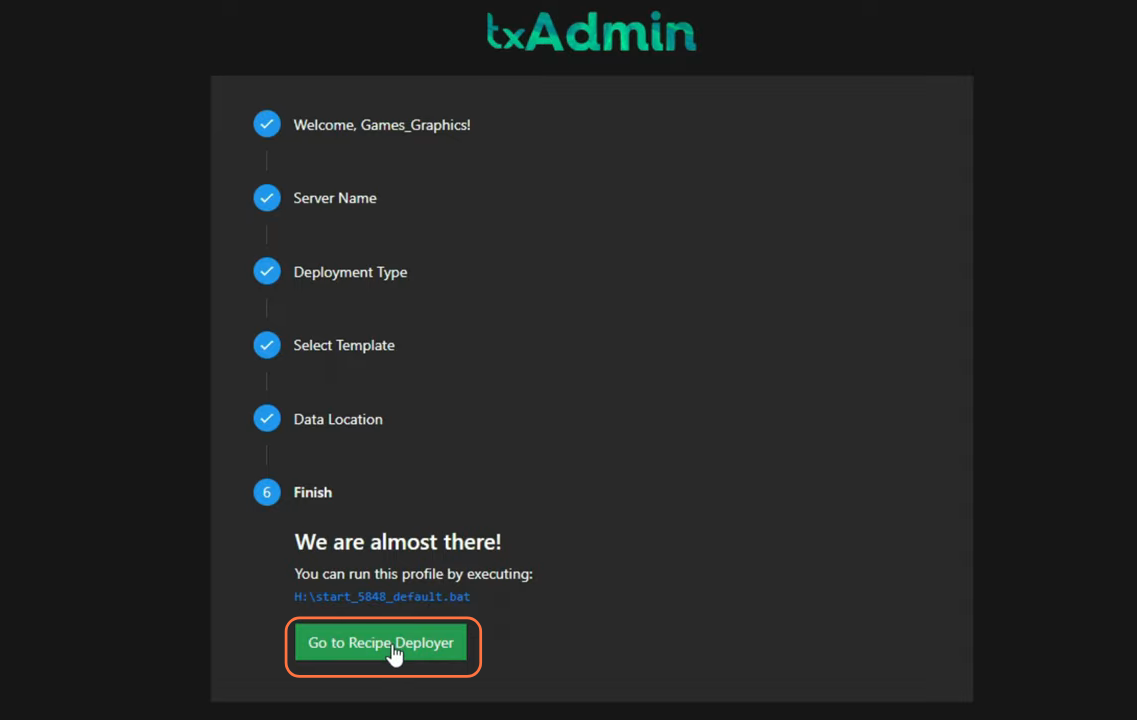
Step 12: Finalize and Deploy
- Once you reach the Finish step, you’ll be able to run this profile.
- Click the “Go to Recipe deployer” button to continue.
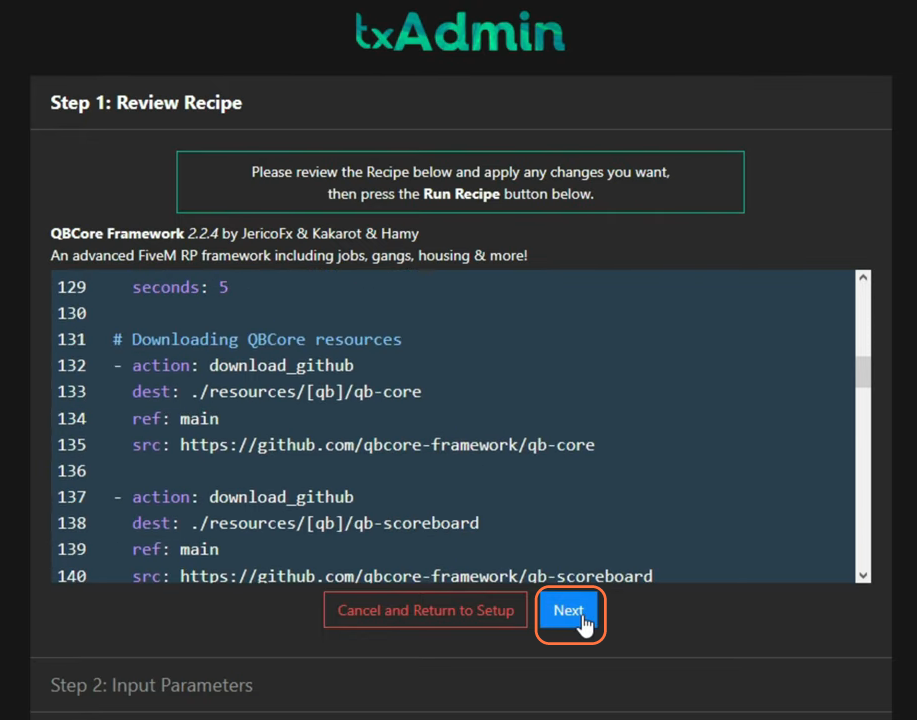
Step 13: Review the Recipe
You’ll be taken to the next page where you can review the server’s recipe. Simply click ‘Next’.
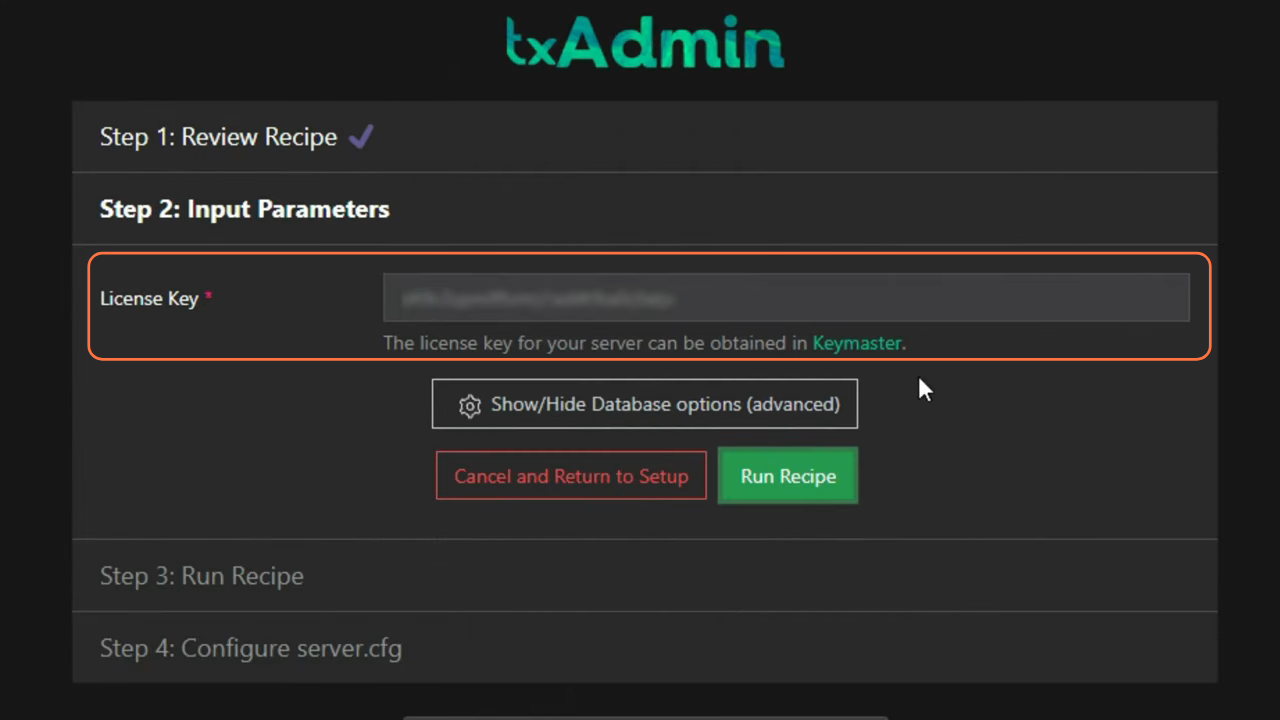
Step 14: Input Parameters
After that, enter parameters, including your license key.
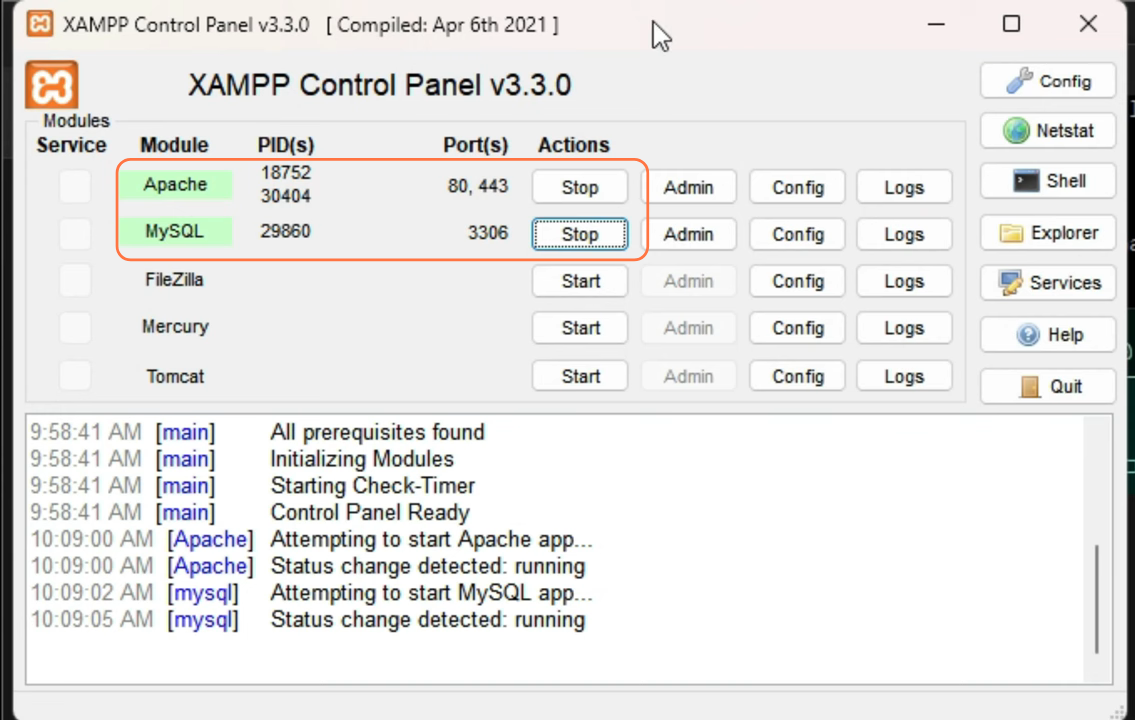
Step 15: Start XAMPP Services
- Return to the XAMPP control panel and start the Apache and MySQL modules.
- Minimize the control panel and press the “Run Recipe” button on the TxAdmin window.
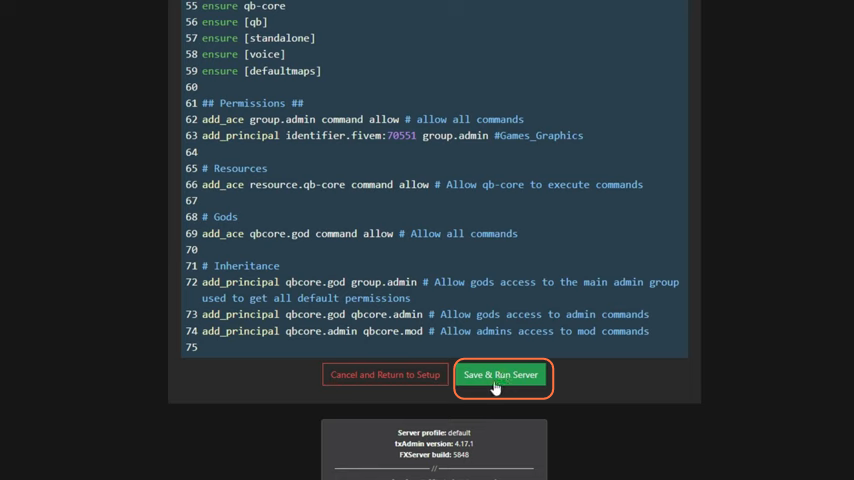
Step 16: Complete the Process
- Once the Recipe loading is complete, press “Next”, and your server’s CFG file is ready.
- Finally, click “Save & Run Server” to finish the installation process.
By following these steps, you can install QBCore server with TxAdmin (2023) for GTA 5 RP.