In this guide, you’ll learn how to install the Realistic Ultrasound Mod in The Sims 4. You have to follow the simple steps to do so.
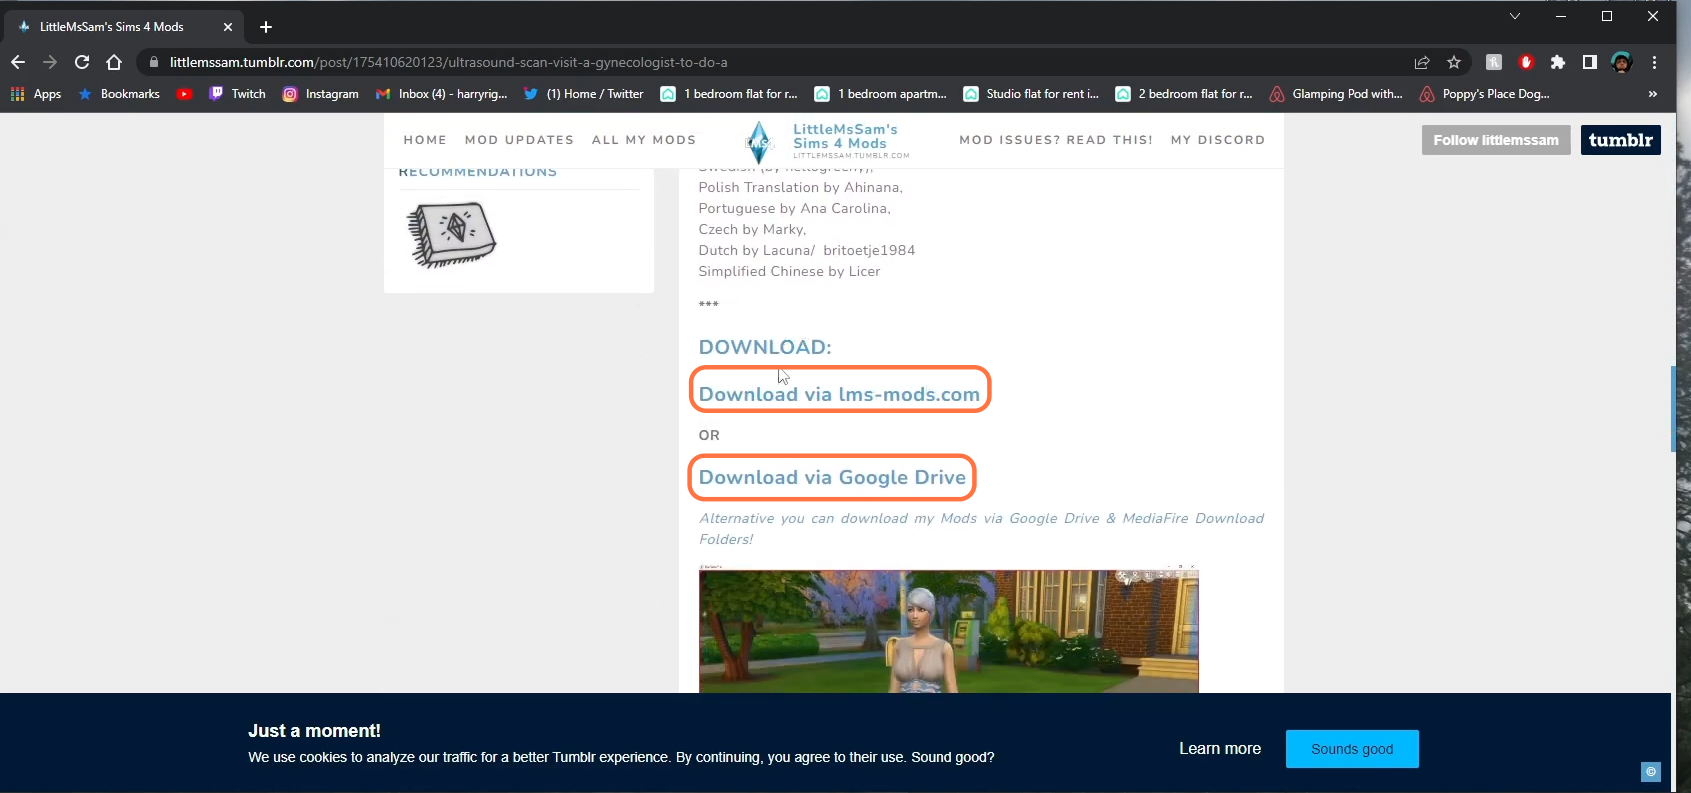
1. The first thing you will need to do is download the Realistic Ultrasound Mod for the Sims 4 from “https://littlemssam.tumblr.com/post/175410620123/ultrasound-scan-visit-a-gynecologist-to-do-a“. Open the link and scroll all the way down to click on the Download via Google drive link.
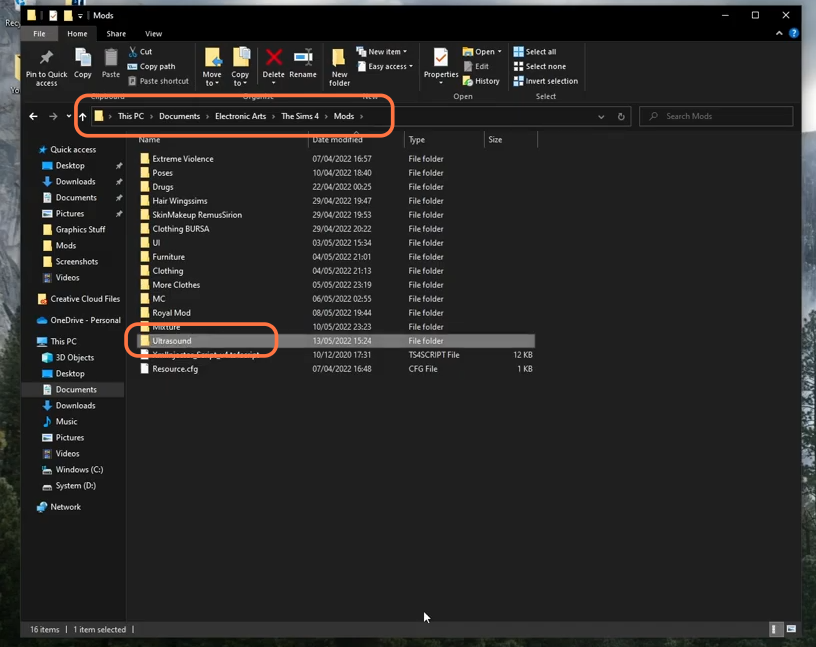
2. Once it gets downloaded, you need to drag the file to the desktop. Then open the game’s directory which in this case is in Documents > Electronic Arts > The Sims 4 > Mods. You have to create a folder and name it ultrasound or whatever name you want to give it for your ease.
3. After that, right-click on the downloaded zip file, select Extract All, and then choose the folder you just created inside the Sims 4 directory.

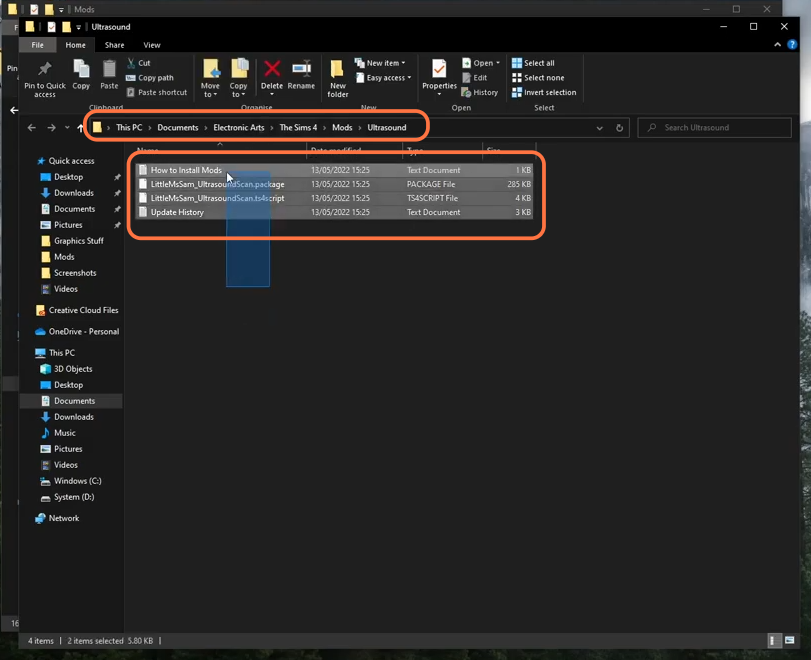
4. Now you will have these files inside the ultrasound folder of the mods folder. The mod has been installed now.
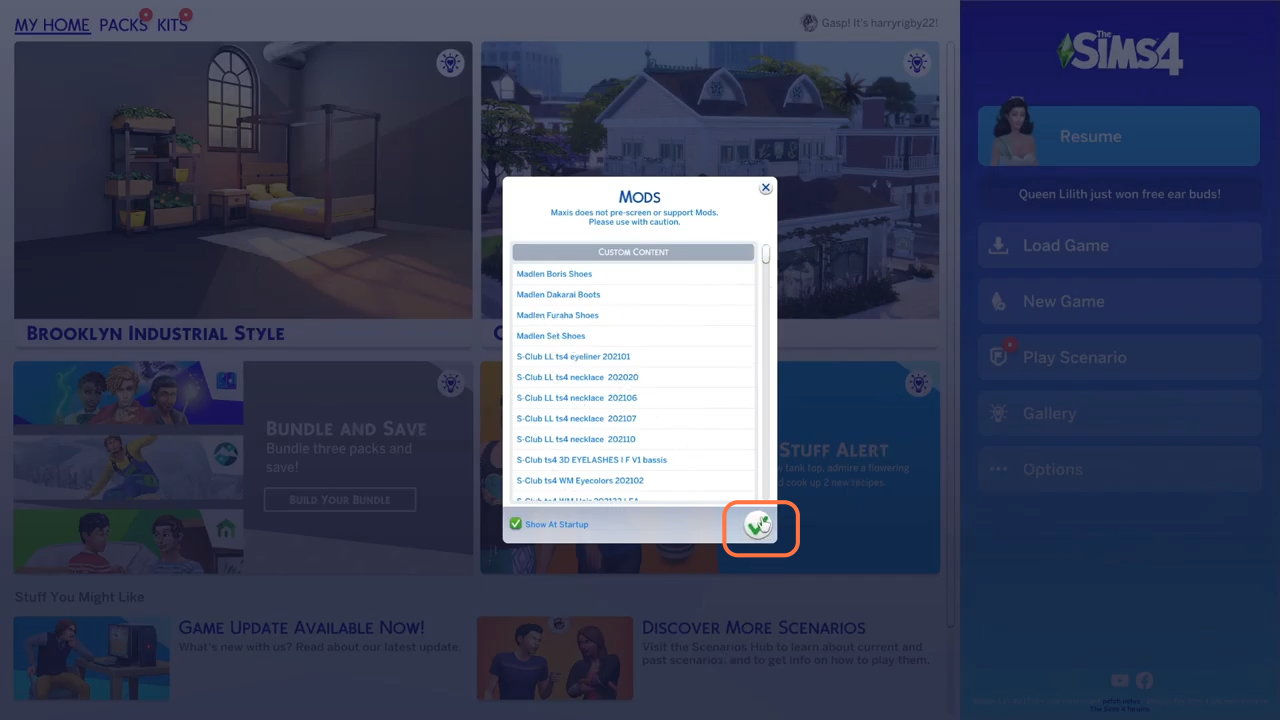
5. Now you can play the game. Once the game loads up, a little Mods pop-up window will appear as you have installed a new mod. Click on the tick mark at the bottom right corner to go ahead.
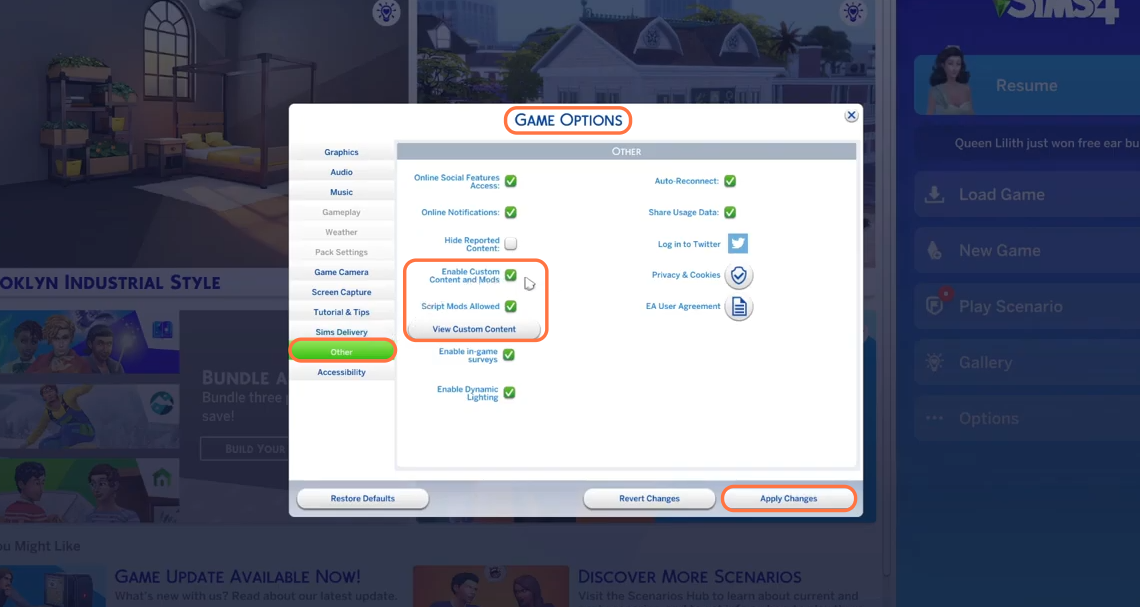
6. Then you need to activate a couple of things in the settings. Click on “Options” then select “Game Options” then click on the “Others” tab and make sure to check the “Enable custom content and mods” and “Script Mods Allowed” options. After that, click on the apply changes button to save these settings.