In this comprehensive guide, we will walk you through the seamless process of installing the Sims using TSR’s website. The Sims Resource (TSR) is an ultimate destination for custom content to provide you an enhanced Sims 4 gameplay experience! It is an online community where Simmers from all corners of the globe come together to share, discover, and create unique content for the Sims games.
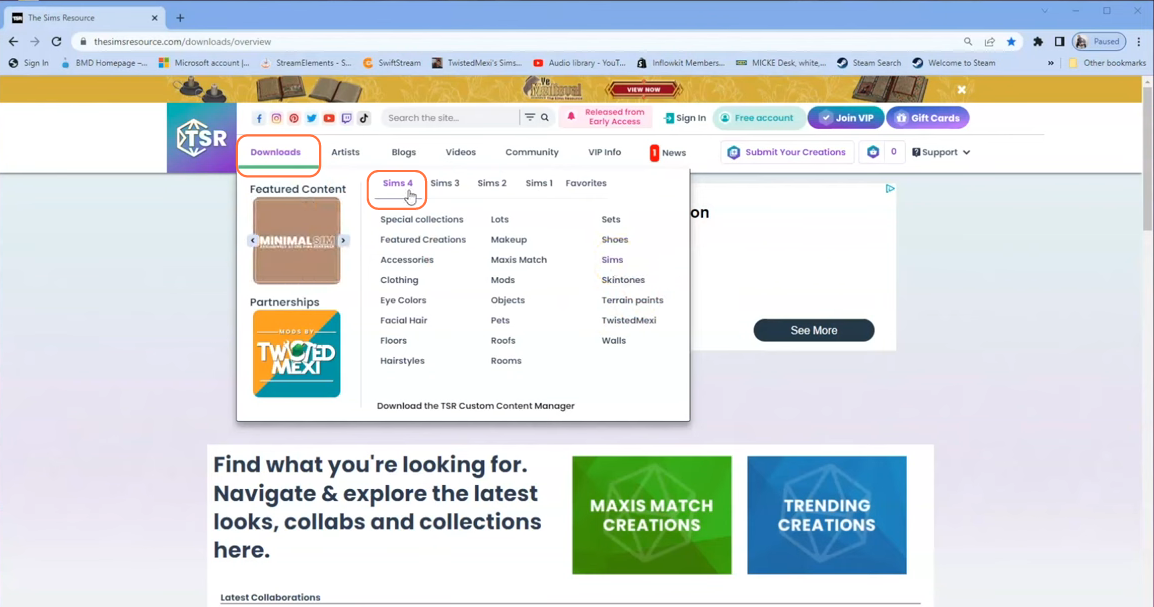
Step 1: Start by visiting the official website of TSR (The Sims Resource) using this link: “www.thesimsresource.com/“. Once on the website, click on the Downloads tab located at the top left corner. From there, select the Sims 4 tab to ensure you are browsing content specifically for that game. Select the Sims option from the drop down menu.
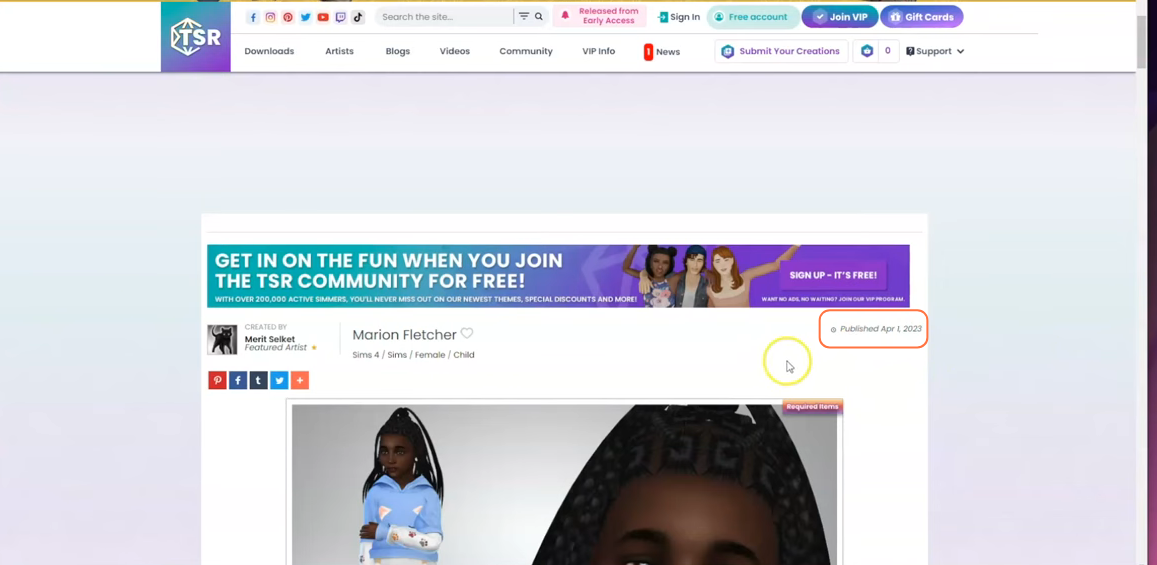
Step 2: Within the Sims 4 section, browse through the available Sims and choose the one you like. Look for the Published stamp in the upper right corner of the selected Sim’s page. If you don’t see it, you may have to wait until the specified date to download it.
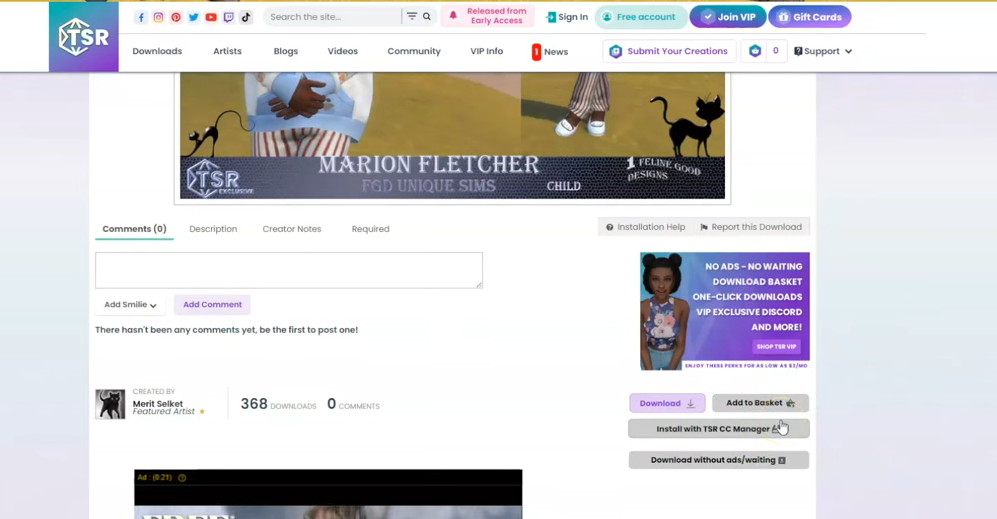
Step 3: Scroll down the page until you find a purple Download button. Alternatively, you can also use the ‘TSR CC manager’ by first downloading it onto your computer.
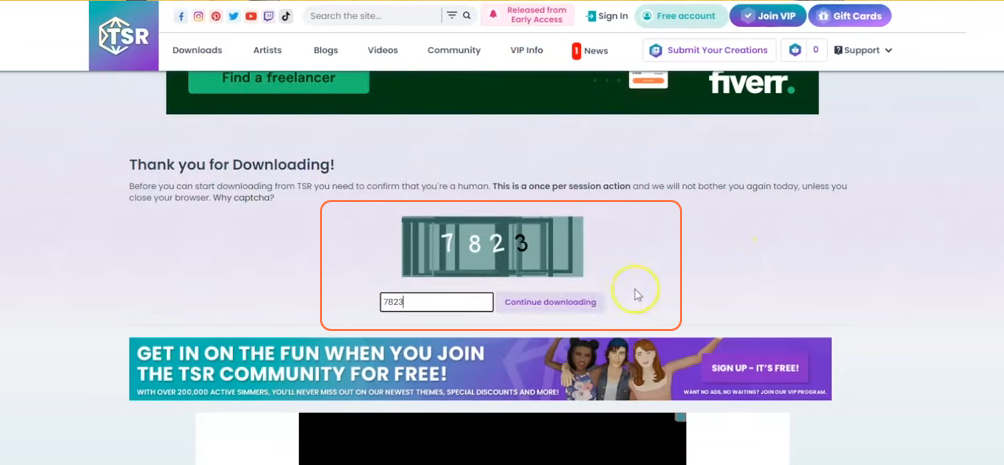
Step 4: Upon clicking the Download button, you will be redirected to a new page where a 4-digit code will be displayed. Enter this code in the given input field to confirm that you are not a bot. Once verified, the downloading process of your selected Sim will begin.
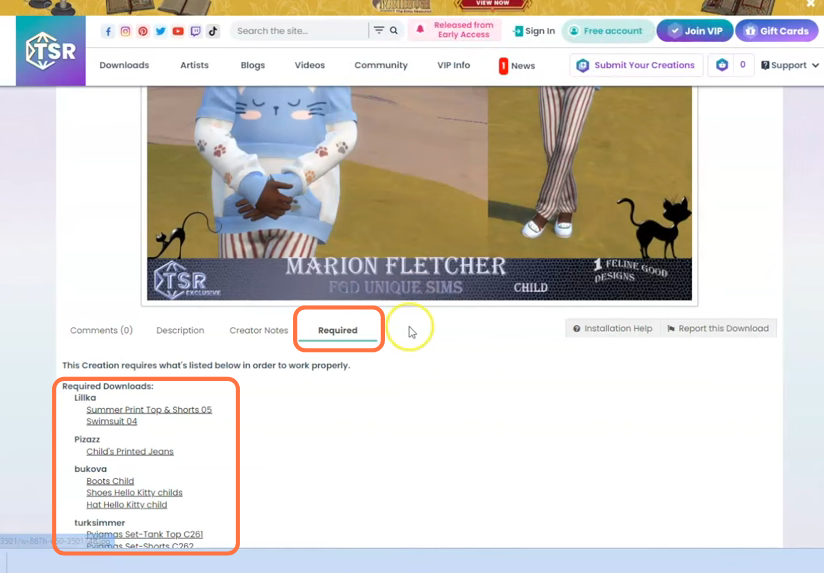
Step 5: On the next page, press the “Download now” button to finally get the Zip file of the Sim. Look for the required items highlighted in red text and ensure that you have all these necessary items installed as well to use the Sim character in the game.

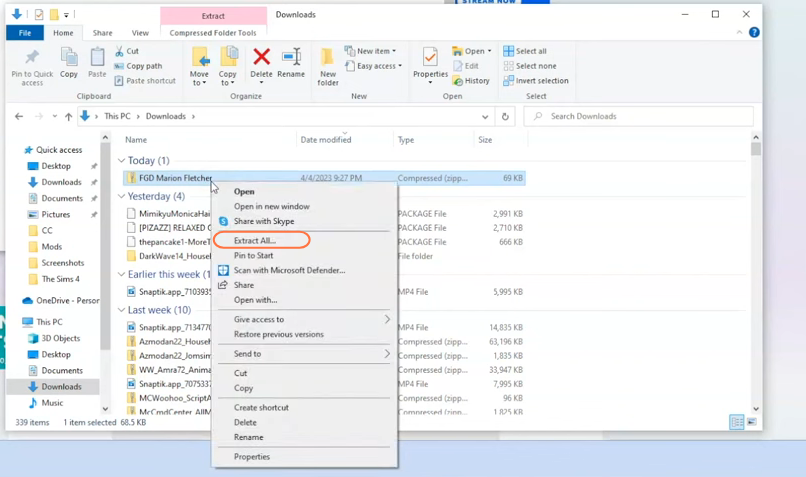
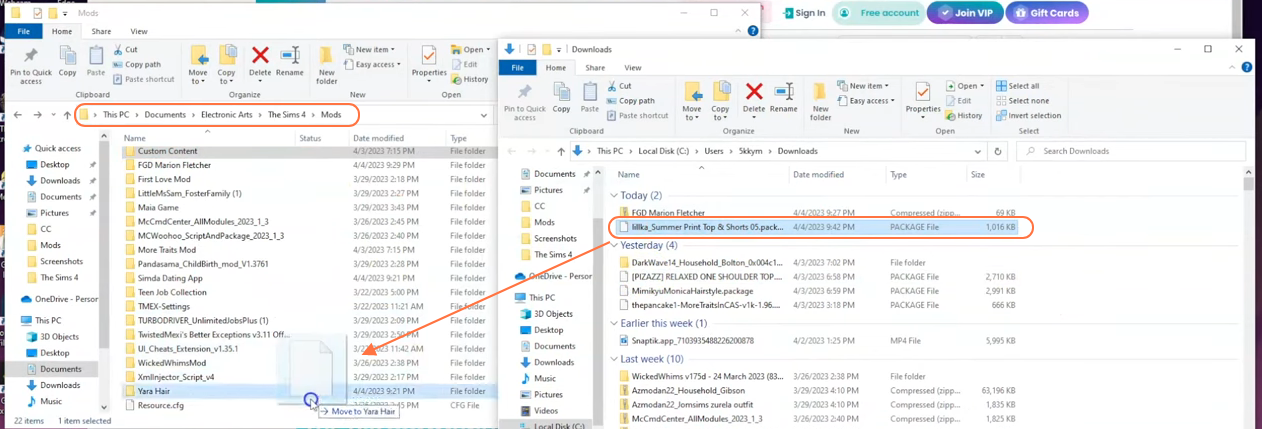
Step 6: Once the download is complete, open your File Explorer Window and locate the “Downloads” folder. This is typically where downloaded files are saved. Right-click on the downloaded zip file, choose the “Extract All” option to bring out its content into a separate folder. This folder will contain the TS4script and package files.
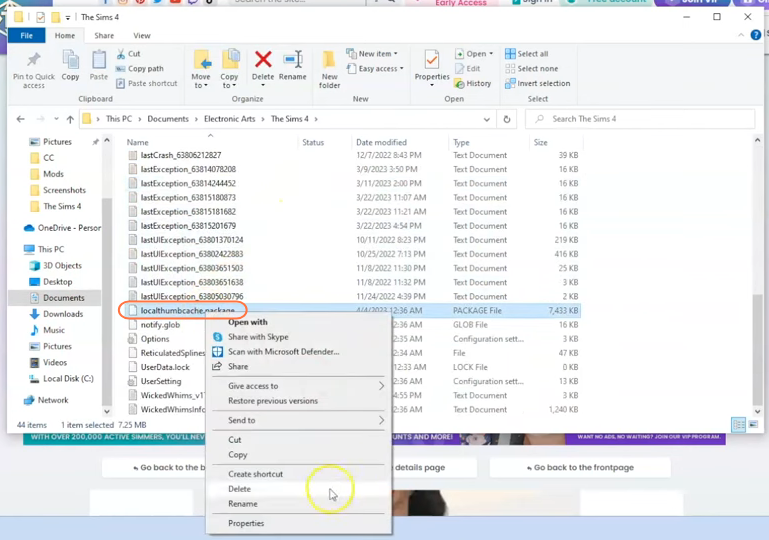
Step 7: Open another File Explorer window and navigate to the Mods folder in your Sims 4 game directory. The game directory is usually found at Documents > Electronic Arts > The Sims 4. The Mods folder serves as the designated location for all custom content and mods, allowing the game to recognize and use them effectively. It is recommended to delete the “localthumbcache.package” file from your Sims 4 folder.
If you don’t have a Mods folder, you can create one yourself as it is necessary for storing mod files and custom content. Keep in mind that if you haven’t installed any mods before, you need to load the game at least once and then exit to generate the required folders, such as Documents and Electronic Arts, for a seamless CC installation process. Additionally, ensure that the game is not running while you install any modifications.
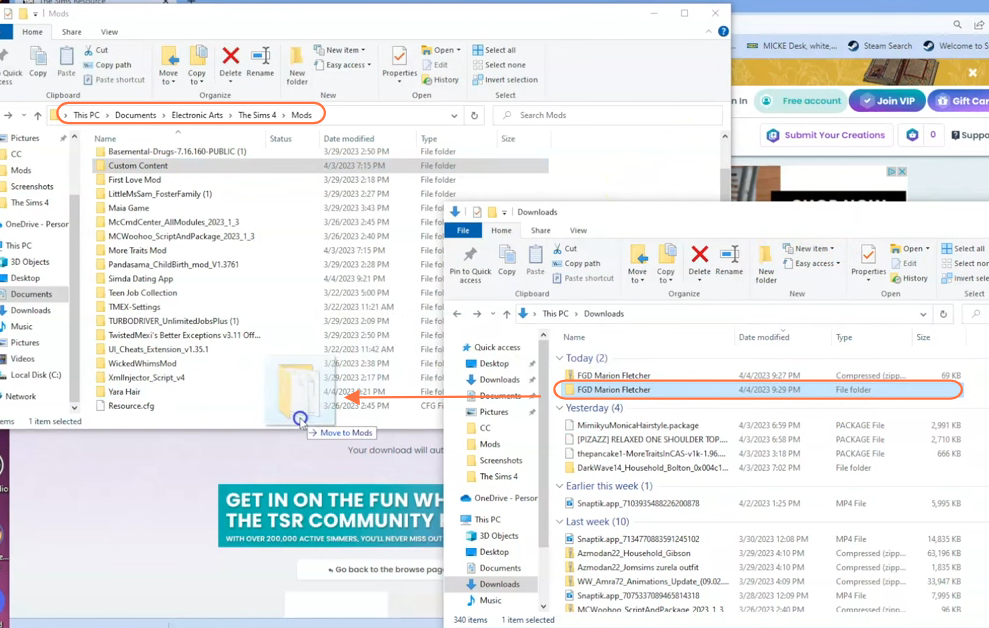
Step 8: Drag the extracted folder containing the files into the Mods folder of the Sims 4 directory. This will ensure that the custom content files are placed correctly for the game to recognize and activate them.
Step 9: After downloading the desired custom content for your selected Sim, scroll down to the bottom of the Sim’s main page. Click on the required tab and download all the necessary items to ensure the custom content functions as intended.
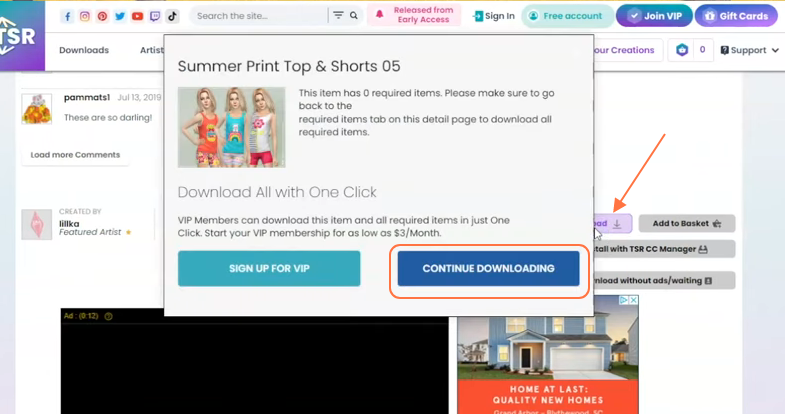
Step 10: If downloading each file separately feels slow and tiresome, you can consider joining the VIP membership. This allows you to perform all the necessary actions with just one click.
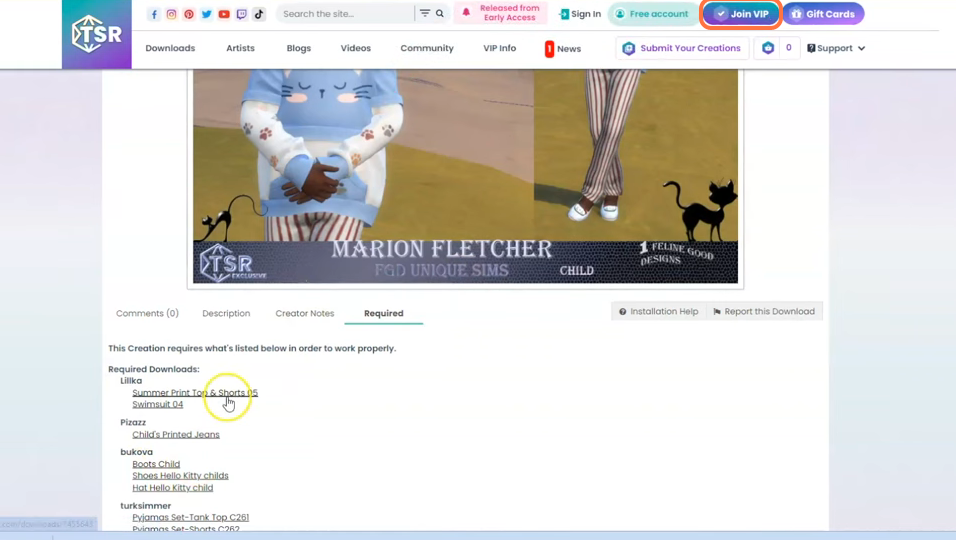
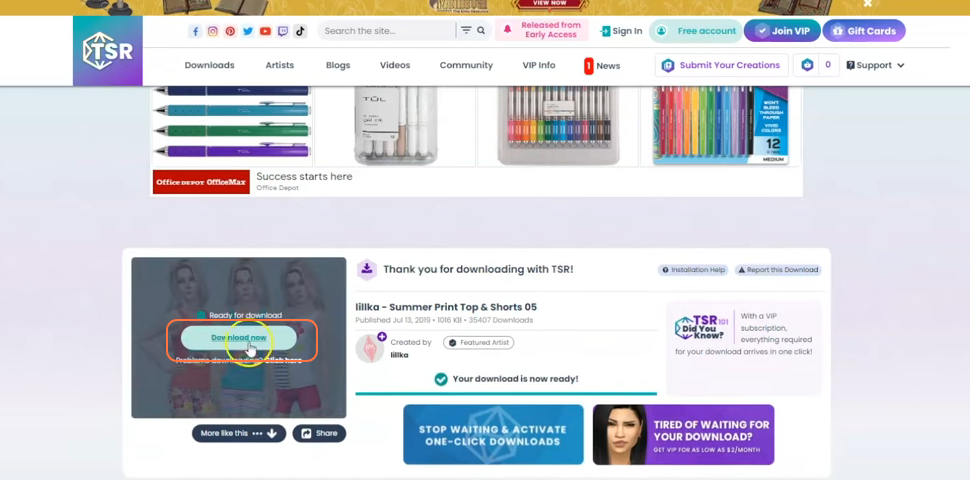
Step 11: If you prefer to download each file individually, click on each item, and you will be redirected to the details page. There, you will find a Download button to obtain the required file. Click the “Continue Downloading” button on the pop-up window and wait a few seconds for it to be ready for downloading.
Step 12: Once the file is prepared, click the “Download Now” button. The file will be downloaded, and instead of a zip file, you will receive a package file.
Step 13: Now, drag the downloaded package file into the Mods folder of the Sims 4 directory. This will ensure that the file is placed correctly for the game to recognize and activate it. Repeat the same process with the other required items for that particular Sim. This step is essential, as you won’t be able to access your Sim without these items.
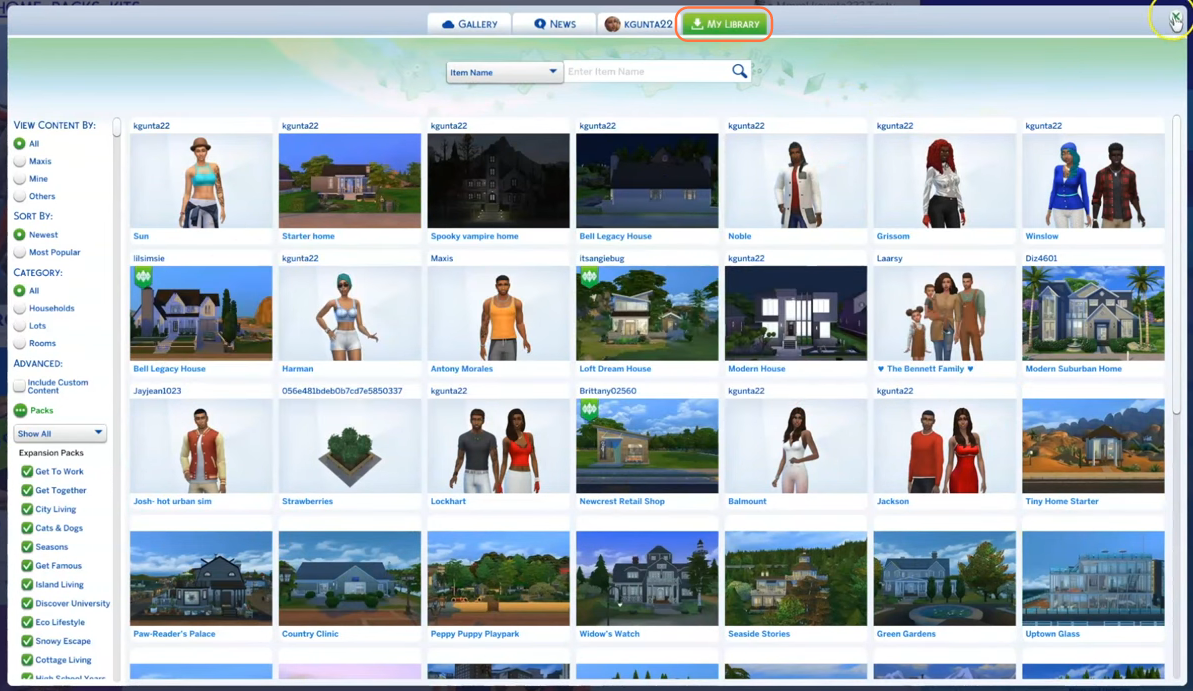
Step 14: When you launch your Sims 4 game through the EA app, you will have the option to visit your personal gallery and view the new Sim there. Click on the Gallery tab, then select the My Library tab to find the custom content within your personal private folder.
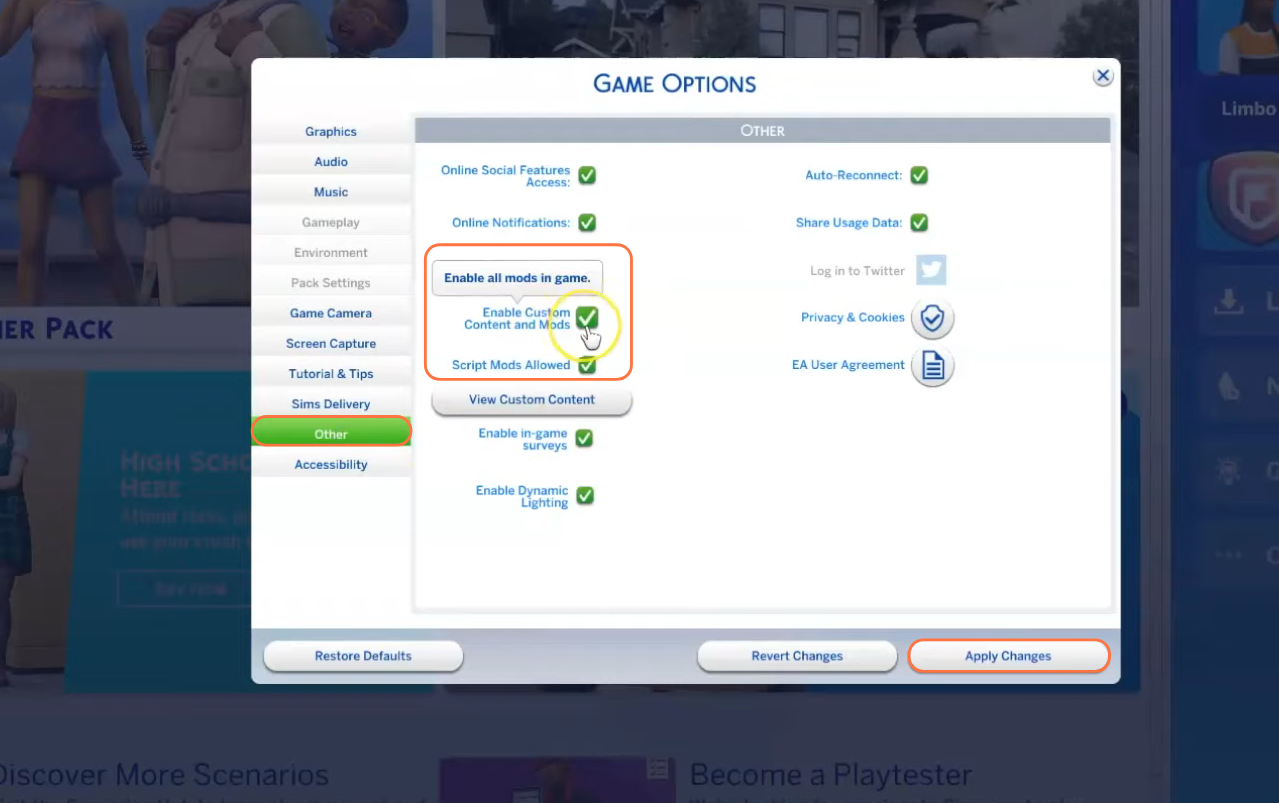
Step 15: Finally, if you are new to installing custom content and mods, make sure to enable the “mods” and “script mods” options in The Sims 4 game settings. Launch the game and click on the “Options” tab, followed by “Game Options”. In the “Other” tab, check the boxes for “Enable Custom Content and Mods” as well as “Script Mods Allowed”. Once you have made these selections, click the “Apply Changes” button located at the bottom right corner of the screen.