Enhance your Sims 4 gameplay experience with the Smarter Self Care mod, a unique modification that empowers your Sims to take better care of themselves. Bid farewell to discomfort caused by low motives and revolutionize your virtual households. Follow this comprehensive guide to seamlessly install the mod and unlock a world of improved self-care options for your Sims.
Step 1: Downloading the Mod
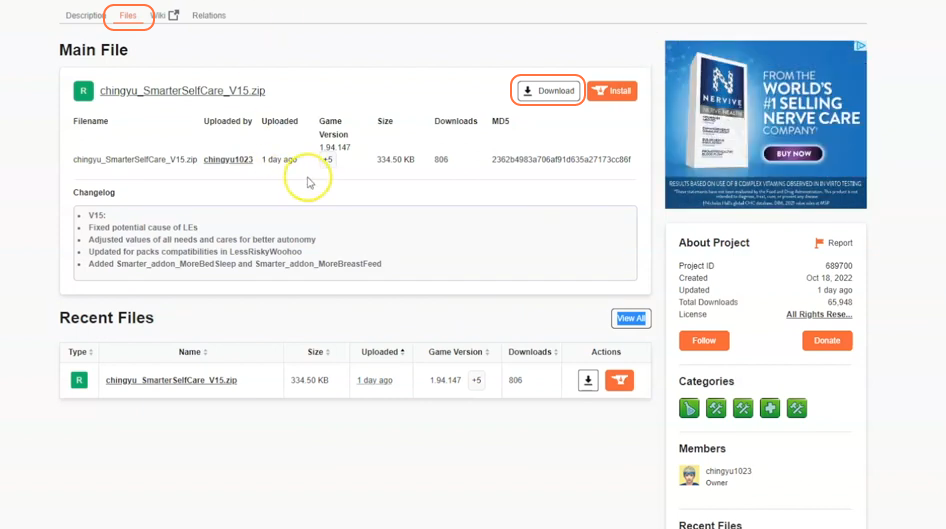
To begin, visit the official source of the mod on CurseForge at “https://www.curseforge.com/sims4/mods/smarter-self-care“. It is crucial to ensure that you download the latest version of the mod to avoid any compatibility issues
with the game. On the mod’s page, navigate to the “Files” tab and click the Download button located under the Main File section. The mod’s zip file will begin downloading in about five seconds, and you can monitor the progress at the bottom of your screen. In some cases, you may also find the Recent Files or Additional Files section. The additional files are sometimes required by the mod or can be optional that can be added if desired.
Step 2: Extracting the Mod
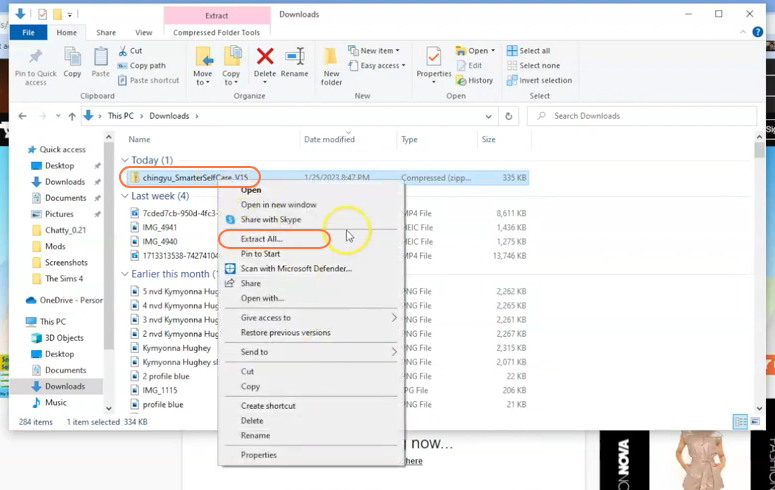
Once the download is complete, open your File Explorer (Windows) or Finder application (Mac) and locate the “Downloads” folder where the downloaded files are typically stored. Right-click on the downloaded zip file of the Smarter Self Care Mod and select the “Extract All” option. Choose a destination for the extracted files, and click “Extract” to proceed. Mac users can simply double-click the zip file to unzip its contents. The extracted folder will contain several package files catering to different needs and hobbies for self-care, all essential for the mod’s installation.
Step 3: Organizing and Selecting Package Files
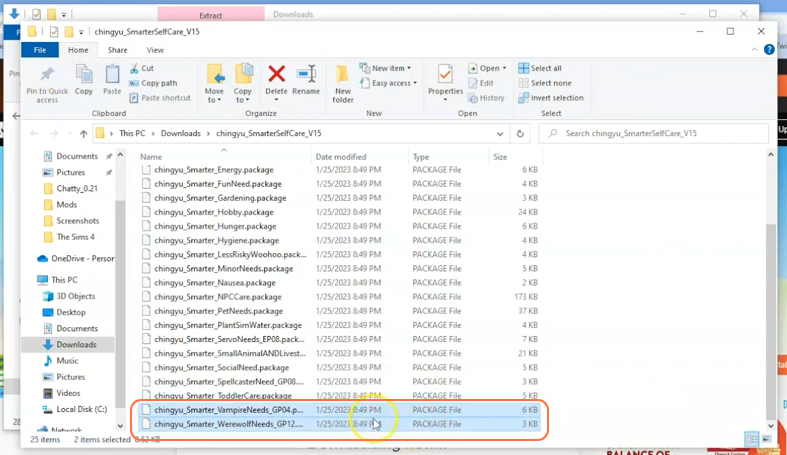
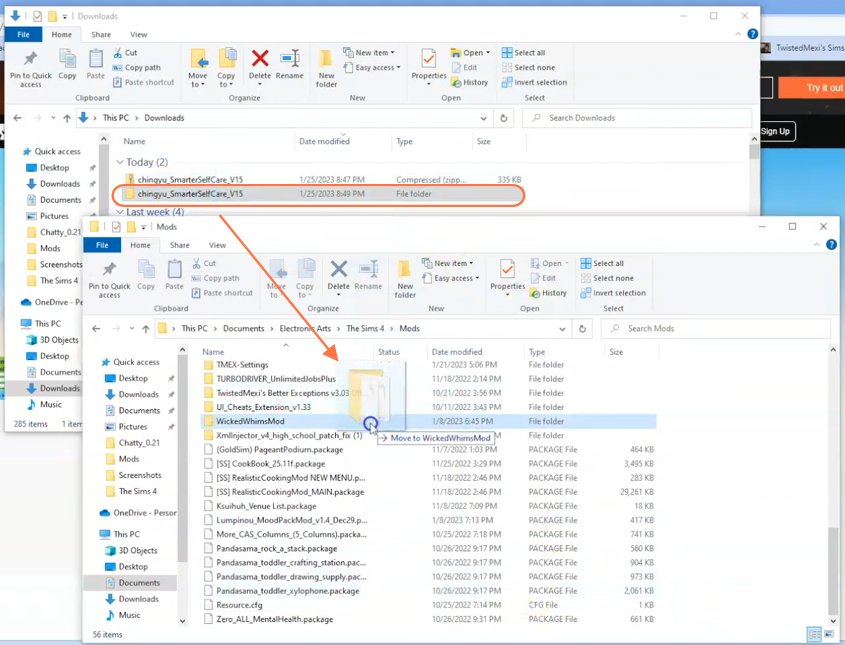
At this stage, you have the freedom to select specific needs or hobbies package files from the collection and place them directly into the Mods folder or create a new folder within the Mods directory for better organization. Avoid nesting files too deeply to ensure smooth functioning. For example, if you only want the werewolf and vampire package files, simply grab those files and drag them into the Mods folder within your Sims 4 directory.
Step 4: Locating and Preparing the Mods Folder
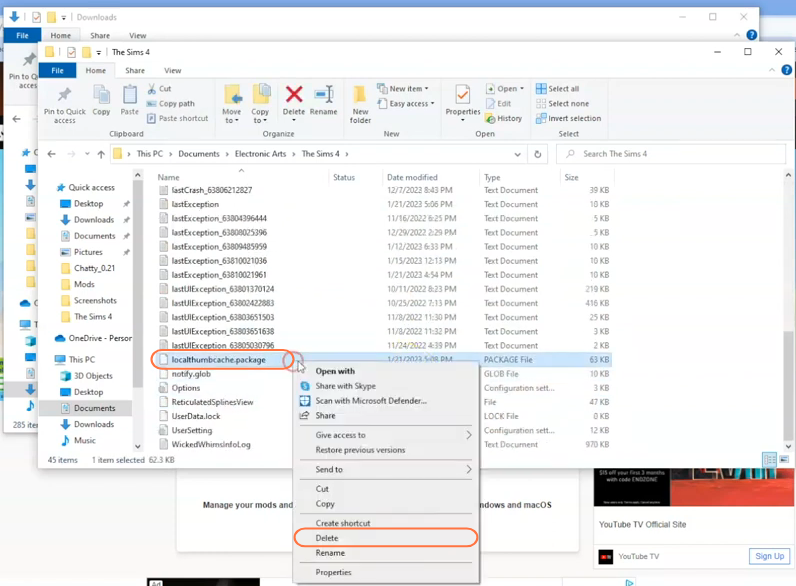
Open another File Explorer window and navigate to the Mods folder in your Sims 4 game directory. The game directory is typically found at Documents > Electronic Arts > The Sims 4. This designated folder serves as the central location for all custom content and mods, enabling the game to recognize and utilize them effectively. It is recommended to delete the “localthumbcache.package” file from your Sims 4 folder.
In case you don’t have a Mods folder in your game directory and have never installed mods before, load up the game at least once and then exit to generate the necessary folders, such as Documents and Electronic Arts, for a smooth mod installation process. Remember to ensure that the game is not running while you install any modifications.
Step 5: Installing the Mod
Drag the entire extracted folder that containing all of the self-care items (package files) into the Mods folder of The Sims 4 directory. Or if you want to add any specific needs (package file) then open the extracted folder and take and drag that need into the Mods folder. This action ensures that the mod is correctly placed for the game to recognize and activate it seamlessly.
Step 6: Disable Auto Updates for Origin or EA App
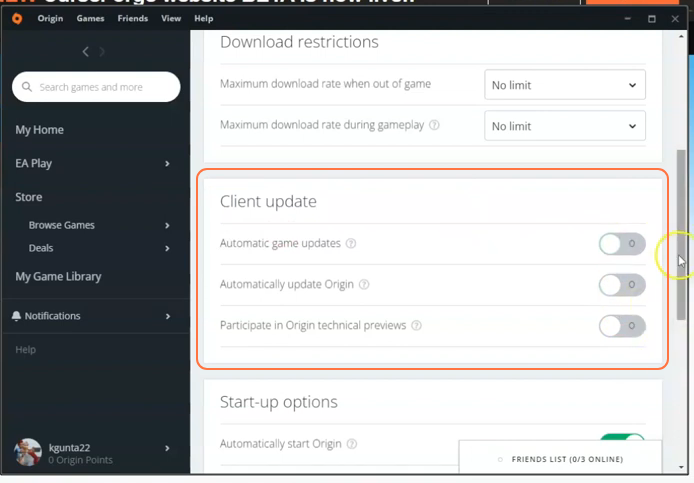
Next, let’s prevent any potential issues with your mods by disabling auto updates for the EA or Origin app. If you are using the Origin app, hover over your username and select “Application Settings”. Scroll down to the “Client Update” section and ensure that all the toggle buttons for automatic updates are disabled. This is crucial because when an update is available for the Origin app, you must first take out your mods folder from the Sims 4 directory and store it in a save place, update the app, exit the Sims 4 game and then reinsert the mods folder into the directory to avoid any conflicts or issues.
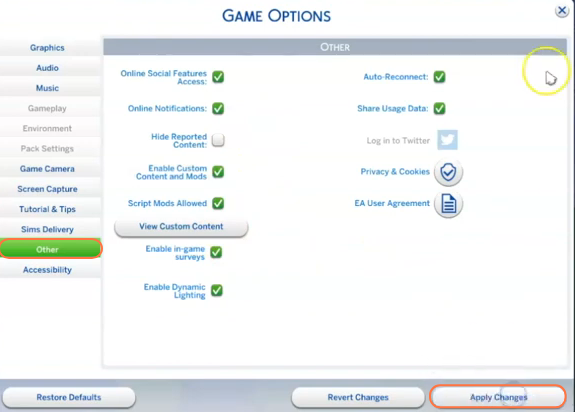
Step 7: Enabling Mods and Script Mods
After completing the previous steps, launch the Origin or EA application and click on “My Game Library”. Press the Play button to enter into the game and enable the “mods” and “script mods” options to ensure the proper functioning of the mod. Once the game has loaded, click on the “Options” tab, followed by “Game Options”. Under the “Other” tab, check the boxes for “Enable Custom Content and Mods” as well as “Script Mods Allowed”. Once you’ve made these selections, don’t forget to click the “Apply Changes” button located at the bottom right corner of the screen.