In this guide, you will find out how to install SSEEdit in Skyrim. You have to follow the step-by-step instructions to do so.
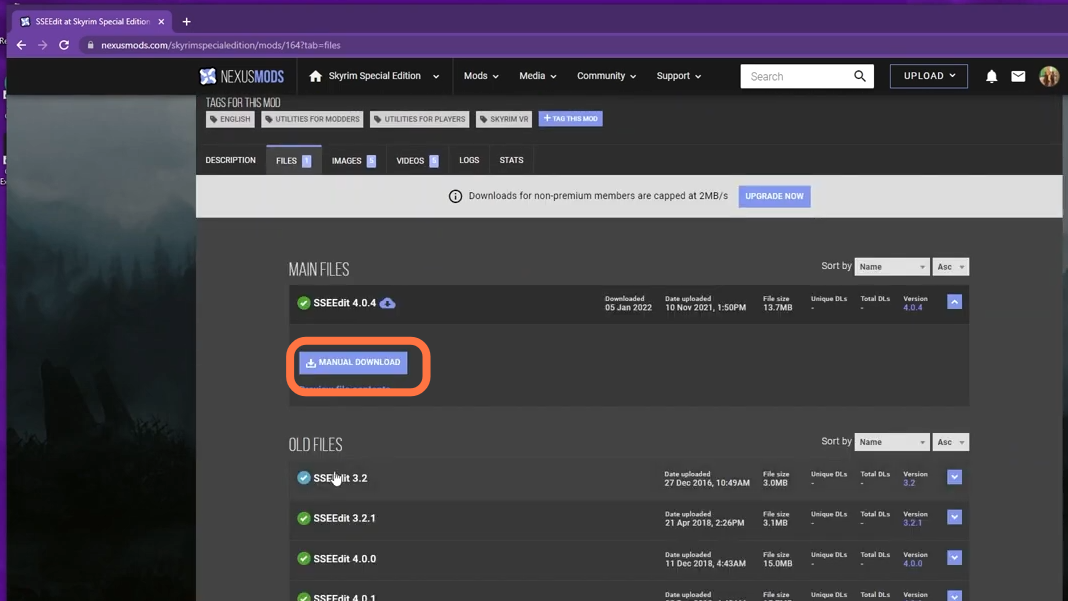
1. First, you need to download the SSEEdit mod from “https://www.nexusmods.com/skyrimspecialedition/mods/164?tab=files“. Click on the Files tab and then press the Manual Download button to get it for free.
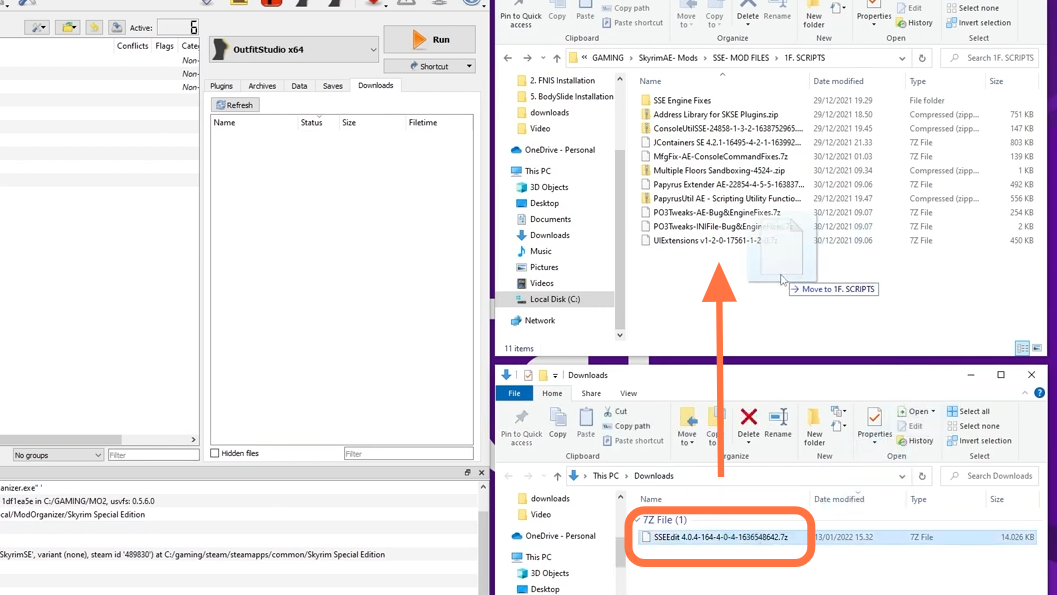
2. Now open the downloads folder and drag the SSEEdit zip file into the permanent mod directory of the game directory. After that, extract this zip file using 7zip or WinRAR file archiver.
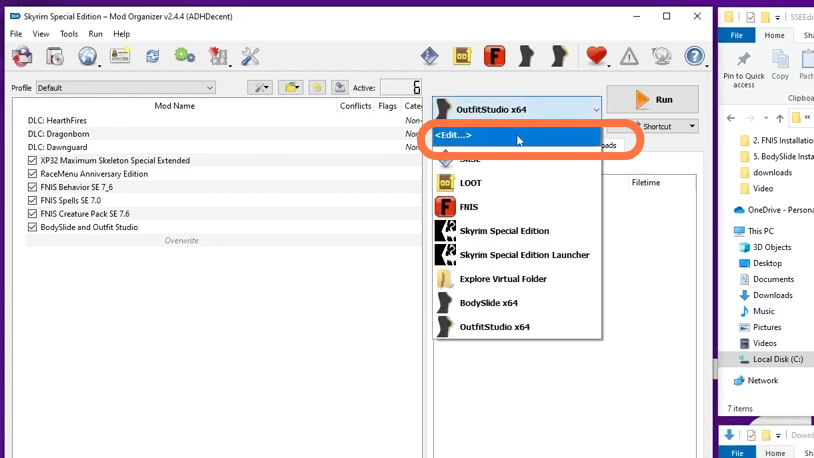
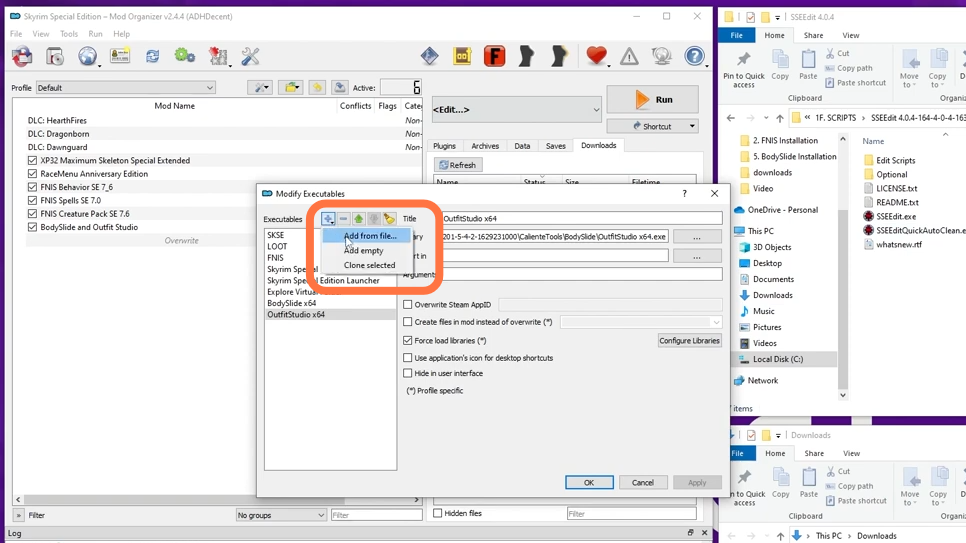
3. Now open the mod organizer, then use the drop-down list and select Edit.
4. On the next window, you have to click the ‘+‘ symbol and select ‘Add From File and navigate to the extracted SSEEdit folder. After that, open the SSEEdit.exe file, select Apply and tap on Ok.
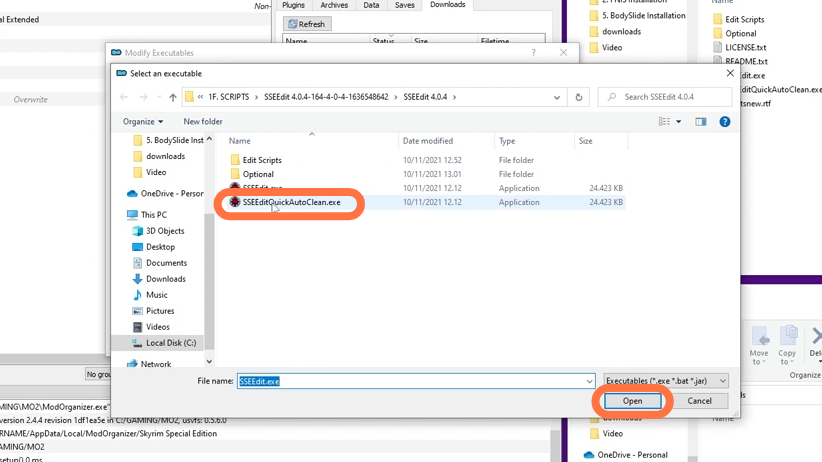
5. You have to do the same with the “Quick Auto Clean” file. Click the ‘+’ icon select ‘Add From File’, then go to the file directory and select the ‘.exe’ file. After that, click on Open.
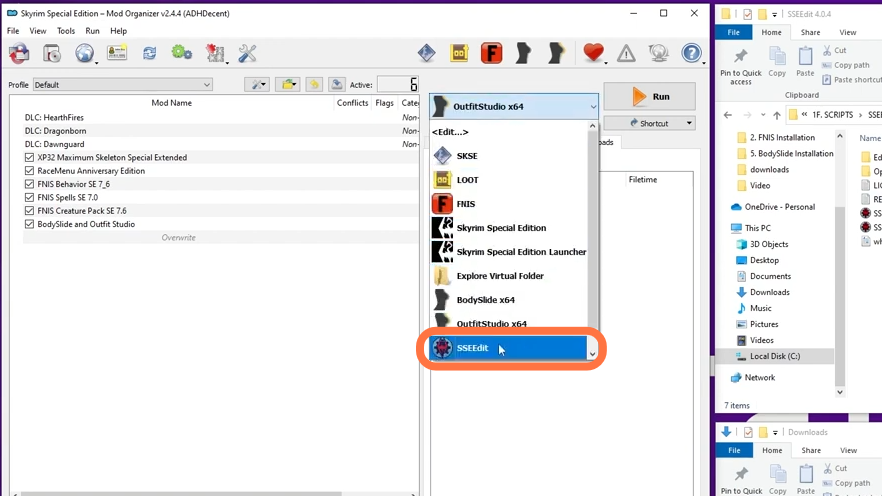
6. Once it’s done, you need to go to the drop-down list and select the SSEEdit. After that. click Run to launch.
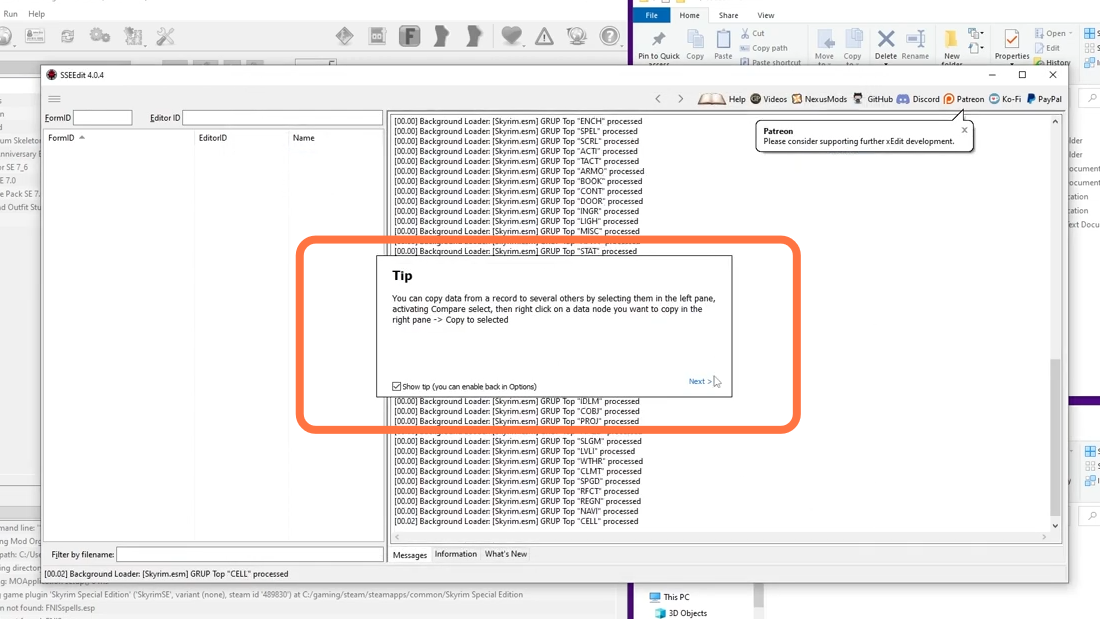
7. It will take some time to load up, but it may prompt you with a number of tips about how to use the application.
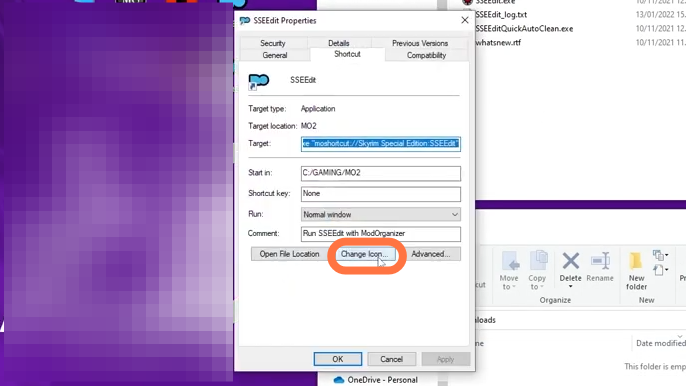
8. If you have added a shortcut to the SSEEdit, you can change its icon. For this, right-click on its desktop icon and select properties. Click on Change Icon and navigate to your extracted folder and select the SSEEdit.exe file from it.