The Live In Services mod for The Sims 4 adds a new gameplay feature that allows your Sims to hire live-in services such as nannies, butlers, or personal assistants. This comprehensive guide will walk you through the steps of installing the Live In Services mod to enhance your Sims 4 gameplay experience. Have fun customizing your Sims’ lifestyles with this exciting addition to the game. This mod requires XML injector mod to work seamlessly.
Step 1: Check Compatibility
Before installing any mod, ensure that your game version is compatible. Check if the Live In Services mod supports the current version of The Sims 4. It is recommended to have the latest version of the game installed on your Windows or Mac PC.
Step 2: Download the Mod Files
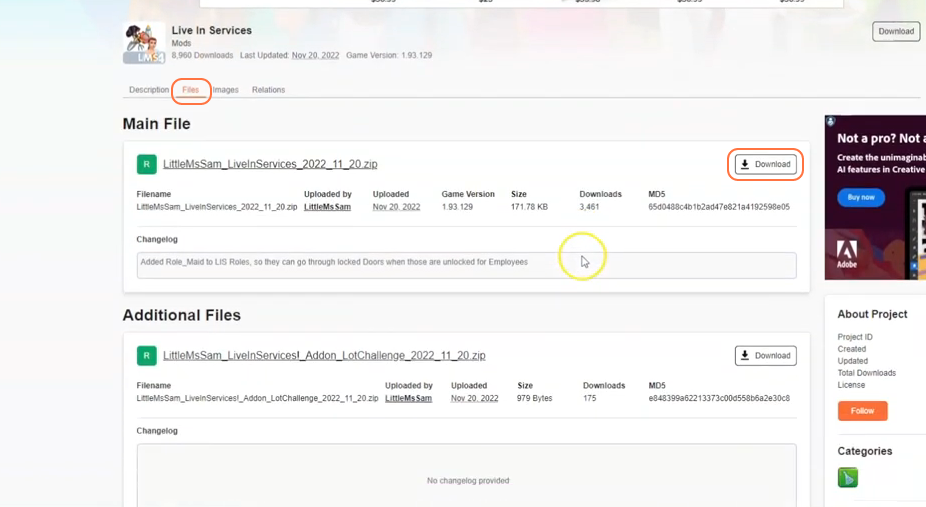
To download the Live In Services mod files, visit the following link “https://www.curseforge.com/sims4/mods/live-in-services“. Choose the appropriate version of the mod that matches your game version. On the mod’s page, navigate to the “Files” tab and click the “Download” button under the Main File section. The mod’s zip file will start downloading in matter of seconds, and you can monitor the progress at the bottom of your screen. Sometimes, you may find additional files provided by the mod creator to incorporate the main mod, which you can download according to your preferences.
Step 3: Extract the Files
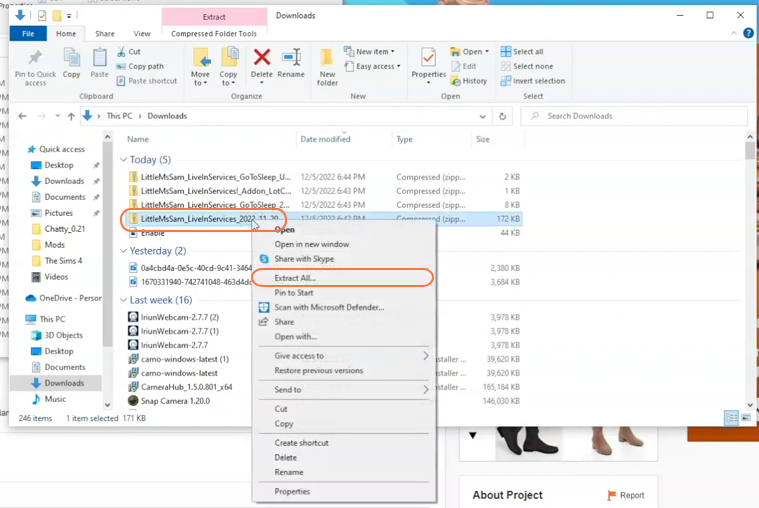
Once the download is complete, open your File Explorer app (Windows) or Finder application (Mac) and locate the “Downloads” folder where the downloaded files are typically stored. If the mod is in a compressed file format usually a .zip or .rar file, extract the files from the archive. Right-click on the downloaded file and select “Extract All” or “Extract Here“. Choose a destination for the extracted files, and click “Extract” to proceed. Mac users can simply double-click the zip file to unzip its content. The extracted folder will contain a TS4script and a package file, which are essential for the mod’s installation.
Step 4: Locate the Sims 4 Mods Folder
Open a File Explorer window and navigate to the Mods folder in your Sims 4 game directory. The game directory is typically found at Documents > Electronic Arts > The Sims 4. The Mods folder serves as the central location for all custom content and mods.
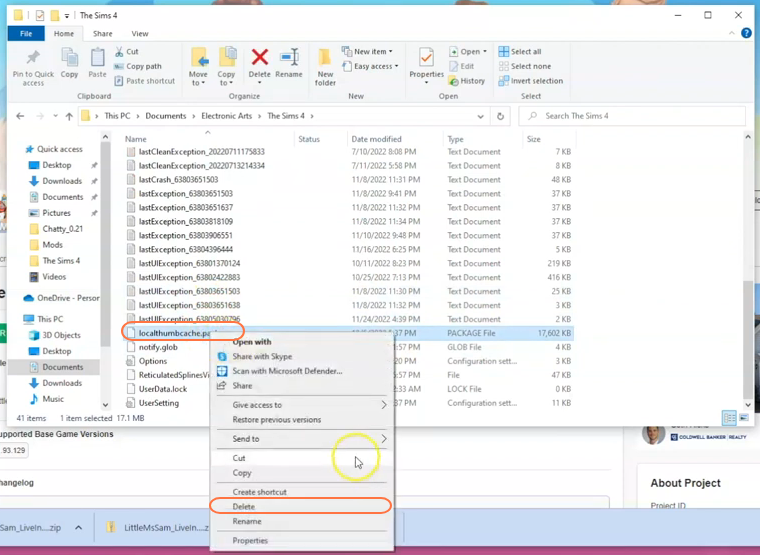
If you don’t have a Mods folder in your game directory or have never installed mods before, launch the game at least once and then exit to generate the necessary folders, such as Documents and Electronic Arts, for a smooth mod installation process. Ensure that the game is not running while you install any modifications. It is also recommended to delete the “localthumbcache.package” file from your Sims 4 folder.
Step 5: Install the Mod
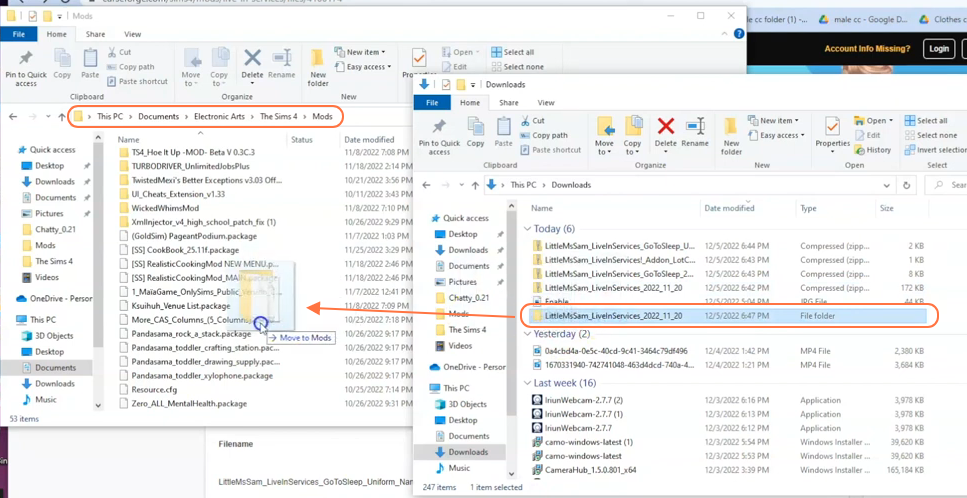
Take the folder containing the package and TS4script files from the downloads folder and drag it into the Mods folder of The Sims 4 directory. This action ensures that the mod is correctly placed for the game to recognize and activate it seamlessly. If you already have an older version of the Live In Services mod installed, remove it from the Mods folder before adding the new version.
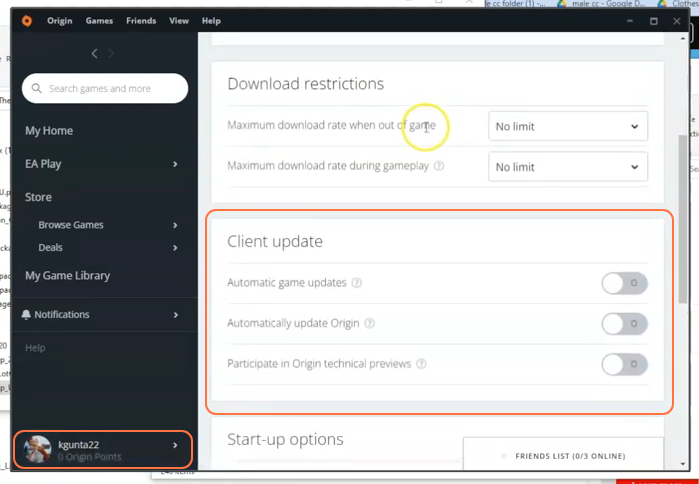
Step 6: Disable Auto Updates for Origin or EA App
If you are using the Origin app, it is recommended to disable auto updates for both the app and the game to prevent potential issues with your mods. Launch the Origin app, hover over your username, and select “Application Settings” option. Scroll down to the “Client Update” section and disable all the toggle buttons for automatic updates. Disabling auto updates ensures that your mods folder won’t be affected when an update is available for the app or the Sims 4 game.
If an update is released, first take out your mods folder from the Sims 4 directory to a save place, update the app or game, and then reinsert the mod folder to maintain the functionality of your mods.
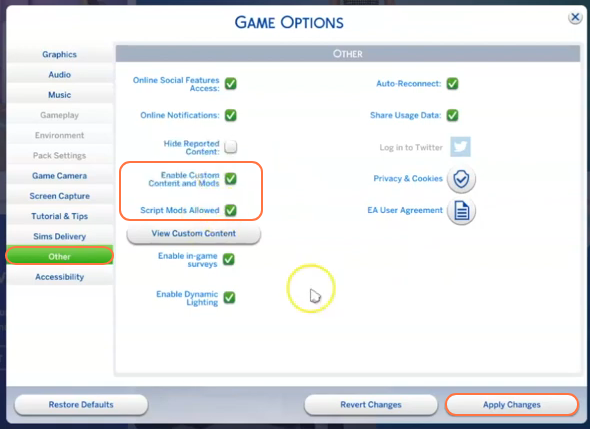
Step 7: Enable Mods and Script Mods in the Game
Now launch The Sims 4 game and navigate to the main menu. Click on the Options menu, then select Game Options. In the Game Options window, go to the “Other” tab. Locate the section labeled “Enable Custom Content and Mods” and make sure the box next to it is checked.
Also, enable the “Script Mods Allowed” option. Click the “Apply Changes” button at the bottom right corner of the screen to save the settings.
Step 8: Run the Game and Verify Installation
After enabling mods, exit the options menu and start a new or existing save. When the game loads, a pop-up notification should appear, indicating that the Live In Services mod has been successfully installed. This notification may appear every time you launch the game, and it’s normal. Familiarize yourself with the mod’s features and instructions provided by the creator on the website.