If you want to enhance your Sims 4 gameplay with custom content and mods then make sure to install all of the base mods in your game. One essential mod that serves as a foundation for many others is the XML Injector mod. This guide will provide you with clear instructions on how to install the XML Injector mod and get it up and running in your game.
Step 1: Begin by downloading the XML Injector mod file from the following link:
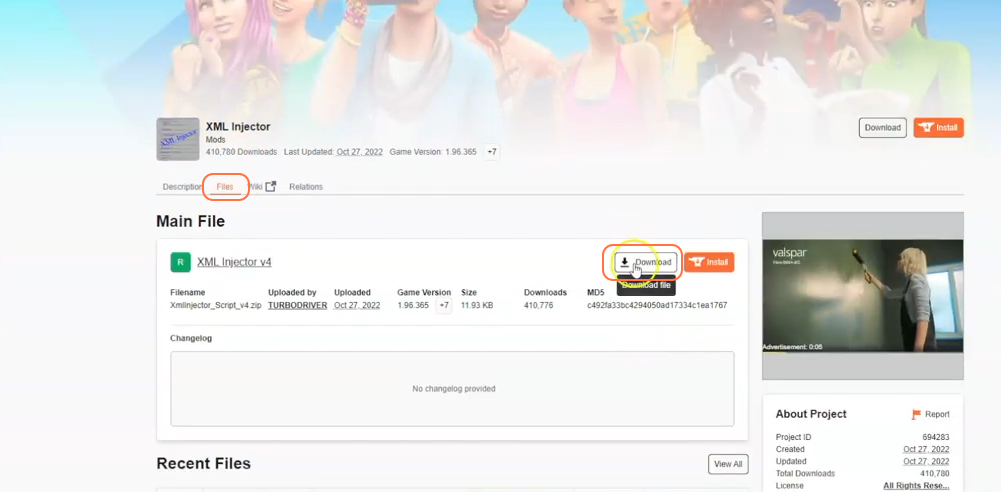
“https://www.curseforge.com/sims4/mods/xml-injector“. Once you’re on the webpage, navigate to the “Files” tab and click the “Download” button. The file will start downloading, and within a few seconds, it should be saved to your computer.

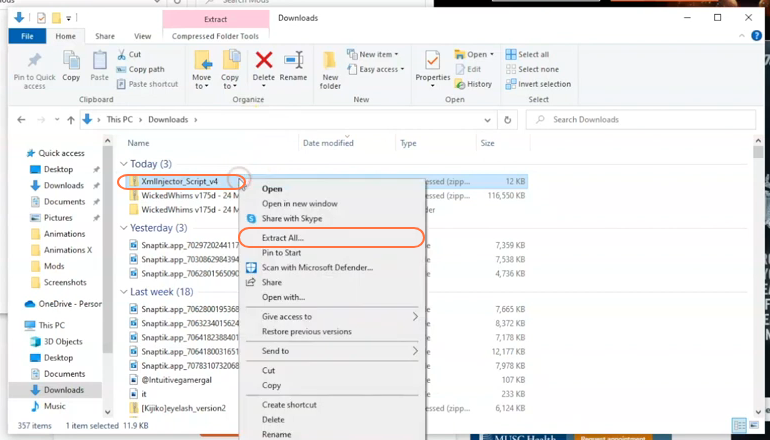
Step 2: After the download is complete, locate the downloaded file on your computer. Typically, it can be found in the “Downloads” folder. The file will be compressed, so you’ll need a tool like WinRAR to extract its contents. Right-click on the compressed file and select the “Extract All” option. Mac users can simply double-click the file to unzip it. In case the file is not in a zip format, there’s no need to worry. Your PC may be able to open it directly. Even if it’s not a zip file, you should still be able to see the contents within the folder. Look for a ts4script file, as it will be necessary for the mod installation.

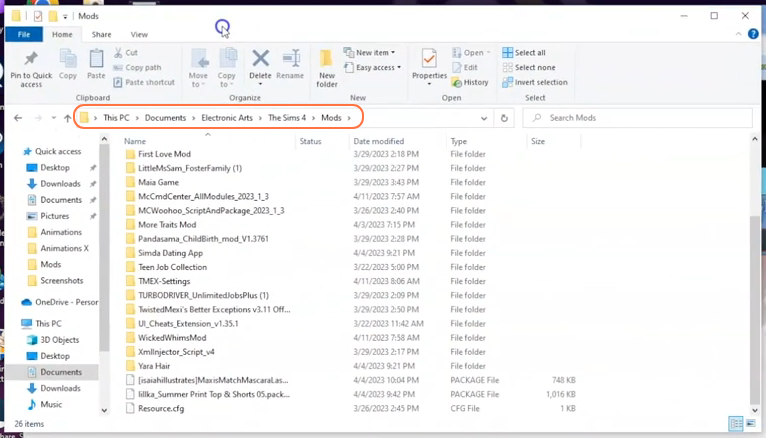
Step 3: Now, open the Mods folder from your Sims 4 game directory. Usually, the game directory can be found at Documents > Electronic Arts > The Sims 4. This folder serves as the designated location for all custom content and mods, allowing the game to recognise and utilise them effectively. It’s also recommended to delete the “localthumbcache.package” in your Sims 4 folder. In case you don’t have a Mods folder in your game directory, you can create one yourself as it is required to store the mod files. It’s important to note that if you haven’t installed any mods before, you need to load up the game at least once and then exit to generate the necessary folders, such as Documents and Electronic Arts, for a seamless mod installation process. Additionally, ensure that the game is not running while you install the mod.

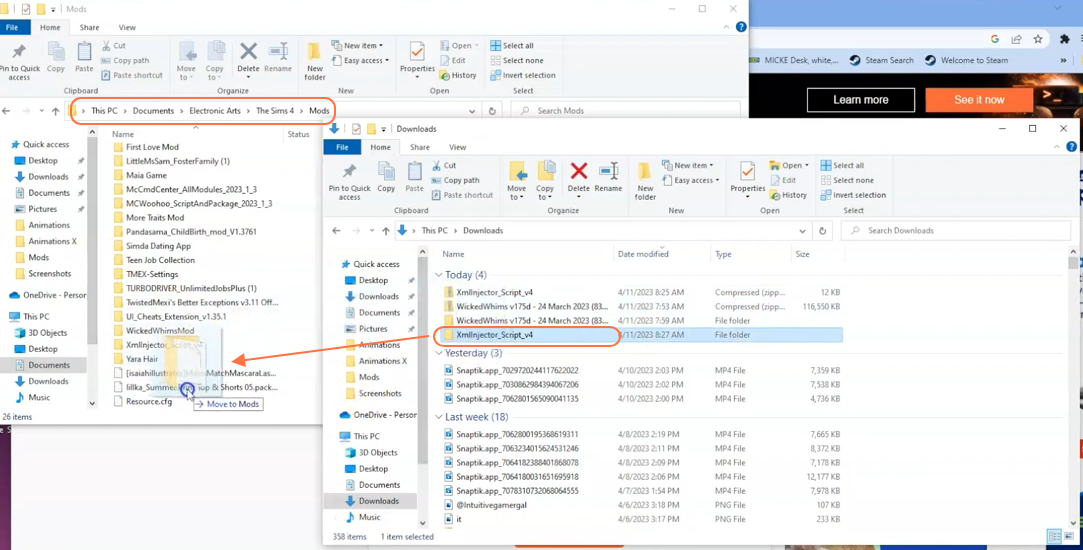
Step 4: Take the extracted folder from your downloads folder and drag it into the “Mods” folder of your Sims 4 directory. This action ensures that the mod files are installed correctly and ready to be used in the game. You have successfully installed the XML Injector mod in The Sims 4. With this foundation mod in place, you’ll be able to explore and enjoy a wide range of other mods that rely on it.
