In this guide, we’ll walk you through the process of creating a modded Minecraft server that can be a thrilling and creative venture.
Step 1: Acquire Forge
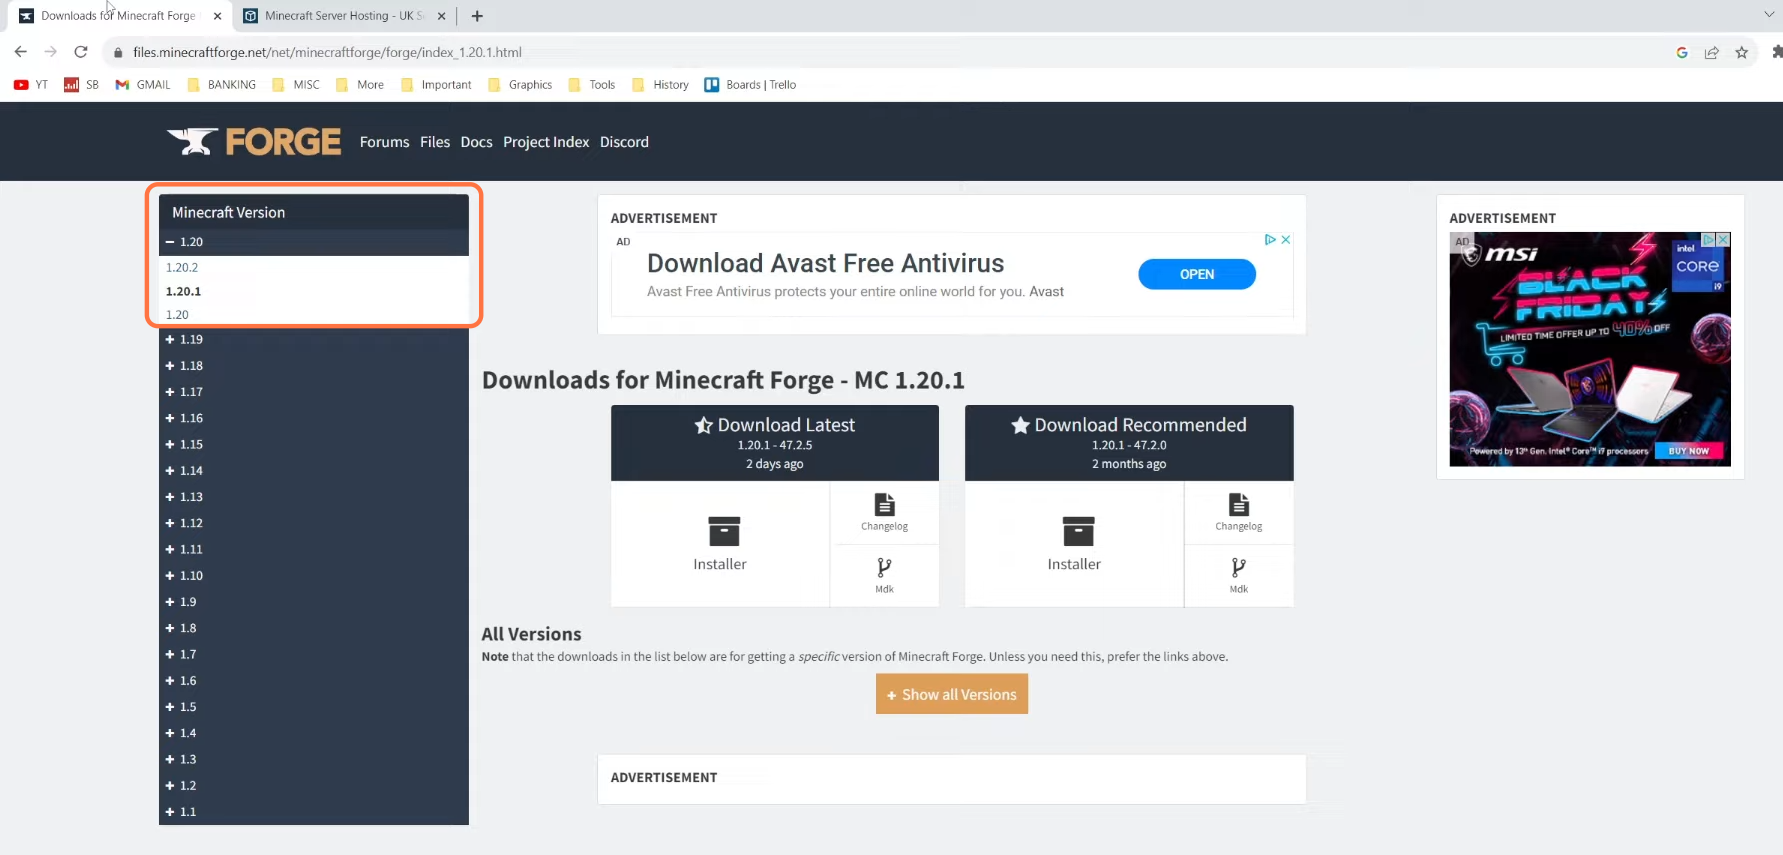
- Firstly, visit the official Forge Website.
- Download the appropriate Forge files for your desired Minecraft version.
- Be cautious of misleading download buttons on ad walls. Wait for the correct download prompt.
- Once downloaded, drag the Forge files to your desktop for easy access.
Step 2: Download Mods
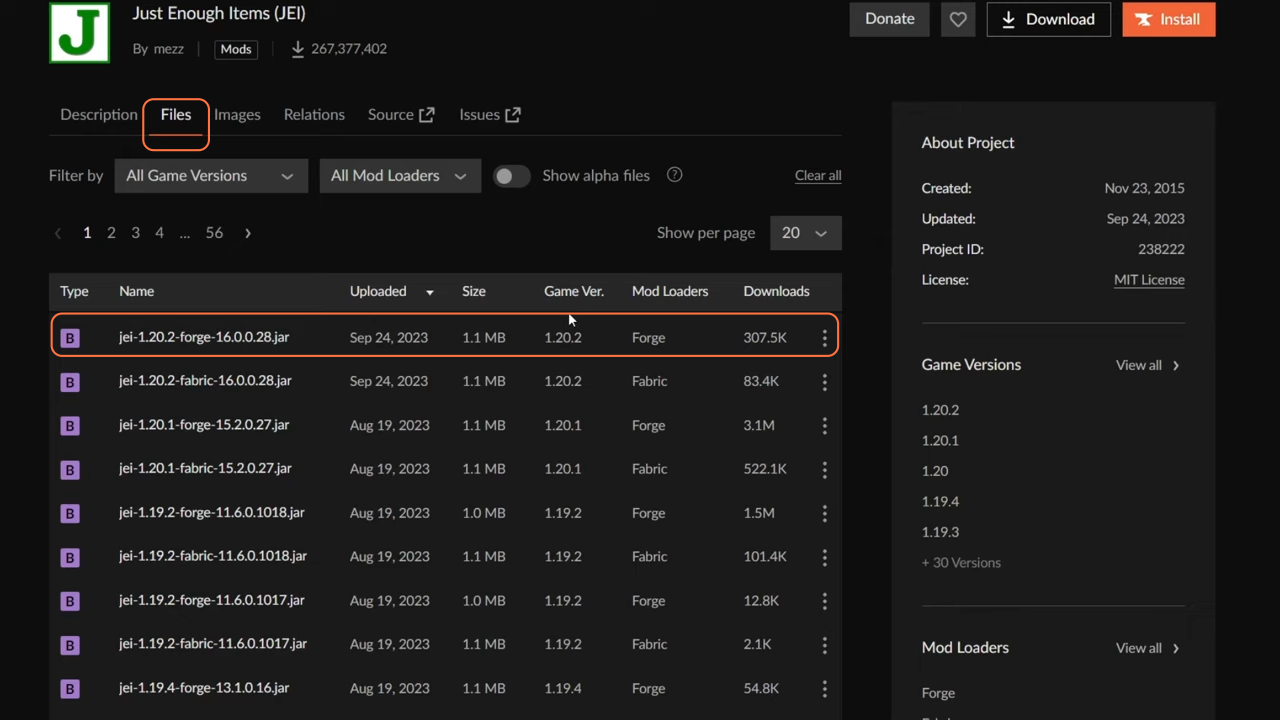
- Now, visit the CurseForge website to find Minecraft mods.
- Browse through mods compatible with your selected Forge version.
- Click on the desired mod and ensure they match both the game version and Forge version.
- Once on the details page for the mod, press the Files tab and choose the version.
- Drag the mod files to your desktop as well for convenience.
Step 3: Install Forge
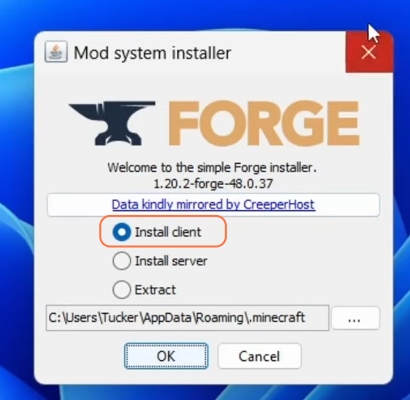
- Double-click the downloaded jar file of the Forge. If it doesn’t open, ensure Java is installed on your system.
- Launch the Forge installer using Java.
- Install Forge for your Minecraft client and also ensure that everybody who wants to join this server will require to install it as the client as well.
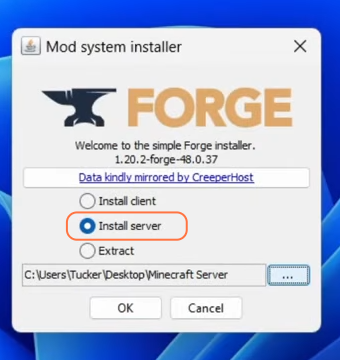
- Now open up the Forge jar file again to install it for the server but before that create a dedicated folder for the server on your desktop.
- Run Forge by selecting the “Install Server” option, and choose the designated folder.
Step 4: Troubleshoot Server Setup
- Open the dedicated server folder and run the Run.bat file.
- If encountering errors while running the server, verify the Java version. Install the Java SE Development Kit and run the bat file again.
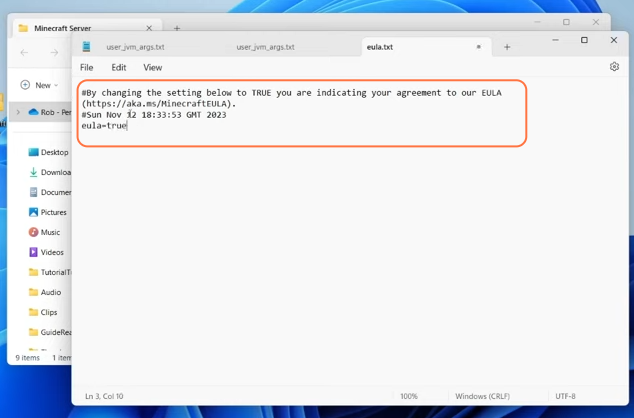
- After that, you’ll find an EULA.txt file in the dedicated server folder. Open the file and agree to the ‘End User License Agreement’ (EULA) by setting the value to ‘true’.
- Launch the server again, allowing it to complete the setup process.
Step 5: Incorporate Mods
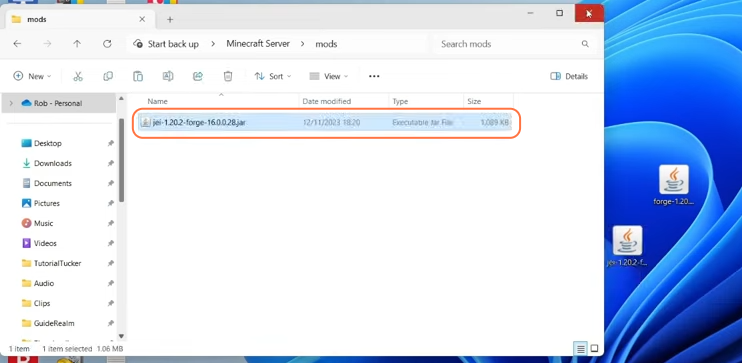
- Move the downloaded mods into the server’s ‘mods’ folder.
- Ensure that all players joining the server have installed the same mods on their Minecraft client.
Step 6: Configure Minecraft Client
- Keep the server’s console window active to keep your server on.
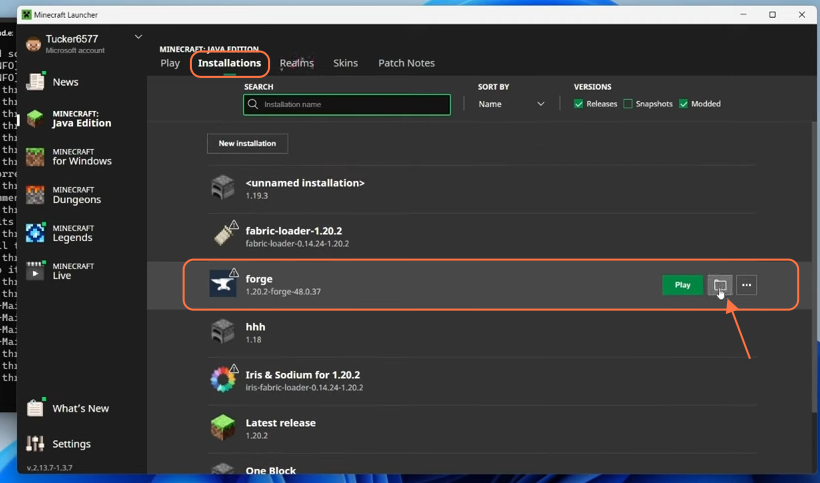
- Open Minecraft Launcher and locate the ‘Installations’ tab.
- Select the Forge installation and navigate to the ‘mods’ folder within Minecraft files and select the mod.
Step 7: Validate Server and Client Mods
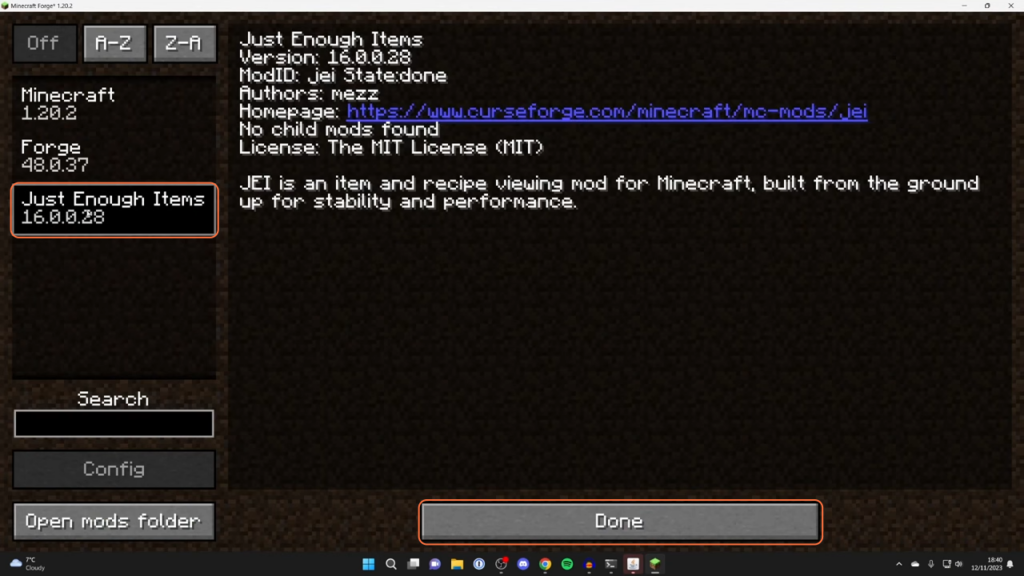
- Launch Minecraft using the Forge installation to verify successful mod integration.
- Access the Mods menu in-game to confirm the installed mods.
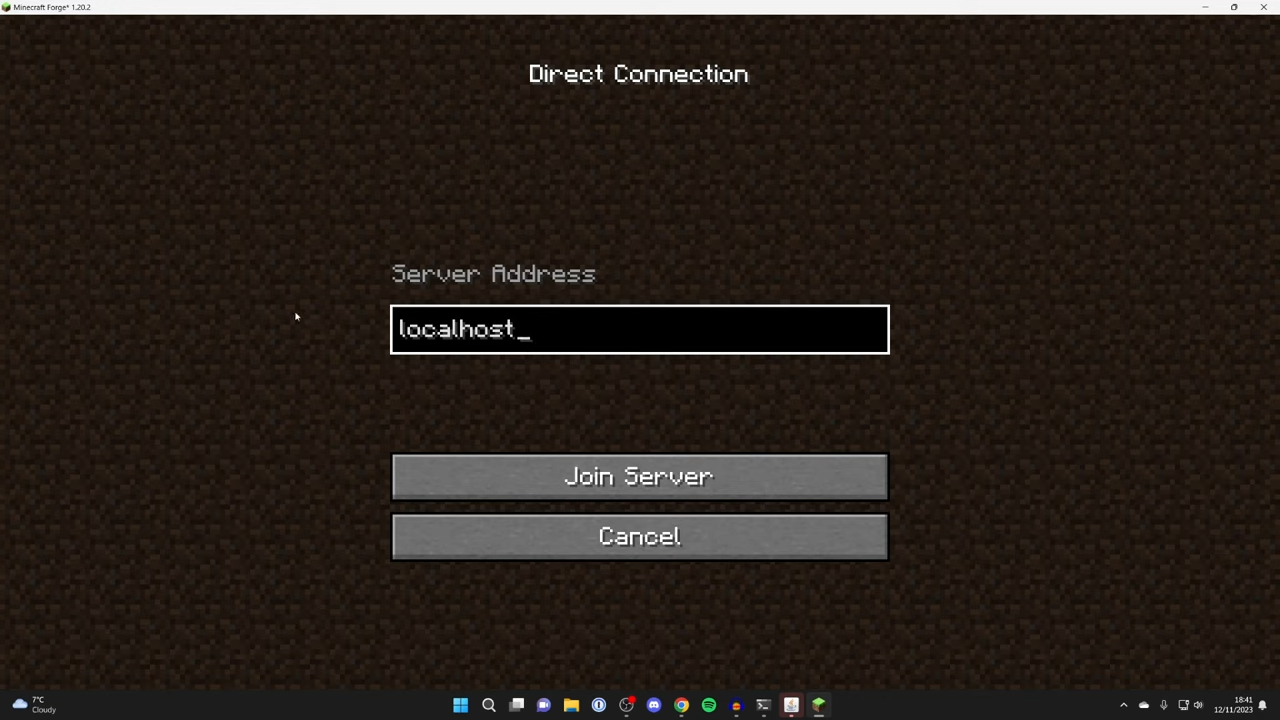
Step 8: Connect & Enjoy Your Modded Minecraft Server
- Set up port forwarding to enable friends to join your server using your IP address.
- Join your server and explore the new features and possibilities offered by the installed mods.
- Delve into the enhanced Minecraft experience with friends and fellow gamers.
By following the above steps you can easily create a modded Minecraft server.