This guide will show how to set up a dedicated server for Core Keeper. You have to follow all the steps carefully to do so.
You have to go to your Steam library and make sure you have your own Core Keepers. If you own Court Keepers and you don’t see this Core Keeper dedicated server, then you need to restart your Steam.
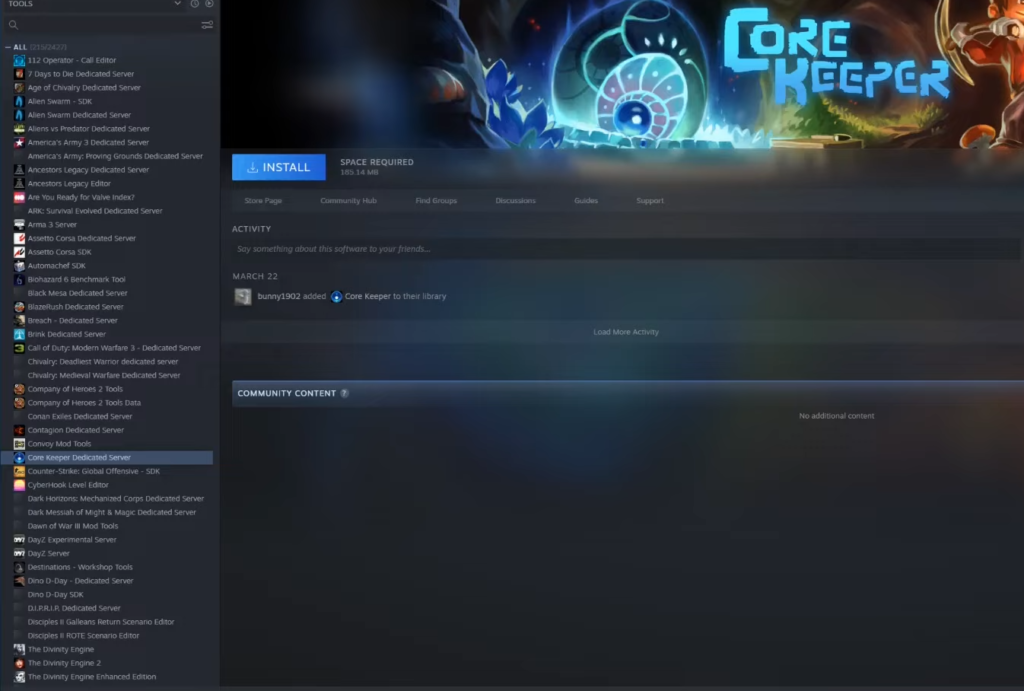
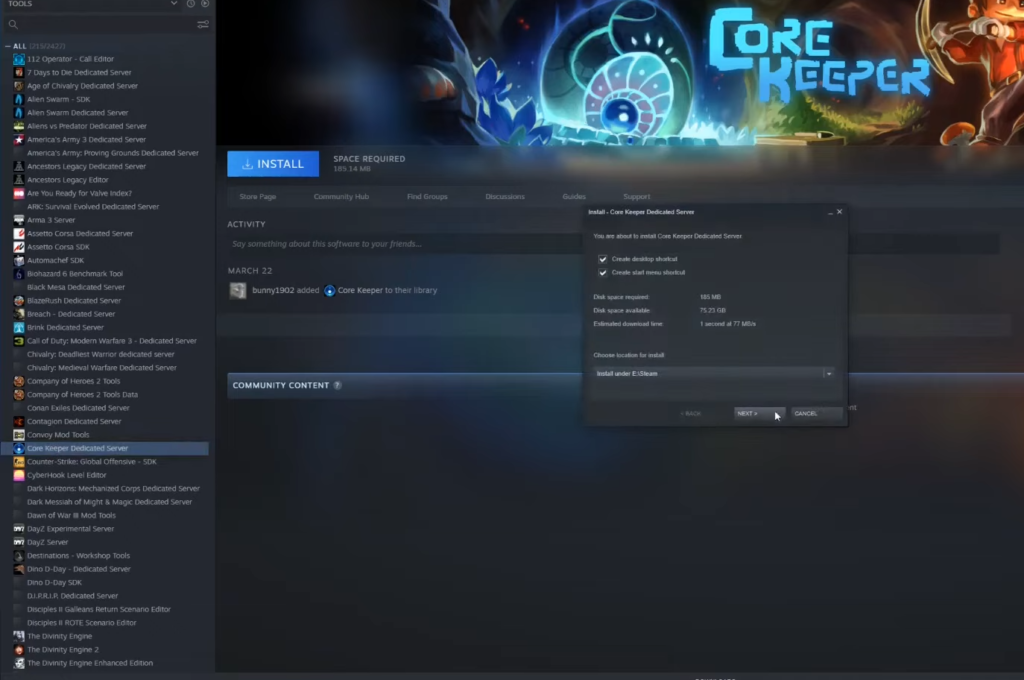
After that, click on the Tools button at the top of your menu and uncheck everything except for tools. It will show up all the tools for your library and you will need to find Core Keeper dedicated server and Install it.
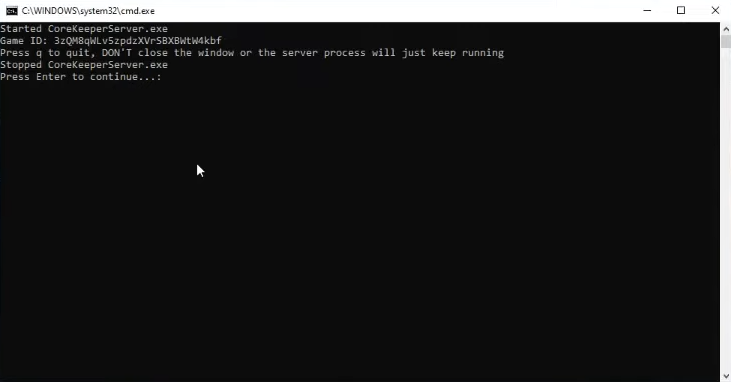
Now you’re good to launch your server. You will find a pop-up menu and it will start to create the server. You don’t have to close this window, you need to go to the task menu and kill the task to shut the server down. It is the proper way to shut it down when you’re done playing.
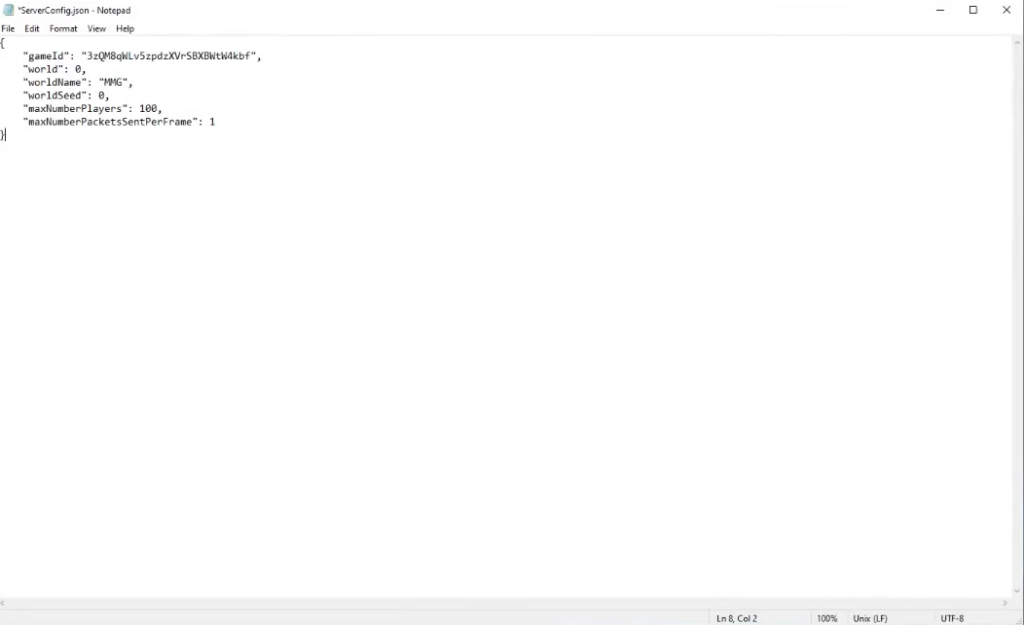
To edit your server files, you will need to go to your user profile, go to the user’s folder and navigate to app data. After that, go to local low and navigate inside the pugstorm folder. Then go to Court Keeper, open the dedicated server folder and you’ll find a serverconfig.json. You need to edit it.
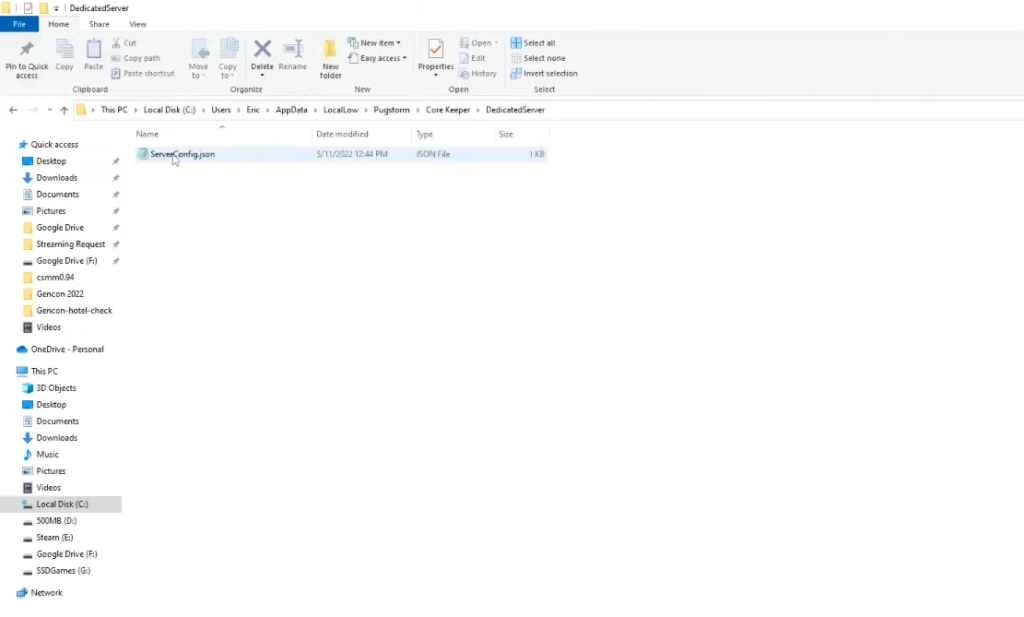
You can use a notepad to edit it. You have to set a few settings, the world name, world seed, and maximum players. After that, save the file.
Now you have to launch the server and go back to the Core Keeper game. After that, join the game by entering the game id.
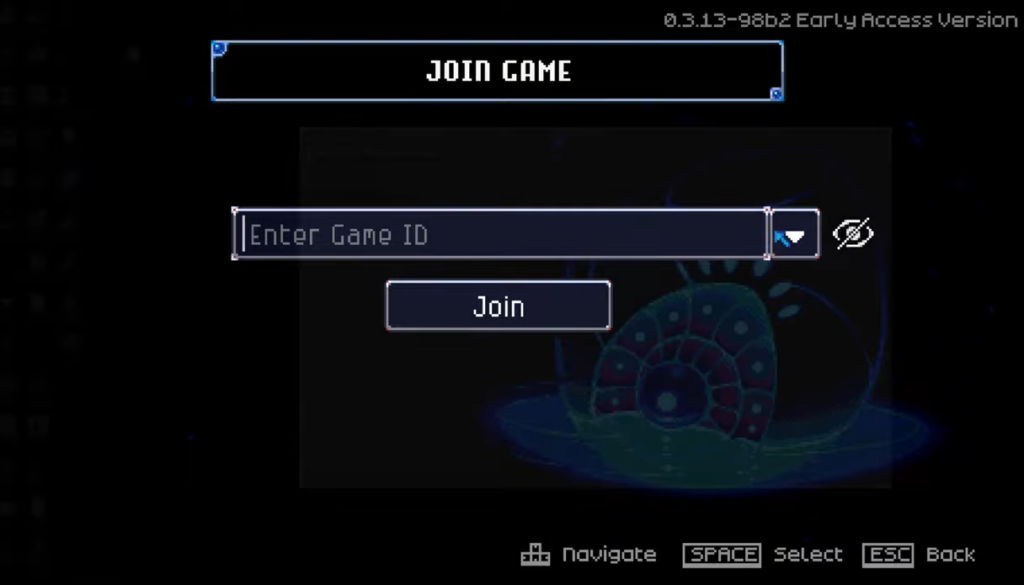
You need to share that id with anybody who you want to join the server. Now you will be connected to enter the server.